Show a separate score for each skill with grading groups
Put each question in a grading group named after the skill it checks, then show one score per group on the ending, with a note that appears only for the skill a student still needs to practise.
- Level
- Intermediate
- Time
- About 15 min
- Steps
- 7
- Updated
- Oct 11, 2026
A four-question fractions and decimals check-in whose ending shows the total, a Fractions score, a Decimals score, and a practice note under any skill the student didn't get fully right.
Get the finished lesson
Skip straight to the result, or keep it open beside the steps. Add this tutorial's lesson to your account and explore how it works in the studio.
Free to sign up, and you'll come straight back here. I have an account
A total like 3/4 tells a student how they did. It doesn't tell them, or you, _what_ they need to work on. Was the slip on fractions or on decimals?
In this tutorial you'll build a short check-in with two questions on fractions and two on decimals. Each question joins a grading group named after its skill. On the ending, two Score widgets show one score per group, and a short note appears under any skill the student didn't get fully right. The total still works exactly as before: groups add a second way of counting, they don't take anything away.
If you haven't built a quiz in Berdee before, start with Build your first quiz question. This tutorial moves quickly through the questions and spends its time on the groups.
Step 1: Build a four-question check-in
Start a blank lesson (New lesson, then Start from scratch) and name it Fractions and decimals check-in. In the Scenes panel, click Add scene three times and rename the new scenes Question 2, Question 3 and Question 4. Make all the scenes first: each Next button points at a specific scene, so the scene it goes to has to exist.
Then build one question on each of the Opening Scene and Question 2 to Question 4:
- Under Background, click Choose a style, open Textures, and pick Notebook paper.
- Add a Heading that names the skill and the question number (
Fractions · Question 1 of 4) and a Body with the question, both in dark navy. - Add a Multi Choice with three answers and the right one marked correct. We used:
Which fraction is the same as one half?with2/4(right),1/3and2/5Which fraction is the biggest?with1/2,3/4(right) and2/3Which number is the biggest?with0.65,0.7(right) and0.09What is 0.3 + 0.4?with0.07,7and0.7(right)
- Add a Button, label it
Next, and use Behaviors → Make this a "Next" button. Then click the scene's empty background and set Progression to Stay.
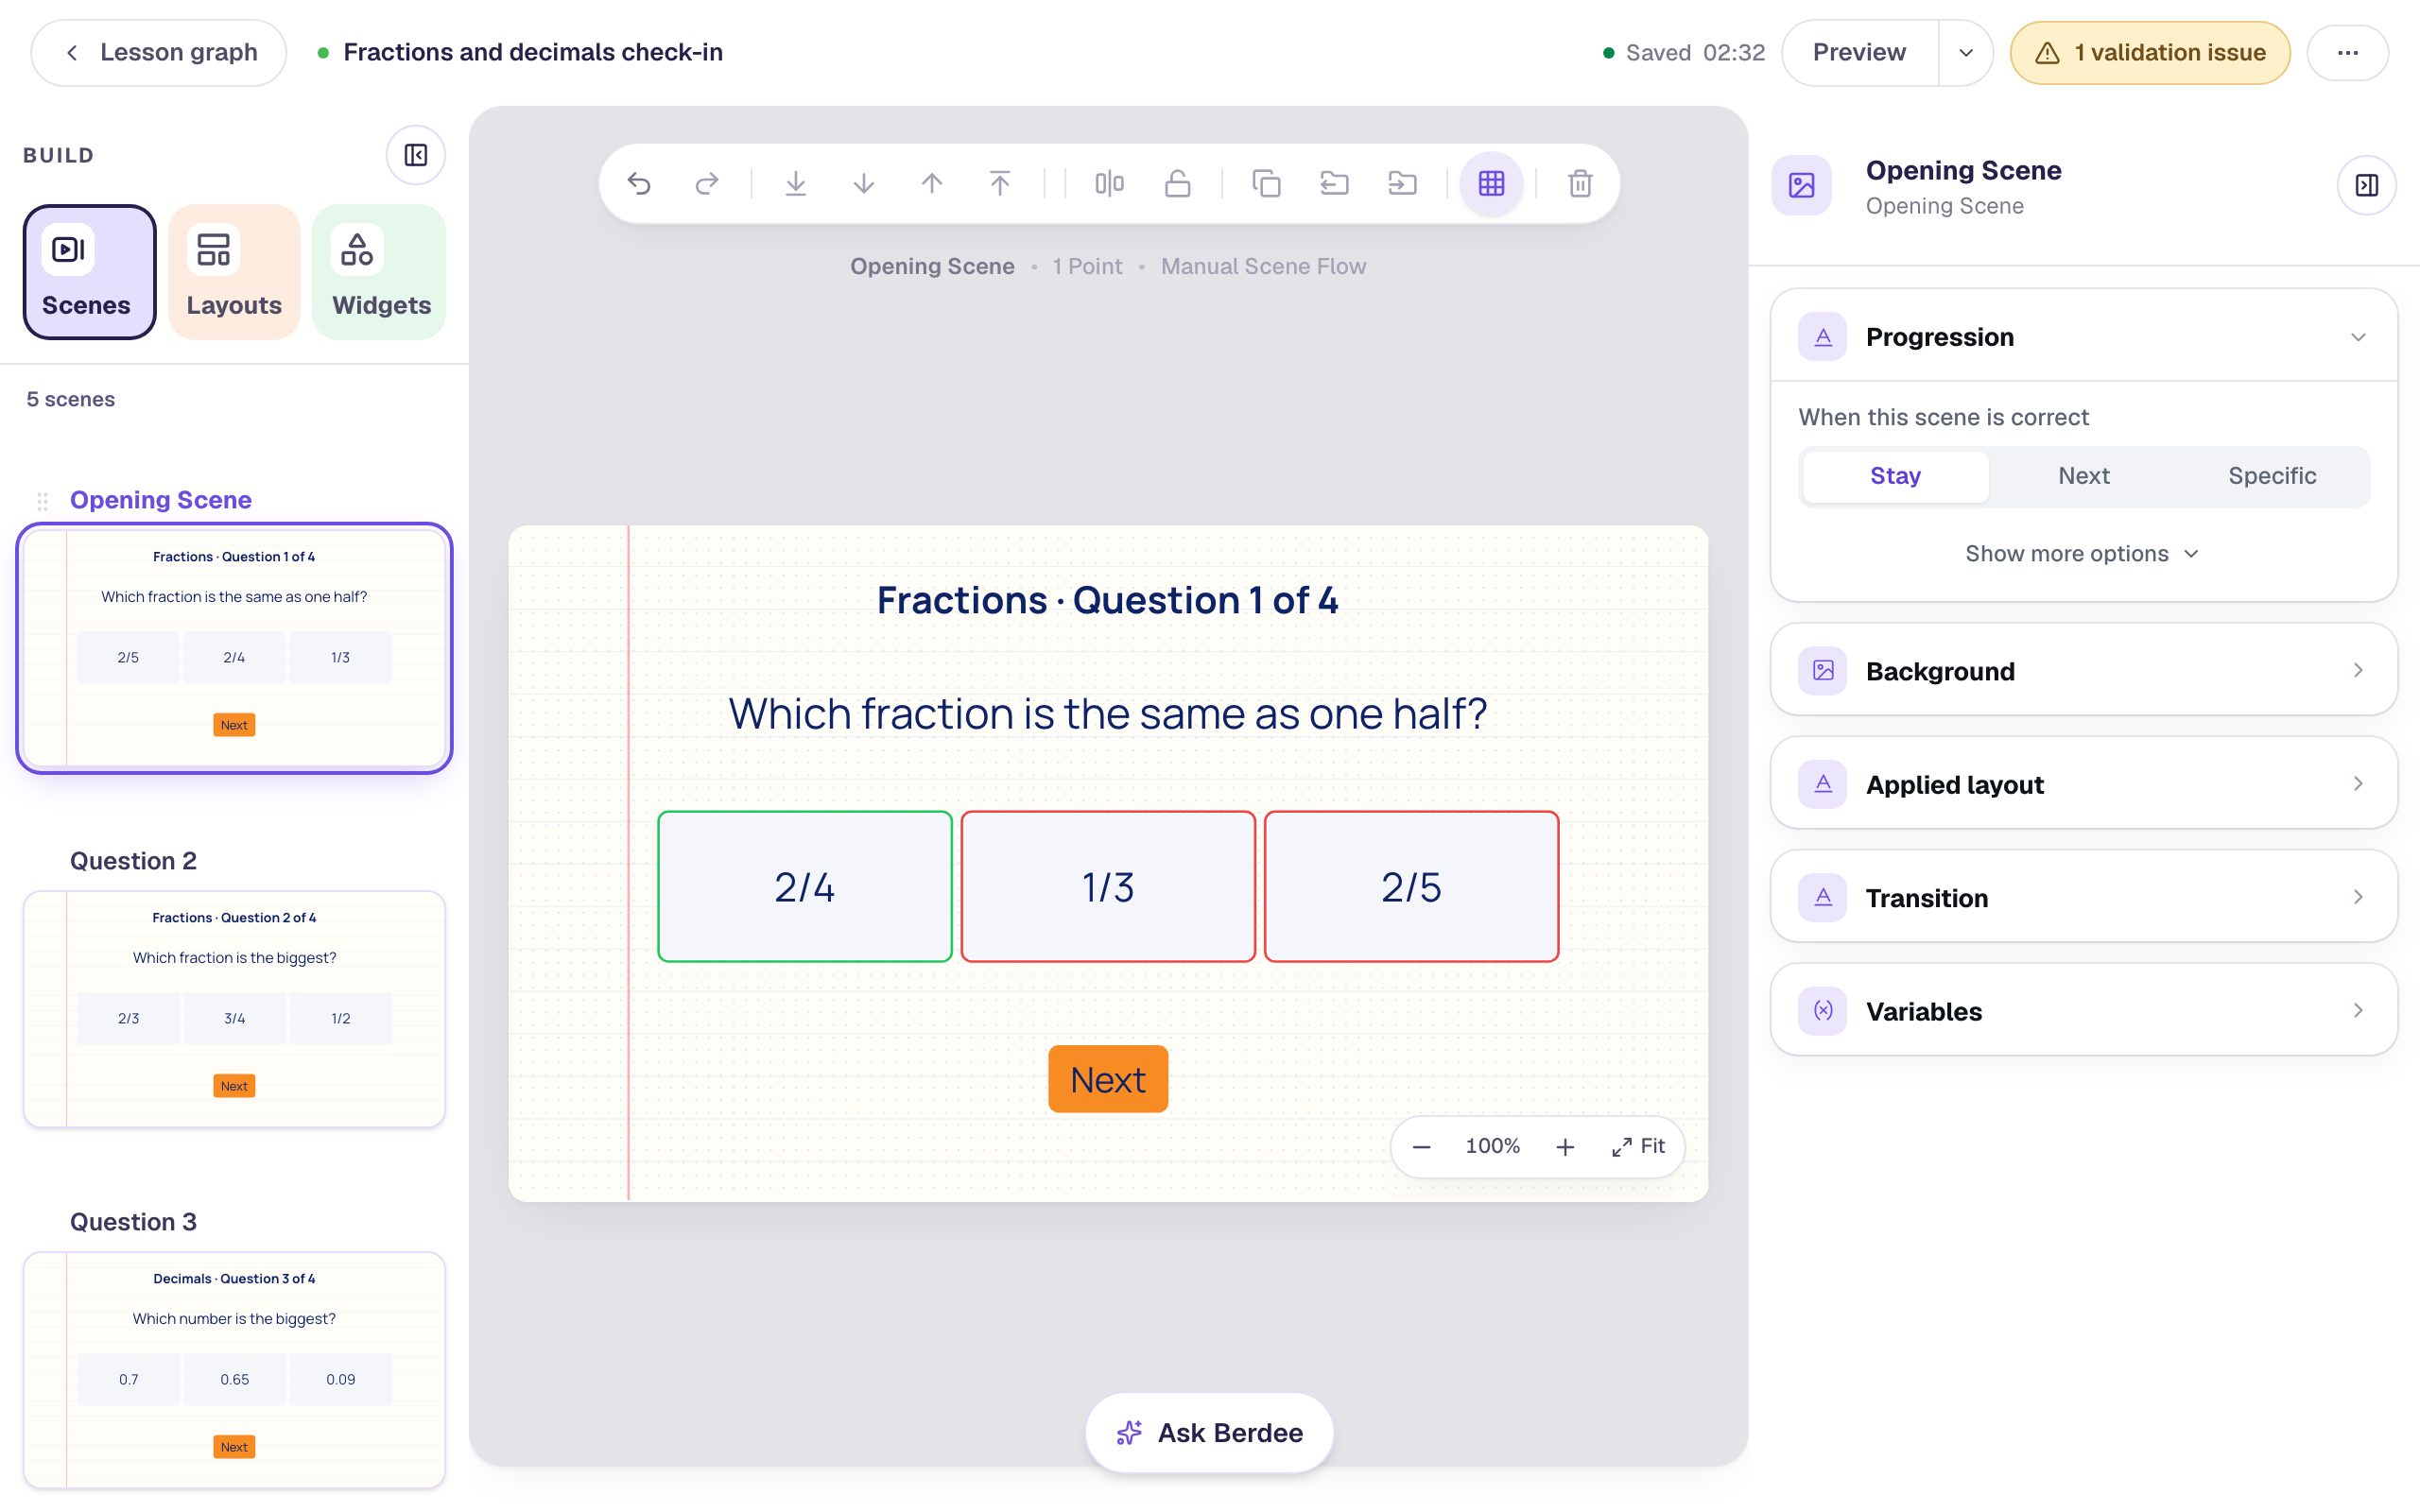
Stay and the Next buttons make a wrong answer count as wrong. On the default Next progression, a scene only moves on once its answer is right, so every student would finish with full marks in every skill, and the per-skill scores would have nothing to tell you.
Step 2: Put the first question in a Fractions group
Open the Opening Scene, click one of the answers to select the Multi Choice, and click ⚙ Configure. The Scoring section at the top has a Group box that starts on (none).
- Click the Group box.
- Click Create new group…, type
Fractions, and press Enter. - Click Save.
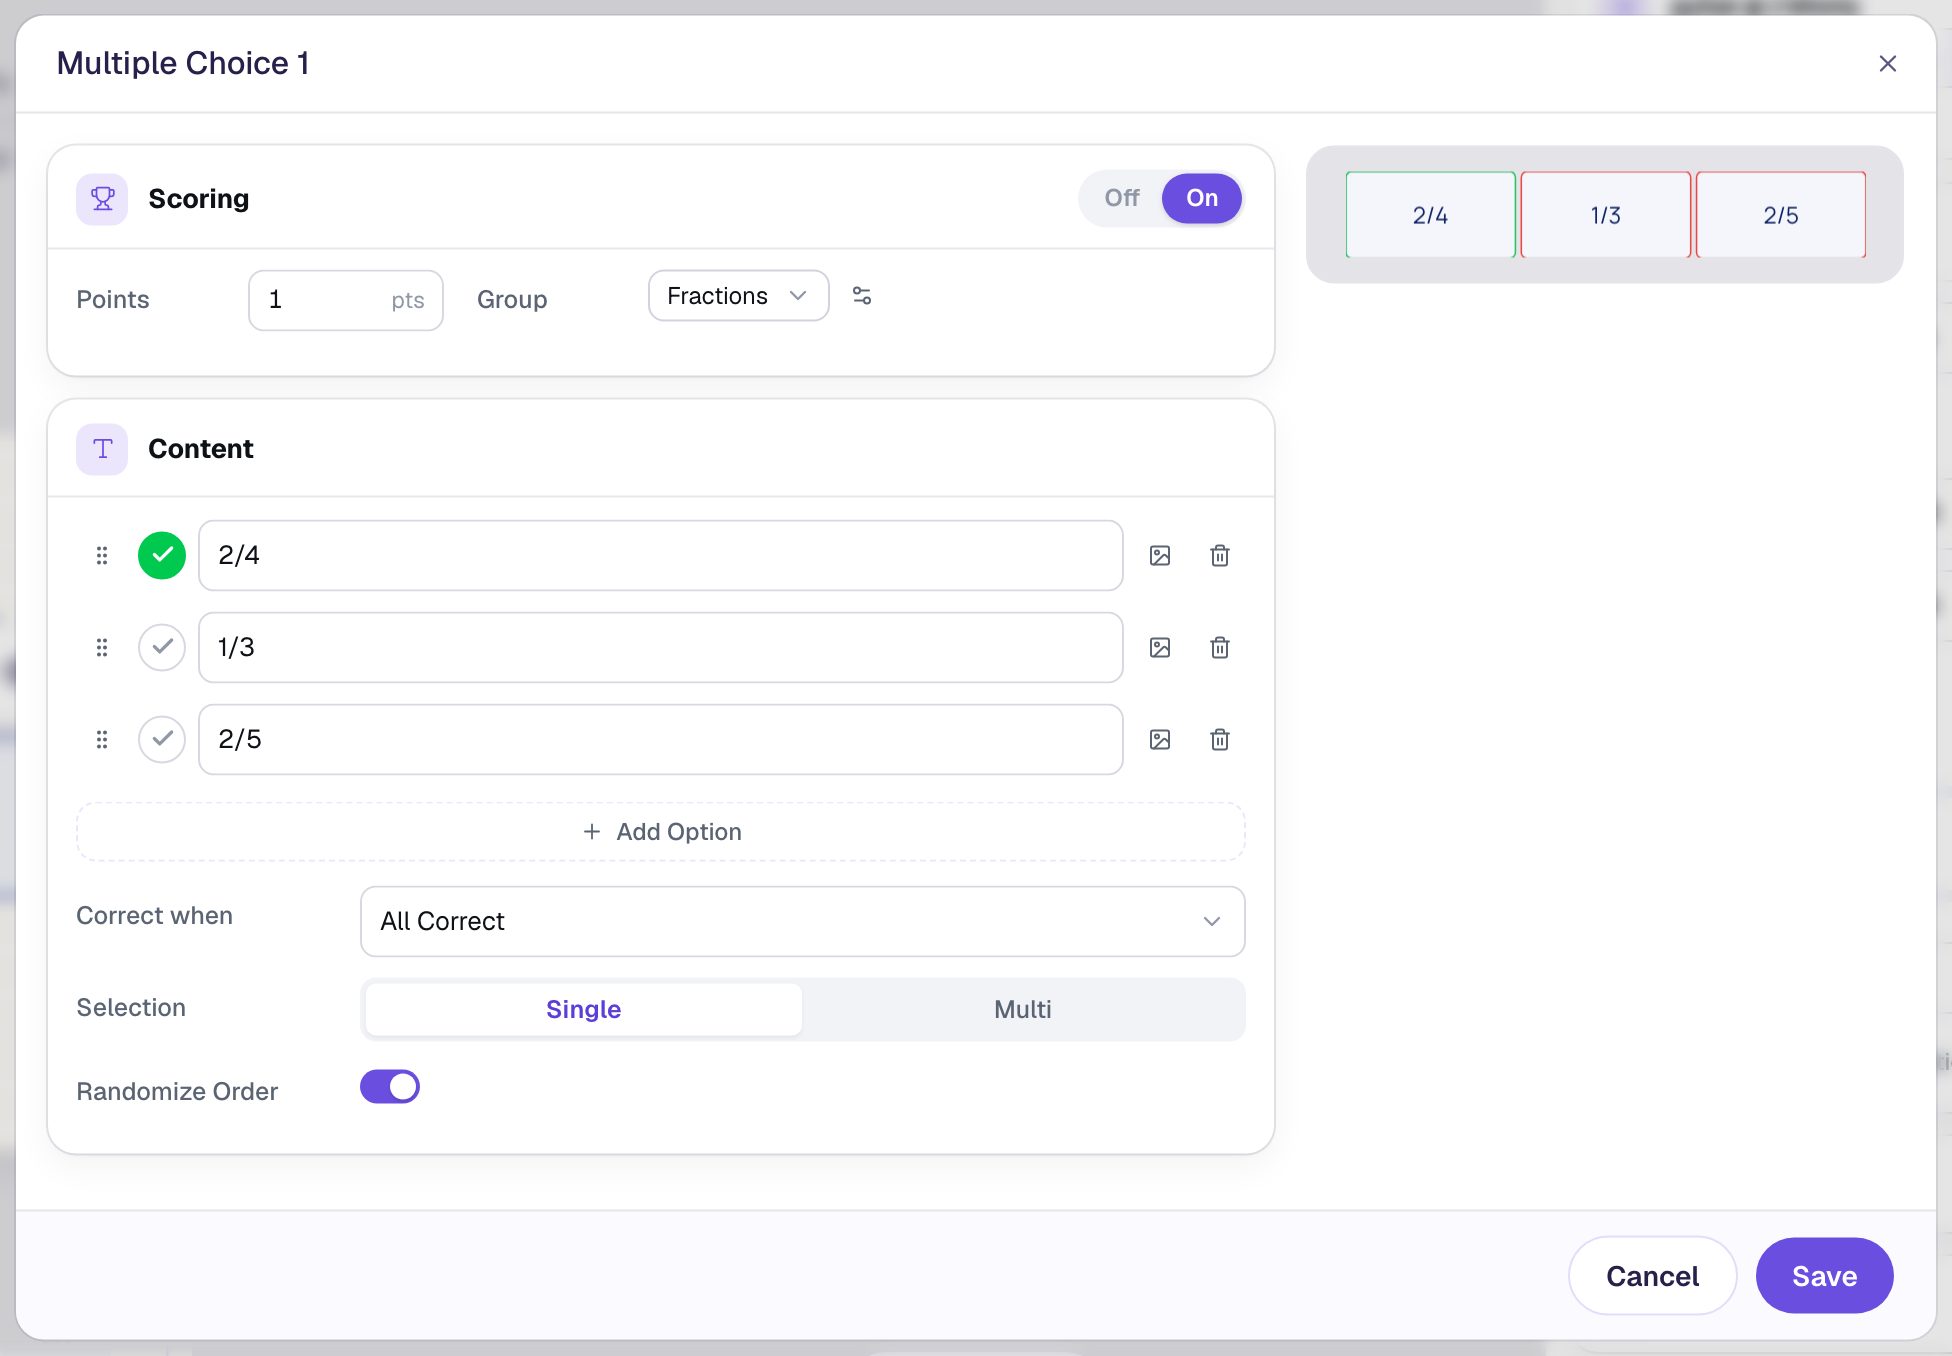
A grading group is just a name that questions share. There's nothing else to set up: the group exists as long as at least one question is in it.
Step 3: Add the other three questions
Do the same on the other scenes, but pick from the list instead of typing whenever the group already exists:
- Question 2: open ⚙ Configure, click Group, and pick Fractions.
- Question 3: Create new group… again, this time named
Decimals. - Question 4: pick Decimals.
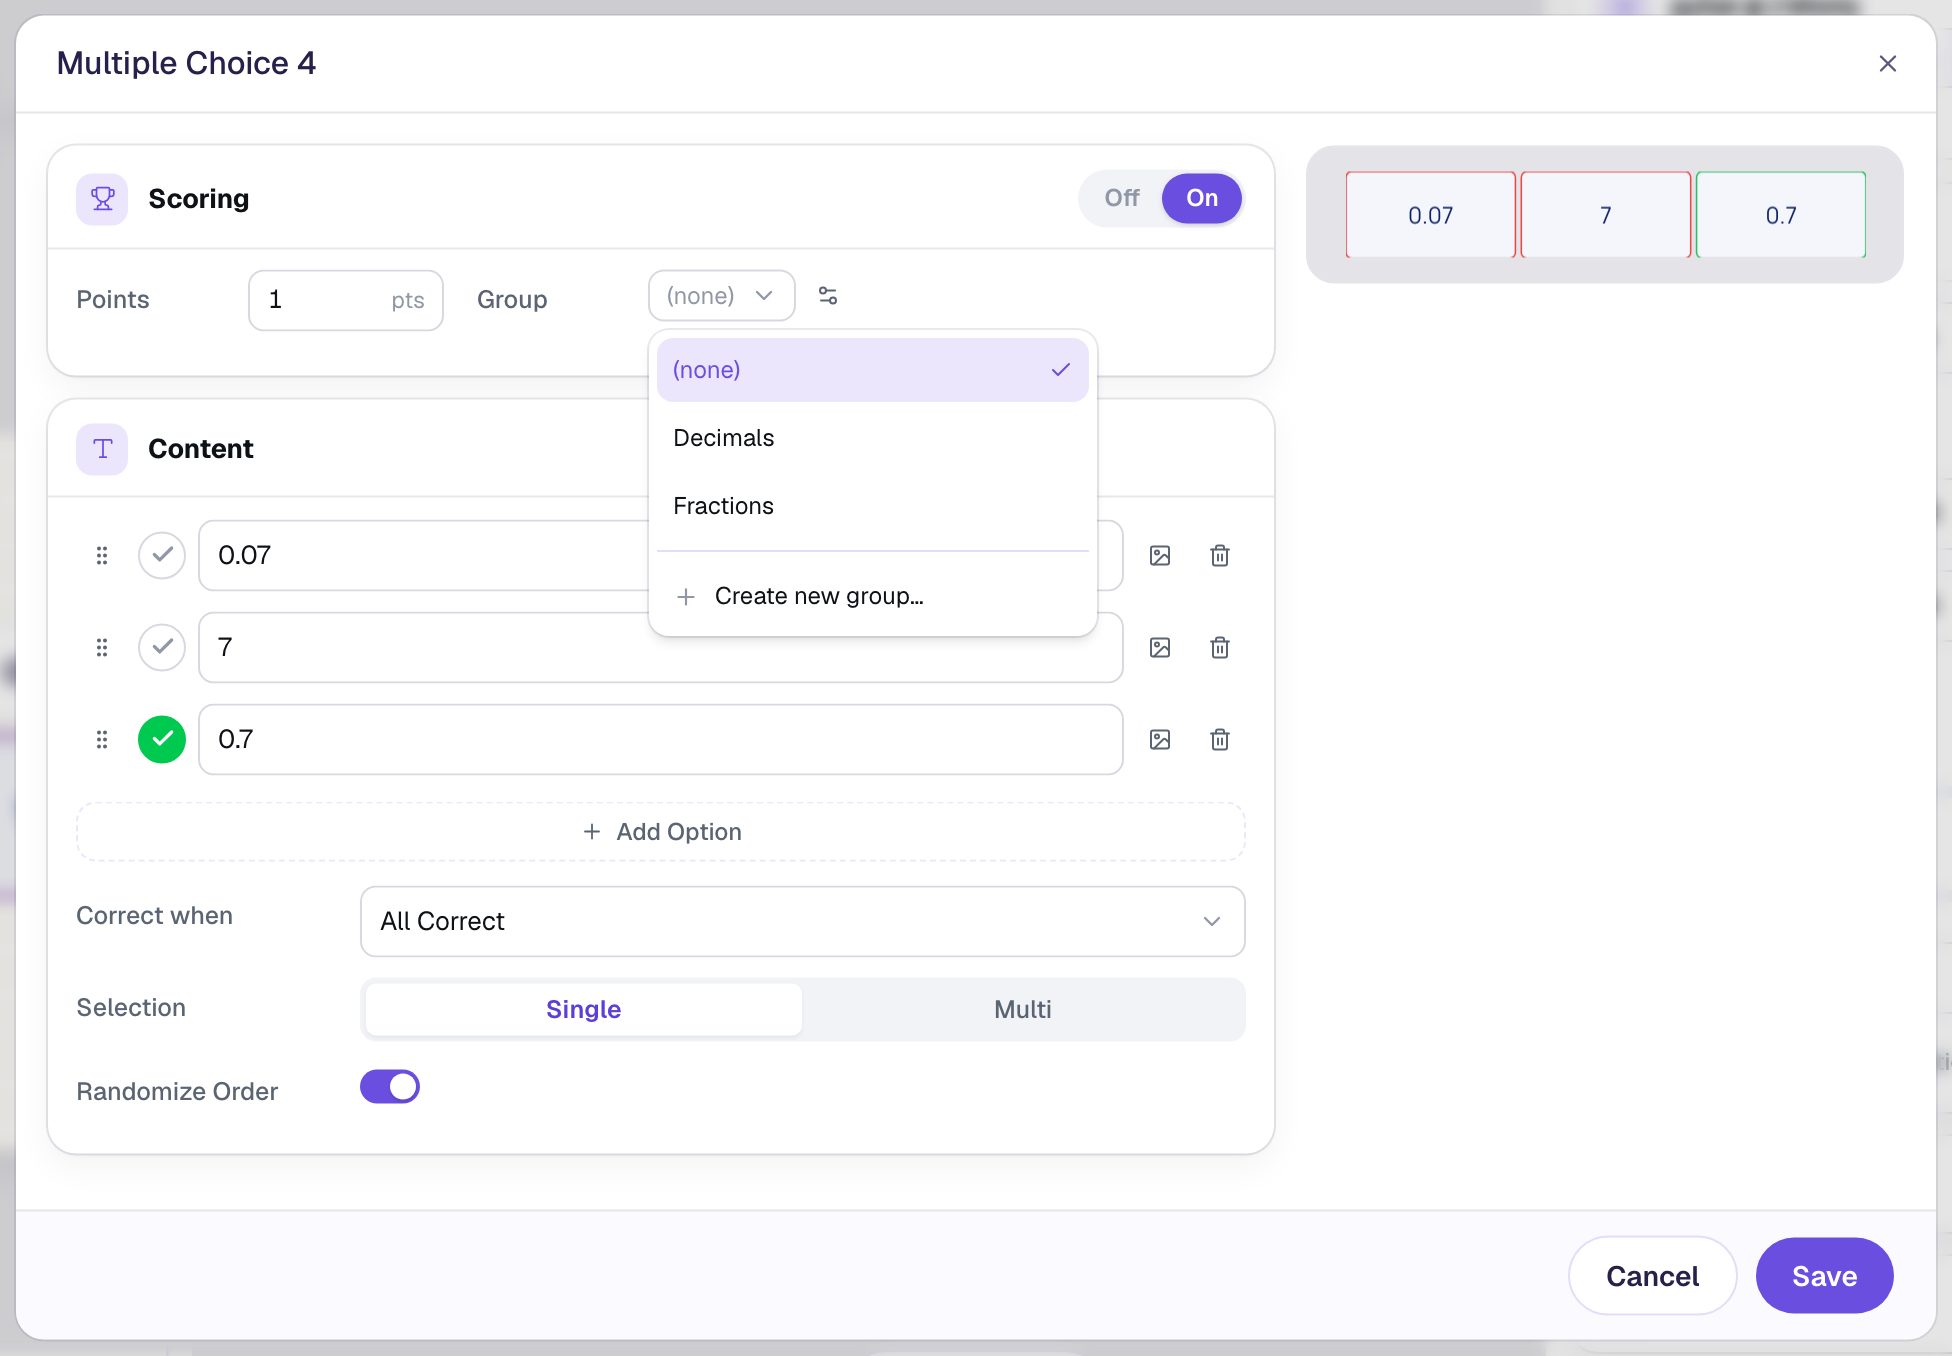
Picking from the list matters. A group is matched by its exact name, so typing Decimal on one question and Decimals on another would quietly make two different groups. If you do end up with a typo, the small Manage groups button next to the Group box renames or deletes a group everywhere at once.
Step 4: Show the Fractions score on the ending
Open the Closing Scene under Ending and give it the same Notebook paper background. Berdee already put a headline, the lesson score and a hidden celebration timer here. Drag the headline and the Your score box up a little to make room below them.
Now add the first group score:
- From the Widgets tab, add a Score. Rename it
Fractions score(click its name at the top of the properties panel). - Under Style & Layout, set the Font Size to 36 px, the Background to a pale yellow and the Text Color to dark navy. Choose Fixed width and set Width to
340. Drag it under the left half of Your score. Doing this first means the settings window's preview shows the chip at its real size.
Then click ⚙ Configure and set it up:
- Scope: Group. A Group box appears under it.
- Group: Fractions.
- Format: Fraction, so students read
2/2rather than a bare number of points. - Label:
Fractions. Berdee adds the colon for you.
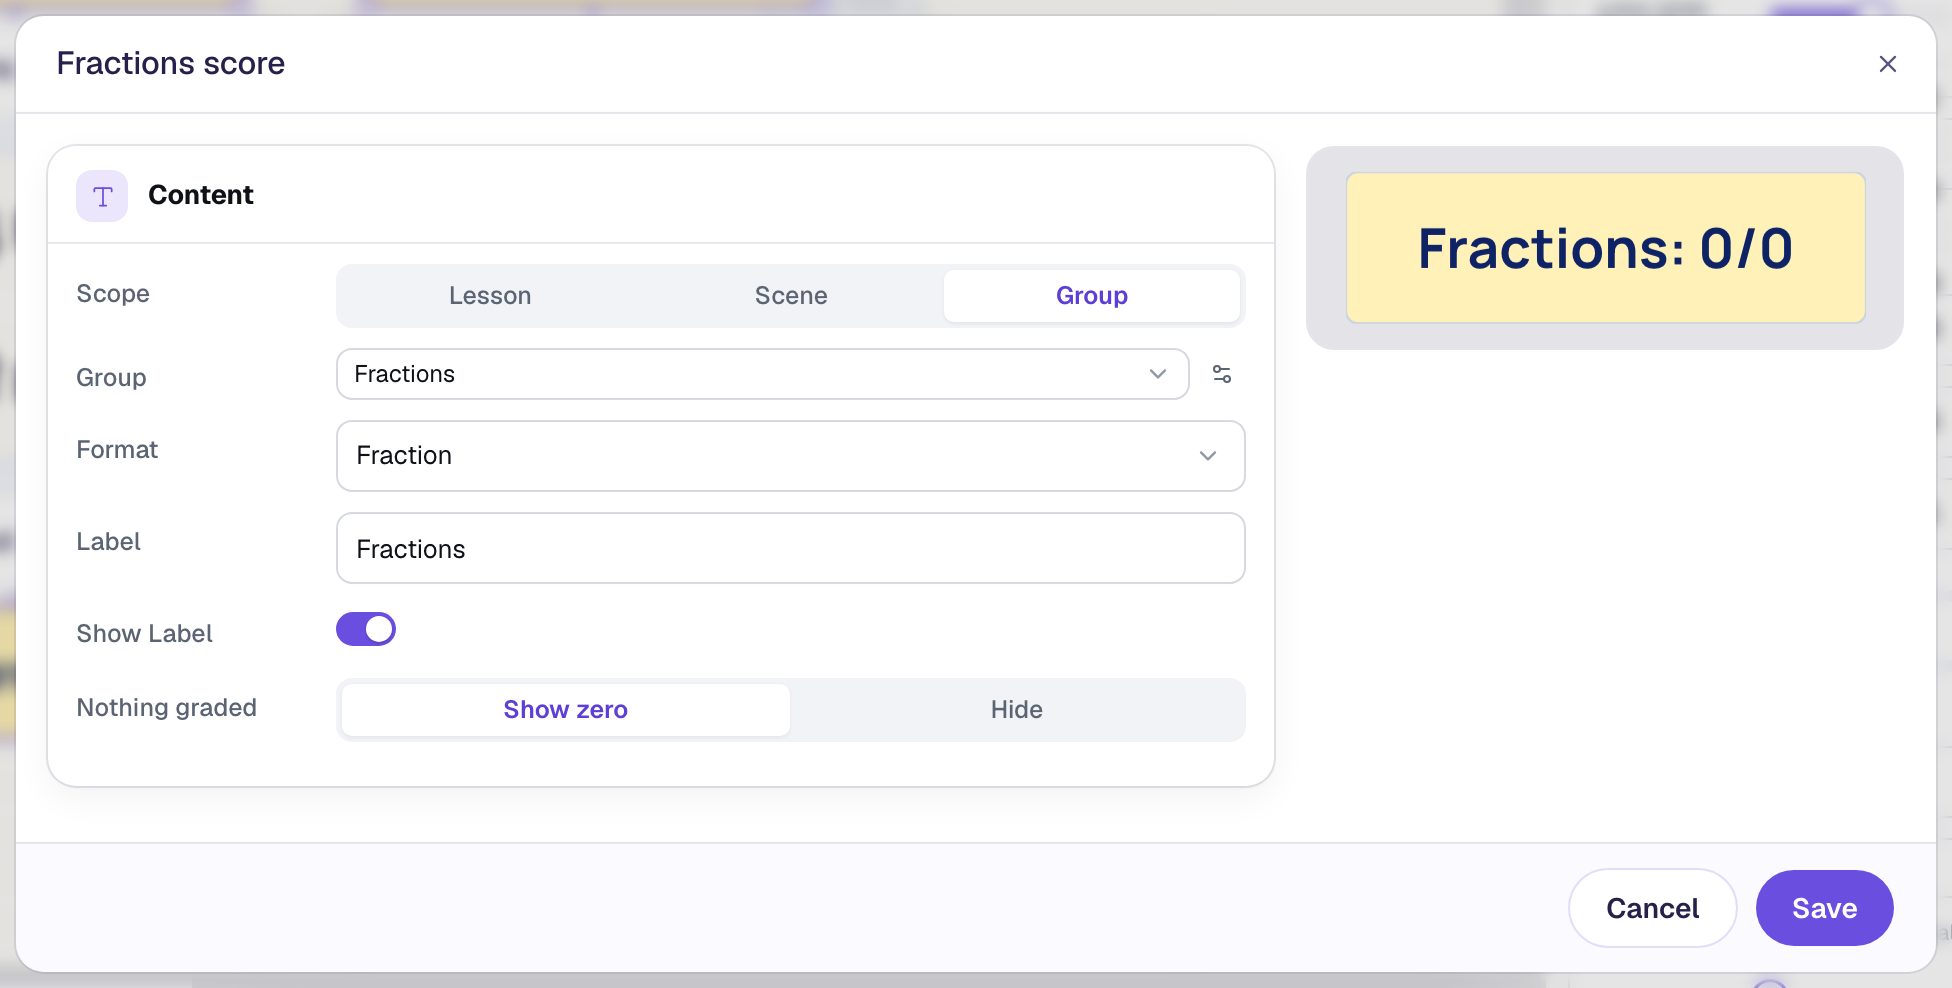
Click Save. Every Score on the canvas reads 0/0 while you edit, because nobody has answered anything yet.
Step 5: Copy it for Decimals
With Fractions score still selected, press ⌘ D (Ctrl + D on Windows) to copy it. The copy keeps the size and colours, so only three things change:
- Rename it
Decimals score. - In ⚙ Configure, set Group to Decimals and Label to
Decimals, then Save. - Set its Background to a pale green, and drag it under the right half of Your score.
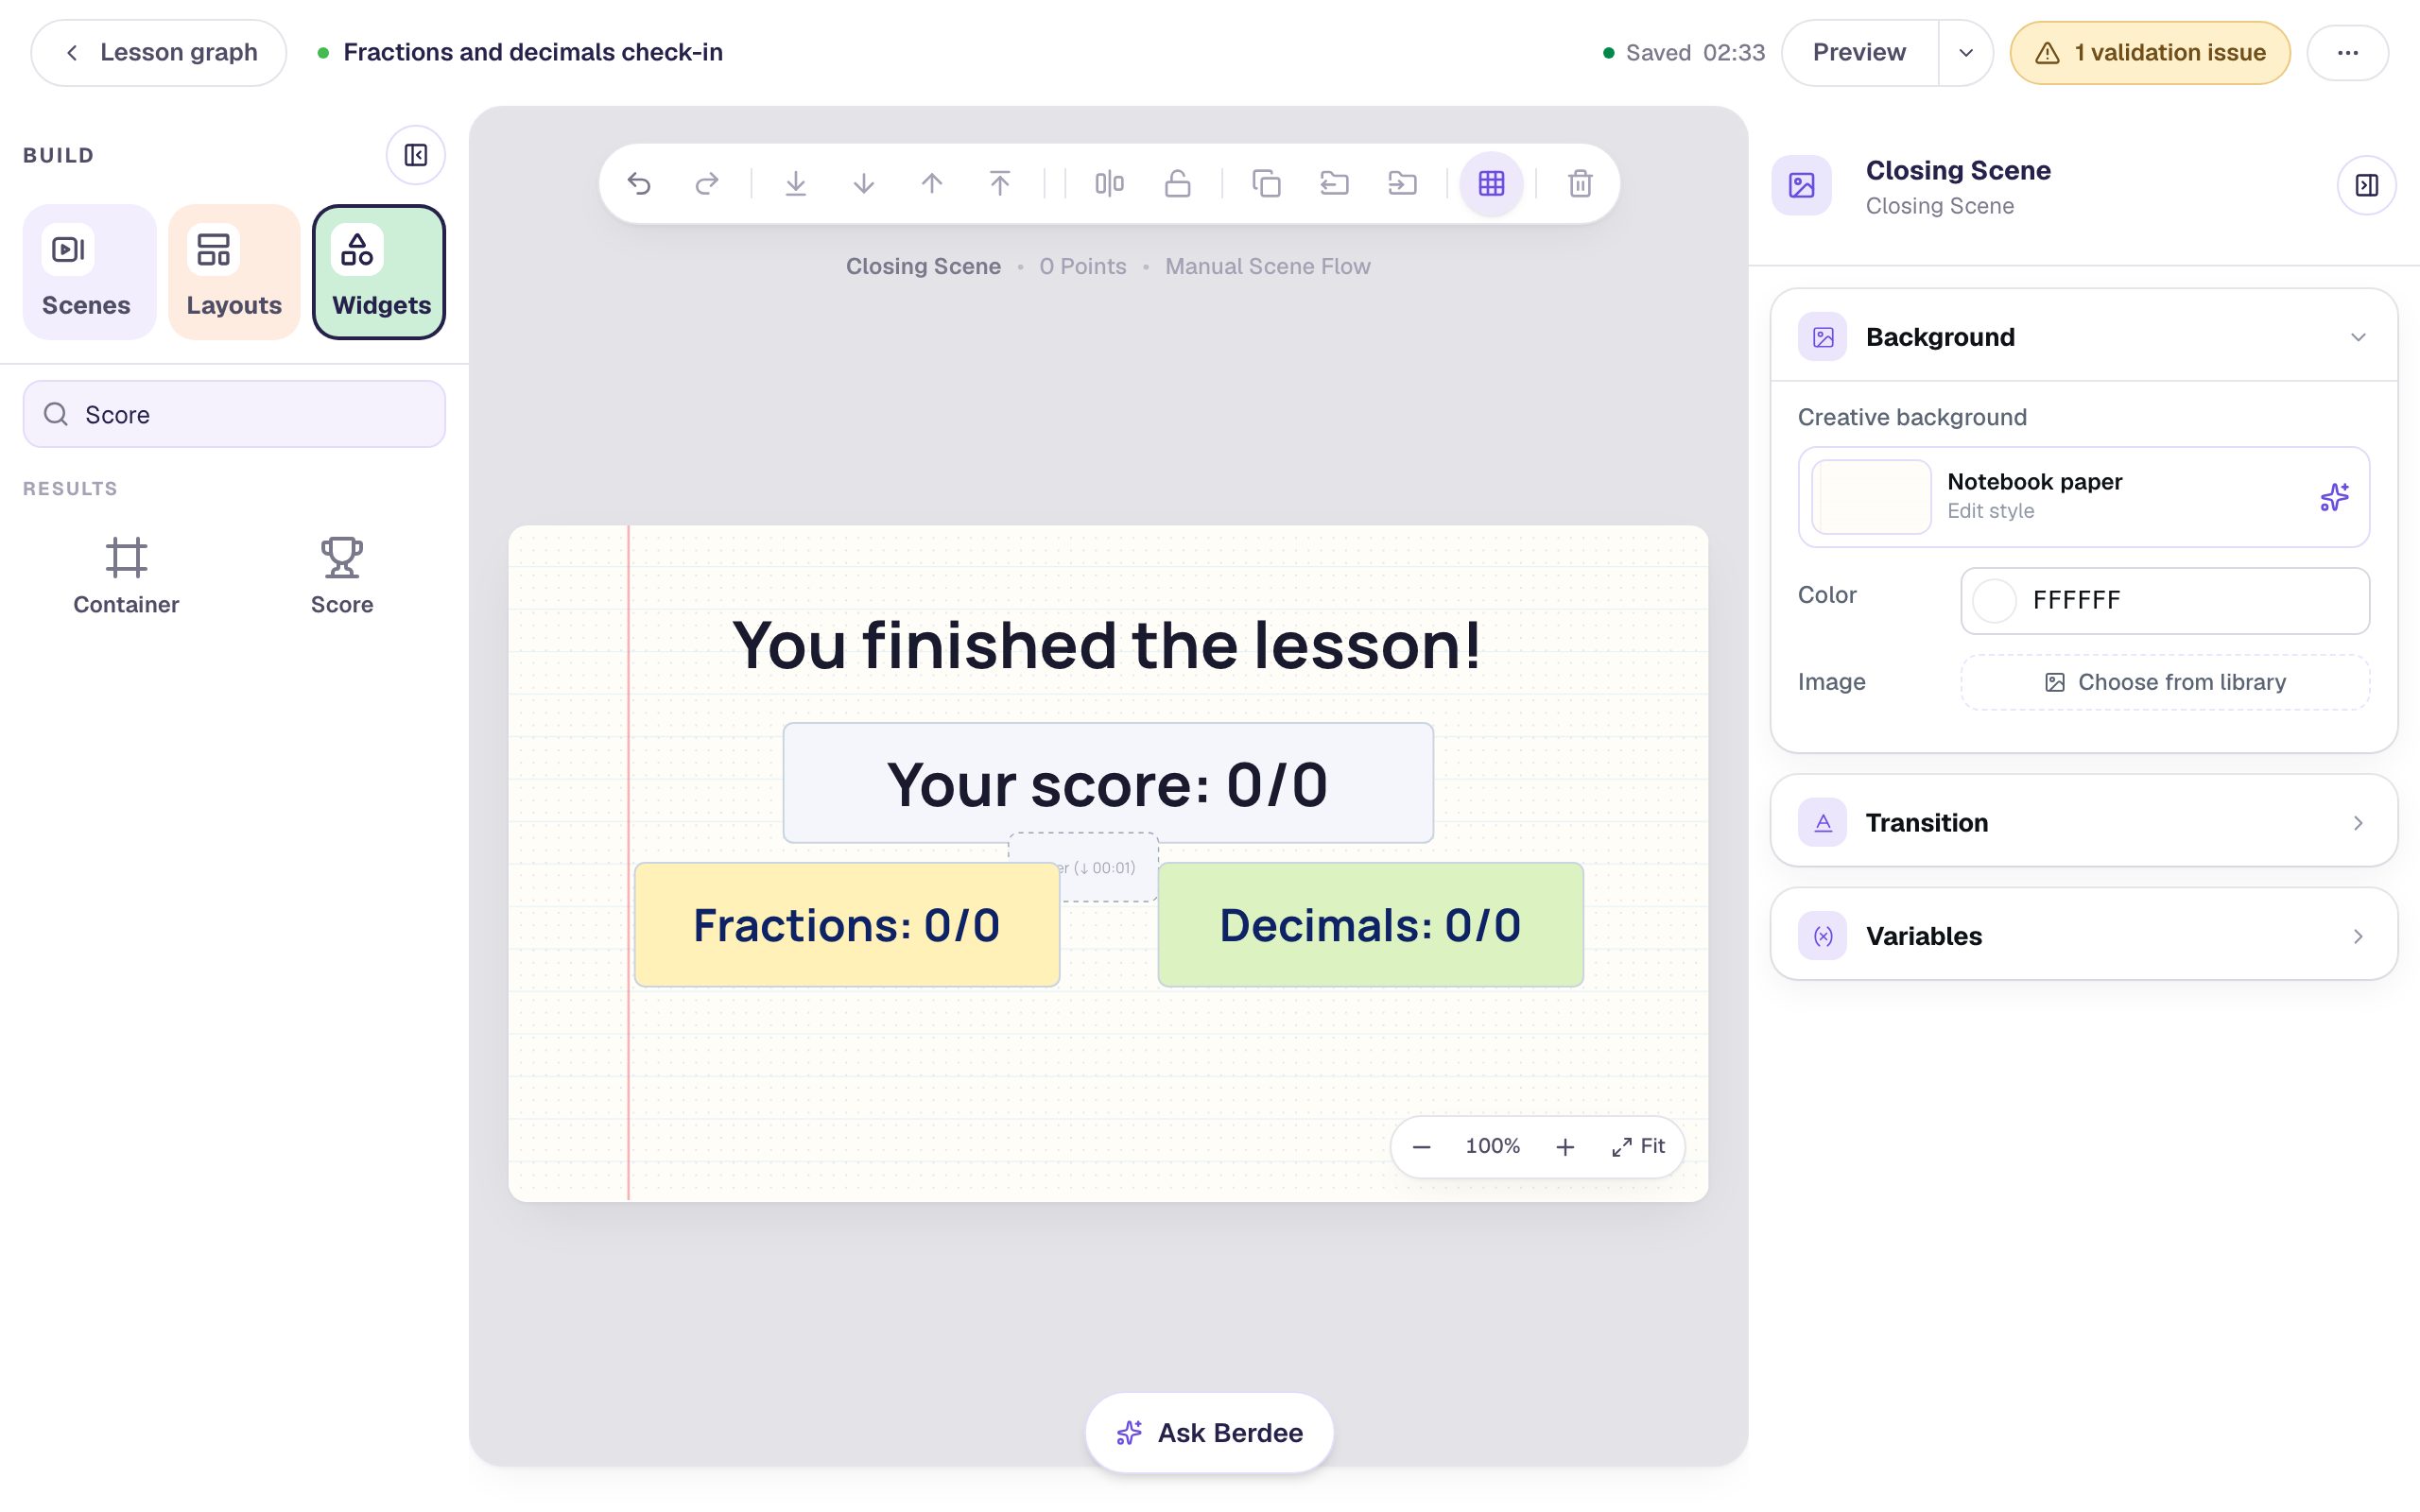
The small dashed Timer box between them is the ending's celebration timer, which plays the confetti. Students never see it, so it's fine where it is.
Step 6: Add a practice note under each skill
A score of 1/2 is a fact. A note under it turns it into a next step. For each skill:
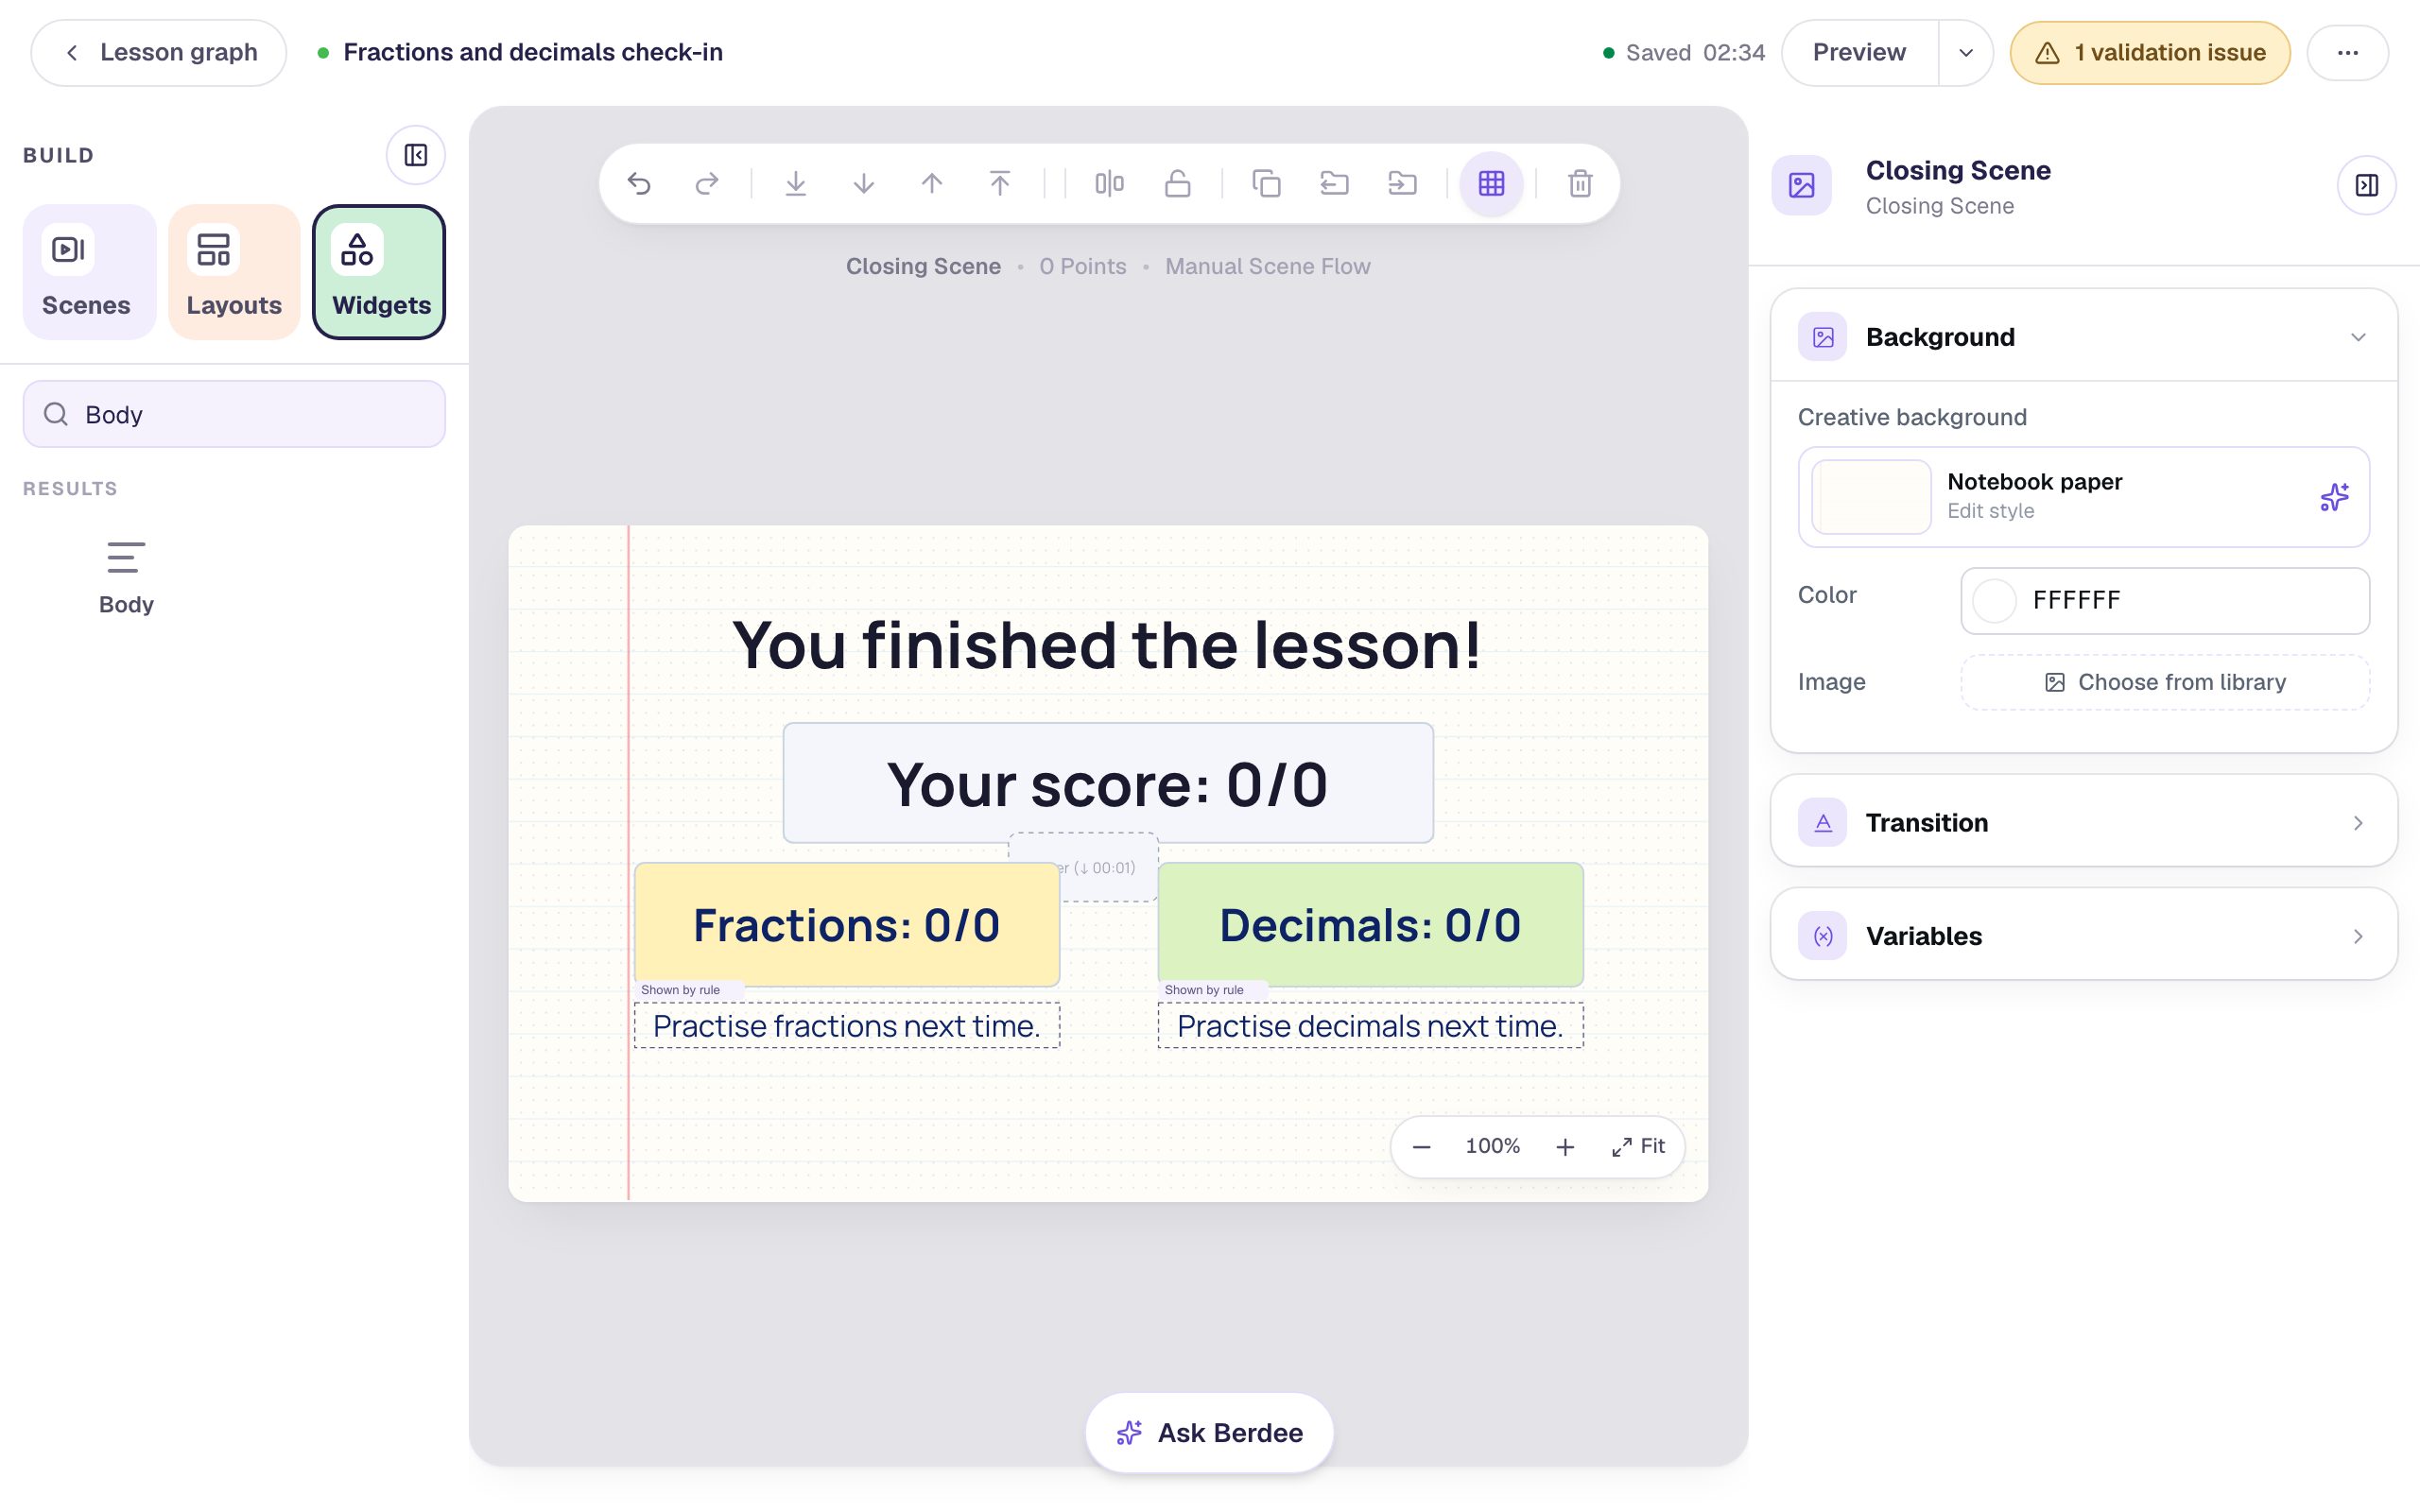
- Click the scene's empty background, add a Body, and type
Practise fractions next time.(orPractise decimals next time.). - Under Style & Layout, choose Fixed width, set Width to
340and Font Size to 24 px, set Text Color to dark navy, and drag it under its score. Rename itFractions note(orDecimals note). - Open Visibility, set Mode to Conditional, and change the condition's first dropdown to the group, Group: Fractions (or Group: Decimals). Then choose score is below and type
100.
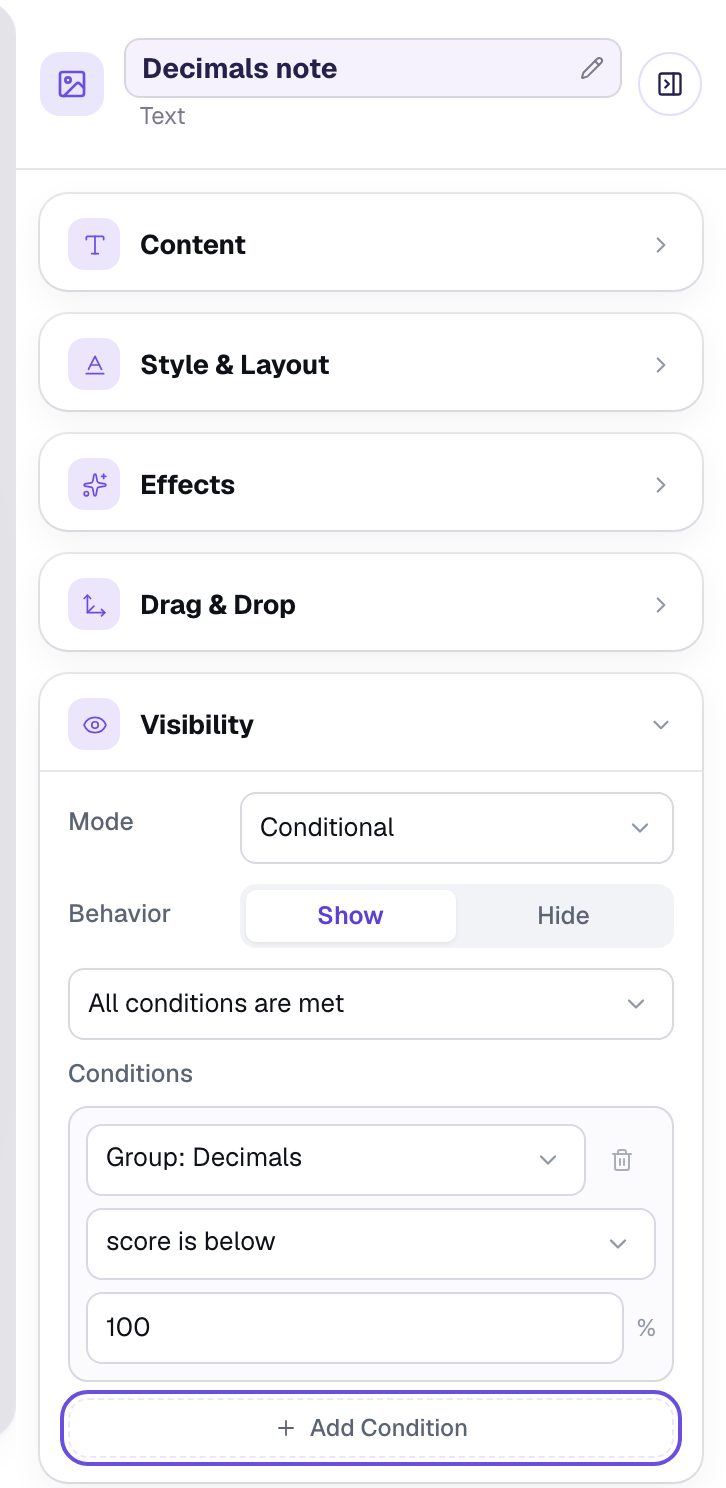
Every group you create appears in that first dropdown, next to Lesson and Current scene. 100 shows the note after any slip in that skill. With more questions per skill you might pick 80 instead, so one slip in five doesn't count as needing practice.
Step 7: Try it in Preview
Go back to the Opening Scene and click Preview. Play like a student who knows fractions but slips on decimals: 2/4, 3/4, then the wrong 0.65, then 0.7, pressing Next after each. The answers appear in a different order each time, because a new Multi Choice shuffles them.
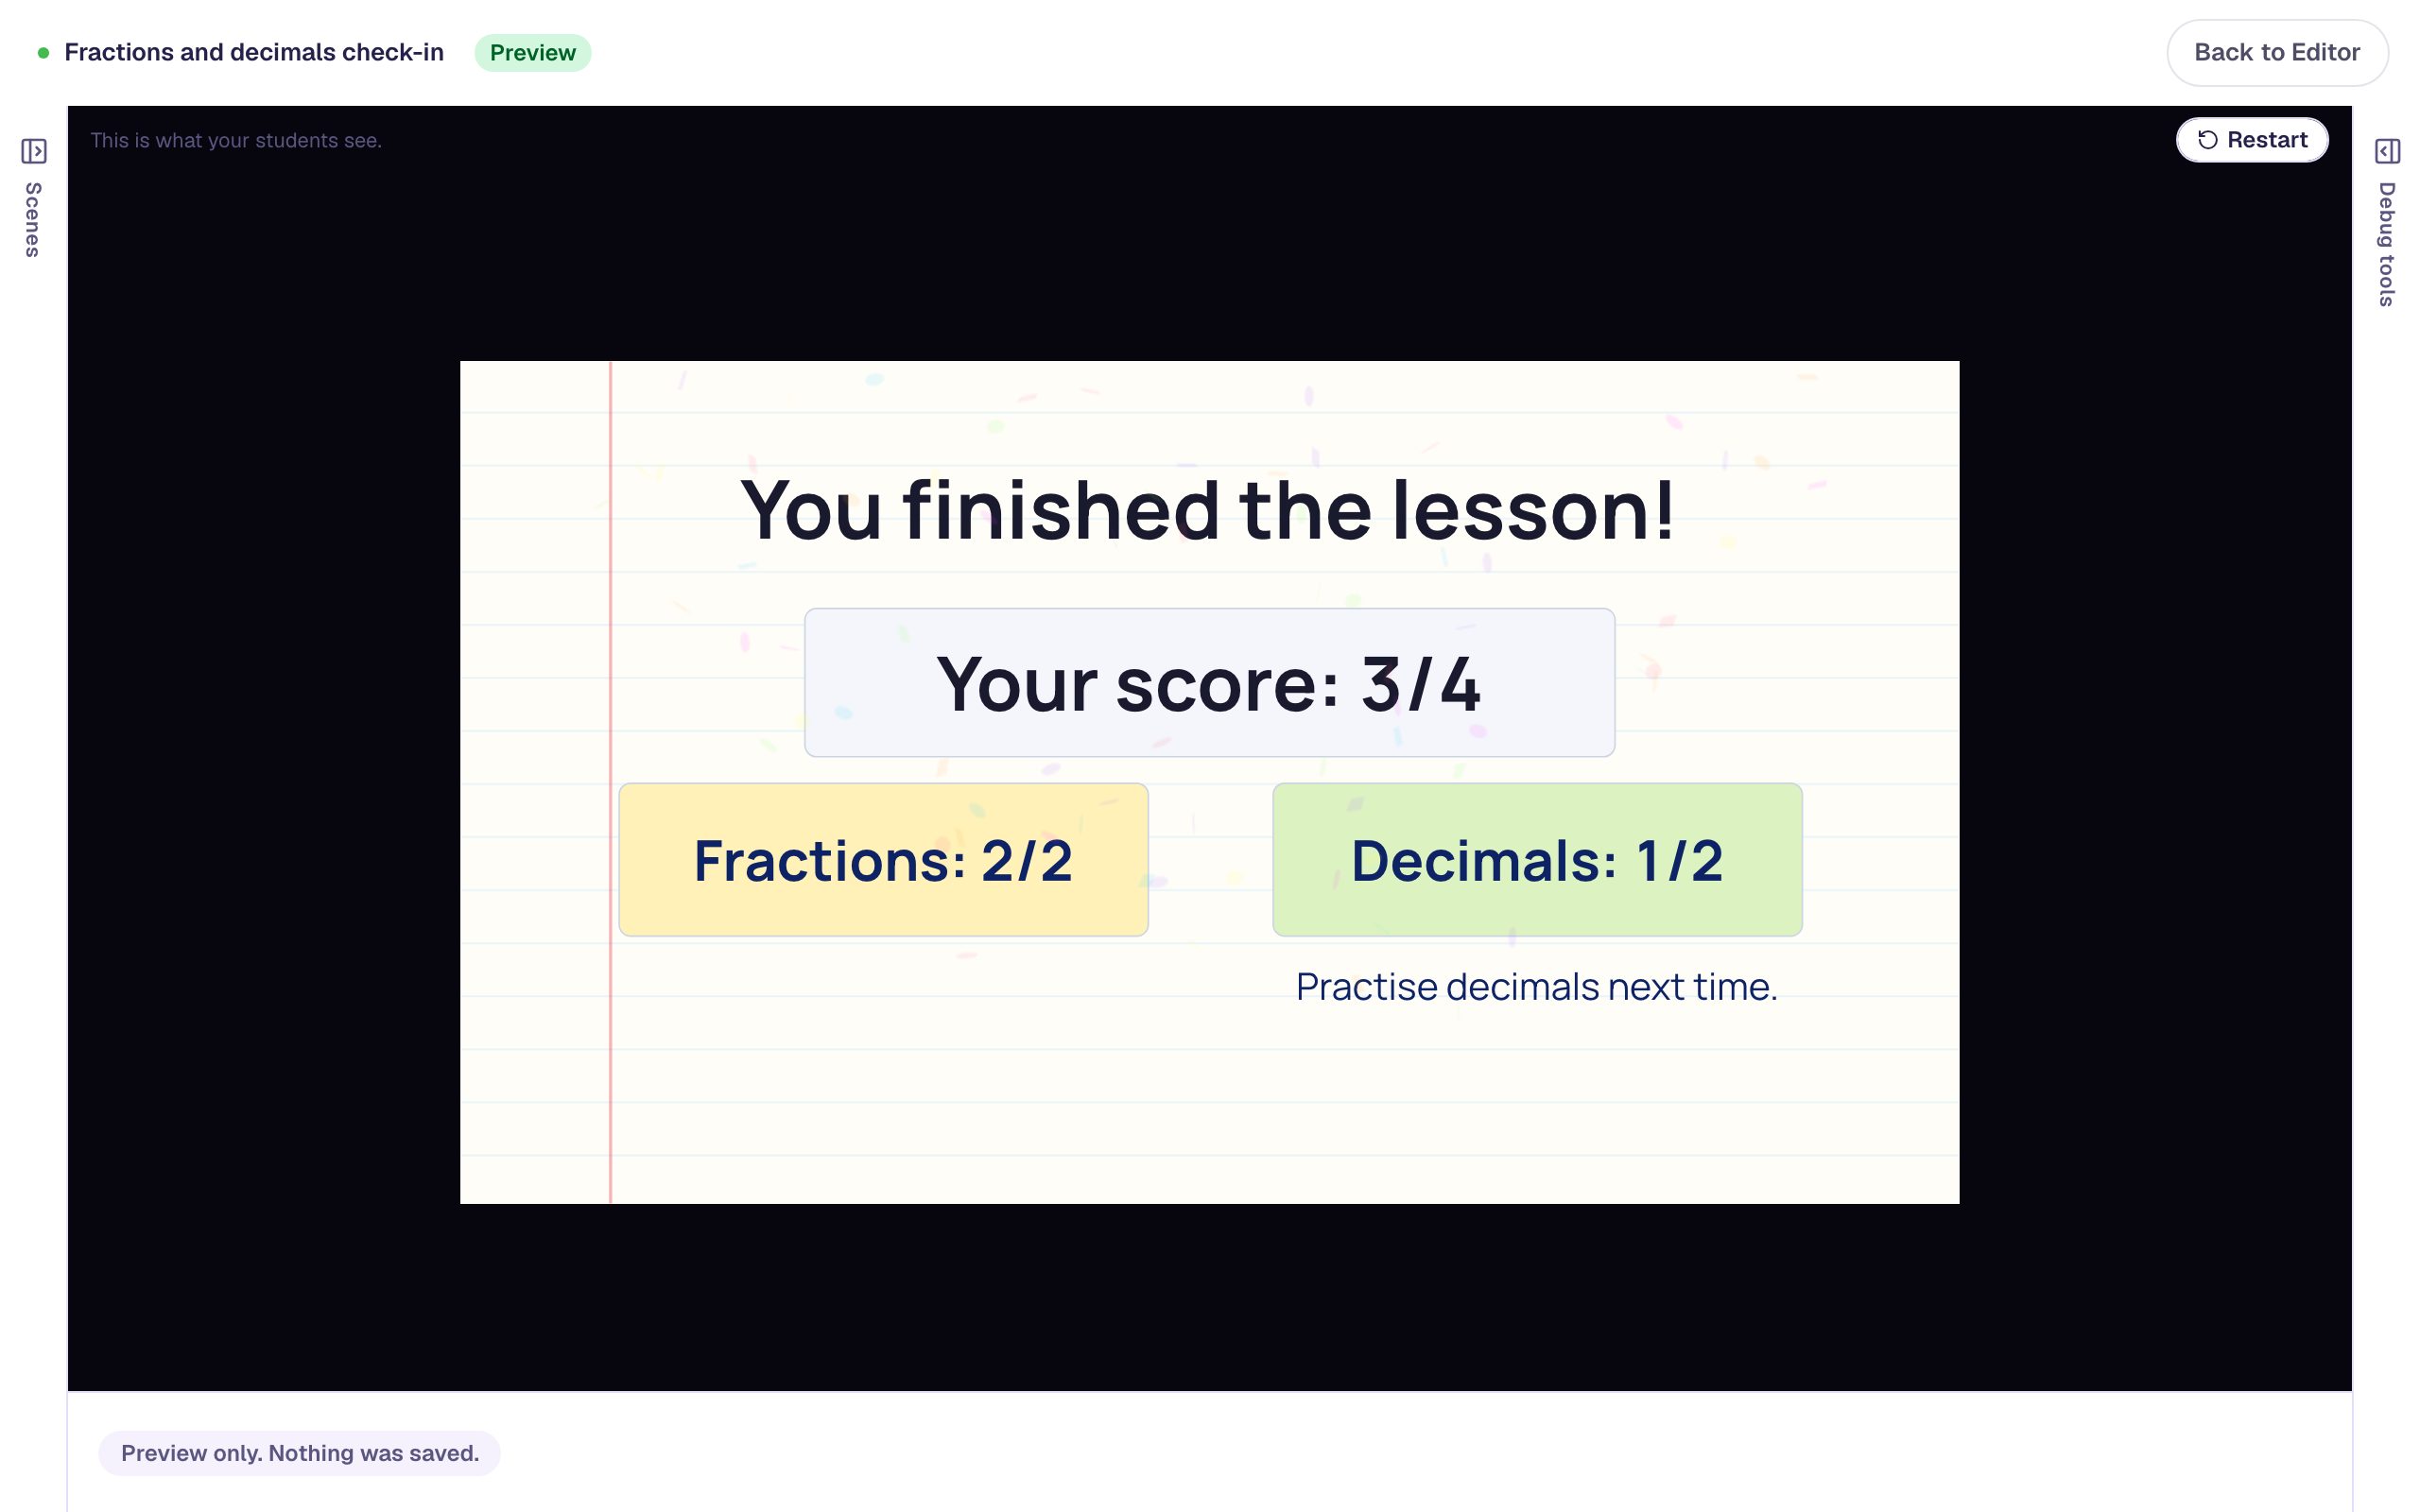
The total says 3/4, the same as before. The groups say where the missing point went, and the only note on screen is the one this student needs. Press Restart and try other mixes: get every answer right and both notes stay hidden, or miss a fraction and the Fractions note appears instead.
What you built
A check-in whose ending reports each skill on its own:
- four questions, each in a grading group named after its skill (Fractions or Decimals), still counting toward the lesson total,
- a Score per group with Scope set to Group, next to the lesson's own Your score,
- a note under each score with a visibility rule, Group: Fractions (or Decimals) score is below 100%, and
- Next buttons with Stay progression, so a wrong answer counts as wrong.
Groups work across scenes, so the questions in a skill can be anywhere in the lesson, and a lesson can have as many groups as it has skills. Before you publish, the lesson also needs a Submit button set to Submits = Lesson. The validation pill at the top of the studio reminds you.
To change the ending's message by the overall score instead, see Cheer a high score and encourage a low one on the ending. To make some questions worth more than others, see Make some questions count more, and one not at all.
Make this lesson yours
Add the lesson you just watched being built to your account, then change it for your class: your questions, your pictures, your colors.
Free to sign up, and you'll come straight back here. I have an account