Cheer a high score and encourage a low one on the ending
Give the ending two messages, one for students who scored 80% or more and one for everyone else, and save the confetti for the high scores, using visibility rules and a behavior condition on the lesson score.
- Level
- Intermediate
- Time
- About 15 min
- Steps
- 7
A three-question ocean quiz whose ending cheers and throws confetti for a score of 80% or more, and shows a gentle "Good try" with no confetti below that.
Get the finished lesson
Skip straight to the result, or keep it open beside the steps. Add this tutorial's lesson to your account and explore how it works in the studio.
Free to sign up, and you'll come straight back here. I have an account
Every lesson ends on the same screen: You finished the lesson!, the student's score, and a burst of confetti. That's a happy ending for a student who got everything right. For a student who got one out of three, confetti over a low score can feel like it's laughing at them.
In this tutorial you'll make the ending answer the score. Students who score 80% or more see a cheer and the confetti. Everyone else sees their score and a kind nudge to look back at what they missed, with no confetti. You'll do it with two visibility rules and one condition on the confetti, all on the ending you already have.
If you haven't set up questions before, start with Build your first quiz question. This tutorial moves quickly through the quiz and spends its time on the ending.
Step 1: Build a short quiz
Start a blank lesson (New lesson, then Start from scratch) and name it Ocean animals quiz. In the Scenes panel, click Add scene twice and rename the new scenes Question 2 and Question 3. Make all the scenes first: each Next button points at a specific scene, so the scene it goes to has to exist.
Then build one question on each of the Opening Scene, Question 2 and Question 3:
- Under Background, click Choose a style, open Nature, and pick Layered waves.
- Add a Heading (
Ocean quiz · 1 of 3) and a Body with the question, both in dark navy so they read well on the pale water. - Add a Multi Choice with three answers and the right one marked correct. We used:
Which of these ocean animals is a mammal?with🐬 Dolphin(right),🦈 Sharkand🐙 OctopusHow many arms does an octopus have?with6,8(right) and10Which is the biggest animal in the ocean?with🐋 Blue whale(right),🦈 Great whiteand🐢 Sea turtle
- Add a Button, label it
Next, and use Behaviors → Make this a "Next" button. Then click the scene's empty background and set Progression to Stay.
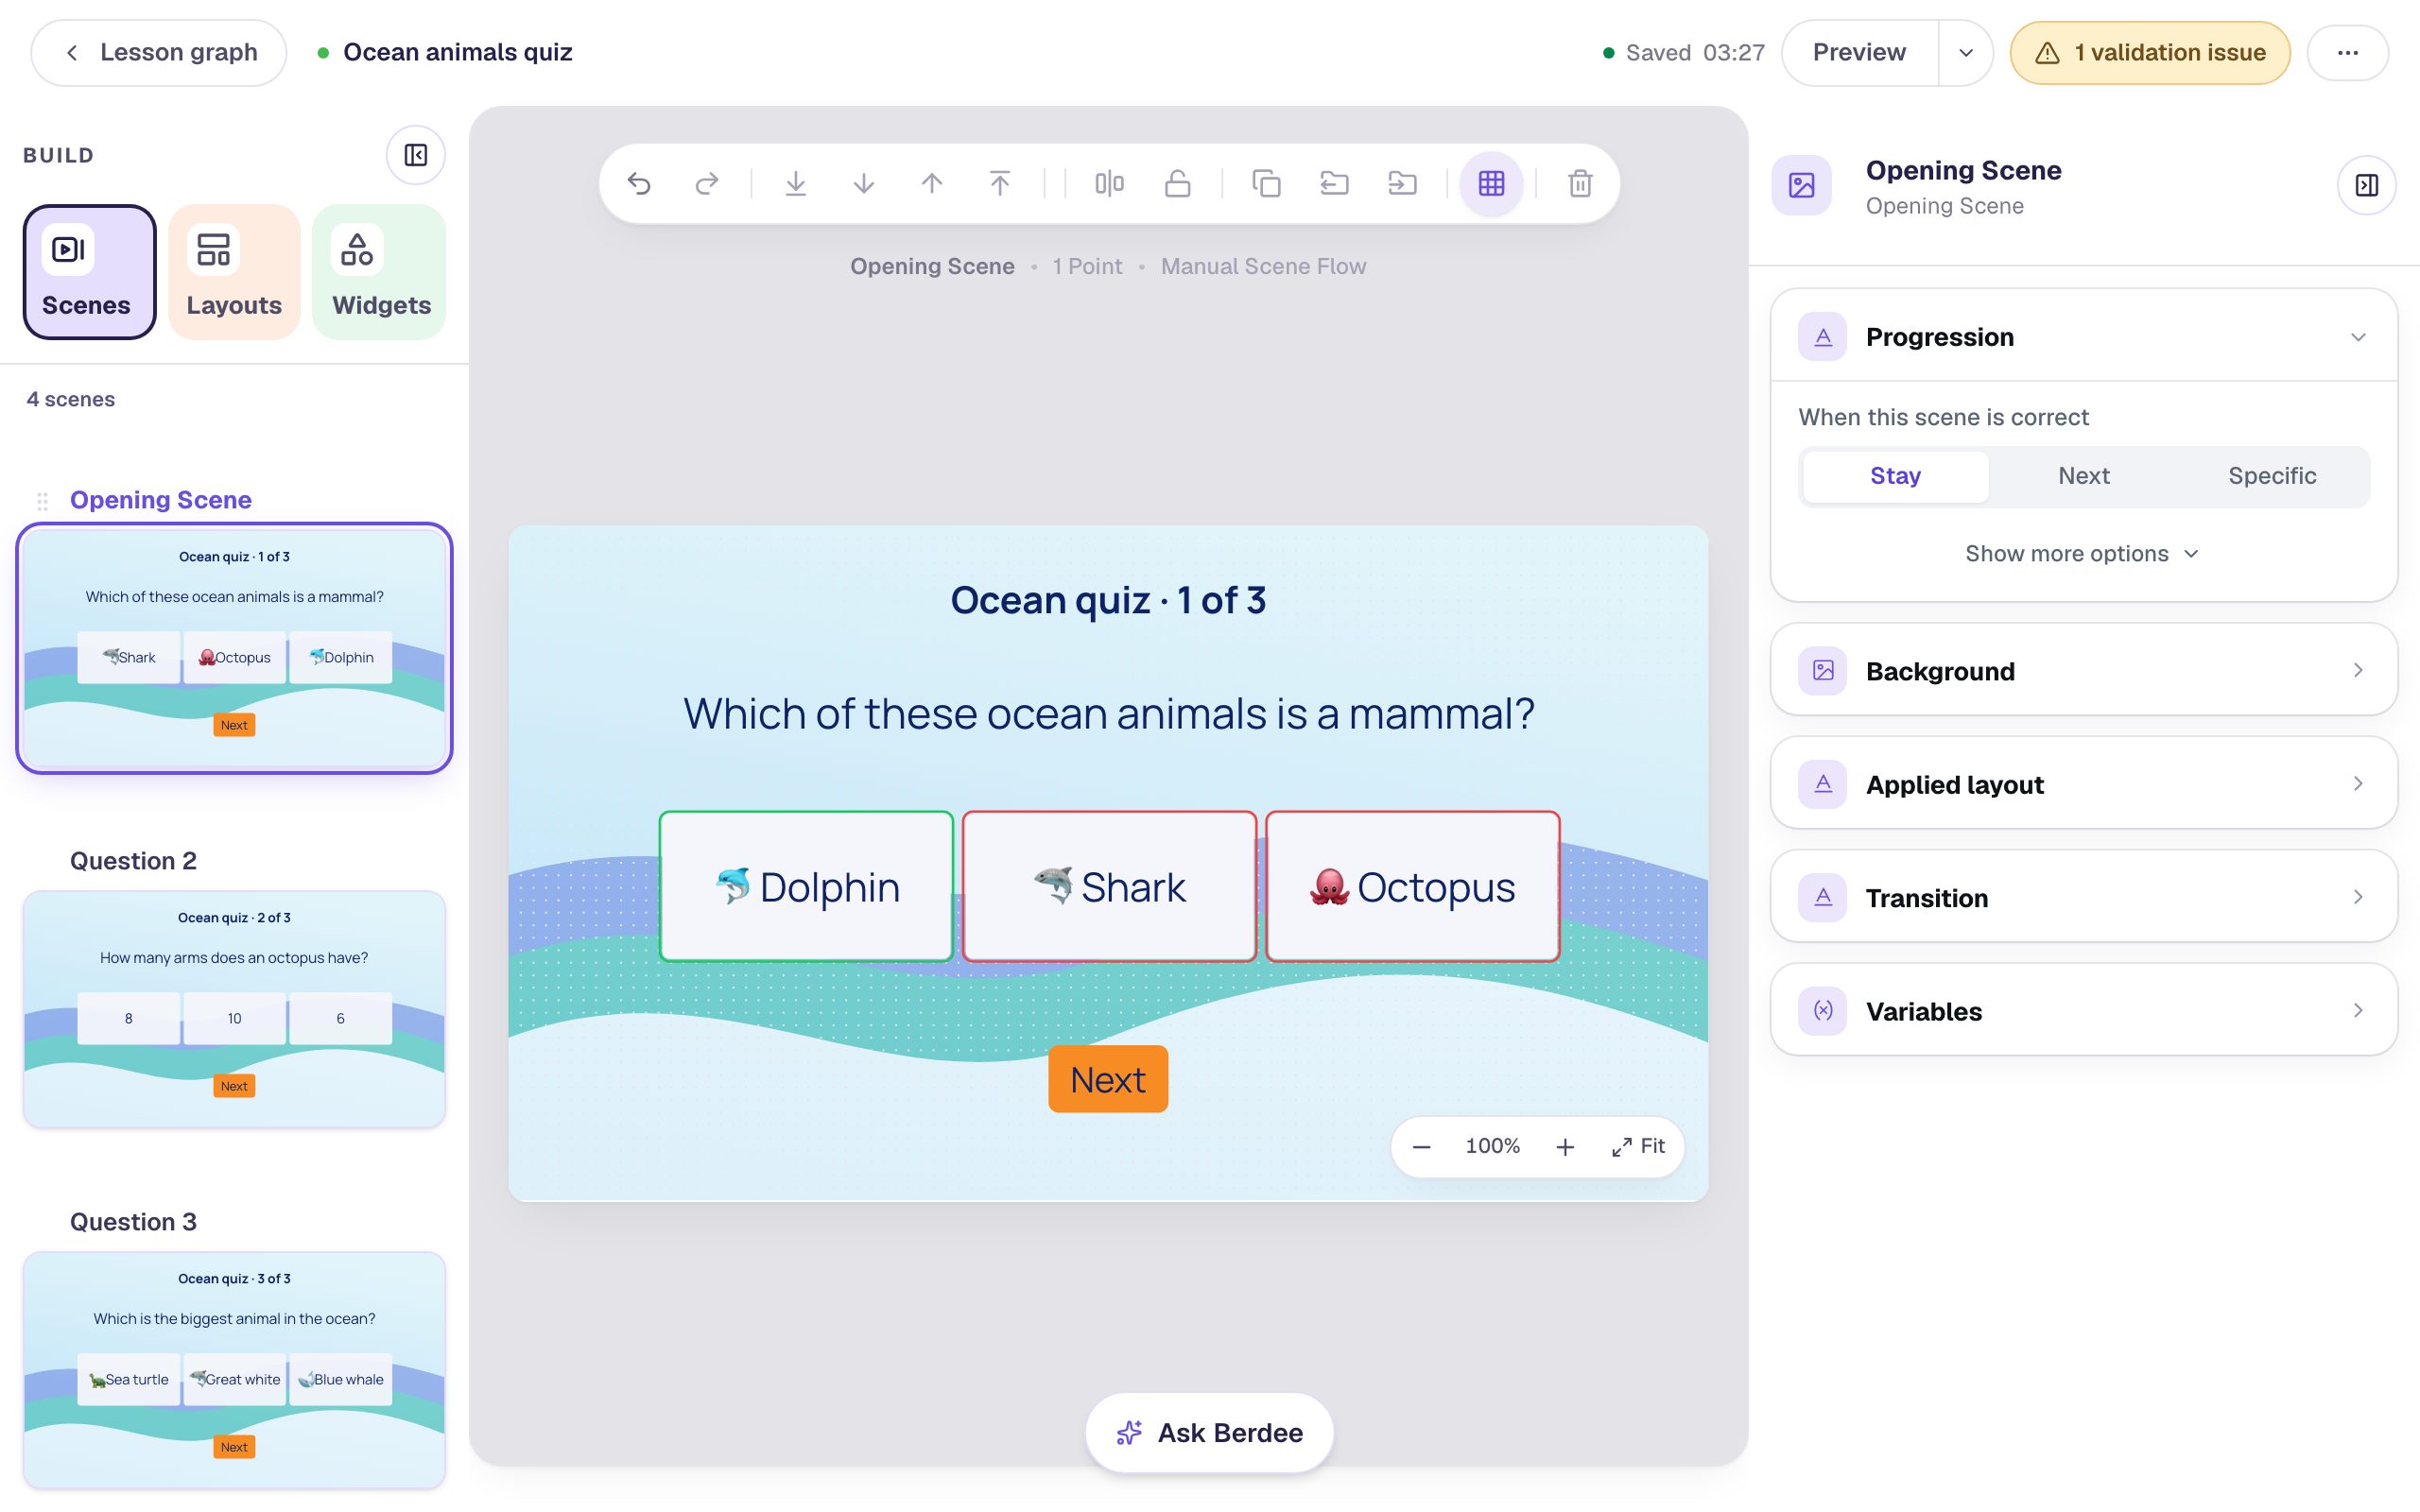
The Next buttons matter for this tutorial. With Stay, a scene waits for the student to press Next, so a wrong answer is recorded as wrong. Left on the default Next, a scene only moves on once the answer is right, so a student can keep picking until they get it, and nearly everyone would finish with a perfect score.
Step 2: Look at the ending you already have
Open the Closing Scene under Ending in the Scenes panel, and give it the same Layered waves background so the lesson ends where it started.
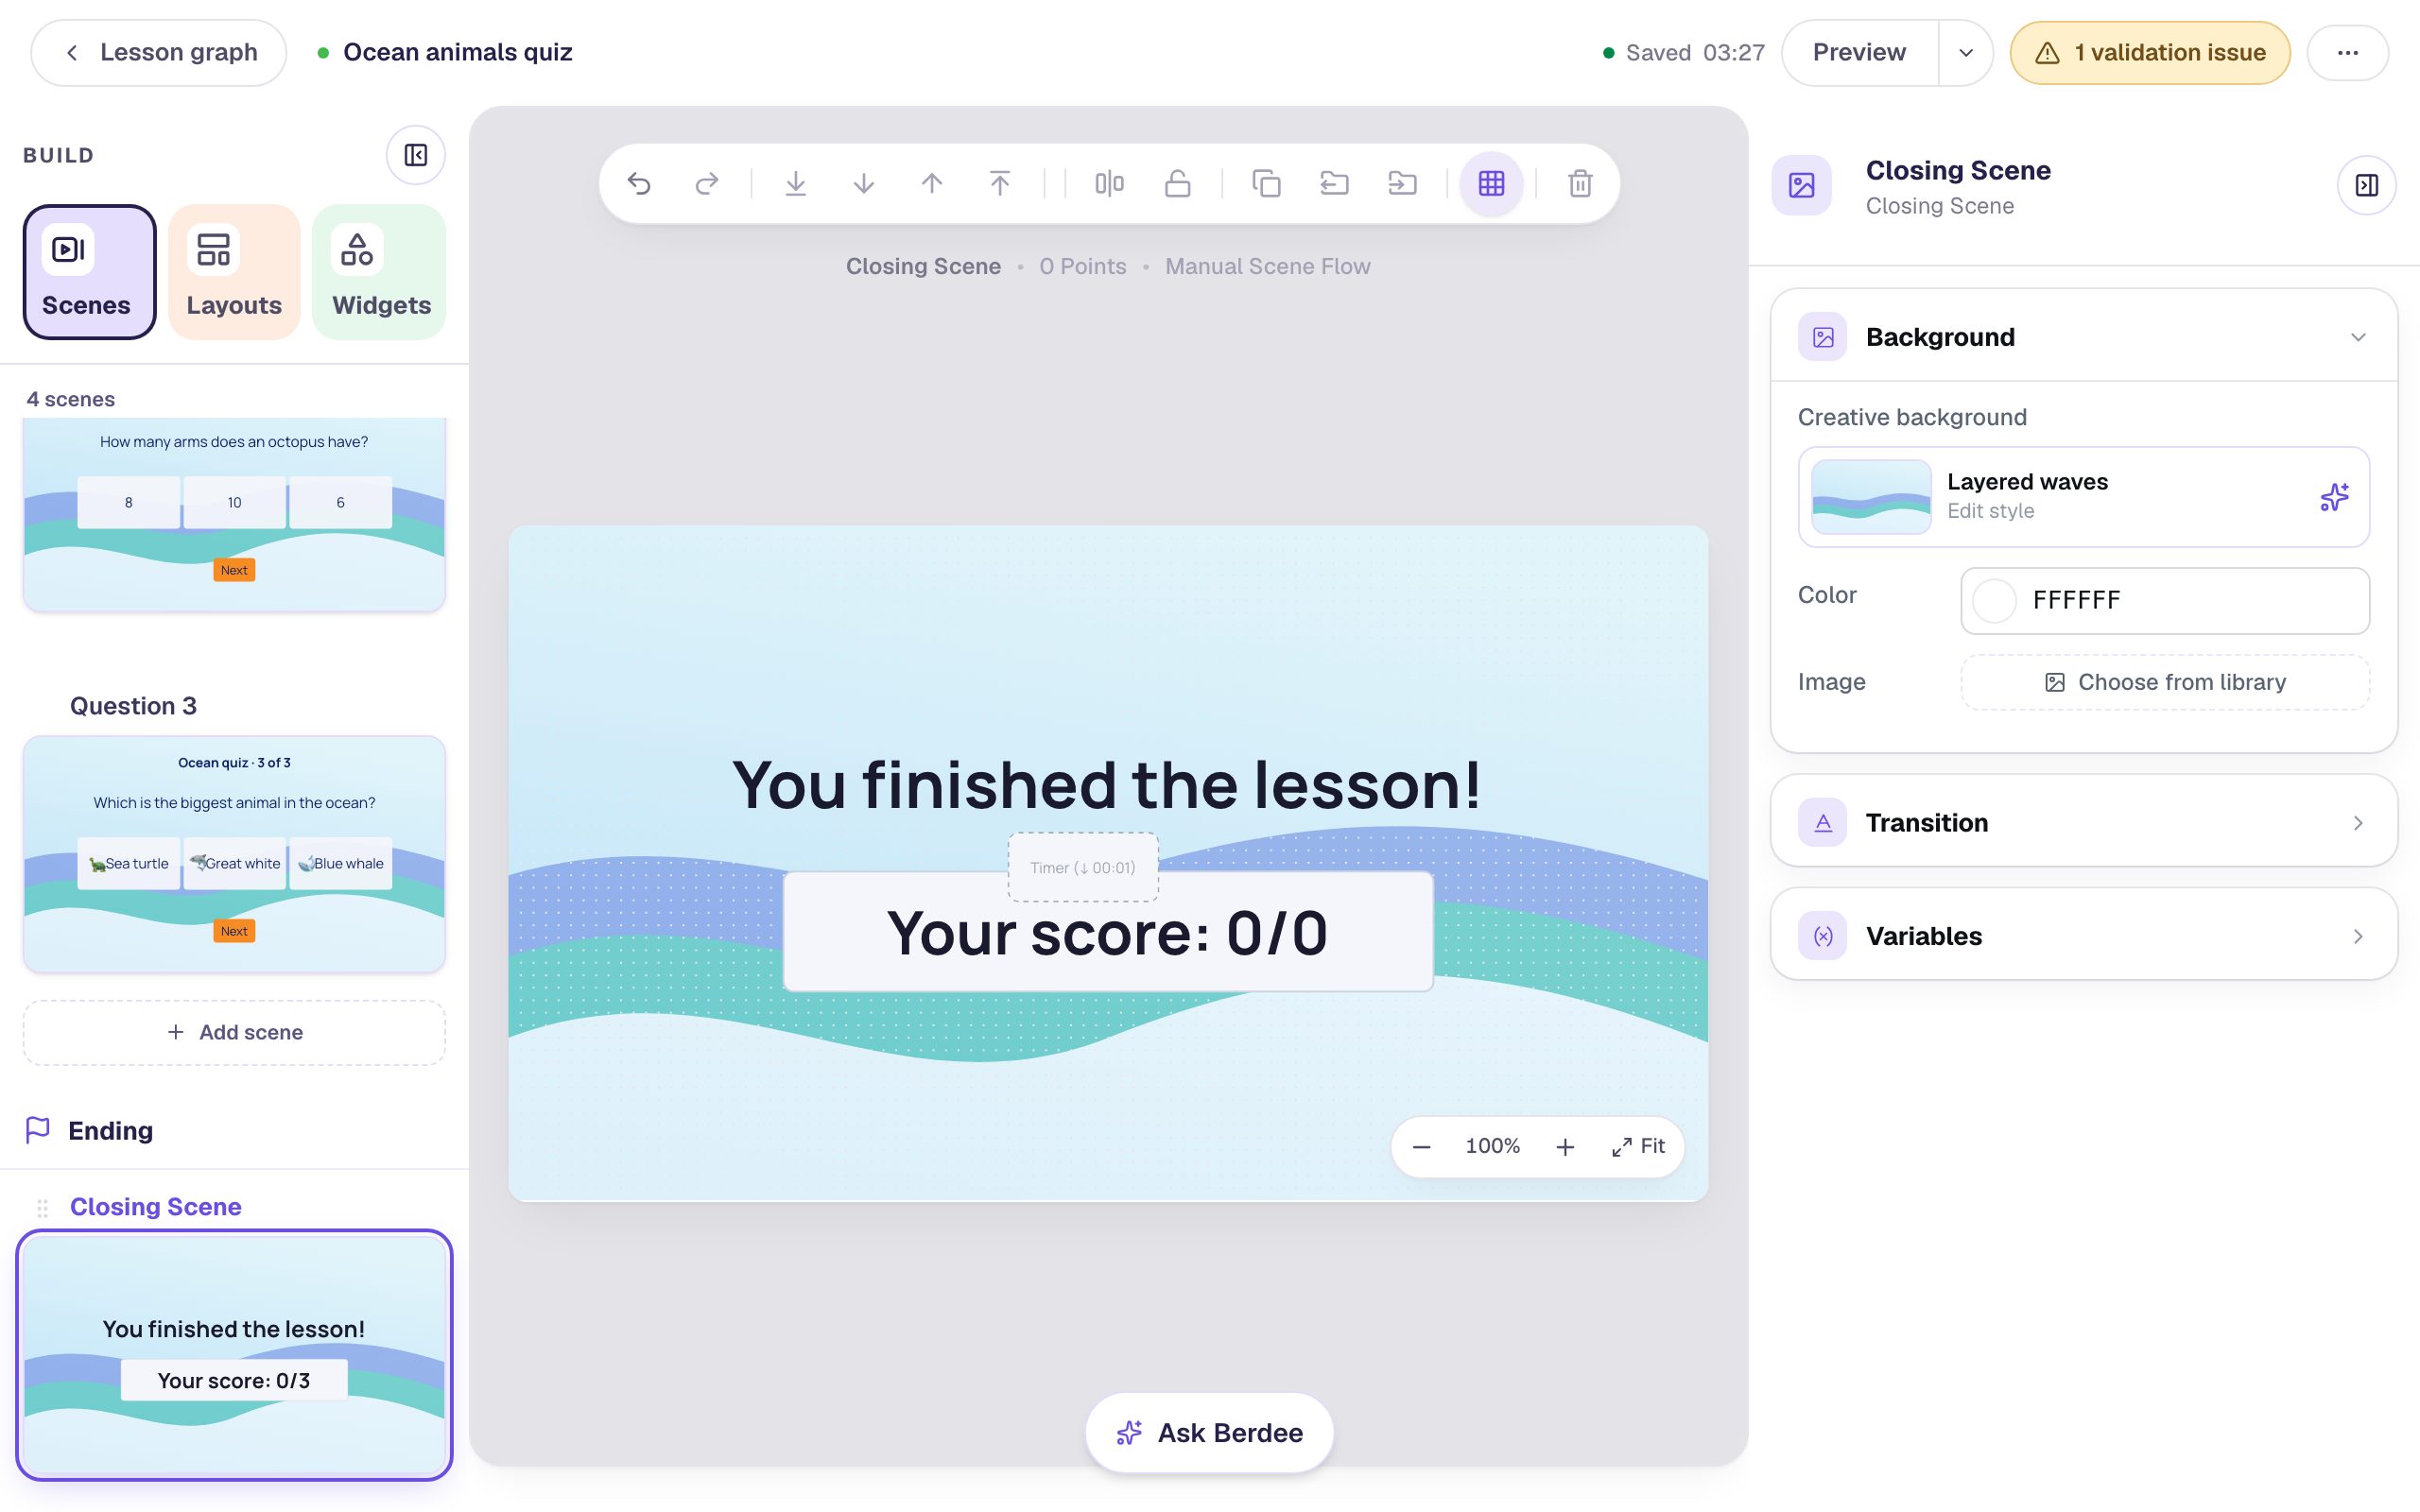
Every new lesson's ending has three widgets, and you can change all of them:
- Ending headline: the text
You finished the lesson! - Ending score: the student's score for the whole lesson
- Ending celebration: a hidden timer, the small dashed Timer box over the score. One second after a student arrives it plays the confetti. Students never see the timer itself.
Reaching this scene finishes the lesson and locks the student's answers, so the score here is final.
Step 3: Turn the headline into a cheer
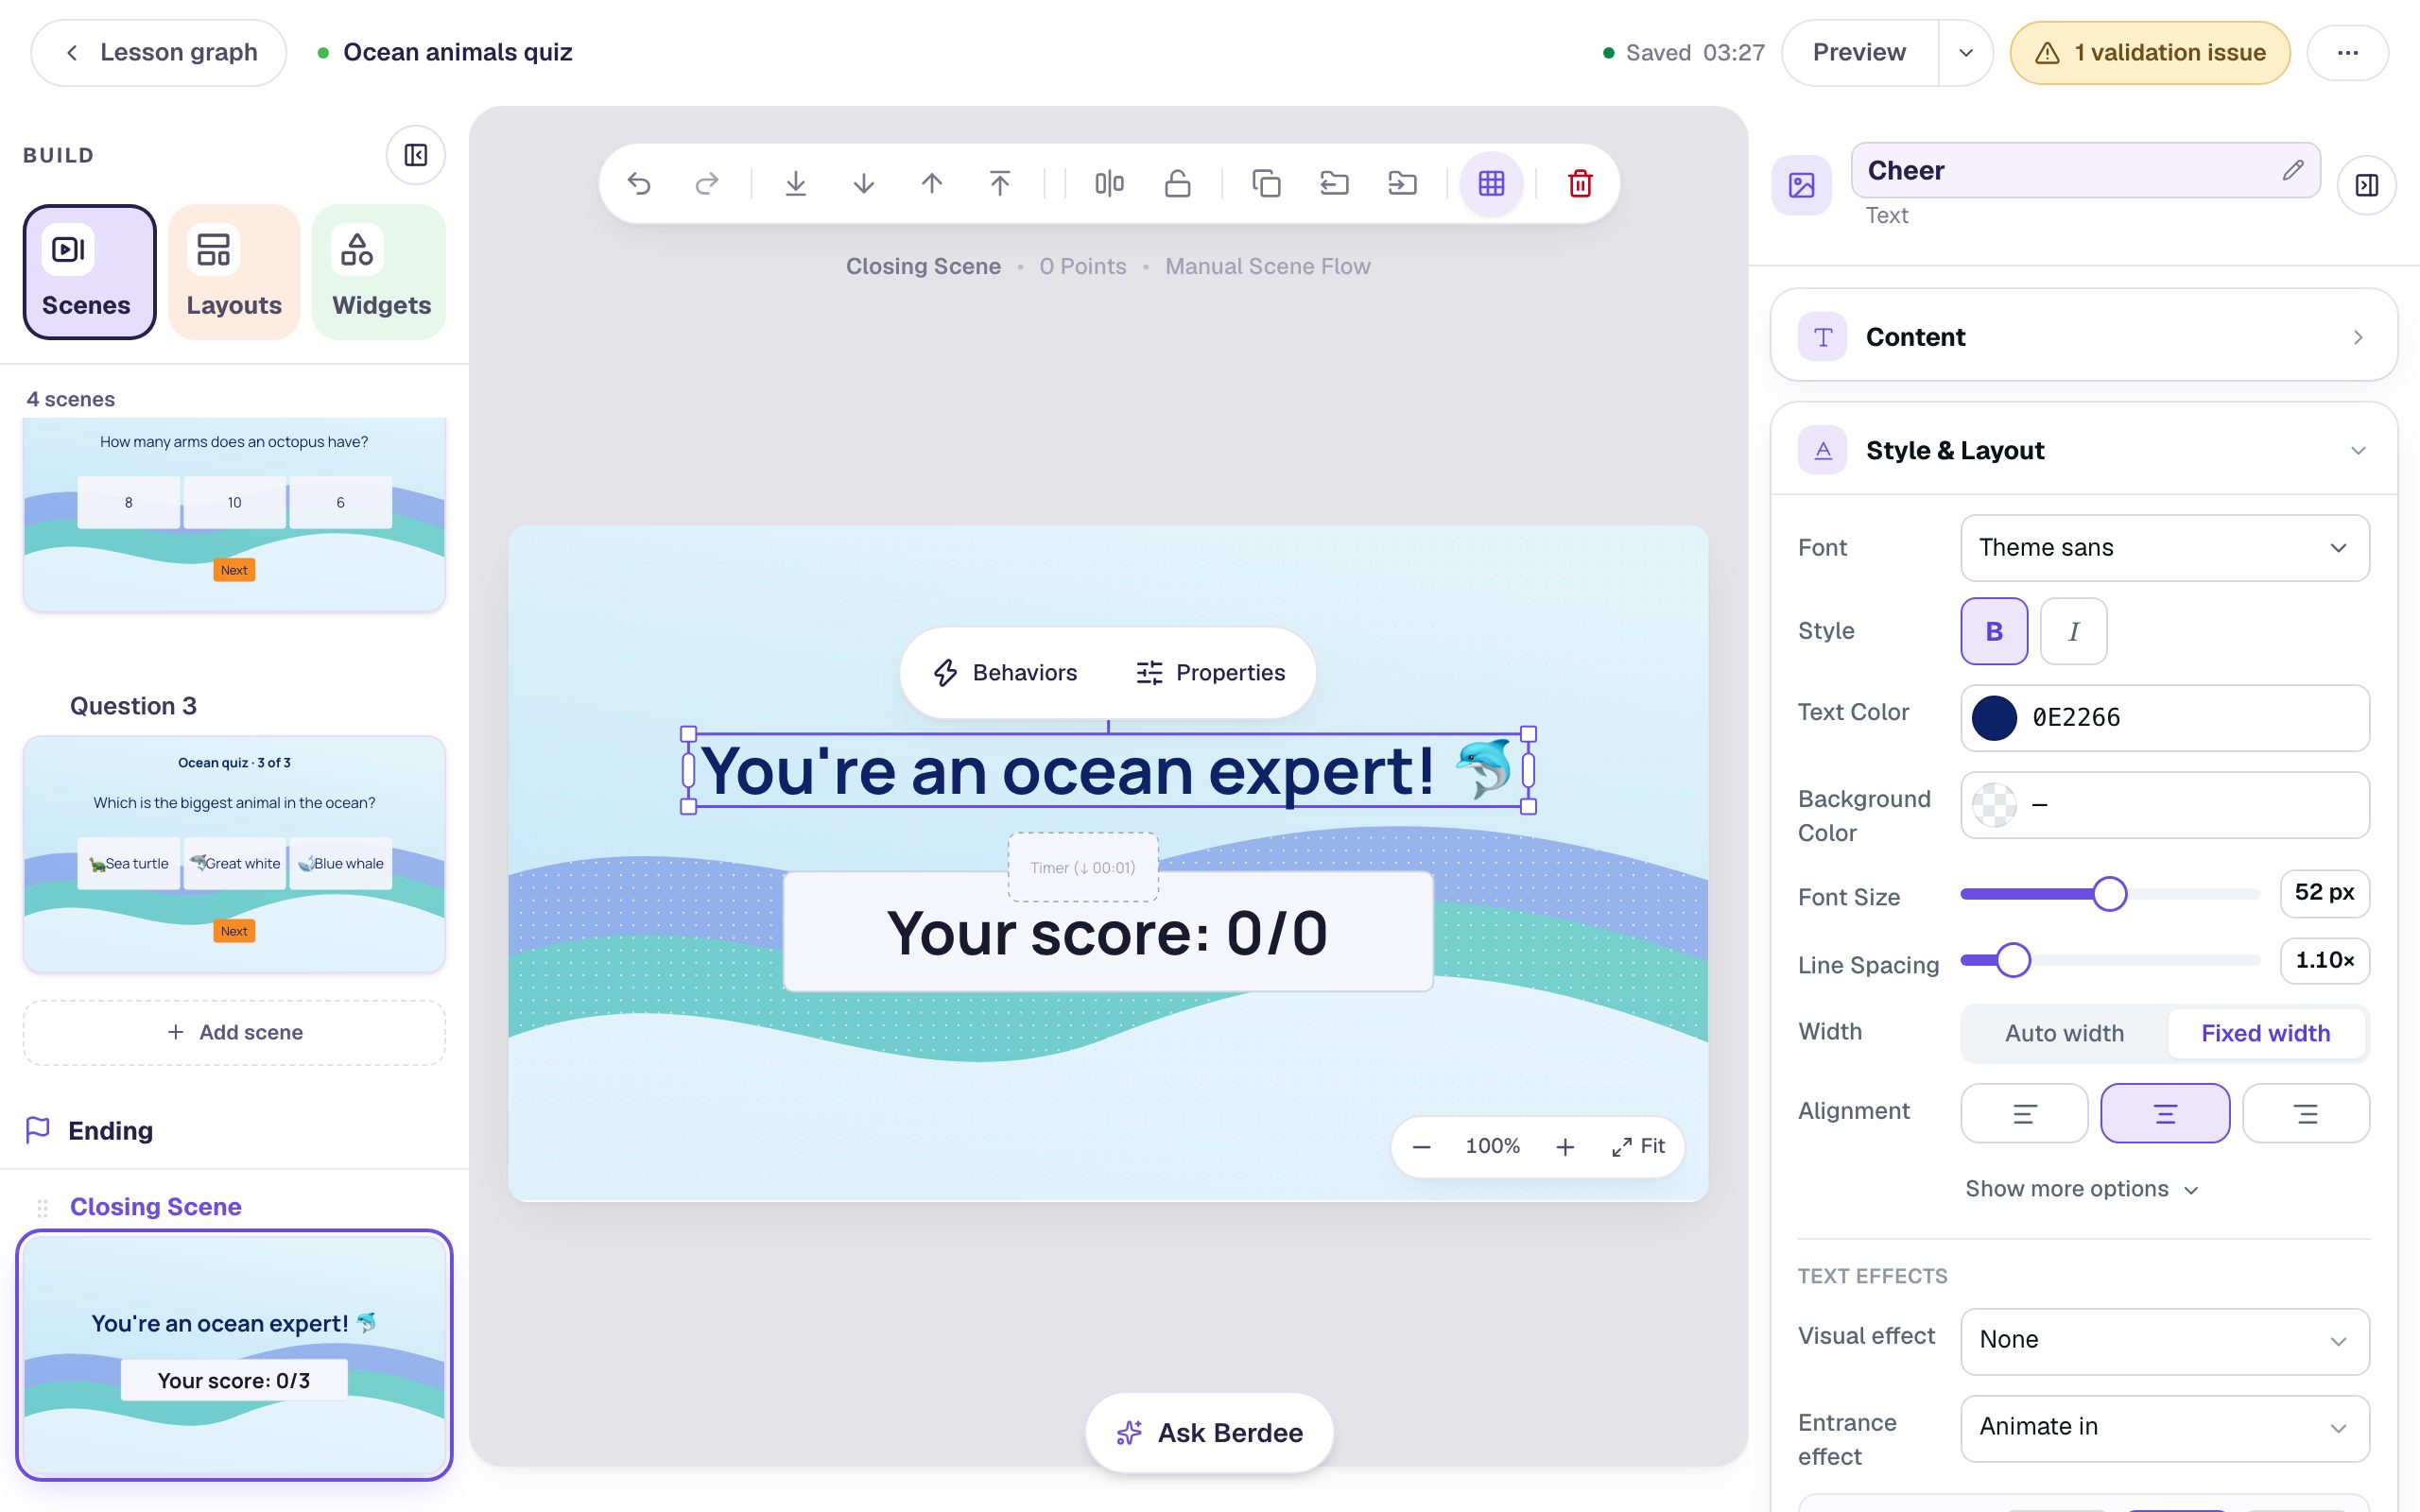
Click You finished the lesson! to select it. Then:
- Click its name at the top of the properties panel, type
Cheer, and press Enter. A clear name makes the rule you write next easier to read. - Open Content and replace the text with
You're an ocean expert! 🐬. - Under Style & Layout, set Text Color to dark navy to match the questions.
Step 4: Show the cheer only for a high score
With Cheer still selected, open Visibility in the properties panel:
- Set Mode to Conditional. Behavior is already Show.
- A condition row appears, pointing at one of your widgets. Change its first dropdown to Lesson, at the top of the list.
- Change the second dropdown to score is at least.
- Type
80in the box. It's a percentage of the whole lesson's points.
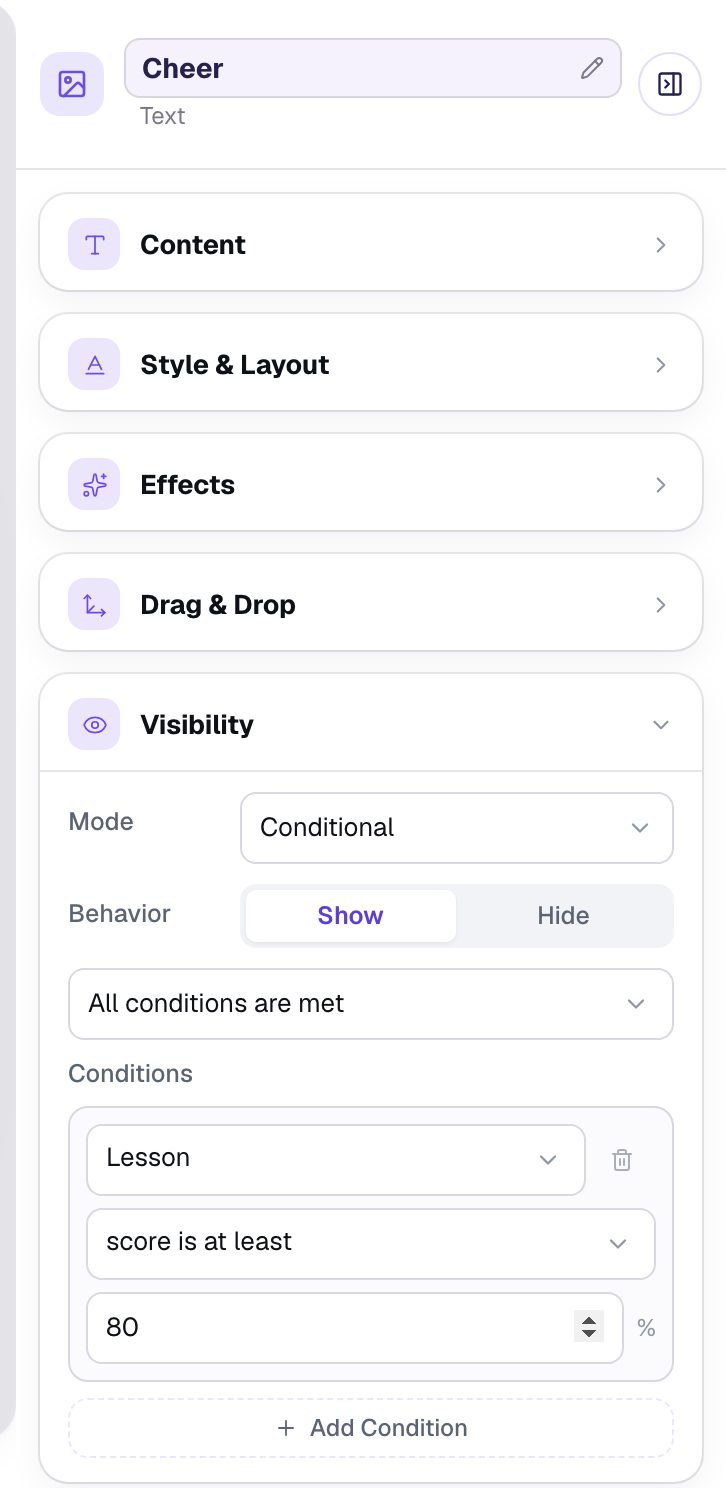
Lesson means the score across every scene, the same score the ending shows. Current scene would only count the questions on the ending, and there aren't any.
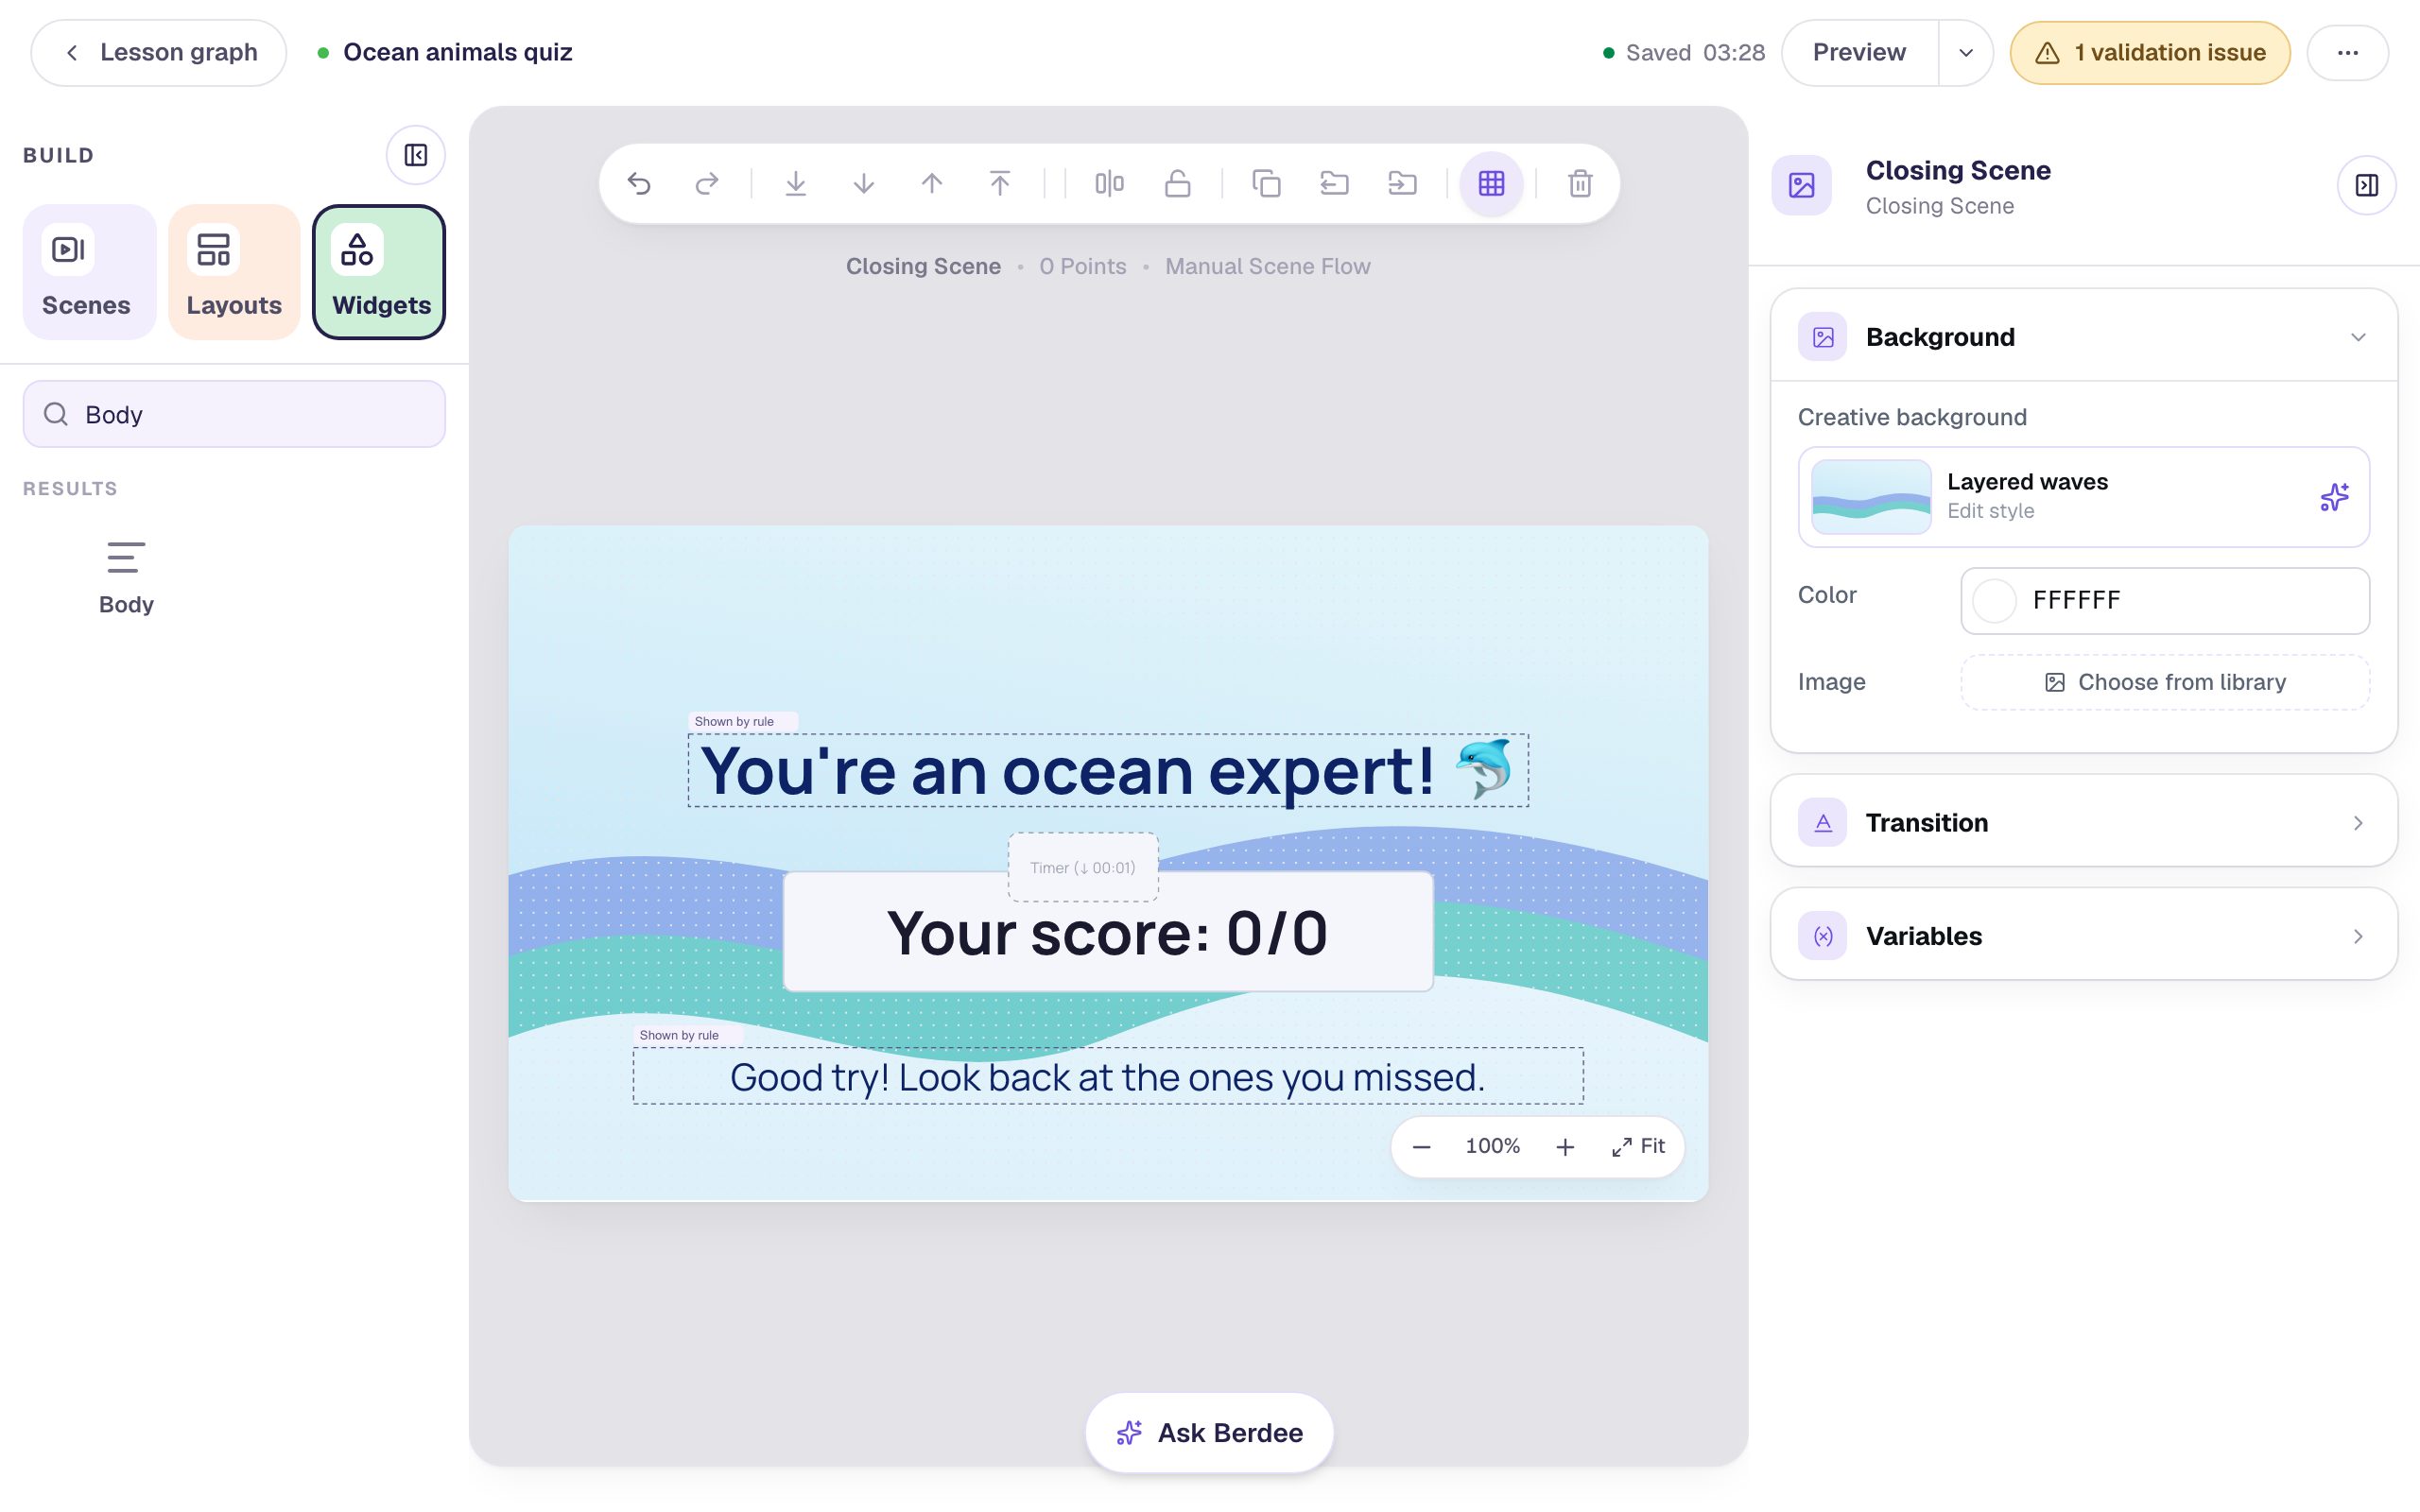
On the canvas, the headline now has a dashed outline and a small Shown by rule tag. That's the studio telling you a rule decides whether students see it. You still see it while you edit.
Step 5: Add a note for everyone else
A student below 80% now sees only their score. Give them something kind to read:
- Click the scene's empty background to deselect, then add a Body from the Widgets tab and type
Good try! Look back at the ones you missed. - Under Style & Layout, choose Fixed width and set Width to
760so it stays on one line, then set the Font Size to 30 px and the Text Color to dark navy. - Drag it below the score, and rename it
Try again note. - Open Visibility, set Mode to Conditional, change the target to Lesson, choose score is below, and type
80.
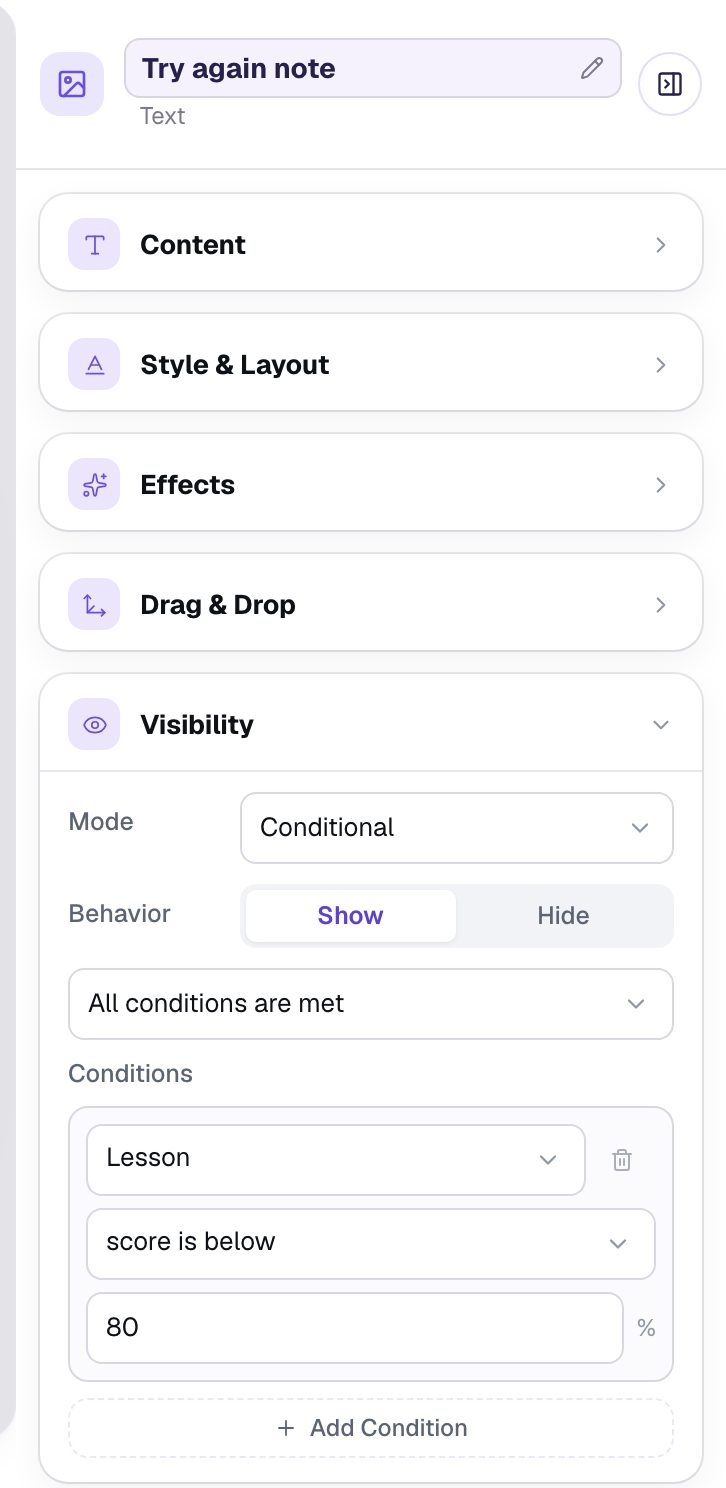
Use the same number in both rules. "At least 80" and "below 80" cover every score with no gap and no overlap, so every student sees exactly one message.
Step 6: Save the confetti for a high score
The confetti still plays for everyone. It belongs to the hidden timer, so select the timer: click the small dashed Timer box over the middle of the score. Its name, Ending celebration, appears at the top of the properties panel.
- Open Behaviors. You'll see the timer's one behavior: On Timer Complete, Play Effect, Confetti.
- Under it, click Add Condition.
- Change the condition's first dropdown to Lesson, the second to score is at least, and type
80.
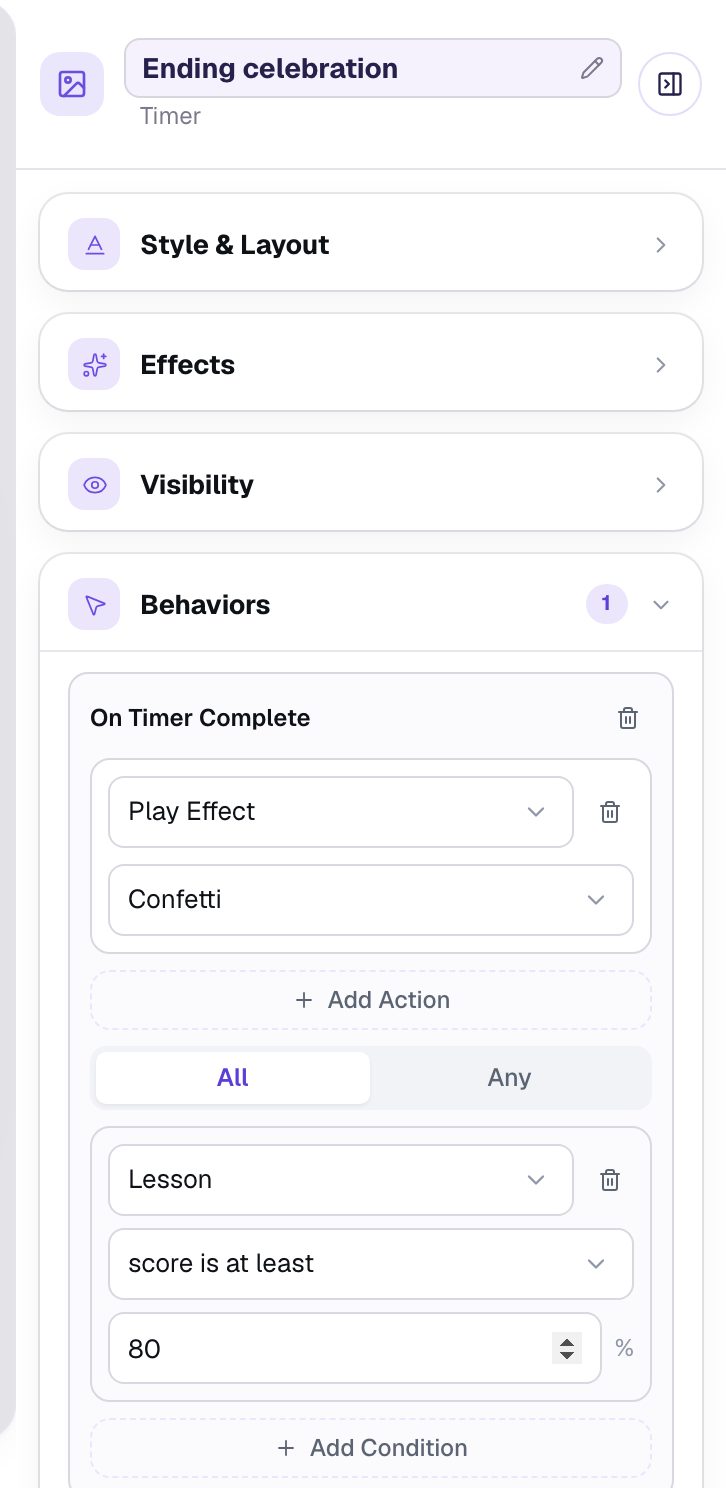
The condition goes on the behavior, not in the timer's Visibility: the behavior is what plays the confetti, and its condition decides whether it does.
Click an empty spot on the scene. The ending now has both messages, each tagged Shown by rule:
Step 7: Try both endings in Preview
Go back to the Opening Scene and click Preview. First, play like a student who knows their ocean animals: Dolphin, 8, Blue whale, pressing Next after each. The answers appear in a different order each time, because a new Multi Choice shuffles them.
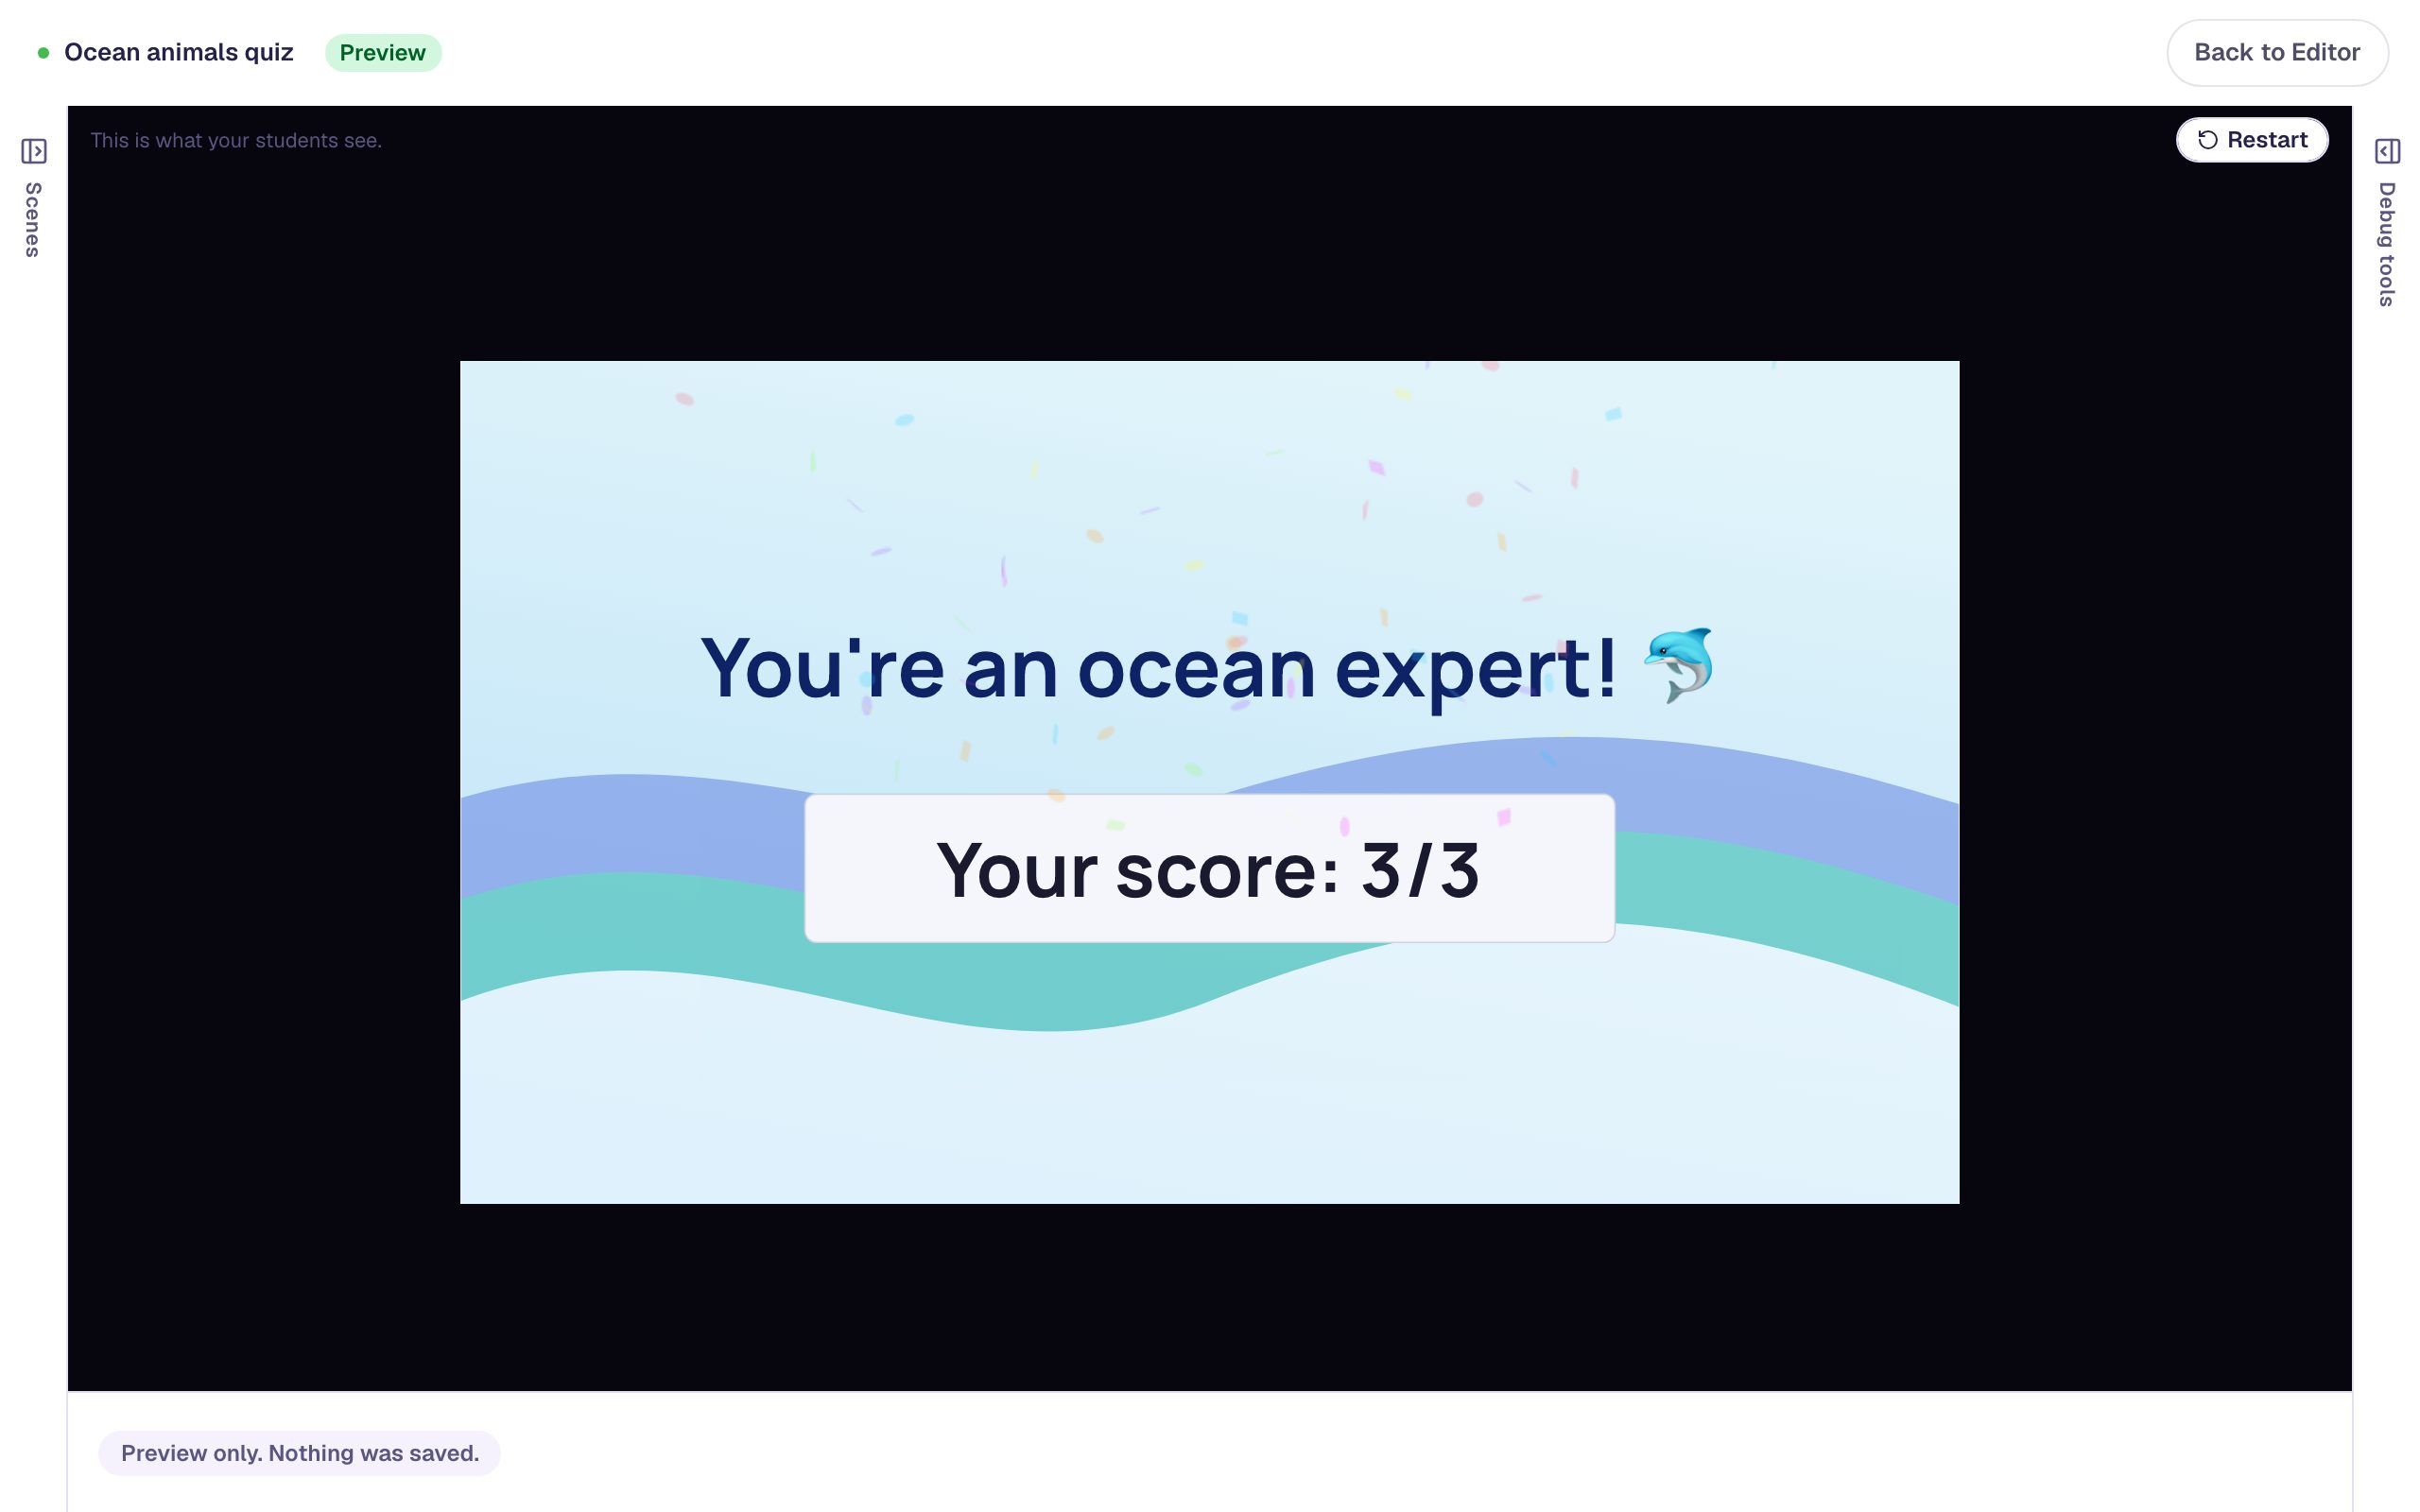
Now press Restart and miss one: pick 6 on the octopus question.
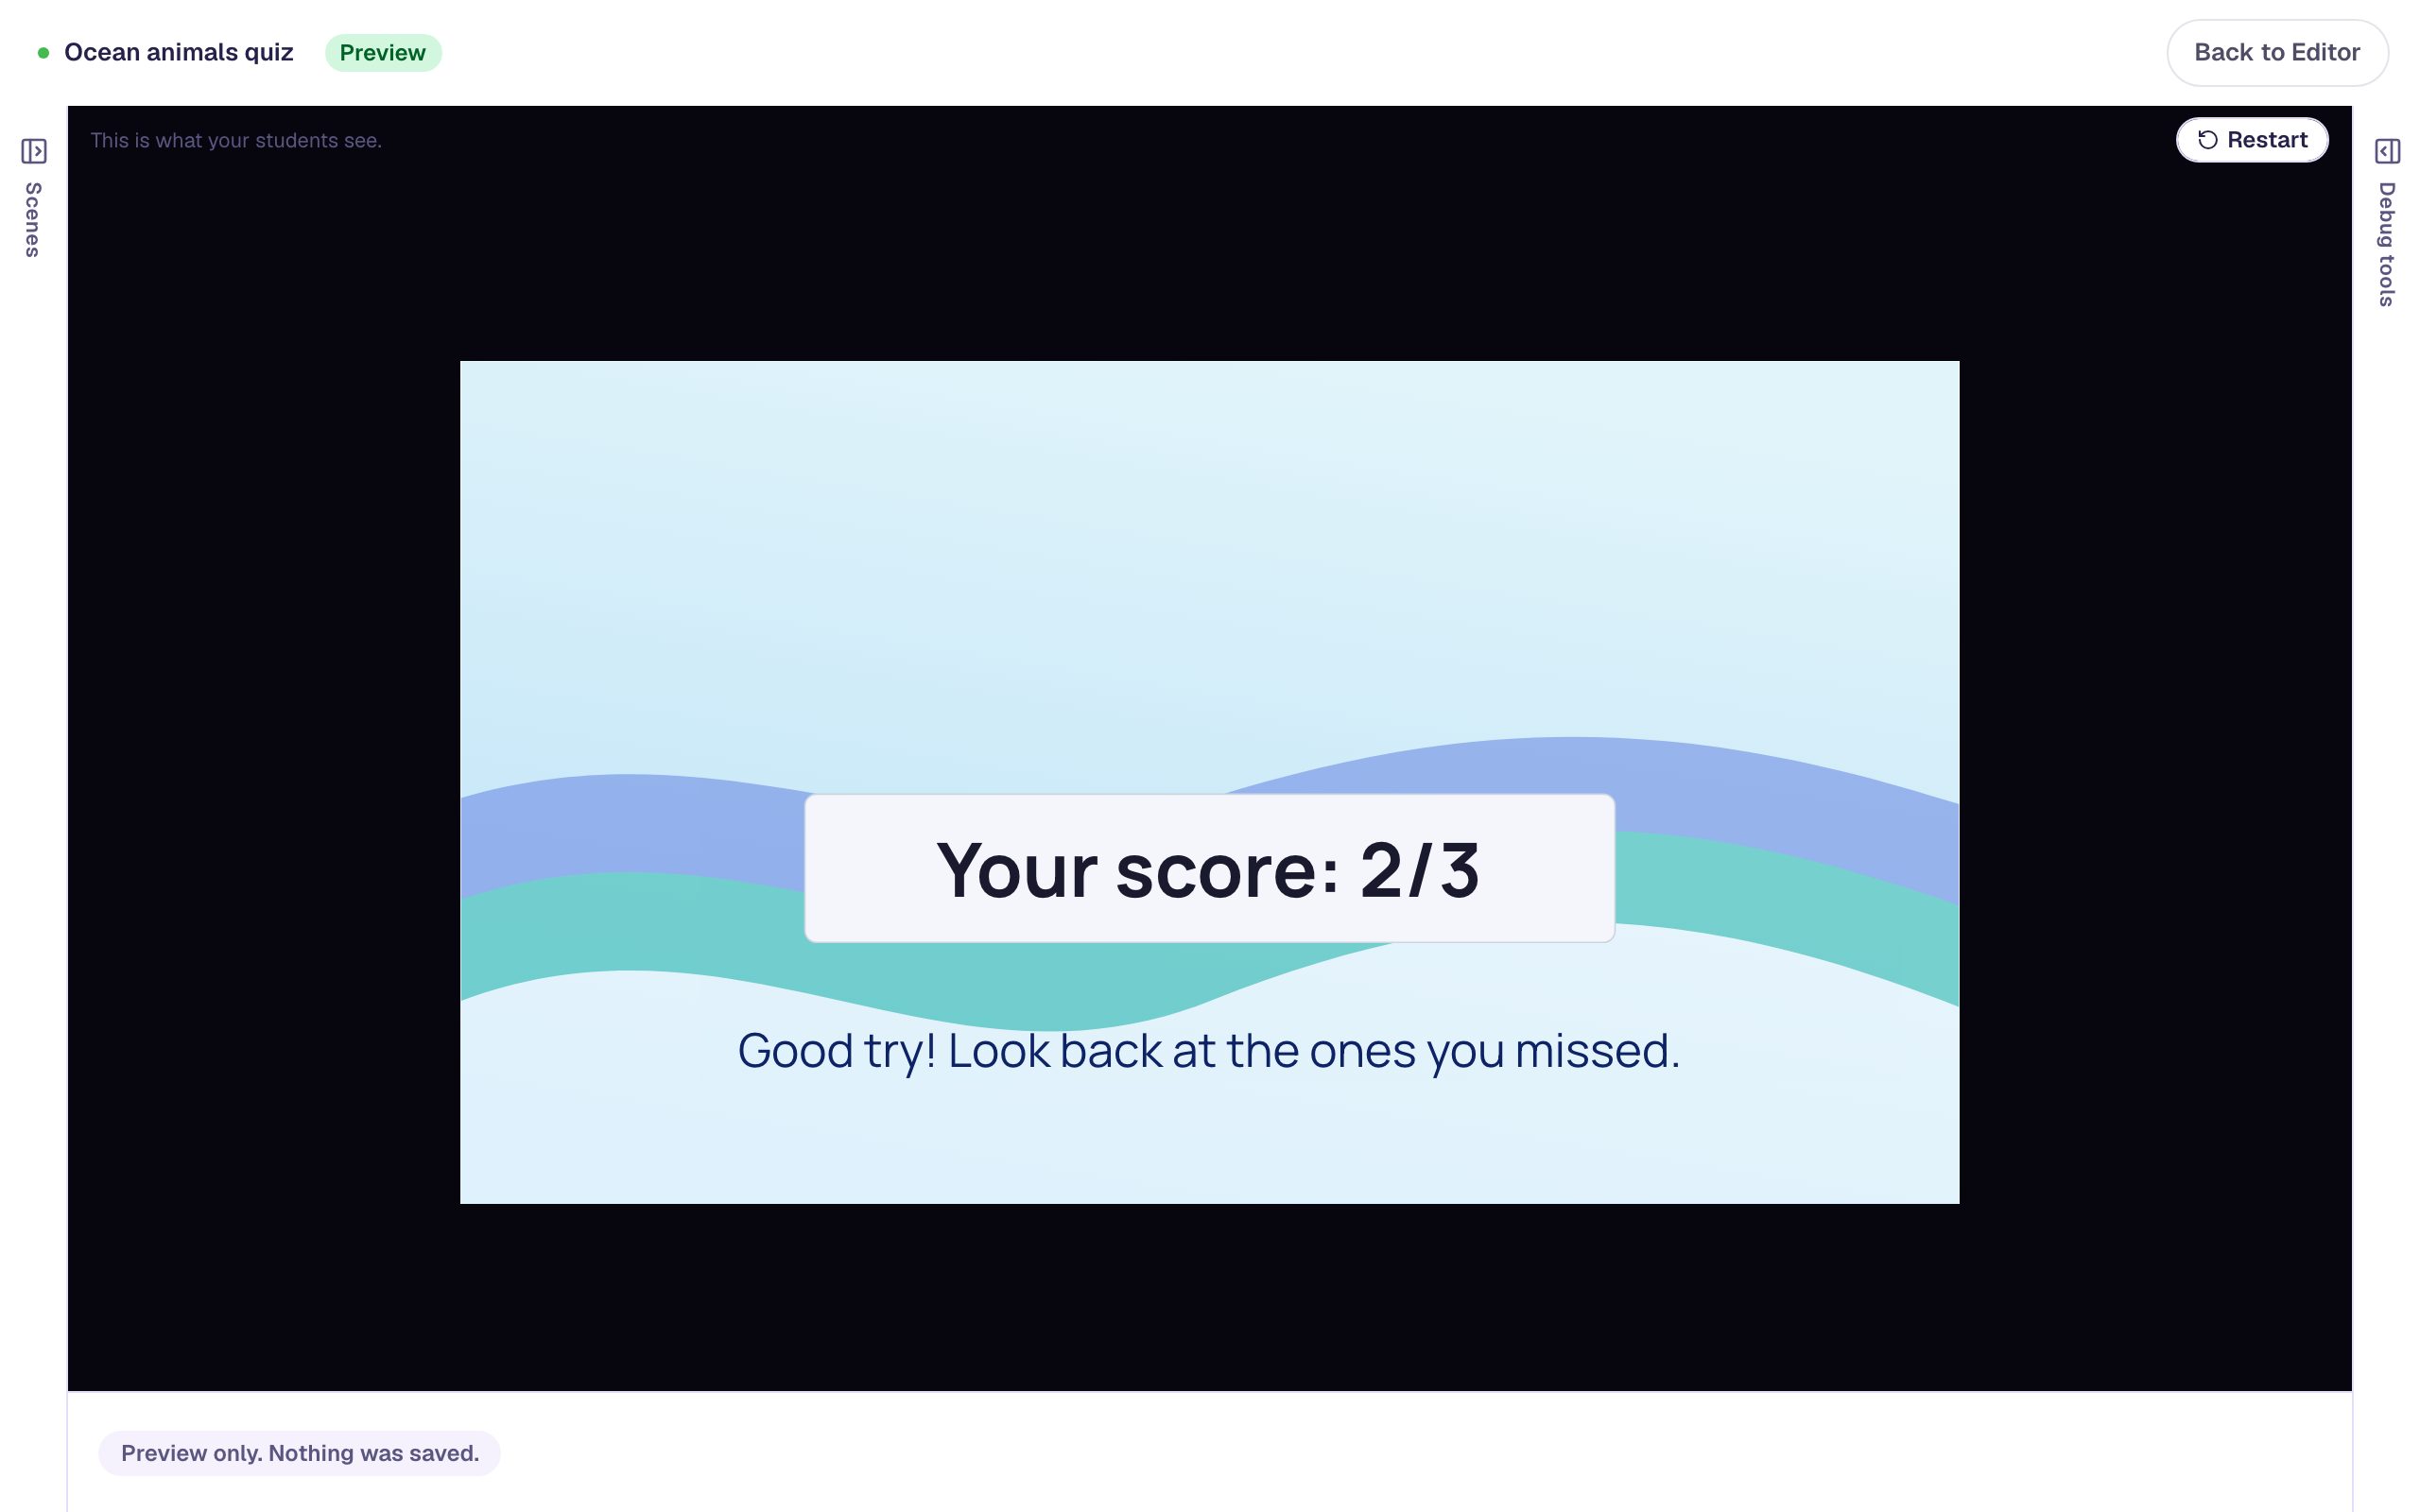
Two out of three is 67%, so this student gets the note and no confetti. Try a few more runs. Whatever the score, you'll always see exactly one of the two messages.
What you built
An ending that responds to how the student did:
- a Cheer headline with a visibility rule: Show when Lesson score is at least 80%,
- a Try again note with the opposite rule: Show when Lesson score is below 80%,
- a condition on the Ending celebration timer's Play Effect behavior, so the confetti only plays for 80% or more, and
- Next buttons with Stay progression, so a wrong answer counts as wrong.
Pick the cut that fits your class. 100 celebrates only a perfect score, and 50 celebrates passing half. With more questions, the percentage still works the same way. Before you publish, the lesson also needs a Submit button set to Submits = Lesson. The validation pill at the top of the studio reminds you.
To send students somewhere different by their score, not just show them a different message, continue with Send students down different paths by their score. To make some questions worth more points, see Make some questions count more, and one not at all.
Make this lesson yours
Add the lesson you just watched being built to your account, then change it for your class: your questions, your pictures, your colors.
Free to sign up, and you'll come straight back here. I have an account