Send students down different paths by their score
Put three questions on one scene and use the Lesson Graph's score paths to send students who got most of them right one way and students who need practice another.
- Level
- Intermediate
- Time
- About 15 min
- Steps
- 7
A times-tables check that sends students who score below 50% to a practice tip and everyone else to a "Nice work!" scene, before both reach the ending.
Get the finished lesson
Skip straight to the result, or keep it open beside the steps. Add this tutorial's lesson to your account and explore how it works in the studio.
Free to sign up, and you'll come straight back here. I have an account
A right-or-wrong path treats one slip the same as a blank page. With several questions on a scene, you can do better: look at how many a student got right and send them where they'll learn the most. In this tutorial you'll build a three-question times tables check. Students who score below 50% get a practice tip. Everyone else gets a Nice work! scene. Both then meet at the ending.
You'll draw the branches in the Lesson Graph with Their score is… paths. If you haven't used the graph yet, start with Let students choose their own path: this tutorial moves quickly through the parts it already covers.
Step 1: Build the check
Start a blank lesson (New lesson, then Start from scratch). On the Opening Scene, add:
- A Heading:
Times tables check. - Three Body texts, one per line:
3 × 4 =,6 × 7 =, and8 × 9 =. Set their Font Size to about 36 px. - A Number Input beside each one. Click ⚙ Configure, type the answer into Correct Value (
12,42, and72), and click Save. Each question is worth 1 point, so the scene is worth 3. - A Submit Button. In Content, change its Label to
Check my answersand leave Submits on Current scene. Then click its name at the top of the properties panel (Submit 1), typeCheck my answers, and press Enter, so the Lesson Graph calls it by the name students see.
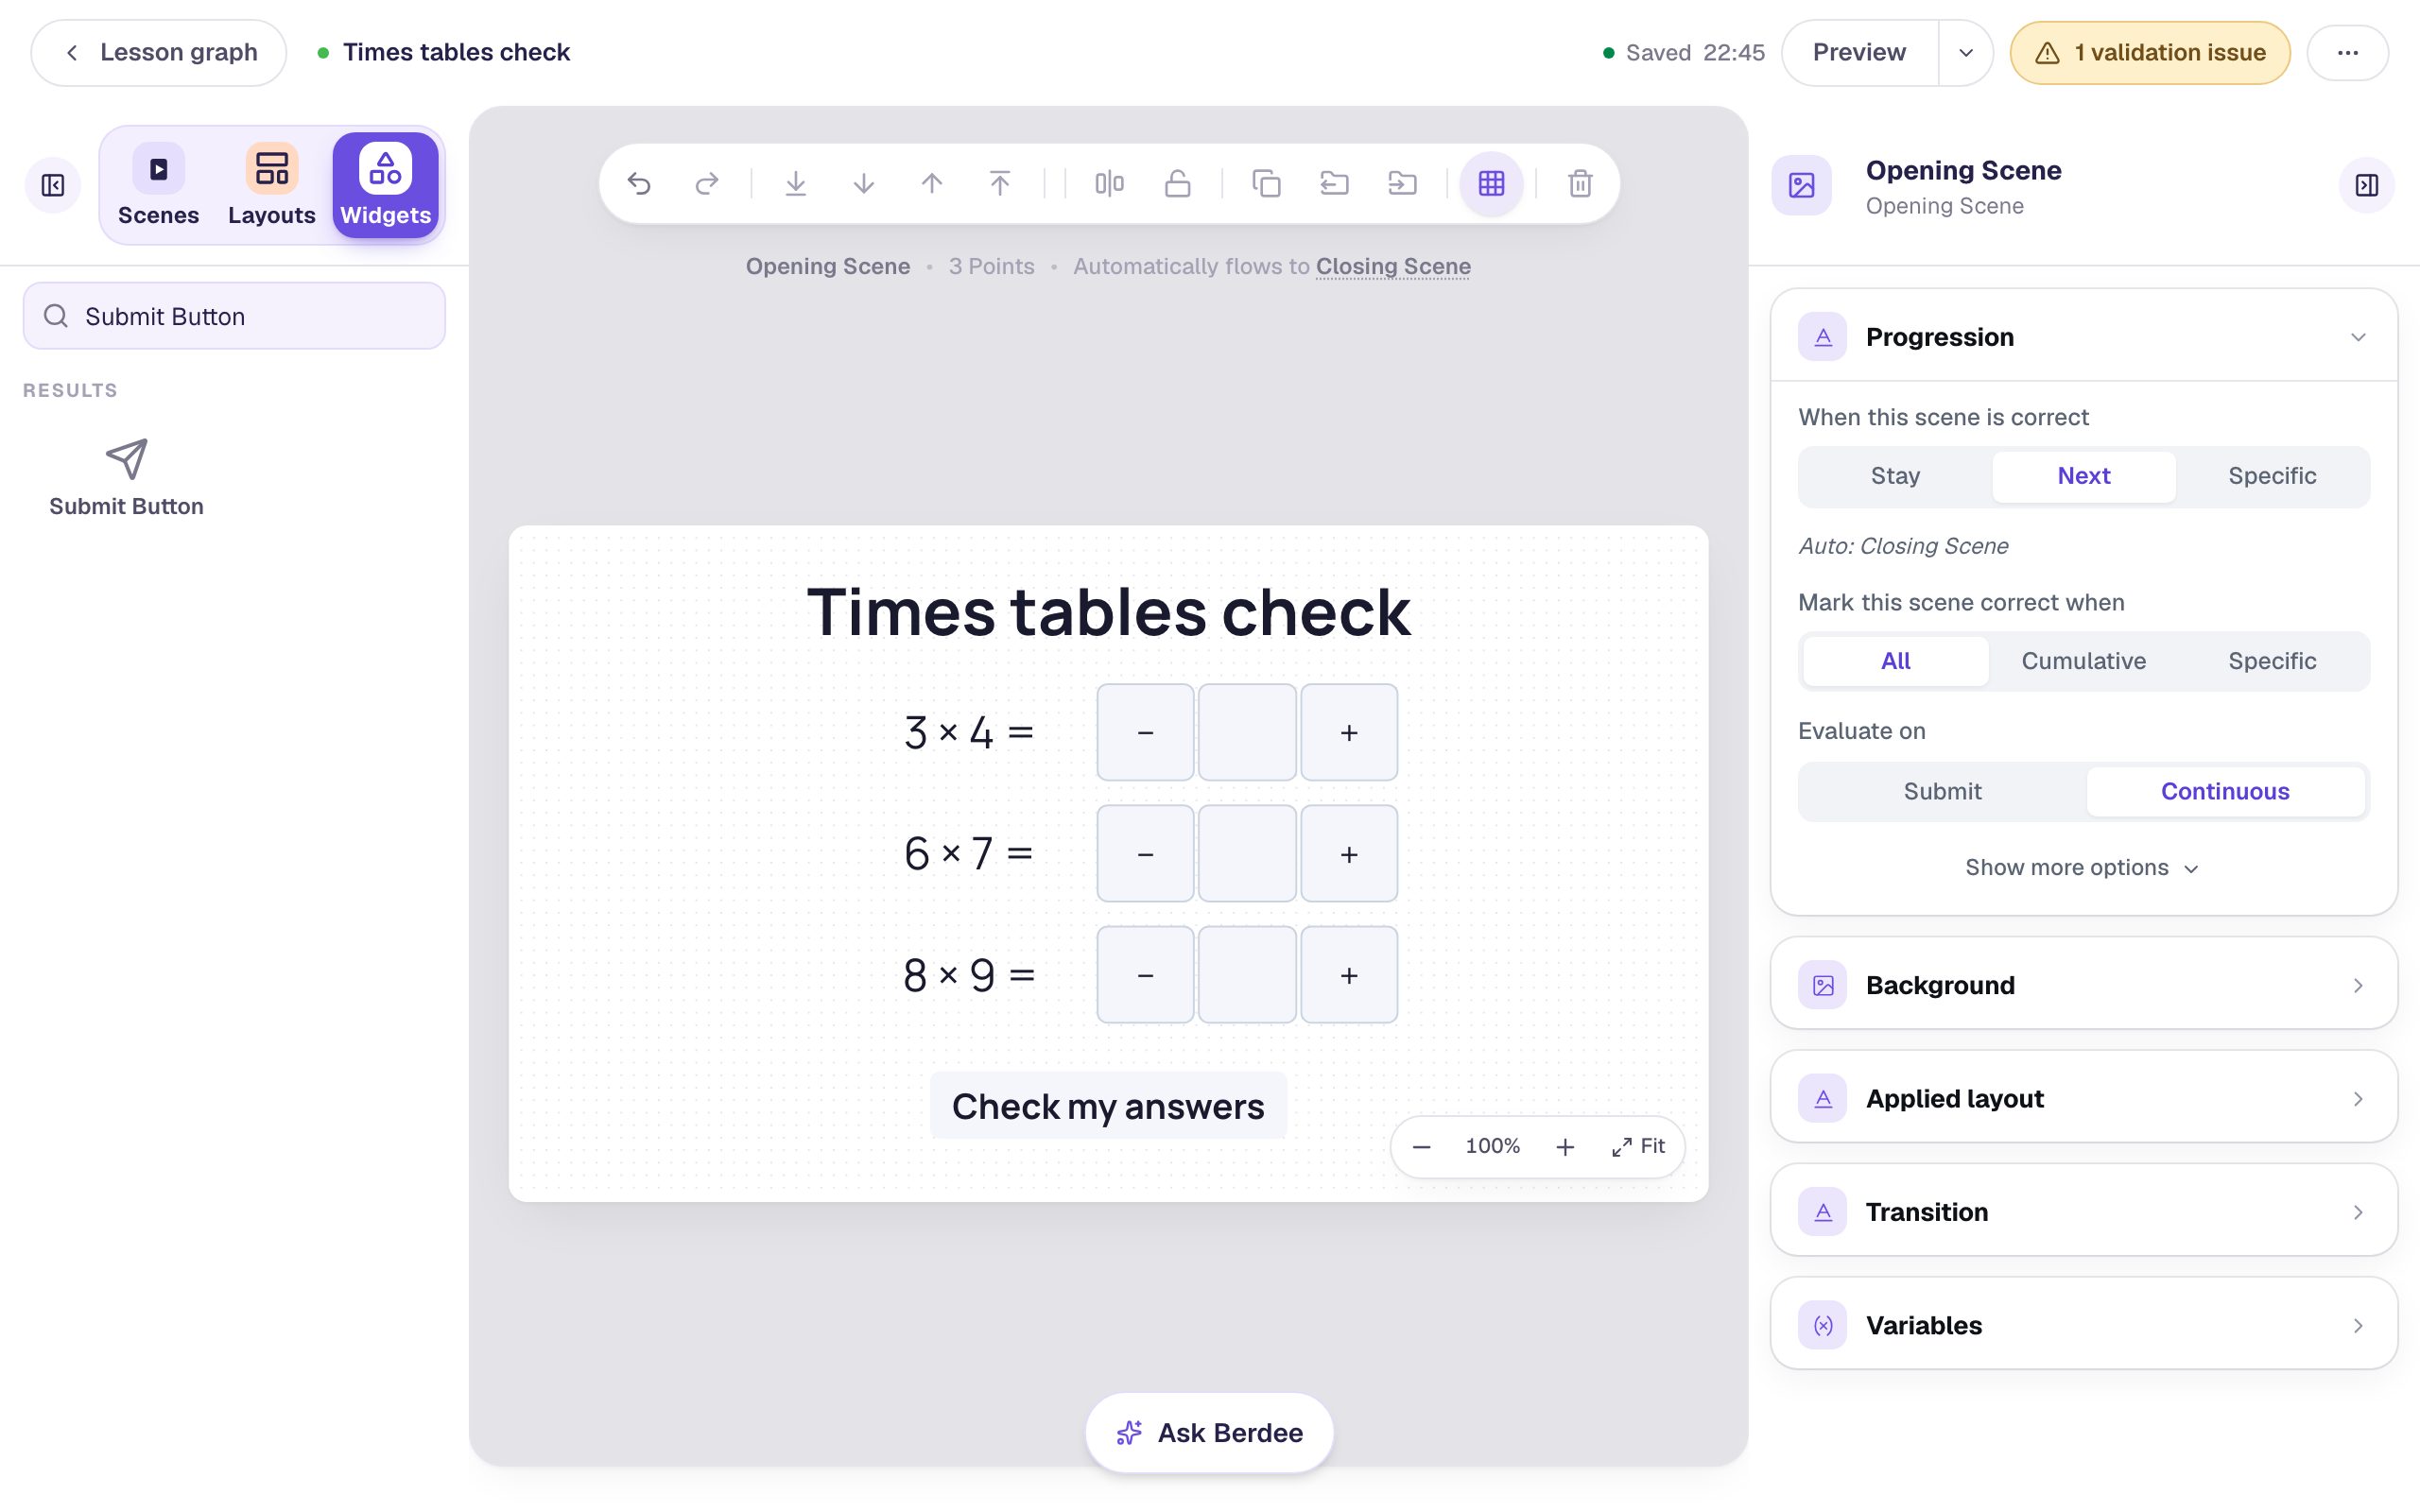
The Check my answers button is what the score paths listen for: when a student presses it, Berdee works out their score on this scene and picks a path.
Step 2: Turn off the automatic path
Click Lesson graph at the top left. You'll see the Opening Scene and the Closing Scene, joined by a dashed When answered correctly arrow.
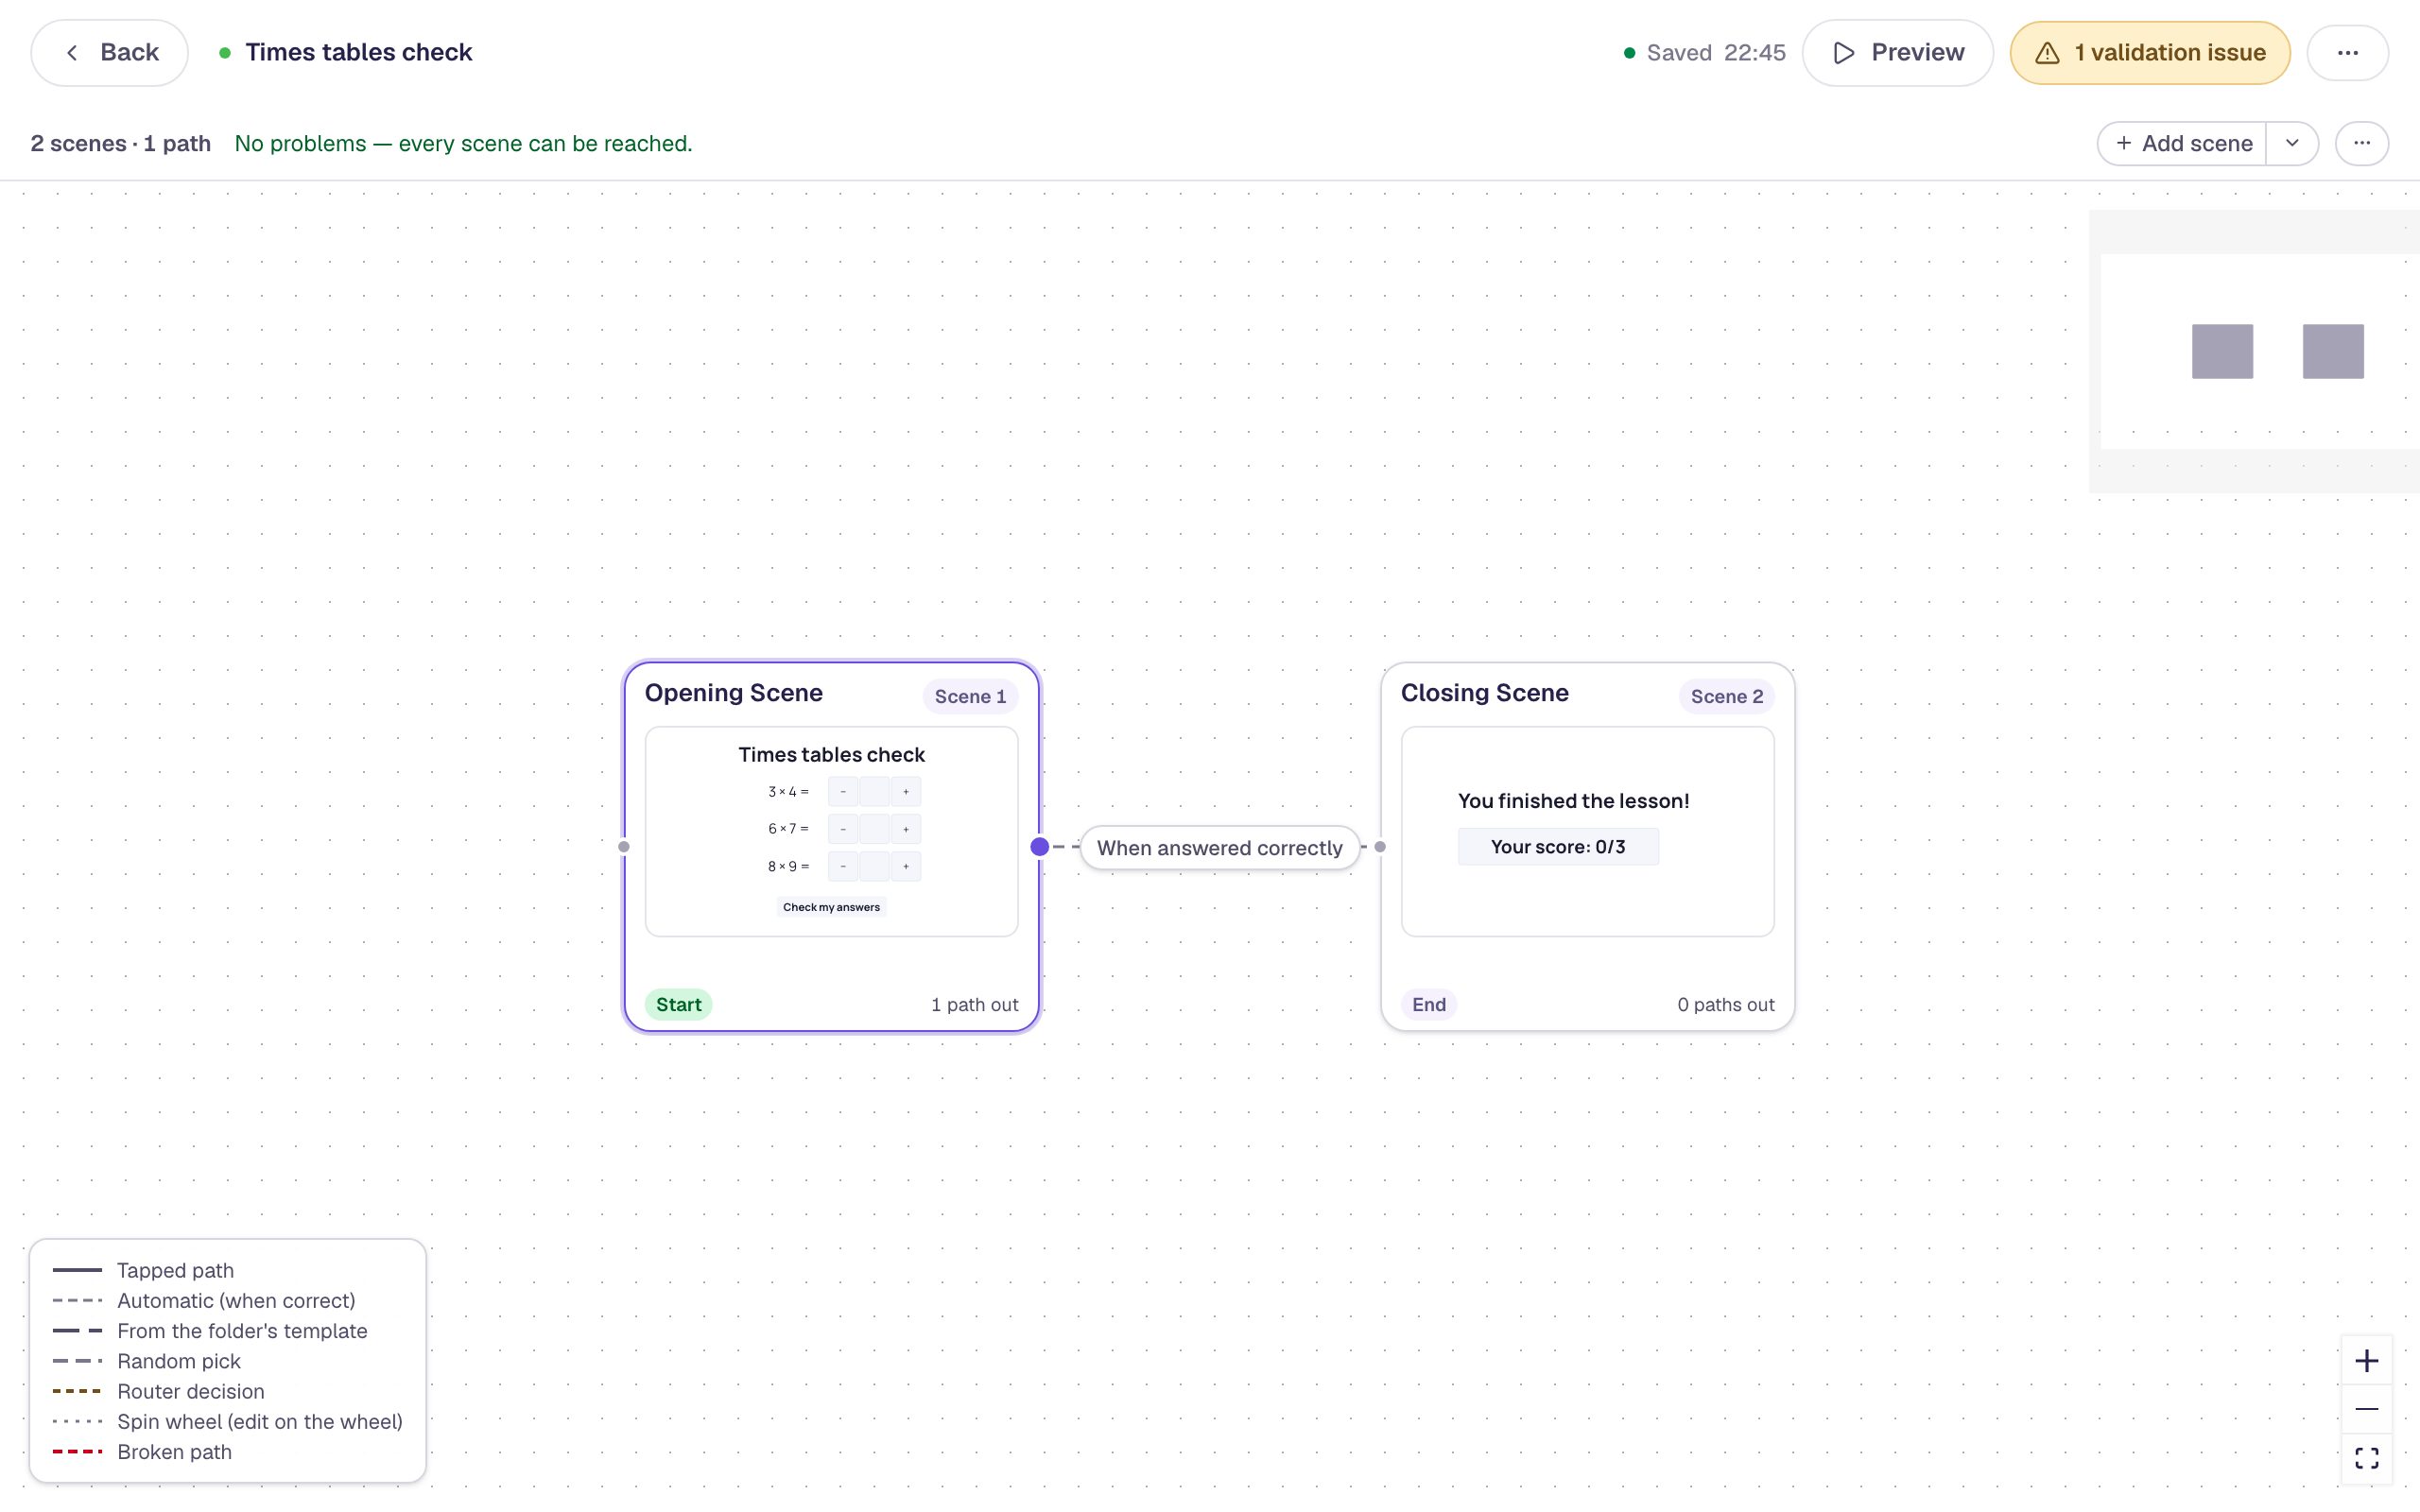
That arrow moves a student on the moment every answer on the scene is right, before they press Check my answers. A student who gets all three right would skip your score paths entirely. Click the When answered correctly label, then click Remove path.
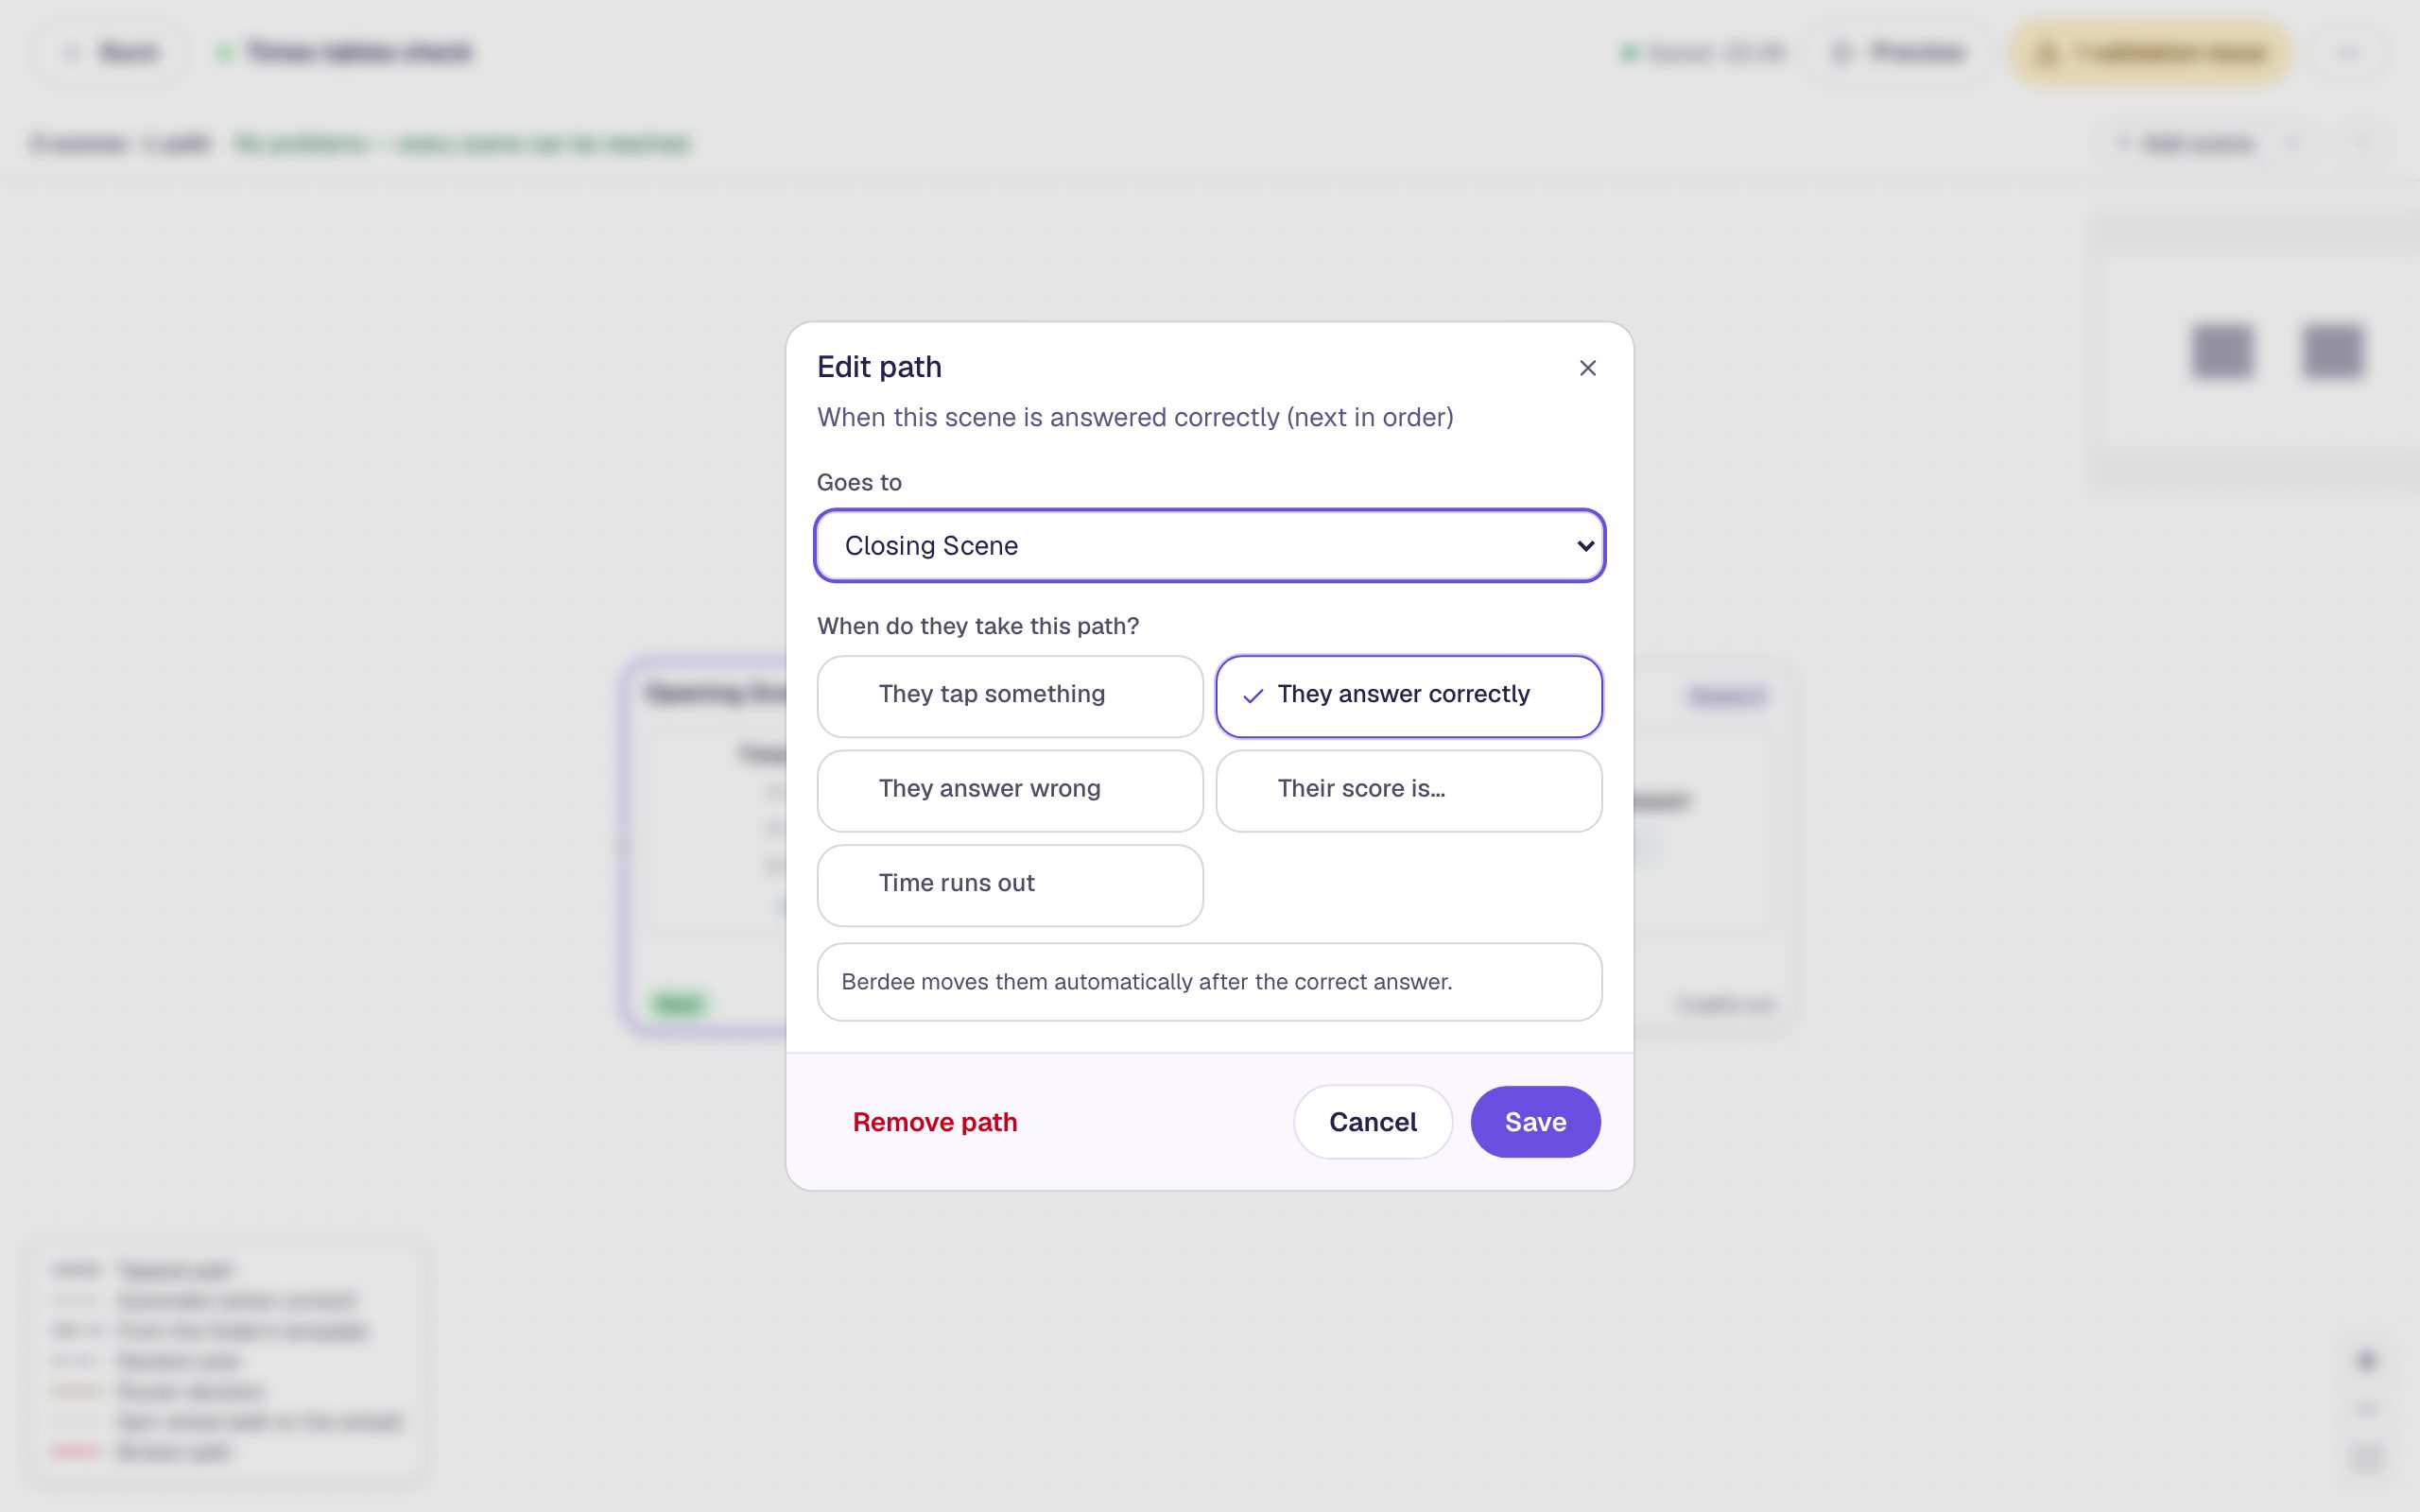
The strip at the top now warns that the Closing Scene can't be reached. That's expected: the next two steps give students a way there.
Step 3: Add a scene for students who need practice
Hover over the Opening Scene card and click the dot on its right edge:
- What do you want to add? Leave A new scene selected and click Next.
- Name the scene
Practice. - Under Students go there when…, choose Their score is….
- Leave the comparison on Score is below and type
50into the percent box. - Click Add scene.
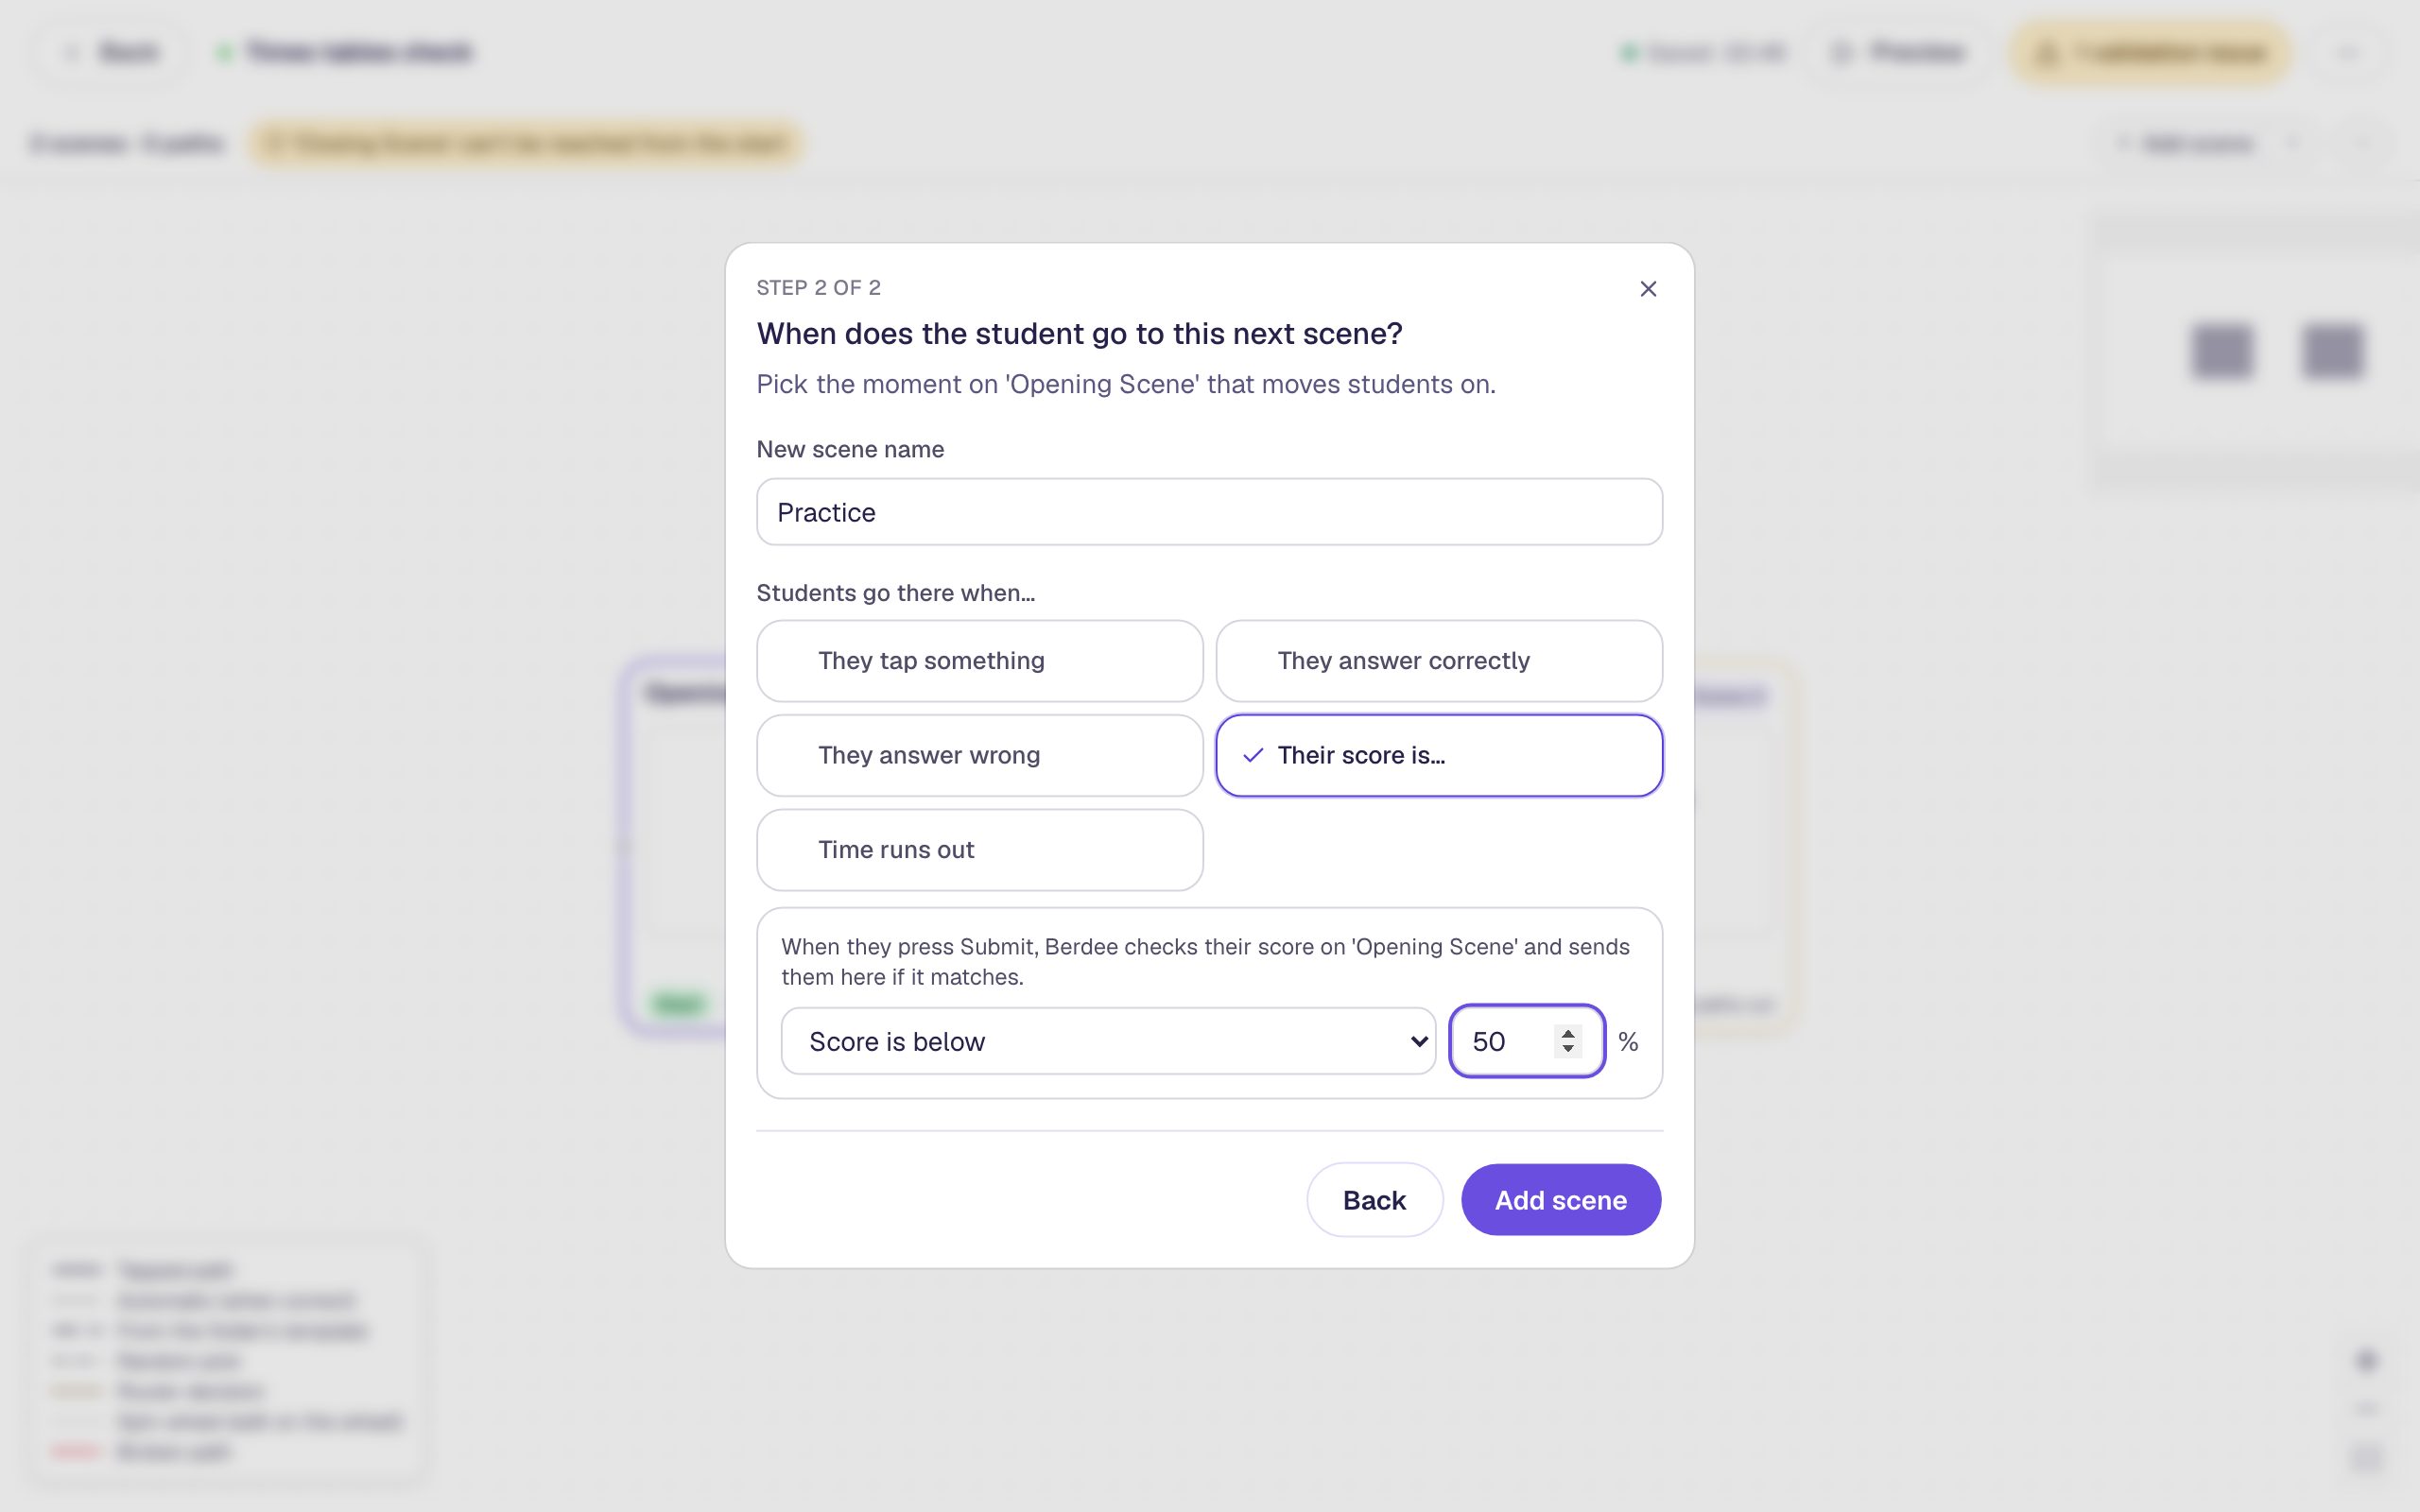
Why 50? The scene is worth 3 points, so a student can score 0%, 33%, 67%, or 100%. Below 50% means "one right or fewer". Pick cuts that fall between the scores students can actually get, so a student who lands exactly on one is never a surprise.
Step 4: Add a scene for everyone else
Click the Opening Scene's dot again. Choose A new scene, name it Nice work, choose Their score is…, set the comparison to Score is at least, type 50, and click Add scene.
Now the Opening Scene splits two ways:
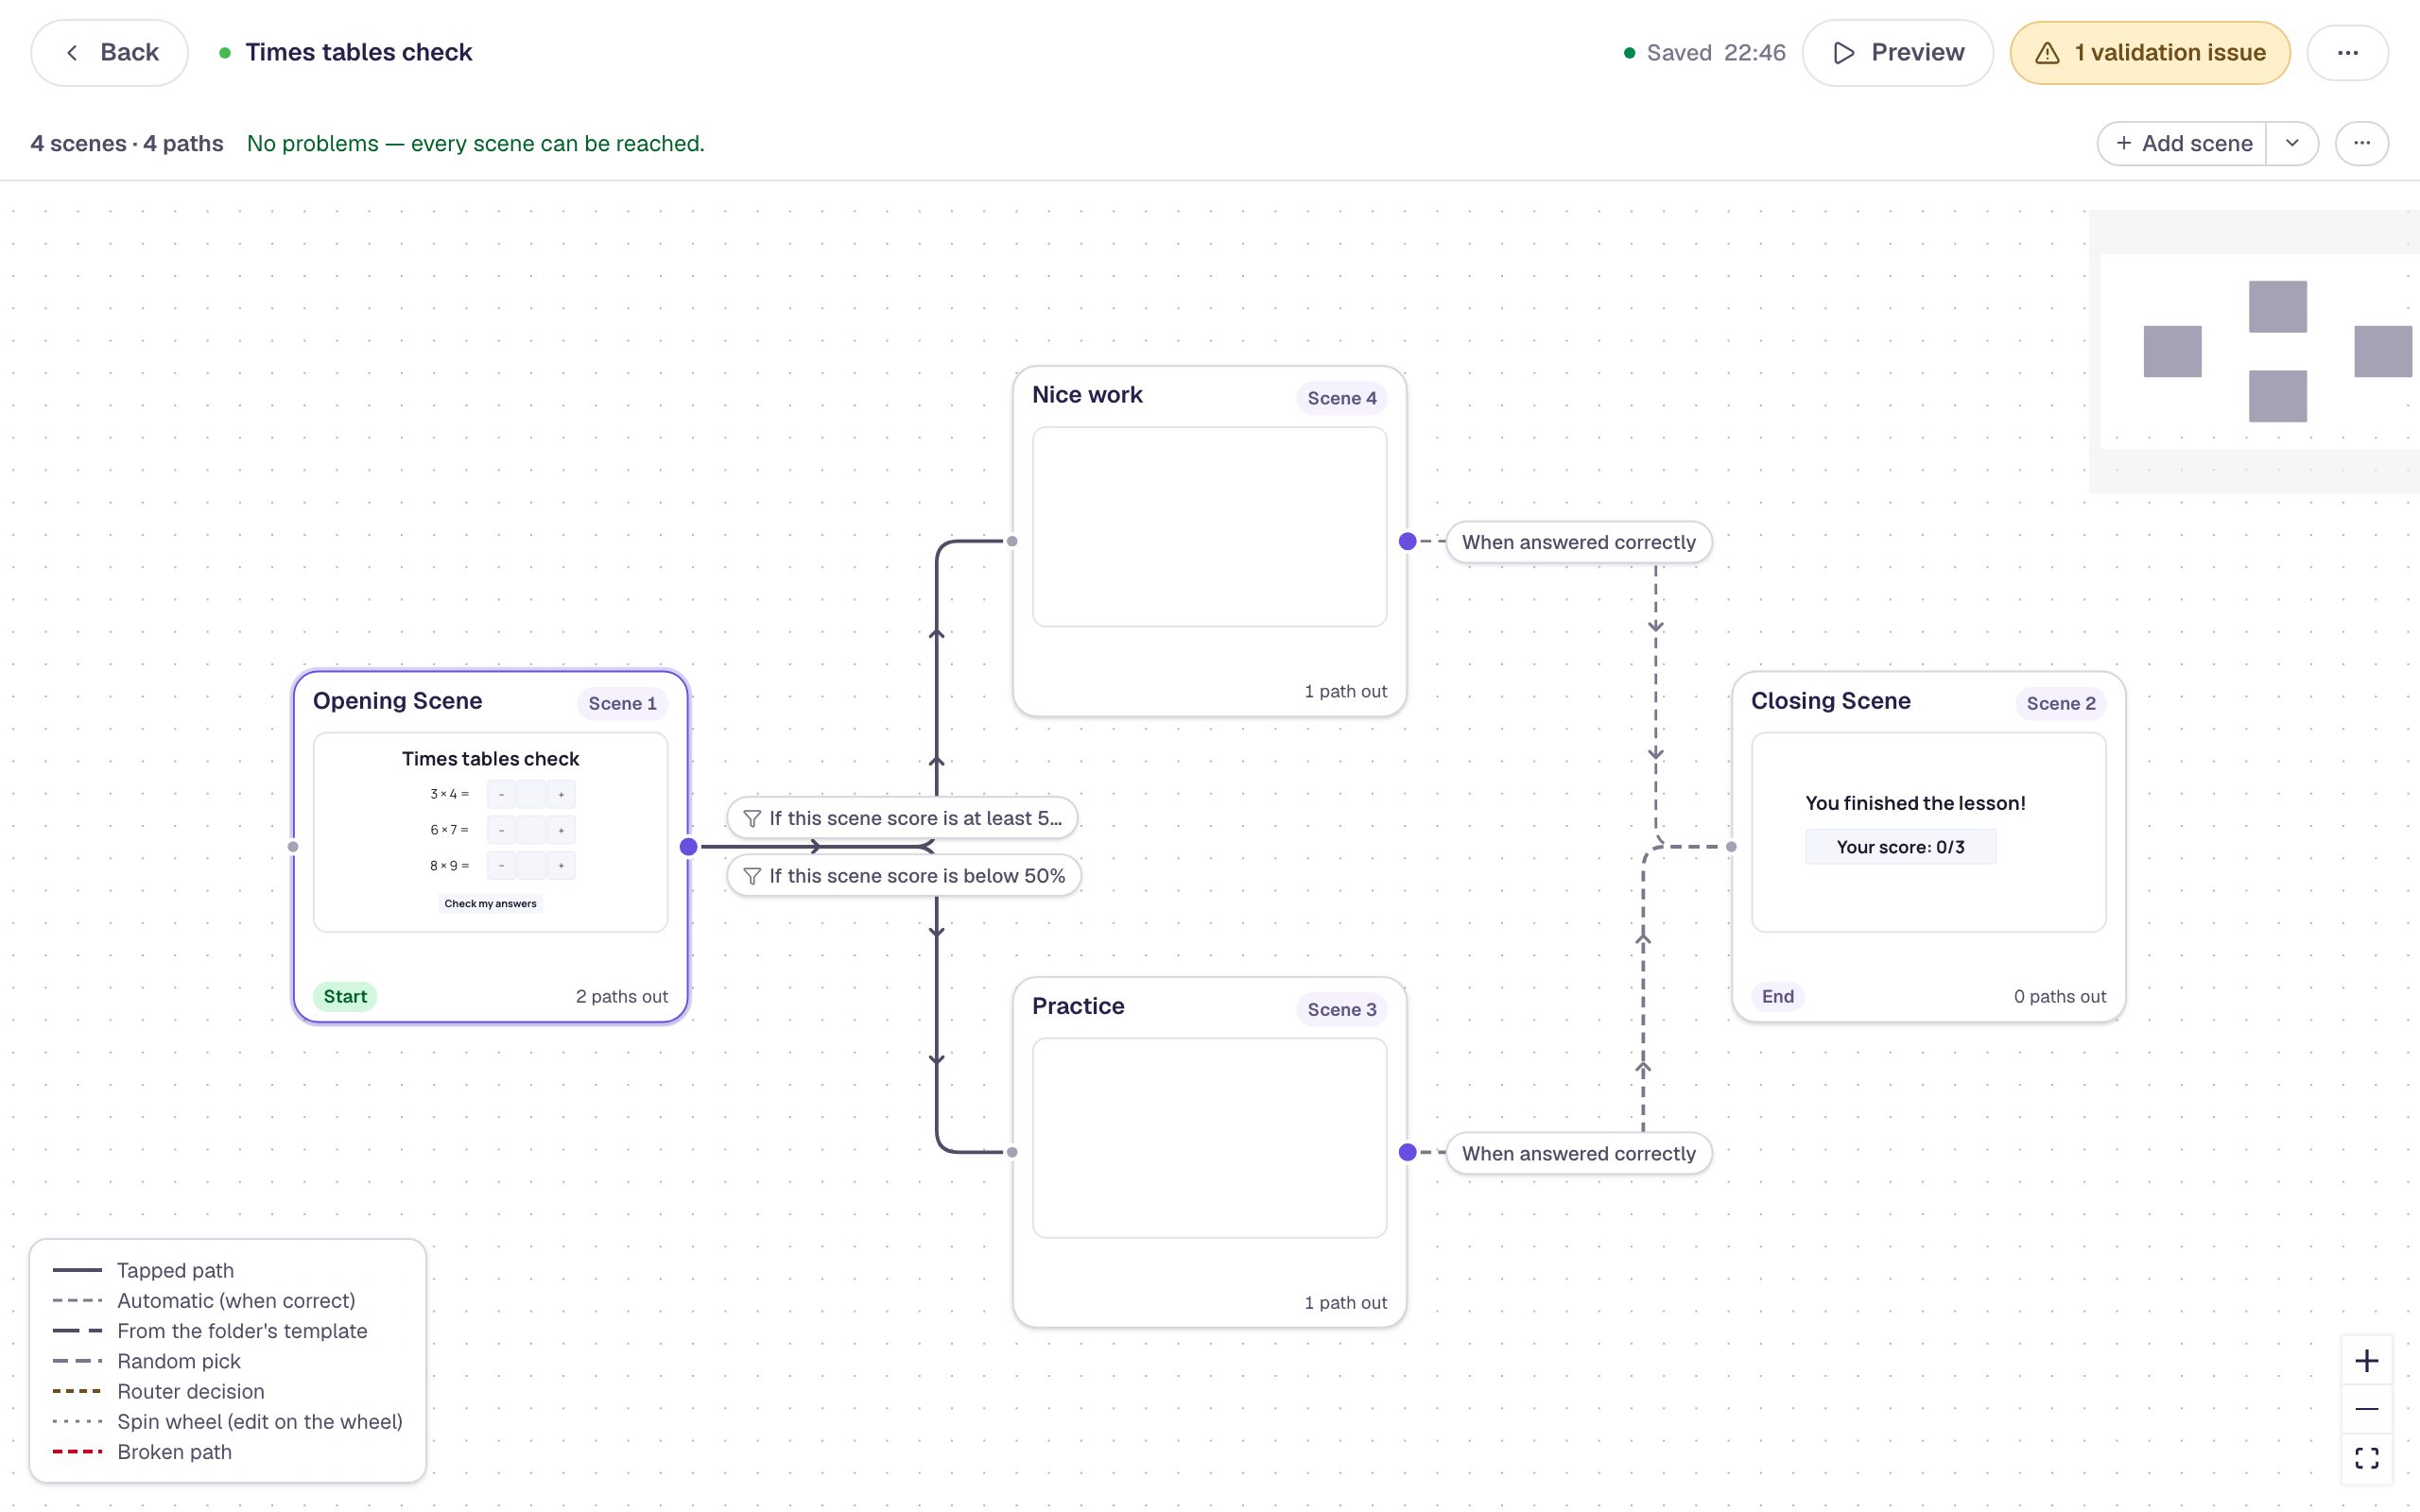
The two cuts meet at 50% without overlapping, so every student matches exactly one of them. If two score paths both match, the student takes the one you added last, so keep your cuts from overlapping.
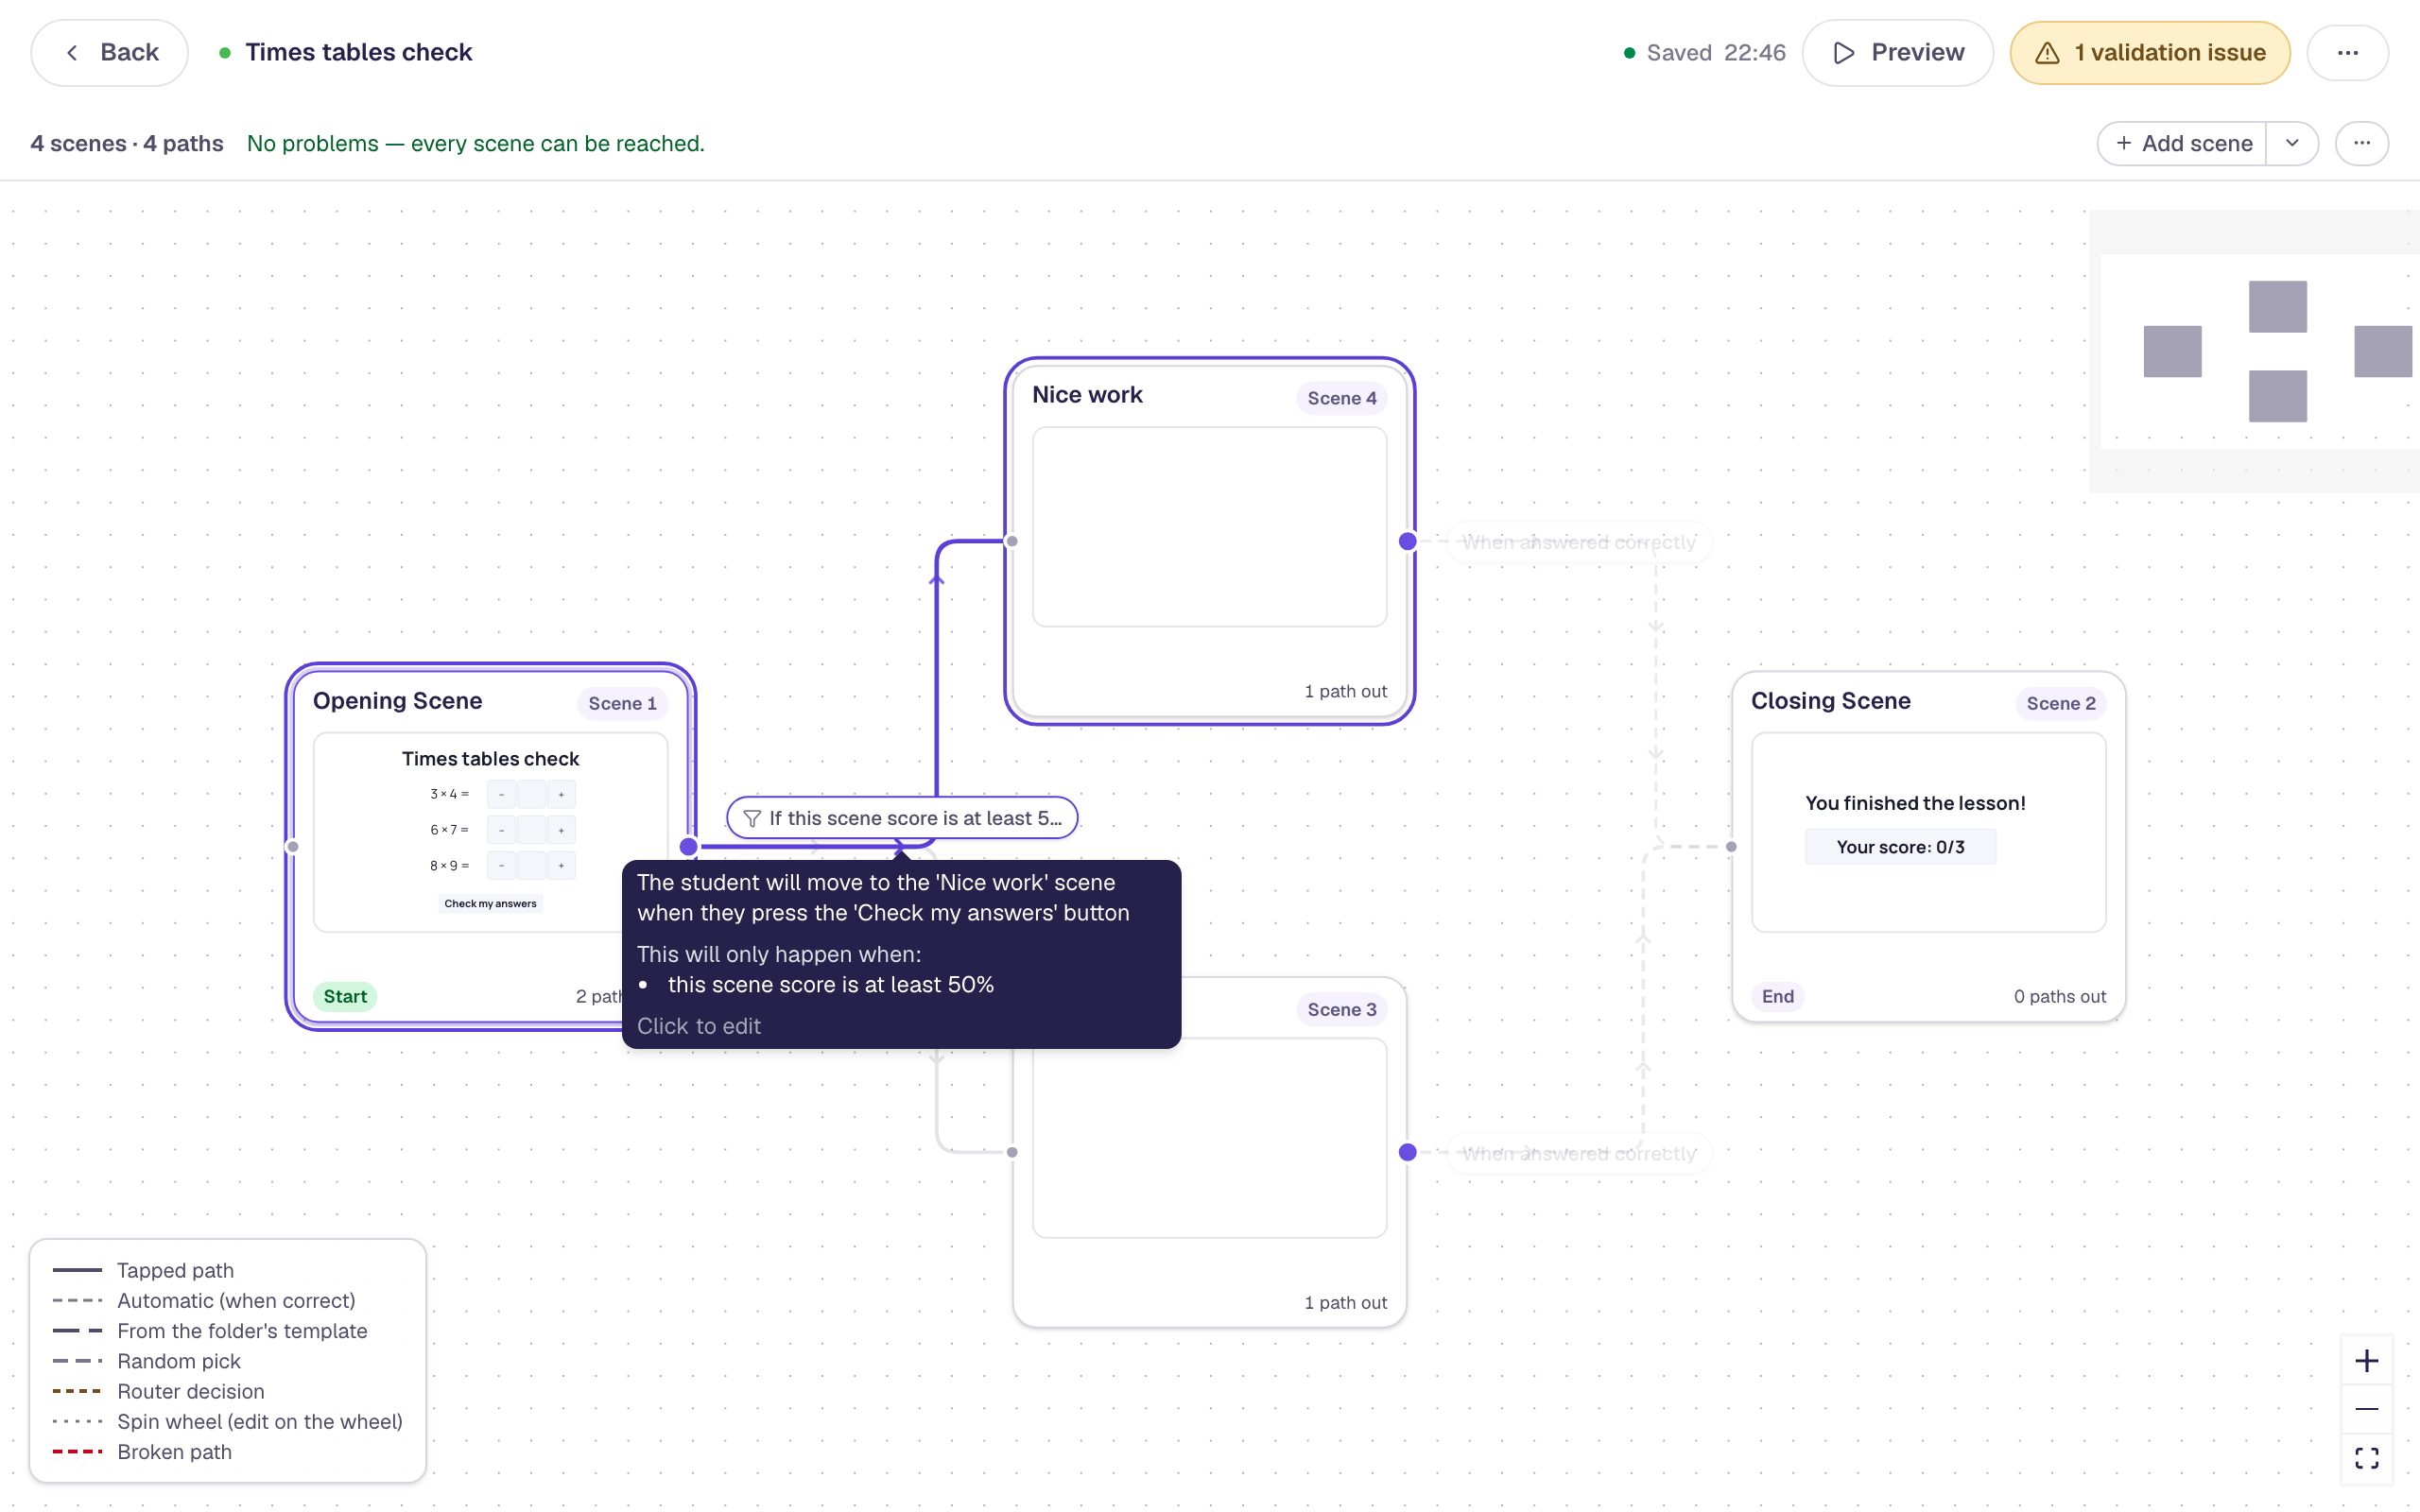
The map shortens long labels. Hover over a path's label to read the whole rule:
Step 5: Fill in each branch
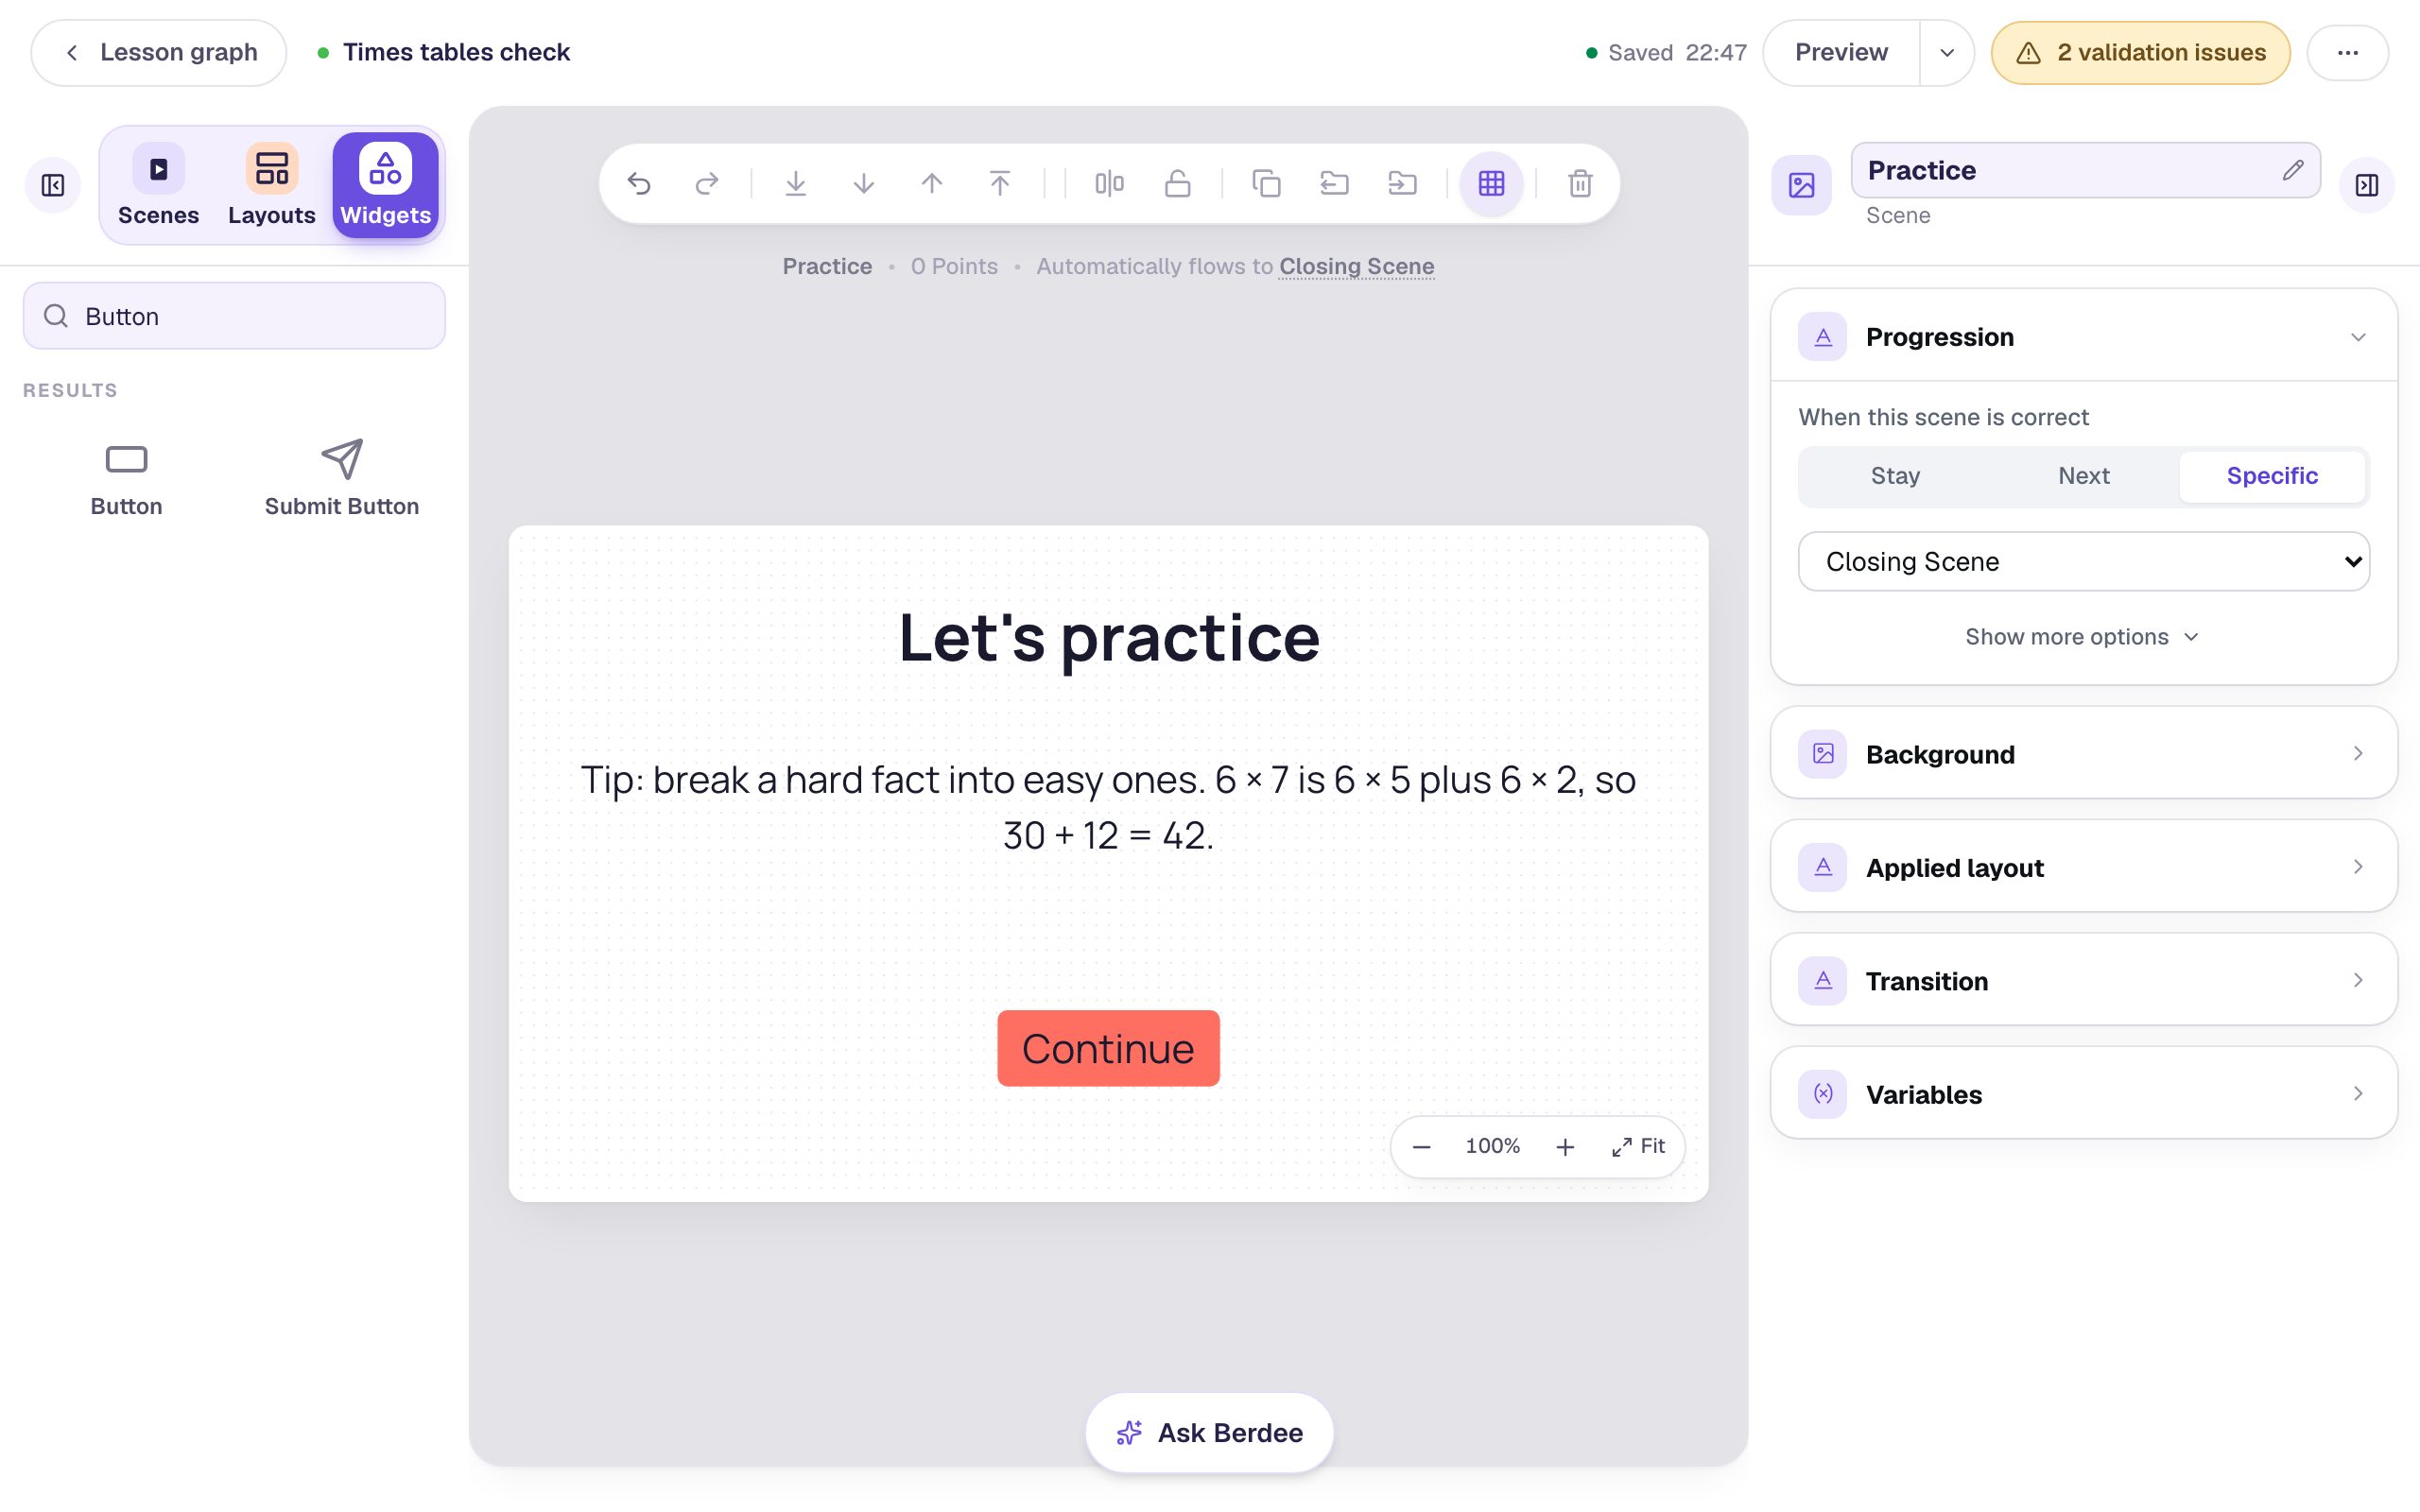
Hover over the Practice card and click Edit. Add:
- A Heading:
Let's practice. - A Body text with a tip:
Tip: break a hard fact into easy ones. 6 × 7 is 6 × 5 plus 6 × 2, so 30 + 12 = 42.Set its Font Size to about 30 px. - A Button labelled
Continue, at 32 px, near the bottom. Name itPractice Continue(click its name at the top of the properties panel, type, and press Enter).
Then go back to the graph, open Nice work with Edit, and build it the same way: a Nice work! heading, the line You know these facts. Try one in your head before you go: 9 × 9., and a Continue button named Nice work Continue.
Step 6: Bring both paths to the ending
Click Lesson graph. Connect each branch to the Closing Scene with a tap on its Continue button:
- Hover over the Practice card and click the dot on its right edge.
- Choose Or connect to a scene or router that's already in the lesson, then click Next.
- Set Goes to to Closing Scene, leave They tap something selected, and set Student taps to Practice Continue.
- Click Add path.
Do the same from Nice work, with Student taps set to Nice work Continue.
If a branch still shows a dashed When answered correctly arrow beside its new path, click its label and Remove path. It's left over from adding the second branch, and without a question on the scene it would never fire anyway.
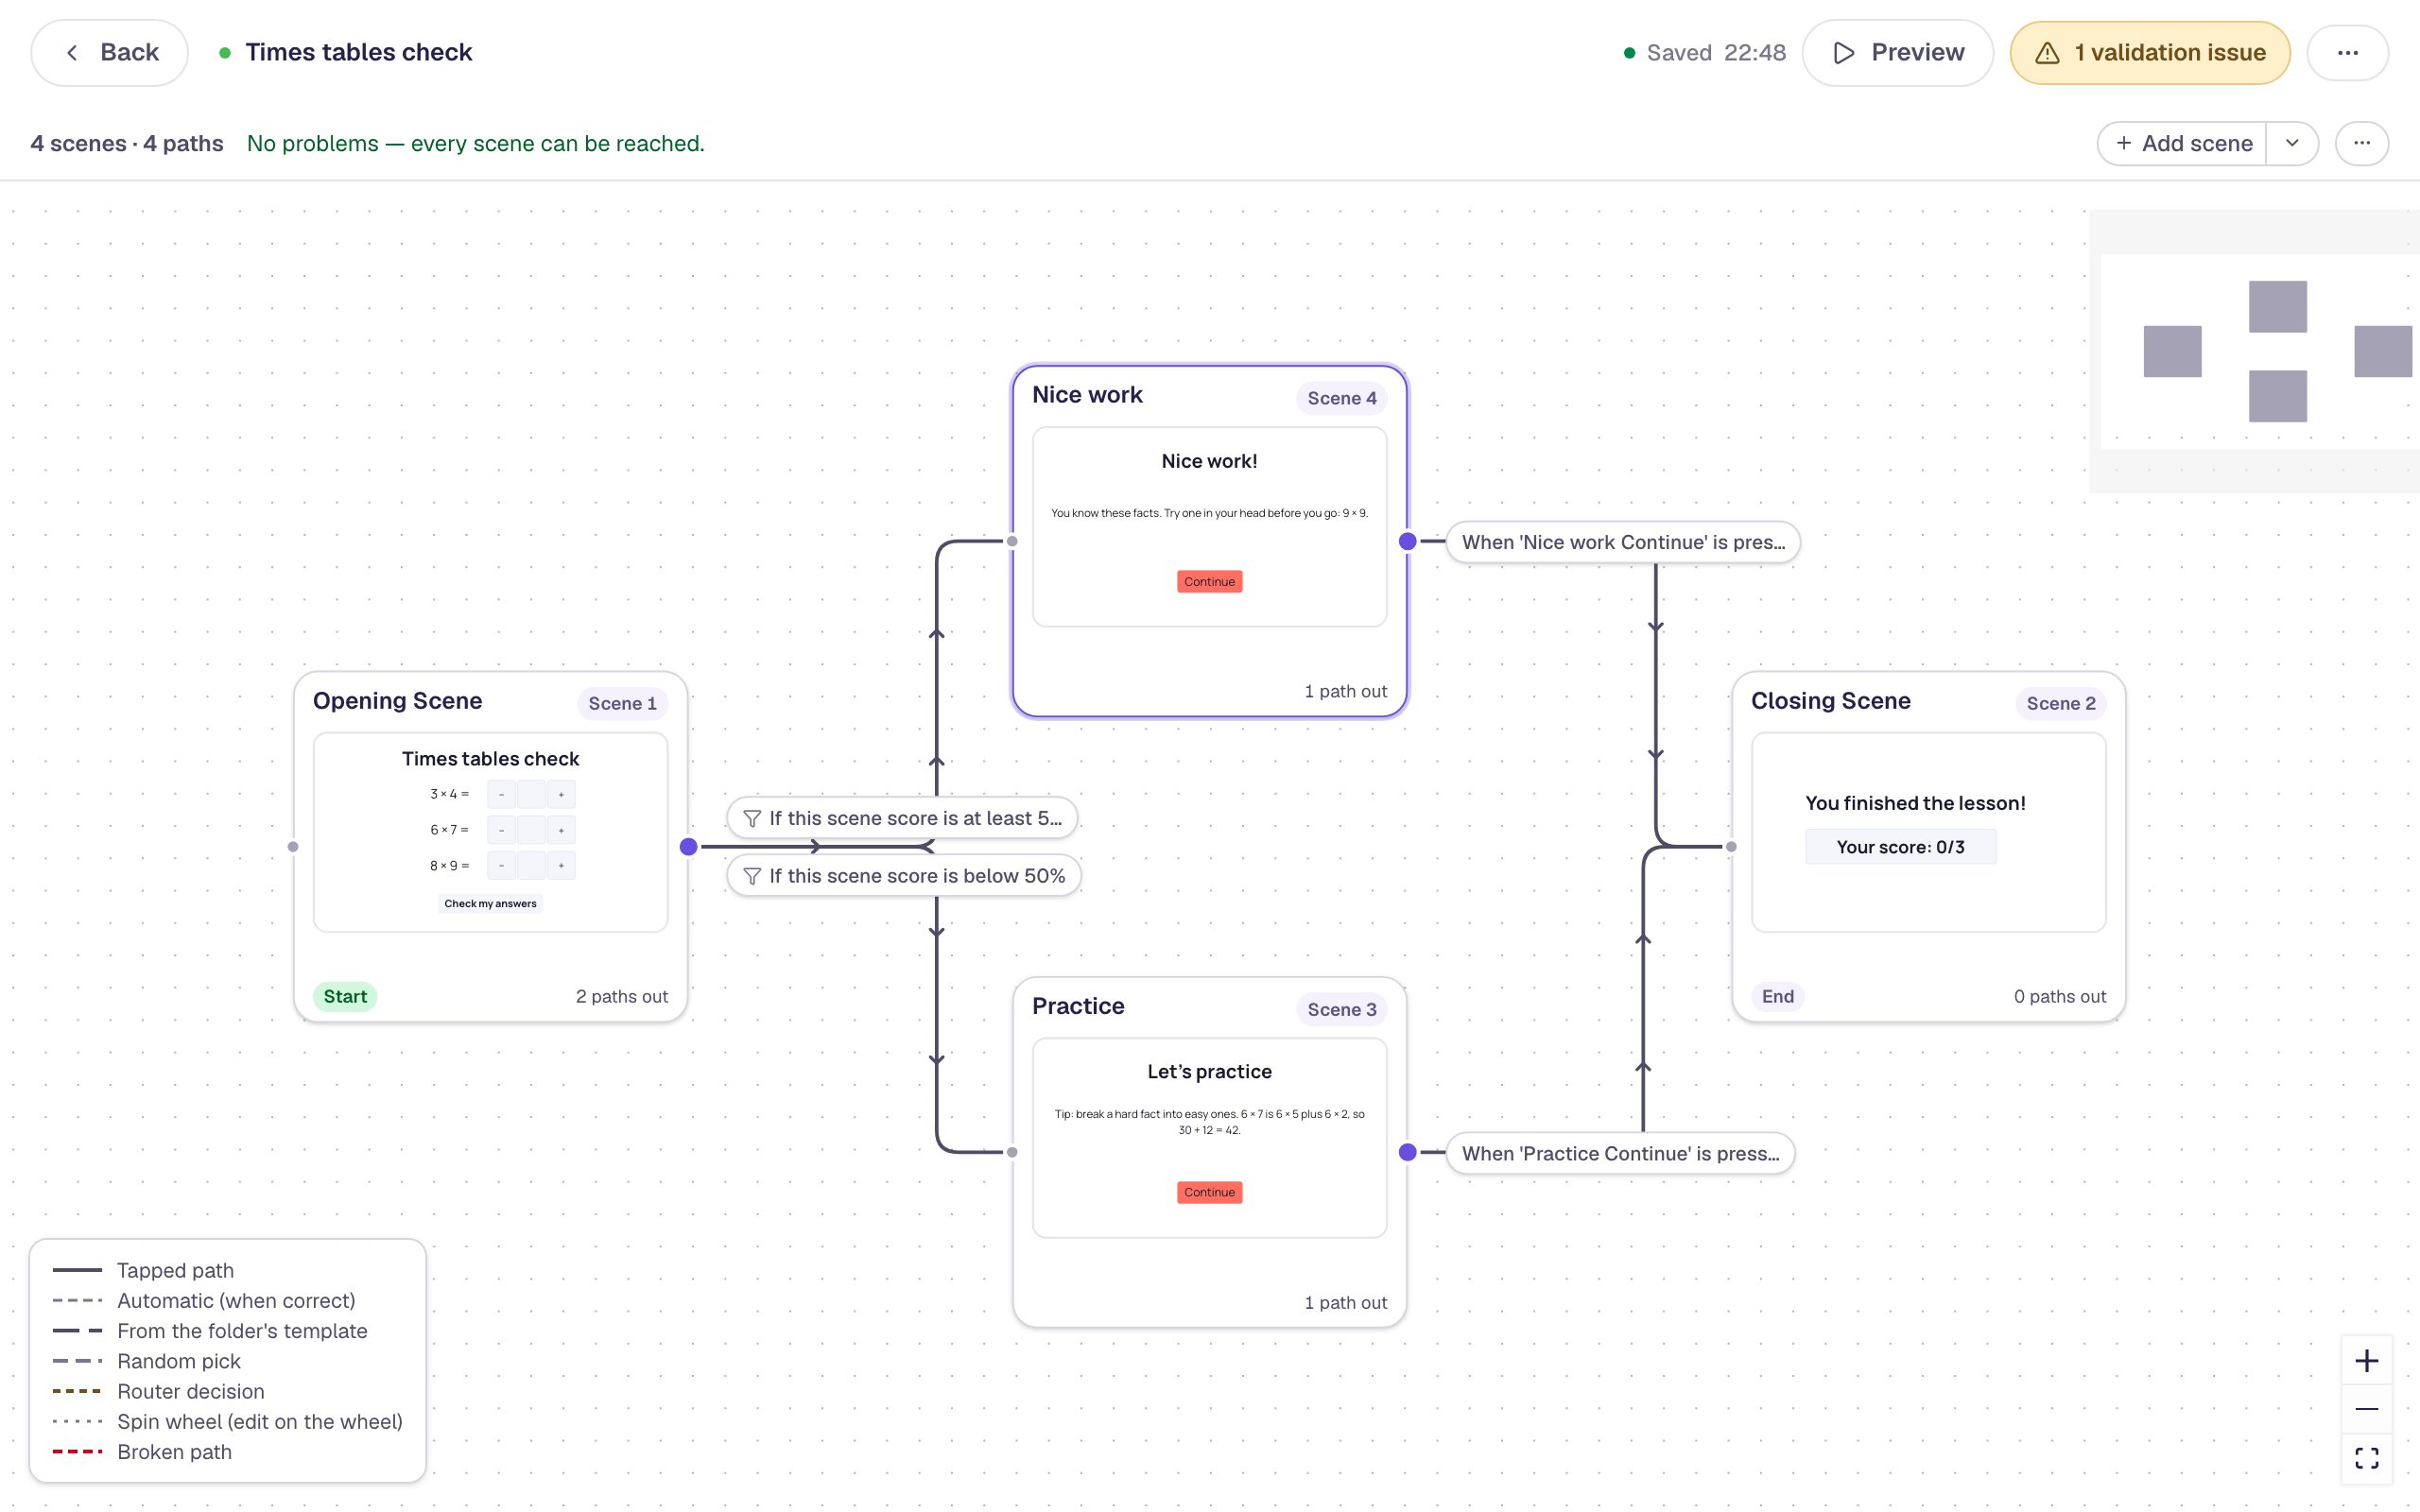
The strip at the top says No problems — every scene can be reached. The yellow pill still lists No Lesson-Submit Button: Berdee wants a Submit button set to Lesson somewhere before it publishes. You don't need one to preview. When you're ready to publish, add a small one to each branch; it can't share the Opening Scene with Check my answers.
Step 7: Try both routes in preview
Click Preview at the top. From the graph, preview always starts at the opening scene. First answer like a student who needs practice, then restart and get them all right:
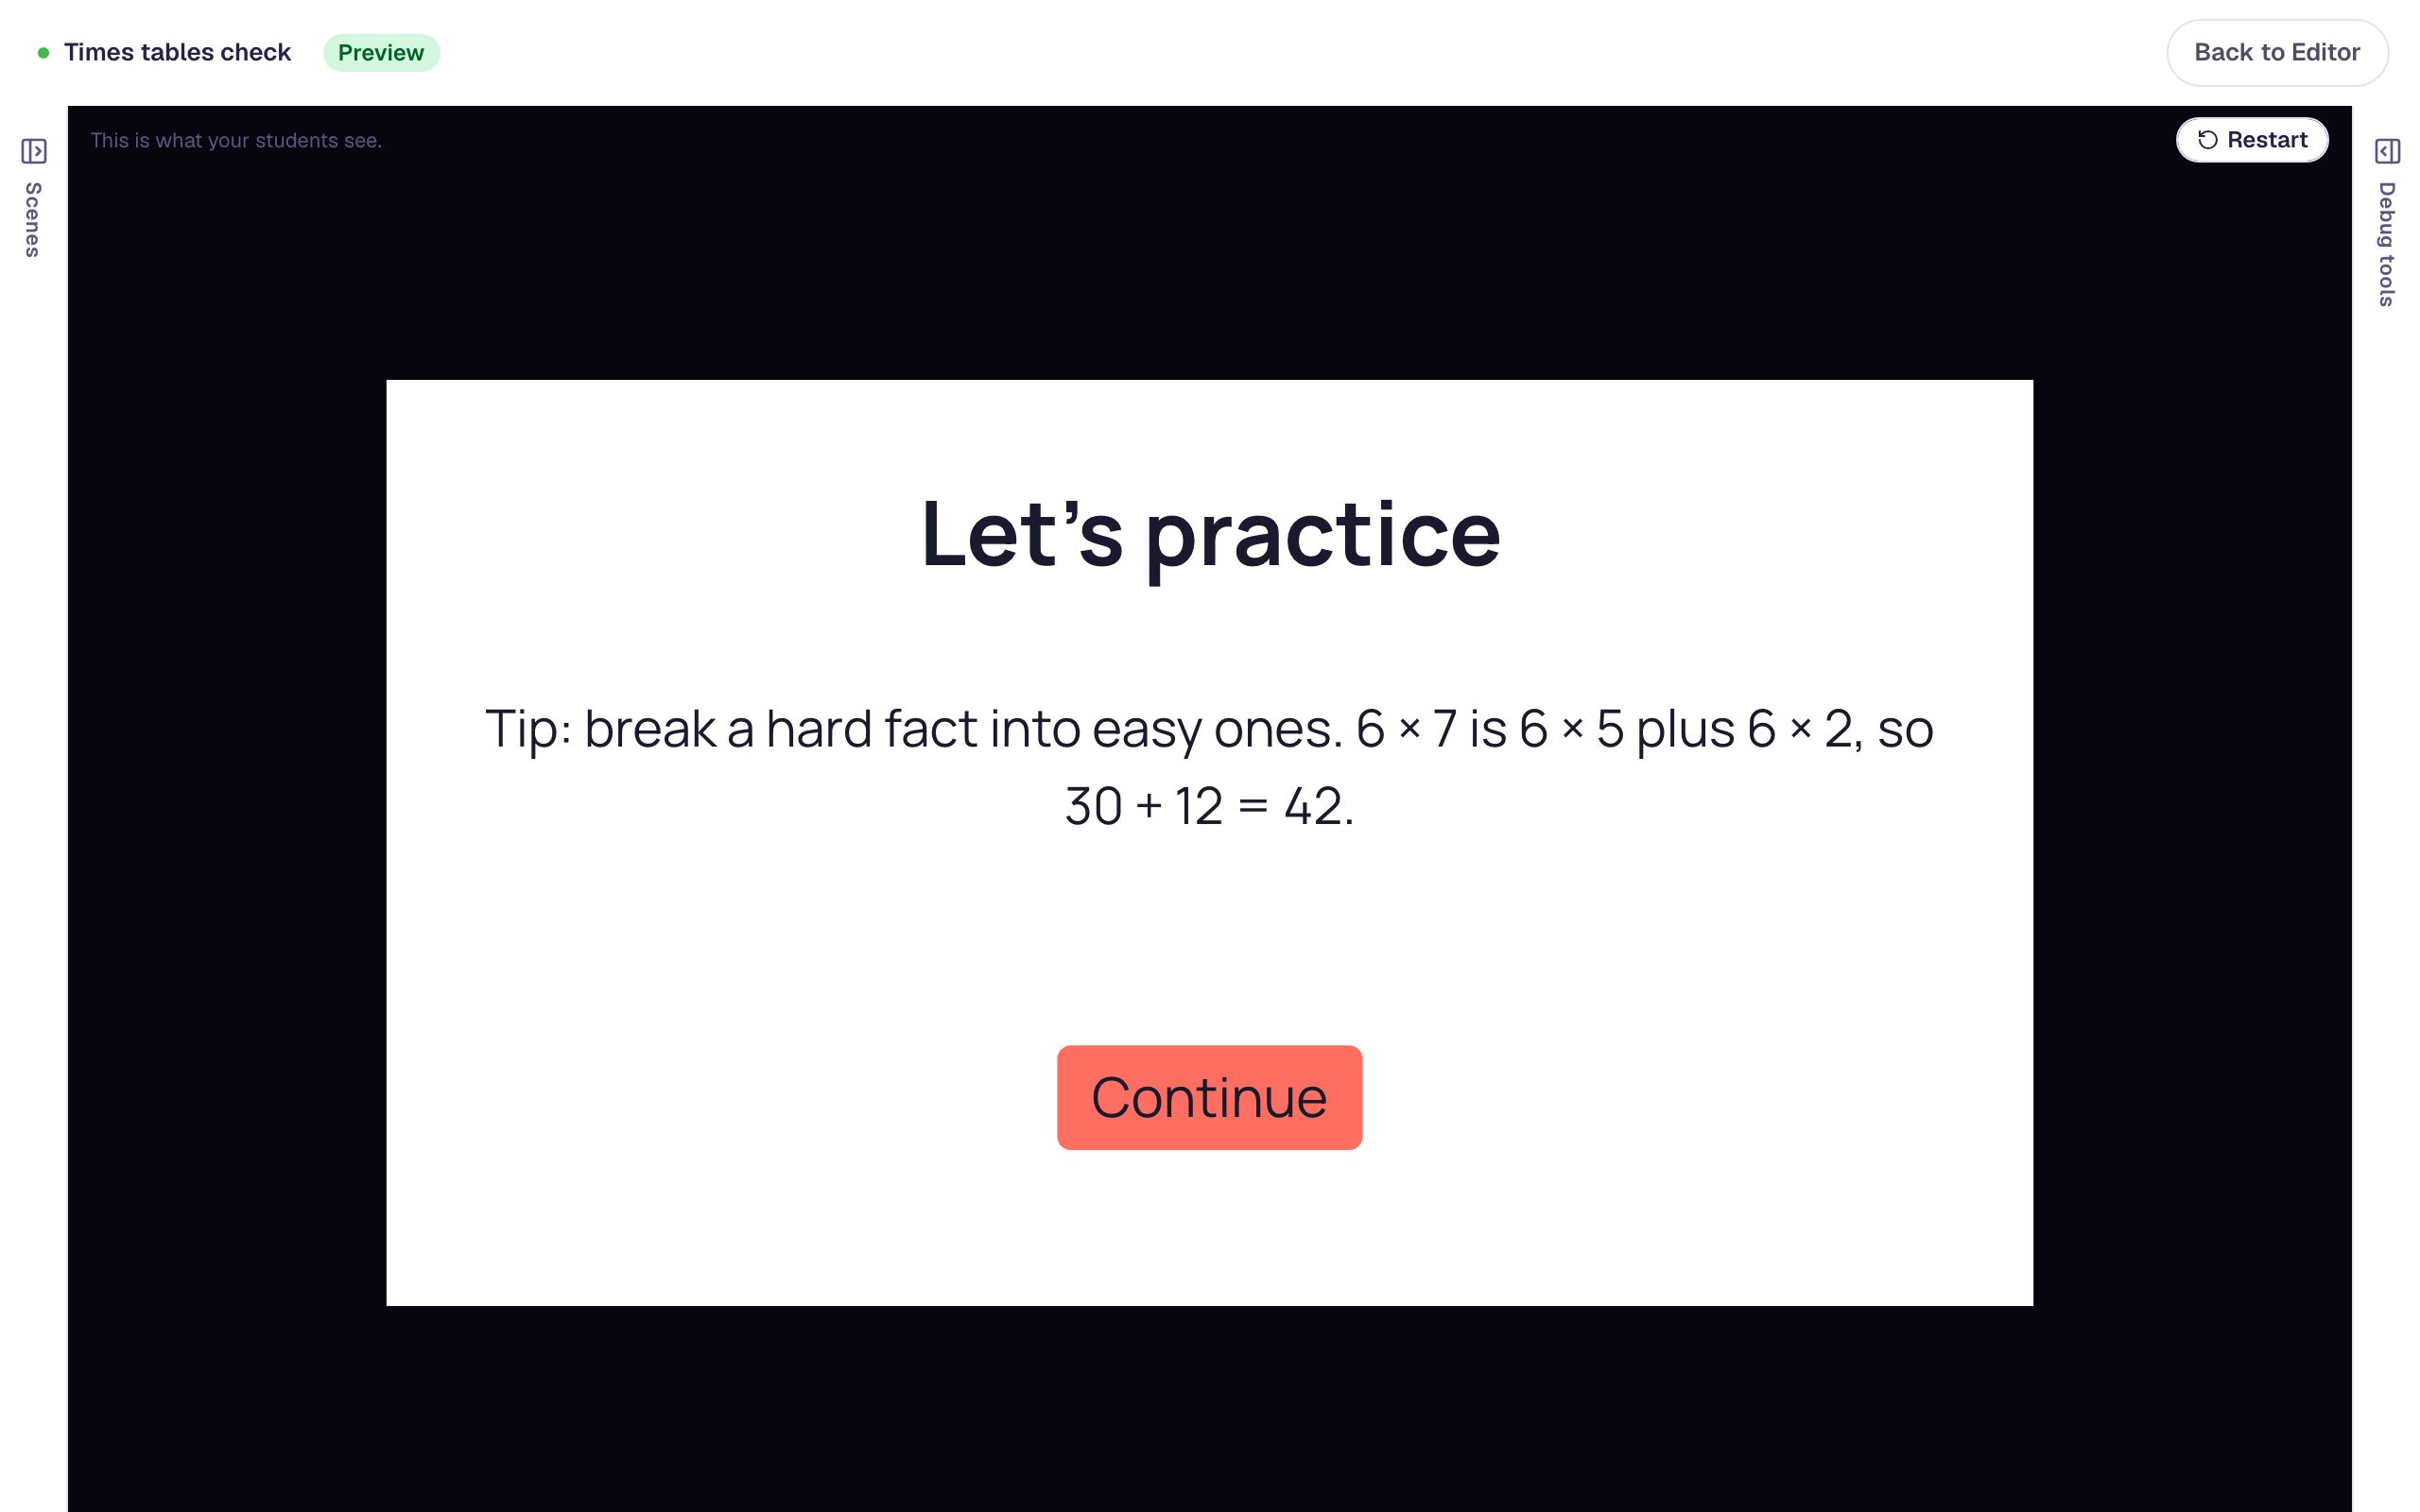
Type 12, 48, and 81 and press Check my answers. One right out of three is 33%, below 50%, so the practice tip appears:
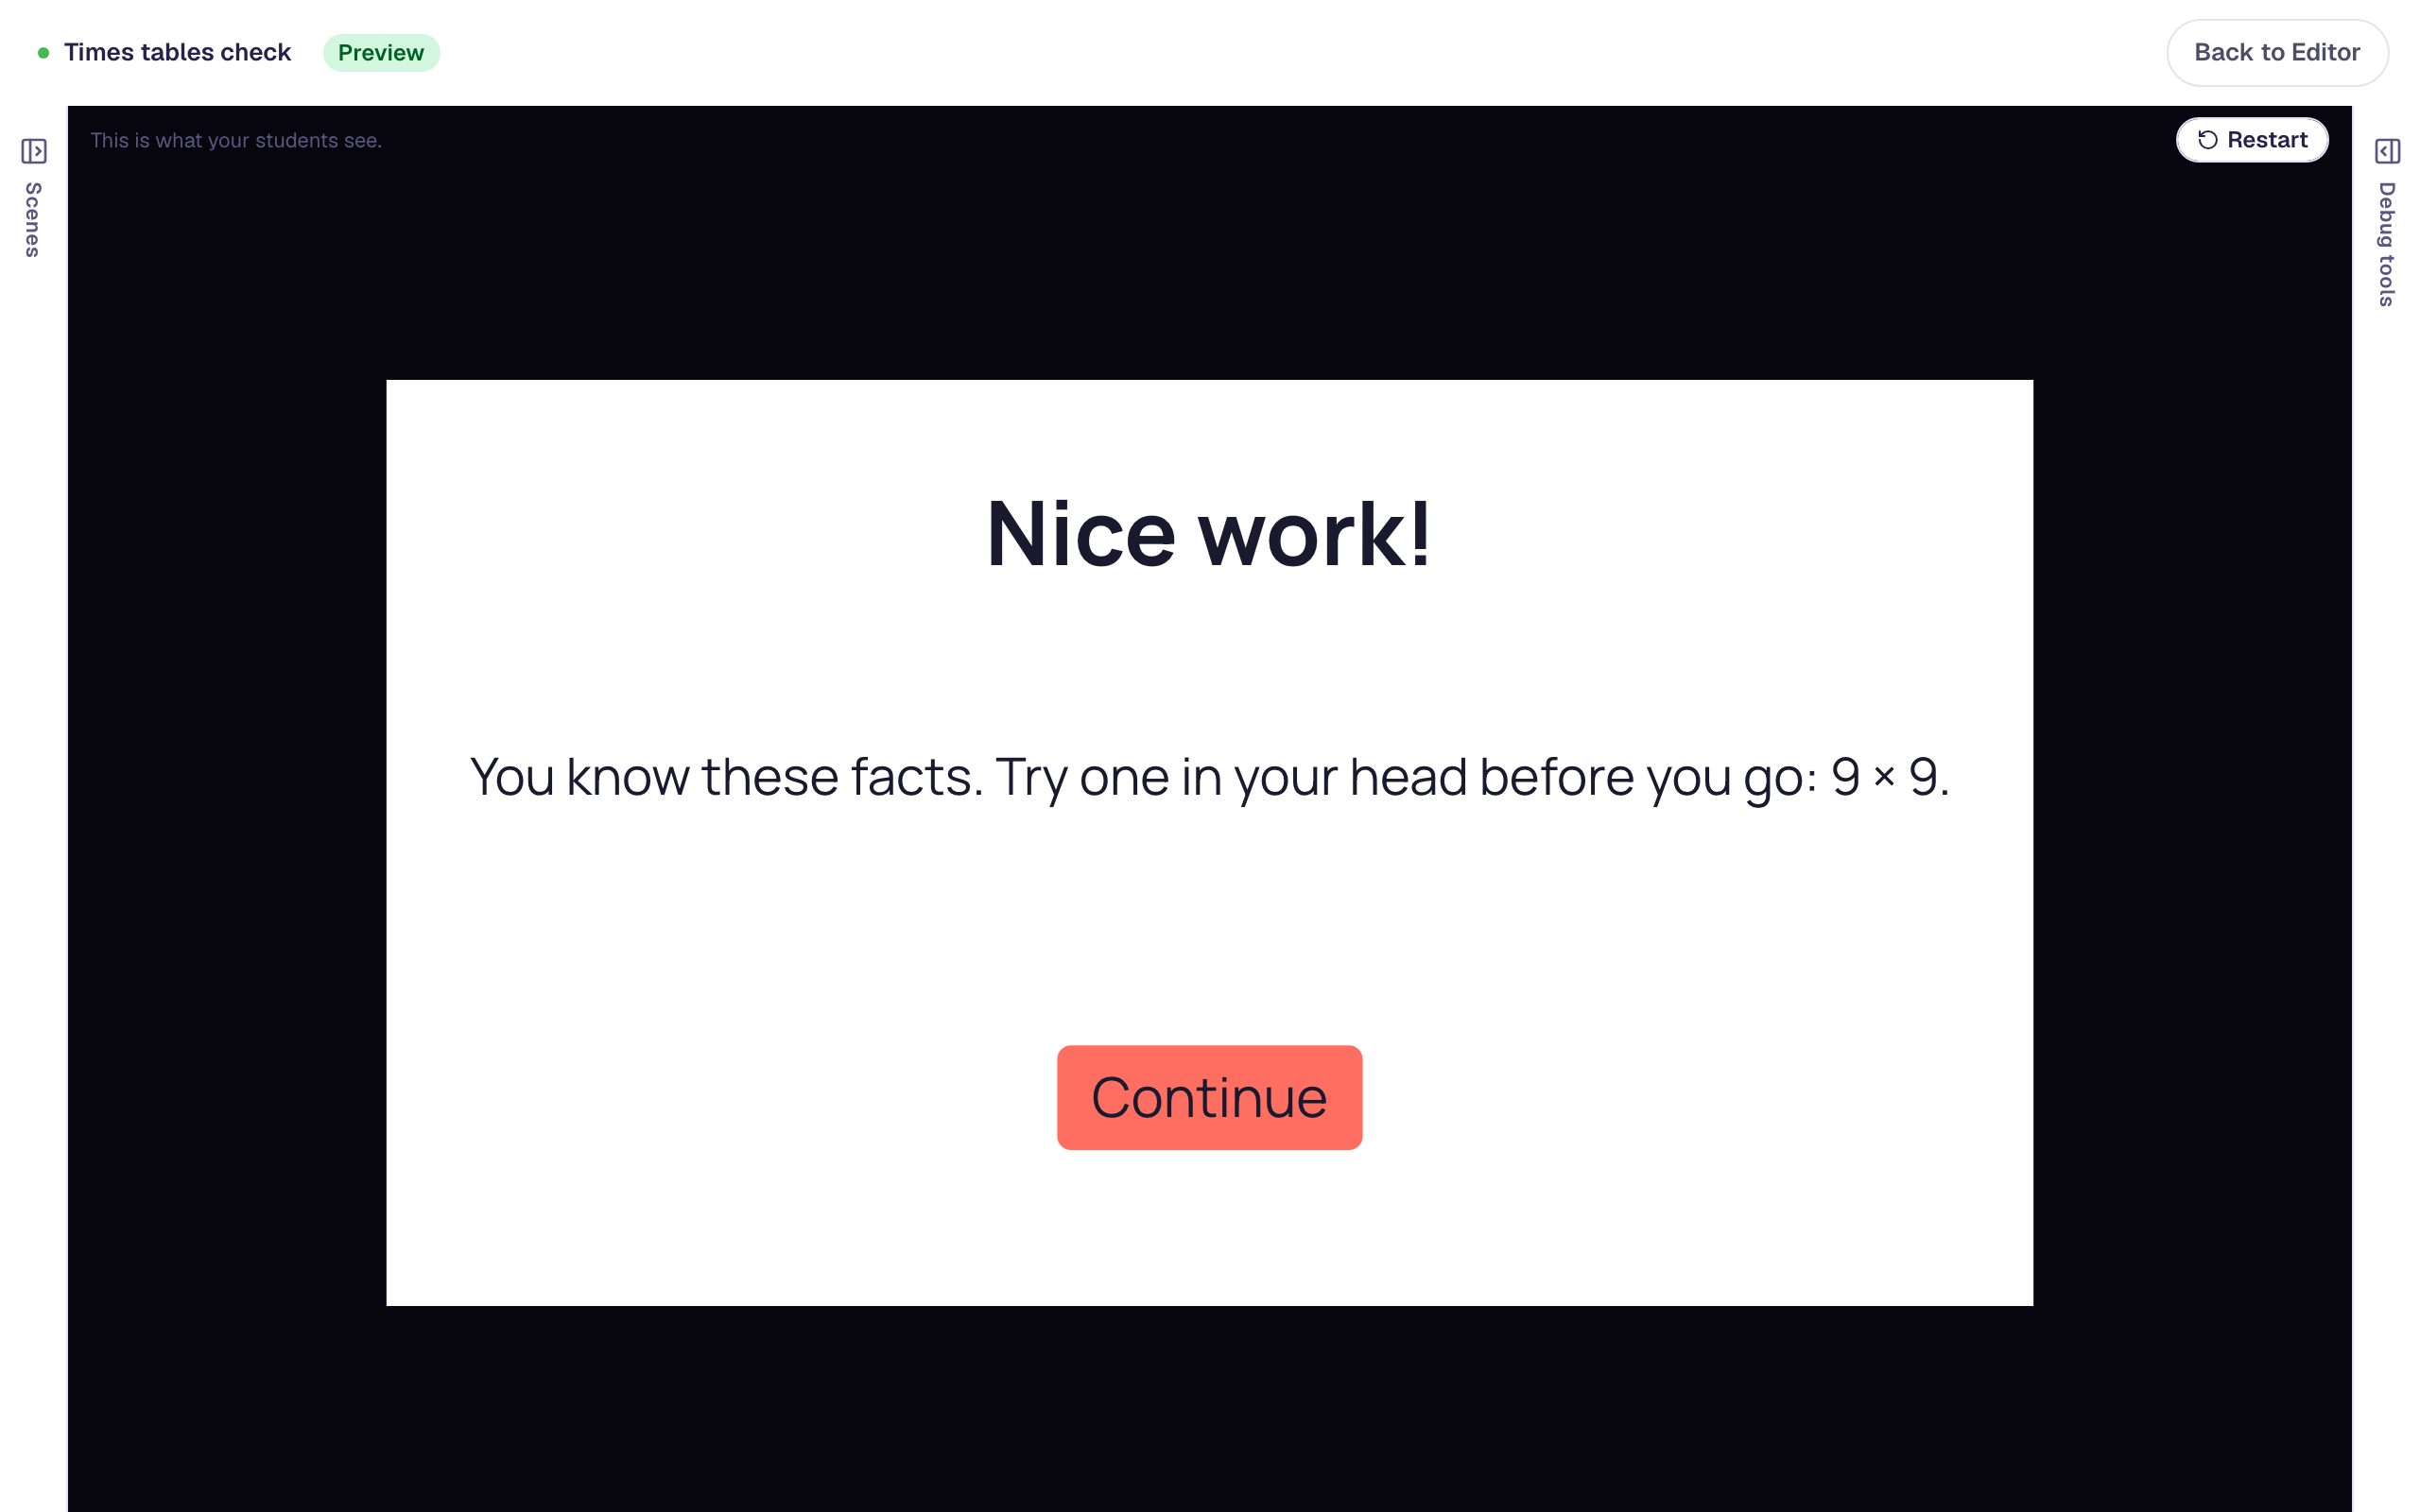
Click Restart, type 12, 42, and 72, and press Check my answers. That's 100%, so you get Nice work! instead:
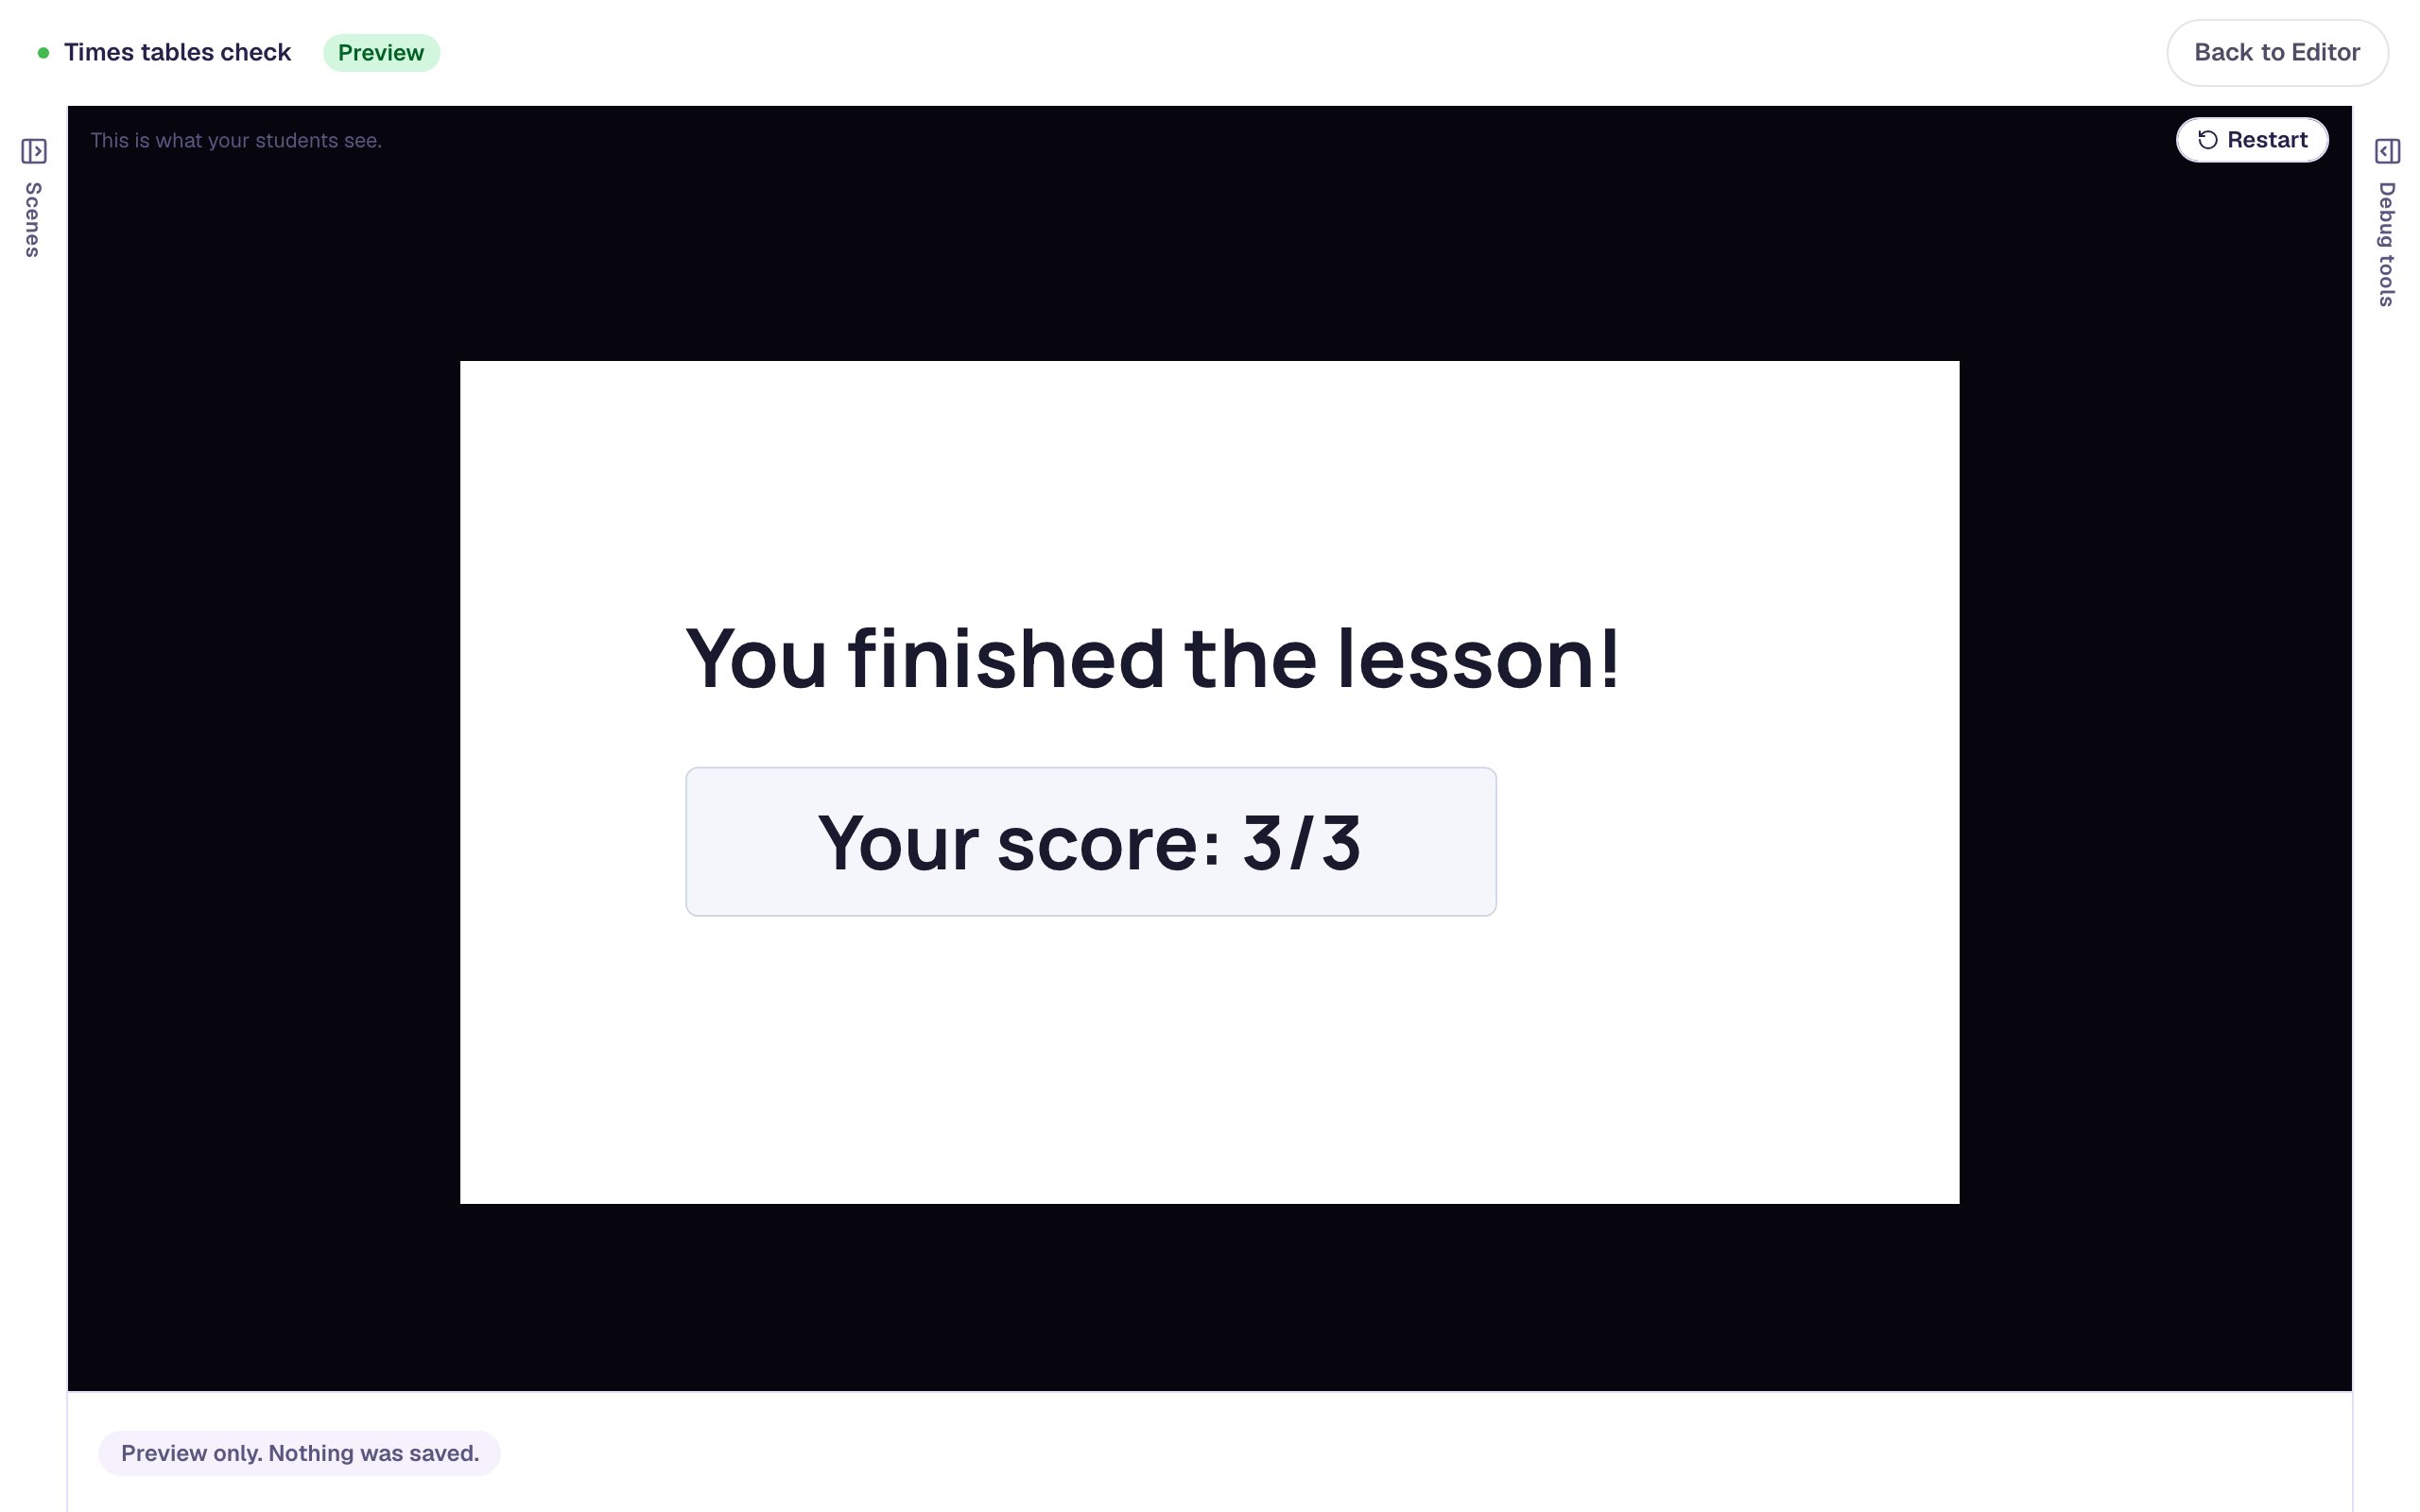
Tap Continue to reach the ending, which shows the student's score:
What you built
You built a check that responds to how a student did, not just whether they were perfect:
- one scene with three Number Input questions and a Submit Button that checks just that scene,
- the automatic When answered correctly path removed, so every student presses Check my answers,
- two Their score is… paths with cuts that meet at 50% without overlapping, and
- a Continue path from each branch to the Closing Scene.
To sort students three ways, add a third score path and split the range again (for example, below 50%, at least 50%, and at least 90%, adding the highest cut last). Keep every branch moving forward: pressing Check my answers locks the answers on the check, so a path back to it would leave the student stuck.
Make this lesson yours
Add the lesson you just watched being built to your account, then change it for your class: your questions, your pictures, your colors.
Free to sign up, and you'll come straight back here. I have an account