Let students choose their own path
Put two buttons on a scene and use the Lesson Graph to give each one its own scene, so students pick what they explore before both paths meet again at the ending.
- Level
- Beginner
- Time
- About 10 min
- Steps
- 7
A choose-your-path lesson where students tap Owls or Bats, see a scene about the animal they picked, and finish at the same ending either way.
Get the finished lesson
Skip straight to the result, or keep it open beside the steps. Add this tutorial's lesson to your account and explore how it works in the studio.
Free to sign up, and you'll come straight back here. I have an account
Students care more about a lesson when they get to make a choice in it. In this tutorial you'll build a short lesson that asks Which night animal do you want to meet? and lets each student tap Owls or Bats. Each button opens its own scene, and both scenes lead to the same ending.
You'll draw the branches in the Lesson Graph, the map of every path a student can take through your lesson. If you haven't built anything in the studio yet, start with Build your first quiz question: this tutorial moves quickly through the parts it already covers.
Step 1: Build the choice
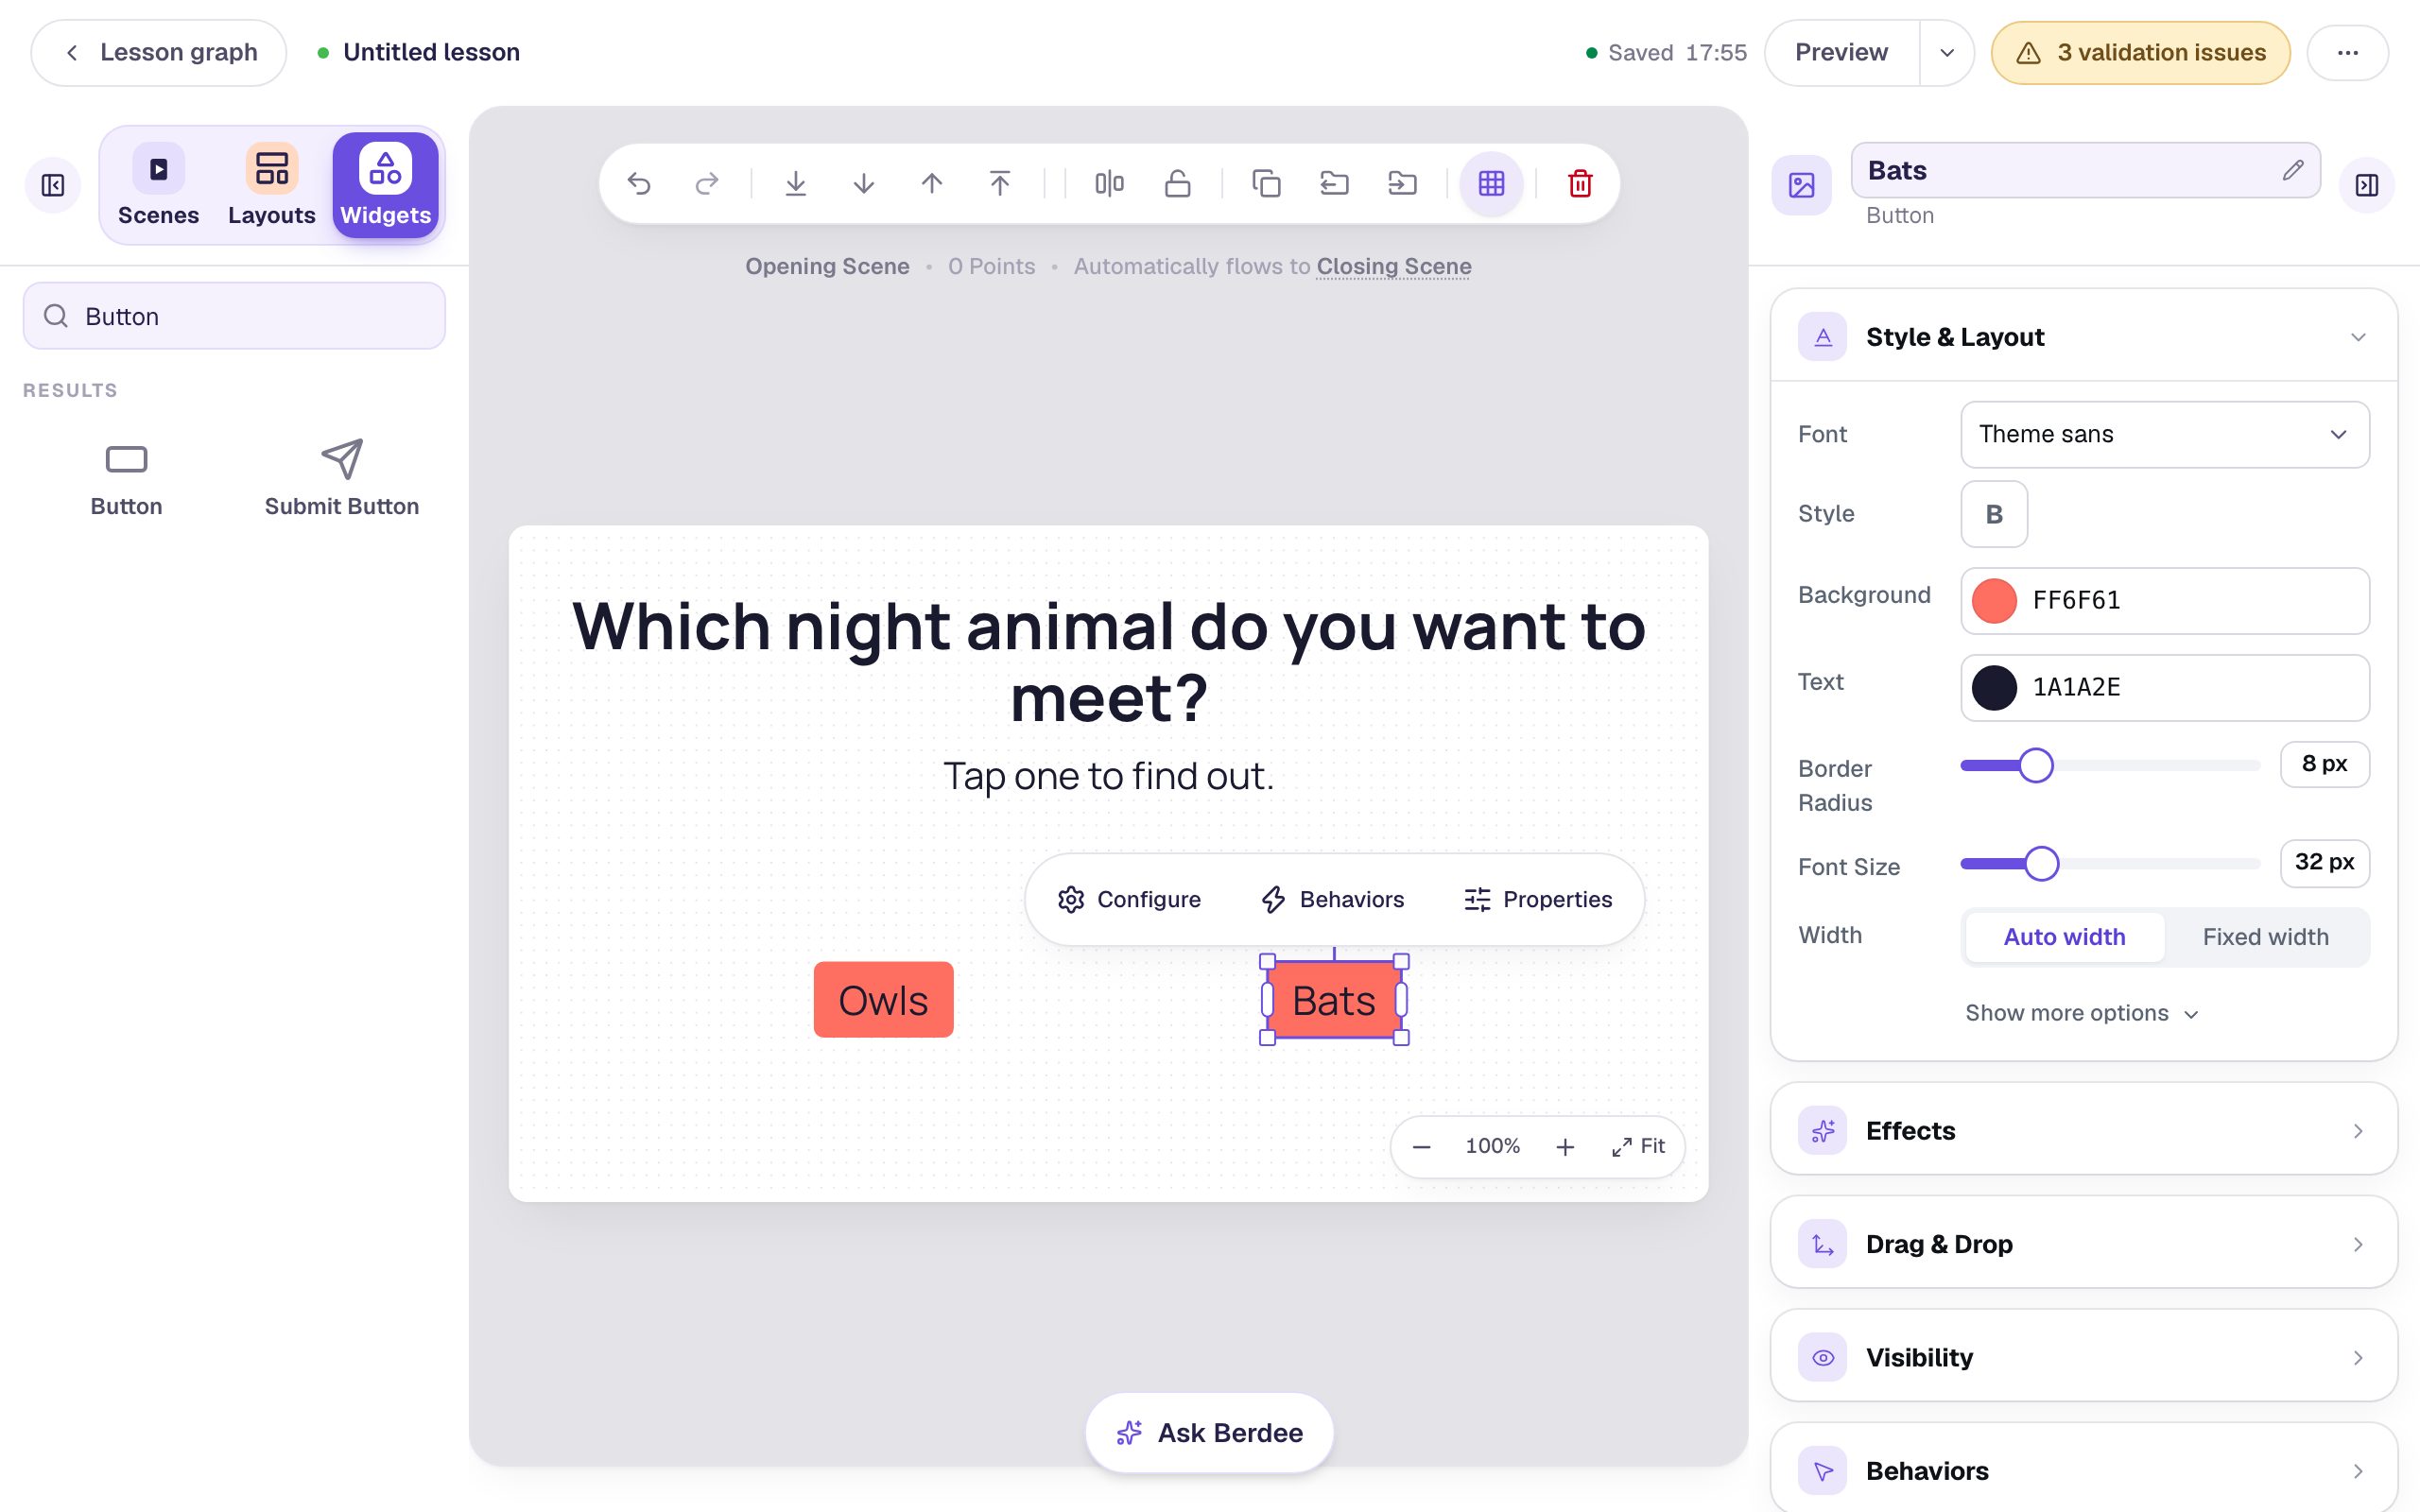
Start a blank lesson (New lesson, then Start from scratch). On the Opening Scene, add:
- A Heading that asks the question:
Which night animal do you want to meet?Drag it near the top. - A Body text under it:
Tap one to find out.In Style & Layout, set its Font Size to about 30 px. - A Button. Click Configure in the pill above it, change the Label to
Owls, and click Save. Set its Font Size to 32 px and drag it to the left half of the scene. - A second Button, labelled
Bats, the same size, on the right half.
Now give each button a name. At the top of the properties panel, click the button's name (Button 1), type Owls, and press Enter. Name the other one Bats. The Lesson Graph lists buttons by name, so this is how you'll find them in the next step.
Step 2: Open the Lesson Graph
Click Lesson graph at the top left of the studio. Right now the map has two scenes: your Opening Scene and the Closing Scene, which is where the lesson ends. The dashed When answered correctly arrow between them is the default path. It moves a student on after they answer a question correctly. Your choice scene has no question, so this arrow never fires, and it goes away in the next step.
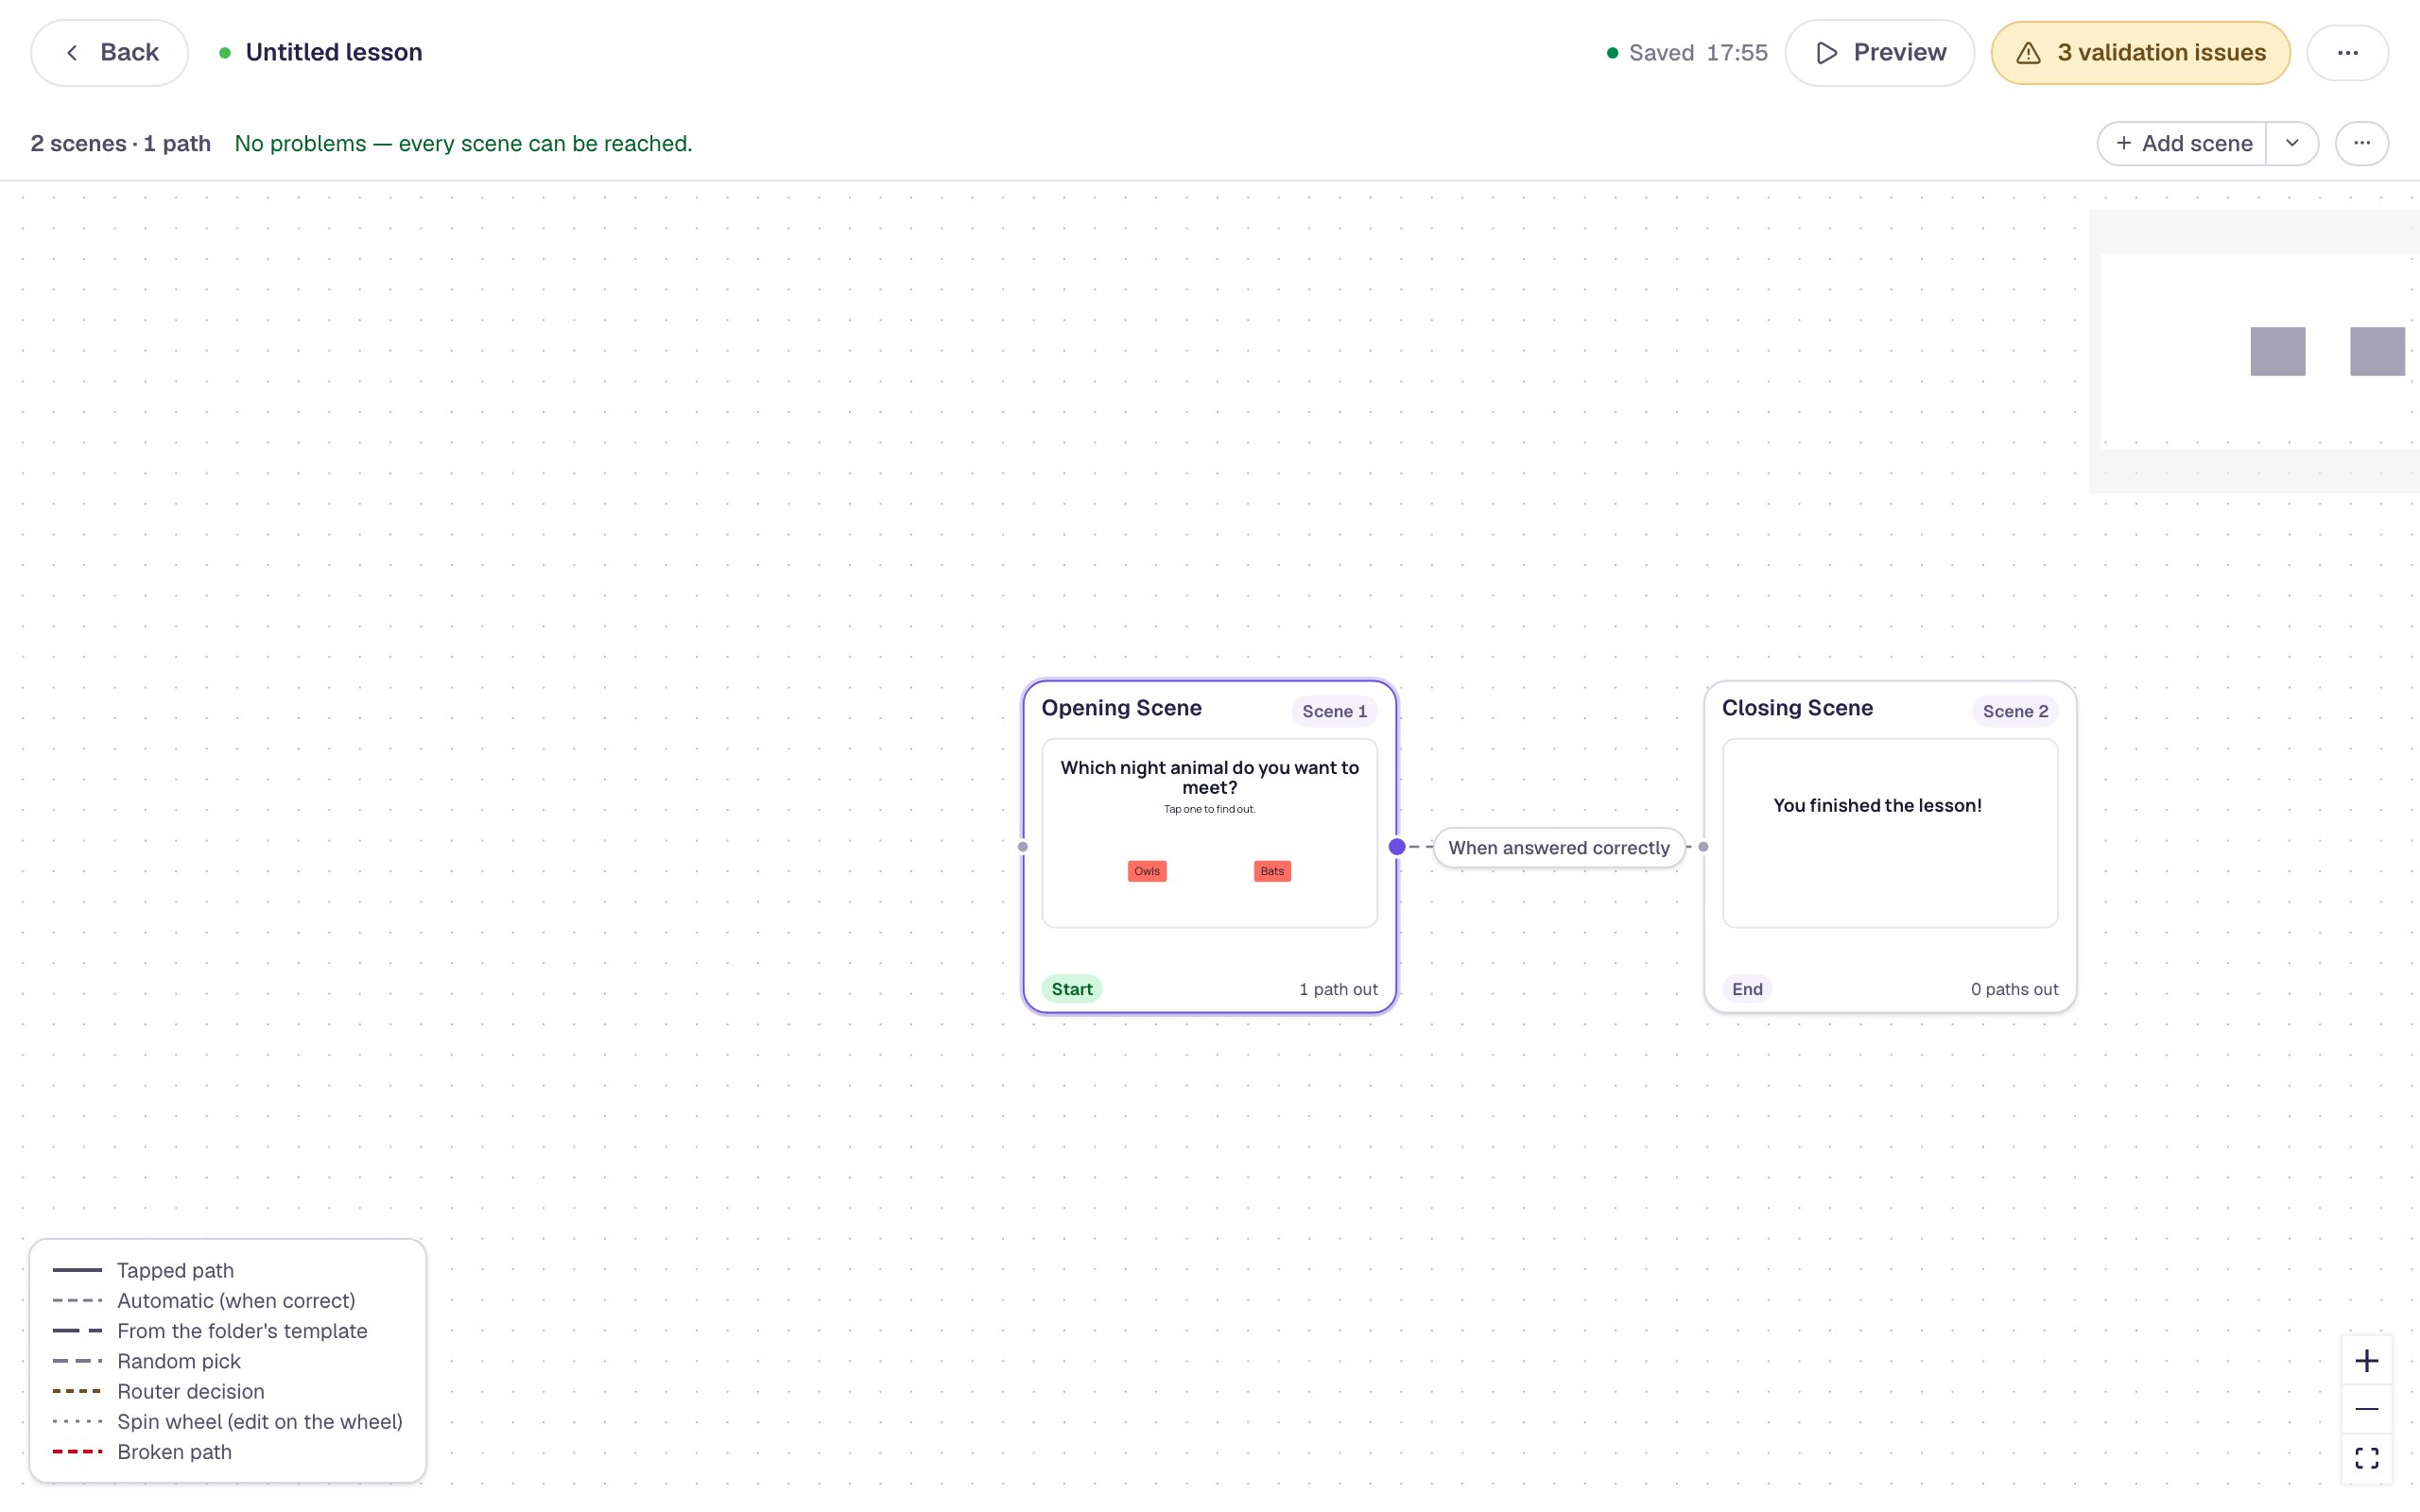
If a card on the left explains how to read the map, click its × to close it.
Step 3: Give each button its own scene
Hover over the Opening Scene card and click the dot on its right edge. A short window asks what comes next:
- What do you want to add? Leave A new scene selected and click Next.
- Name the scene
Owls. - Under Students go there when…, choose They tap something, and set Student taps to Owls.
- Click Add scene.
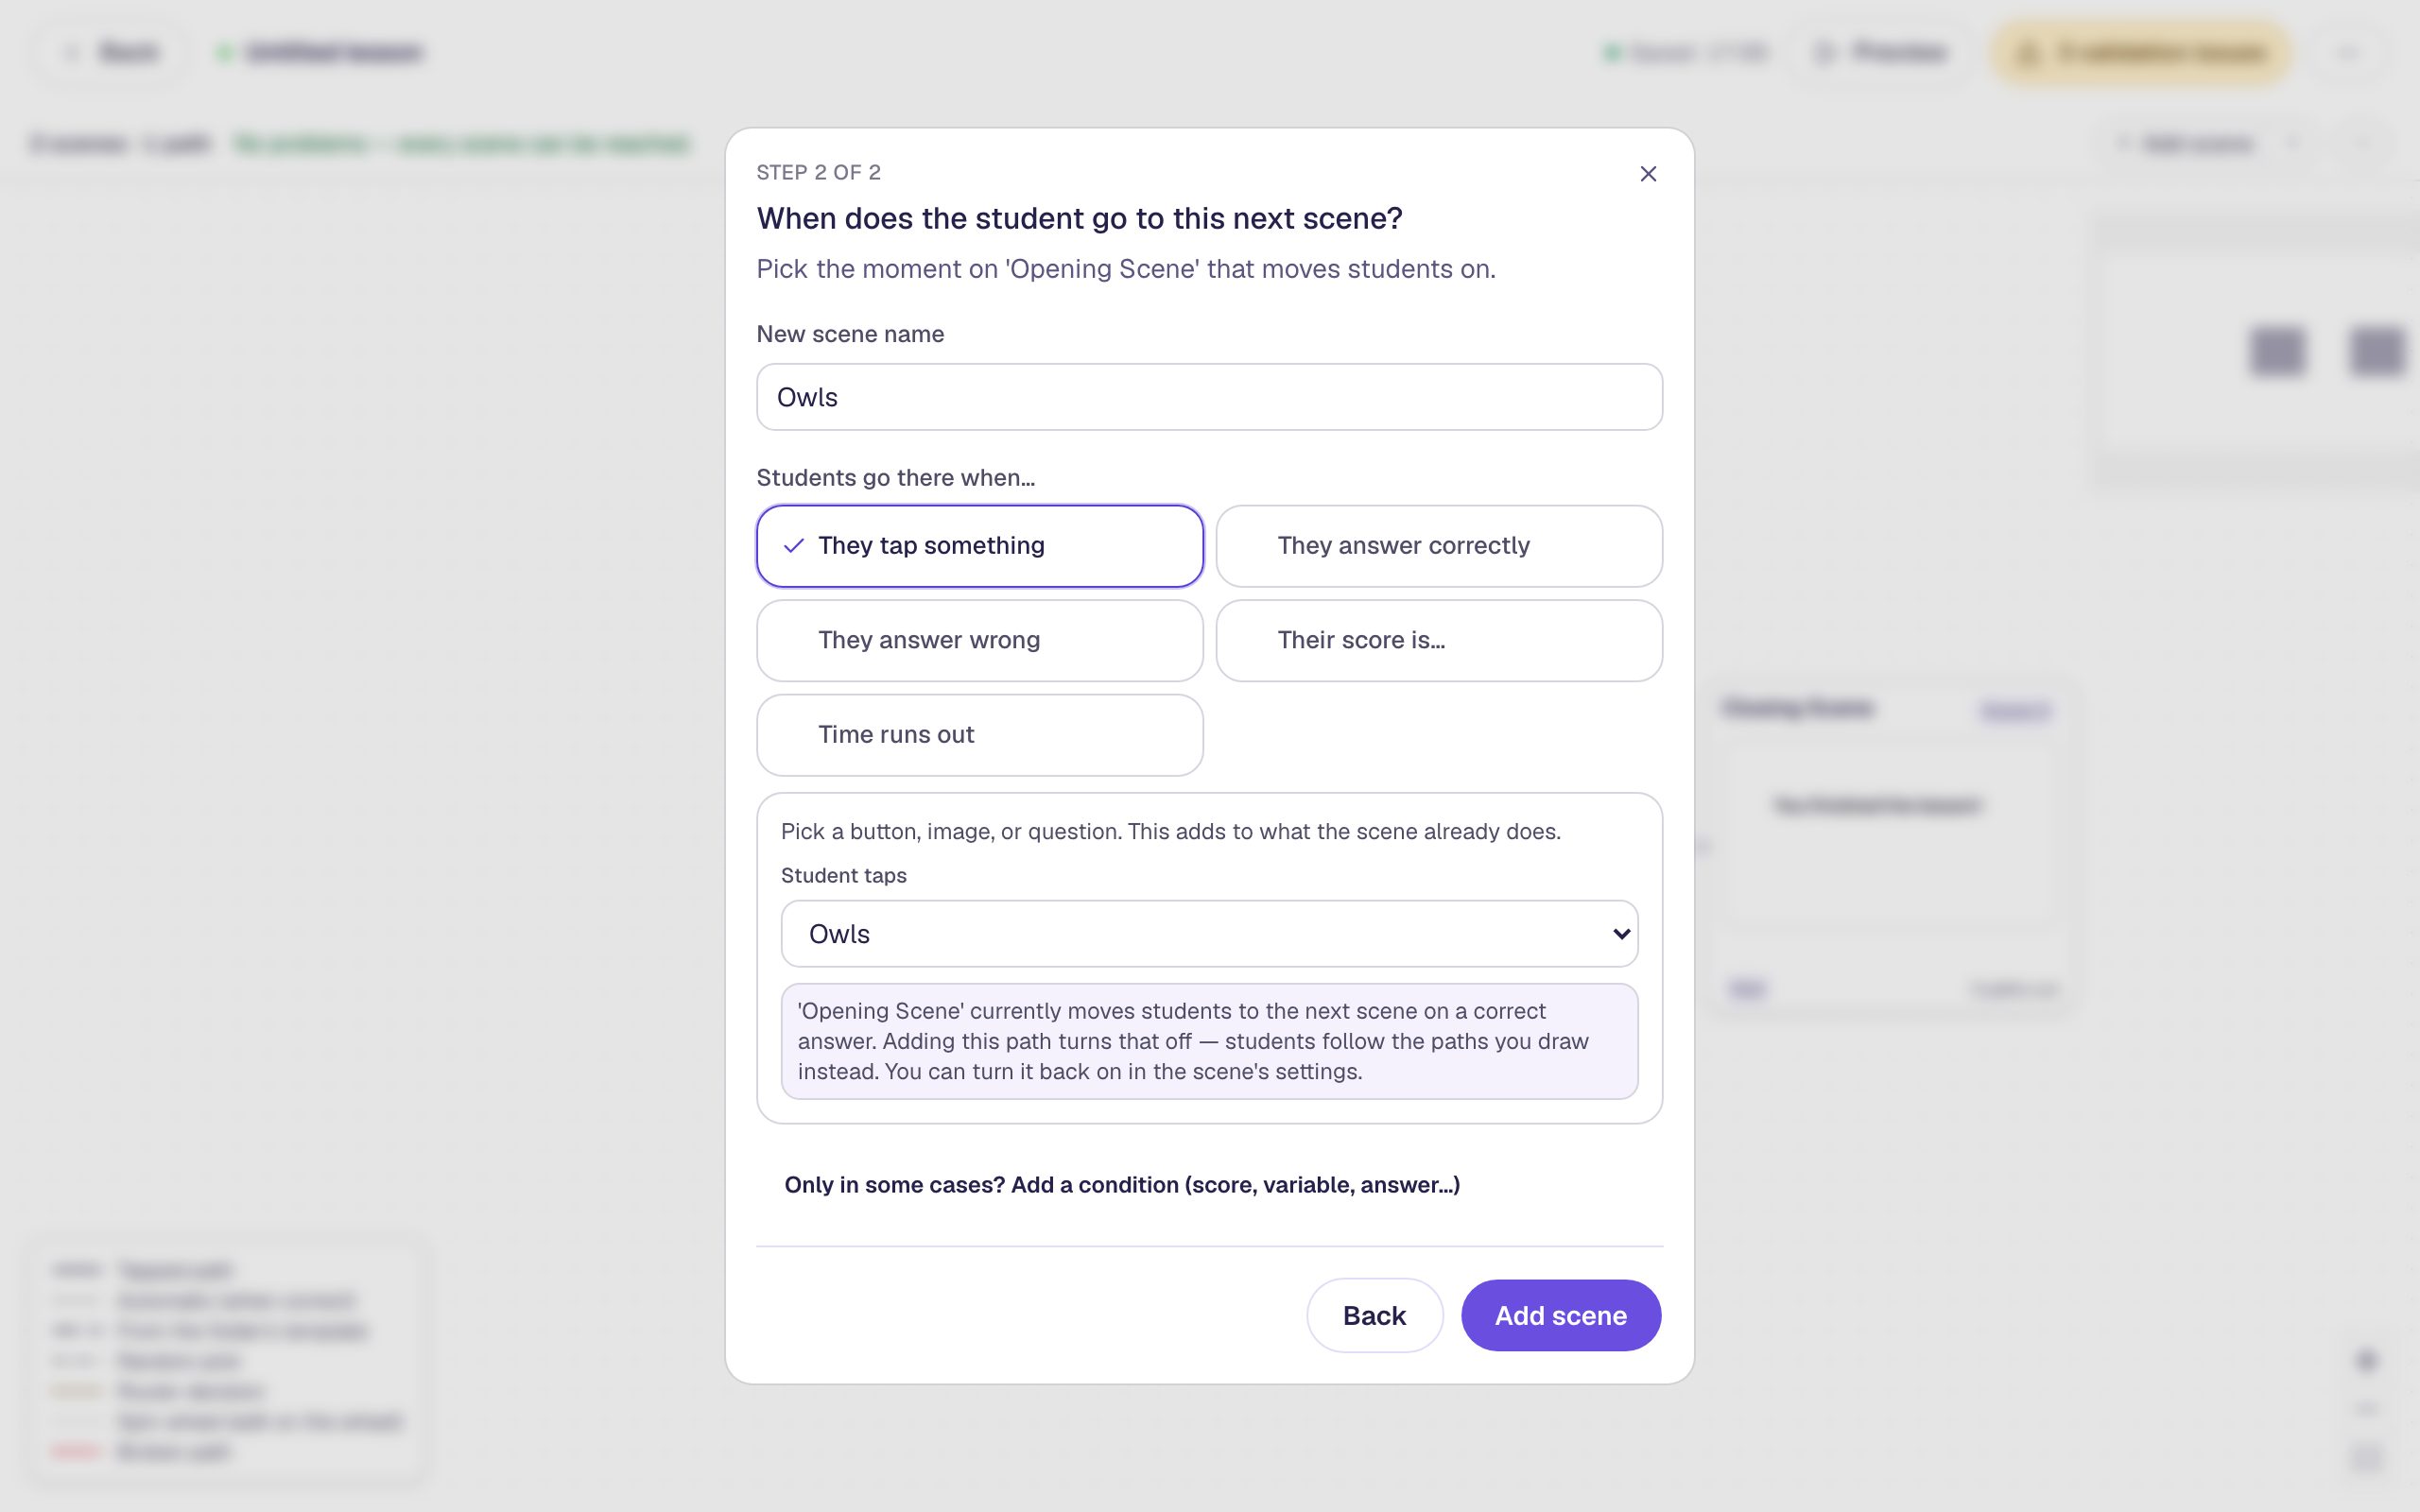
Read the note at the bottom of the window. Once you draw a tap path from a scene, Berdee stops moving students on automatically, because they now leave by the paths you draw. That's what you want here: a student should leave the choice scene only by tapping a button.
Do the same thing again for the other button. Click the Opening Scene's dot, choose A new scene, name it Bats, choose They tap something, set Student taps to Bats, and click Add scene.
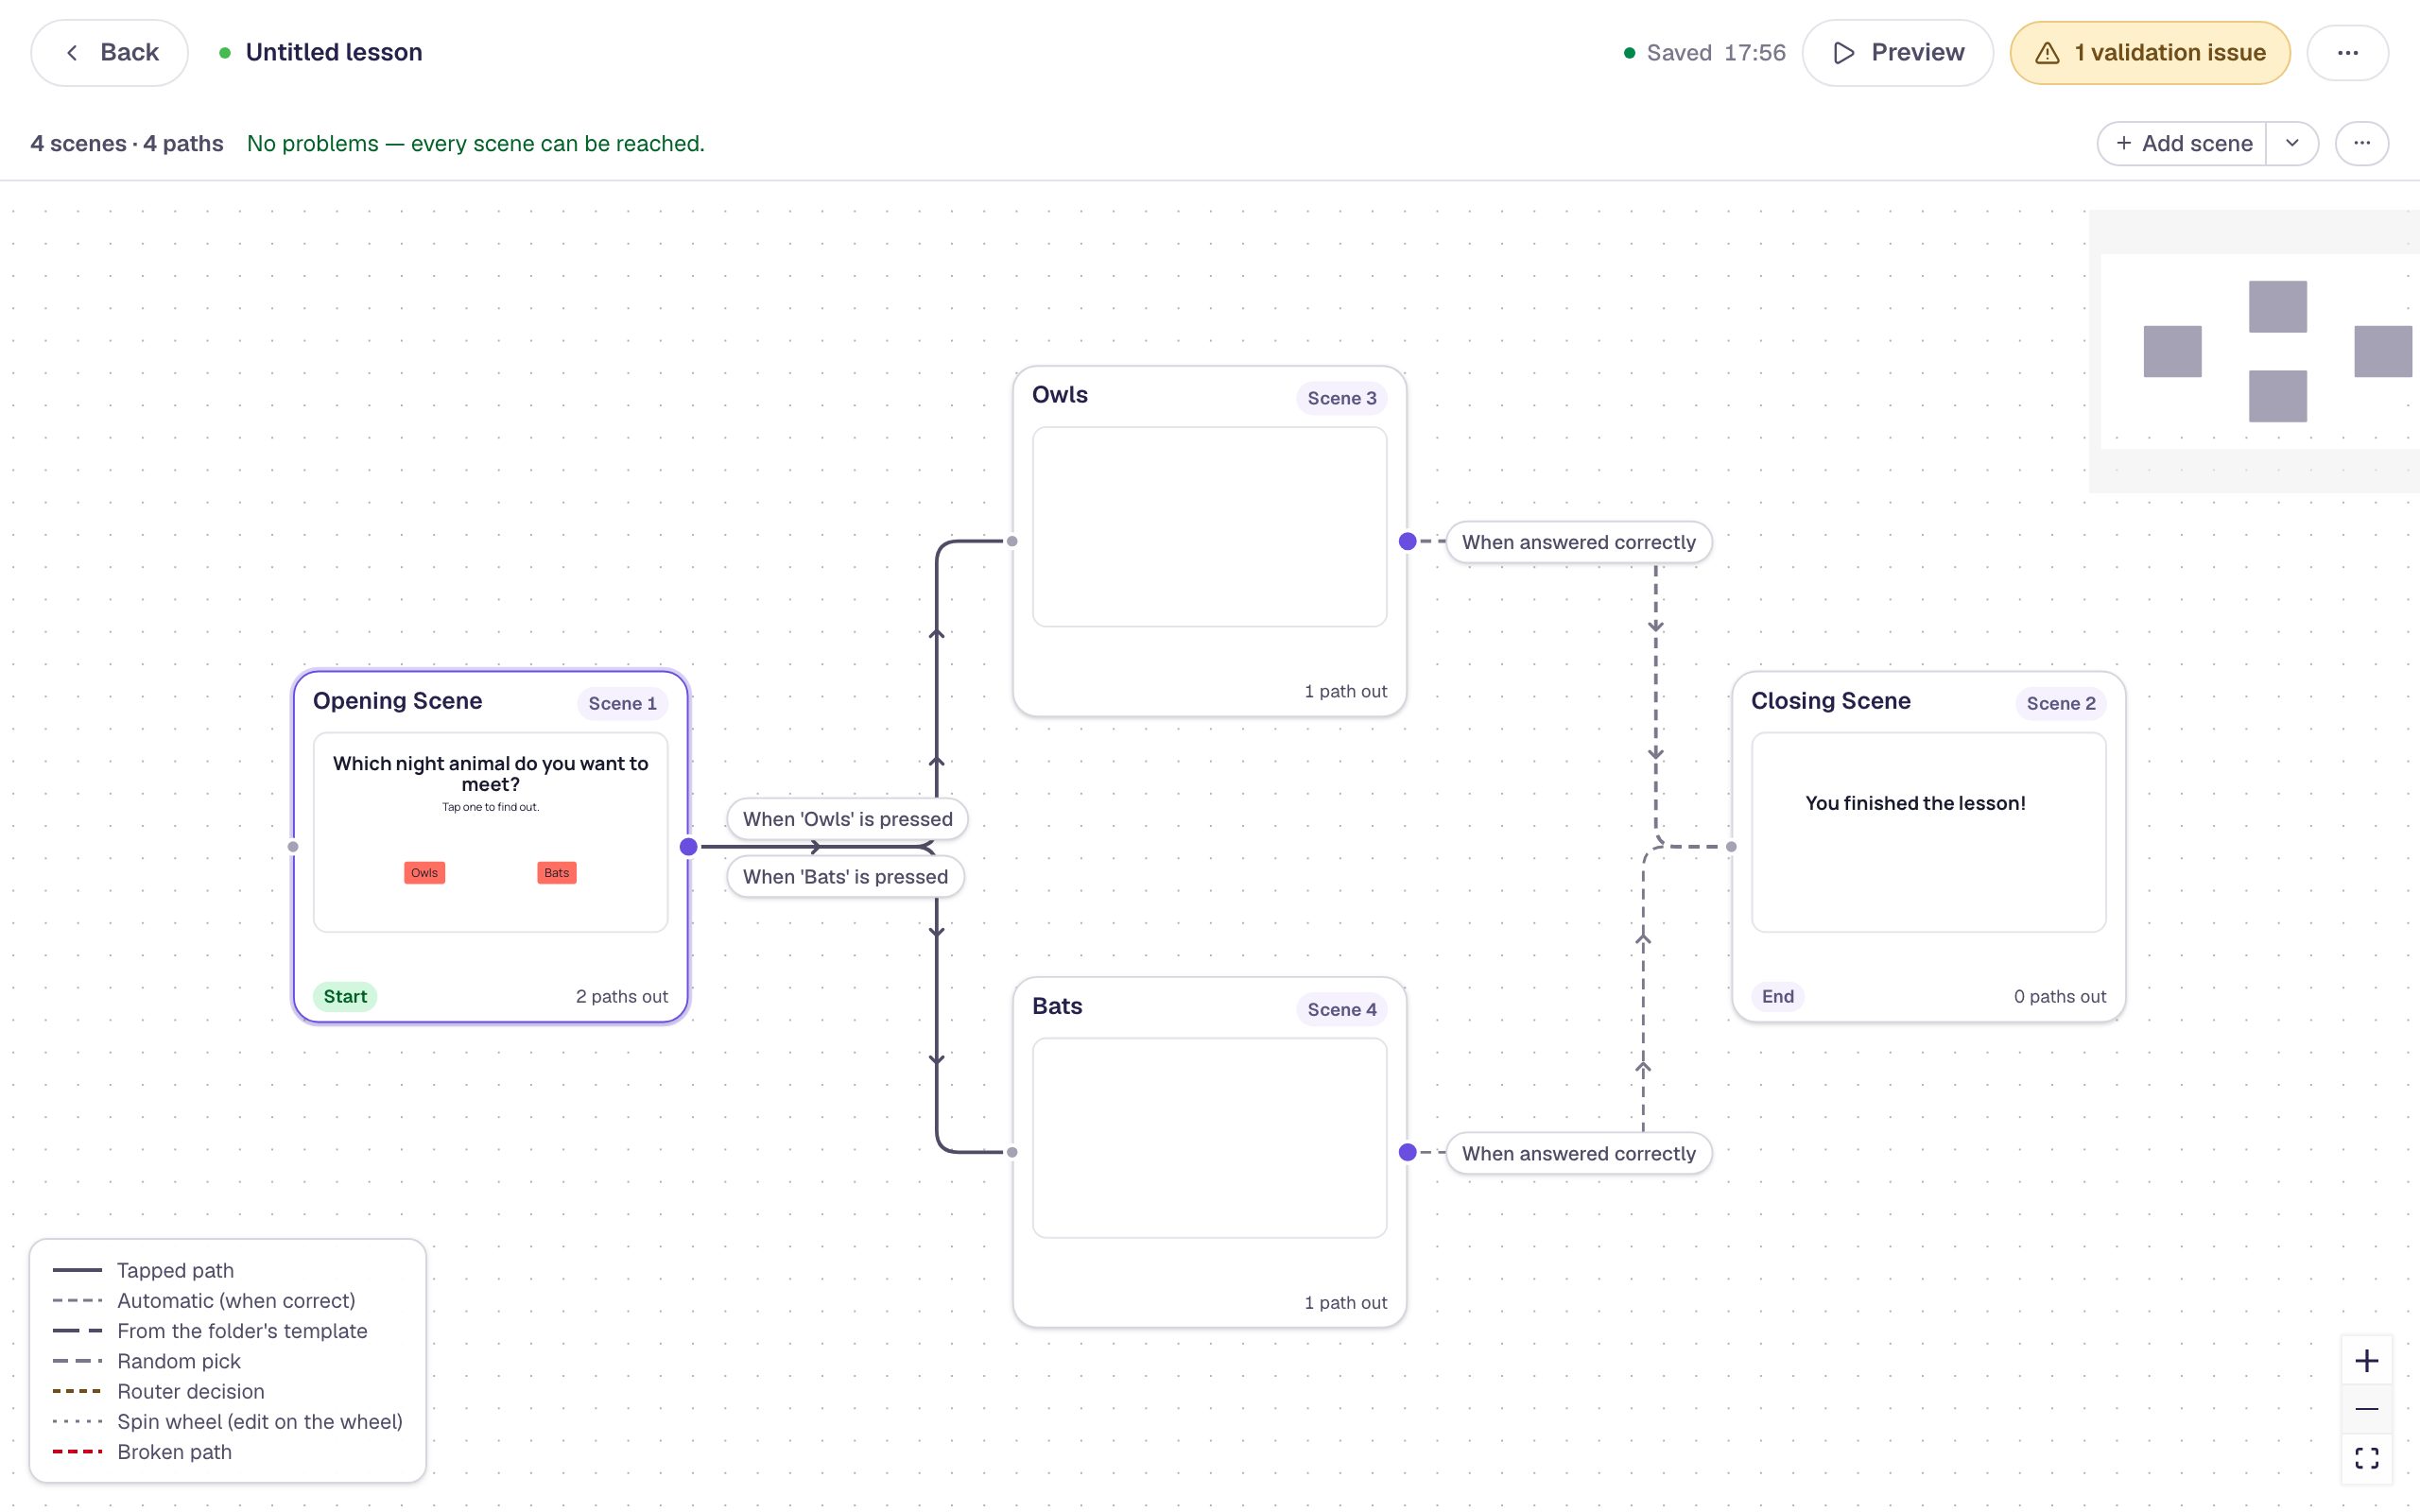
The Opening Scene now branches two ways:
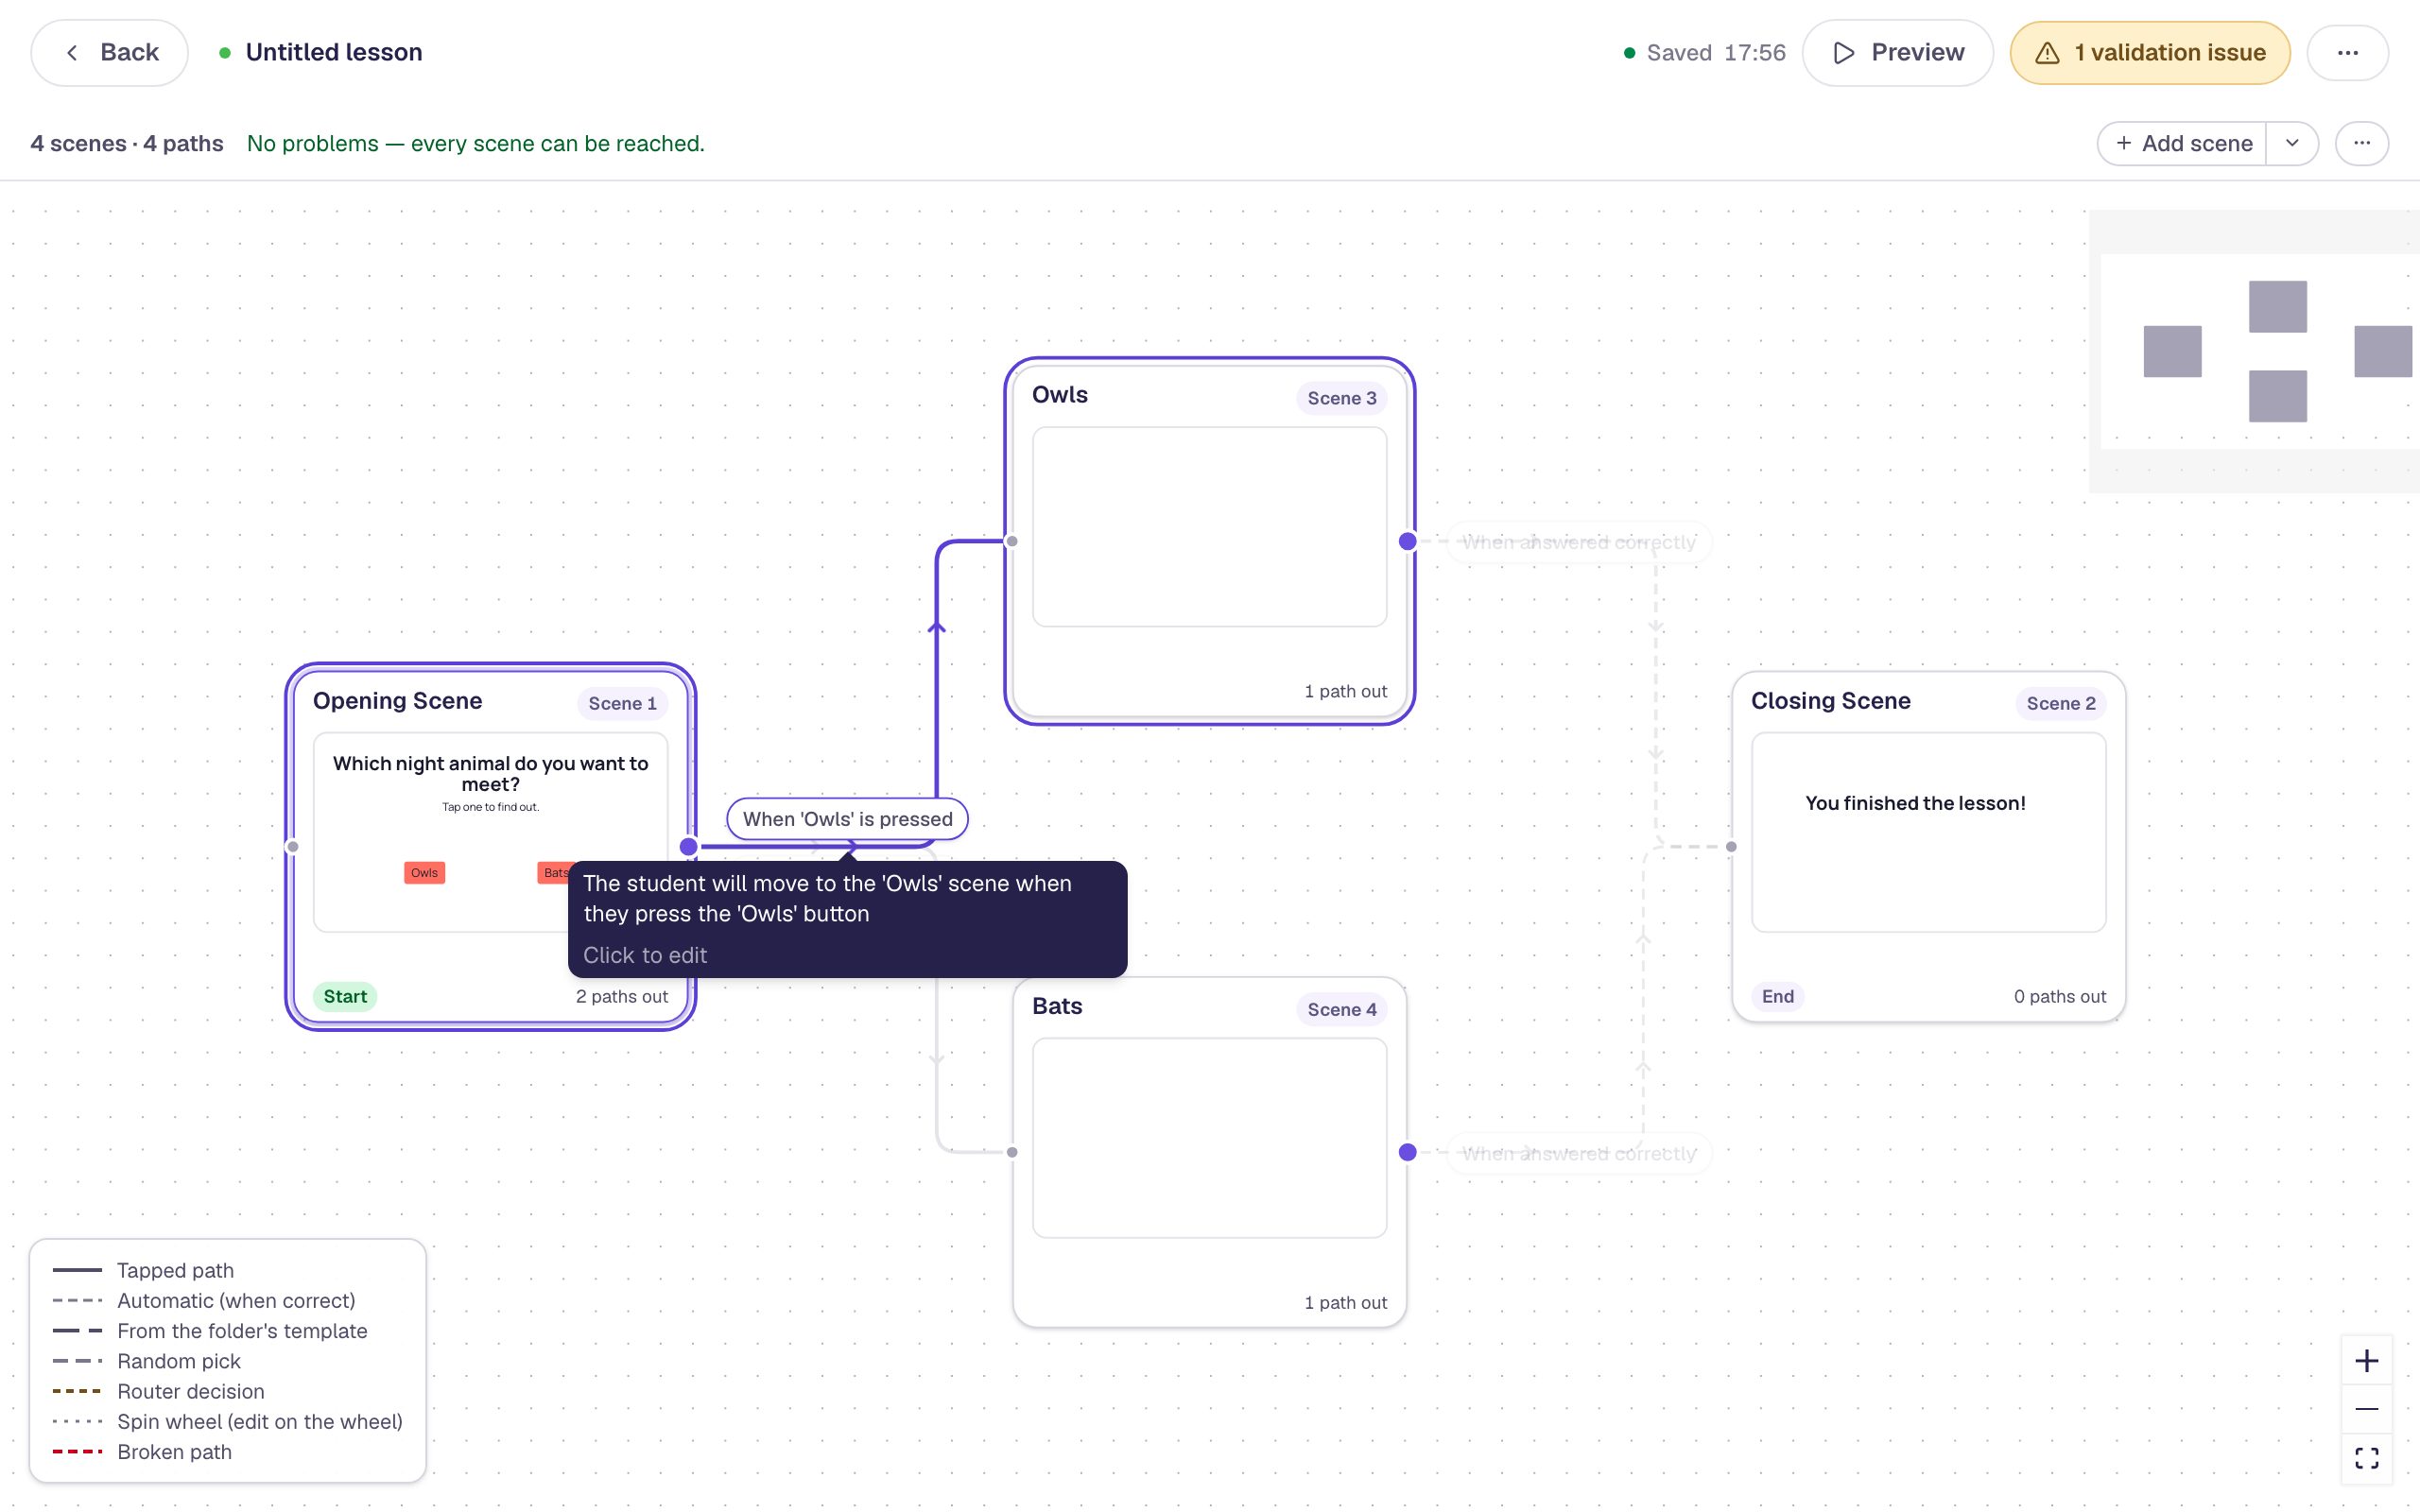
Hover over a path's label to check where it goes:
Step 4: Fill in each branch
Hover over the Owls card and click Edit. You're in the studio, on the new, empty scene. Add:
- A Heading that says
Owls. - A Body text with a fact:
An owl can turn its head almost all the way around.Set its Font Size to about 30 px. - A Button labelled
Continue, at 32 px, near the bottom. Name itOwls Continue.
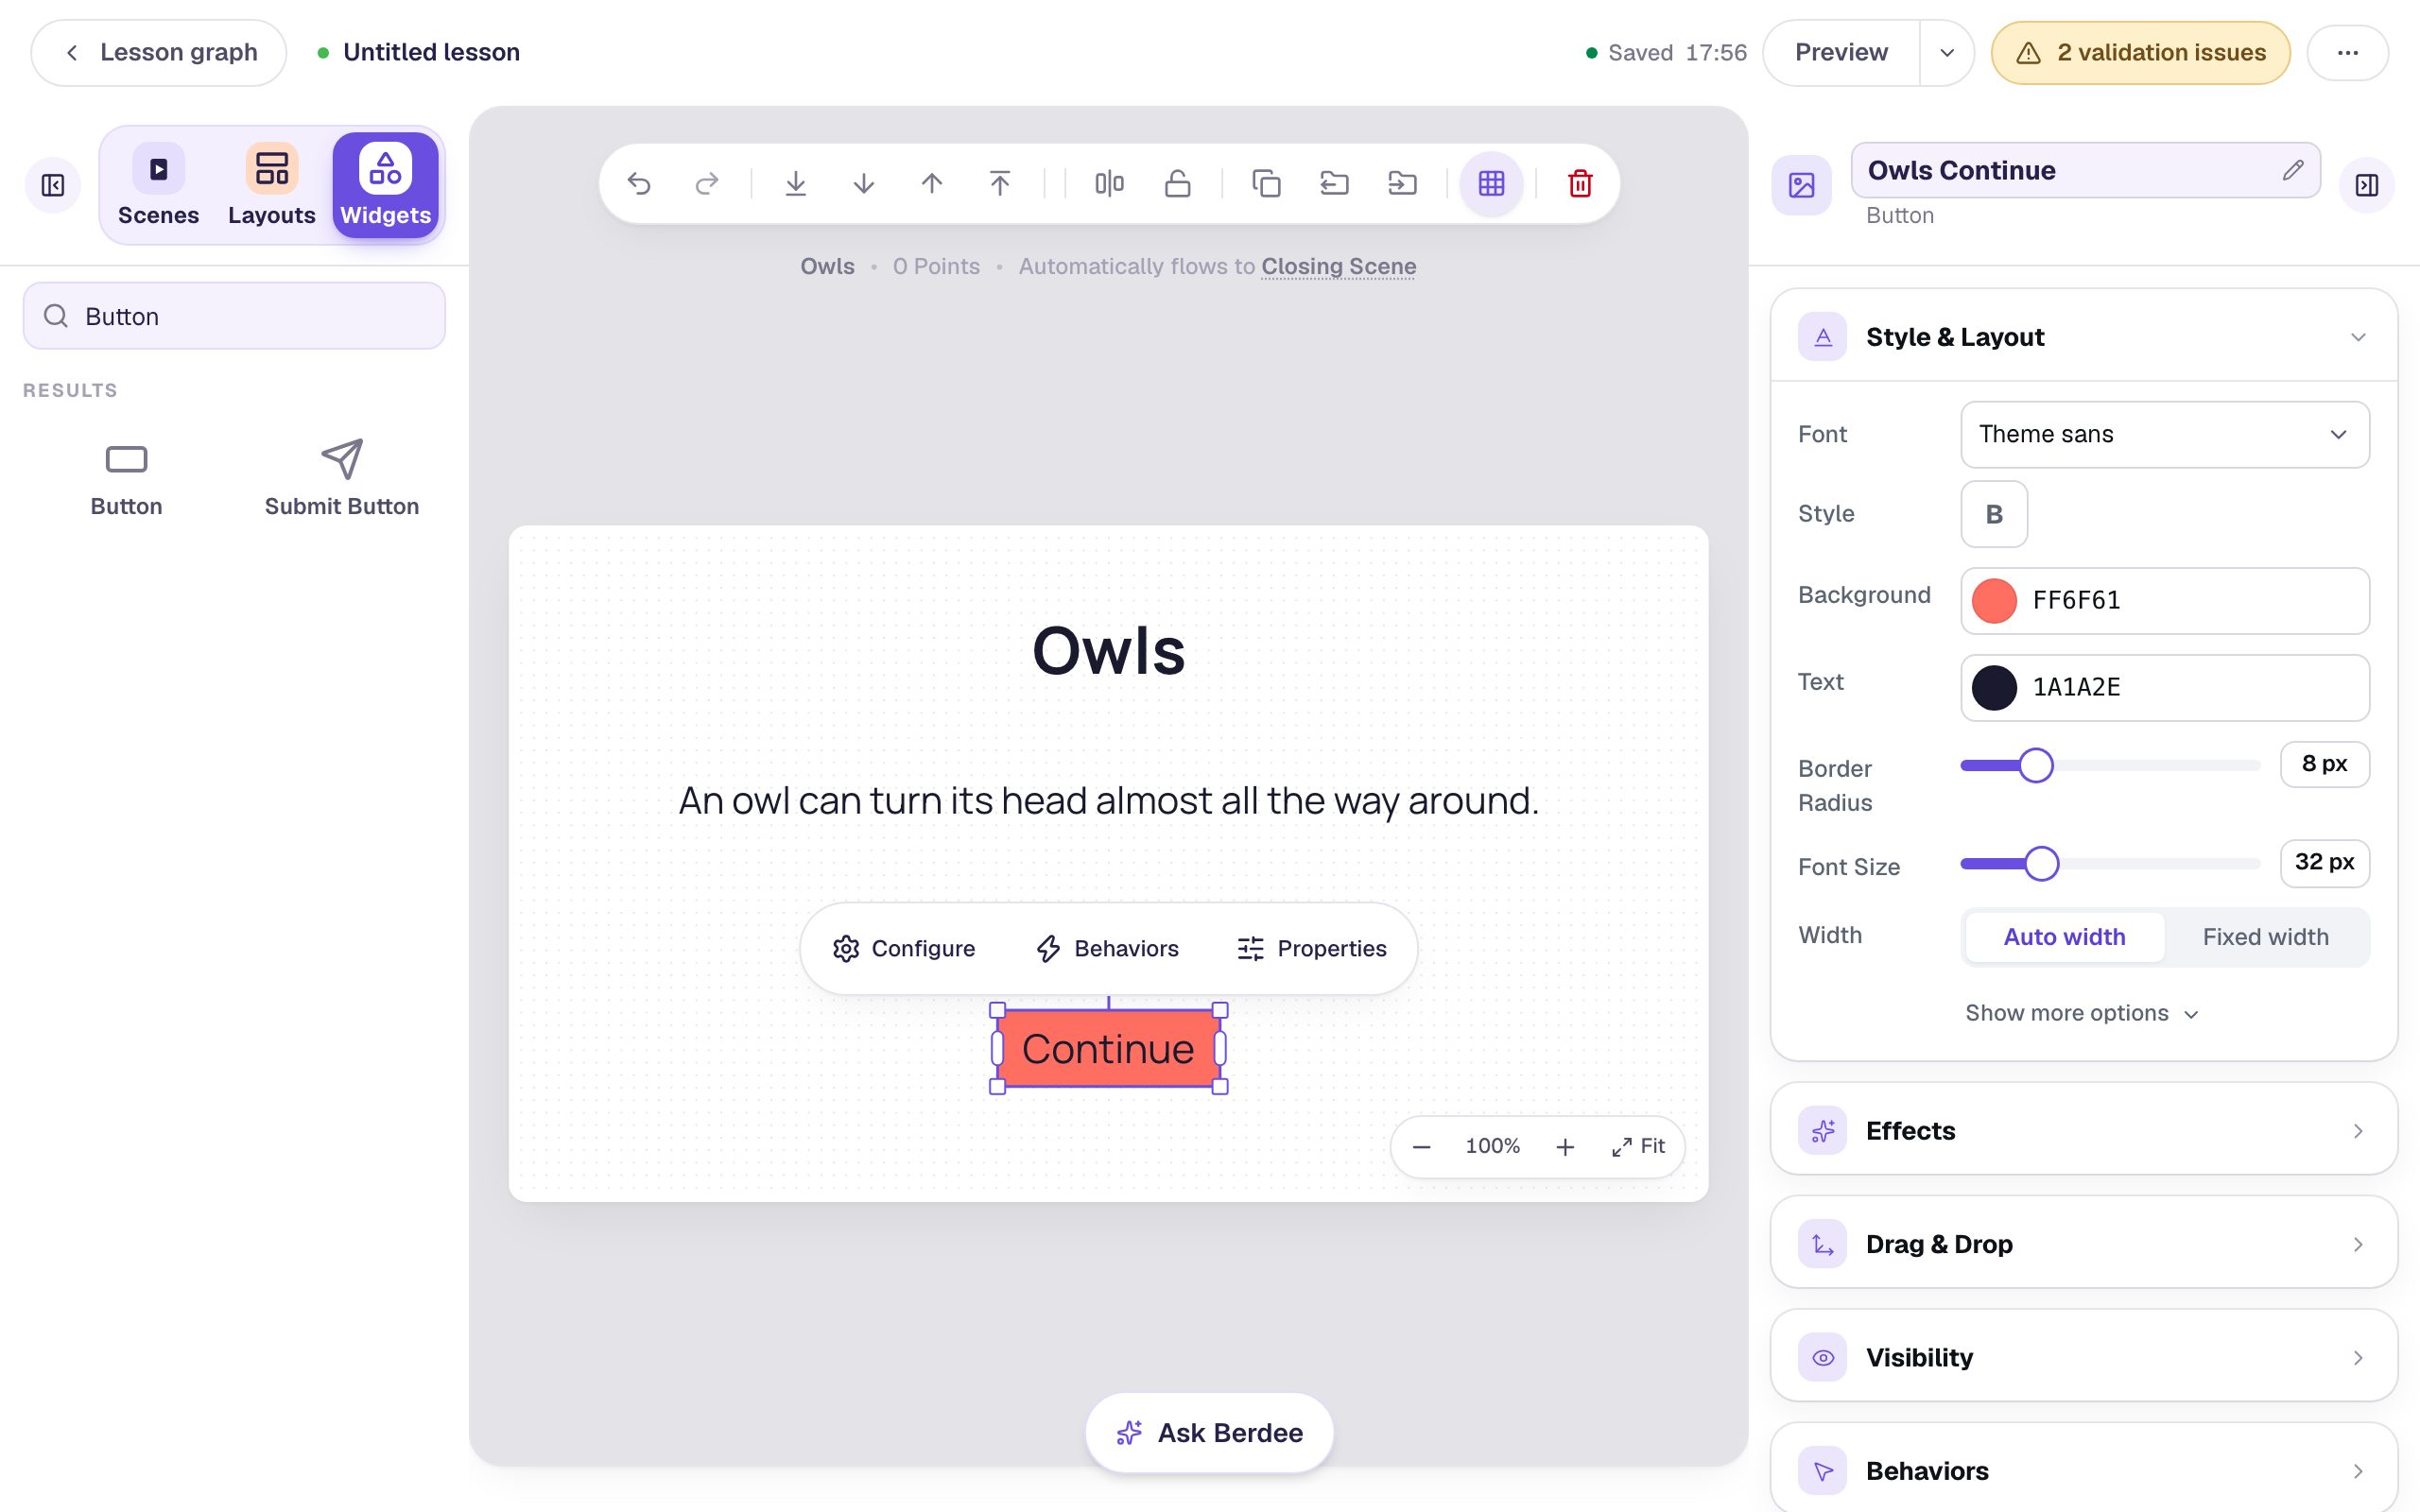
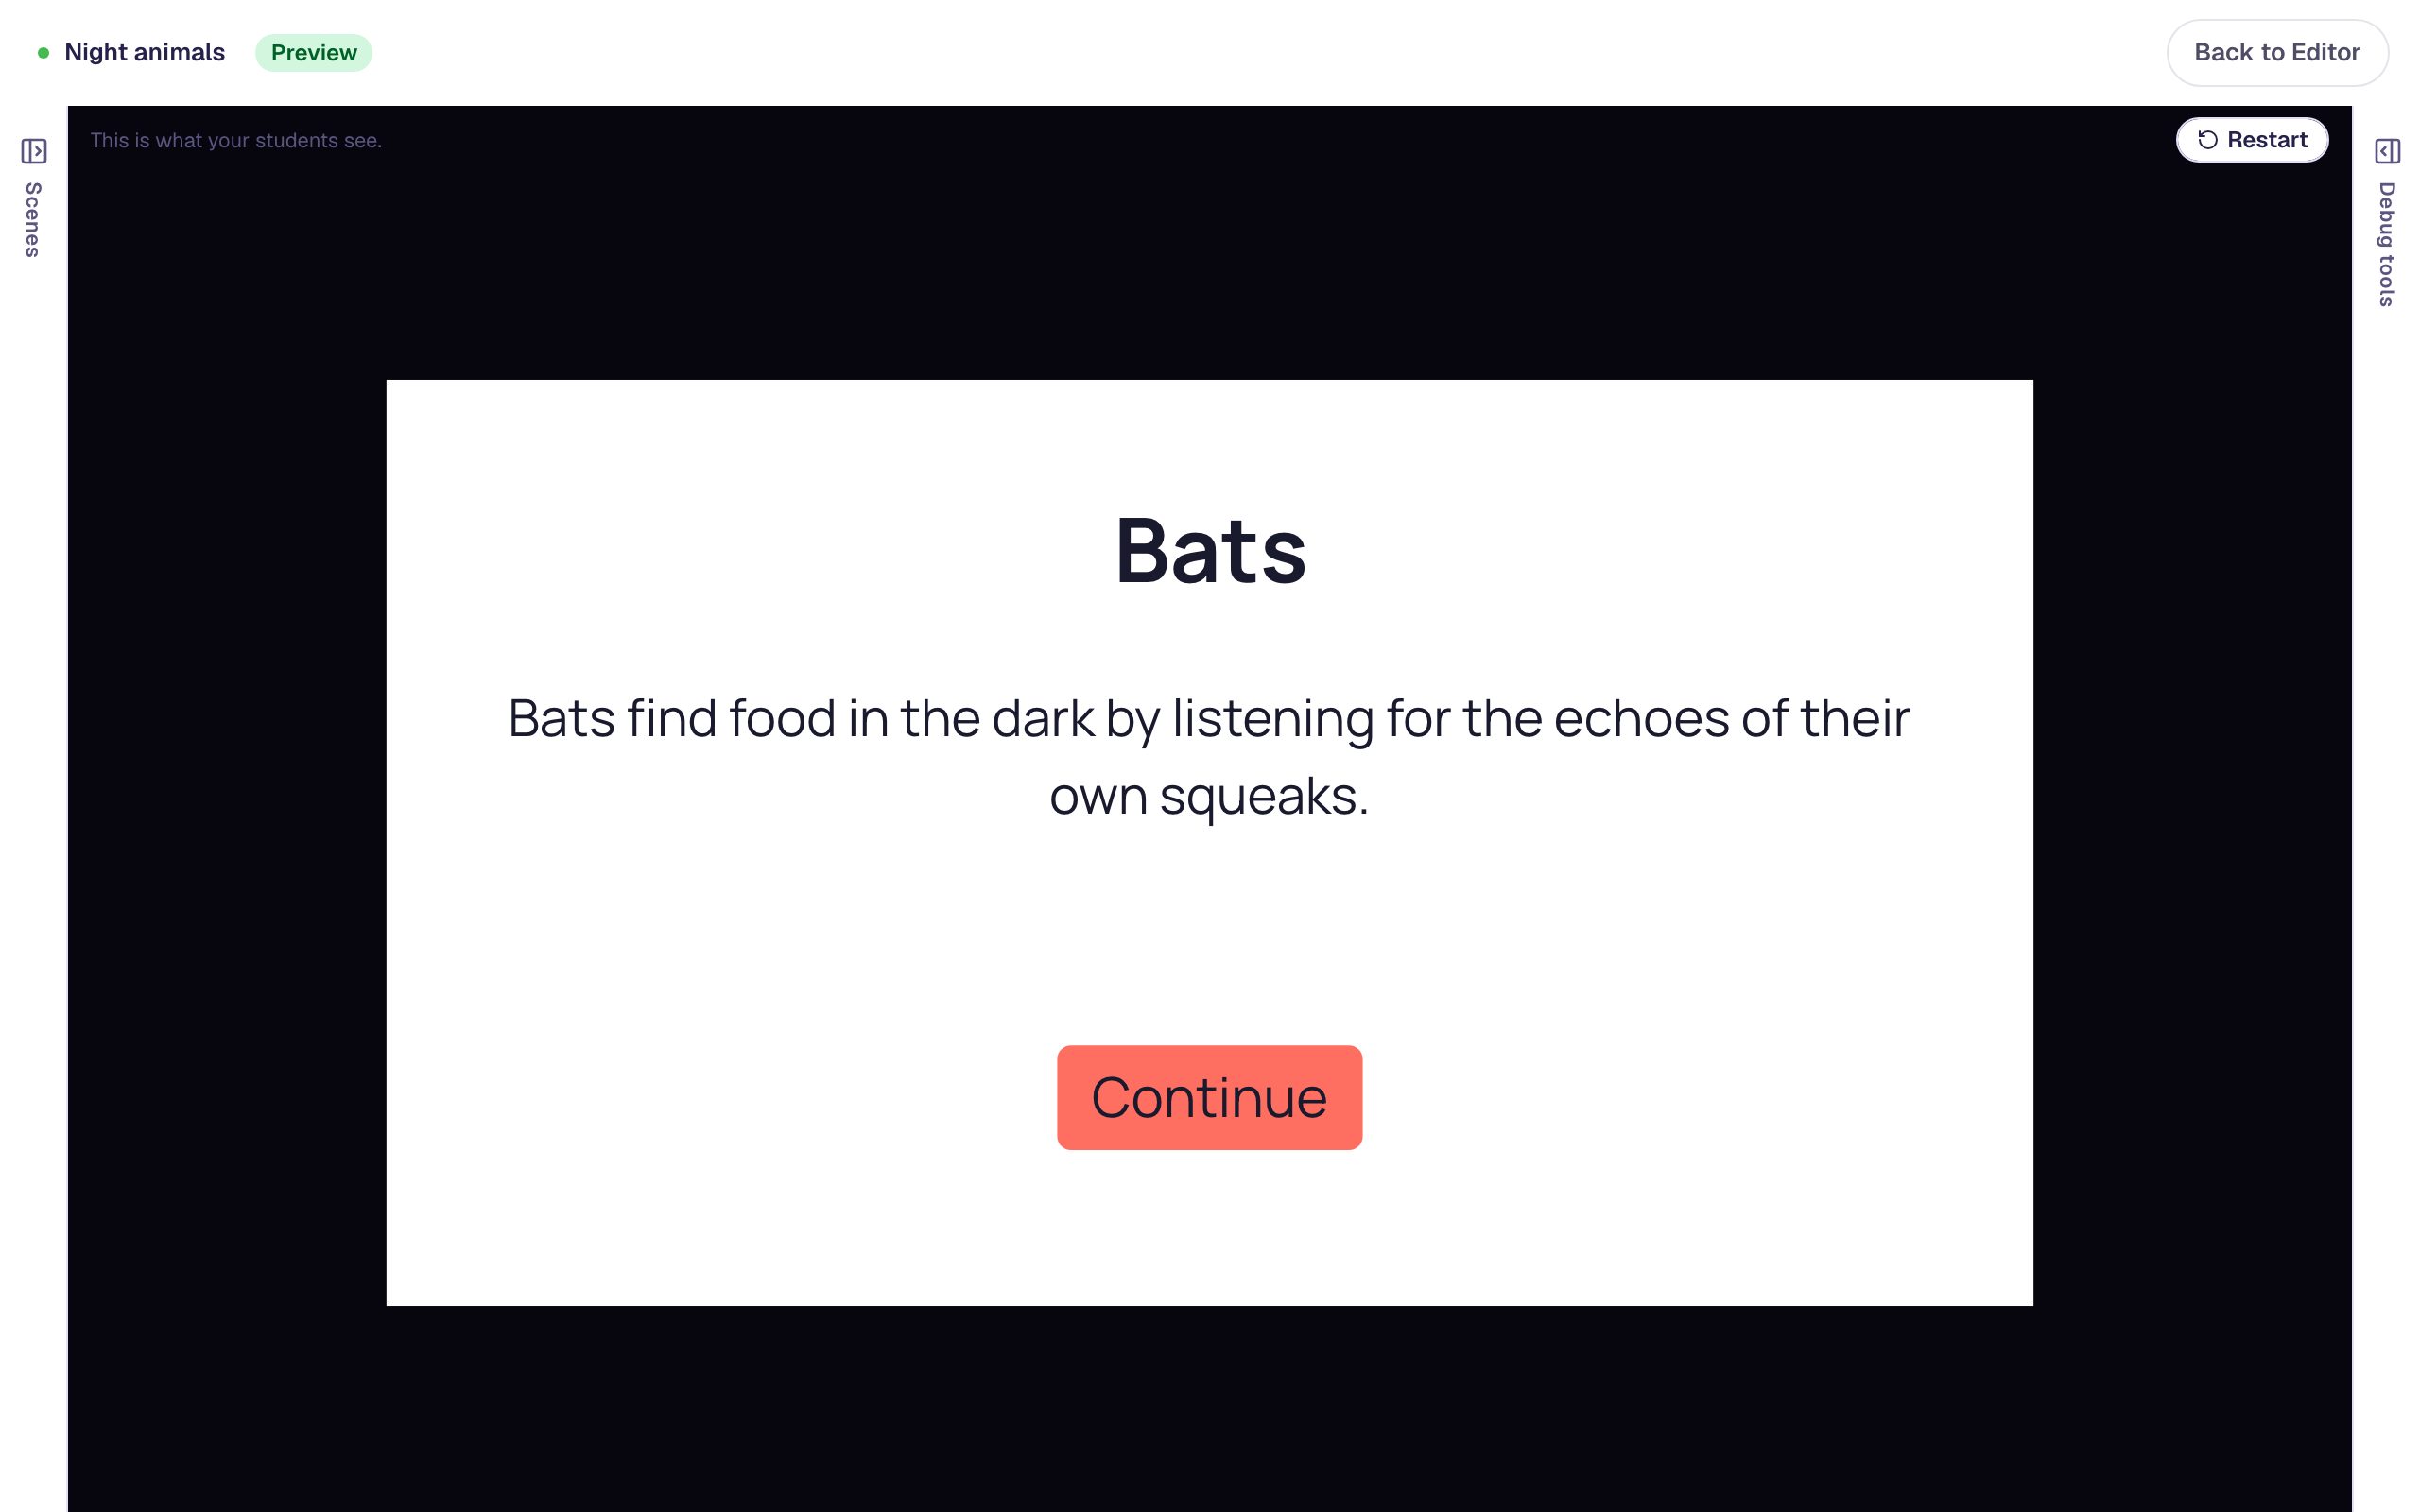
Click Lesson graph, open the Bats card with Edit, and build it the same way: a Bats heading, the fact Bats find food in the dark by listening for the echoes of their own squeaks., and a Continue button named Bats Continue.
Each scene's button can say Continue, but the names have to be different. Widget names are unique across the whole lesson, and different names keep the two buttons apart in the graph.
Step 5: Bring both paths back to the ending
Click Lesson graph. Now connect each branch to the Closing Scene, which is already in the lesson:
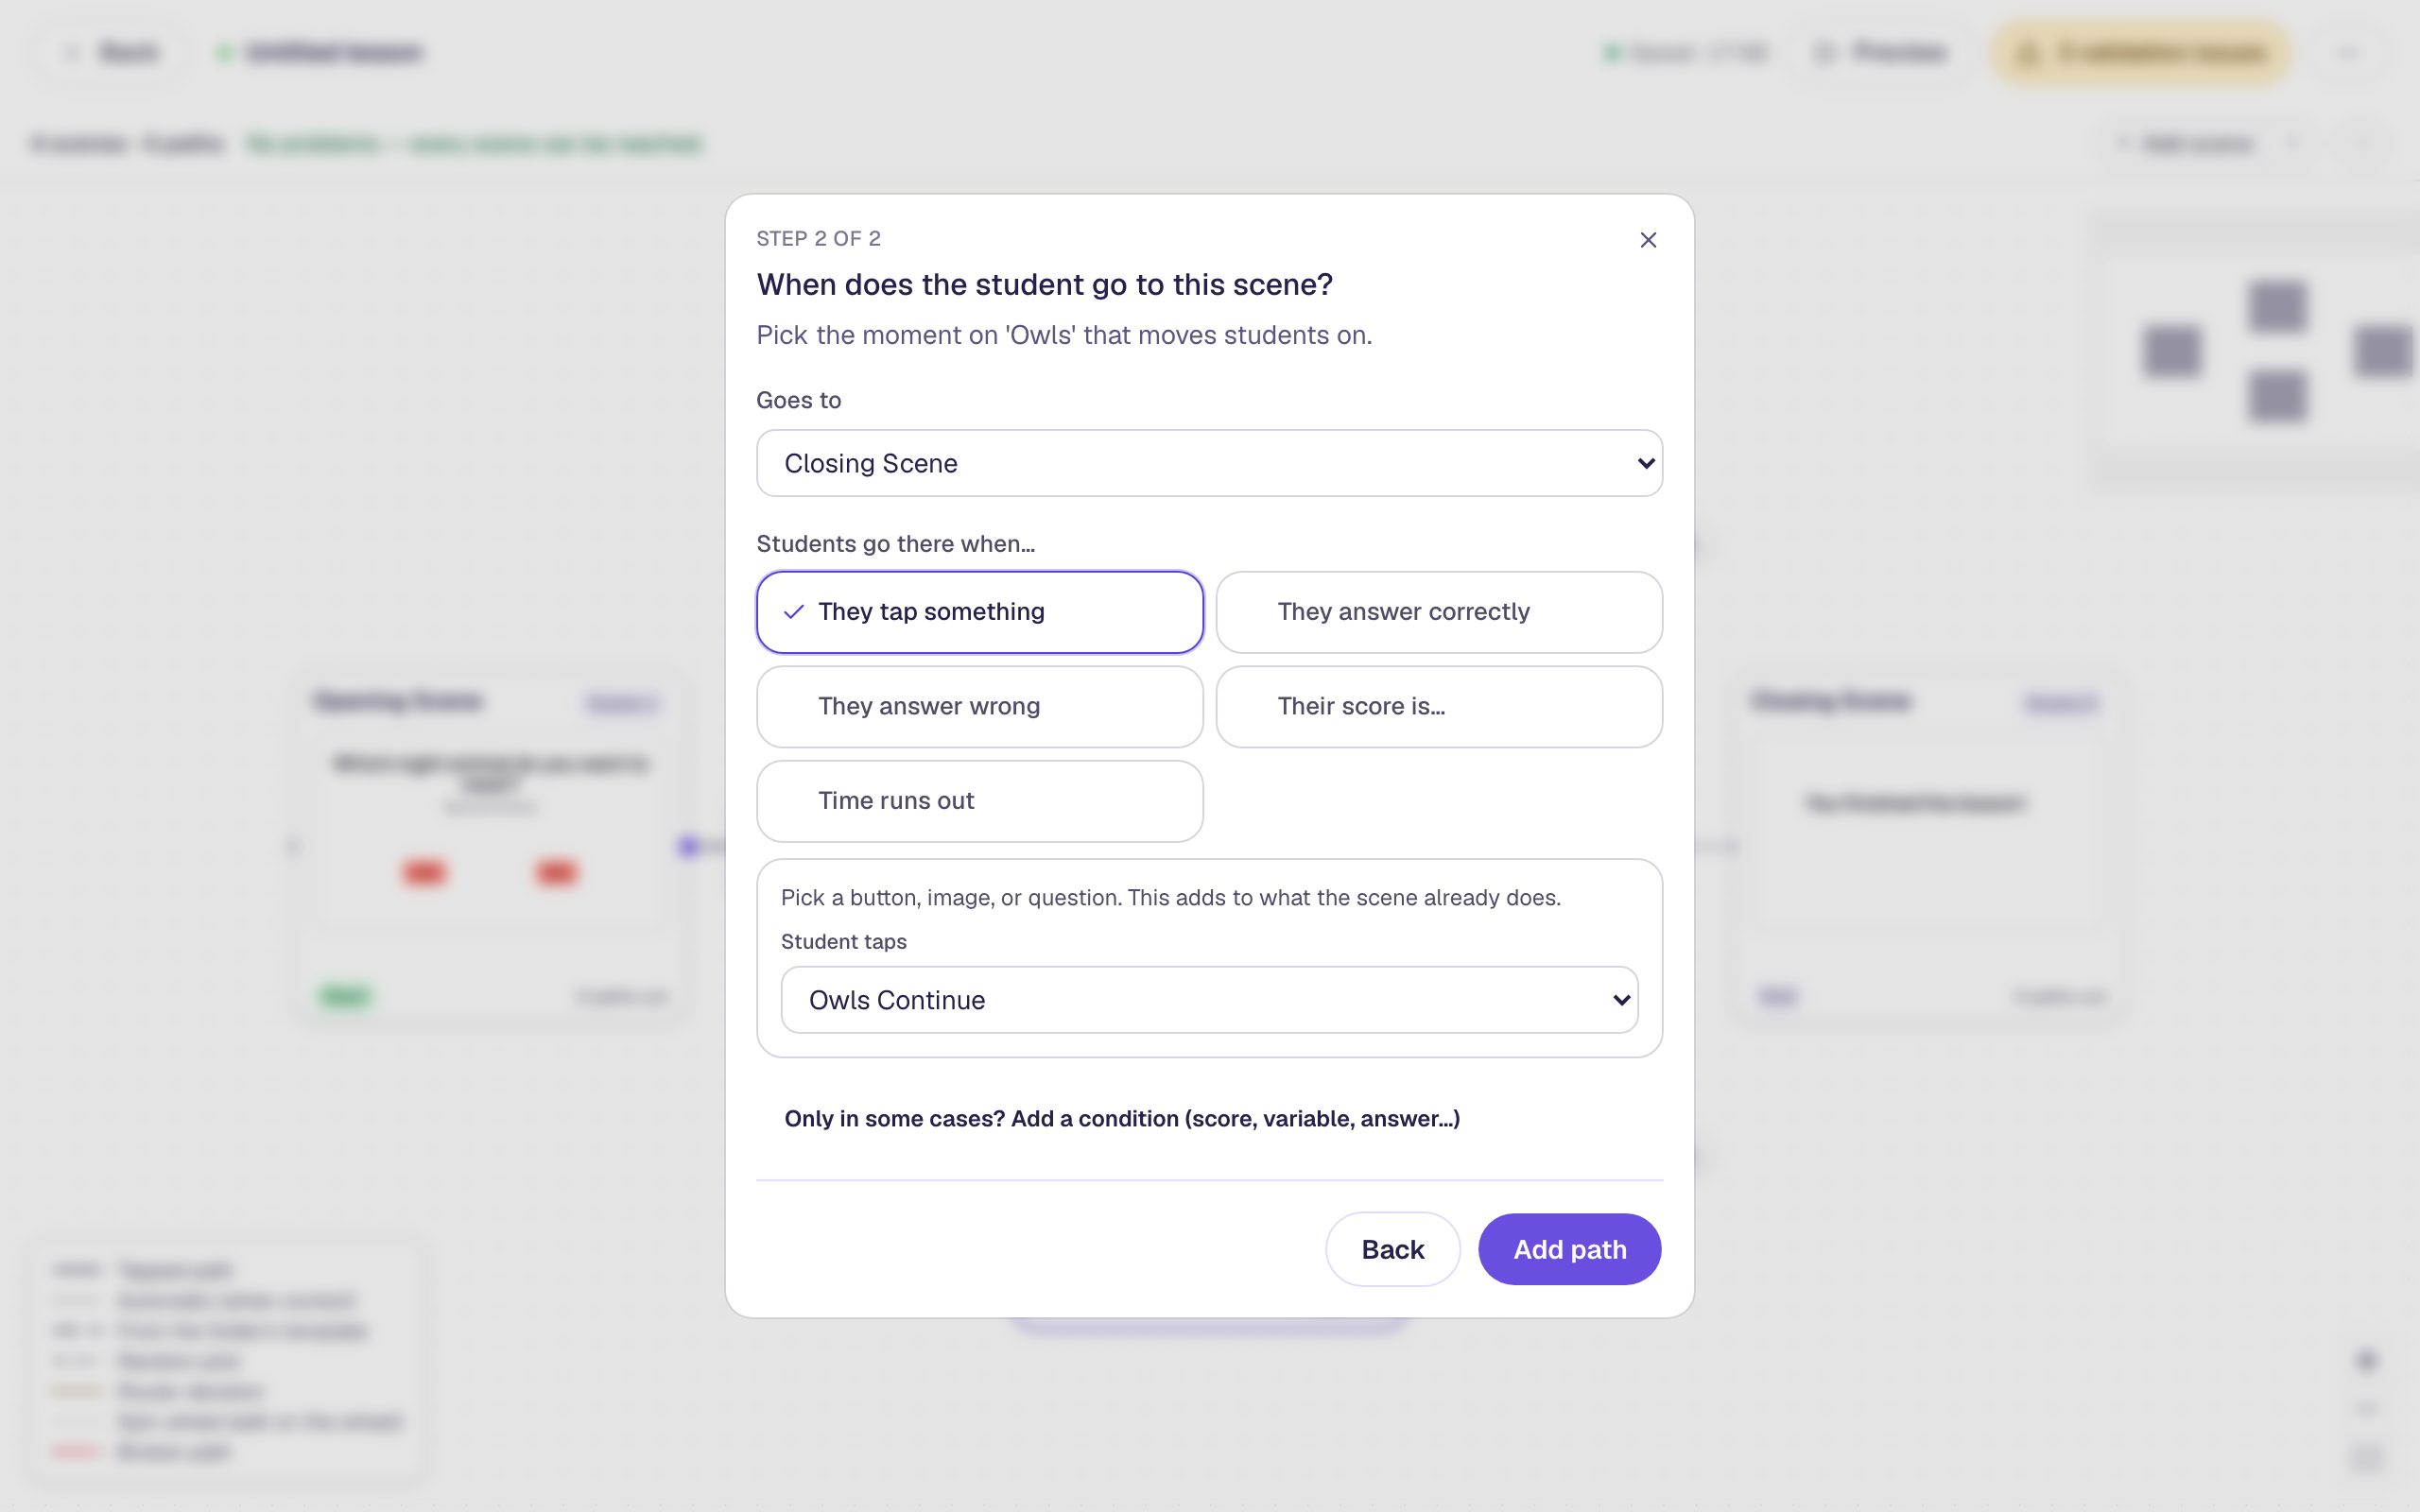
- Hover over the Owls card and click the dot on its right edge.
- Choose Or connect to a scene or router that's already in the lesson, then click Next.
- Set Goes to to Closing Scene.
- Leave They tap something selected, and set Student taps to Owls Continue.
- Click Add path.
Then do the same from the Bats card, with Student taps set to Bats Continue.
Step 6: Tidy up the leftover arrow
Look at the map. Both branches now reach the Closing Scene by a tapped path, but one of them may also still have a dashed When answered correctly arrow:
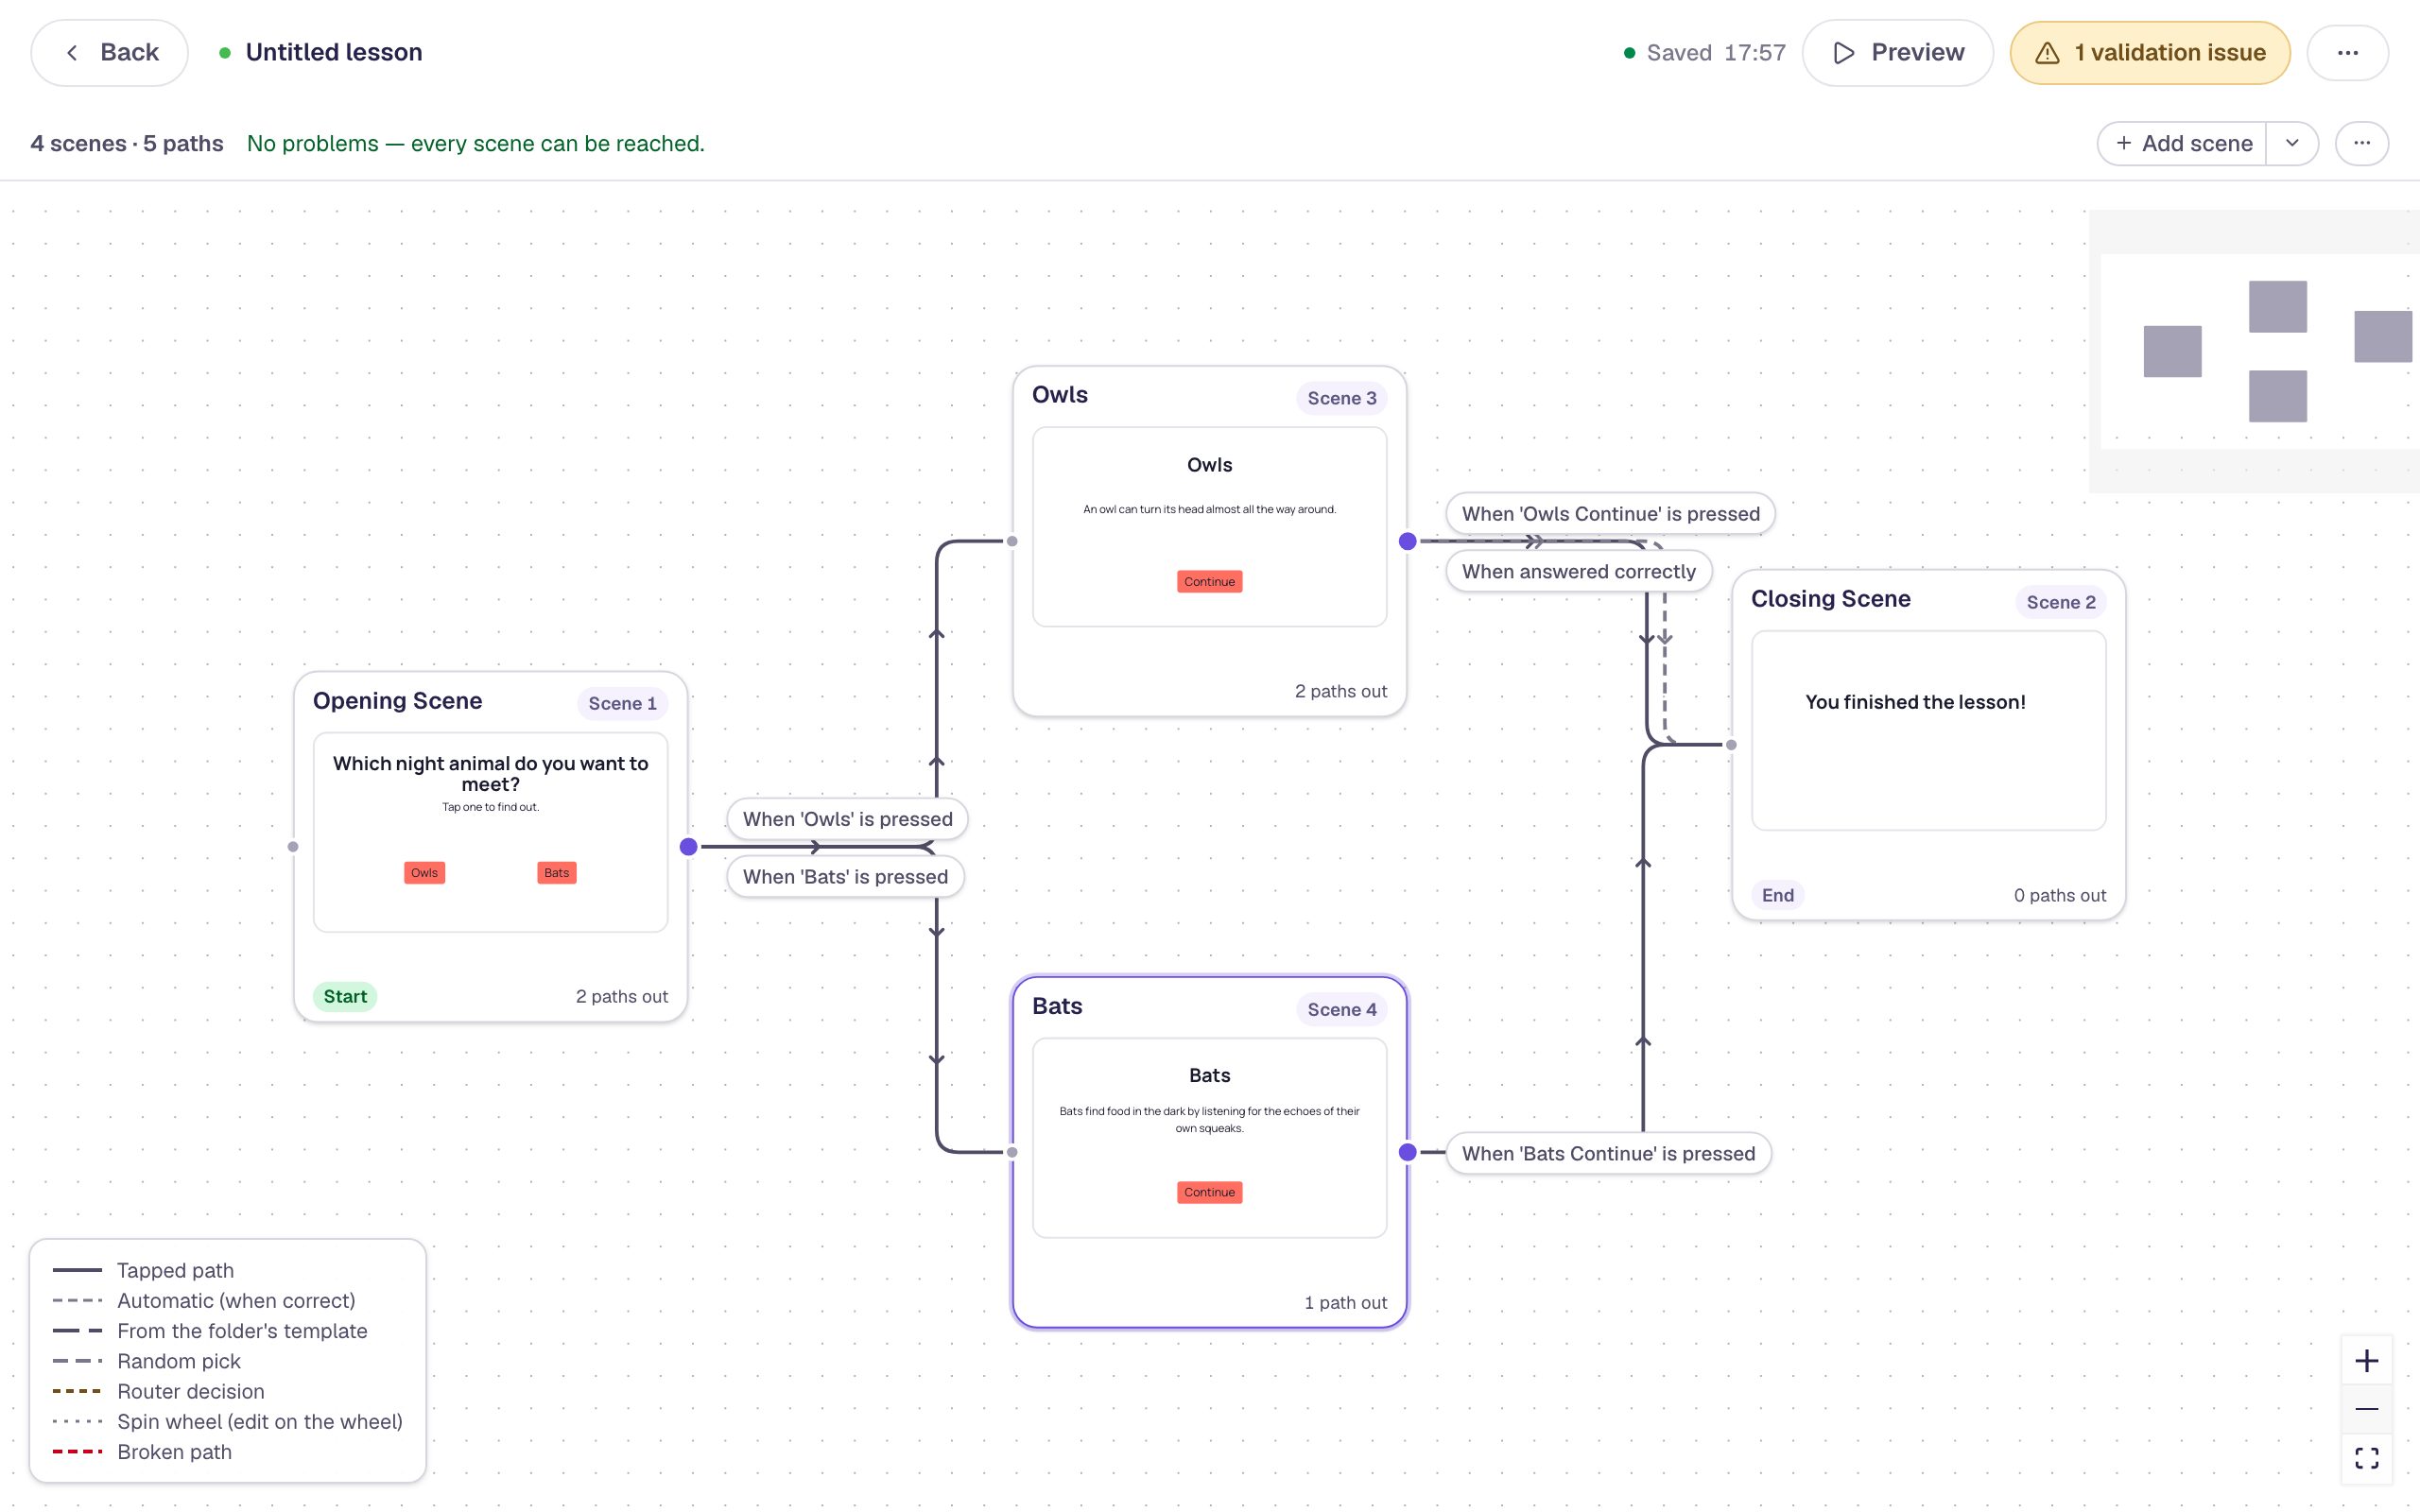
That arrow is left over from when you added the second branch. It won't do anything, because there's no question on the scene, but a clean map is easier to check. Click the When answered correctly label, then click Remove path.
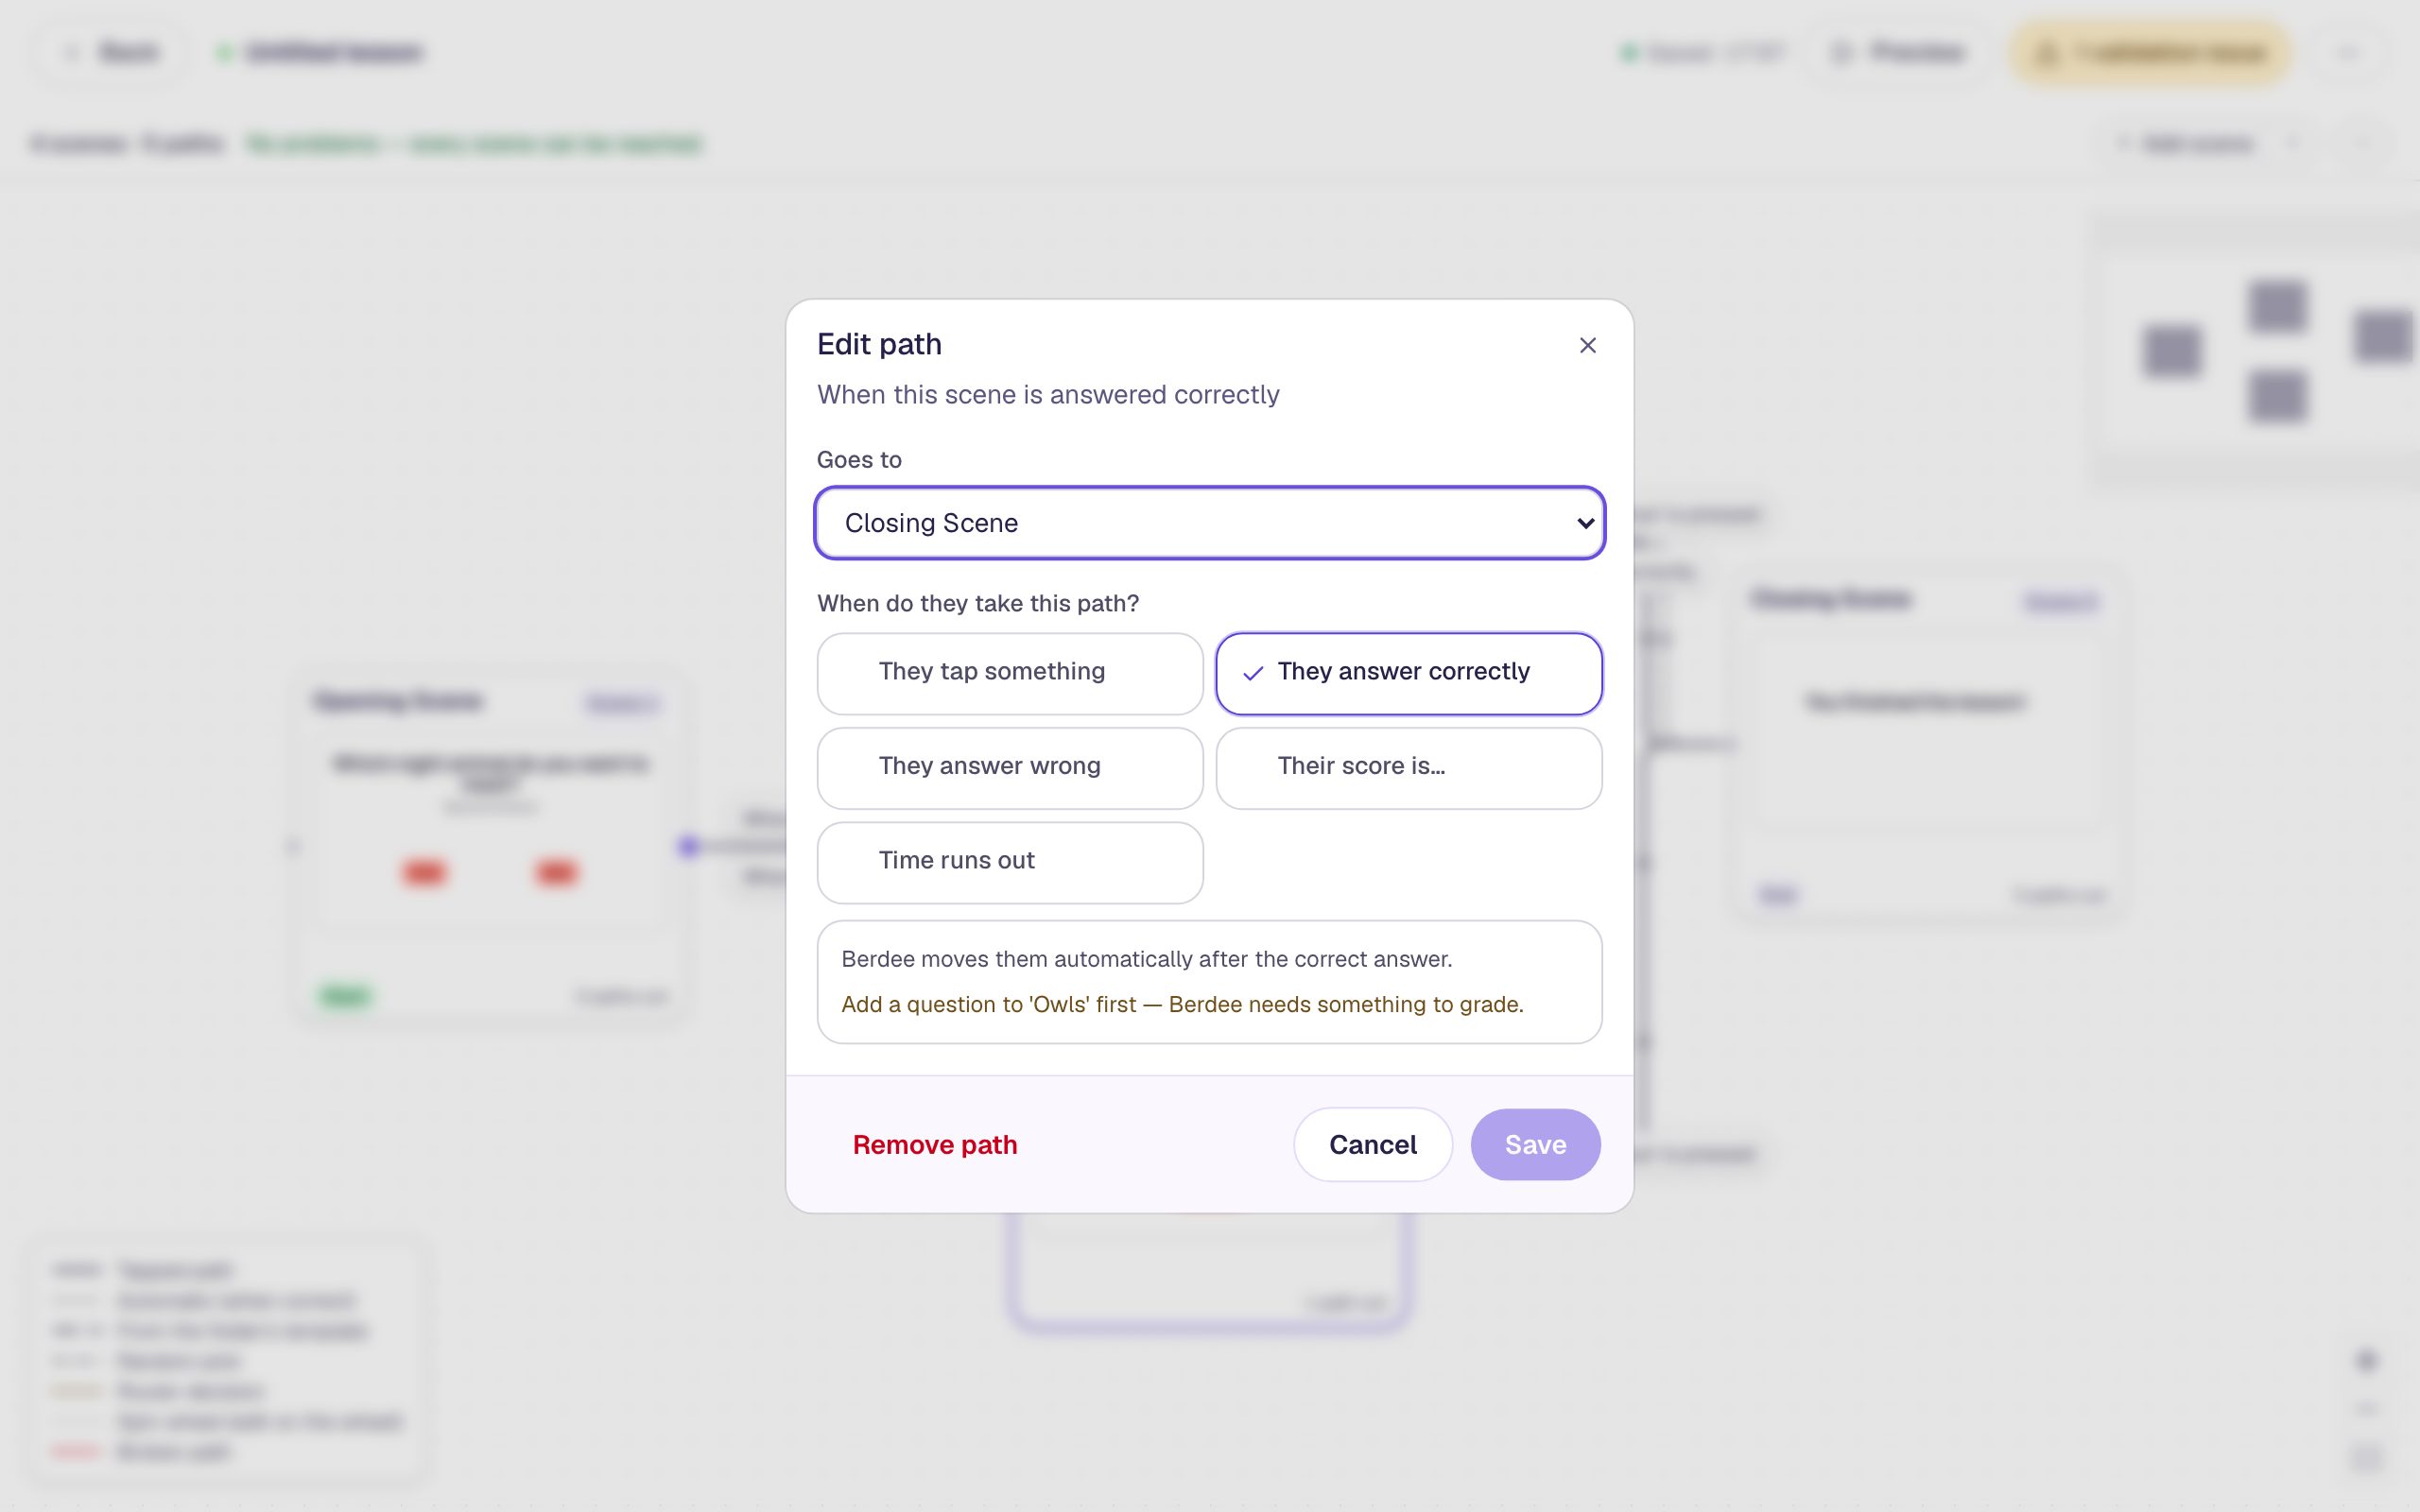
Here's the finished lesson. The choice splits into two paths, each branch has one way out, and both meet at the Closing Scene. The strip at the top says No problems — every scene can be reached.
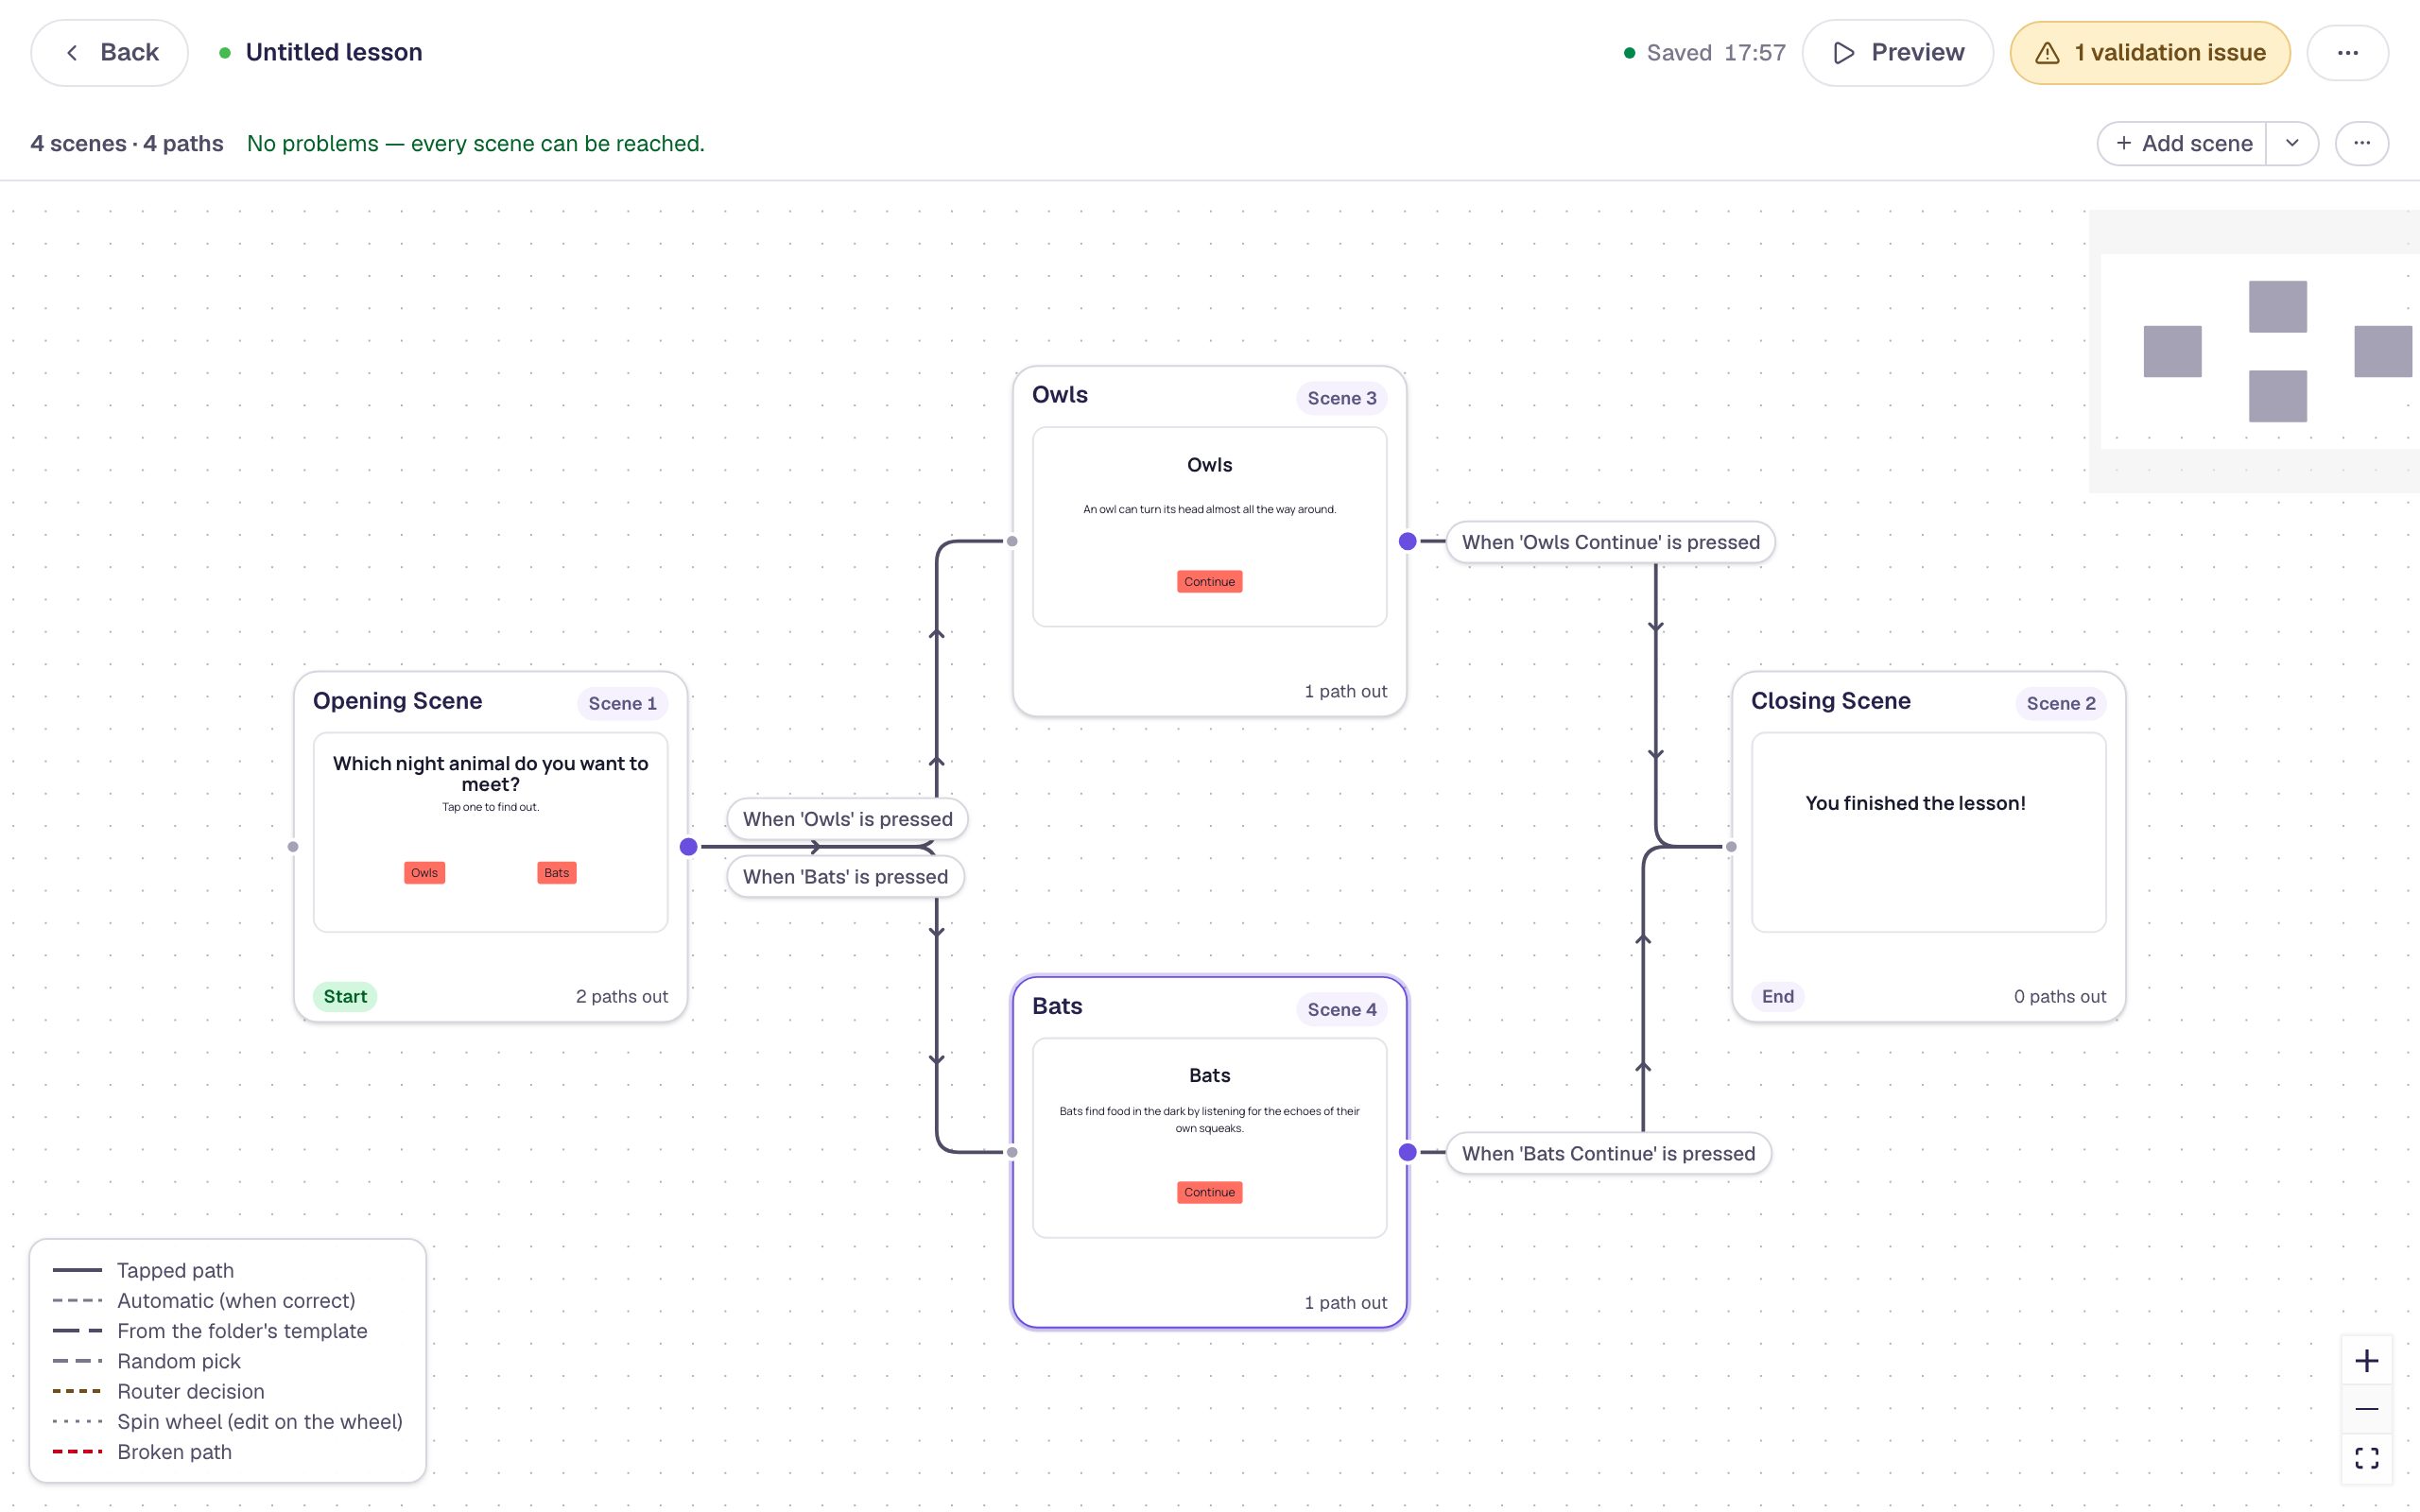
The yellow pill at the top still shows one item, No Lesson-Submit Button:
Berdee wants a Submit button set to Lesson somewhere in every lesson before it publishes. You don't need one to preview. When you're ready to publish, add a small one in a corner of either branch. Build your first quiz question shows how.
Step 7: Try both paths in preview
Click Preview at the top. From the graph, preview always starts at the opening scene. Take one path, then restart and take the other:
Tap Owls, and the owl scene appears:
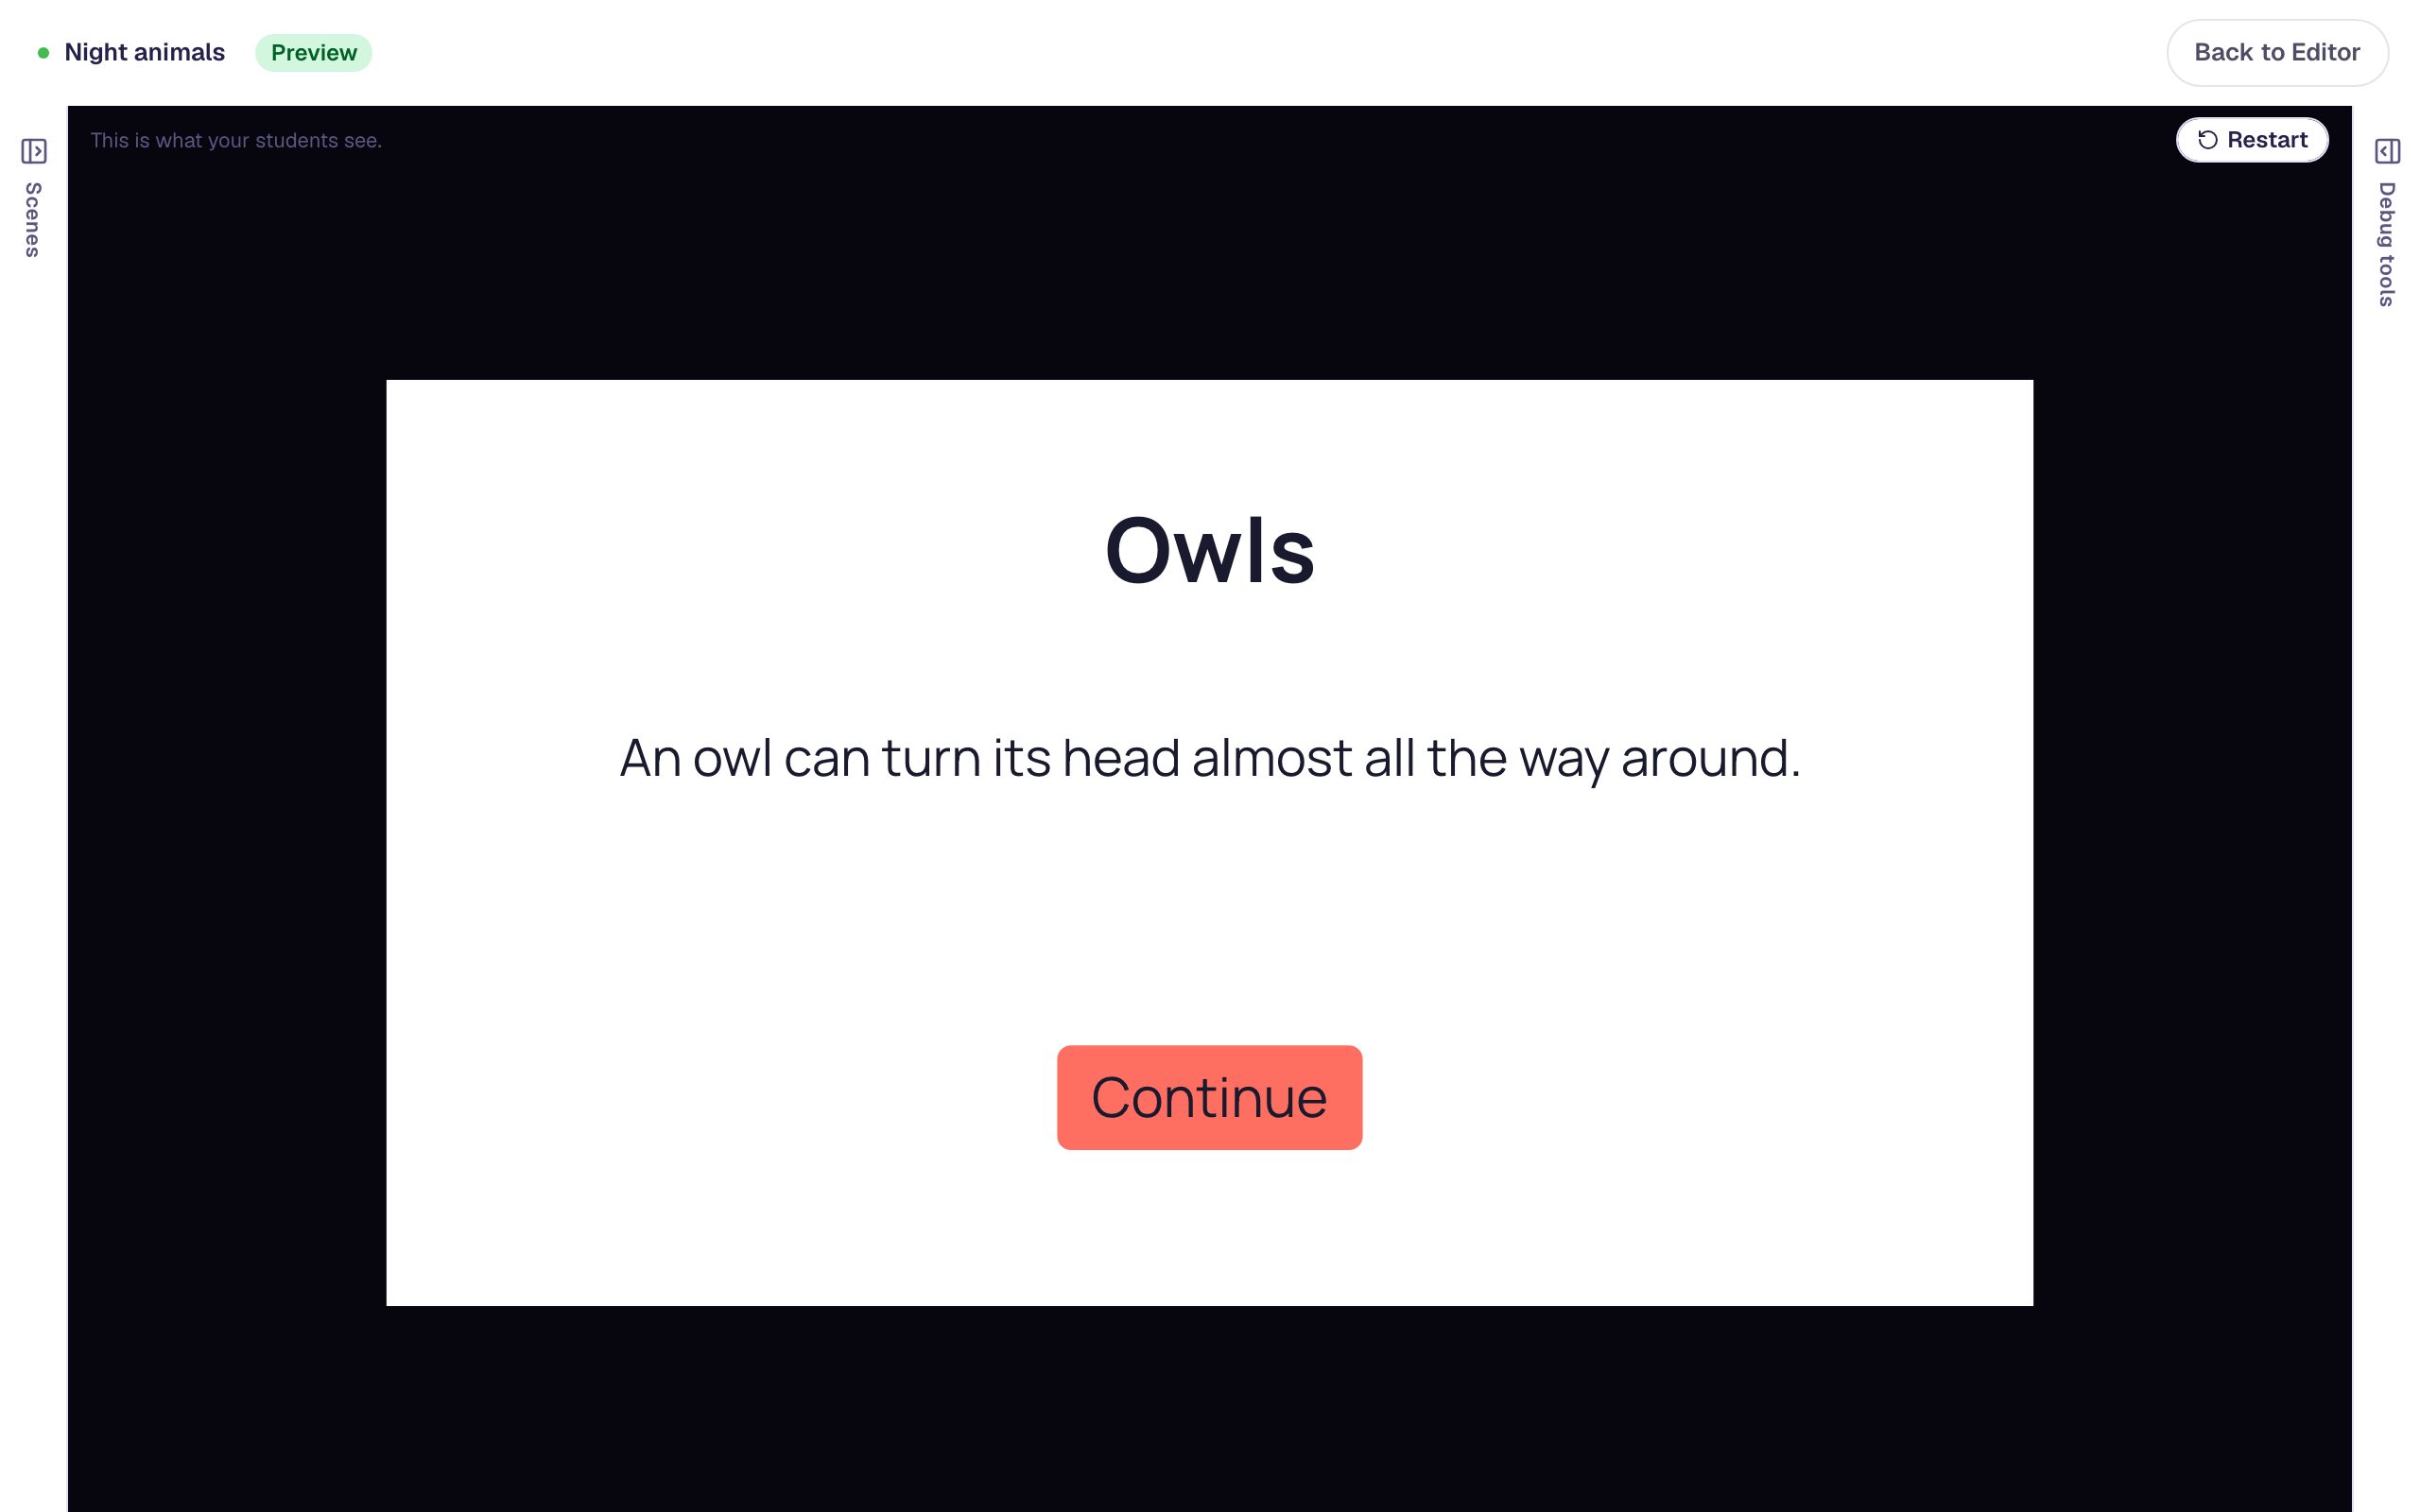
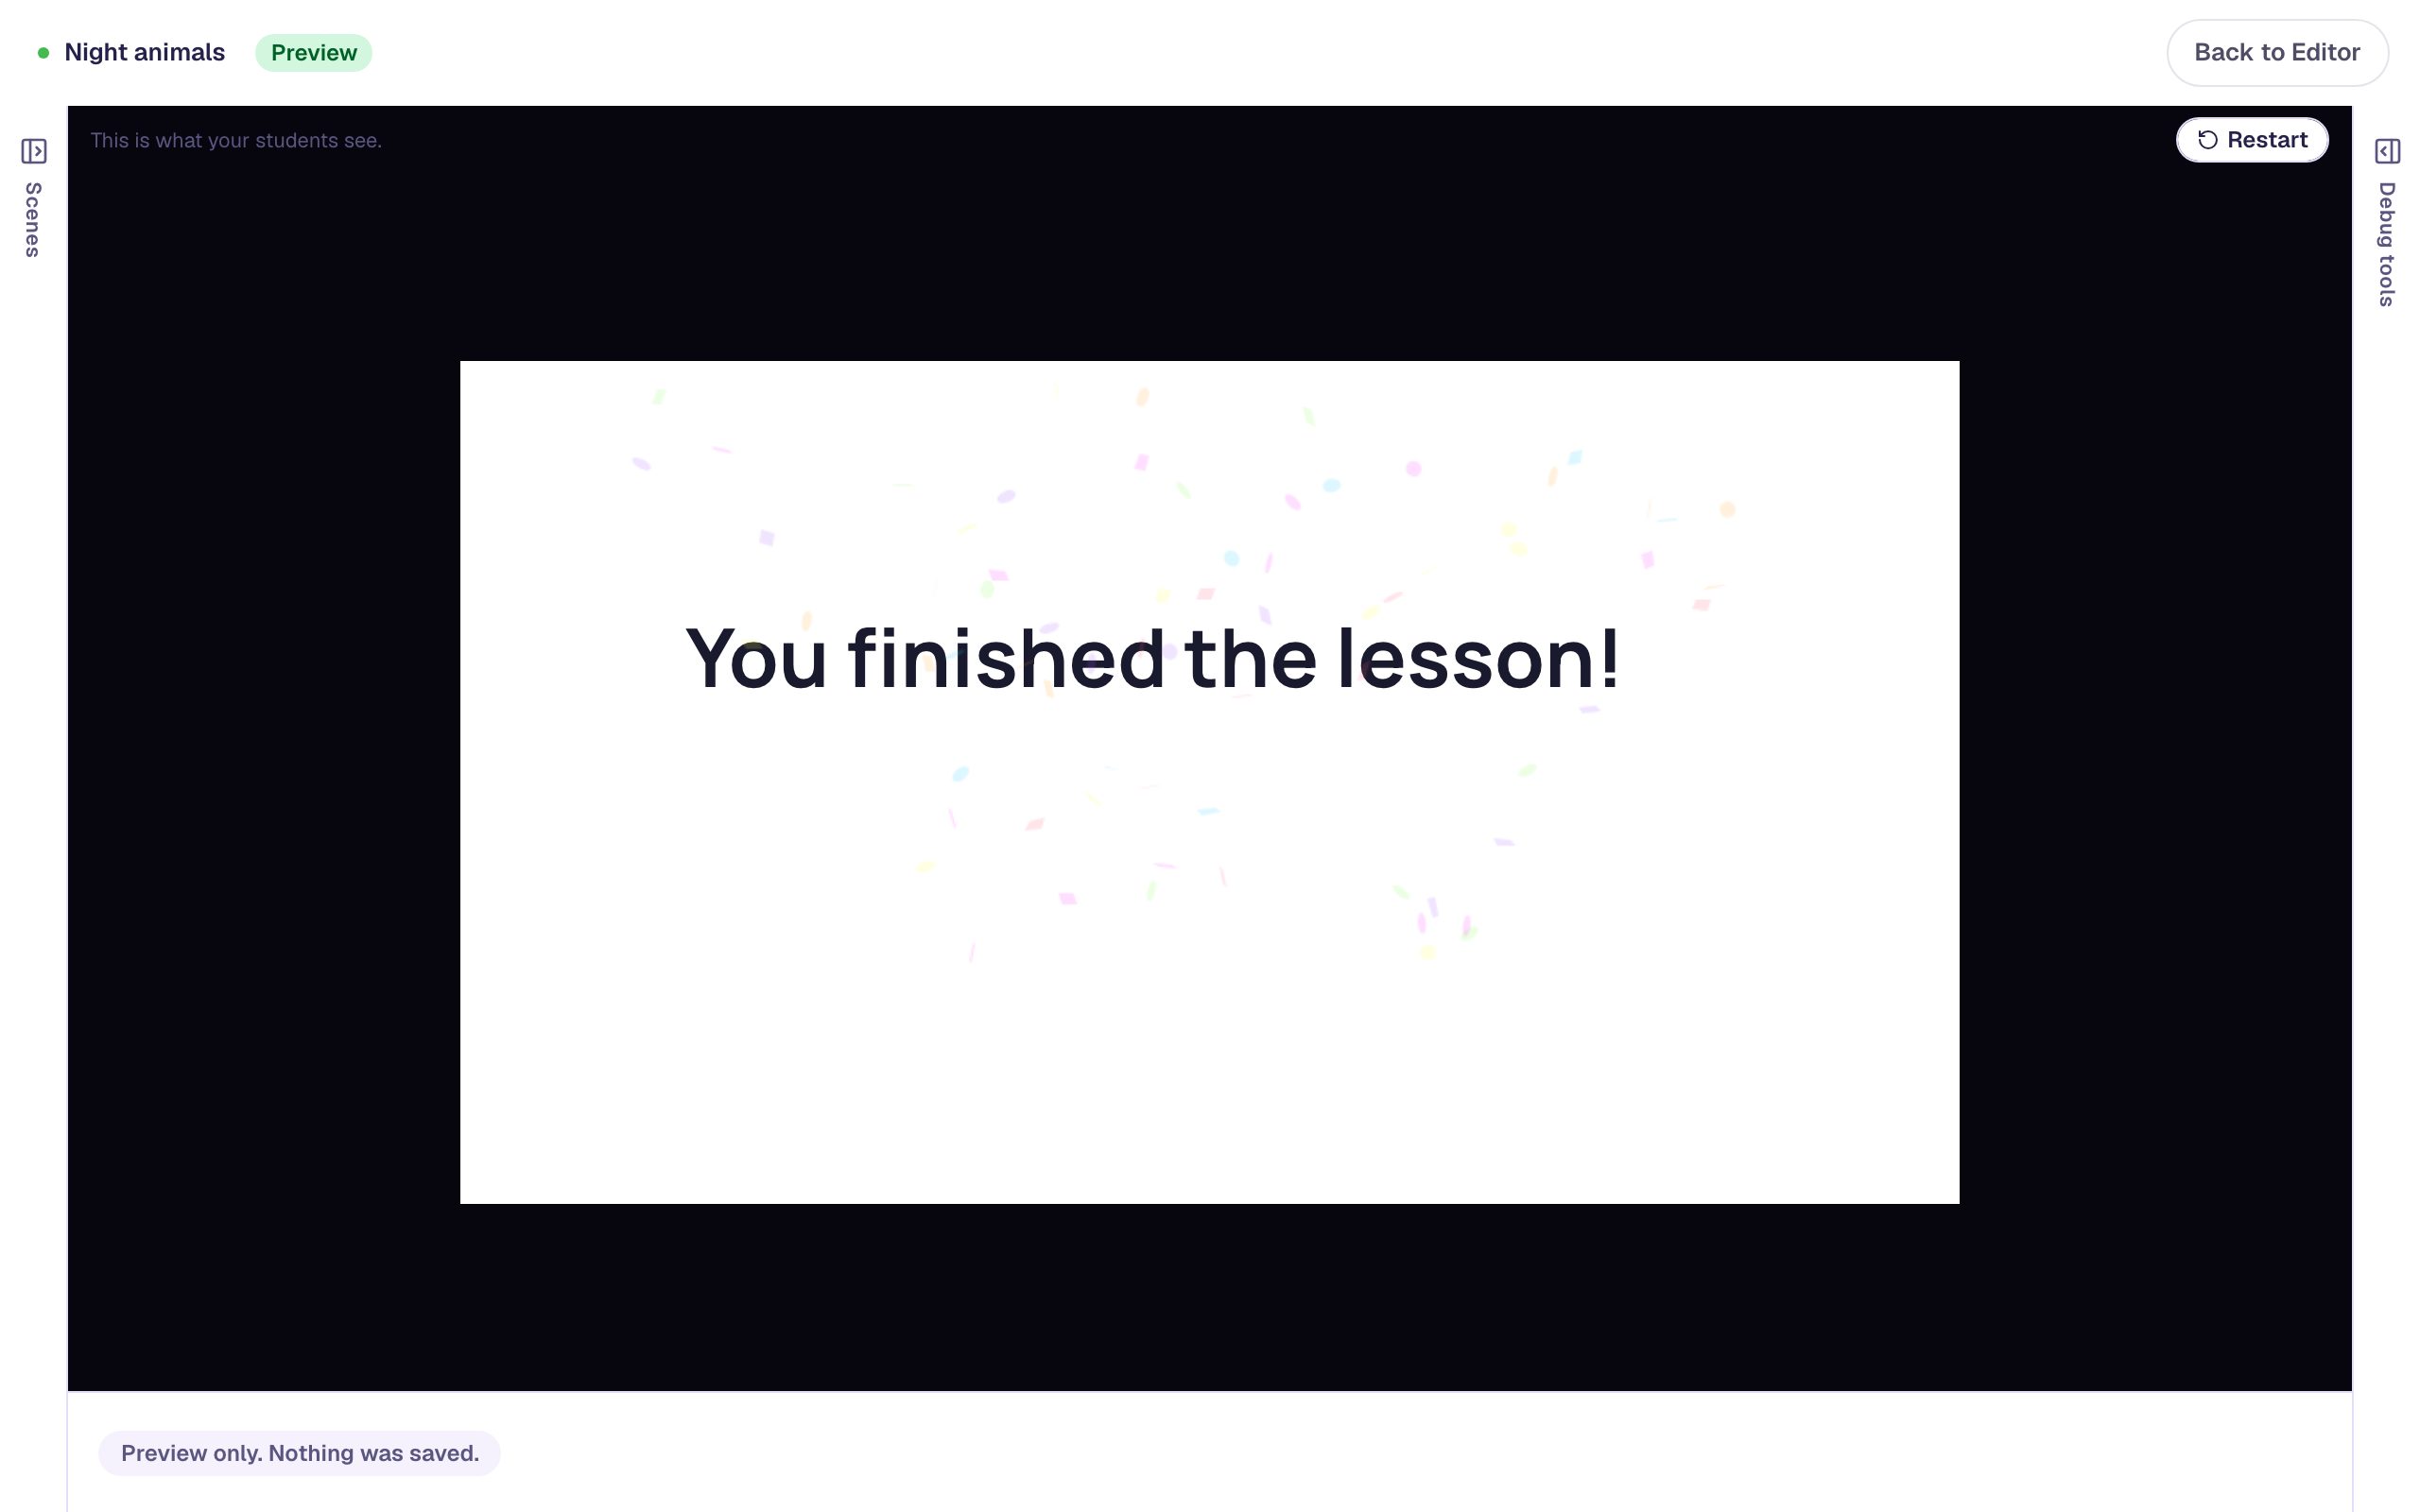
Tap Continue to reach the ending. This lesson has no questions, so the ending shows no score, only the finish message:
Click Restart and tap Bats this time. You get the bat scene instead, and its Continue button leads to the same ending.
What you built
You built a lesson that lets each student decide where to go:
- a choice scene with two Buttons, each named after its label,
- a They tap something path from each button to its own new scene,
- a Continue button on each branch with a tapped path to the Closing Scene, and
- a clean map with one way out of every scene.
To offer more choices, add more buttons and repeat Step 3 for each one. To let students visit every branch and come back to choose again, see Share working buttons across scenes with a layout, which gives every branch one shared Back to the map button. To add a quiz question to a branch, see Show an explanation when a student gets it wrong. Questions can lock a student's answers, so lead each branch forward to the ending, never back to a question the student has already submitted.
Make this lesson yours
Add the lesson you just watched being built to your account, then change it for your class: your questions, your pictures, your colors.
Free to sign up, and you'll come straight back here. I have an account