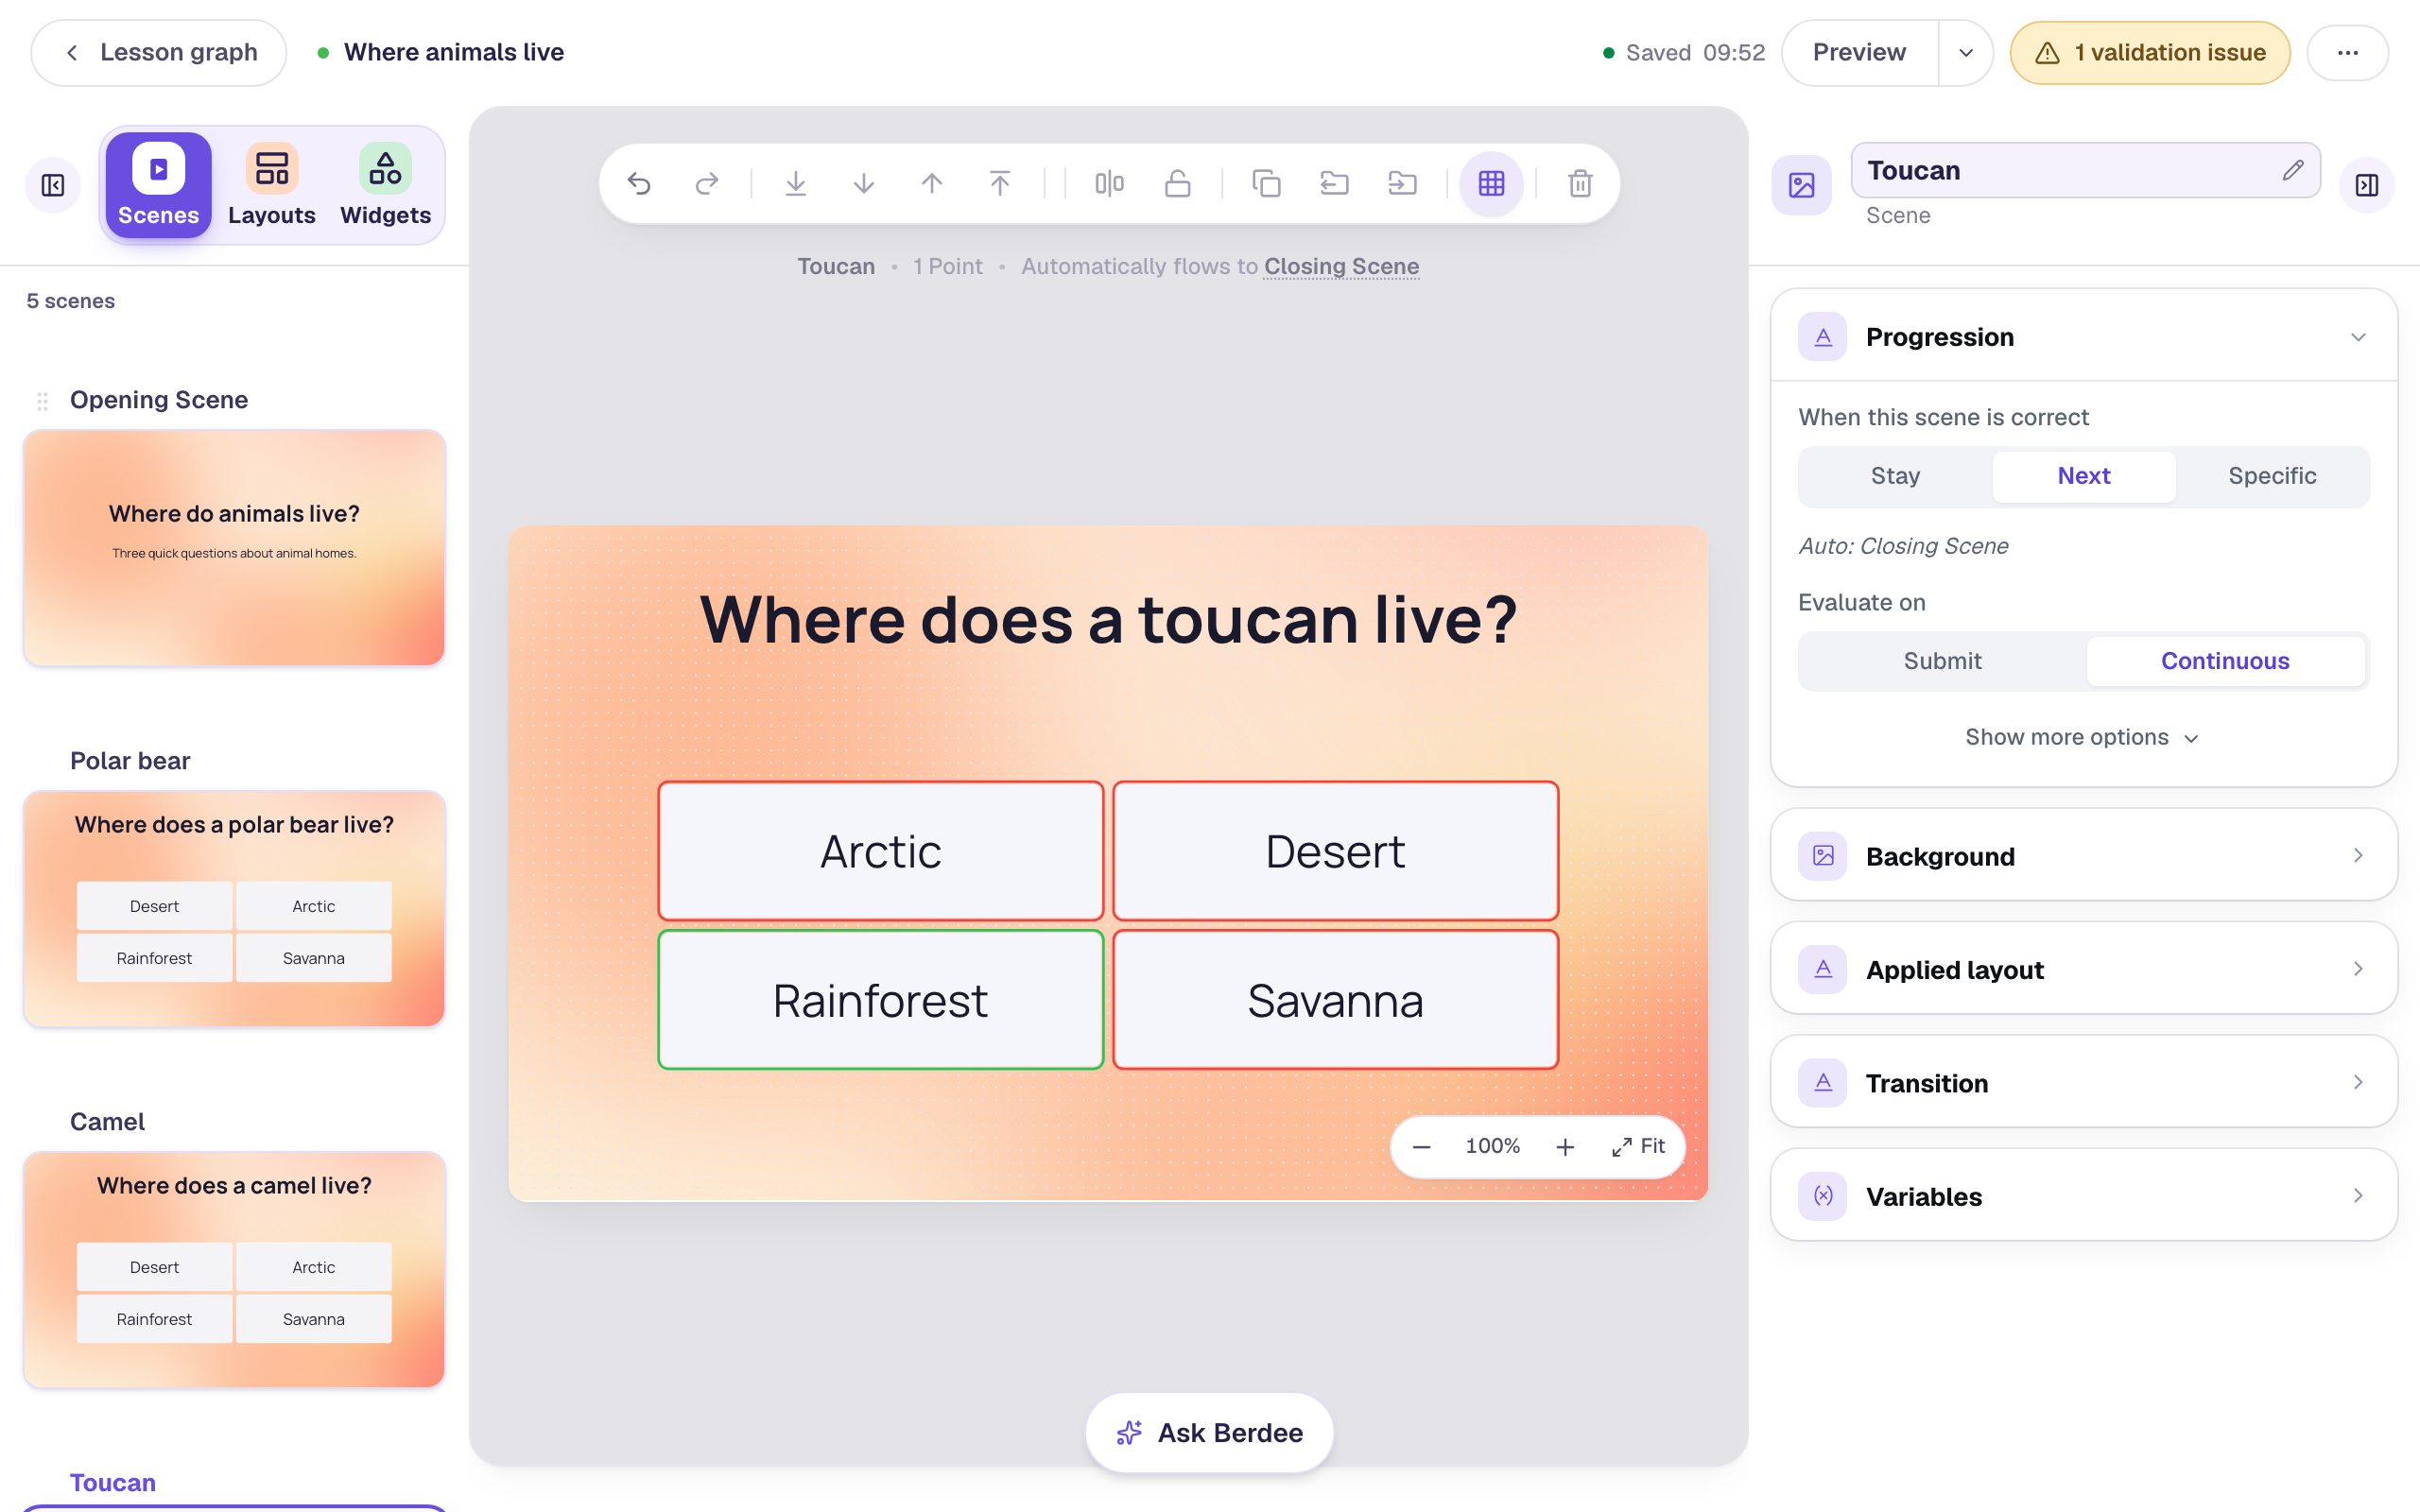
Build your first quiz question
Start a blank lesson, add a multiple-choice question, and watch it score in preview, one click at a time.
- Level
- Beginner
- Time
- About 10 min
- Steps
- 9
A one-question lesson that checks the answer, carries the student to the ending, and shows their score.
Get the finished lesson
Skip straight to the result, or keep it open beside the steps. Add this tutorial's lesson to your account and explore how it works in the studio.
Free to sign up, and you'll come straight back here. I have an account
In this tutorial you'll build a real, working lesson: one question, four answers, and an ending that shows the score. It's the smallest lesson that still does everything a lesson does, so it's the quickest way to learn how the studio fits together.
We'll ask "Which planet is closest to the Sun?", but use any question you like. Berdee saves as you go, so you can stop at any step and come back.
Step 1: Start a blank lesson
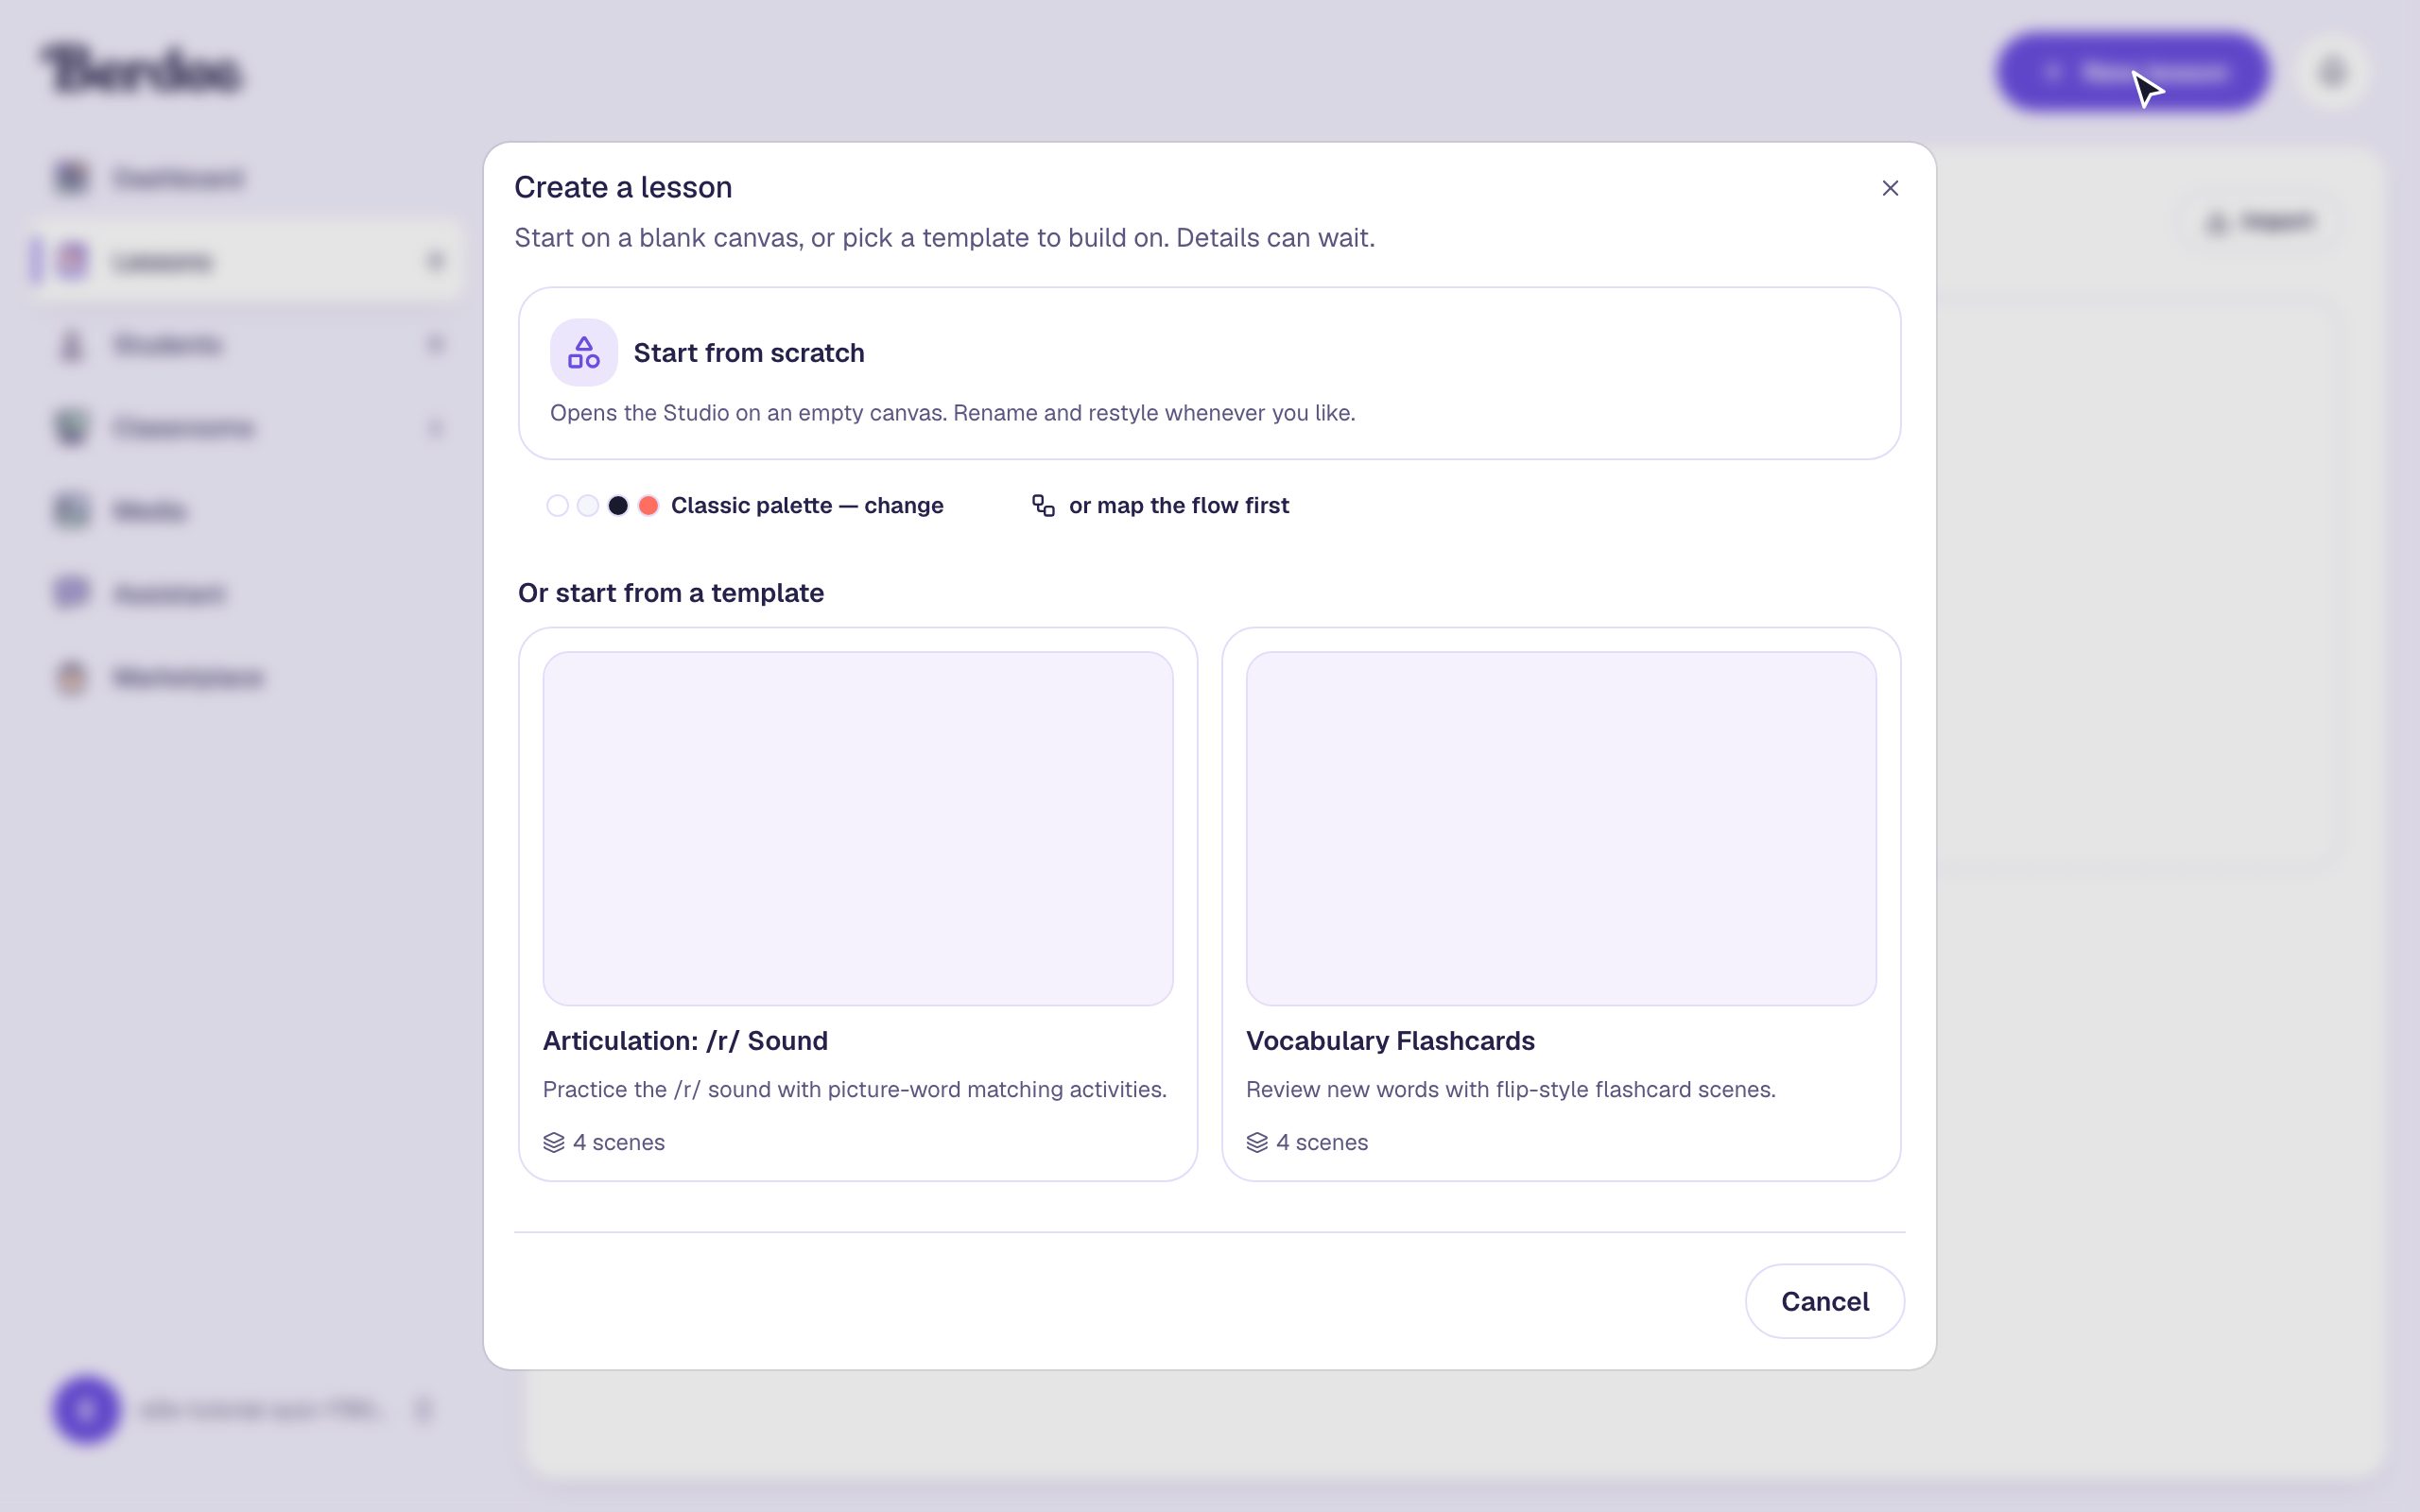
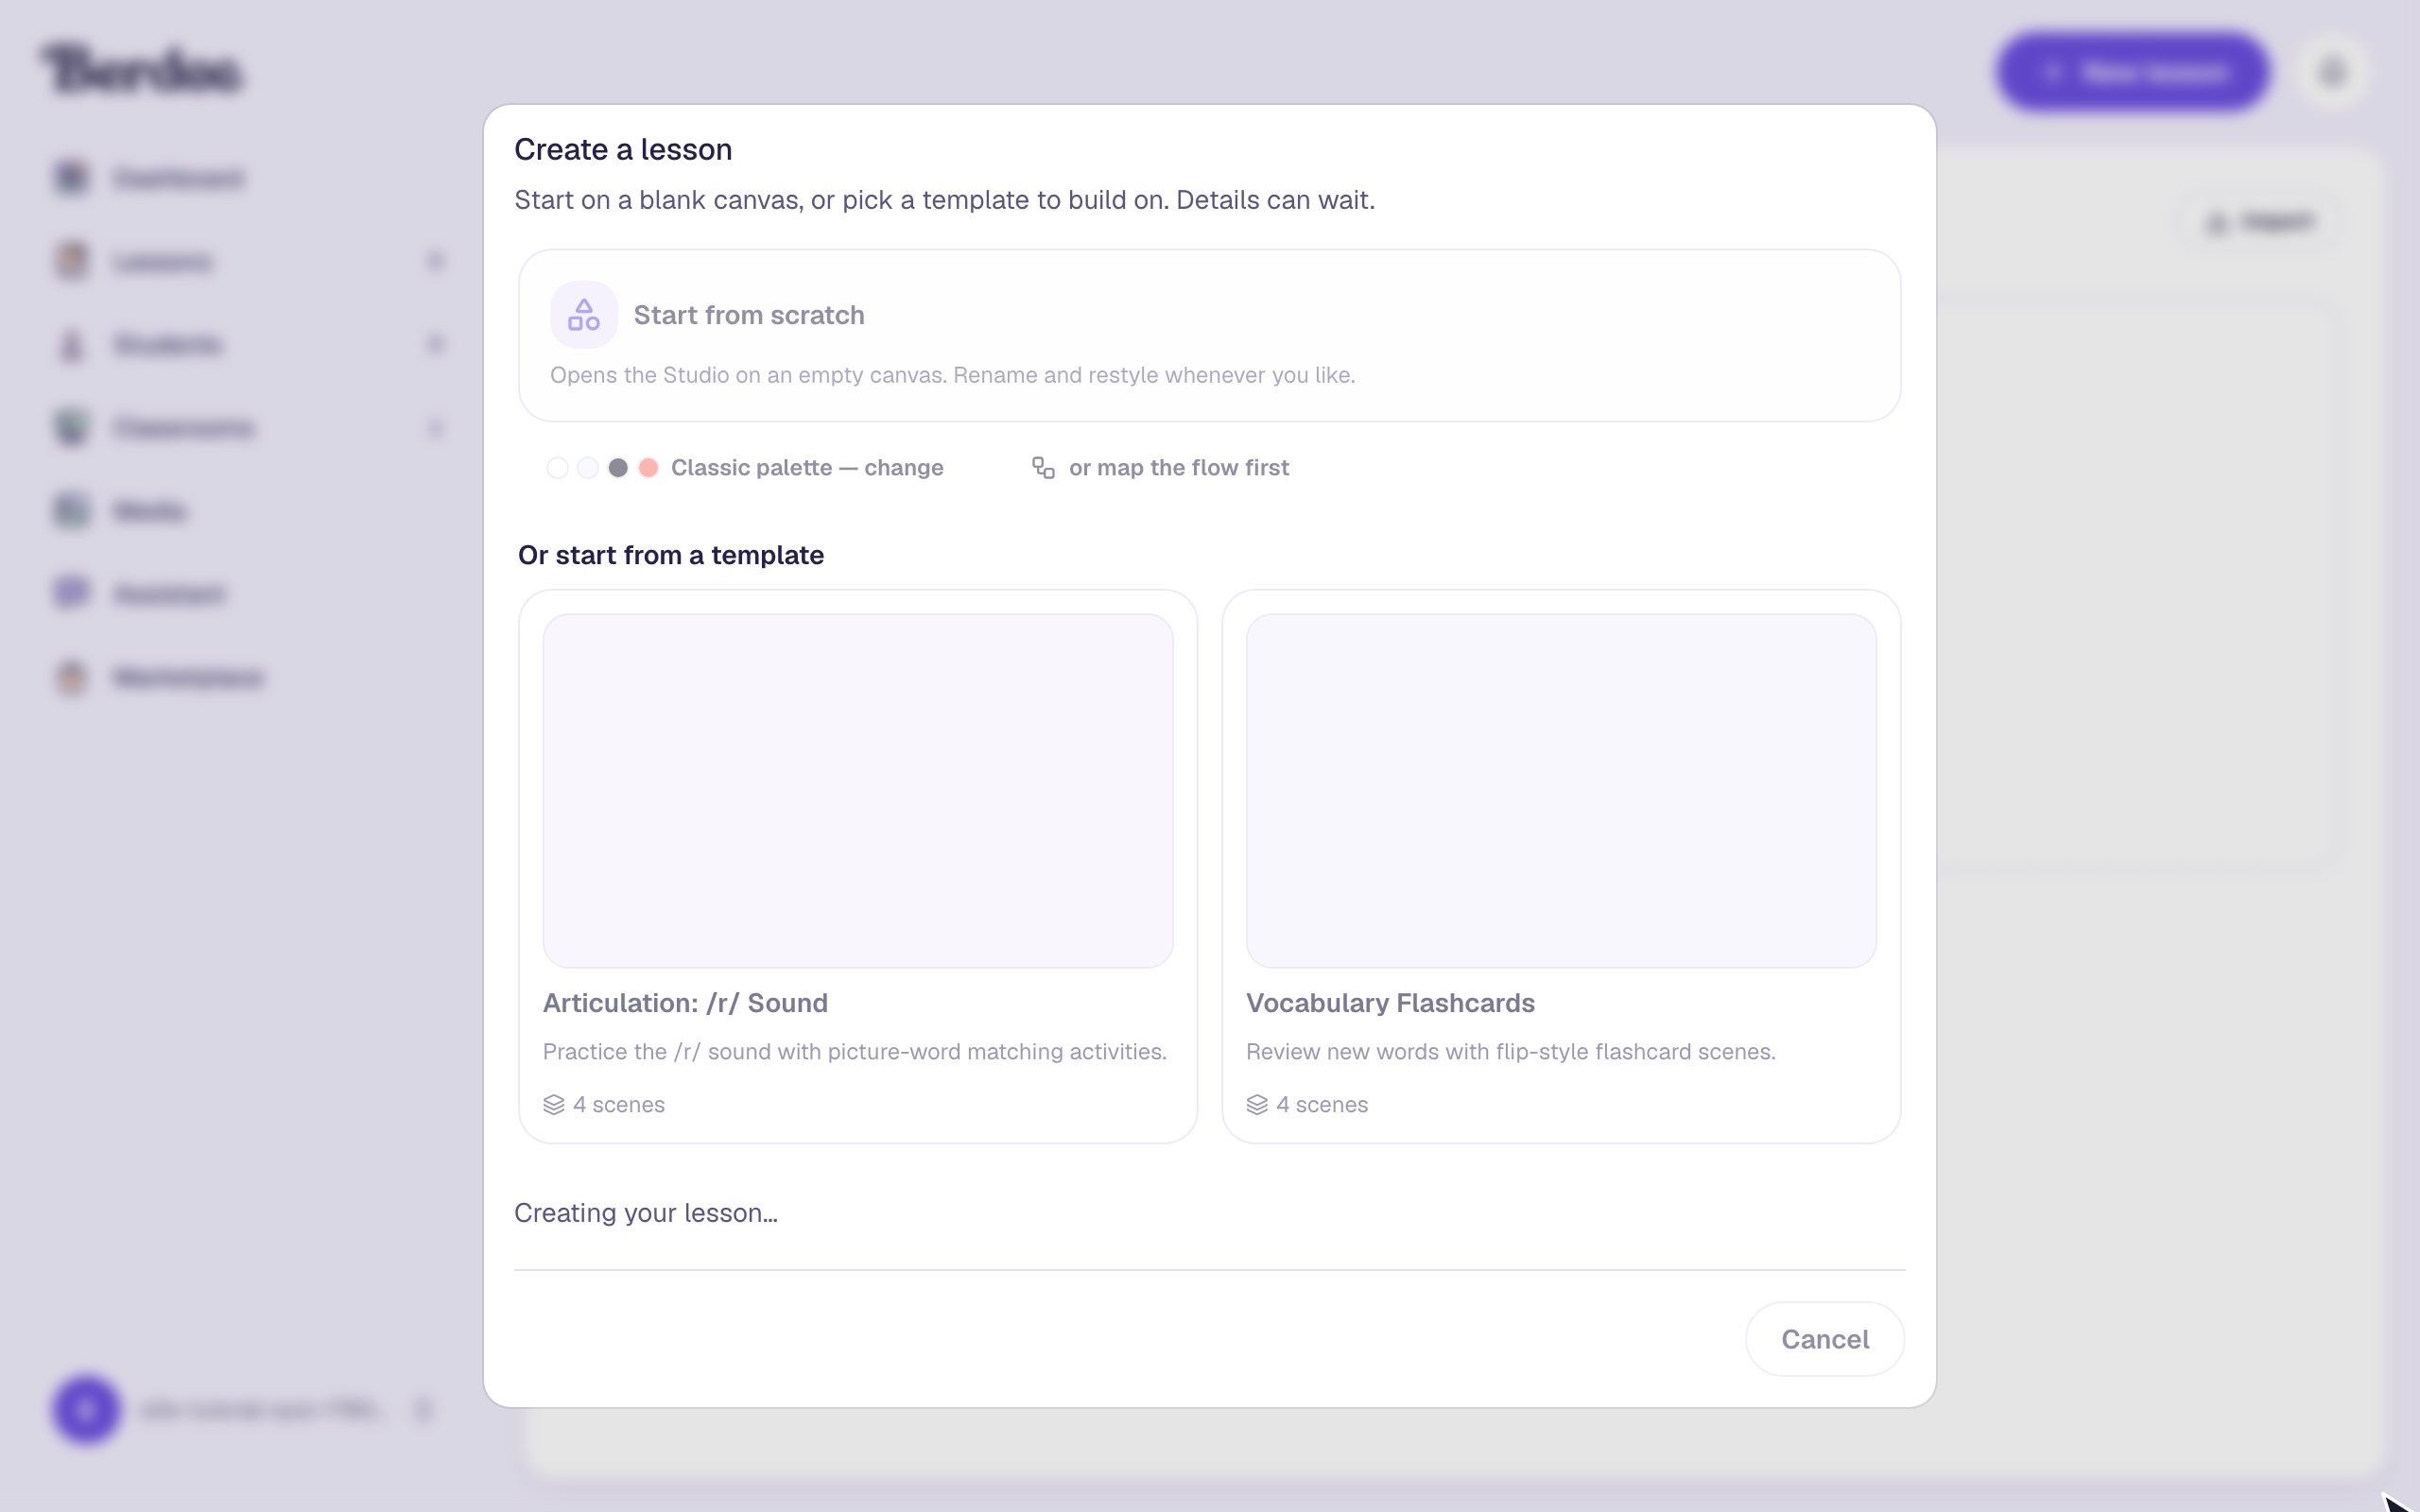
Click New lesson in the top-right corner of any page in your workspace. In the dialog, click Start from scratch. You don't need to fill anything in first; the name and the rest can wait.
The studio opens on your new lesson. Take a second to look around:
- The left panel has three tabs: Scenes, Layouts, and Widgets. Right now it shows your scenes: an Opening Scene to build on, and a Closing Scene that already shows students their score.
- The canvas in the middle is what students will see.
- The properties panel on the right shows settings for whatever you've selected.
Look at the thin line just above the canvas. It says Automatically flows to Closing Scene. That's the plan for this lesson: when a student answers correctly, Berdee moves them to the ending on its own.
Step 2: Write the question
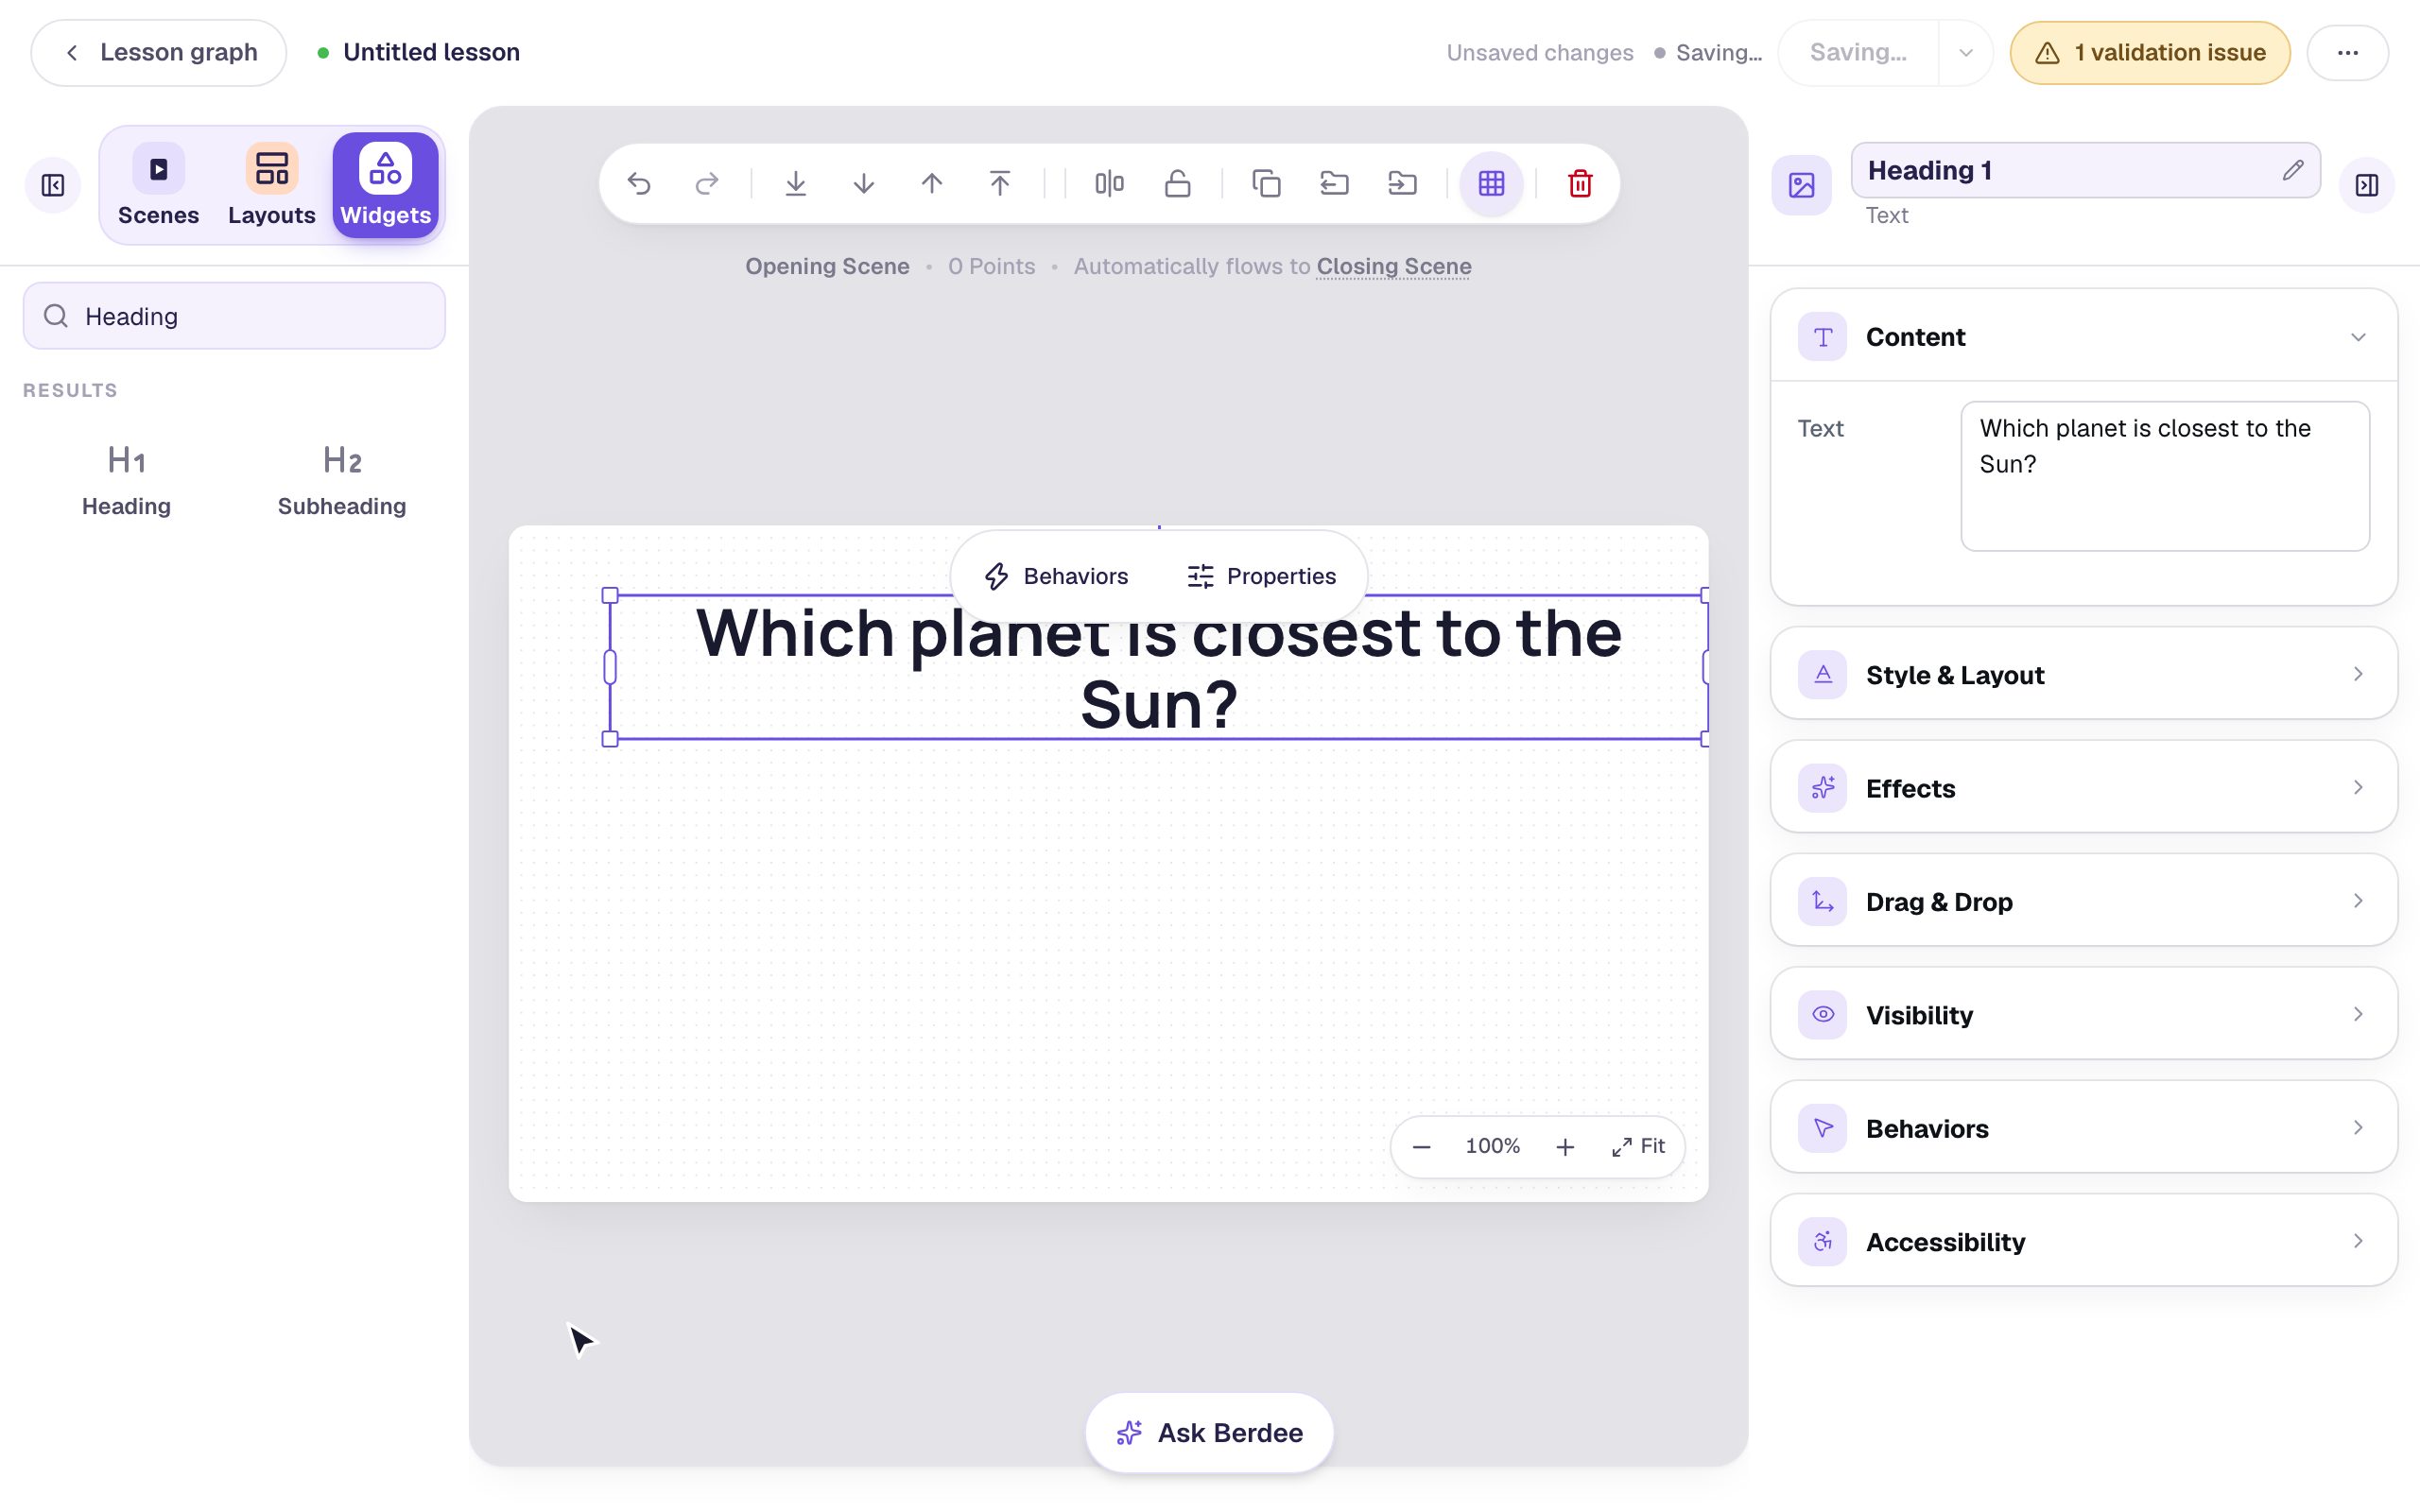
- Click the Widgets tab in the left panel. The search box is ready for typing.
- Type
Headingand click the Heading tile. - A heading appears in the middle of the canvas with its text already selected. Type your question.
- Click an empty part of the gray area around the canvas to finish typing.
- Drag the heading up toward the top of the canvas.
Step 3: Add a multiple-choice question
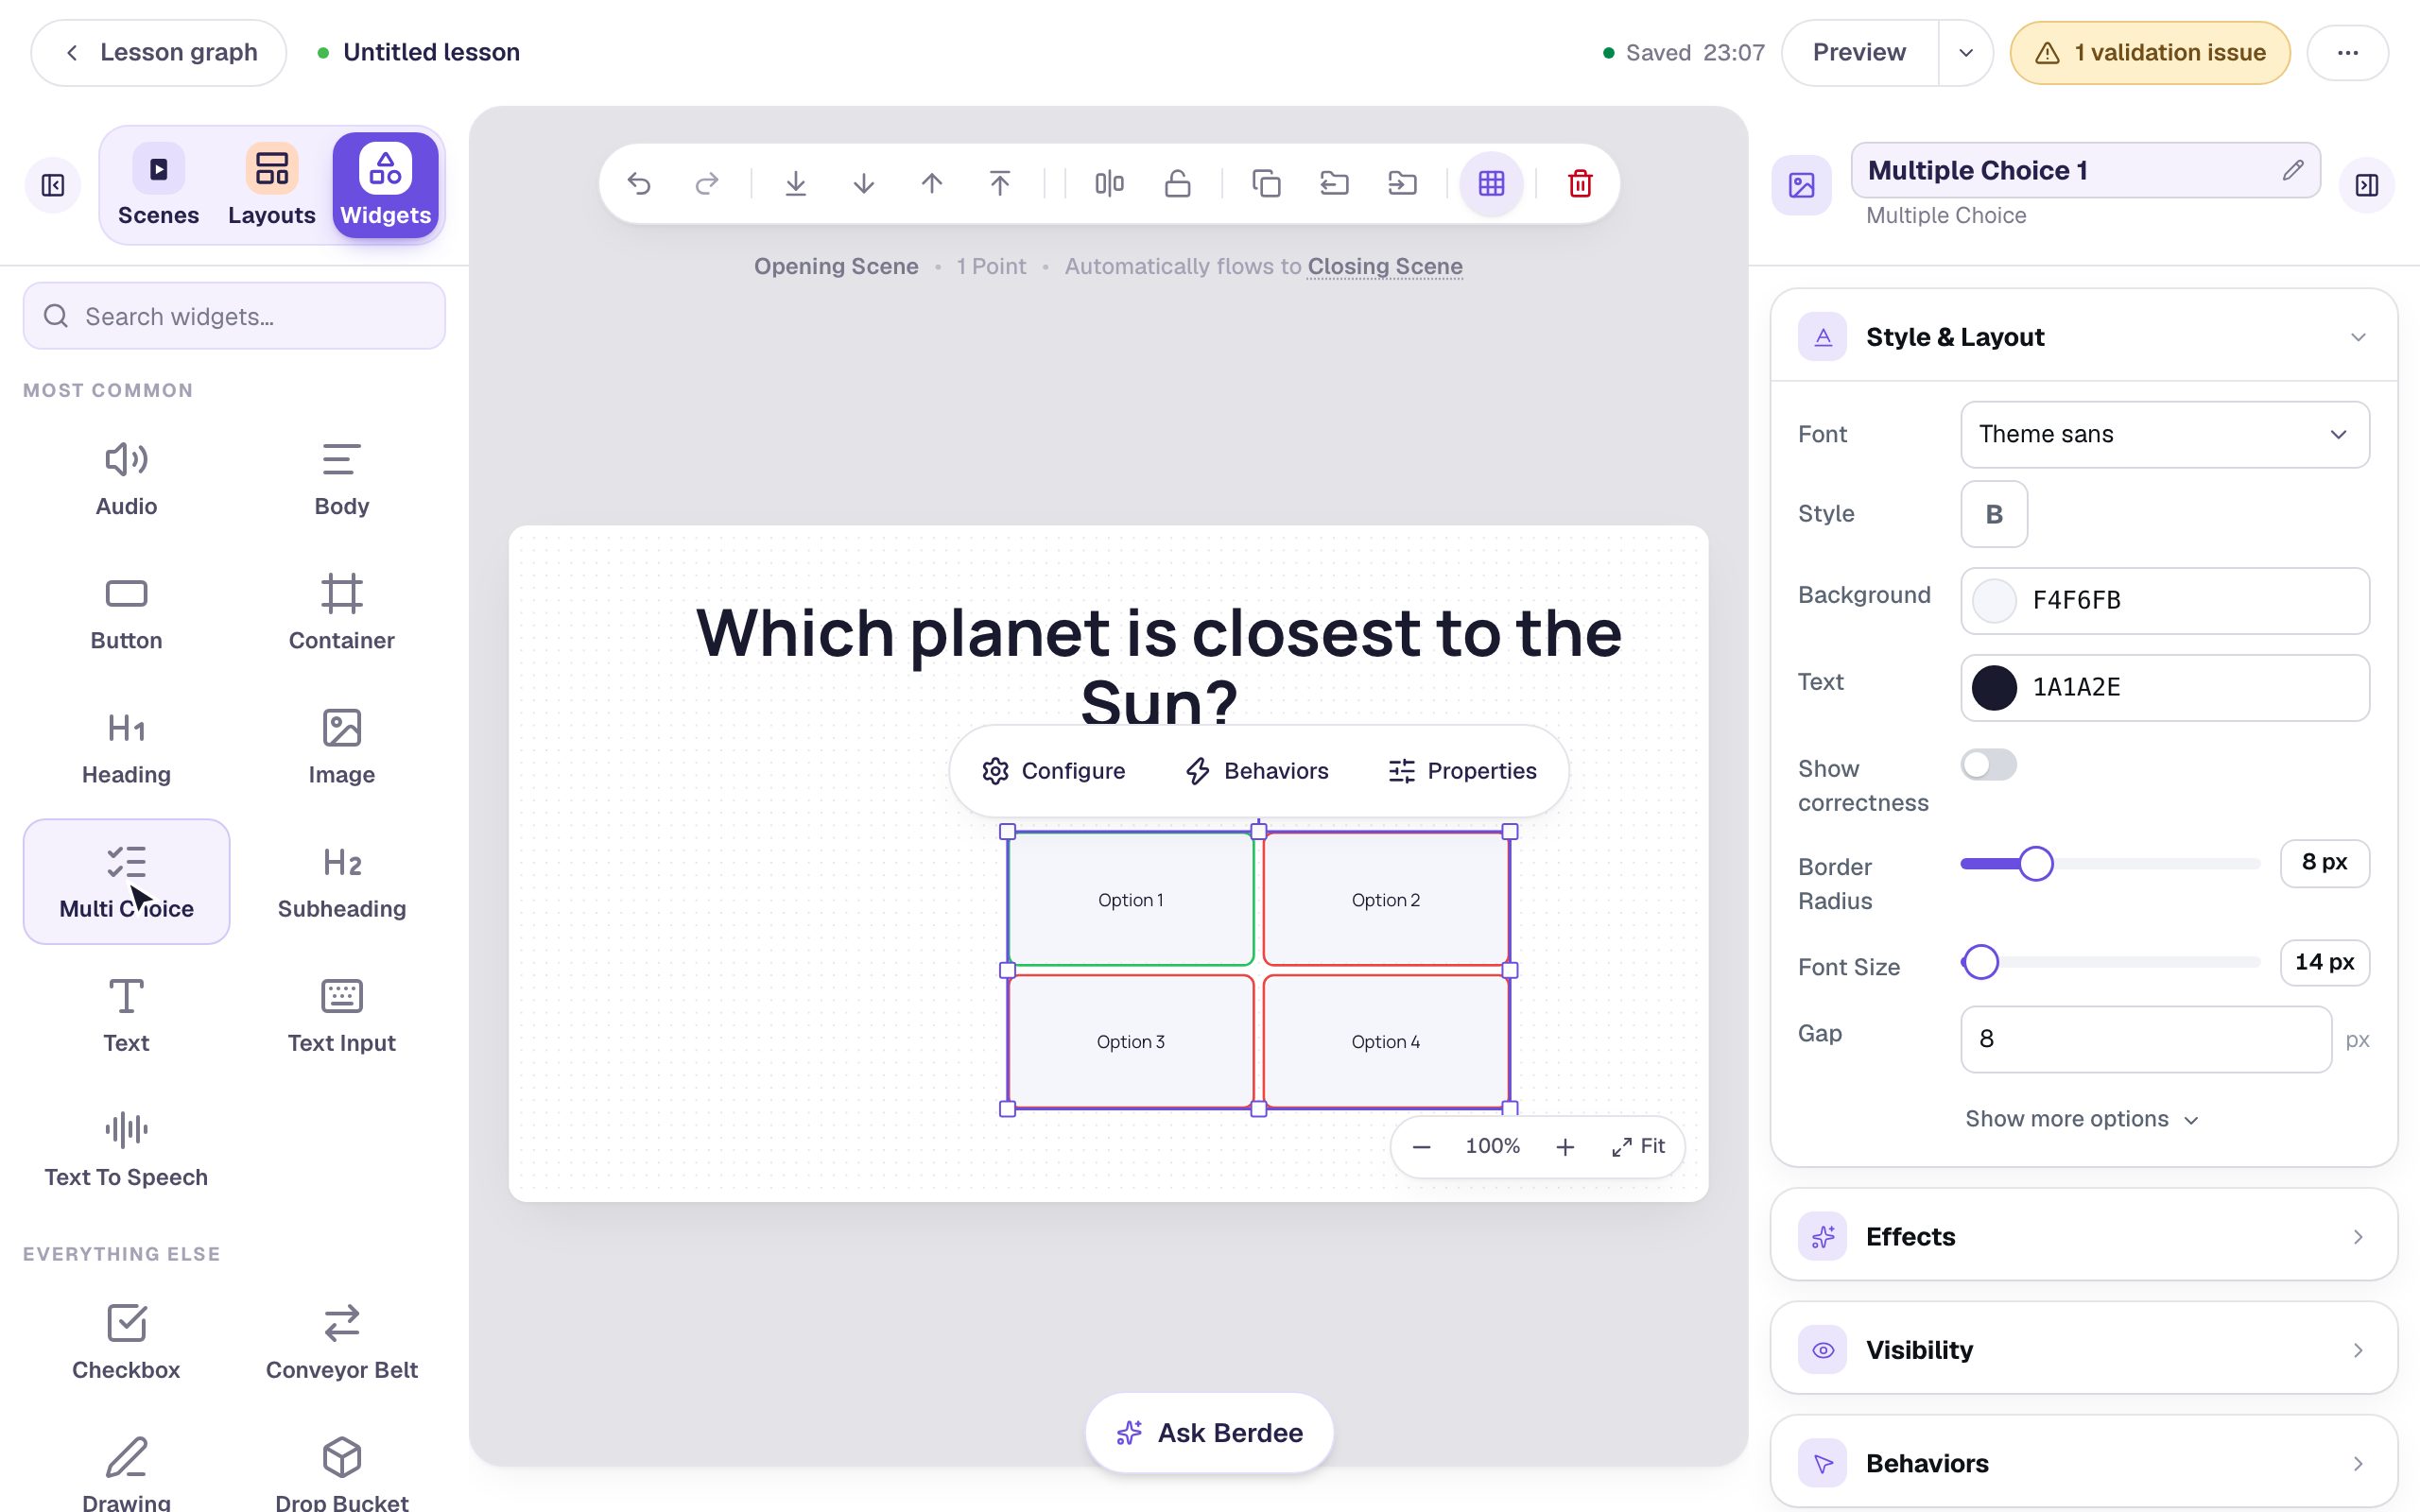
Clear the search box. Under Most Common, click Multi Choice.
The widget lands in the middle of the canvas, already selected, with four answers called Option. A small pill floats above it with Configure, Behaviors, and Properties. The line above the canvas now says 1 Point, because this widget is scored.
Step 4: Type the answers and mark the right one
Click Configure in the pill. A large dialog opens with a live preview on the right, so you can see the result as you type. Here's the whole step:
- Click into each option and type an answer:
Venus,Mercury,Earth,Mars. - Click the round check mark beside Mercury. It turns green: that's the correct answer.
Every new question starts with its first option marked correct, so Venus was green until now. A student picks just one answer here, so the question has one right answer, and the check mark moved from Venus to Mercury on its own.
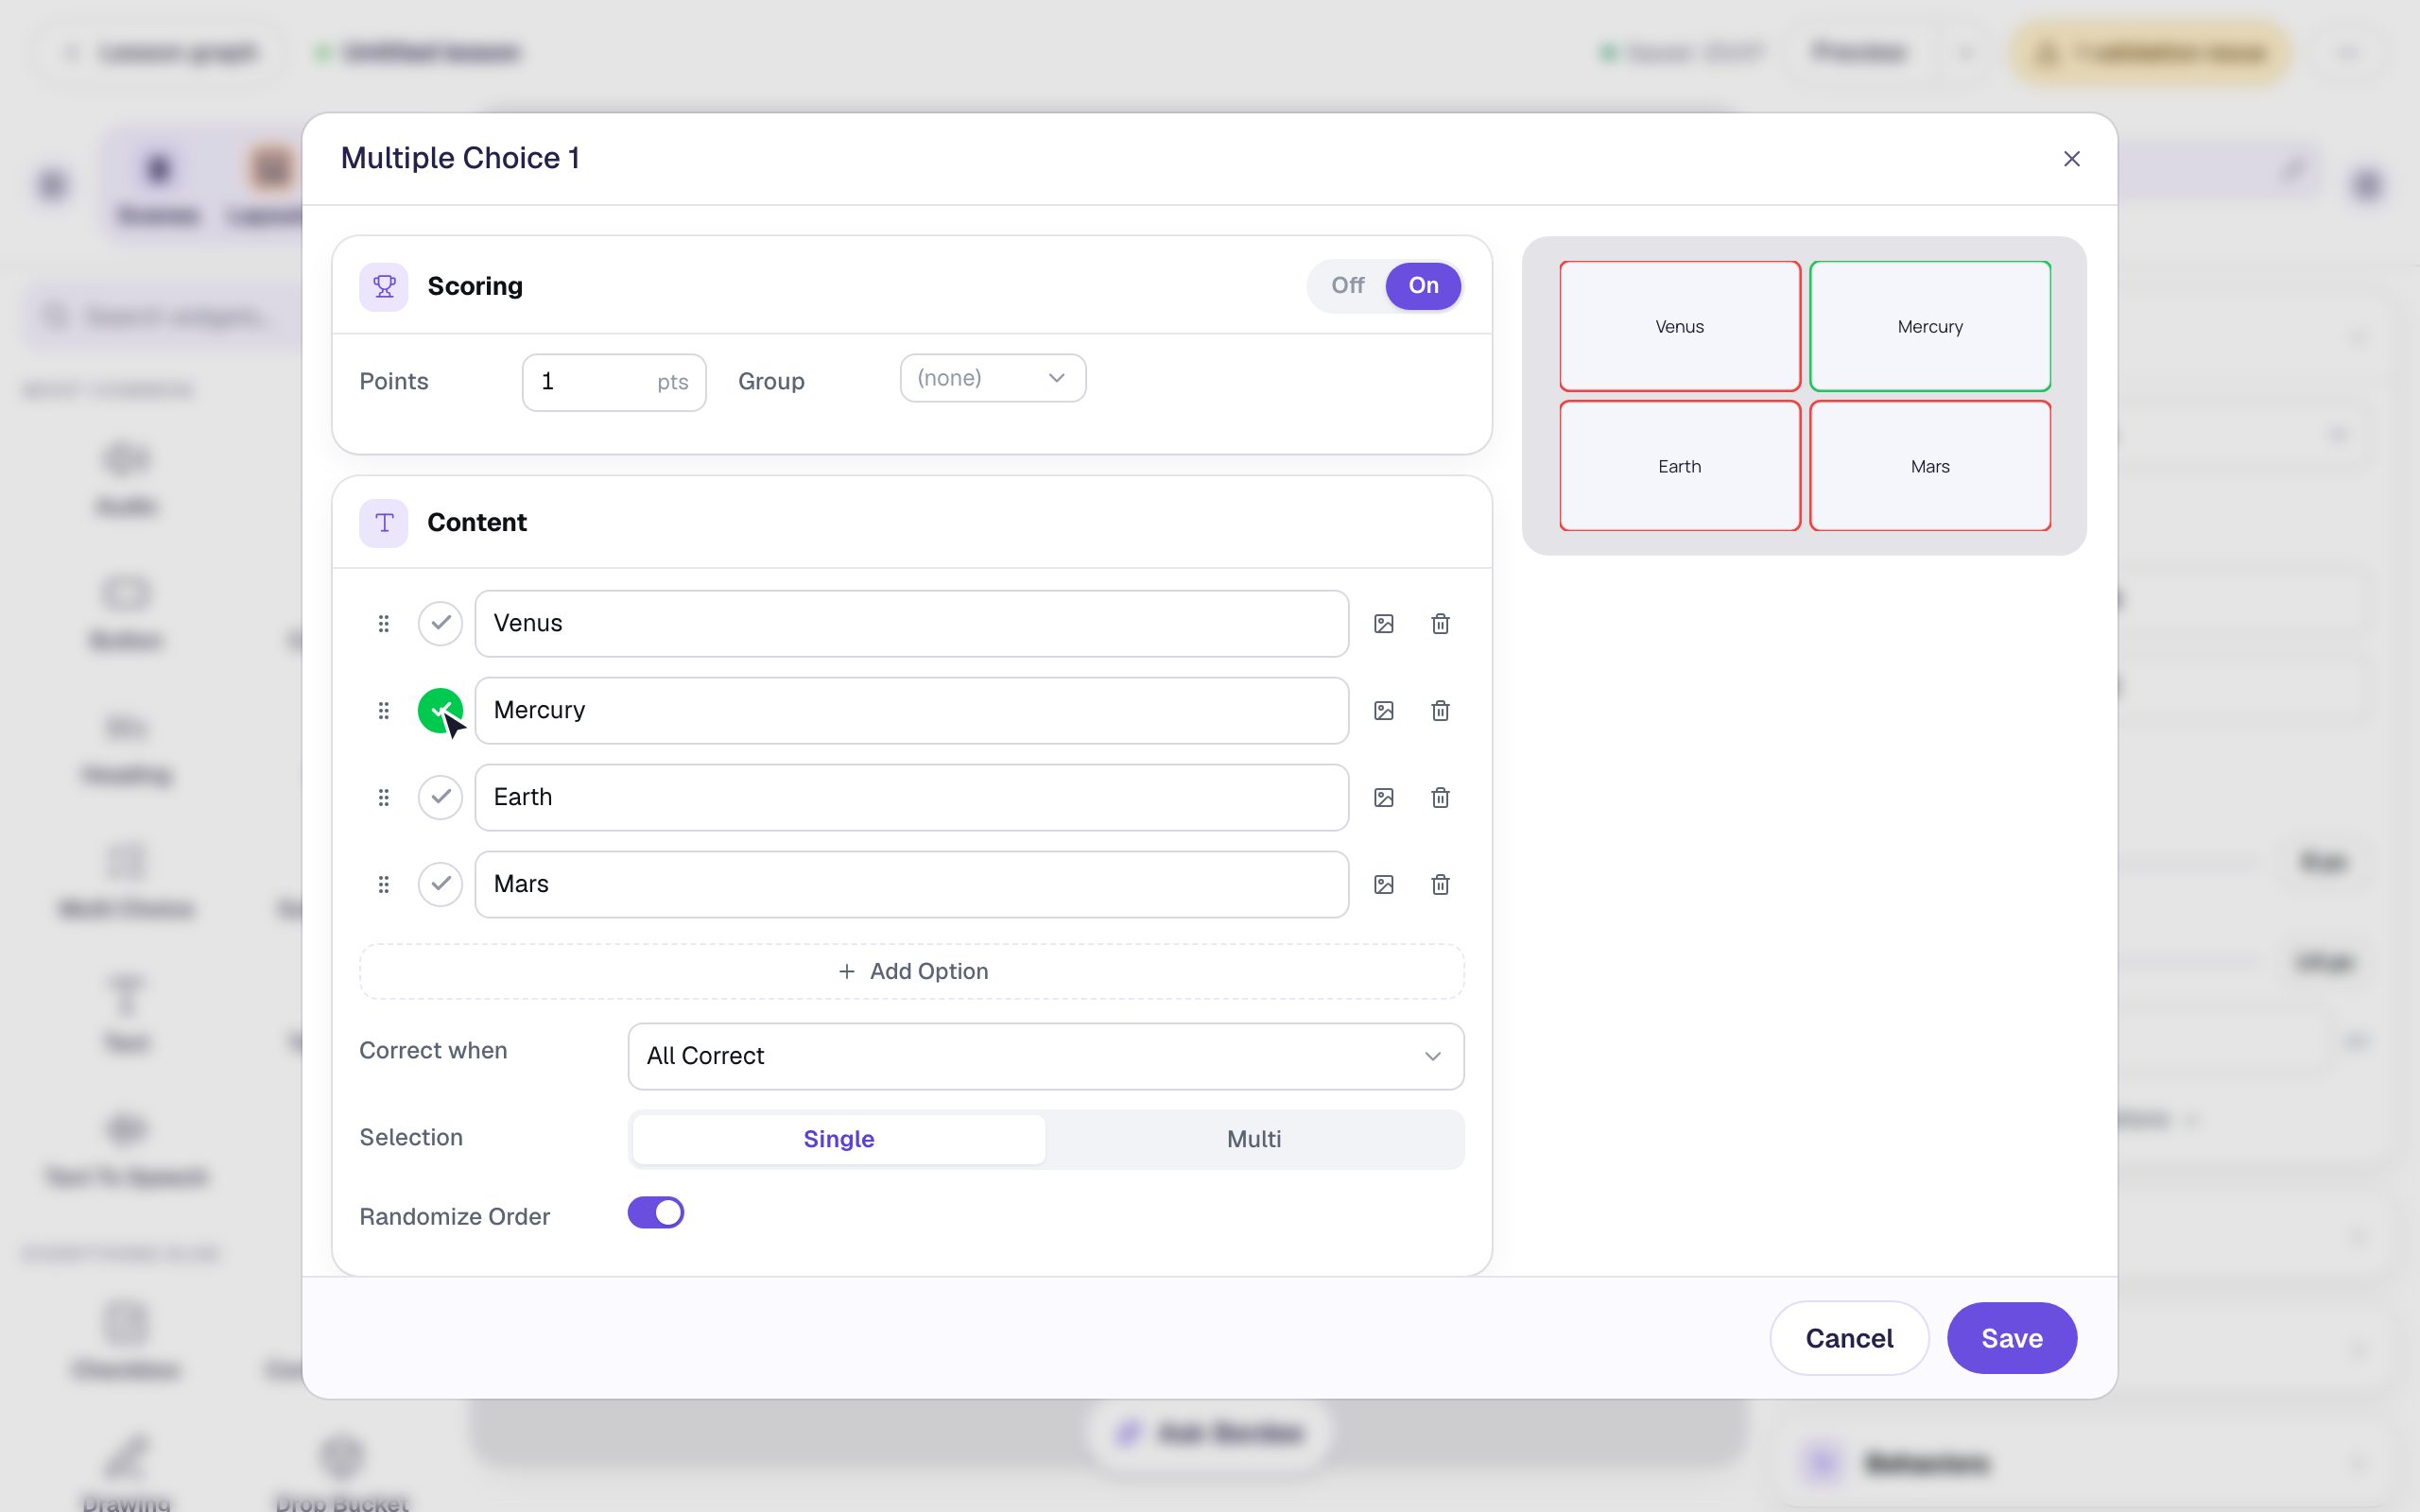
A few settings you can leave alone for now: Scoring is on and worth 1 point, Selection is Single (one answer per student), and Randomize Order shuffles the answers for each student so nobody memorizes "it's the top-left one".
Click Save.
Step 5: Make it easy to read and show feedback
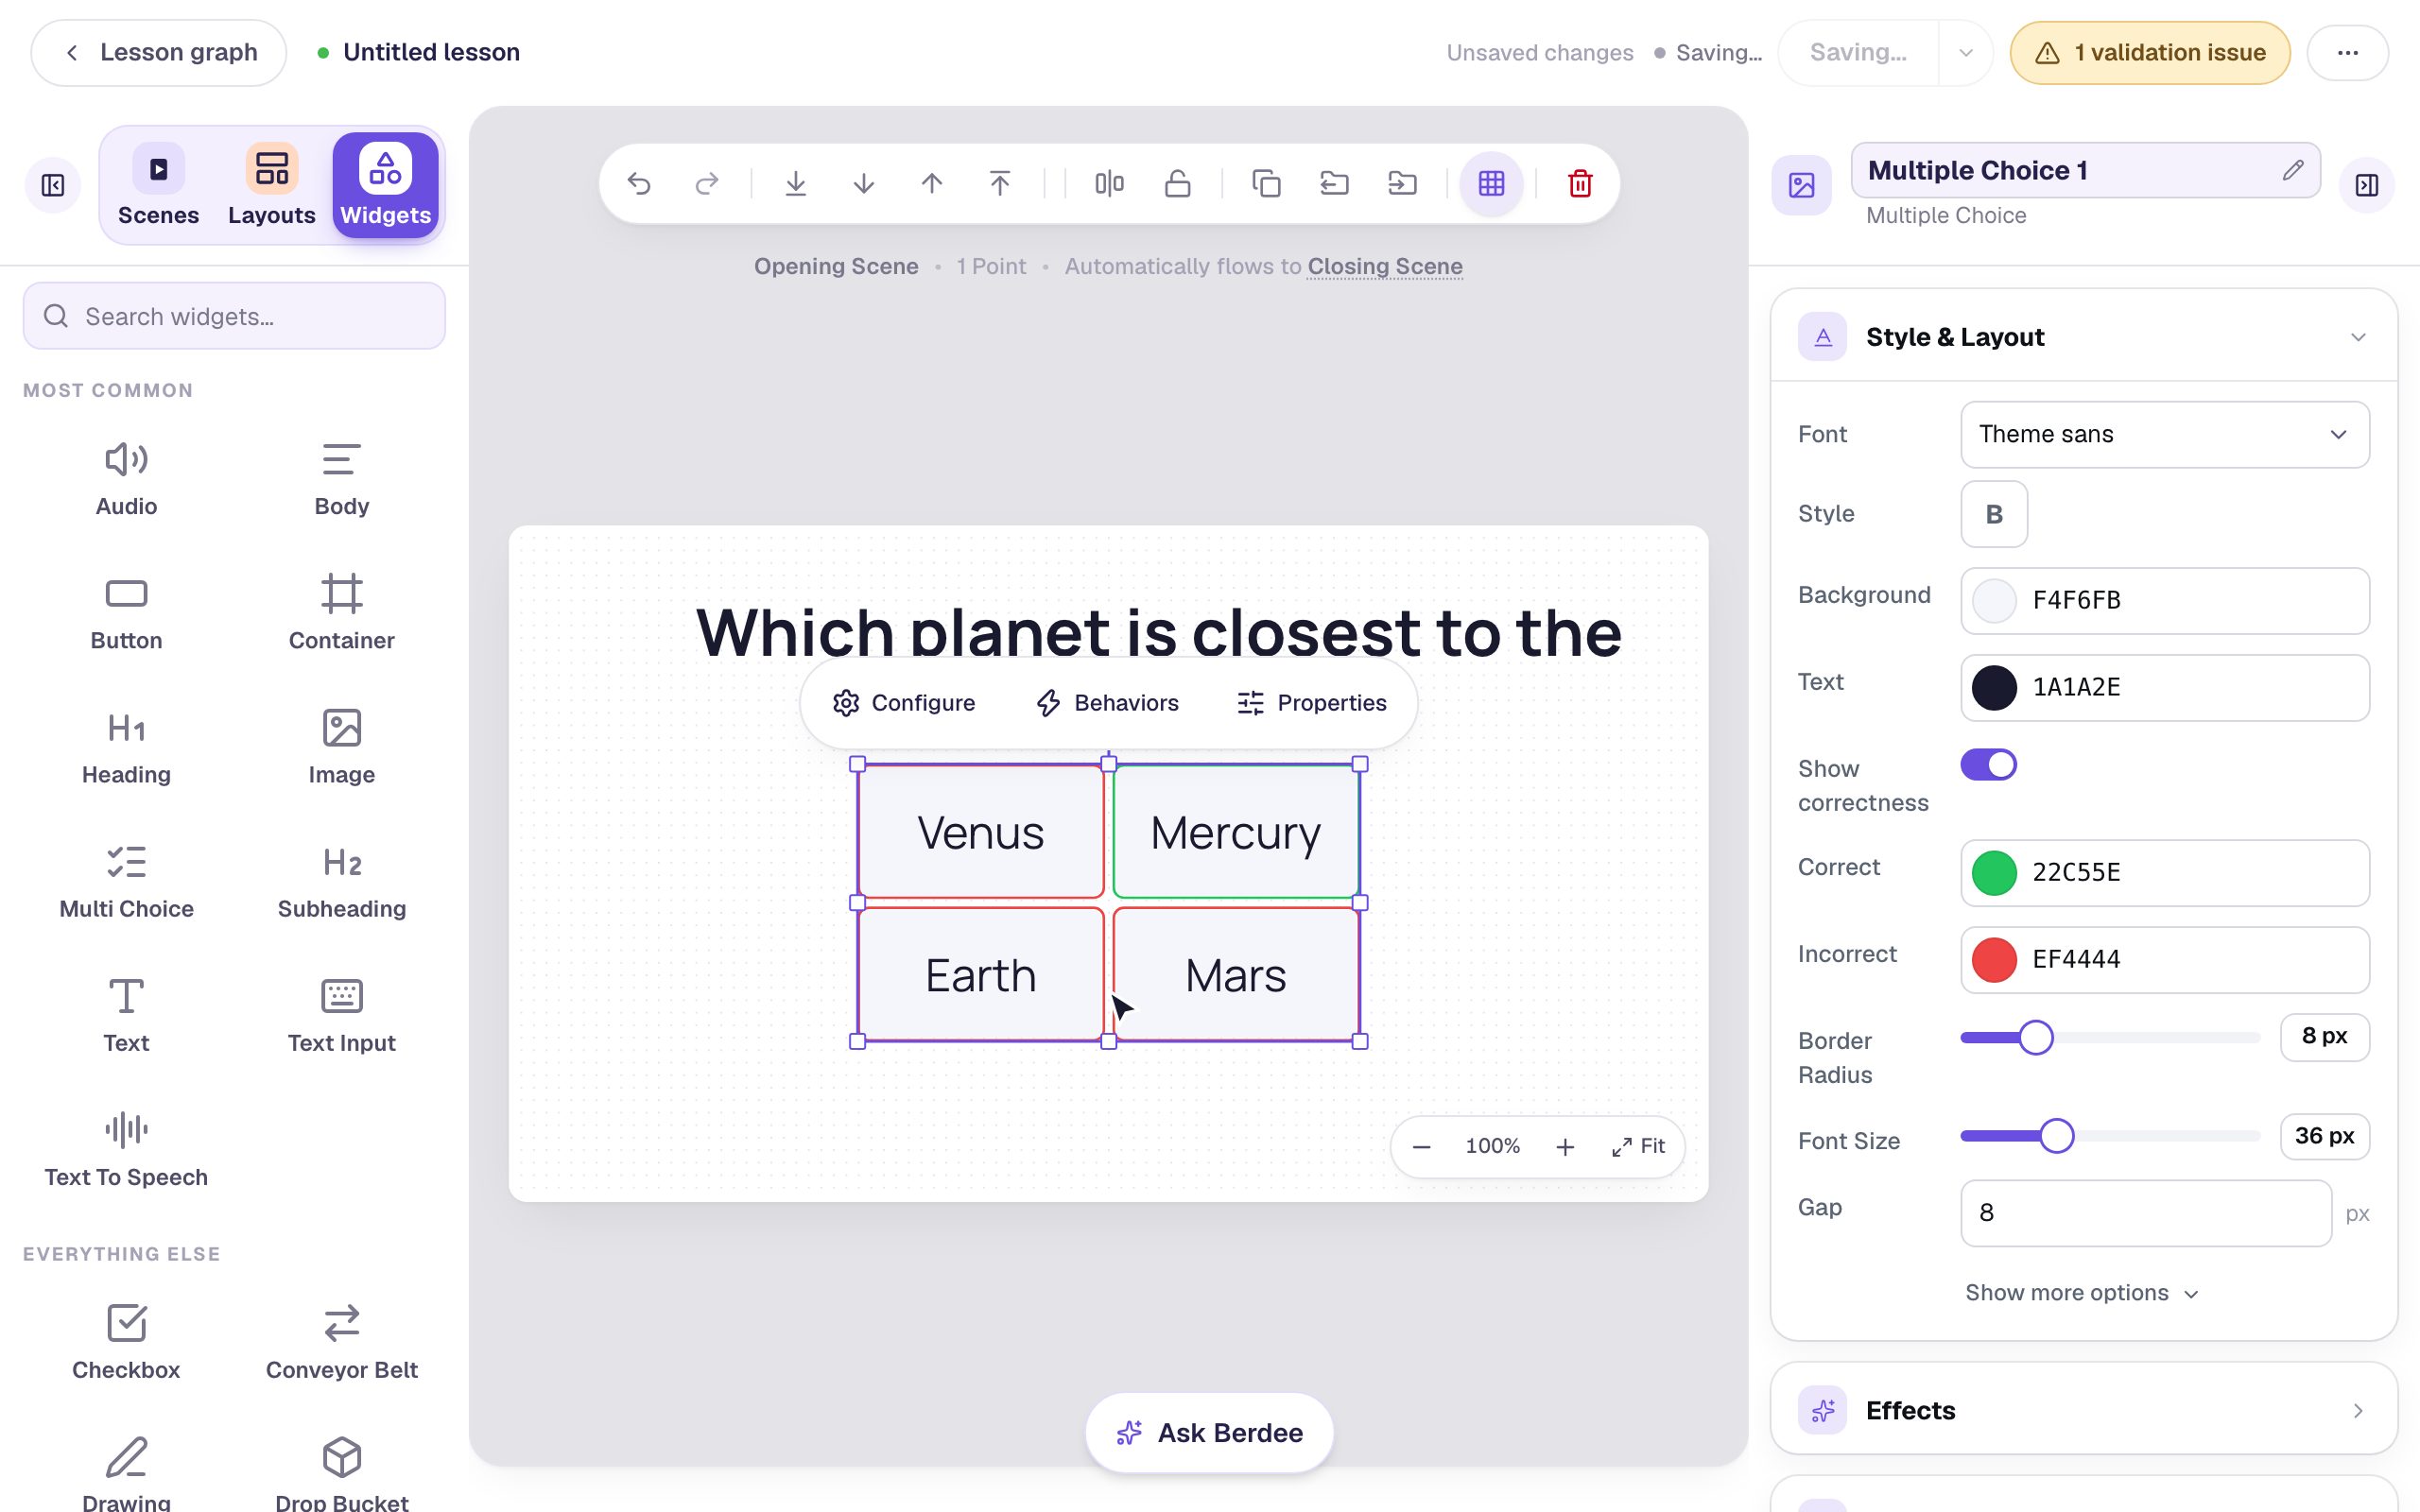
New answers start small, so they fit any answer box. With the question still selected, look at Style & Layout in the properties panel:
- Drag the Font Size slider up to about 36 px, so the answers are easy to read from across the room. "Mercury" still fits its box at that size.
- Turn on Show correctness. Now a student who taps a wrong answer sees it outlined in red, and the right answer in green. You can change both colors just below the switch.
- Drag the question so it sits neatly under the heading.
Step 6: See what's left to do
At the top right there's a yellow pill that says 1 validation issue. It's Berdee's checklist for a lesson that's ready to give to students. Click it.
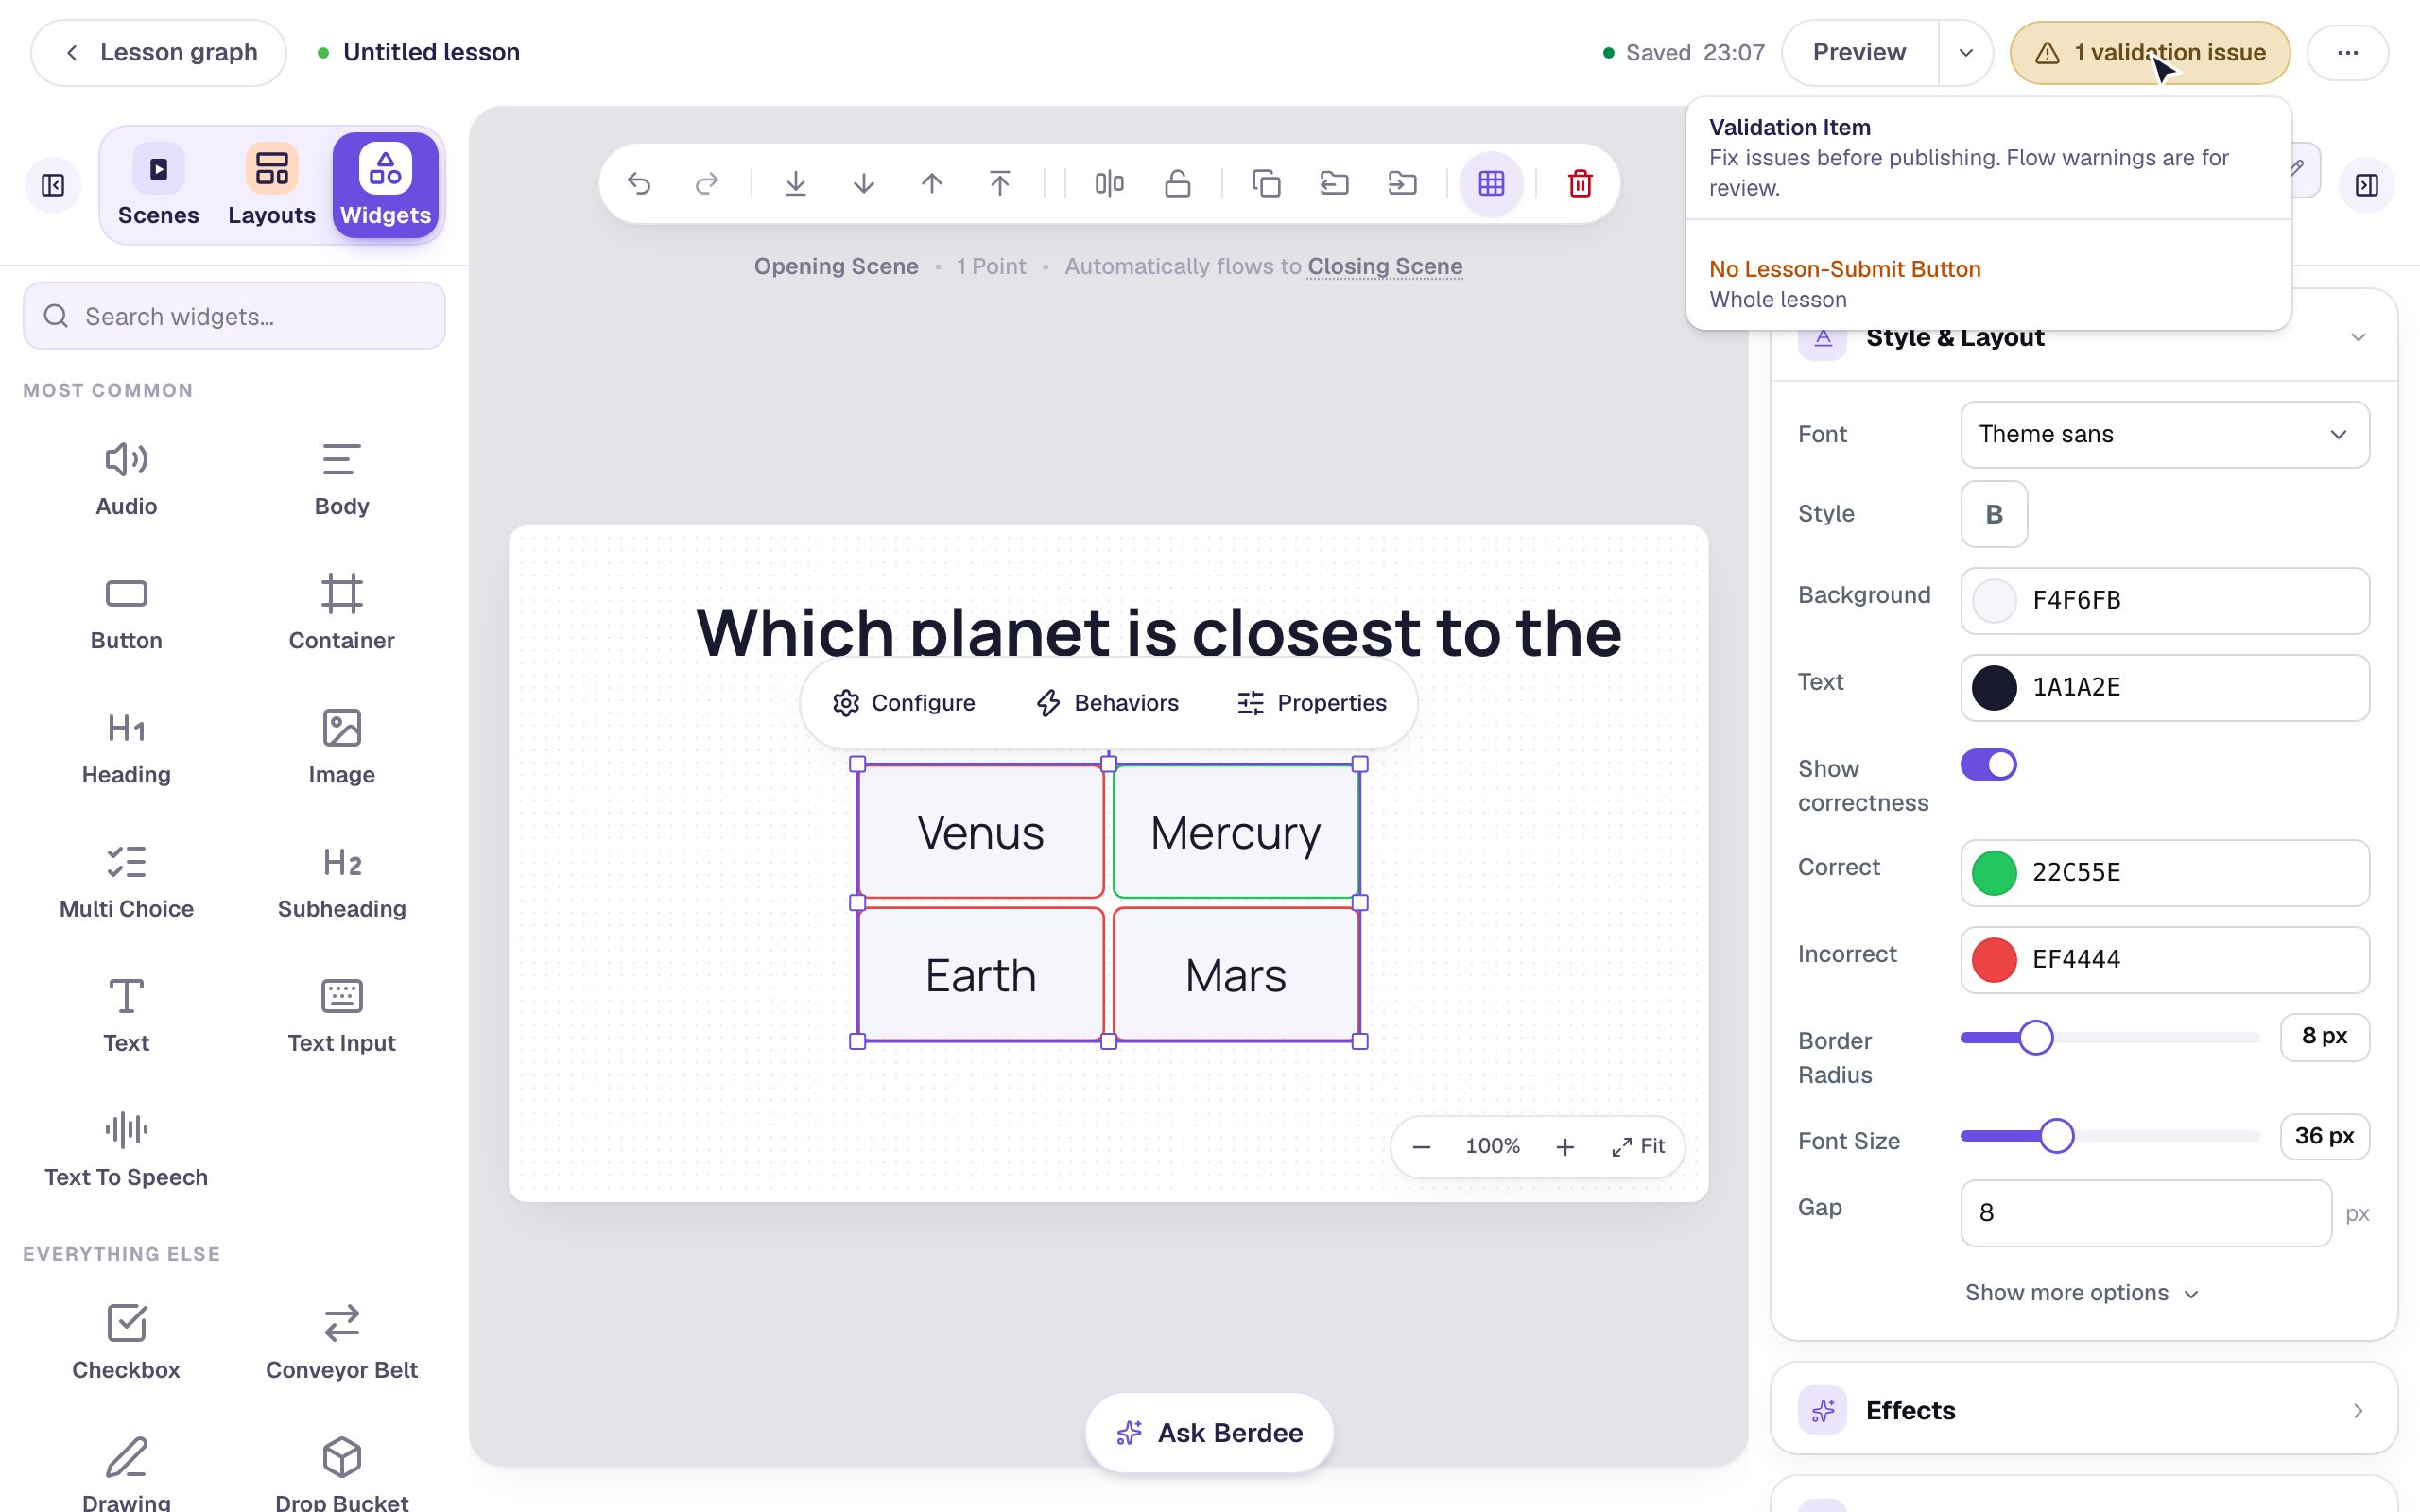
It says No Lesson-Submit Button. Every lesson needs one button that lets a student say "I'm finished", even when the lesson would end on its own. It's also a way out for a student who is stuck.
Step 7: Add an "I'm done" button
- In the Widgets tab, search for
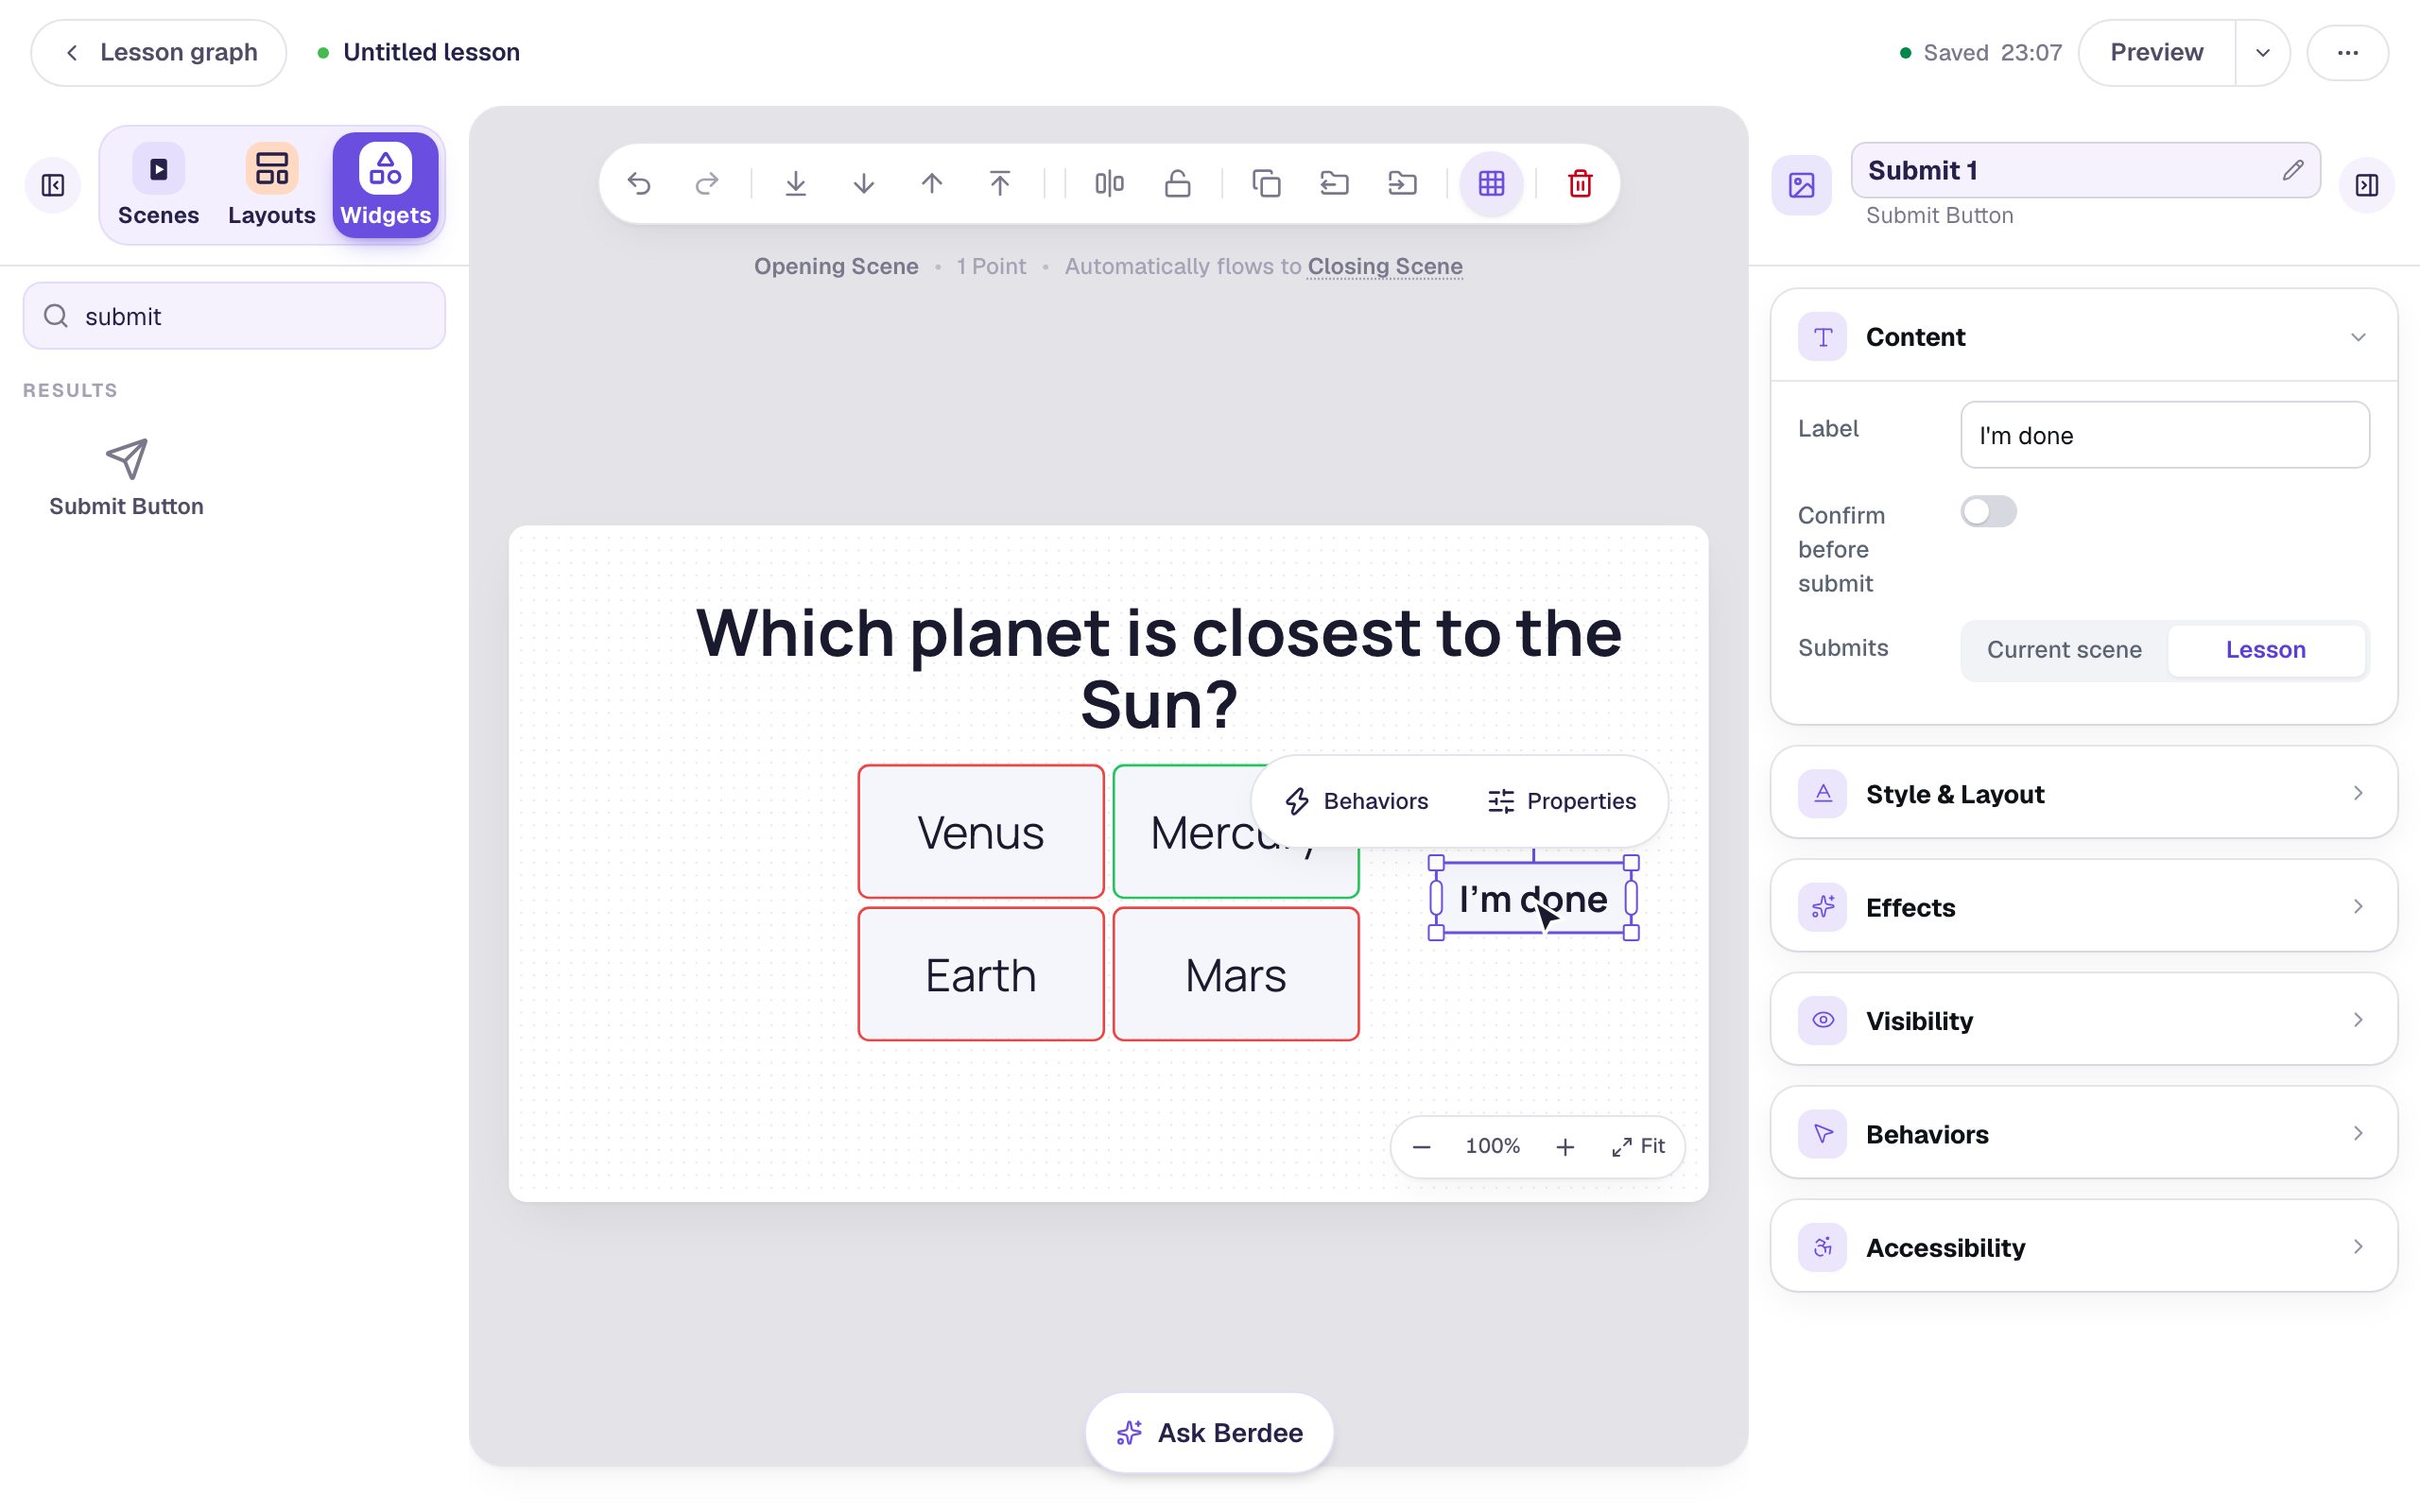
submitand click Submit Button. - In the properties panel, open Content. Change Label to
I'm done, and set Submits to Lesson. That makes it finish the whole lesson, not just this scene. - Drag the button to the right of the answers.
The yellow validation pill disappears. The lesson is complete.
Step 8: Name your lesson
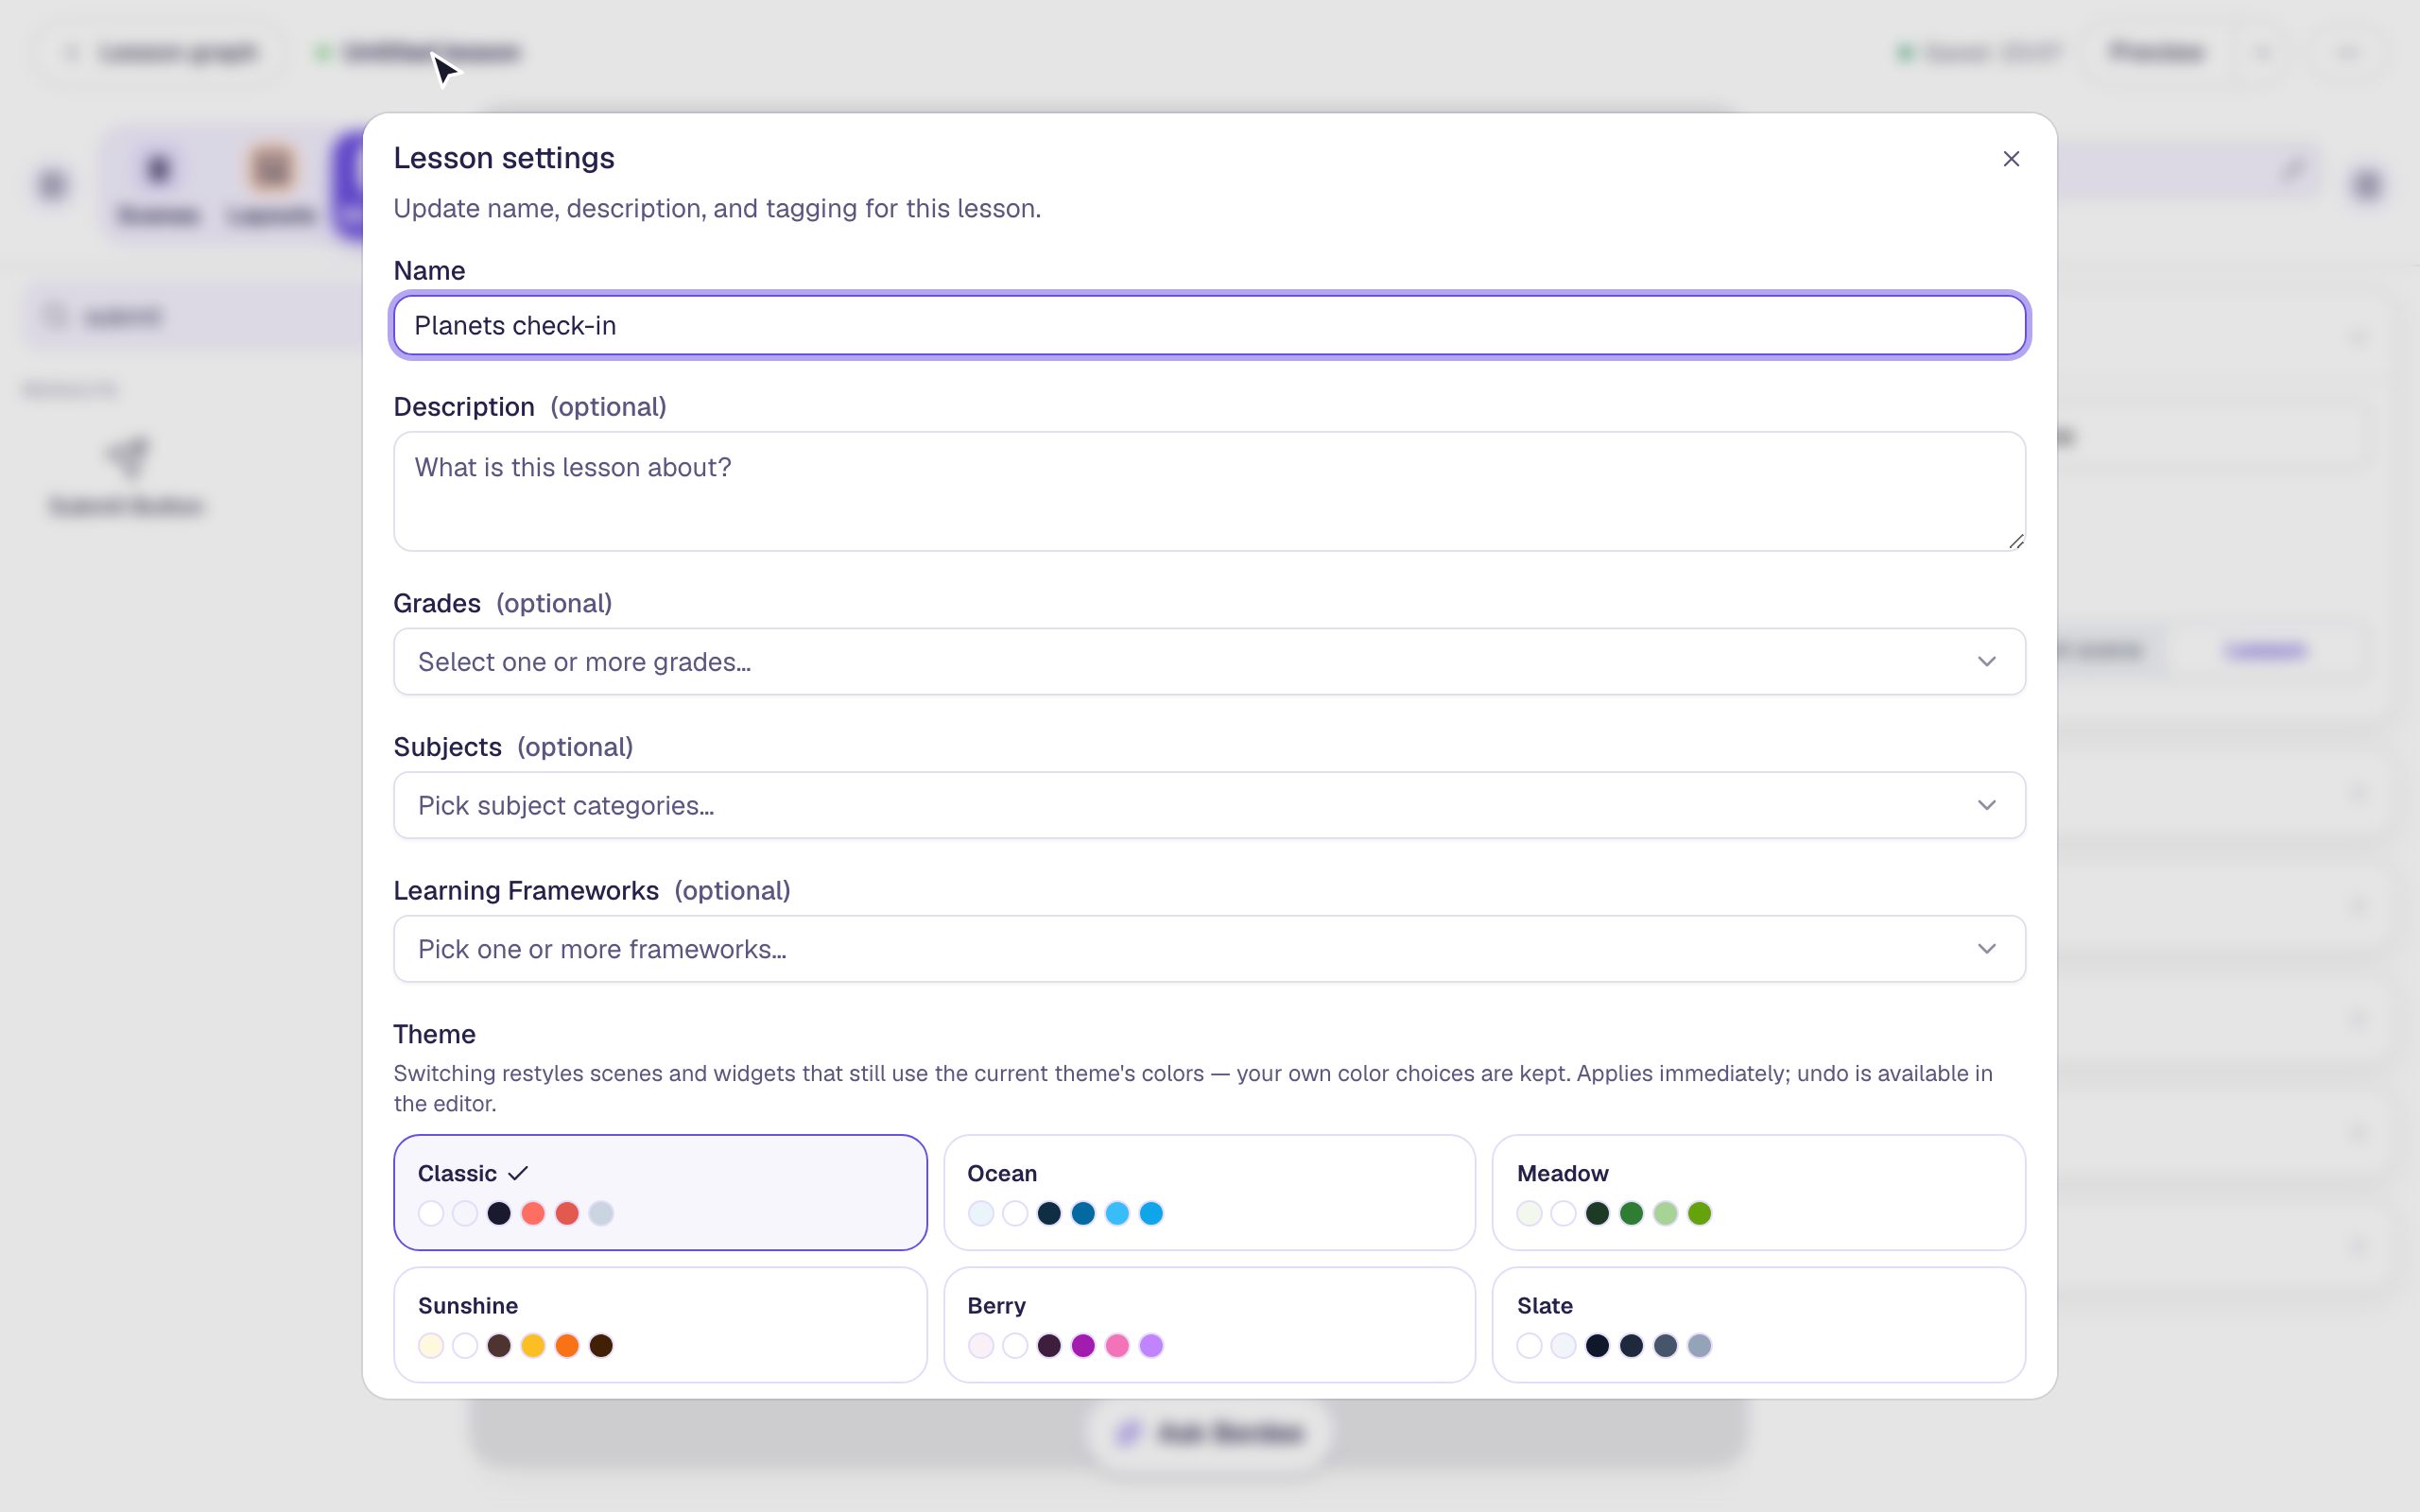
Click Untitled lesson at the top left. The Lesson settings dialog opens. Type a name you'll recognize later, like Planets check-in, and click Save changes.
Step 9: Try it as a student
Click Preview at the top of the studio. This is exactly what a student sees. Try a wrong answer first, then the right one:
Venus turns red. Mercury is right, so Berdee waits a moment and then moves to the Closing Scene, which shows the score.
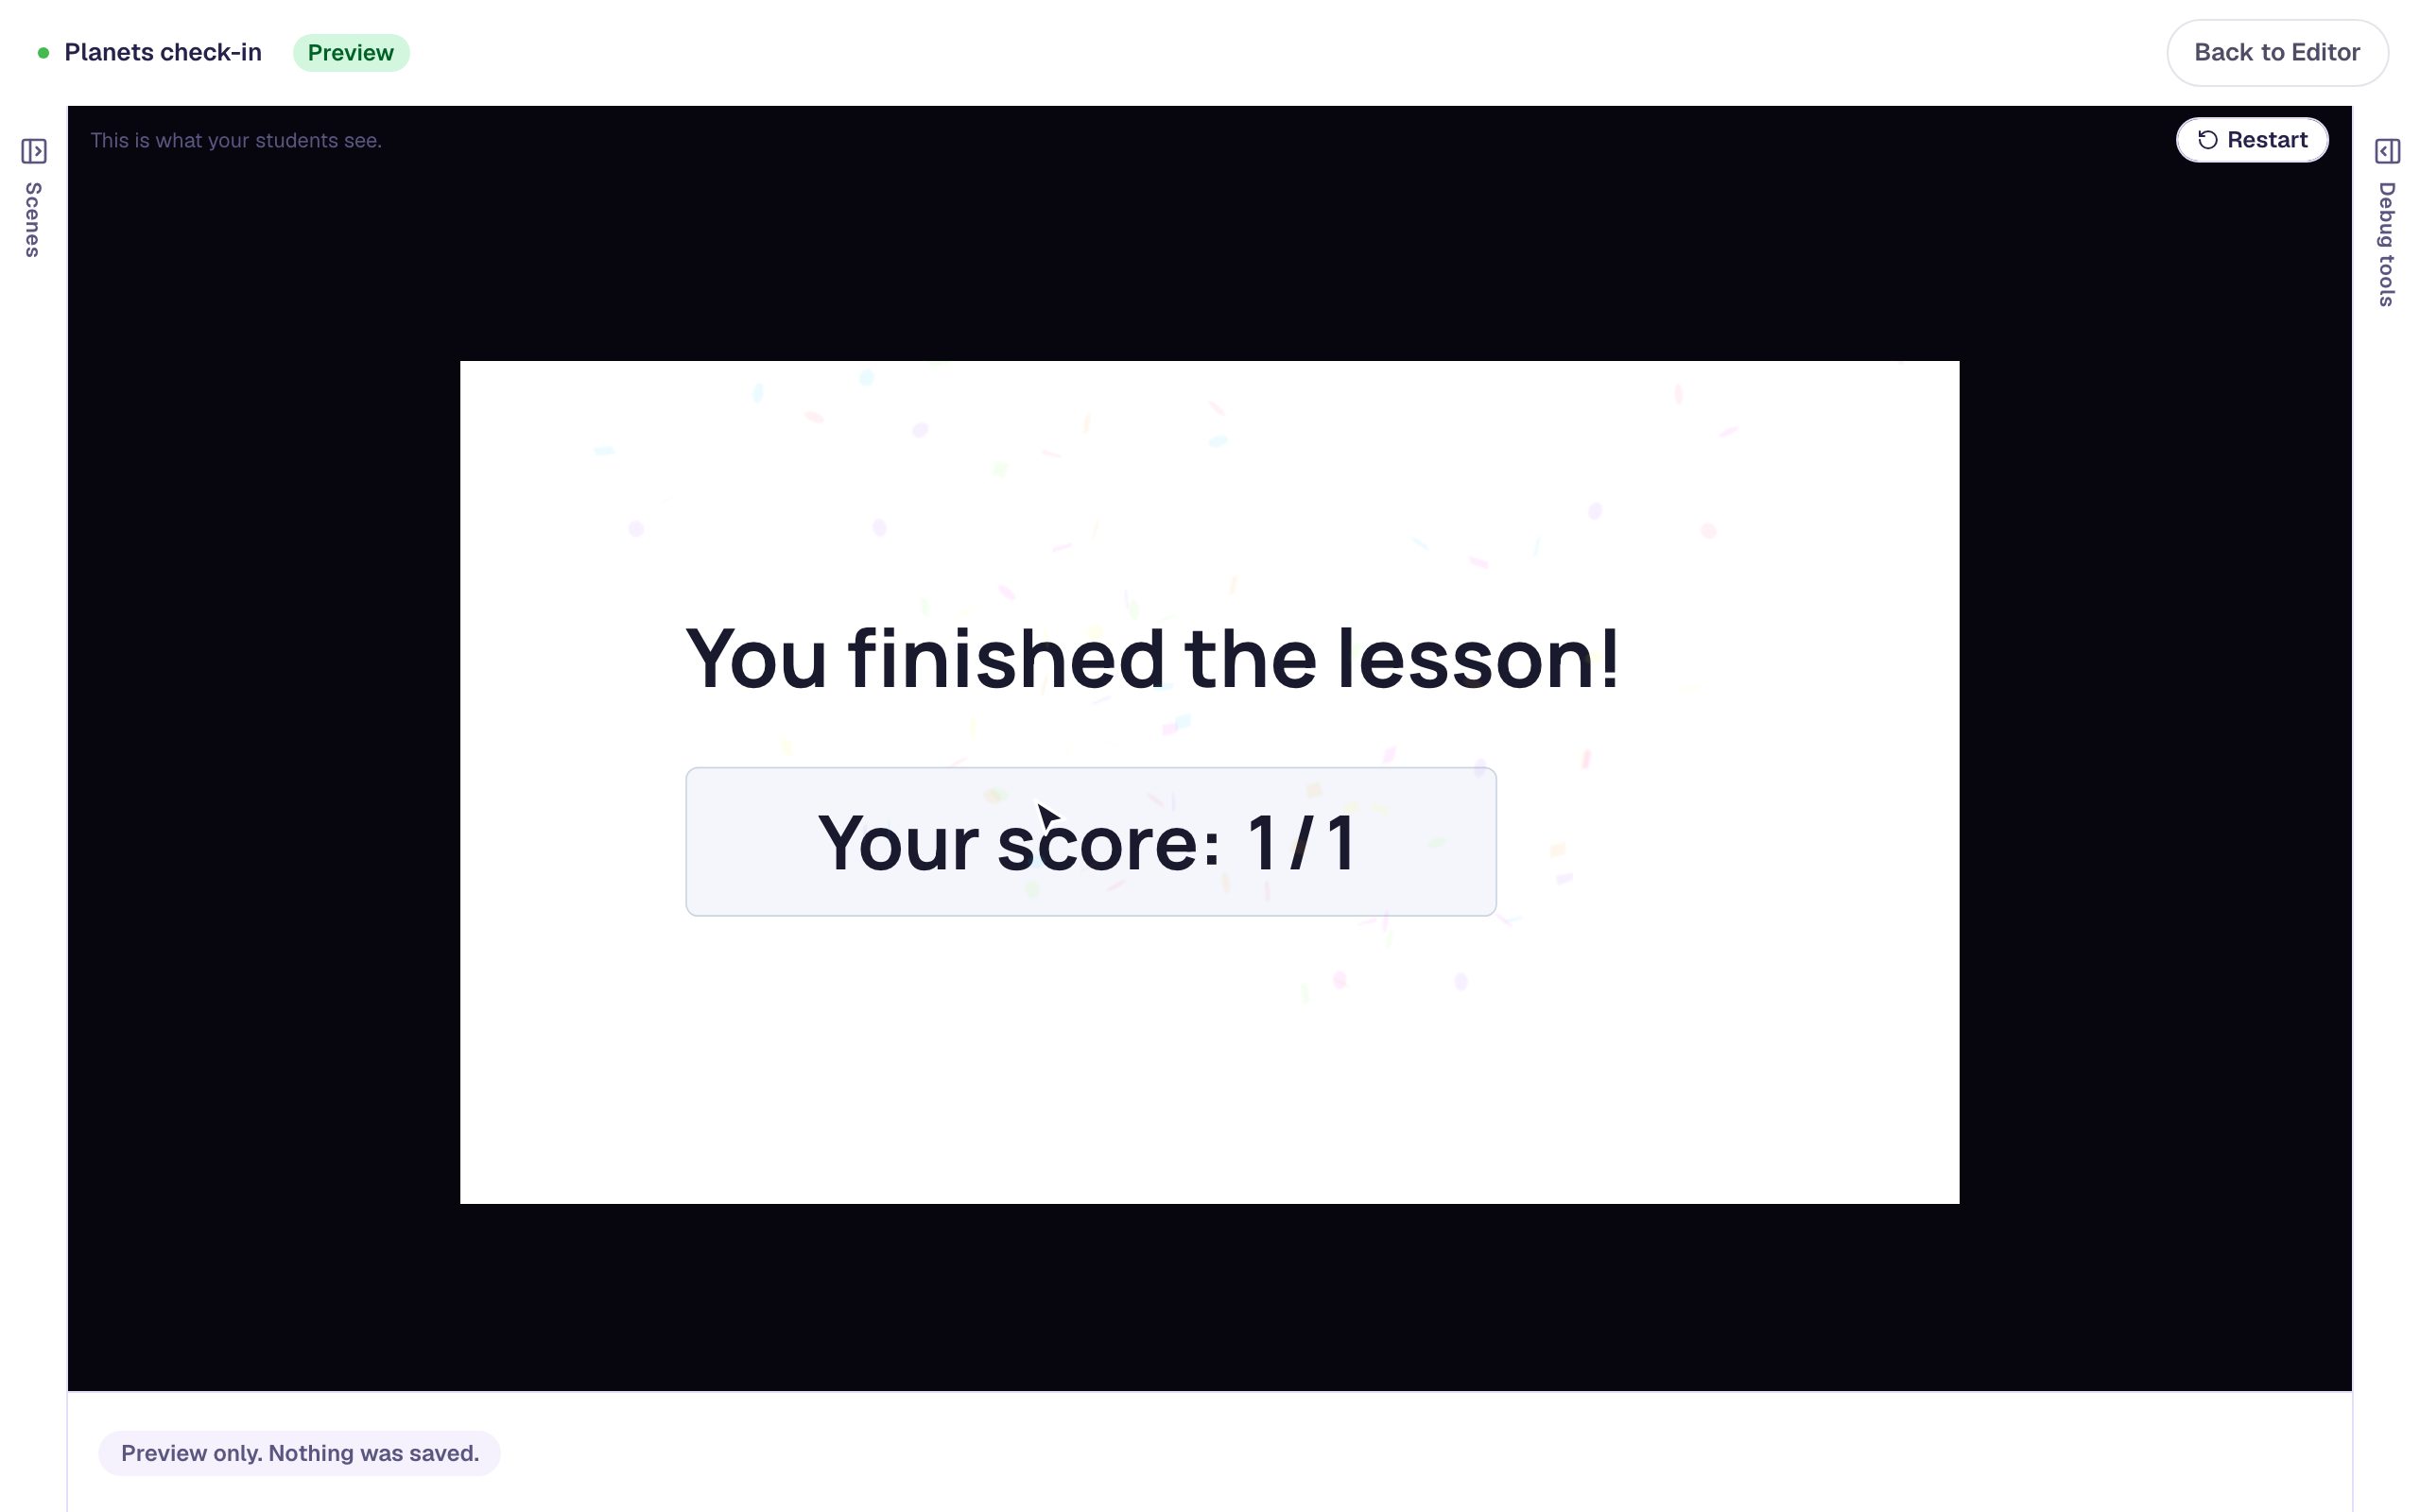
Preview never records anything. The bar at the bottom says Preview only. Nothing was saved. Click Restart to try again, or Back to Editor to keep building.
The score is 1 / 1 even though we tried Venus first. This scene moves on the moment the answer is right, so a student can keep trying until they get there. That's great for practice. If you want the first answer to count, have the scene check answers only when a Submit button is pressed: see When the check happens.
What you built
You built a complete lesson with:
- a question written as a heading,
- a scored multiple-choice widget with one correct answer and instant feedback,
- an I'm done button that finishes the lesson, and
- the closing scene that shows the score.
That's the core loop of every Berdee lesson. To make it longer, add more scenes from the Scenes tab, or build a question once and copy it: Build a three-question quiz by duplicating a scene shows how. For a question with more than one right answer, and photos instead of words, try Ask a "select all that apply" question with pictures. For a question where students type the answer instead of picking it, try Write a fill-in-the-blank sentence that accepts more than one answer. When you're ready to share it, see Assigning lessons.
Make this lesson yours
Add the lesson you just watched being built to your account, then change it for your class: your questions, your pictures, your colors.
Free to sign up, and you'll come straight back here. I have an account