Share working buttons across scenes with a layout
Build a map students explore in any order, and put a Back to the map button and a mission reminder on a layout, so every scene that uses it gets buttons that work, built and wired once.
- Level
- Intermediate
- Time
- About 15 min
- Steps
- 8
A Planet explorers lesson where students pick Mars, Jupiter or Saturn from a map, and every planet scene has the same working Back to the map and Your mission buttons, built once on a layout.
Some lessons aren't a straight line. A map, a museum, a choice board: students pick where to go, look around, and come back for the next pick. Every one of those scenes needs the same way home, and wiring a Back button on each scene by hand gets old fast, especially when you add a scene later.
A layout solves it. Layouts aren't only for looks: a button on a layout works on every scene that uses it. Wire it once, and every scene gets a working copy, including scenes you add next month.
In this tutorial you'll build Planet explorers. The opening scene is a map with three planets. Each planet has its own scene, and all three share a layout called Planet page with two buttons: 🗺️ Back to the map, which takes students home, and 🚀 Your mission, which reminds them what to do. If you haven't used layouts before, Give every question the same frame with a layout covers the basics.
Step 1: Build the map
Click New lesson, then Start from scratch, and name the lesson Planet explorers. The Opening Scene is the map:
- Click an empty part of the scene, open Background, click Choose a style, open Nature, pick Night peaks, and click Apply background.
- Add a Heading that says
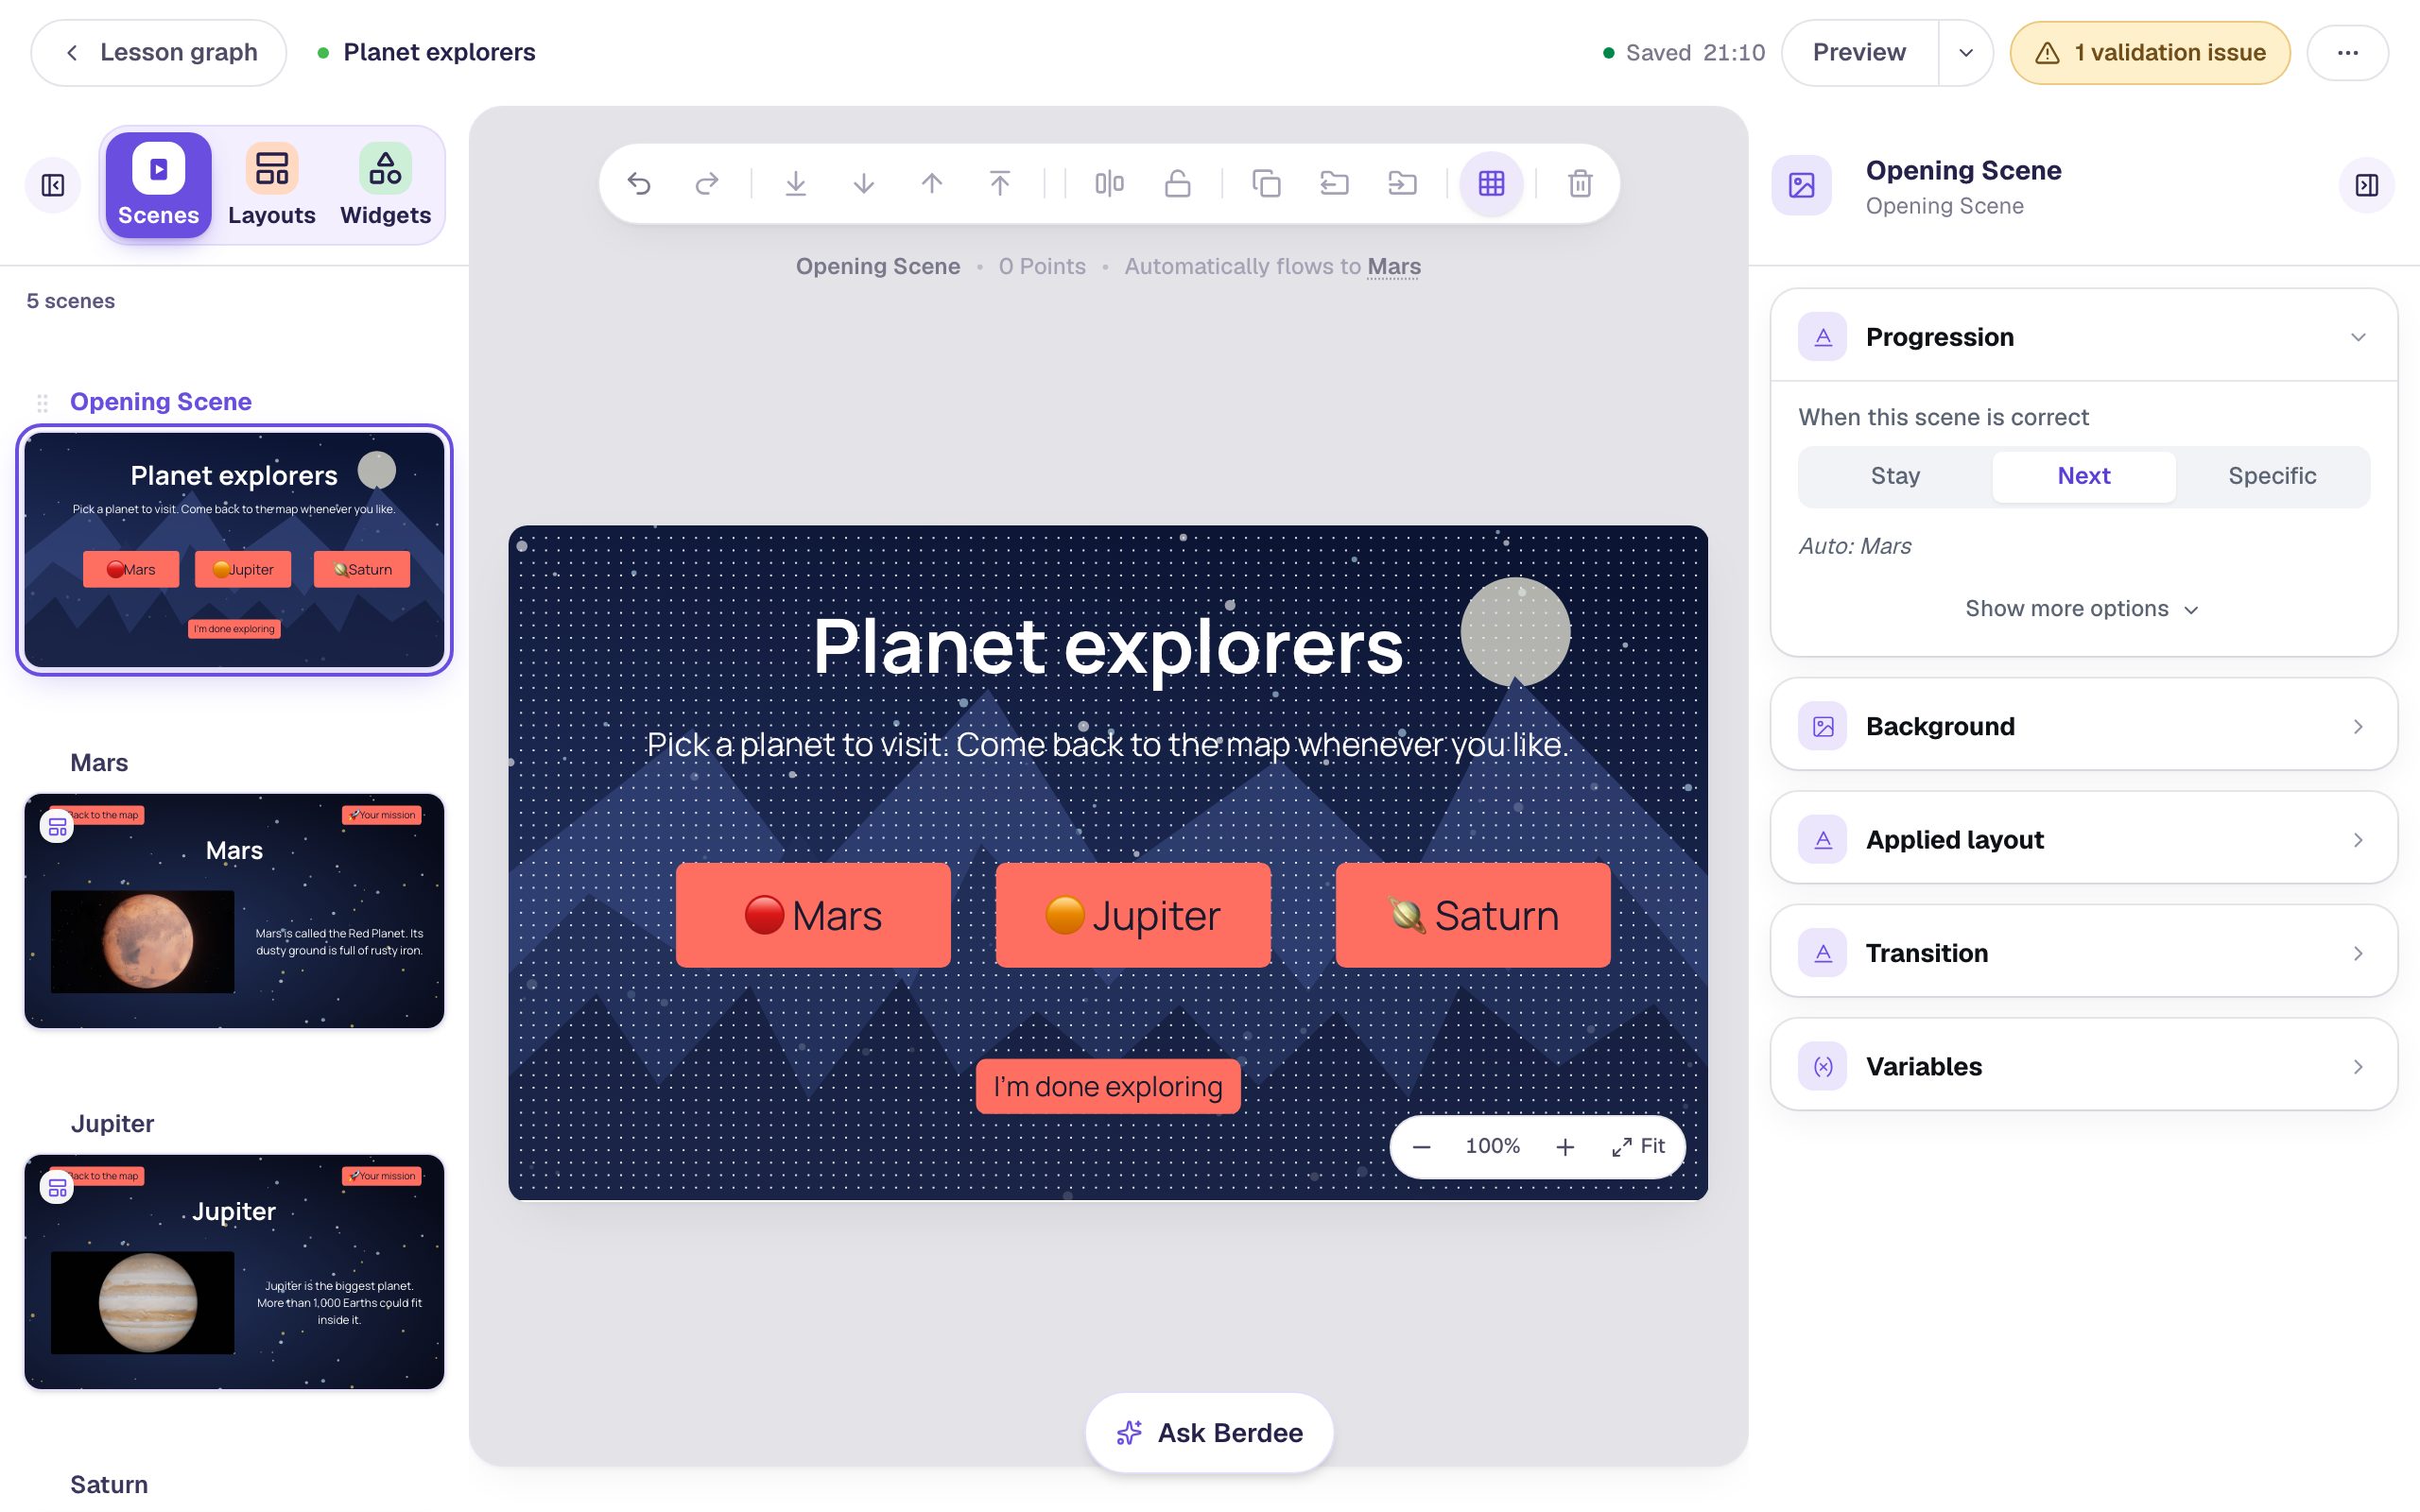
Planet explorersand a Body text that saysPick a planet to visit. Come back to the map whenever you like.Set both to white in Style & Layout → Text Color, so they read on the night sky. - Add three Buttons labelled
🔴 Mars,🟠 Jupiter, and🪐 Saturn(click Configure to change a button's label). Set their Font Size to 32, switch them to Fixed width, and line them up across the middle. - Add one more Button,
I'm done exploring, smaller, under the planets.
Give each button a name that says what it does: click its name at the top of the properties panel (Button 1), type Mars, and press Enter. The Lesson Graph lists buttons by name, so this pays off in Step 7.
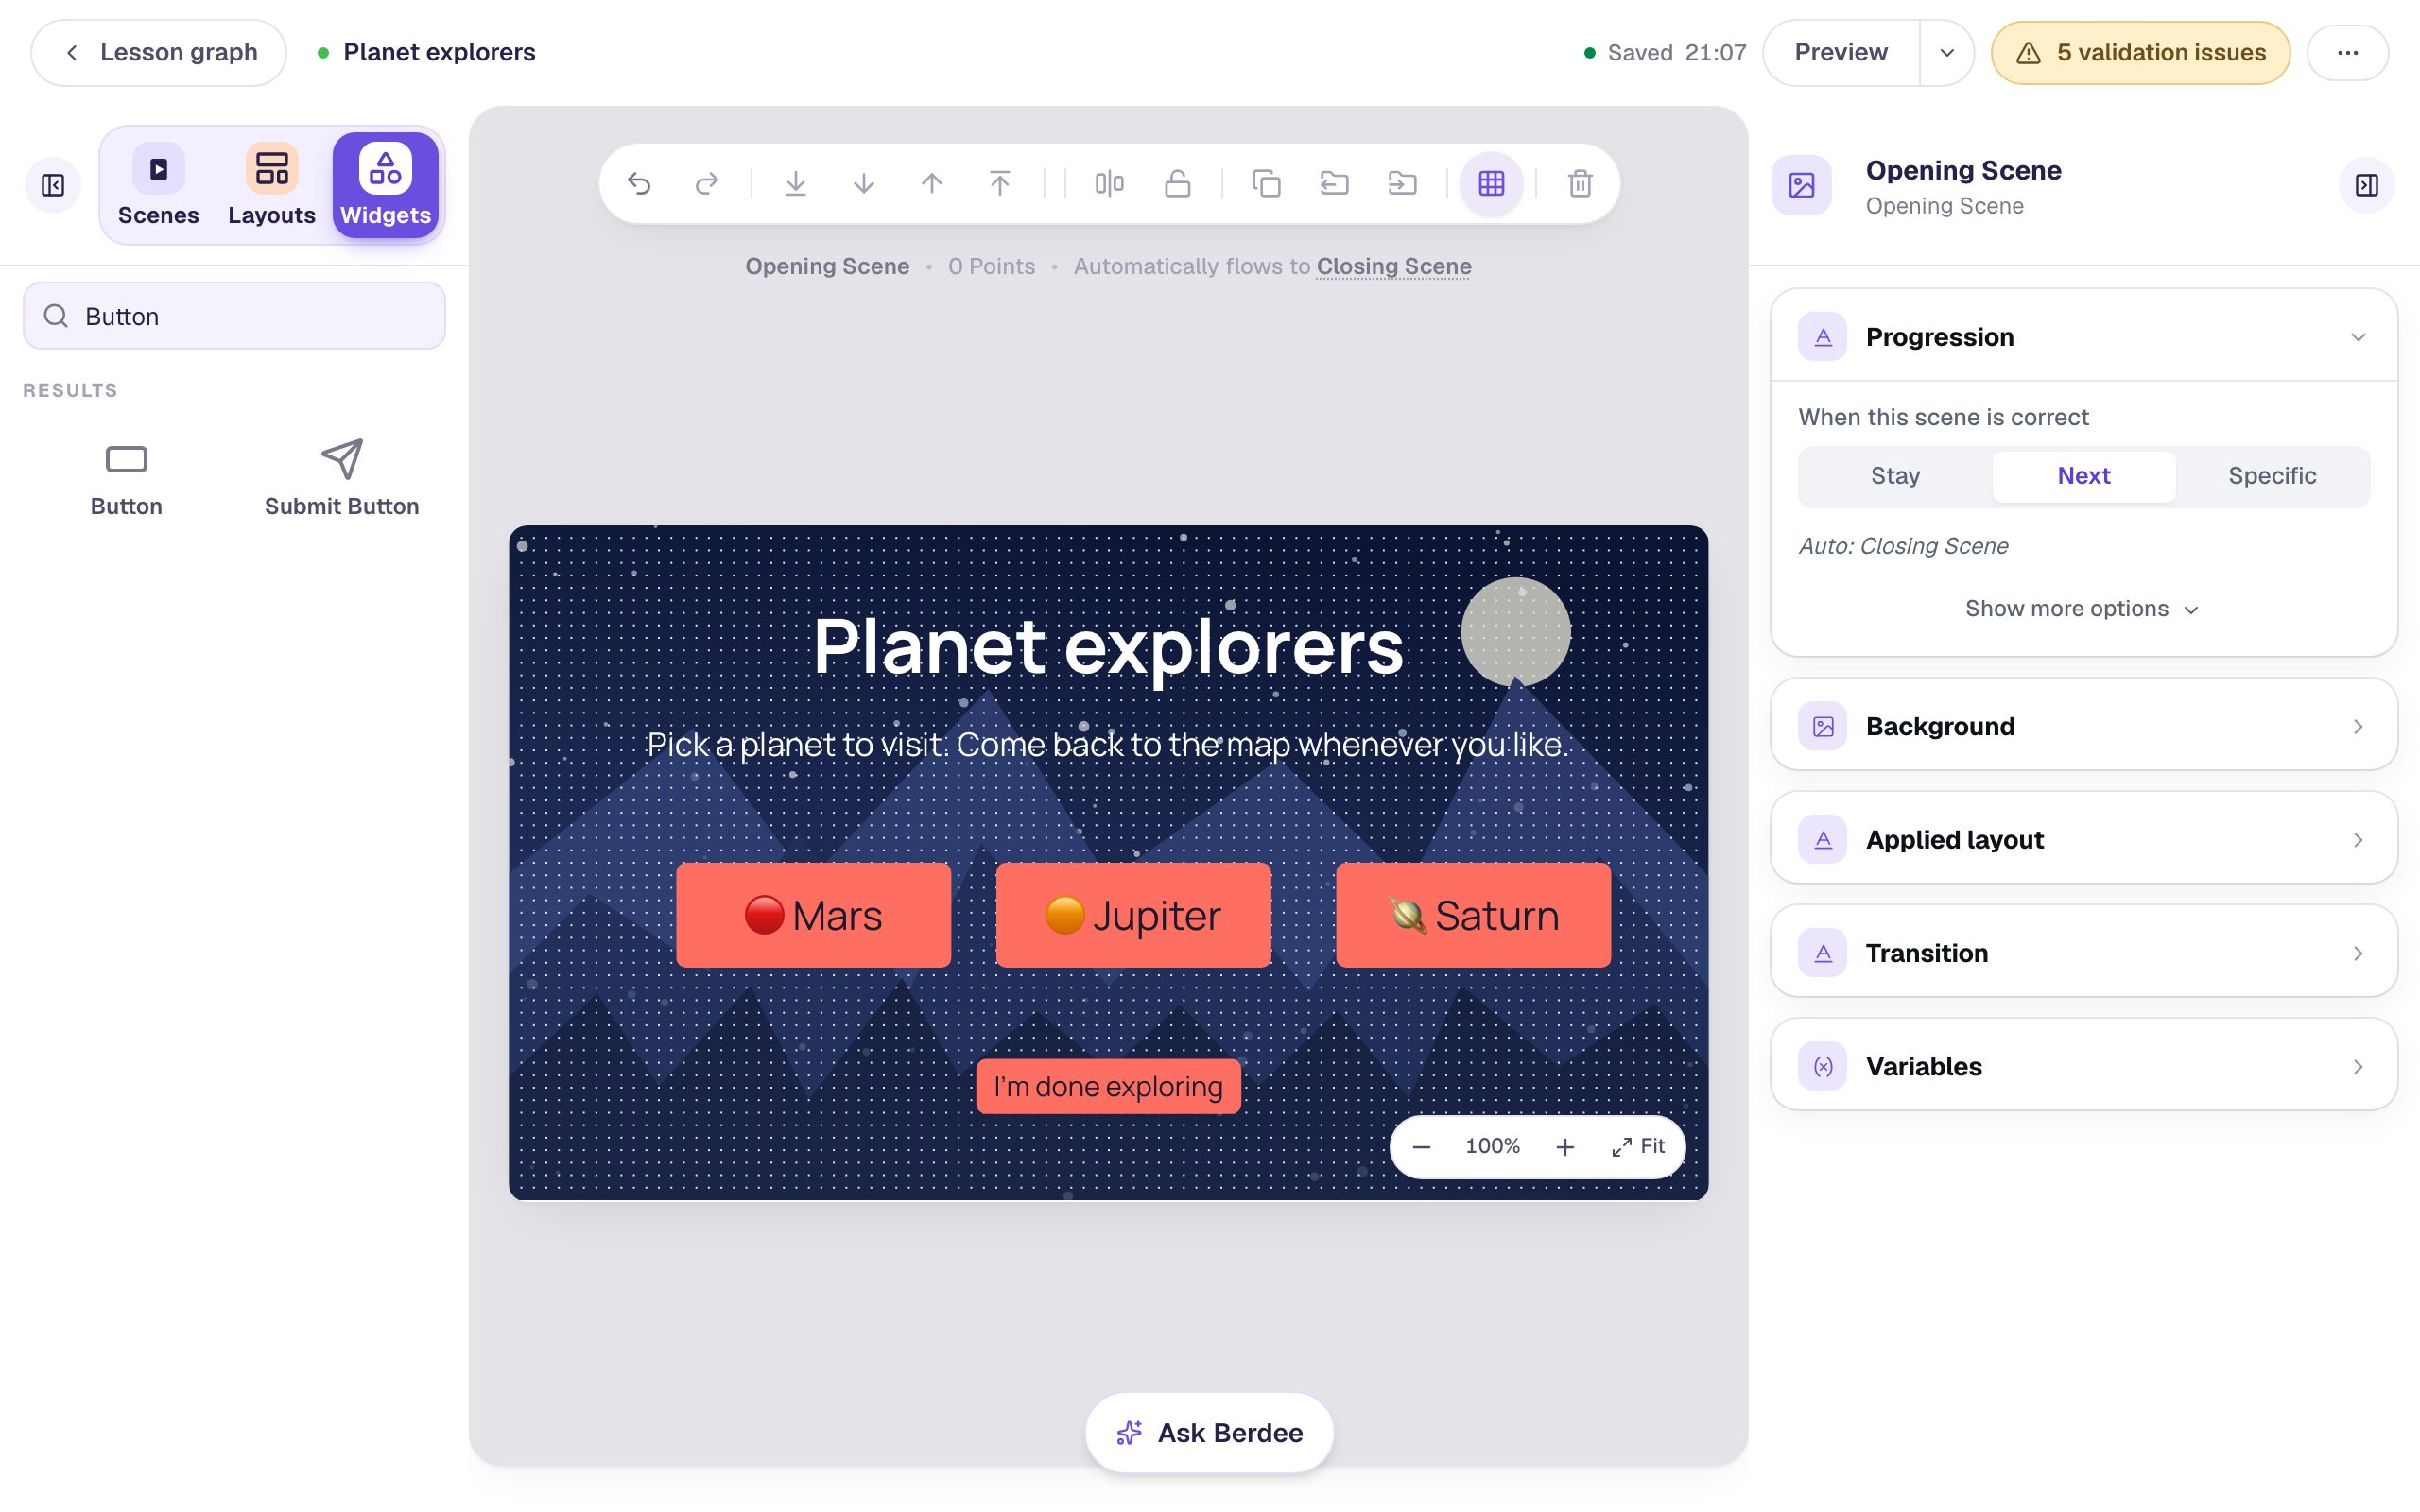
The buttons don't do anything yet. You'll wire them in Step 6, once their scenes exist.
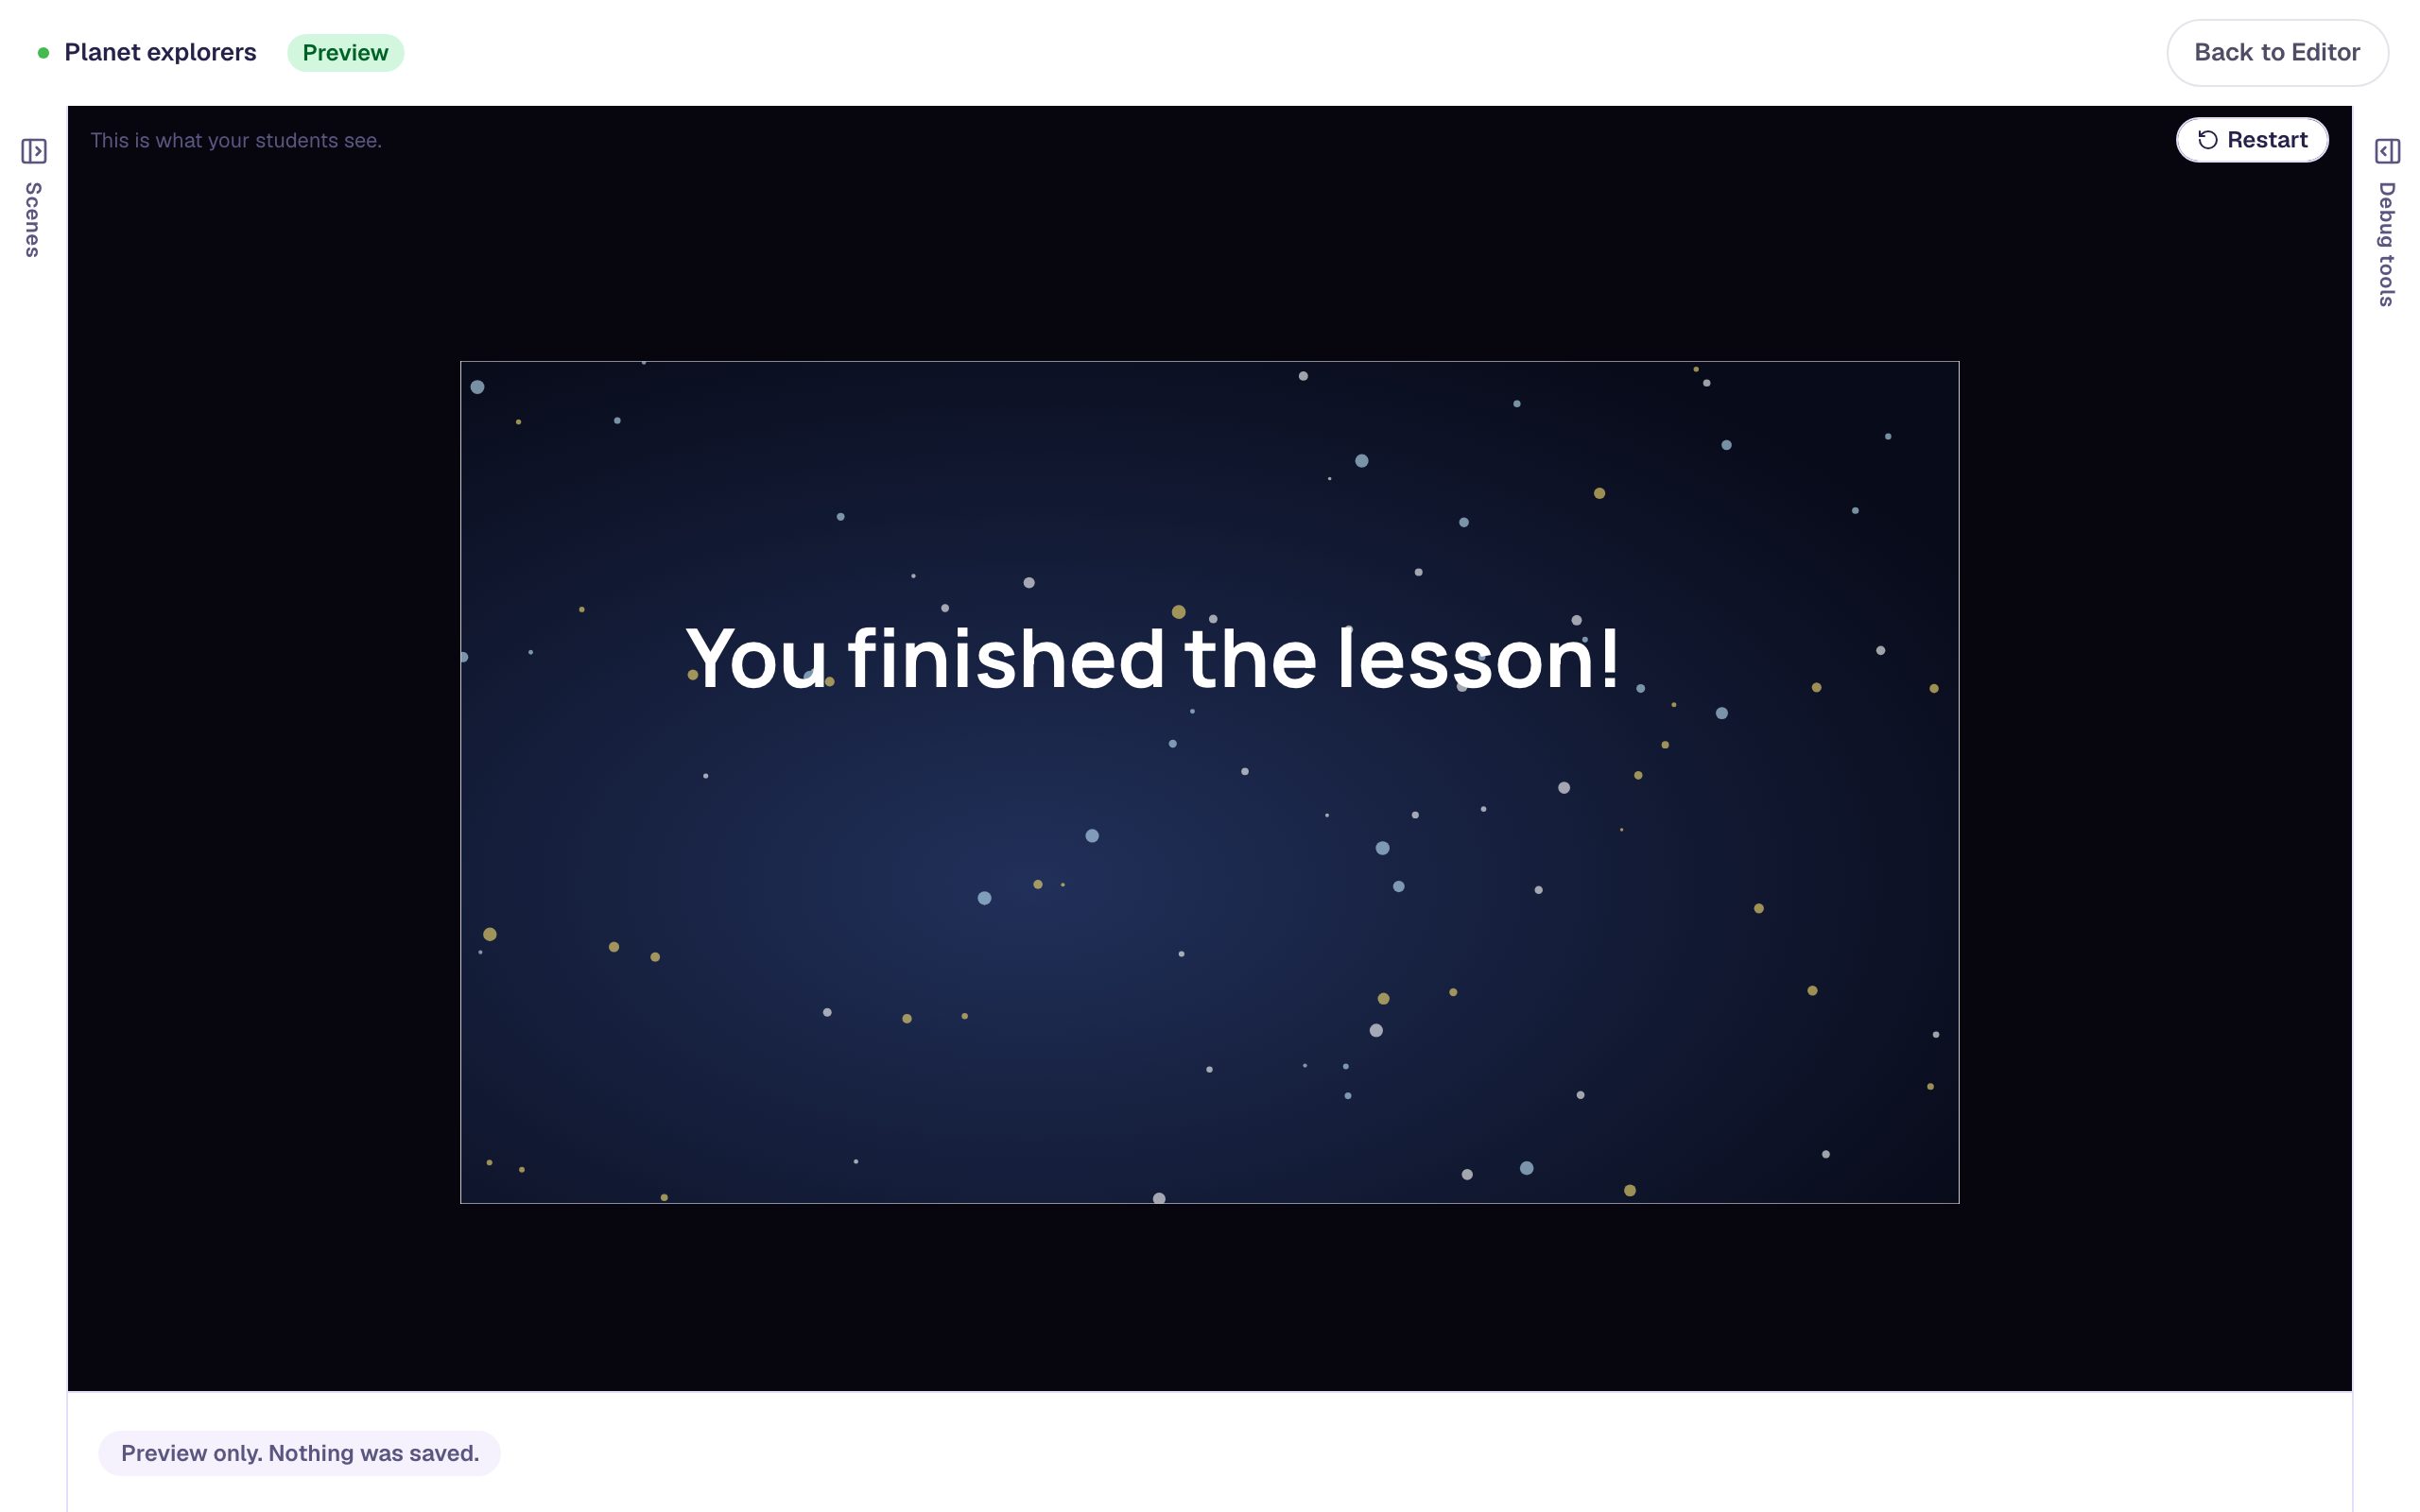
Give the Closing Scene a background too (Starfield, in Nature), and set its You finished the lesson! headline to white so it shows up on the dark sky.
Step 2: Make a layout
Open the Layouts tab, next to Scenes, and click Add layout. The new layout opens with its name ready to type: type Planet page and press Enter.
Click the layout to open it on the canvas, click an empty part of it, and give it the Starfield background (Background → Choose a style → Nature).
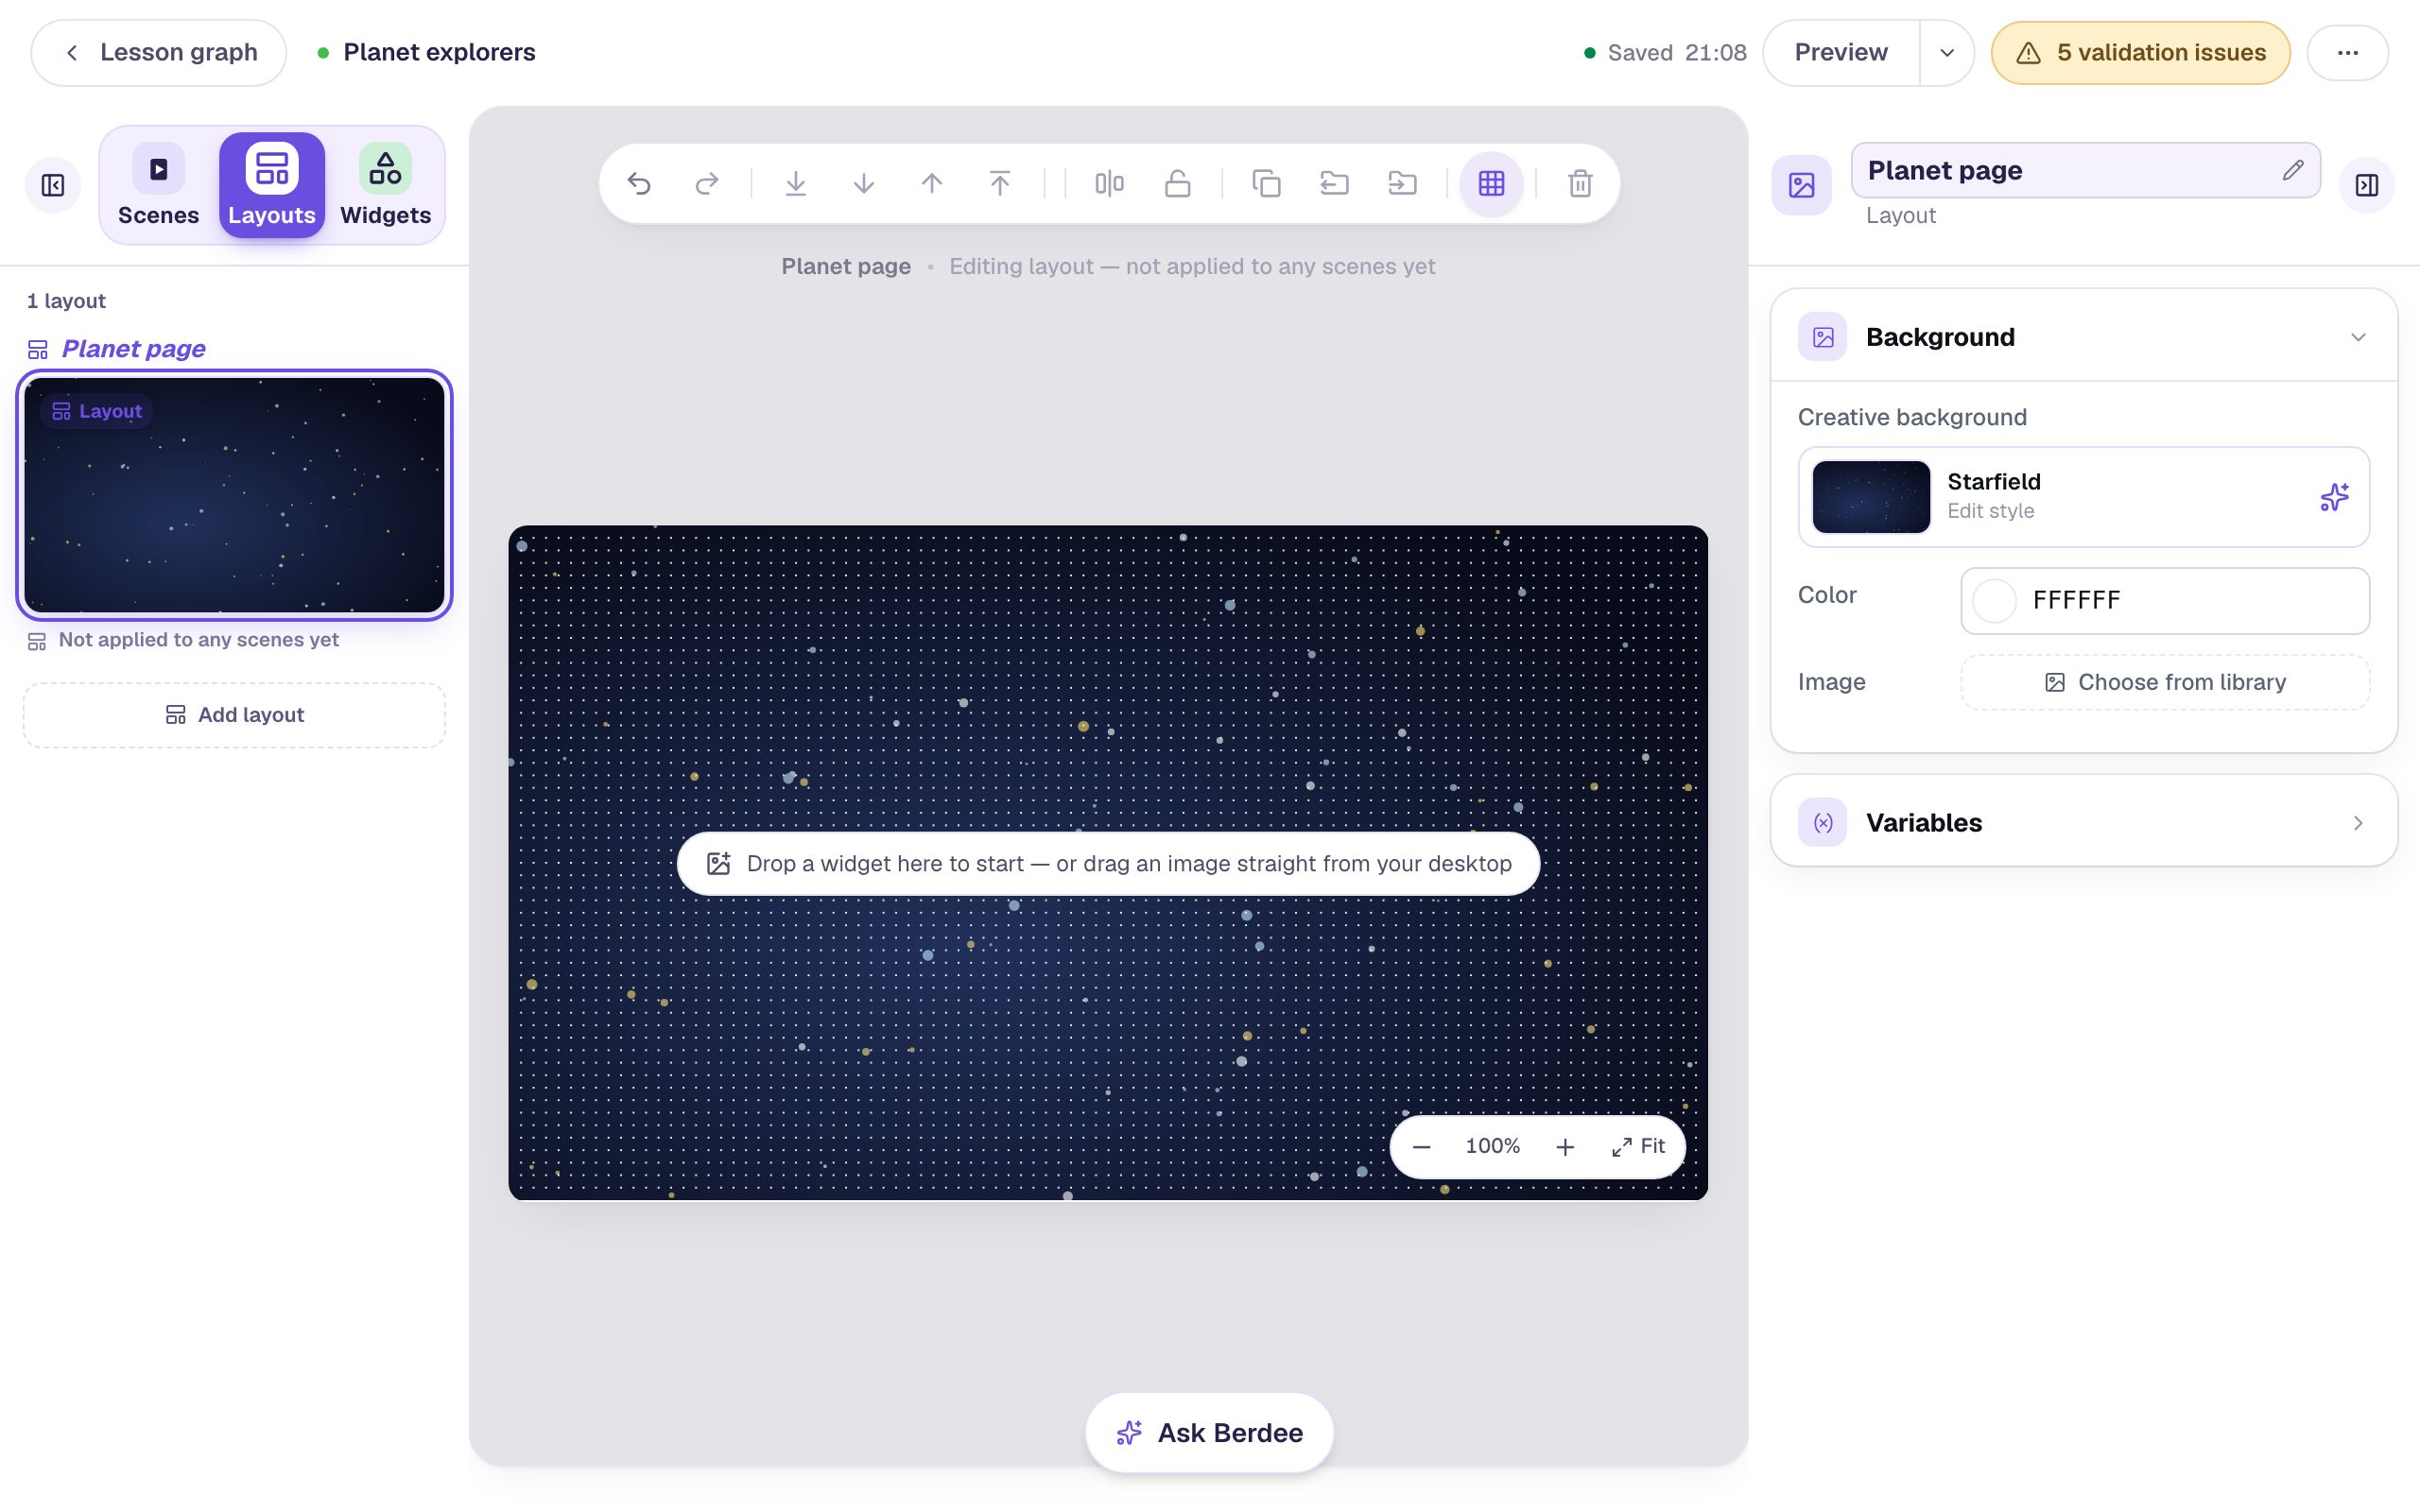
The strip above the canvas reads Editing layout — not applied to any scenes yet. Everything you add here will show on every scene that uses Planet page.
Step 3: Add the way home
Still on the layout, add a Button labelled 🗺️ Back to the map, name it Back to the map, set its Font Size to 22, and drag it to the top-left corner.
Now make it work. In the properties panel, open Behaviors:
- Click Add Behavior and choose On Press. A new behavior starts with a Display Message action.
- Change Display Message to Navigate to Scene.
- In the list under it, choose Opening Scene, the map.
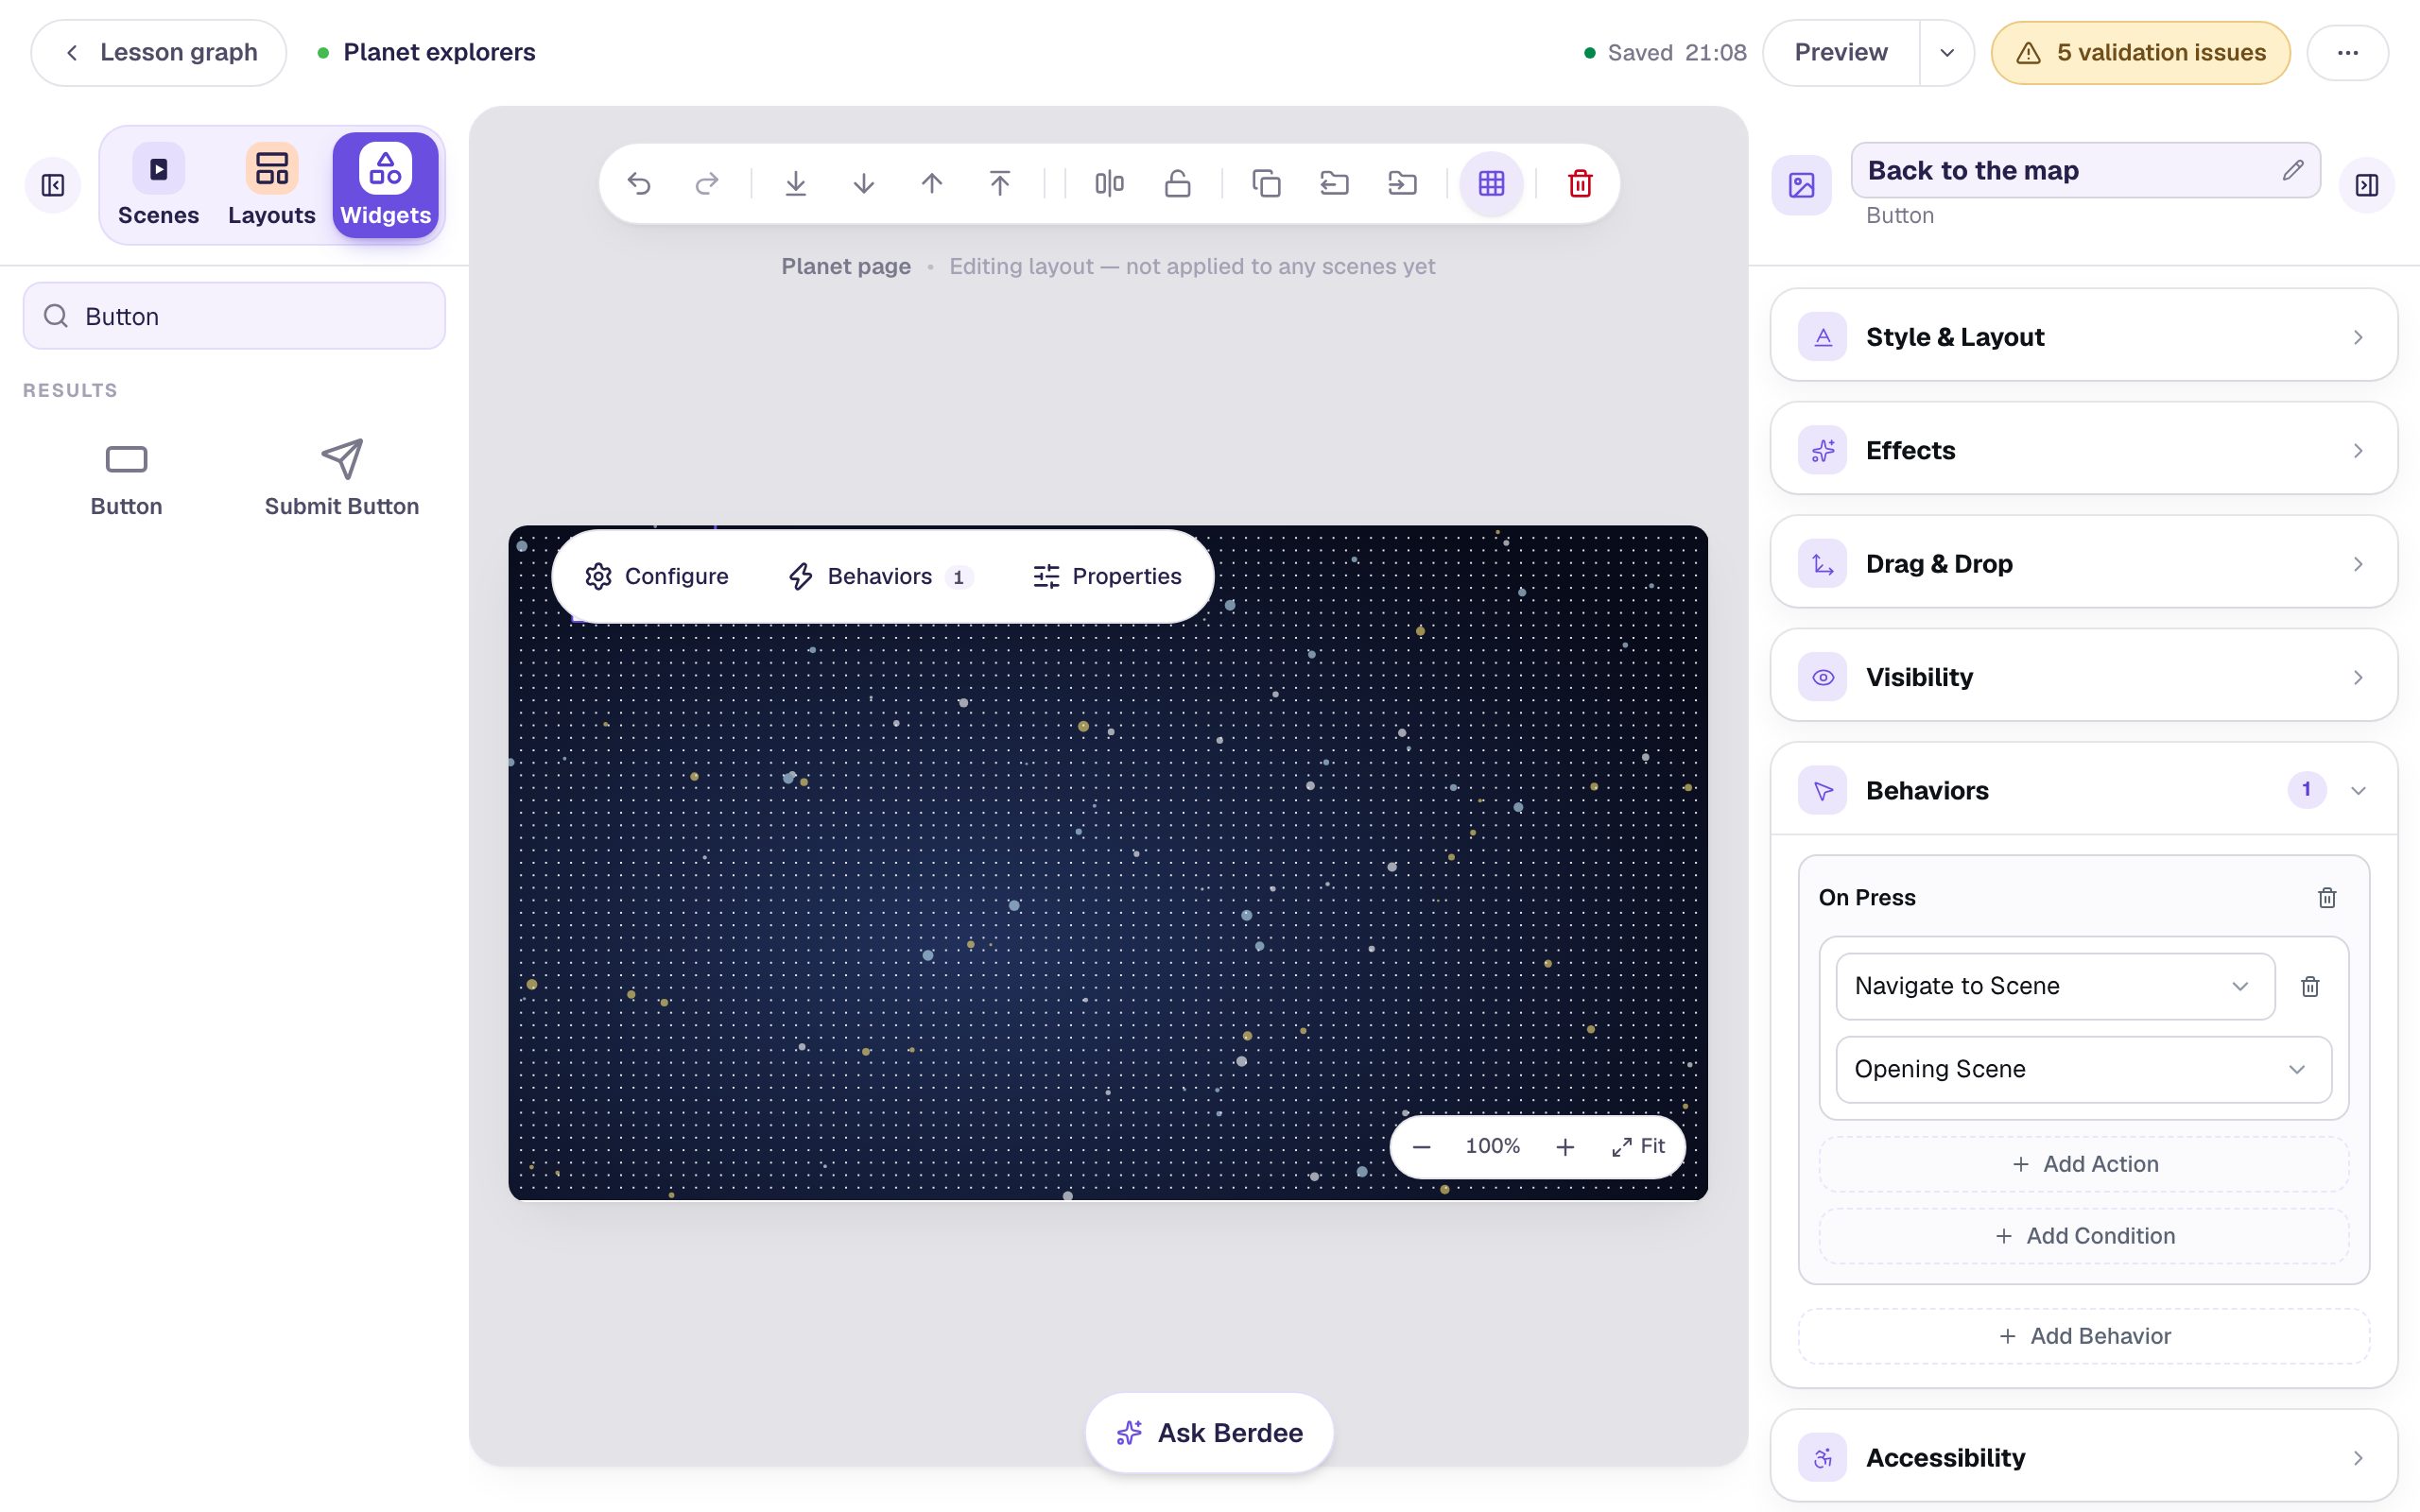
A Navigate to Scene action always goes to the scene you chose, wherever it's pressed. That's exactly right for a way home: from Mars, Jupiter or Saturn, the map is in the same place. (It's also why a layout isn't the place for a Next button: "next" is a different scene on each planet.)
Step 4: Add a mission reminder
Add a second Button to the layout, labelled 🚀 Your mission, named Your mission, at Font Size 22, in the top-right corner. Give it an On Press behavior too, but keep the Display Message action and type the message:
Find one amazing fact on this planet. Then go back to the map and visit another one!
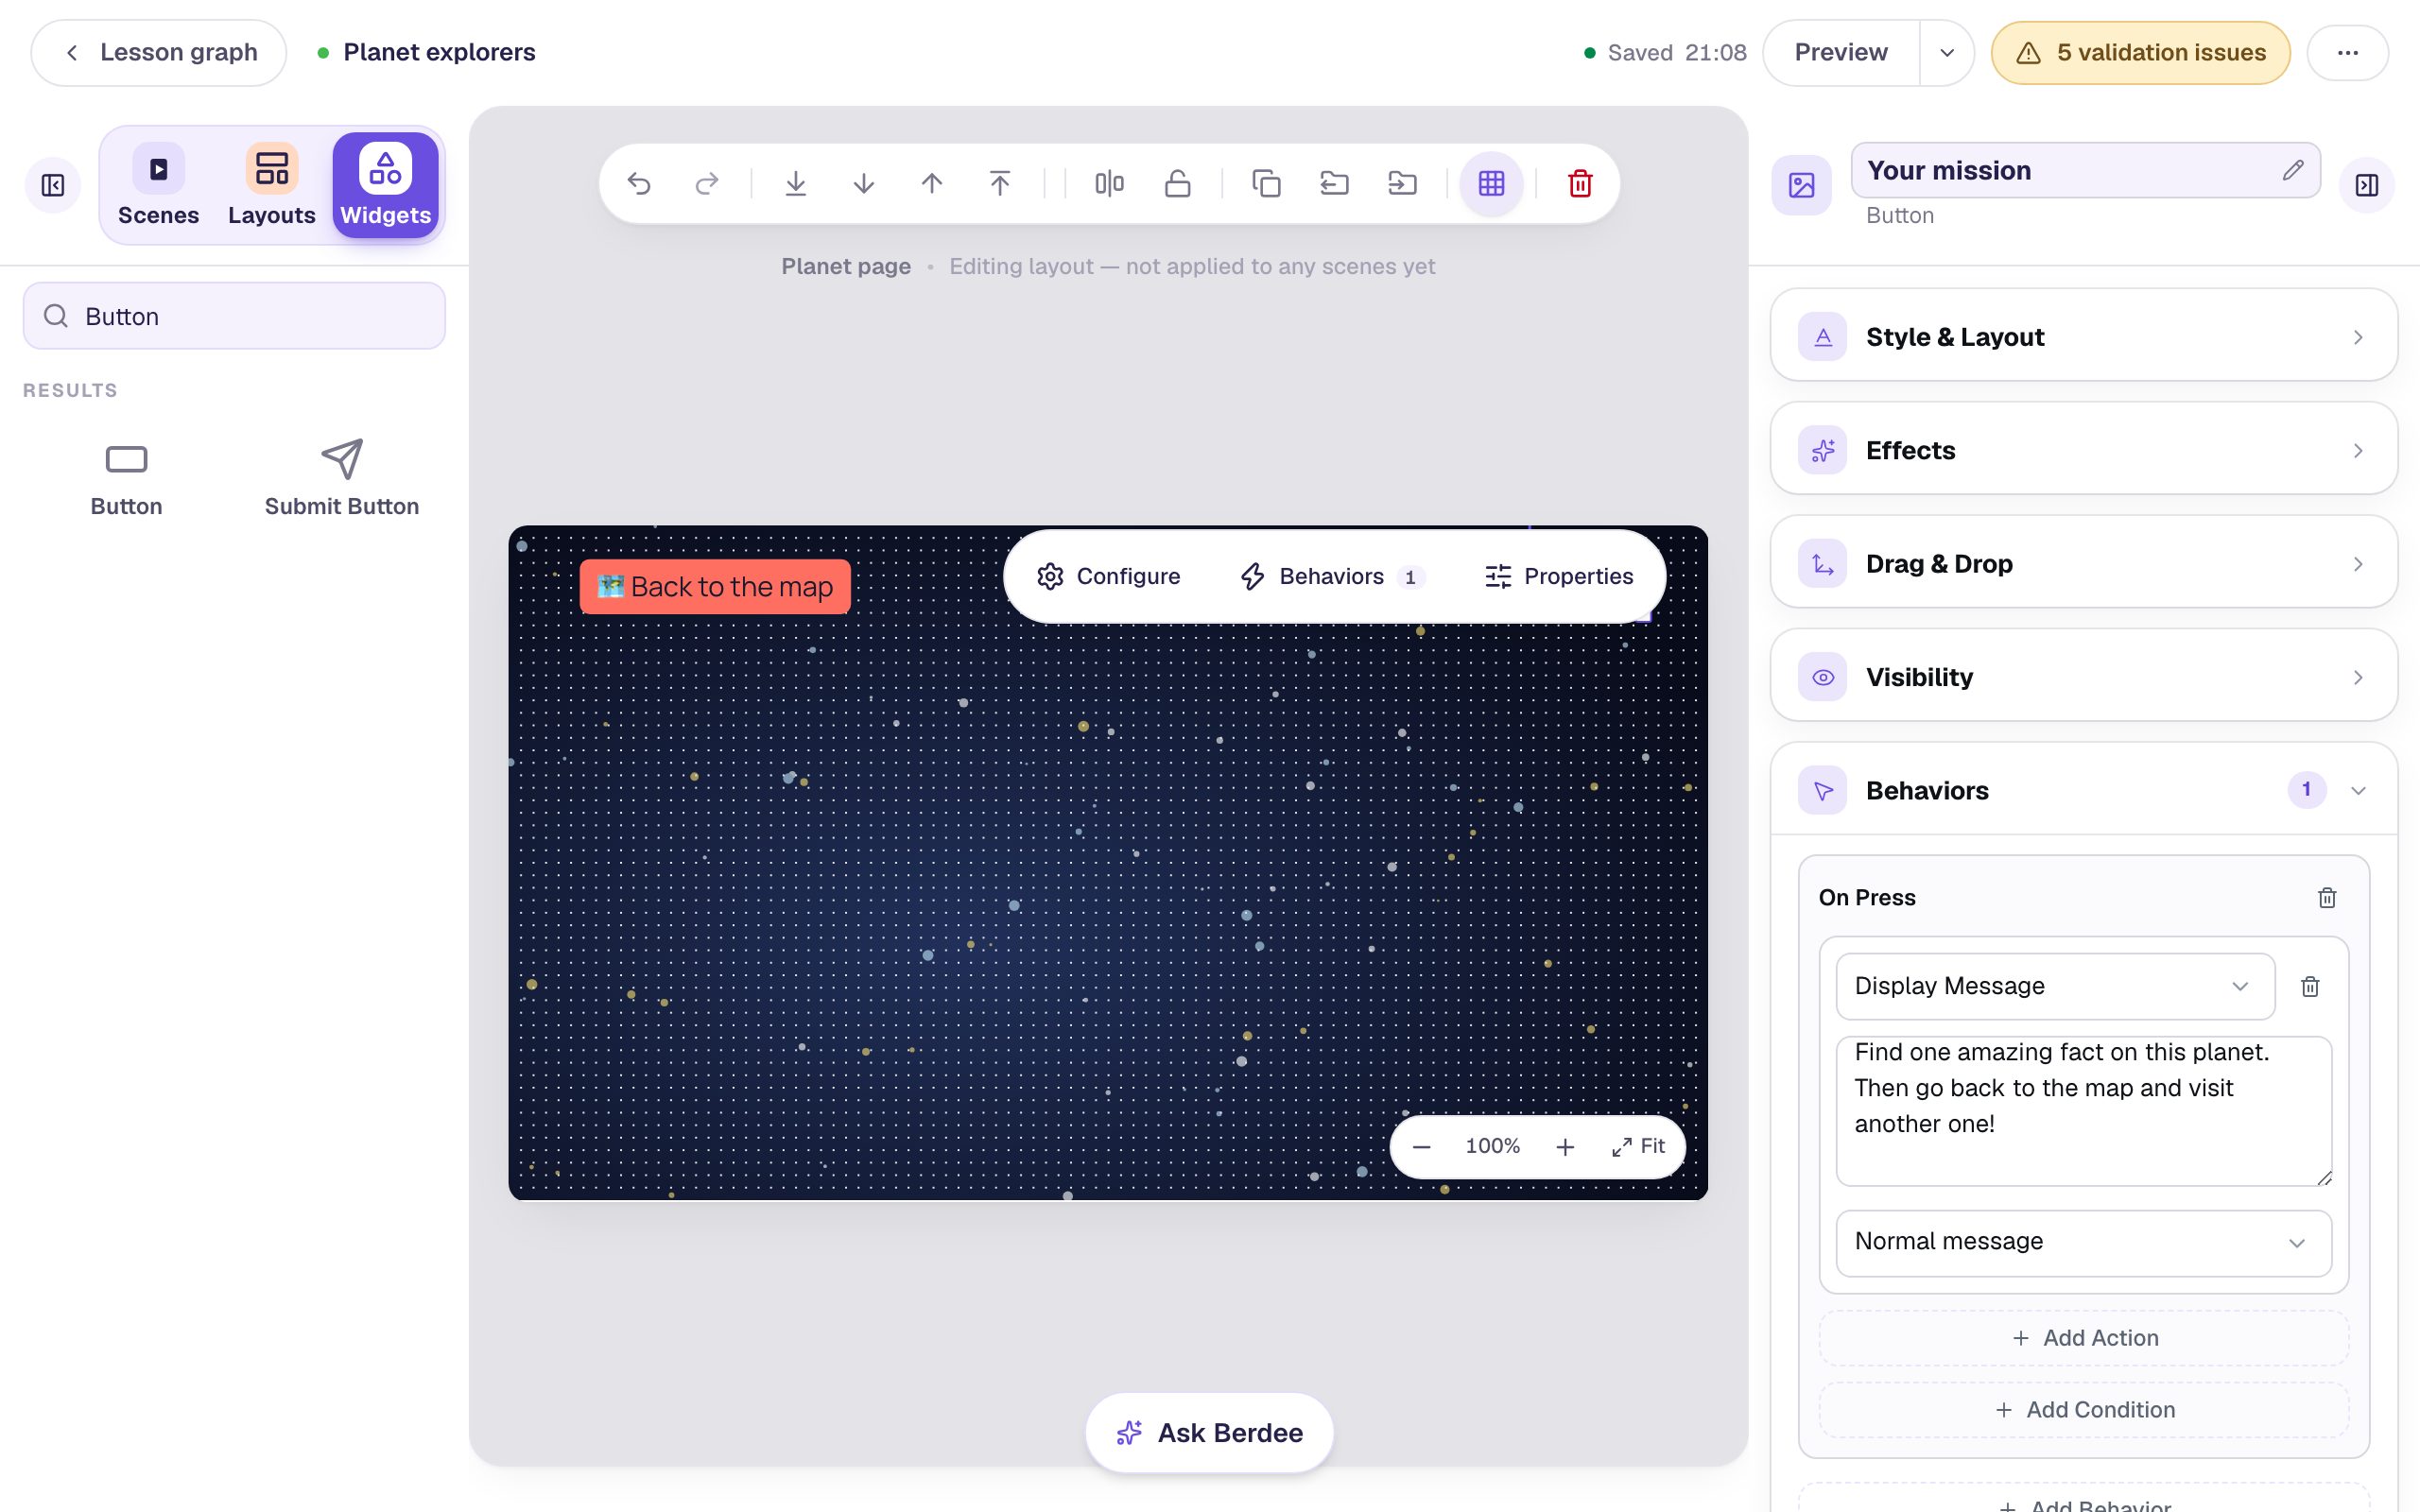
That's the whole layout: a night sky and two buttons that work.
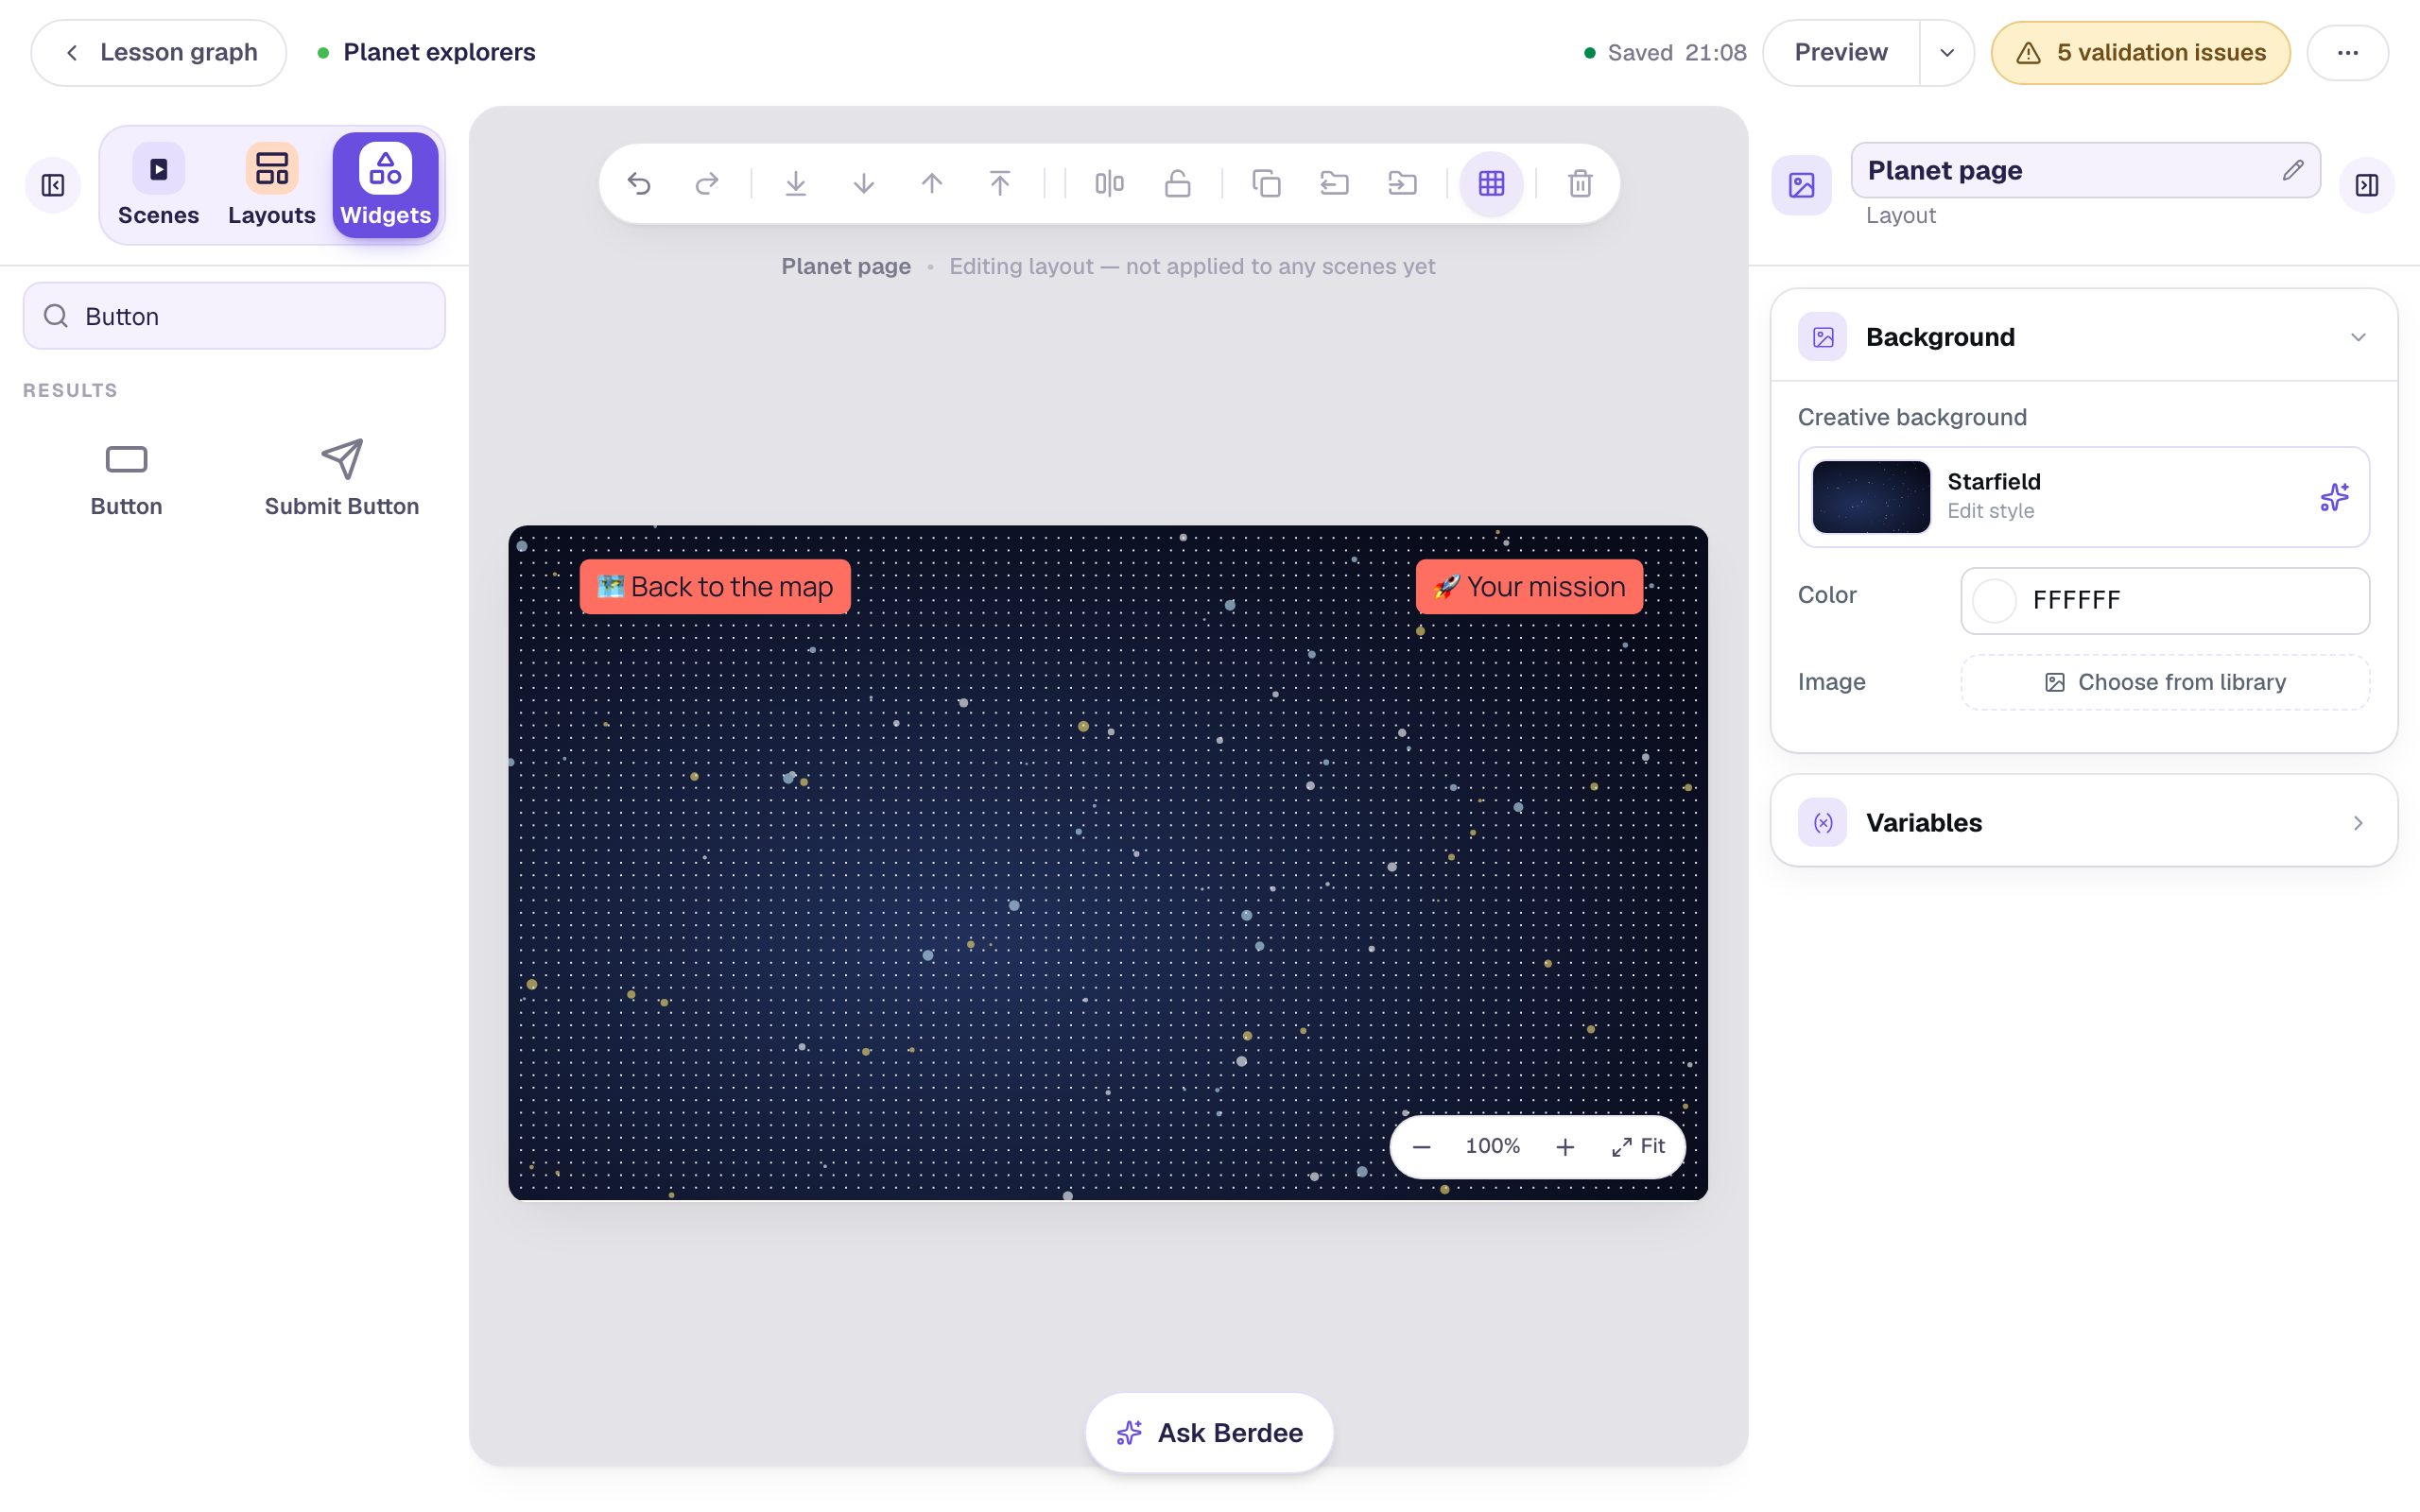
Keep each planet's own content off the layout. A layout is for what every scene shares.
Step 5: Add the planets
Open the Scenes tab, click the Opening Scene, and click Add scene. Now that the lesson has a layout, Berdee asks which one the new scene should use. Click Planet page, check the preview, and click Add scene:
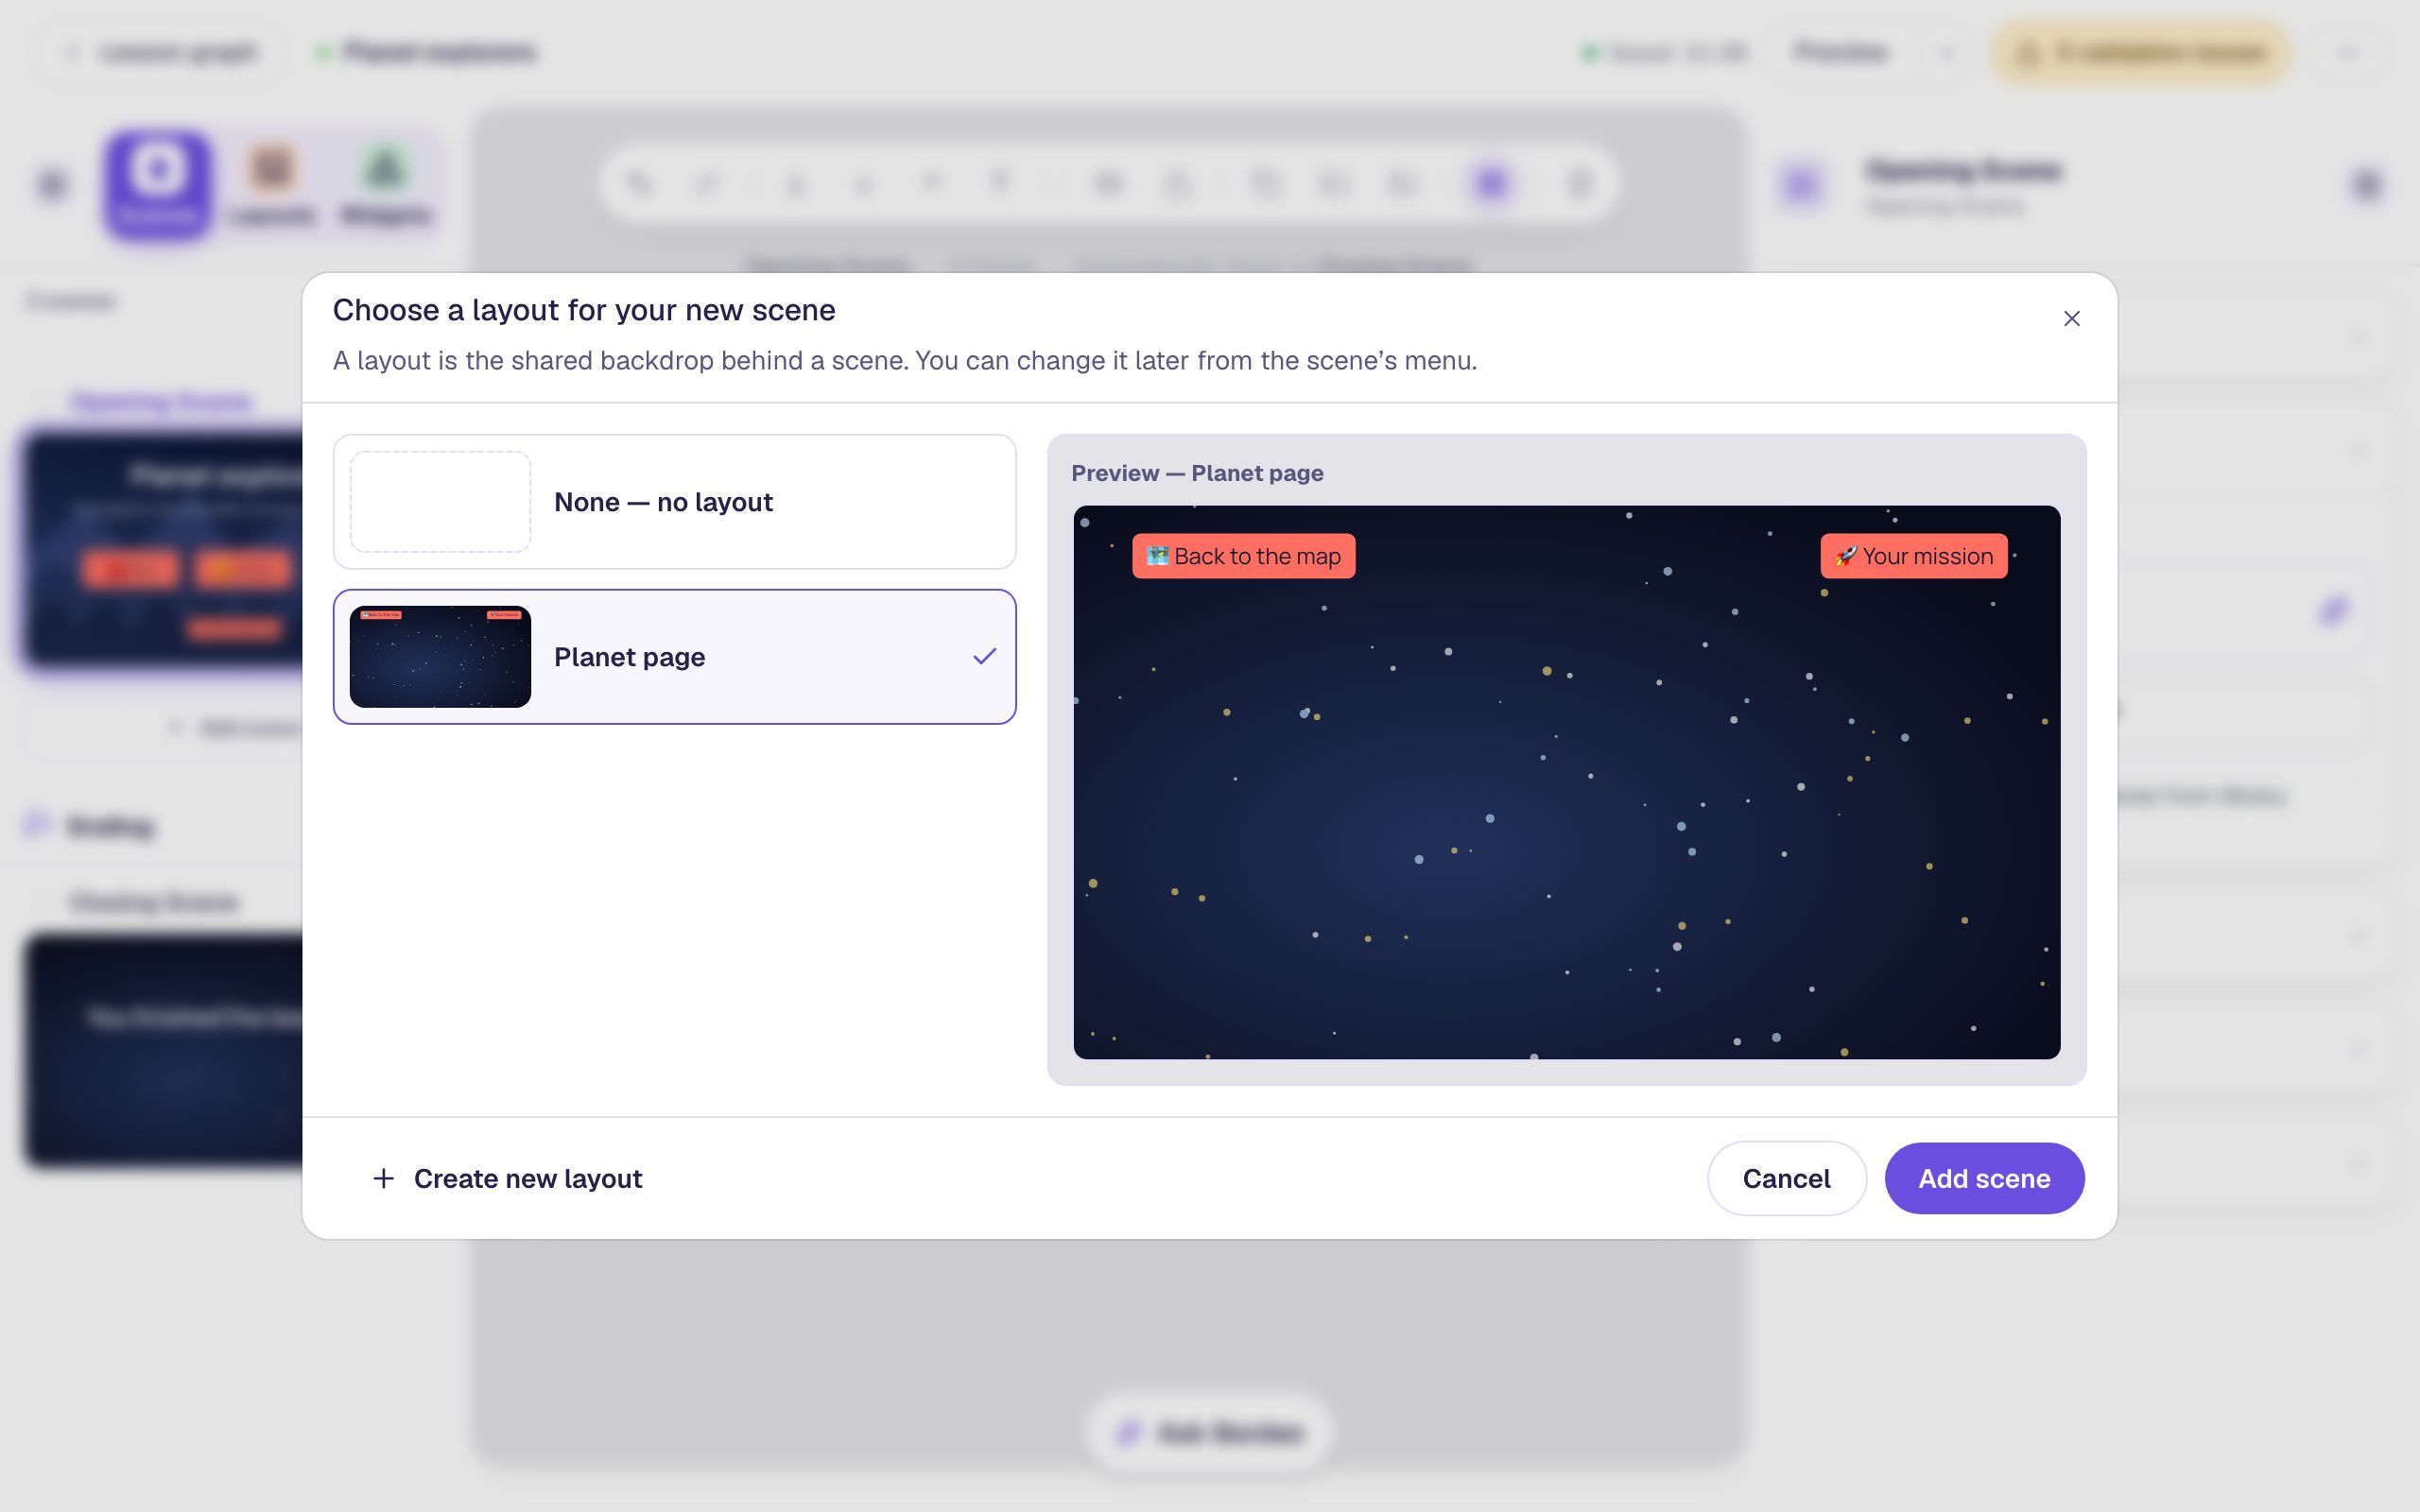
The map doesn't use a layout, so the first time the picker starts on None. Rename the new scene Mars (double-click its name in the Scenes list) and give it its own content:
- A white Heading that says
Mars, under the layout's buttons. - An Image: click Choose image, search the stock photos for
mars planet, and pick one. - A white Body text with one fact:
Mars is called the Red Planet. Its dusty ground is full of rusty iron.
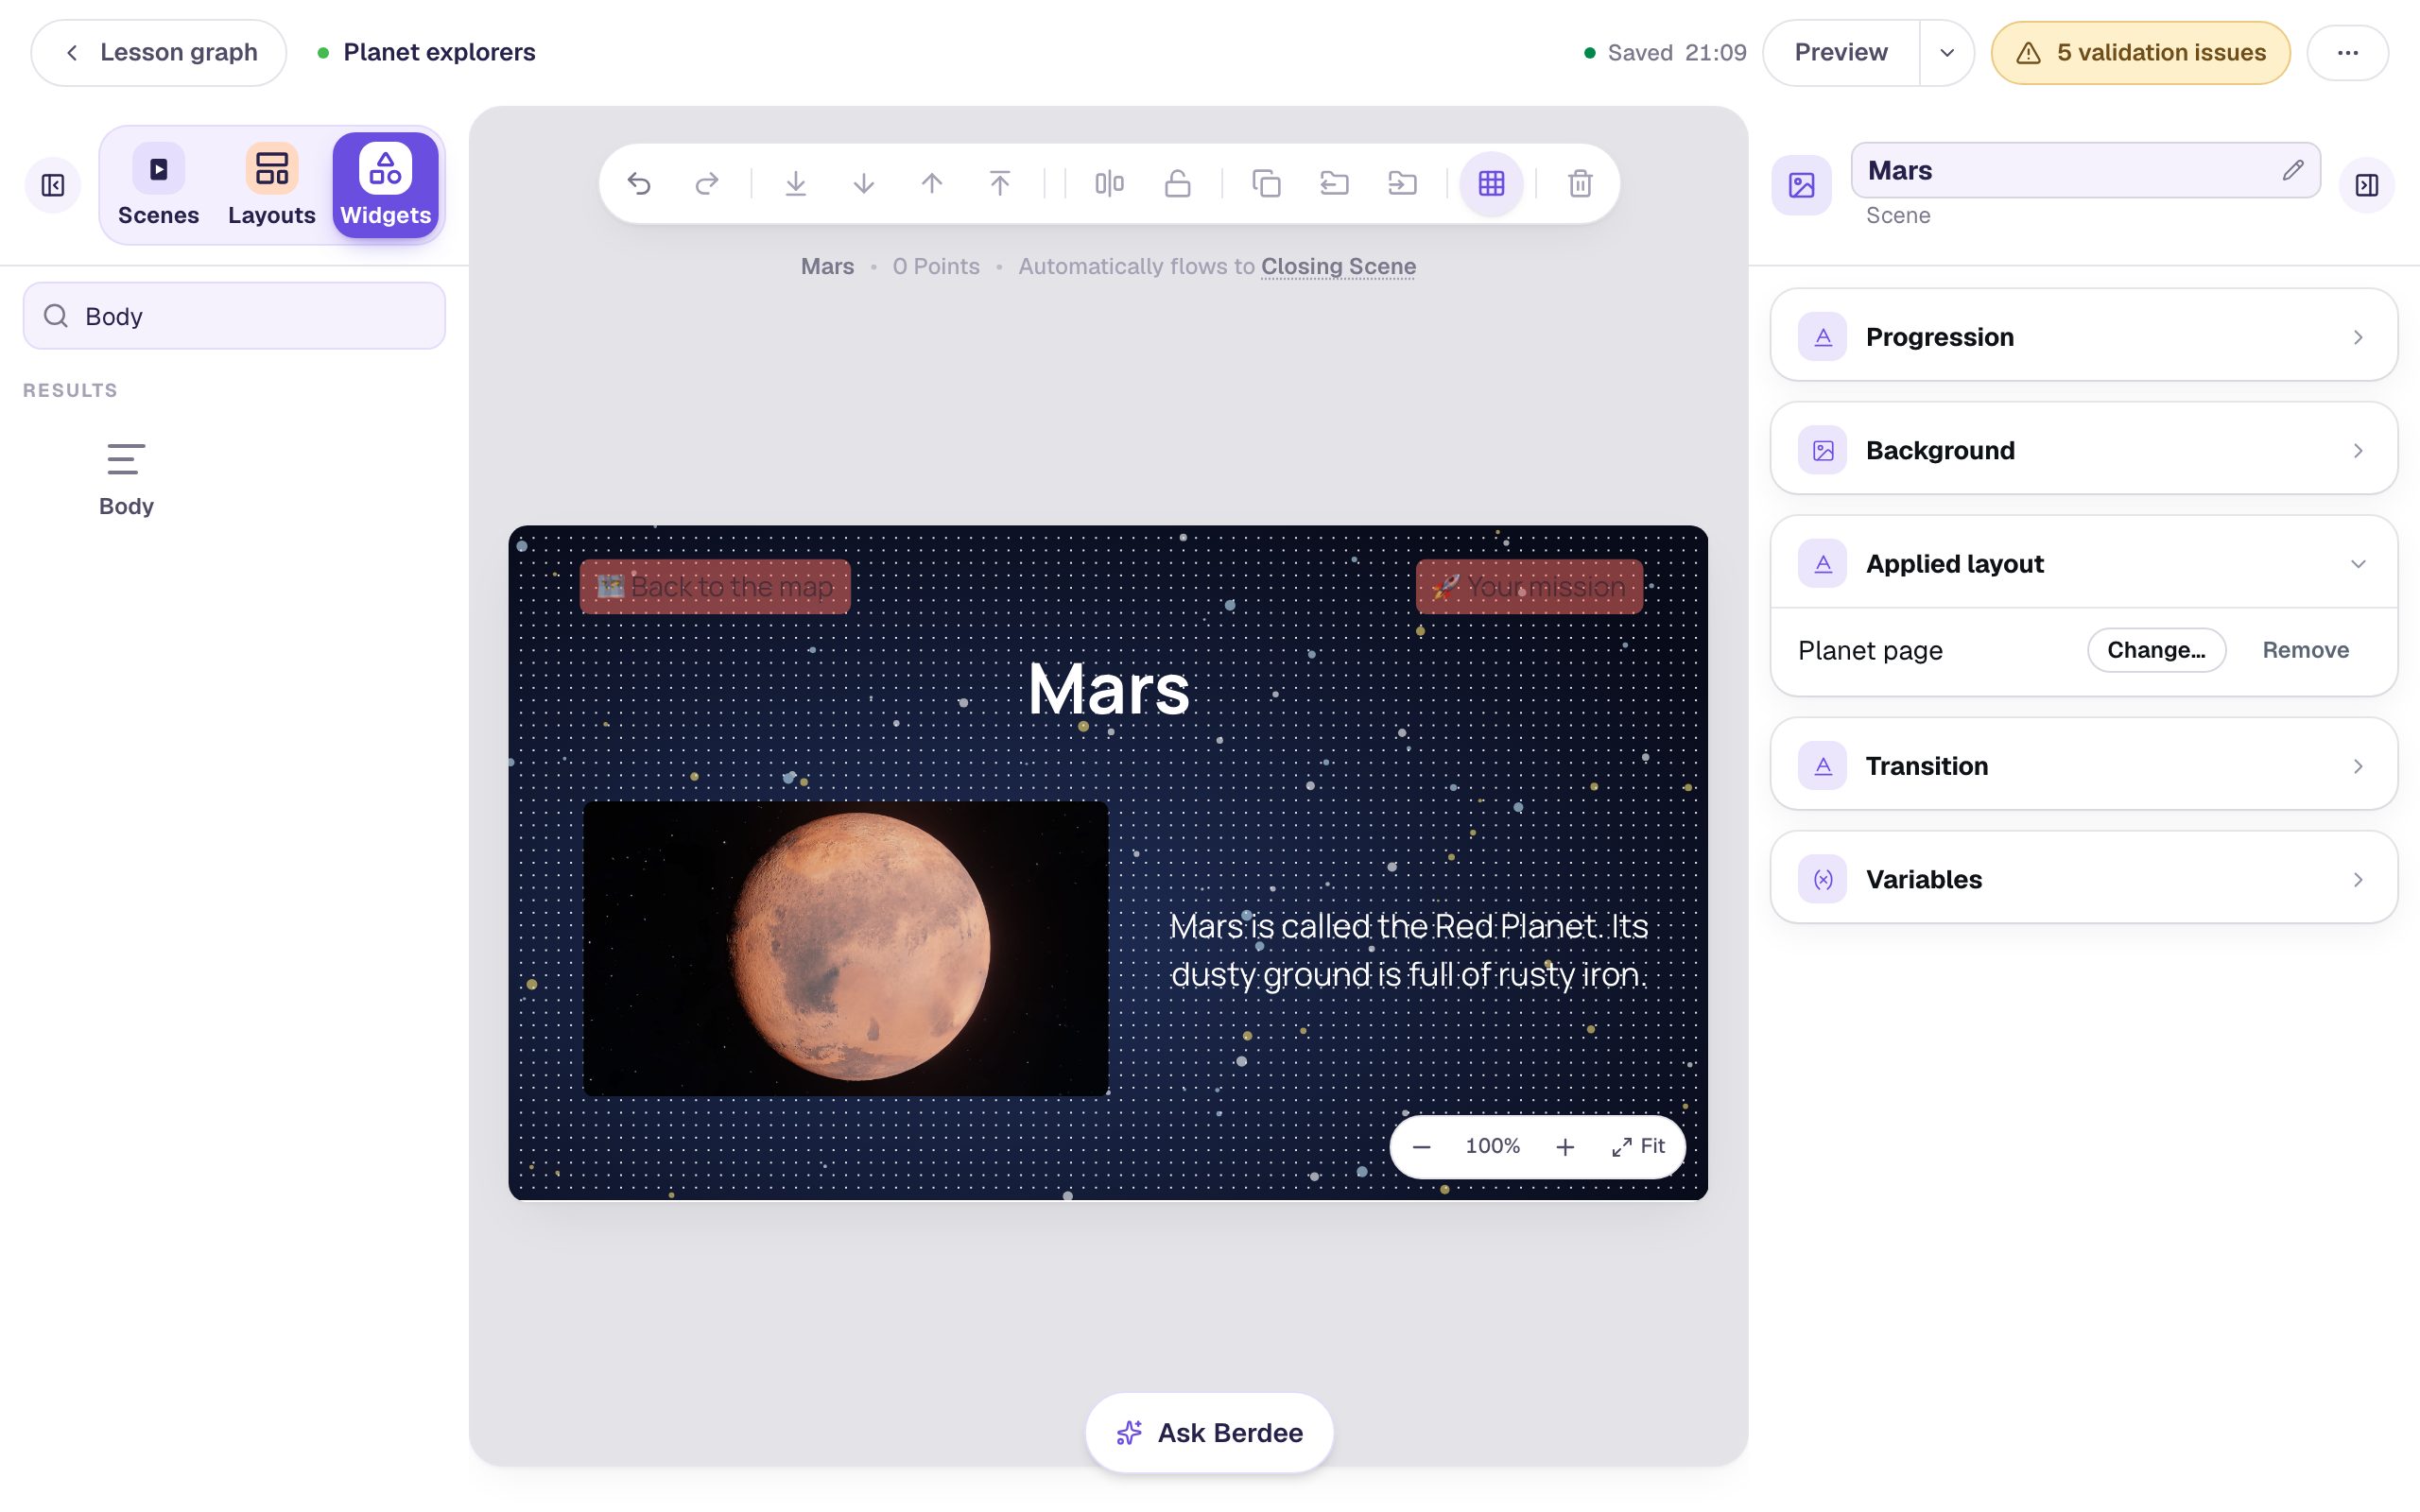
The layout's buttons are drawn faded while you edit a scene, and clicking them does nothing: that's how you tell them from the scene's own widgets. To change them, edit the layout.
Add Jupiter and Saturn the same way. With Mars open when you click Add scene, Planet page is already chosen, because it's the layout of the scene you're on. Use these facts, or your own:
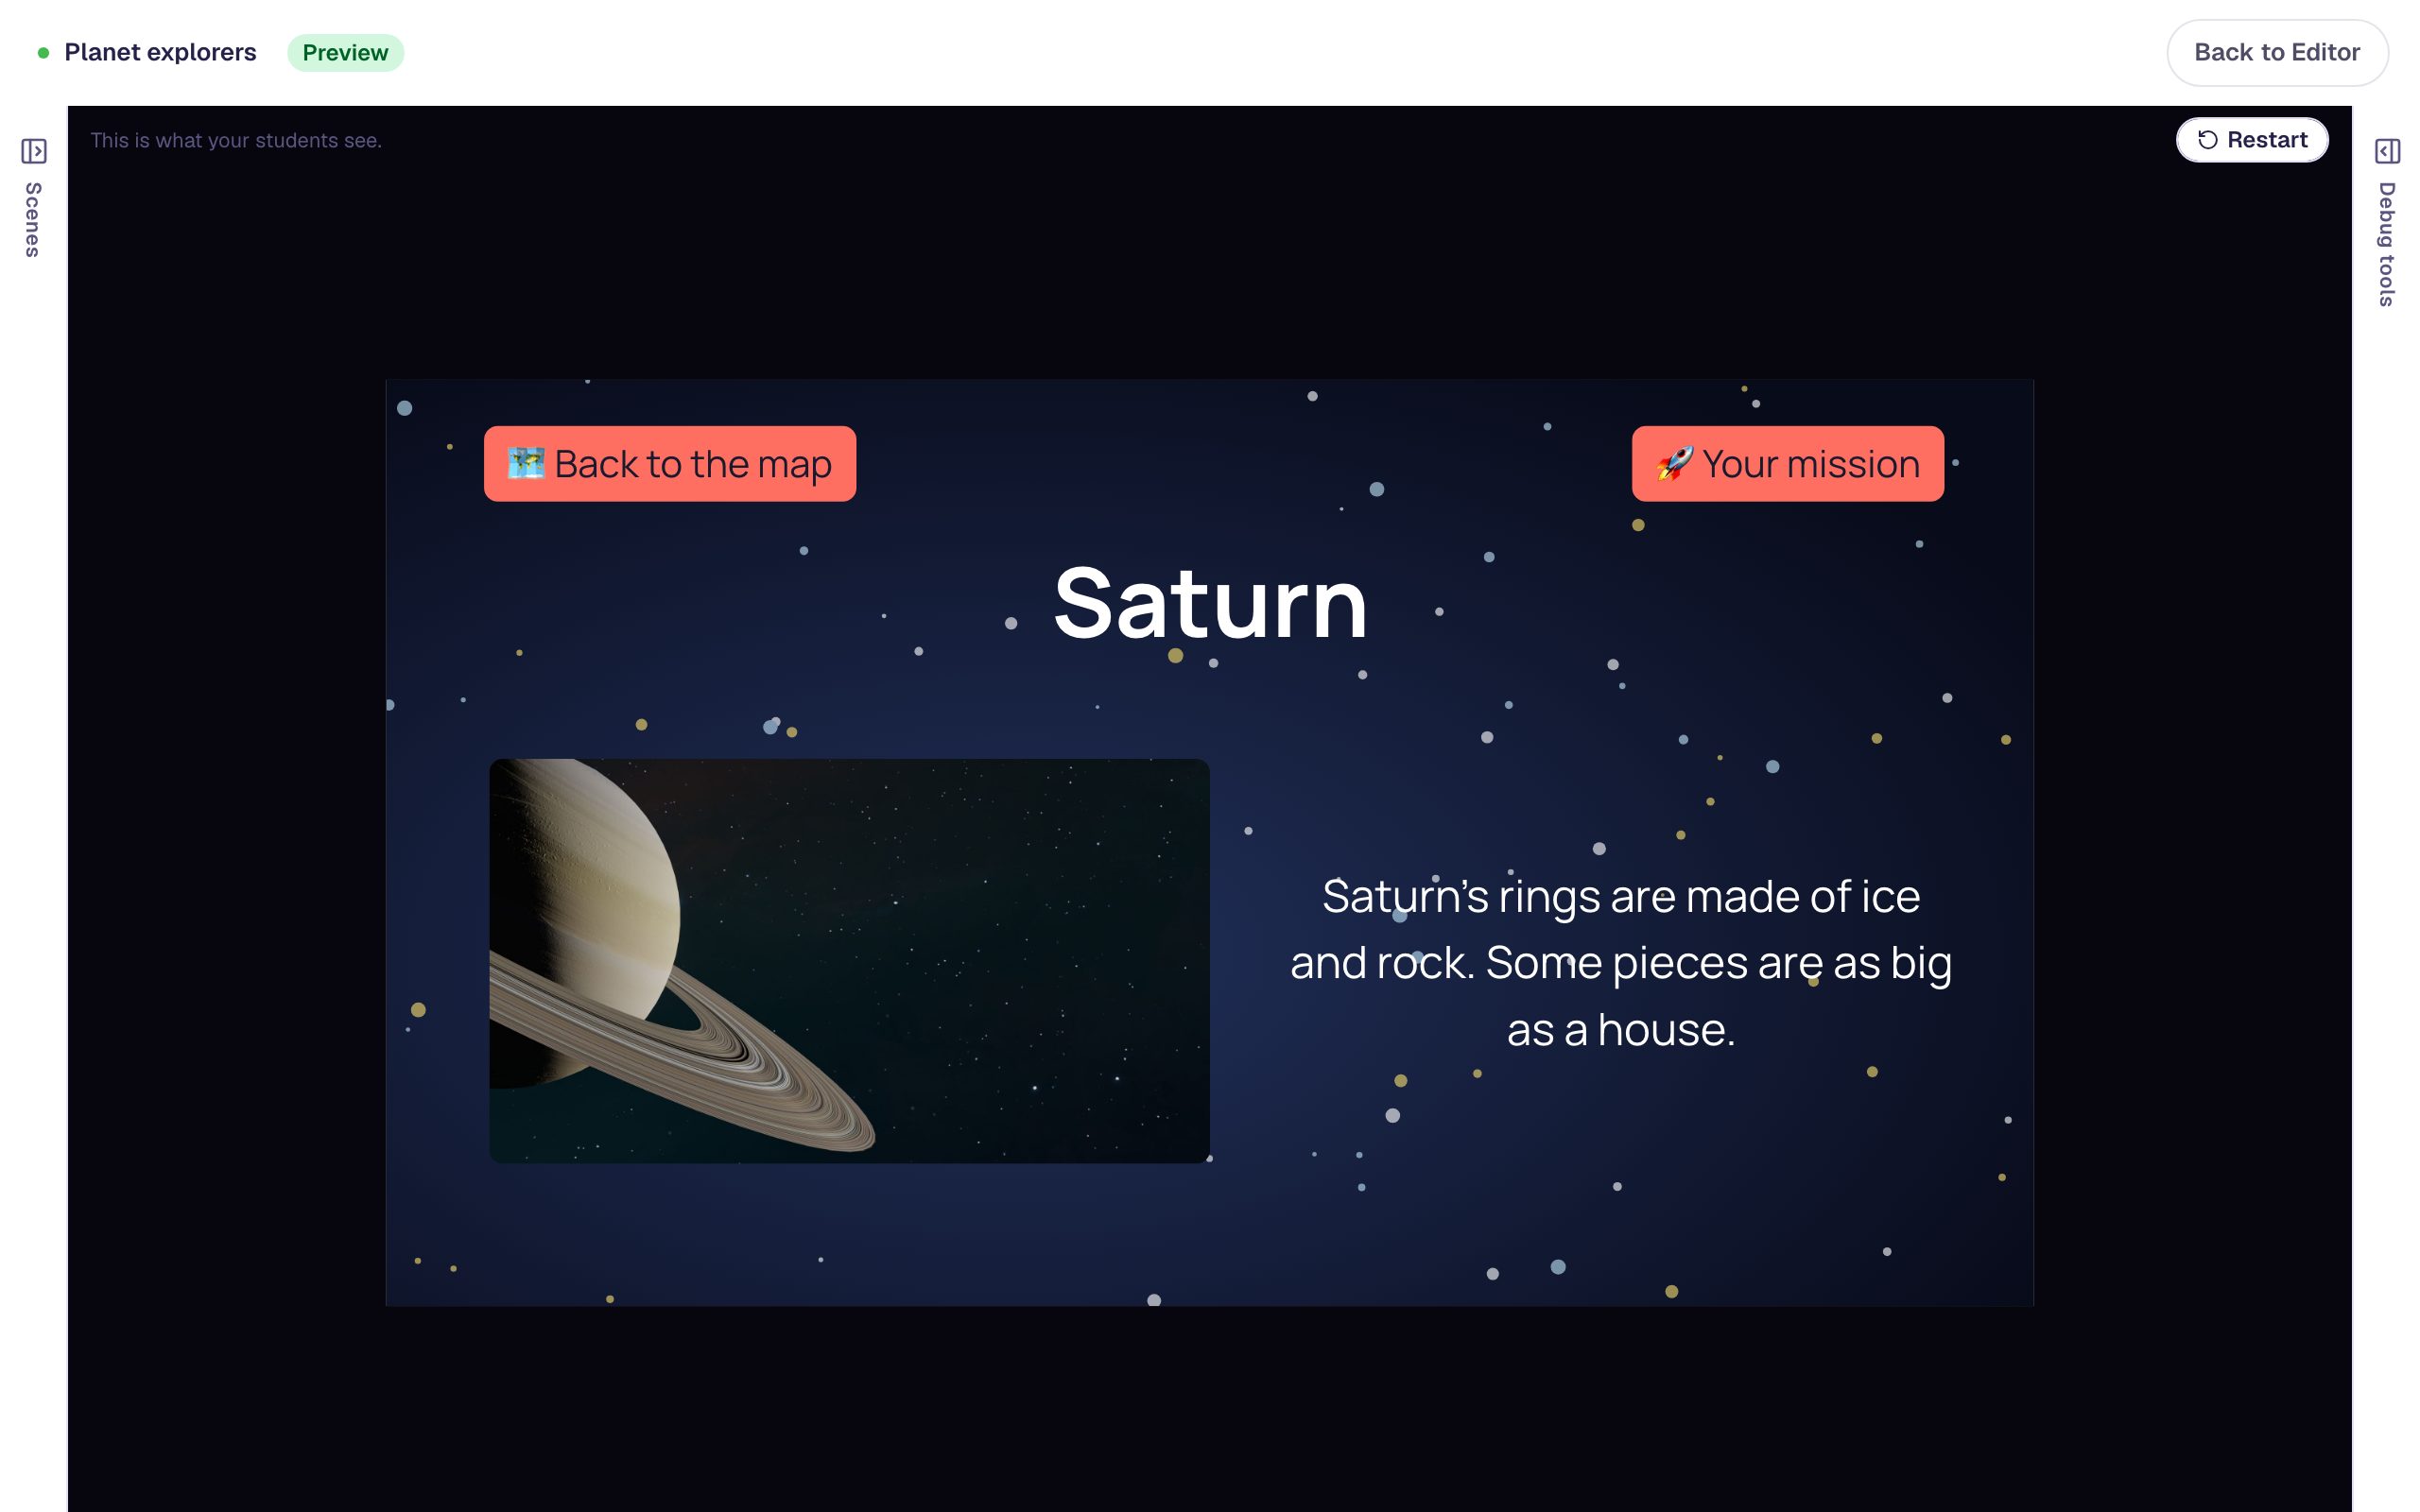
Jupiter is the biggest planet. More than 1,000 Earths could fit inside it.Saturn's rings are made of ice and rock. Some pieces are as big as a house.
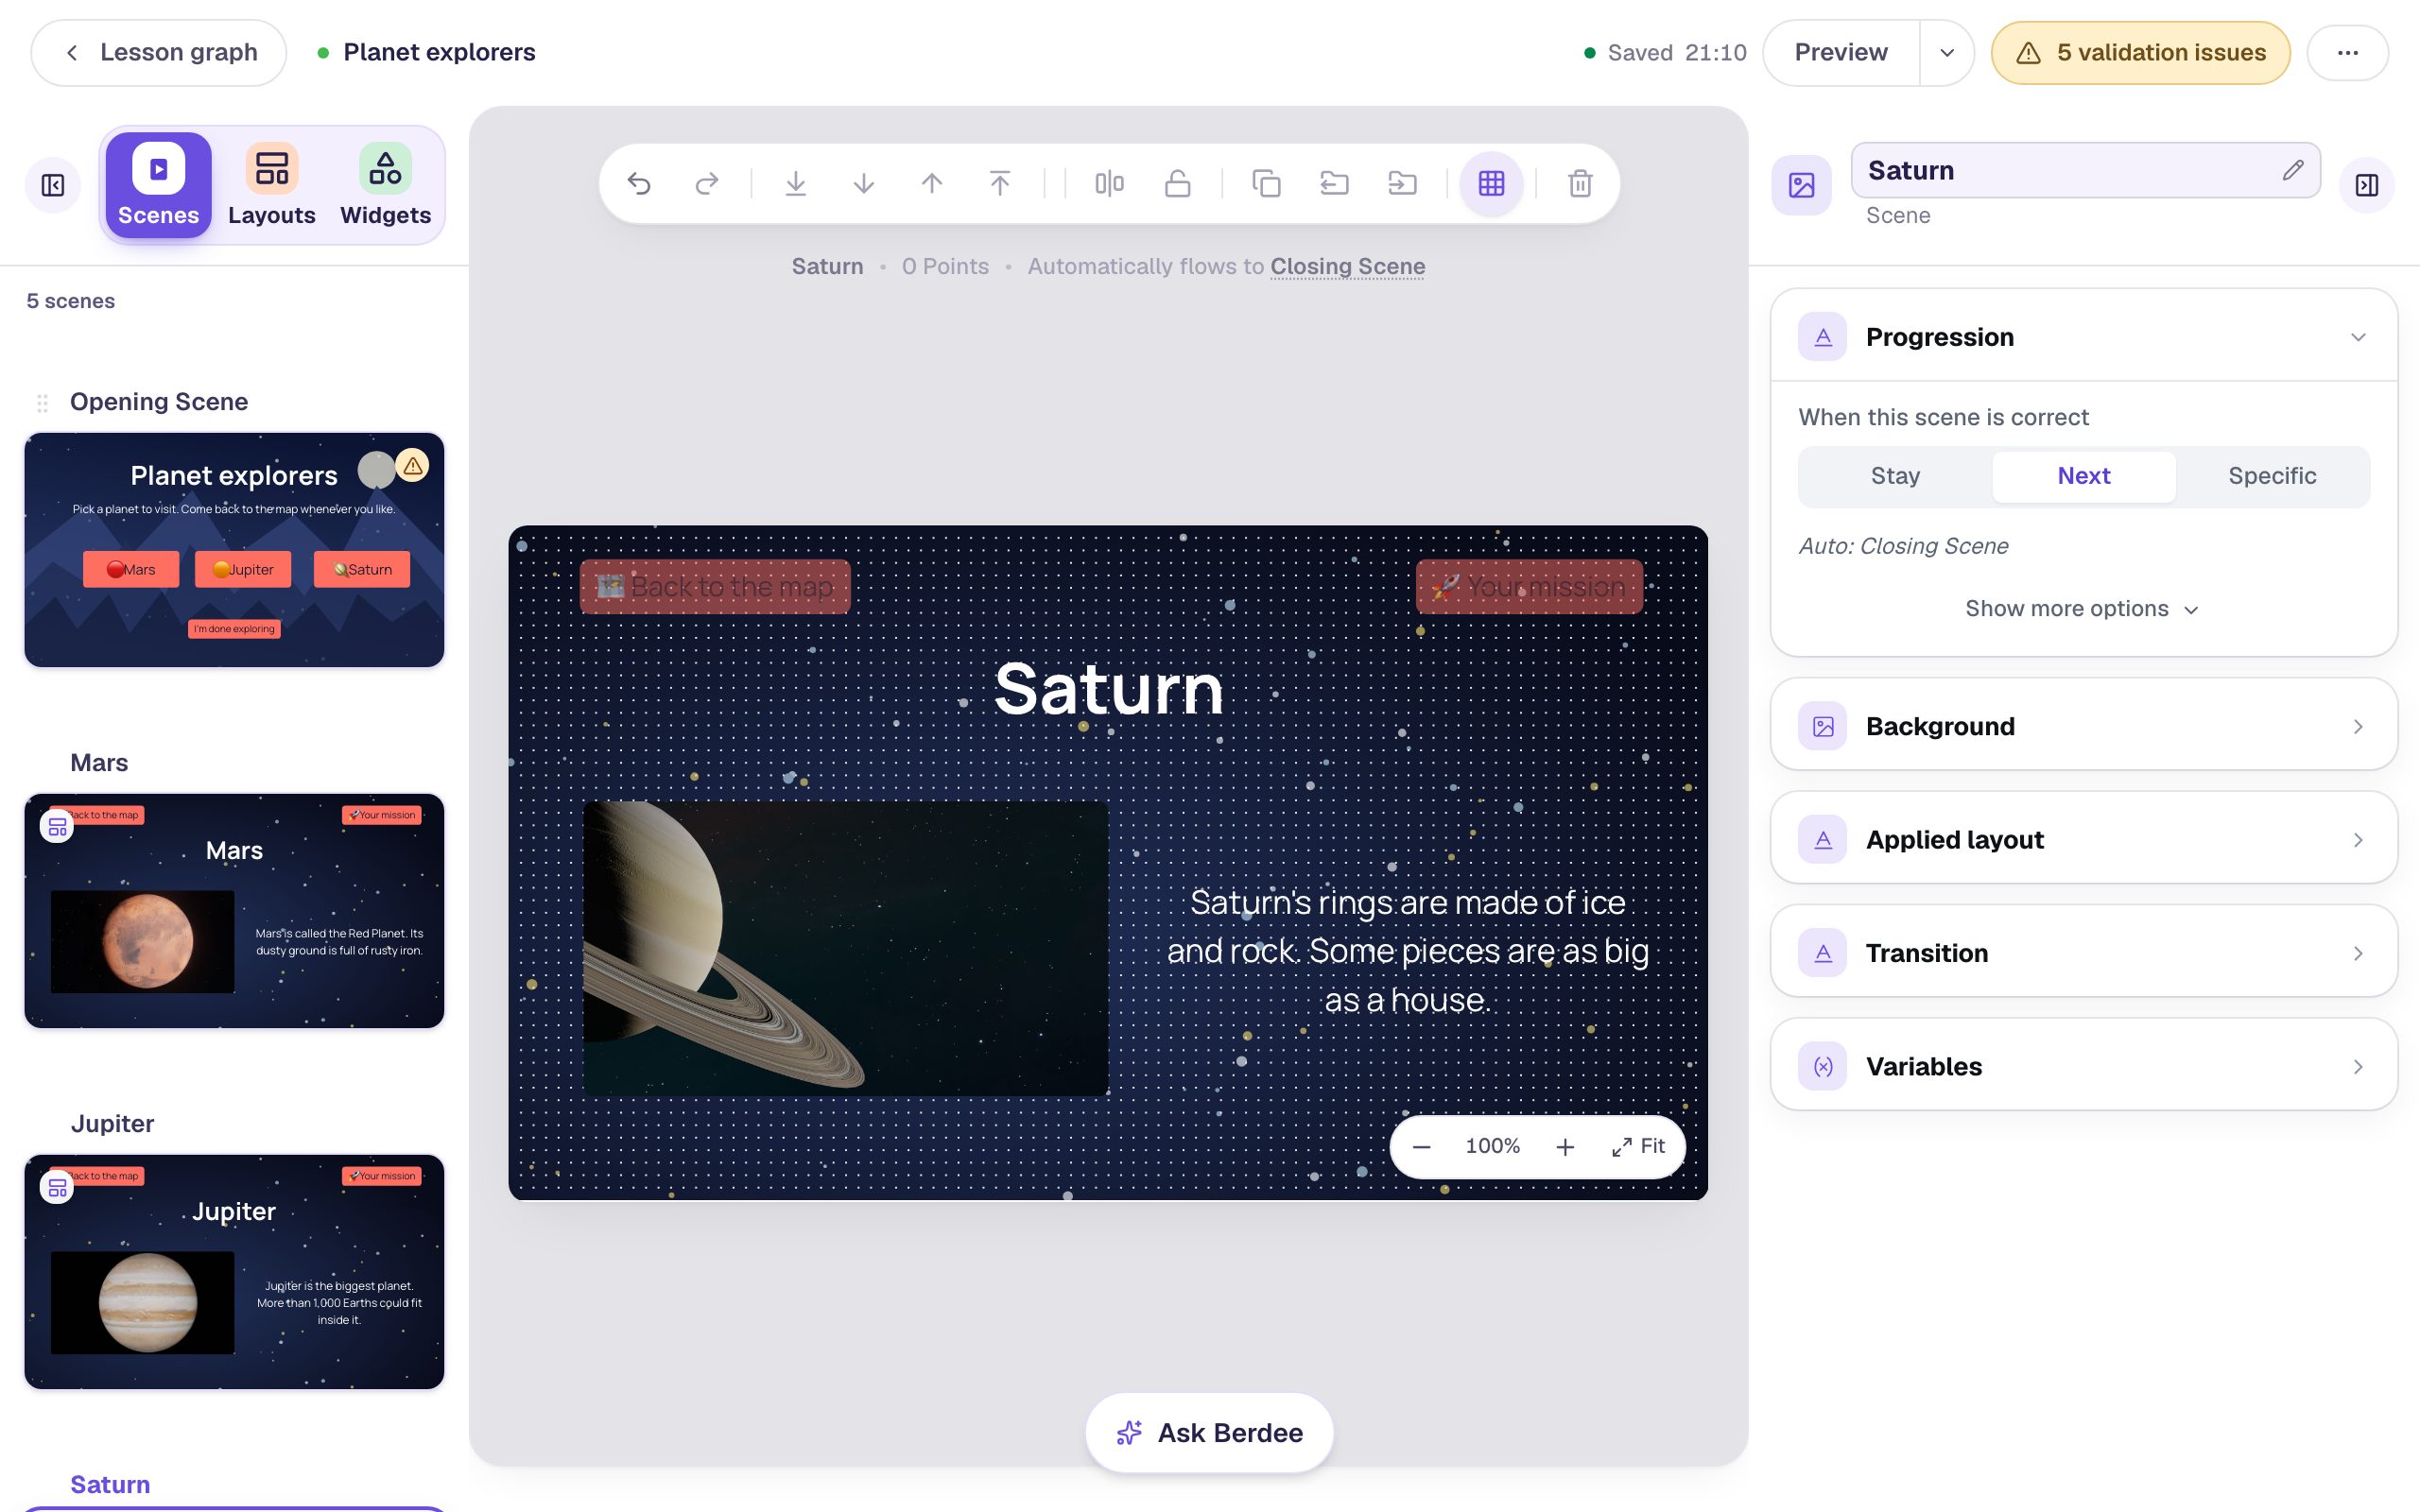
You didn't add or wire a single button on the planets, and all three already have both.
Step 6: Wire the map
Open the Opening Scene. Click the 🔴 Mars button and give it an On Press behavior with a Navigate to Scene action set to Mars:
Do the same for 🟠 Jupiter (to Jupiter) and 🪐 Saturn (to Saturn), and send I'm done exploring to the Closing Scene.
Step 7: See it on the Lesson Graph
Click Lesson graph at the top left. The map has a tapped path to each planet and one to the Closing Scene. Each planet has a path back to the map, When 'Back to the map' is pressed, even though you only wired that button once:
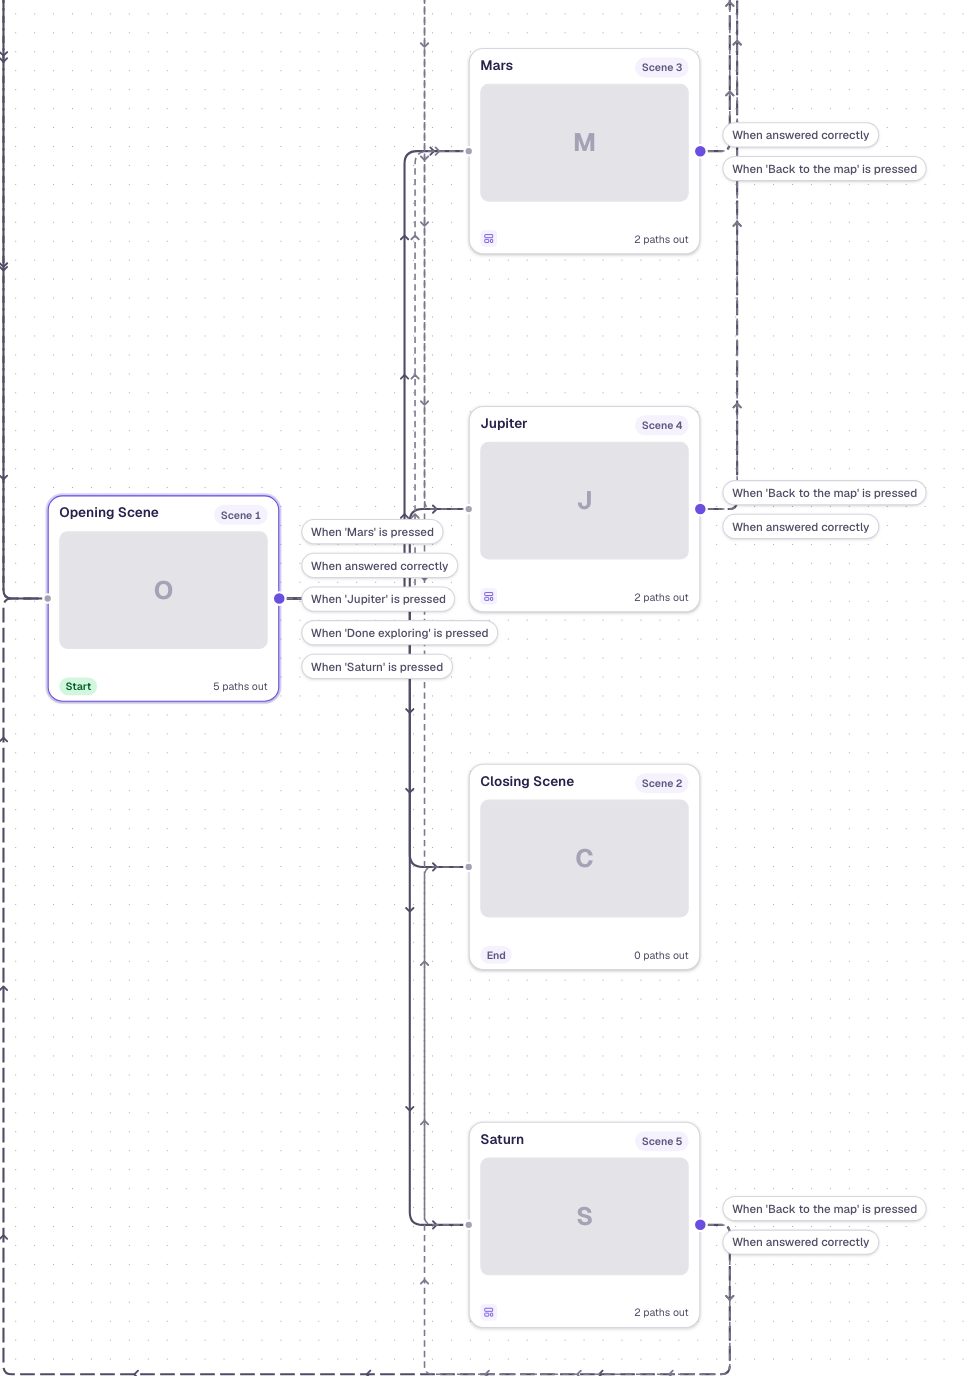
The graph draws a layout's paths from every scene that uses the layout, with a long-dash line. Editing one of those paths edits the button on the layout, so it changes the path for all three planets at once. The strip at the top reads No problems — every scene can be reached.
You'll also see When answered correctly arrows from scene to scene. Those move a student on when every question on a scene is right. These scenes have no questions, so the arrows never fire.
Step 8: Explore as a student
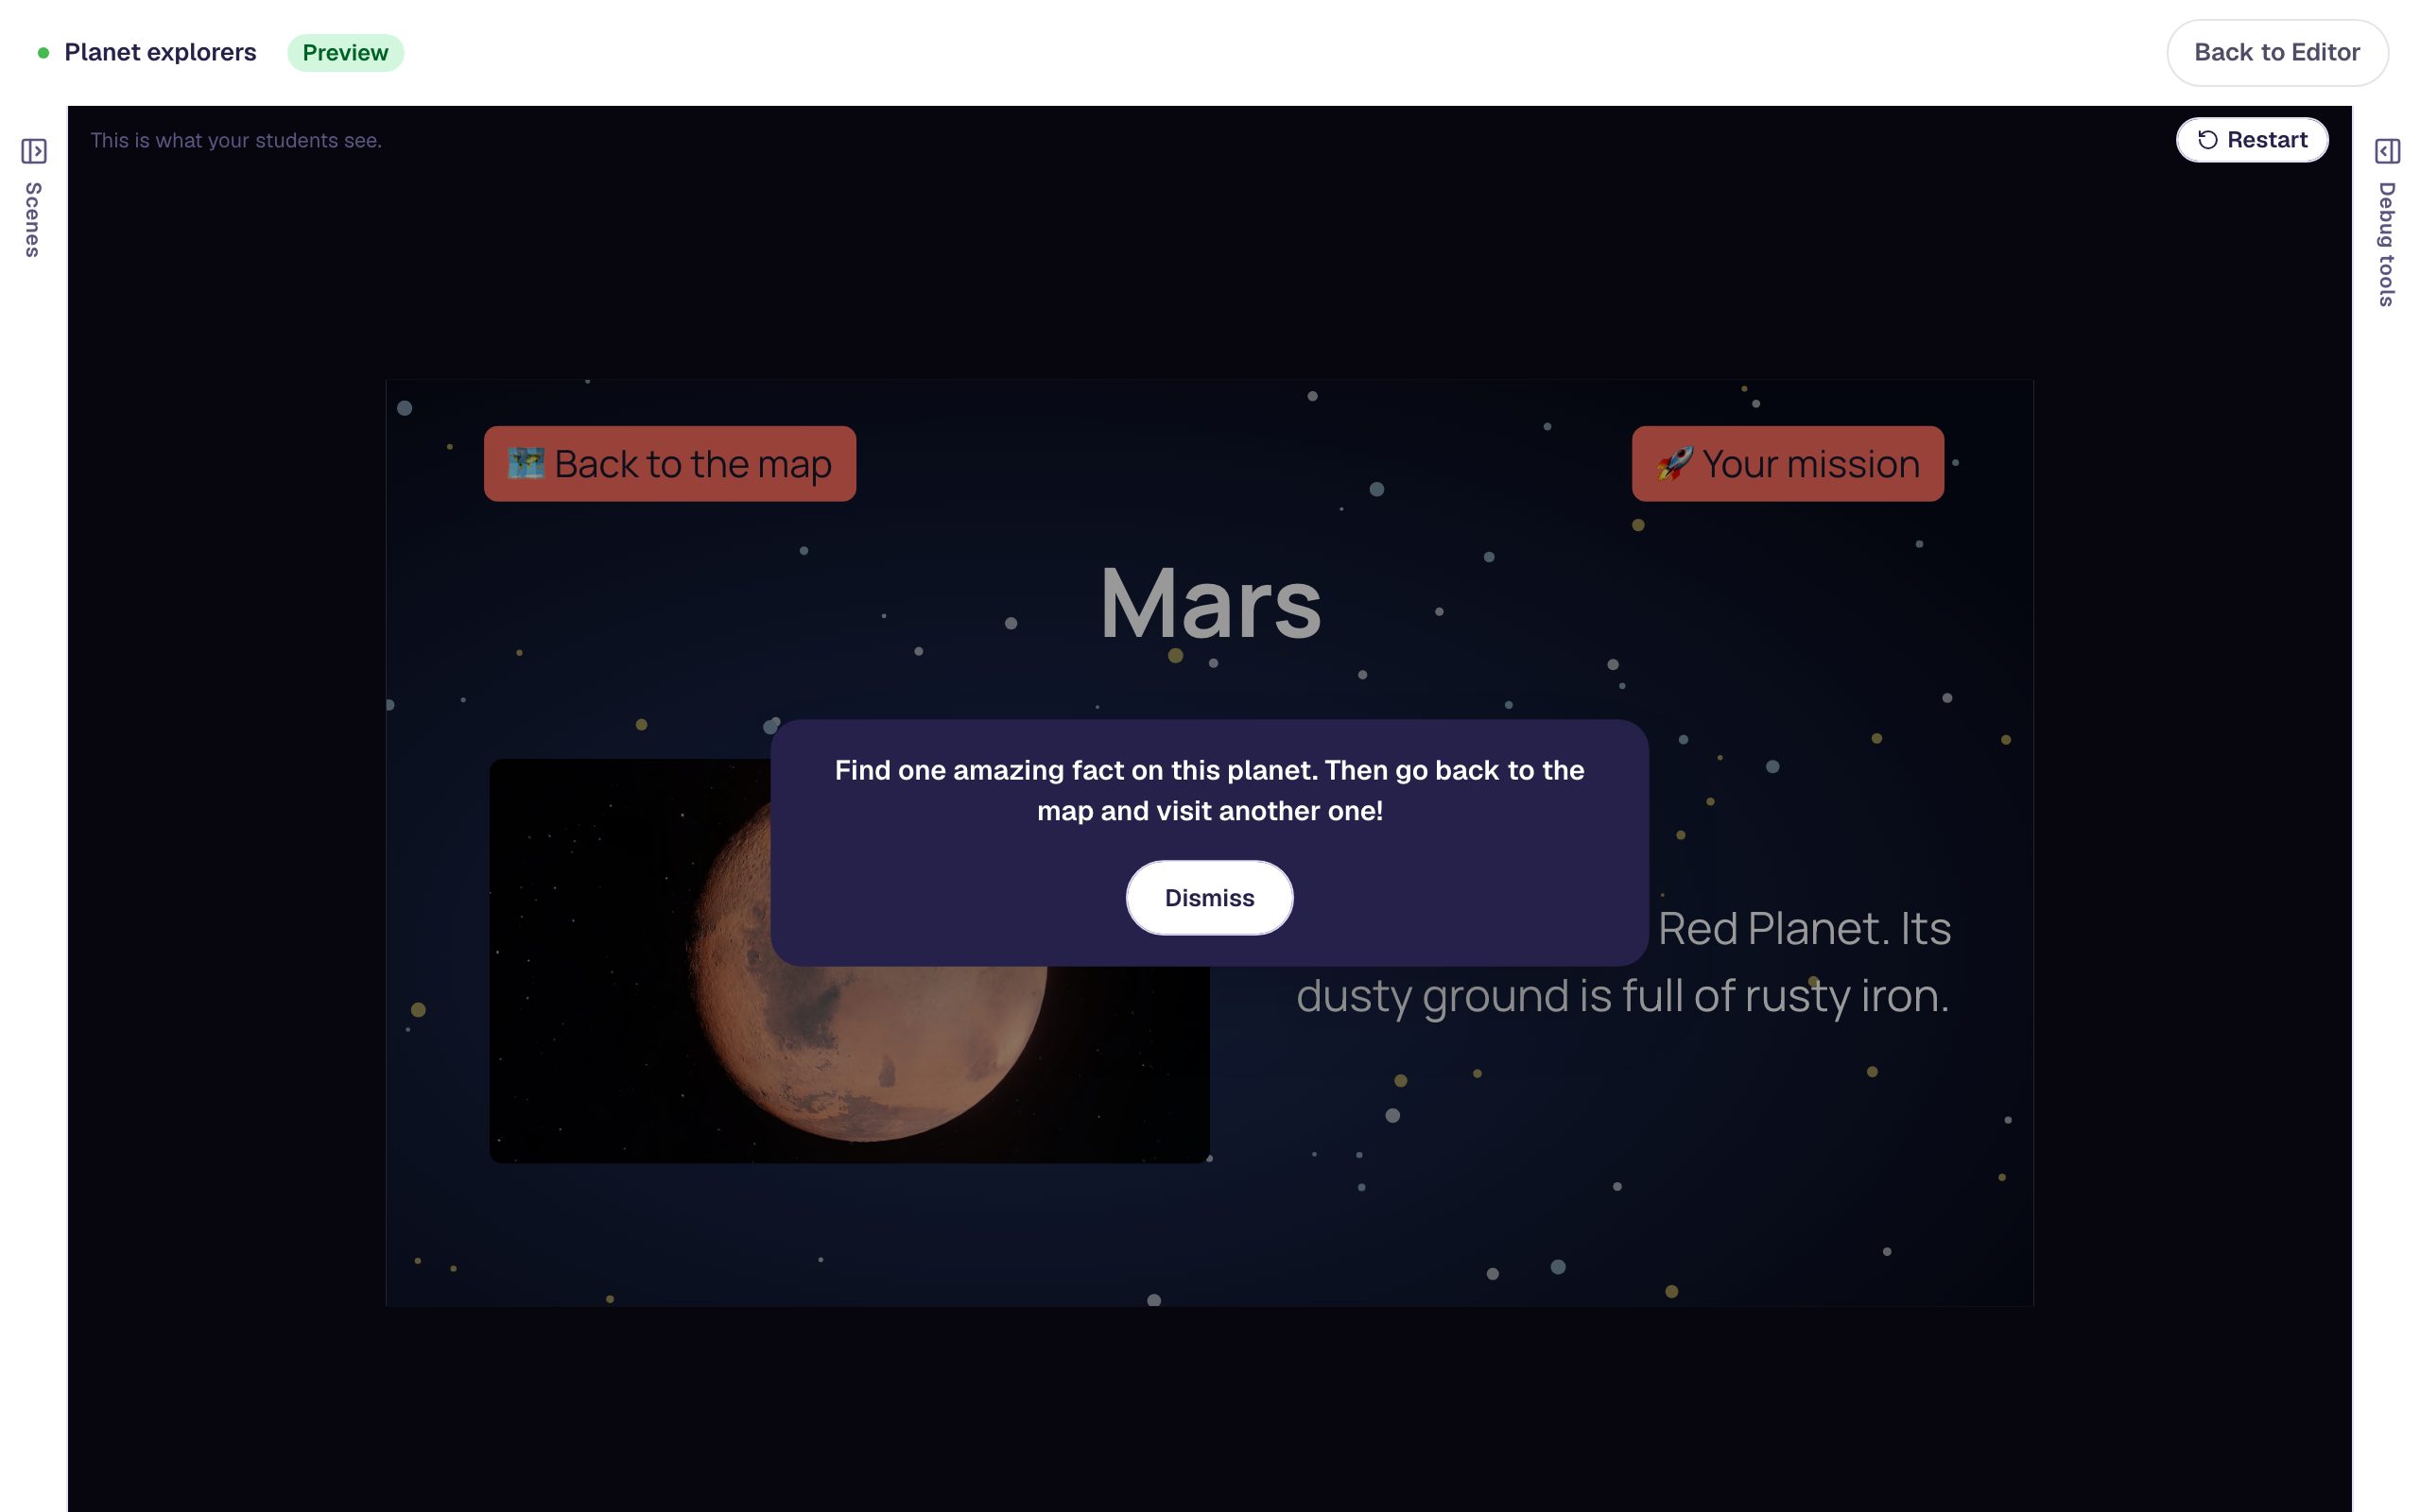
From the Lesson Graph, click Preview. It starts on the map. Visit Mars, open 🚀 Your mission, close it, go 🗺️ Back to the map, visit Saturn, come back, and click I'm done exploring:
Before you publish, Berdee wants a Submit Button set to Lesson somewhere in the lesson. You don't need one to preview. Build your first quiz question shows how to add one.
What you built
An explore-in-any-order lesson with:
- a map whose buttons lead to each planet and to the ending,
- a layout, Planet page, with a Back to the map button that navigates home and a Your mission button that shows a message, each wired once,
- three planet scenes that got both buttons, working, just by choosing the layout when you added them, and
- a Lesson Graph that shows the layout's path from every planet.
To add a fourth planet, click Add scene on any planet: the layout is already chosen, and its buttons already work. The same trick fits any button that does the same thing everywhere: a Help message, a Word bank that reminds students of key terms, a Home button on every station of a choice board. Everything else layouts can do is in Layouts. To end the lesson only once a student has visited every planet, instead of with an I'm done exploring button, see Finish the lesson only after students explore every part.