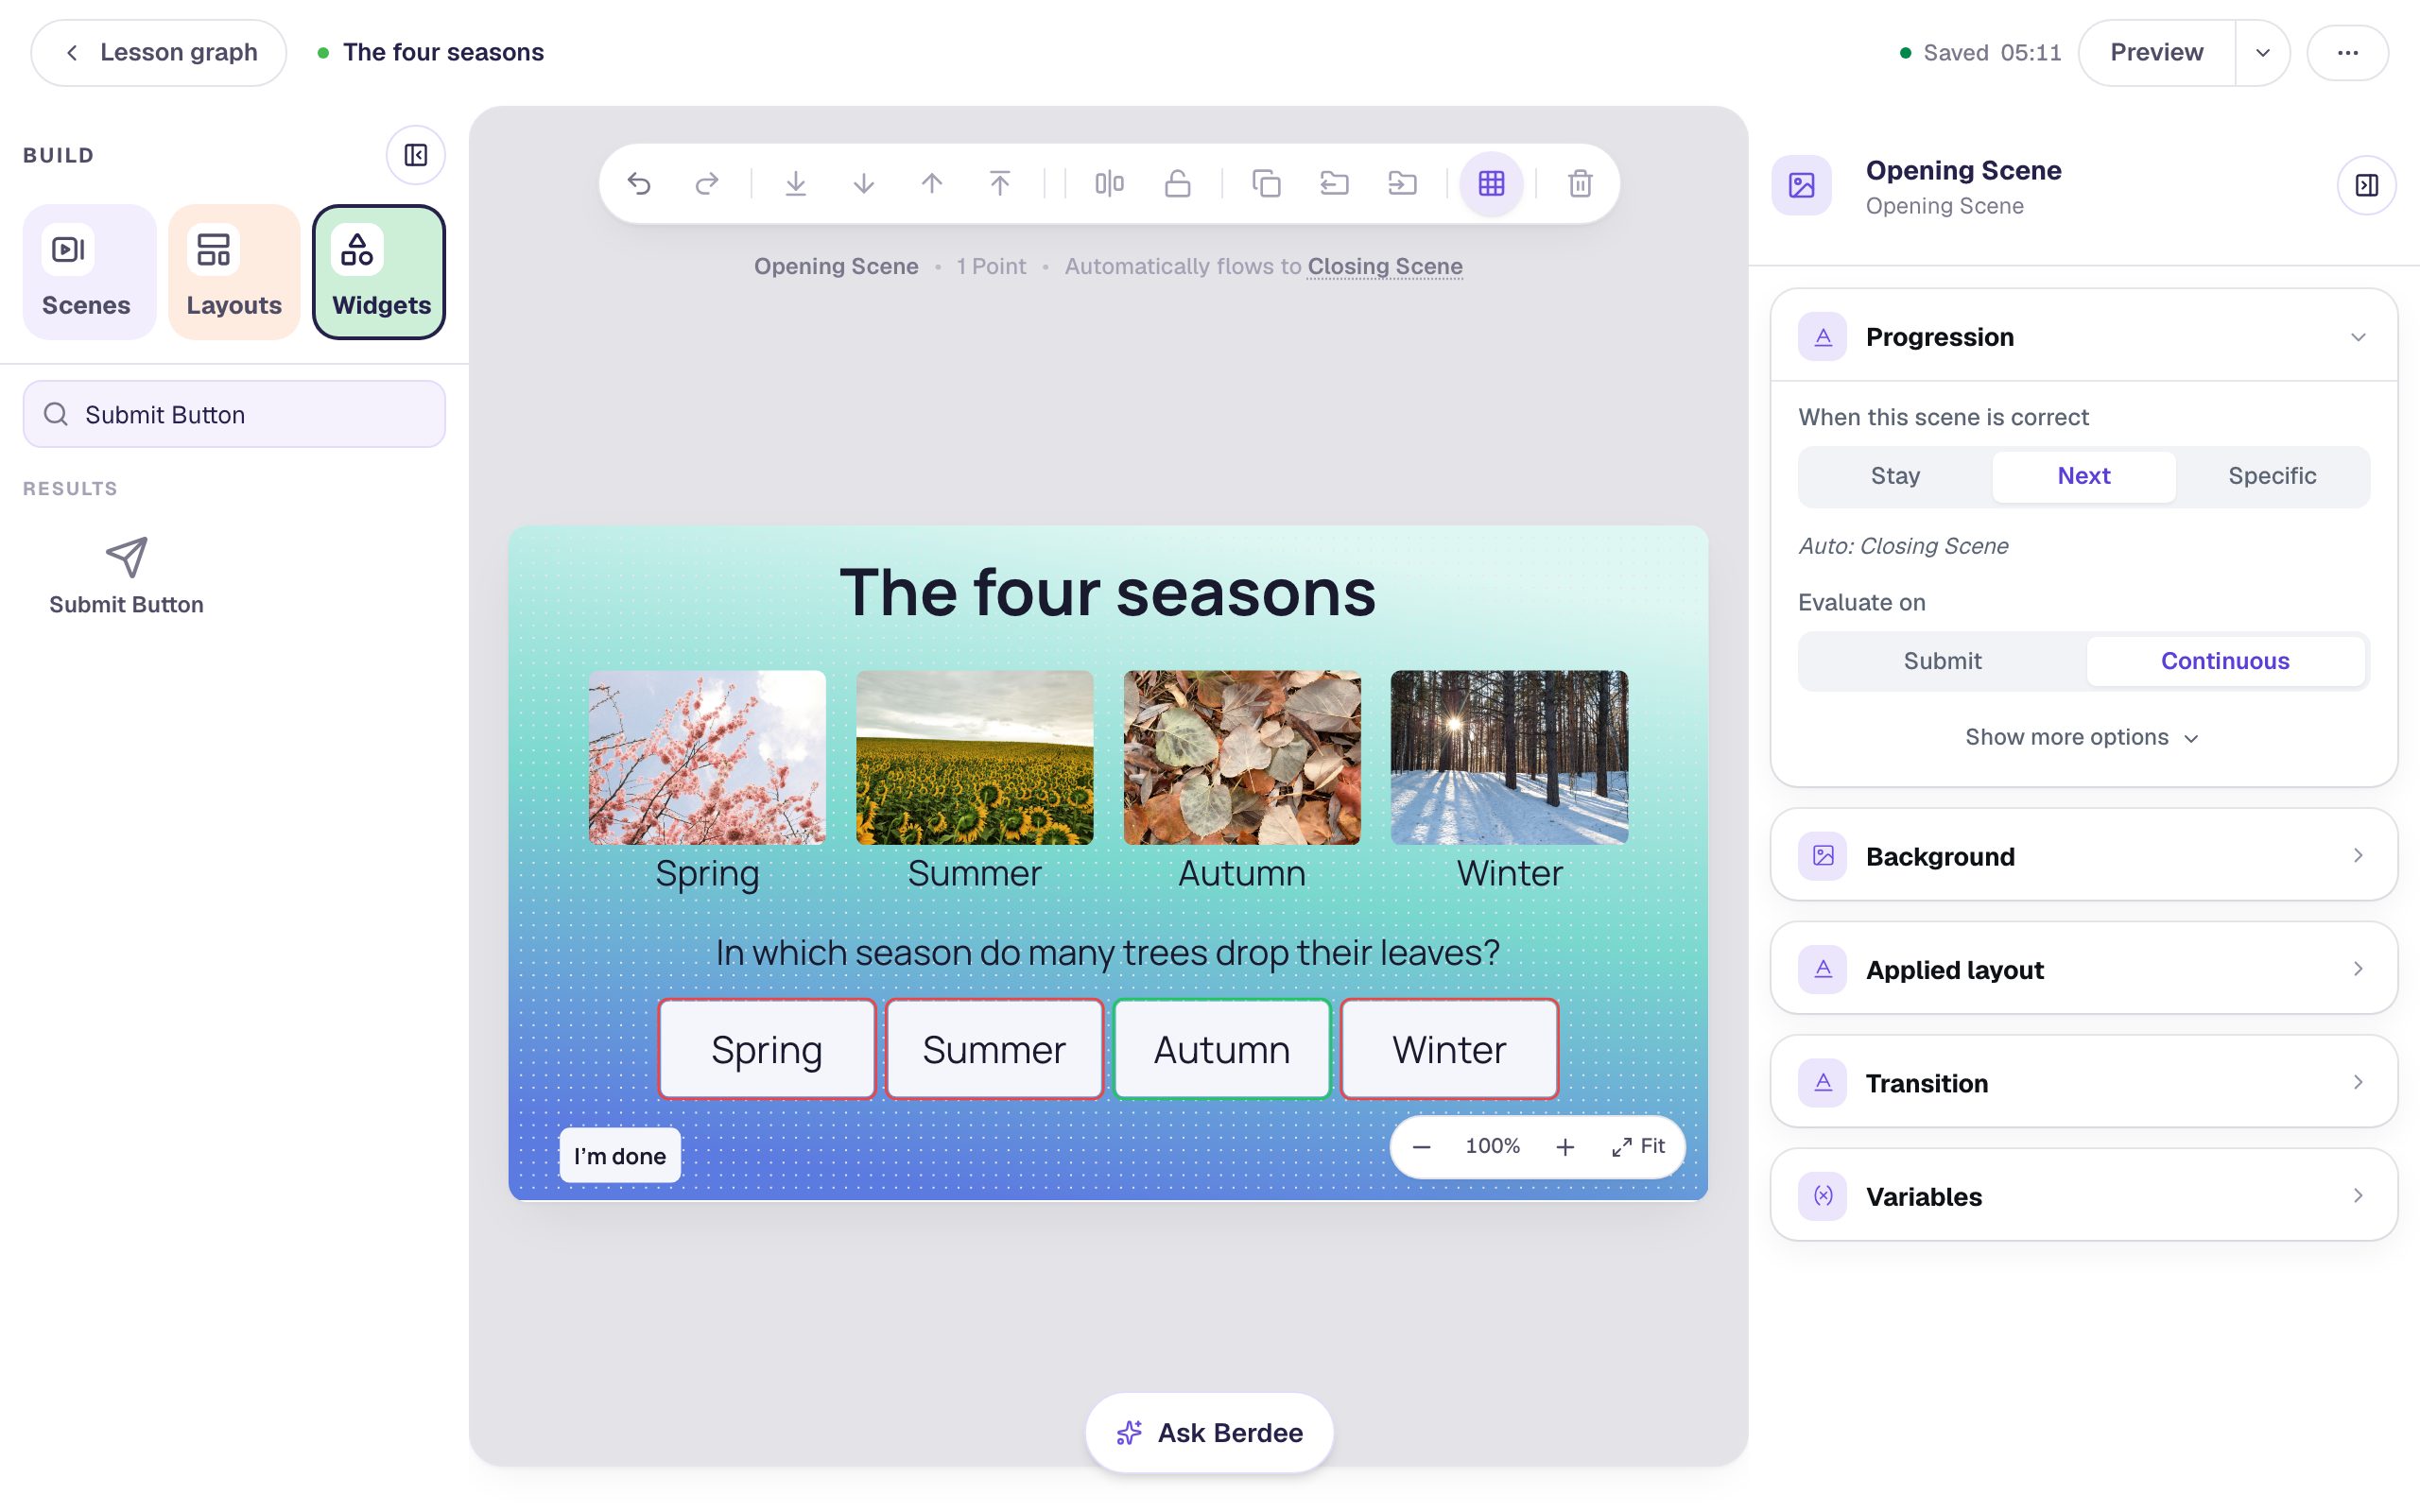
Give every question the same frame with a layout
Design a title bar, a running score, and a background once as a layout, then use it behind every question in a quiz. Change the layout later and every scene that uses it changes with it.
- Level
- Beginner
- Time
- About 12 min
- Steps
- 8
A two-question ocean quiz where both questions sit in the same frame (a title bar, a running score, and a wavy background), built once as a layout and changed in one place.
Get the finished lesson
Skip straight to the result, or keep it open beside the steps. Add this tutorial's lesson to your account and explore how it works in the studio.
Free to sign up, and you'll come straight back here. I have an account
A quiz looks finished when every question sits in the same frame: the same title bar, the same background, the same score in the same corner. You could build that frame on each scene, but then a change means editing it on each scene, and the copies drift apart.
A layout is a frame you build once. You choose which scenes use it, and those scenes show it behind their own widgets. Change the layout and every scene that uses it changes too.
In this tutorial you'll build Ocean explorers: a title scene and two questions (an octopus and a dolphin) that share one layout called Quiz frame. The frame has a title bar, a score that keeps a running total across the lesson, a wavy background, and a line of directions. If you haven't built a question before, start with Build your first quiz question.
Step 1: Add a scene, and let the studio make you a layout
Click New lesson, then Start from scratch. Click Untitled lesson at the top left, name the lesson Ocean explorers, and click Save changes.
The Opening Scene is the lesson's title page, so it gets its own look and won't use the frame. Click an empty part of the scene, open Background, click Choose a style, pick Lagoon gradient, and click Apply background. Add a Heading that says Ocean explorers and a Body text that says Two quick questions about animals that live in the sea.. Give the Closing Scene the same Lagoon gradient background too.
Now add the first question's scene. In the Scenes tab, click Add scene:
While your lesson has no layouts, adding a scene asks whether you'd like to make one. The animation shows the idea: your scene, your layout, and the two together.
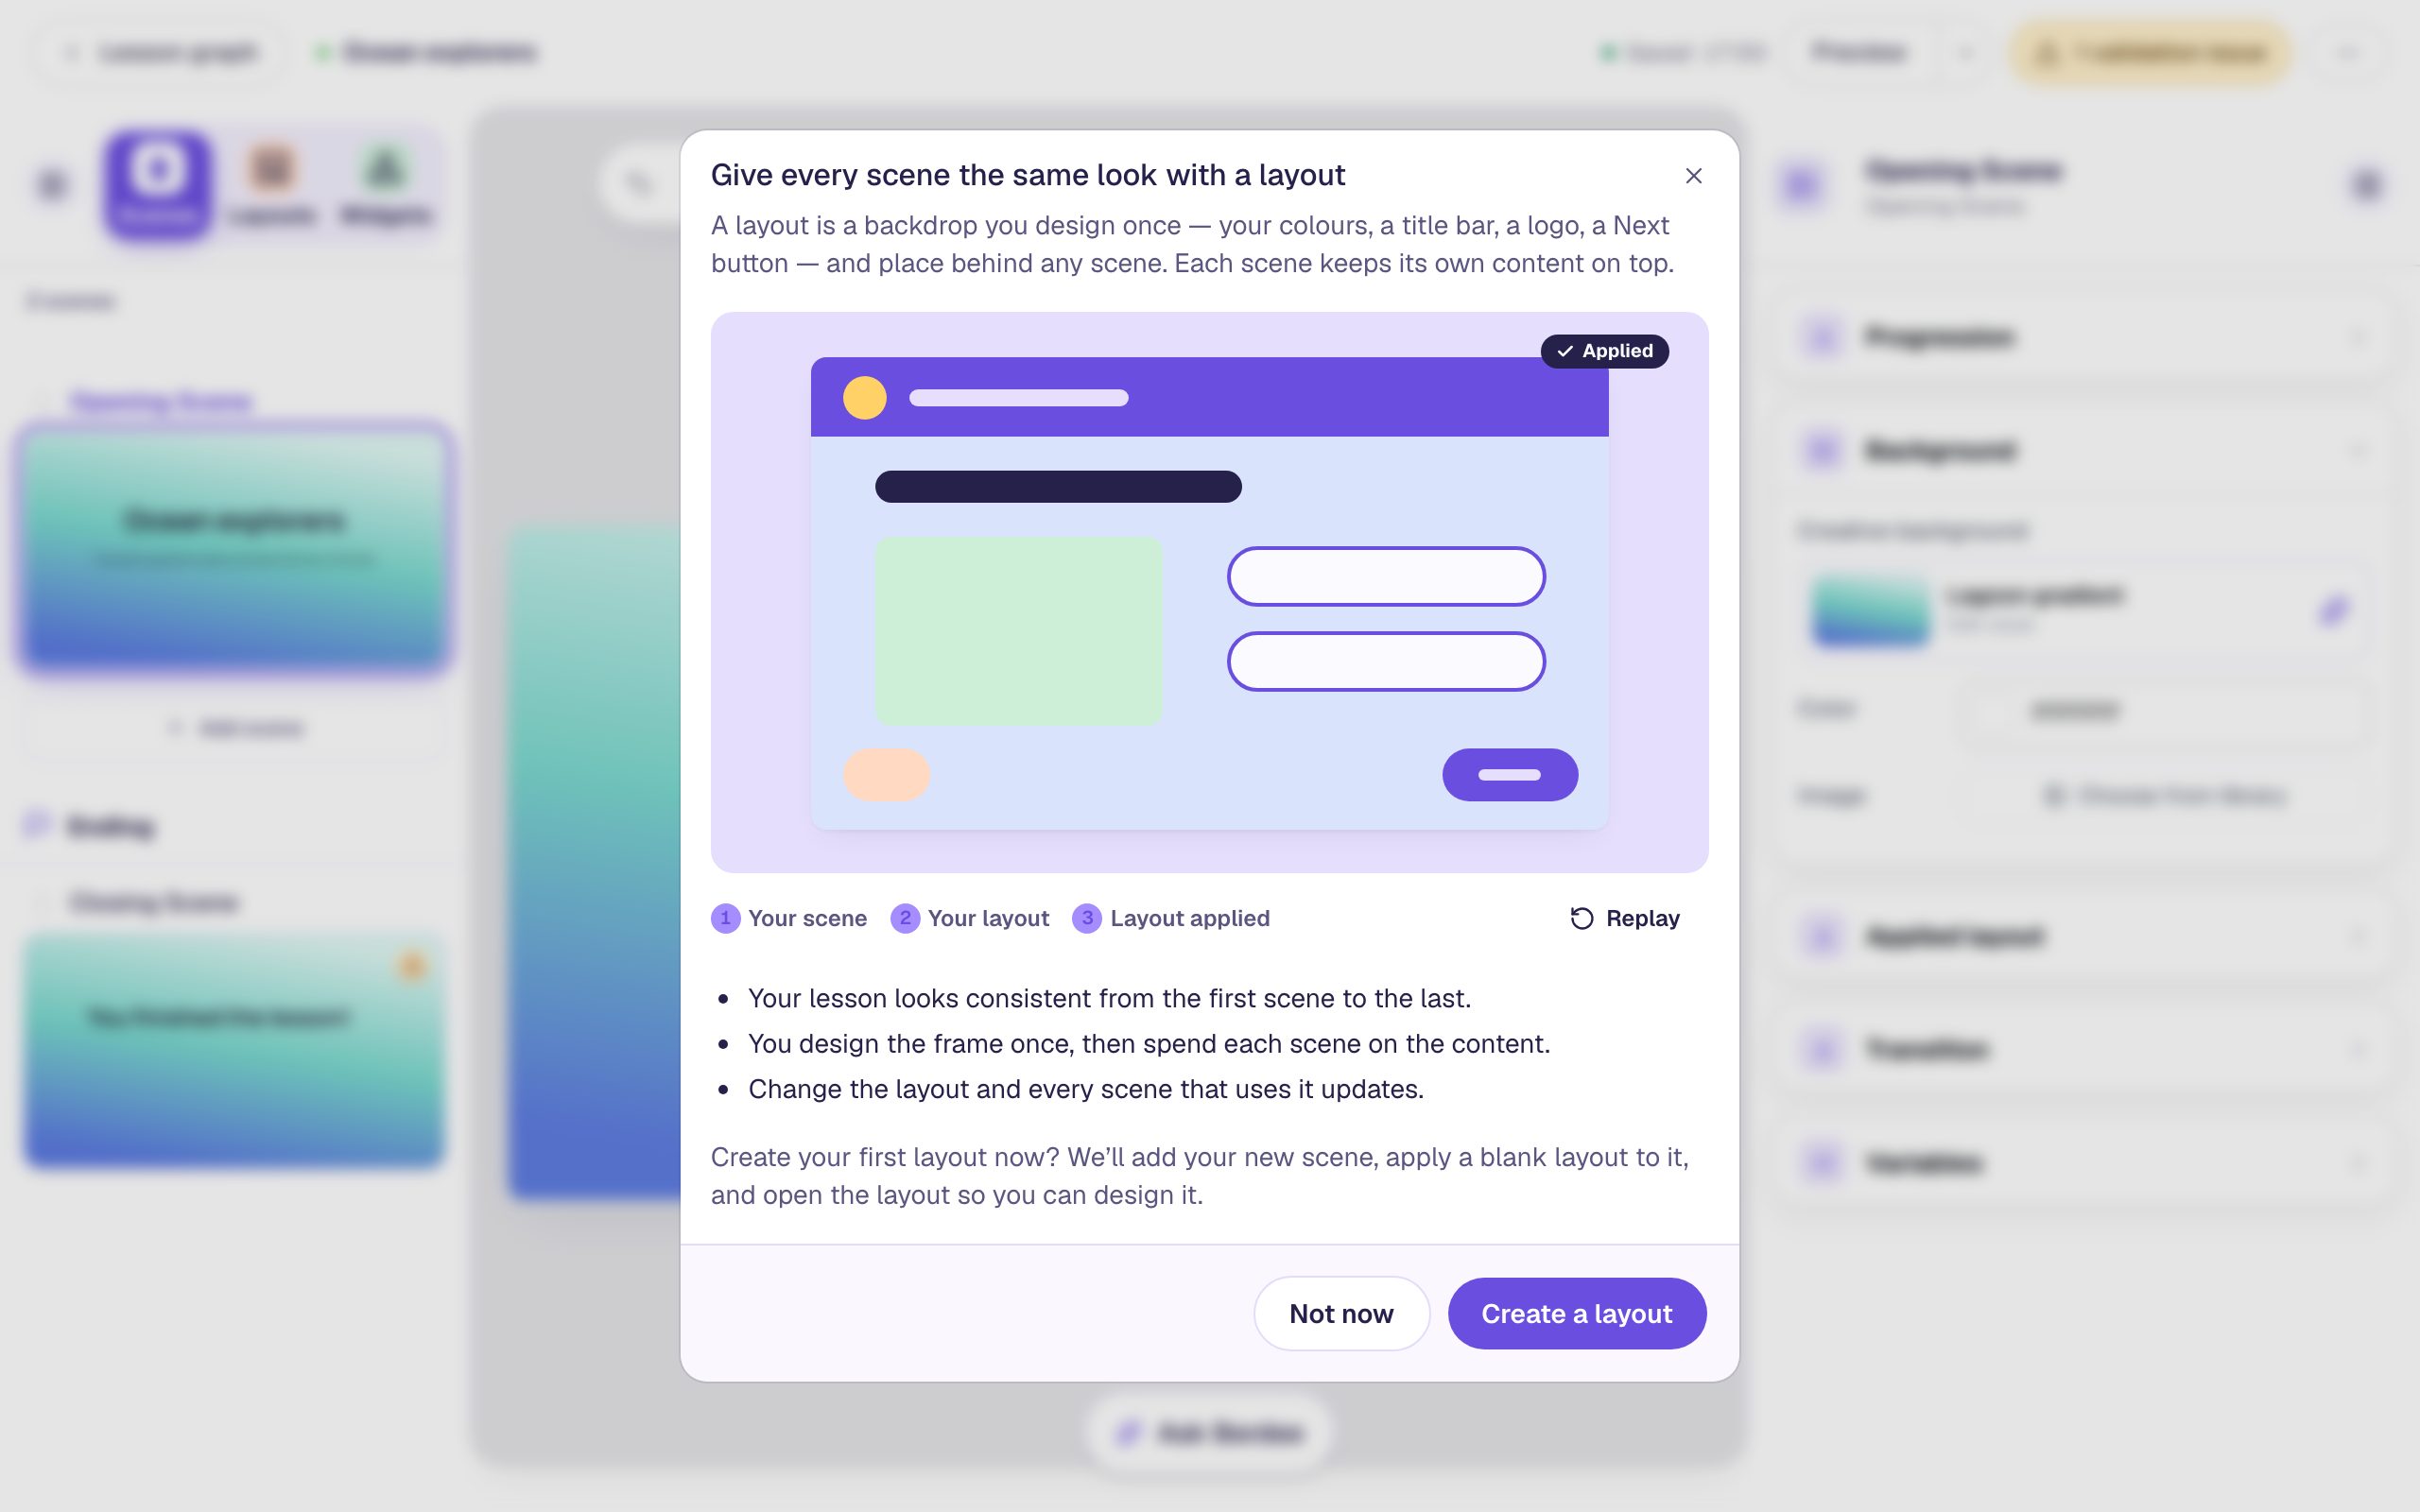
Click Create a layout. Berdee adds the new scene, puts a blank layout behind it, and opens the layout on the canvas so you can design it. (Not now just adds the scene. You can always make a layout later from the Layouts tab.)
Step 2: Name the layout and give it a background
The layout opens in the Layouts tab, next to Scenes. The strip above the canvas says Editing layout — applied to 1 scene, so you can tell you're working on the layout, not a scene.
- Double-click the layout's name in the list, type
Quiz frame, and press Enter. A name that says what the layout is for helps once a lesson has more than one. - Click an empty part of the canvas. A layout's properties panel has only Background. Click Choose a style, open the Nature group, pick Layered waves, and click Apply background.
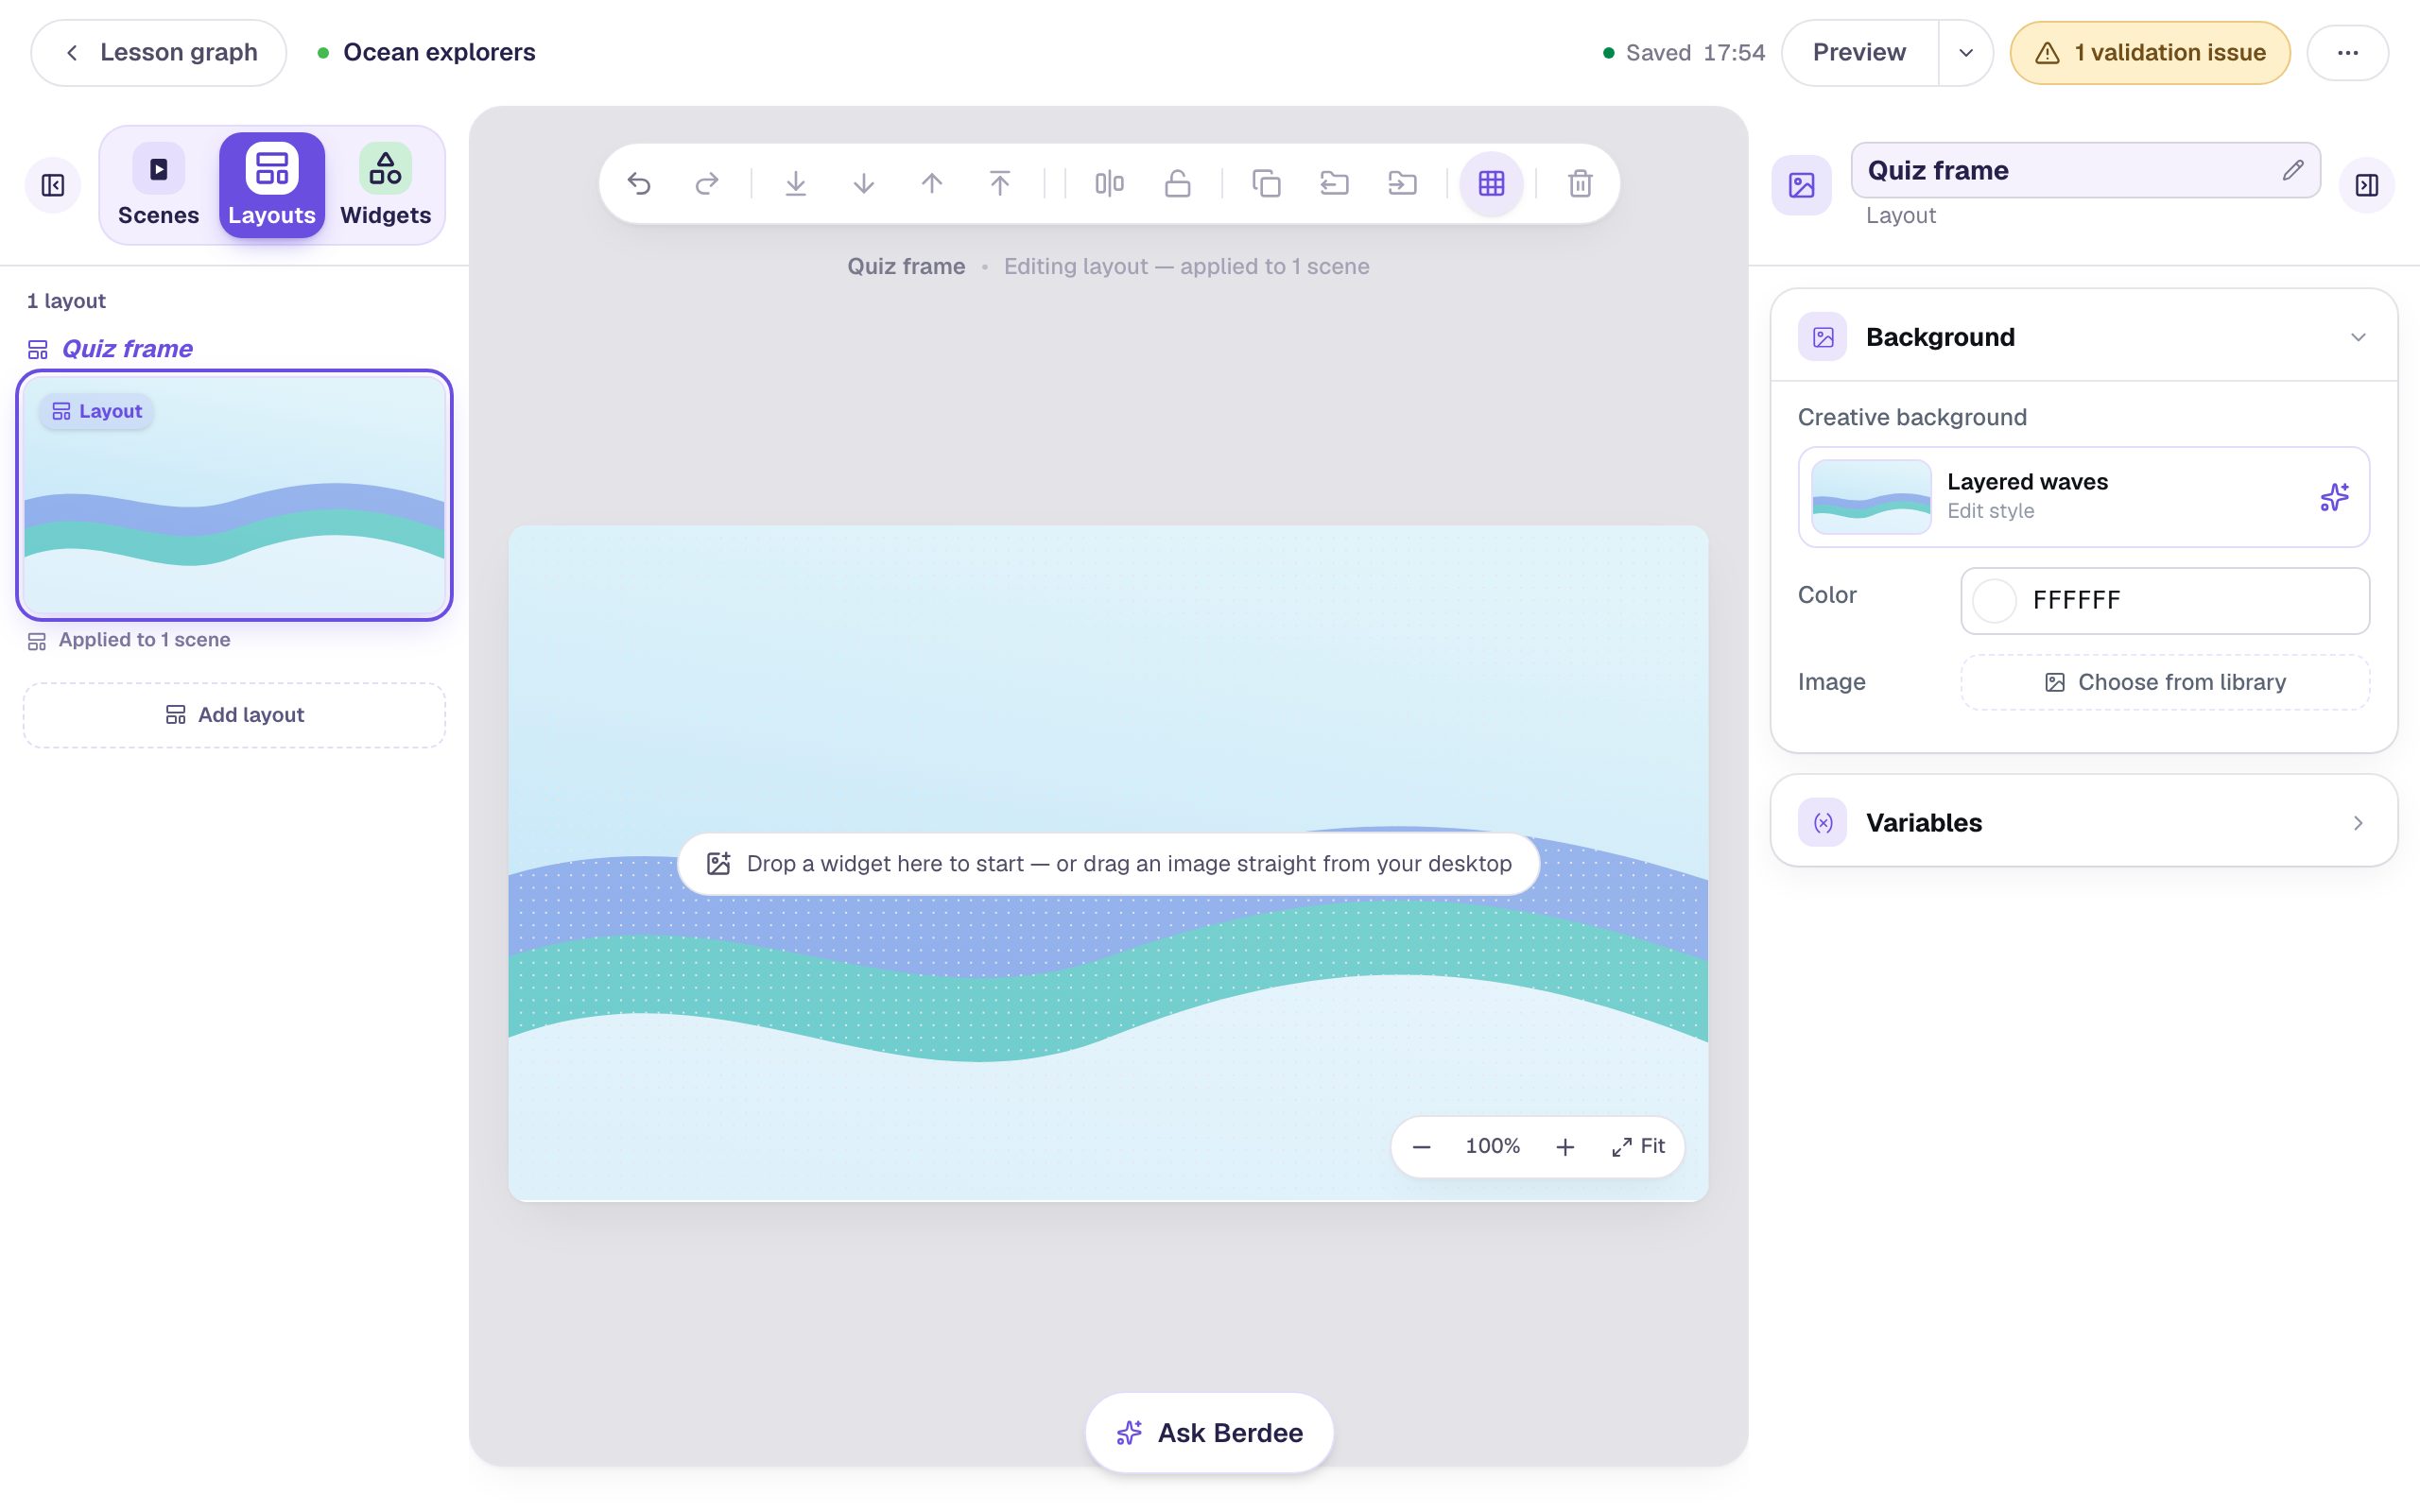
A scene that has no background of its own shows its layout's background, so the waves will appear behind both questions without you setting them twice.
Step 3: Build the frame
Add the parts that should be the same on every question. Start with a title bar across the top:
- From the Widgets tab, add a Shape. In the window that opens, pick Rectangle and click Save.
- In Style & Layout, click Show more options and set Width to
960and Height to96, the full width of the scene. - Set Fill Color and Stroke Color to a deep ocean blue, then drag the bar to the top edge.
Then add what goes on and under the bar:
- A Heading that says
🐙 Ocean explorers, at Font Size 40, with Text Color set to white. Drag it onto the left side of the bar. - A Score. Click Configure, set Scope to Lesson and Format to Fraction, and click Save. Set its Font Size to 24 and drag it to the right end of the bar.
- A Body text that says
Tap the answer you think is right., at Font Size 20, along the bottom of the scene.
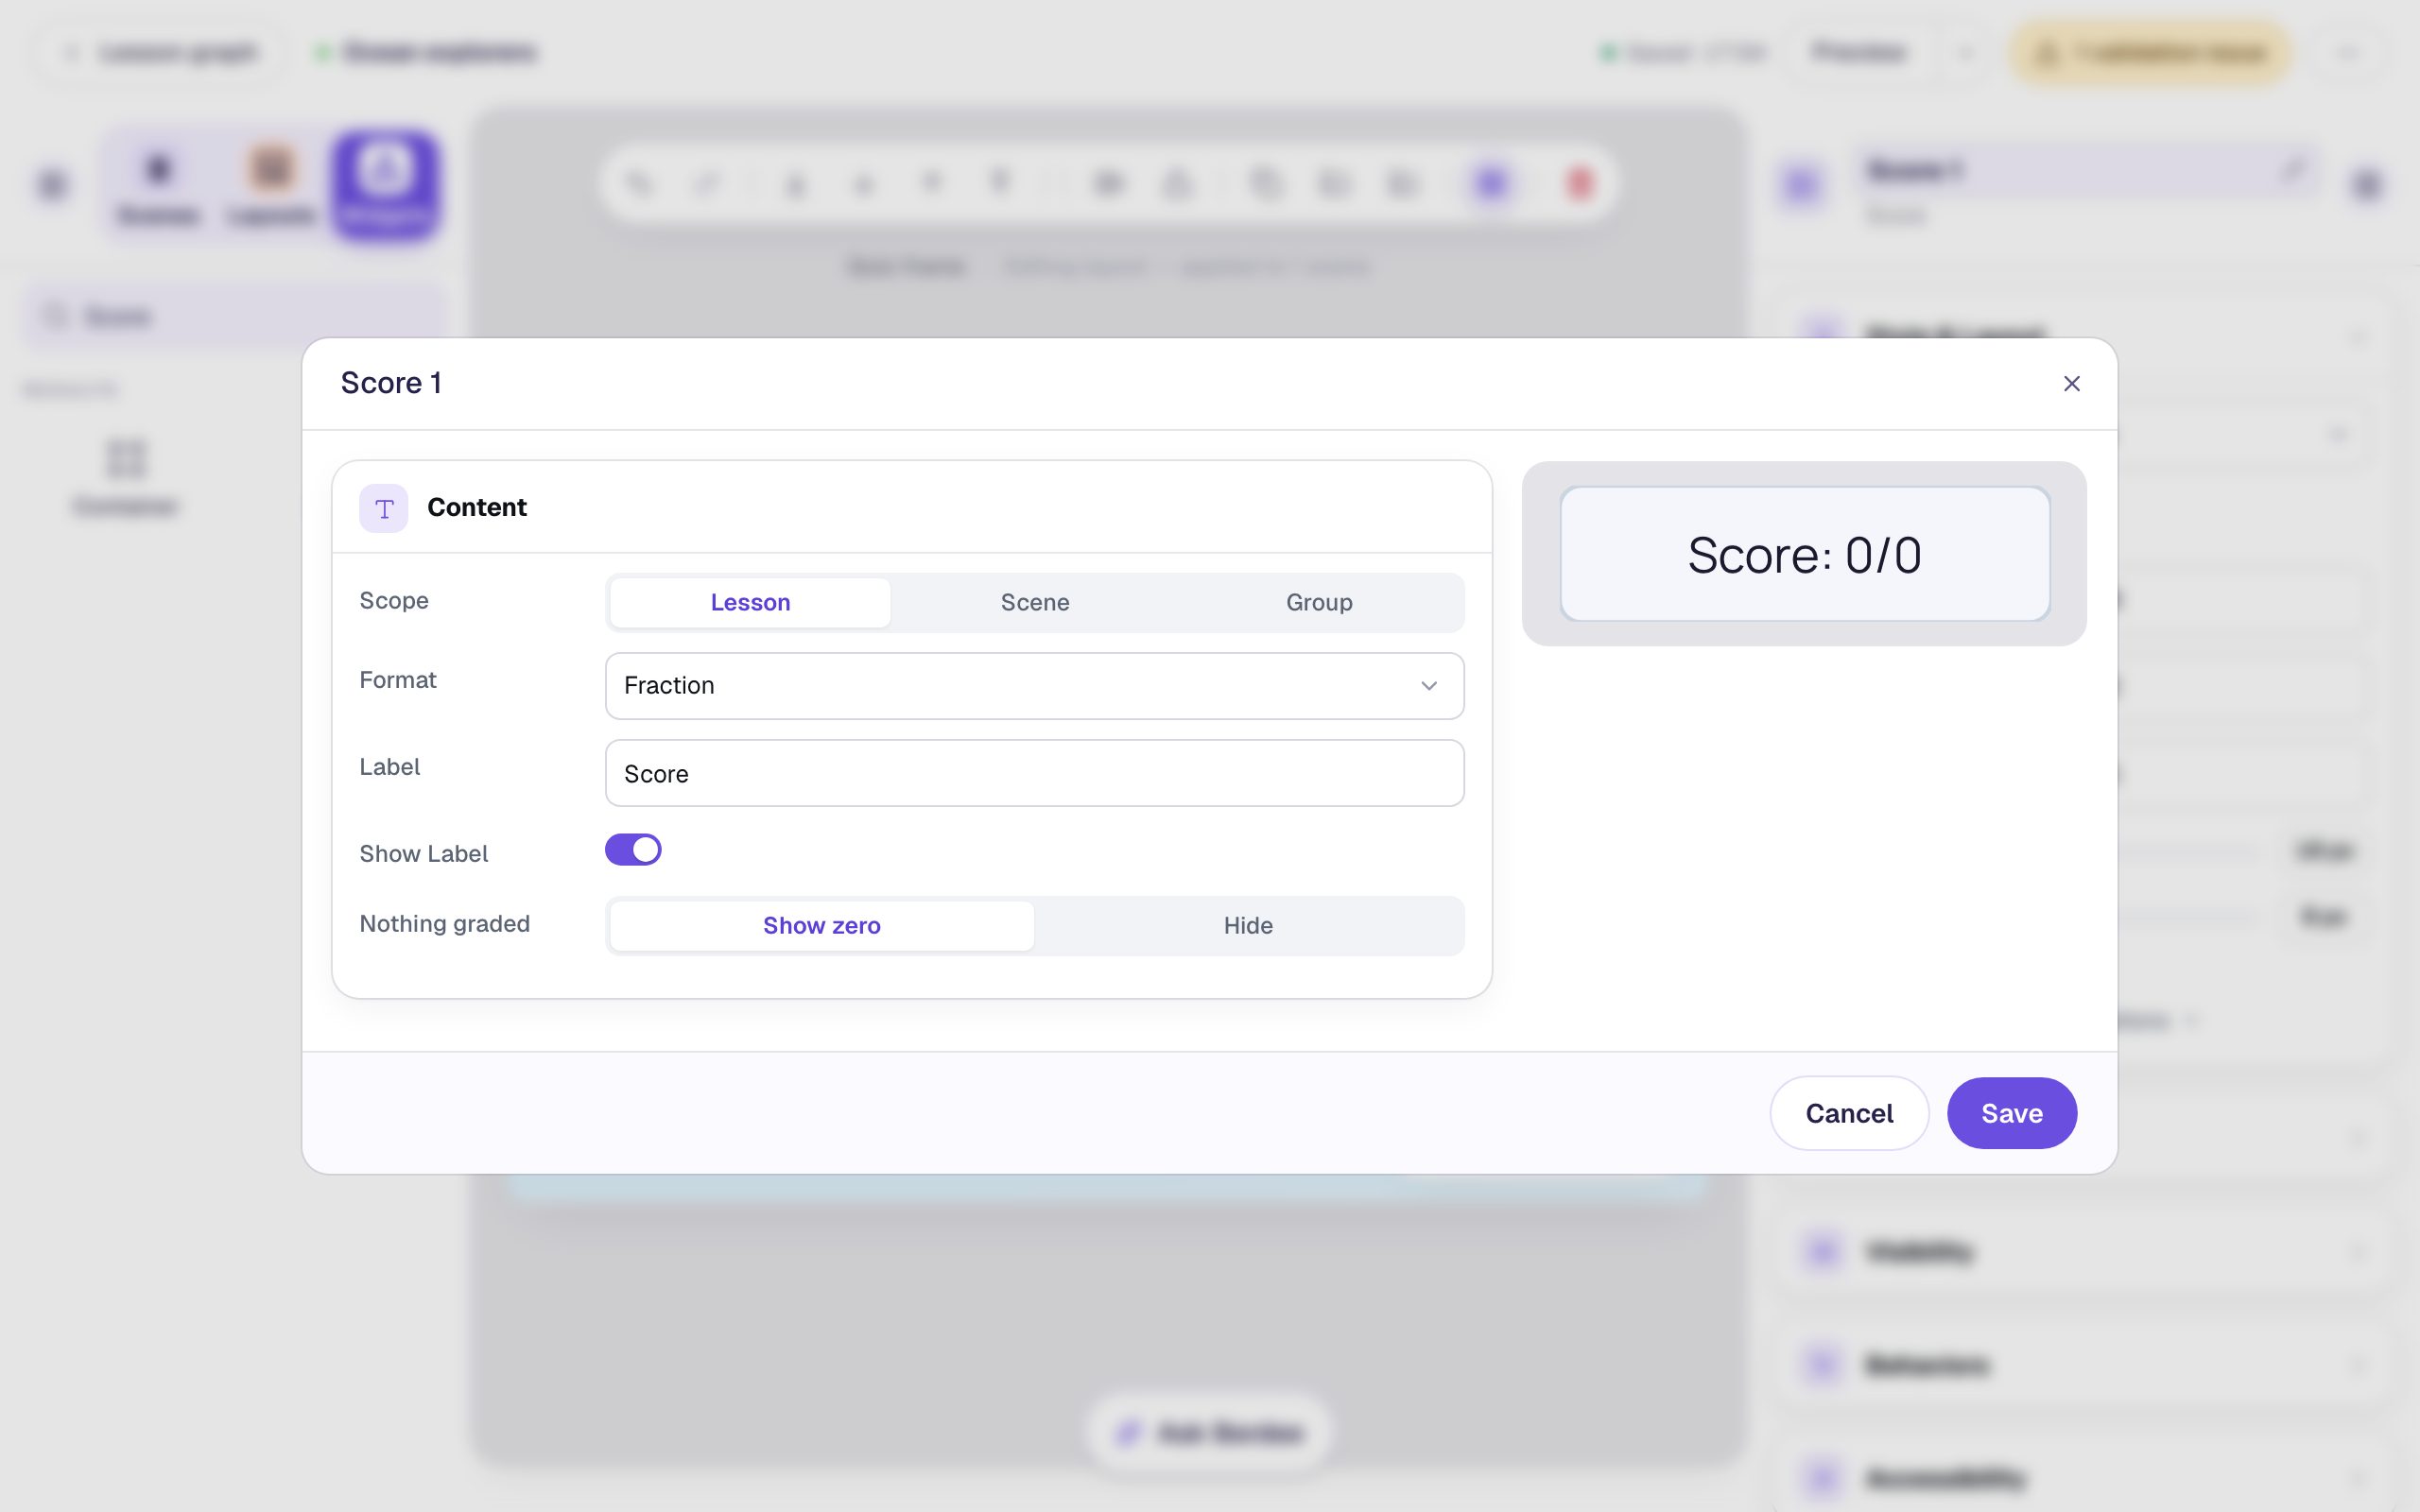
Scope matters here. A Scene score counts only the questions on the scene showing it, so on a layout it would start again at zero on each question. Lesson keeps adding up across the lesson. See Score Widget for the other settings.
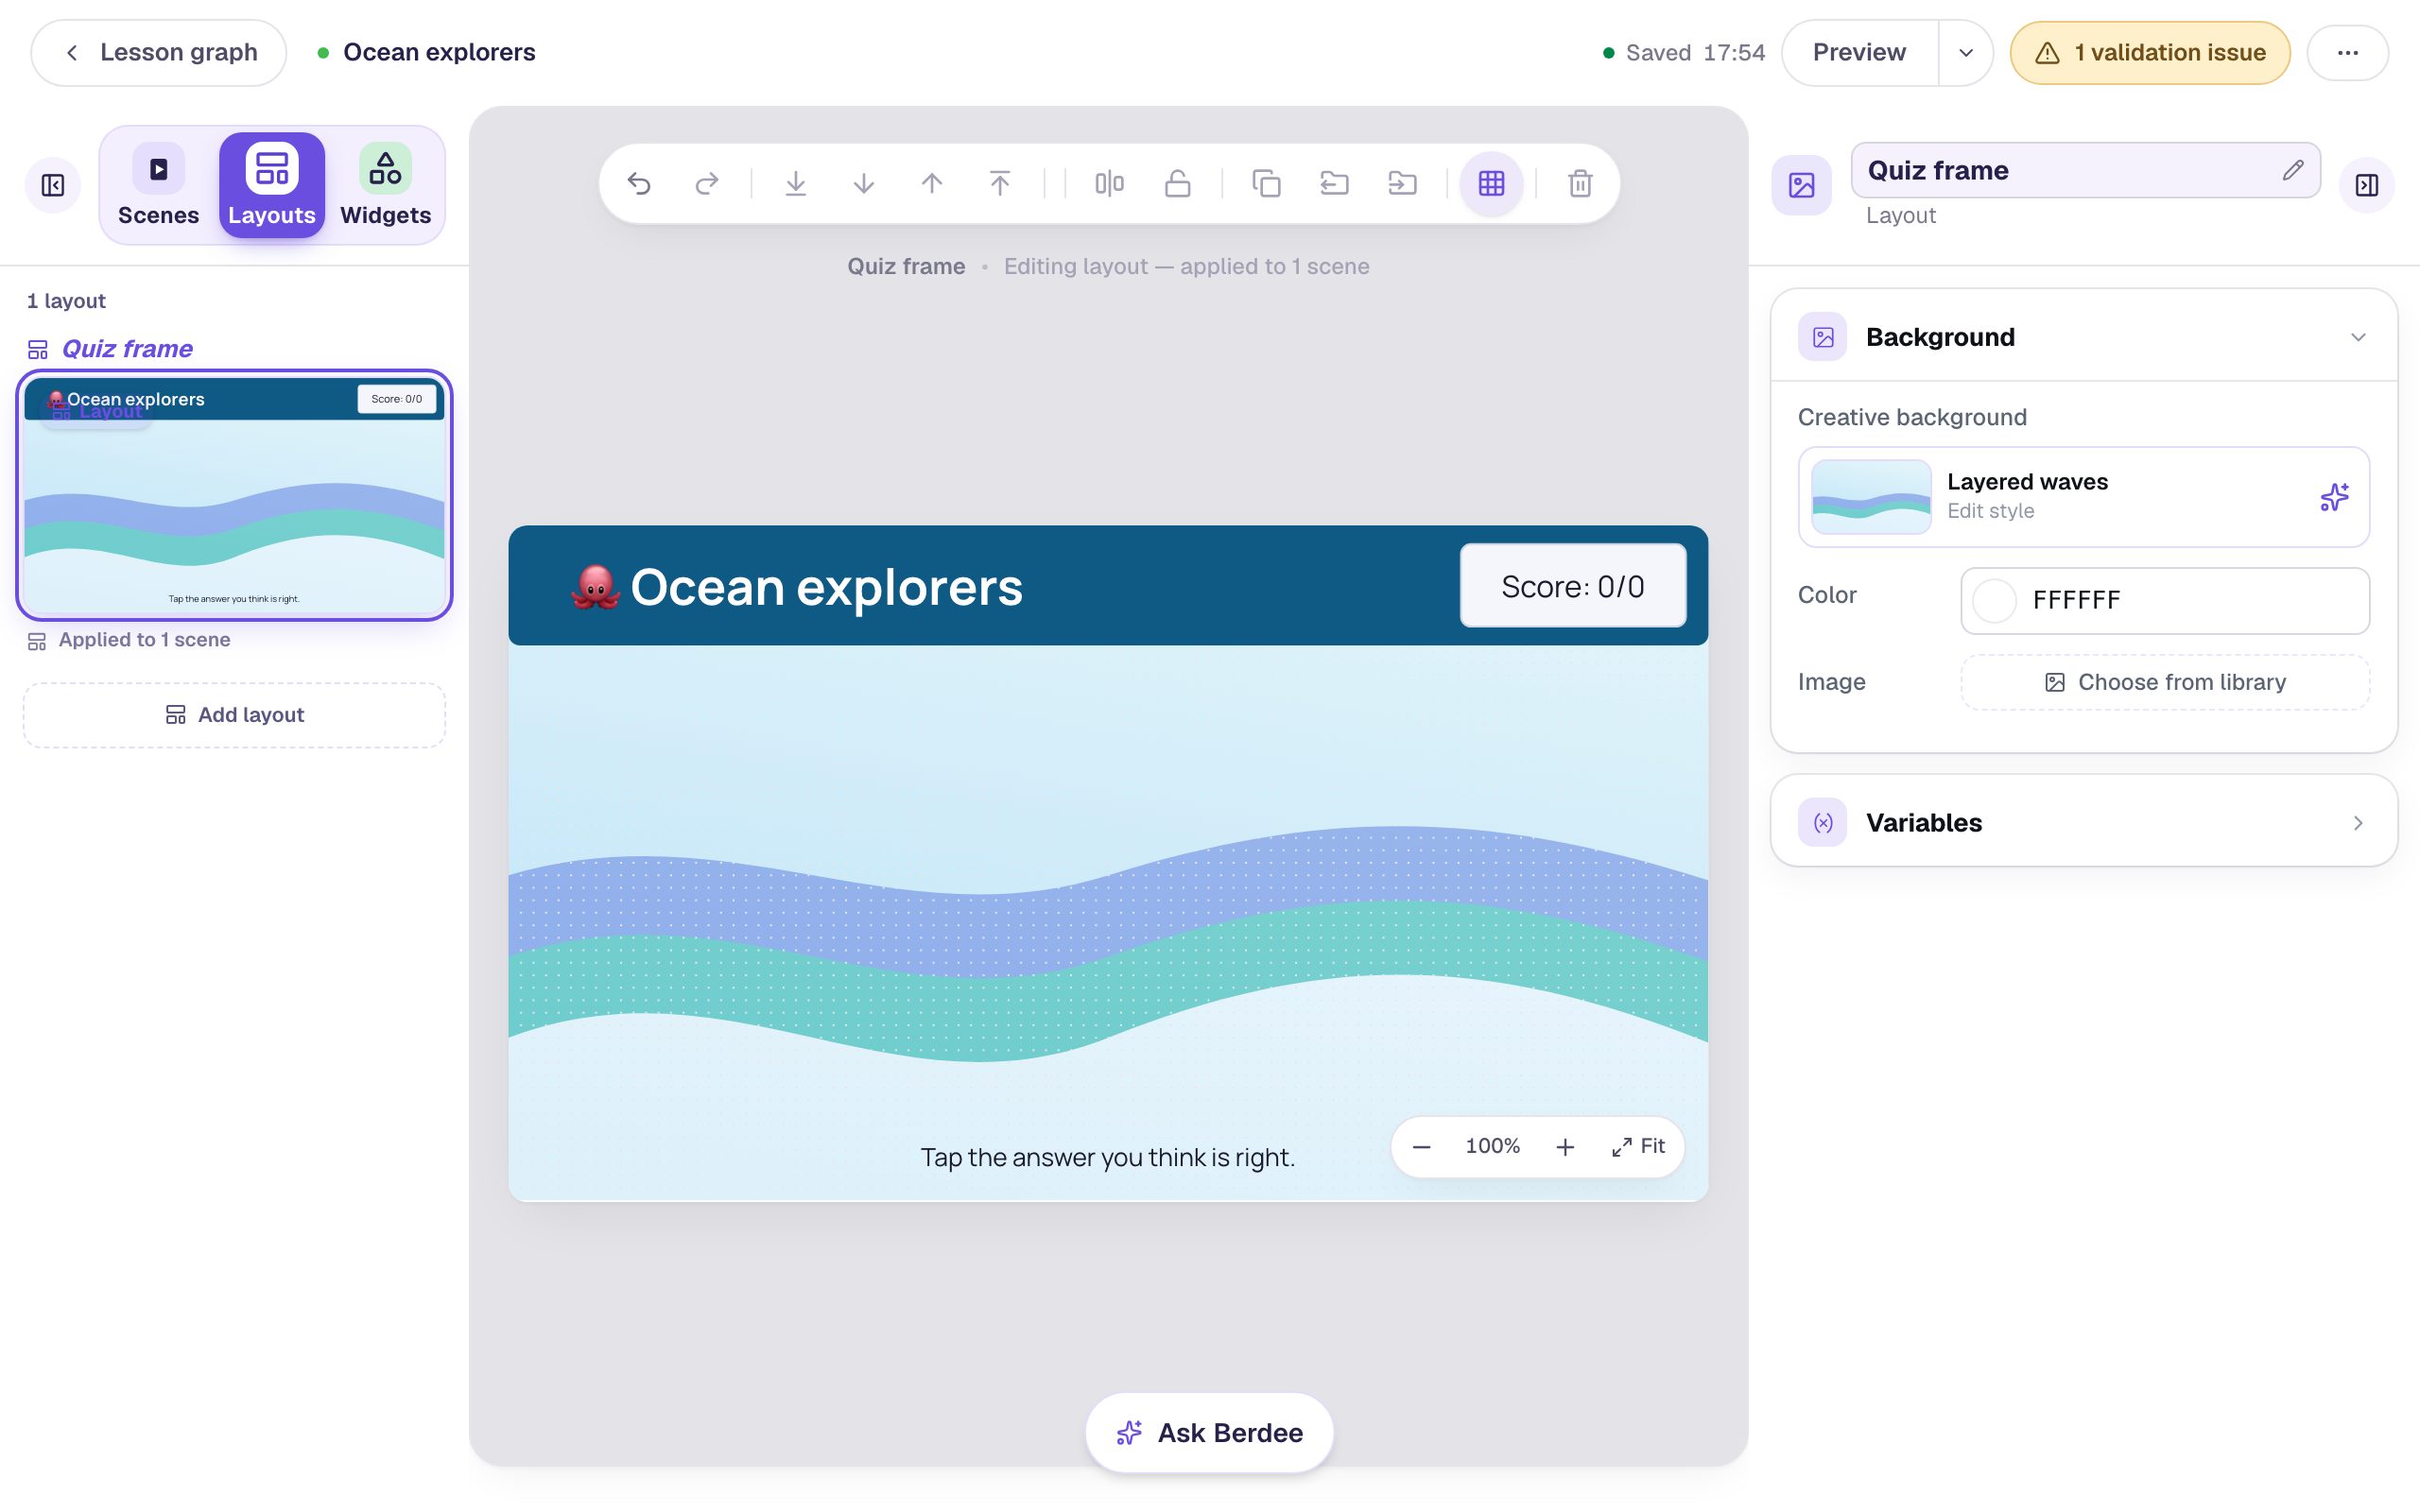
Keep questions, answers and anything else that changes from scene to scene off the layout. A layout is for what stays the same.
Step 4: Put the first question on its scene
Open the Scenes tab. The scene you added in Step 1 is called Scene 1. Double-click its name and rename it Octopus. It already shows the frame.
Add the question on top of the frame:
- A Heading that says
Which sea animal has eight arms?, at Font Size 40, just under the title bar. - A Multi Choice widget. Click Configure and type
Octopus,Starfish,Jellyfish, andCrab. Octopus is already marked correct, because a new question marks its first answer correct. Click Save. - In Style & Layout, set Font Size to 32, click Show more options, set Width to
720and Height to230, and drag the question to the middle of the scene.
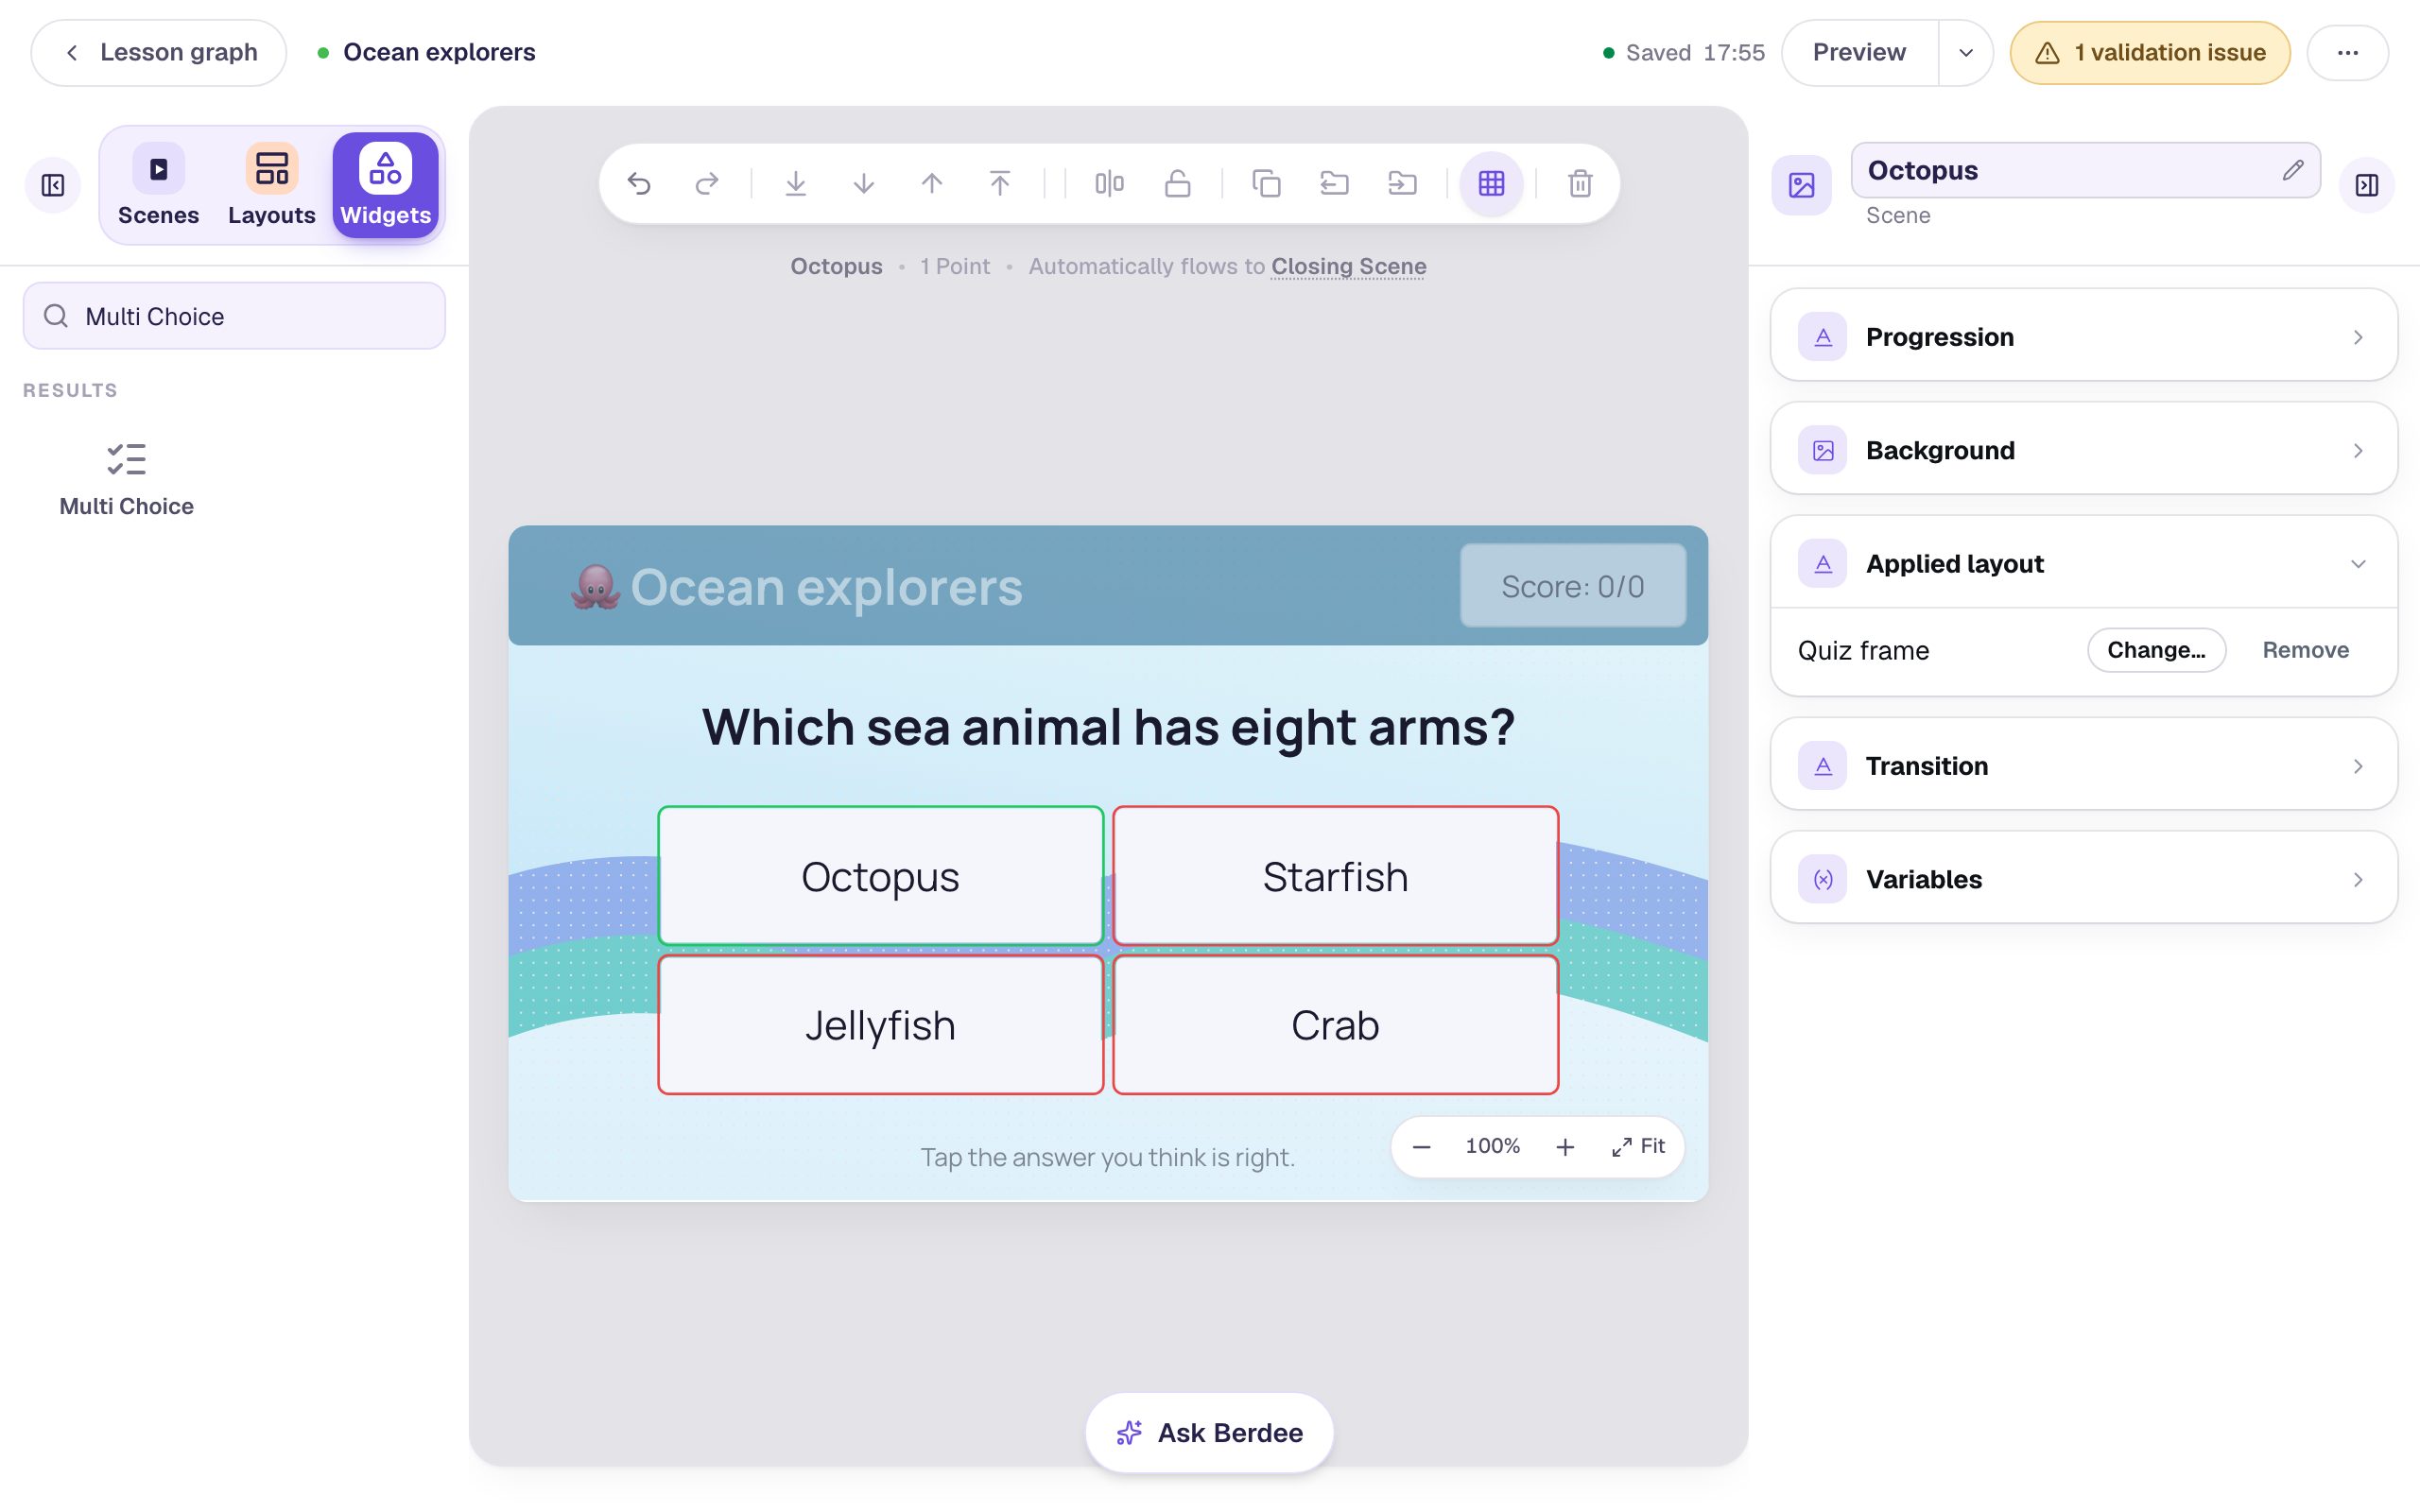
While you're editing a scene, the frame is drawn faded and you can't select it. That's how you tell the scene's own widgets from the layout's. To change the frame, you edit the layout (Step 6). Students see the whole frame at full strength.
The Applied layout section in the scene's properties shows which layout a scene uses. Change… picks another one and Remove takes it off, without touching the layout itself.
Step 5: Add the next question, and keep the frame
Click Add scene again. Now that the lesson has a layout, Berdee asks which layout the new scene should use:
Quiz frame is already chosen, because it's the layout of the scene you were on. The preview shows exactly what the new scene will look like. Click Add scene.
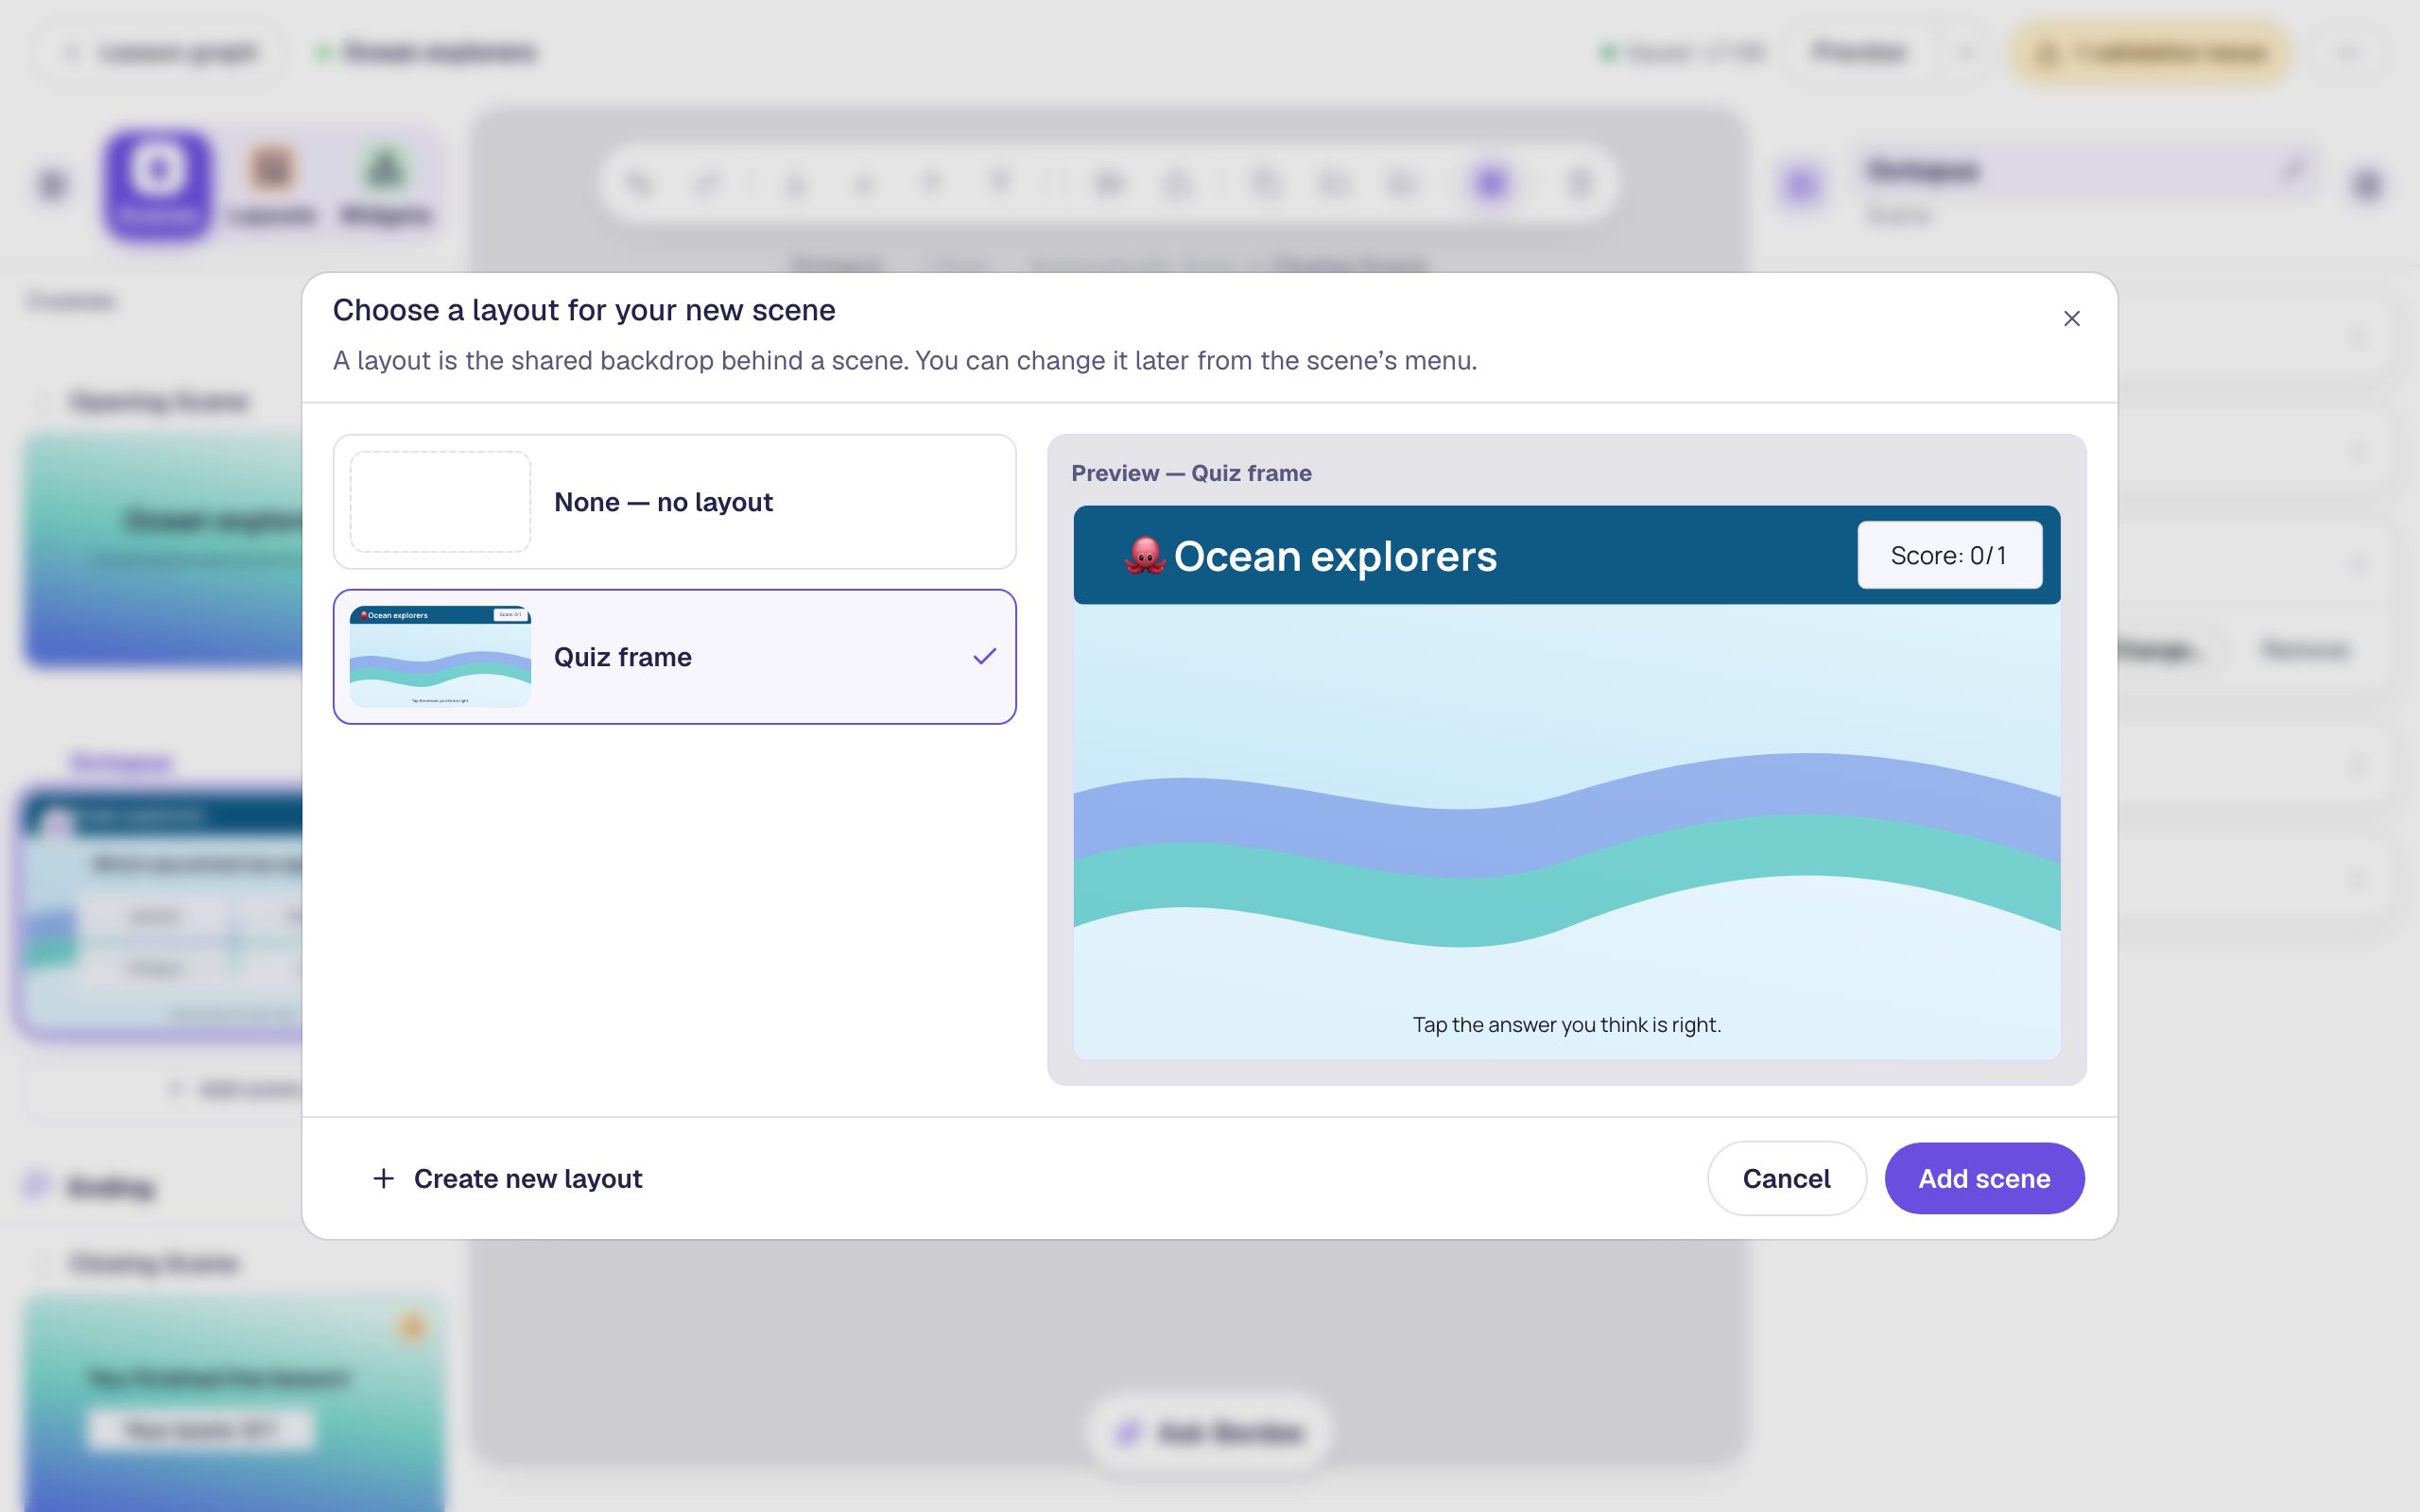
Rename the new scene Dolphin and build its question the same way: What does a dolphin breathe? with the answers Air, Water, Sand, and Seaweed, with Air marked correct.
This is the last question, so it also gets the button that finishes the lesson. Add a Submit Button, set its Label to I'm done and Submits to Lesson, make it small, and put it in the bottom-left corner. A lesson needs a Submit set to Lesson before you can publish it. It goes on the scene, not on the layout: on the layout it would appear on every question and let students finish at question one.
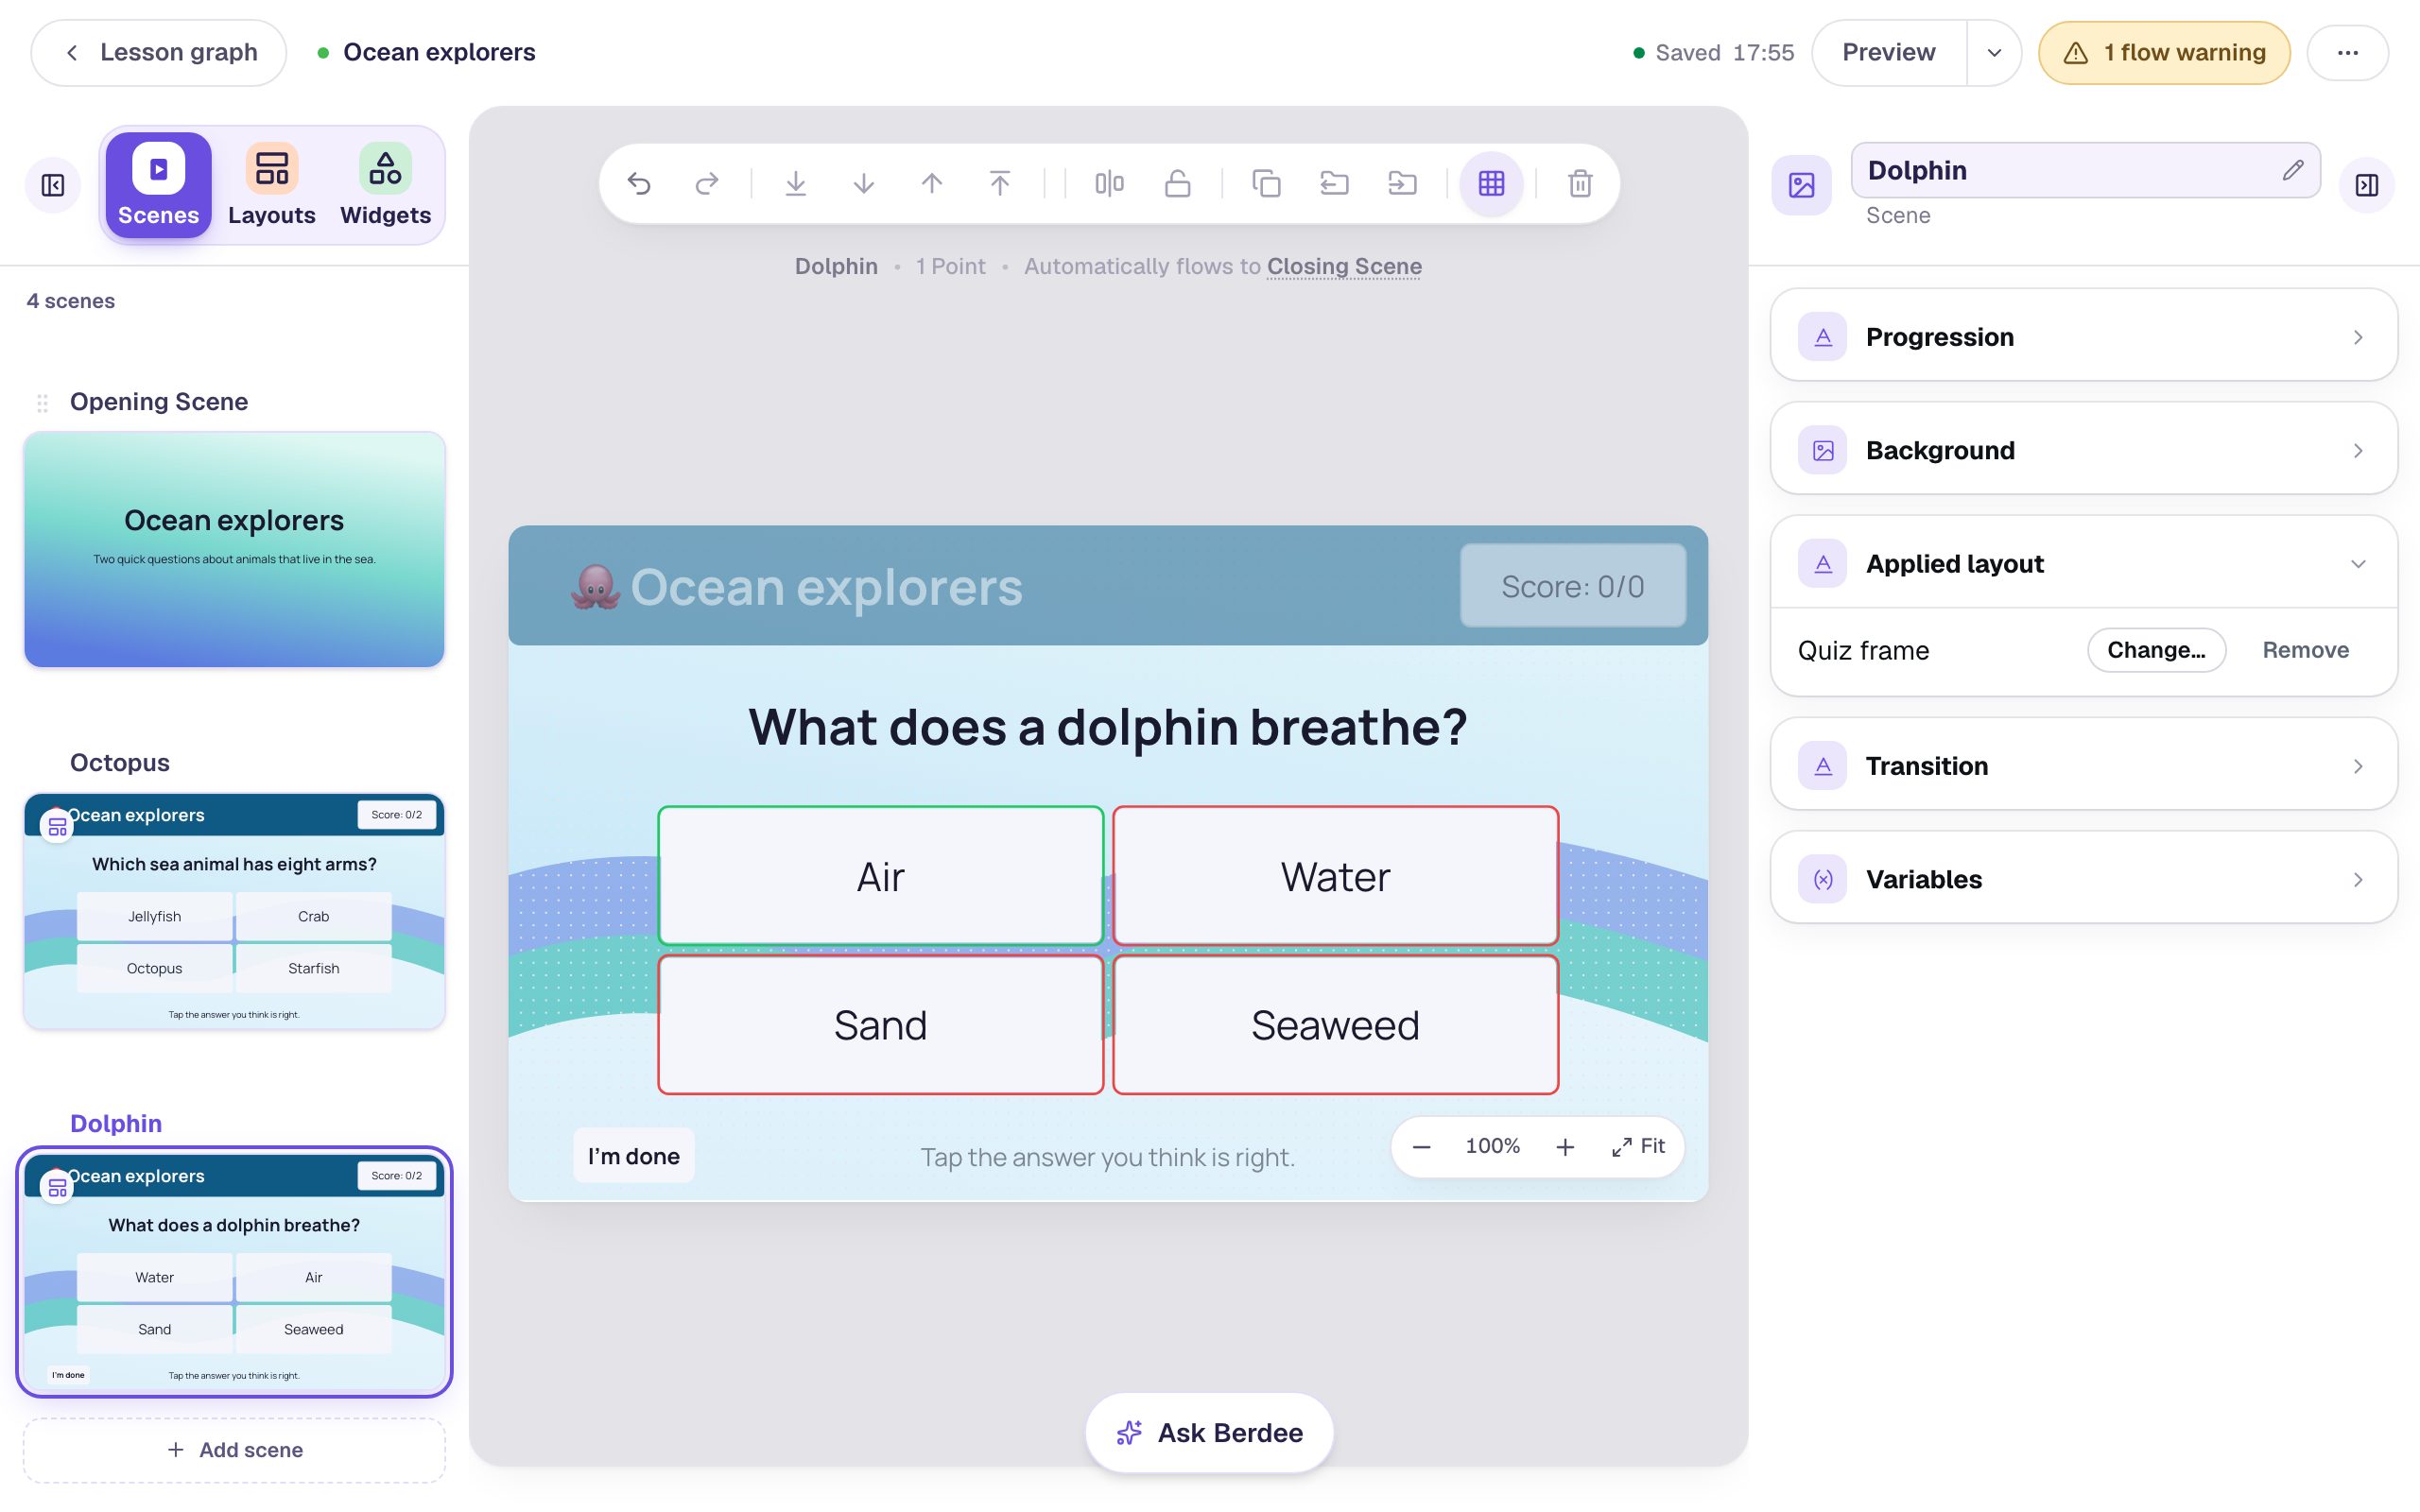
The small badge in the corner of each thumbnail marks a scene that uses a layout.
Step 6: Change the frame once
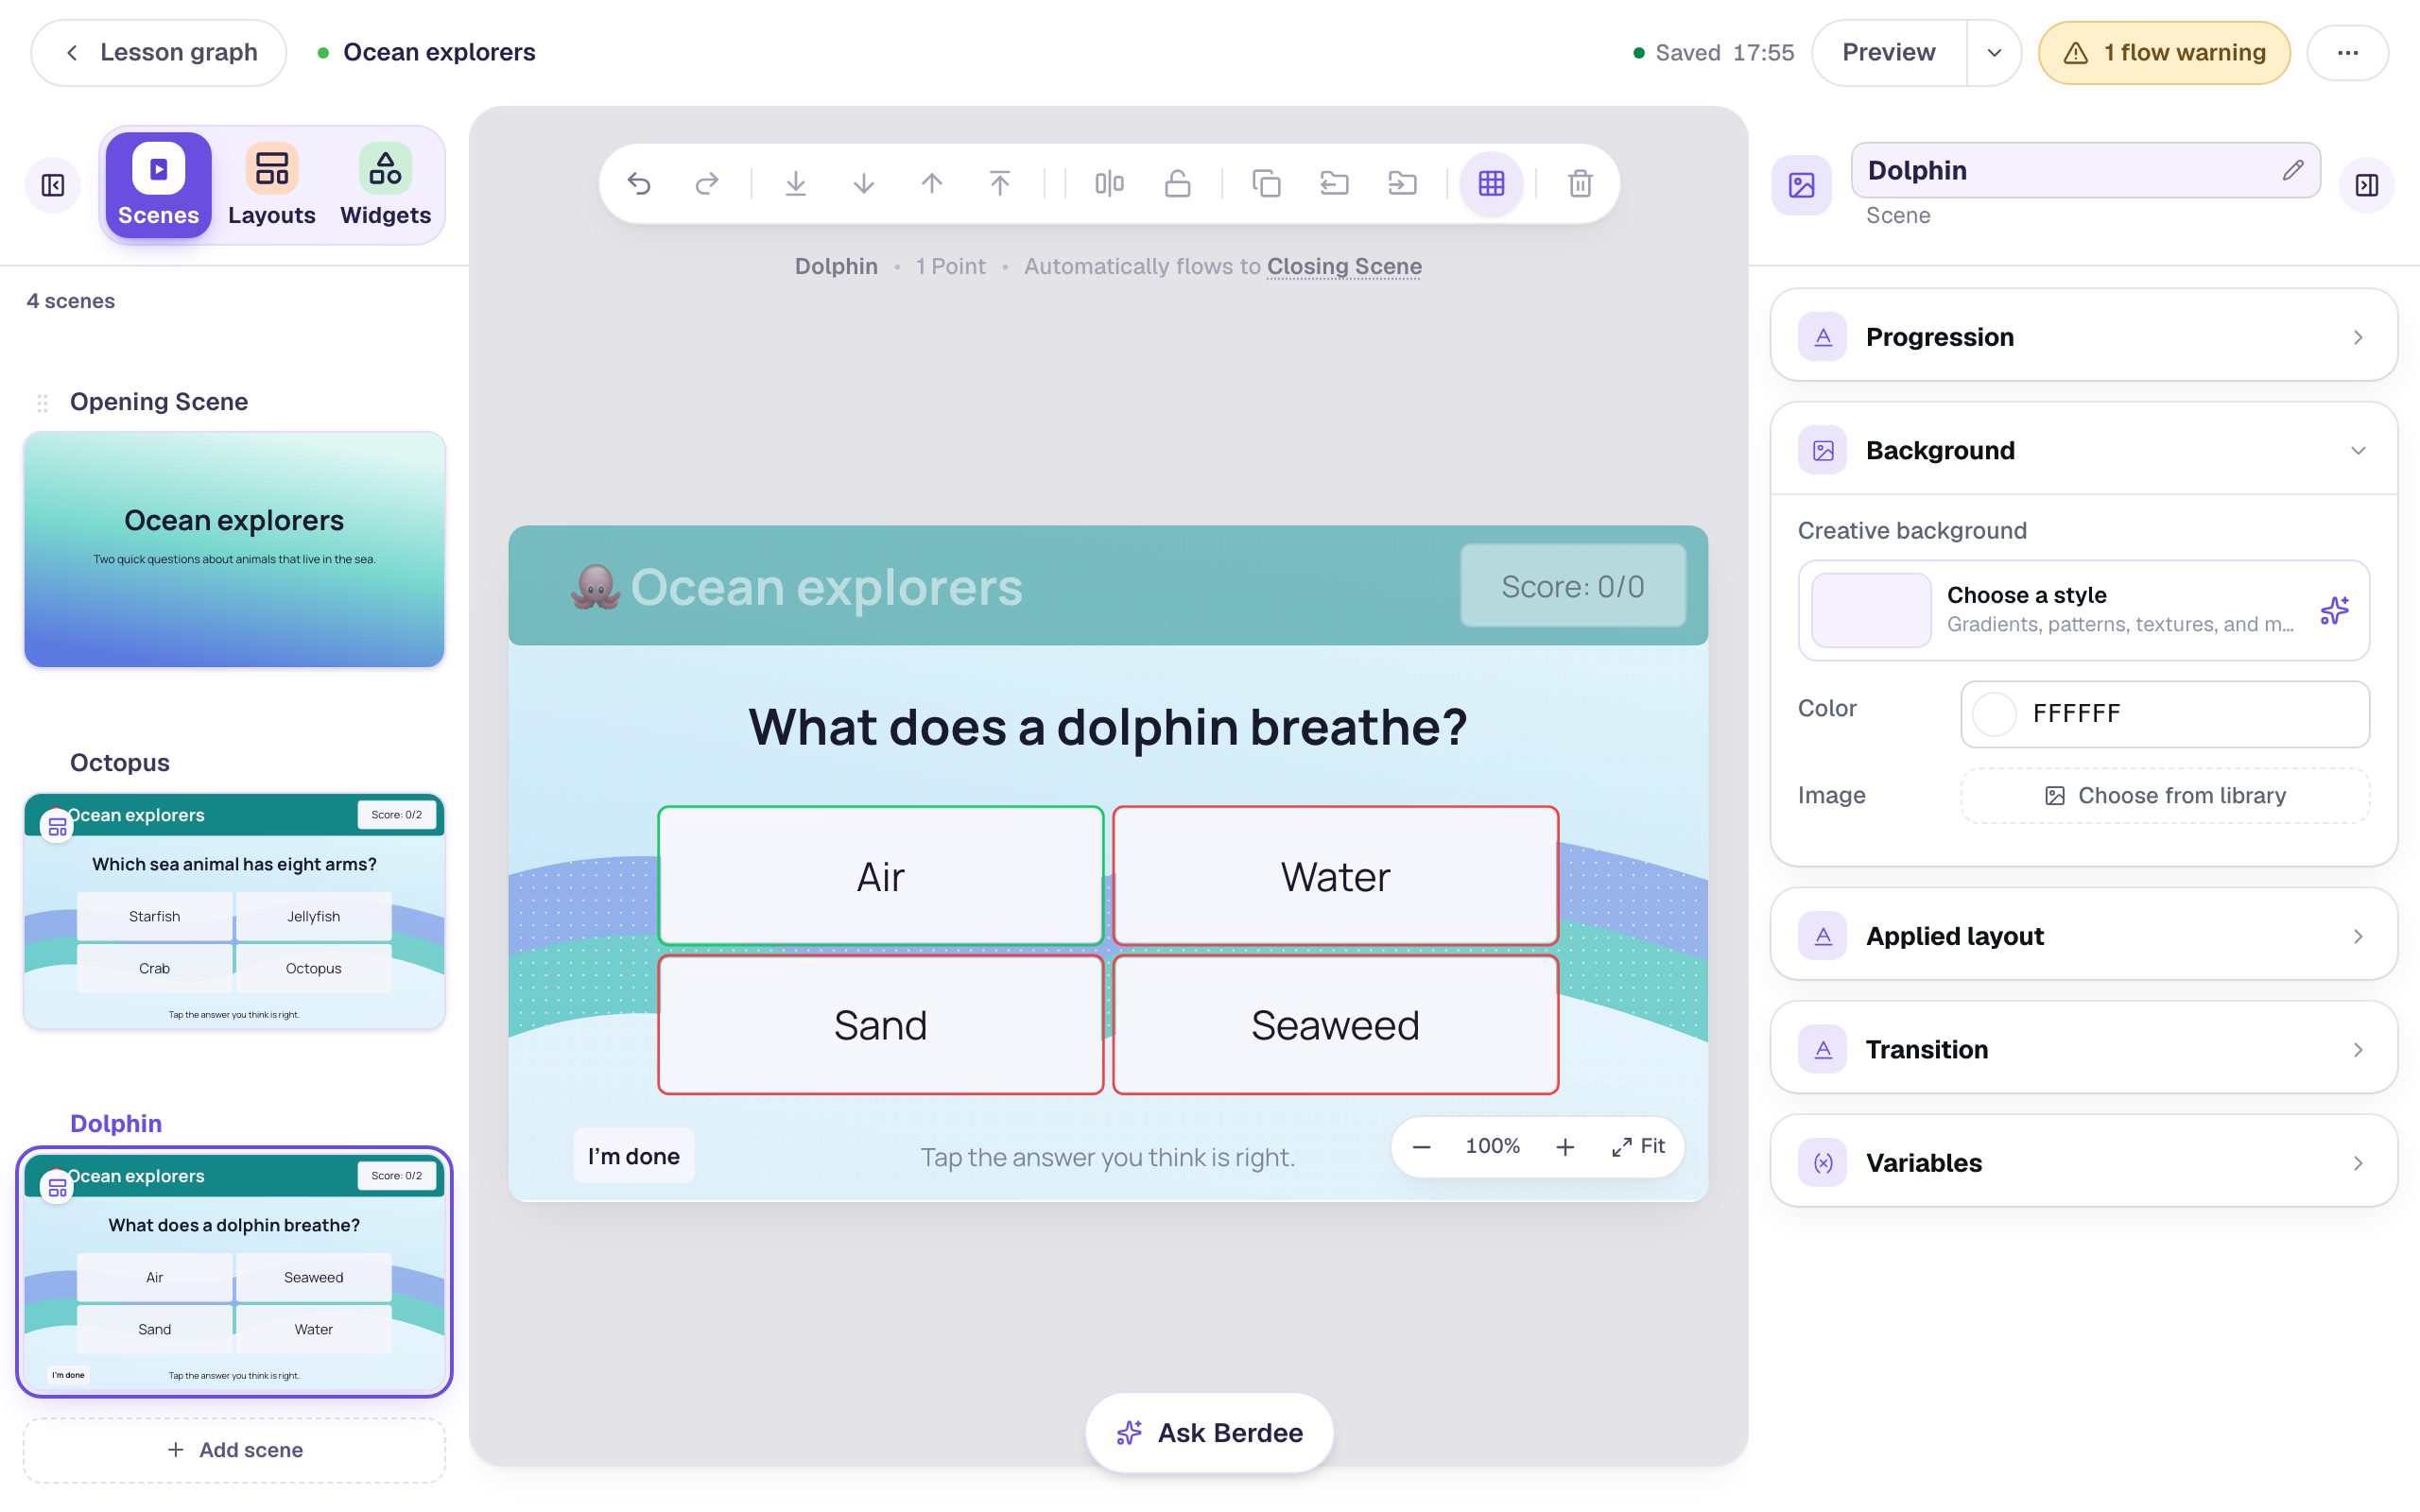
Say you'd like the title bar in teal instead. Open the Layouts tab and click Quiz frame. Click the title bar and set its Fill Color and Stroke Color to teal. Then go back to the Scenes tab:
Both questions changed. Layouts aren't copied into scenes: every scene that uses Quiz frame shows the same layout, so one edit reaches all of them, whether that's two scenes or twenty.
Step 7: Give the title scene a start button
Open the Opening Scene and add a Button. Click Configure, set its Label to Dive in, and click Save. Open Behaviors, choose Make this a "Next" button, and click Add behavior. Drag it under the intro text.
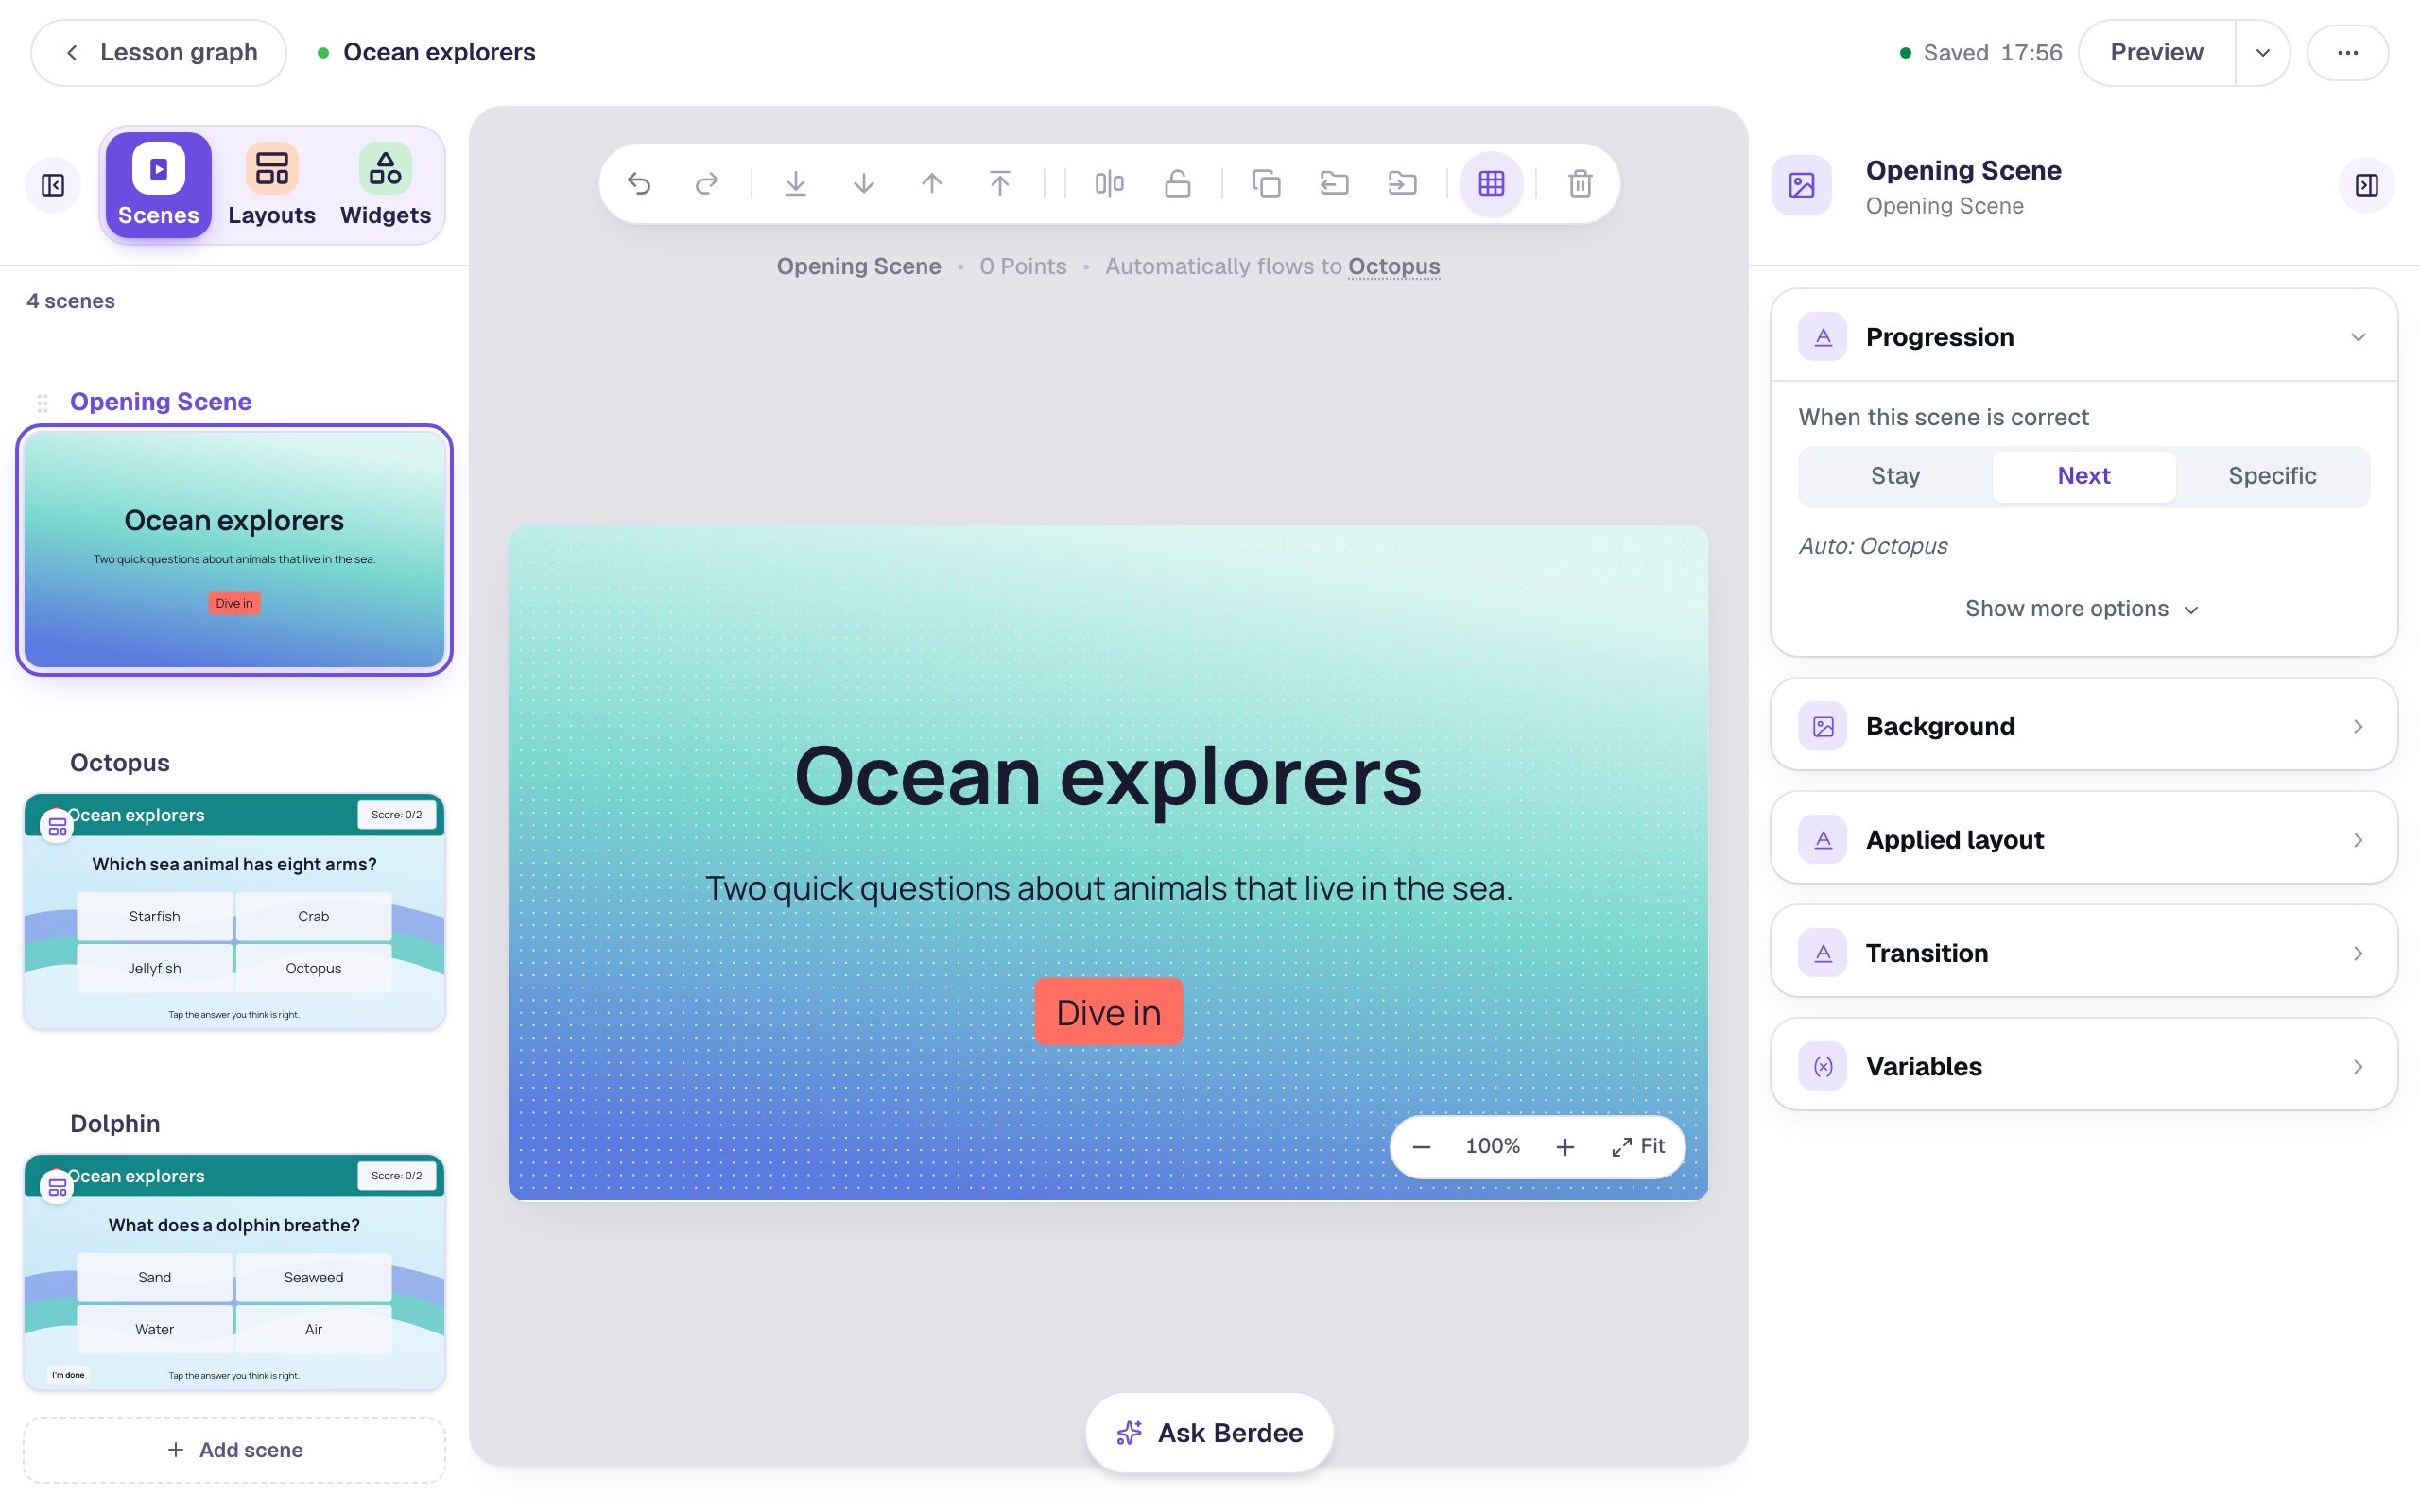
The Opening Scene has no layout, so it shows only its own widgets.
Step 8: Try it as a student
With the Opening Scene open, click Preview. Press Dive in, try a wrong answer on the octopus question, then answer both questions correctly:
The answers are in a different order than on the canvas, because Multiple Choice shuffles them for each student. The frame stays in place from question to question, and the score in the title bar keeps a running total.
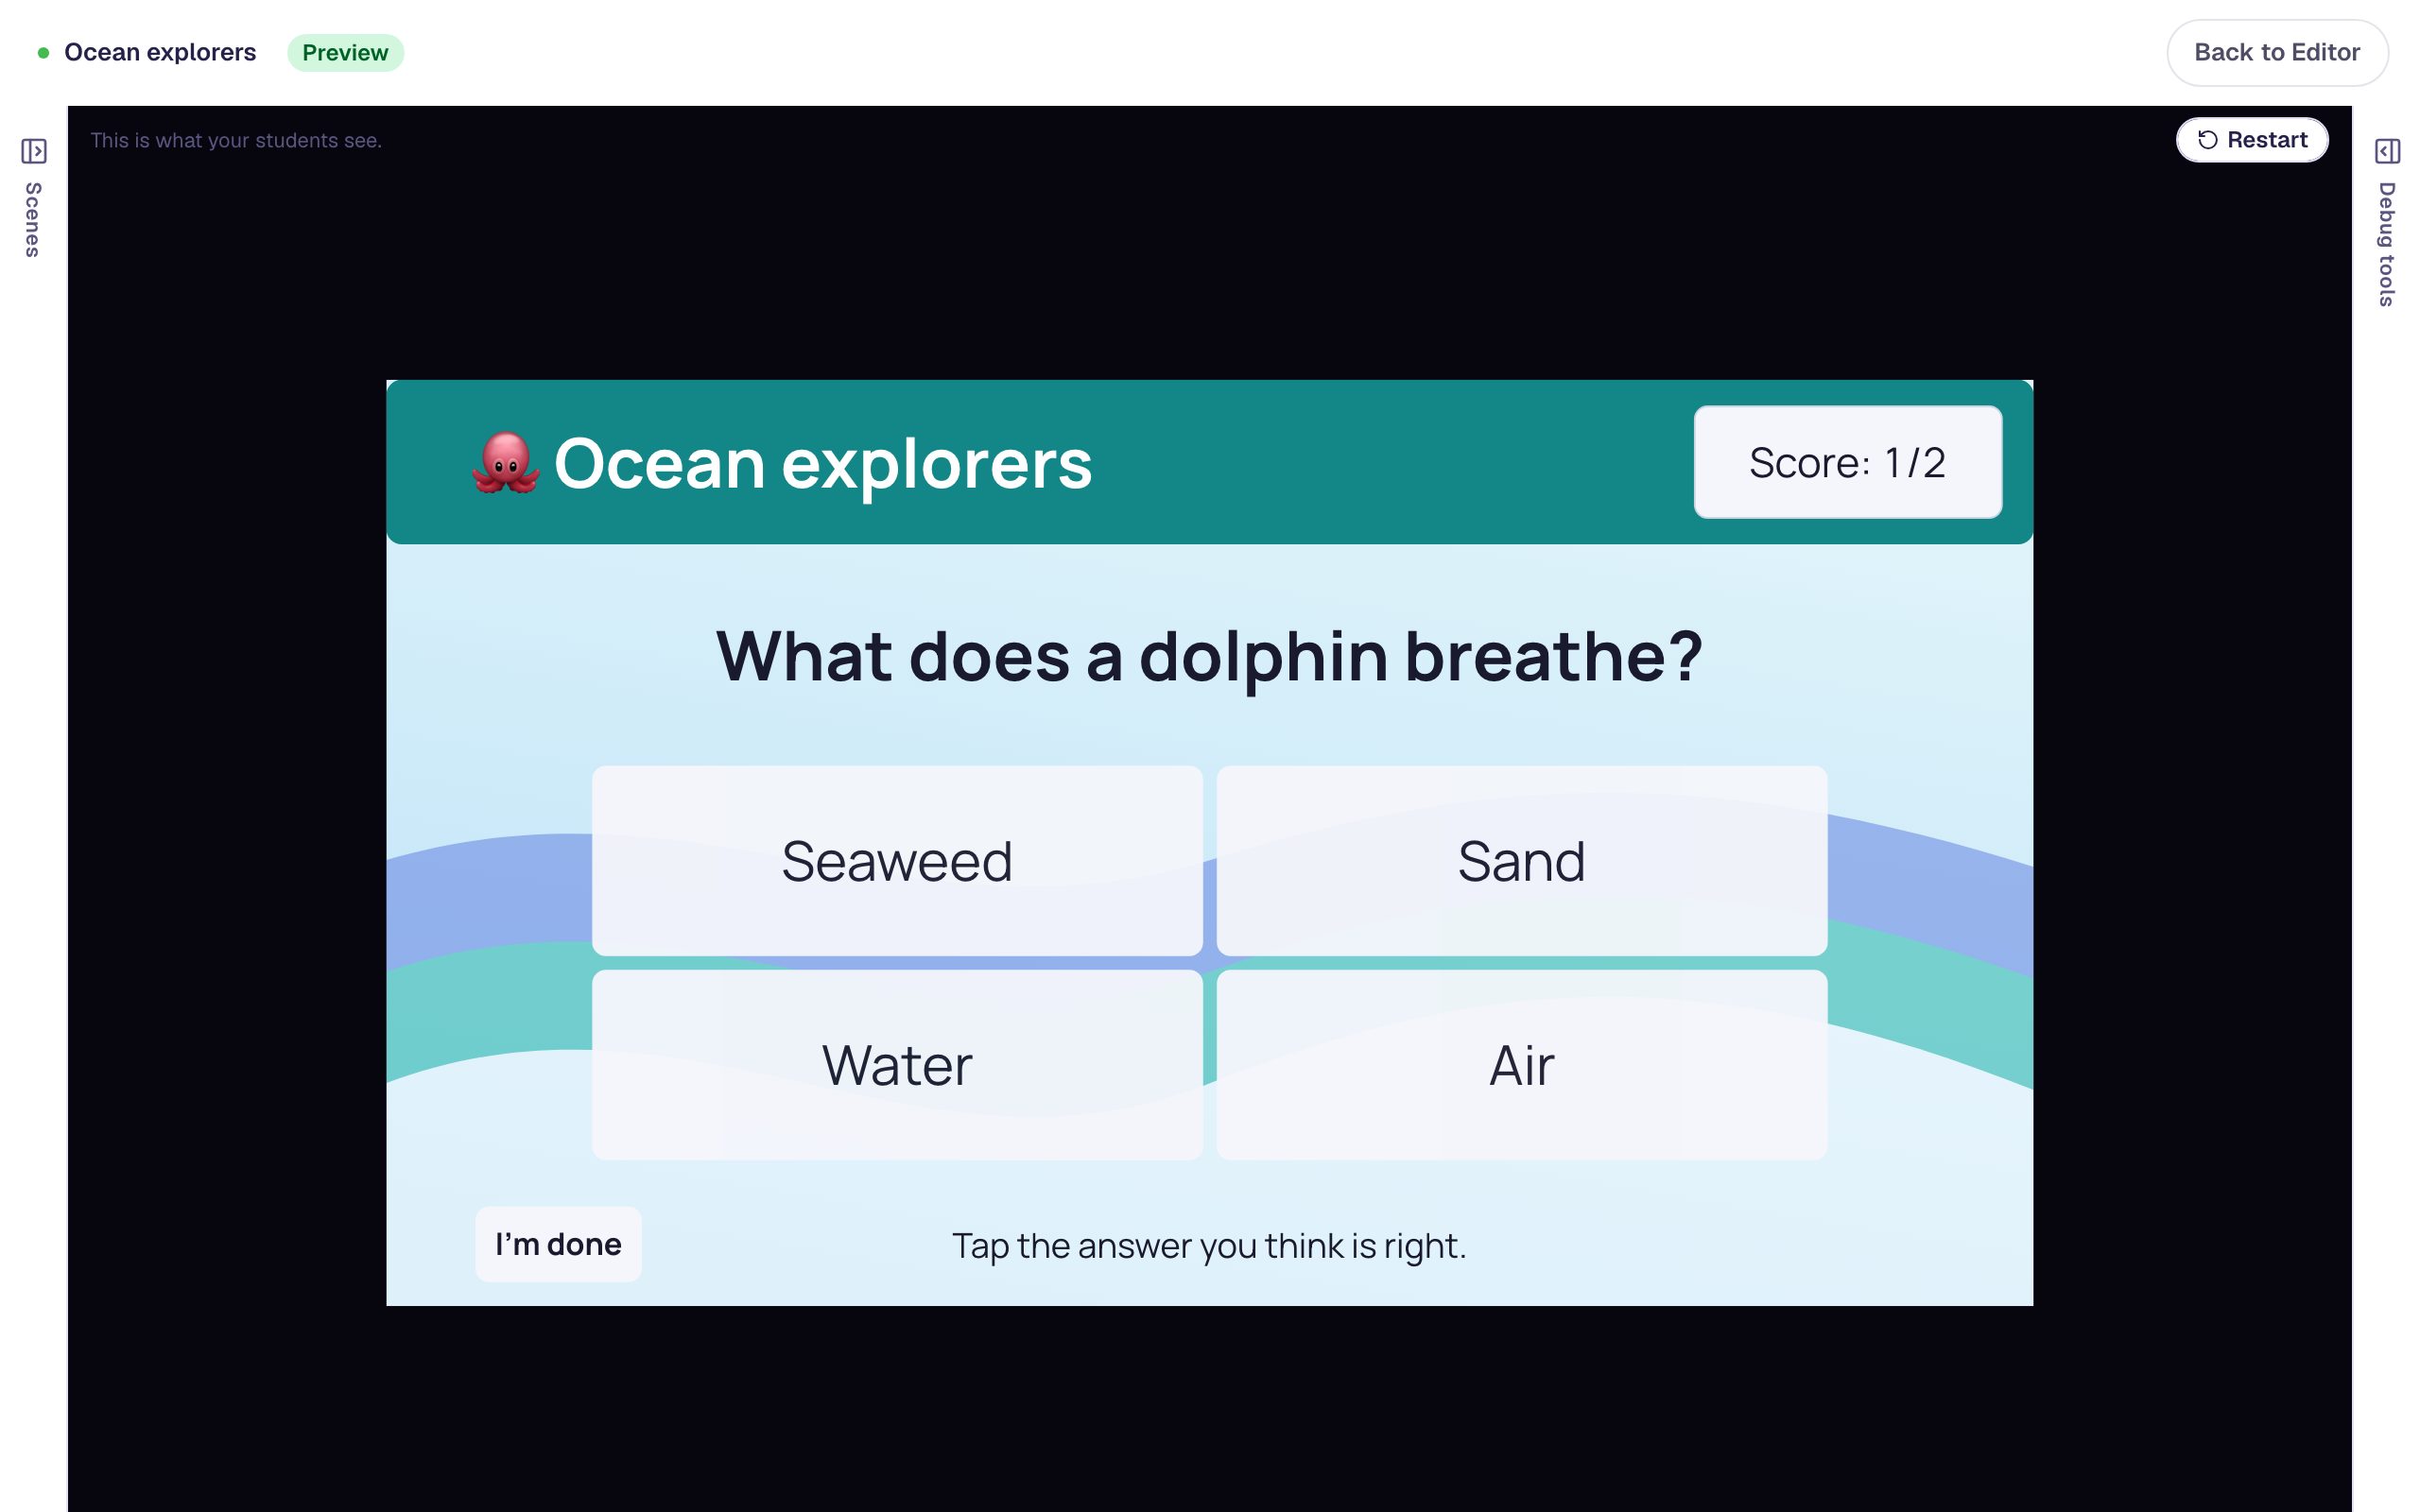
The score shows 1/2 on the second question: one point so far, out of the two questions reached. It starts at 0/1 on the first question.
What you built
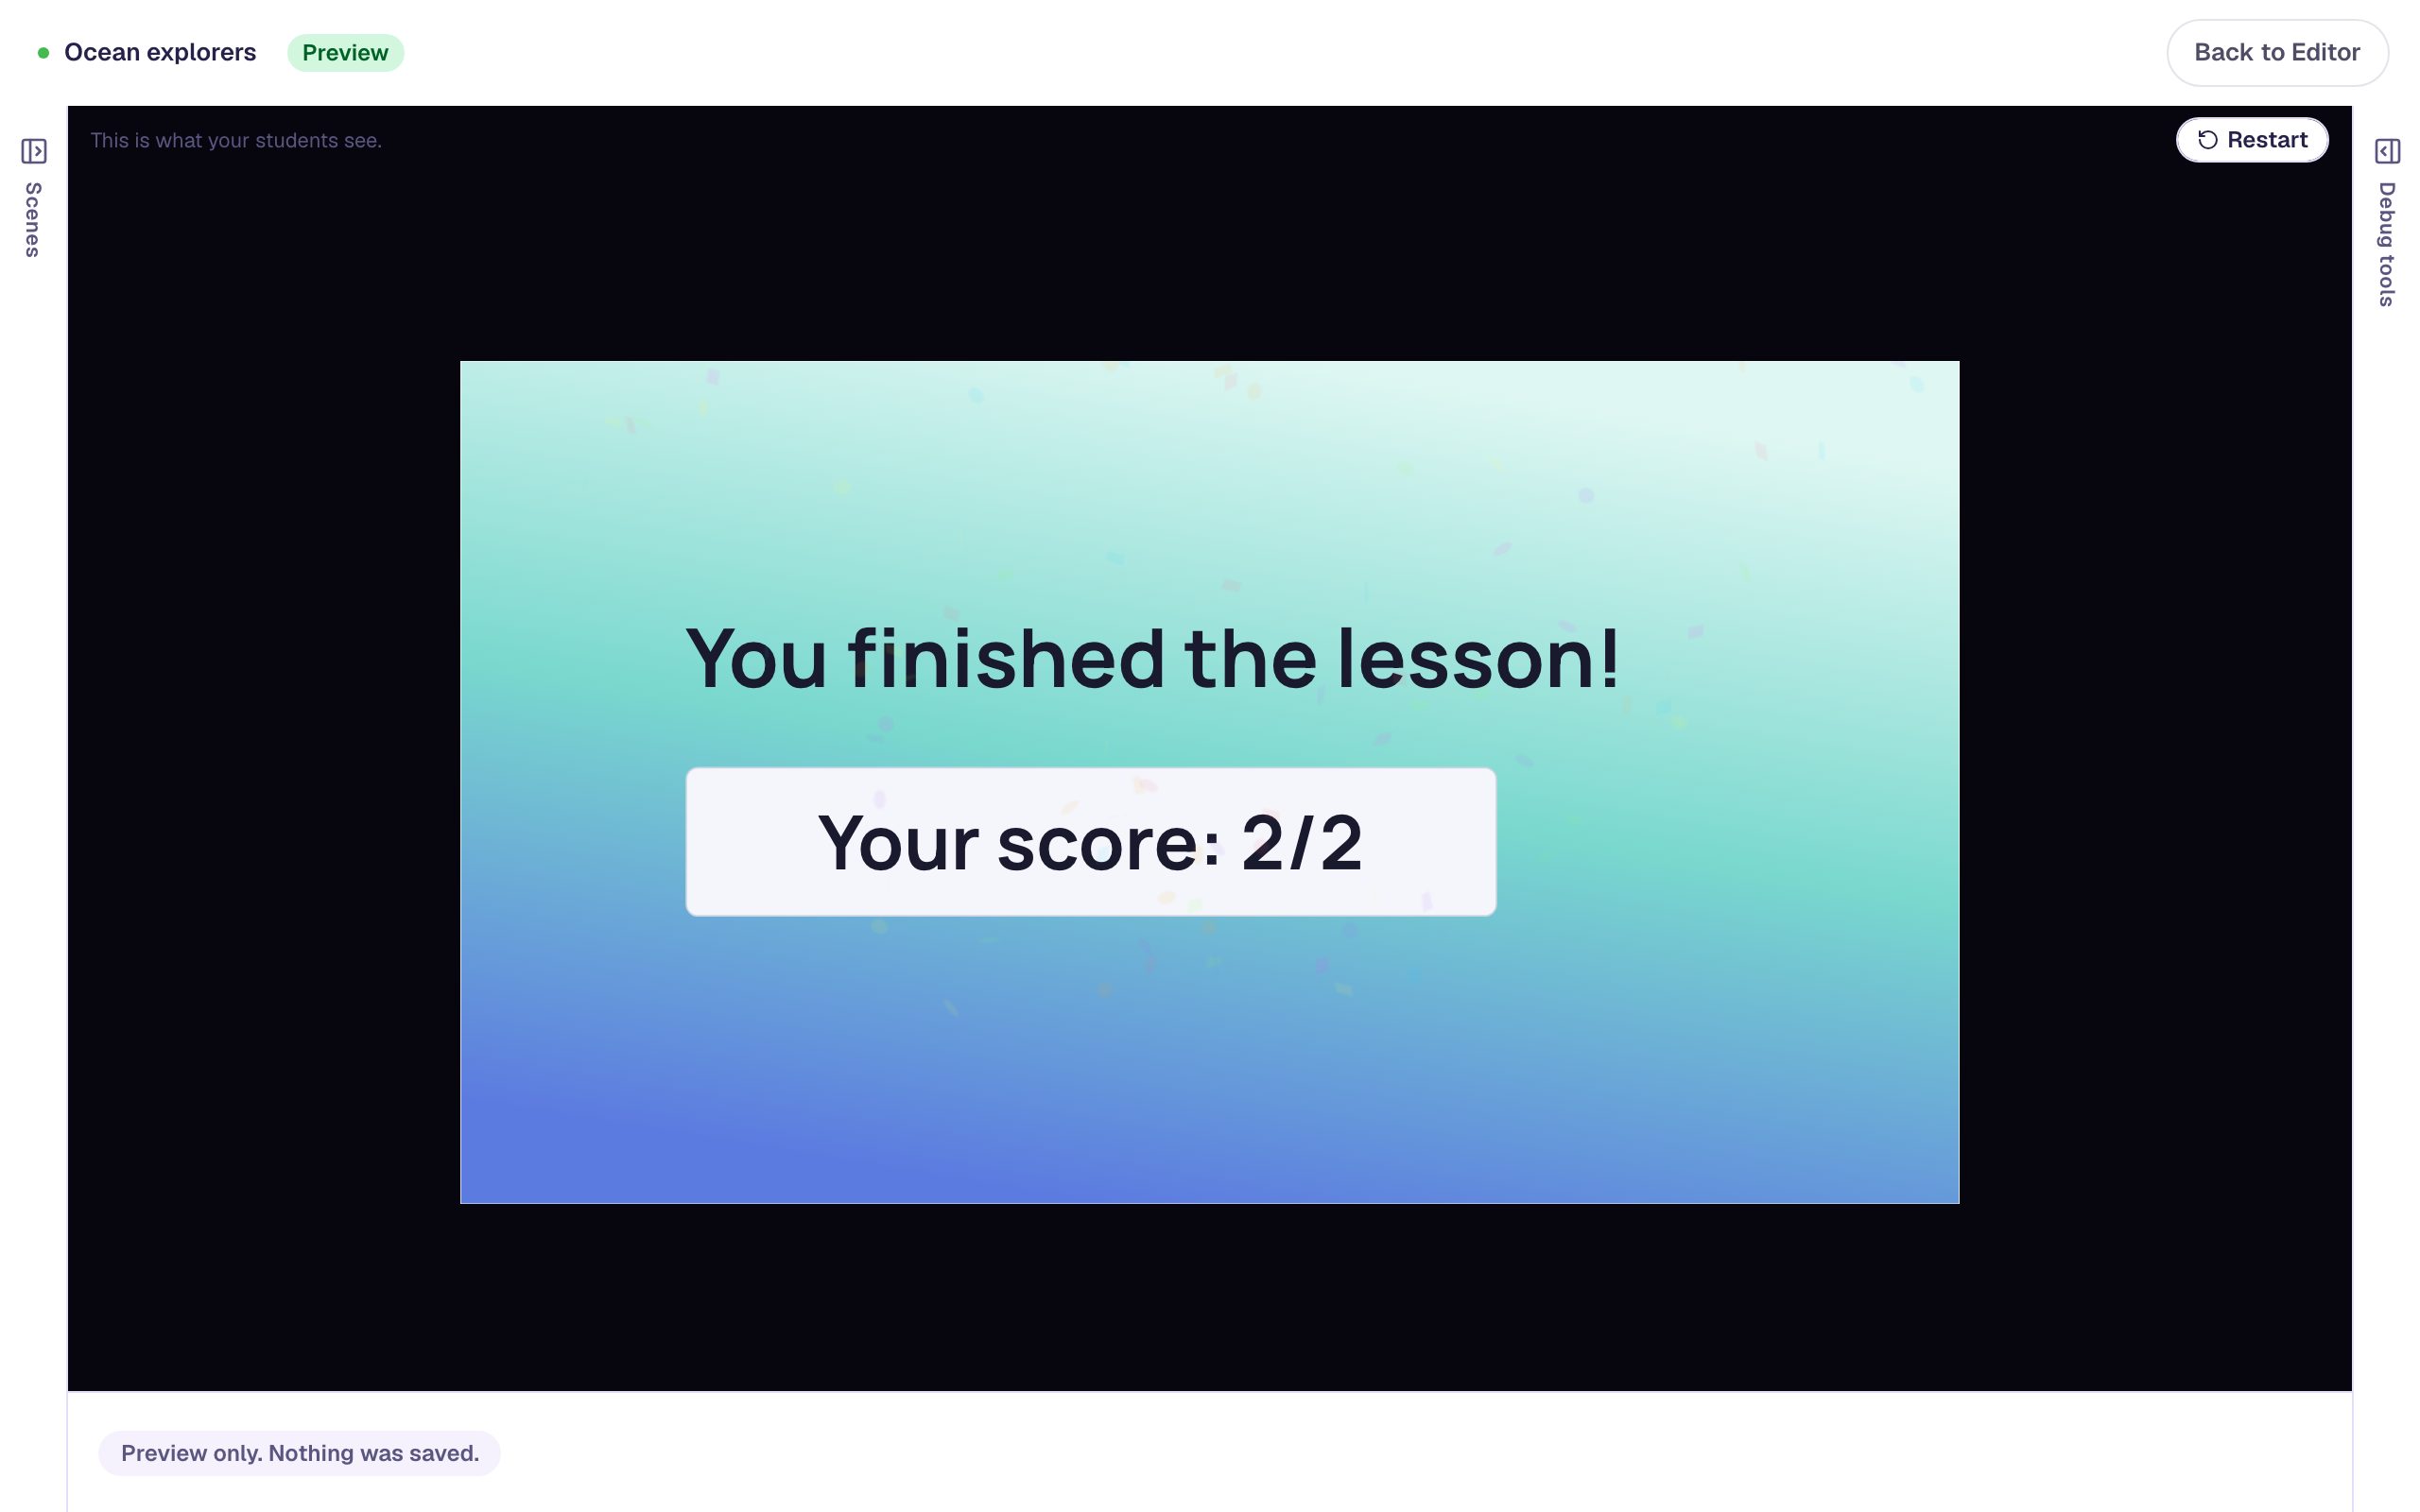
A two-question quiz with:
- a layout, Quiz frame, with a title bar, a lesson score, a background, and directions, built once,
- two question scenes that use it, one through Create a layout and one through the layout picker when you added it,
- a frame you changed in one place and saw change on every scene, and
- a title scene and an ending with their own look, because a scene uses a layout only when you choose one.
Layouts work for anything you'd otherwise rebuild on every scene: a header with your class name, a timer, directions for a run of practice scenes. Buttons on a layout work too: Share working buttons across scenes with a layout builds a Back to the map button once for a whole lesson. A lesson can have as many as you need, such as one frame for practice and another for review. To apply a layout to a scene you've already built, use Apply layout… on the scene's ⋯ menu. Everything else layouts can do is in Layouts.
Make this lesson yours
Add the lesson you just watched being built to your account, then change it for your class: your questions, your pictures, your colors.
Free to sign up, and you'll come straight back here. I have an account