Finish the lesson only after students explore every part
Build a map students explore in any order, and use a router to send them back to the map until they've visited every part. The lesson finishes on its own once they've seen them all.
- Level
- Intermediate
- Time
- About 15 min
- Steps
- 7
A "Layers of the rainforest" lesson where students visit the canopy, the understory and the forest floor in any order, and the lesson ends by itself once they've seen all three.
Get the finished lesson
Skip straight to the result, or keep it open beside the steps. Add this tutorial's lesson to your account and explore how it works in the studio.
Free to sign up, and you'll come straight back here. I have an account
A map that students explore in any order is a great way to teach something with parts: the layers of a rainforest, the rooms of a castle, the planets. The hard part is the ending. A Finish button lets a student skip most of the map, and sending everyone to the ending after the last scene forces them into one order.
In this tutorial you'll let the lesson decide. Every part ends with the same Back to the map button, and every one of those buttons goes to a router. A router is a decision the lesson makes on its own, and students never see it. This one asks one question, "has this student seen every layer?", and sends them back to the map until the answer is yes. After that, it sends them to the ending.
You'll use the Lesson Graph throughout. If you haven't drawn a path on it before, Let students choose their own path is a gentler start.
Step 1: Build the map
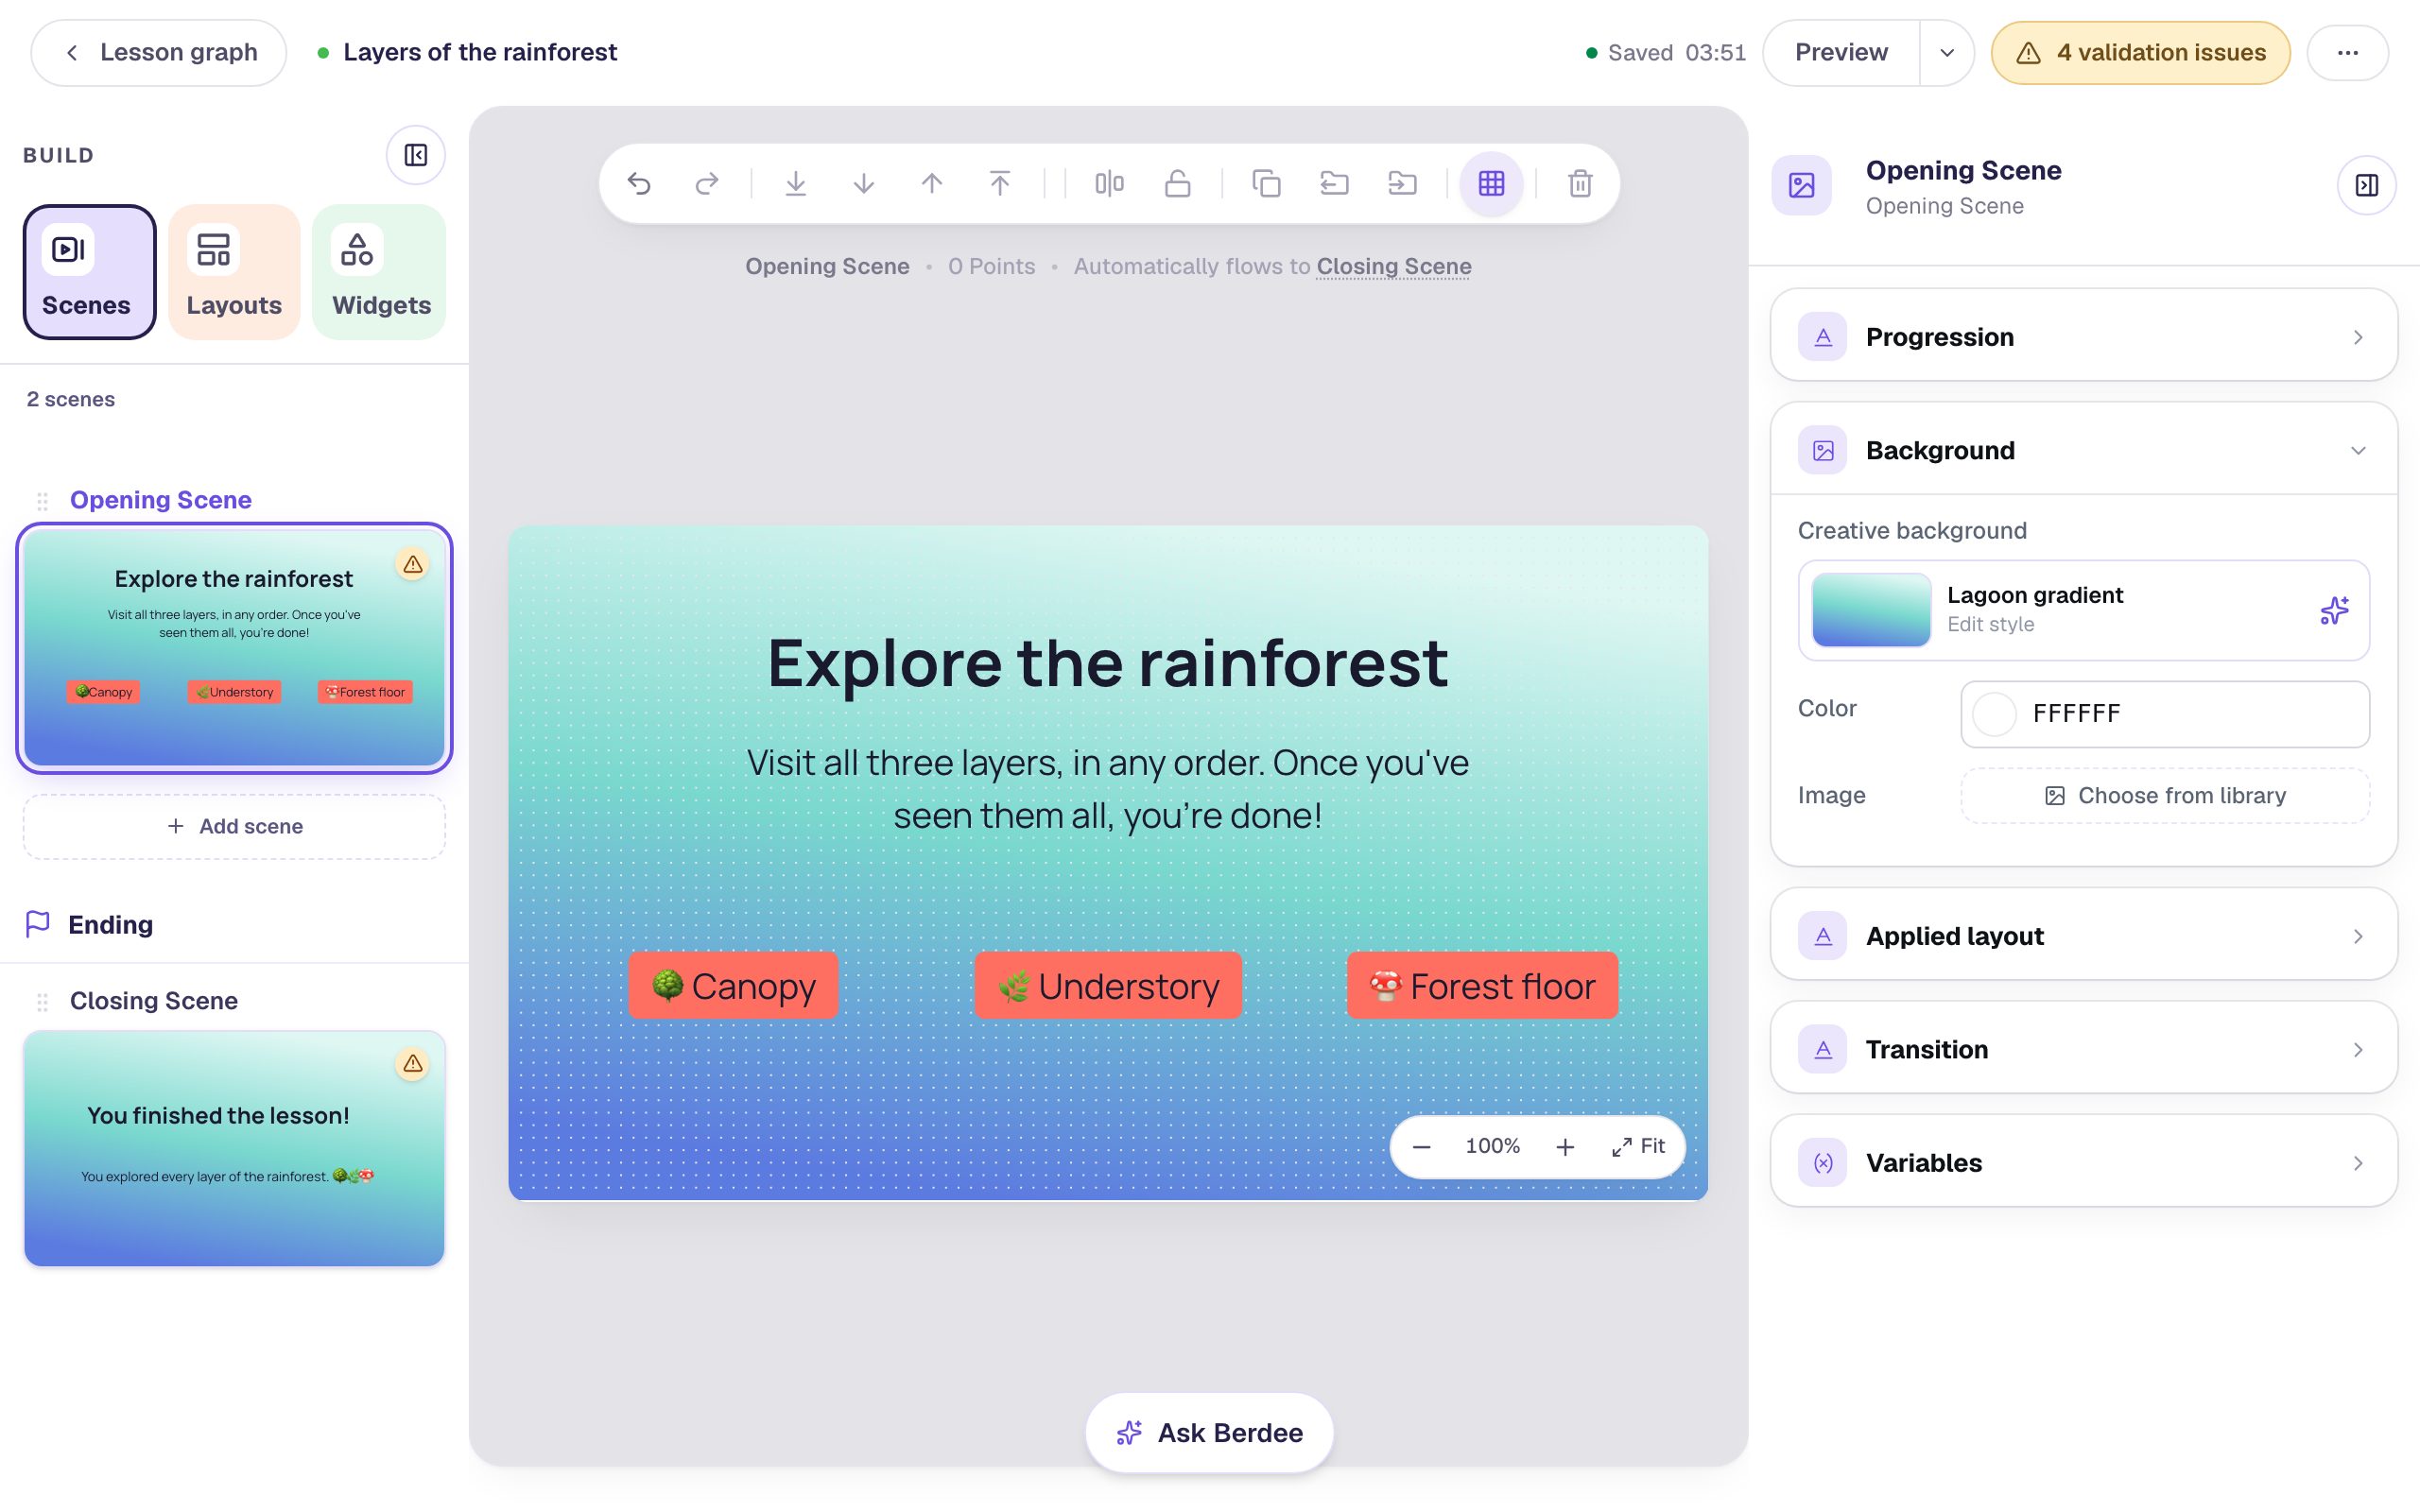
Start a blank lesson (New lesson, then Start from scratch) and name it Layers of the rainforest. On the Opening Scene:
- Give the scene a background: with nothing selected, open Background, click Choose a style, and pick Lagoon gradient under Gradients.
- Add a Heading that says
Explore the rainforest. - Add a Body text that says
Visit all three layers, in any order. Once you've seen them all, you're done!Set its Font Size to28and make it Fixed width so it wraps onto two lines. - Add three Buttons in a row. Click ⚙ Configure on each and set its Label to
🌳 Canopy,🌿 Understoryand🍄 Forest floor. - Rename each button after its layer:
Canopy,UnderstoryandForest floor. Click the pencil next to the button's name at the top of the properties panel, type, and press Enter. The Lesson Graph lists buttons by name, so good names make the next steps easy.
Give the Closing Scene the same background too, and add a Body under its headline: You explored every layer of the rainforest. 🌳🌿🍄.
Step 2: Give each layer its own scene
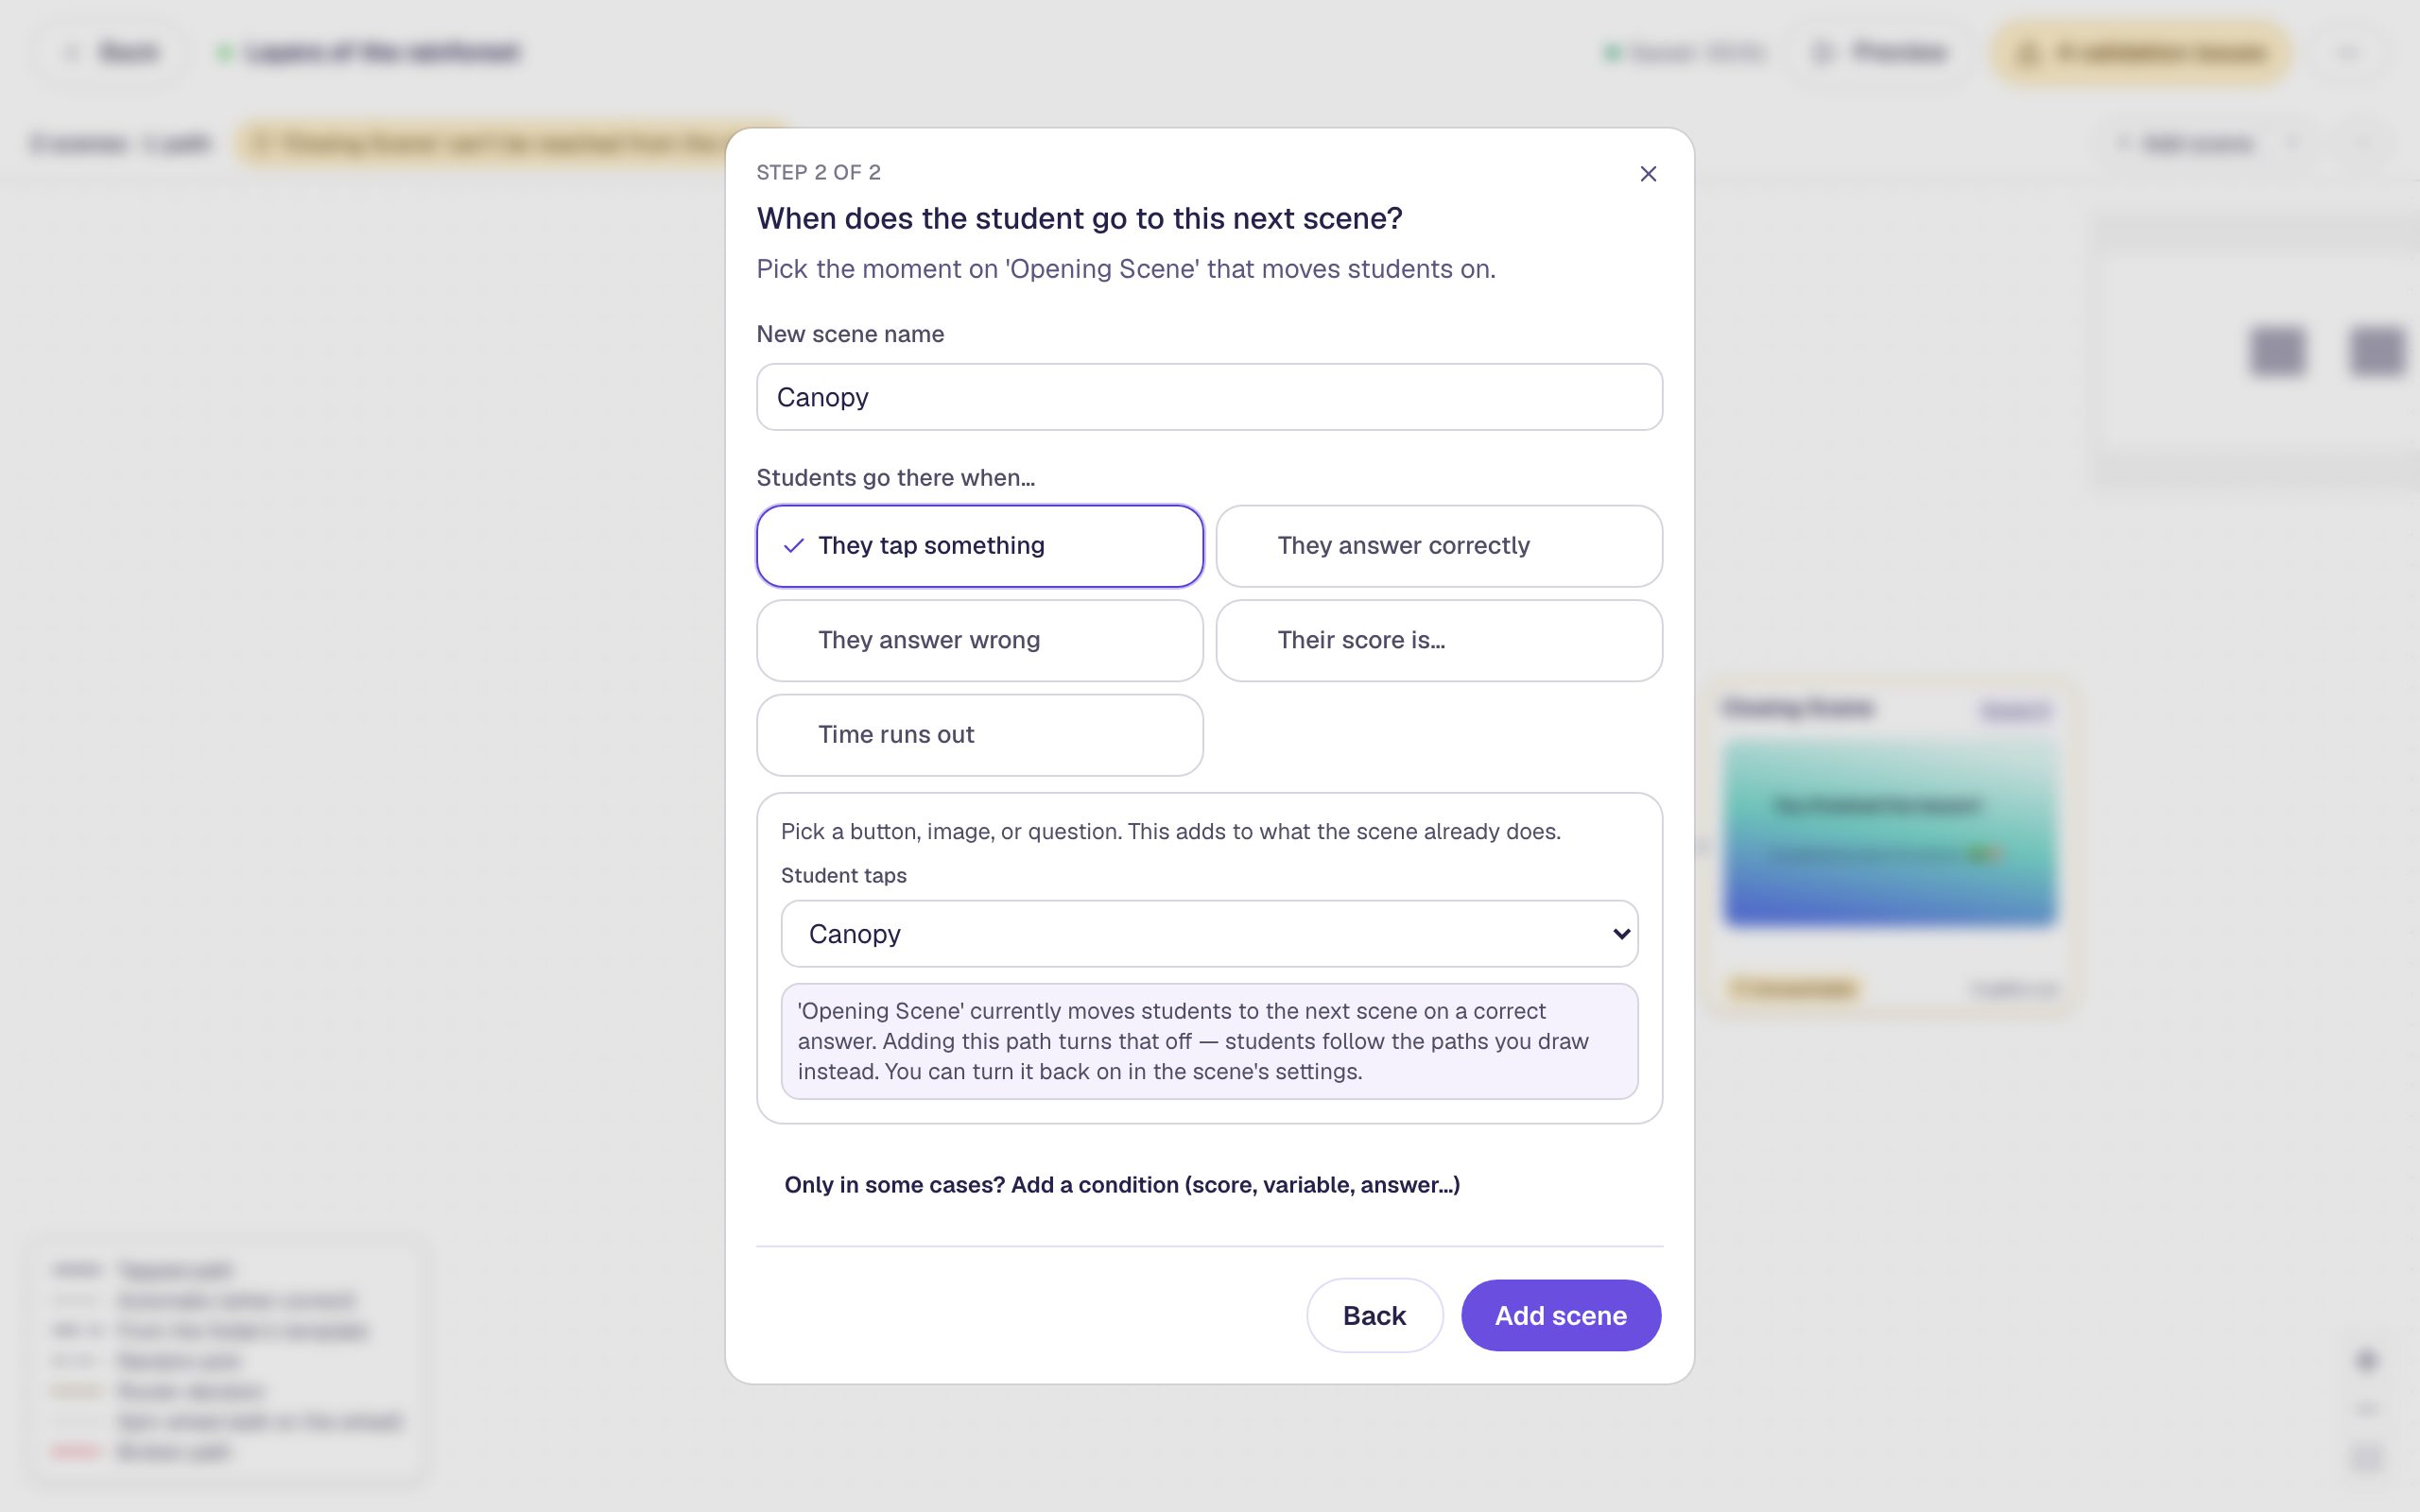
Click Lesson graph at the top left. Hover over the Opening Scene card and click the dot on its right edge. A short window asks what comes next:
- Leave A new scene selected and click Next.
- Name the scene
Canopy. - Choose They tap something, and set Student taps to Canopy.
- Click Add scene.
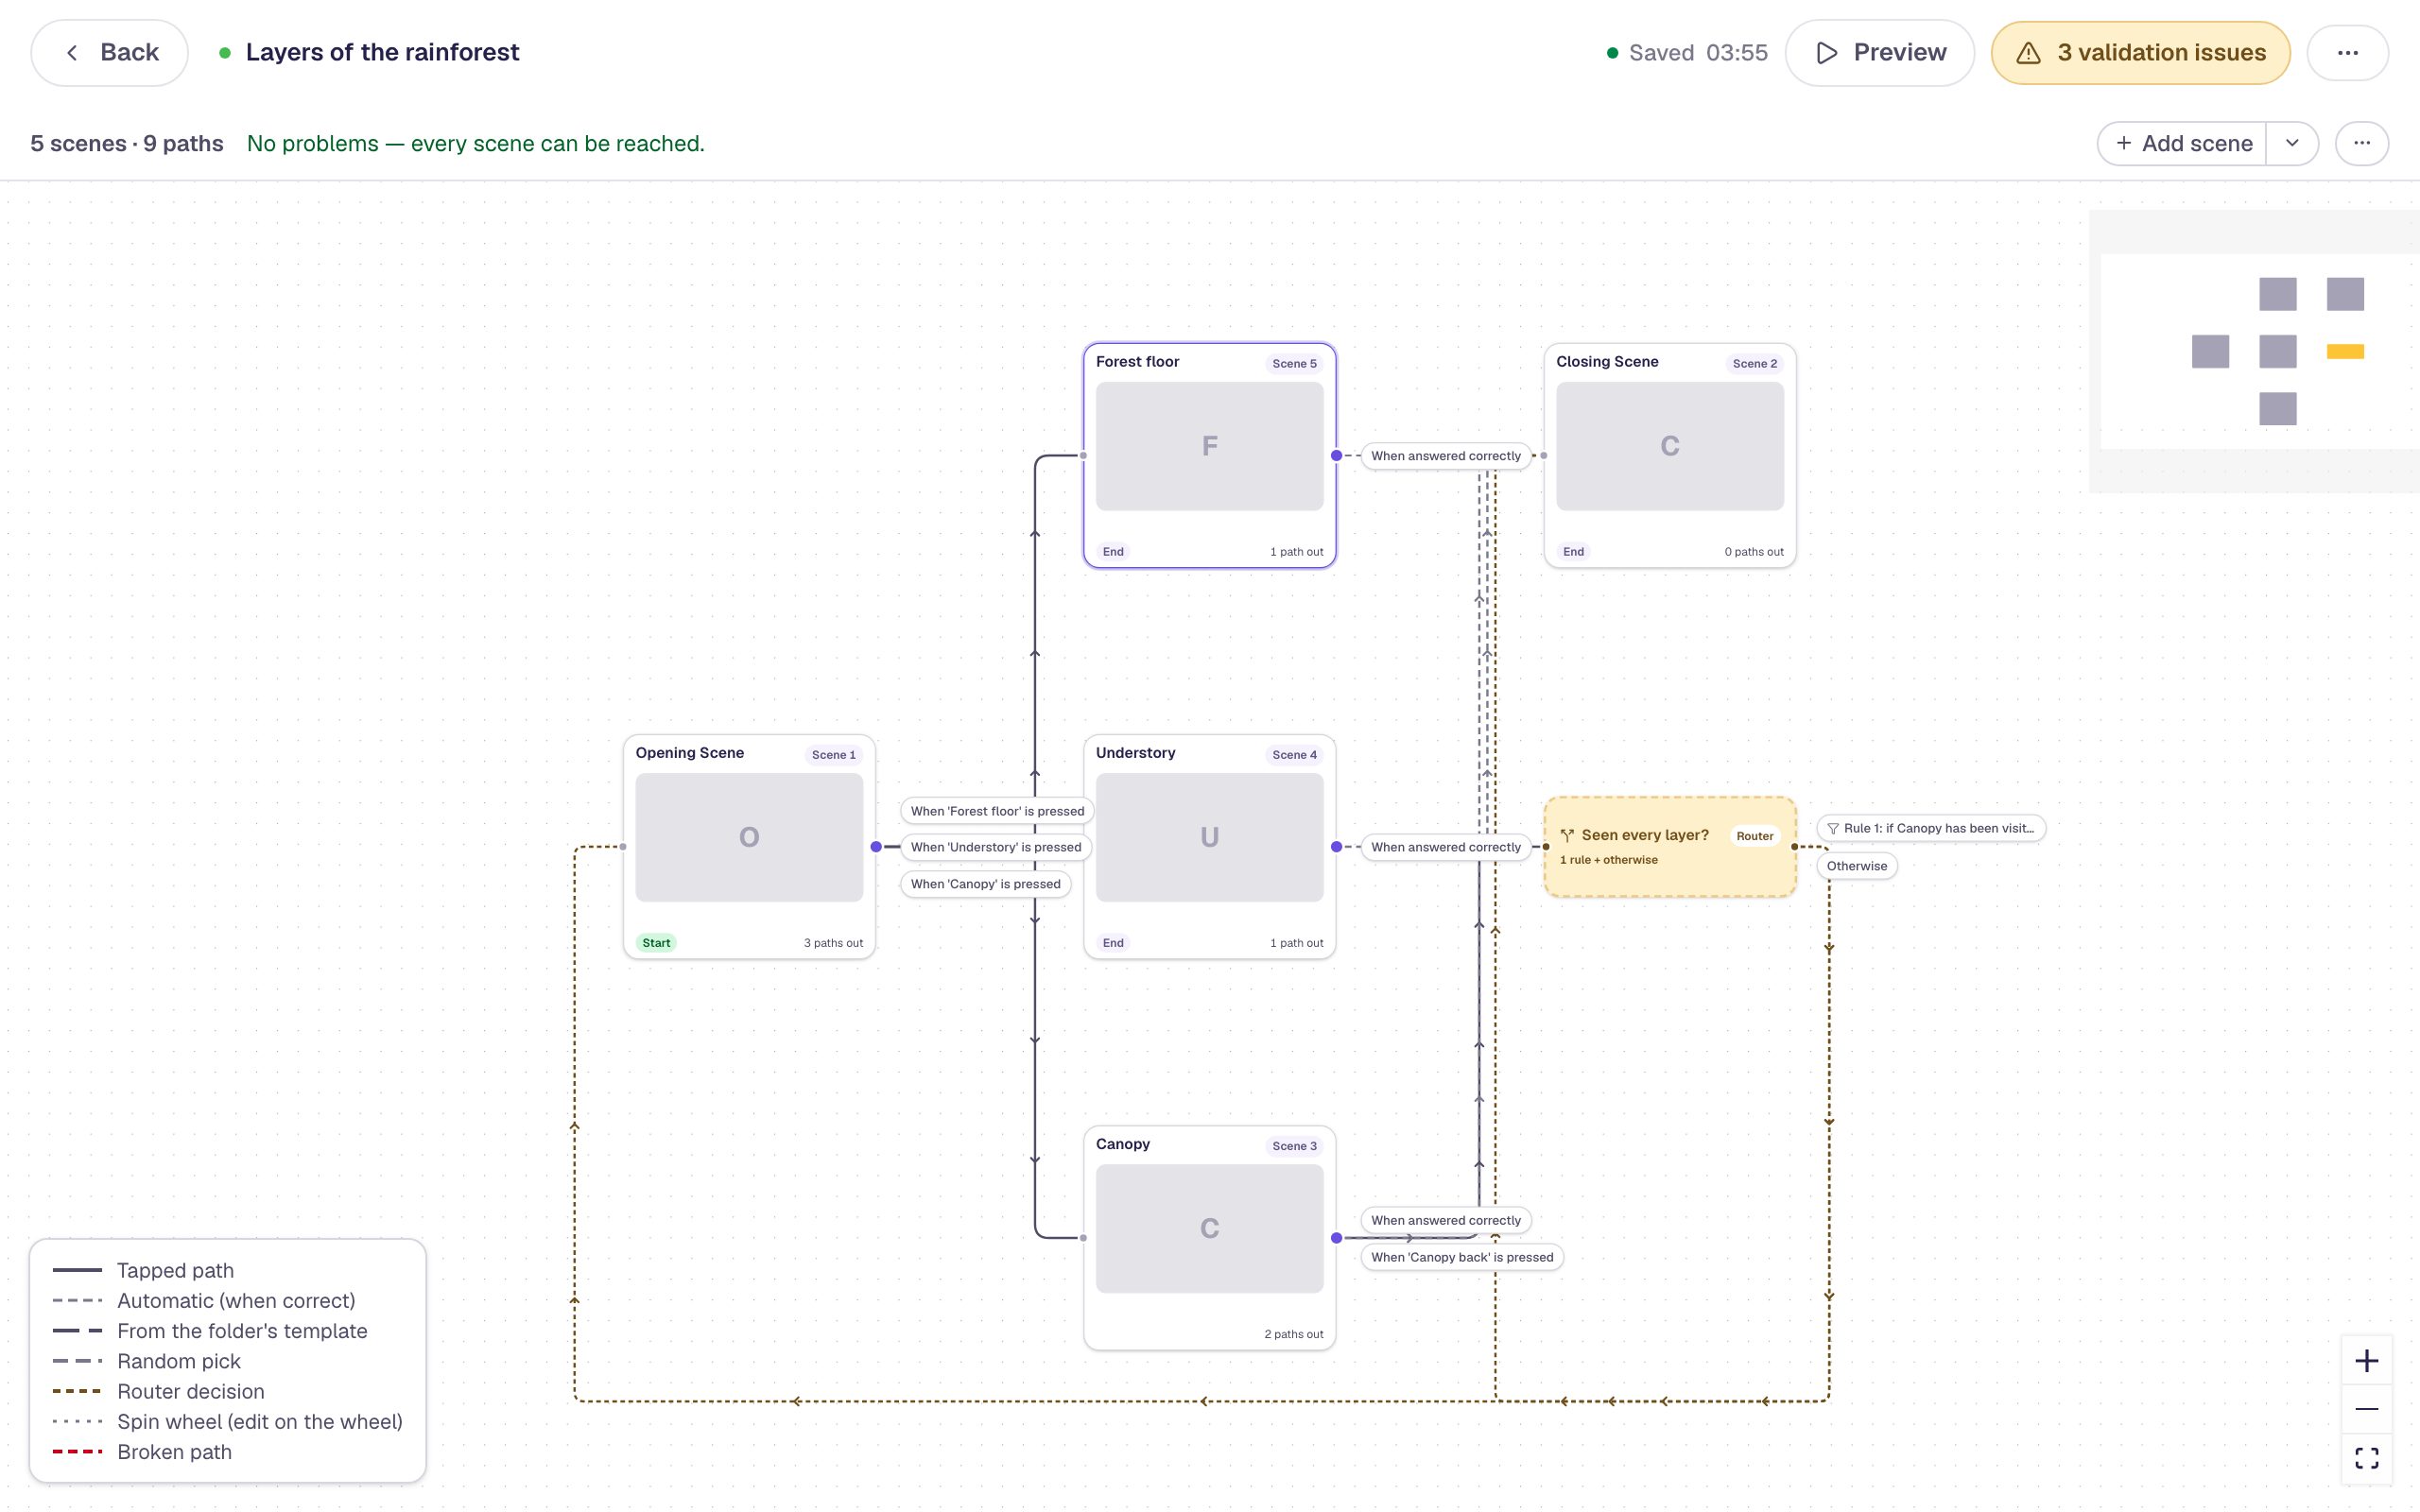
Do the same twice more from the Opening Scene's dot: a scene named Understory reached by tapping Understory, and a scene named Forest floor reached by tapping Forest floor. The map now branches three ways:
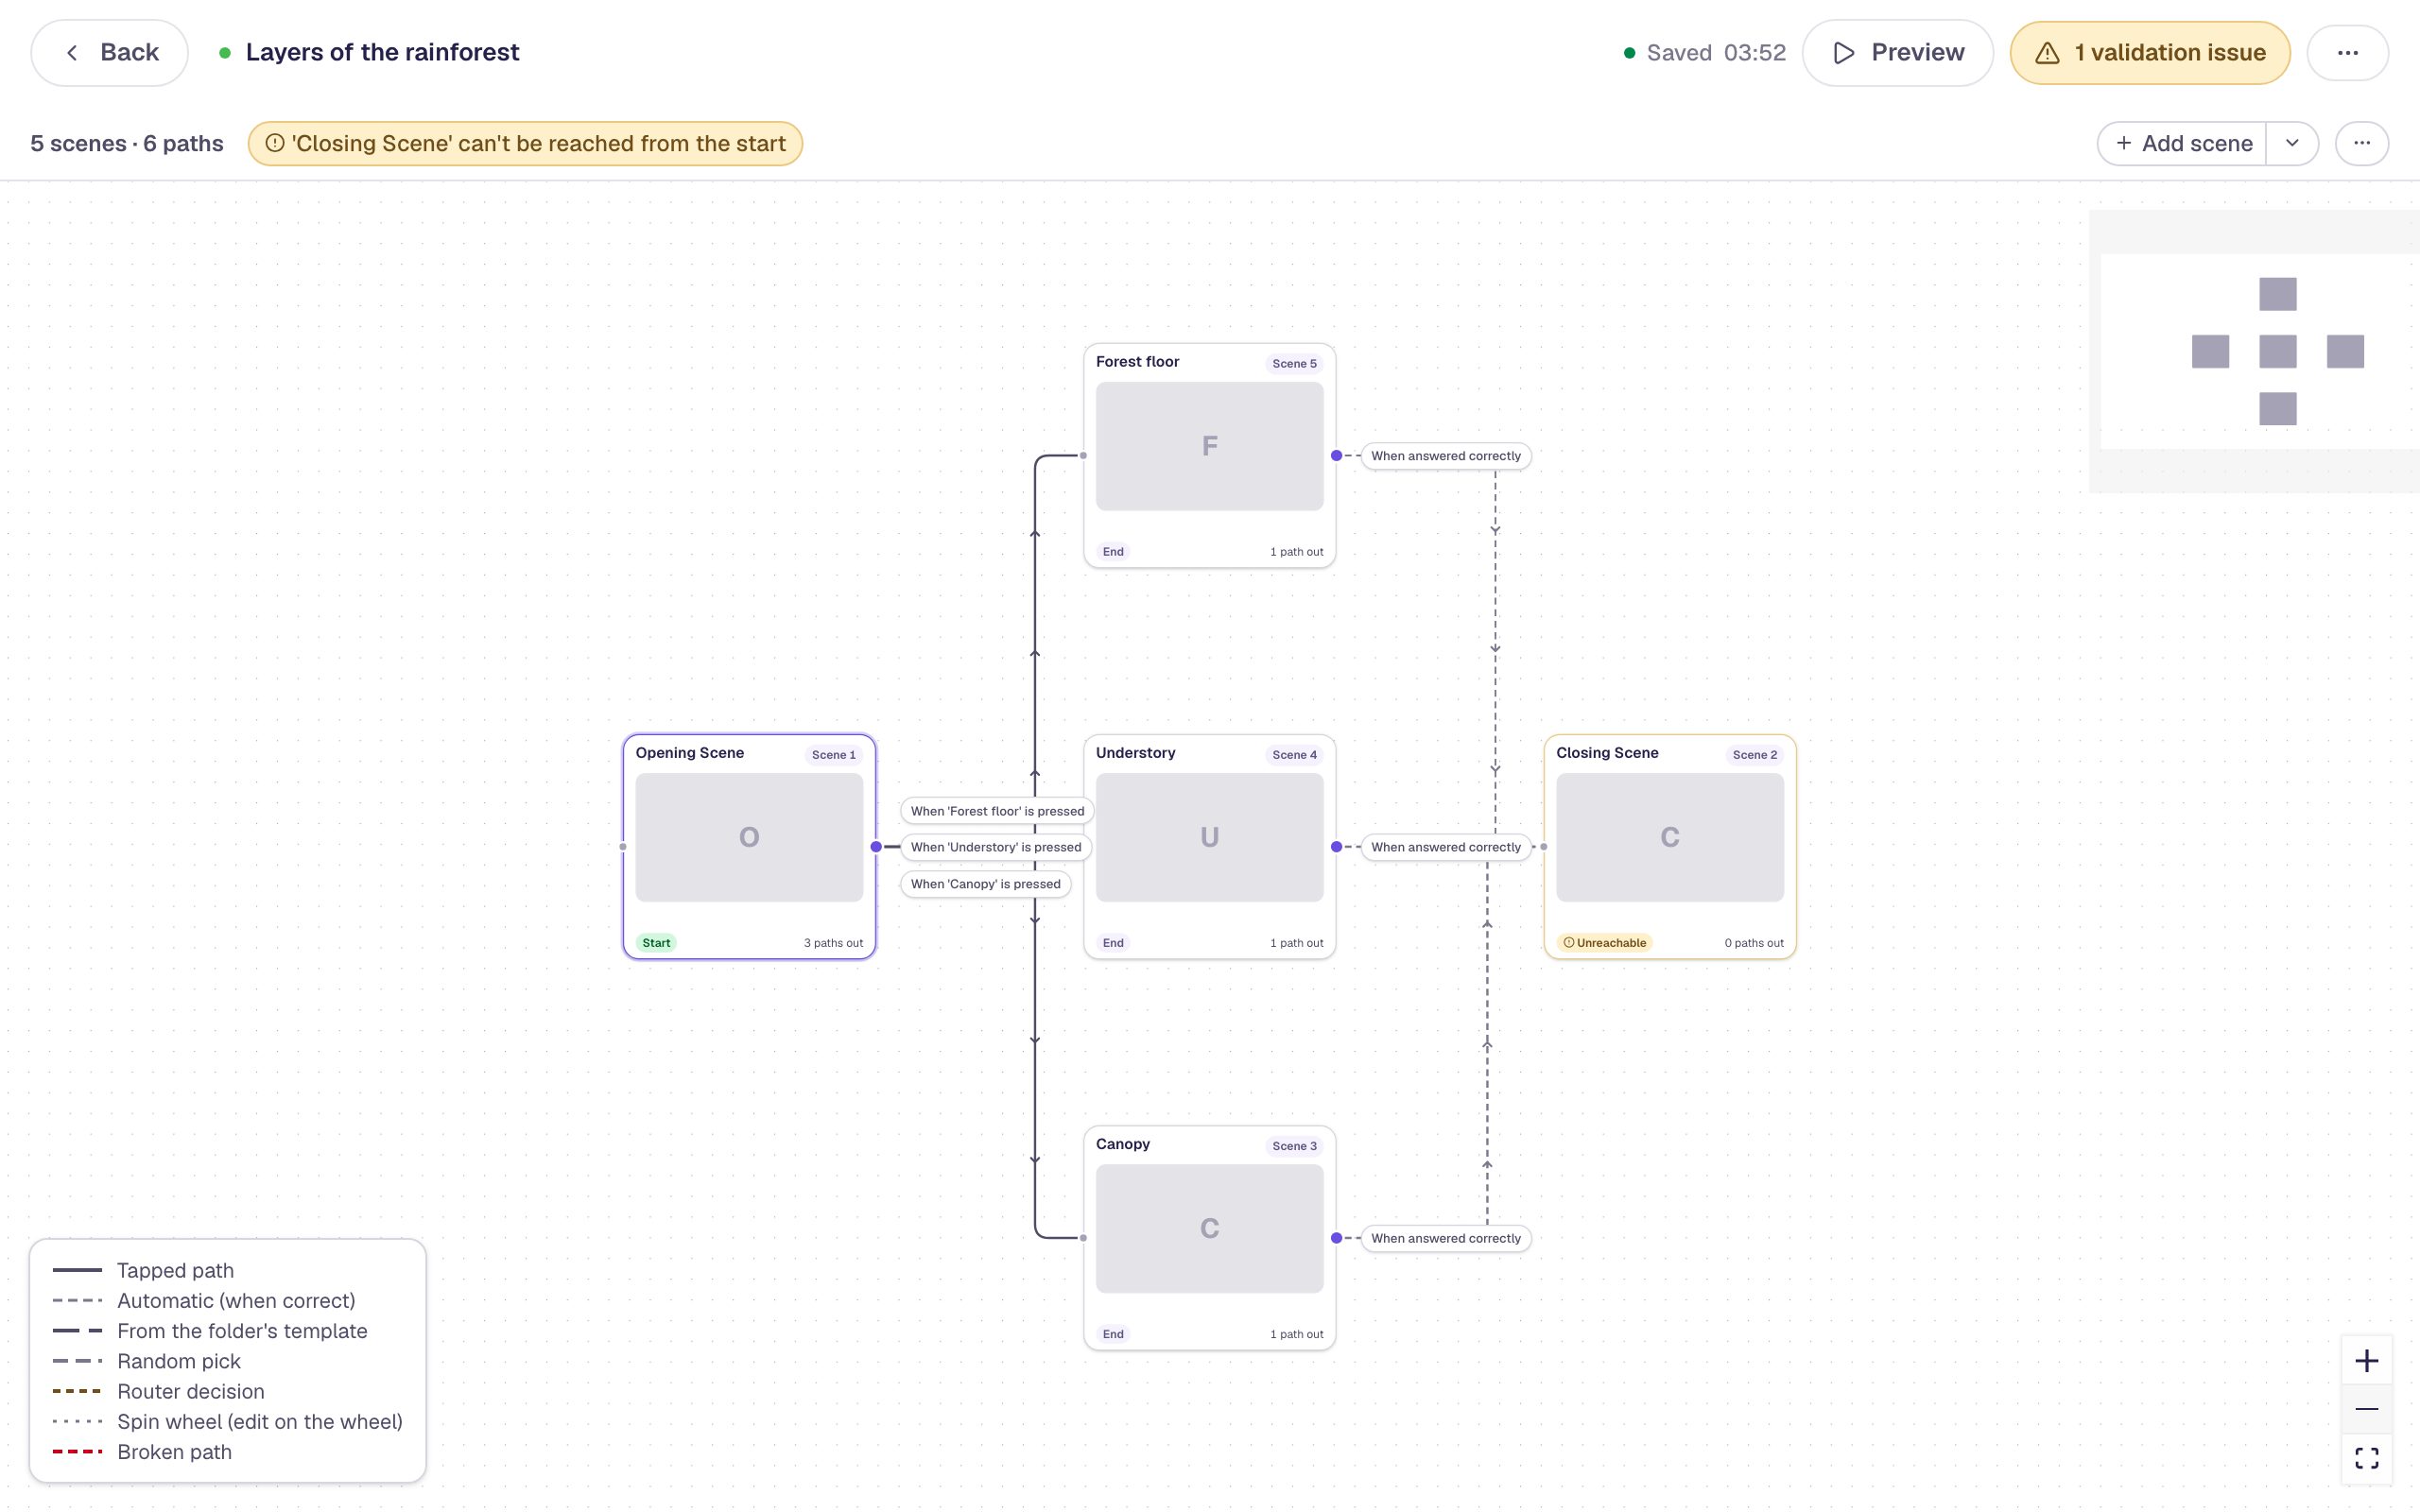
The strip at the top says the Closing Scene can't be reached. That's true for now: nothing leads there yet. The router will fix it in Step 4.
Step 3: Fill in each layer
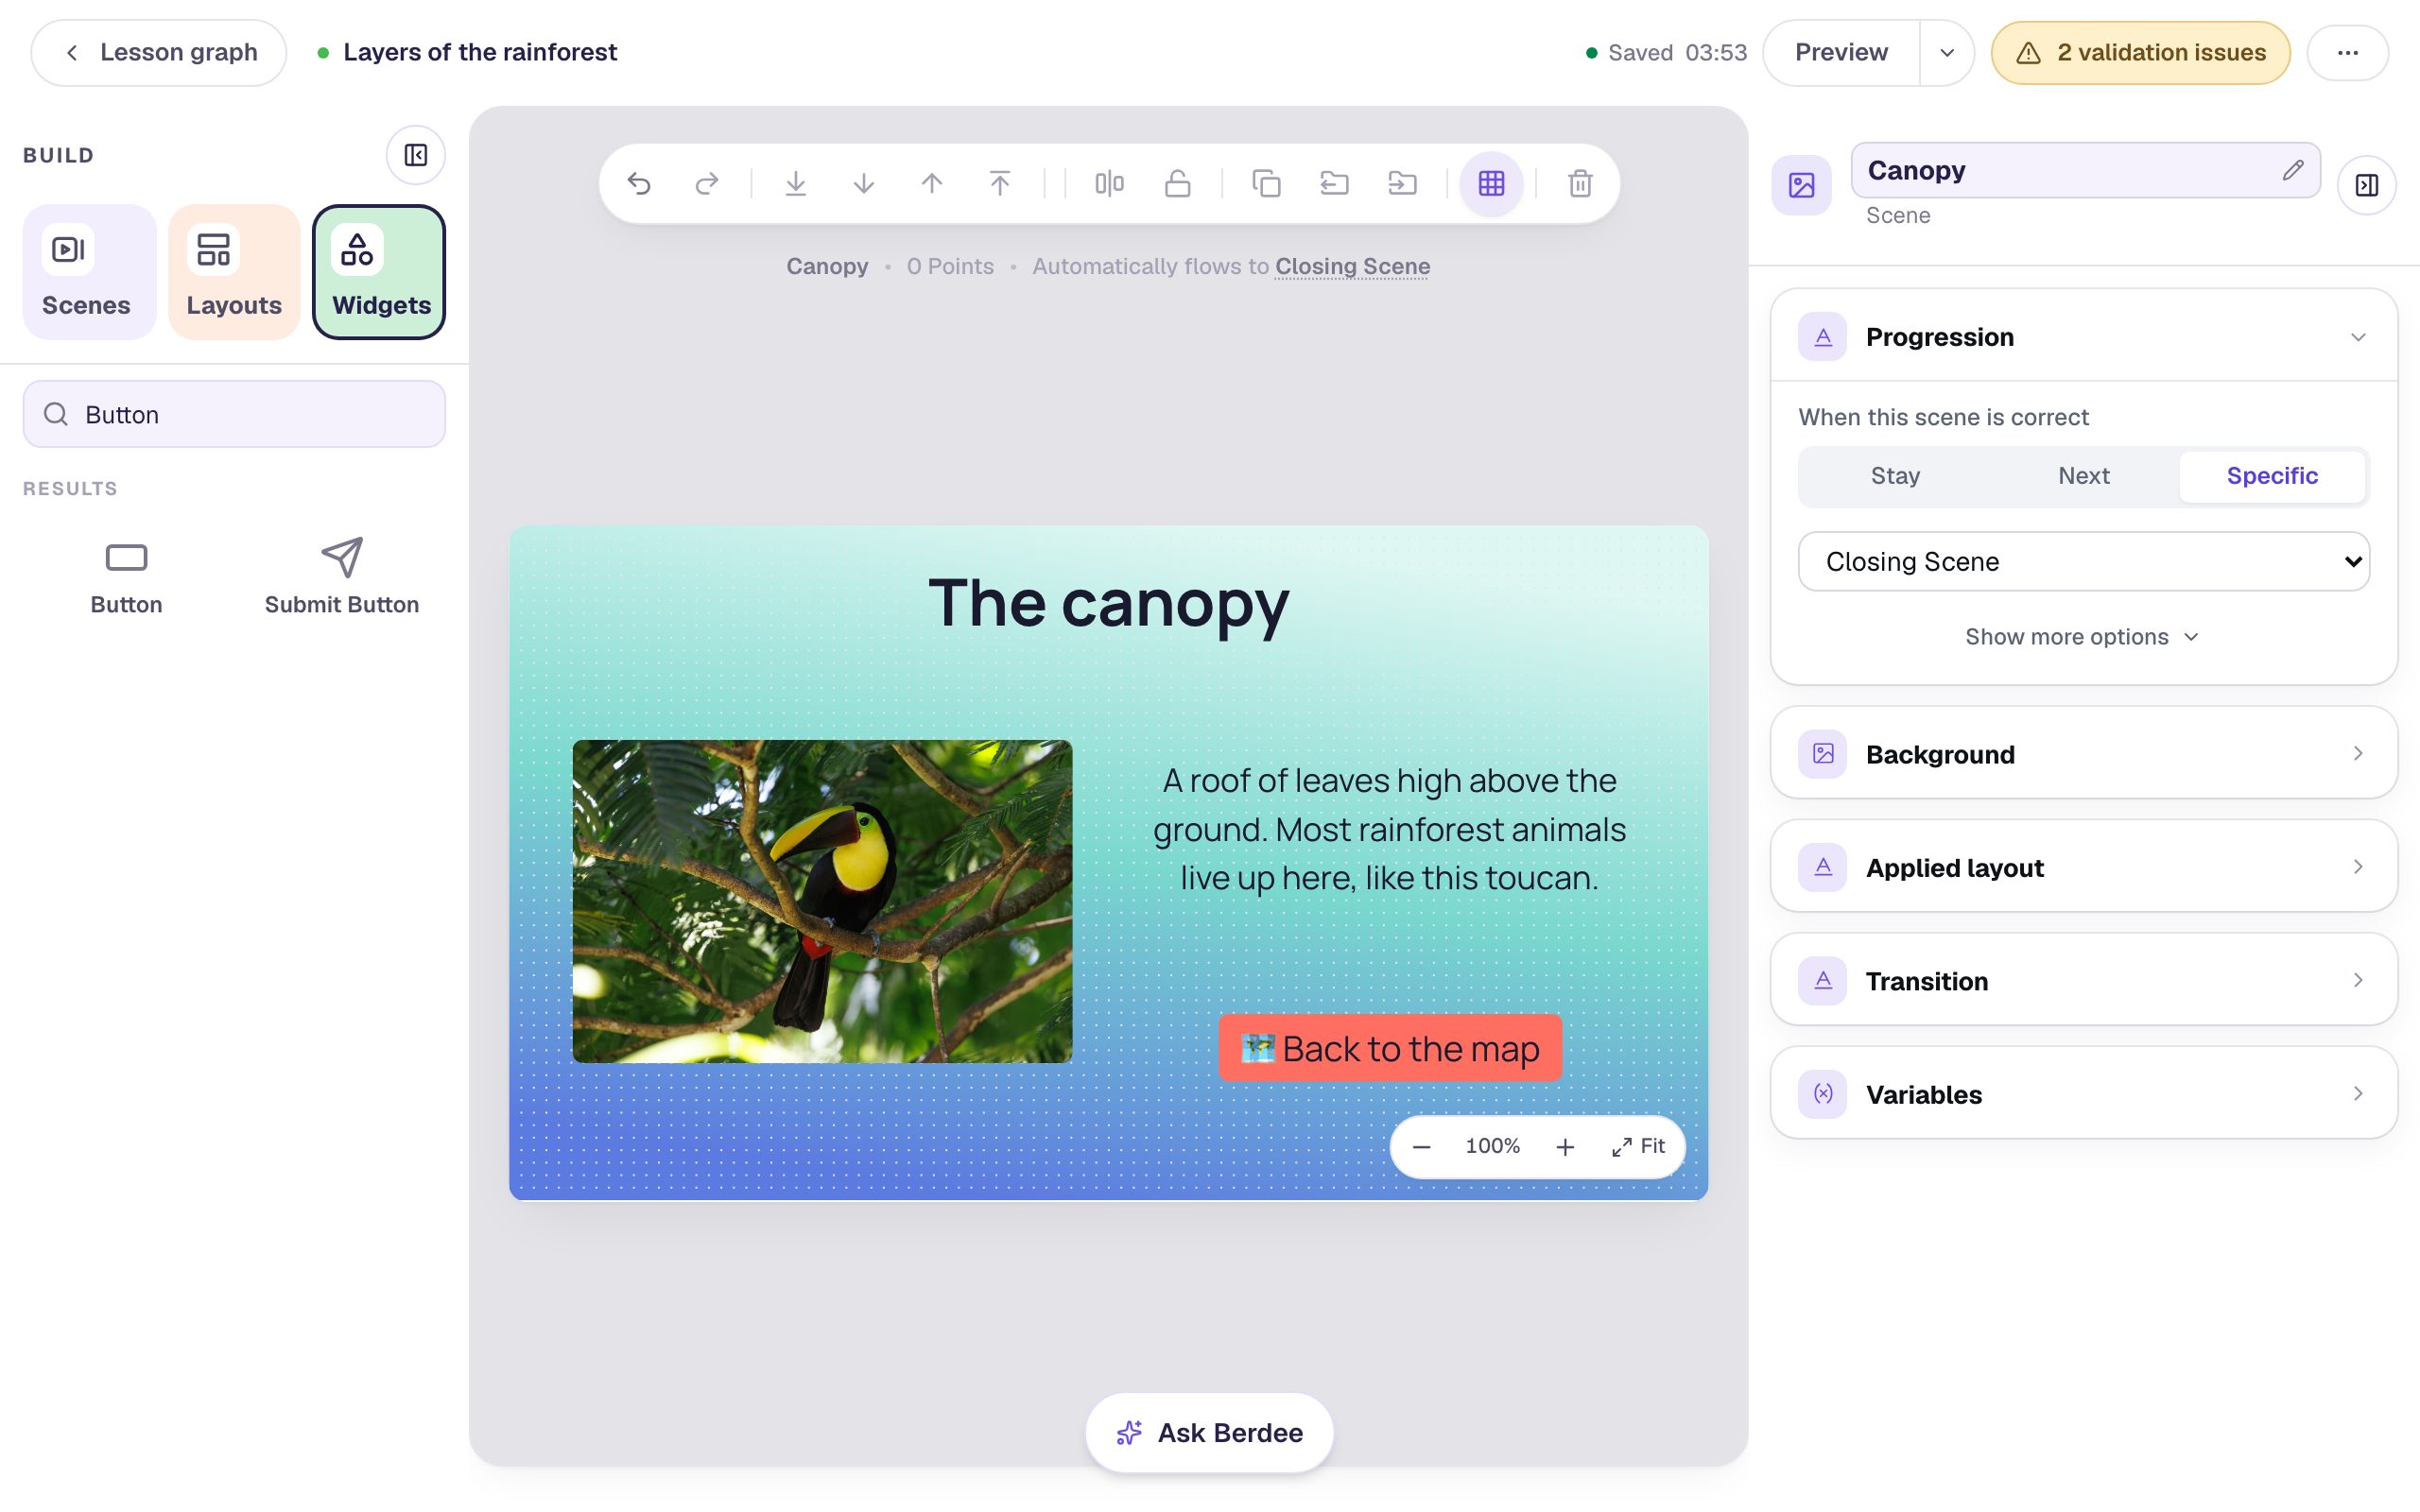
Hover over the Canopy card and click Edit scene. Build the scene:
- Give it the Lagoon gradient background, like the map.
- Add a Heading that says
The canopy. - Add an Image, set its size to
400×300under Style & Layout, and drag it to the left. Click Choose image, search the stock photos fortoucan, and pick one. - Add a Body text to the right of the picture:
A roof of leaves high above the ground. Most rainforest animals live up here, like this toucan.Set it to Fixed width at Font Size26. - Add a Button under the text, set its Label to
🗺️ Back to the map, and rename itCanopy back.
Go back to the graph and build the other two the same way:
- Understory: the heading
The understory, a photo from a search forred eyed tree frog, the textUnder the leaves it is shady, warm and damp. Tree frogs cling to the plants down here., and a🗺️ Back to the mapbutton namedUnderstory back. - Forest floor: the heading
The forest floor, a photo from a search formushrooms forest, the textHardly any sunlight reaches the ground. Mushrooms help fallen leaves rot away fast., and a🗺️ Back to the mapbutton namedForest floor back.
Name every Back button after its layer. All three say the same thing to students, but the graph needs to tell them apart.
Step 4: Send Back to the map to a router
Now the decision. In the graph, hover over the Canopy card and click its dot. This time, add a router instead of a scene:
- Choose A router and click Next.
- Choose They tap something, set Student taps to Canopy back, and click Next.
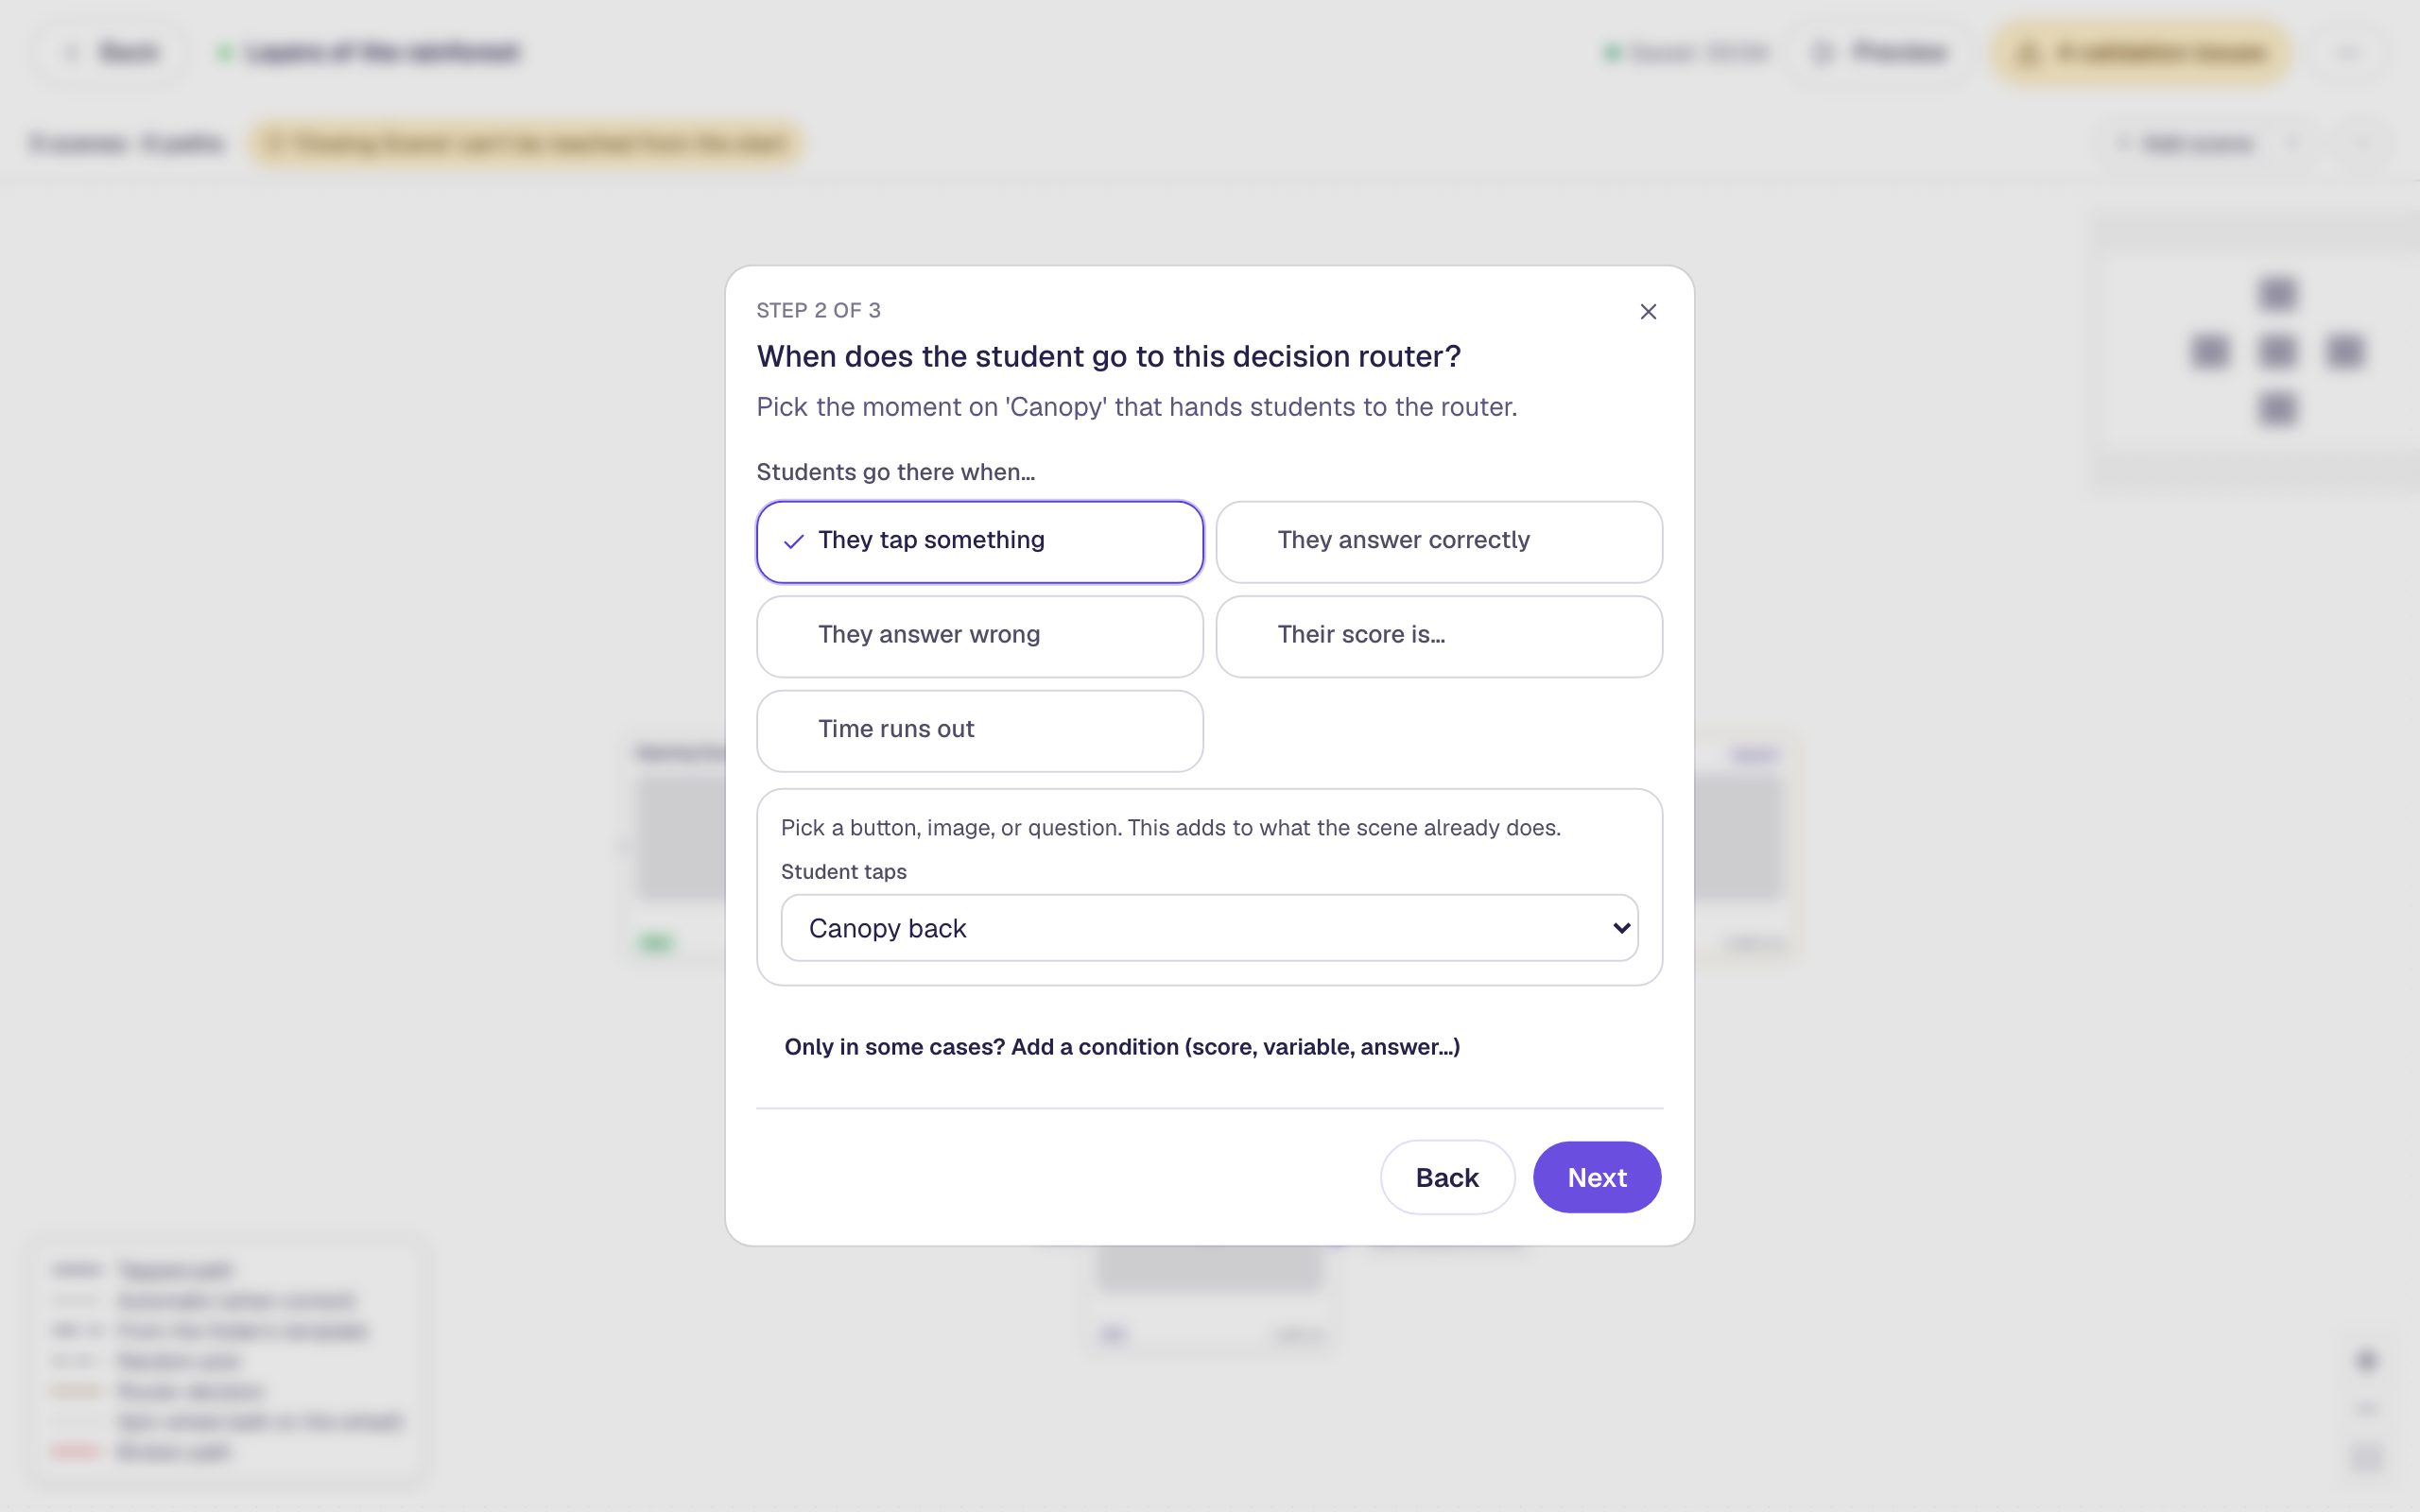
The last step of the window is the router itself: its name, its rules, and where it sends everyone else.
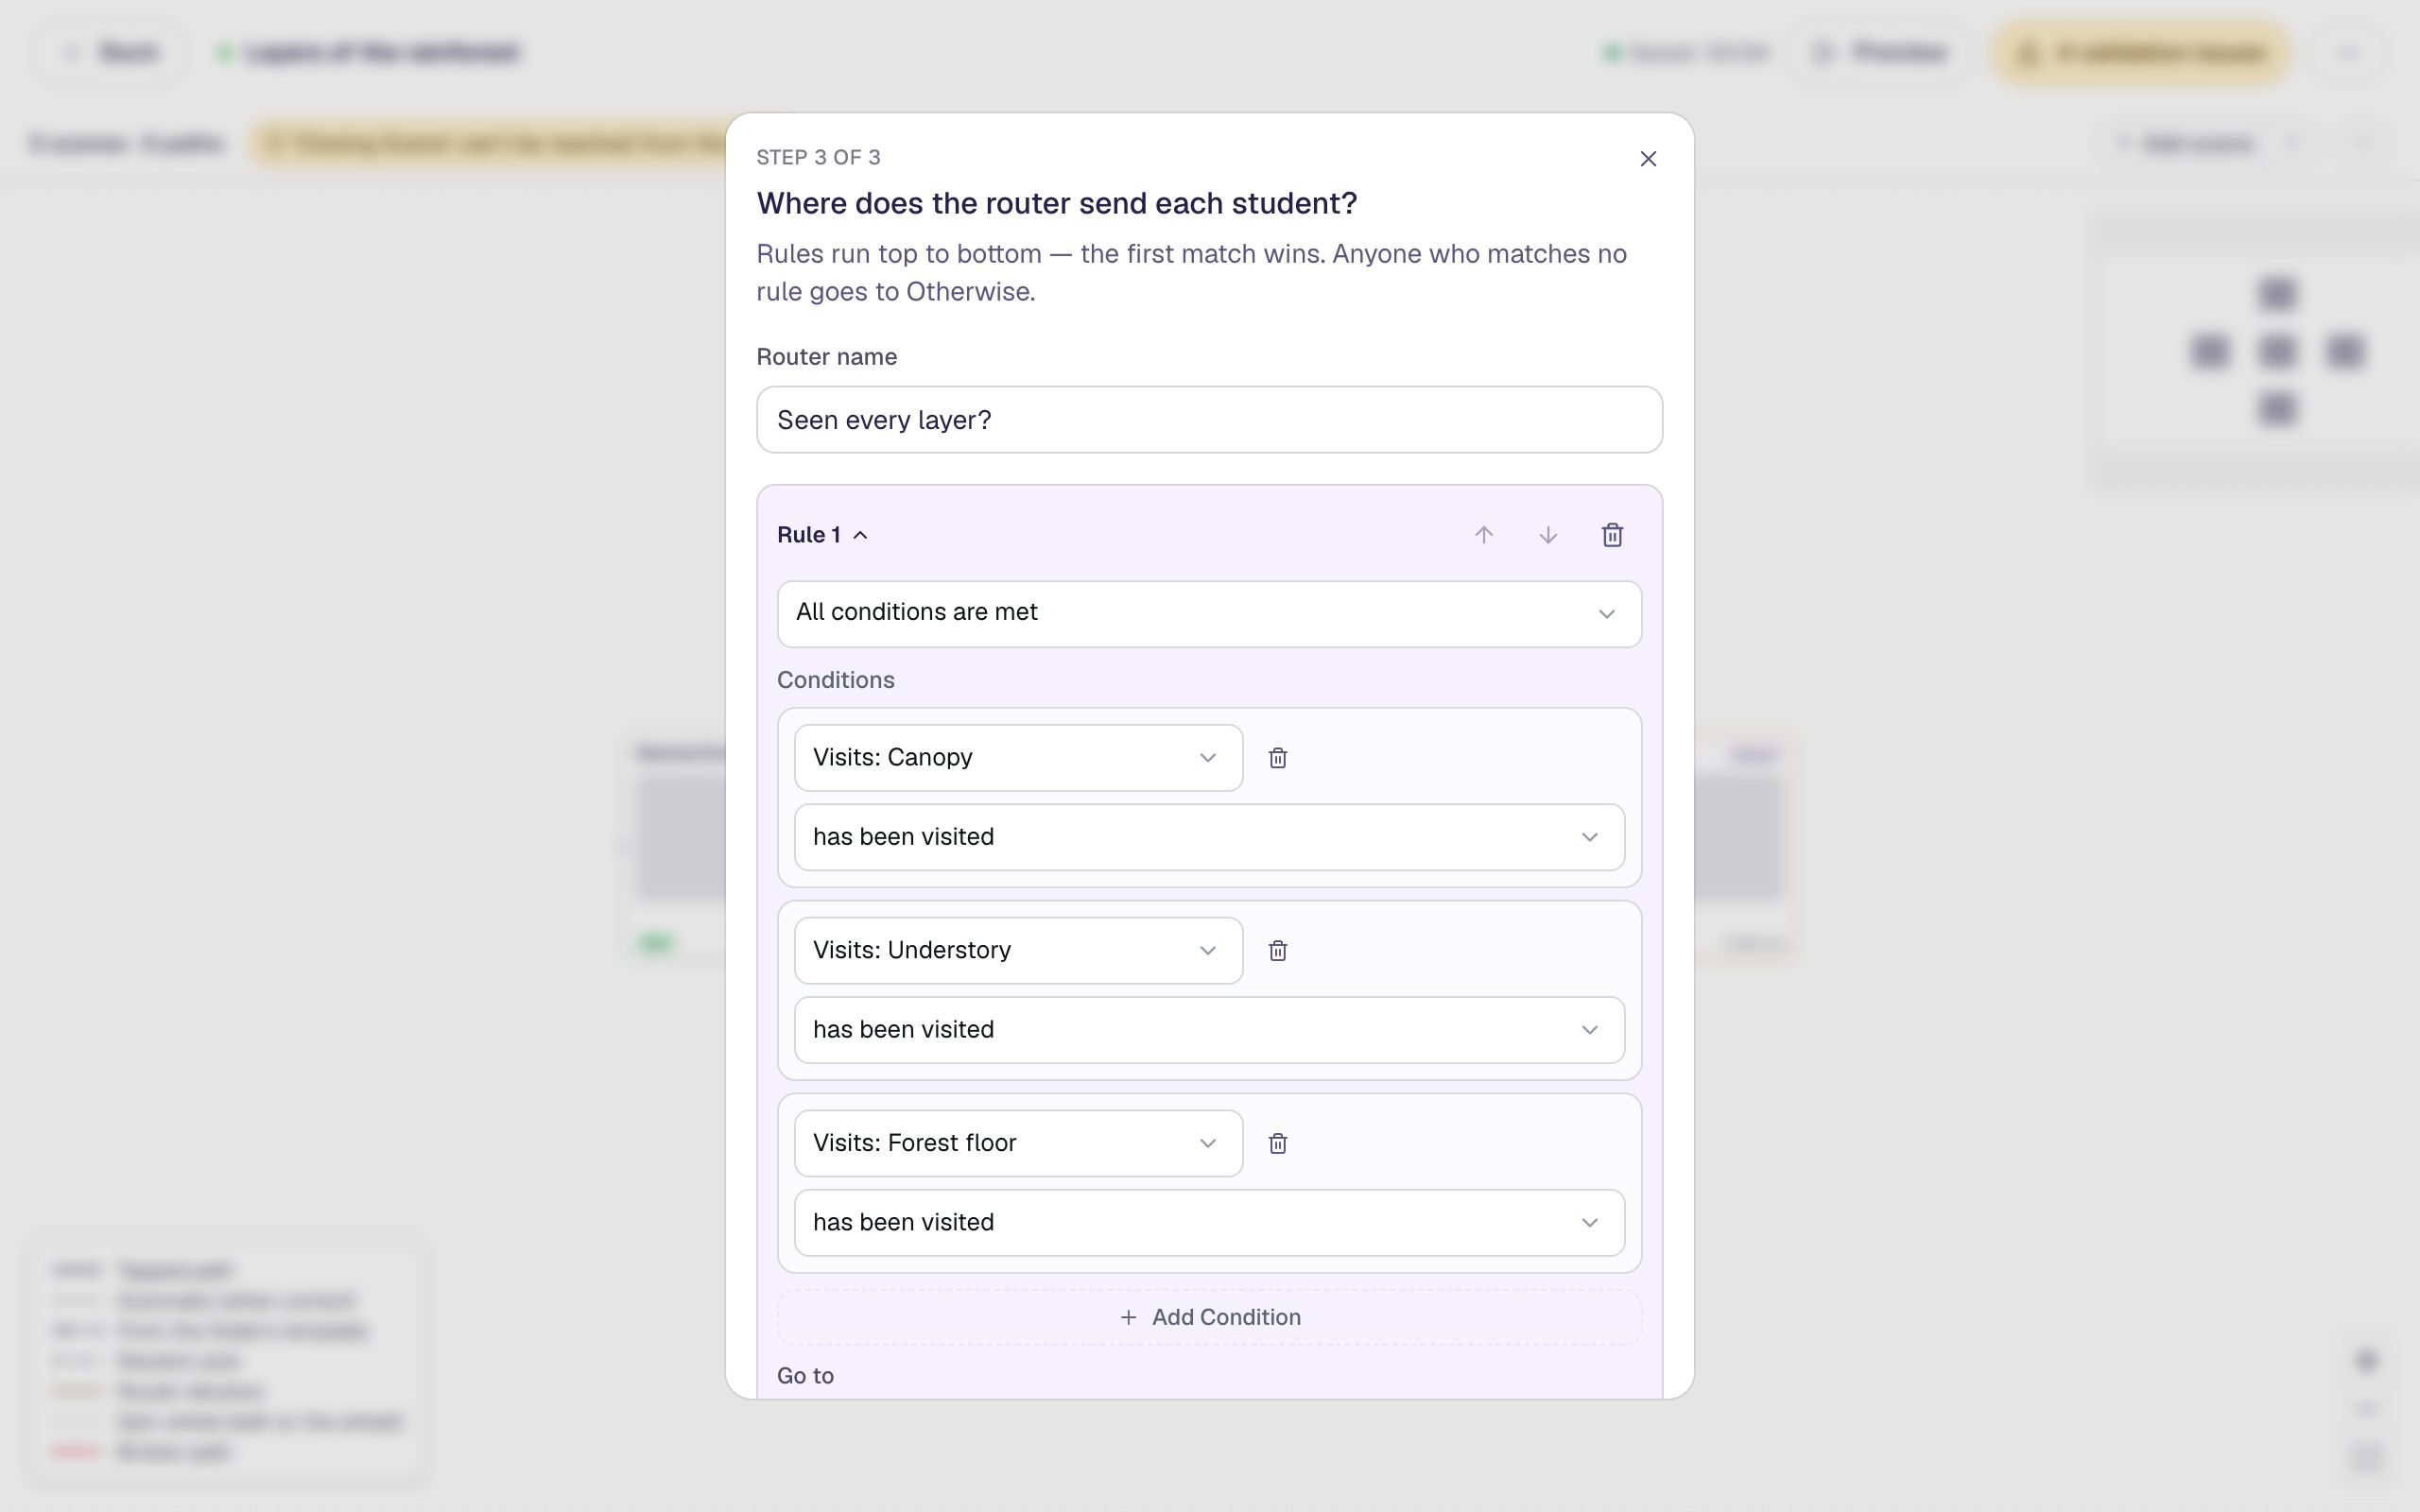
- Name the router
Seen every layer?. - Click Add rule. Under Conditions, click Add Condition and choose Visits: Canopy. It starts on has been visited, which is what you want.
- Click Add Condition twice more and choose Visits: Understory and Visits: Forest floor. Leave the rule on All conditions are met, so it only matches once a student has been to every layer.
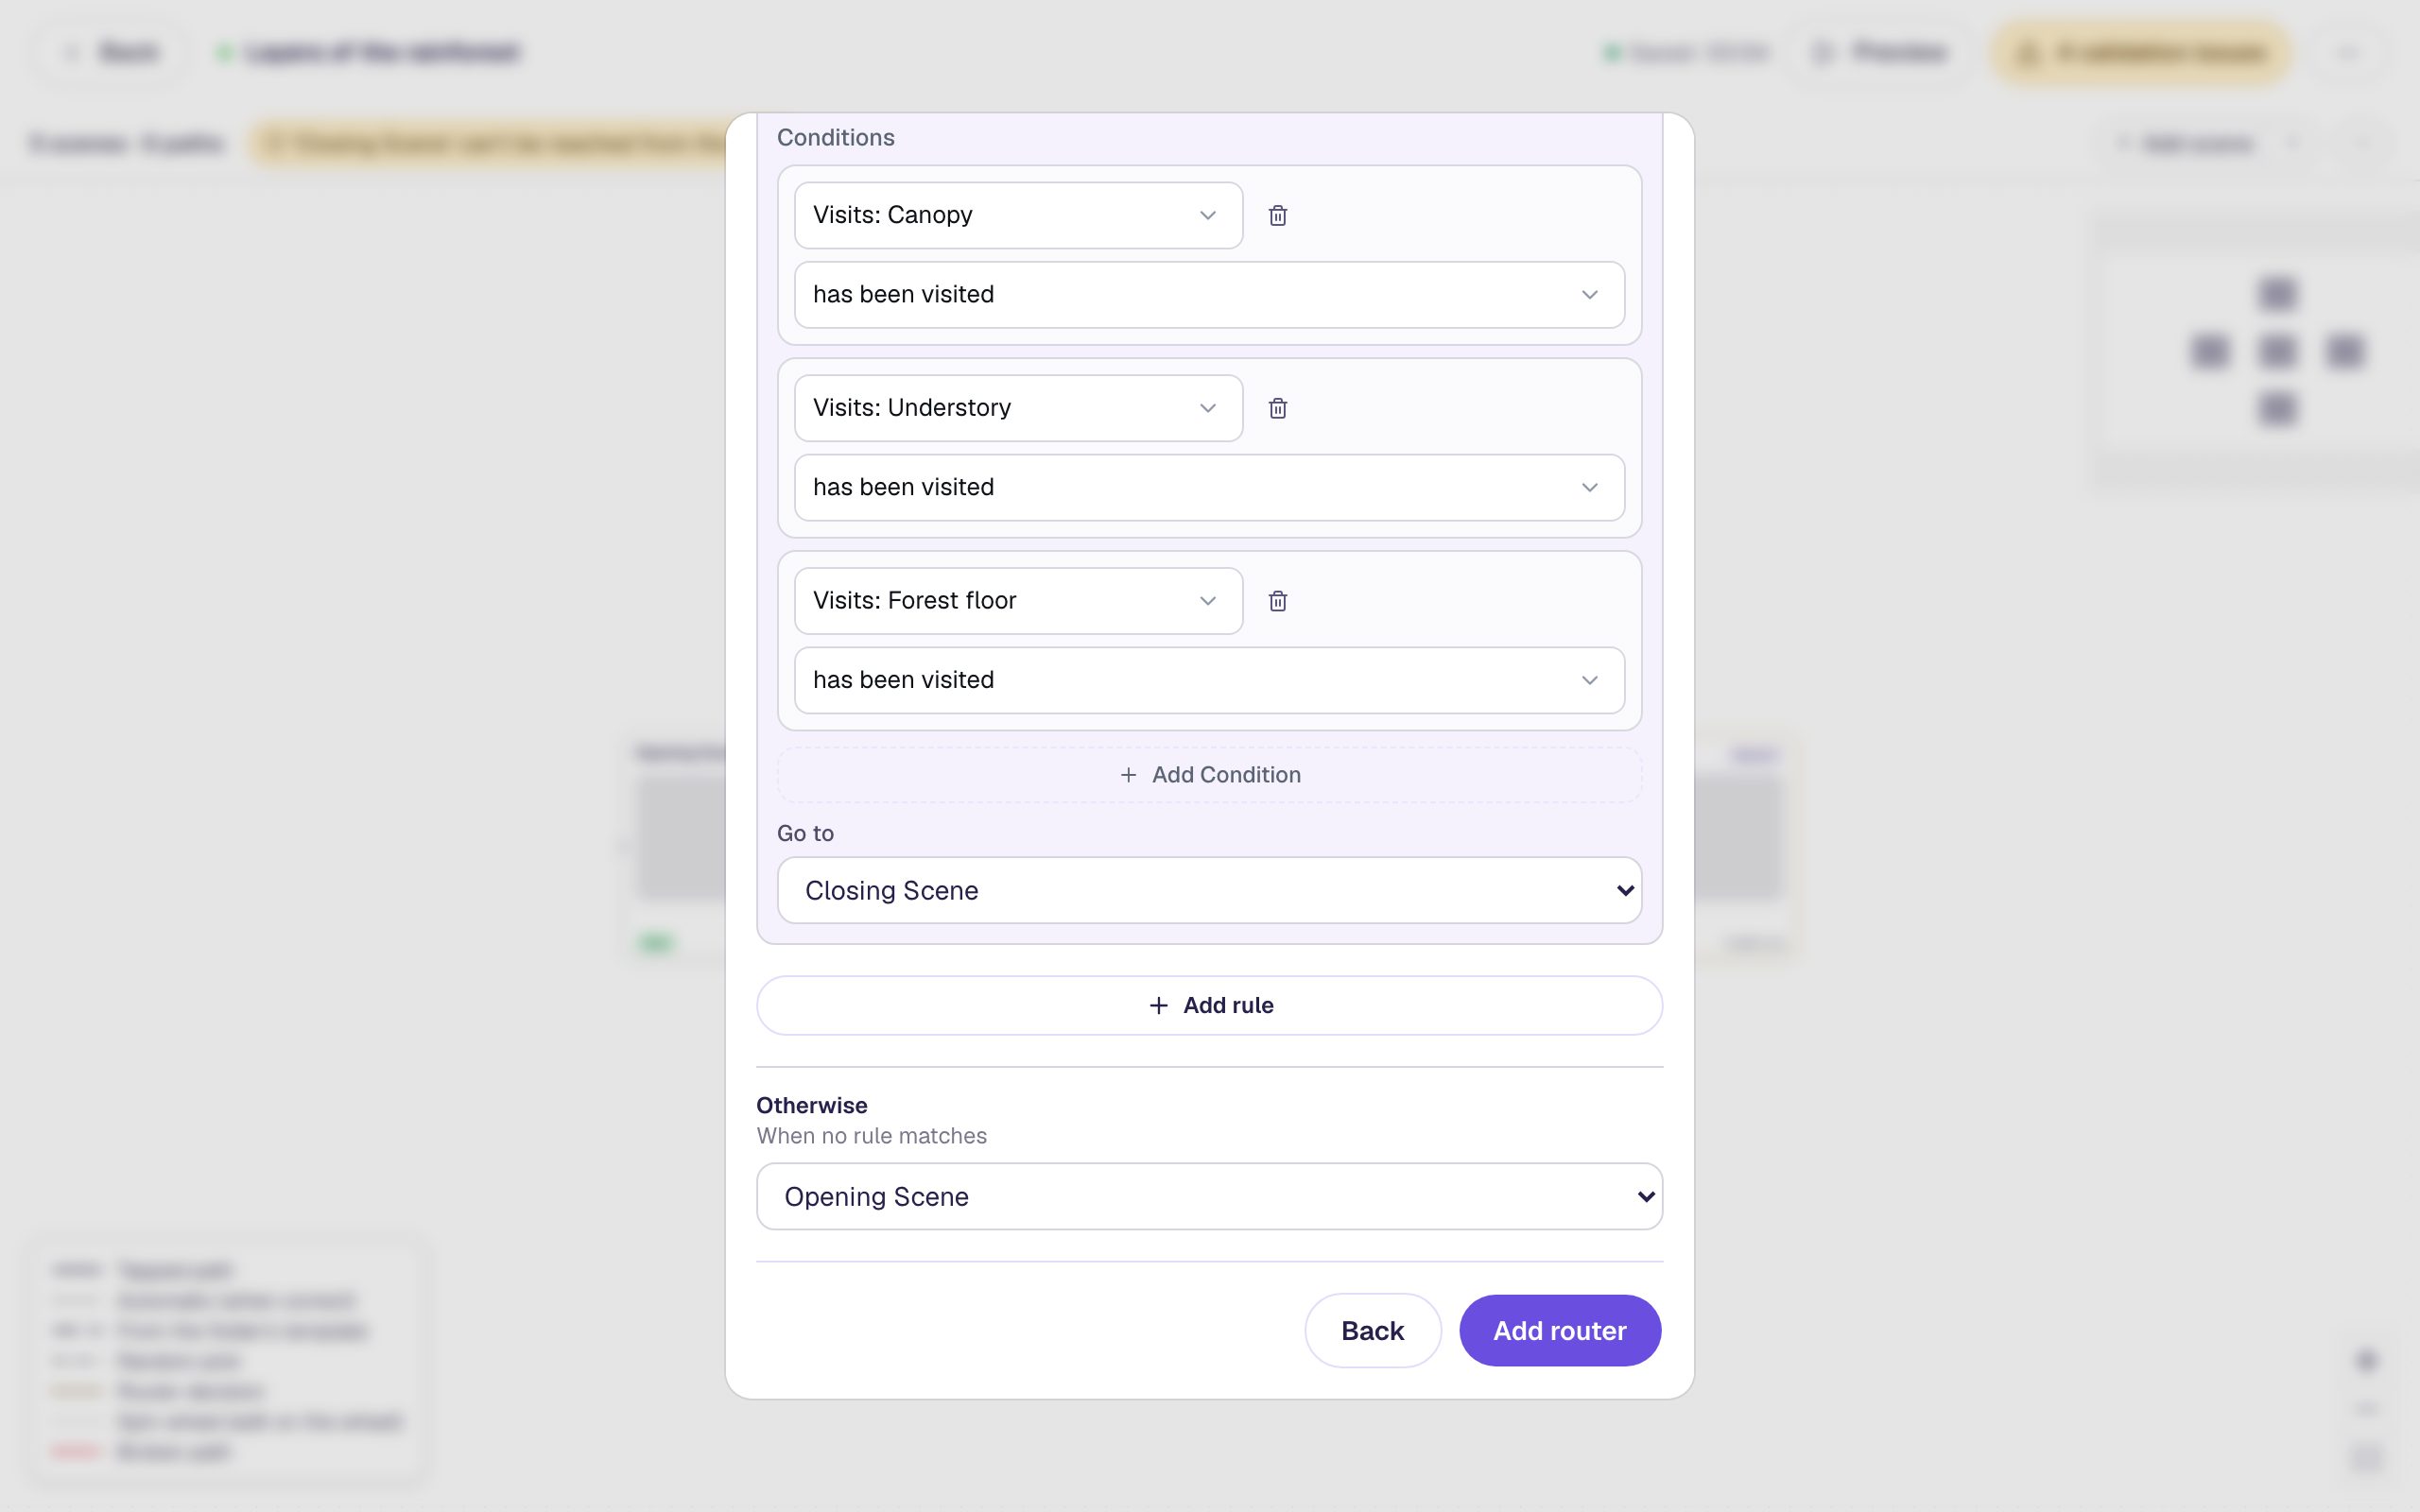
- Set the rule's Go to to Closing Scene. A new rule starts on the Opening Scene, so this one needs changing.
- Set Otherwise to Opening Scene. It starts on whichever scene comes next in the lesson's order, so check it. This is where students go when the rule doesn't match: back to the map, to pick another layer.
- Click Add router.
Why does this work, even for the layer a student is on? A visit counts the moment a student arrives on a scene. So when a student on their third layer presses Back to the map, that layer has already been visited, the rule matches, and they go to the ending.
The router appears on the map as an amber card, with one arrow for its rule and one for Otherwise:
Step 5: Send the other Back buttons to the same router
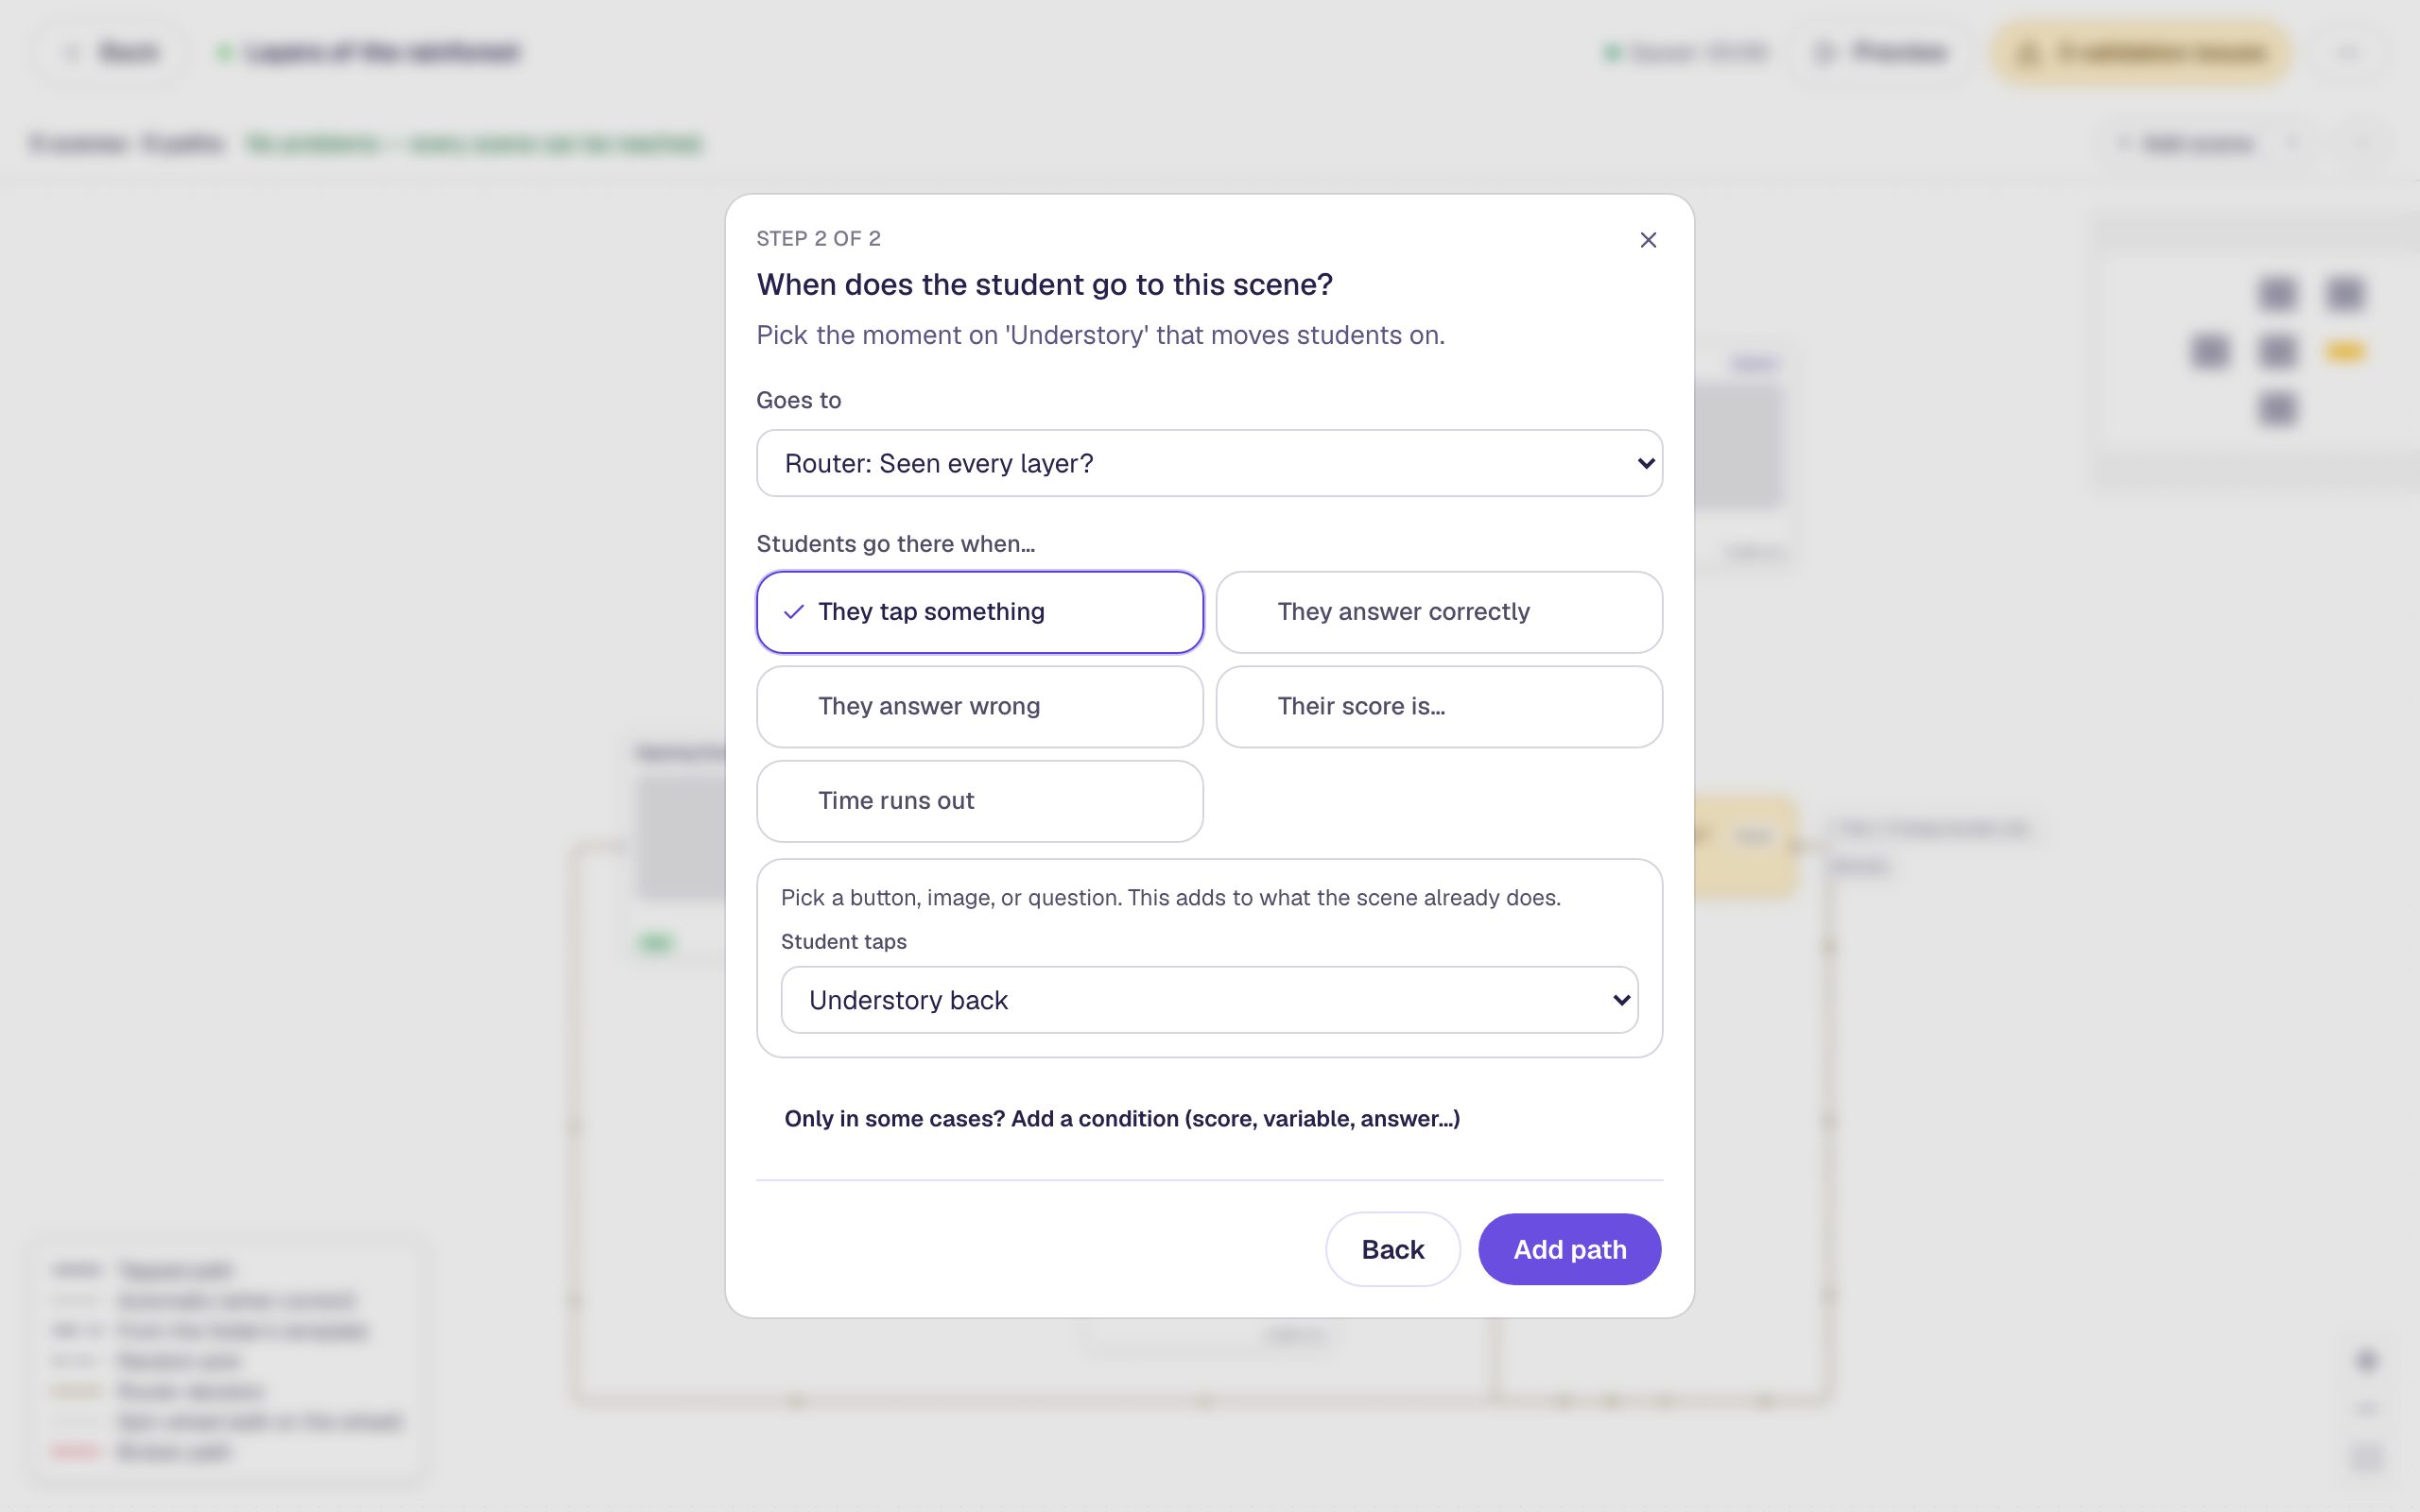
One router can serve every layer. Hover over the Understory card and click its dot:
- Choose Or connect to a scene or router that's already in the lesson and click Next.
- Set Goes to to Router: Seen every layer?.
- Choose They tap something and set Student taps to Understory back.
- Click Add path.
Do the same from the Forest floor card with Forest floor back.
Step 6: Tidy up and check the map
Look at the layer cards. Some of them may still have a dashed When answered correctly arrow beside their Back path. Those are left over from adding the scenes. They'd never fire, since there's no question on these scenes, but a clean map is easier to check. Click each When answered correctly label, then Remove path.
Here's the finished map. Each button on the map opens its layer, every layer's Back button leads to the router, and the router either loops back to the map or opens the ending:
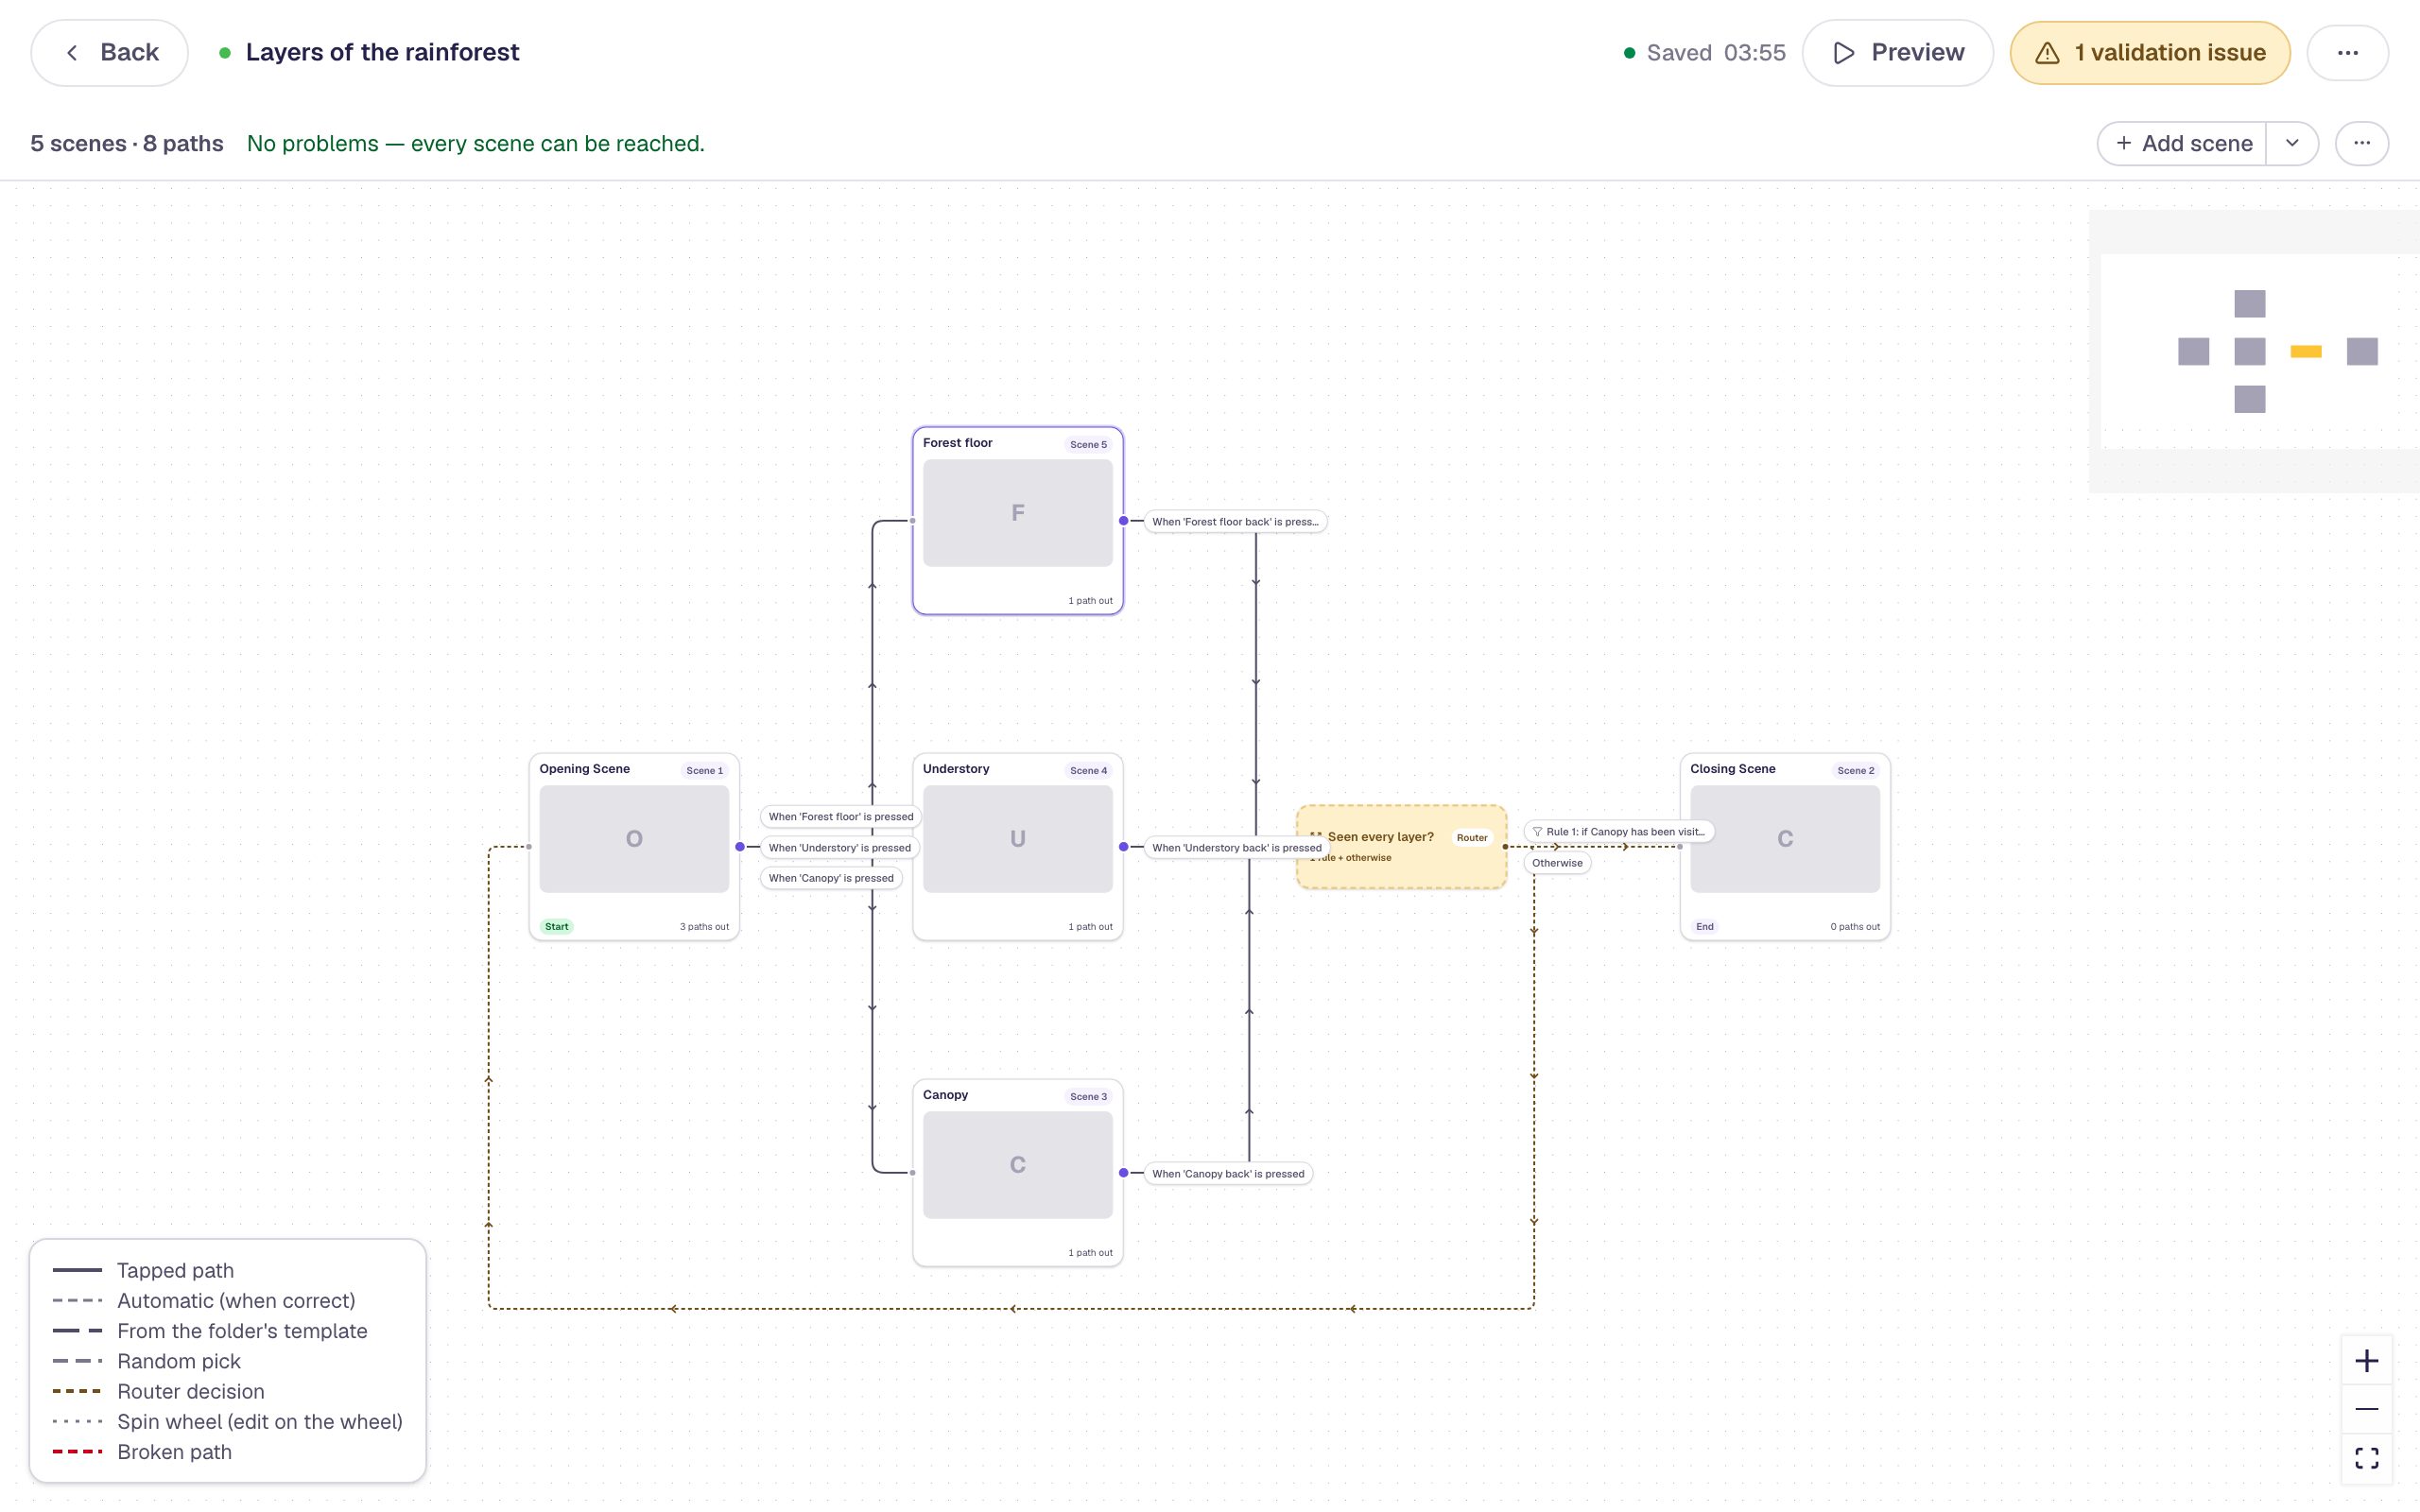
The yellow pill at the top still shows 1 validation issue. Before you publish, Berdee wants a Submit Button set to Lesson somewhere in the lesson. You don't need one to preview. Build your first quiz question shows how to add one.
Step 7: Explore it as a student
Click Preview at the top of the graph. Preview from the graph always starts at the Opening Scene. Visit one layer and come back:
Tap 🌳 Canopy:
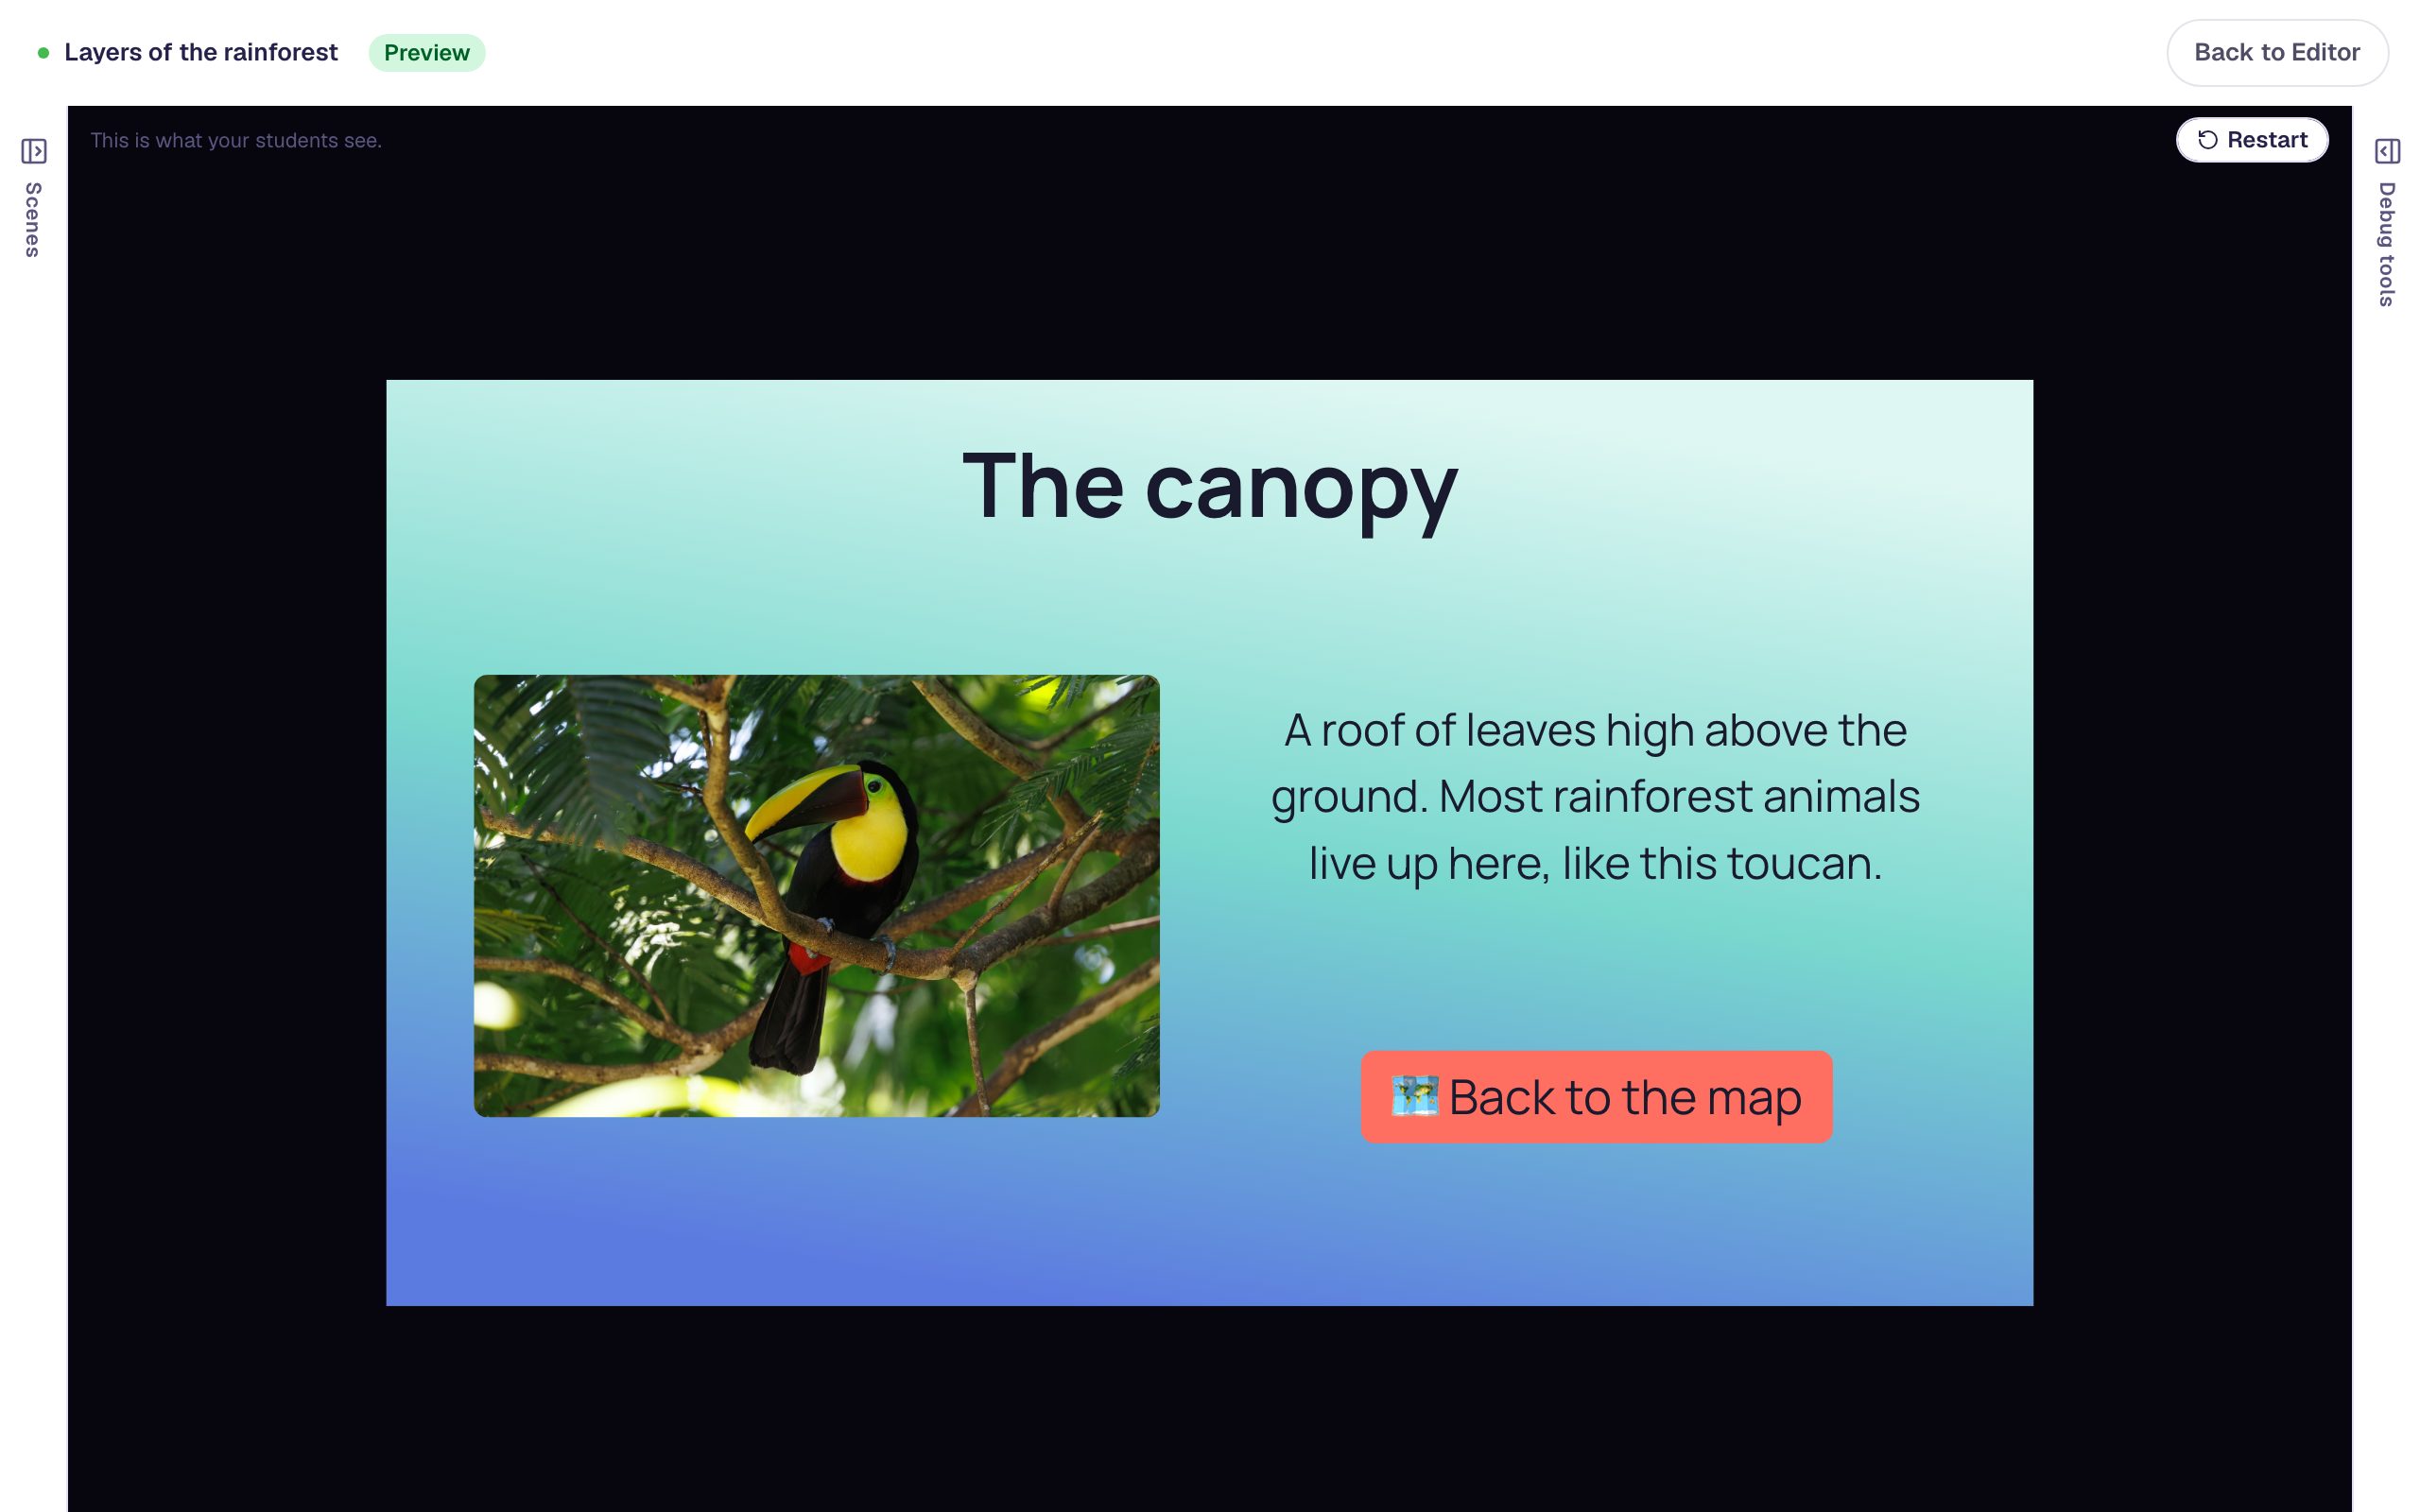
Press 🗺️ Back to the map. The router checks its rule, finds two layers still unvisited, and uses Otherwise, so the student is back on the map:
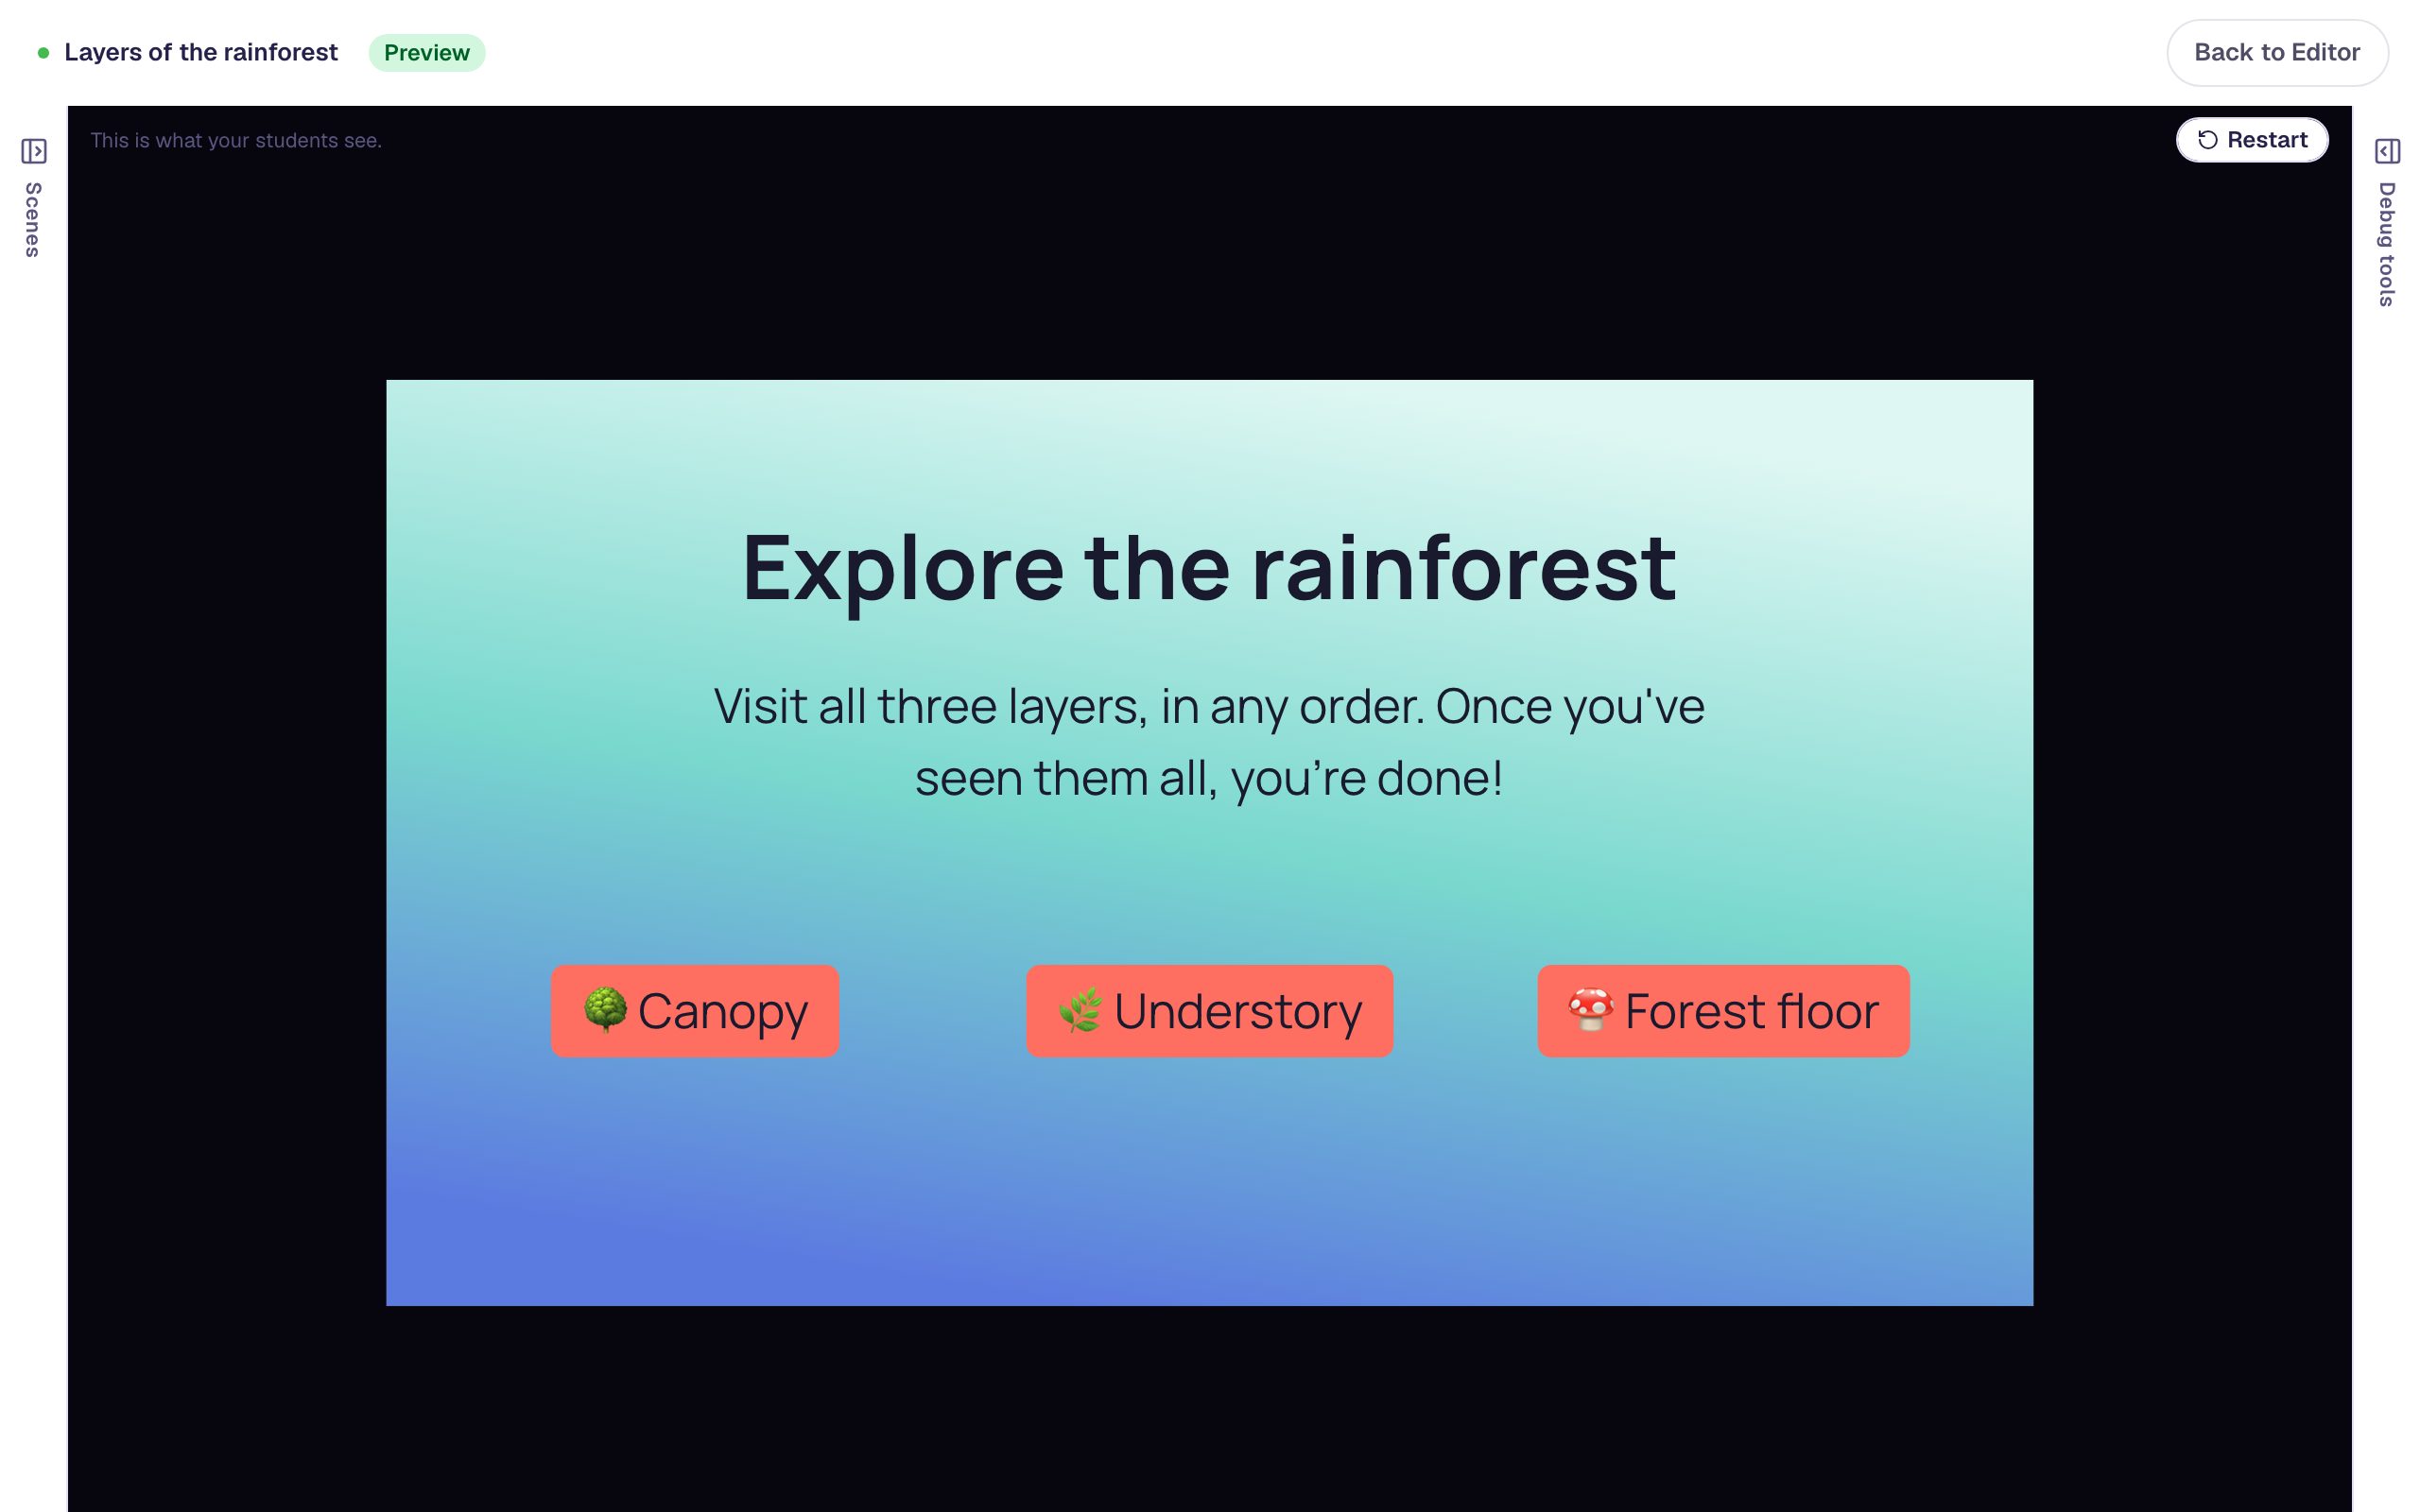
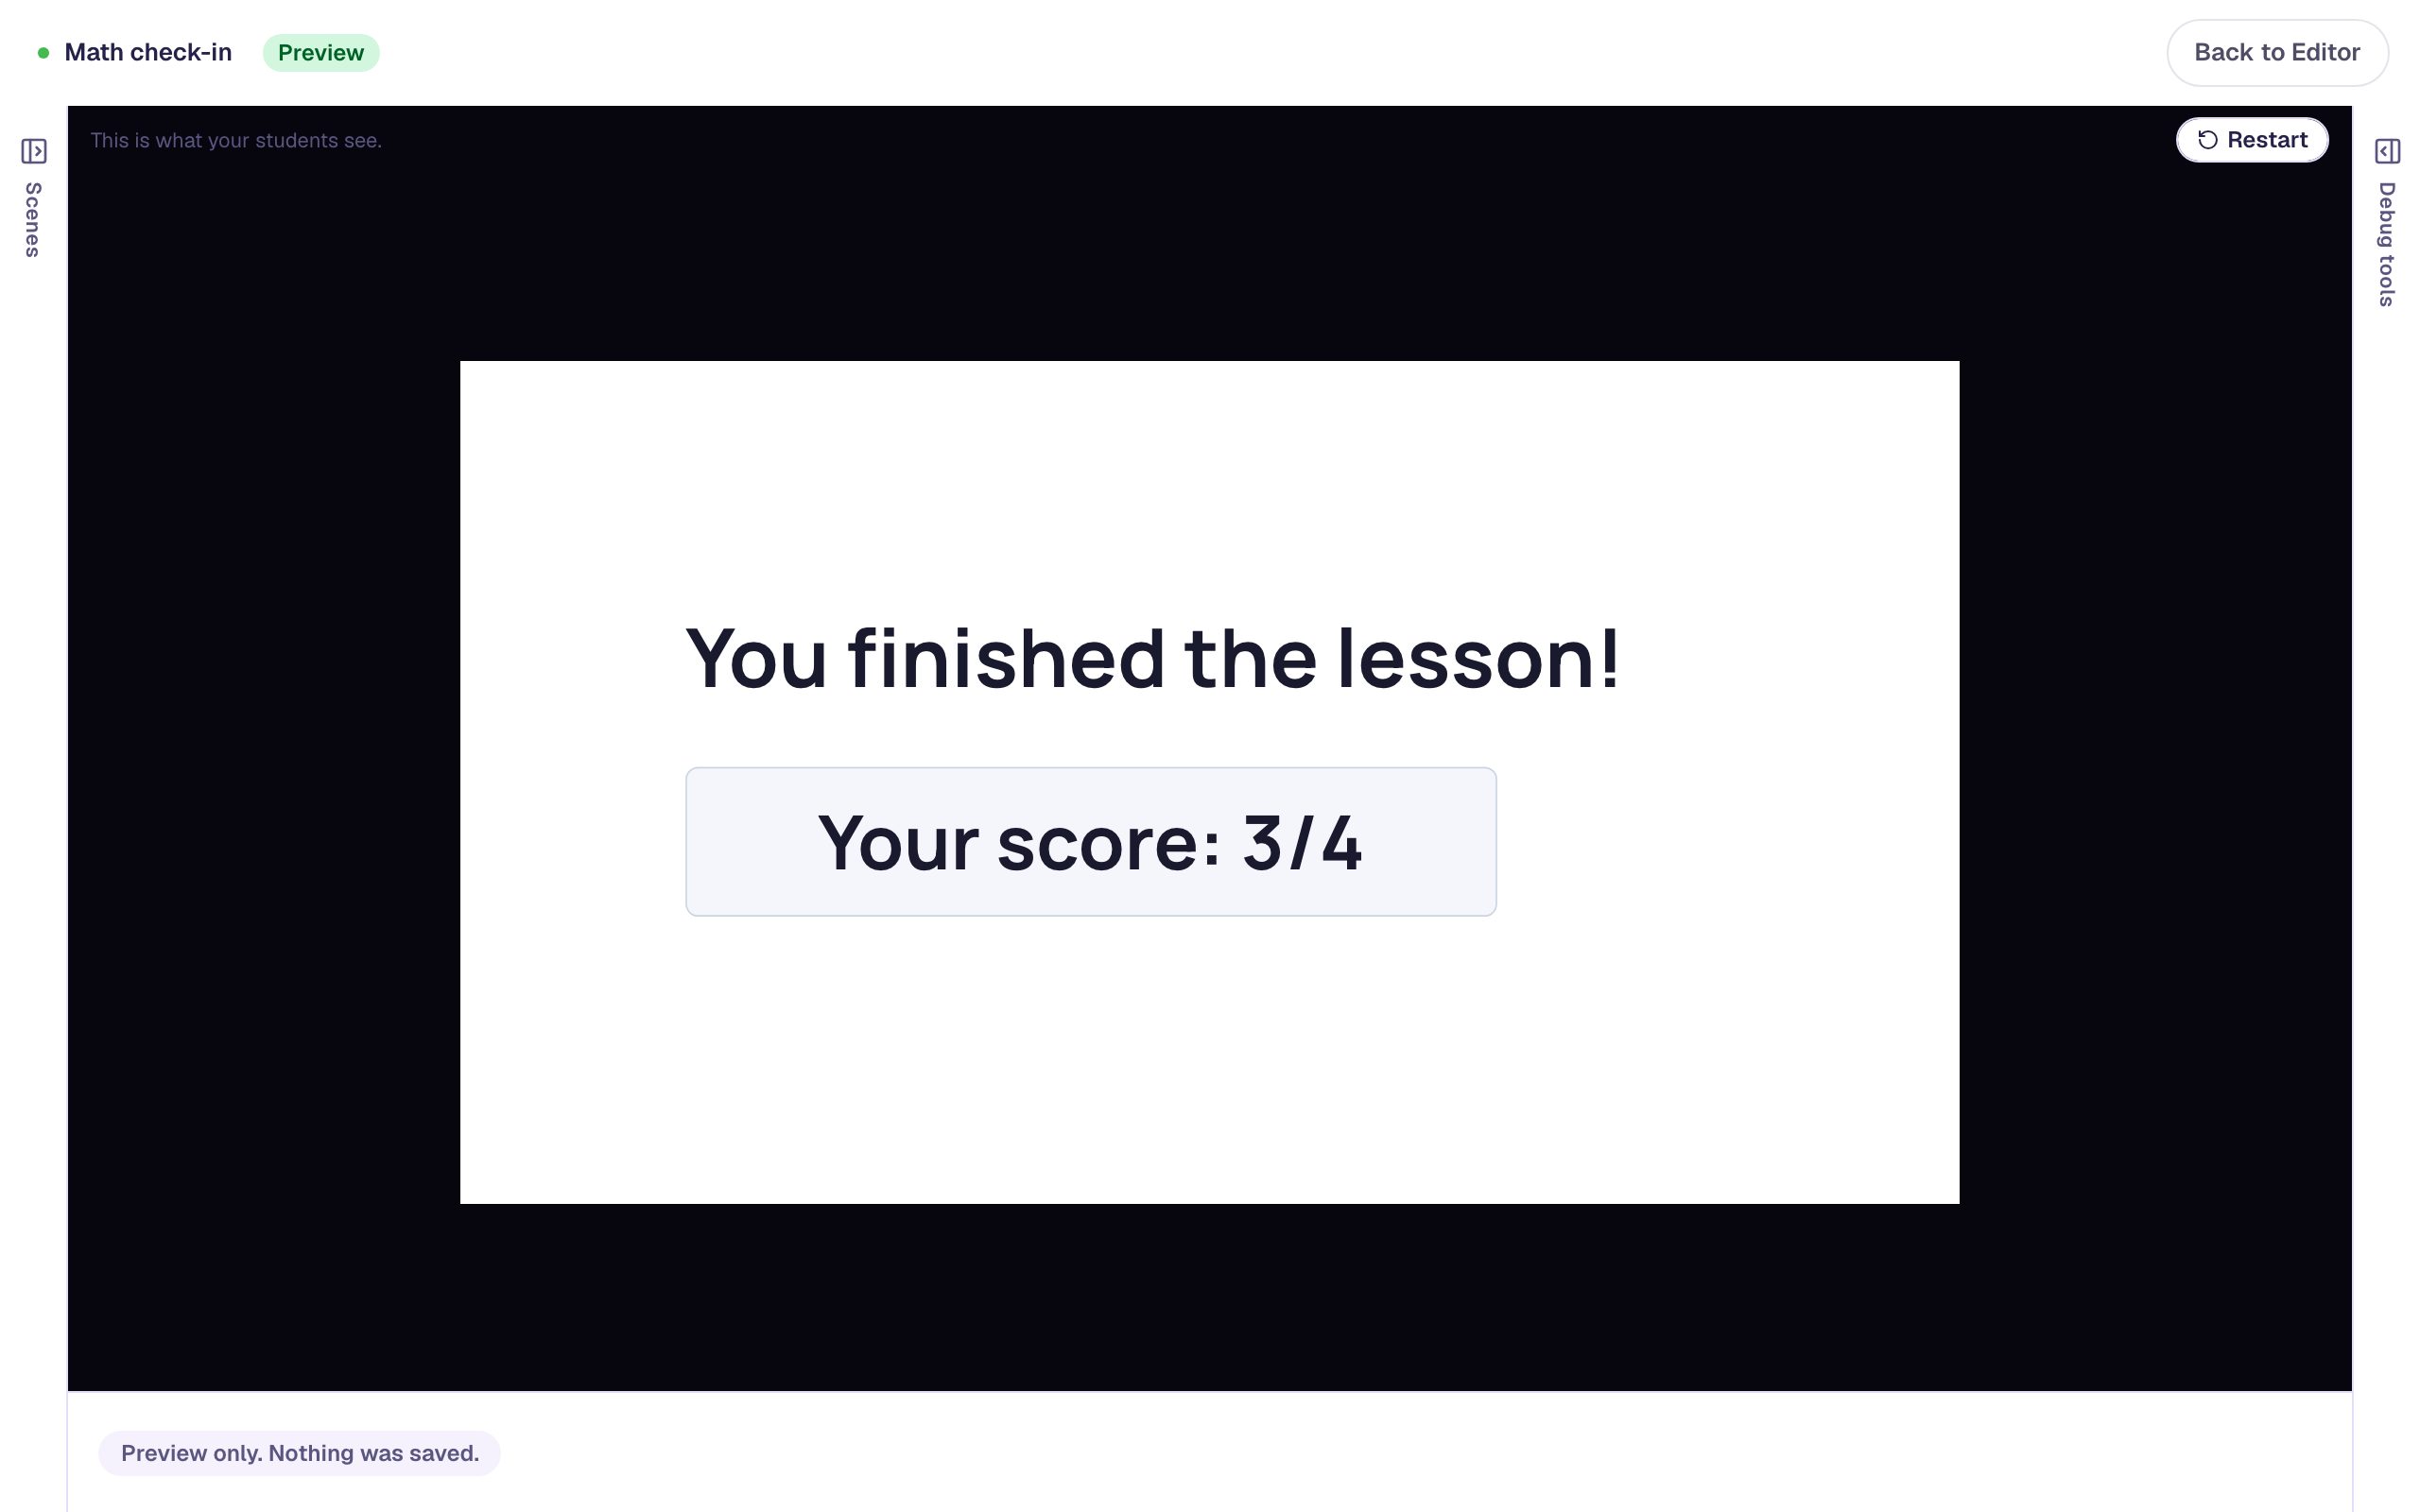
Visit 🍄 Forest floor and come back the same way. Then visit the last one, 🌿 Understory, and press Back to the map. This time every condition is true, and the router goes to the ending instead:
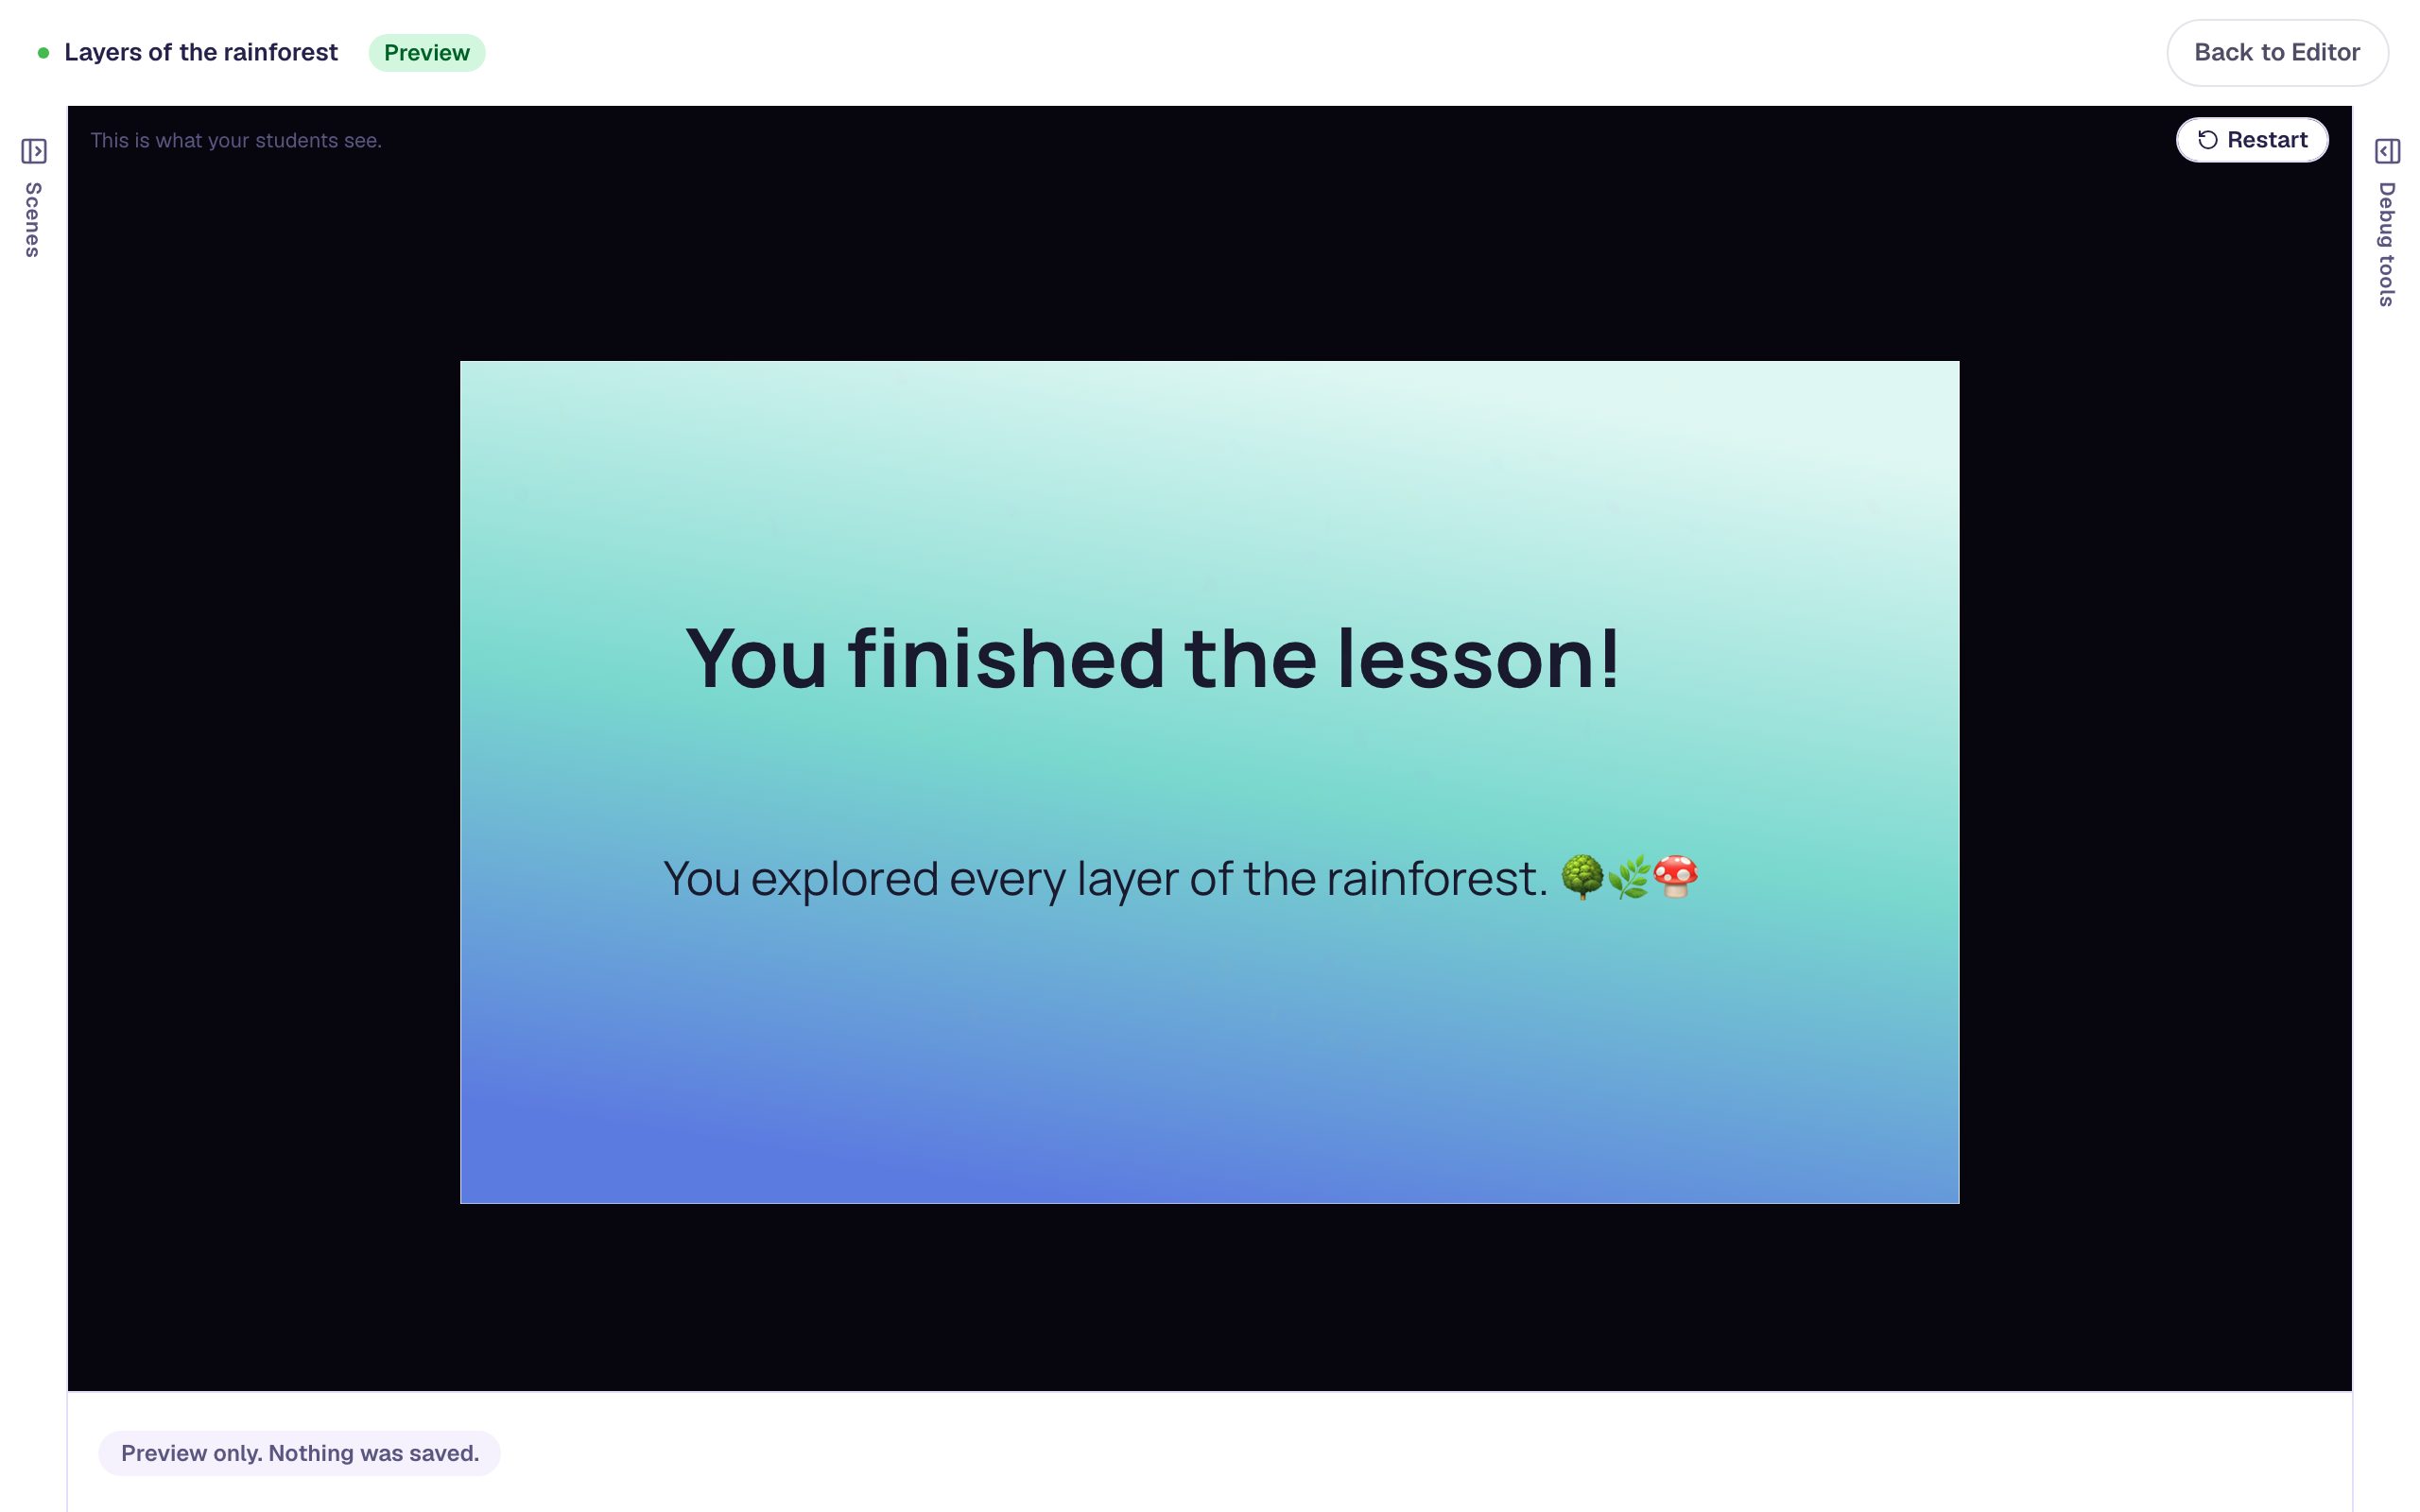
Try a different order with Restart at the top right. Whichever layer a student sees last, its Back button is the one that opens the ending. A student who revisits a layer they've already seen goes back to the map as usual.
What you built
You built a lesson that finishes only when a student has explored all of it:
- a map scene with one Button per layer, each with a They tap something path to its own scene,
- a Back to the map button on every layer, named after its layer,
- one router,
Seen every layer?, that every Back button leads to, - a rule with three Visits: … has been visited conditions that goes to the Closing Scene, and
- Otherwise back to the map.
To add a fourth layer, add its scene and Back button, connect the button to the router, and add one more Visits condition to the rule. You can also ask for less: switch the rule to At least one condition is met, or check the router's own visits (Visits: Seen every layer? (router), visit count is at least 2) to end after any two stops. To put the same Back button on every scene without building it three times, see Share working buttons across scenes with a layout. Avoid sending students back to a scene with a question they've already submitted: their answers stay locked there.
Make this lesson yours
Add the lesson you just watched being built to your account, then change it for your class: your questions, your pictures, your colors.
Free to sign up, and you'll come straight back here. I have an account