Let students check their work and start over
Build a times-tables practice sheet with a Check my answers button that says whether every answer is right, and a Start over button that clears the answers so students can practice again.
- Level
- Intermediate
- Time
- About 15 min
- Steps
- 8
- Updated
- Oct 11, 2026
A three-question times-tables practice scene where Check my answers shows a cheer and confetti when all three are right or a "not yet" message when any is wrong, and Start over clears every box for another go.
Get the finished lesson
Skip straight to the result, or keep it open beside the steps. Add this tutorial's lesson to your account and explore how it works in the studio.
Free to sign up, and you'll come straight back here. I have an account
Practice works best when students can check themselves, fix what's wrong, and try again as many times as they like. A Submit button doesn't fit that: it grades the answers and locks them, so they can't be changed or cleared afterwards. For practice you want two different buttons:
- Check my answers, which looks at the answers without locking them and says "all right" or "not yet", and
- Start over, which clears every answer on the scene so students can do the whole set again.
In this tutorial you'll build both on a times-tables practice sheet with three facts: 6 × 7, 8 × 9 and 7 × 8. Along the way you'll give one button two behaviors, each with its own condition: one for when all the answers are right, one for when any of them is wrong.
This builds on Show a hint after two wrong tries, which uses one condition. If you haven't used the studio before, start with Build your first quiz question: this tutorial moves quickly through the parts it already covers.
Step 1: Set up the practice sheet
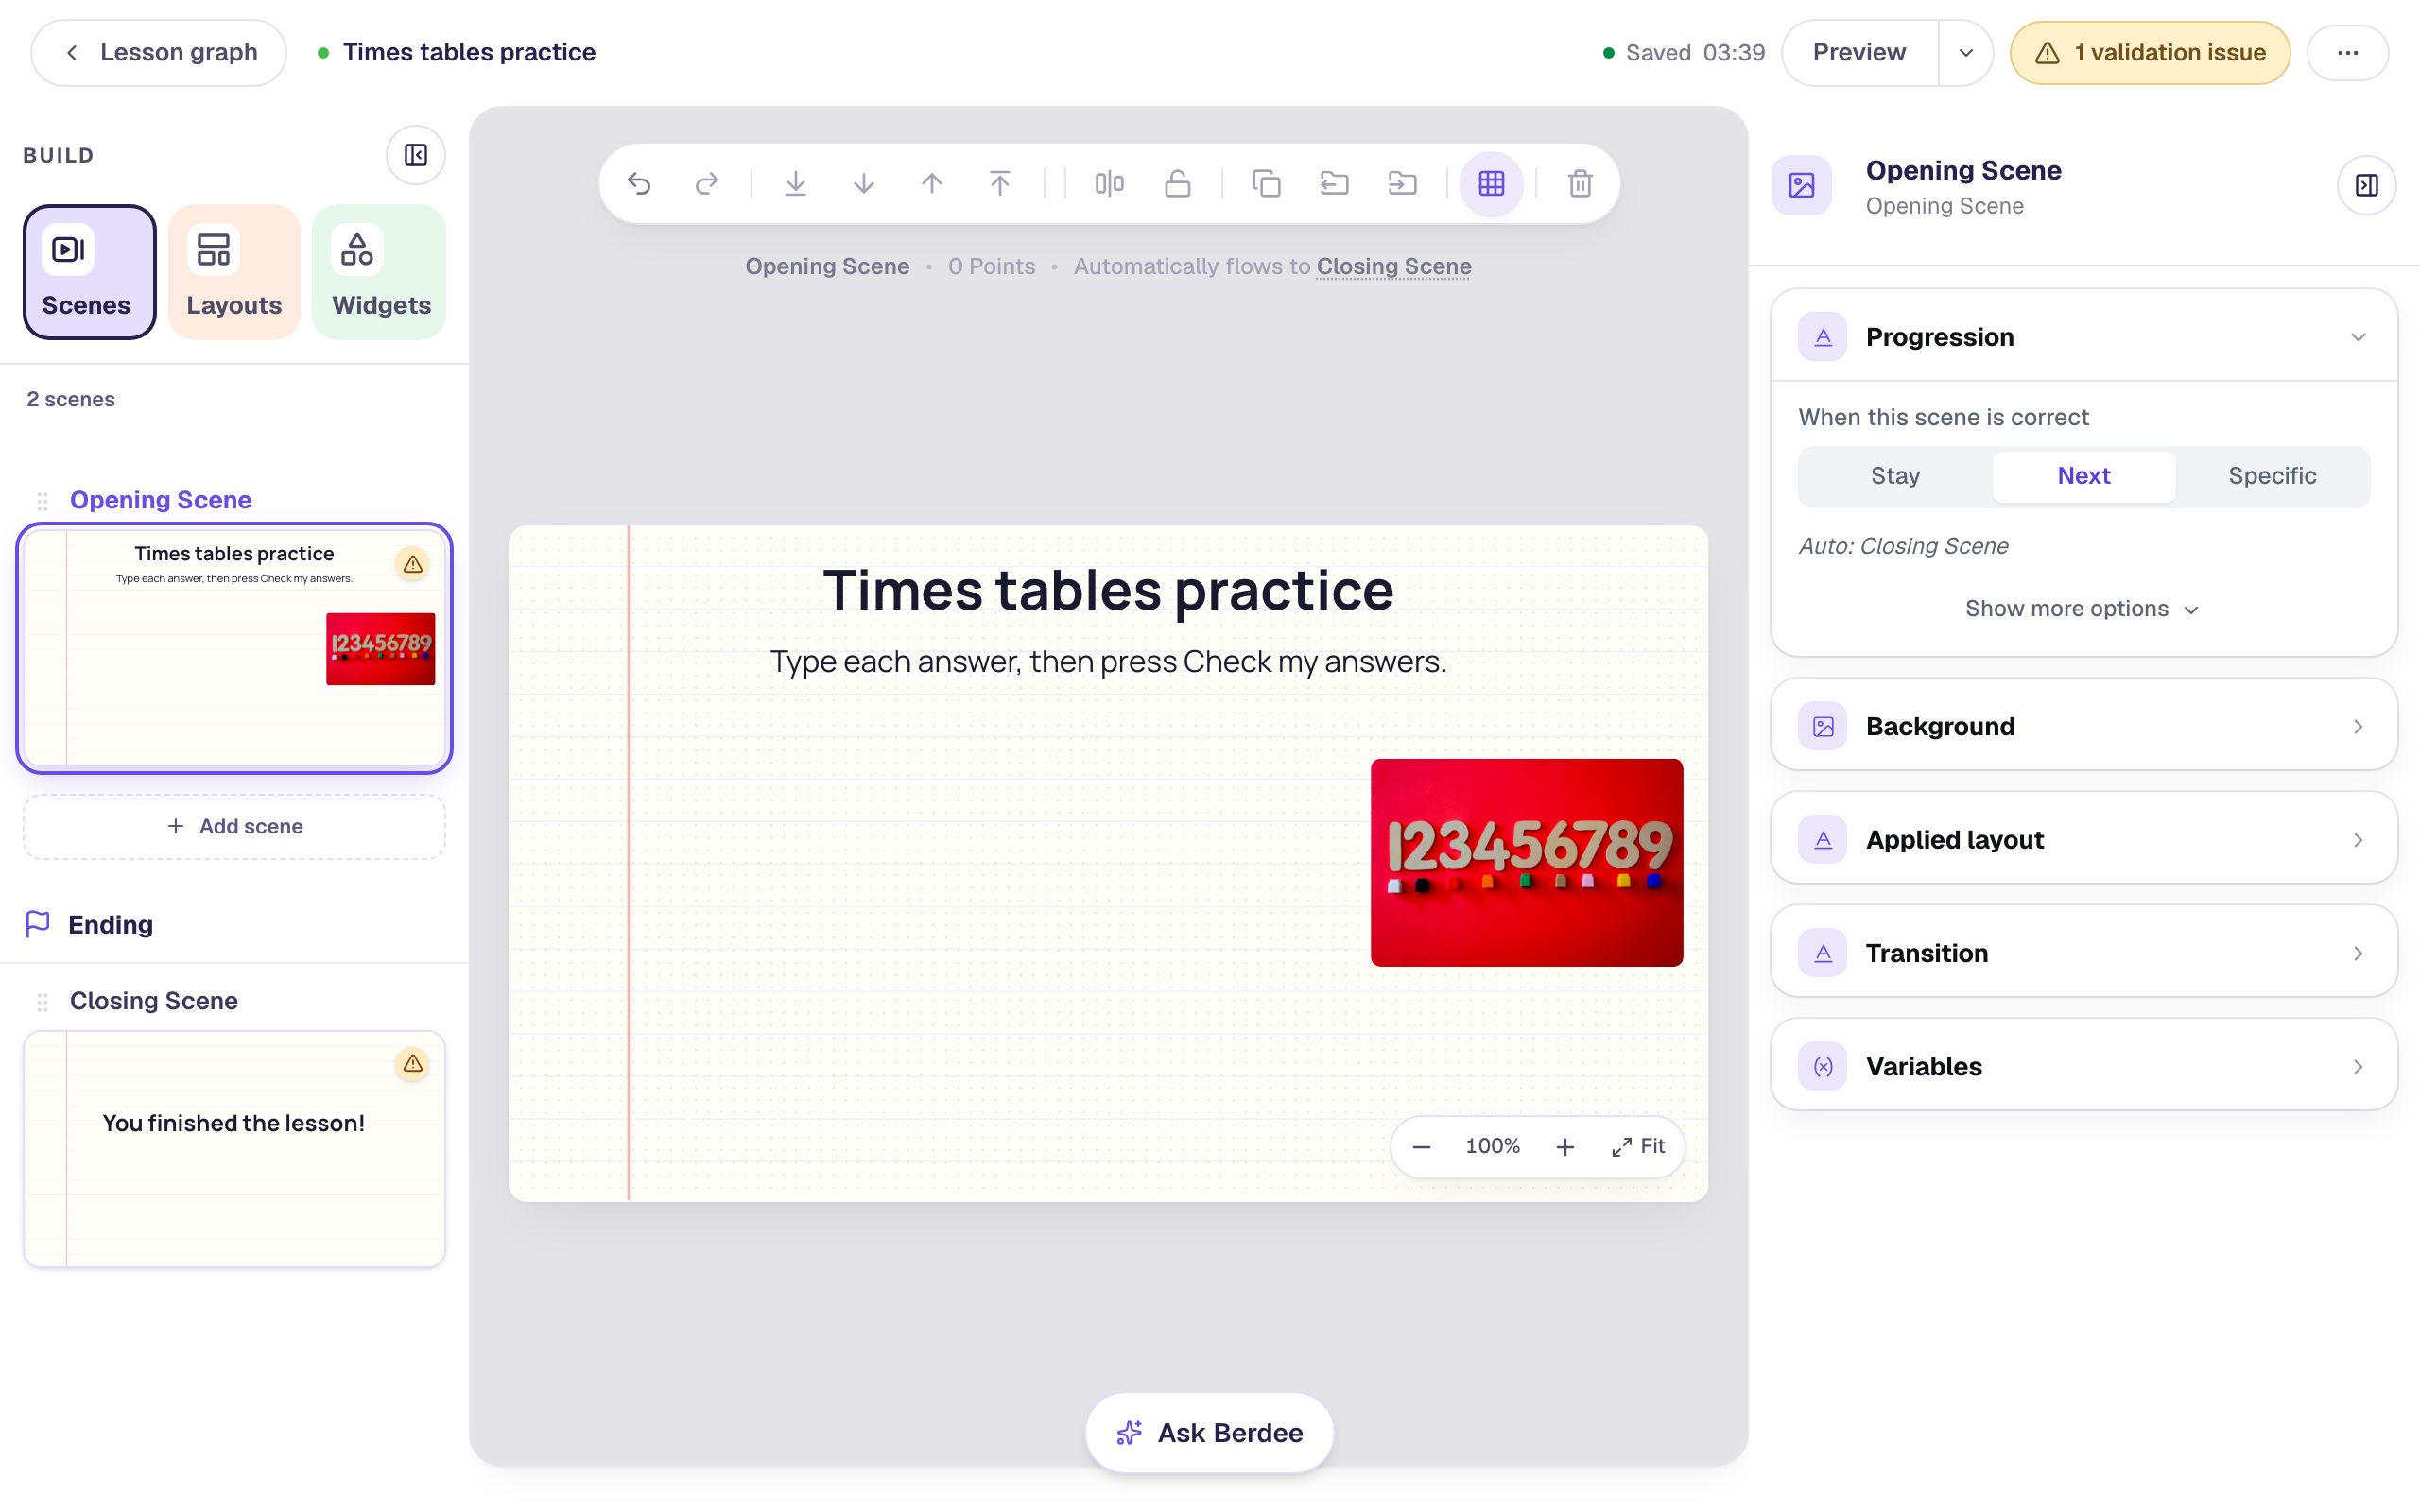
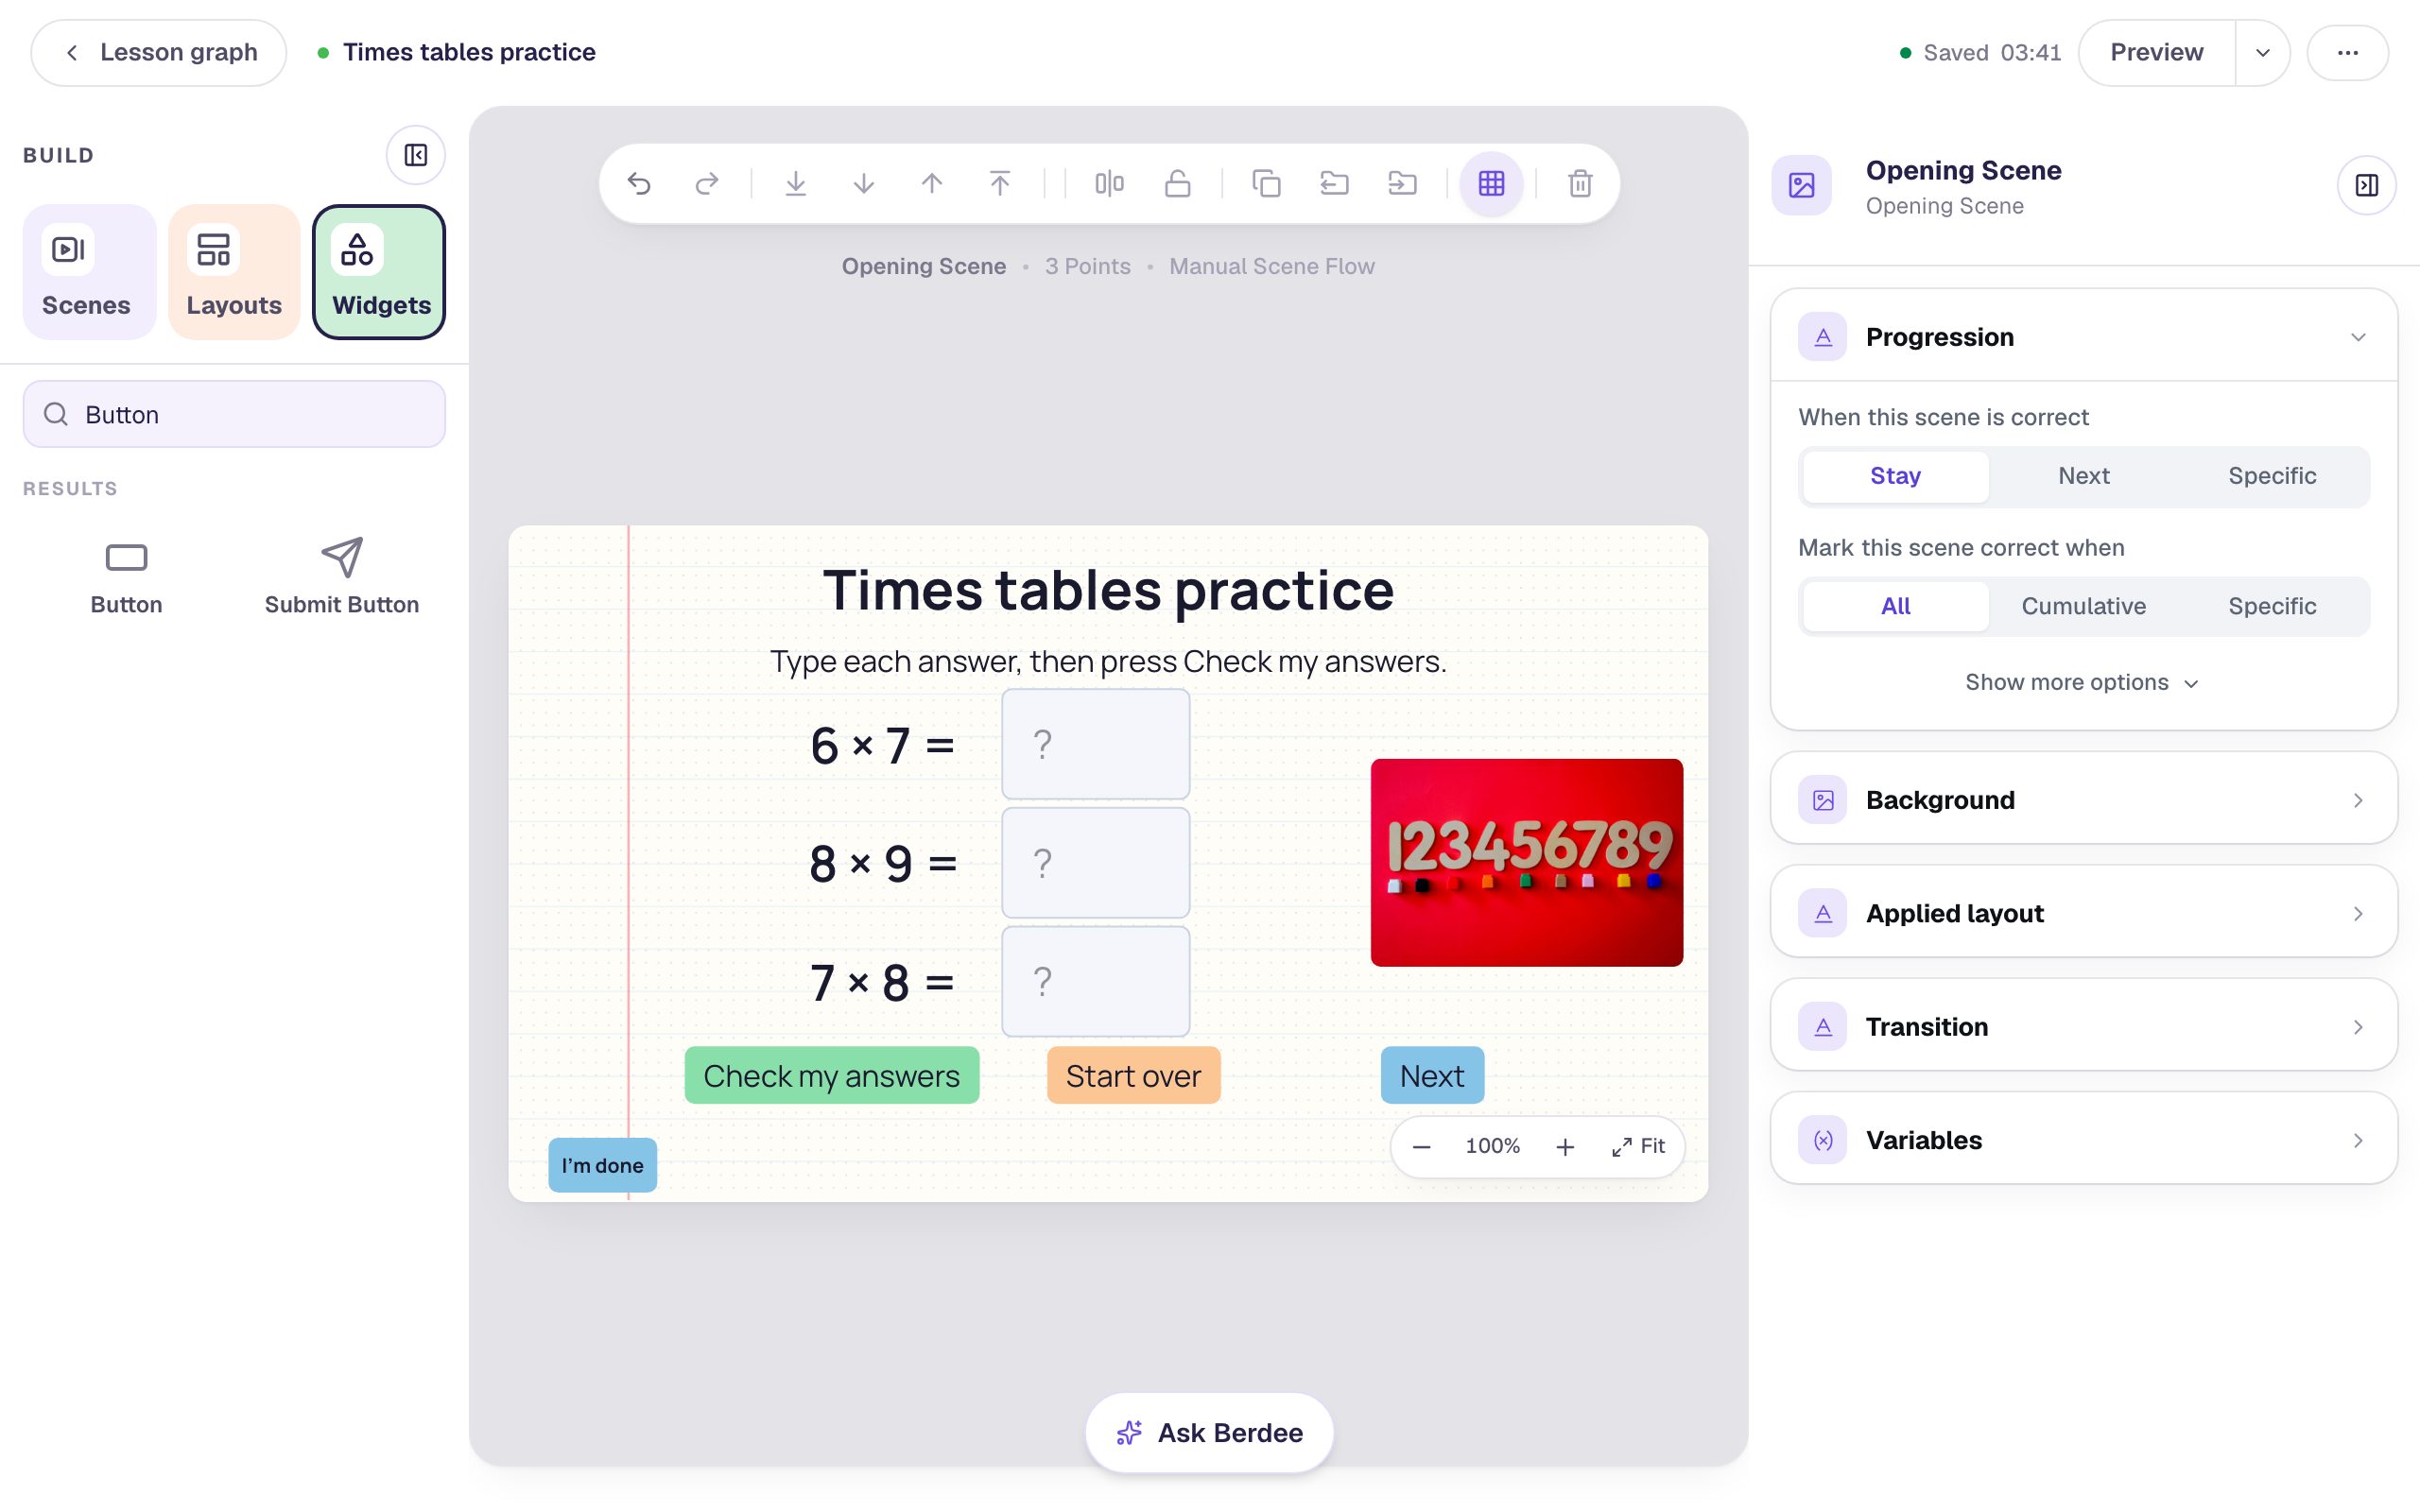
Start a blank lesson (New lesson, then Start from scratch) and name it Times tables practice by clicking Untitled lesson at the top.
Give both scenes a background, so nothing is a bare white page: with nothing selected, open Background, click Choose a style, pick Textures, then Notebook paper, and click Apply background. Do the same on the Closing Scene. Creative Backgrounds covers the gallery in more detail.
Back on the Opening Scene:
- Add a Heading that says
Times tables practice, with a Font Size of44. - Add a Body text under it:
Type each answer, then press Check my answers., with a Font Size of24. - Add an Image on the right. Click Choose image, search the stock photos for
colorful counting blocks, and import one you like. In Accessibility, describe it in Alt Text.
Step 2: Add the first fact
Each fact is two widgets: a Subheading that shows the question, and a Number Input where students type the answer.
Add a Subheading that says 6 × 7 =, set its Font Size to 40, and drag it to the left side of the scene. (To type ×, copy it from this page, or use a lowercase x.)
Now add the answer box:
- In Widgets, search for
Number Inputand click it. - Click ⚙ Configure. Set Correct Value to
42. - Turn Show Step Buttons off. The − and + buttons would let students click their way to the answer instead of recalling it.
- Set Placeholder to
?, so the empty box looks like a question.
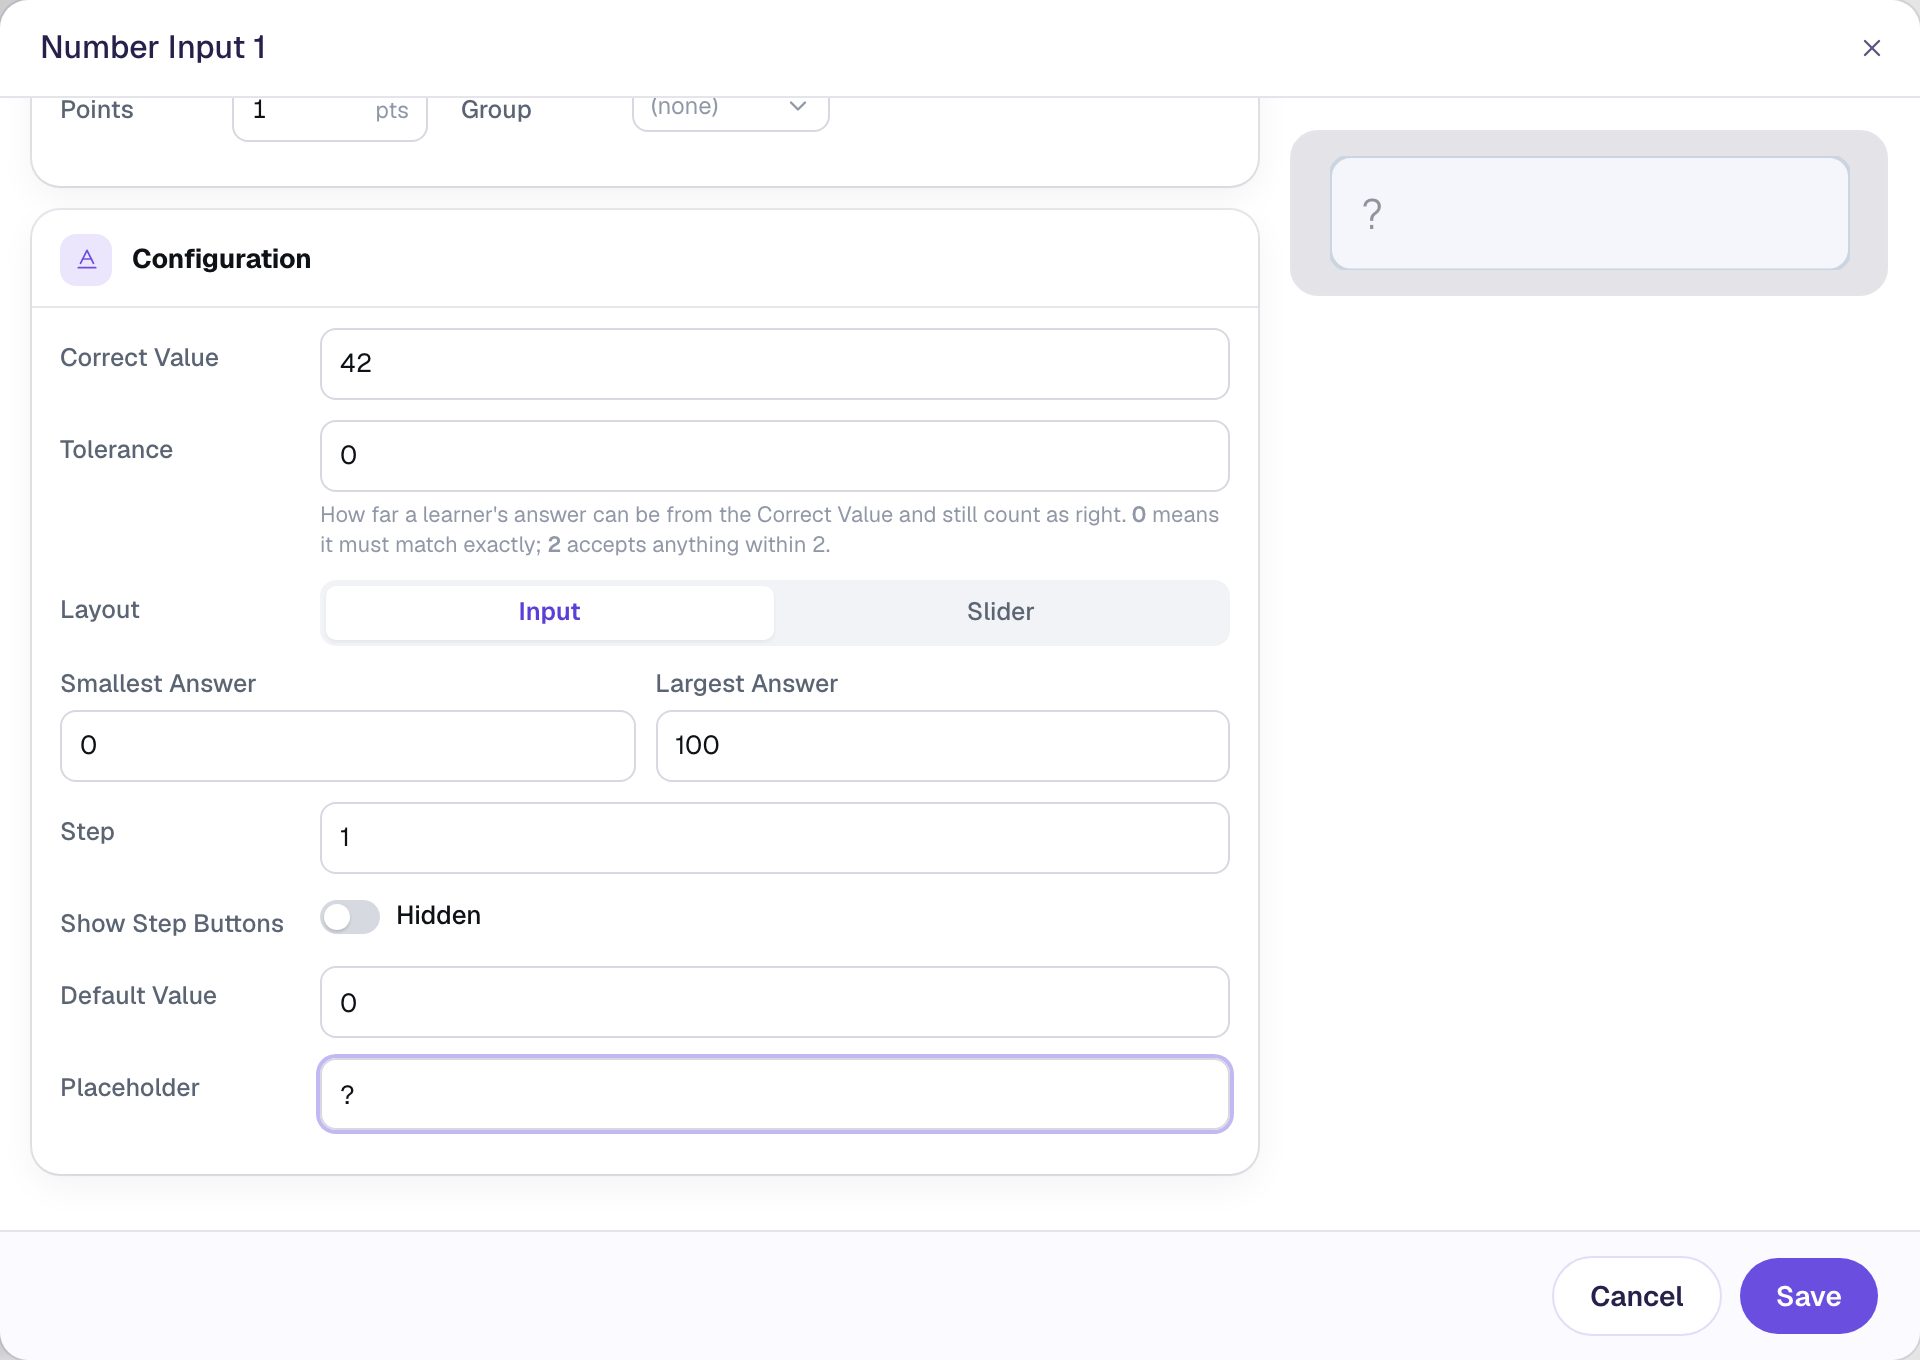
Click Save. Rename the widget 6 × 7 by clicking its name at the top of the properties panel. You'll pick it by name in a condition later, so a name that says what it is helps. In Style & Layout, set Font Size to 32, click Show more options, and set Width to 150. Drag the box beside its question.
Step 3: Copy it for the other two facts
With the answer box still selected, press ⌘D (Ctrl+D on Windows). The copy keeps the size, font and settings, so only the answer changes:
- Click ⚙ Configure on the copy, change Correct Value to
72, and click Save. - Rename it
8 × 9and drag it under the first box.
Press ⌘D again for the third box: Correct Value 56, named 7 × 8. Then add two more Subheadings, 8 × 9 = and 7 × 8 =, at Font Size 40, each beside its box.
Step 4: Keep students on the scene
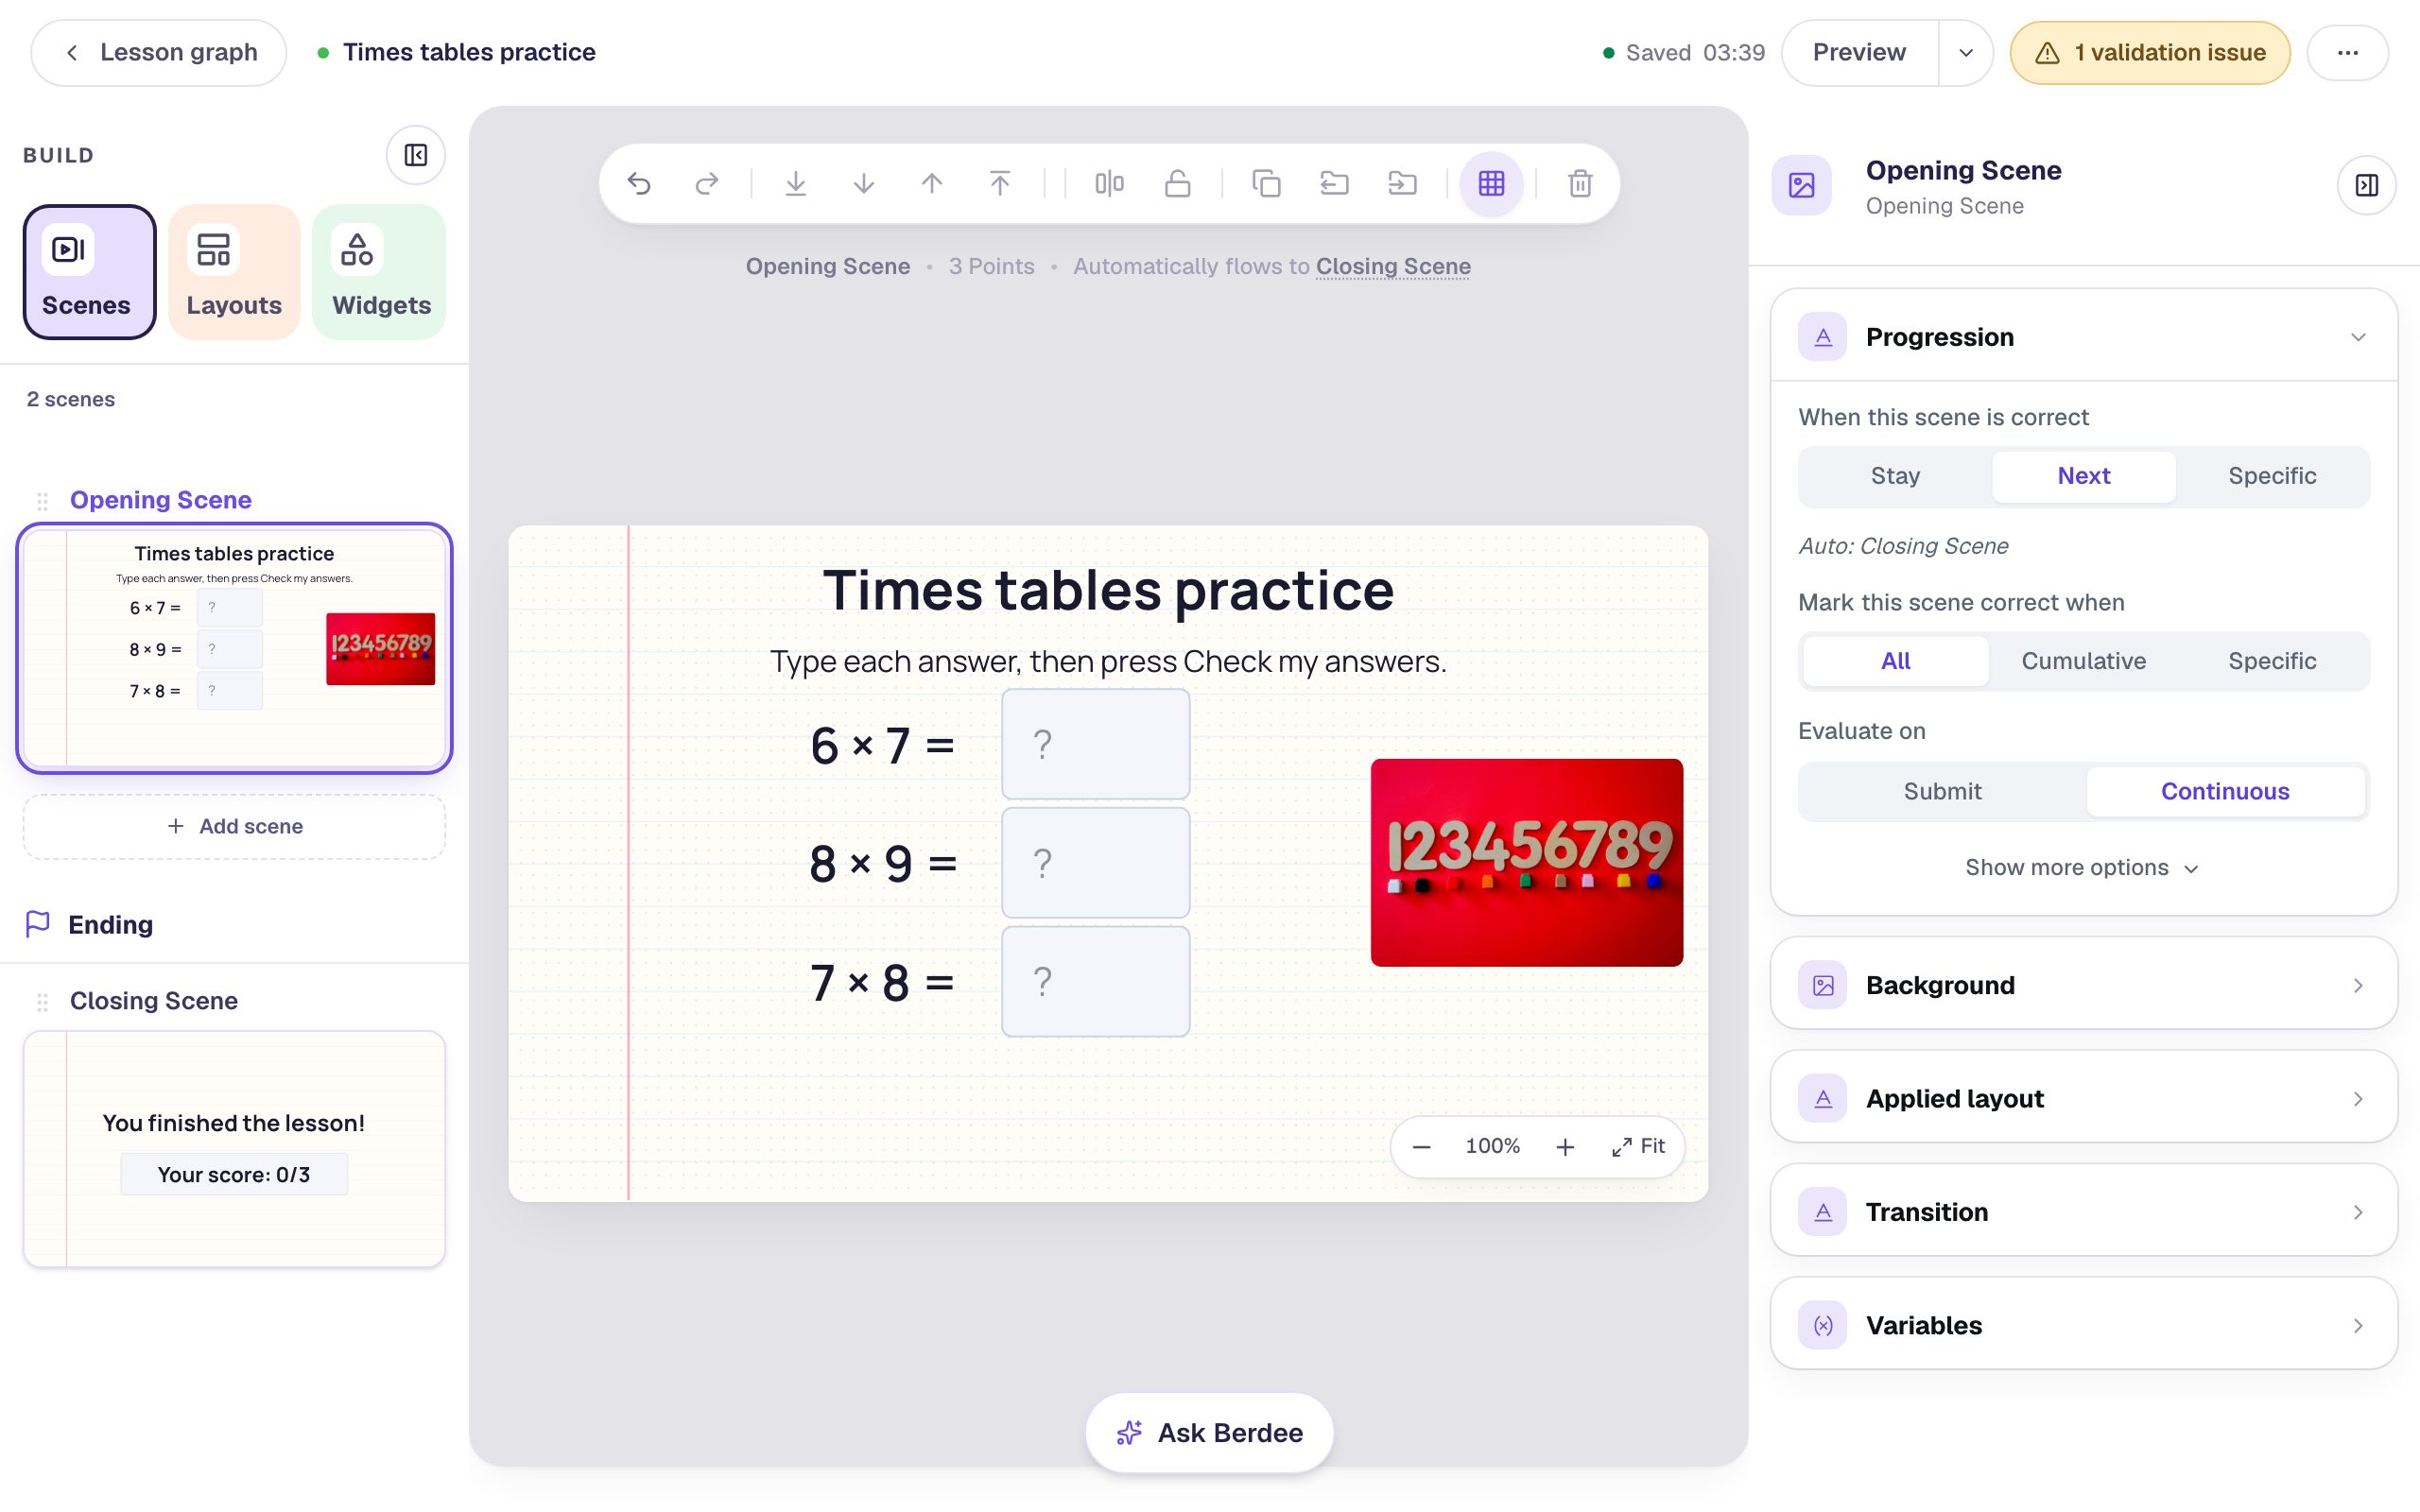
Look at the scene's Progression section (click an empty spot on the scene to see it). It says Next, with Evaluate on: Continuous. That means the moment all three answers are right, the student is whisked to the ending. That's handy for a quiz, but it would skip the Check my answers button you're about to build.
- Click an empty spot on the scene and change When this scene is correct to Stay.
- Add a Button, click ⚙ Configure, set its Label to
Next, and click Save. Click Behaviors, choose Make this a "Next" button, check that Goes to says Closing Scene, and click Add behavior. Give it a light blue Background in Style & Layout, a Font Size of24, and drag it to the bottom right, above the zoom controls. - Berdee needs a way for students to finish the lesson early before it will publish. Add a Submit Button, and in Content set its Label to
I'm doneand Submits to Lesson. Set its Font Size to16and tuck it into the bottom-left corner.
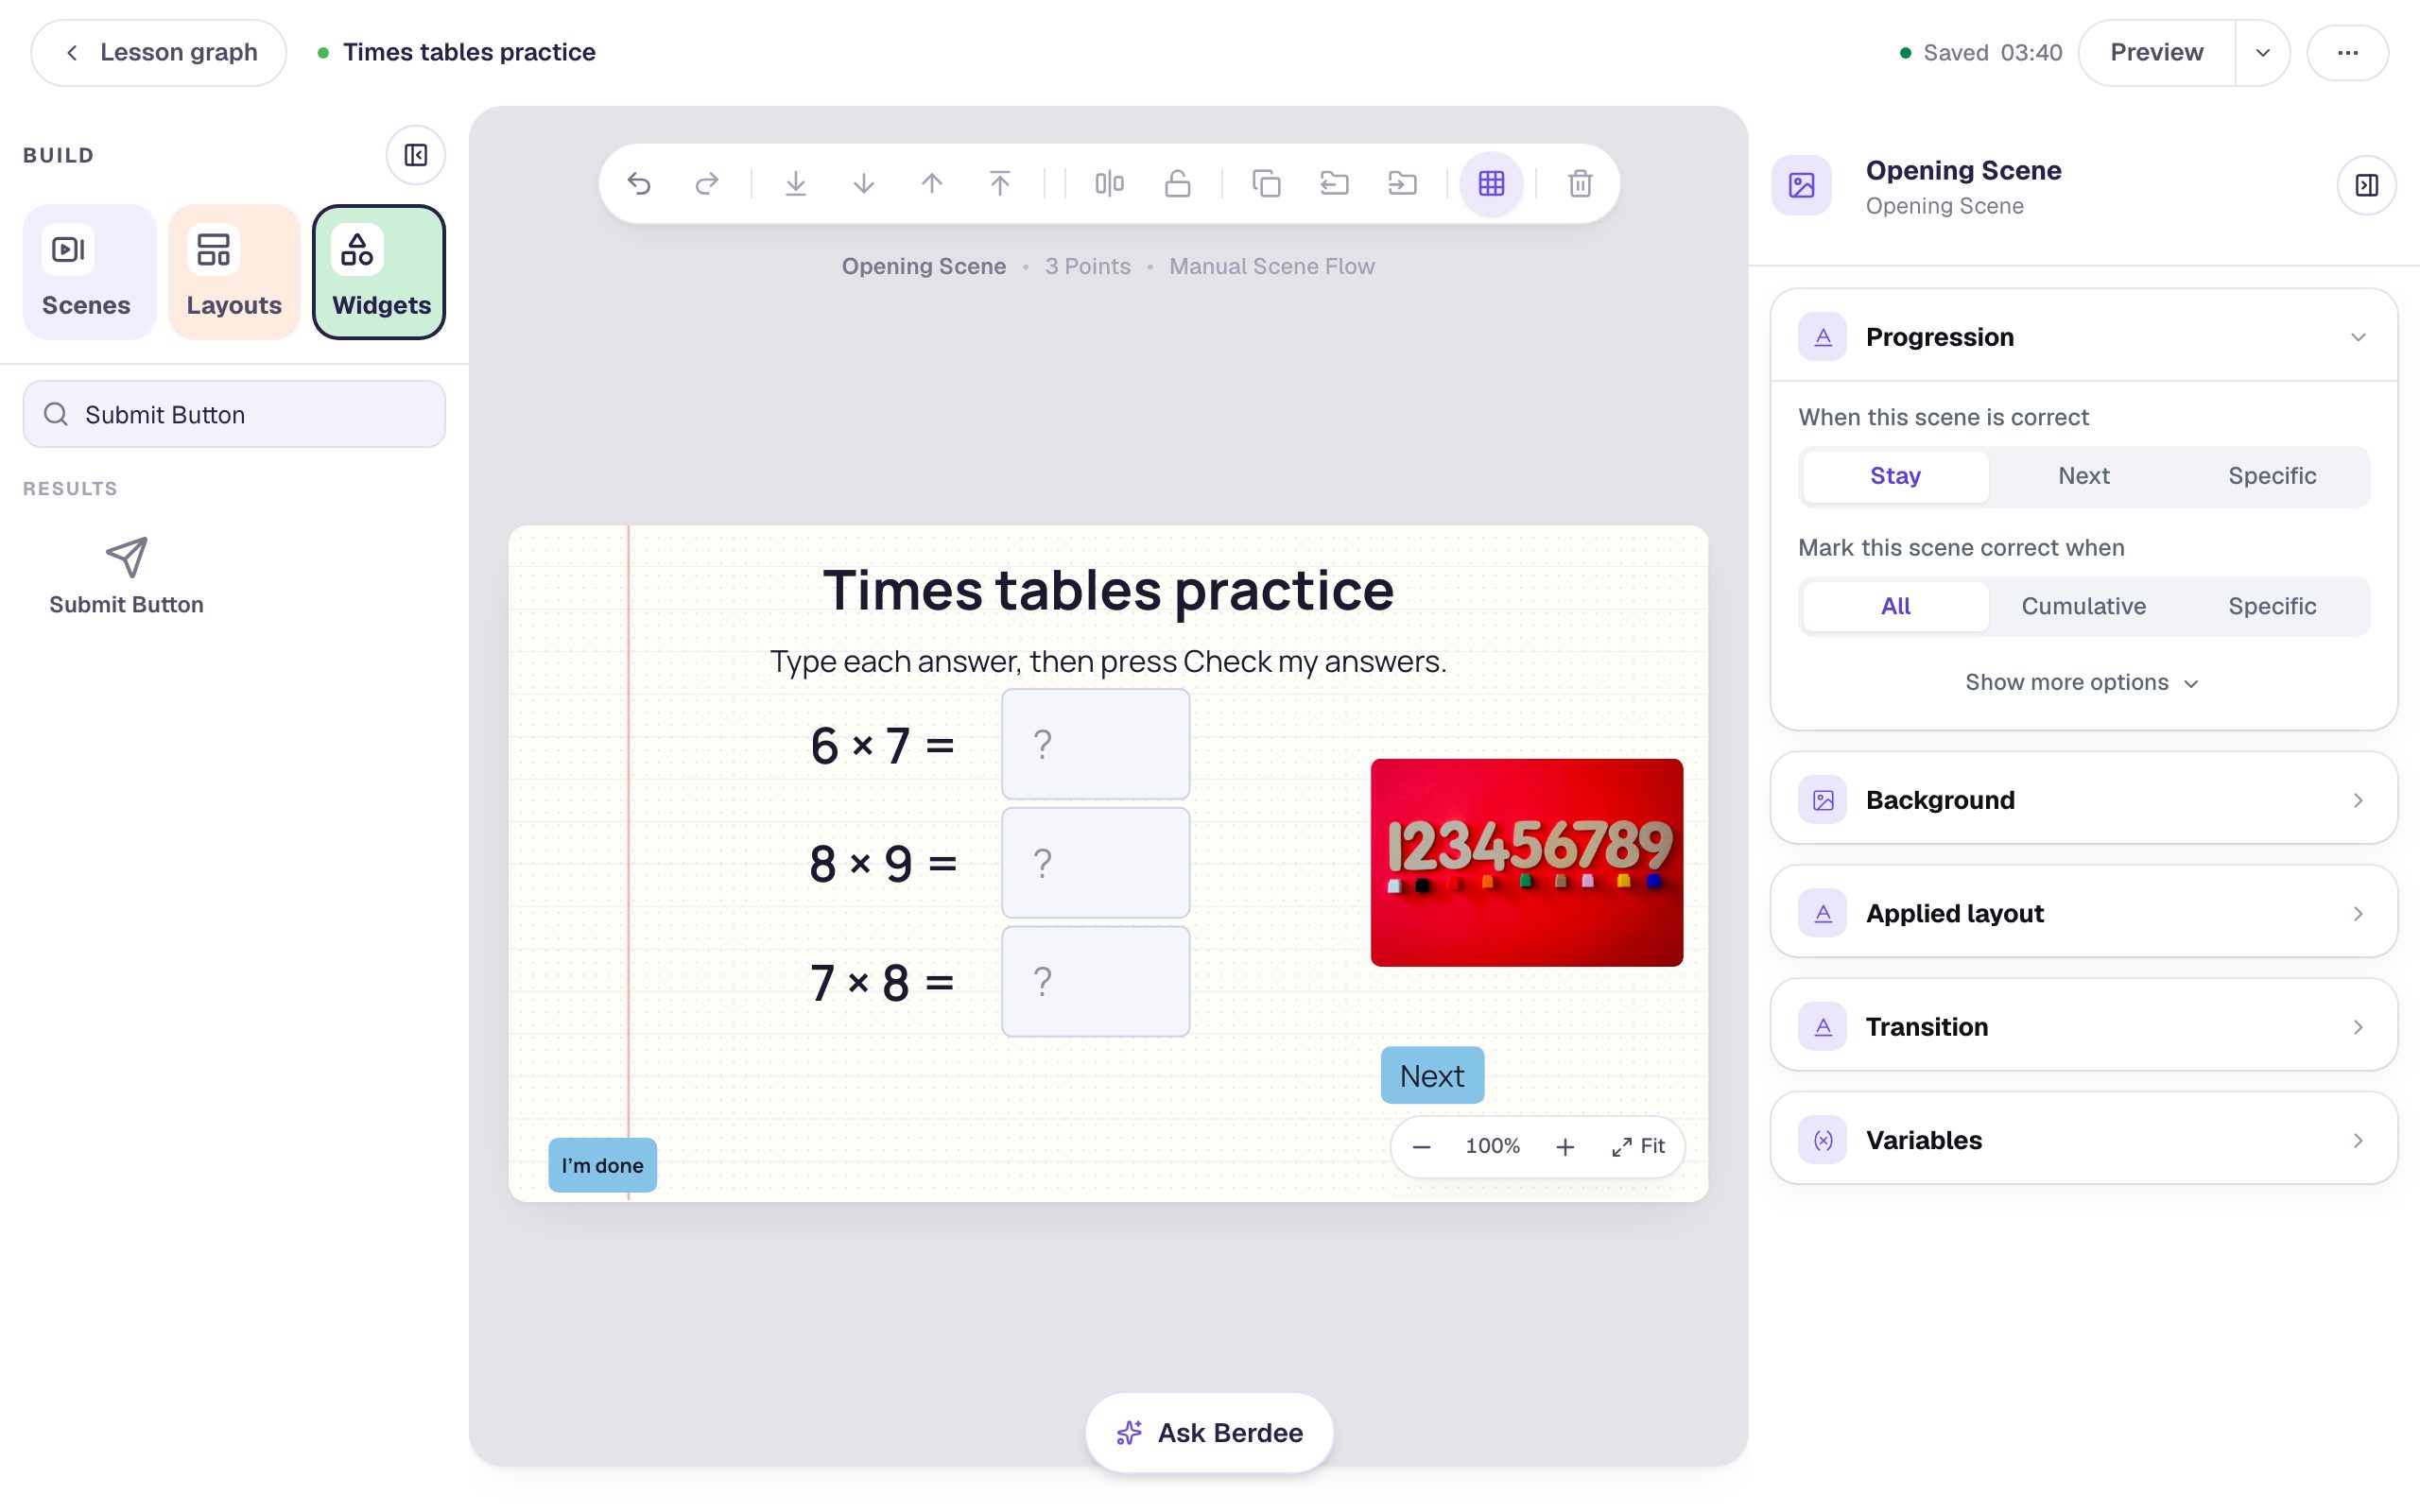
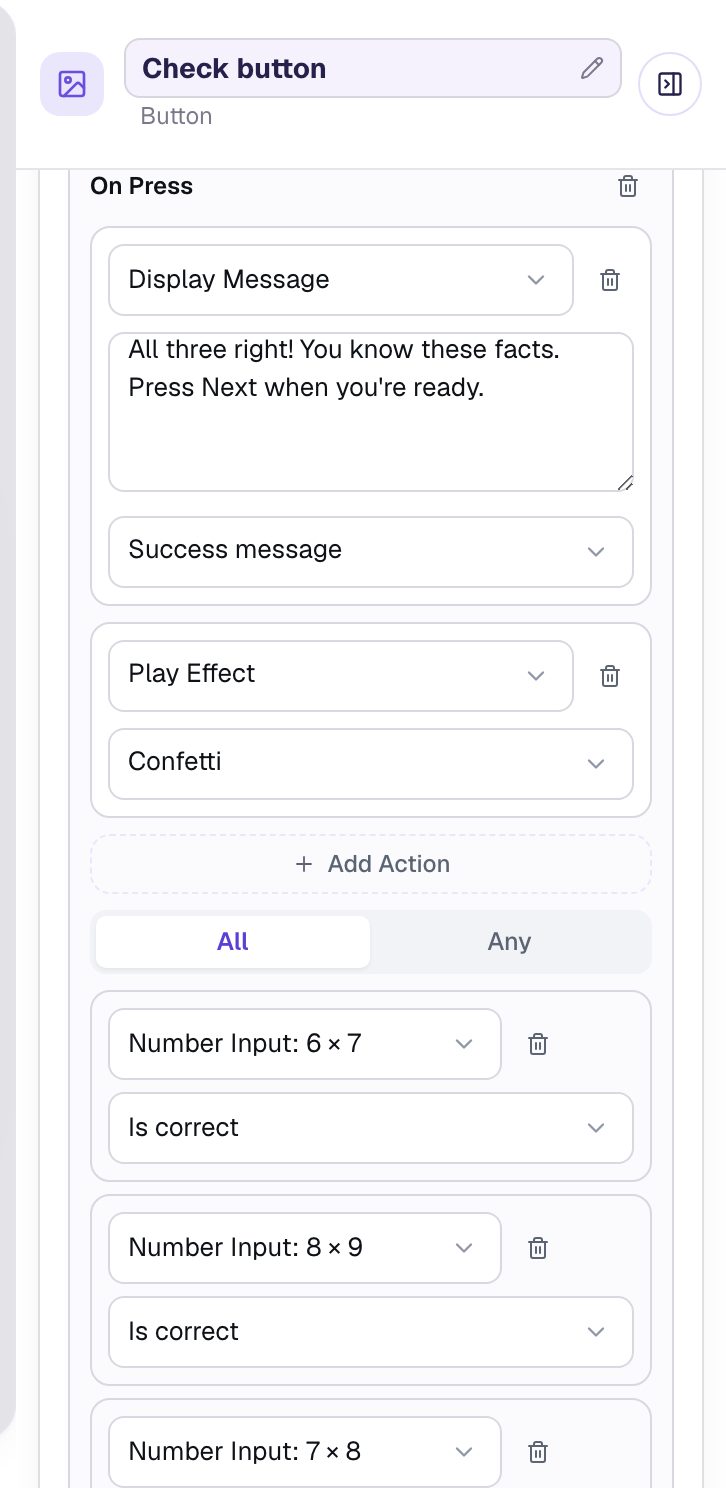
Step 5: Check my answers: when all three are right
Add another Button with the Label Check my answers, rename it Check button, give it a light green Background and a Font Size of 24, and drag it under the answer boxes.
Now teach it what to do when every answer is right:
- Open Behaviors, click Add Behavior, and choose On Press. A new behavior starts with a Display Message action.
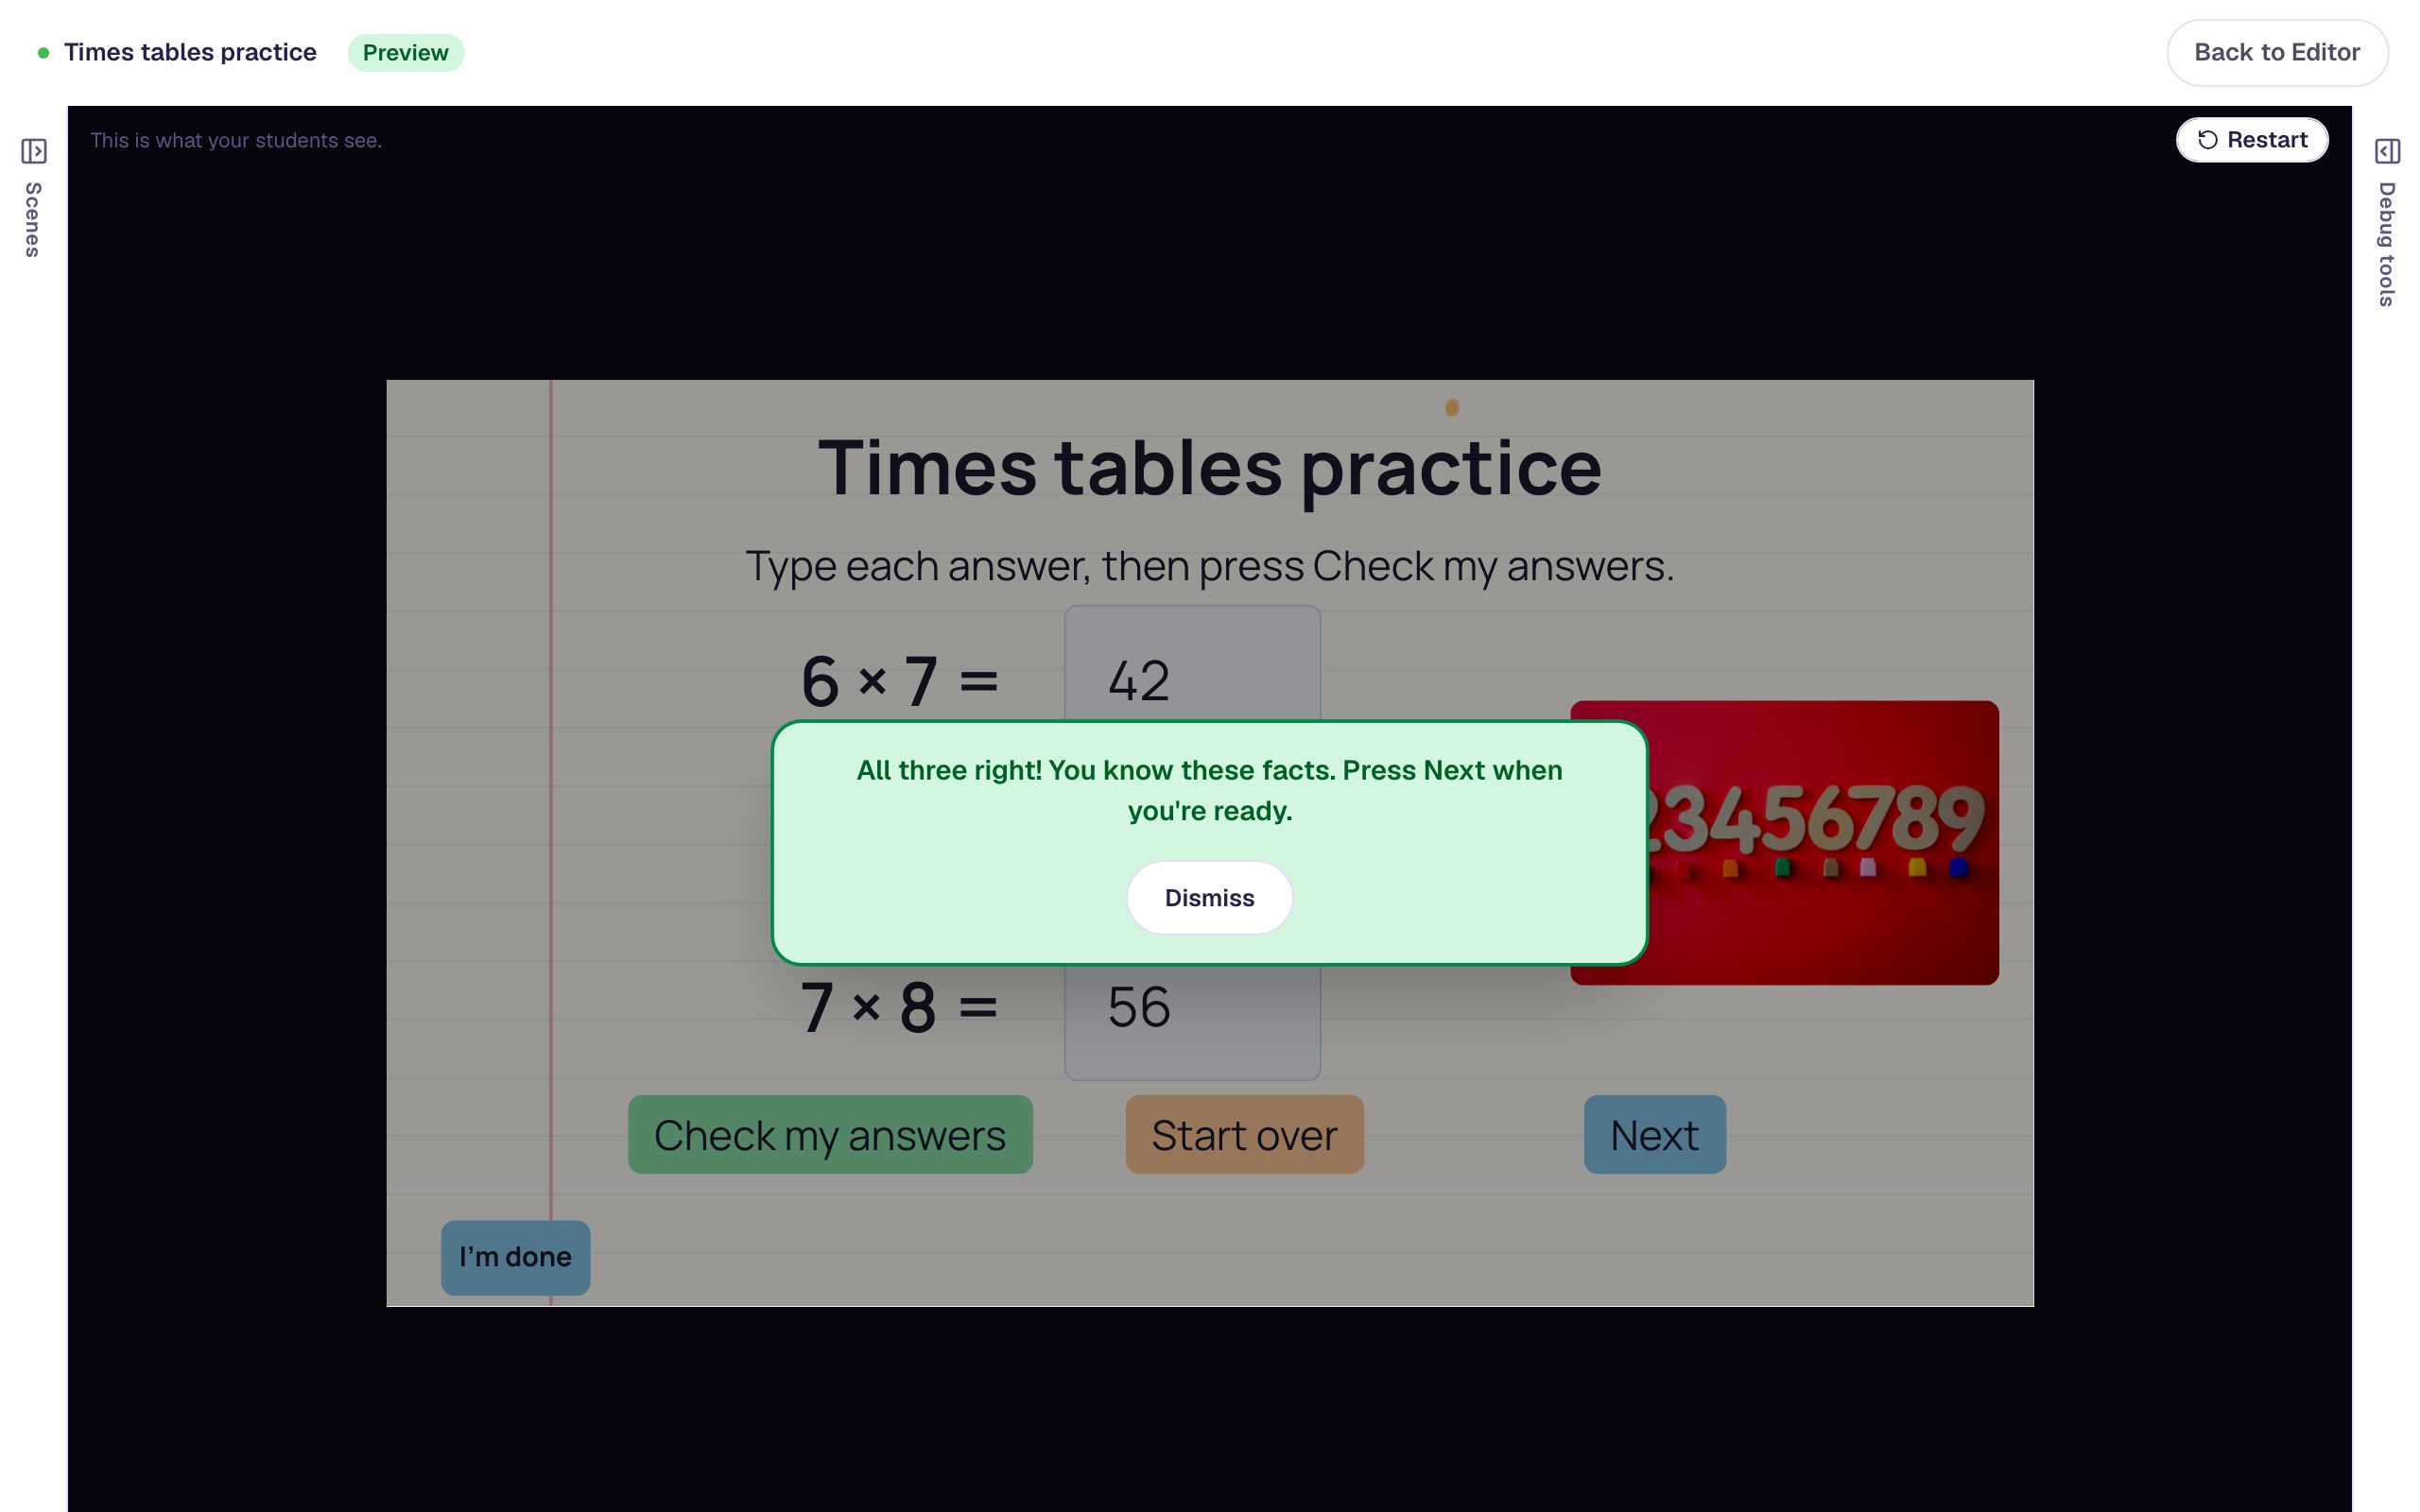
- Type the message:
All three right! You know these facts. Press Next when you're ready. - Change Normal message to Success message, so it shows in green.
- Click Add Action and change the new action from Log to Console to Play Effect. It starts on Confetti.
- Click Add Condition. A new condition points at the first widget in the lesson (Text: Heading 1), so in the first list pick Number Input: 6 × 7. The second list then says Current value; change it to Is correct. Left on Current value, the check would pass only when the box holds
0. - Click Add Condition twice more, for Number Input: 8 × 9 and Number Input: 7 × 8, both Is correct.
Leave the switch above the conditions on All: this behavior runs only when every condition is true.
Step 6: Check my answers: when any is wrong
A button can have more than one On Press behavior, each with its own condition. Every press checks them all, so the second one covers the other case.
- Click Add Behavior again and choose On Press. It's listed as On Press 2.
- Type the message:
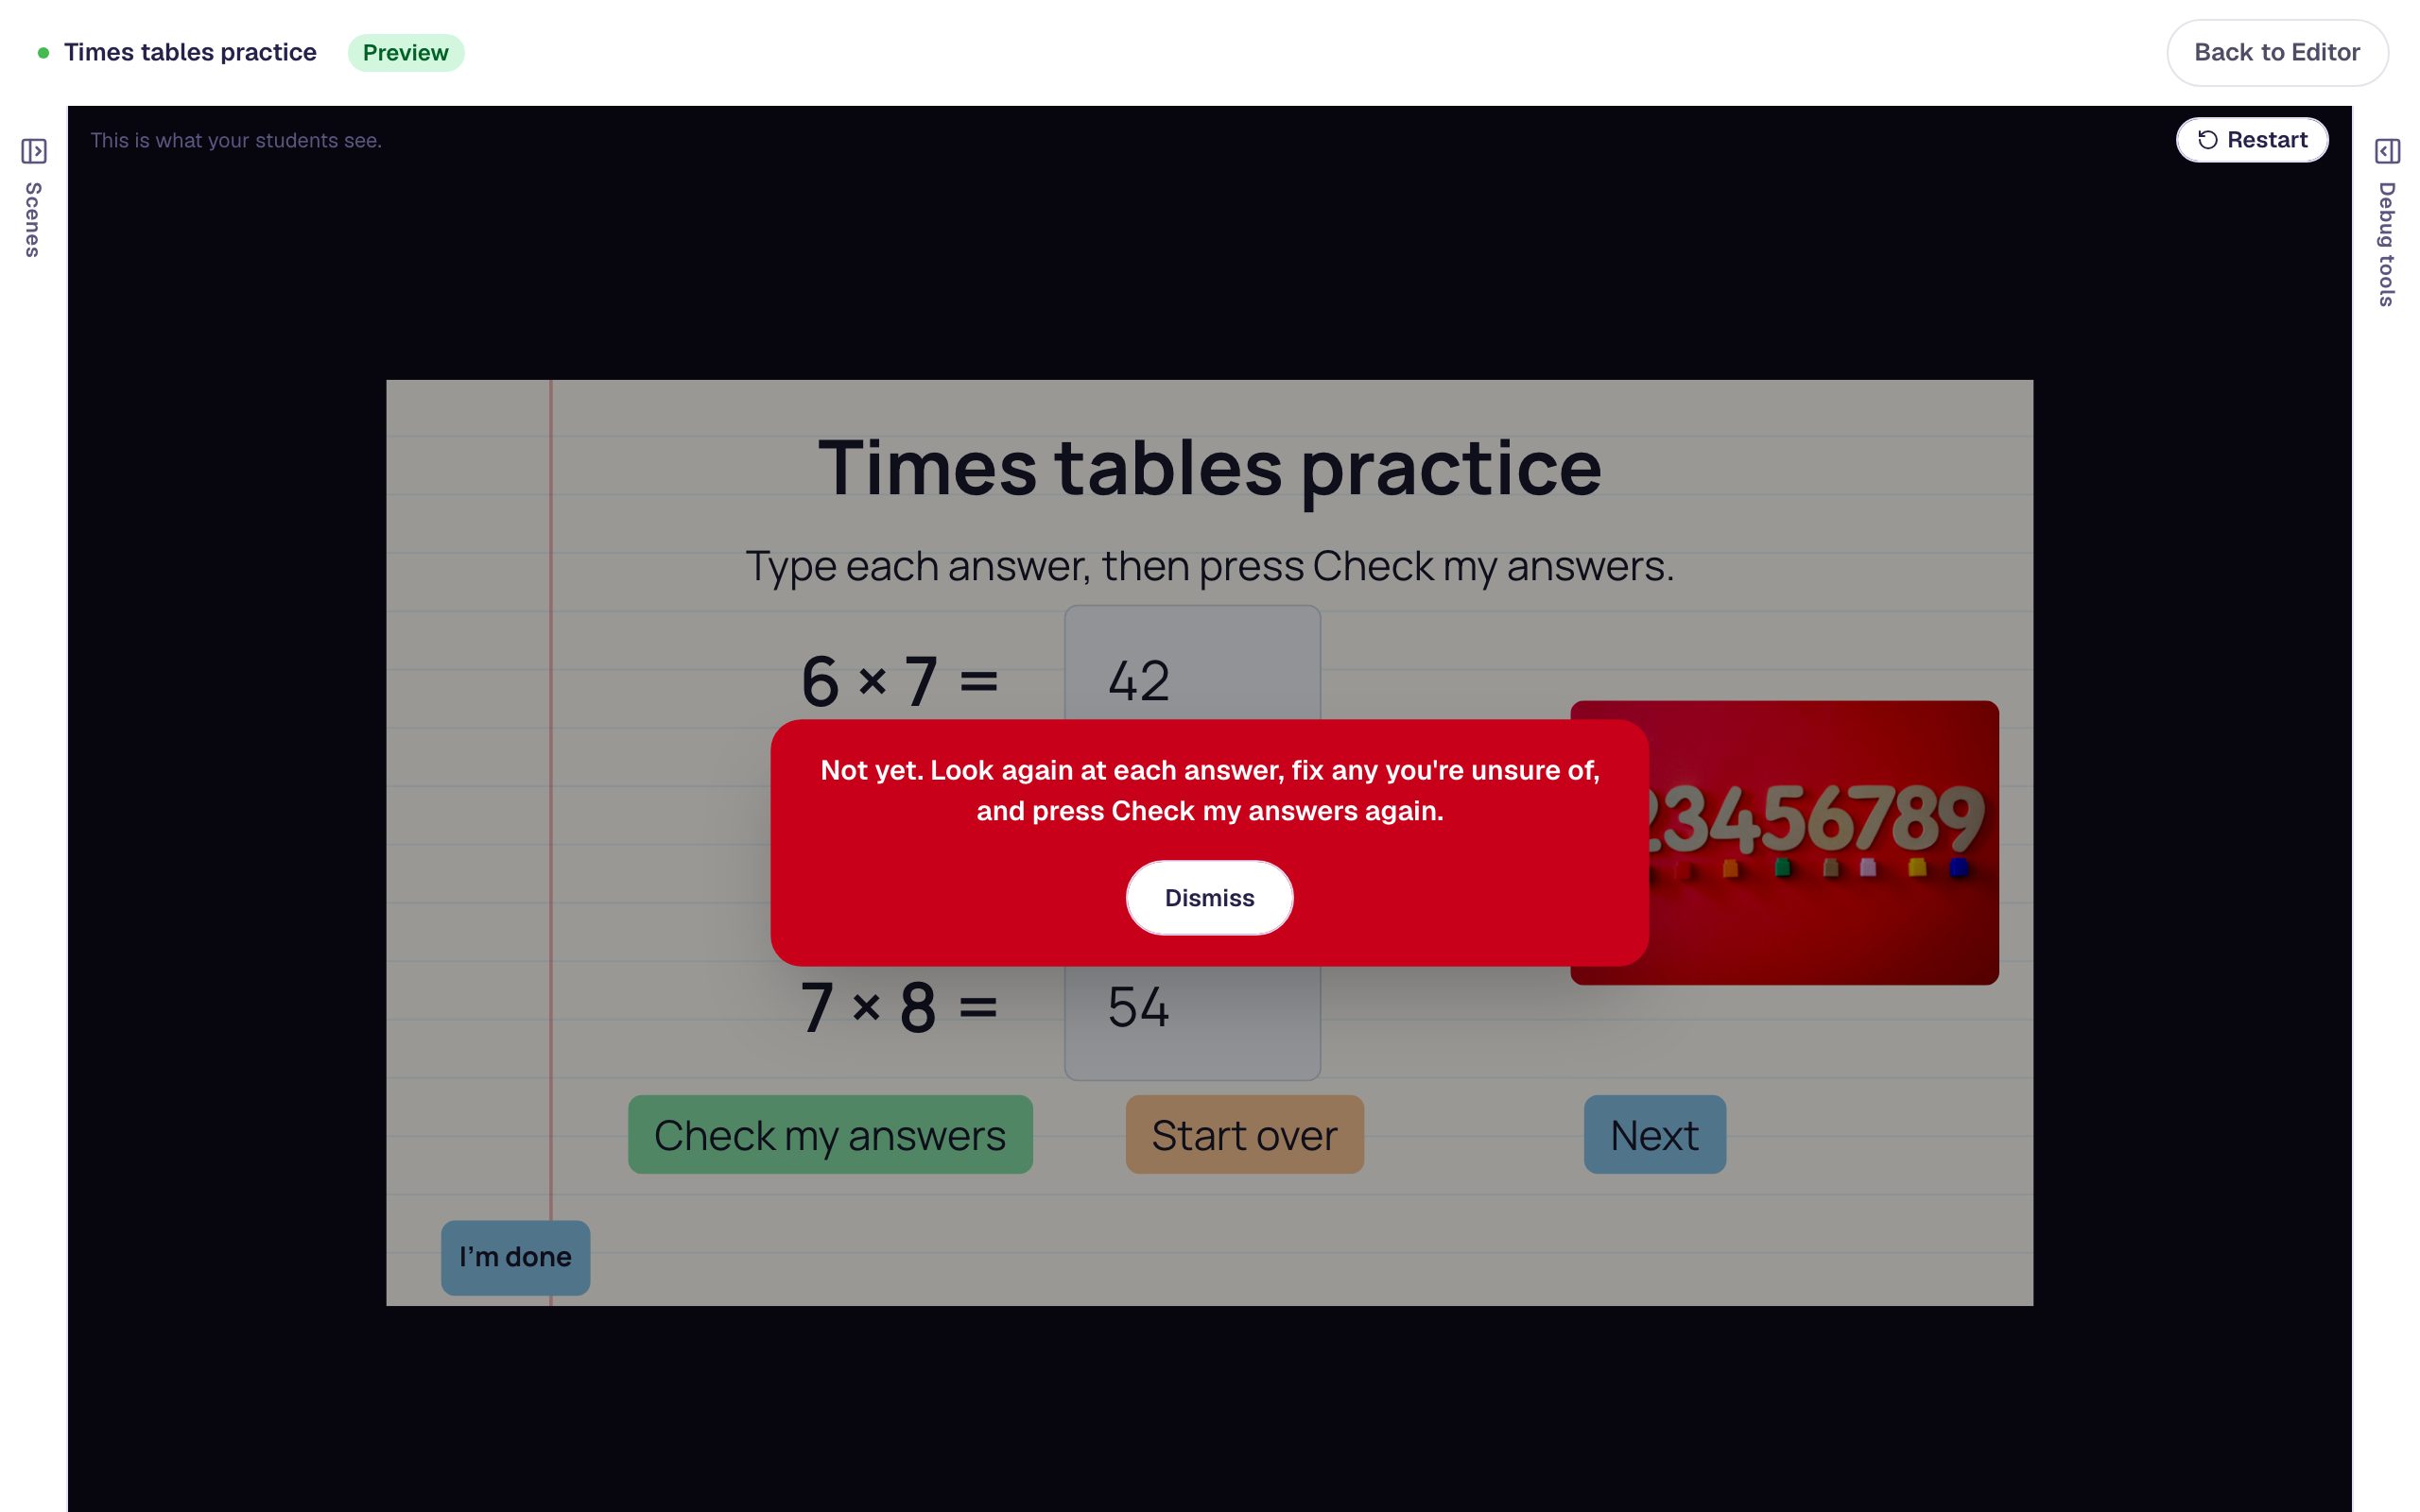
Not yet. Look again at each answer, fix any you're unsure of, and press Check my answers again.Choose Failure message, so it shows in red. - Click Add Condition and switch All to Any.
- Add three conditions, Number Input: 6 × 7, 8 × 9 and 7 × 8, each Is incorrect.
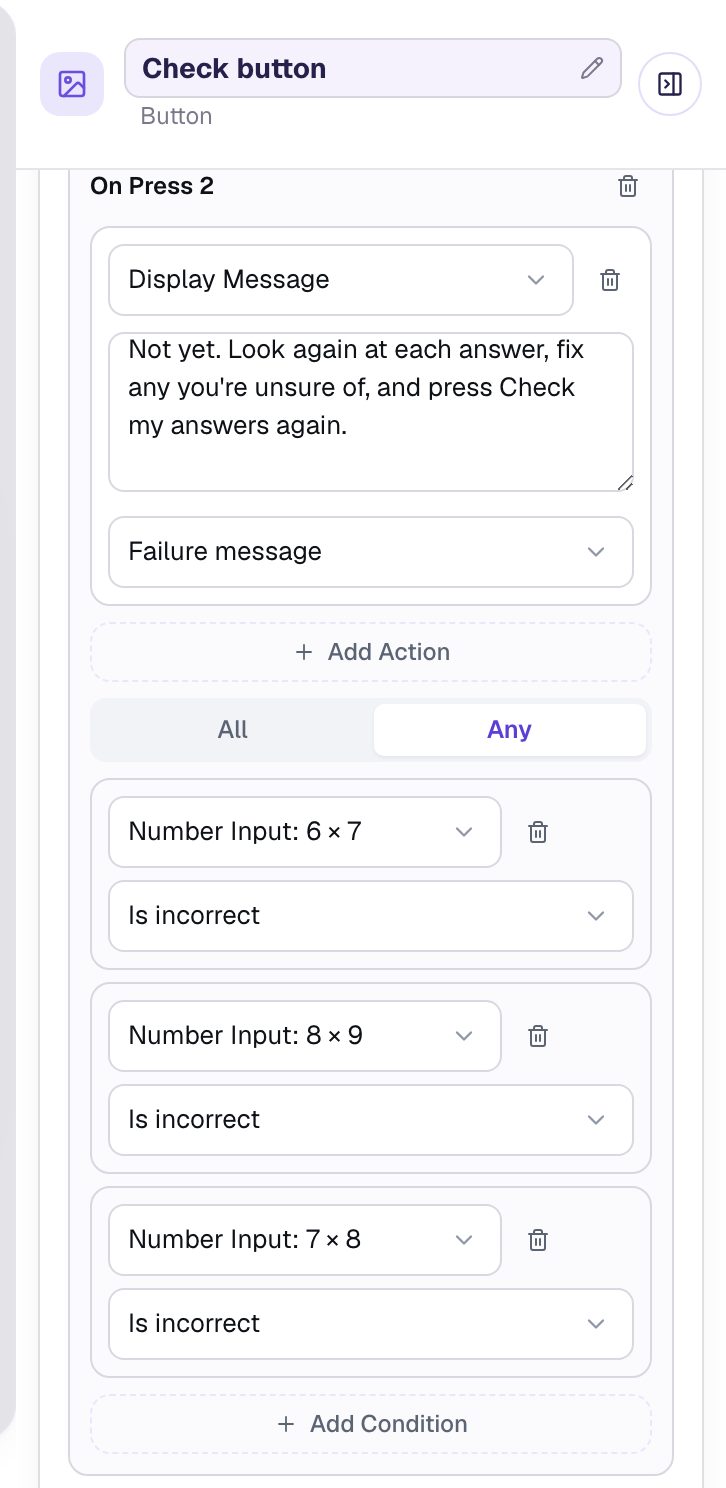
All and Any are opposites here, so exactly one of the two behaviors runs on each press. An empty box counts as incorrect, so a student who presses the button too early gets "Not yet" too.
Notice that neither behavior says _which_ answer is wrong. For practice, that's often what you want: students look over all three again instead of changing just the one they're told about.
Step 7: Start over
Add one more Button with the Label Start over, rename it Start over button, give it a light orange Background and a Font Size of 24, and drag it between Check my answers and Next.
- Open Behaviors, click Add Behavior, and choose On Press.
- Change Display Message to Reset Answers. It starts on Current scene, which clears every answer on this scene and nothing else in the lesson.
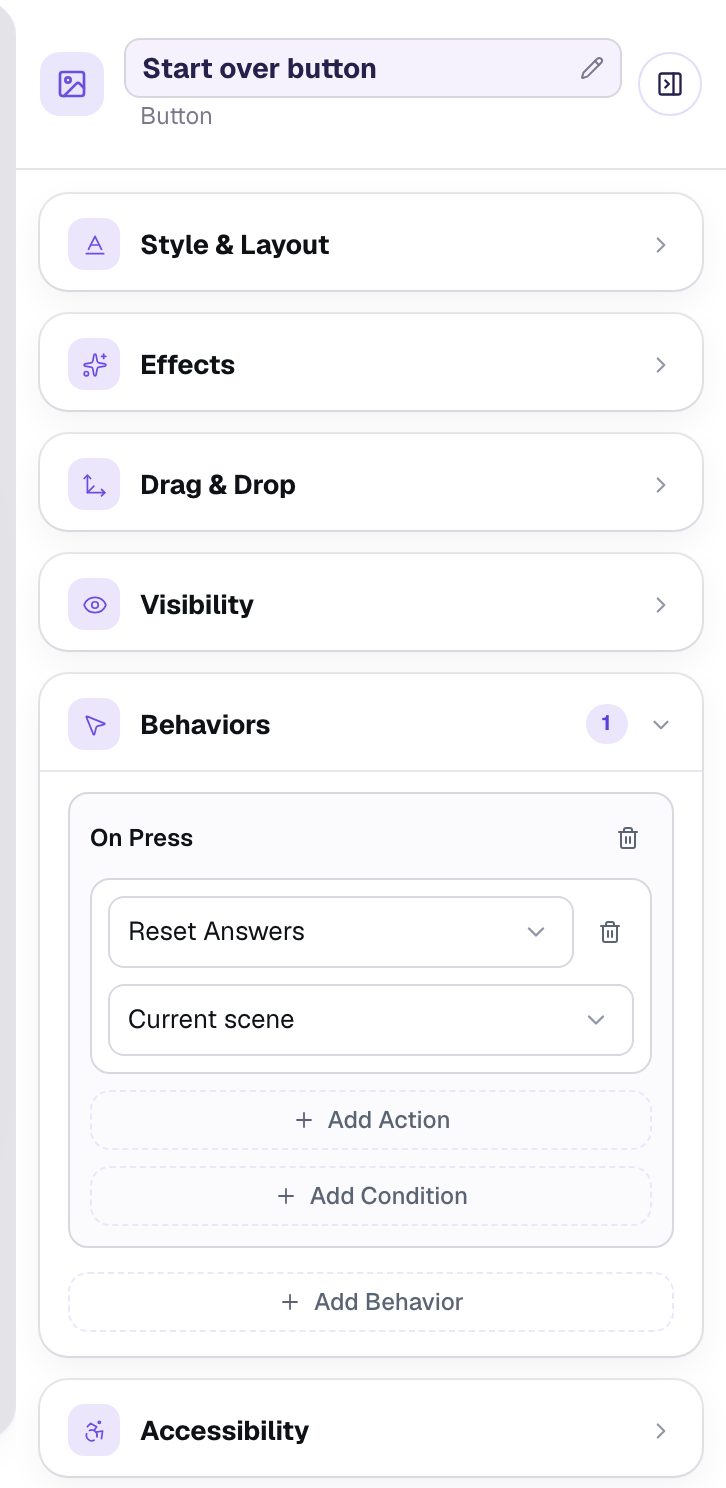
Reset Answers clears the boxes on screen _and_ the answers Berdee has recorded, so what students see always matches what counts. It can't clear an answer a Submit button has already graded, because submitted answers are locked. That's why this practice sheet checks answers with conditions instead of a Submit button.
Step 8: Practice as a student
Click Preview. Type 42, 72 and 54 (the last one is a slip) and press Check my answers.
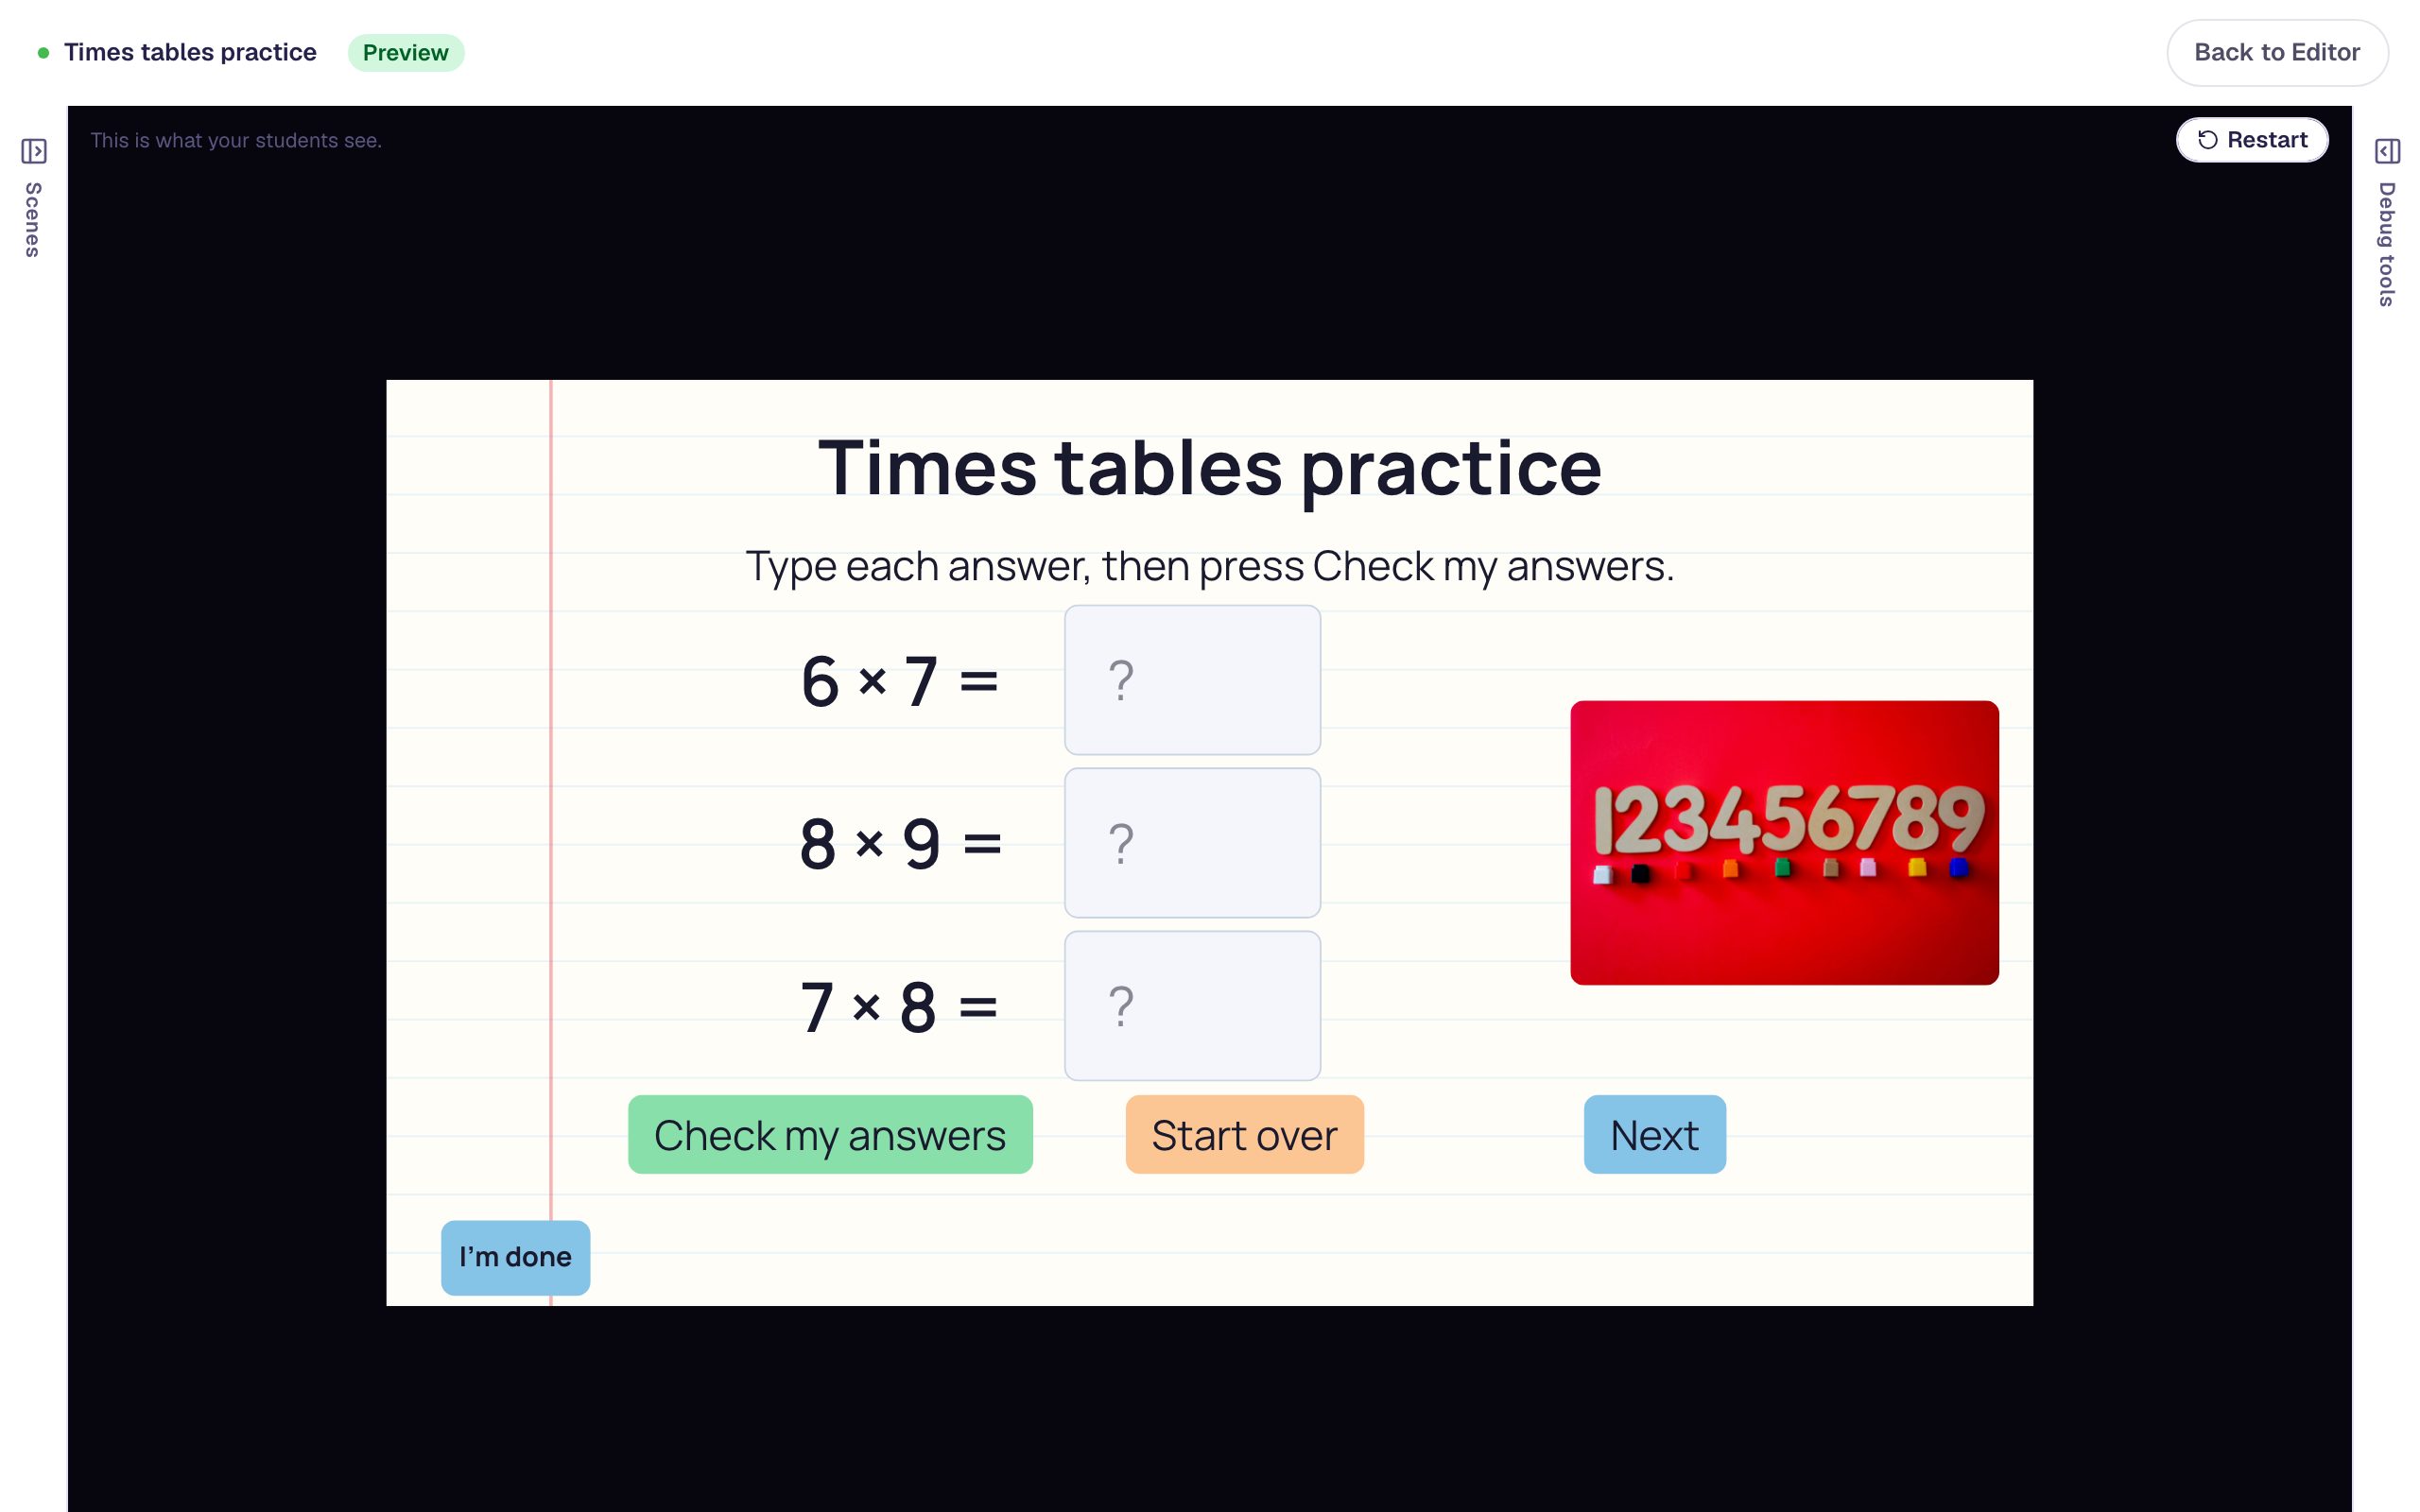
Press Dismiss, then Start over. All three boxes empty at once. Type all three again, this time 56 for the last one, and press Check my answers.
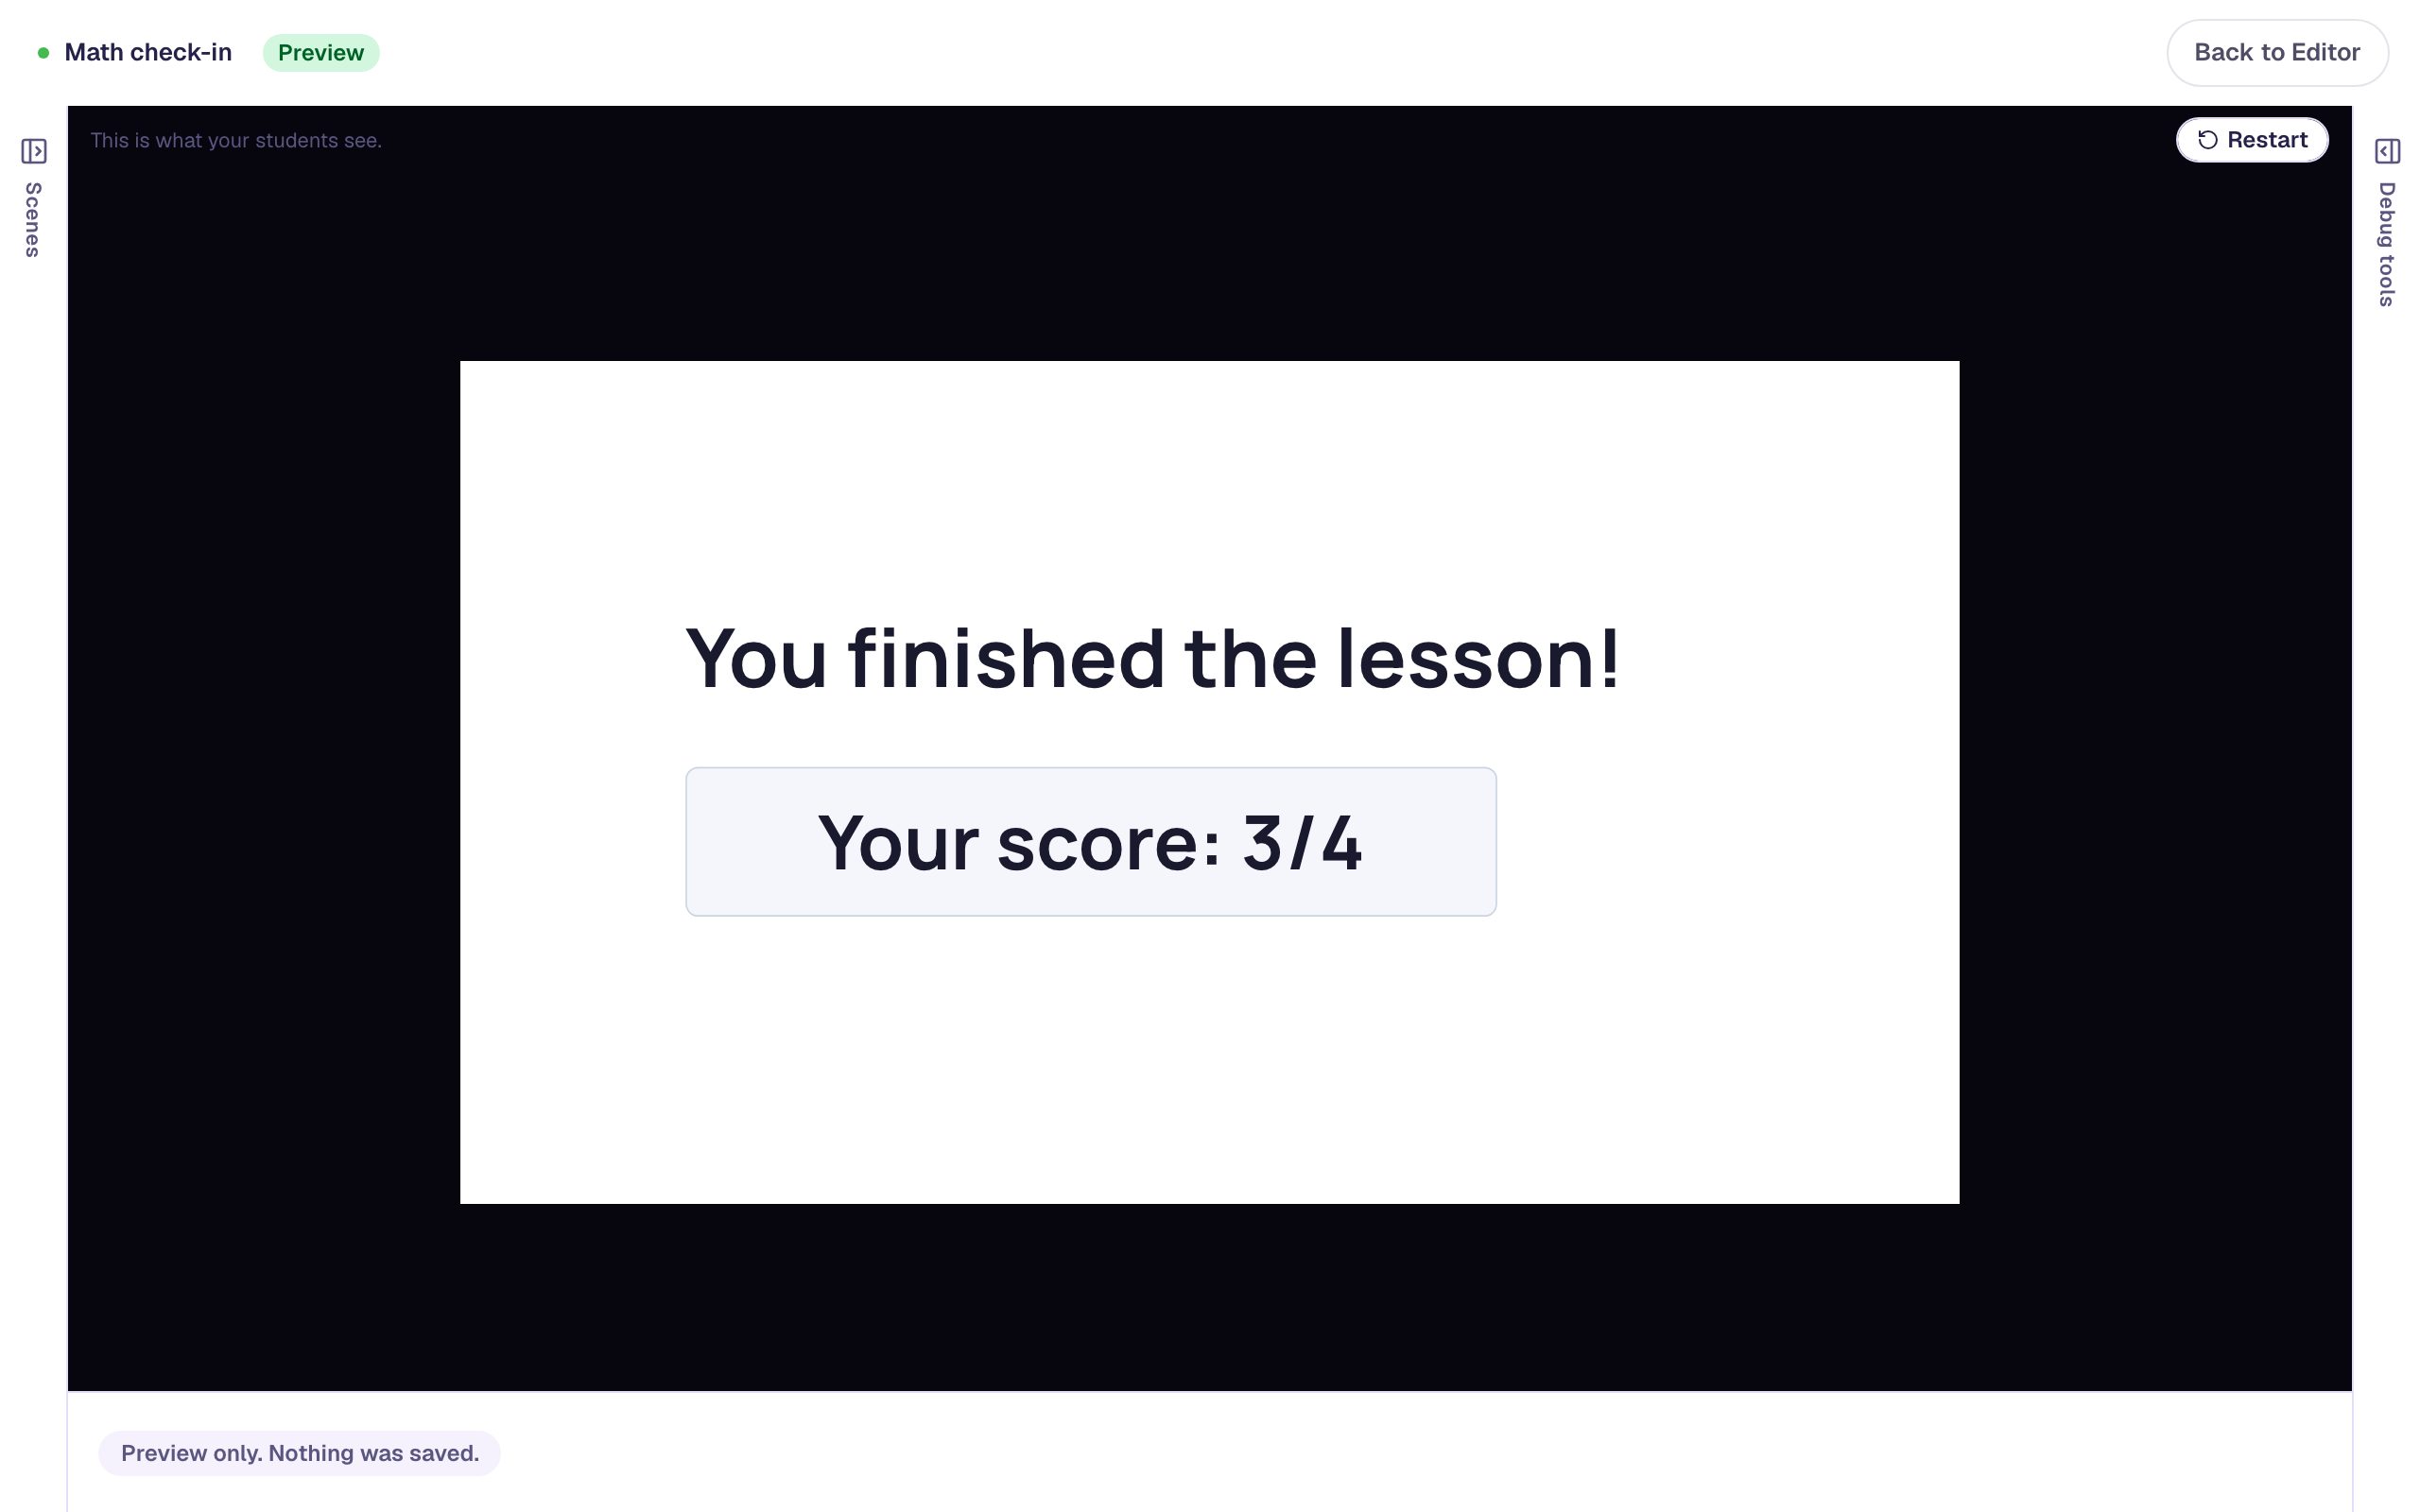
Press Dismiss, then Next. The ending shows the score from the answers the student left on the sheet: here, 3/3.
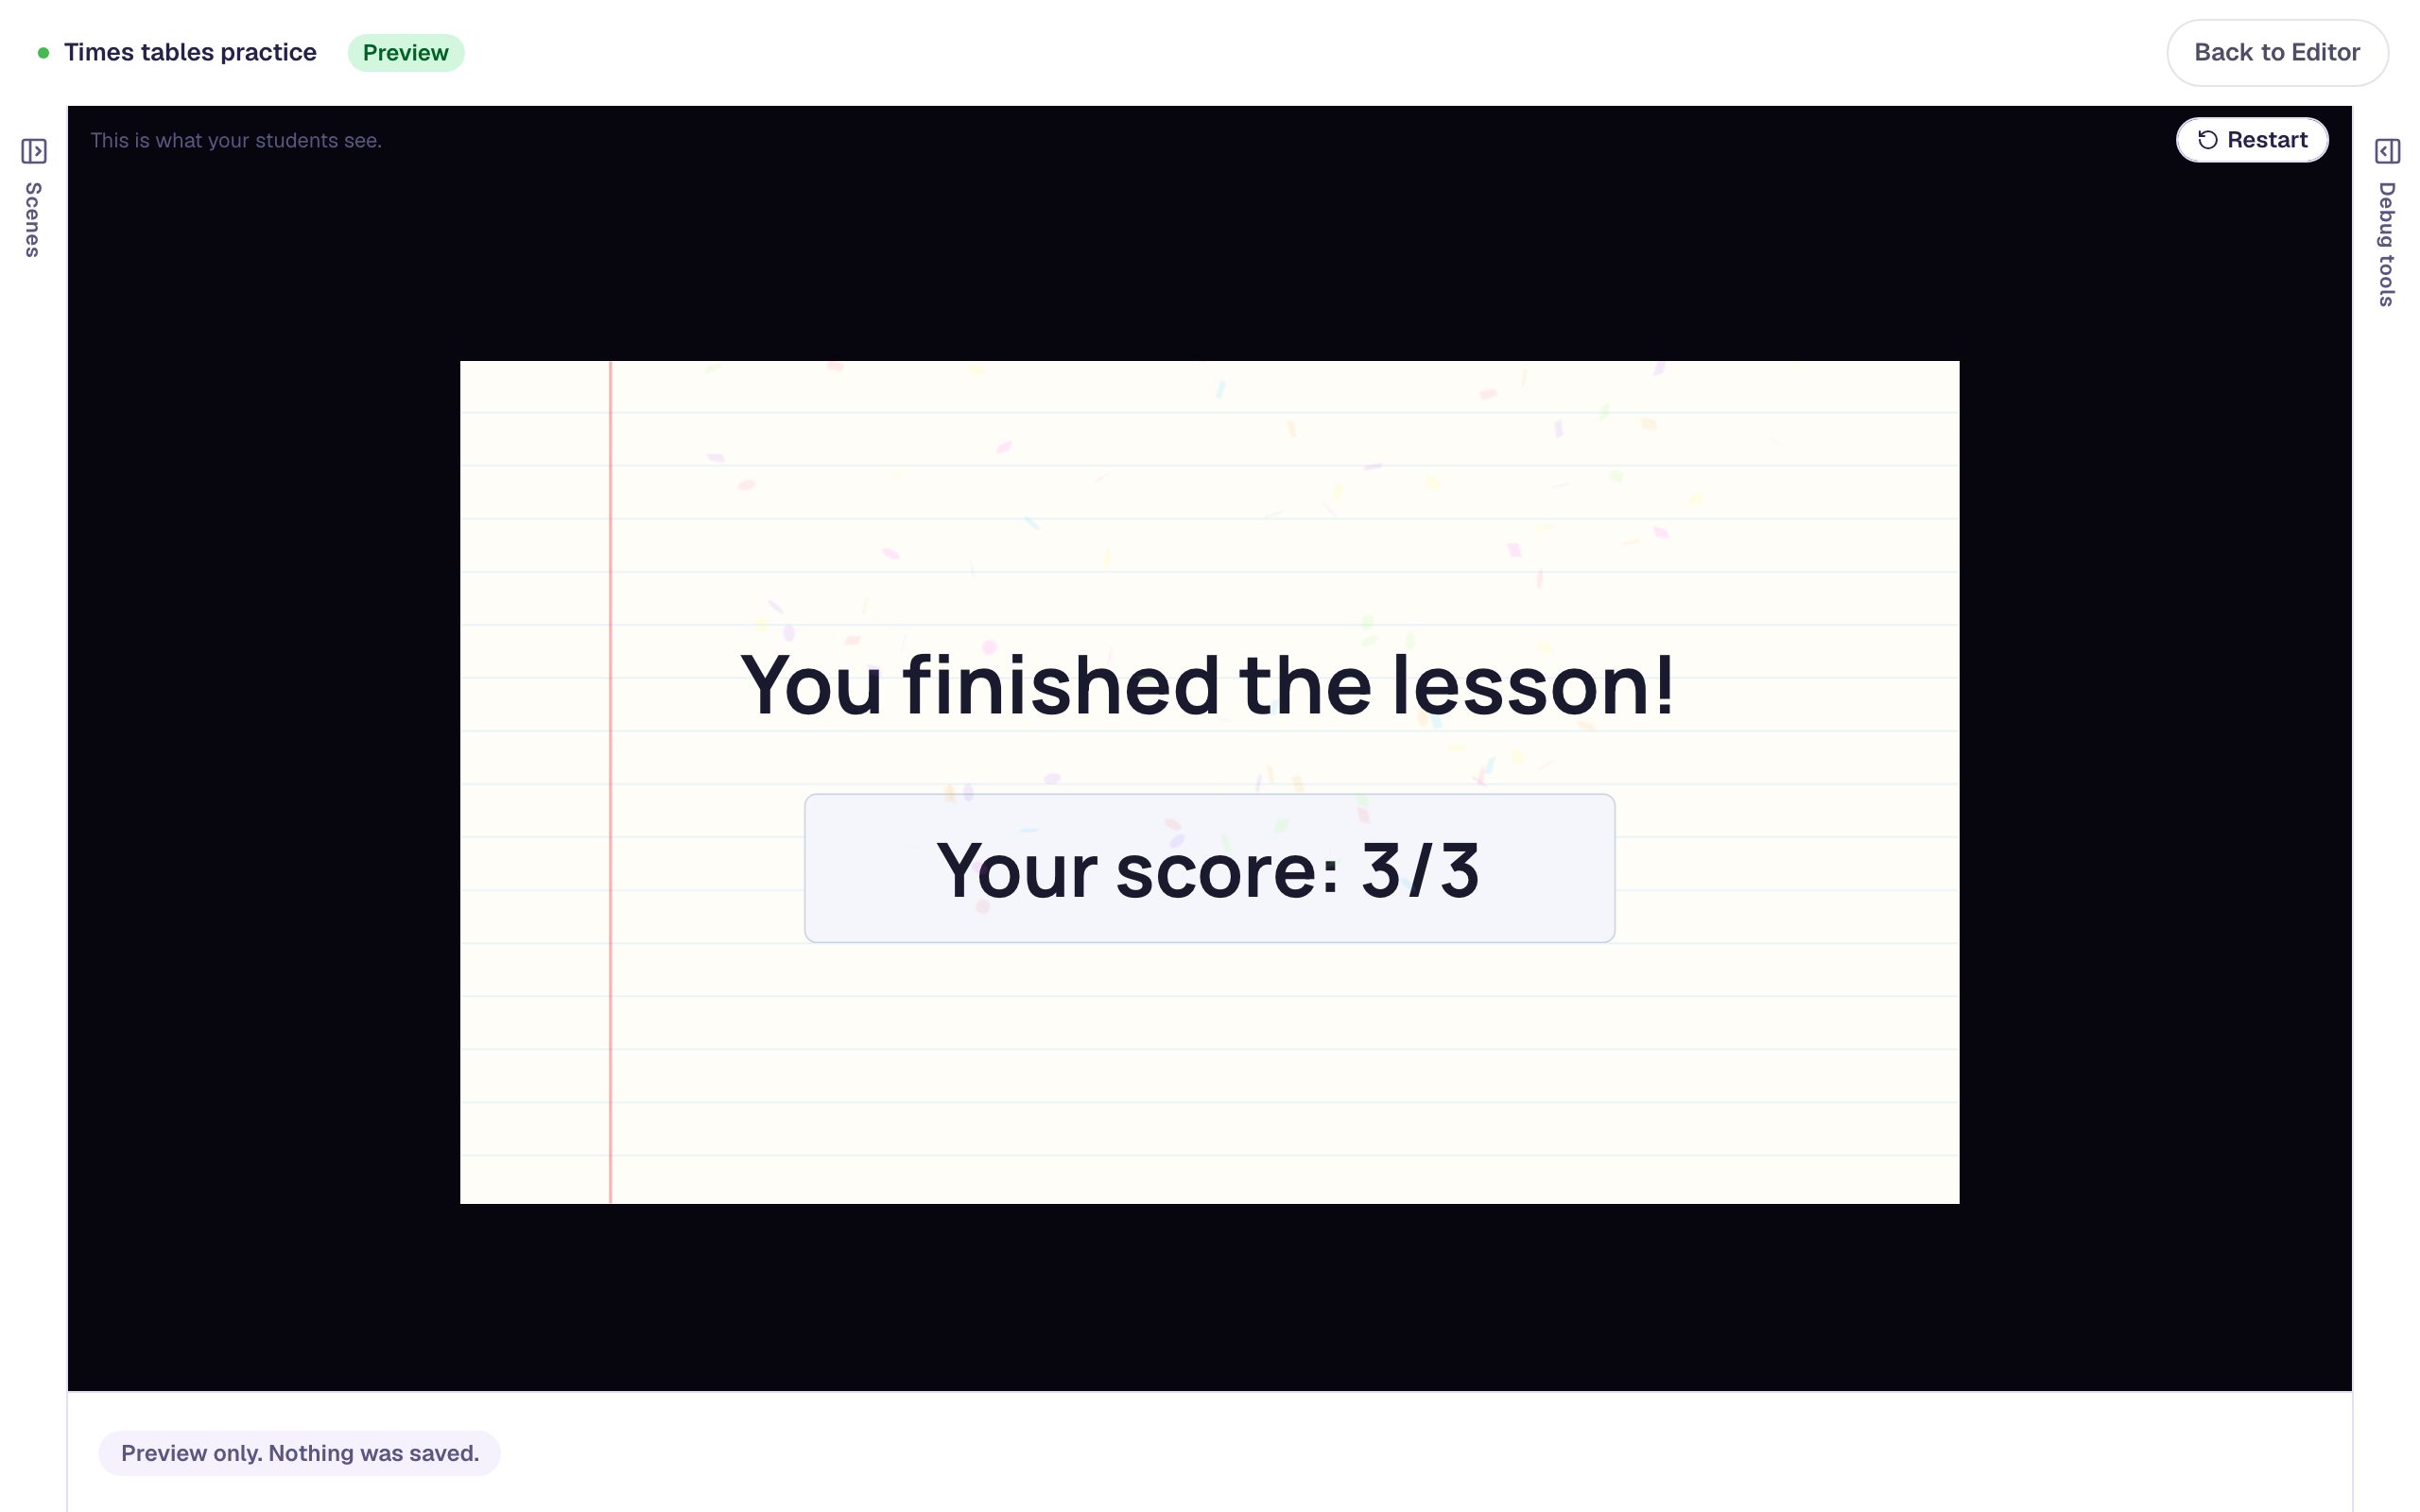
The score counts whatever is in the boxes when the student leaves the scene. A student who presses Start over and then Next without answering again gets 0 for those facts, just like skipping them. Use Restart at the top right of Preview to try it again from the start.
What you built
A practice sheet students can check and redo as often as they like:
- three Number Input answer boxes, with the scene on Stay so it waits for the student,
- a Check my answers button with two On Press behaviors: a success message and confetti when All three are Is correct, and a "not yet" message when Any is Is incorrect, and
- a Start over button whose Reset Answers action clears every answer on the scene.
The same pair works with any question type that can be right or wrong: a sorting list, a matching game, a set of dropdowns. Keep Submit for when answers should count for real, and use Check and Start over for practice. To offer a hint only after a student has struggled, see Show a hint after two wrong tries. To send students down different paths depending on how they did, see Send students down different paths by their score.
Make this lesson yours
Add the lesson you just watched being built to your account, then change it for your class: your questions, your pictures, your colors.
Free to sign up, and you'll come straight back here. I have an account