Turn a picture into a play button for a listening question
Make a "Who's making that sound?" question where students press a big speaker picture to hear a mystery animal. Give the Audio player your own picture for its play button, and a second one that shows while the sound plays.
- Level
- Beginner
- Time
- About 10 min
- Steps
- 8
- Updated
- Oct 11, 2026
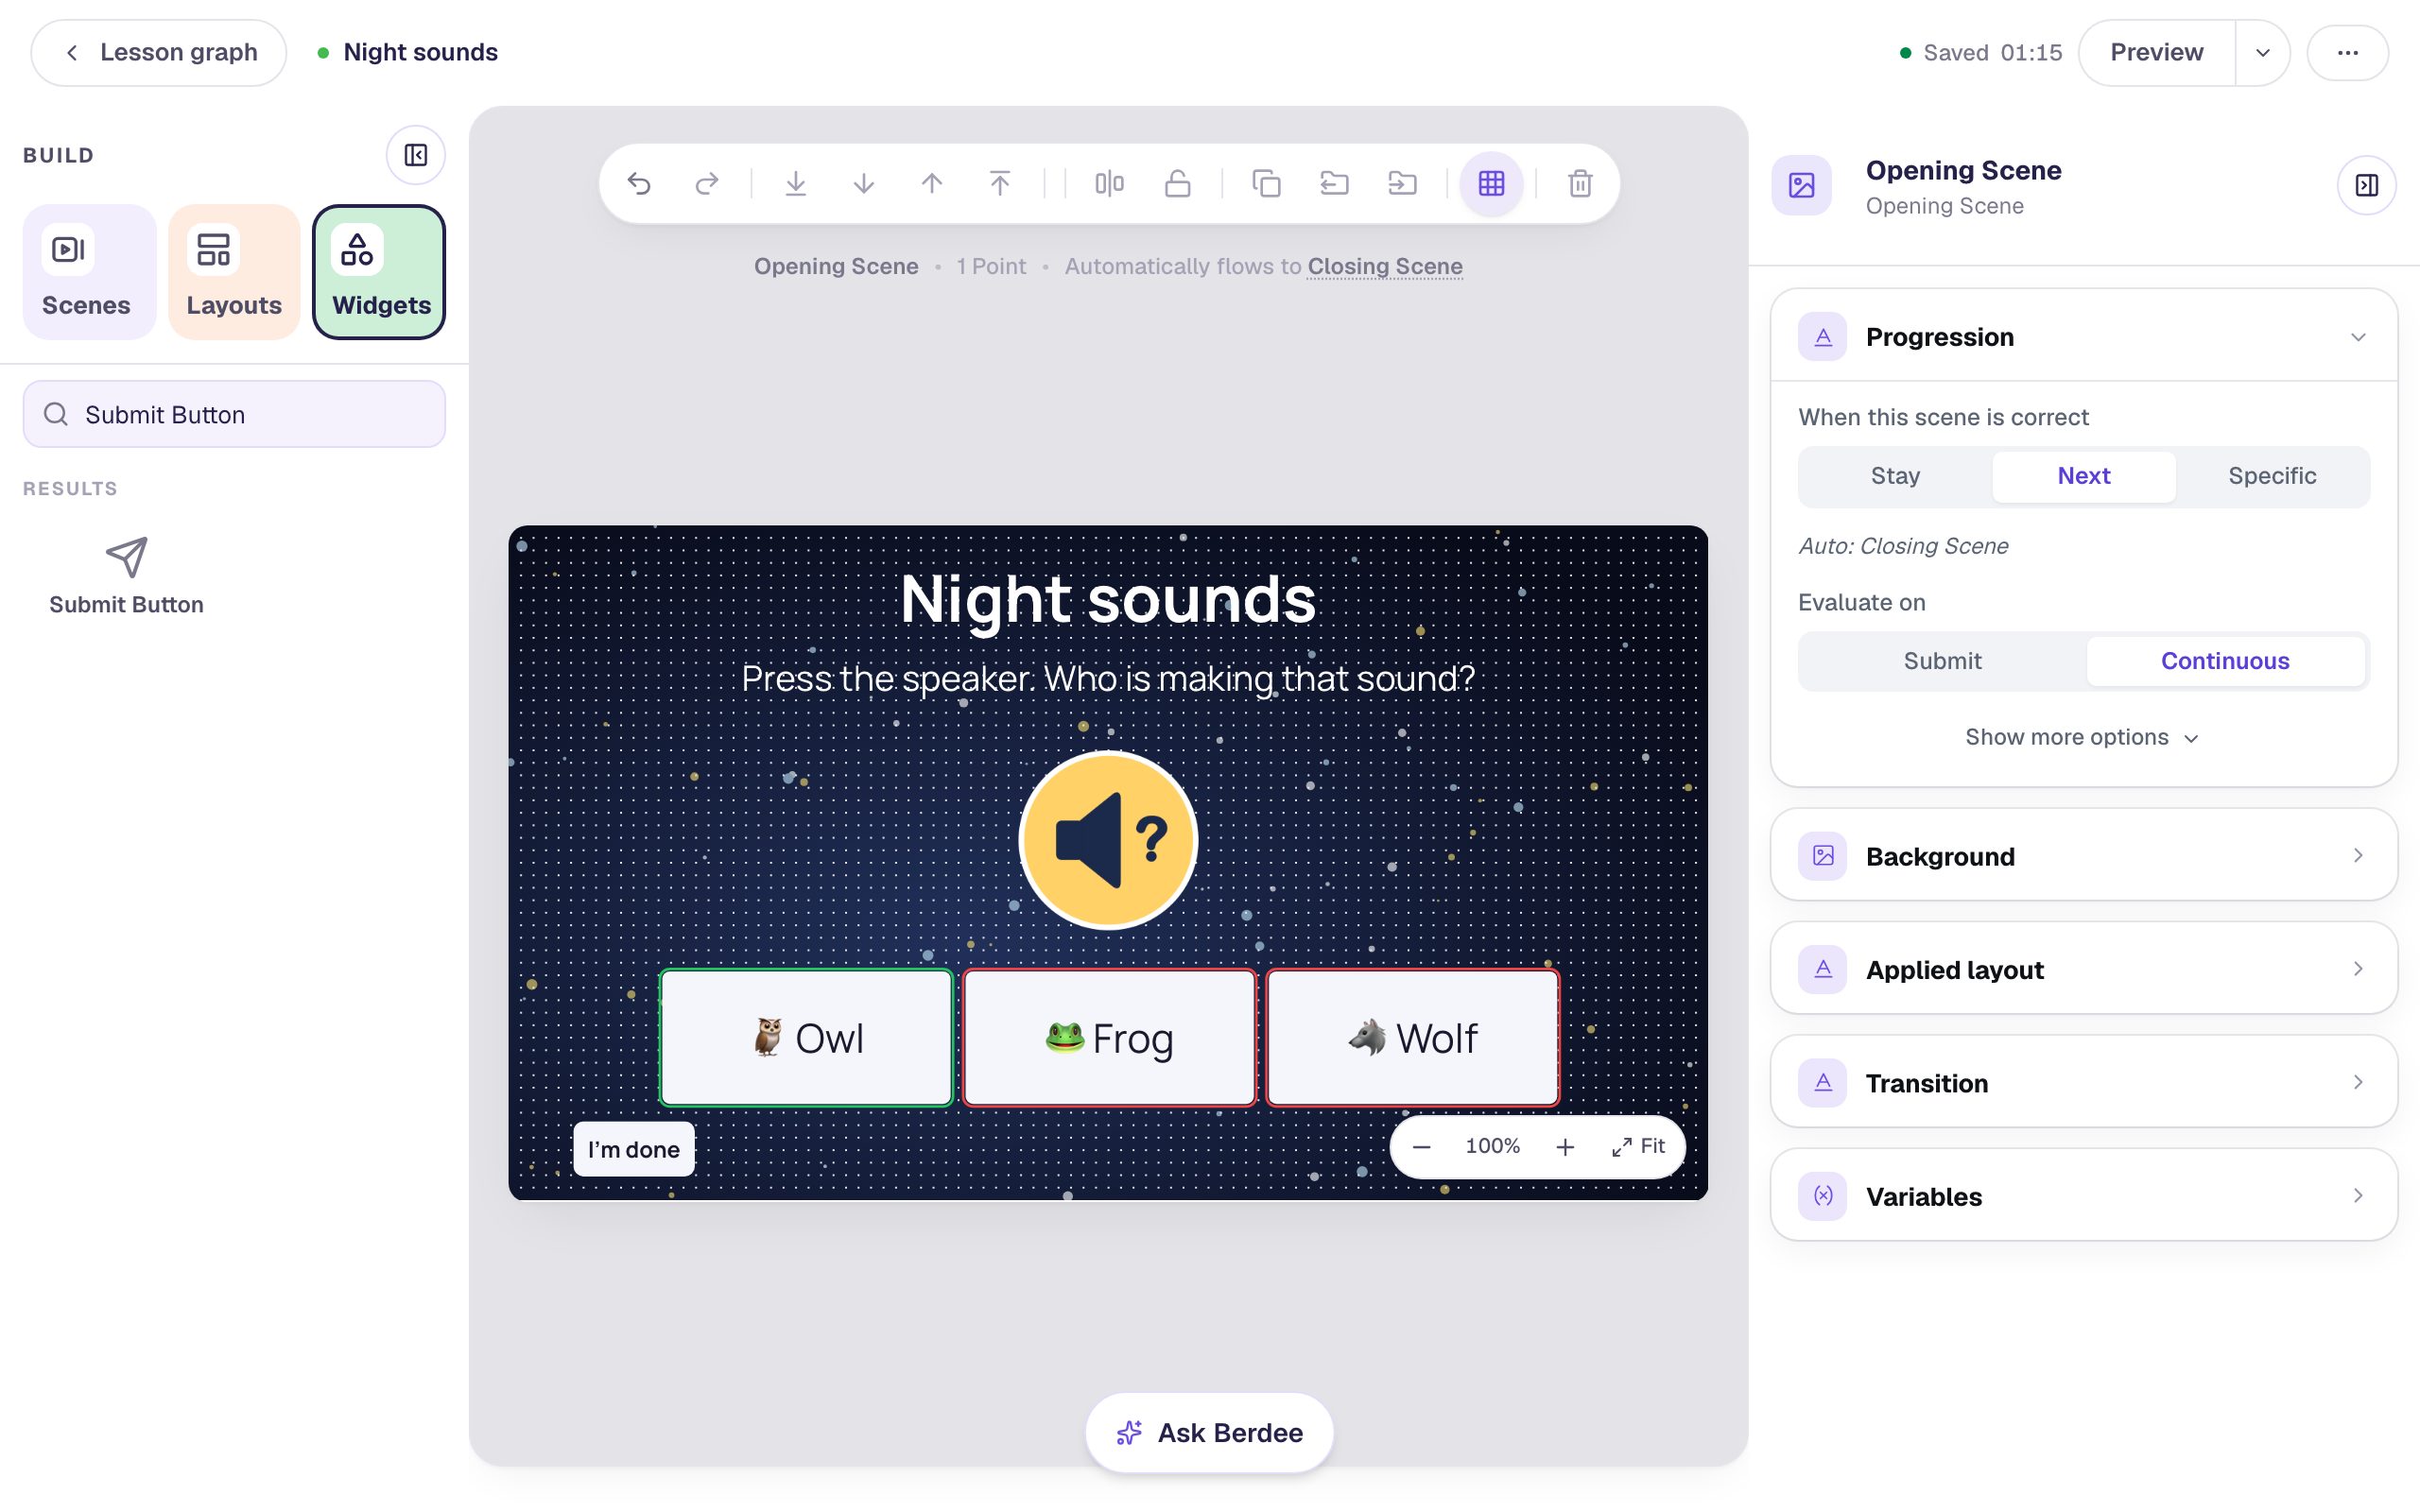
A night-sky listening question with a big speaker picture that plays an owl's hoot, changes while the sound plays, and three answers to choose from.
Get the finished lesson
Skip straight to the result, or keep it open beside the steps. Add this tutorial's lesson to your account and explore how it works in the studio.
Free to sign up, and you'll come straight back here. I have an account
A small round play button is easy to miss, especially for young students on a tablet. In a listening activity the sound is the question, so the button deserves to be the biggest, friendliest thing on the scene.
In this tutorial you'll build one listening question:
Press the speaker. Who is making that sound?
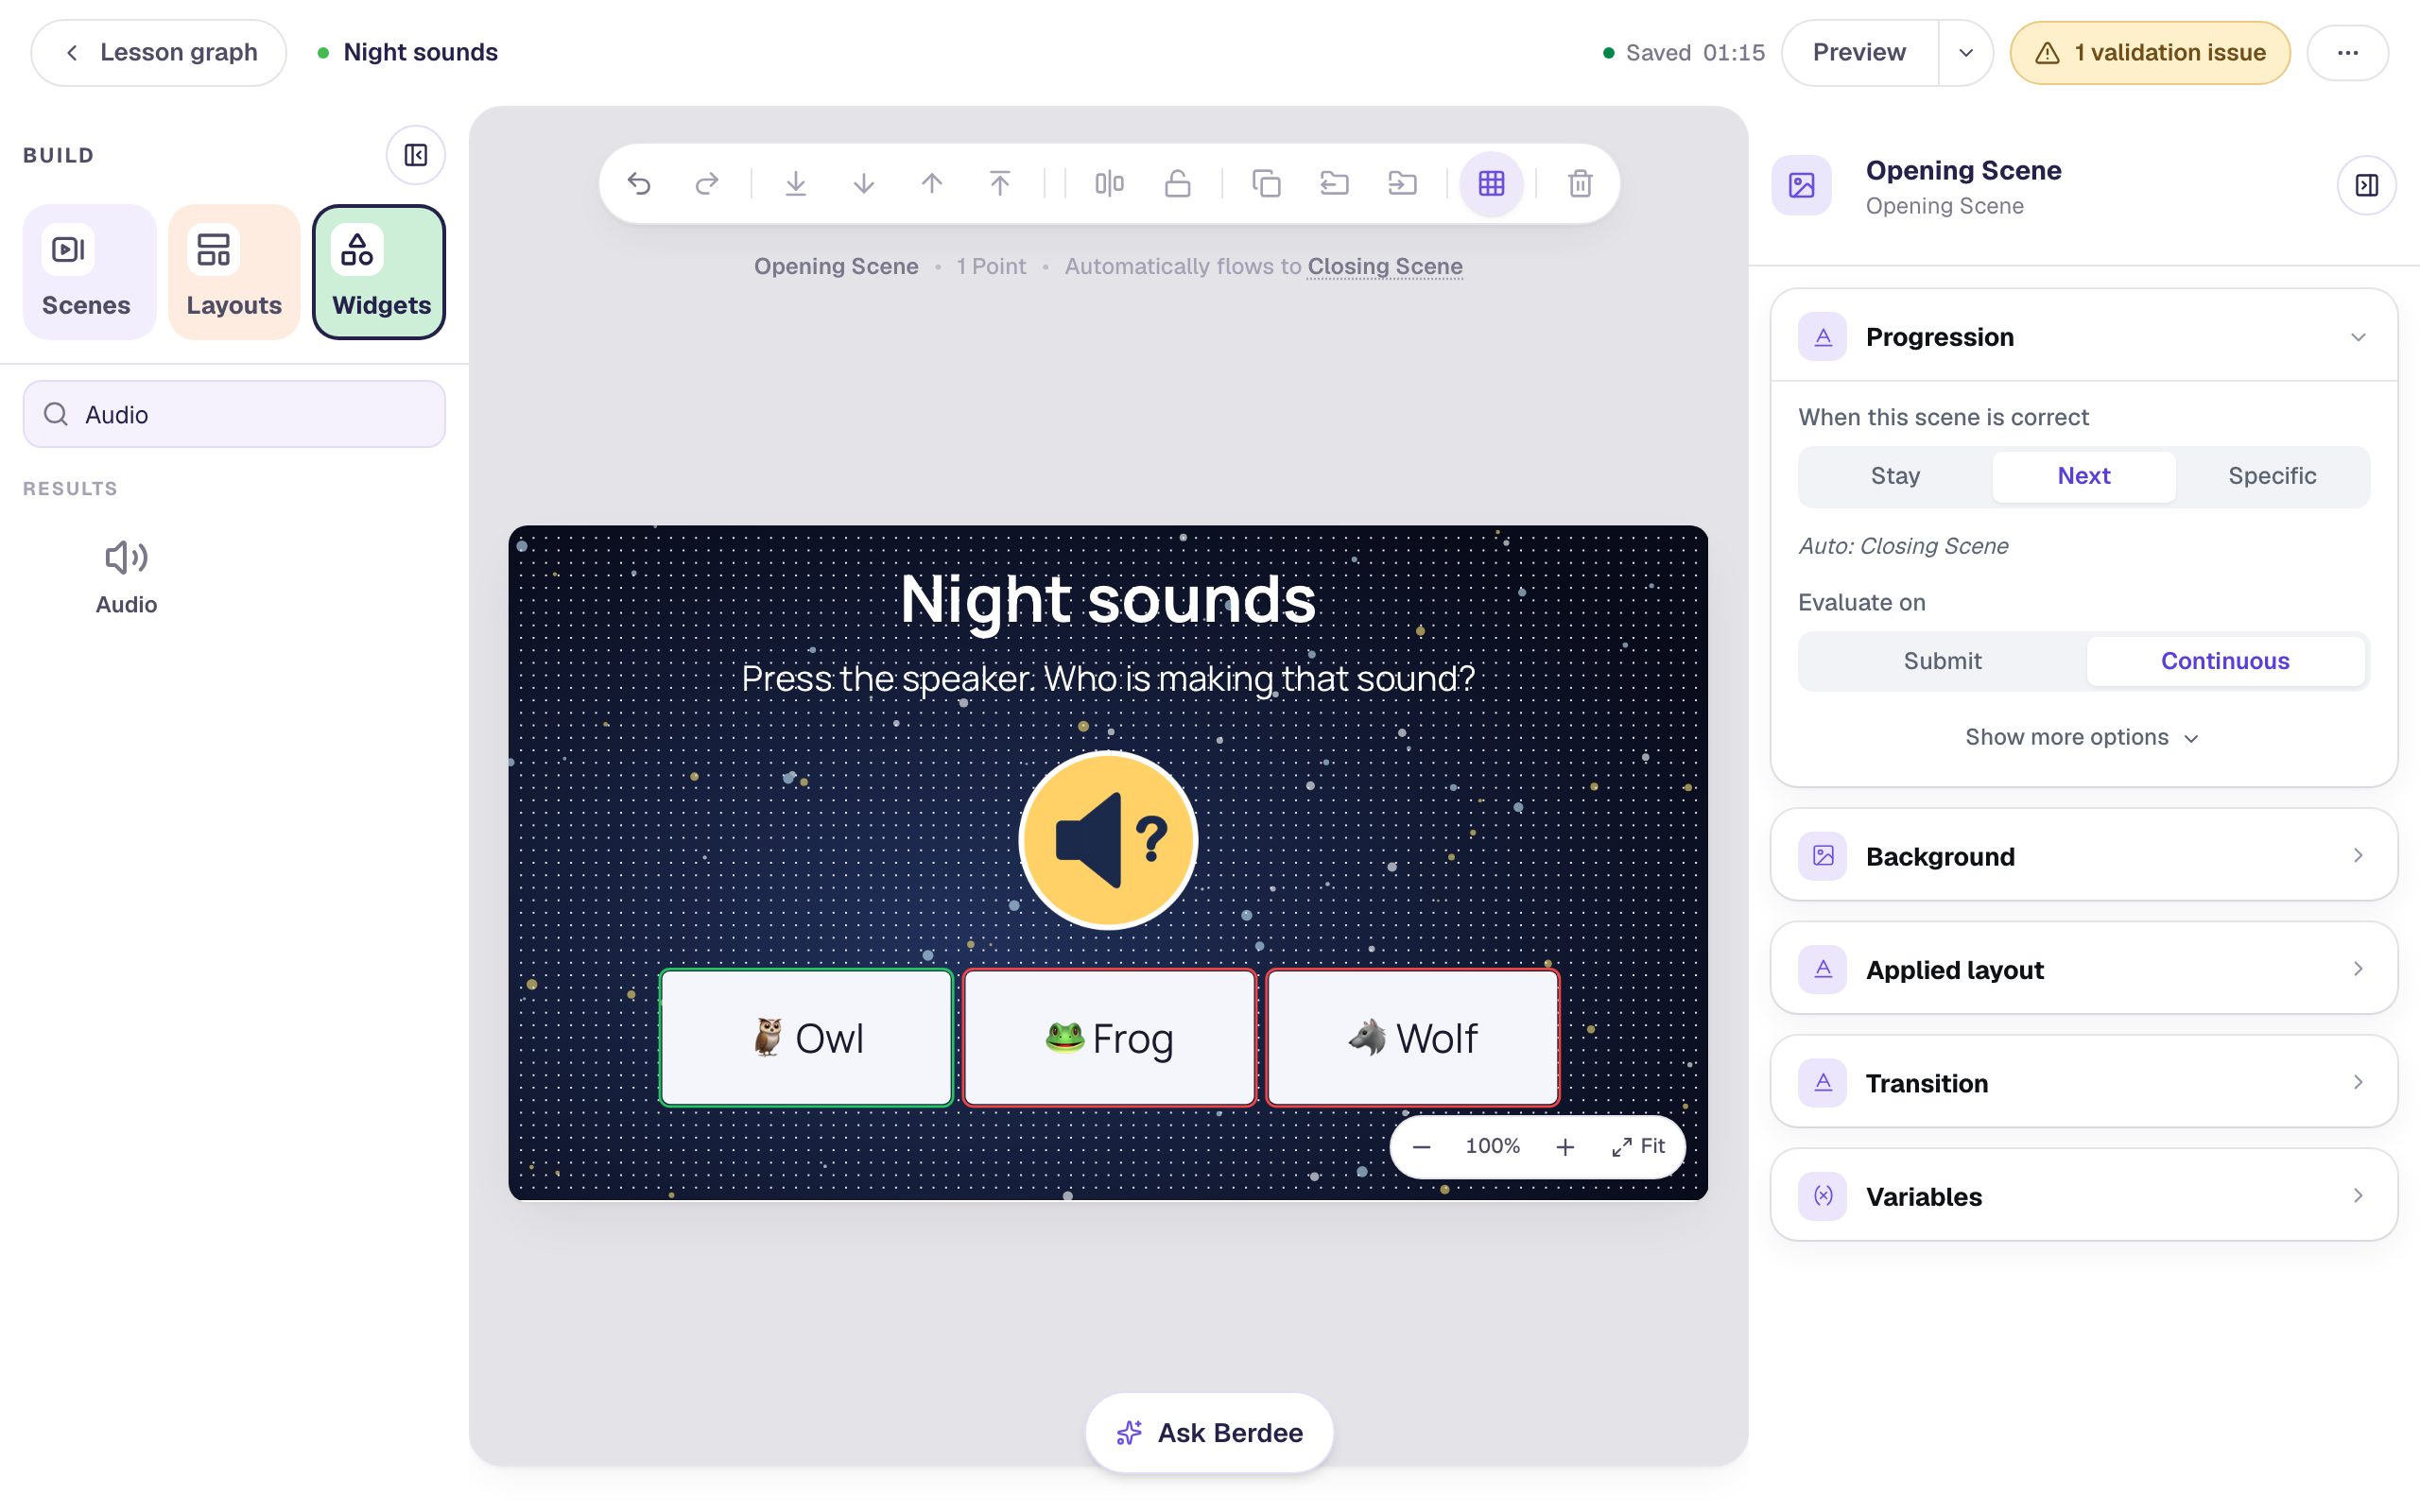
Students press a big yellow speaker to hear a mystery animal. While the sound plays, the speaker turns orange and shows sound waves, so they can see it's working. Then they pick Owl, Frog or Wolf.
The trick is two pictures on an ordinary Audio player: one for the play button and one for while it plays. The same idea works for a talking character, a musical instrument, or a "Listen to the directions" ear.
Making the sound uses Berdee's sound effect generator, which needs Plus or above (see AI and Voice). On any plan you can upload or record your own clip instead, and the finished lesson from this tutorial works on any plan: add it to your account and its sound and pictures come with it.
If you haven't used the studio before, start with Build your first quiz question. This tutorial moves quickly through the parts it already covers.
Step 1: Set the scene
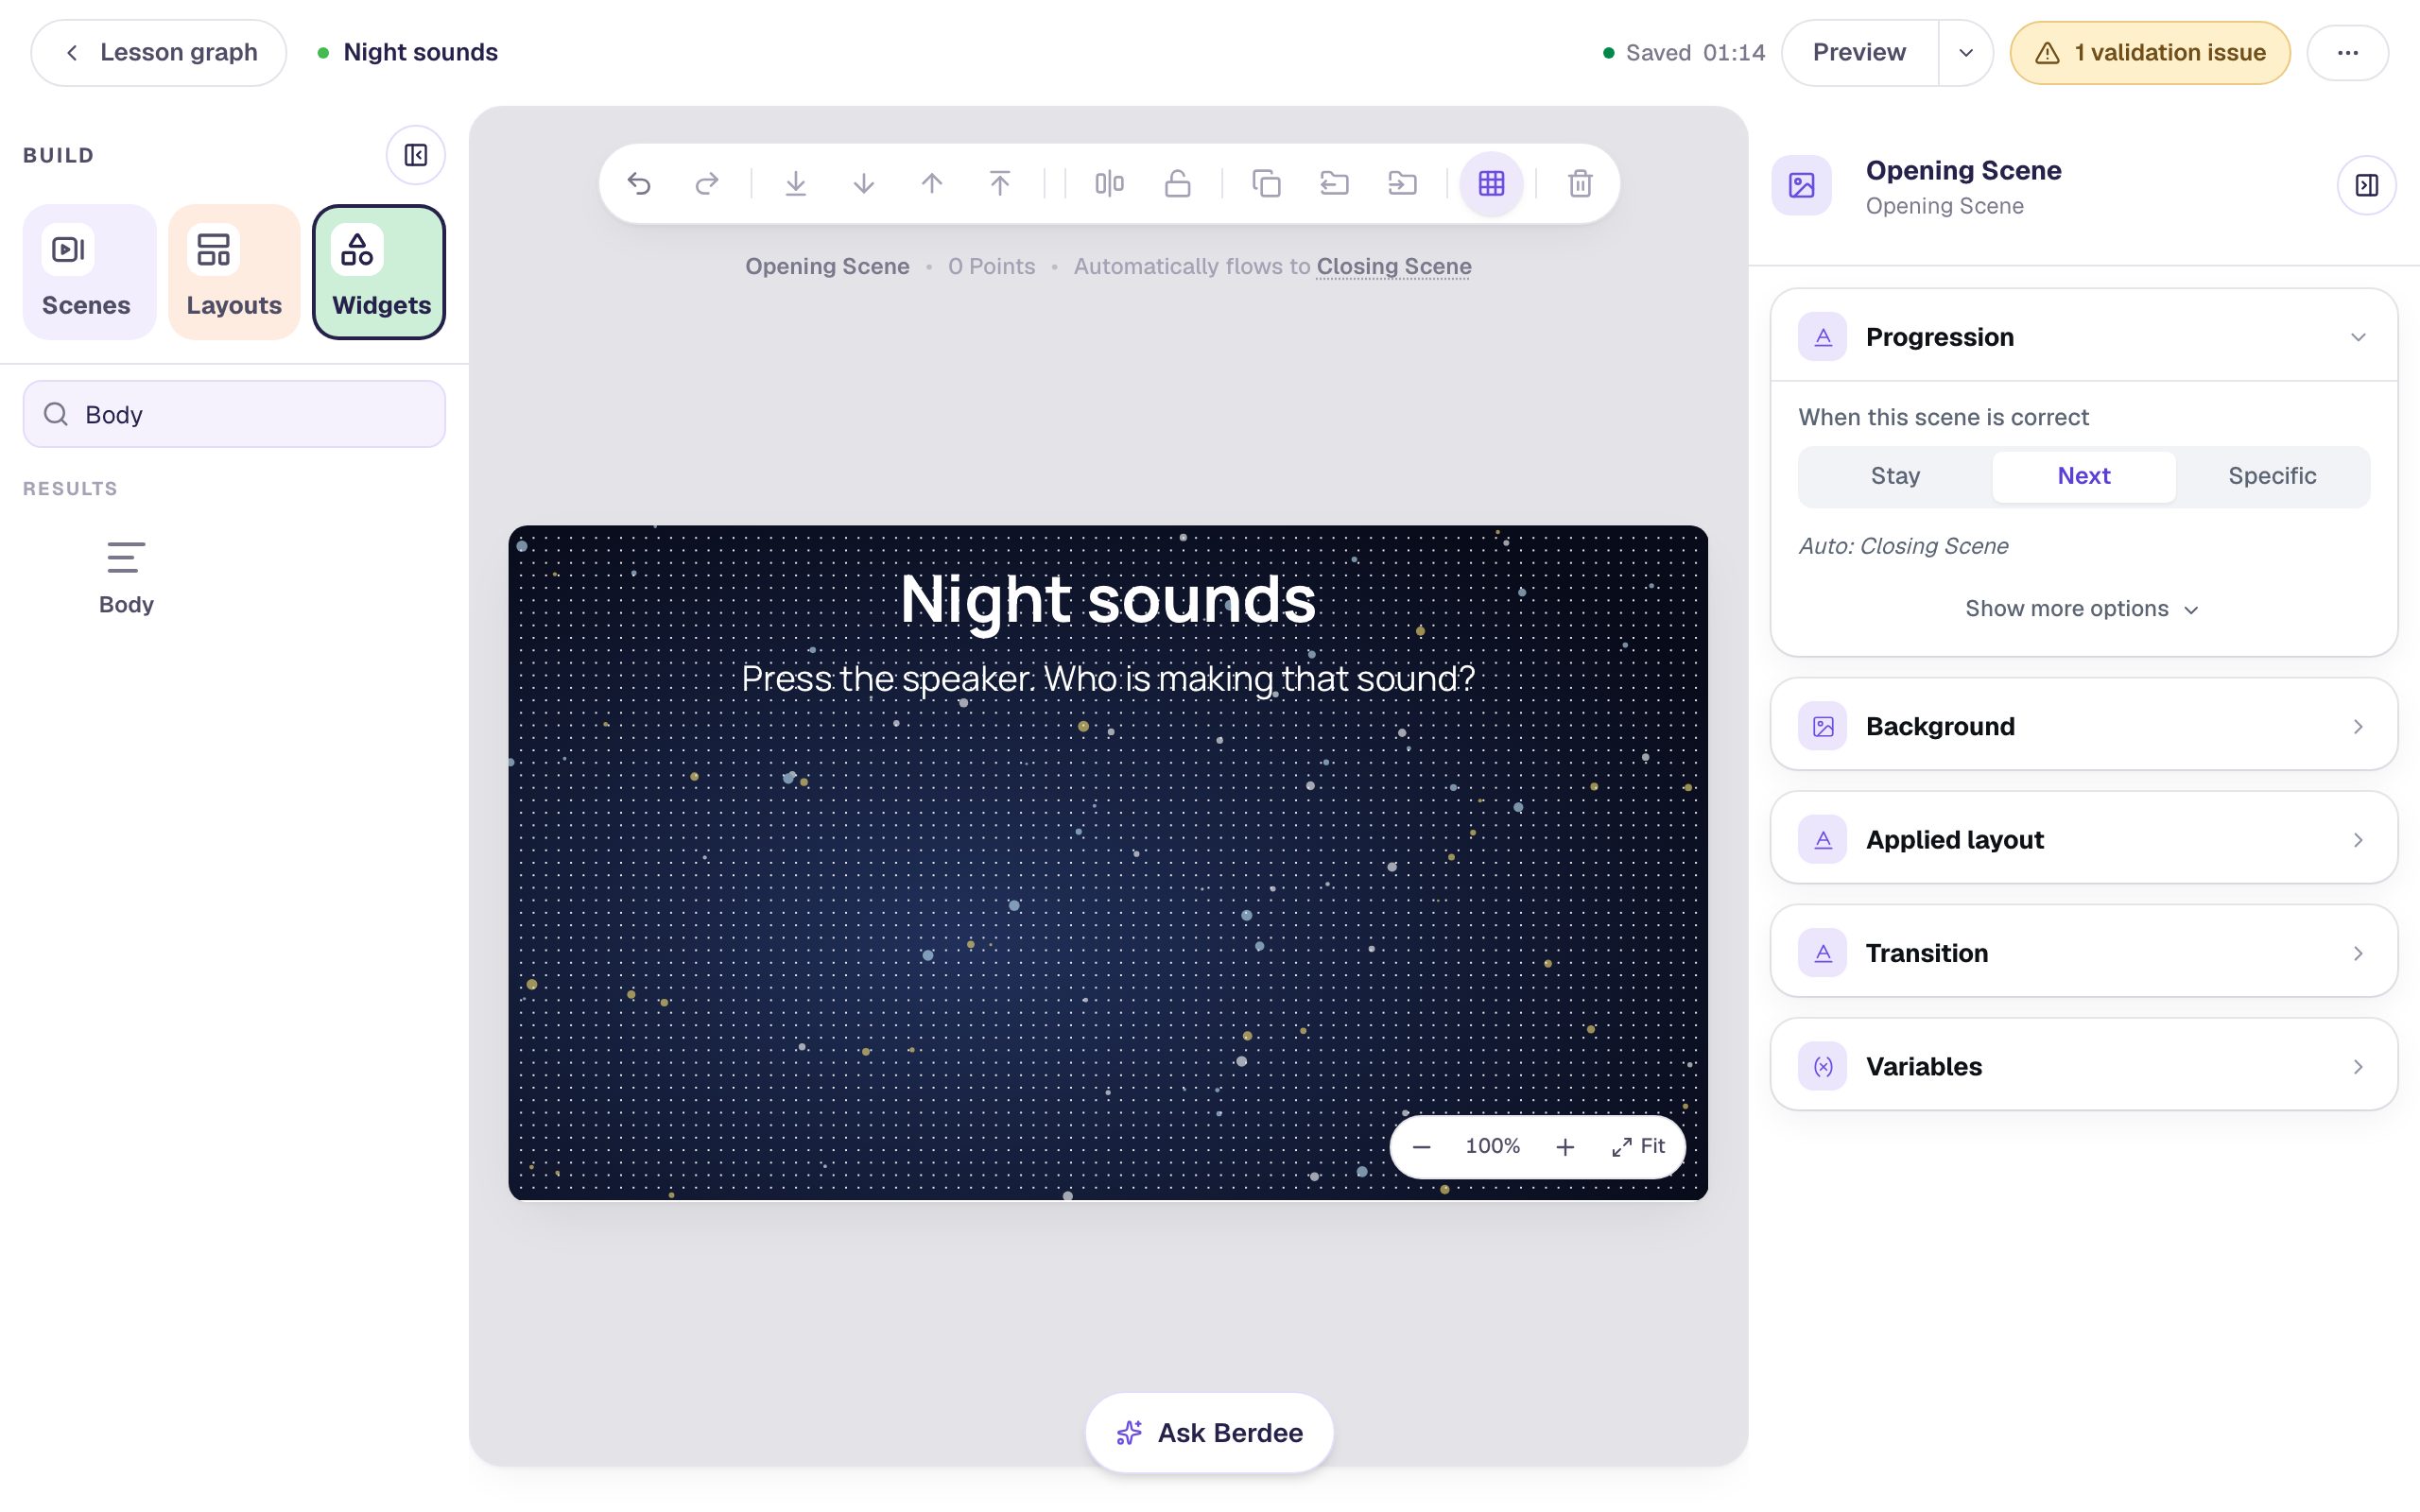
Start a blank lesson (New lesson, then Start from scratch) and name it Night sounds by clicking Untitled lesson at the top.
Owls and wolves come out at night, so give the lesson a night sky. With nothing selected, open Background, click Choose a style, pick Nature, then Starfield, and click Apply background. Do the same on the Closing Scene (in the Scenes panel), then click its You finished the lesson! headline and set its Text Color to white so it shows up on the dark sky.
Back on the Opening Scene, add a Heading that says Night sounds and a Body that says Press the speaker. Who is making that sound? with a Font Size of 28. Make both white with Text Color.
Step 2: Add the answers
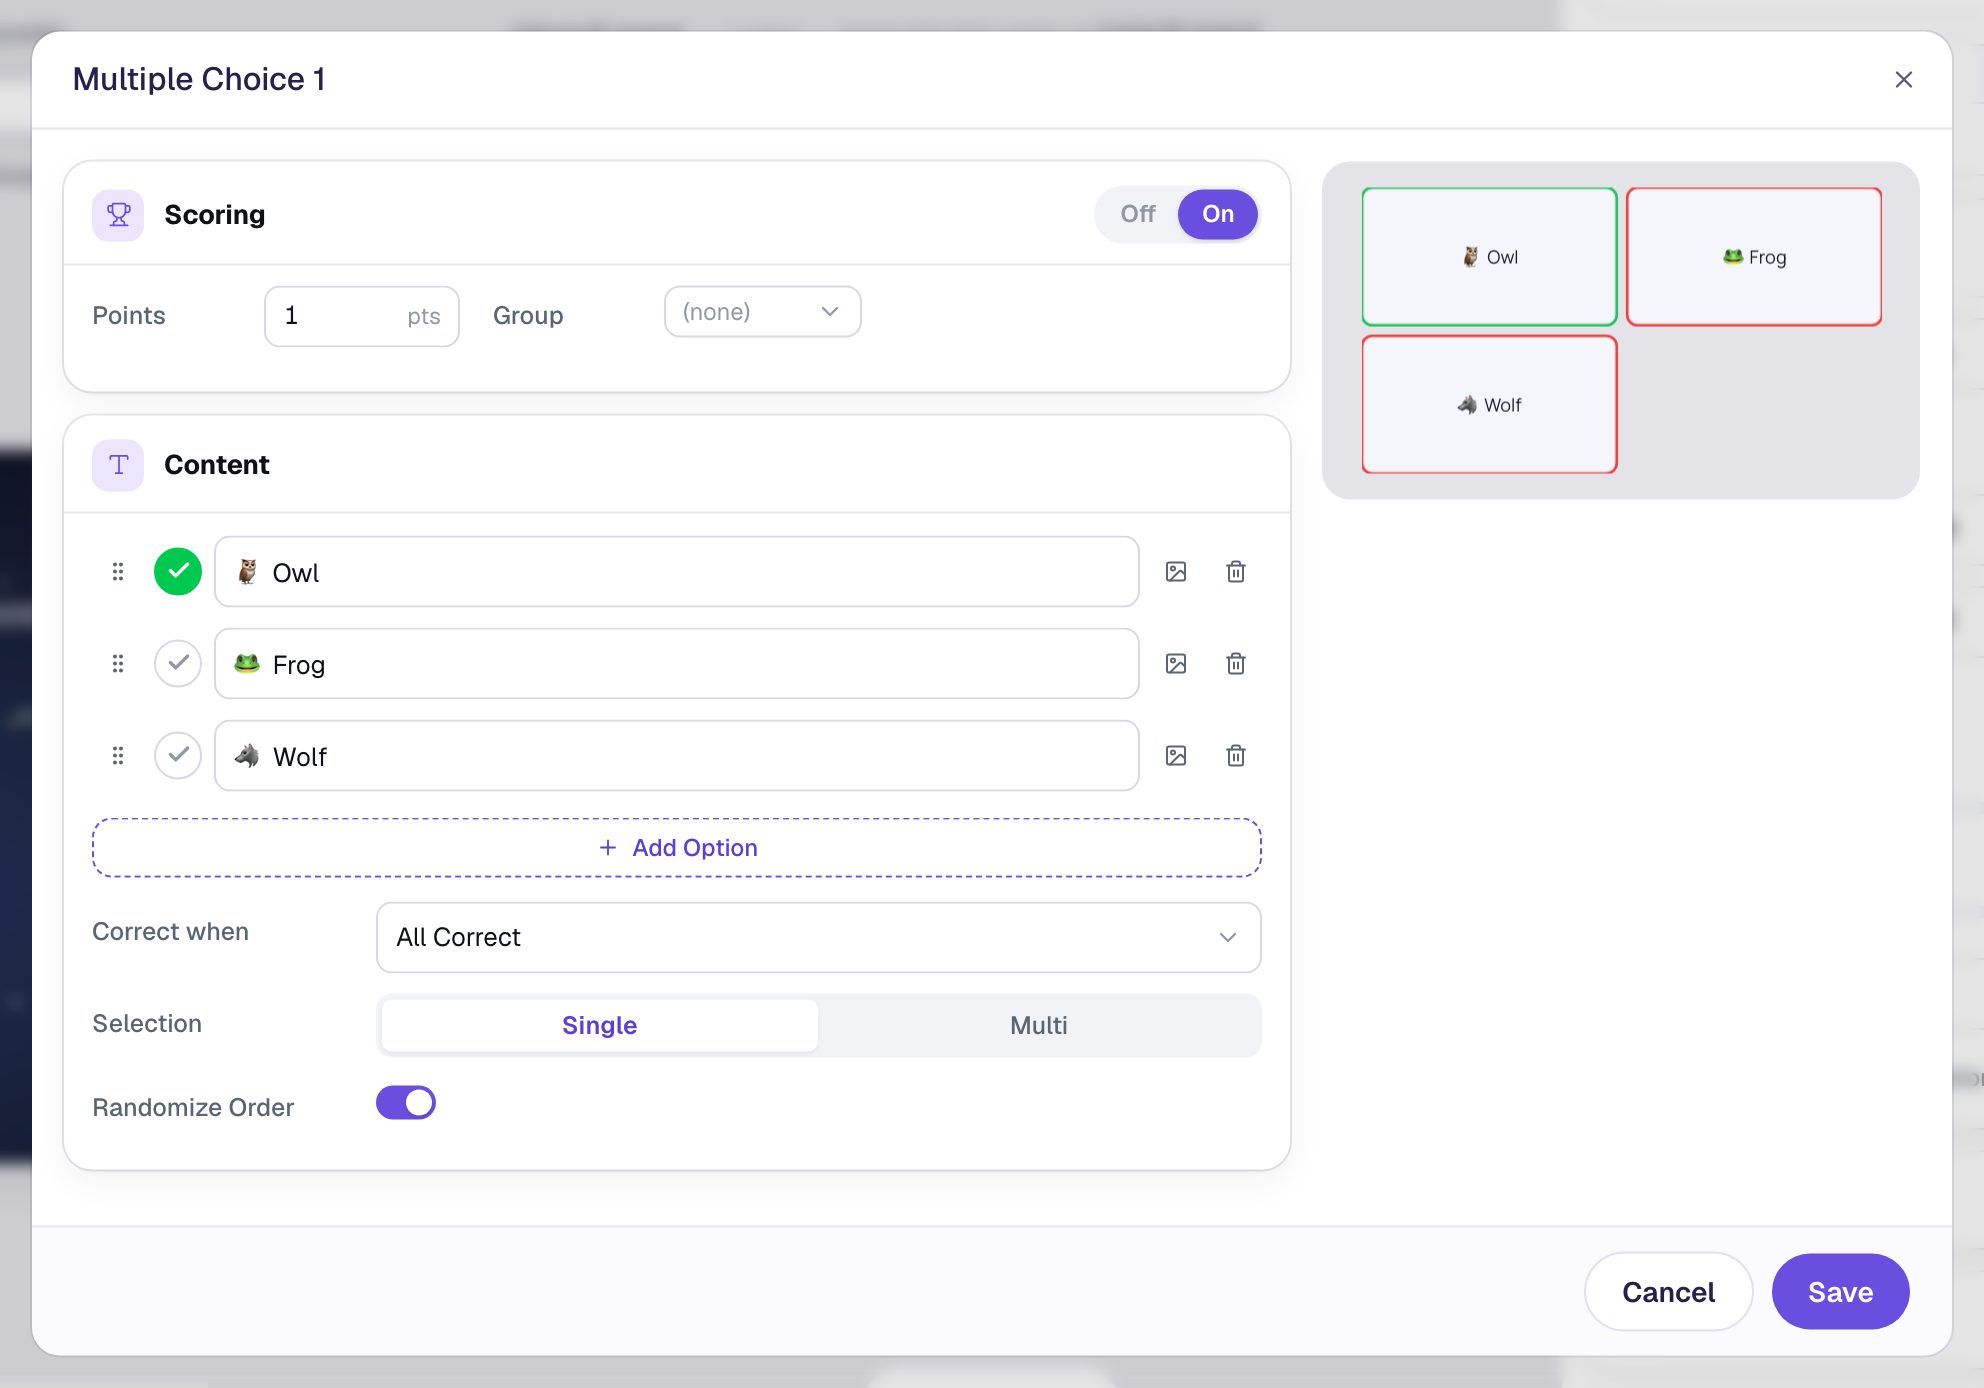
In Widgets, search for Multi Choice and click it. Click ⚙ Configure and type three answers, each starting with an emoji so a student who can't read the word yet can still find it: 🦉 Owl, 🐸 Frog and 🐺 Wolf. A new question has four options, so click the bin beside the fourth to remove it.
The first option starts marked correct (the green tick), and that's Owl, so leave it. Leave Randomize Order on, so the right answer isn't always in the same place.
Click Save. With the question still selected, open Style & Layout, set Font Size to 32, and under Show more options set Width to 720 and Height to 110. A wide, short question puts all three answers in one row. Drag it into the lower part of the scene, leaving room above it for the speaker.
Step 3: Make the mystery sound
In Widgets, search for Audio and click it. Drag the new player into the gap between the question and the answers.
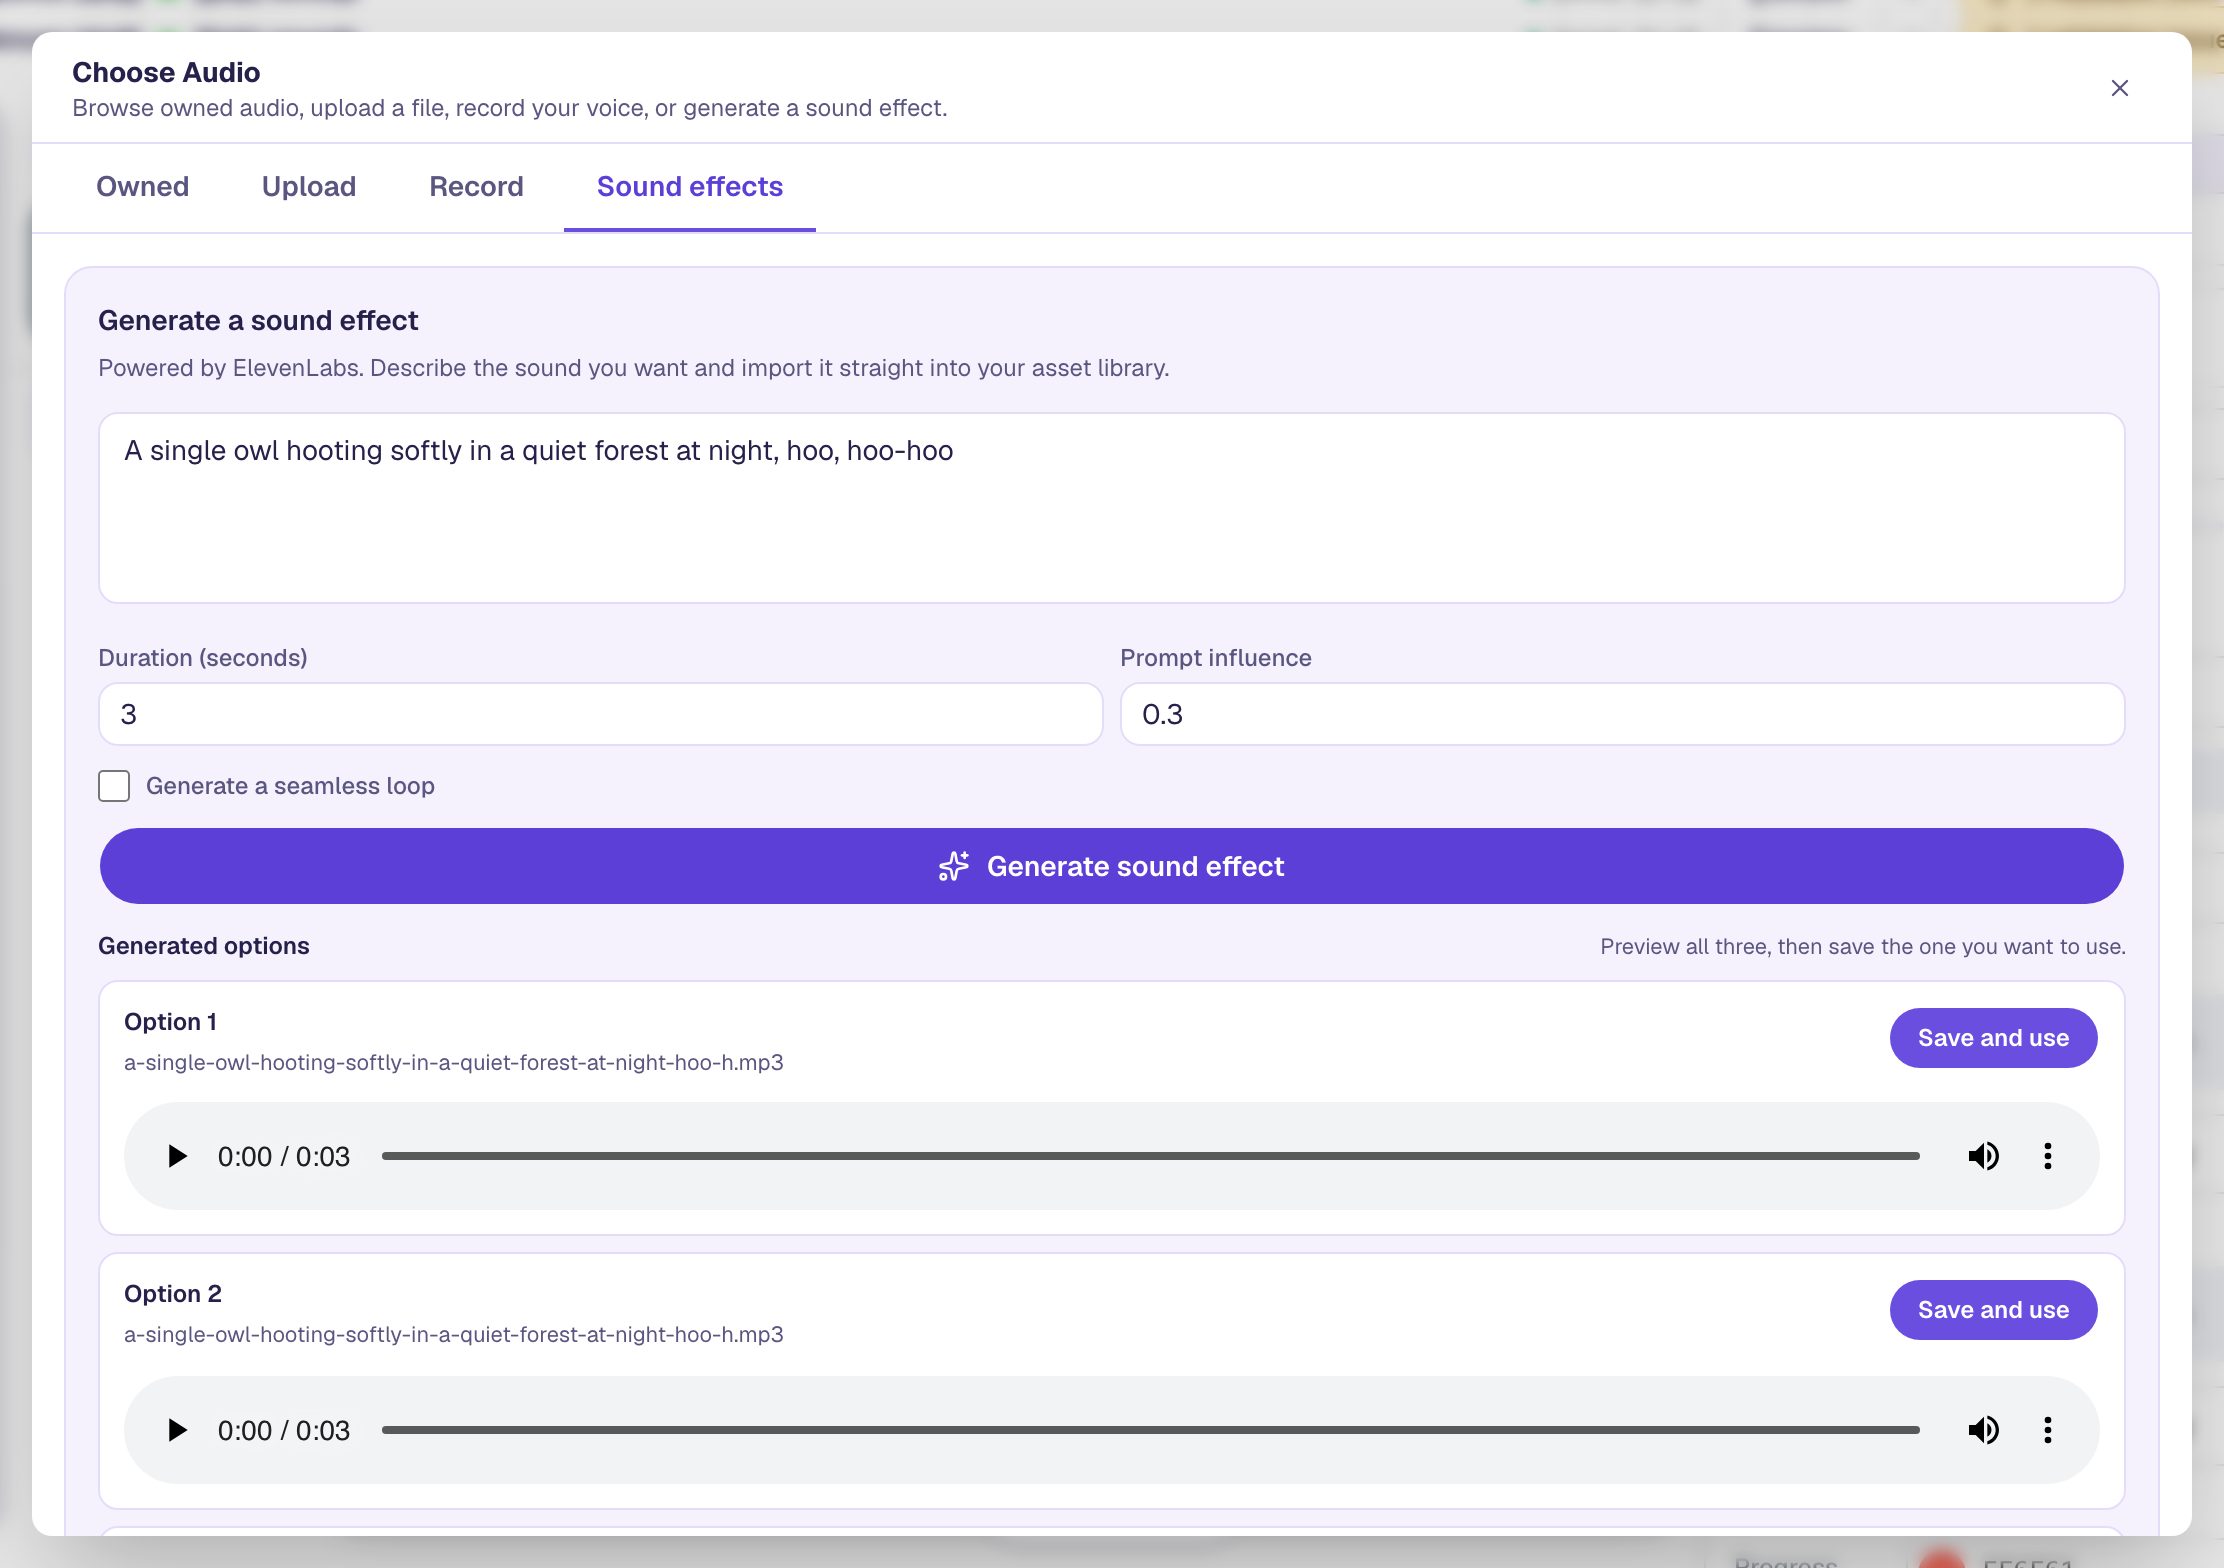
Click ⚙ Configure in the pill above the player, then Open Media Library. On the Sound effects tab, describe the sound: A single owl hooting softly in a quiet forest at night, hoo, hoo-hoo. Set Duration (seconds) to 3 (short clips keep young listeners focused) and click Generate sound effect.
After a few seconds you get three takes of the same idea. Press play on each and keep the one that sounds most like an owl with Save and use. If none of them is right, change the description and generate again.
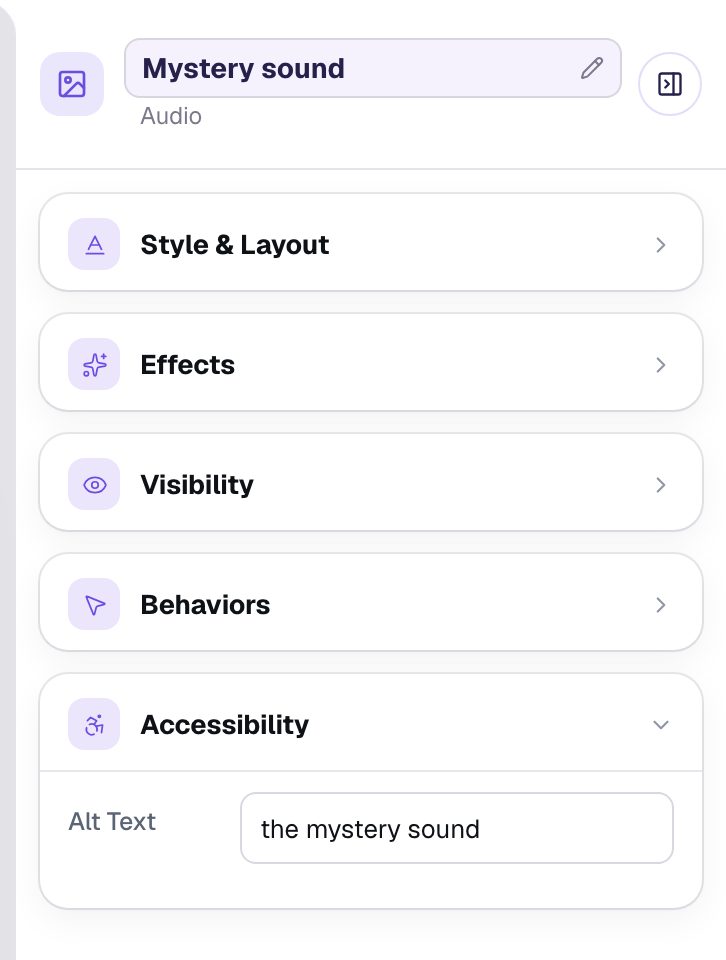
Click Save to close Configure. Then rename the widget Mystery sound by clicking its name at the top of the properties panel, so it's easy to find later.
You don't have to generate the sound. On the same window you can Upload a clip you already have or Record your own voice, for example saying a word for a phonics question.
Step 4: Turn the player into one big button
A new player has a play button and a progress bar. For a picture button you only want the button.
With the player selected, open Style & Layout and click Show more options. Set Player Layout to Button Only. The player shrinks to a small square, so set Width and Height both to 150: big enough to press with a whole hand. Keep them equal, because the button is always square.
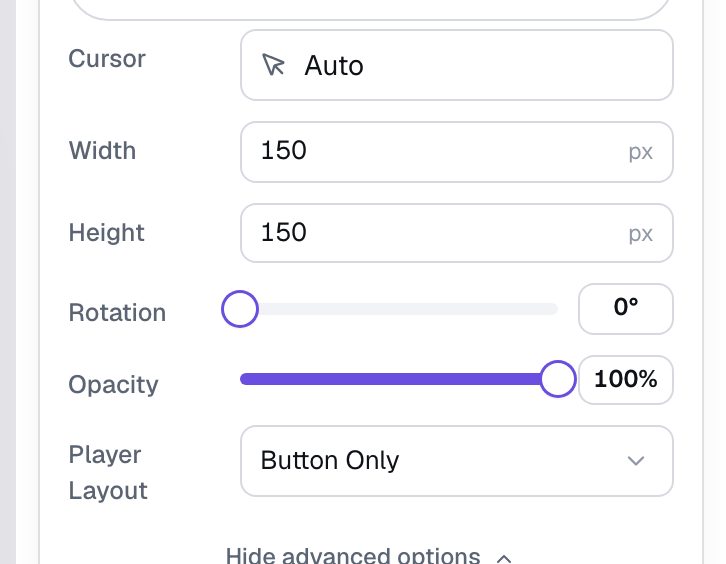
Then, at the top of Style & Layout, click the colour next to Background and choose Transparent. The player normally sits on a pale box; with the box see-through, only your picture will show on the night sky.
Step 5: Swap in your own play picture
Still in Style & Layout, find Play picture, under the Button settings. It says Using the built-in play button. Click the Open Media Library button under it and choose a picture. This lesson uploads a yellow speaker with a question mark, on the Upload tab.
The picture replaces the whole button: the coloured circle, its shape and the icon are gone, and students see your picture exactly as it is. That's why Button Color, Button Shape and Icon Color no longer change anything.
A few tips for the picture:
- Use a square picture. The button is square, so a wide picture shrinks to fit inside it.
- Use a transparent PNG if your picture isn't a rectangle, like this round speaker. Anything that isn't transparent shows as a box around it.
- Make it look pressable. A picture of the thing that makes the sound (a speaker, a radio, a character with an open mouth) tells students what will happen.
Step 6: Show a second picture while it plays
Under Pause picture, click Open Media Library again and choose the picture students see while the sound plays. This lesson uses the same speaker in orange, with sound waves coming out of it.
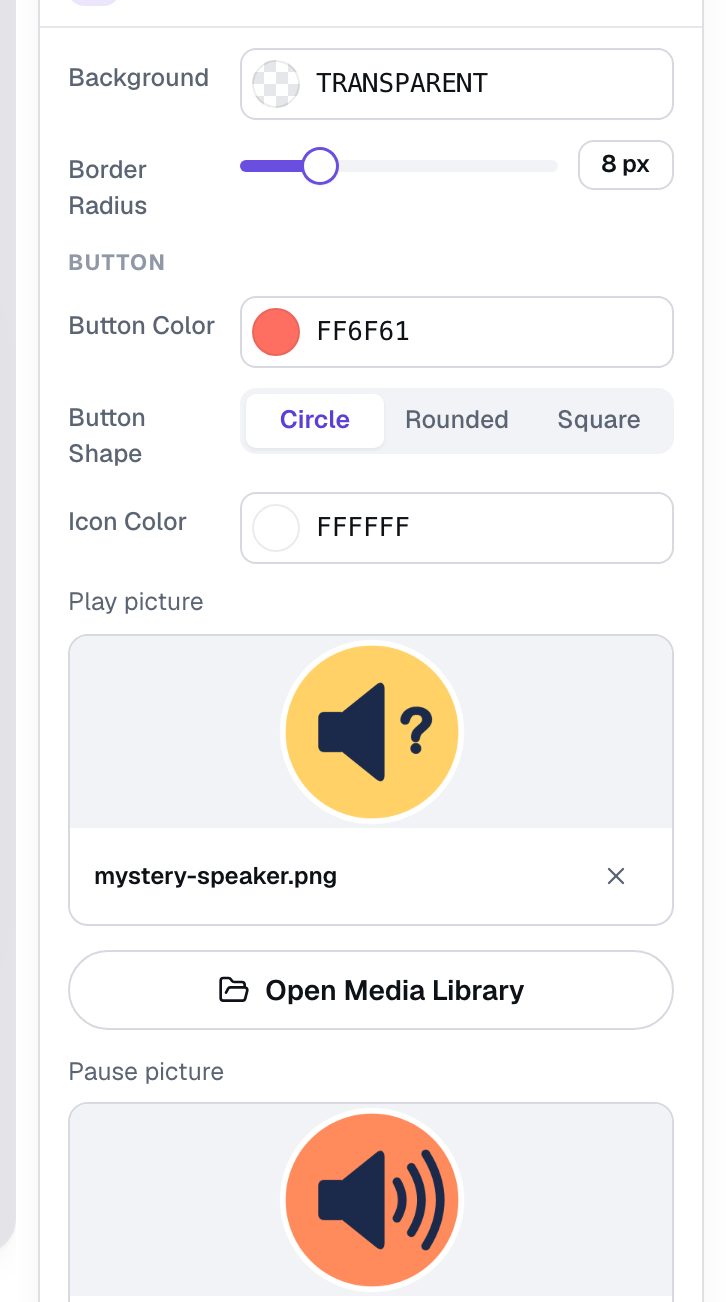
The second picture does two jobs: it shows the sound is playing, and it's where students press to stop it early. If you only set a play picture, the button shows Berdee's built-in pause icon while the sound plays.
Last, give the button a spoken name. A screen reader can't describe your picture, so open Accessibility and set Alt Text to the mystery sound. A screen reader then announces the button as "Play the mystery sound", and "Pause the mystery sound" while it plays.
Step 7: Add a button that finishes the lesson
The 1 validation issue pill at the top says a lesson needs a Submit button set to Lesson before you can publish it.
In Widgets, search for Submit Button and add one. In Content, change its Label to I'm done and choose Lesson. Drag it to the bottom-left corner, out of the way of the answers. Students who pick Owl move on by themselves; this button is for a student who wants to stop.
Step 8: Preview it as a student
Click Preview. Press the speaker and listen, then answer the way a student might: a wrong pick first, then the right one.
While the owl hoots, the speaker shows its sound waves; when the sound ends, it goes back to the yellow speaker so students can play it again. The clip above is silent, but in your browser you'll hear the owl.
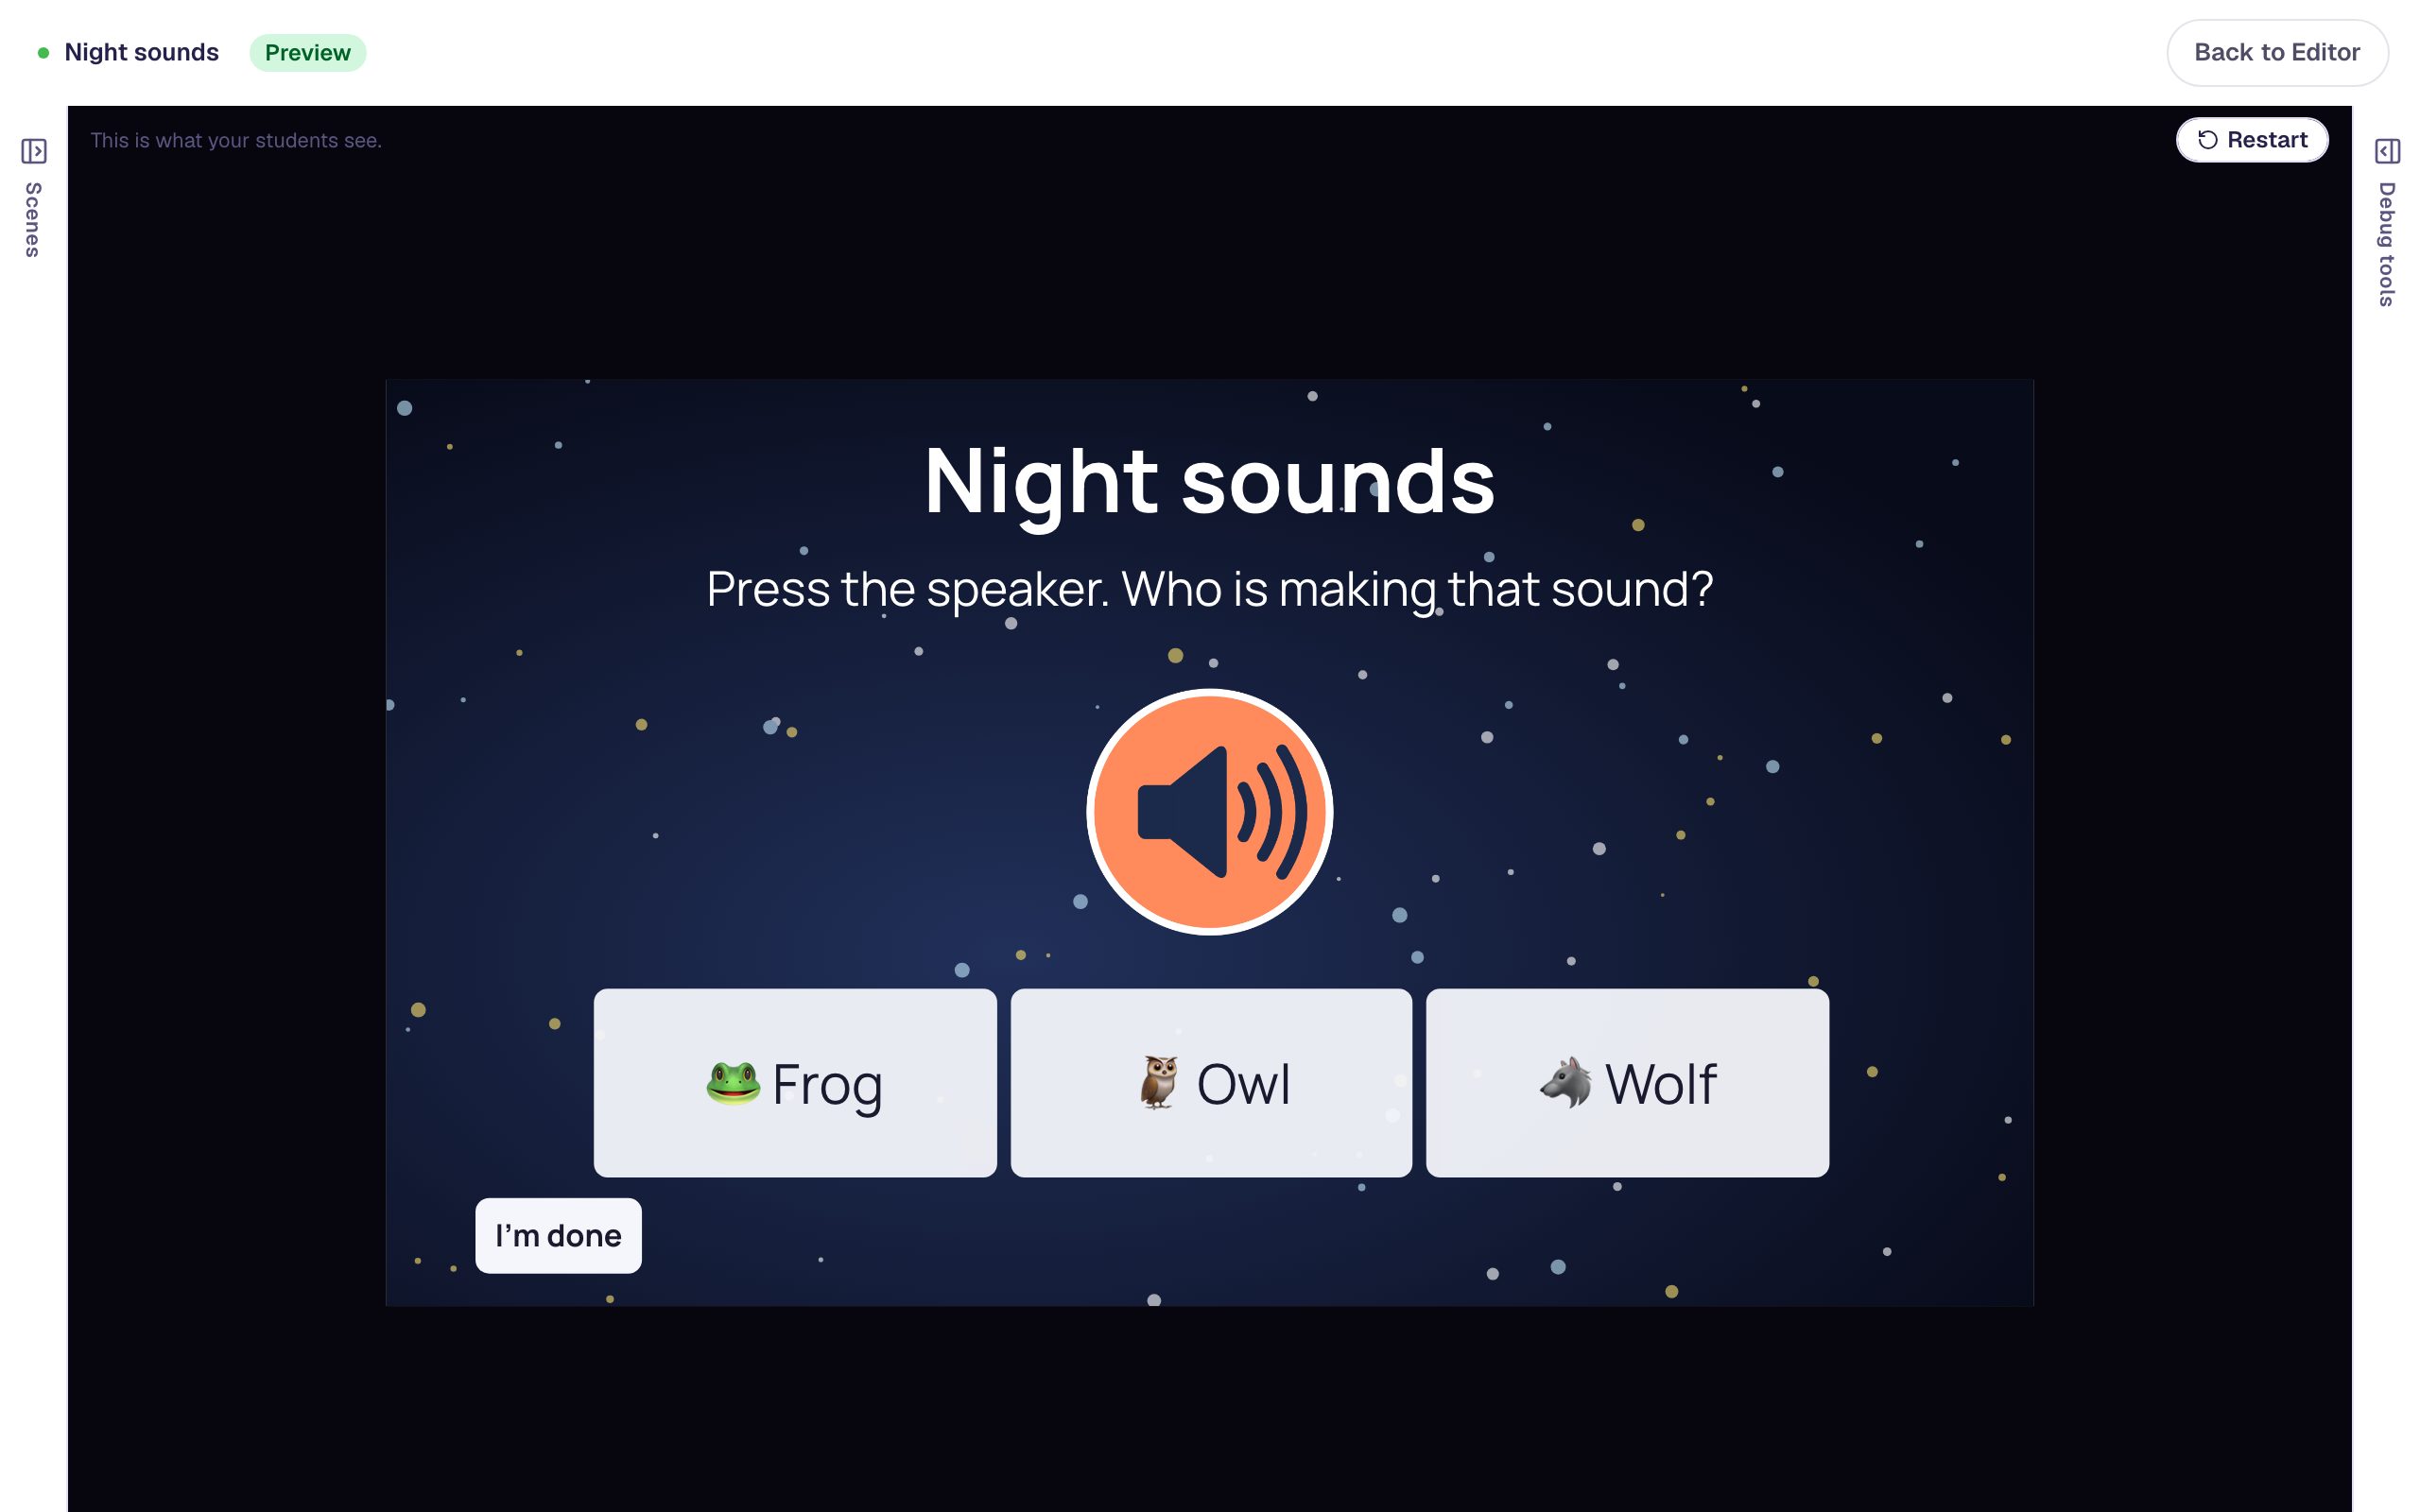
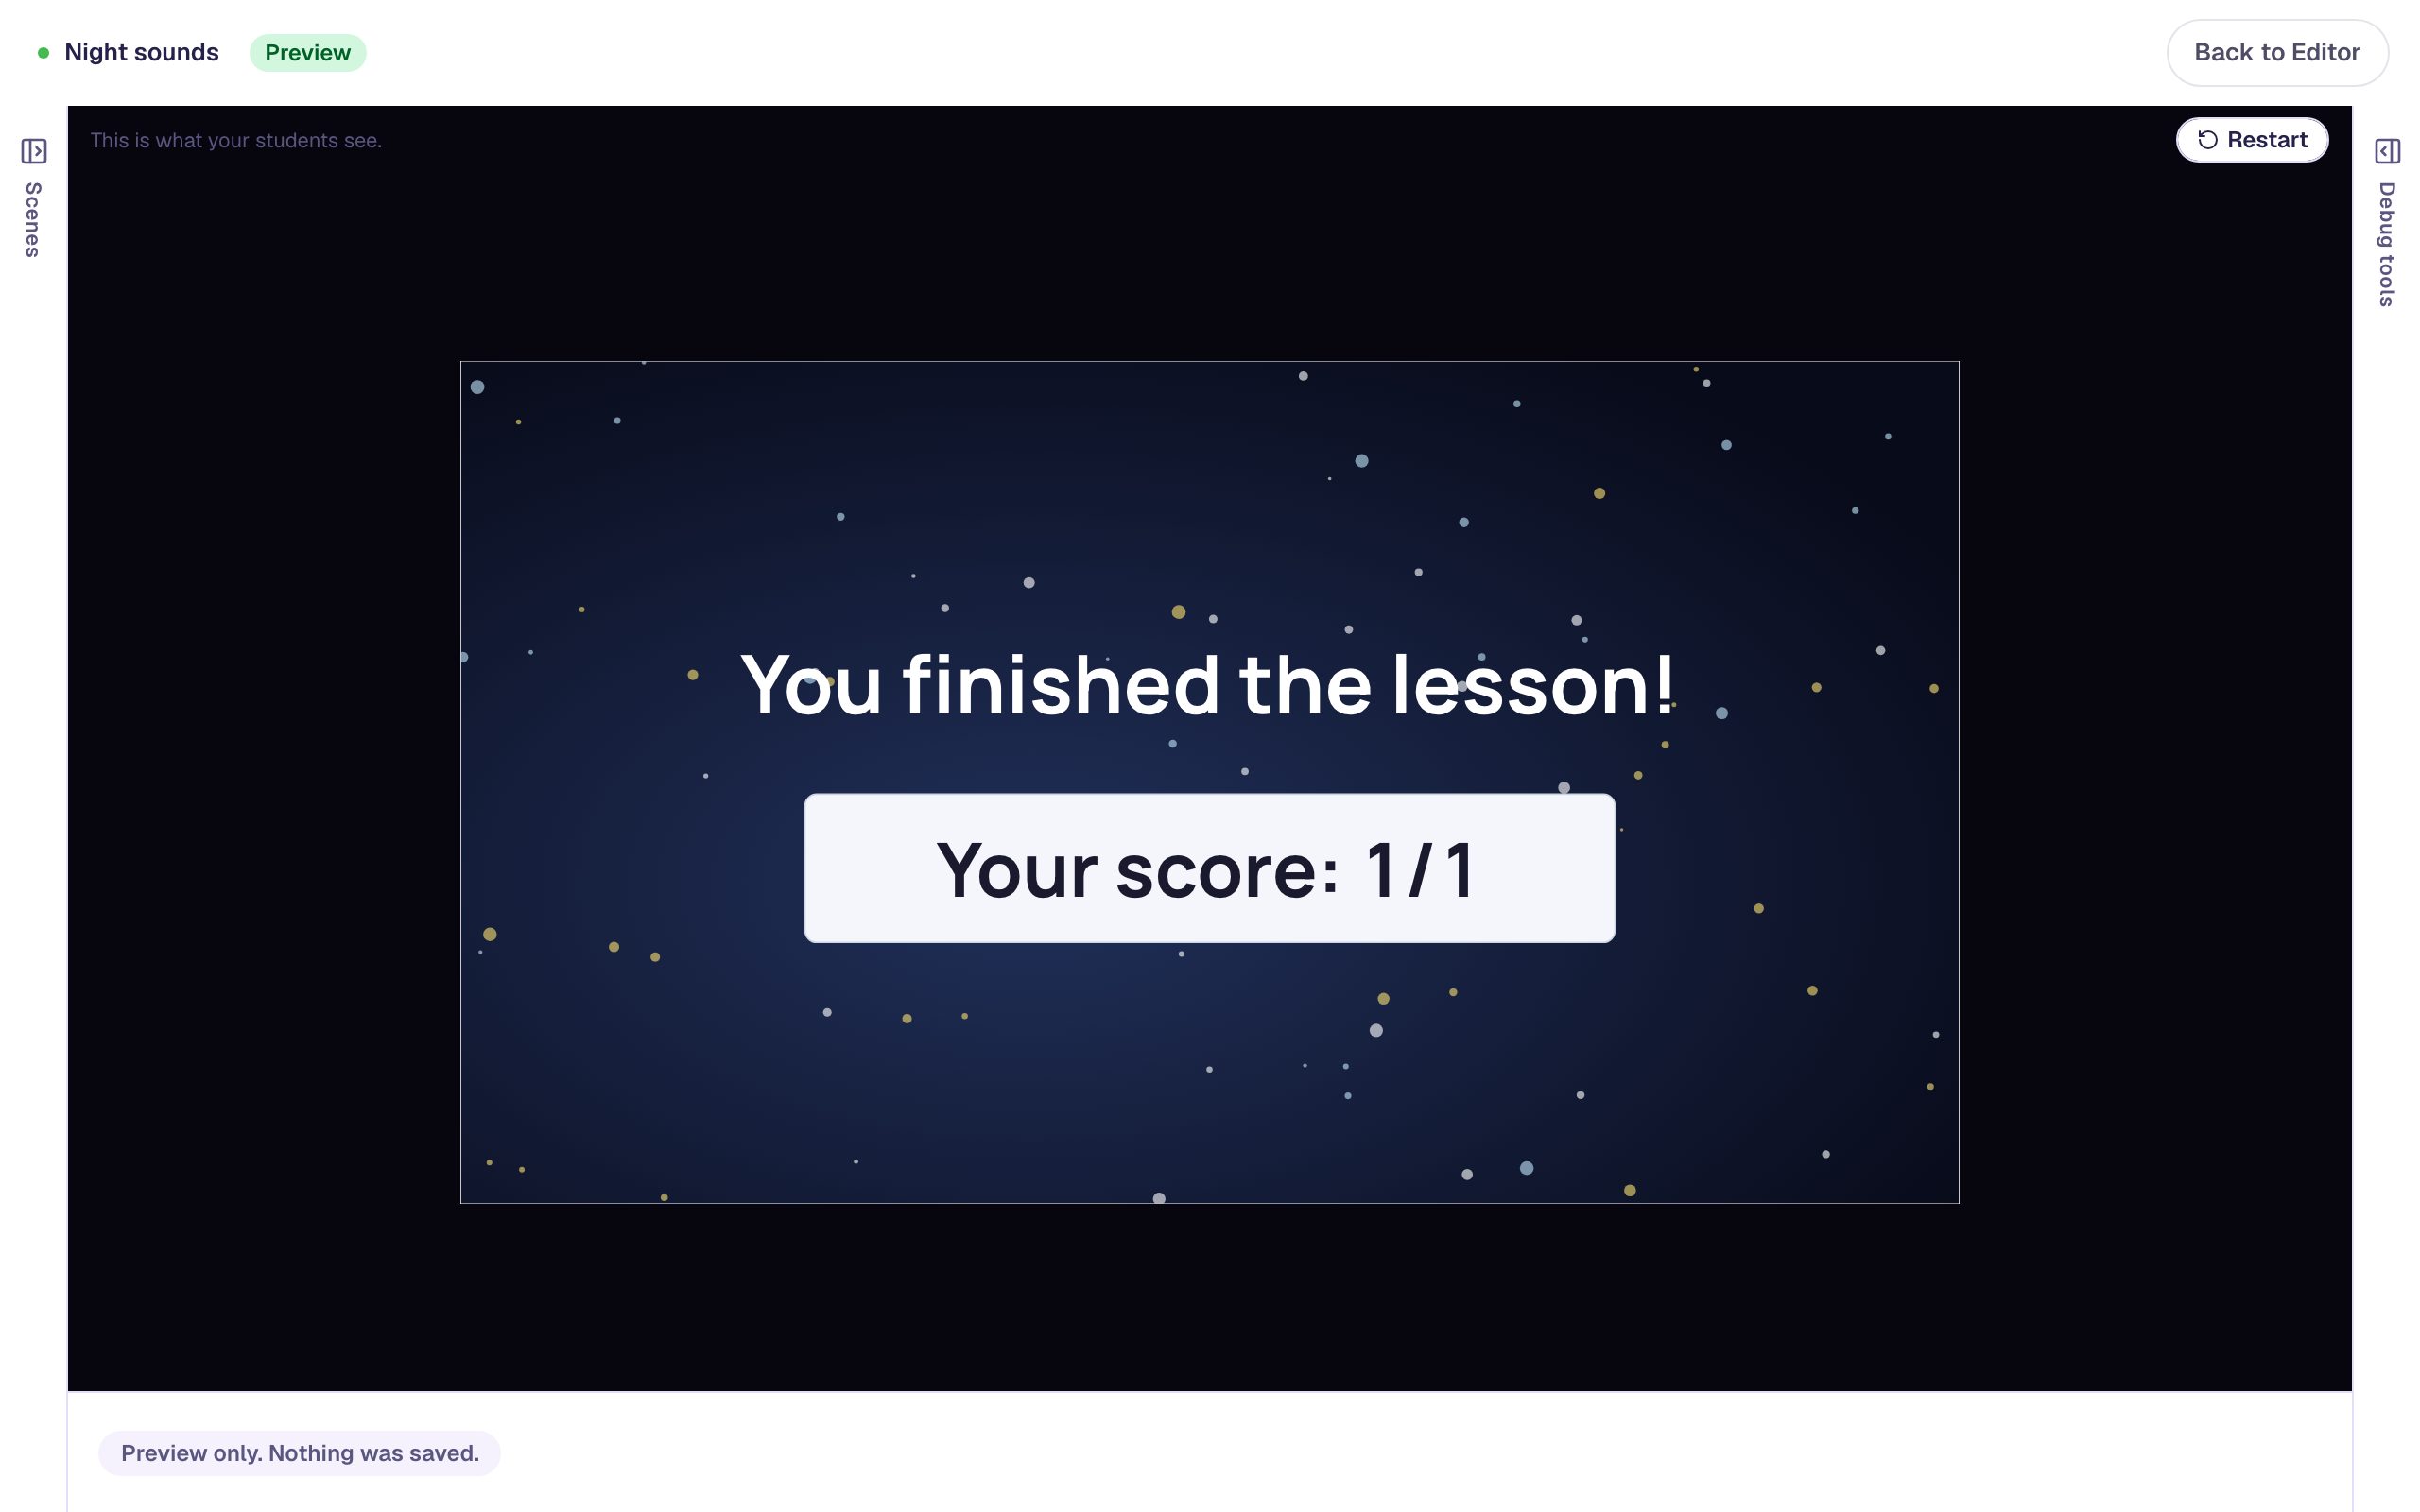
Picking Frog keeps the student on the question, so they can listen again and try another animal. Picking Owl finishes the lesson, and the ending shows the score.
What you built
A listening question where the sound is the star:
- A generated owl hoot in an Audio player set to Button Only, on a transparent background.
- Your own Play picture, big enough to press with a whole hand, and a Pause picture that shows the sound is playing.
- Alt text, so screen readers announce "Play the mystery sound".
- Three emoji answers in a row, and a finish button for publishing.
Next, duplicate the scene and double-click the speaker to pick a new sound (a frog's croak, a wolf's howl) for a whole quiz of night sounds; Build a three-question quiz by duplicating a scene shows how. To have a question read aloud instead of a sound effect, see Read a question aloud for students who are still learning to read.
Make this lesson yours
Add the lesson you just watched being built to your account, then change it for your class: your questions, your pictures, your colors.
Free to sign up, and you'll come straight back here. I have an account