Build a drag-and-drop sorting activity
Combine Text cards and Drop Buckets into a sorting activity that shows students when a card is in the wrong group and moves on once everything is sorted.
- Level
- Beginner
- Time
- About 15 min
- Steps
- 8
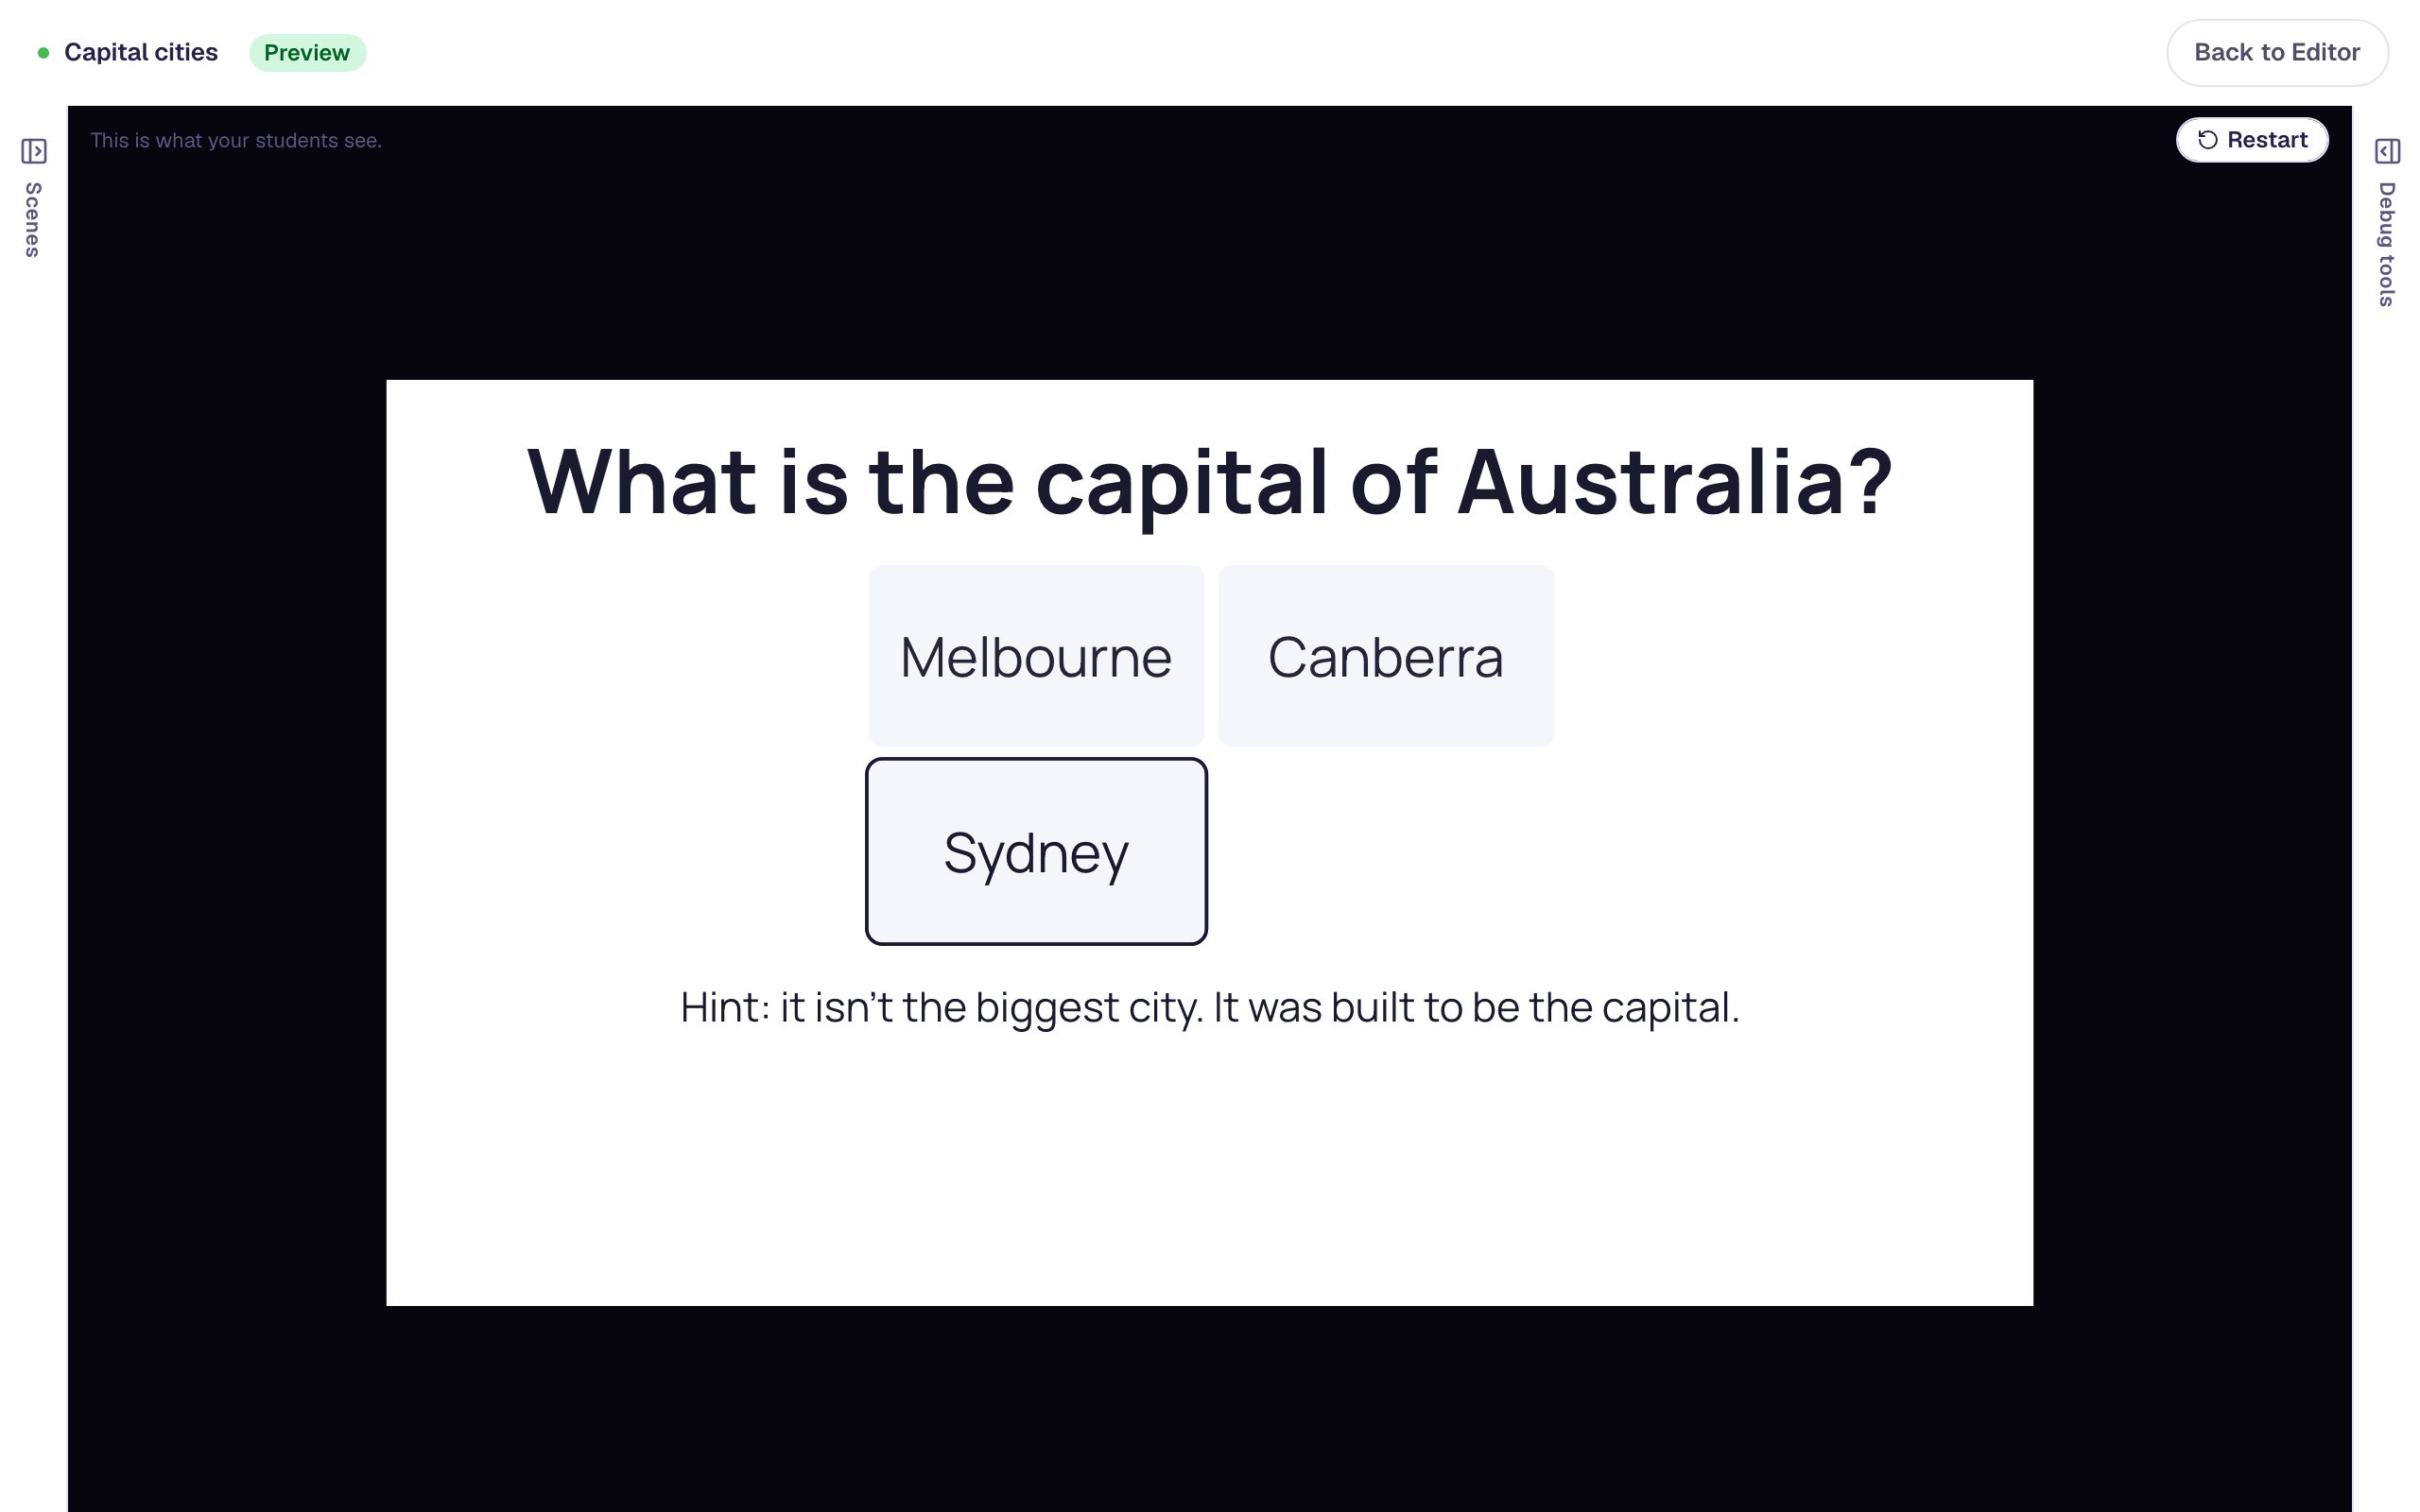
A one-scene sorting activity with four cards and two buckets that turns a bucket red when a card doesn't belong, and carries the student to the ending once every card is in place.
Get the finished lesson
Skip straight to the result, or keep it open beside the steps. Add this tutorial's lesson to your account and explore how it works in the studio.
Free to sign up, and you'll come straight back here. I have an account
Sorting is one of the quickest ways to check that students understand a category. In this tutorial you'll build one: four word cards that students drag into a Living box or a Non-living box.
Two widgets work together here. A Drop Bucket is a box students drop things into, and it holds the answer key. Any Text widget can become a card students pick up, by switching it to Draggable. If you haven't used the studio before, start with Build your first quiz question: this tutorial moves quickly through the parts it already covers.
Step 1: Write the instruction
Start a blank lesson (New lesson, then Start from scratch). On the Opening Scene, add a Heading and type the question students are answering: Living or non-living? Drag it to the top of the scene.
Step 2: Add two buckets
Open Widgets, search for Drop Bucket, and click it. A new bucket is a small square. Make it wide enough to hold two cards side by side:
- In the properties panel, under Style & Layout, click Show more options.
- Set Width to
380and Height to180. - Rename the bucket so you'll recognize it later: click its name at the top of the properties panel (Drop Bucket 1), type
Living, and press Enter. - Drag it to the left half of the scene, below the middle.
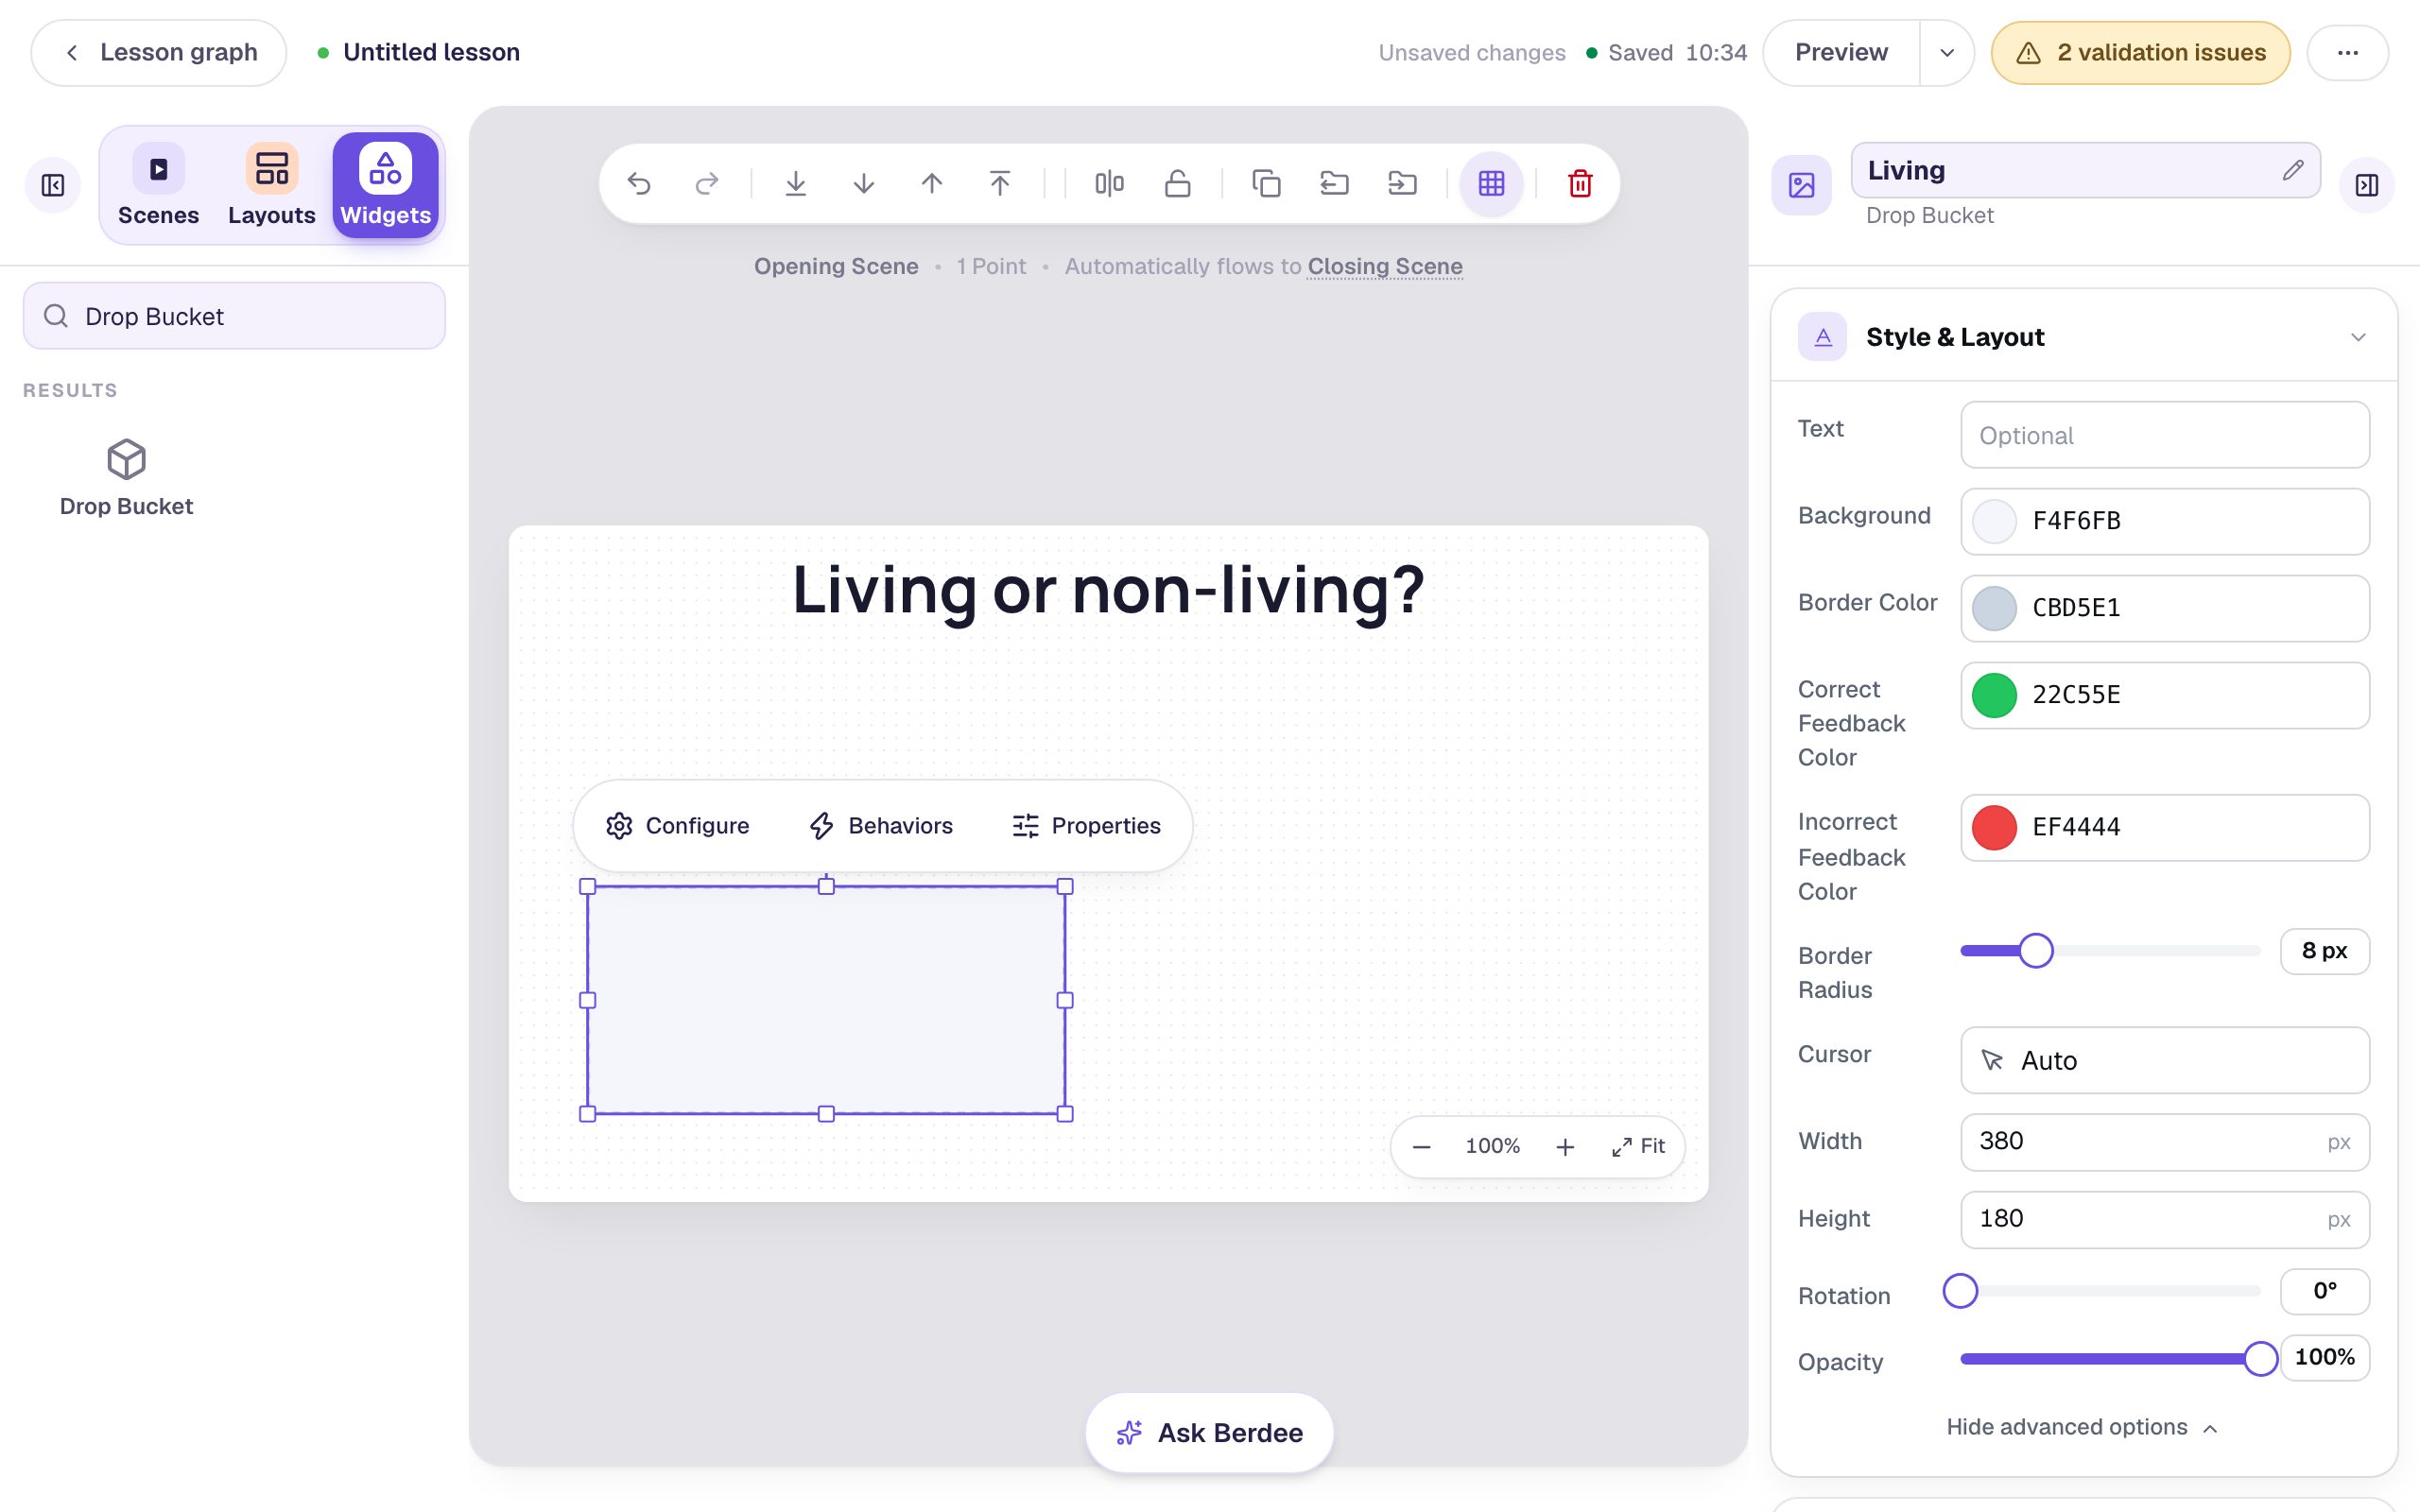
The shape matters: a wide bucket lines the cards up in a row, a tall one stacks them, and a square one fills a grid. You never set how many cards it holds.
Do the same again for a second bucket named Non-living, and drag it to the right half. Then give each bucket a visible label: add a Subheading above each one and type Living and Non-living.
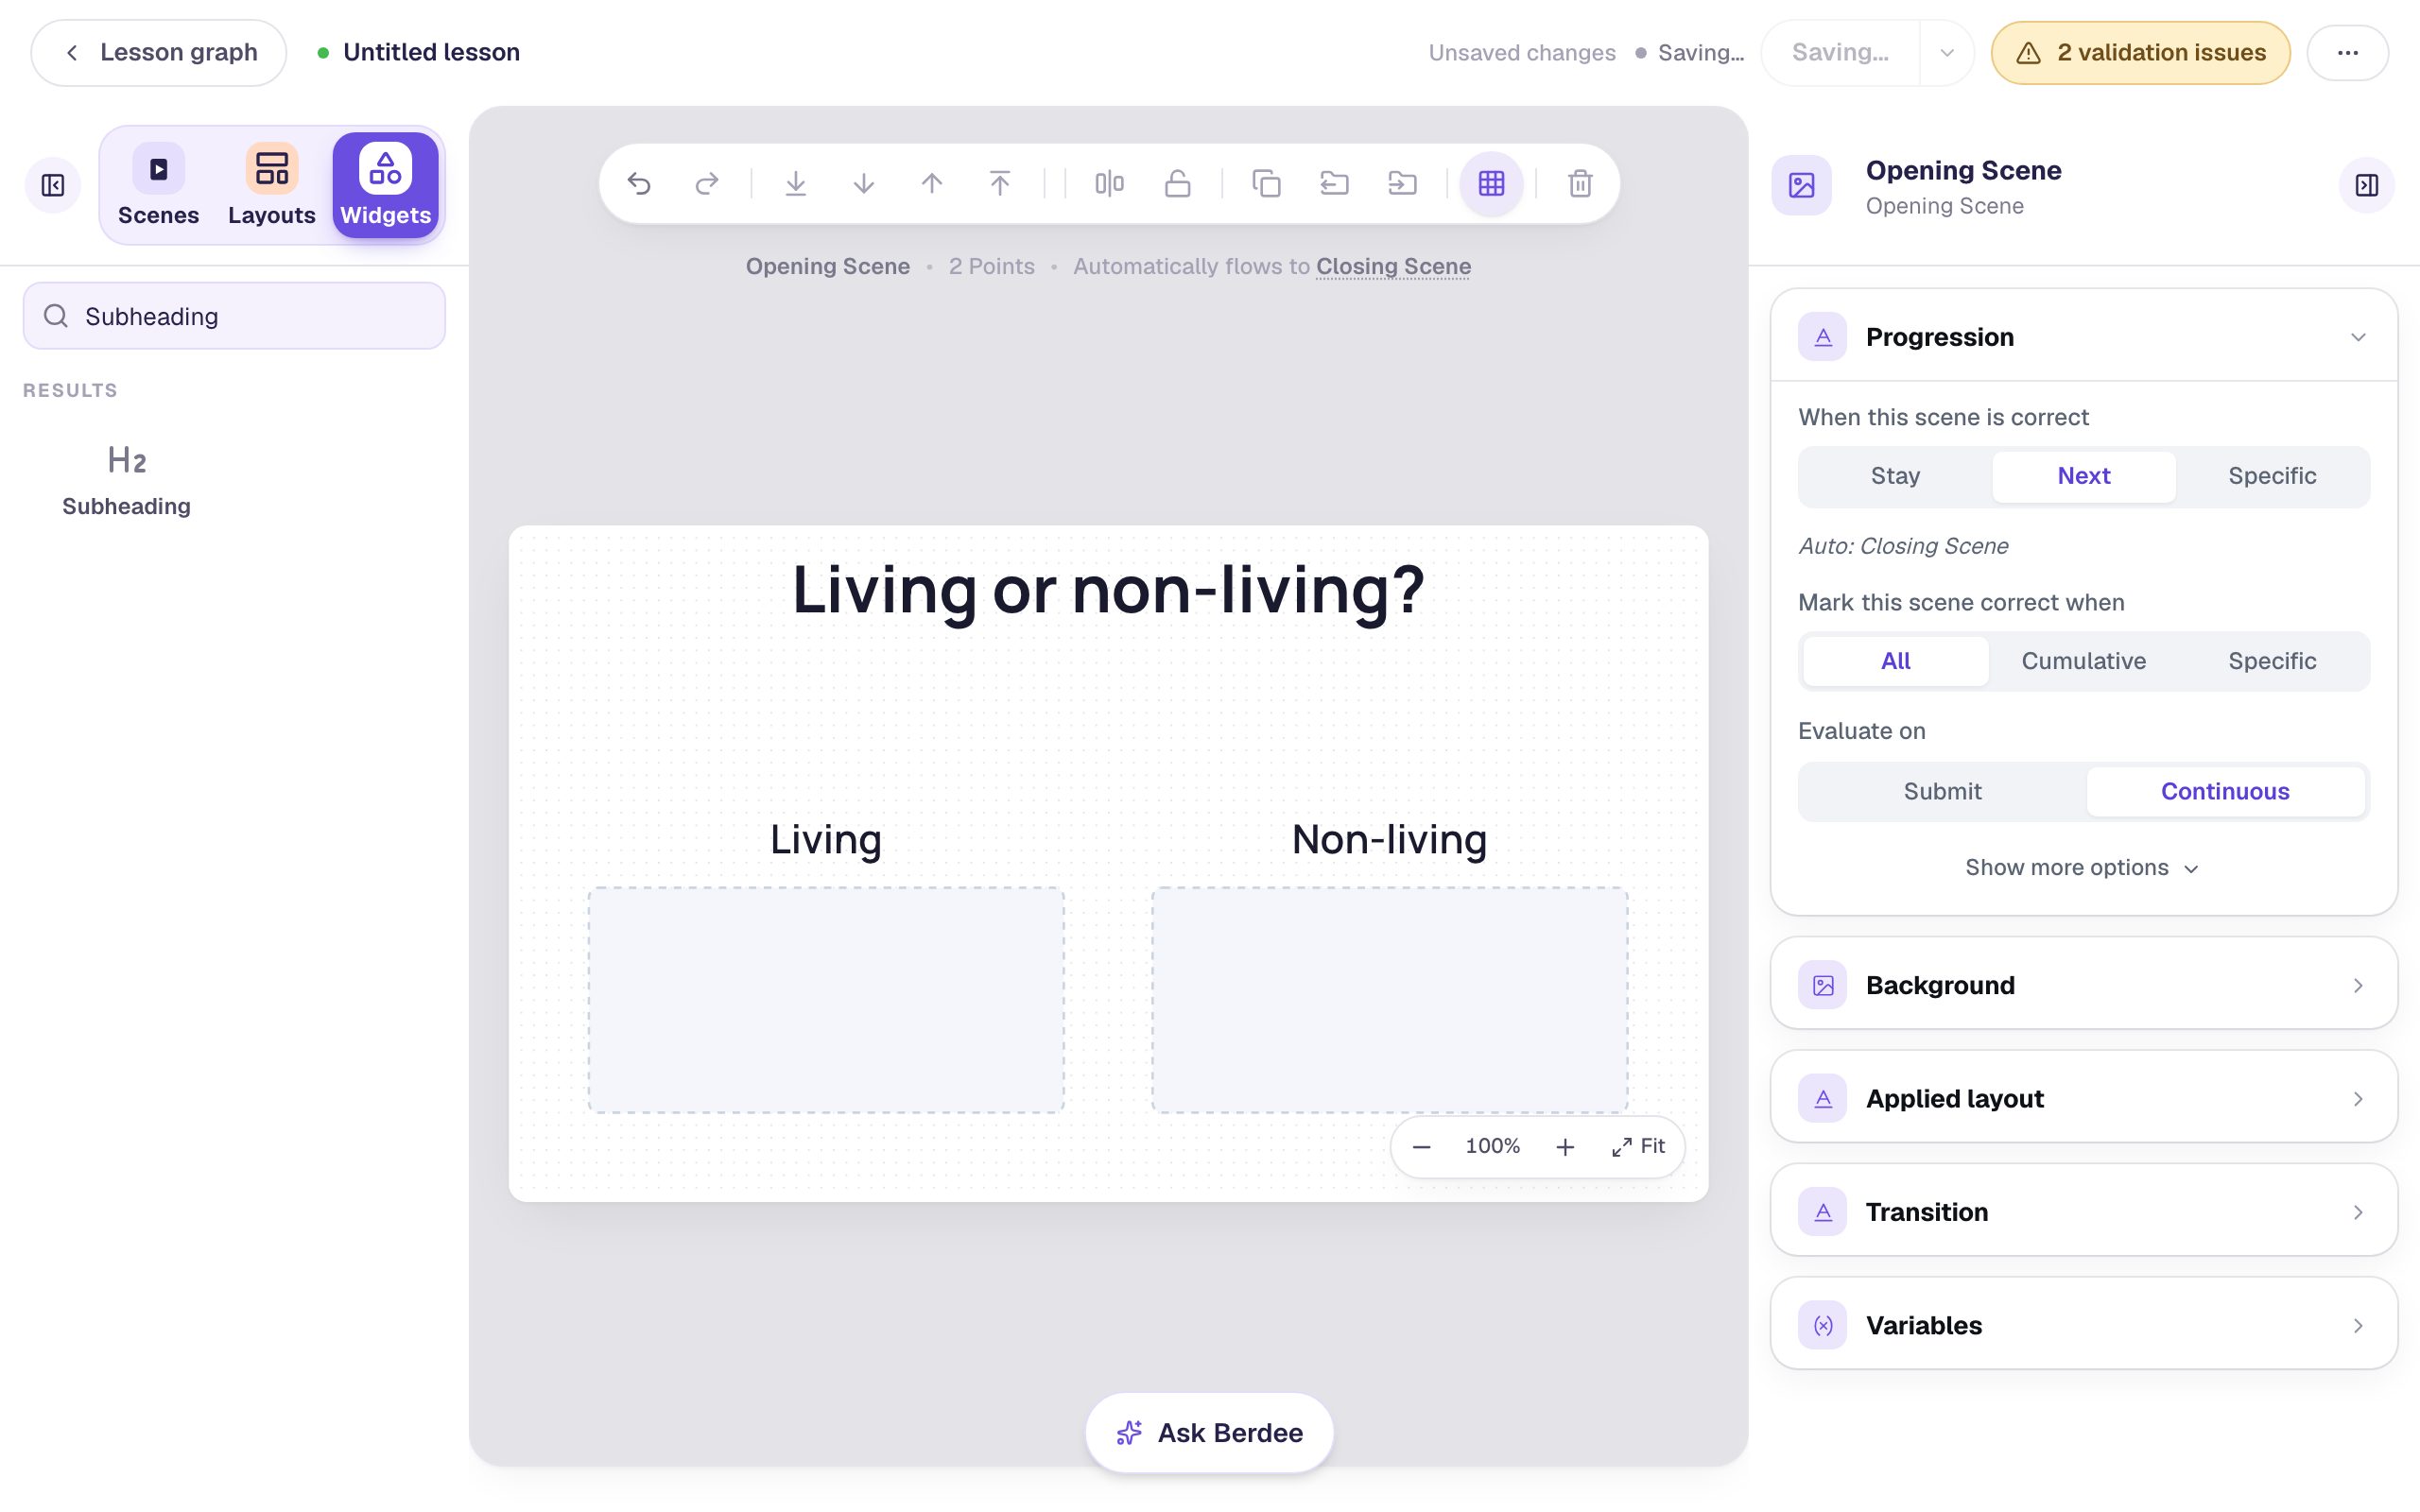
A bucket also has a Text setting of its own, but that's a small hint that only shows while the bucket is empty. A Subheading stays readable after cards land.
While a bucket is selected, open Accessibility and change its Alt Text from Drop bucket to something like Living things go here. Screen readers announce that name, so students using one can tell the two buckets apart.
Step 3: Make the first card
Add a Text widget, type Tree, and press Escape. Rename it Tree at the top of the properties panel, the same way you renamed the buckets. The name is what the bucket's answer list will show.
Make it look like something you can pick up. In Style & Layout:
- Click Background Color and choose the soft yellow from the Theme row.
- Set Width to Fixed width, then under Show more options set Width to
160.
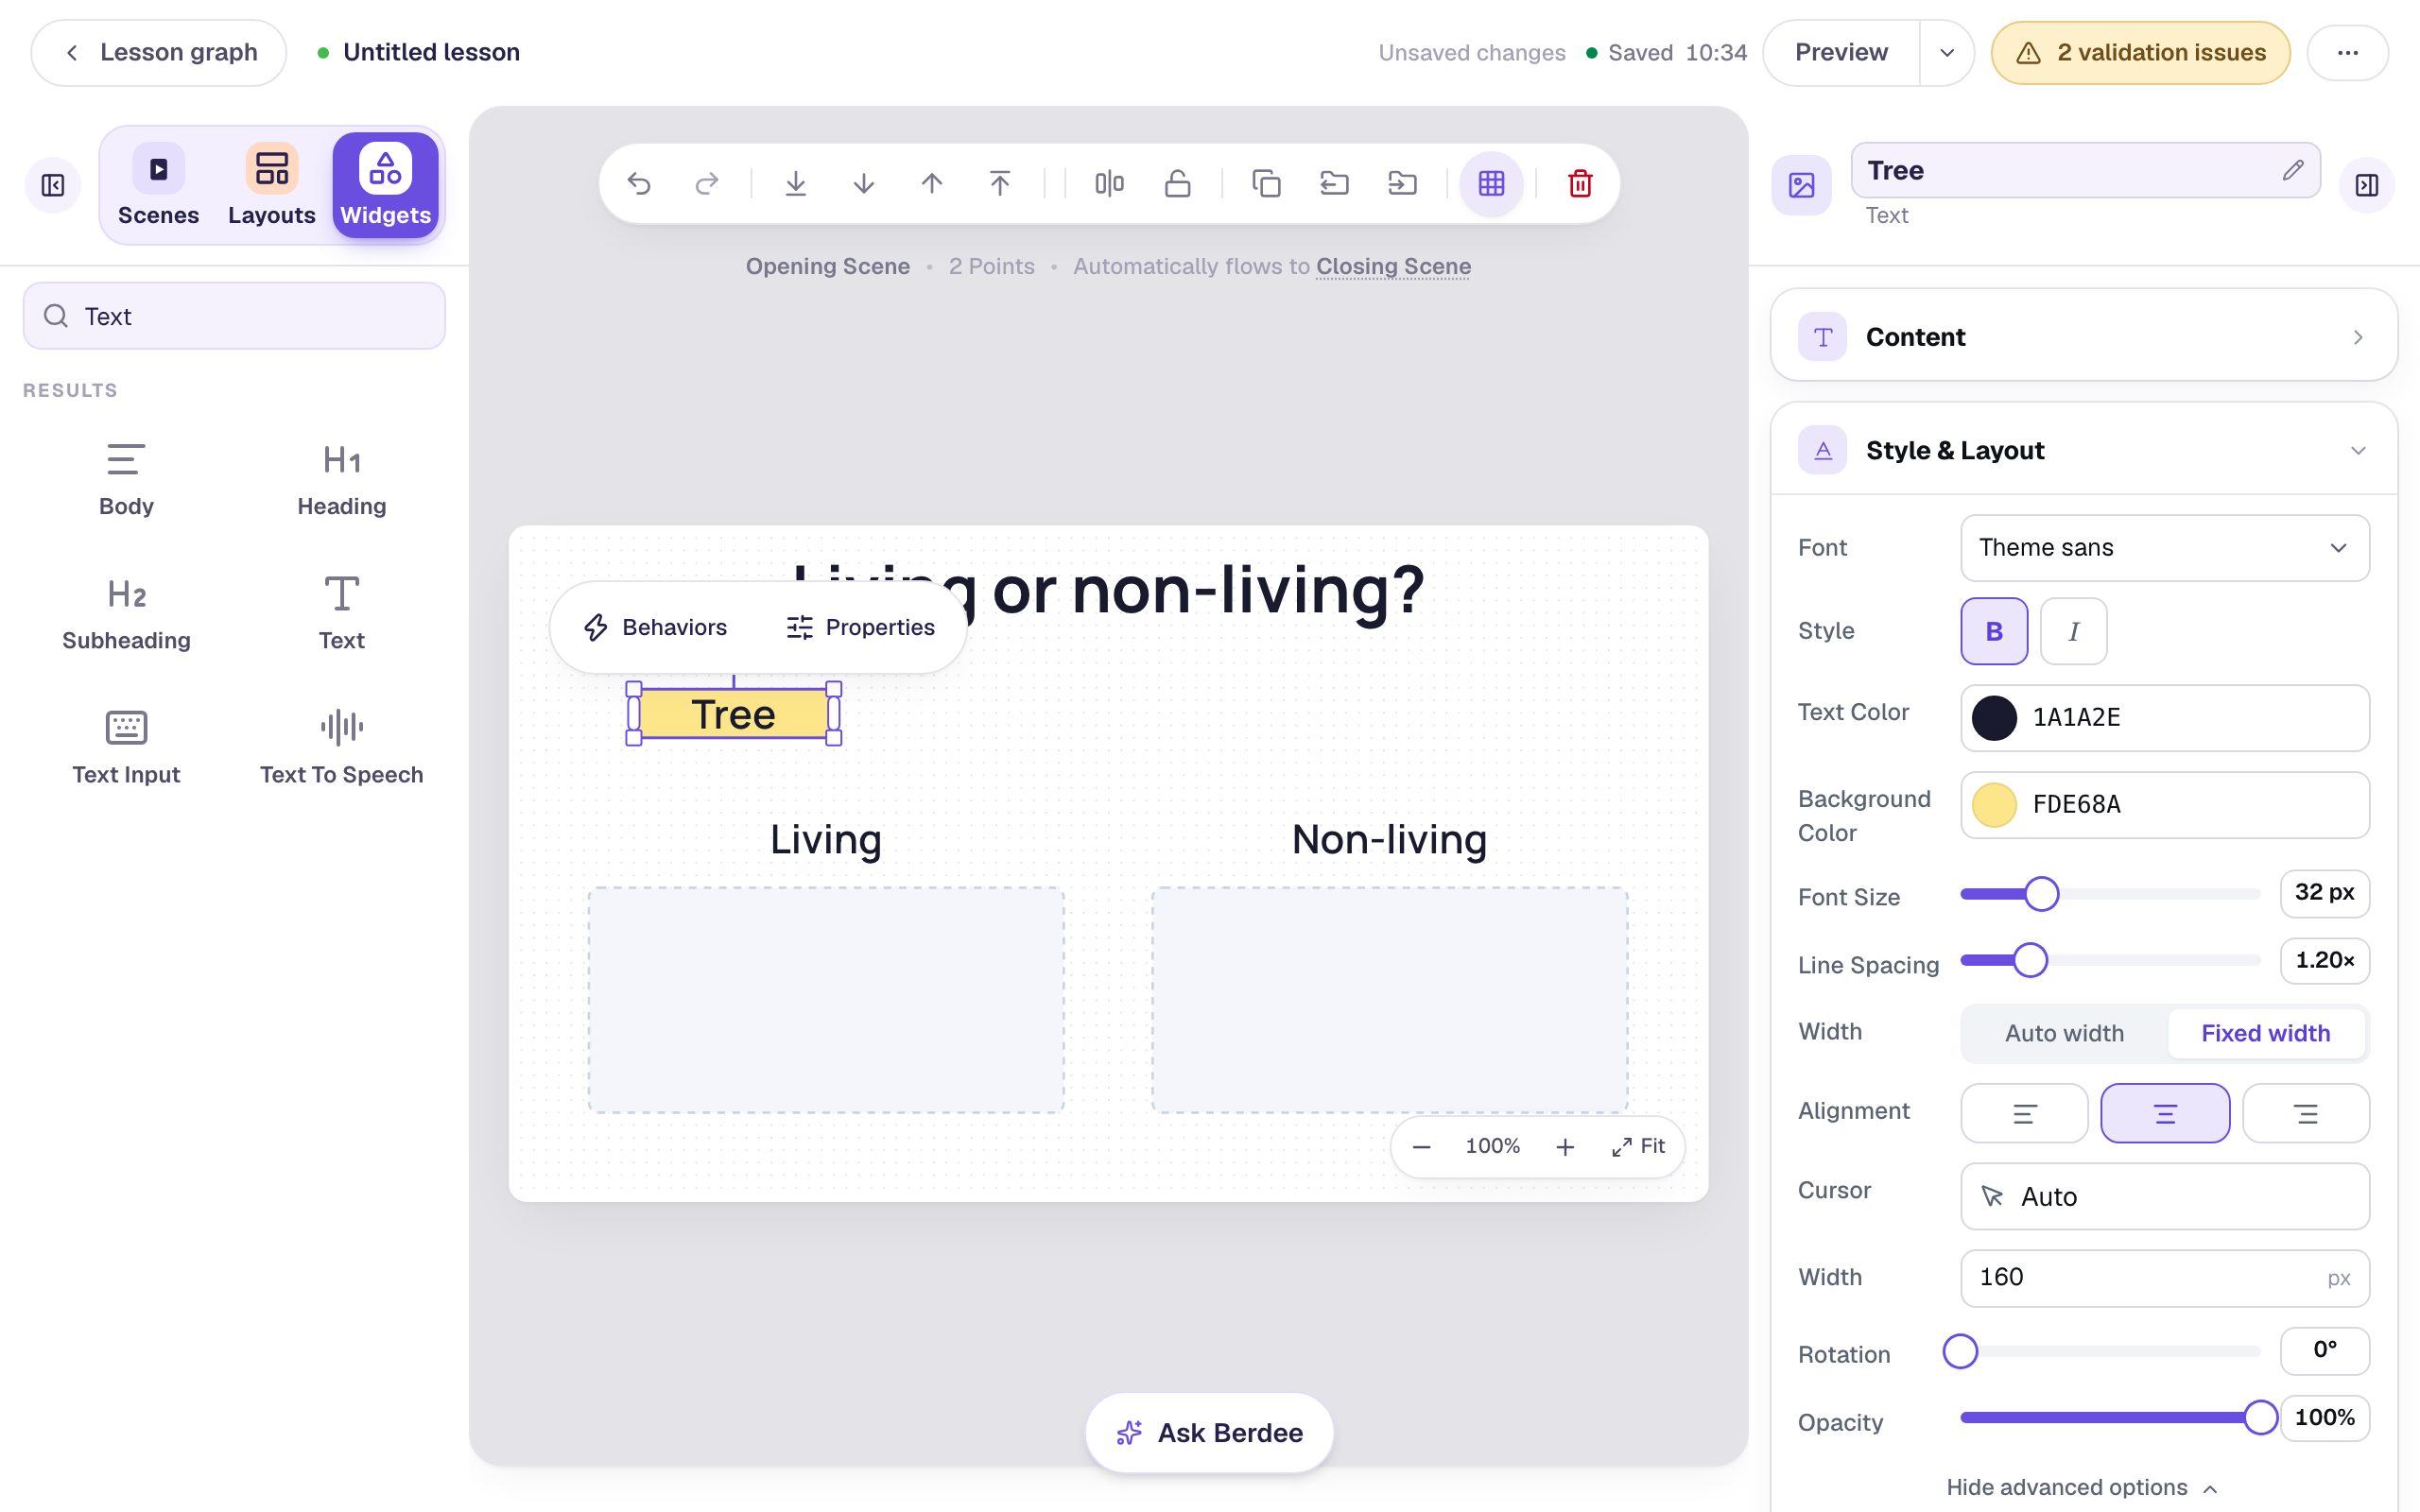
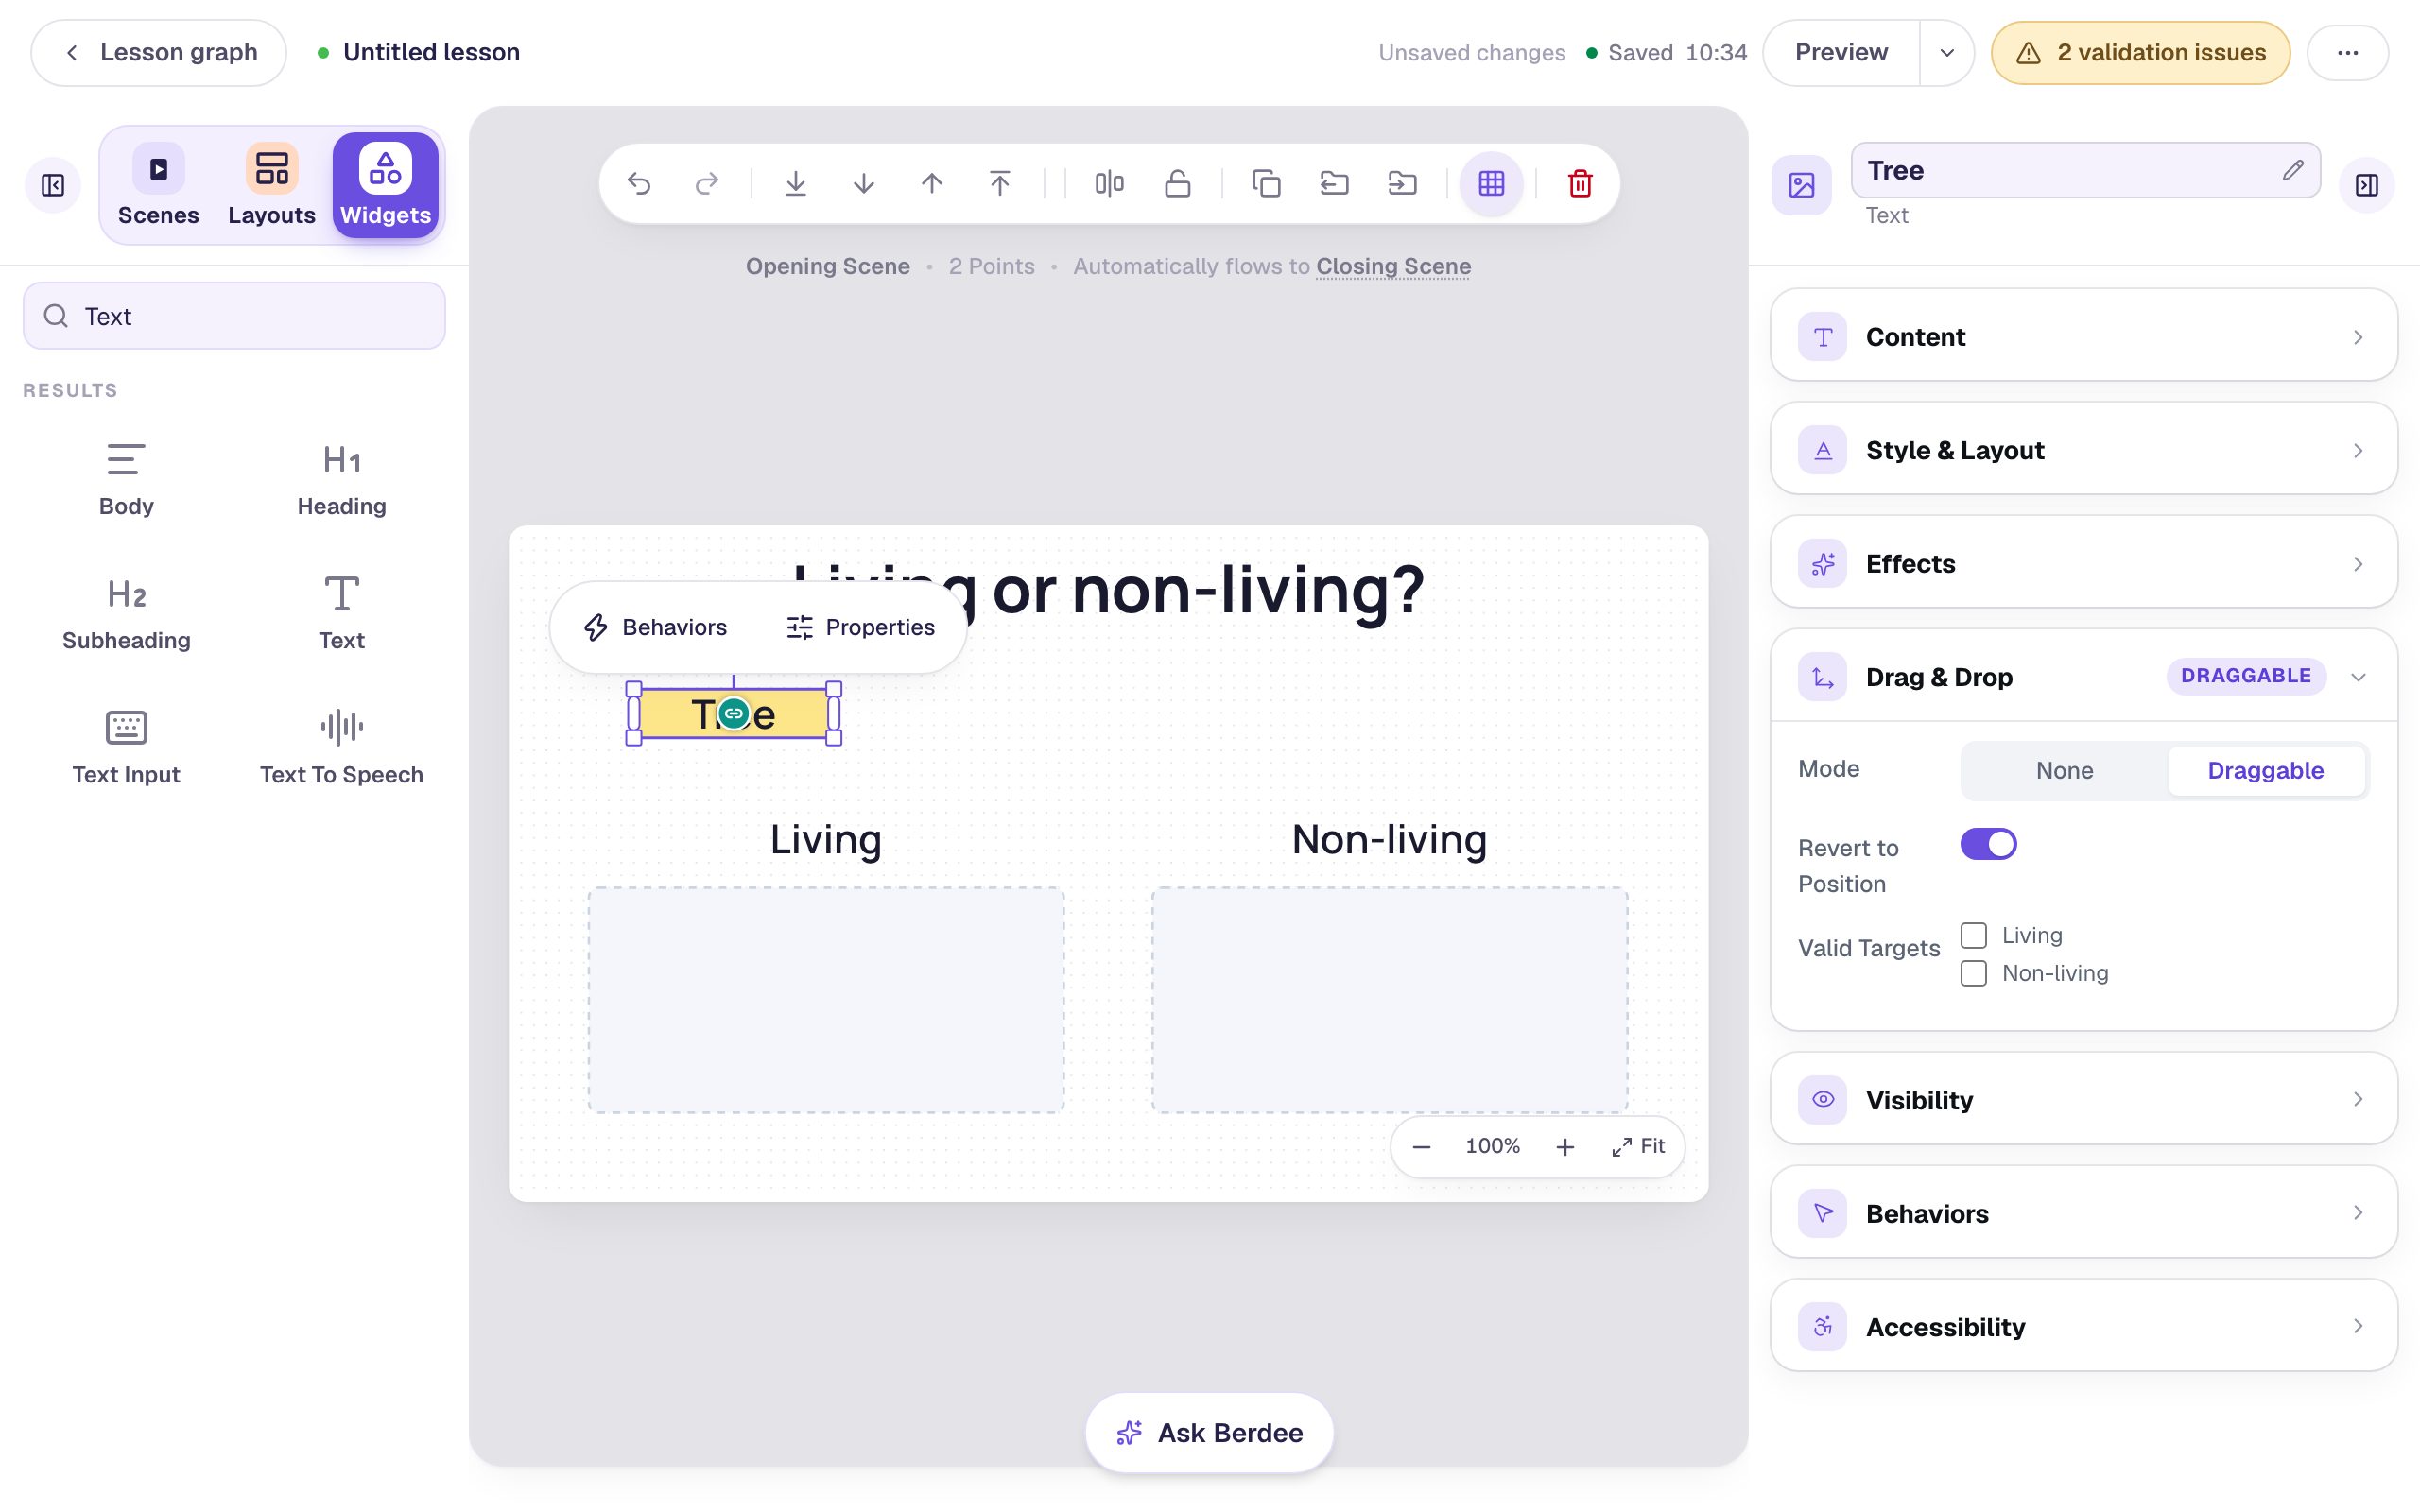
Now open Drag & Drop and set Mode to Draggable. The section's header now says DRAGGABLE, and a small round link badge appears in the middle of the card. You'll use it in Step 5.
Step 4: Copy the card three times
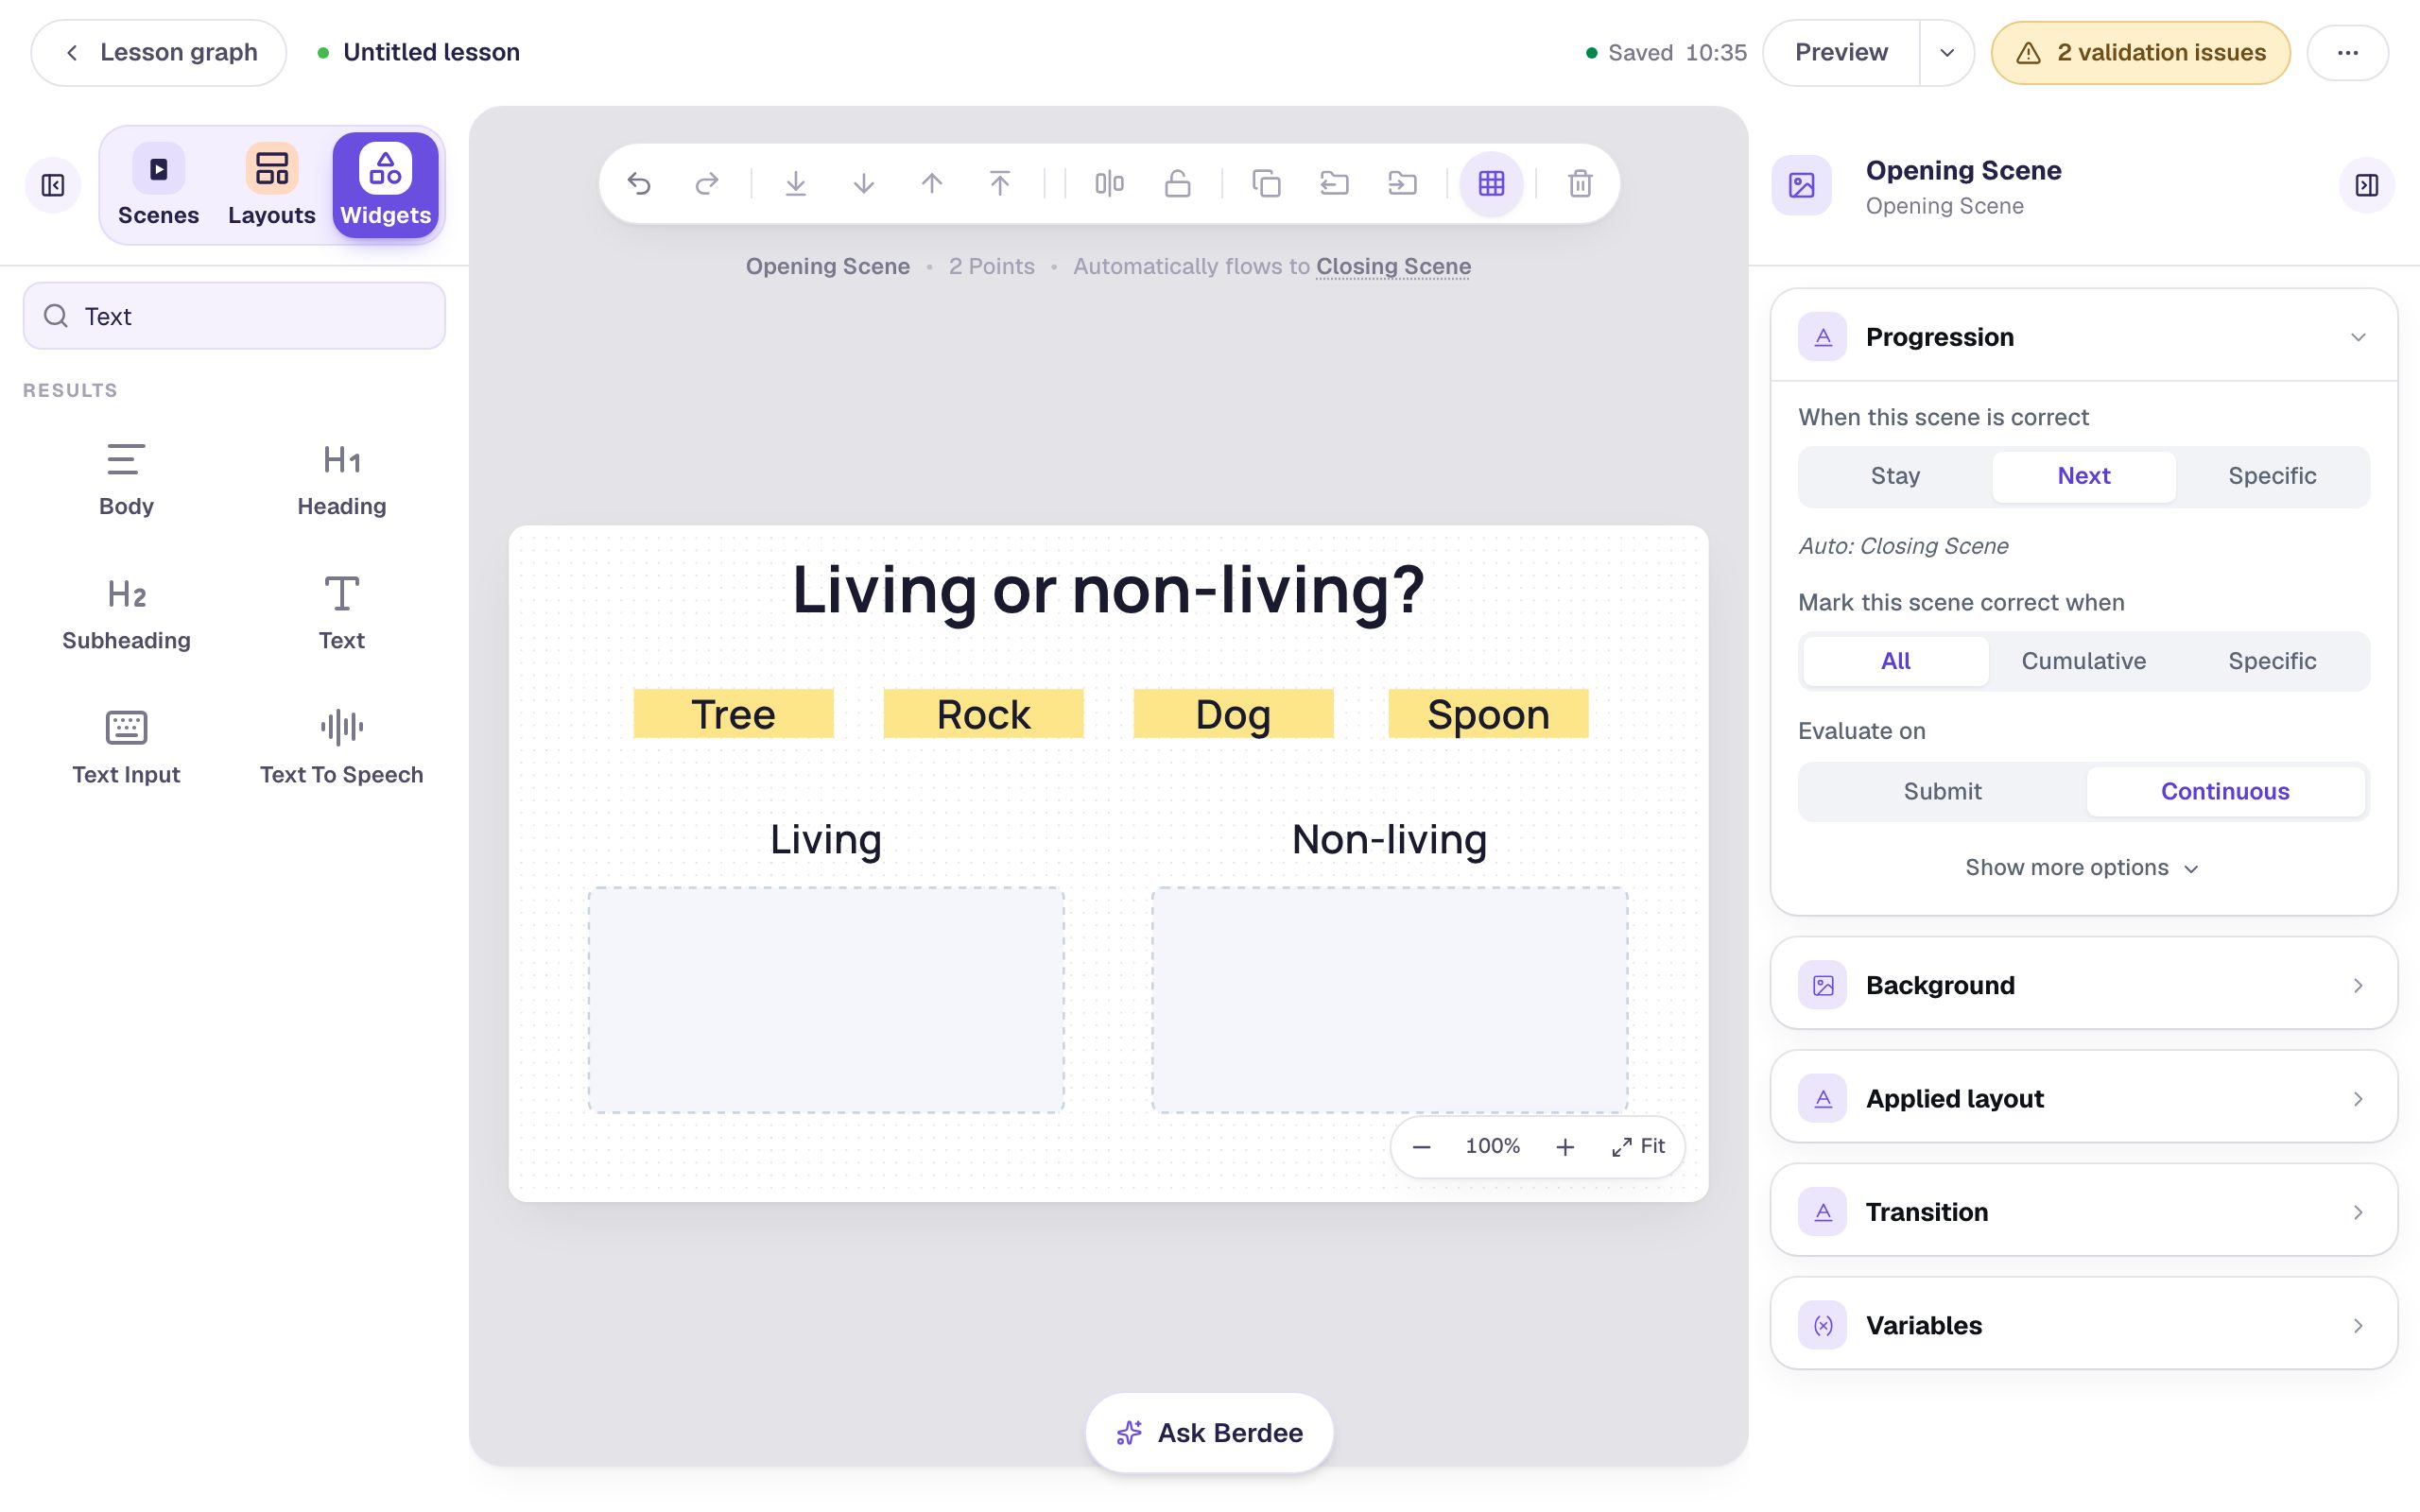
Styling one card and copying it is quicker than building four. With Tree selected, click Duplicate in the toolbar above the canvas. The copy keeps the color, the width, and the Draggable mode. Then:
- Drag the copy into place beside Tree. Grab it near its edge: the middle of a draggable card is its link badge, and dragging that draws a connection instead of moving the card.
- Double-click the copy's edge to edit its word, and type
Rock. - Rename it
Rockin the properties panel.
Repeat for Dog and Spoon. You now have four cards in a row above the buckets.
Step 5: Connect each card to its bucket
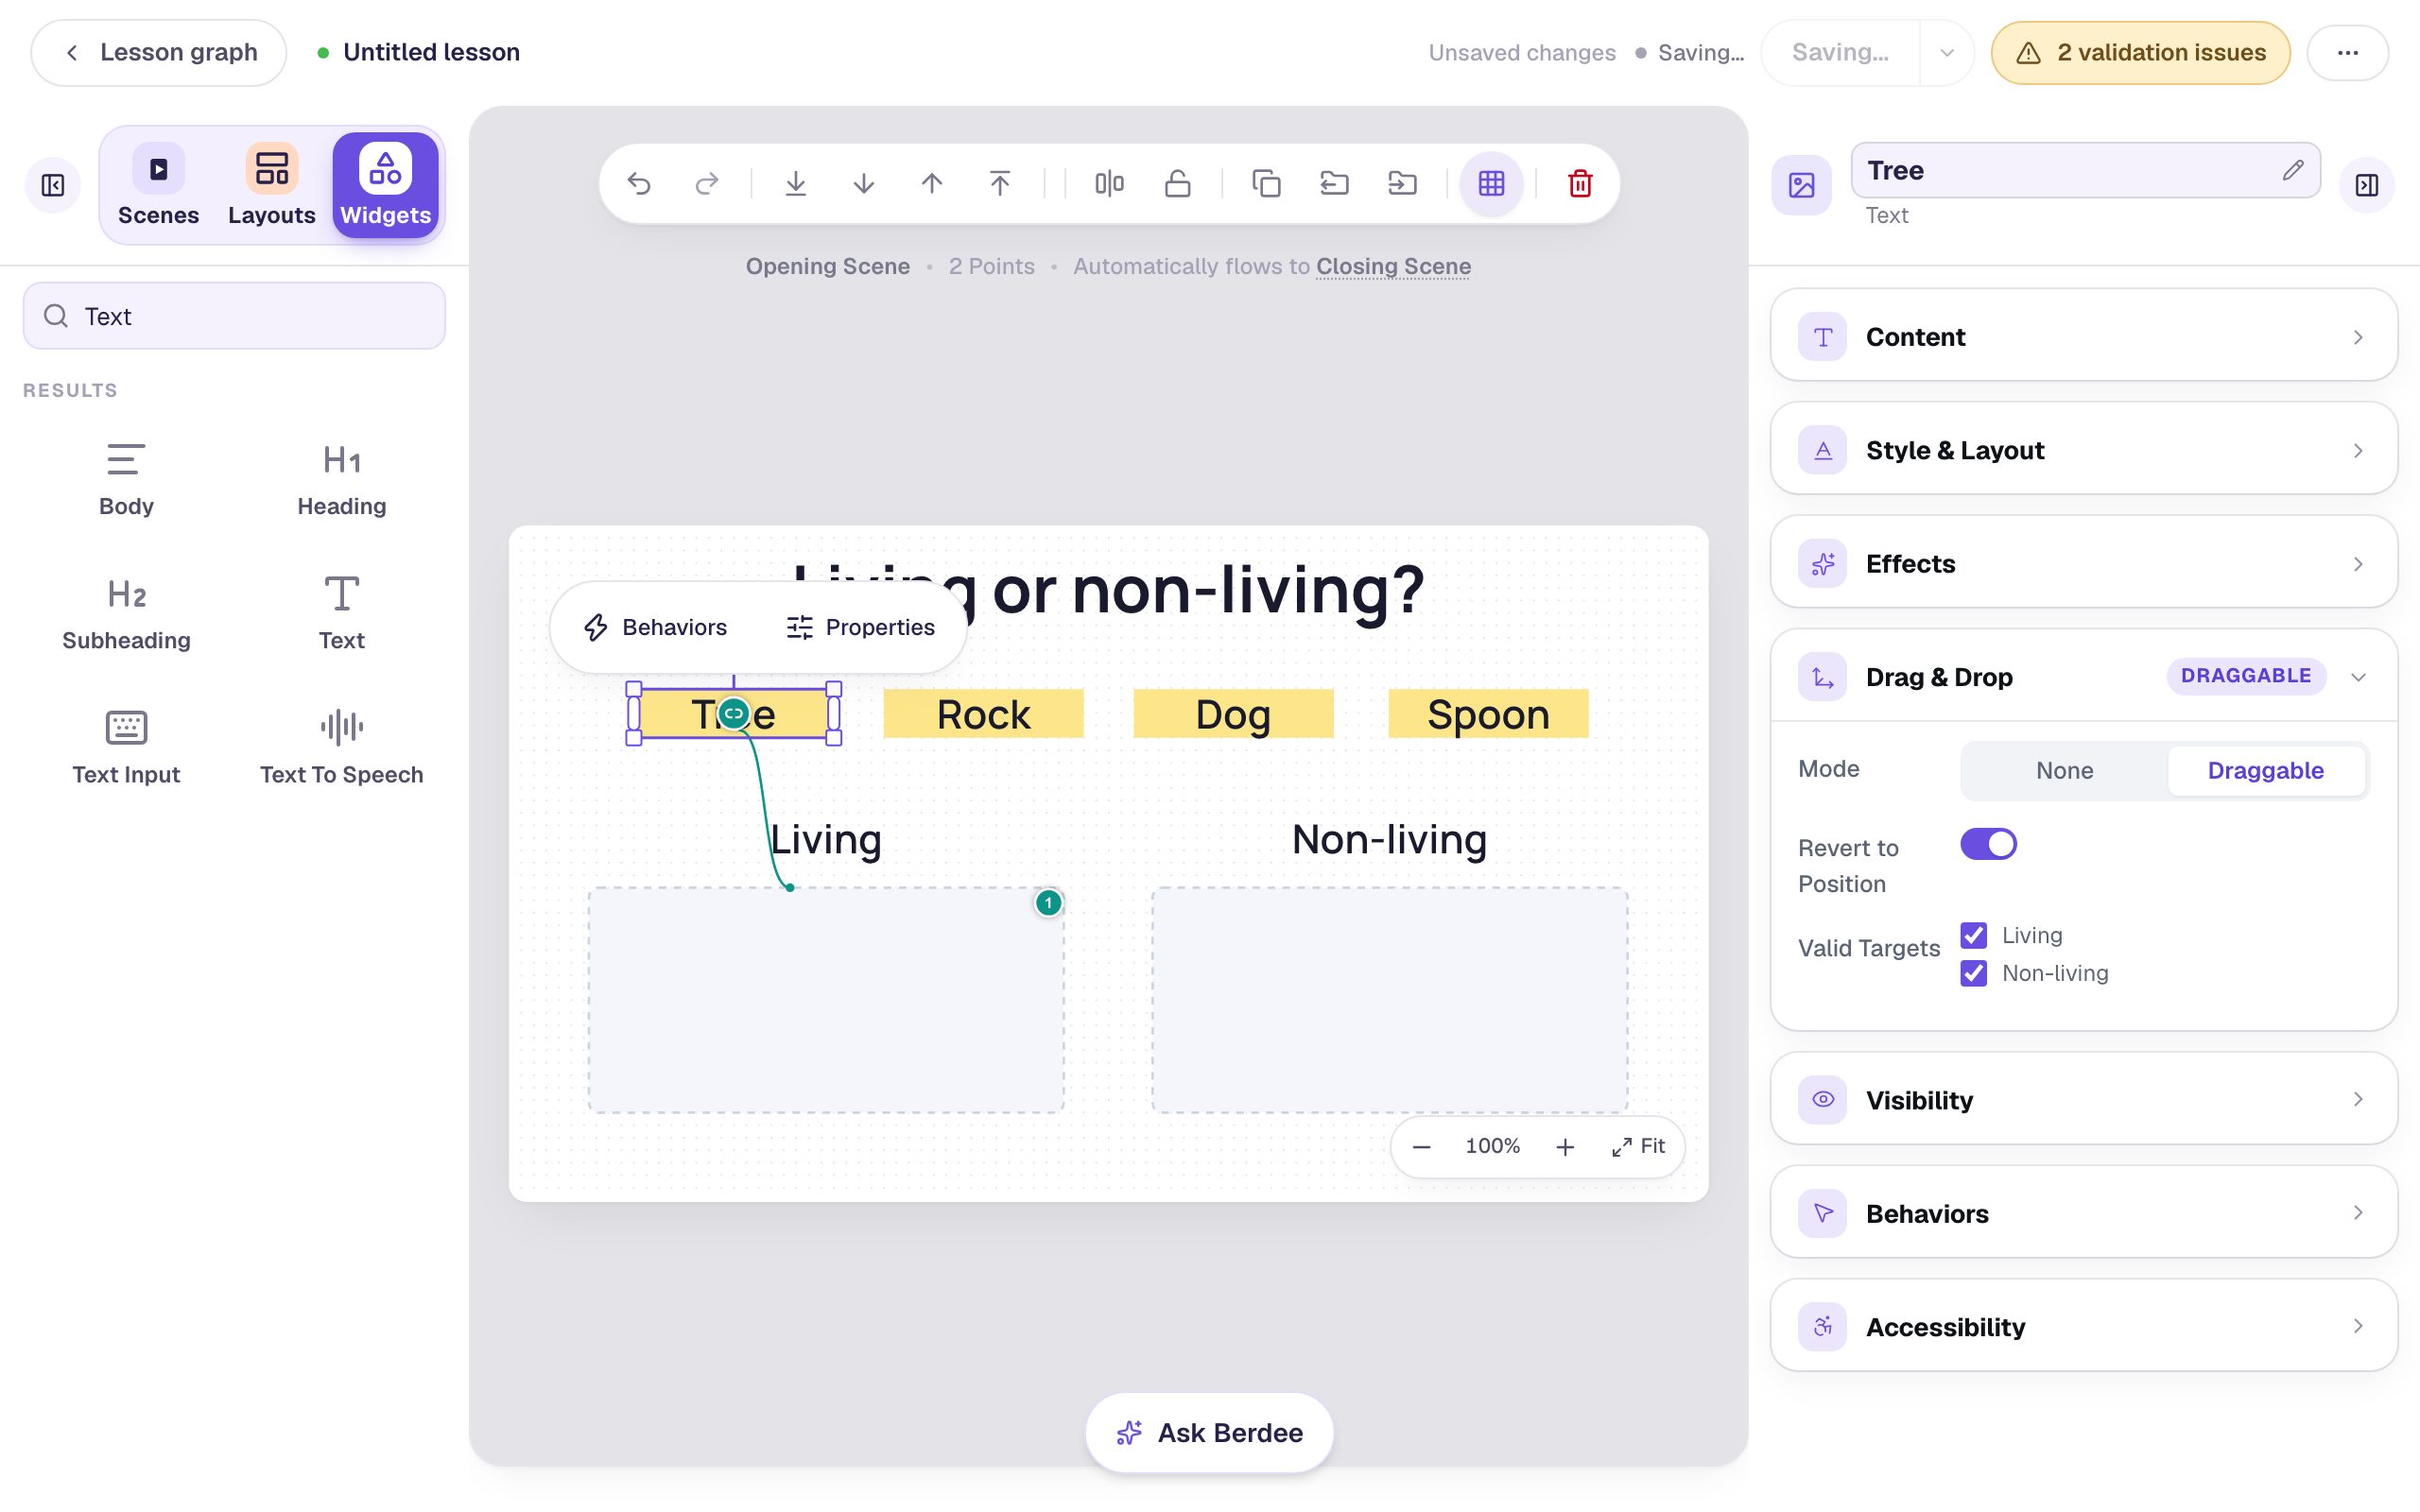
This is the answer key, and you draw it. Click a card to select it, then drag from the link badge in its middle and drop it on the bucket where the card belongs:
- Tree goes to Living.
- Rock goes to Non-living.
- Dog goes to Living.
- Spoon goes to Non-living.
Each drag does two things. It marks the card as correct for that bucket, and it lets the card be dropped in every bucket on the scene. Look at the card's Valid Targets after the first drag: both buckets are ticked. That's on purpose. If students couldn't put a card in the wrong bucket, the activity wouldn't be asking them anything.
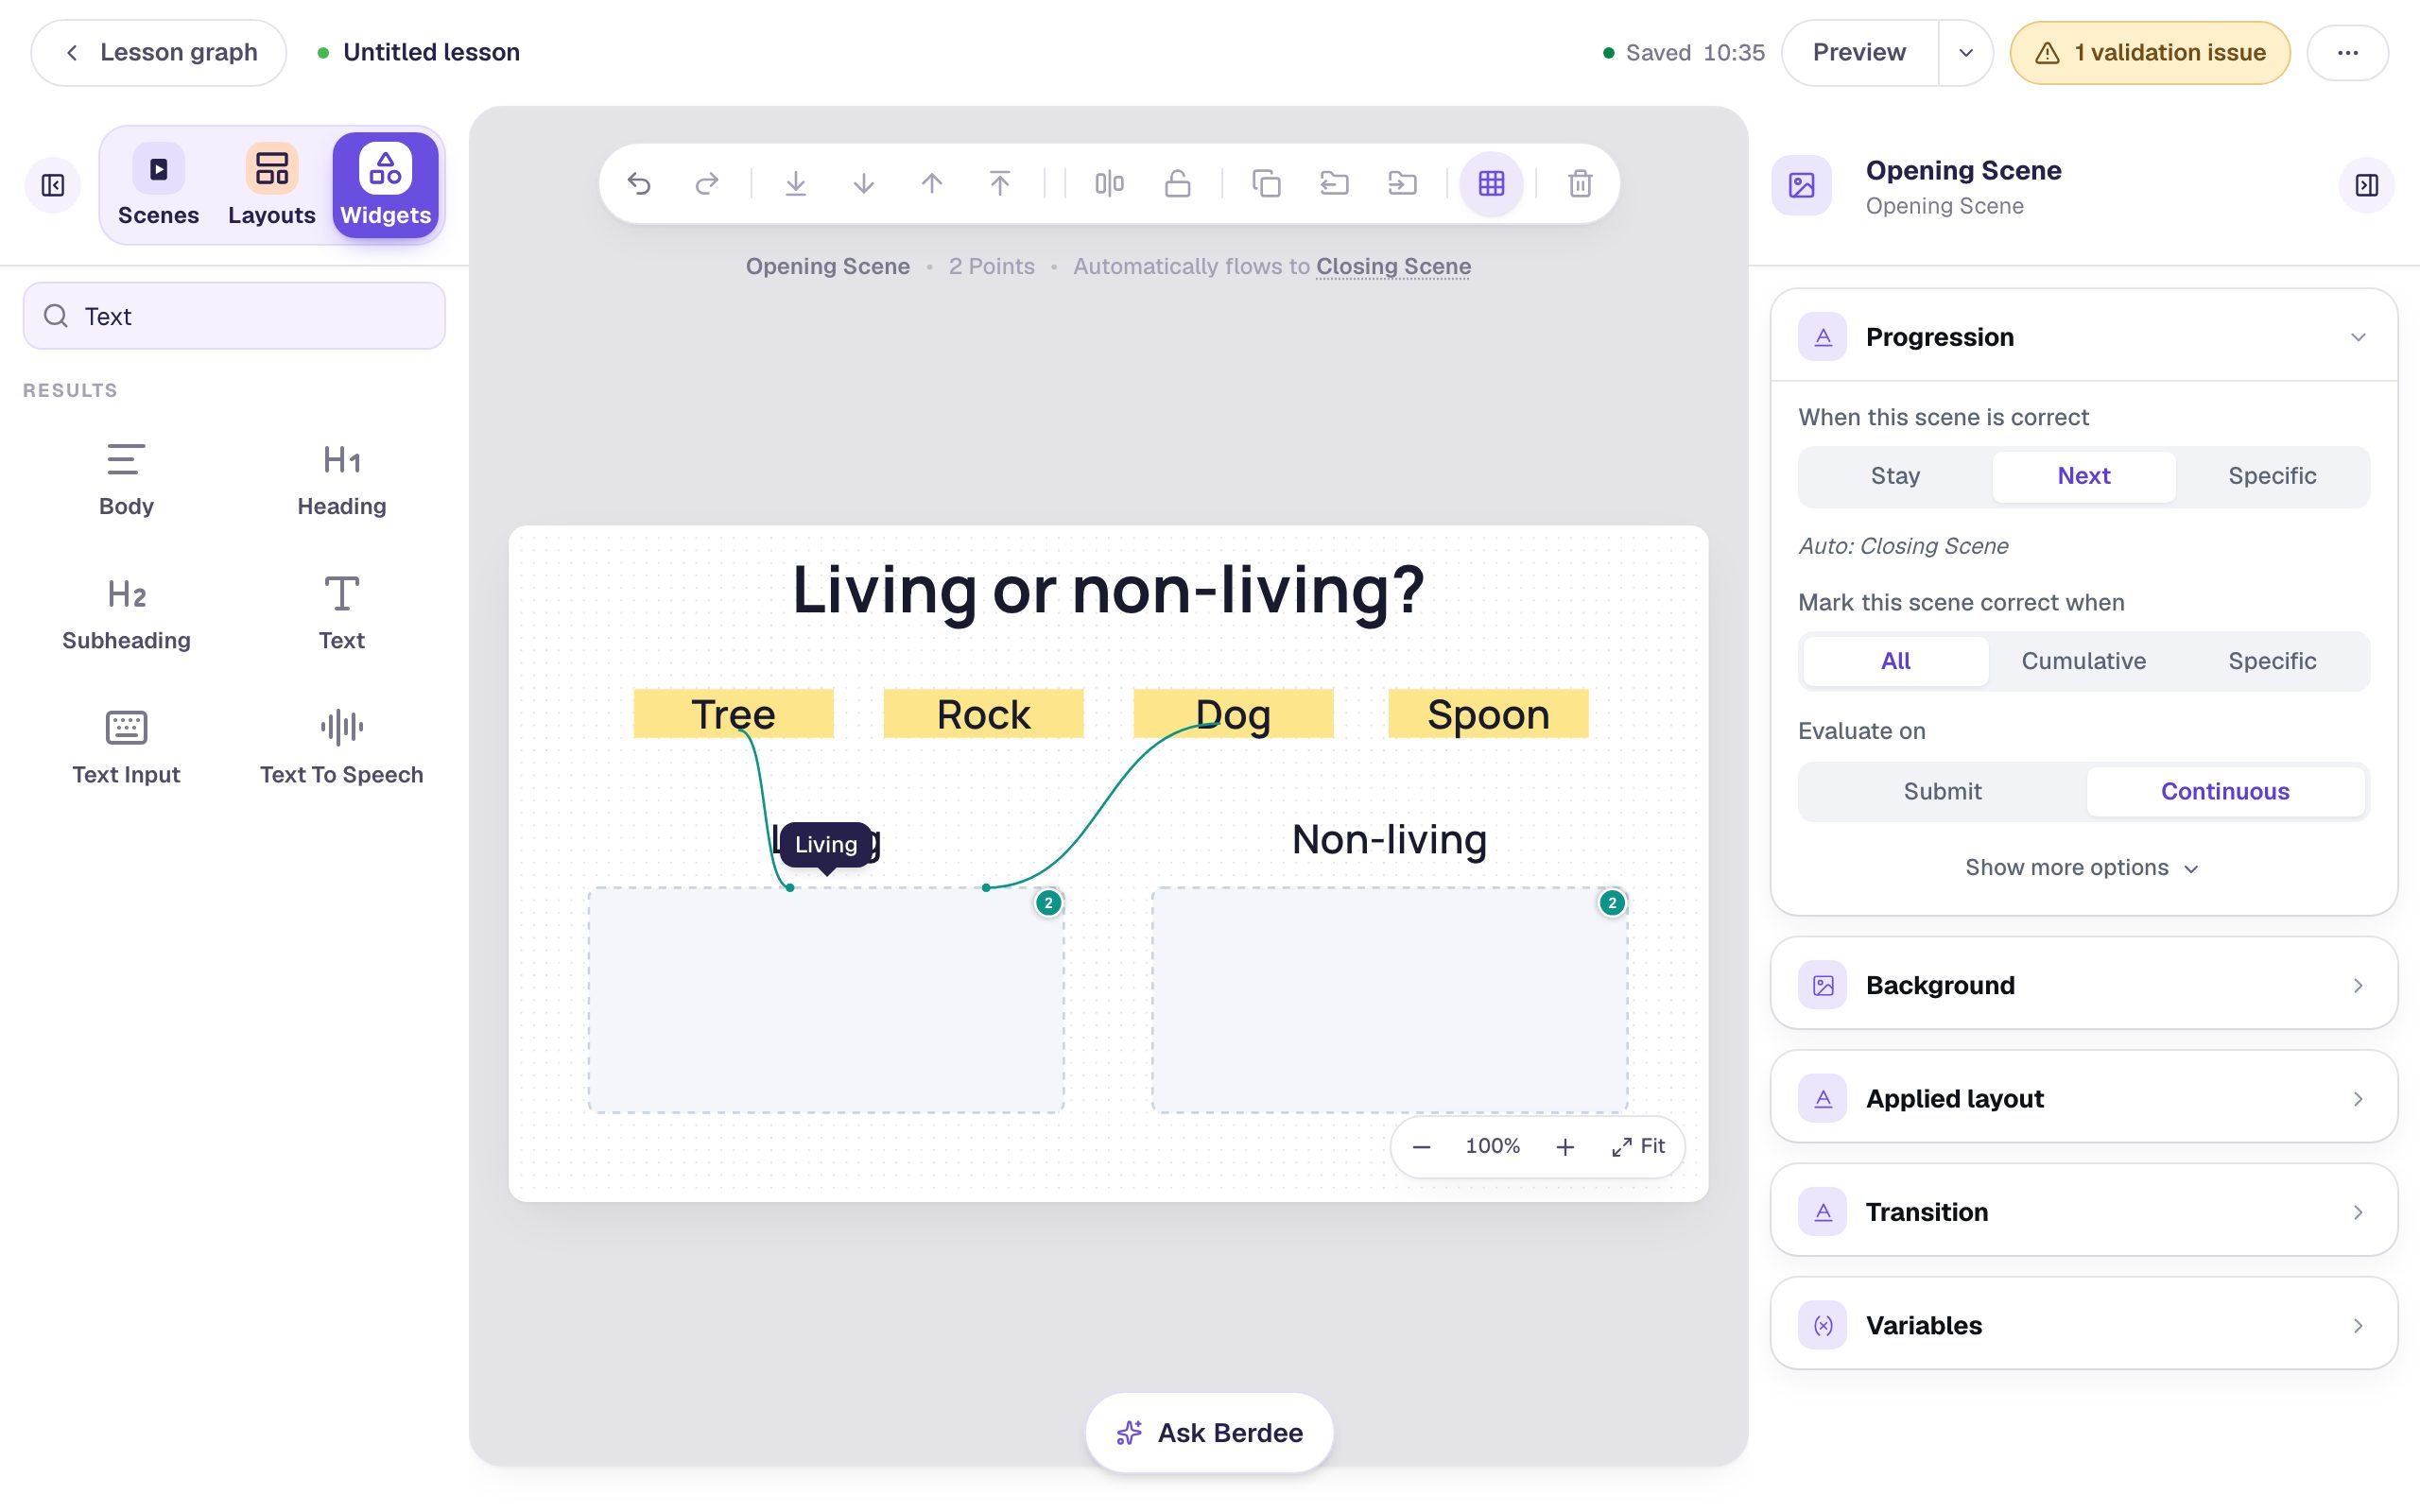
To check your answer key, point at a bucket. Lines appear from every card that belongs in it, and the small number on the bucket's corner counts them.
Connected the wrong card? Drag its badge onto the same bucket again to remove the line.
Step 6: Choose when buckets show right and wrong
Select the Living bucket and click Configure in the pill above it. The Correct draggables list shows the answer key you just drew: Tree and Dog are ticked.
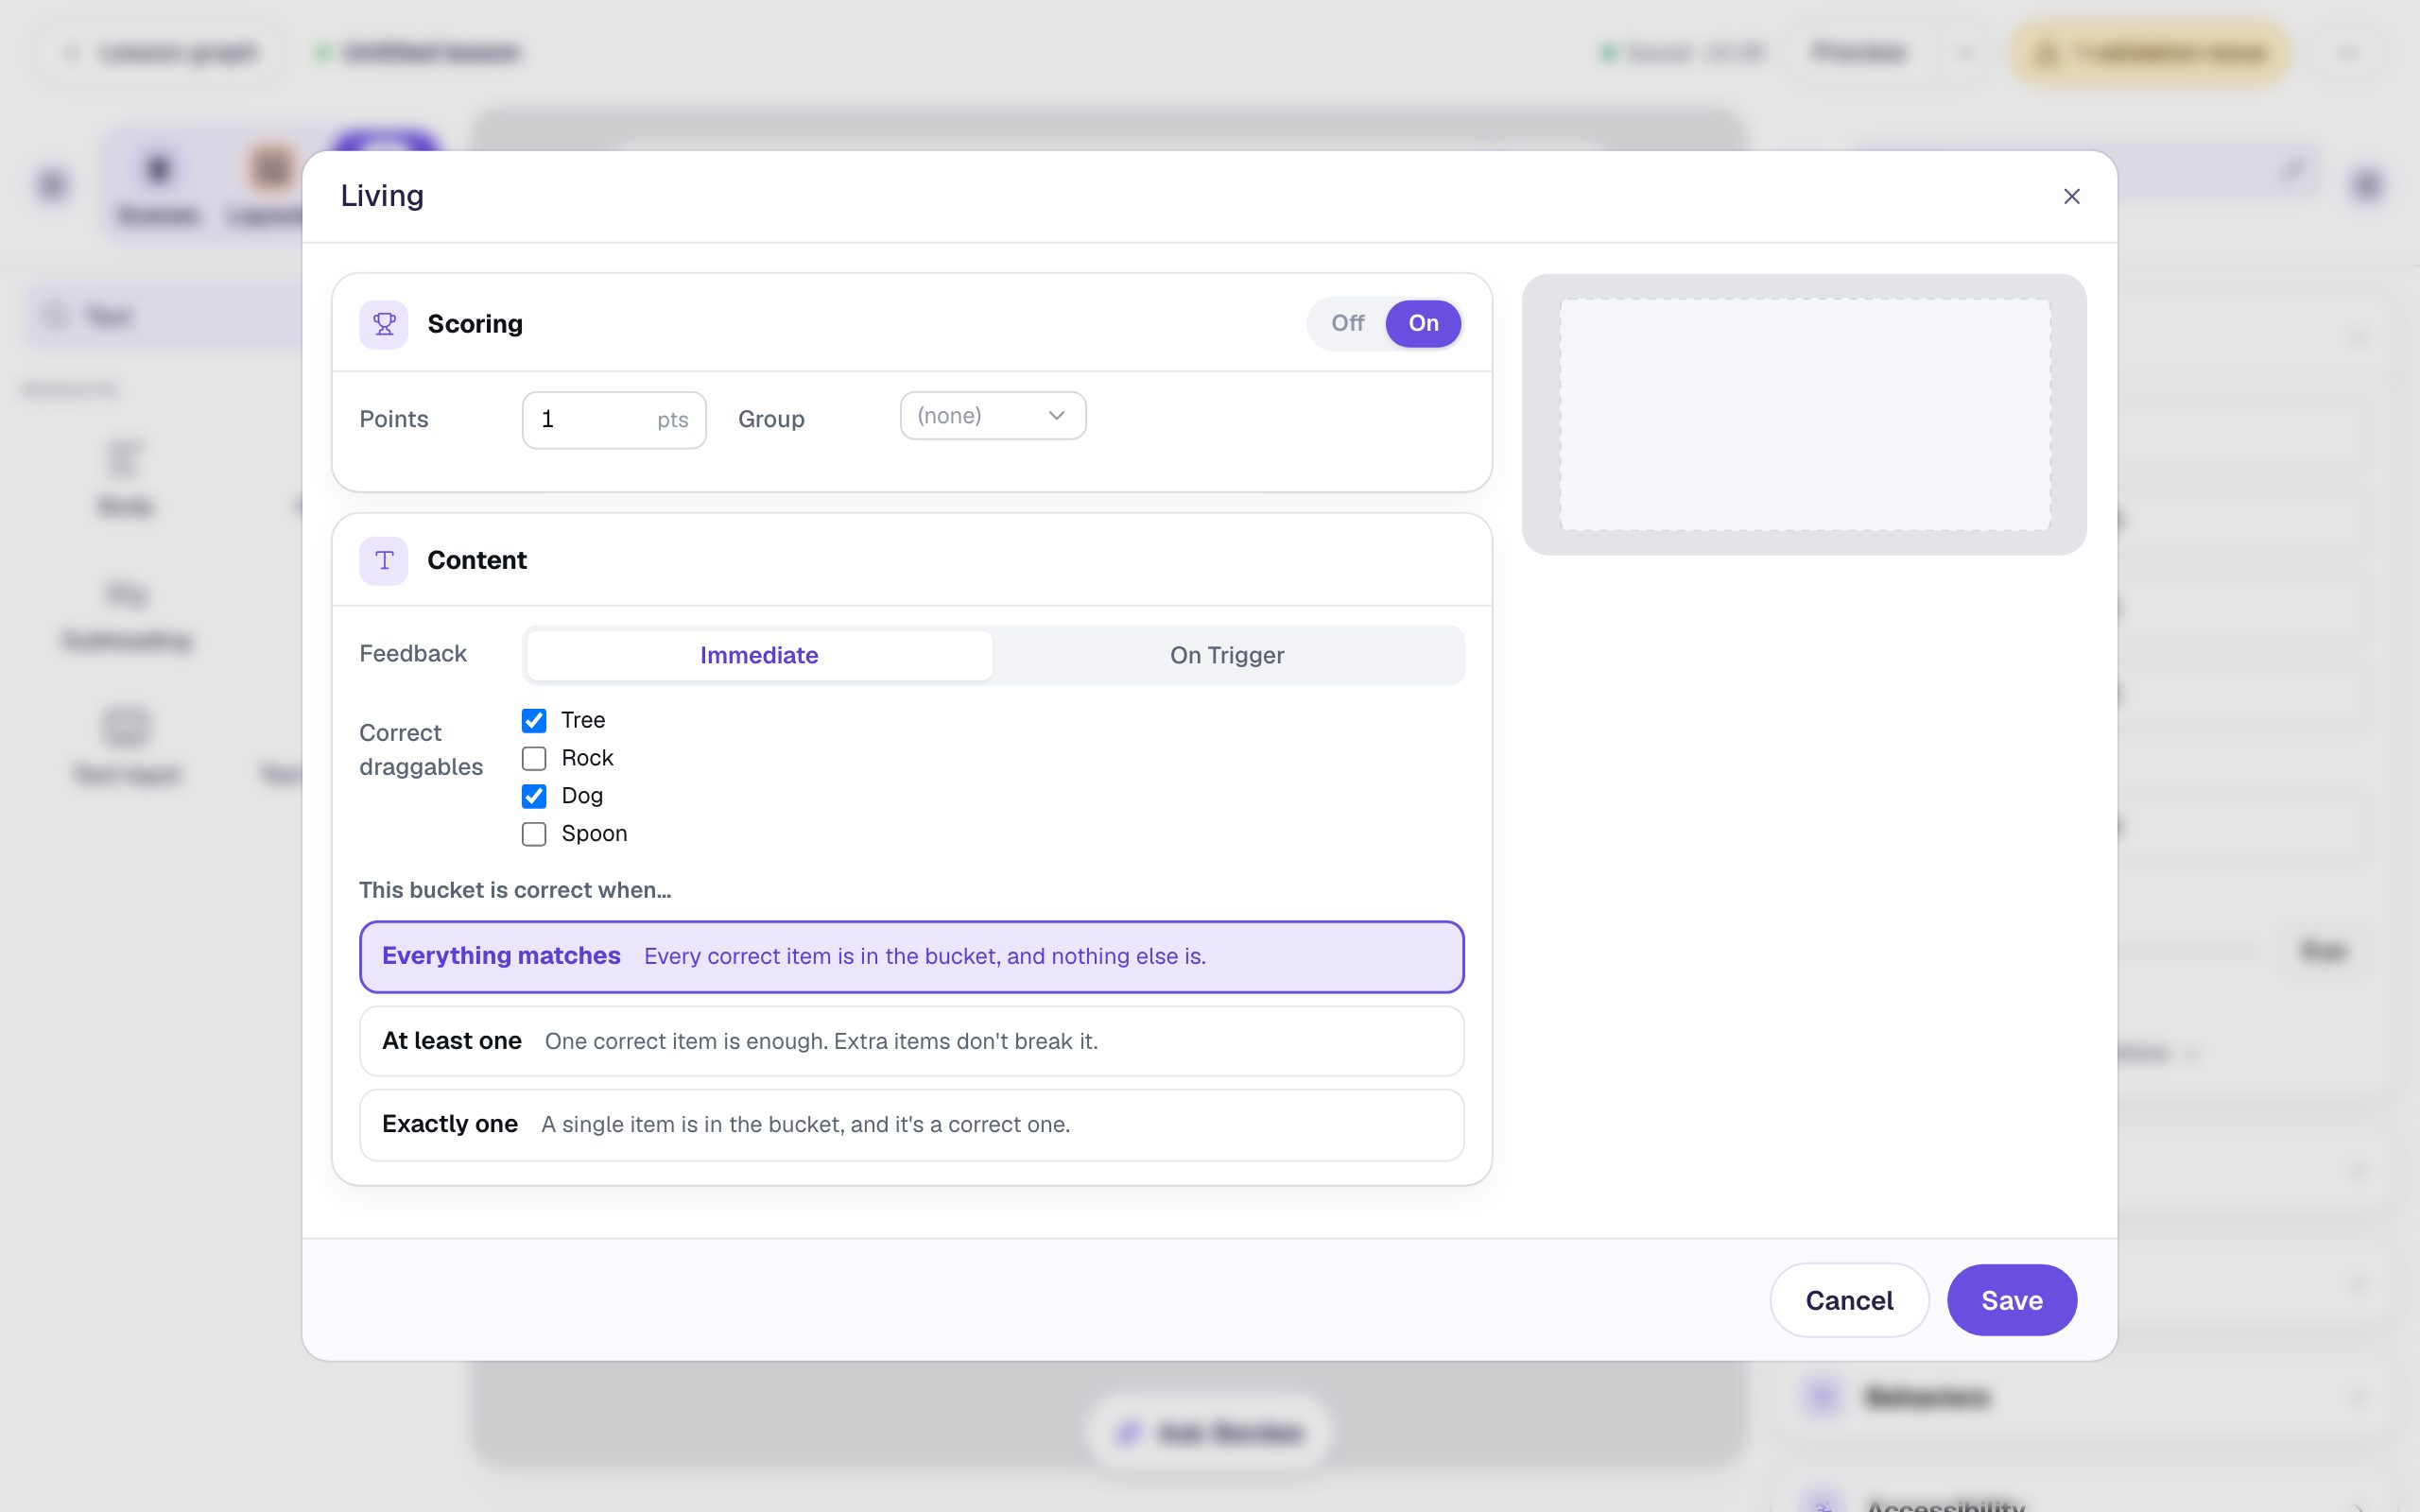
Two settings decide how the bucket behaves:
- Feedback: set it to Immediate. The bucket's border turns red as soon as a card that doesn't belong lands in it, and green once it holds exactly the right cards. Leave it on On Trigger instead if you'd rather students sort everything without hints.
- This bucket is correct when…: leave Everything matches. The bucket is right only when both of its cards are in it and nothing else is.
Click Save, then do the same for Non-living.
Each bucket is worth 1 point, and it's all or nothing: a bucket earns its point once its rule is met. So this activity is out of 2.
Step 7: Add the "I'm done" safety net
The yellow pill at the top now says 1 validation issue. Click it:
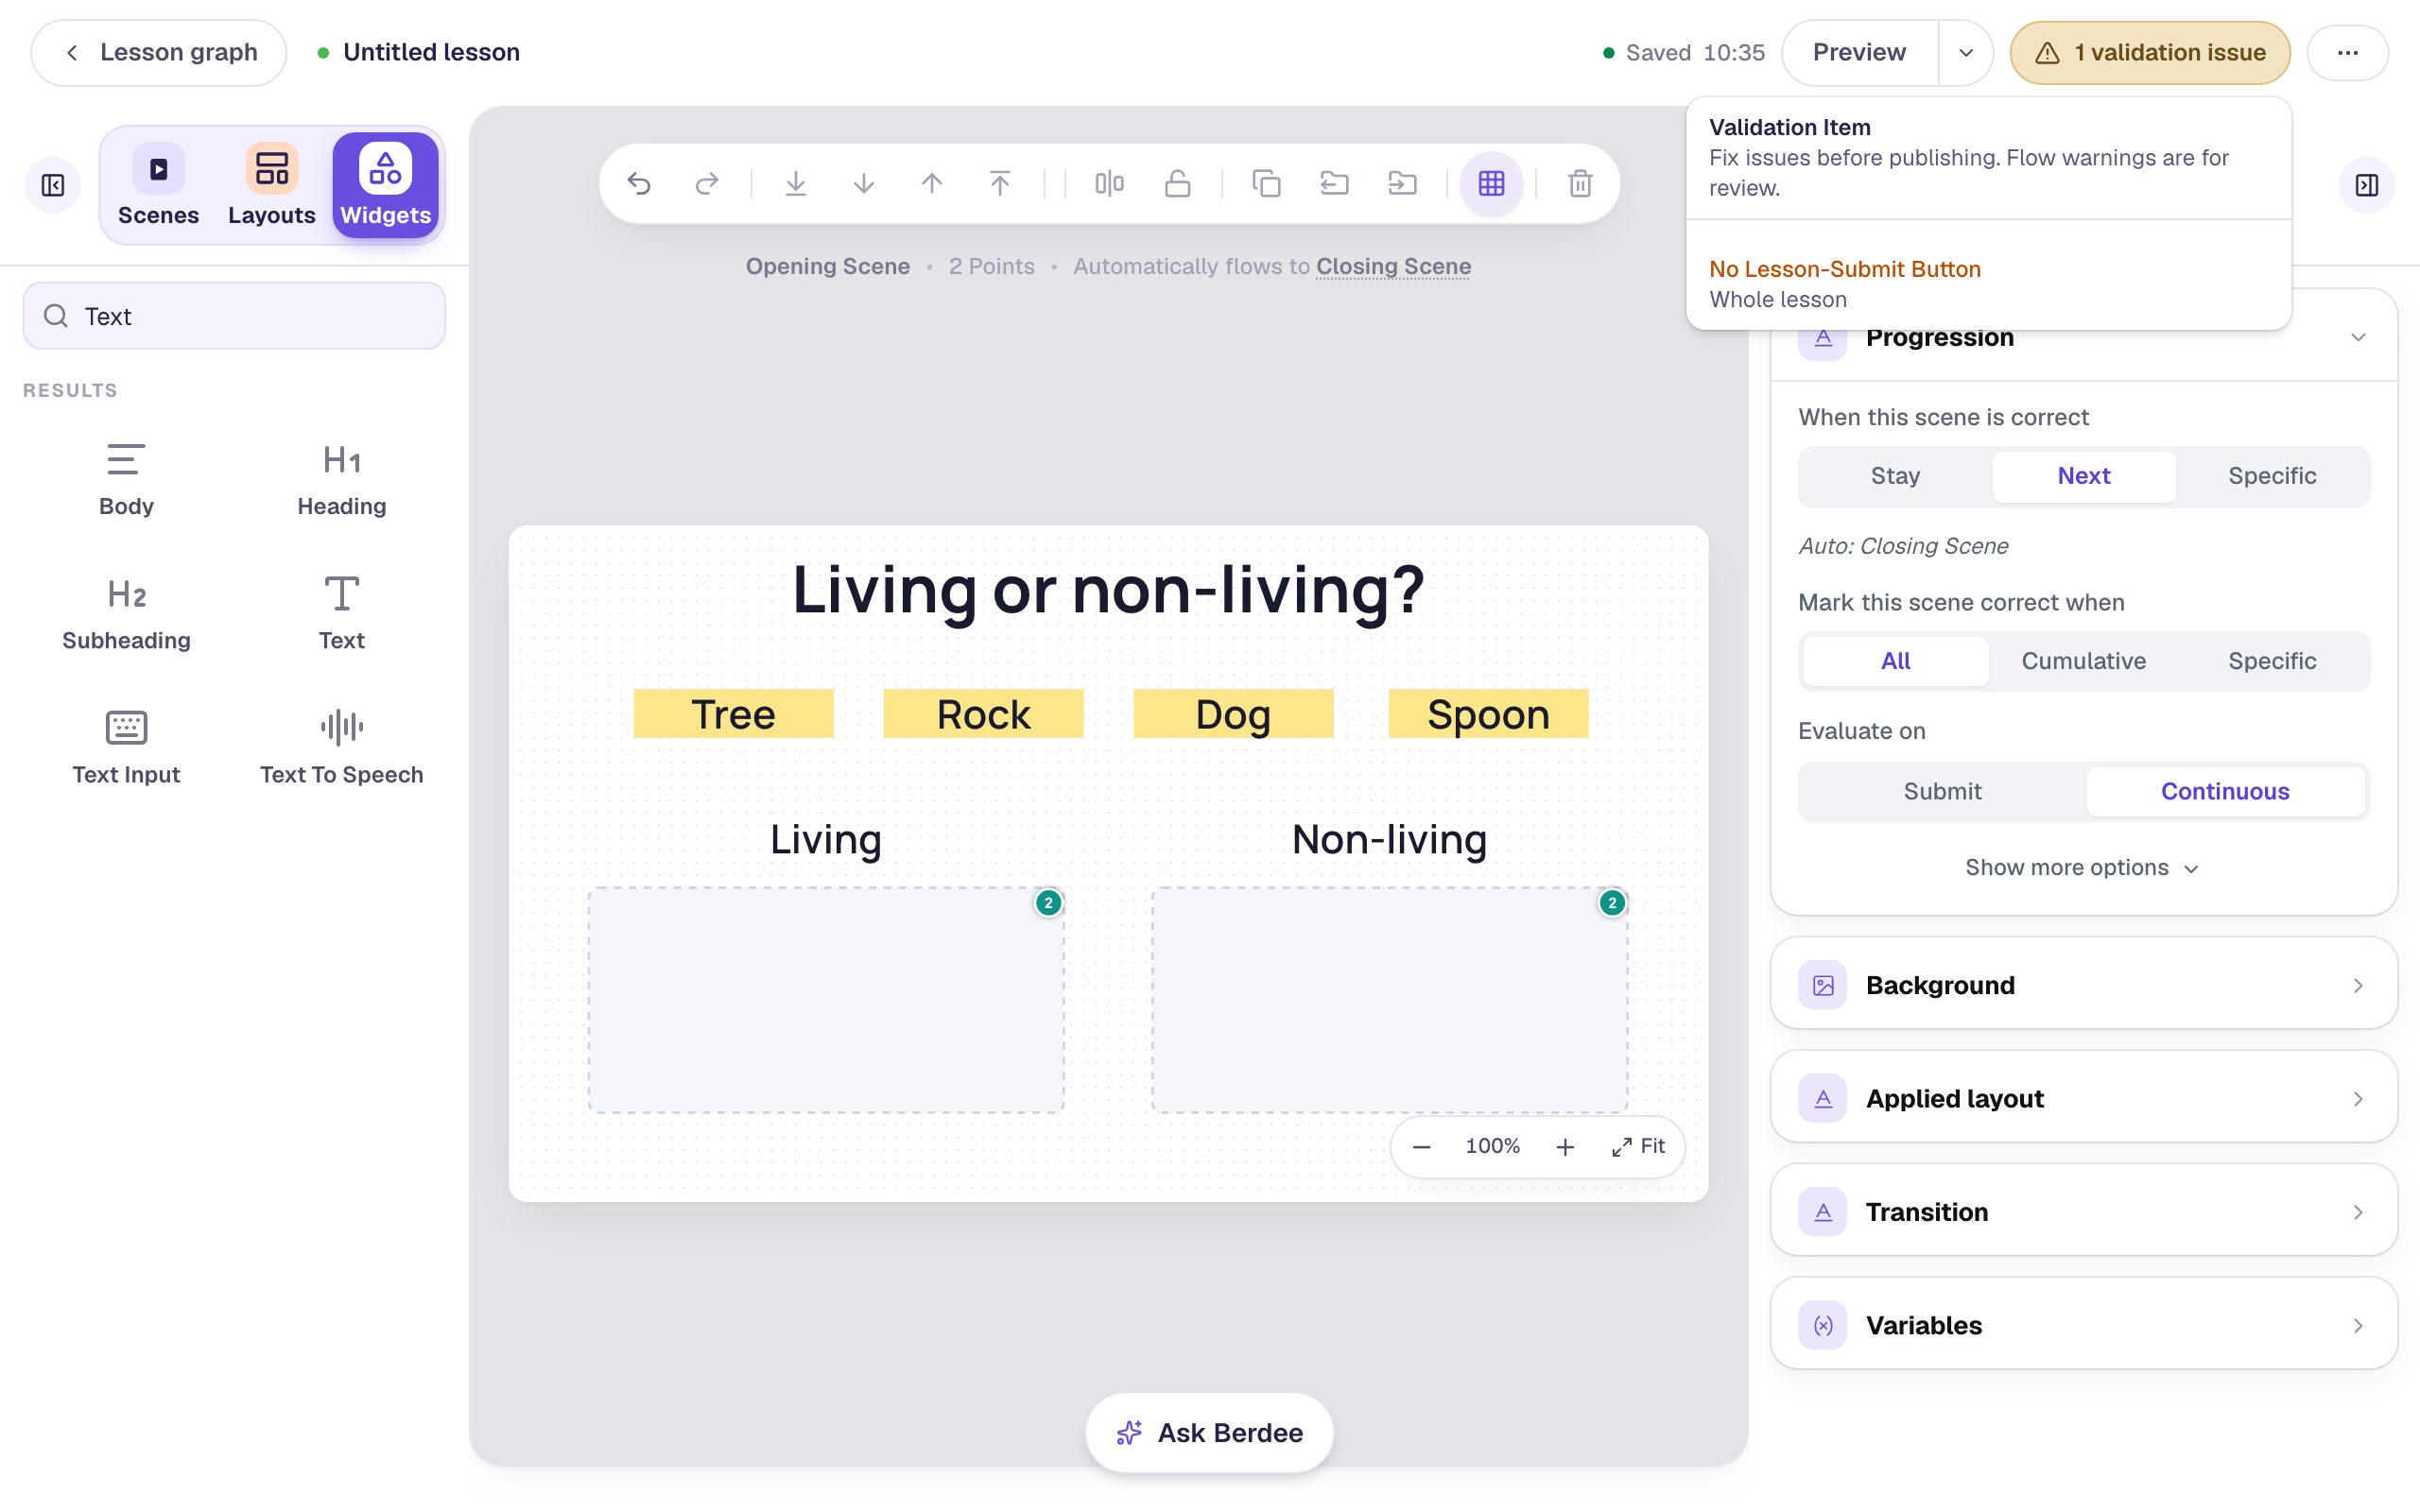
No Lesson-Submit Button means there's no button that lets a student finish early. Add one:
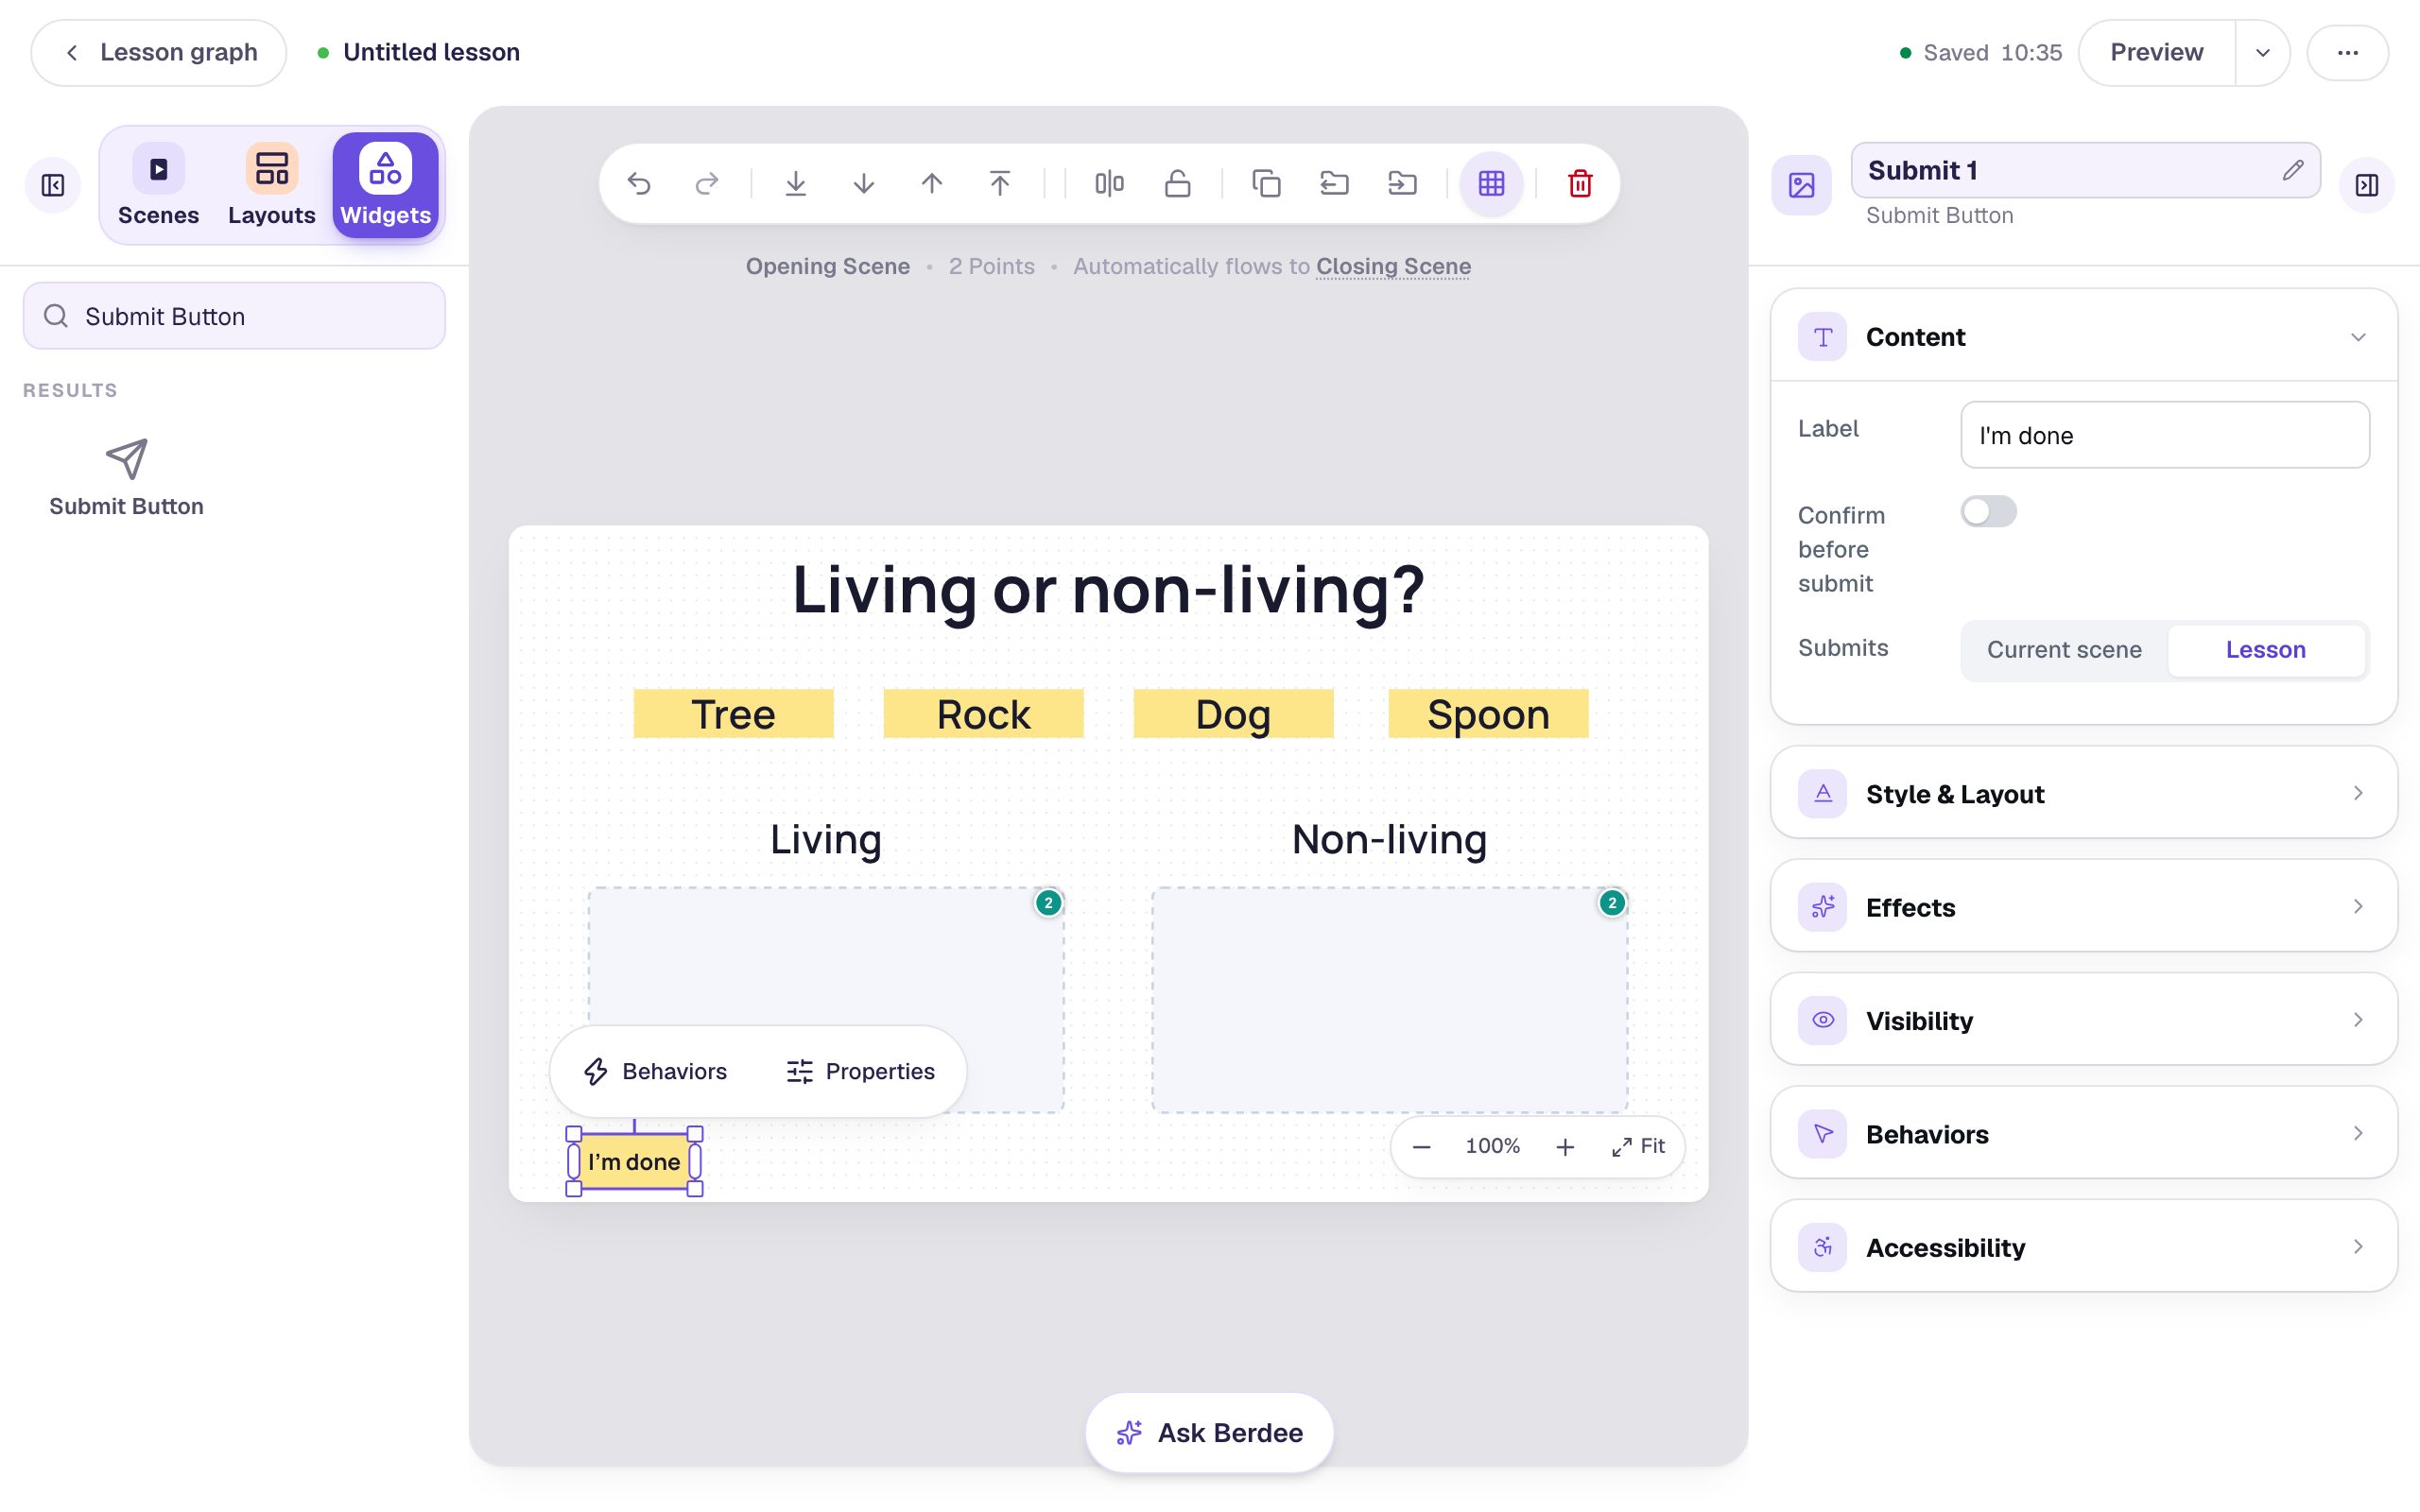
- Add a Submit Button.
- In Content, change the Label to
I'm doneand set Submits to Lesson. - In Style & Layout, bring the Font Size down to about 18 px, and drag it to the bottom-left corner so it stays out of the way.
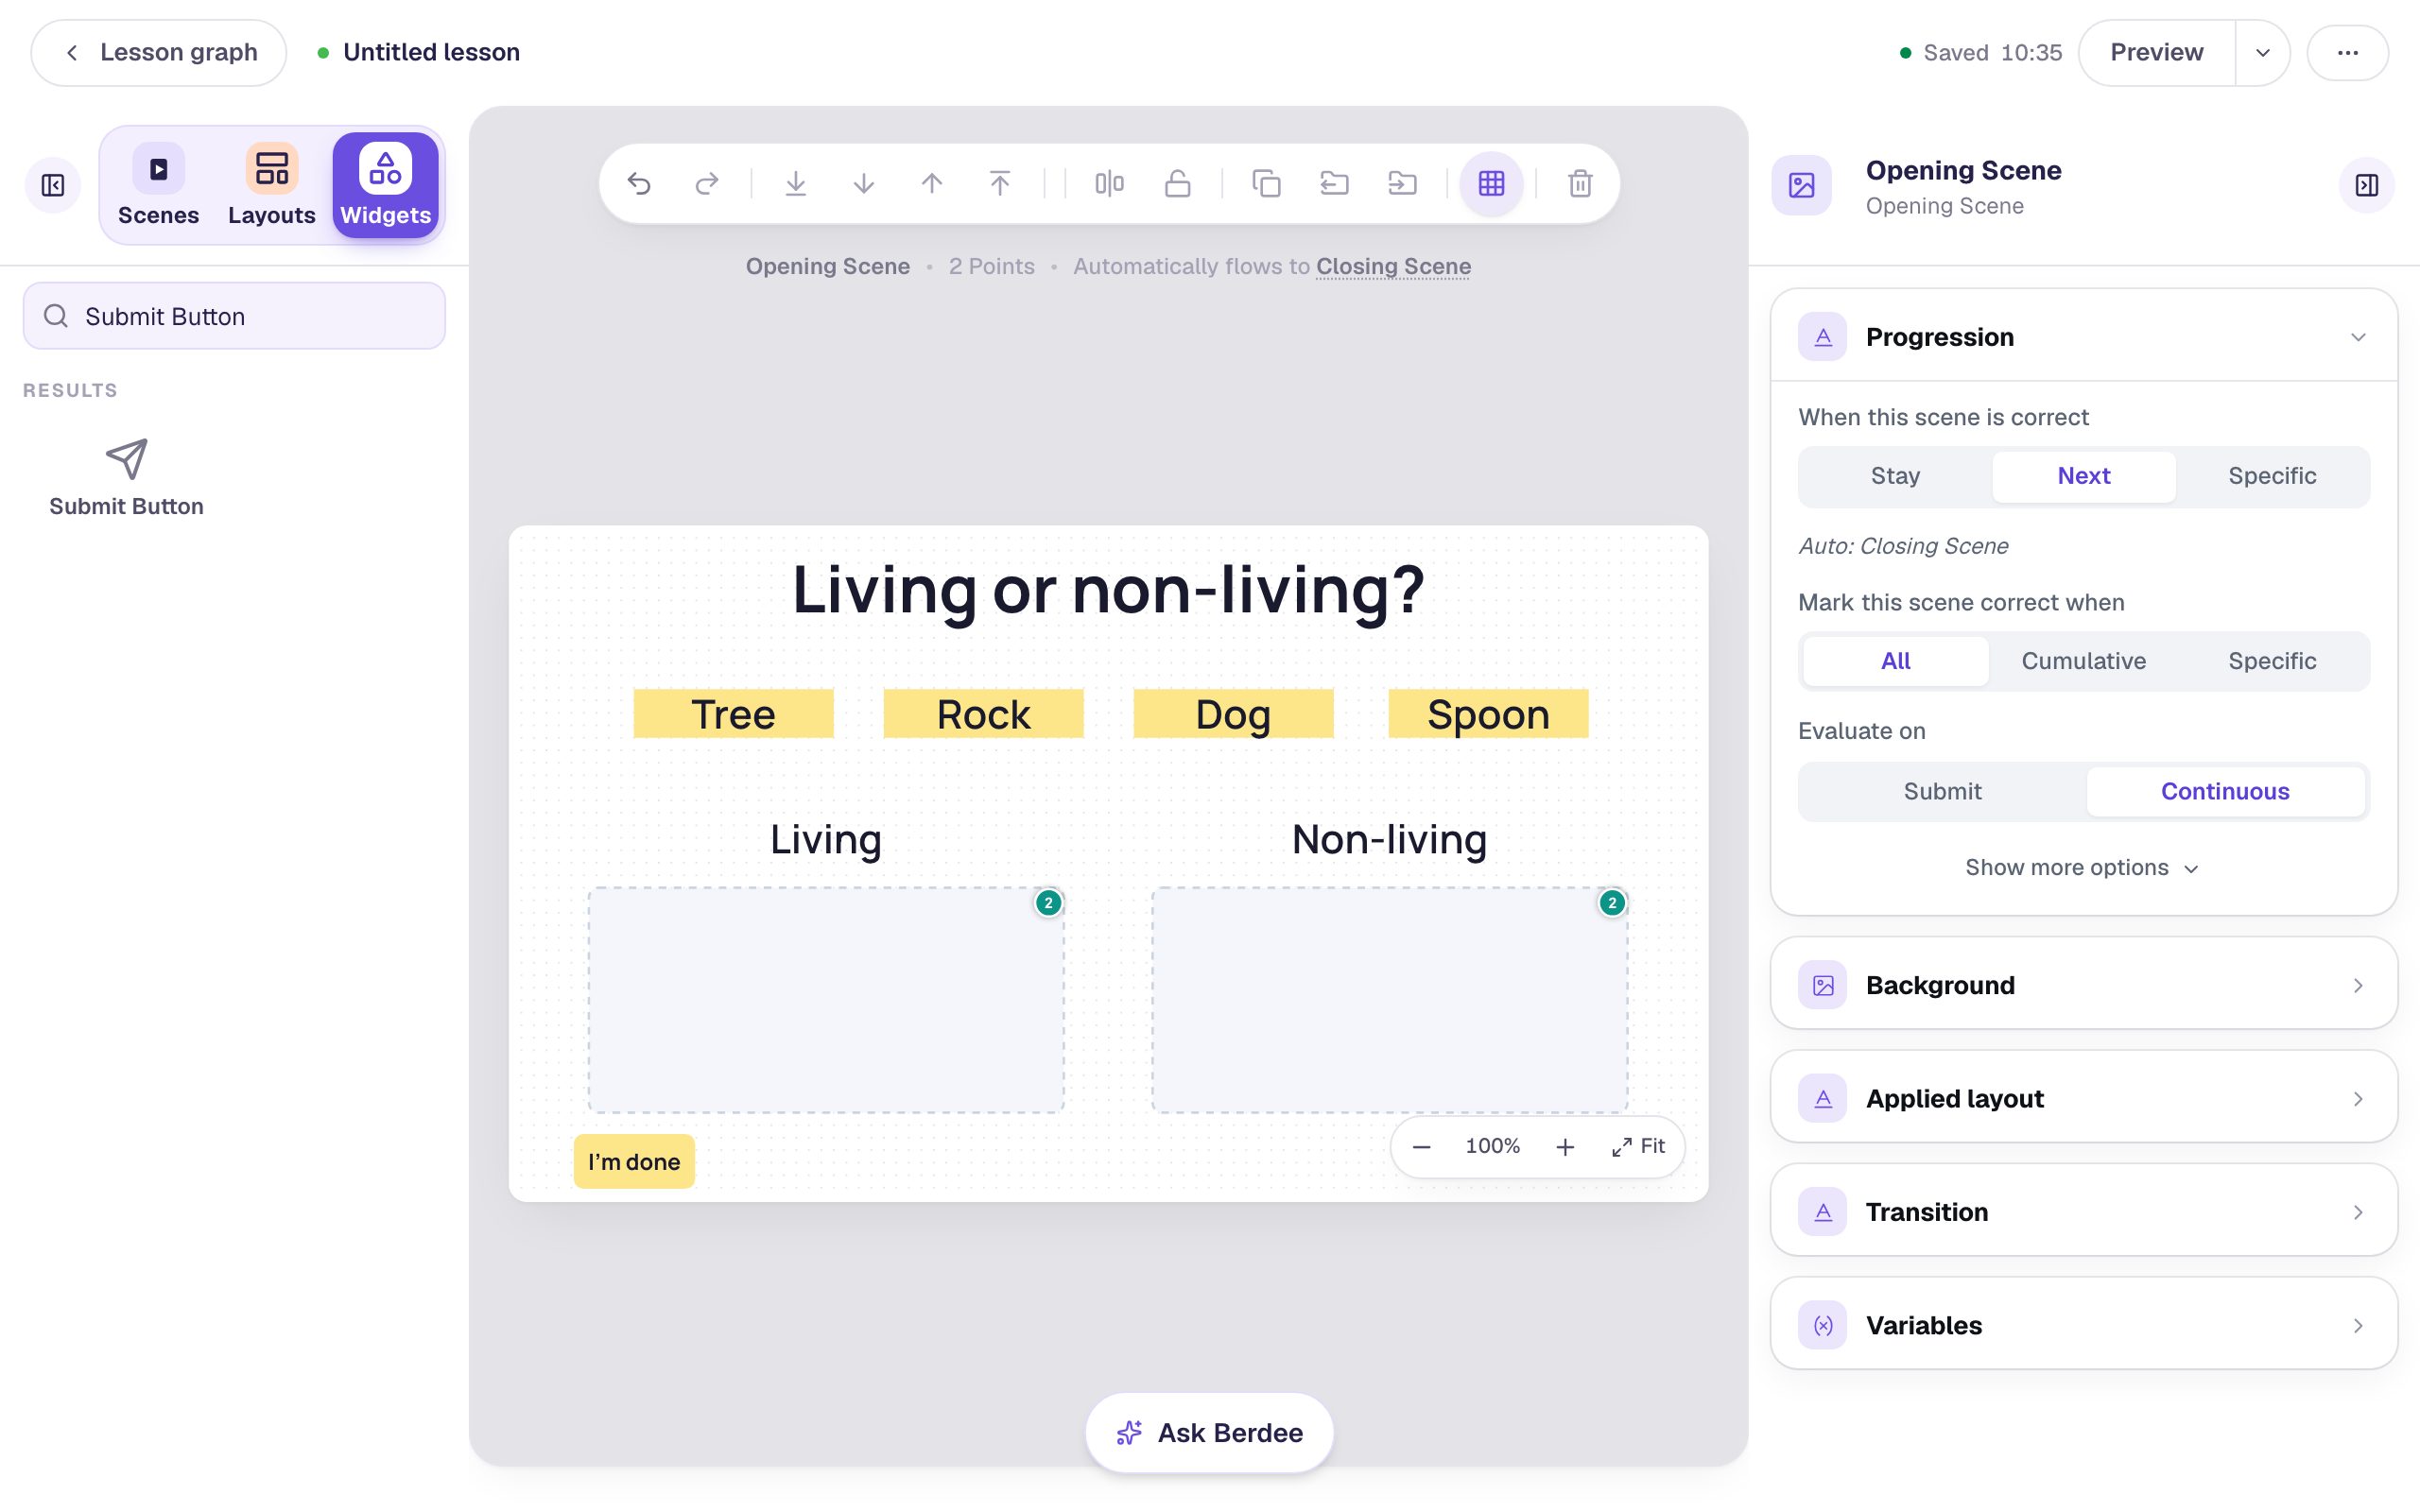
You don't need a button to check the sorting. Click an empty spot on the scene so nothing is selected, and look at Progression: Evaluate on is Continuous. Berdee keeps checking while the student sorts, and the moment both buckets are right, it moves on to the next scene, which here is the Closing Scene.
Step 8: Try it in preview
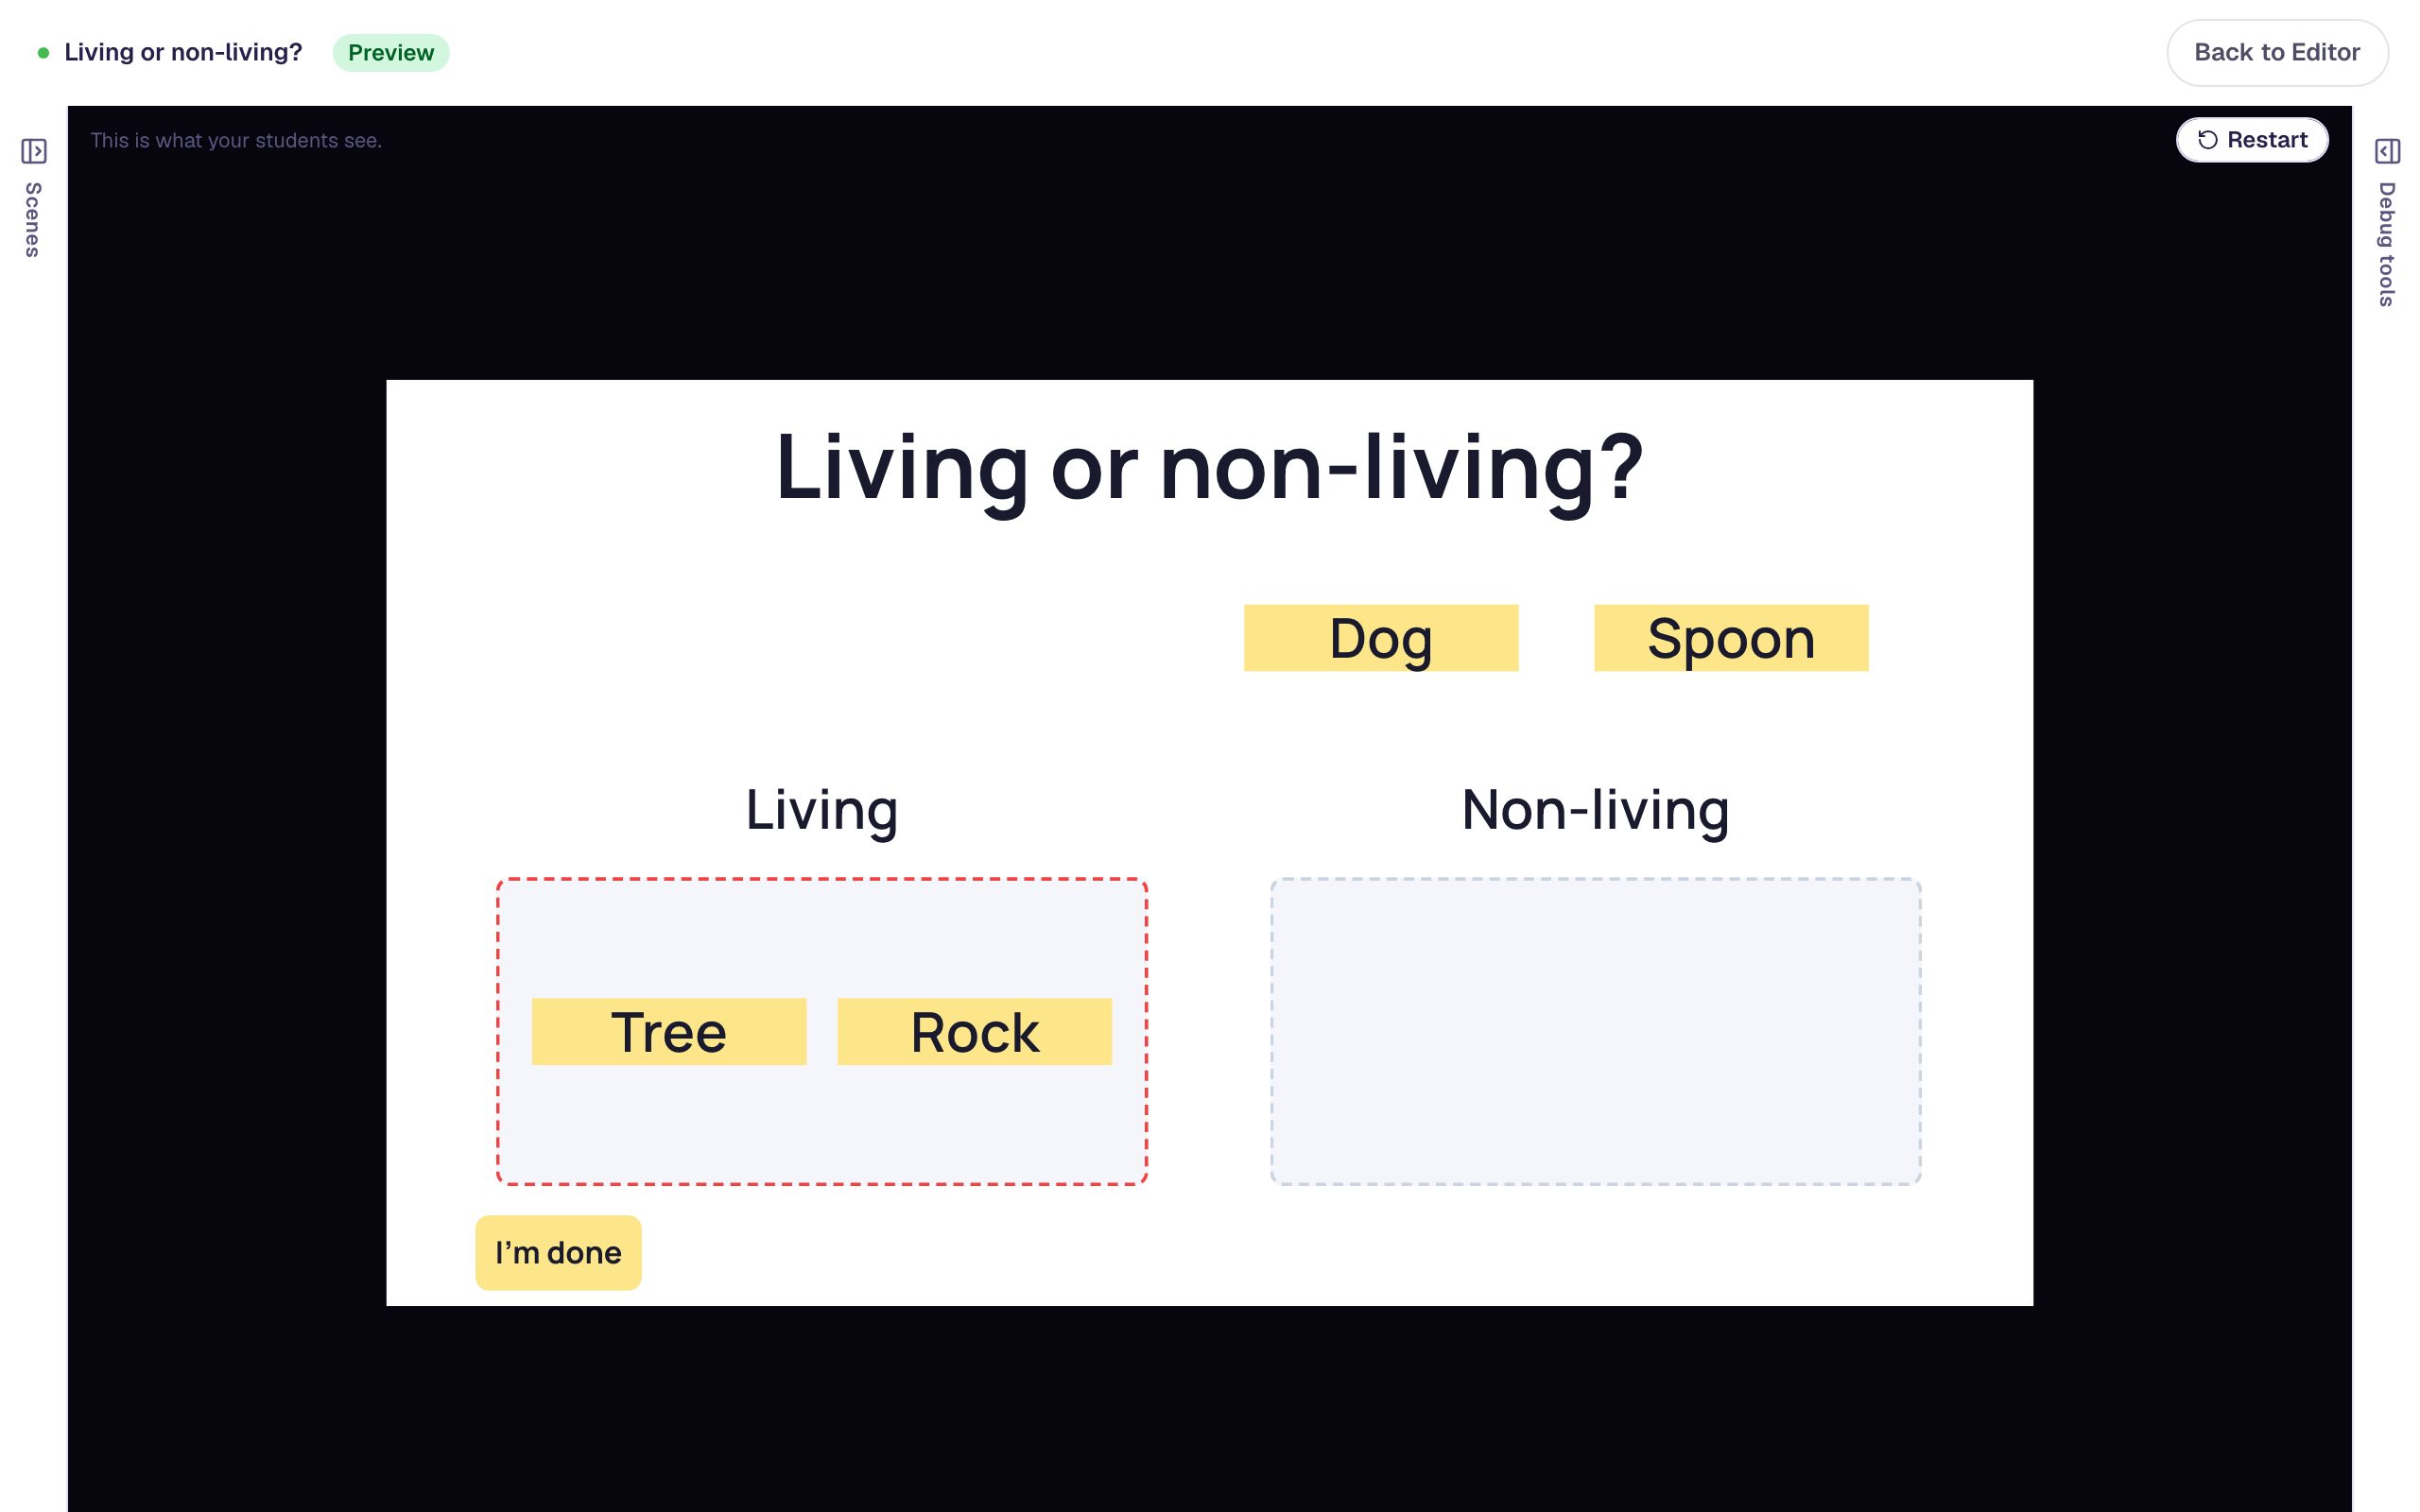
Click the lesson's name at the top left and name it Living or non-living?. Then click Preview and sort the cards as a student would. Put one in the wrong bucket on purpose:
Drop Rock into Living and the border turns red: a card that doesn't belong is in there. Drag Rock out and into Non-living, and the red goes away.
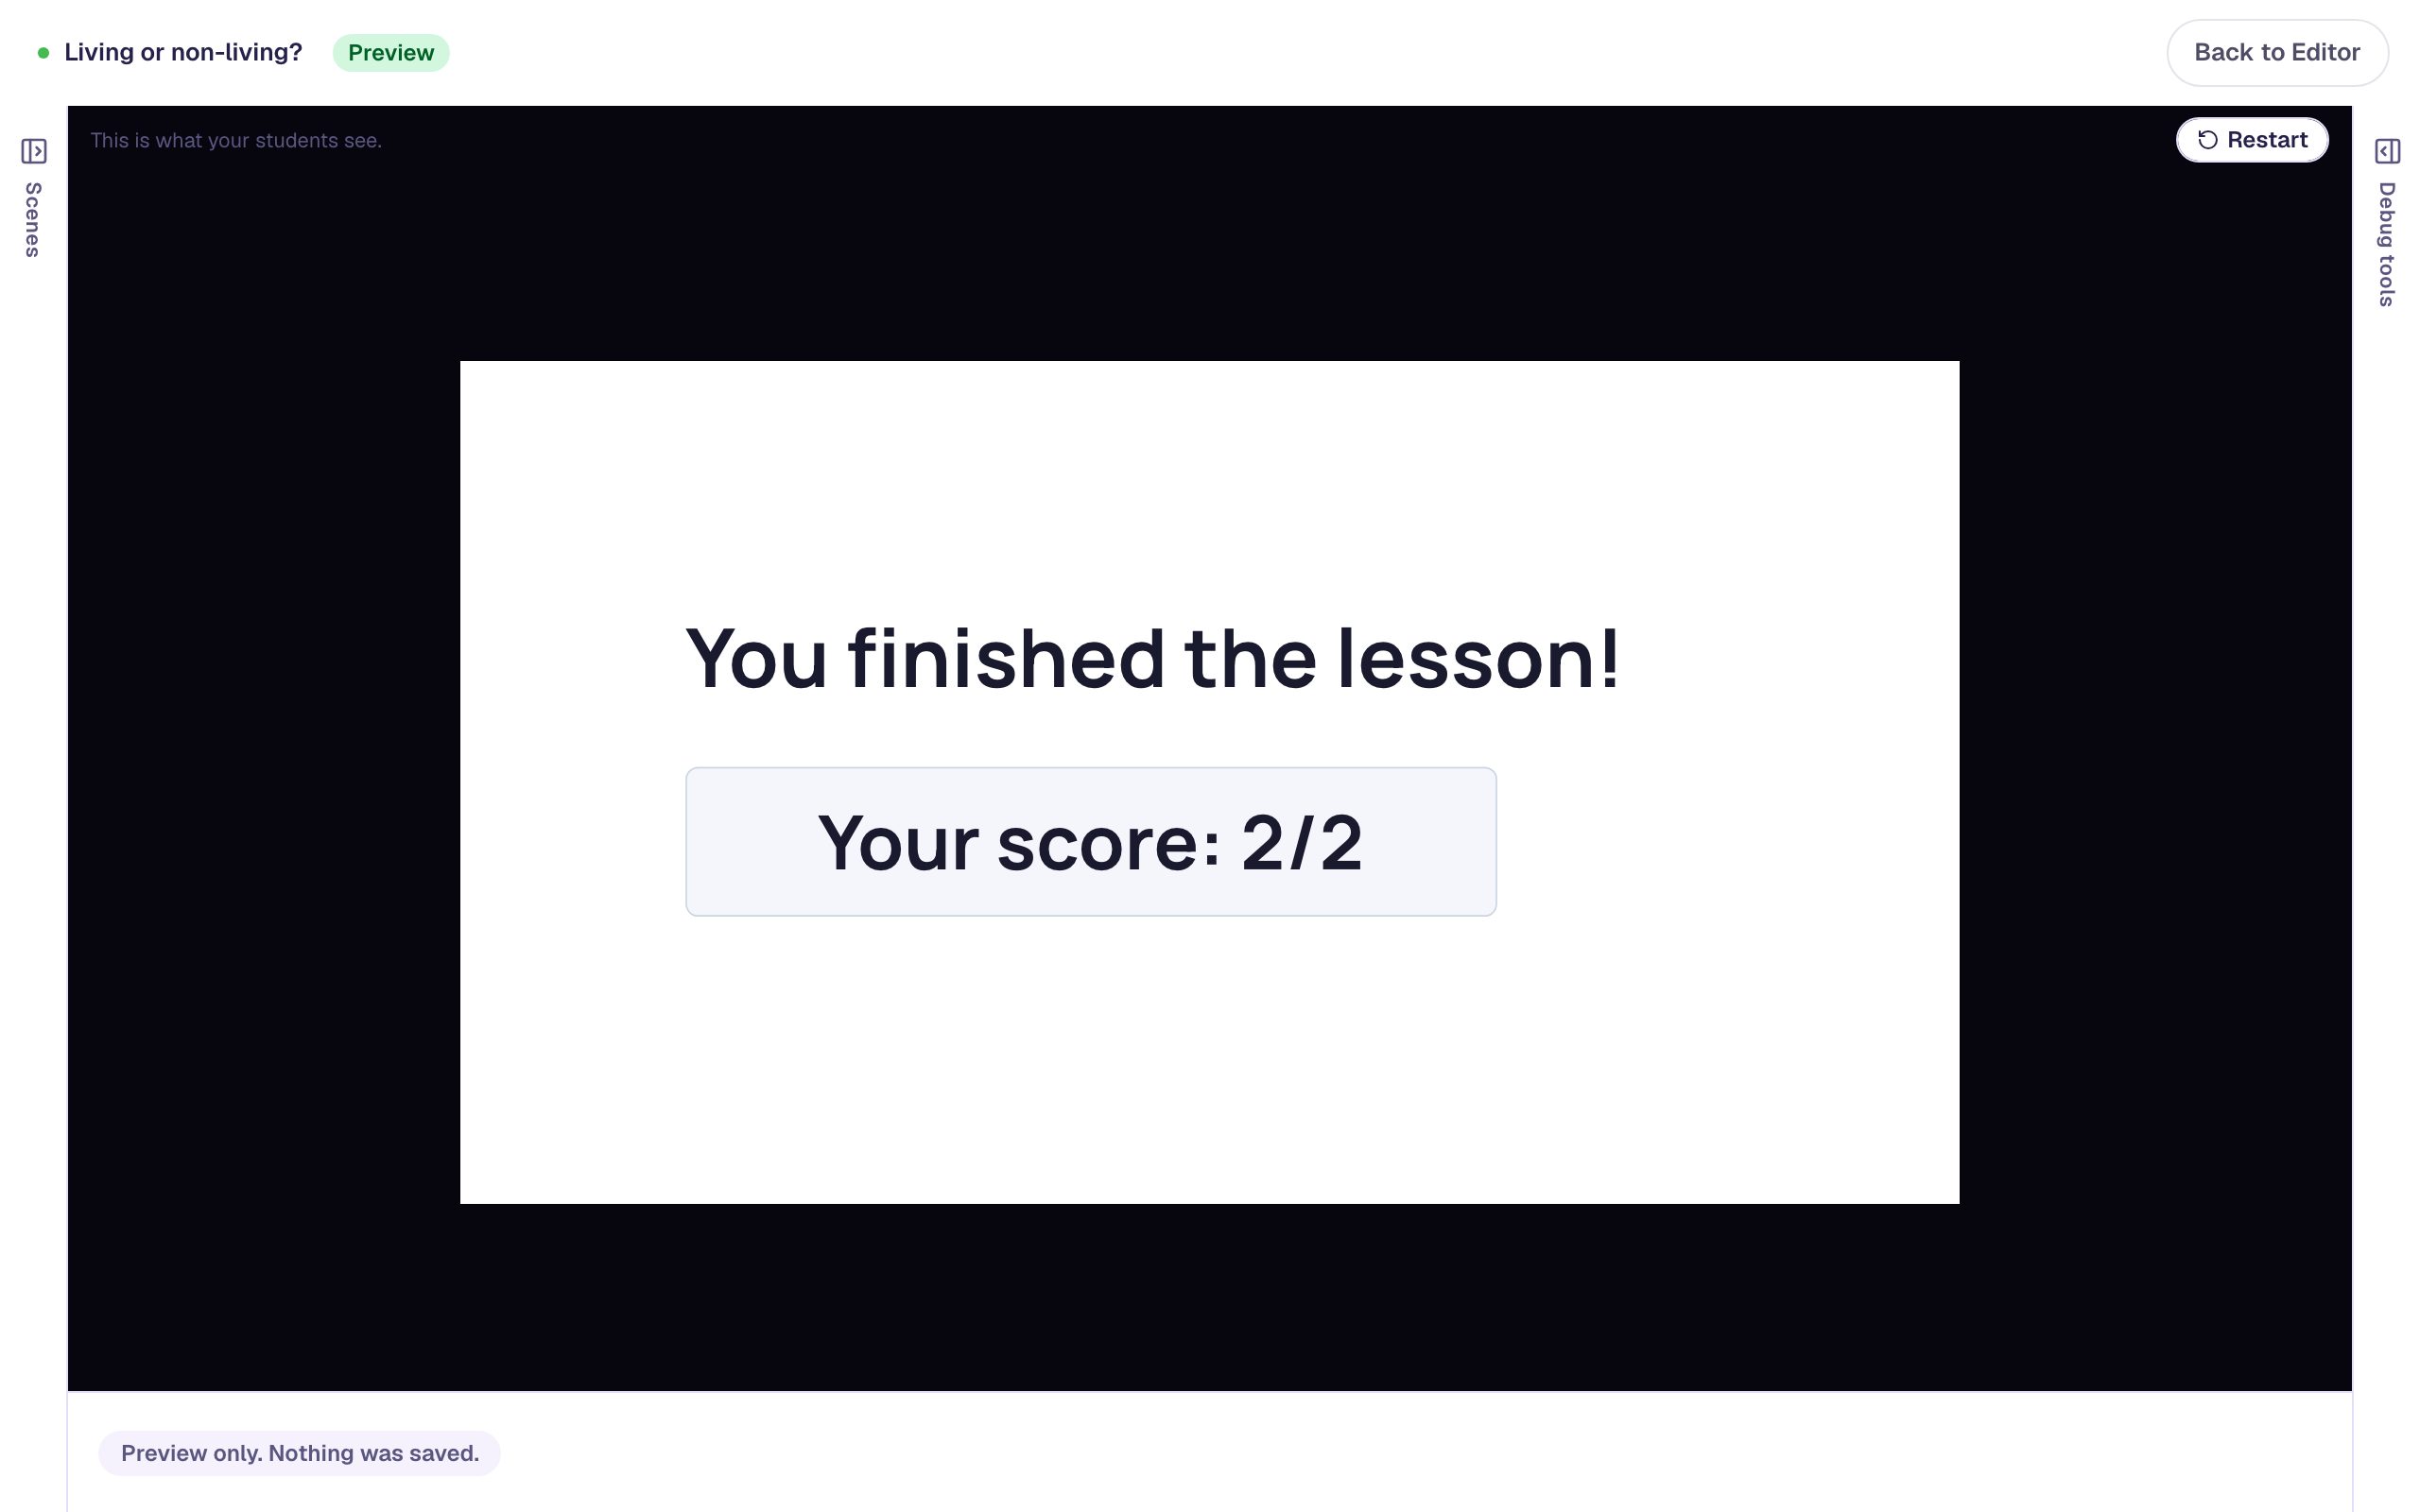
Sort Dog and Spoon, and the lesson moves on by itself to the Closing Scene, with a score of 2 / 2.
What you built
You combined two widgets into an activity:
- two wide Drop Buckets, each with a readable label and a screen-reader name,
- four Text cards in Draggable mode, styled once and duplicated,
- an answer key drawn by connecting each card to its bucket,
- Immediate feedback, so a wrong card shows up red right away,
- a scene that moves on to the ending once everything is sorted, and
- an I'm done safety net, so the lesson can be published.
To sort pictures instead of words, use Image widgets as the cards: they switch to Draggable the same way. For more buckets, add a third one and connect cards to it; an item should belong in just one bucket, so if a card really fits two groups, duplicate it and connect each copy to its own bucket. See Drop Bucket Widget for the other Correct when rules. To put cards in order instead of into groups, see Put events in order with a sorting list.
Make this lesson yours
Add the lesson you just watched being built to your account, then change it for your class: your questions, your pictures, your colors.
Free to sign up, and you'll come straight back here. I have an account