Read a question aloud for students who are still learning to read
Add a Text To Speech player beside a question so students can hear it as many times as they need, in a voice you choose, with no recording or audio file to upload.
- Level
- Beginner
- Time
- About 10 min
- Steps
- 8
A farm-animal question with a big play button that reads it aloud, three answers to choose from, and an ending that shows the score.
Get the finished lesson
Skip straight to the result, or keep it open beside the steps. Add this tutorial's lesson to your account and explore how it works in the studio.
Free to sign up, and you'll come straight back here. I have an account
A five-year-old may know perfectly well which animal says moo and still get the question wrong, because they couldn't read it. A Text To Speech player fixes that: you type the words, choose a voice, and Berdee makes the recording. Students press play to hear the question, and press it again as often as they like.
In this tutorial you'll build one question:
Which animal says moo?
with three picture-word answers and a play button that reads it aloud. It's the same pattern for directions, a word to pronounce, or a short passage for students who read better with their ears.
Making a recording is part of your plan's text-to-speech allowance, so it's available on Plus and above; on Free, Generate Audio offers an upgrade instead (see AI and Voice). The finished lesson from this tutorial works on any plan: add it to your account and its recording plays as it is.
If you haven't used the studio before, start with Build your first quiz question. This tutorial moves quickly through the parts it already covers.
Step 1: Set the scene
Start a blank lesson (New lesson, then Start from scratch) and name it Farm animal sounds by clicking Untitled lesson at the top.
Give the Opening Scene a farm feel. With nothing selected, open Background, click Choose a style, pick Nature, then Rolling hills, and click Apply background. If the sun lands behind where your words will go, click Randomize composition until it sits off to one side. Then select the Closing Scene in the Scenes panel and give it the same background, so the ending matches.
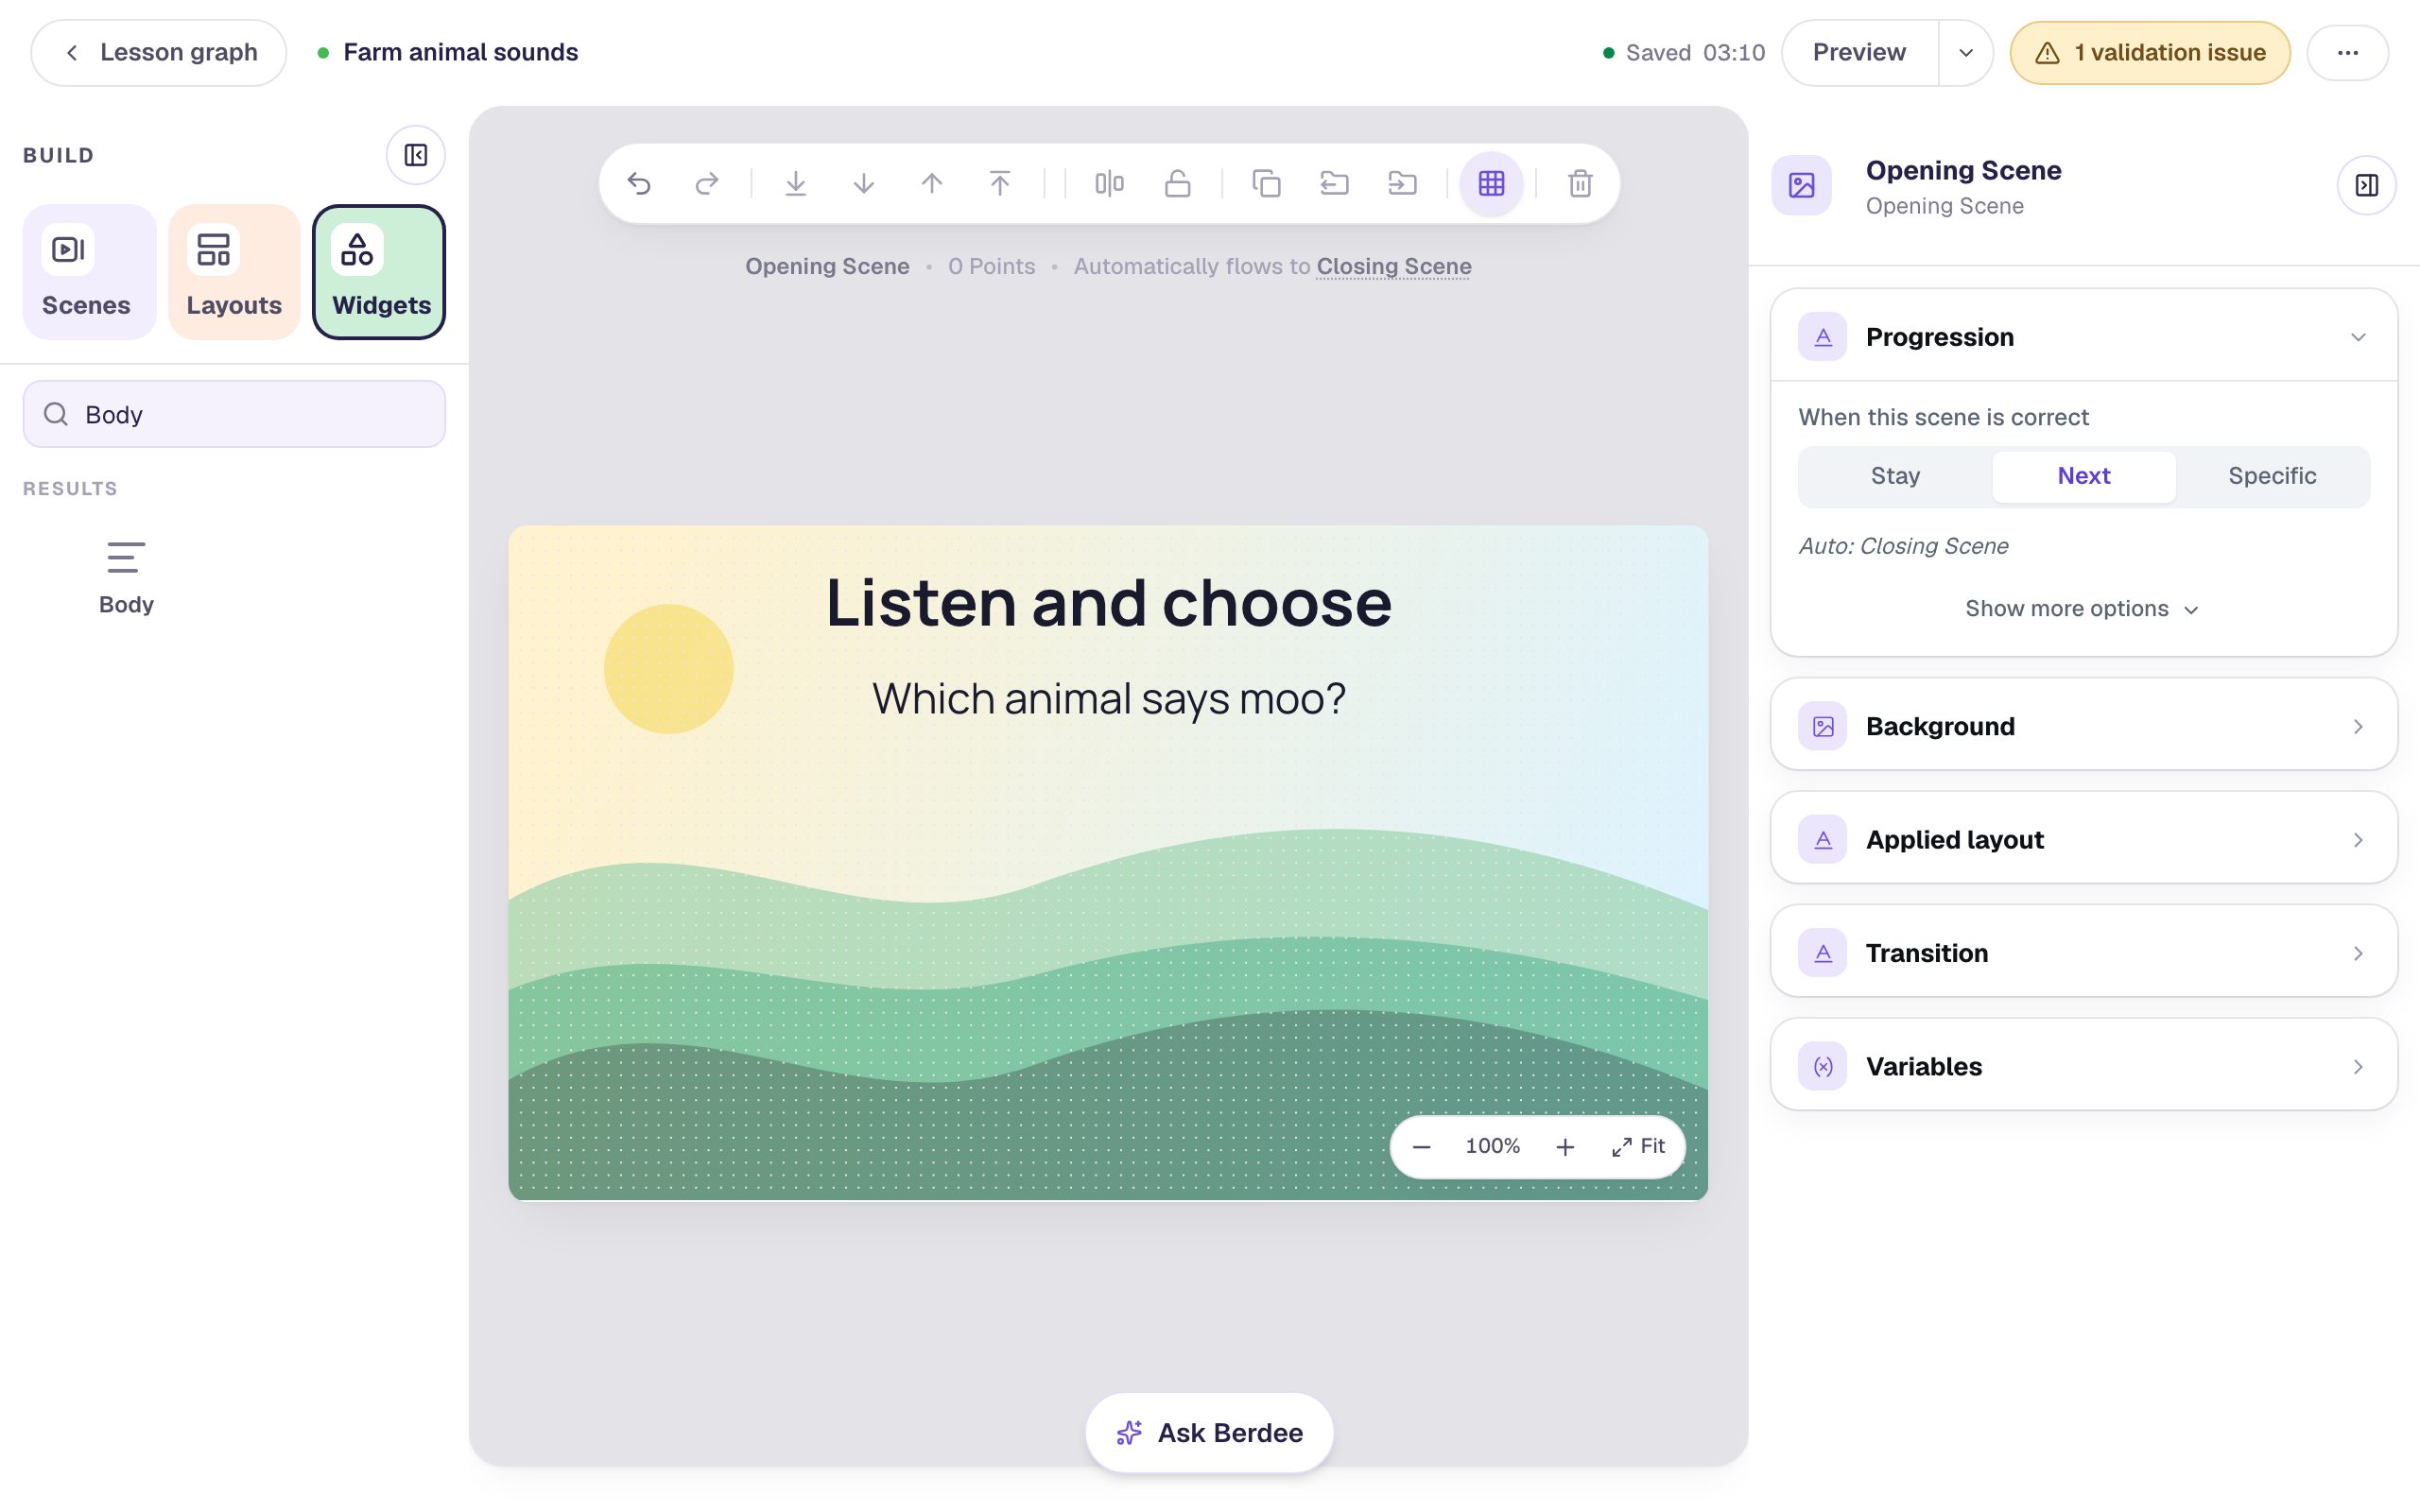
Back on the Opening Scene, add a Heading that says Listen and choose. Under it, add a Body text with the question, Which animal says moo?, and set its Font Size to 34. Keep the written question even though you're about to add a spoken one: students who can read follow along, and students who are learning see the words while they hear them.
Step 2: Add the answers
In Widgets, search for Multi Choice and click it. Click ⚙ Configure and type the three answers, starting each with an animal emoji so even a student who can't read the word can find it:
🐄 Cowin the first option. The first option starts marked correct (the green tick), which is what you want here.🦆 Duckin the second.🐑 Sheepin the third.
A new question has four options, so click the bin beside the fourth to remove it. Leave Randomize Order on: students see the answers in a different order each time, so nobody learns "it's always the first one".
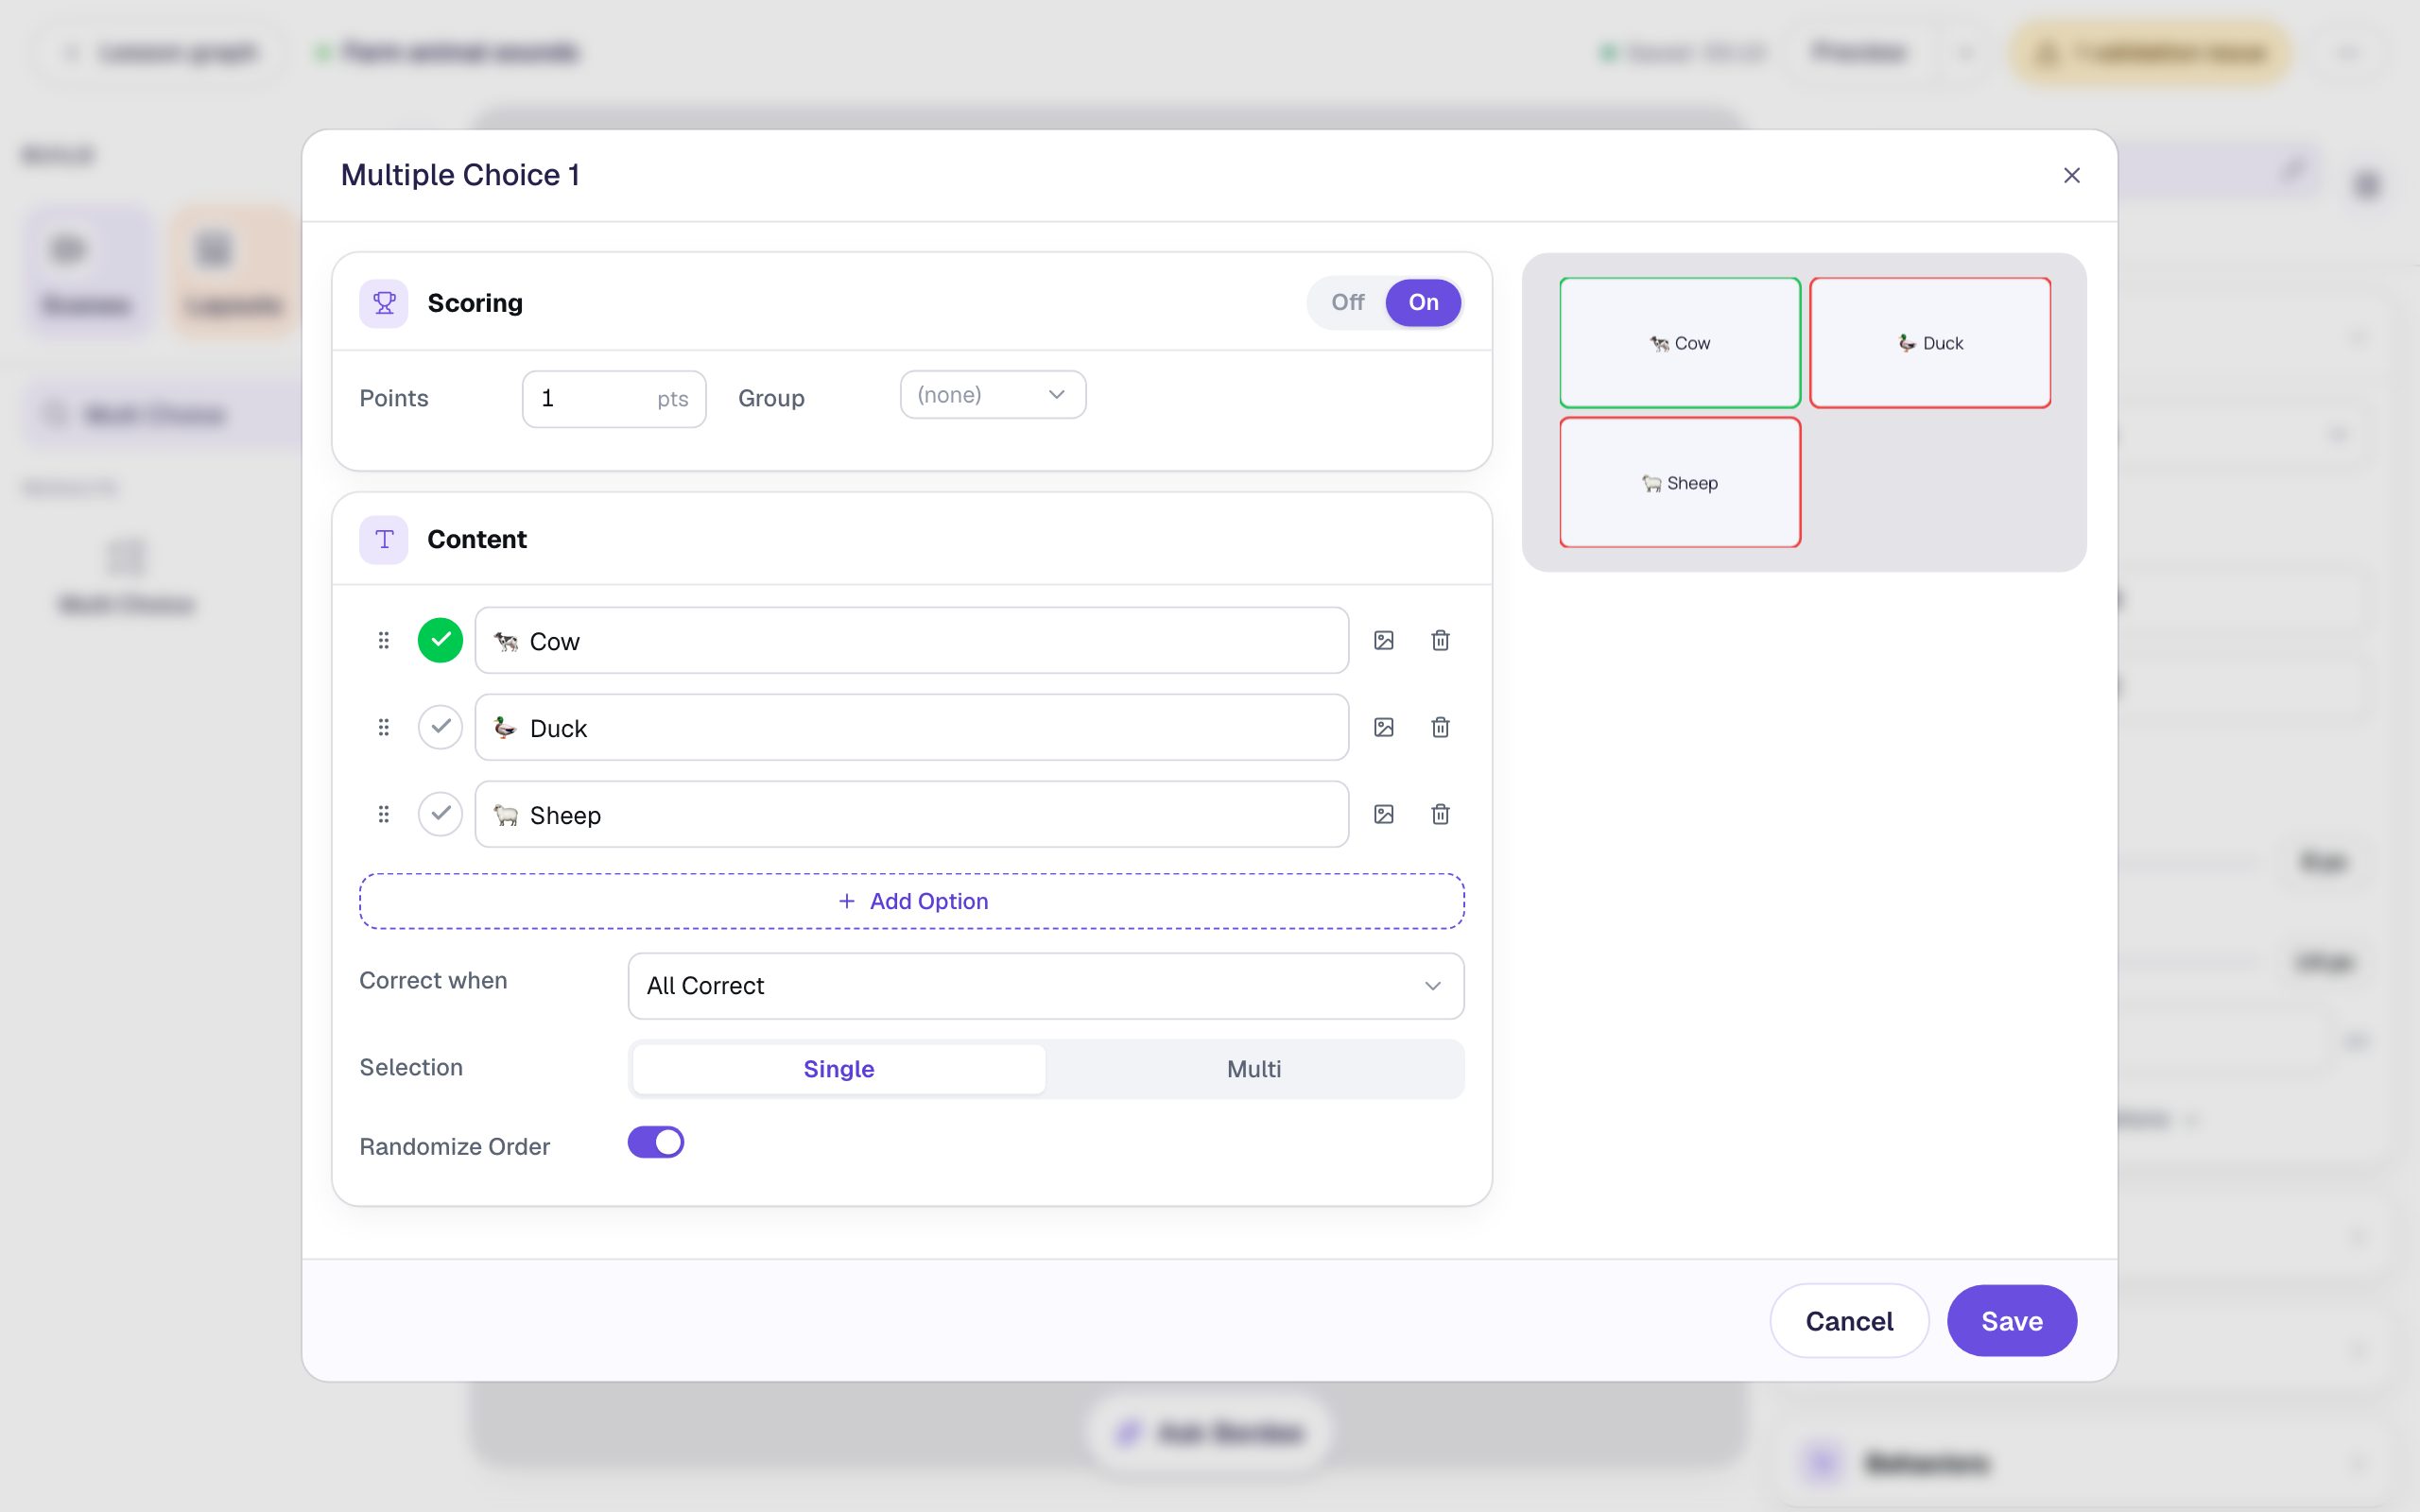
Click Save. Then, with the question still selected, open Style & Layout and set Font Size to 34. Under Show more options, set Width to 720 and Height to 120. The answers arrange themselves to fit the widget's shape, so a wide, short box puts all three in a single row. Drag it into the lower half of the scene.
Step 3: Add a Text To Speech player
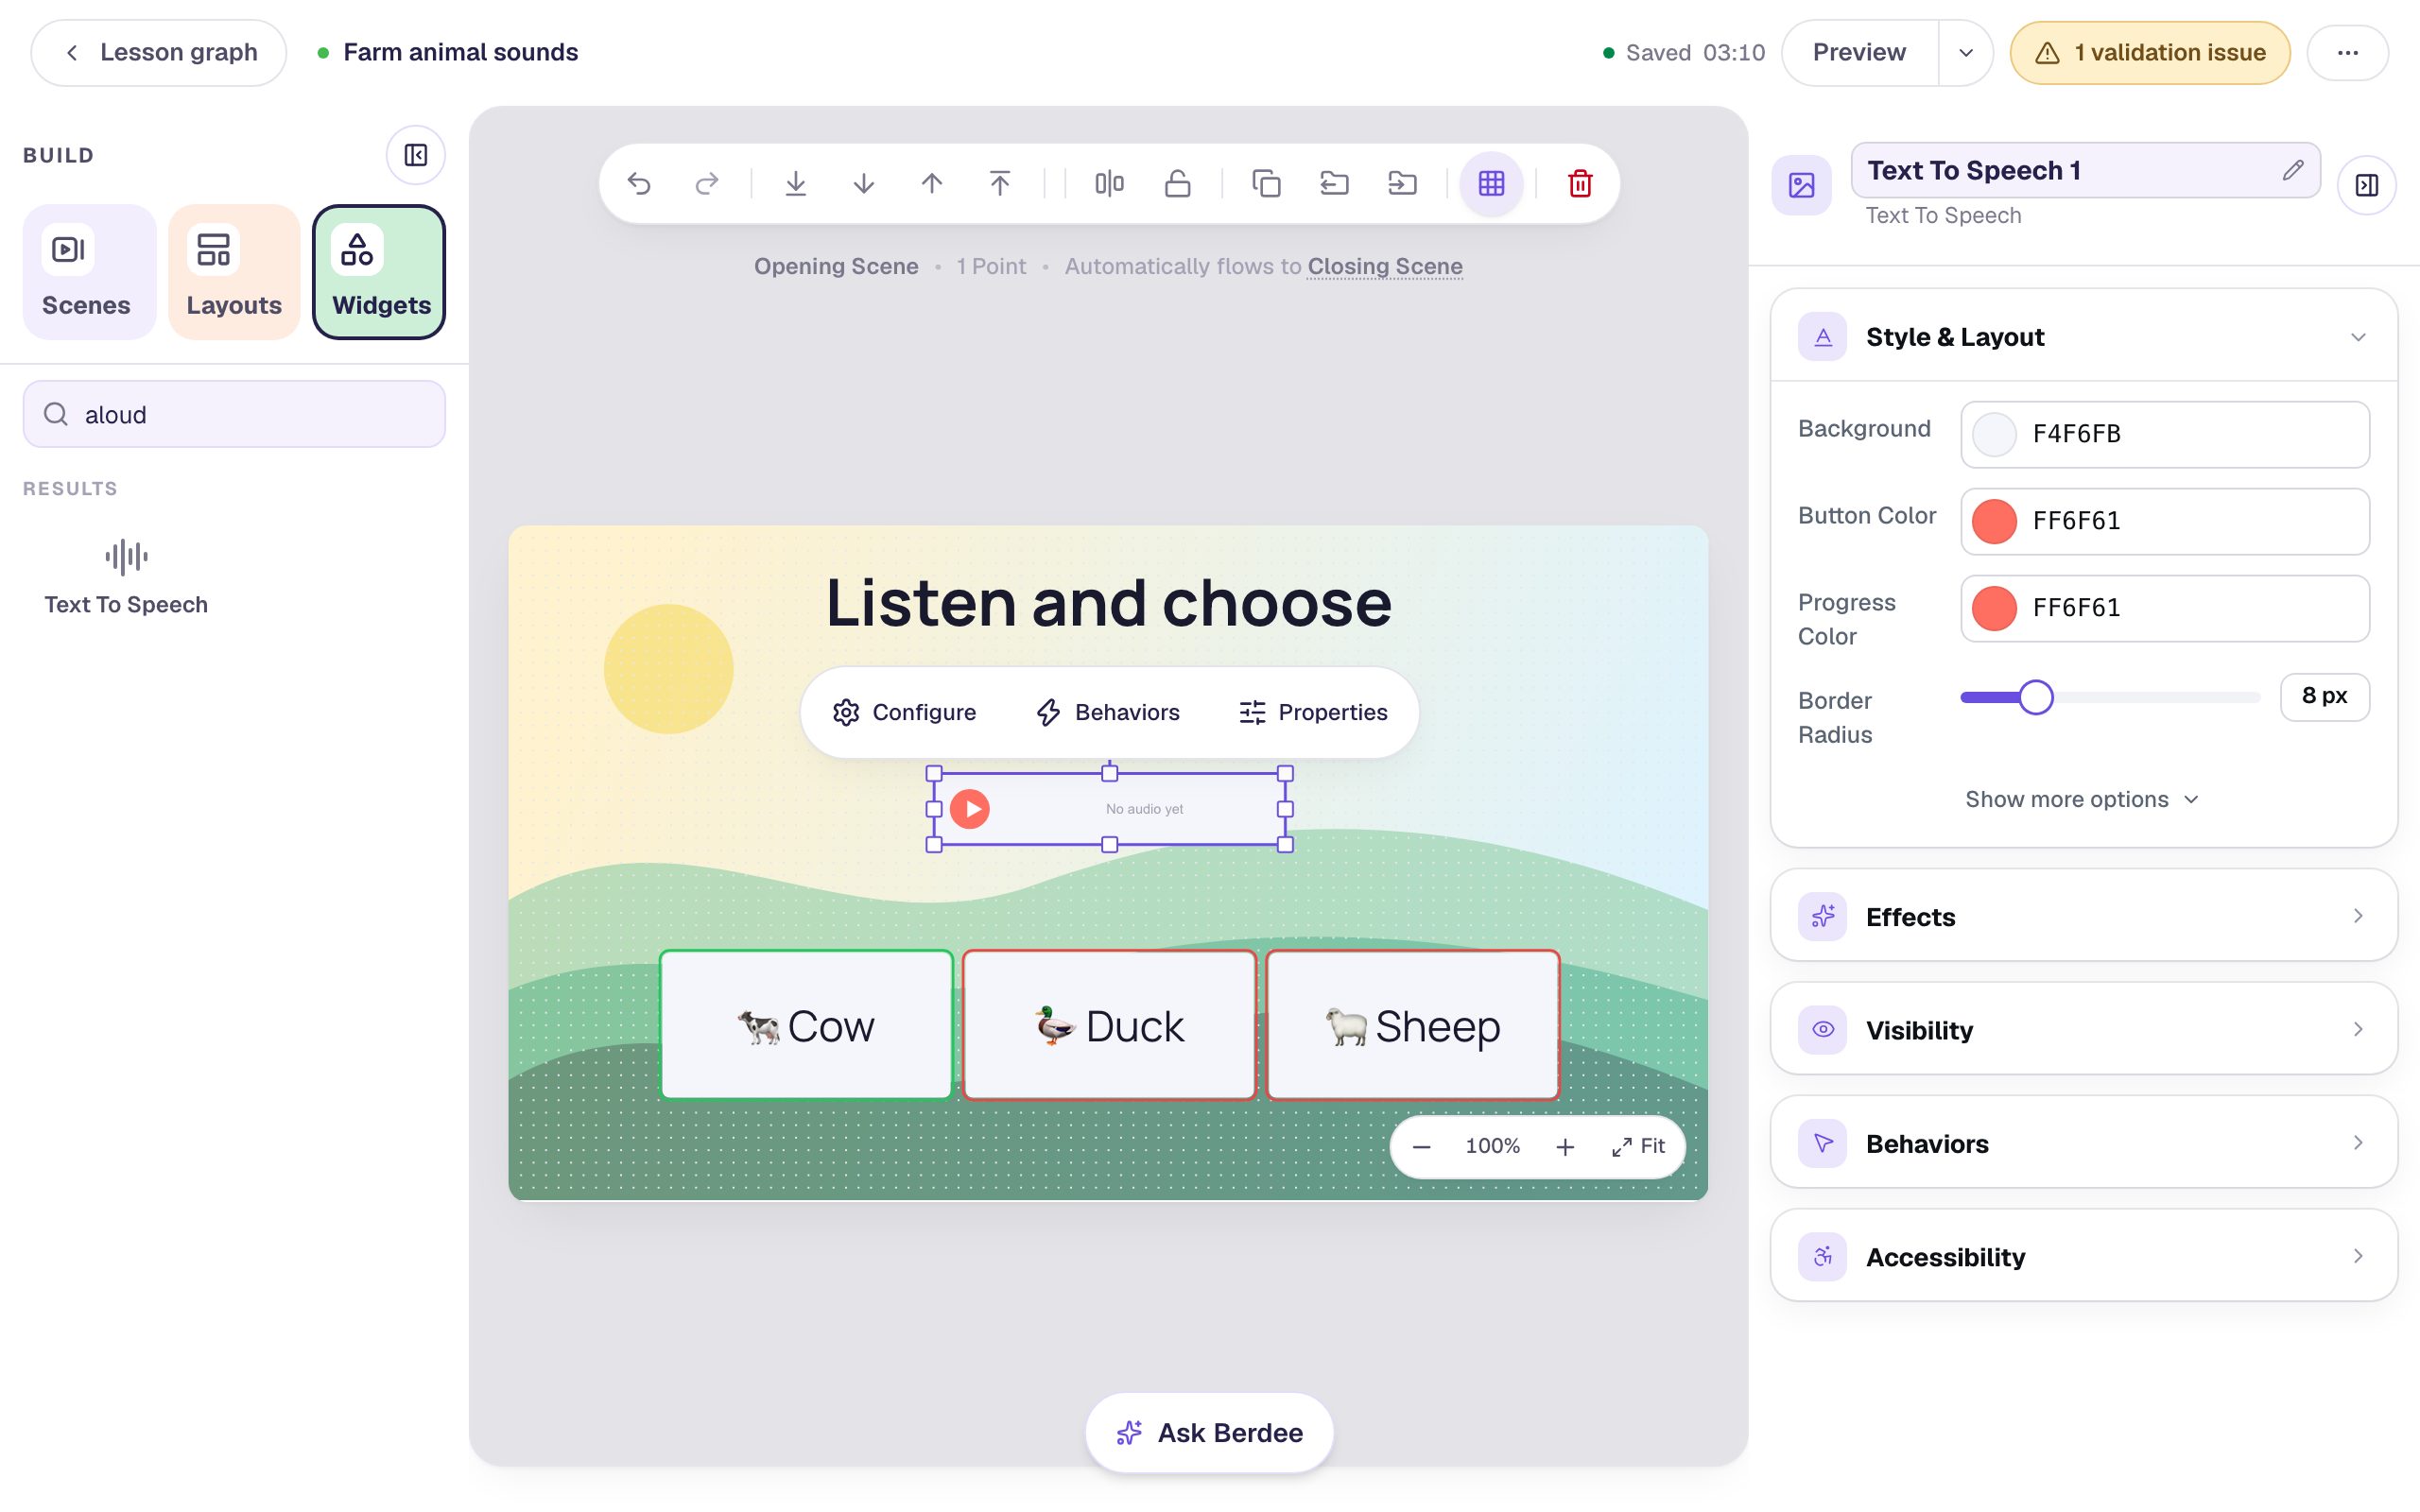
In Widgets, search for aloud and click Text To Speech. A player with a coral play button appears. Drag it into the gap between the question and the answers, where students will look for it.
The player says No audio yet: it doesn't speak until you give it words and make the recording, which is the next two steps.
Step 4: Write what it says and choose a voice
Click ⚙ Configure in the pill above the player.
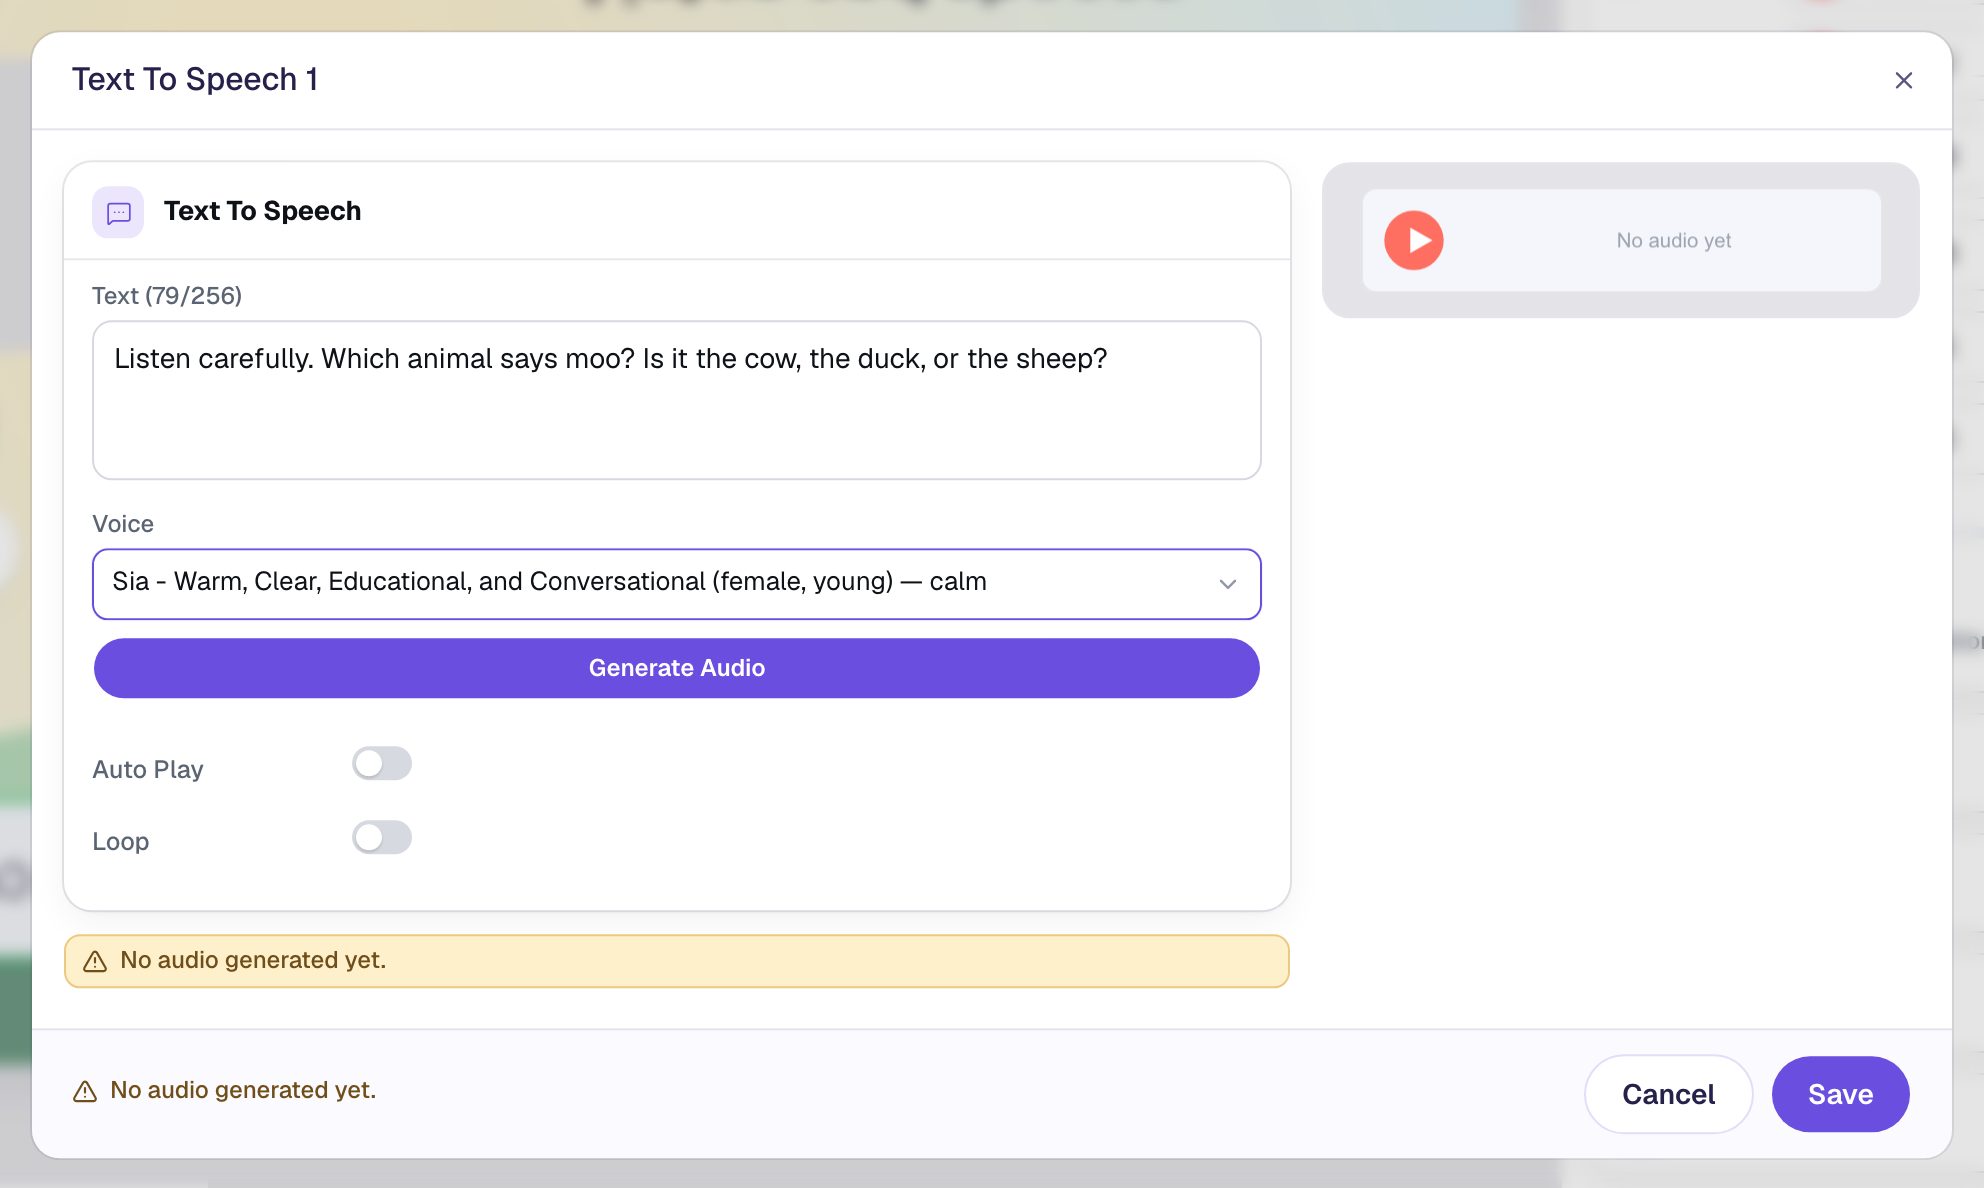
- In Text, type what students should hear:
Listen carefully. Which animal says moo? Is it the cow, the duck, or the sheep?You have up to 256 characters. - Open Voice and pick one. The list loads when you open it and describes each voice (female or male, young or older, calm or upbeat). This lesson uses Sia, a warm, clear voice; any voice works. If you never choose one, Berdee uses its default narrator, Rachel.
The script doesn't have to match the written question word for word. Reading the answers out too ("Is it the cow, the duck, or the sheep?") helps a student who can't read Duck connect the word on the button to the sound.
Step 5: Make the recording and listen to it
Click Generate Audio. It takes a few seconds. When it's done, a row with the recording's file name and a Preview button appears under it, and the warning about missing audio goes away.
Click Preview to hear it right there in the window, and Stop to end it early. Listening first is free: it plays the recording you already made. If something sounds off (a name said strangely, too fast a pace), change the text or the voice and click Regenerate Audio.
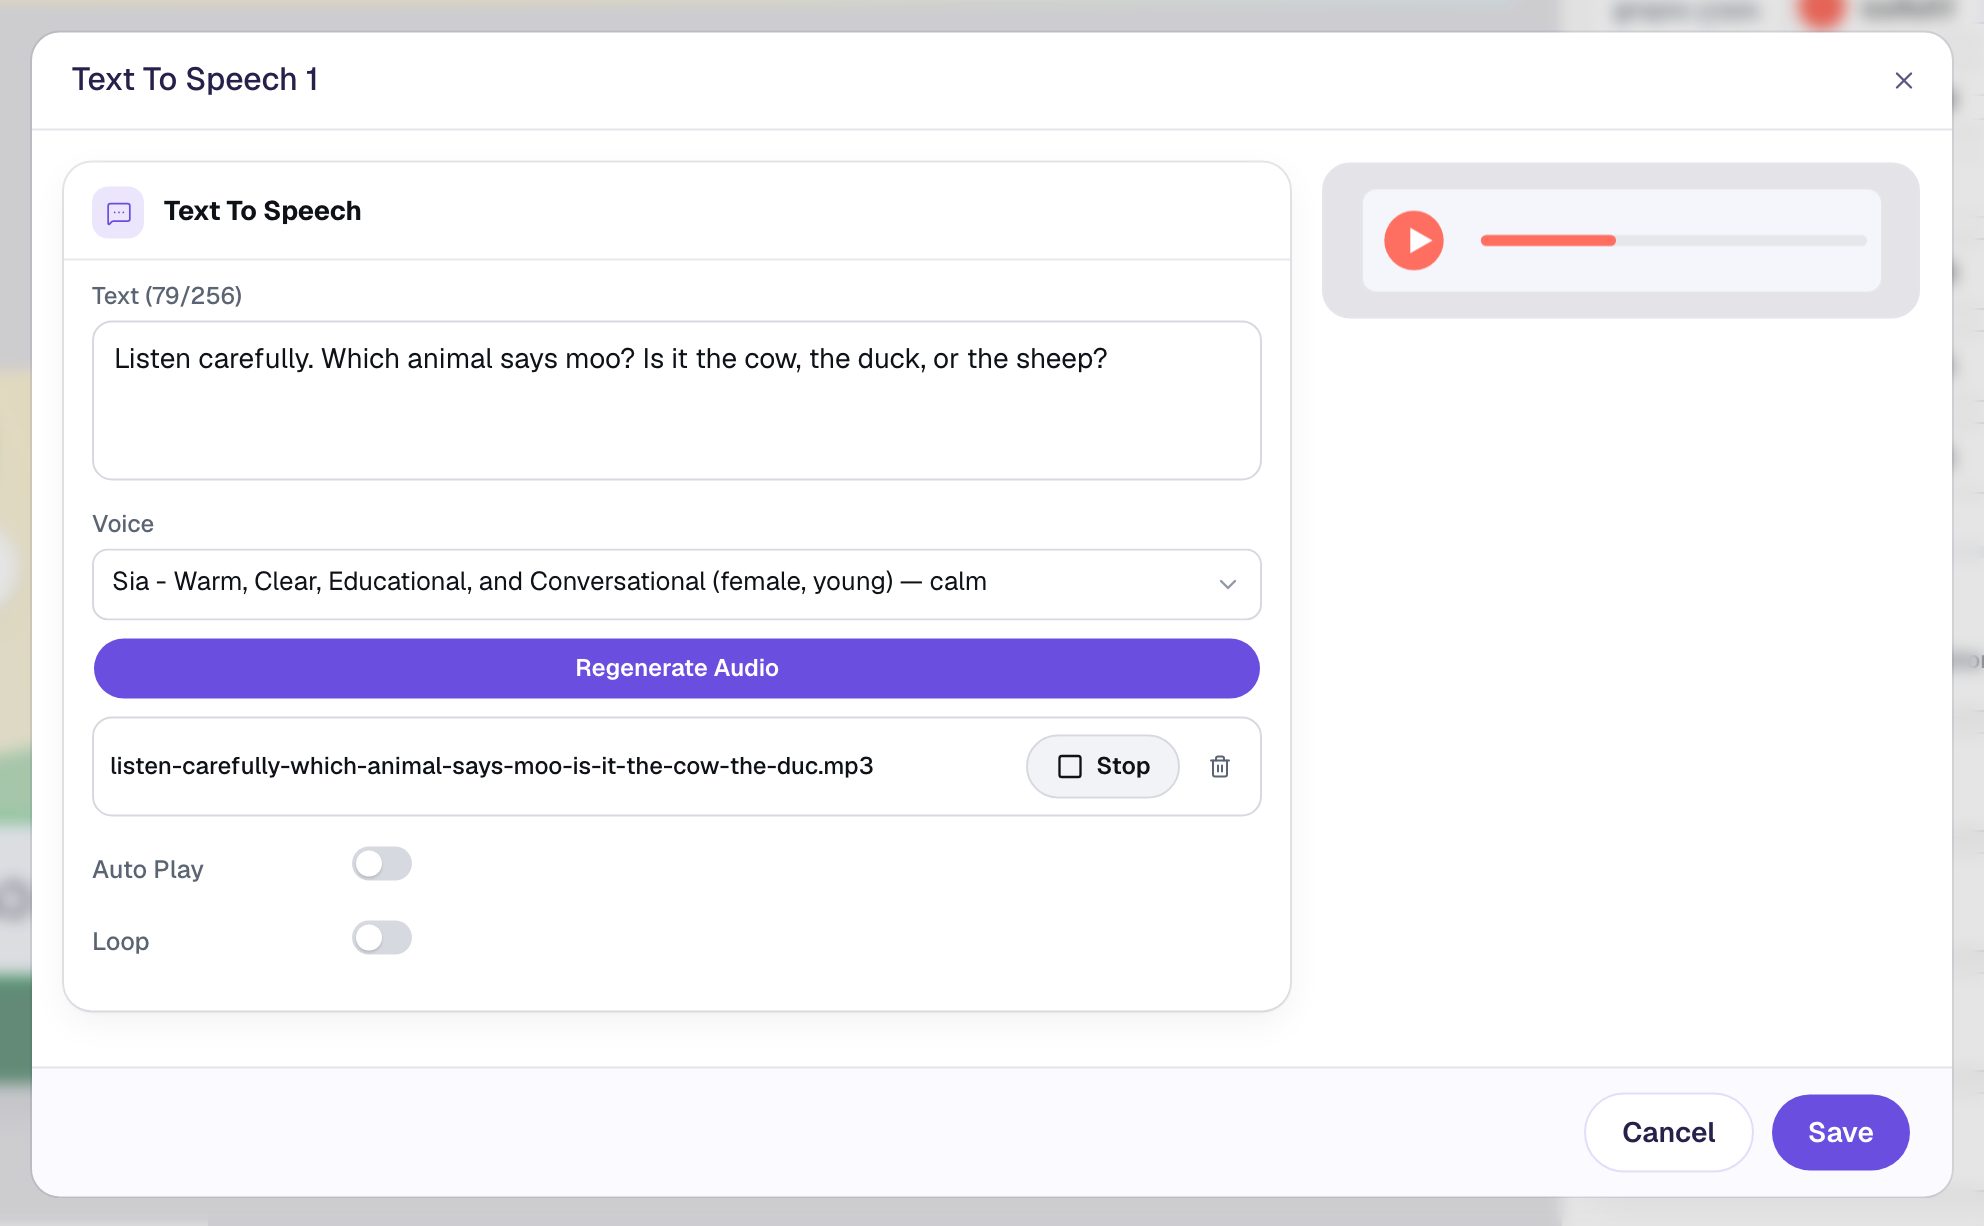
Each recording uses text-to-speech characters from your plan (Plus and above), so press Generate Audio once you're happy with the words rather than after every edit. Changing the text later doesn't remake the recording by itself: the window and the publish check both tell you when the audio no longer matches, so you remember to regenerate. Click Save.
Step 6: Make the player easy to press and to find
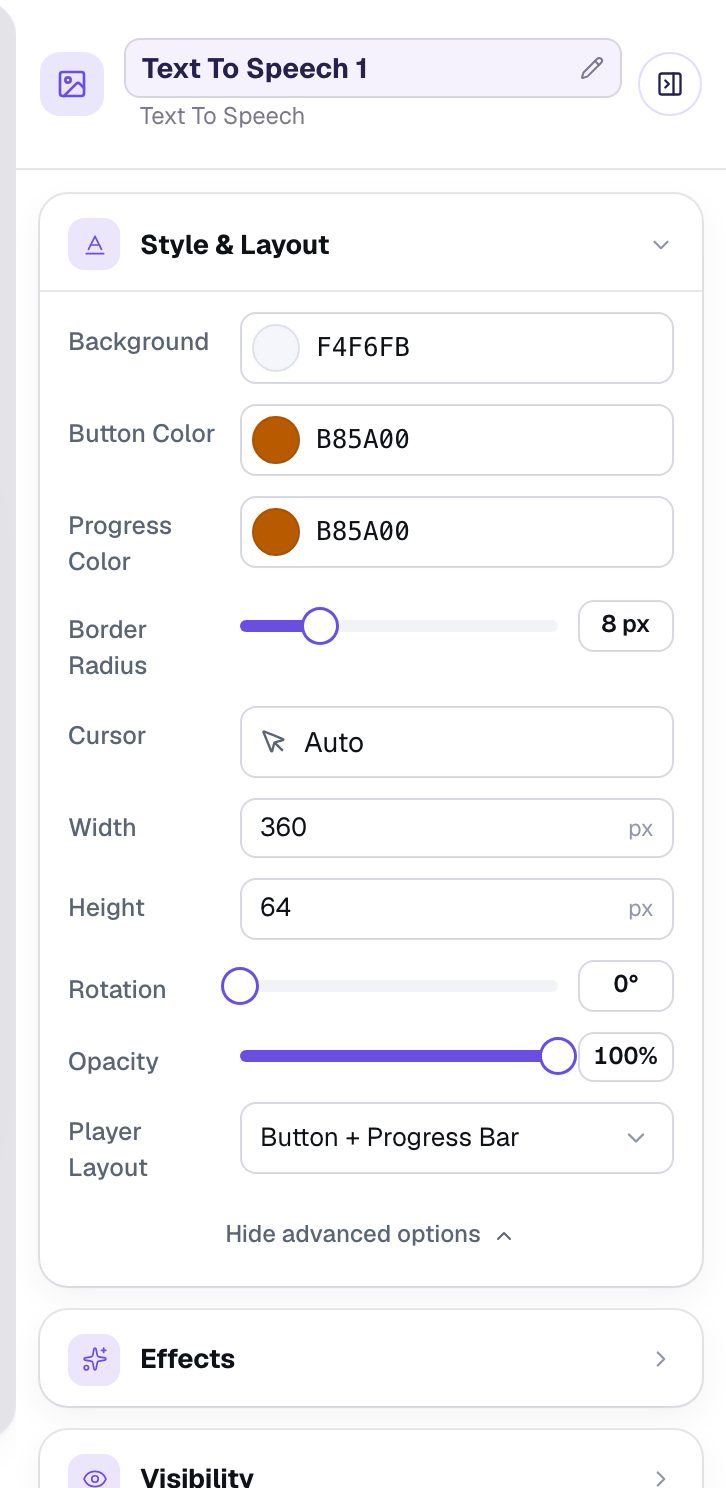
Young students tap with a whole finger, often on a tablet. With the player selected, open Style & Layout, click Show more options, and set Width to 360 and Height to 64. The play button is as tall as the player, so this makes it a big, easy target. Leave Player Layout on Button + Progress Bar: the moving bar shows students it's working and lets them skip back to a part they missed.
Then darken the button. The starting coral is pretty but pale: its white play icon is hard to make out, especially for students with low vision. Click the colour dot next to Button Color and pick the dark orange #b85a00, then do the same for Progress Color. Any colour works as long as the white icon stands out clearly against it and the button stands out against the light player.
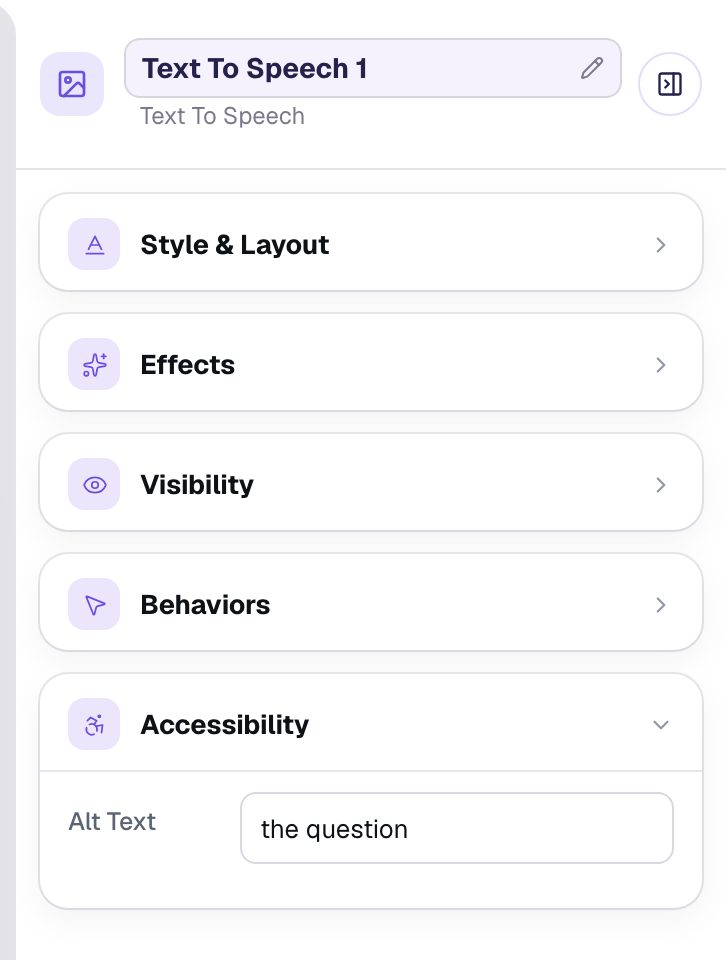
Then open Accessibility and set Alt Text to the question. A screen reader announces the button as "Play the question", so a student who can't see the screen knows what it plays.
Step 7: Add a button that finishes the lesson
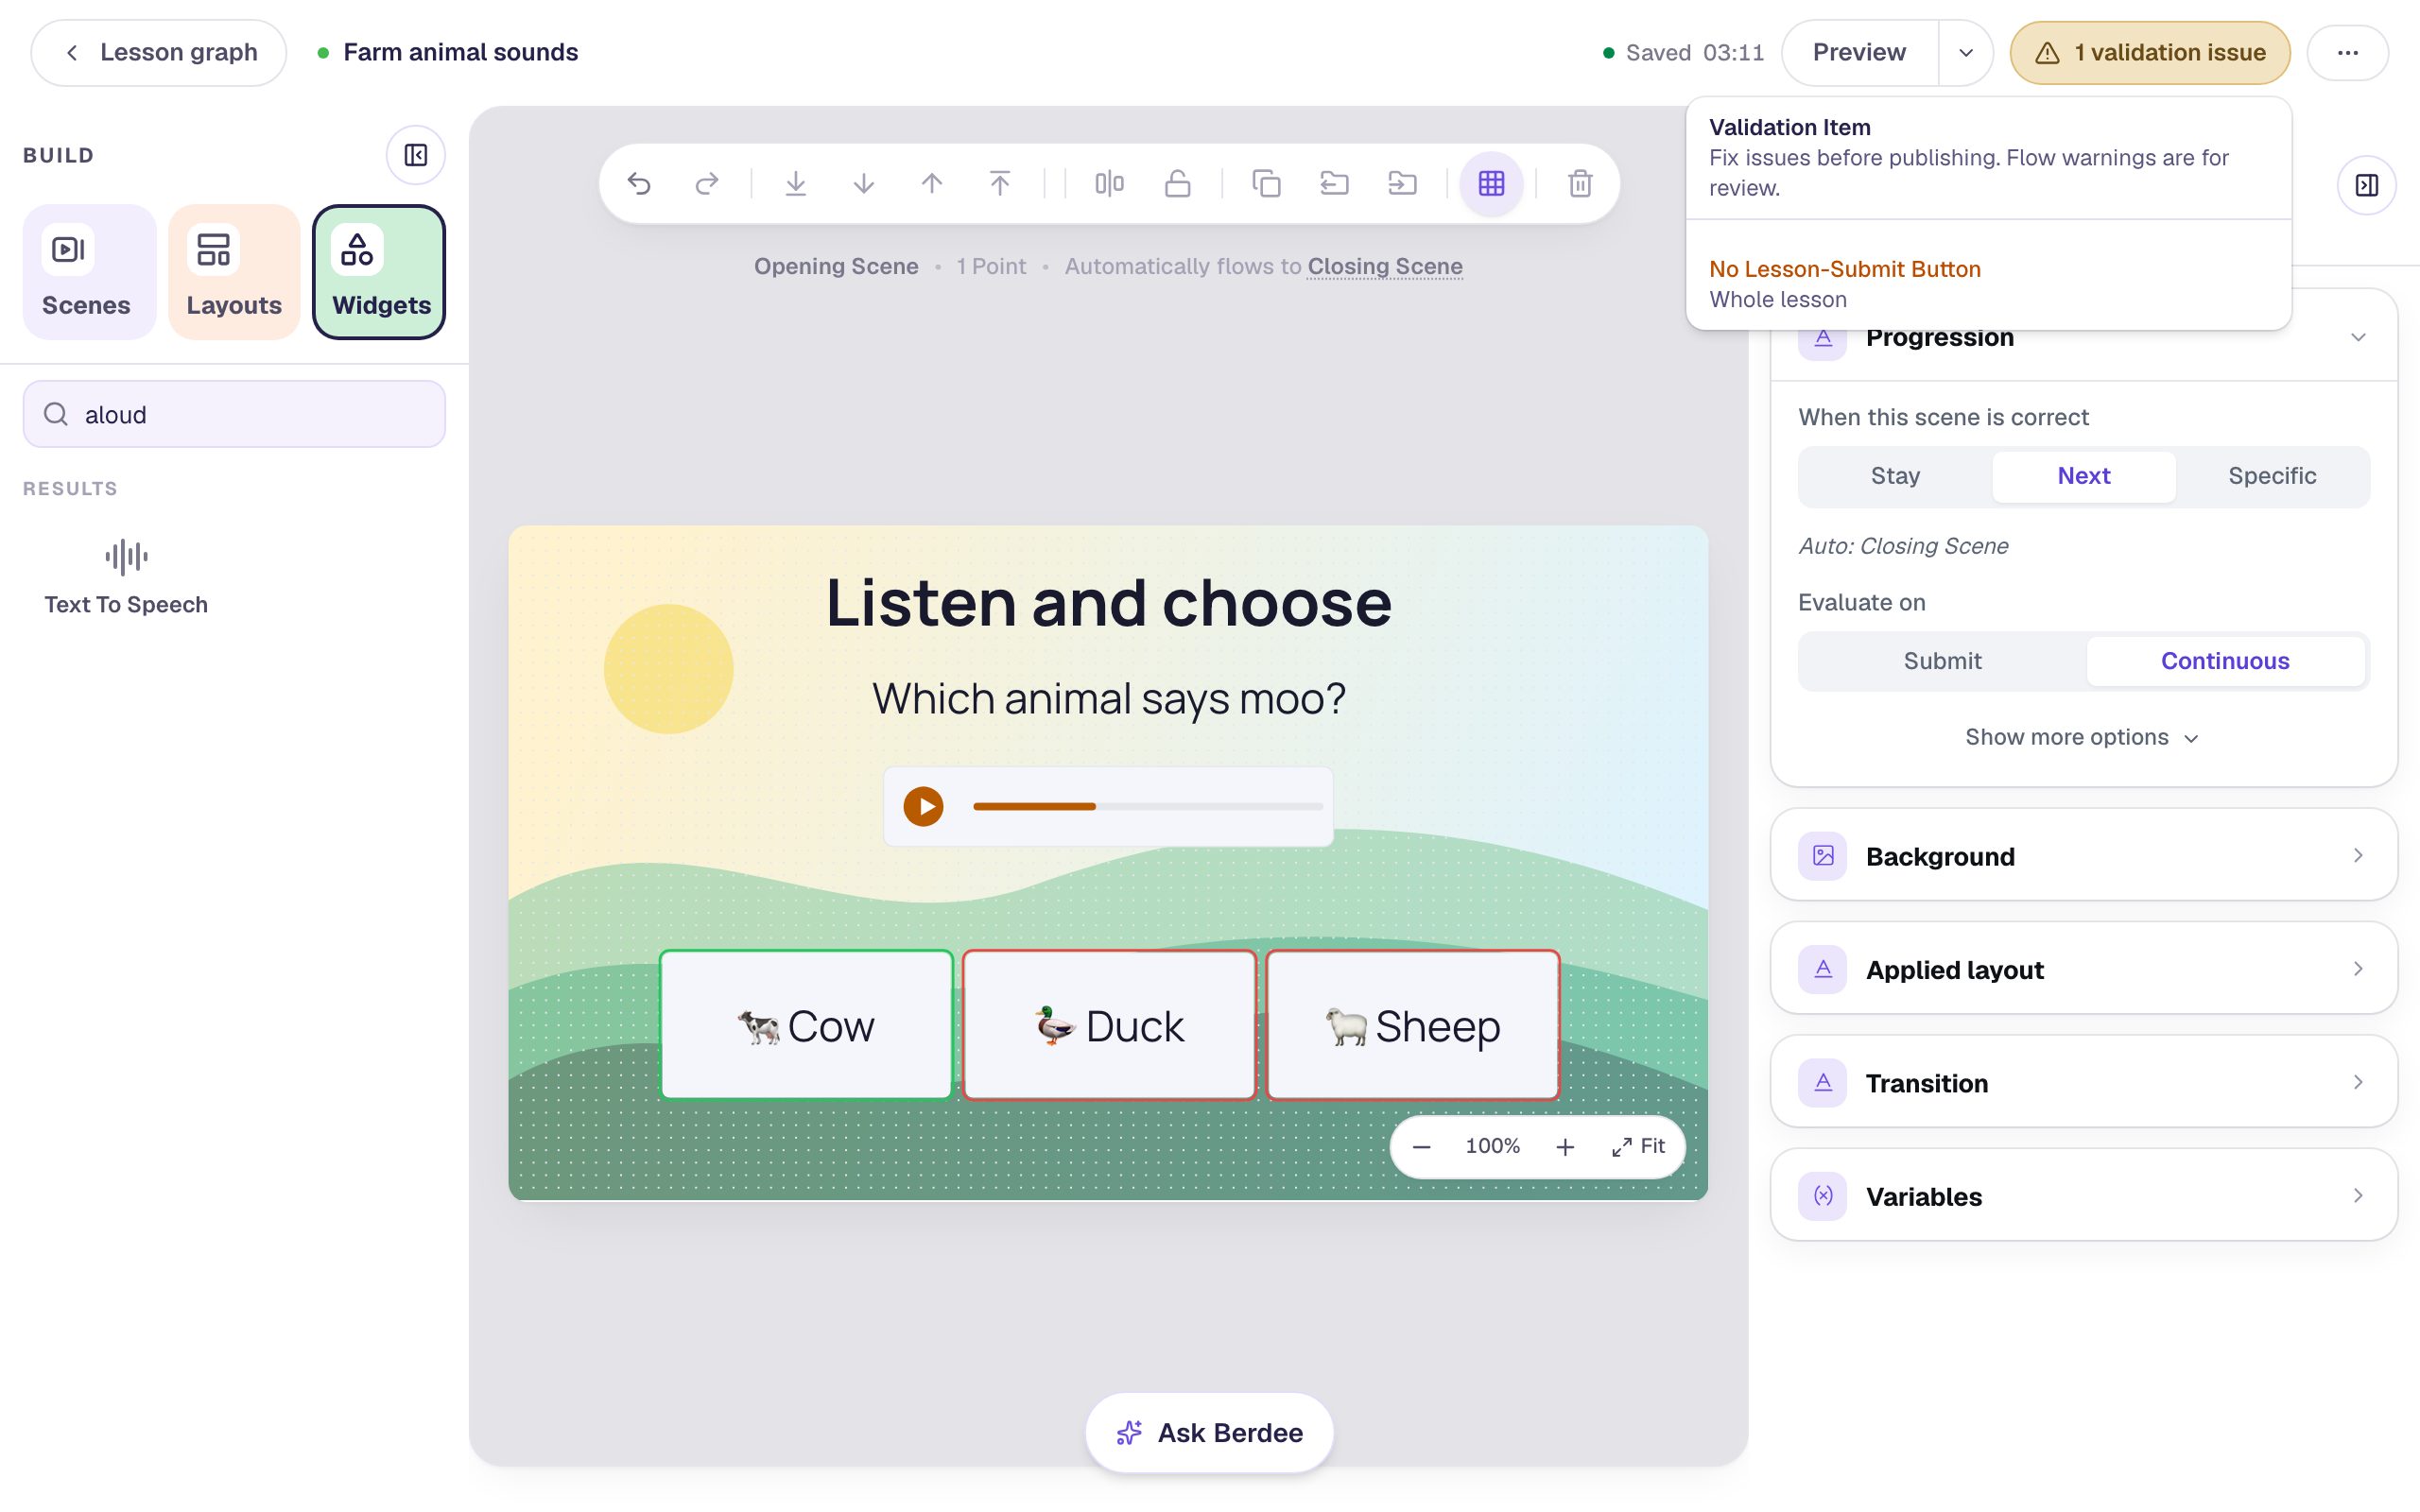
Click the 1 validation issue pill at the top. There's one thing left: No Lesson-Submit Button. A lesson needs a Submit button set to Lesson before you can publish it. (If you had skipped Step 5, the player's No audio yet would be listed here too.)
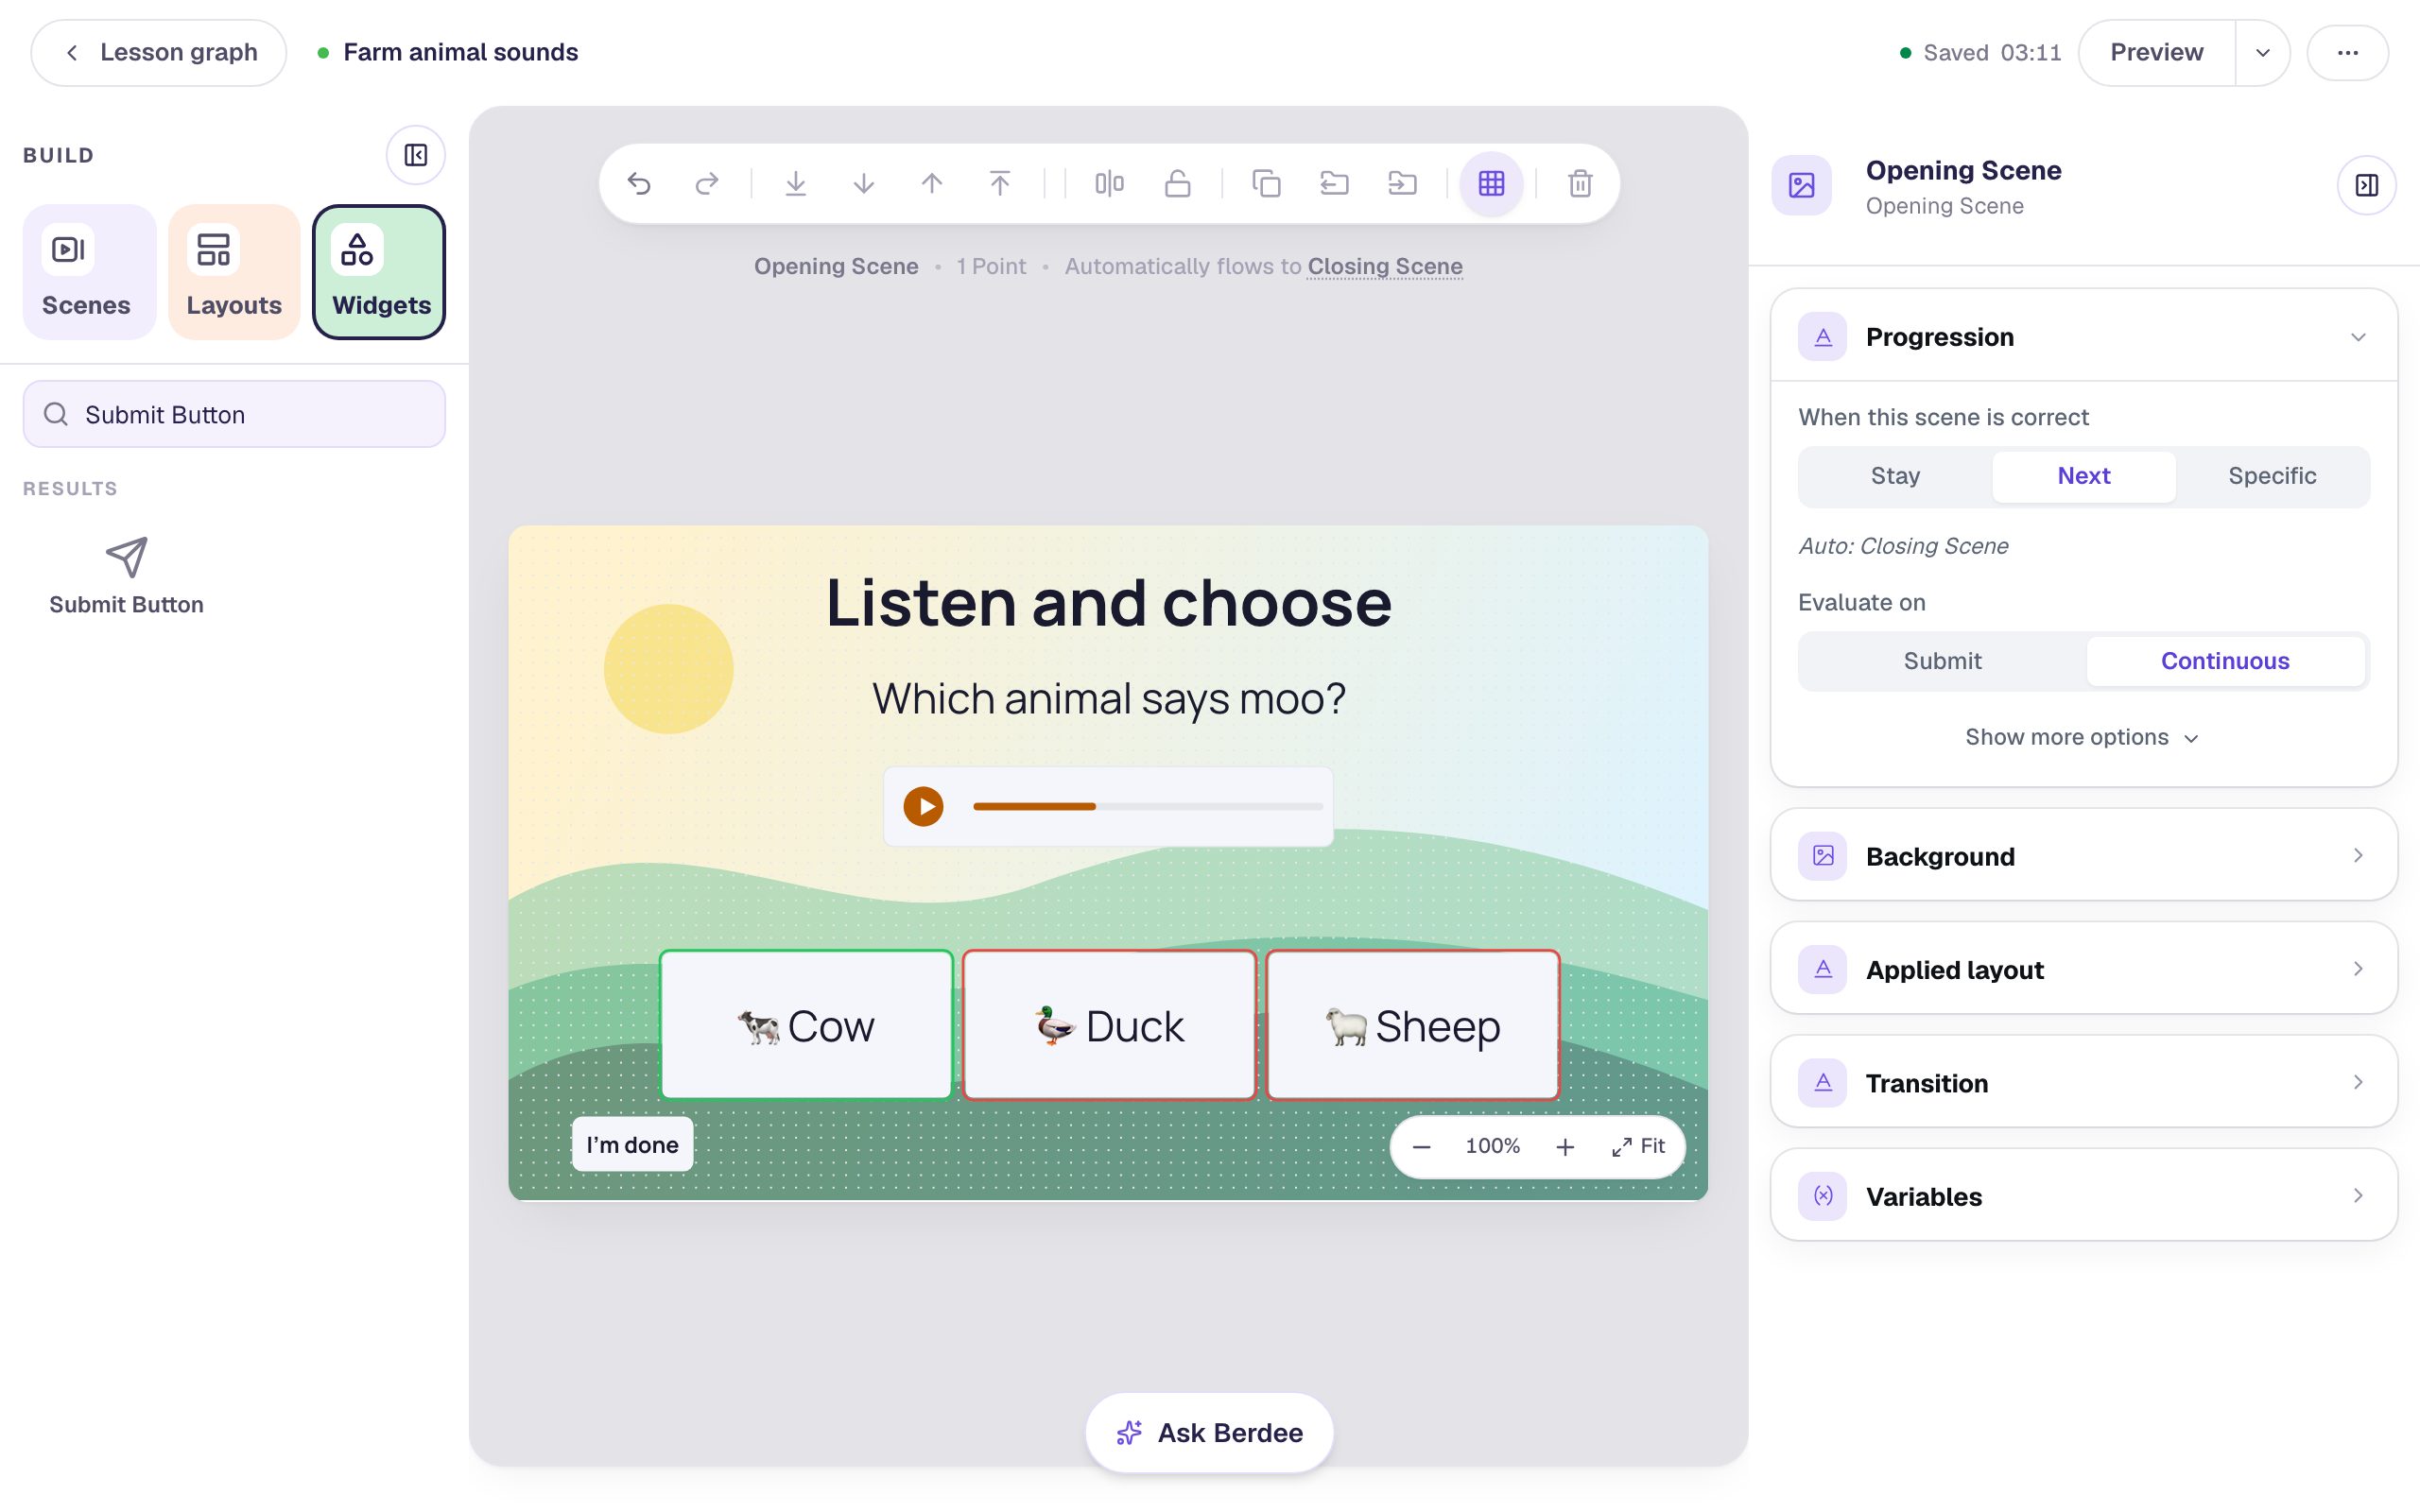
In Widgets, search for Submit Button and add one. In Content, change its Label to I'm done and choose Lesson. Drag it to the bottom-left corner, out of the way of the answers. Students who pick Cow move on by themselves; this button is for a student who wants to stop.
Step 8: Preview it as a student
Click Preview. Press the play button and listen, then answer the way a student might: a wrong pick first, then the right one.
The play button turns into a pause button and the bar fills as the question is read. The clip above is silent, but in your browser you'll hear the voice you chose.
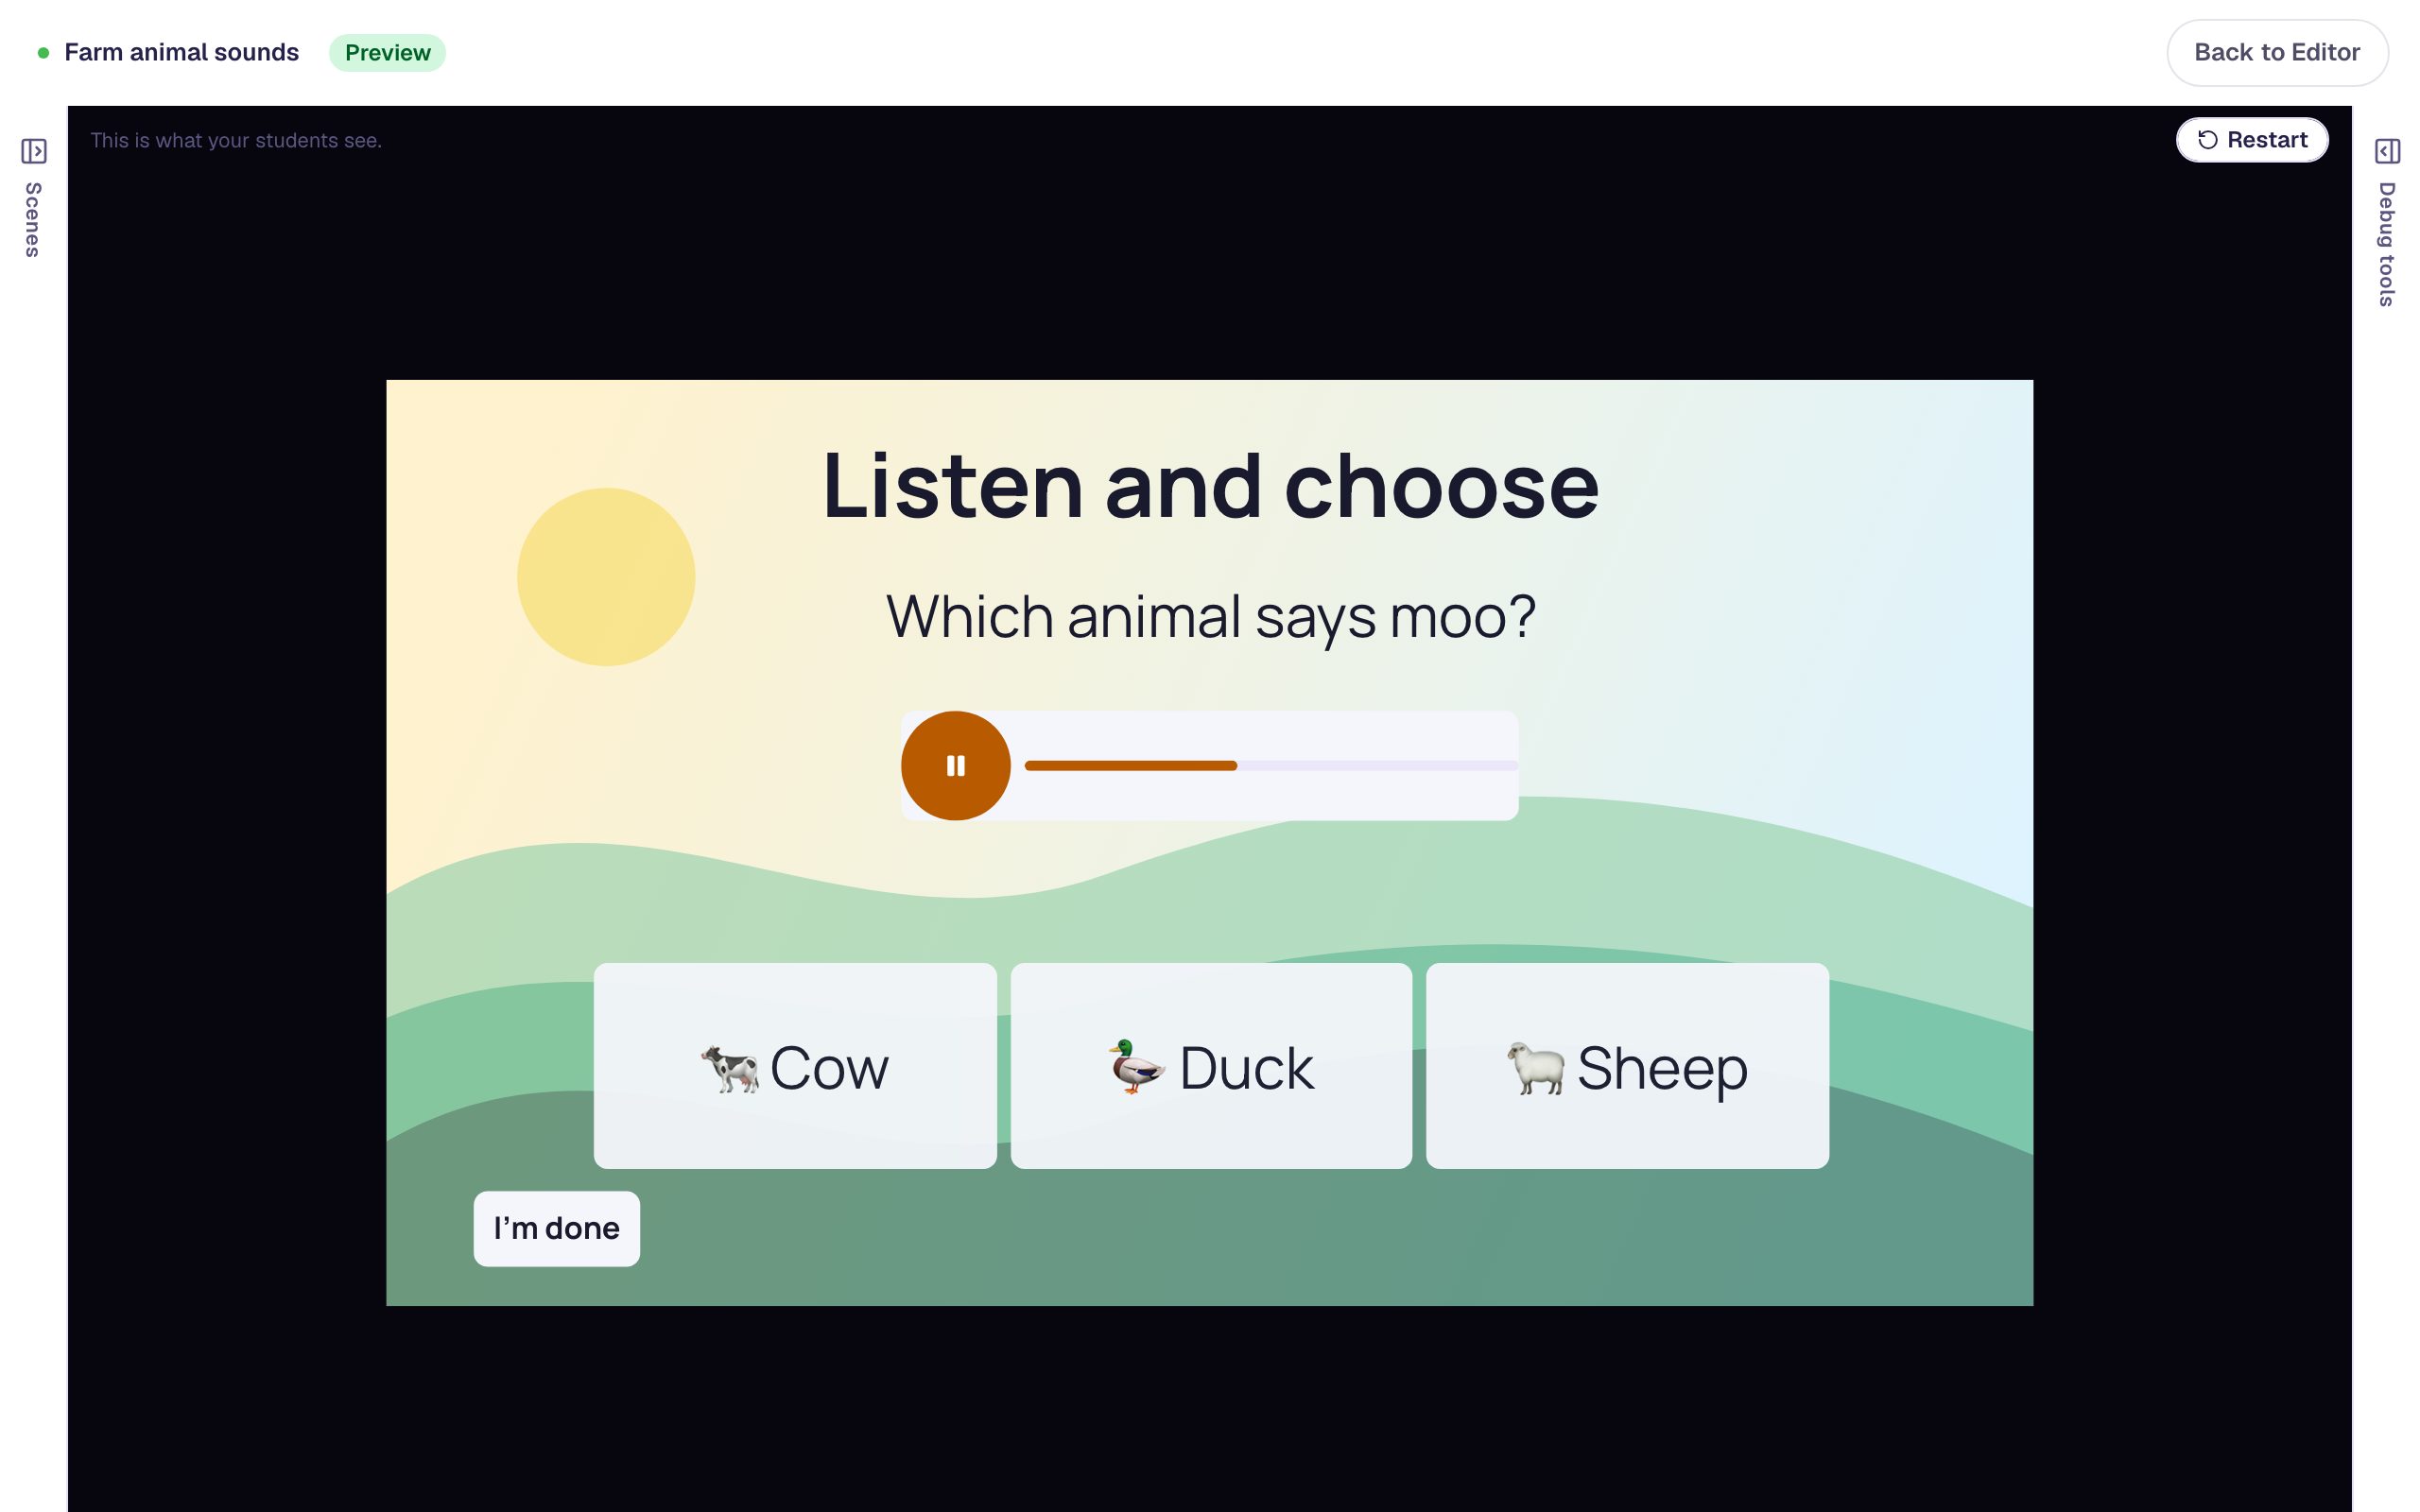
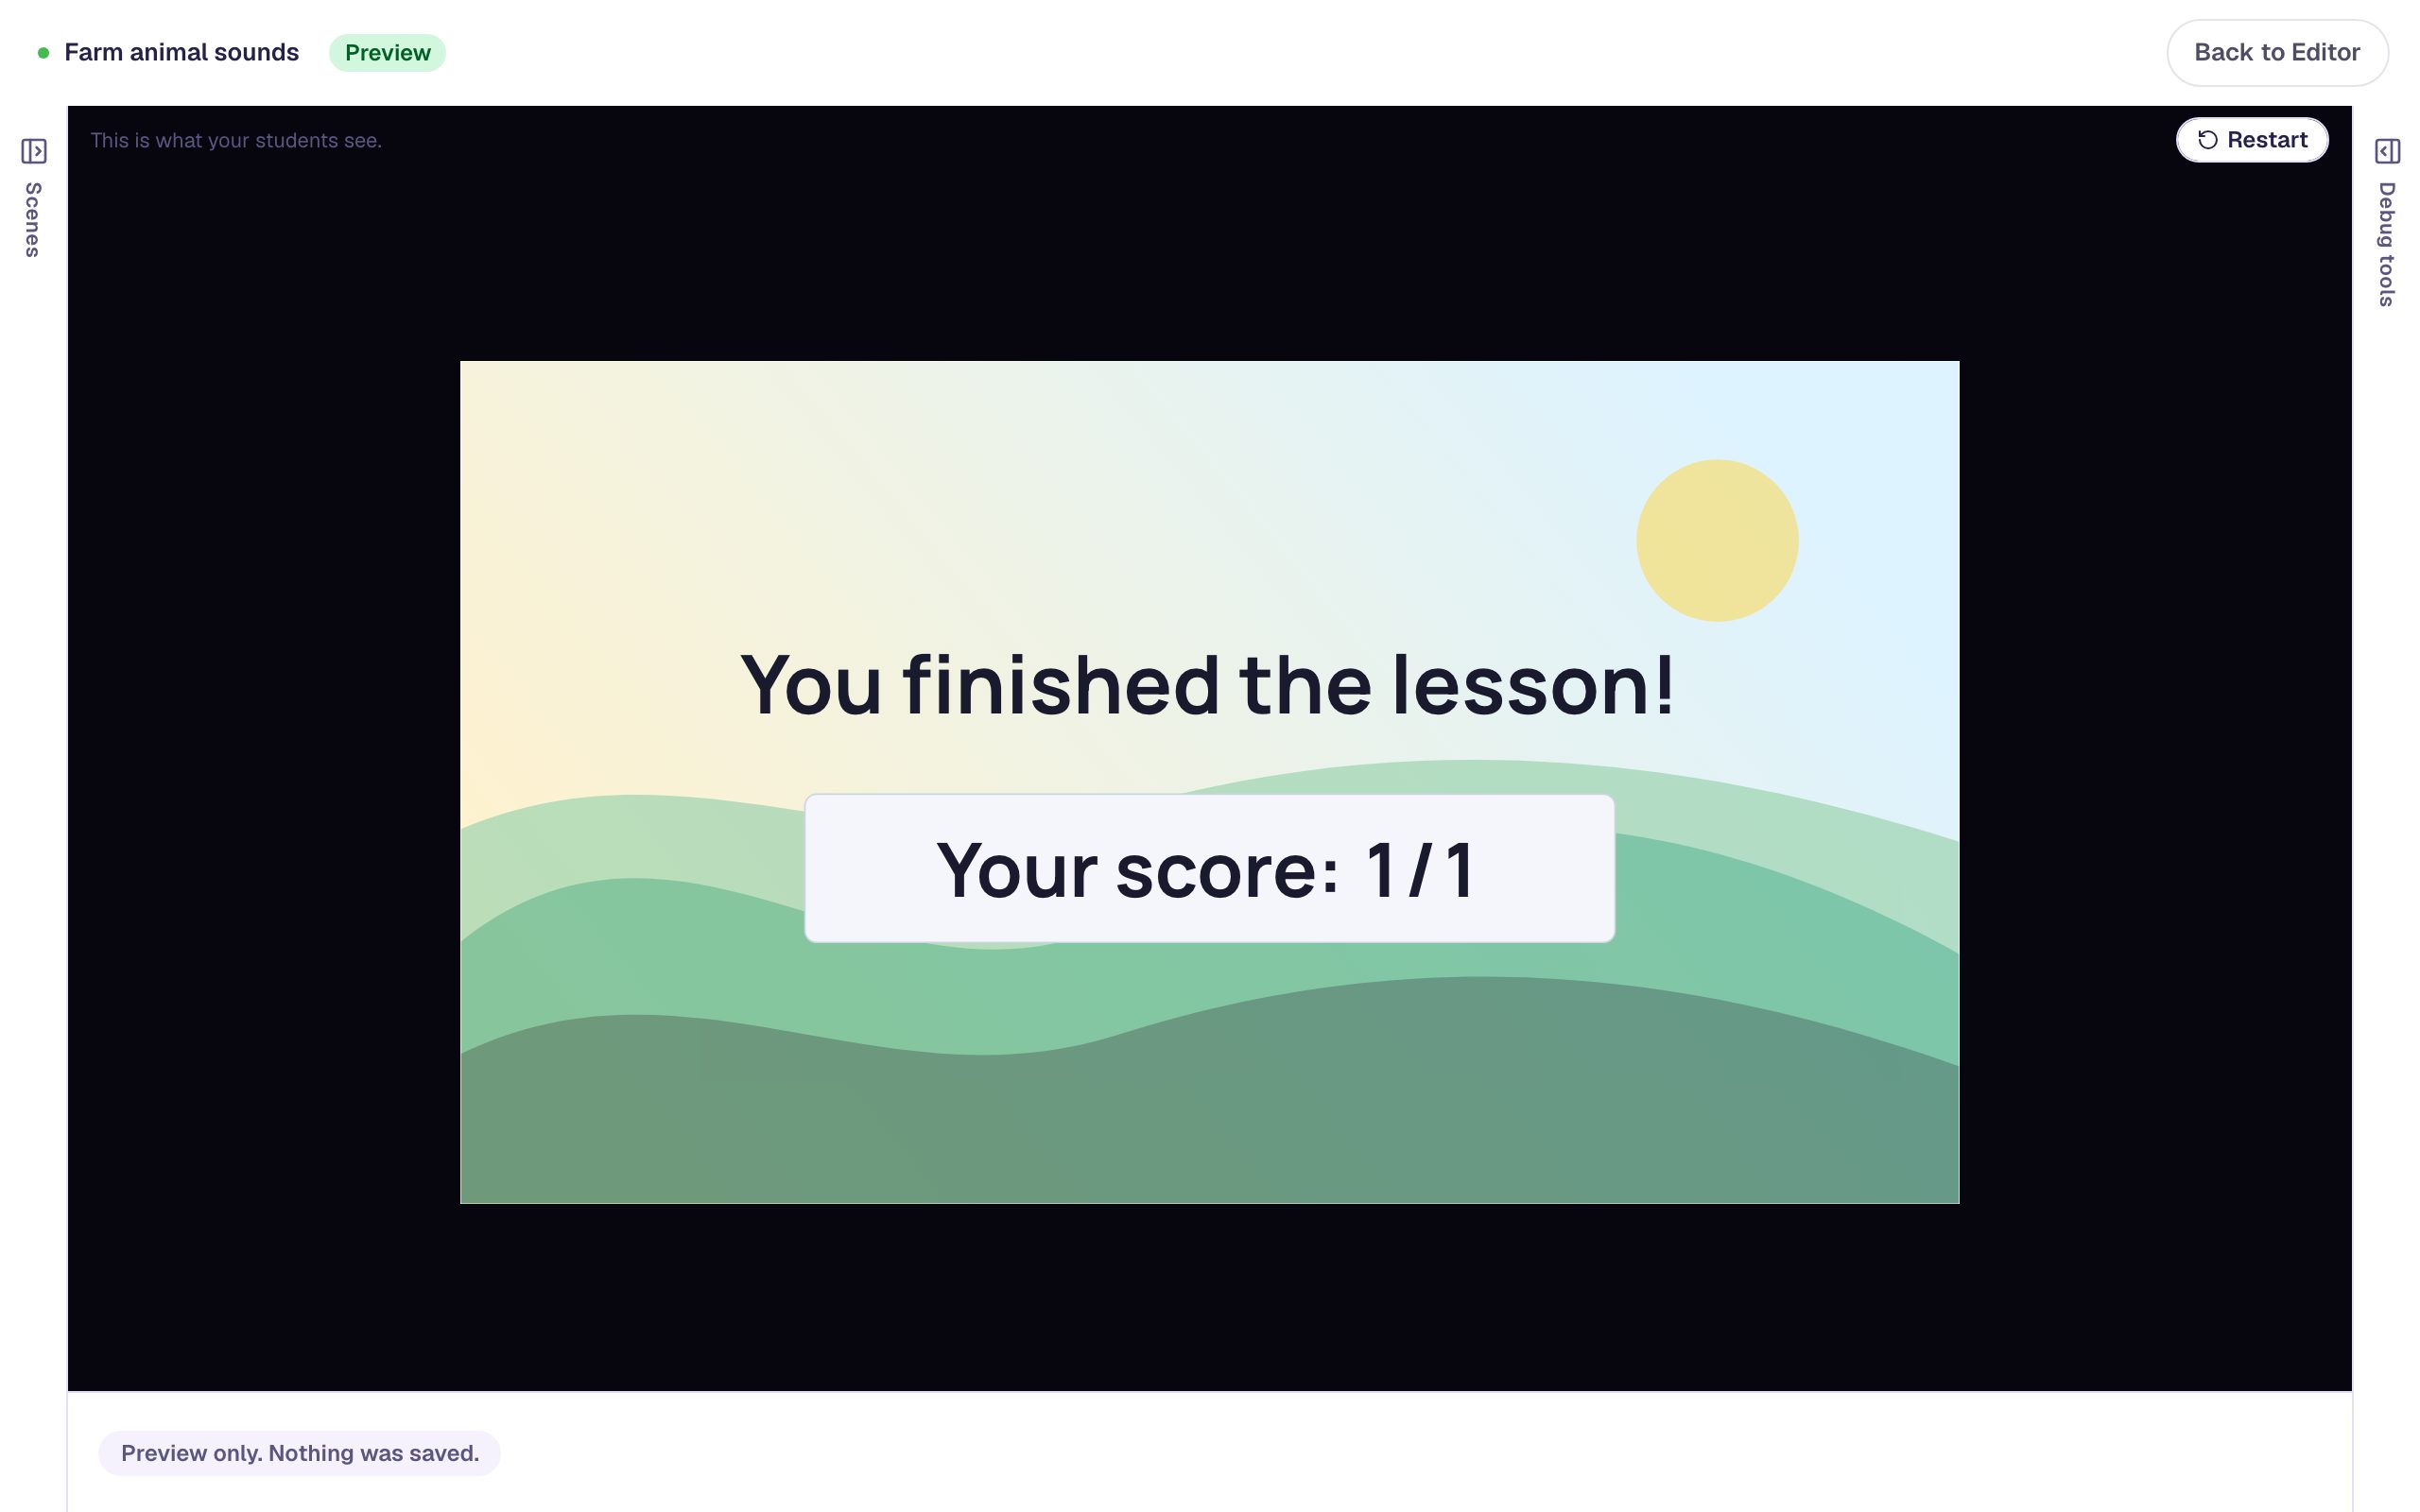
Picking Duck keeps the student on the question so they can listen again and try another answer. Picking Cow finishes the lesson and the ending shows the score.
What you built
A question every student can answer, whether or not they can read it yet:
- A Text To Speech player that reads the question and its answers in the voice you chose, as many times as a student presses play.
- A big, dark, clearly labelled play button that screen readers announce as "Play the question".
- Answers with pictures as well as words, in a single row, in a new order each time.
Next, try the same player for directions on any scene ("Drag each card into the right group"), or turn on Auto Play in the player's Configure window so a scene speaks as soon as it opens. For more practice with questions, see Ask a "select all that apply" question with pictures. To play a cheer or a gentle boing when students answer, see Play a cheer for a right answer and a gentle boing for a wrong one.
Make this lesson yours
Add the lesson you just watched being built to your account, then change it for your class: your questions, your pictures, your colors.
Free to sign up, and you'll come straight back here. I have an account