Let pre-readers hear every answer choice
Turn on Read choices aloud for a picture question, so children who can't read yet tap a picture to hear its name and tap it again to choose it. Give each picture a short spoken name and make the audio in the lesson's narration voice.
- Level
- Beginner
- Time
- About 10 min
- Steps
- 7
- Updated
- Oct 18, 2026
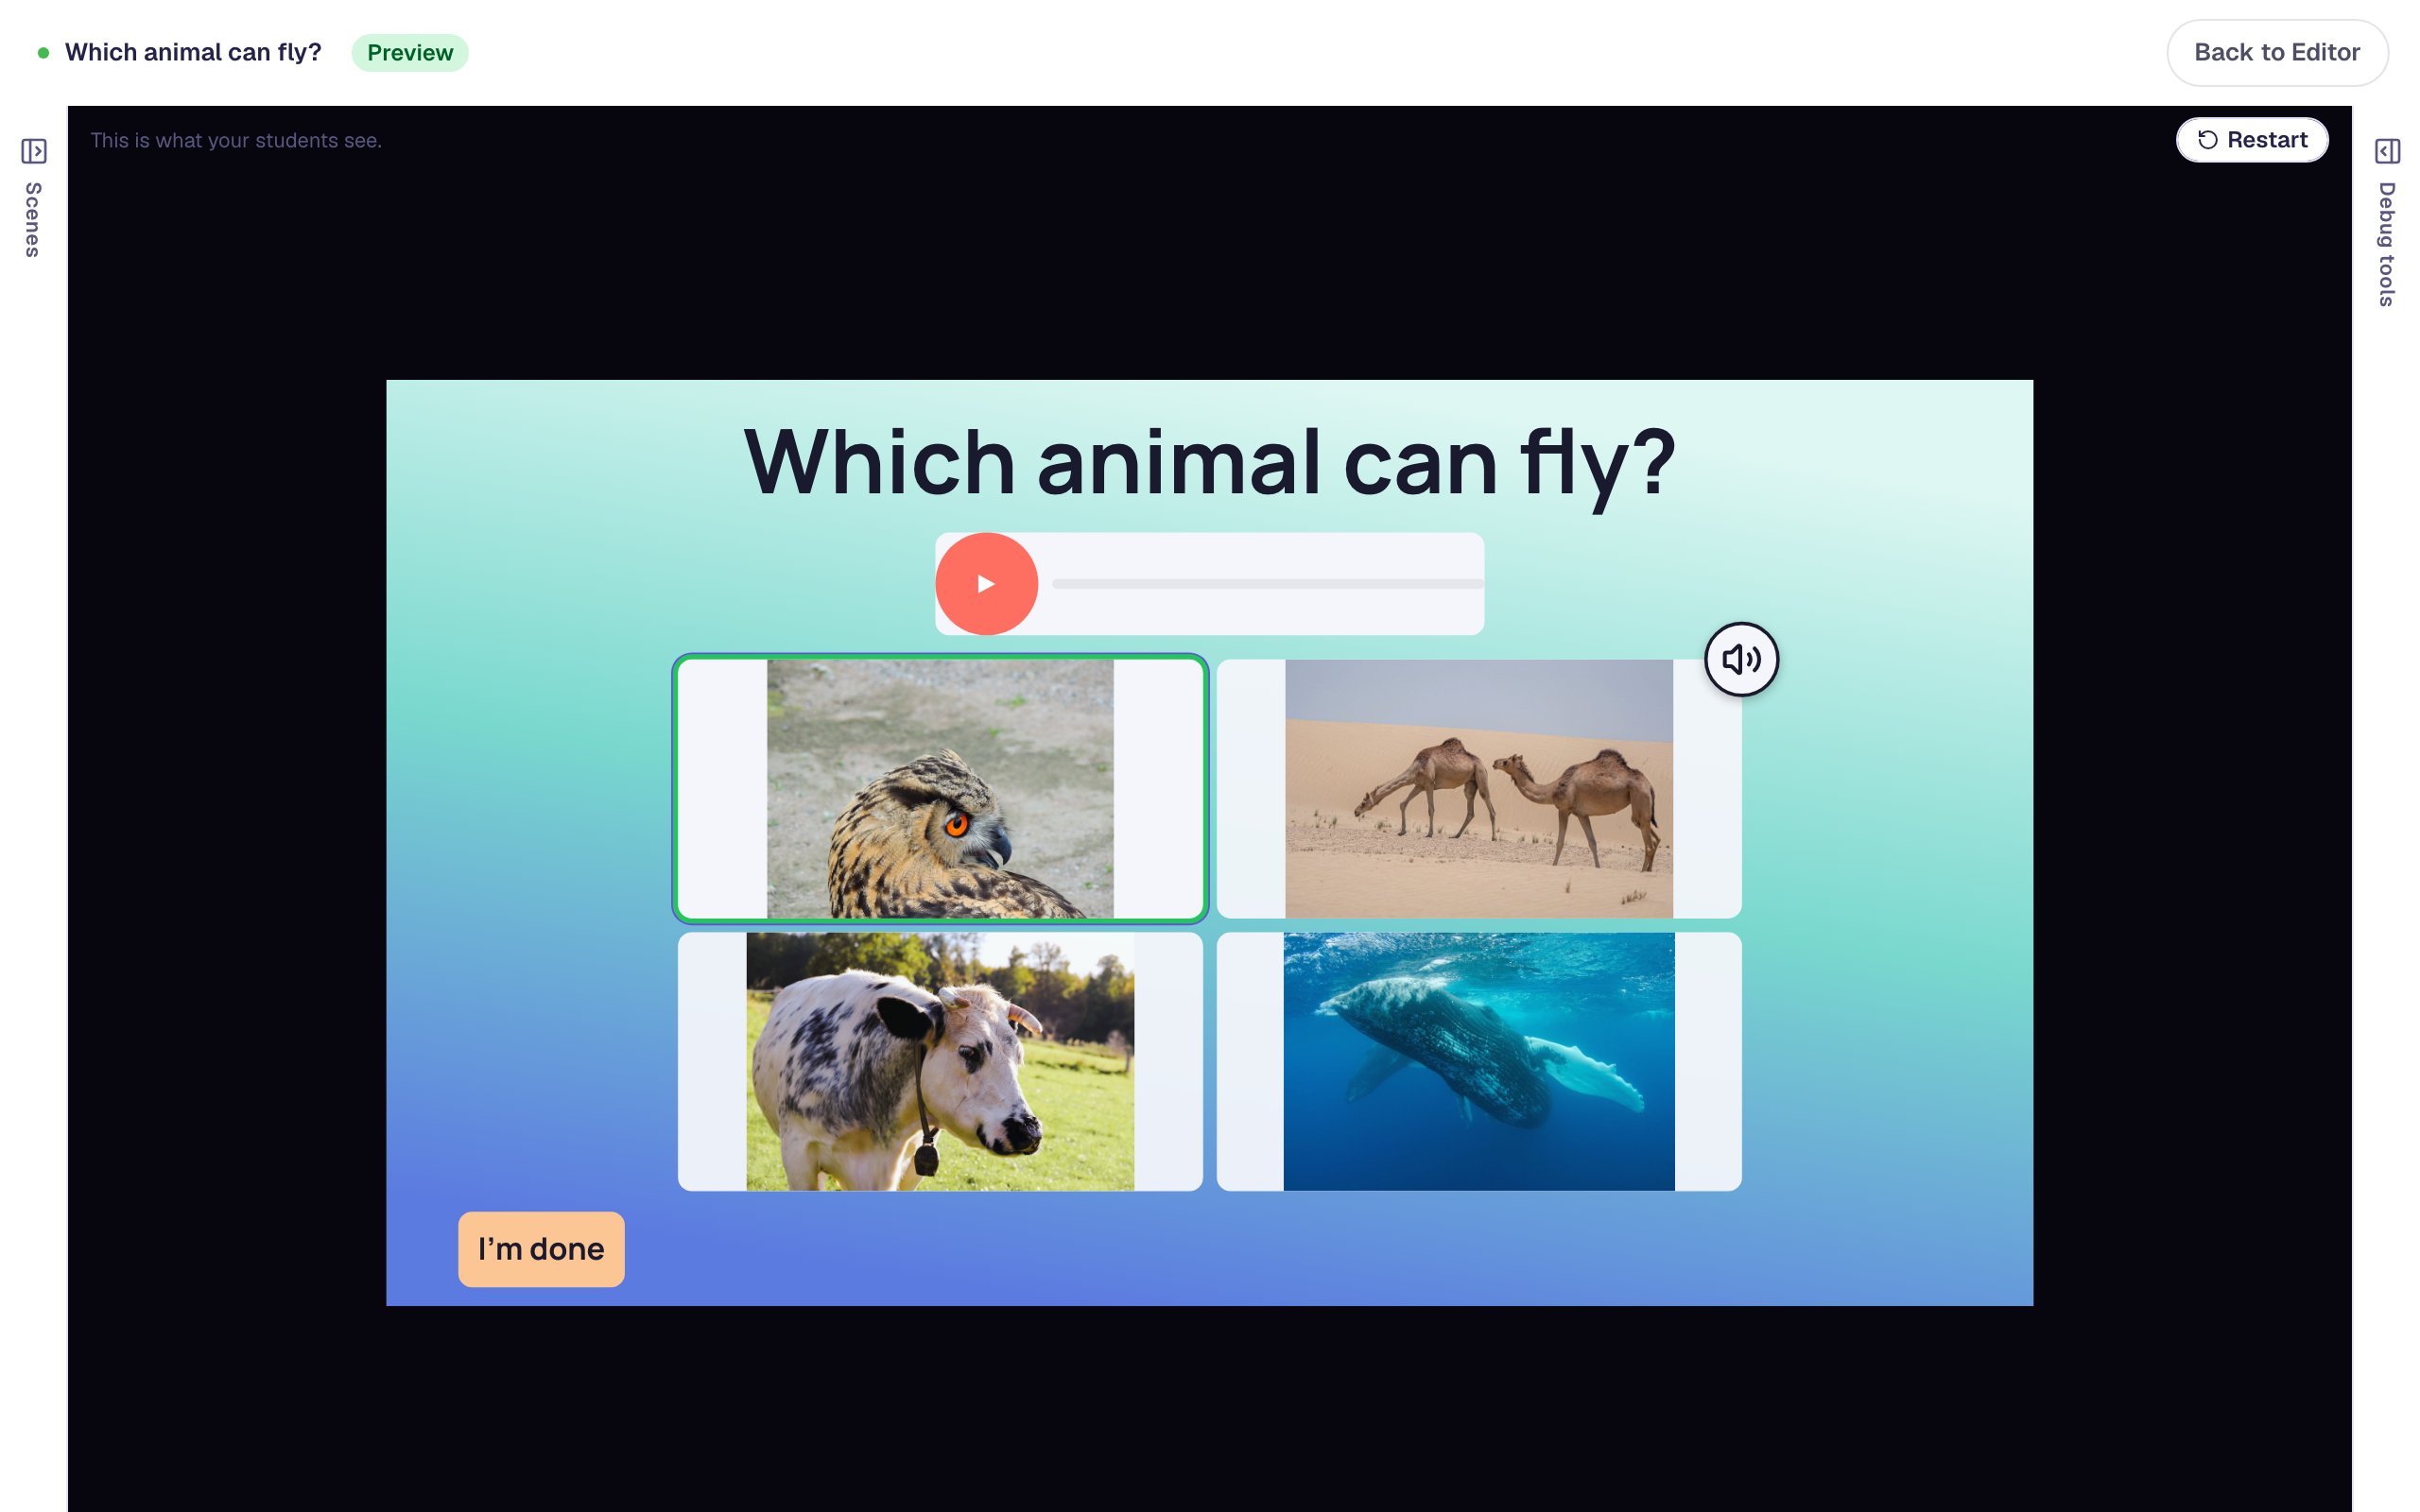
A "Which animal can fly?" scene with four animal photos. A child taps a photo to hear "An owl" or "A whale", taps it again to choose, can hear every choice in turn with one speaker button, and moves on once they choose the owl.
Get the finished lesson
Skip straight to the result, or keep it open beside the steps. Add this tutorial's lesson to your account and explore how it works in the studio.
Free to sign up, and you'll come straight back here. I have an account
A five-year-old who can't read yet can still answer "Which animal can fly?". They just need to hear what each choice is. When the choices are words, they can't answer on their own. When they're pictures, they can still be unsure what a picture shows.
In this tutorial you'll build a picture question whose choices say themselves. A child taps a picture once to hear "An owl", taps it again to choose it, and can press a speaker button to hear every choice in turn. Hearing a choice never answers it, so a child can listen as often as they like.
If you've never built a Multiple Choice question, start with Build your first quiz question.
Step 1: Set the scene and read the question aloud
Start a blank lesson and name it (we used Which animal can fly?). Then build the top of the scene:
- Click an empty part of the canvas, open Background, click Choose a style and pick Lagoon gradient. Give the Closing Scene the same background, so the ending matches.
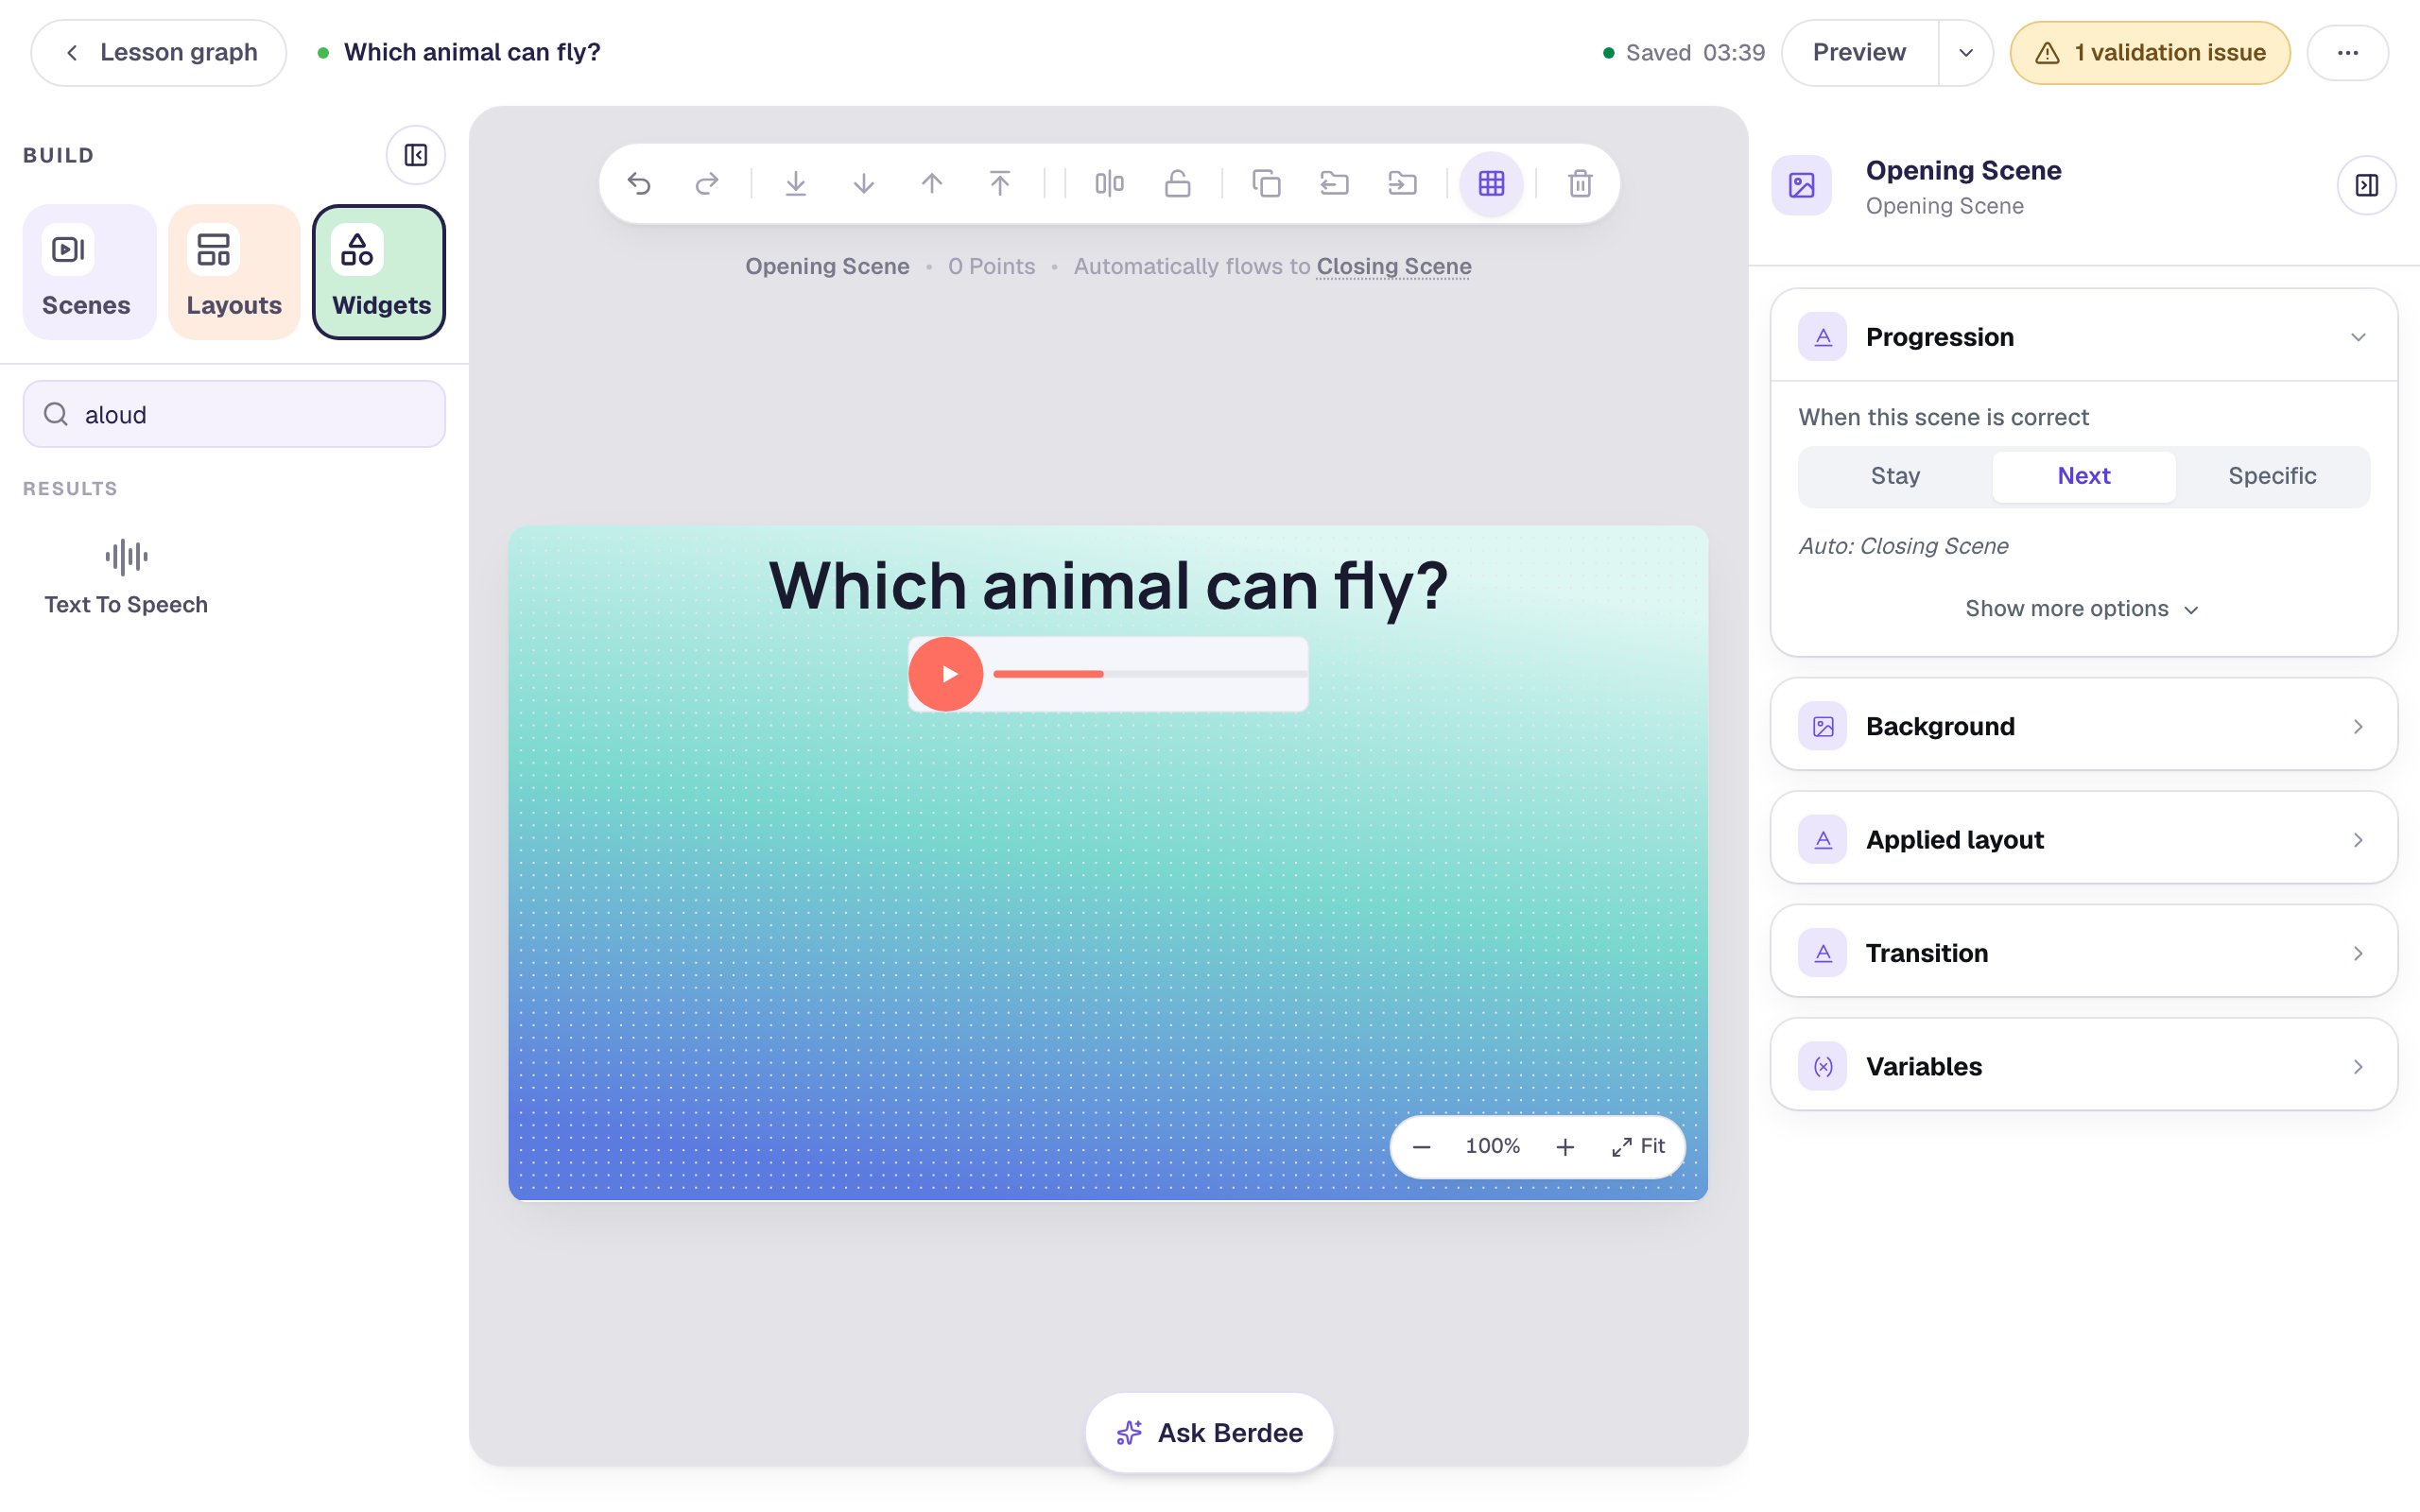
- From the Widgets tab, add a Heading that reads
Which animal can fly?and drag it to the top. - Search the Widgets tab for
aloudand add a Text To Speech player. In its ⚙ Configure window, typeWhich animal can fly? Tap a picture to hear it. Tap it again to choose it., press Generate Audio and Save. We made it 320 × 60, put it under the heading, and set its Alt Text toHear the question.
The player tells a child what to do. The choices you're about to build tell them what each picture is.
Read a question aloud for early readers covers the player step by step, including choosing a voice.
Step 2: Add four picture answers
Search the Widgets tab for Multi Choice and click it. Pictures need room: with the question selected, open Style & Layout, click Show more options, and set Width to 620 and Height to 310. Drag it under the player. A new question already has four answers, which makes a 2 × 2 grid at this size.
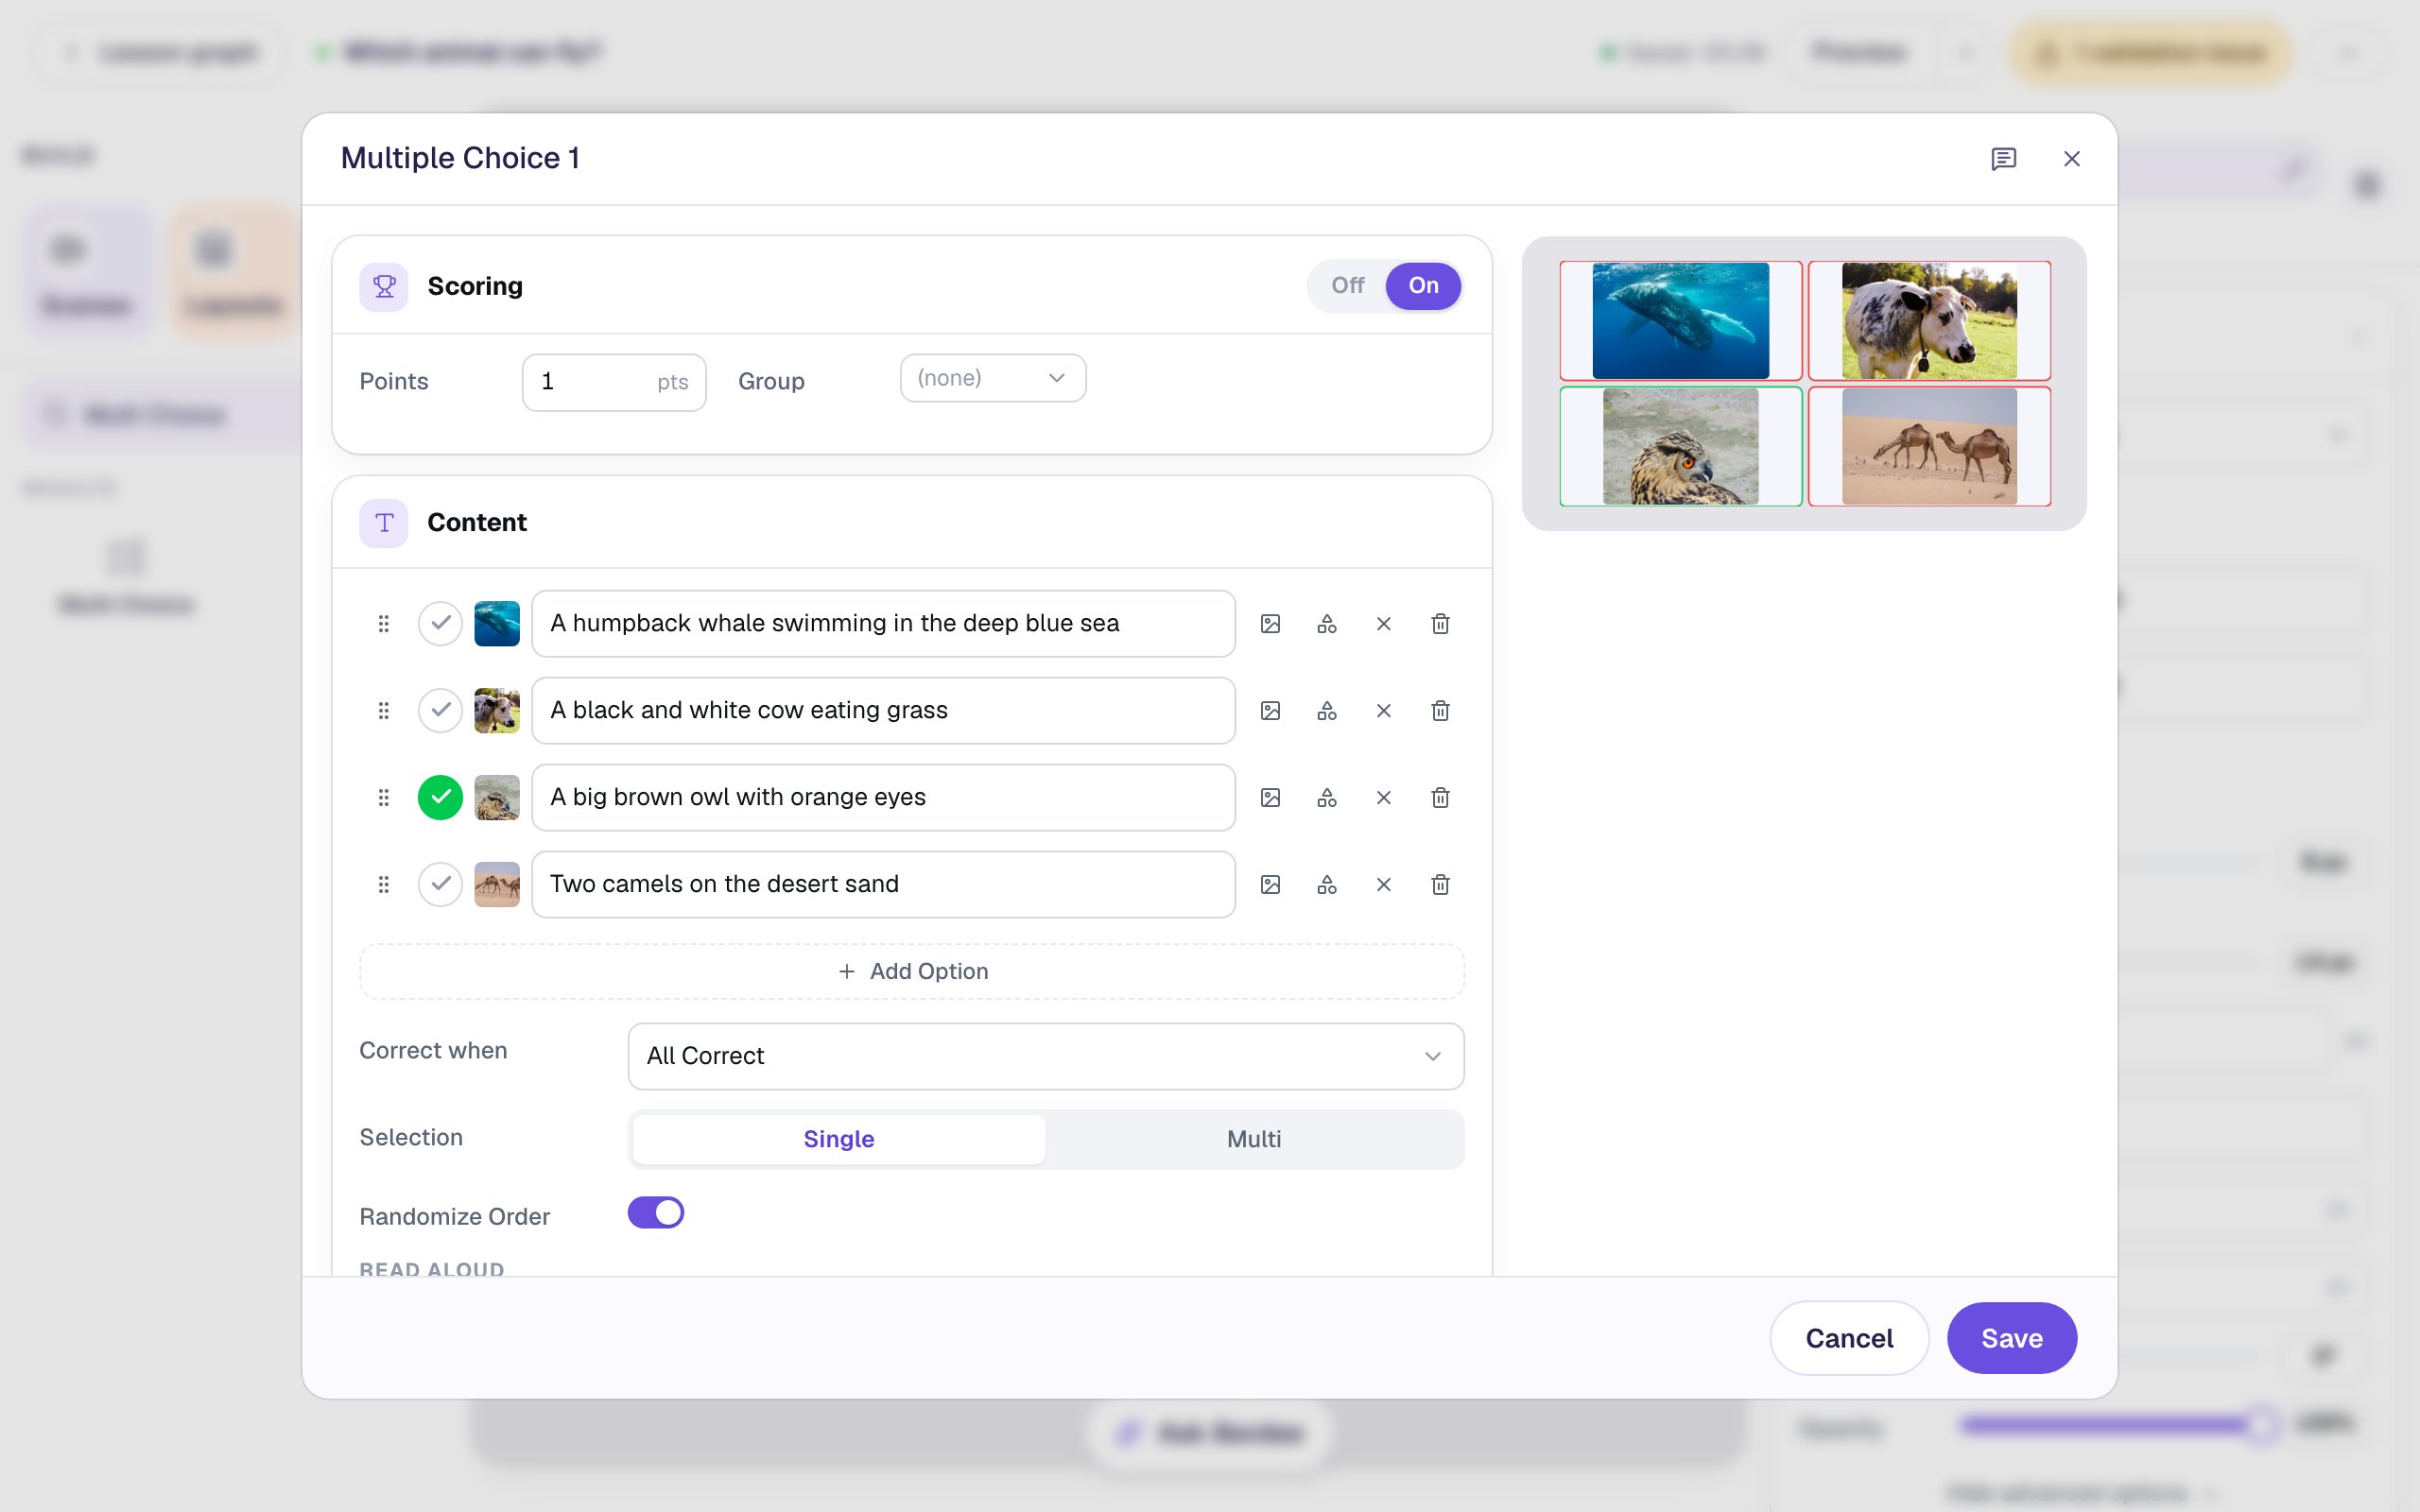
Click ⚙ Configure in the pill above the question. In Content, mark the right answer: the first answer starts out marked correct, so click its check mark to clear it, and click the third answer's check mark instead. That one will be the owl.
Now give each answer a photo. Click the picture button beside an answer's text box, search for a photo, open one, and click Import & insert:
We searched humpback whale underwater, cow meadow, eagle owl and camels desert. Choose wide photos with a big, clear animal: a picture shrinks to fit its tile, and a child can't name a speck.
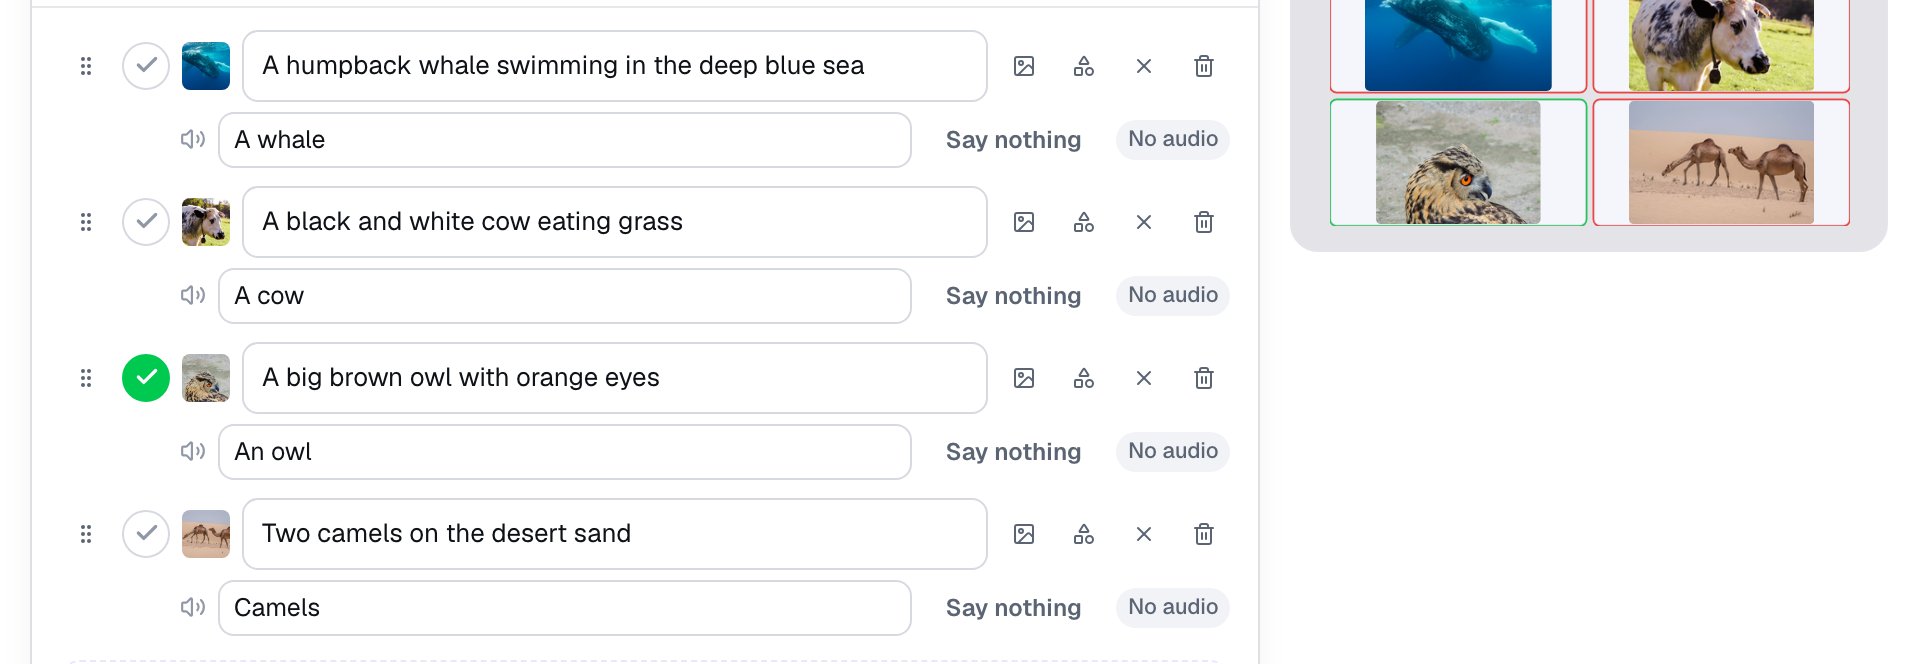
Then replace each answer's text with what its photo shows: A humpback whale swimming in the deep blue sea, A black and white cow eating grass, A big brown owl with orange eyes, Two camels on the desert sand. A child looking at the screen sees only the photos. A screen reader says this text, so describe the picture, never whether it's right.
Step 3: Turn on Read choices aloud
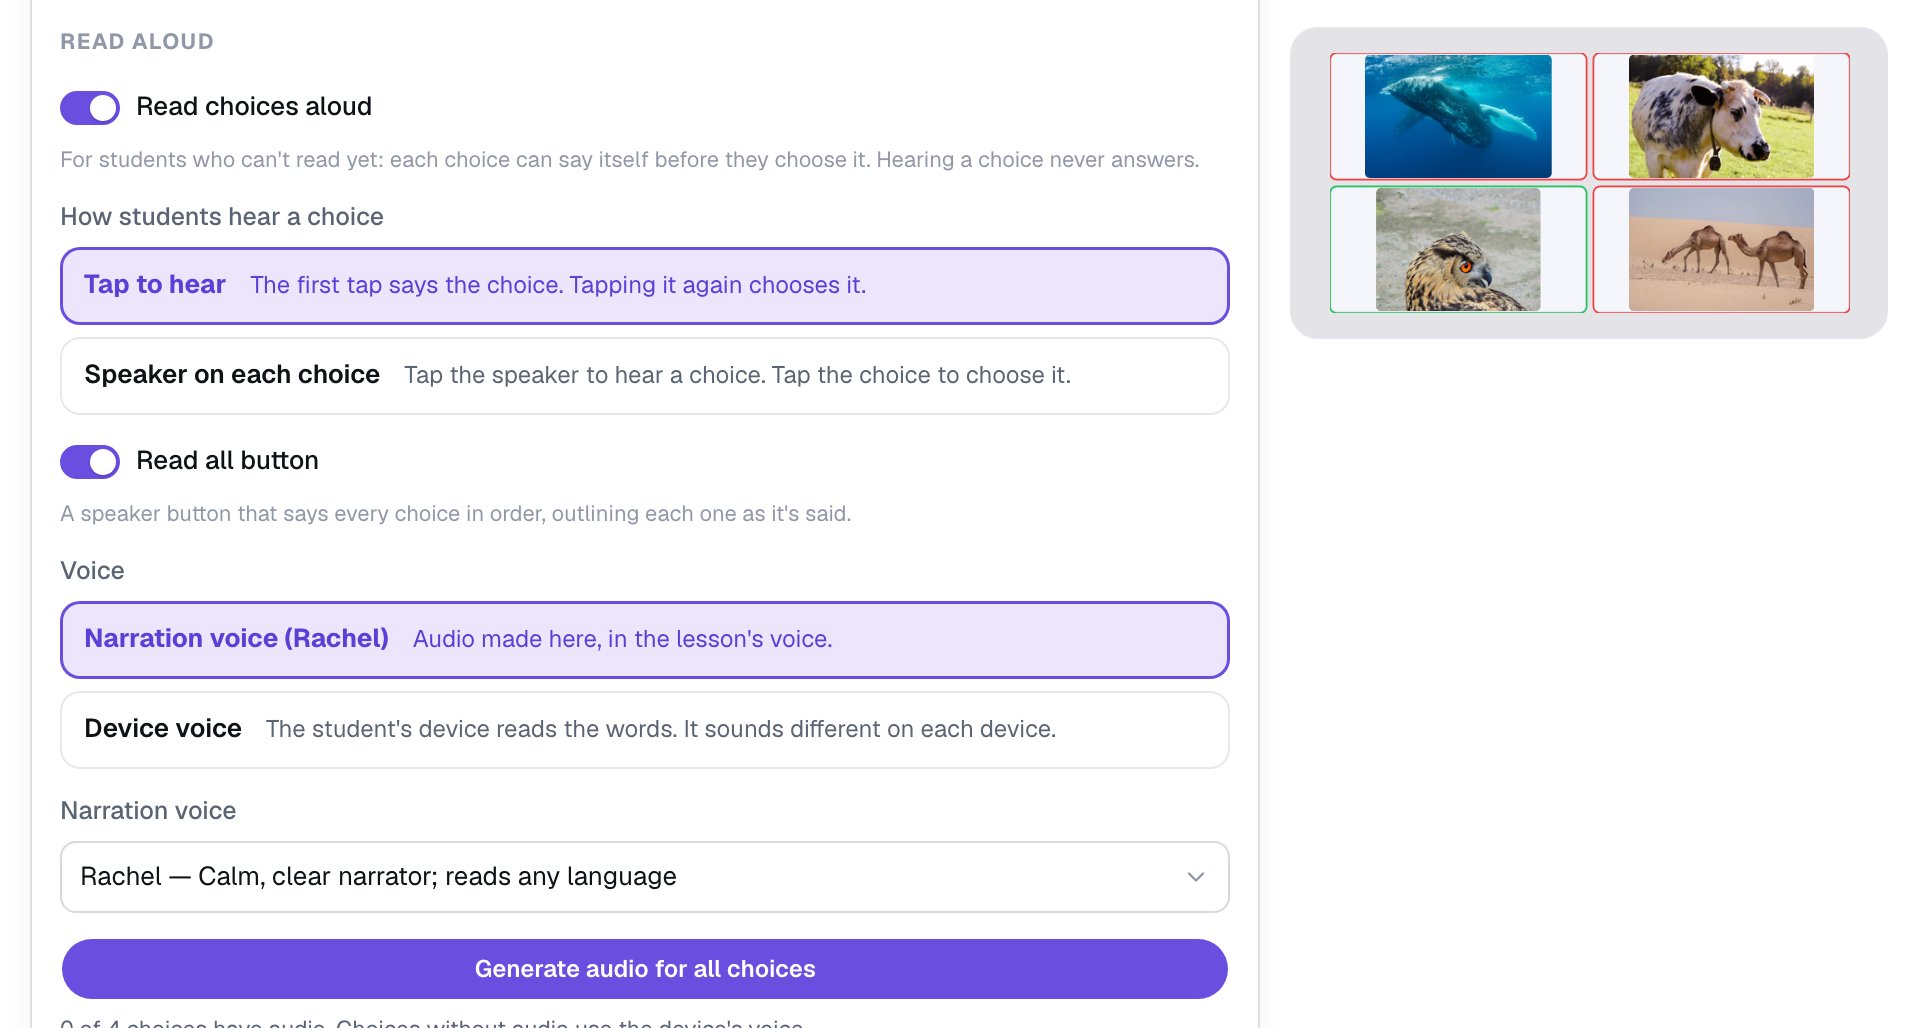
Still in ⚙ Configure, scroll down past Randomize Order to Read aloud and turn on Read choices aloud.
Three settings appear:
- How students hear a choice. Tap to hear (where it starts) suits young children: the first tap on a picture says it and marks it with a dashed outline, and a second tap on the same picture chooses it. There's no small button to aim for, and a stray tap can't answer by accident. Speaker on each choice puts a small speaker in each answer's corner instead: the speaker says the choice, and a tap anywhere else chooses it. That suits children who already know how a quiz works.
- Read all button. On to start with. It adds a speaker button to the question's top-right corner that says every choice in order, outlining each one as it's said.
- Voice. Narration voice makes the audio here, in the lesson's voice, so every child hears the same voice. Device voice lets each child's tablet or computer read the words, and it sounds different on each device.
Leave all three as they are.
Leave Randomize Order on too. Each choice says itself, so the order doesn't matter, and the question player doesn't have to list the choices.
Step 4: Give each picture a short name to say
Look under each answer. A new line with a speaker icon shows what the choice will say, and it starts out as the whole description: Says “A humpback whale swimming in the deep blue sea”. That's a good description for a screen reader, but it's a lot for a five-year-old to hear before choosing.
Type shorter words in each of those spoken words fields: A whale, A cow, An owl, Camels. The description stays what a screen reader says. The spoken words are what a child hears when they tap the picture.
Spoken words are also how you keep a choice from giving the answer away. If a picture's description would name the answer, have it say This one instead. Say nothing keeps a choice silent.
Step 5: Make the audio in the narration voice
Each answer says No audio for now. Until you make the audio, the child's device reads the words in its own voice.
Scroll back down to Read aloud and click Generate audio for all choices. Berdee makes one short clip per choice, in order, and the line under the button counts them.
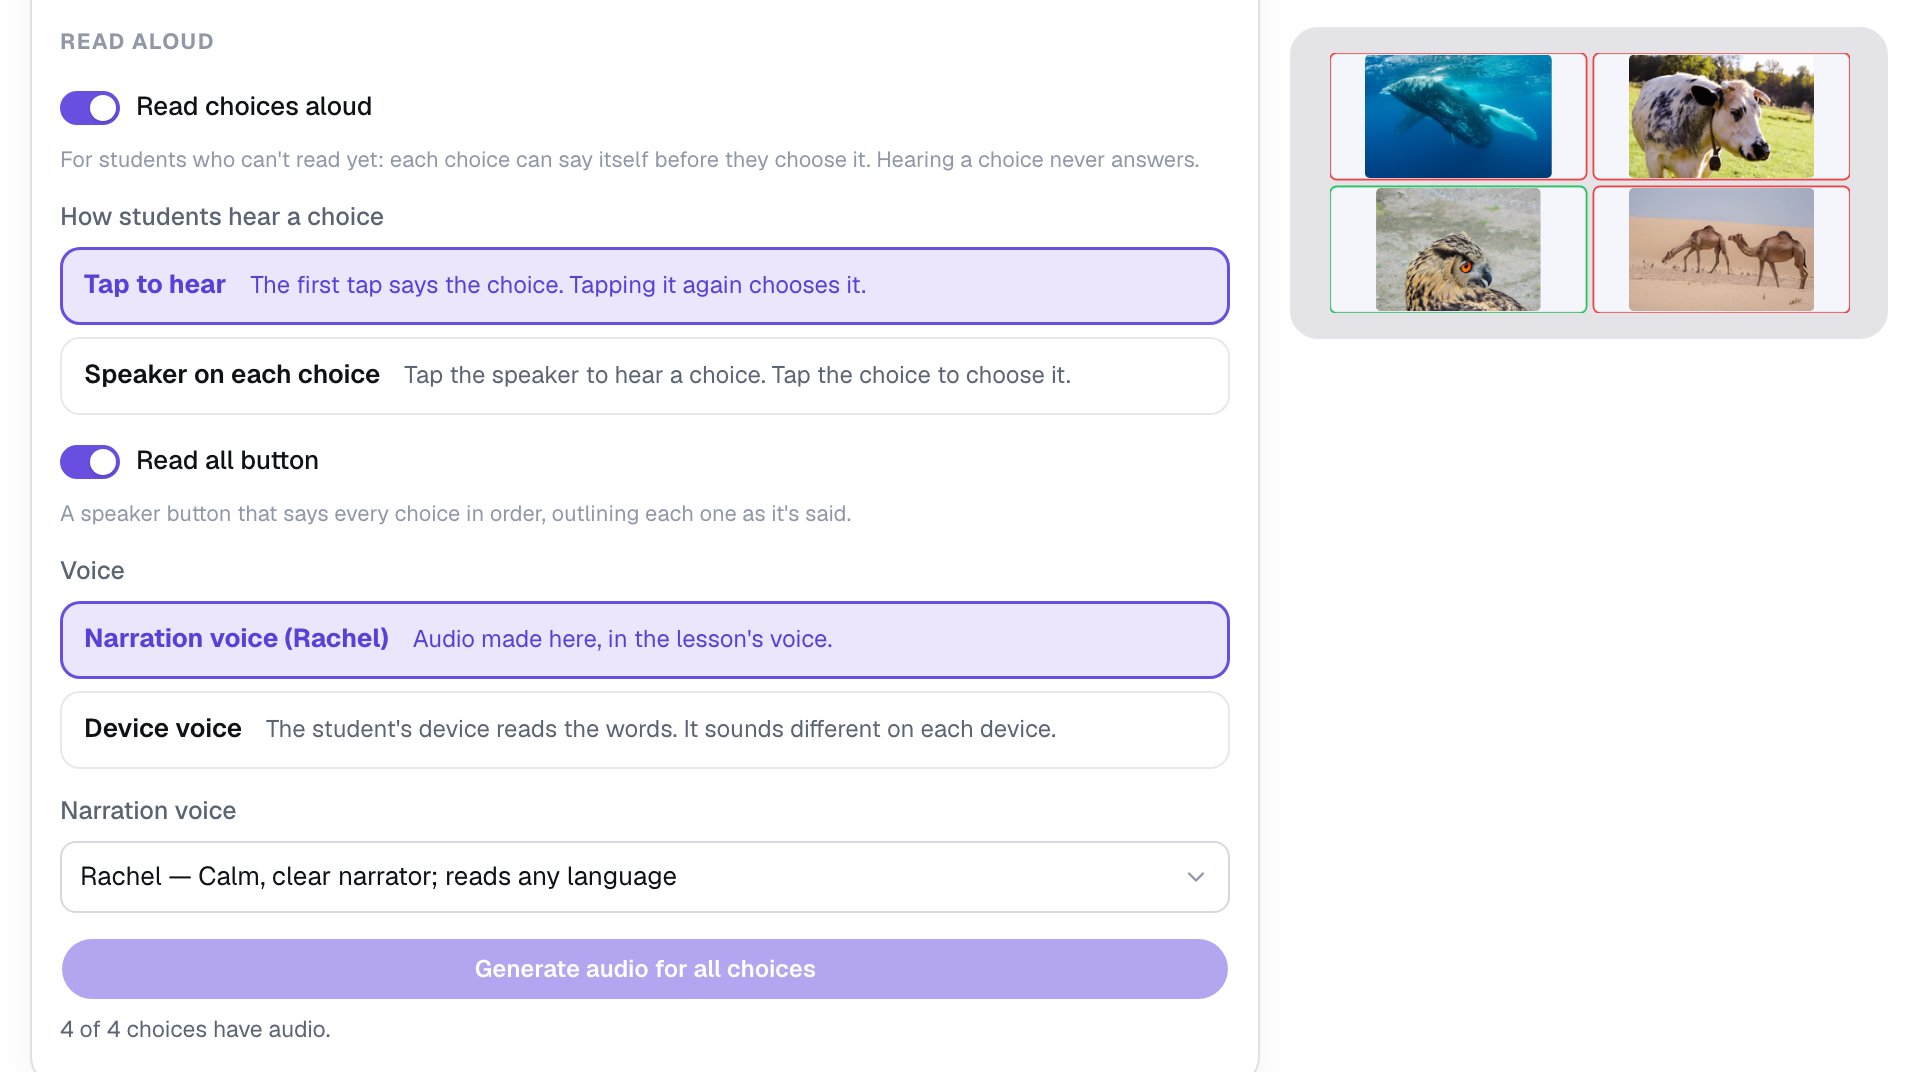
Four short names use only a few dozen of your plan's text-to-speech characters. If you change a choice's words or the voice later, that choice is marked Out of date and the device's voice says it until you generate again. On the Free plan the button shows an upgrade prompt instead, and the device's voice says the choices, so the question still works.
Click Save.
Step 6: Get the scene ready for children
Three small things finish the scene:
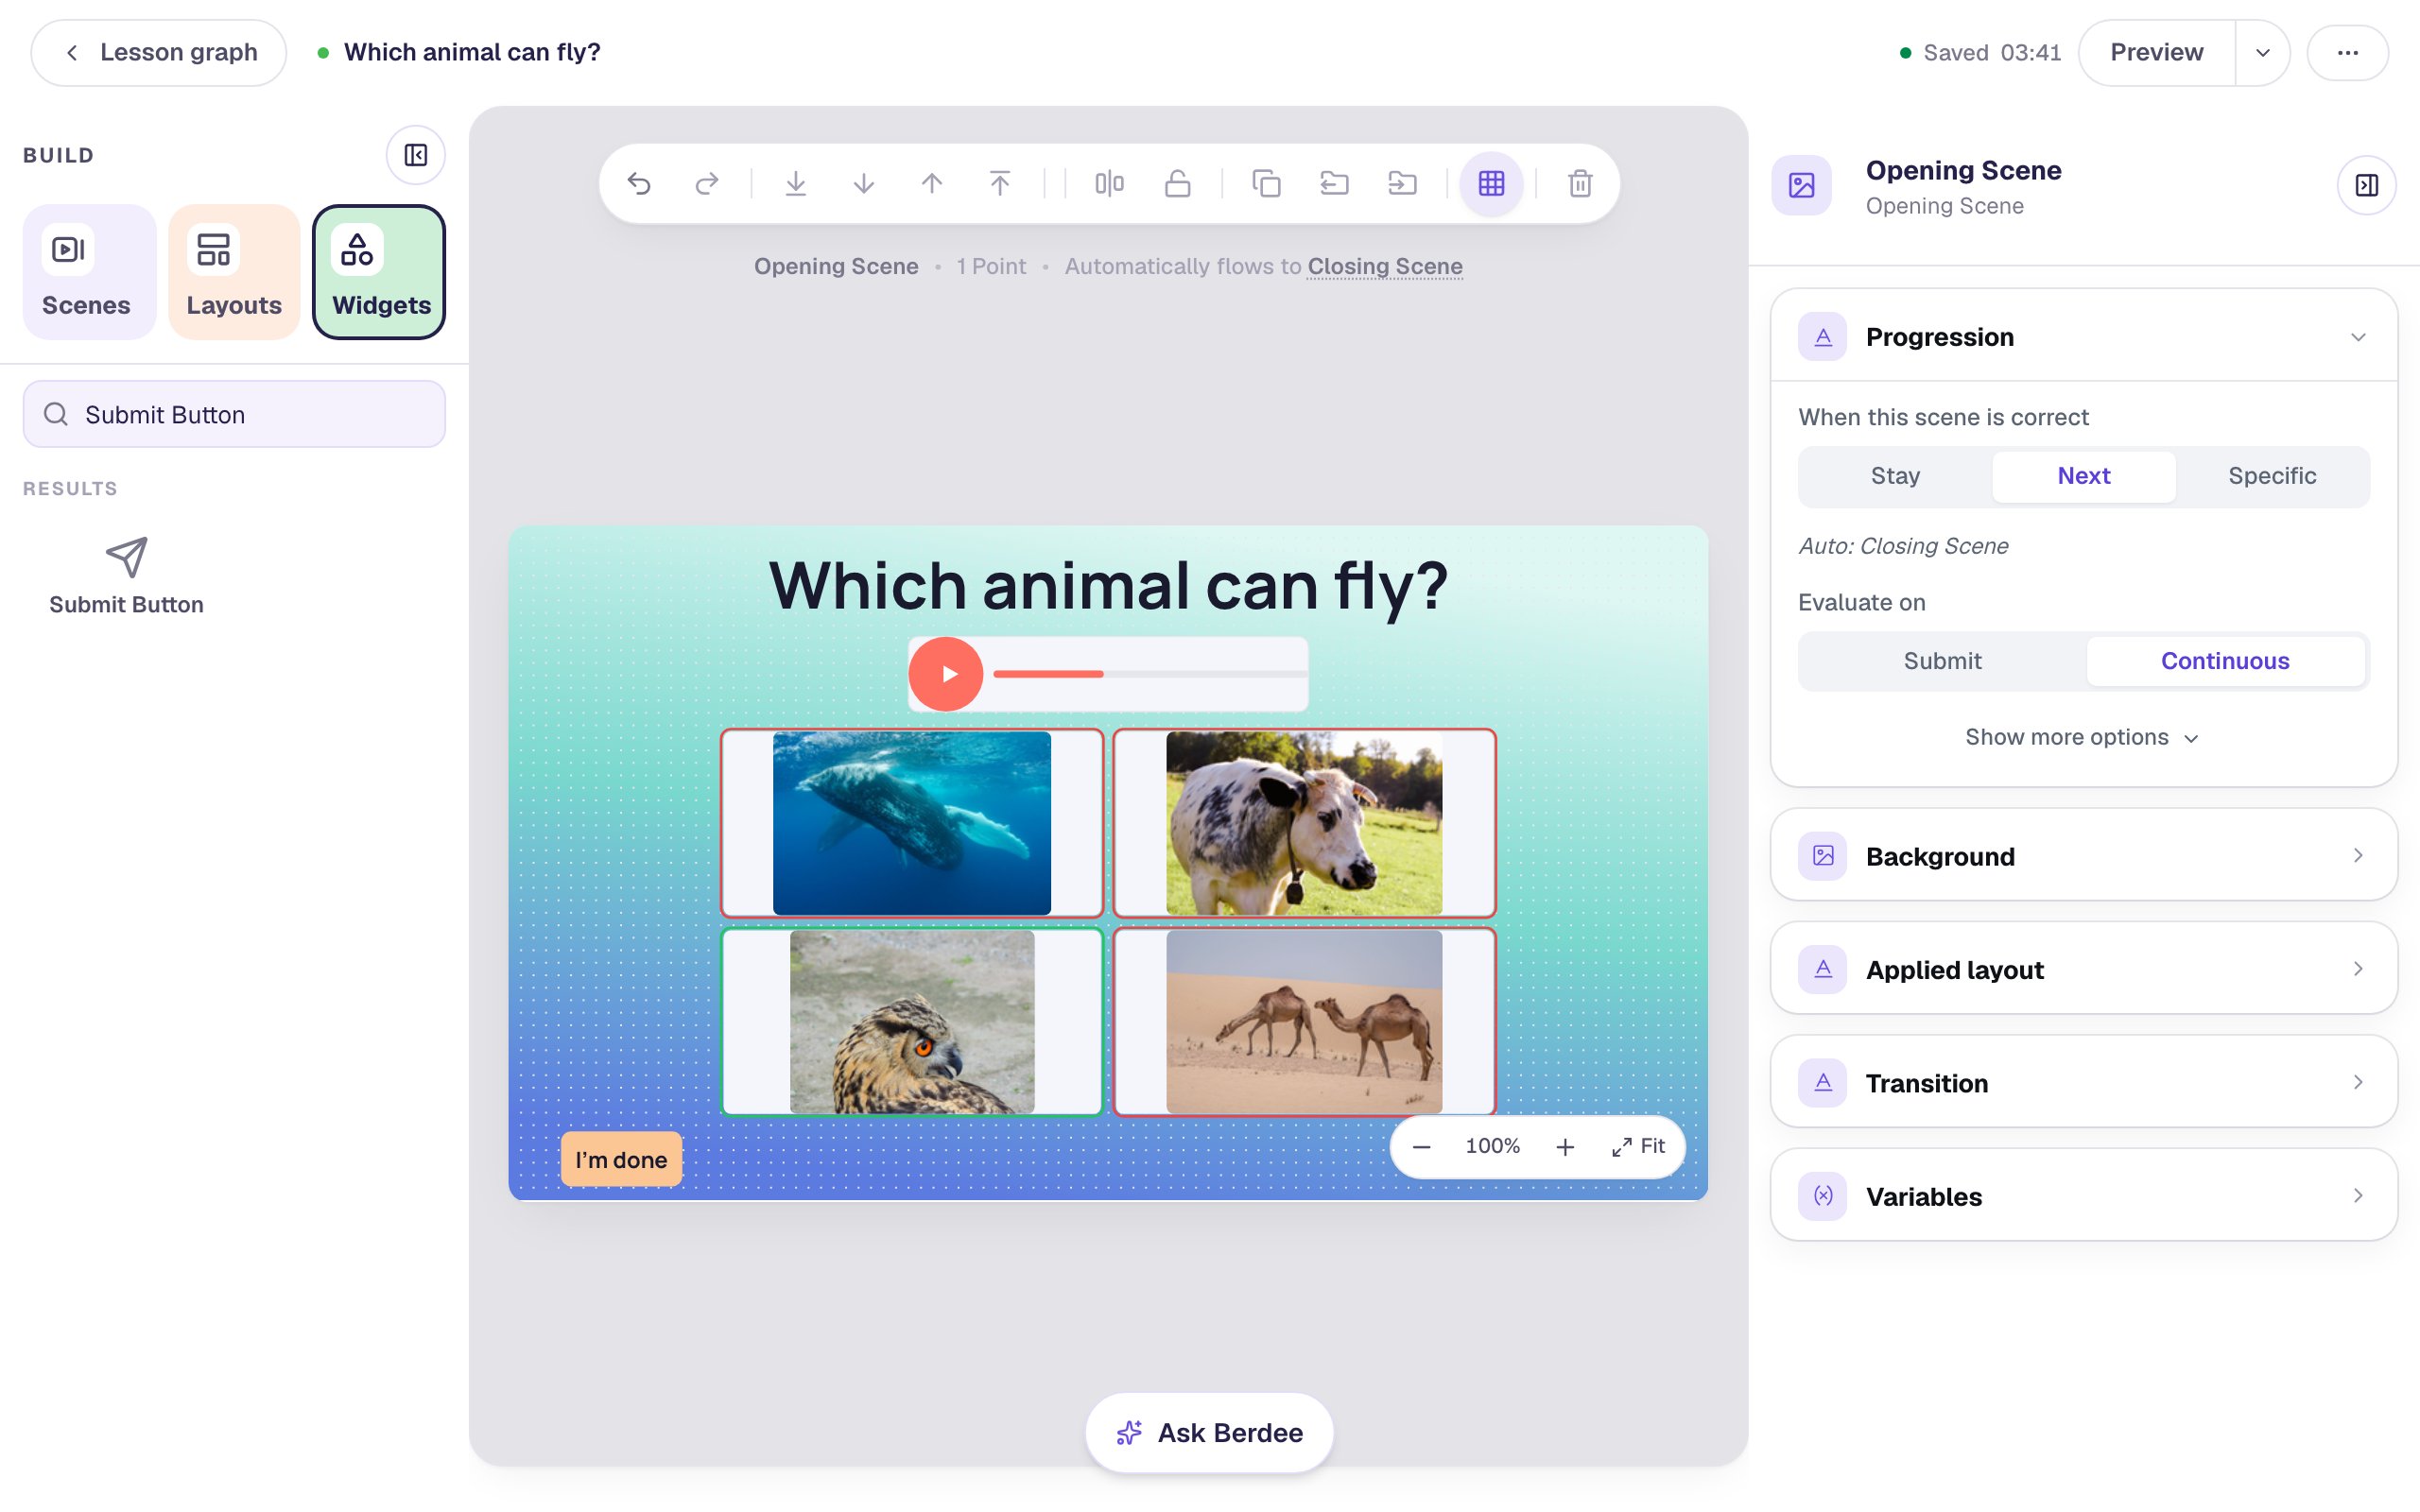
- Show correctness. With the question selected, open Style & Layout and turn on Show correctness, so a chosen picture turns green when it's right and red when it isn't. The canvas now shows your answer key with the same colors. Children don't see them until they choose.
- A pause before moving on. Click an empty part of the canvas, open Progression, click Show more options, and set Advance delay to
2500(2.5 seconds). The scene moves on as soon as the owl is chosen, and a young child needs a moment to see the green outline first. - An "I'm done" button. Every lesson needs a button that finishes it before you can publish. Search the Widgets tab for
Submit Button, set its Label toI'm doneand Submits to Lesson, make it small (Font Size 18), give it a warm Background, and drag it to the bottom-left corner.
Step 7: Try it as a child
Click Preview, and turn your sound on: the recording below is silent, but your Preview isn't.
The pictures are shuffled for each child, so your grid may be in a different order from ours.
Press the speaker in the question's top-right corner. Each picture is outlined while its name is said: here, the camels.
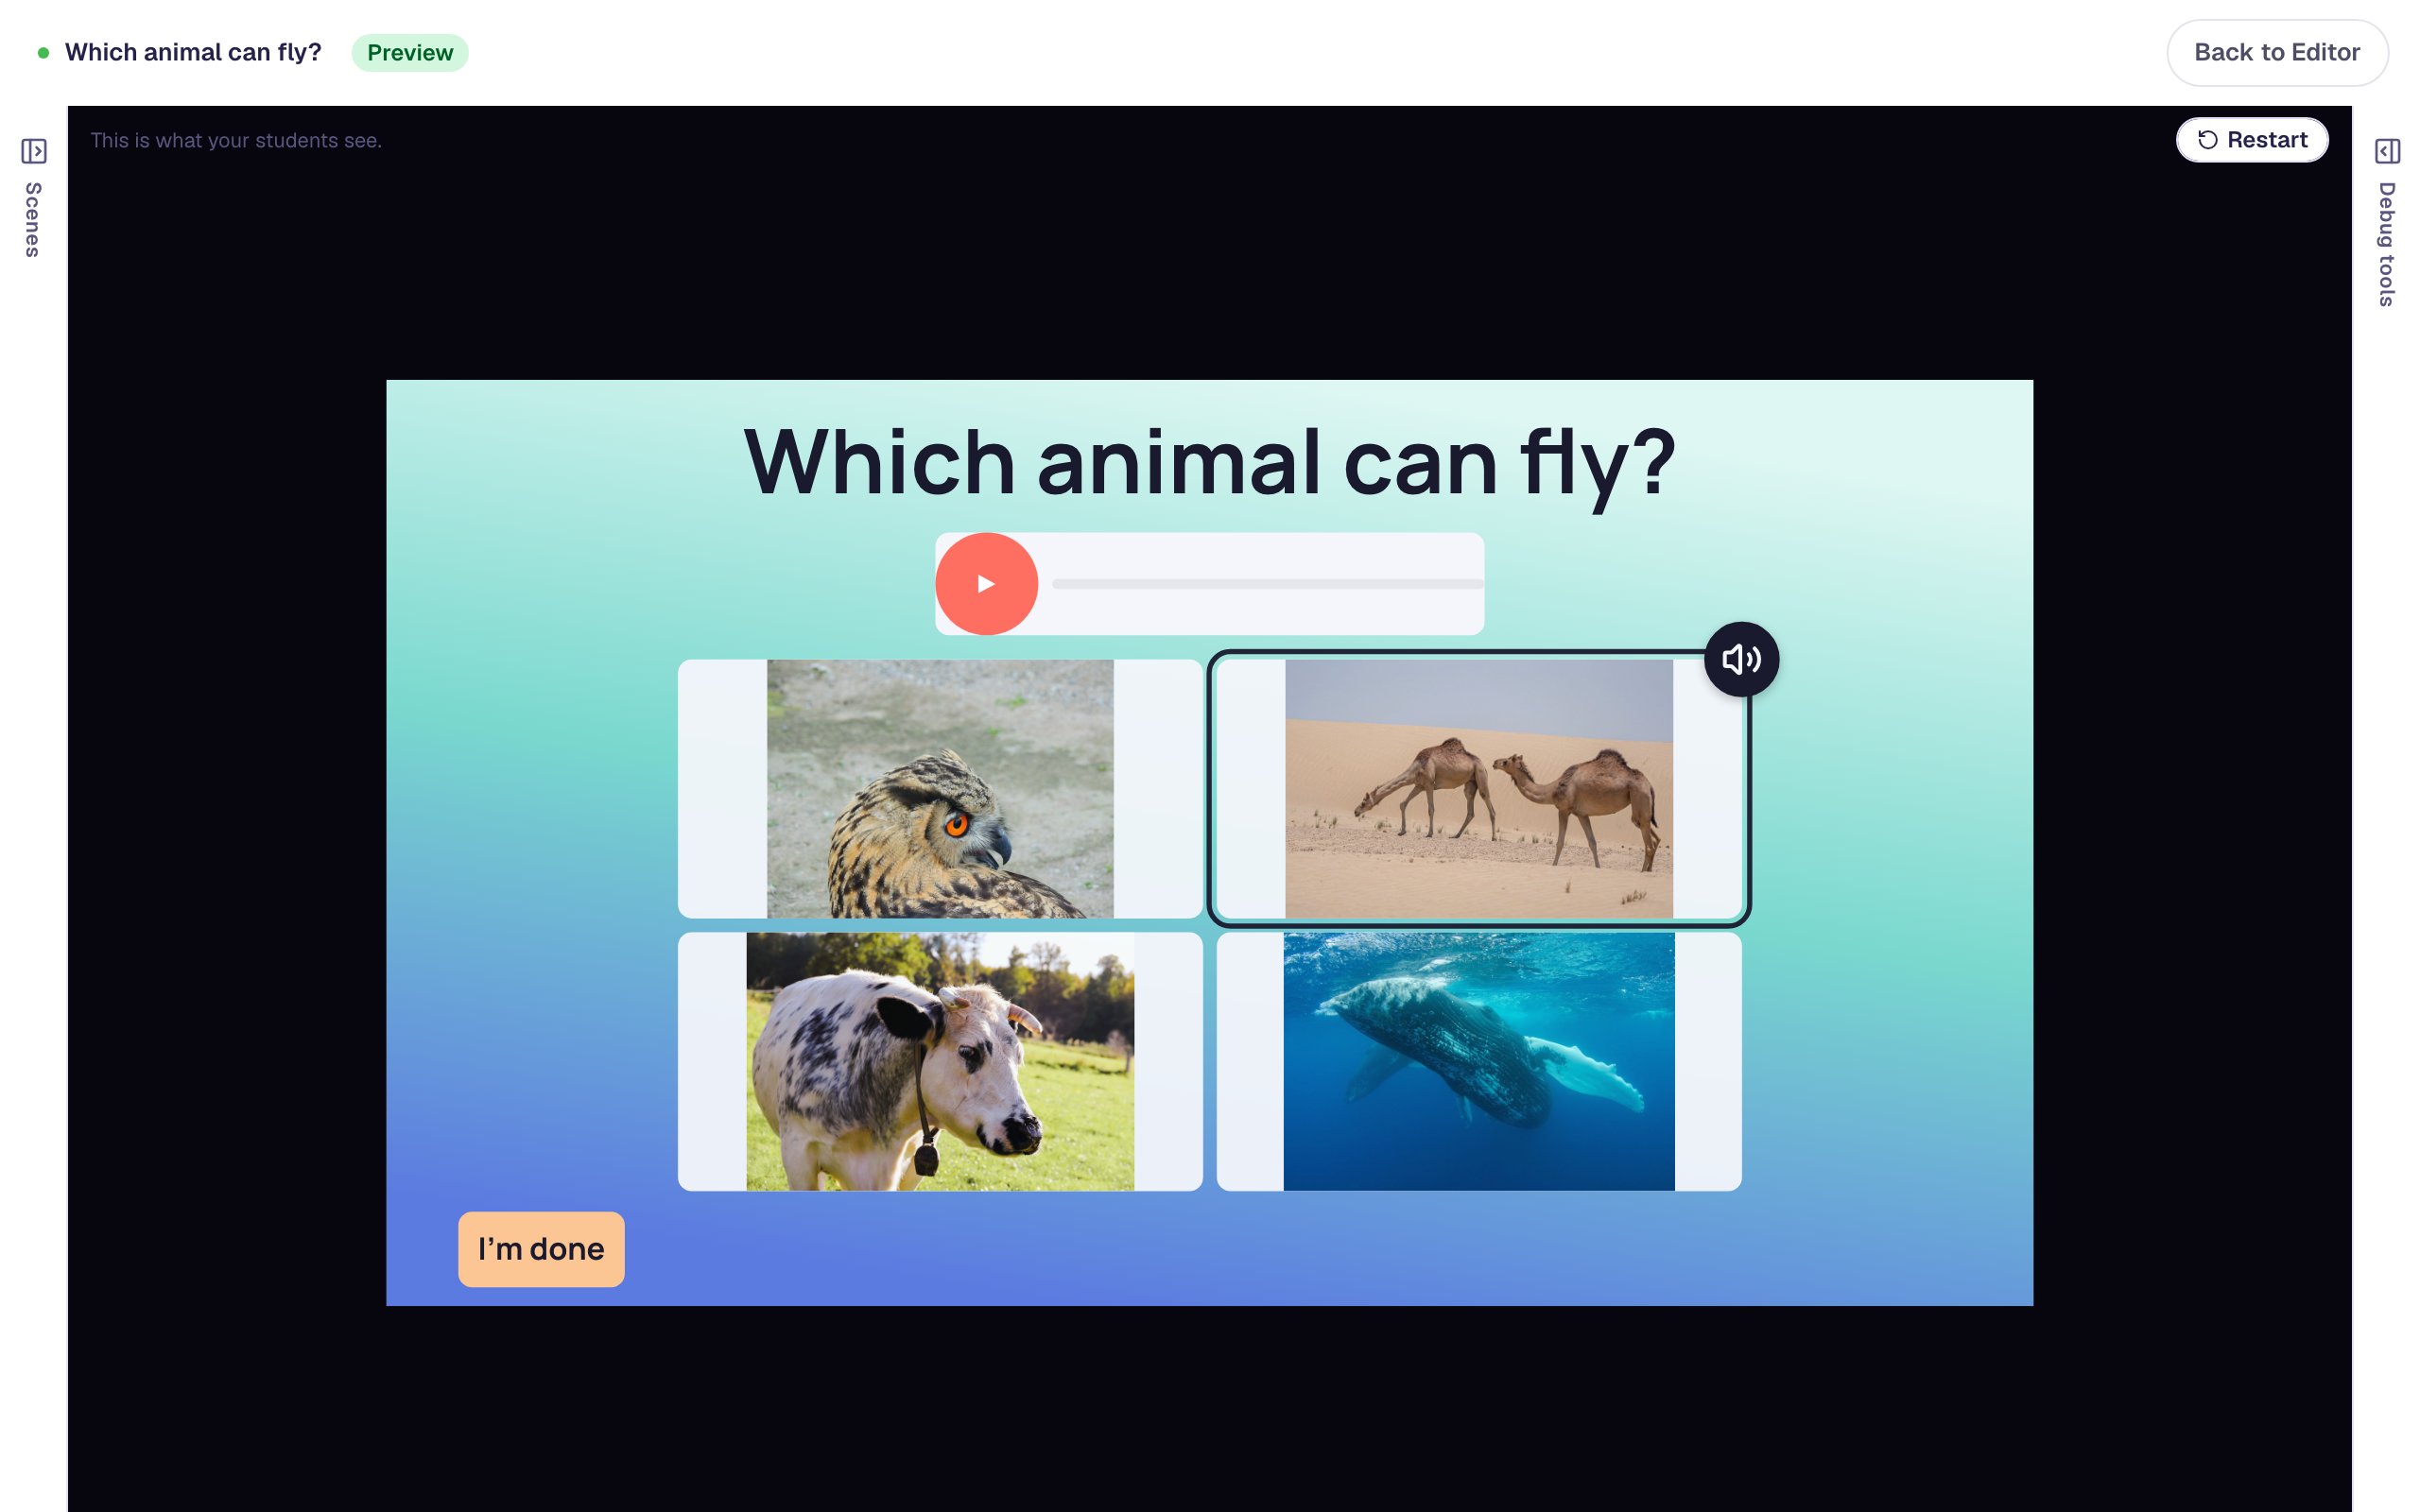
Now tap the whale. It says "A whale", and nothing is chosen. Tap the owl: it says "An owl" and gets a dashed outline, which means "you've heard this one".
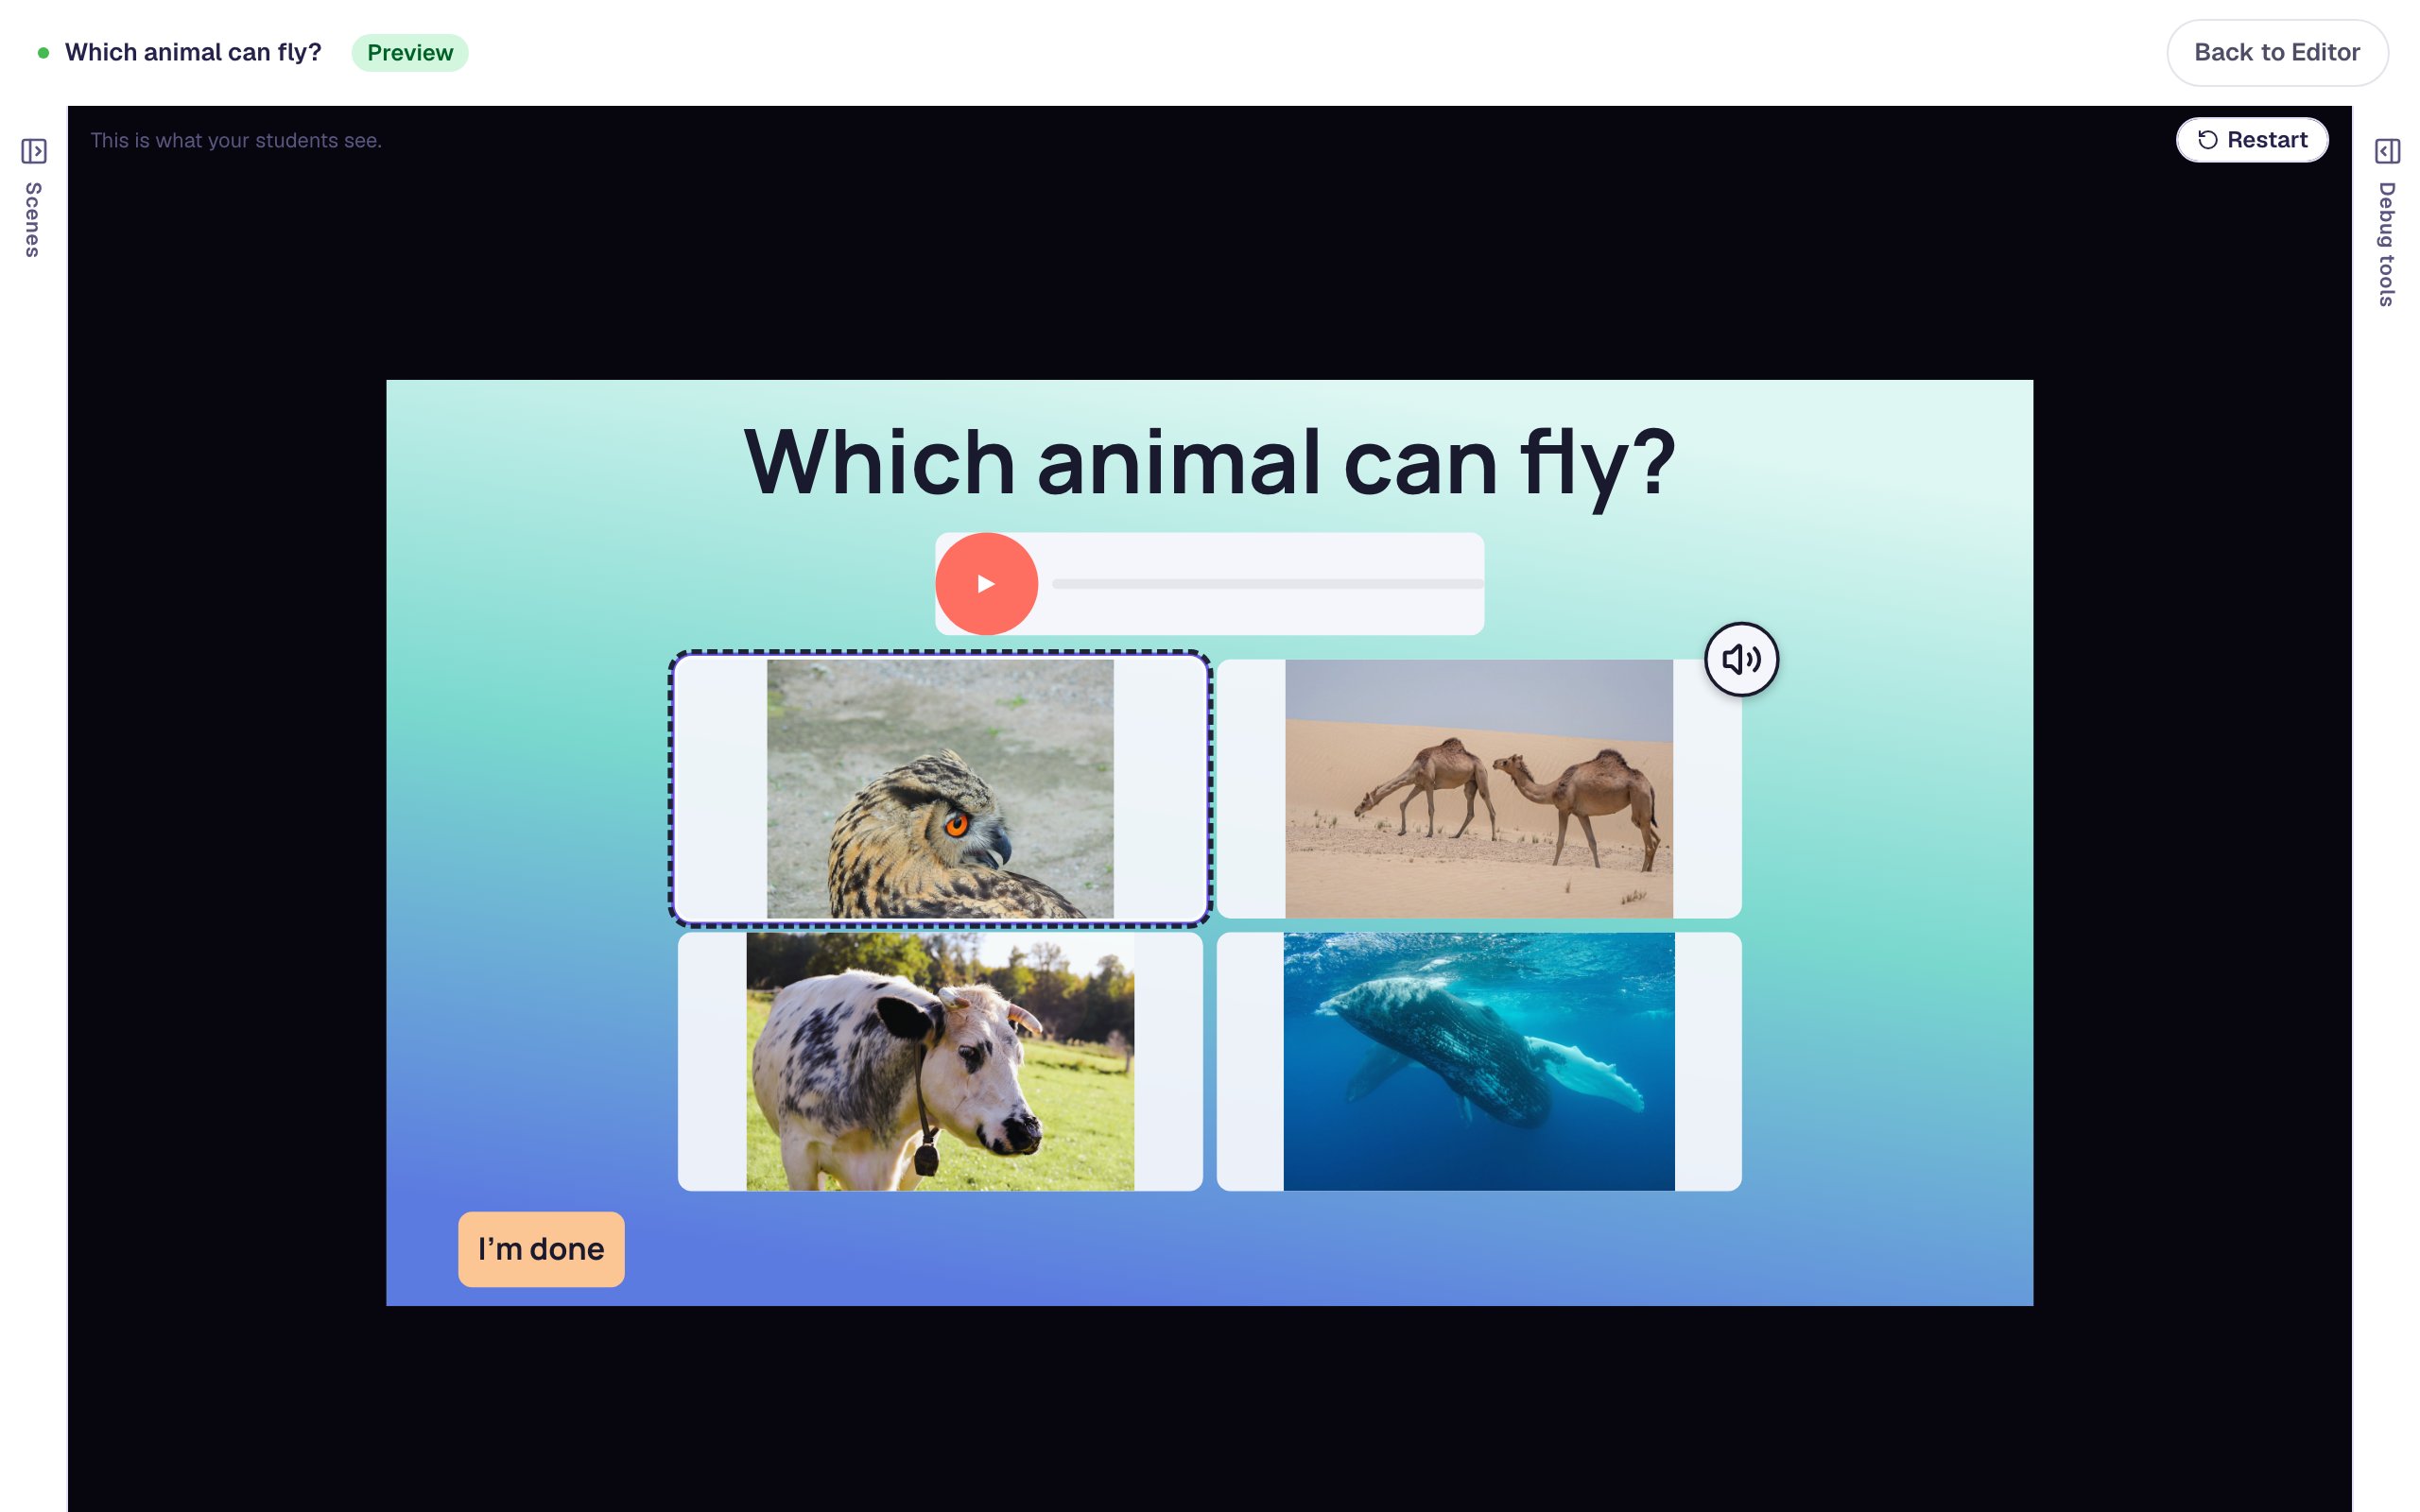
Tap the owl again. Now it's chosen: it turns green, and 2.5 seconds later the lesson moves to the Closing Scene.
Keyboard users press H to hear the highlighted choice, and Enter or Space always chooses it. Screen readers already read every choice's description, so nothing speaks over them.
When a child does this lesson for real, their answer on the attempt page includes a line like "Heard 2 of 4 choices before answering". It helps you tell a child who can't read the words from one who doesn't know the answer.
What you built
You built a picture question a child who can't read yet can answer on their own:
- Read choices aloud with Tap to hear, so the first tap says a choice and the second chooses it,
- a Read all button that says every choice in order,
- short spoken words for each picture, while a screen reader still gets the full description,
- audio in the lesson's narration voice, made with one click, and
- Show correctness and an Advance delay, so the child sees that they got it right before the lesson moves on.
Choices can say themselves in a Matching game, a Sorting List and the number buttons of a Counting Collection and a Quick Look too, with the same settings. Leave it off when reading the words is the skill you're checking, such as sight words.
To check every one of several right answers, see Ask a "select all that apply" question with pictures.
Make this lesson yours
Add the lesson you just watched being built to your account, then change it for your class: your questions, your pictures, your colors.
Free to sign up, and you'll come straight back here. I have an account