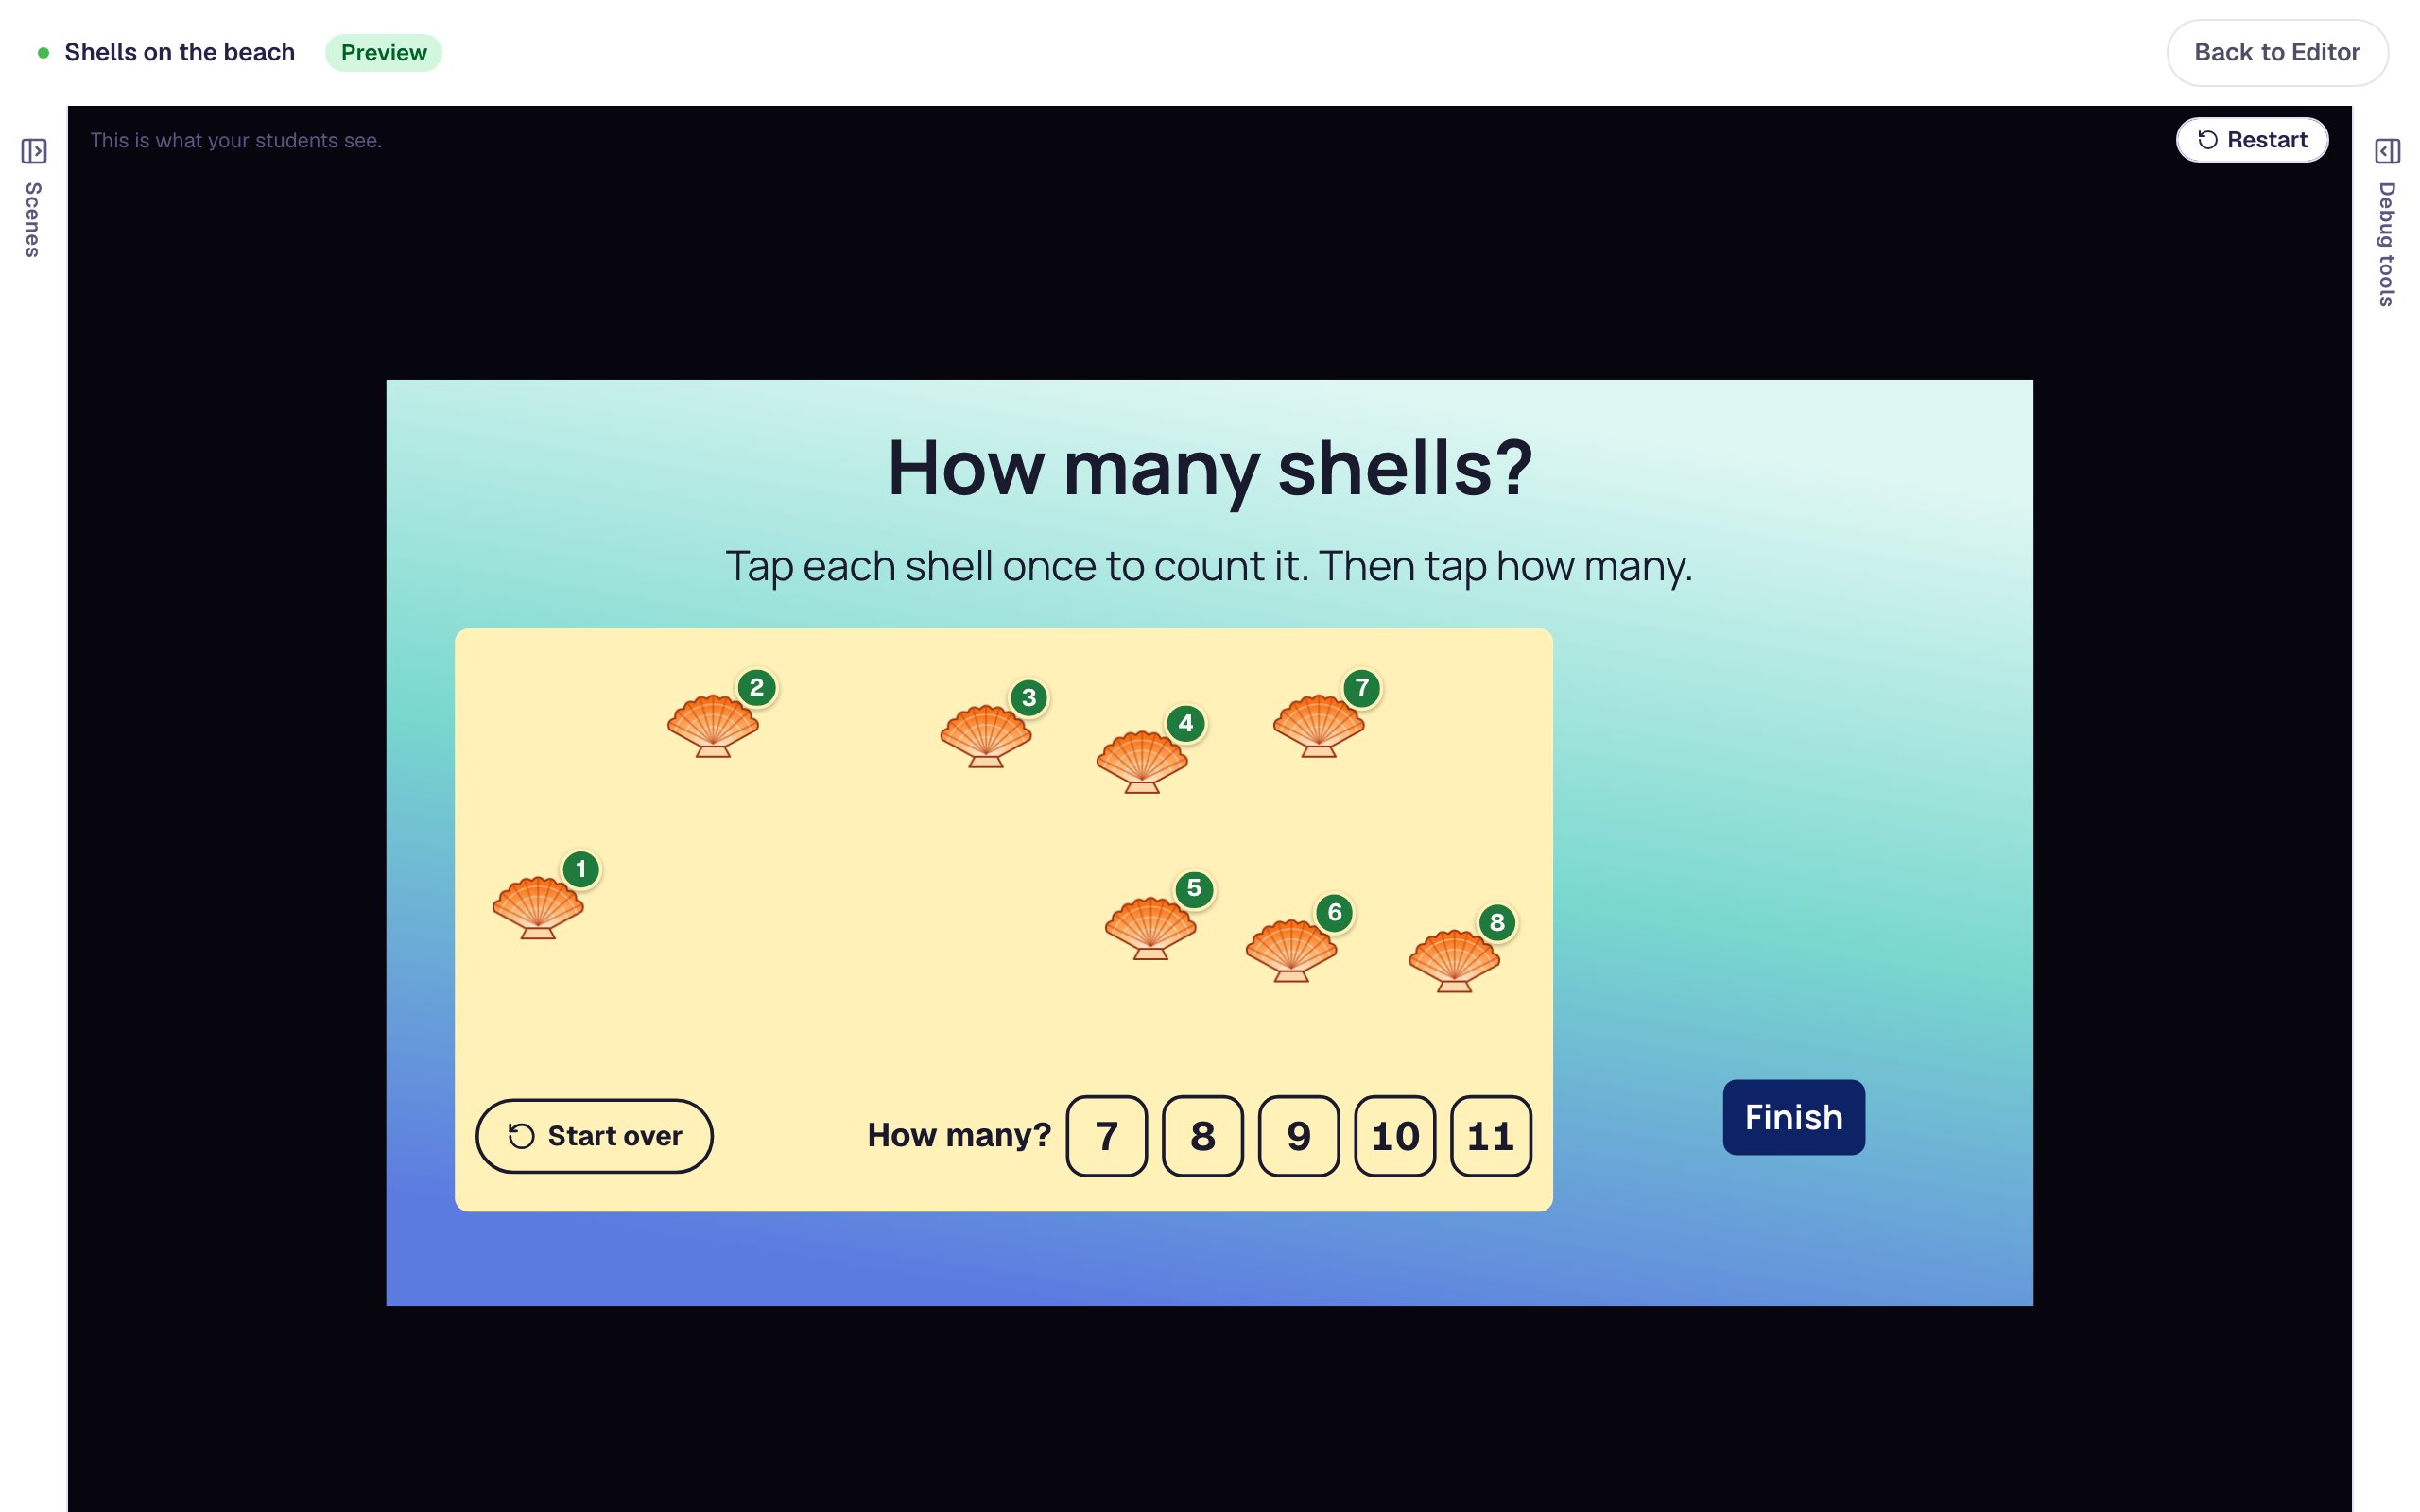
Build a number on a ten frame
Set up a Ten Frame that asks young learners to make 5 with 3 red and 2 yellow counters, show the numeral when they get it right, and give them a moment to see it before the lesson moves on.
- Level
- Beginner
- Time
- About 10 min
- Steps
- 7
- Updated
- Oct 15, 2026
A "Ways to make 5" scene where students tap 5 counters into a 5-frame, flip 2 of them yellow, see the numeral 5 appear, and move on to the ending.
Get the finished lesson
Skip straight to the result, or keep it open beside the steps. Add this tutorial's lesson to your account and explore how it works in the studio.
Free to sign up, and you'll come straight back here. I have an account
A ten frame is the counting tool from every kindergarten and first-grade classroom: a row of squares with one counter per square. It helps children see a number as parts. Five red counters are "a full row". Three red and two yellow are "5 made of 3 and 2".
In this tutorial you'll build a short math activity called Ways to make 5. Students tap counters into a 5-frame, then tap two of them to flip them from red to yellow. When the frame shows 3 red and 2 yellow, the numeral 5 appears beside it and the lesson moves on to the ending. There's no Check button to find: the frame grades itself as students work.
Step 1: Set the scene
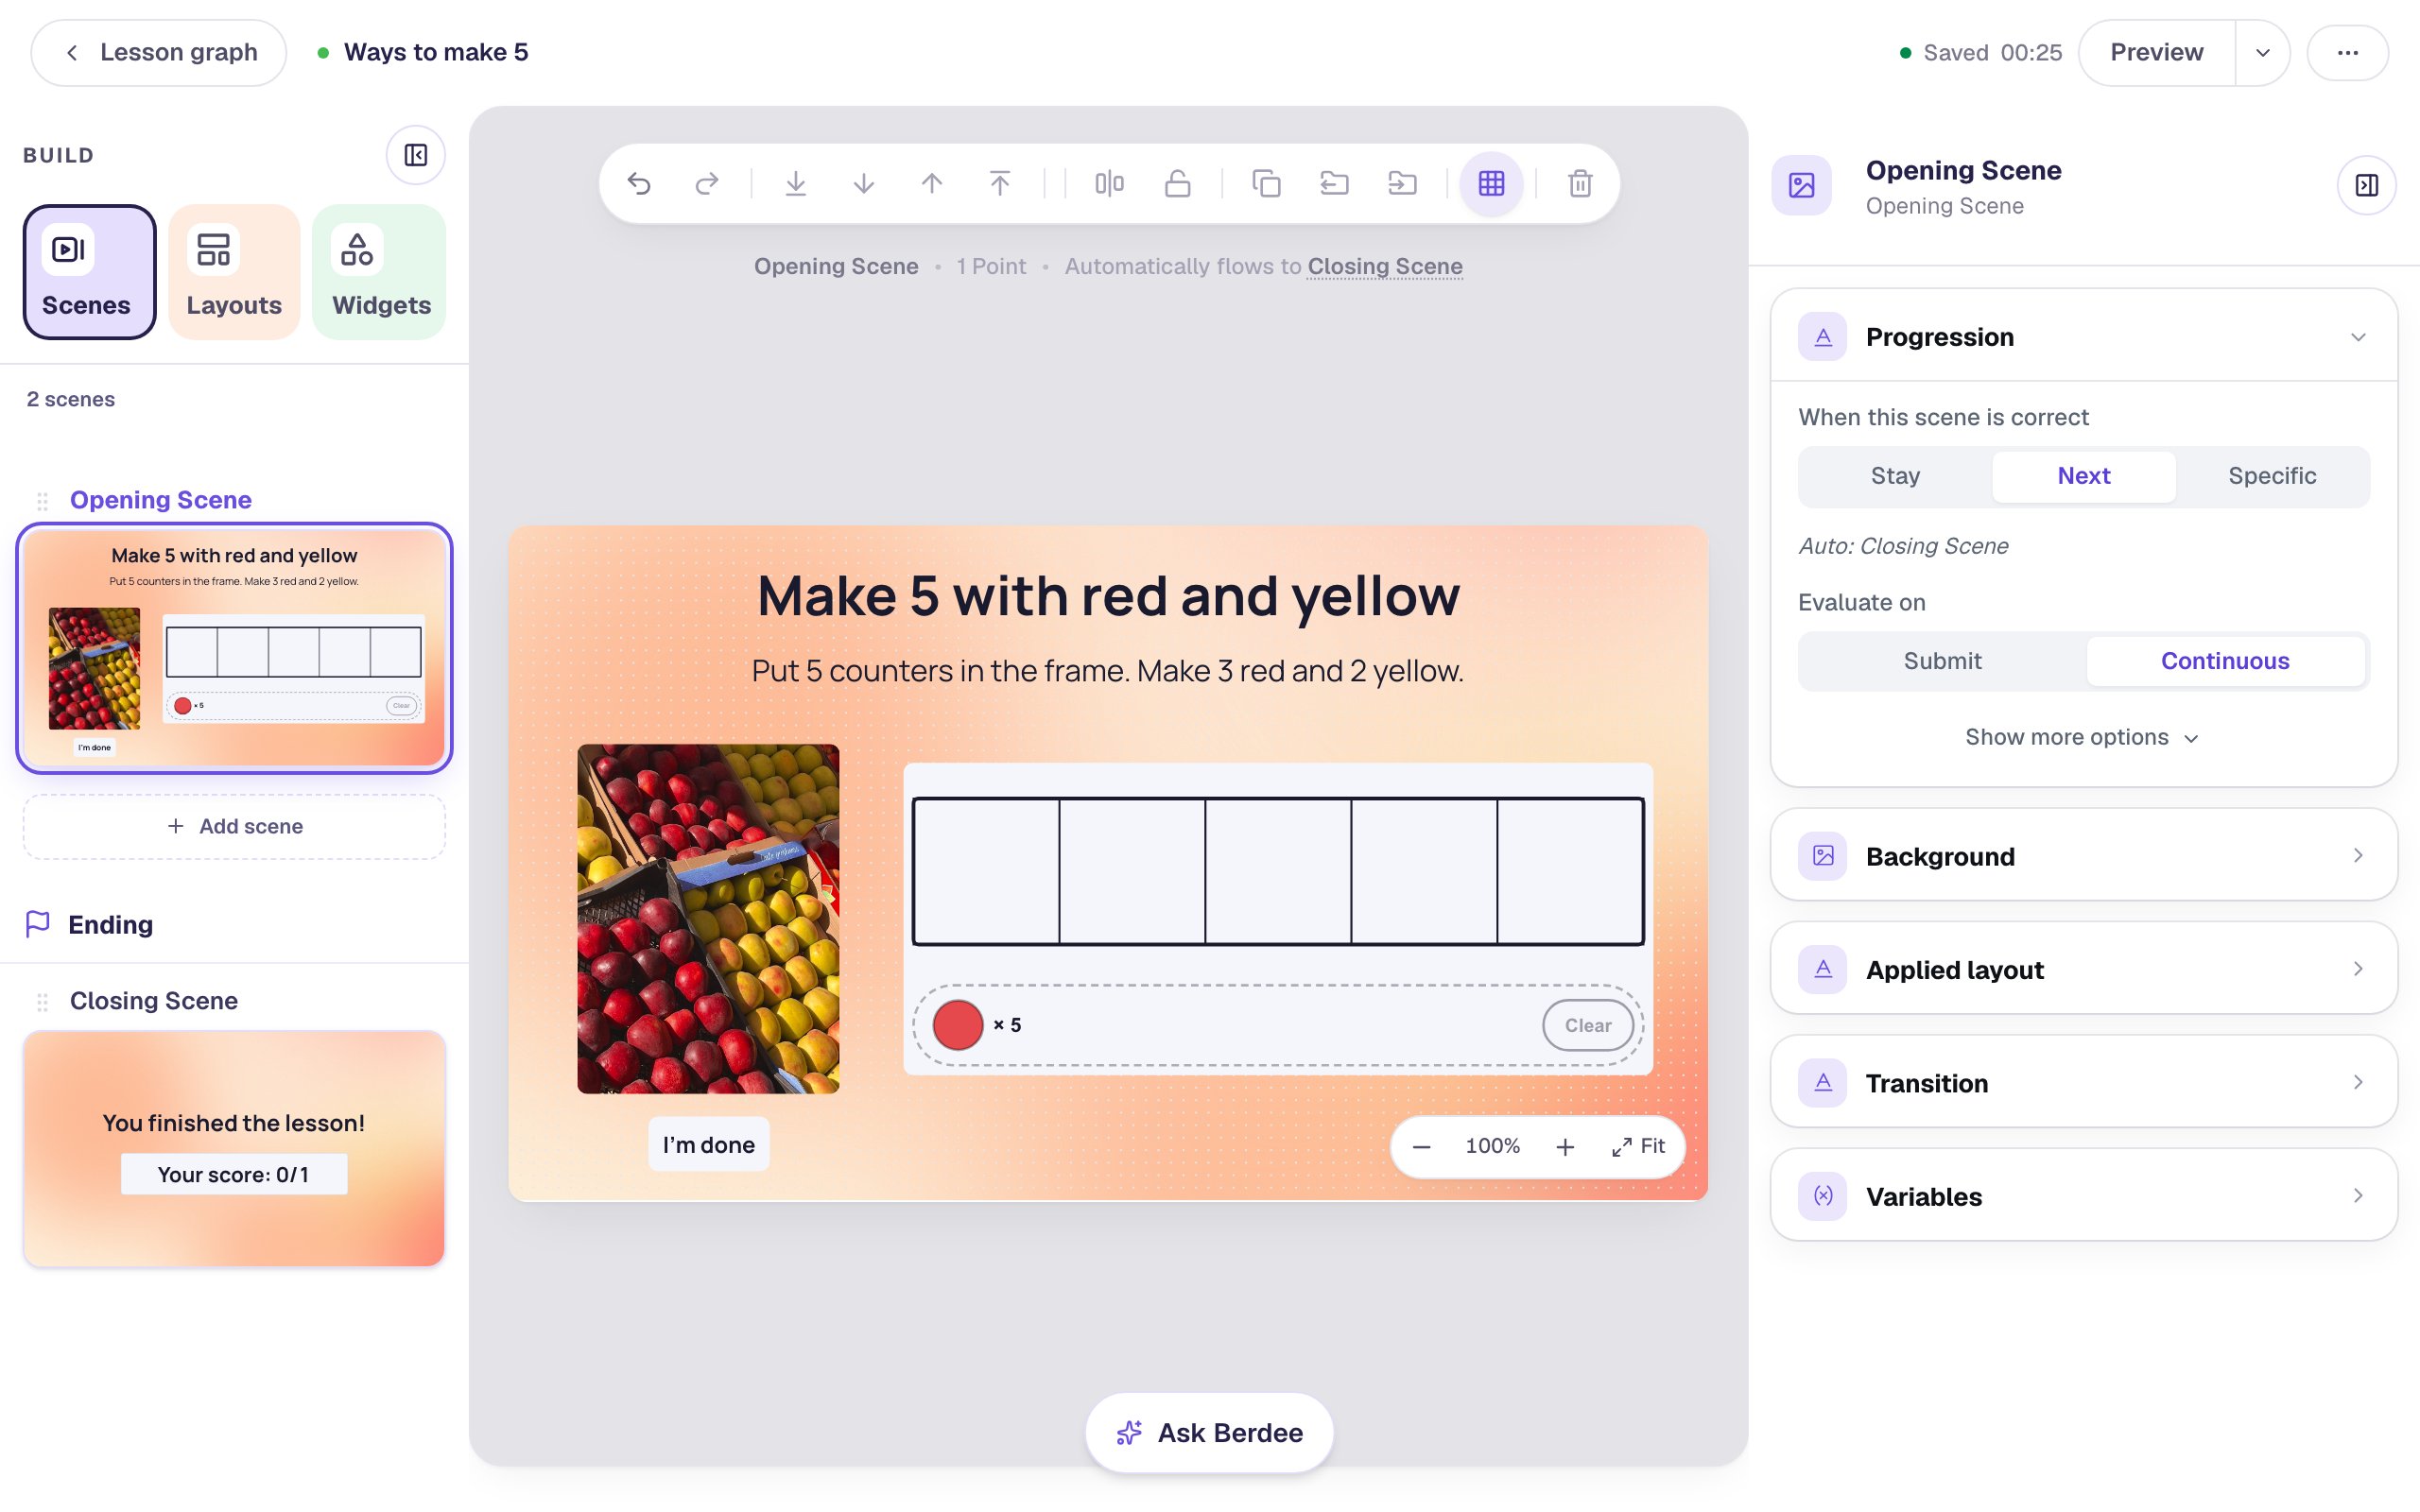
Start a blank lesson (New lesson, then Start from scratch) and name it Ways to make 5 by clicking Untitled lesson at the top left.
Give the scene a warm background. Click an empty spot on the scene, open Background, click Choose a style, and pick Mesh sunrise. Give the Closing Scene the same background so the ending matches.
Then add what students read first:
- A Heading at the top:
Make 5 with red and yellow. Set its Font Size to44. - A Body under it:
Put 5 counters in the frame. Make 3 red and 2 yellow.Set it to Fixed width, about720wide, then set its Font Size to24. - An Image down the left side,
210wide and280tall. Click Choose image, search the stock photos forred and yellow apples in crates, and import a photo of red and yellow apples.
Open the picture's Accessibility section and type an Alt Text that says what's in the photo, for example Wooden crates of shiny red apples next to crates of bright yellow apples. Students who use a screen reader hear that instead of a file name.
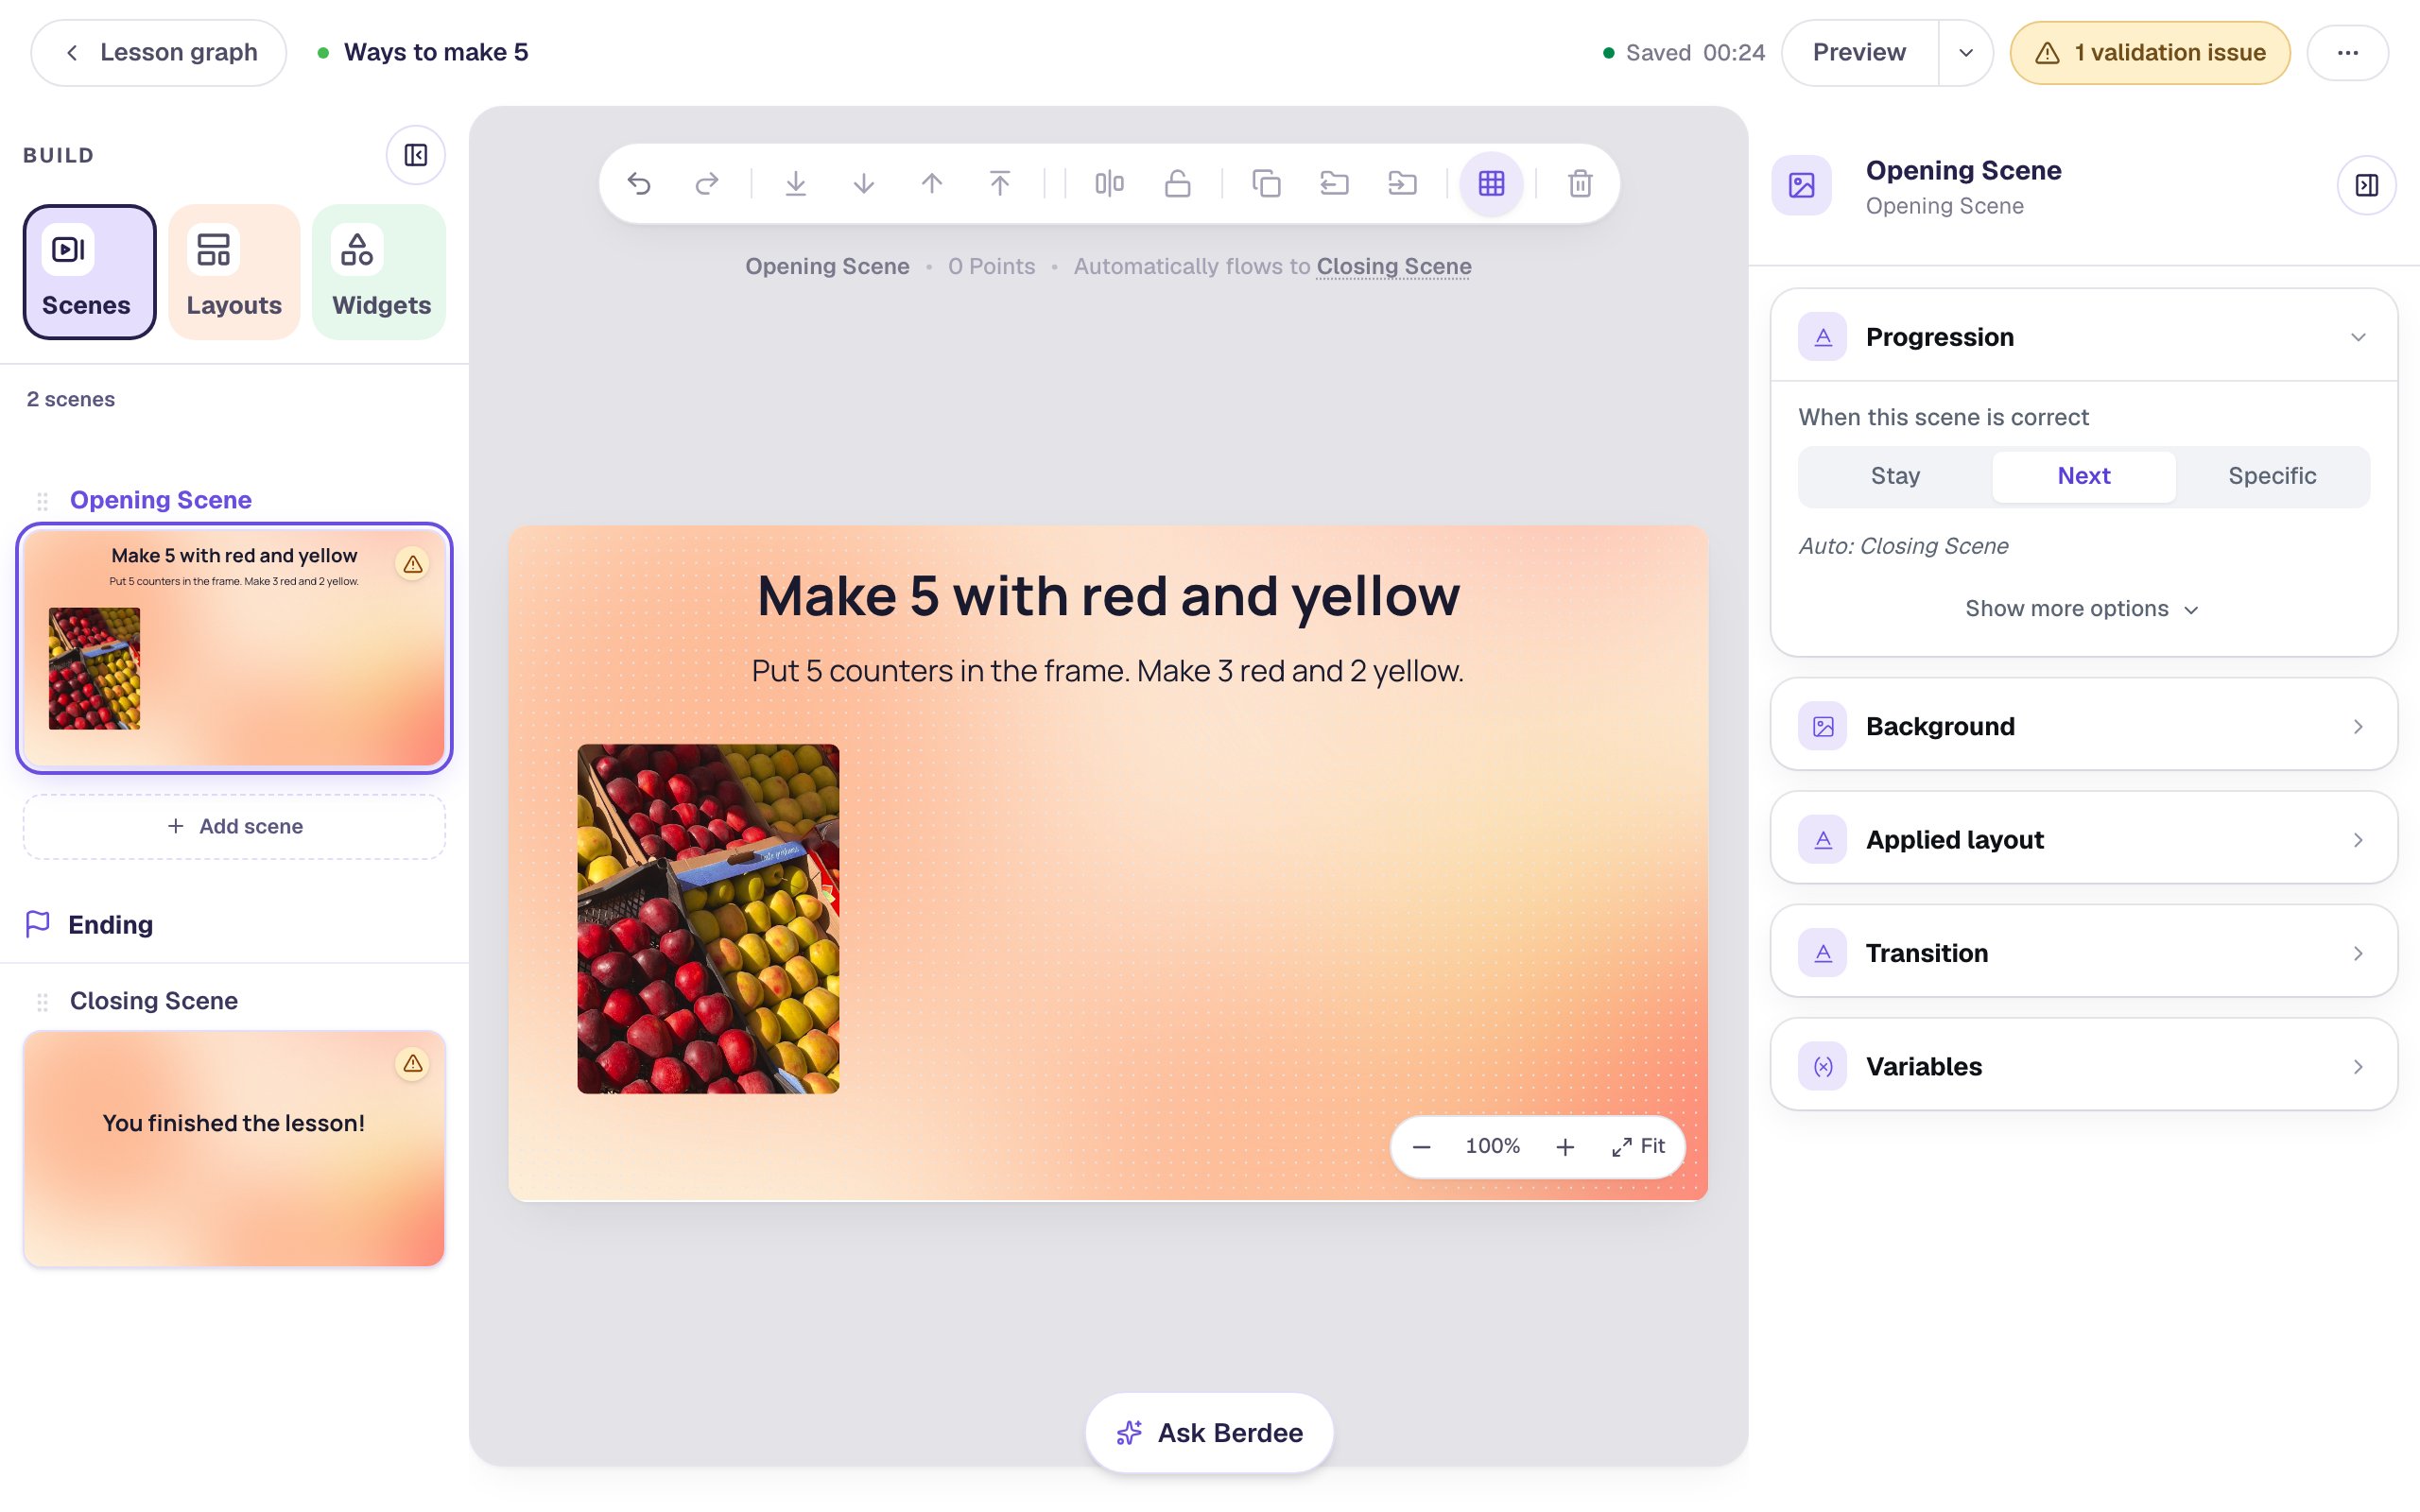
A picture with the same two colors as the counters helps young learners connect "red and yellow" to something real. Keep the instruction short; you can read it aloud to the class, or add a Text to Speech widget that reads it.
Step 2: Add a Ten Frame
Search the Widgets tab for Ten Frame and click it. A new ten frame is a 5-frame: one row of five squares, with a tray of counters underneath. Students tap the tray, or an empty square, to place a counter.
It lands quite tall, with empty space between the squares and the tray. Under Style & Layout, click Show more options and set Height to 250, then drag the frame to the right of the photo.
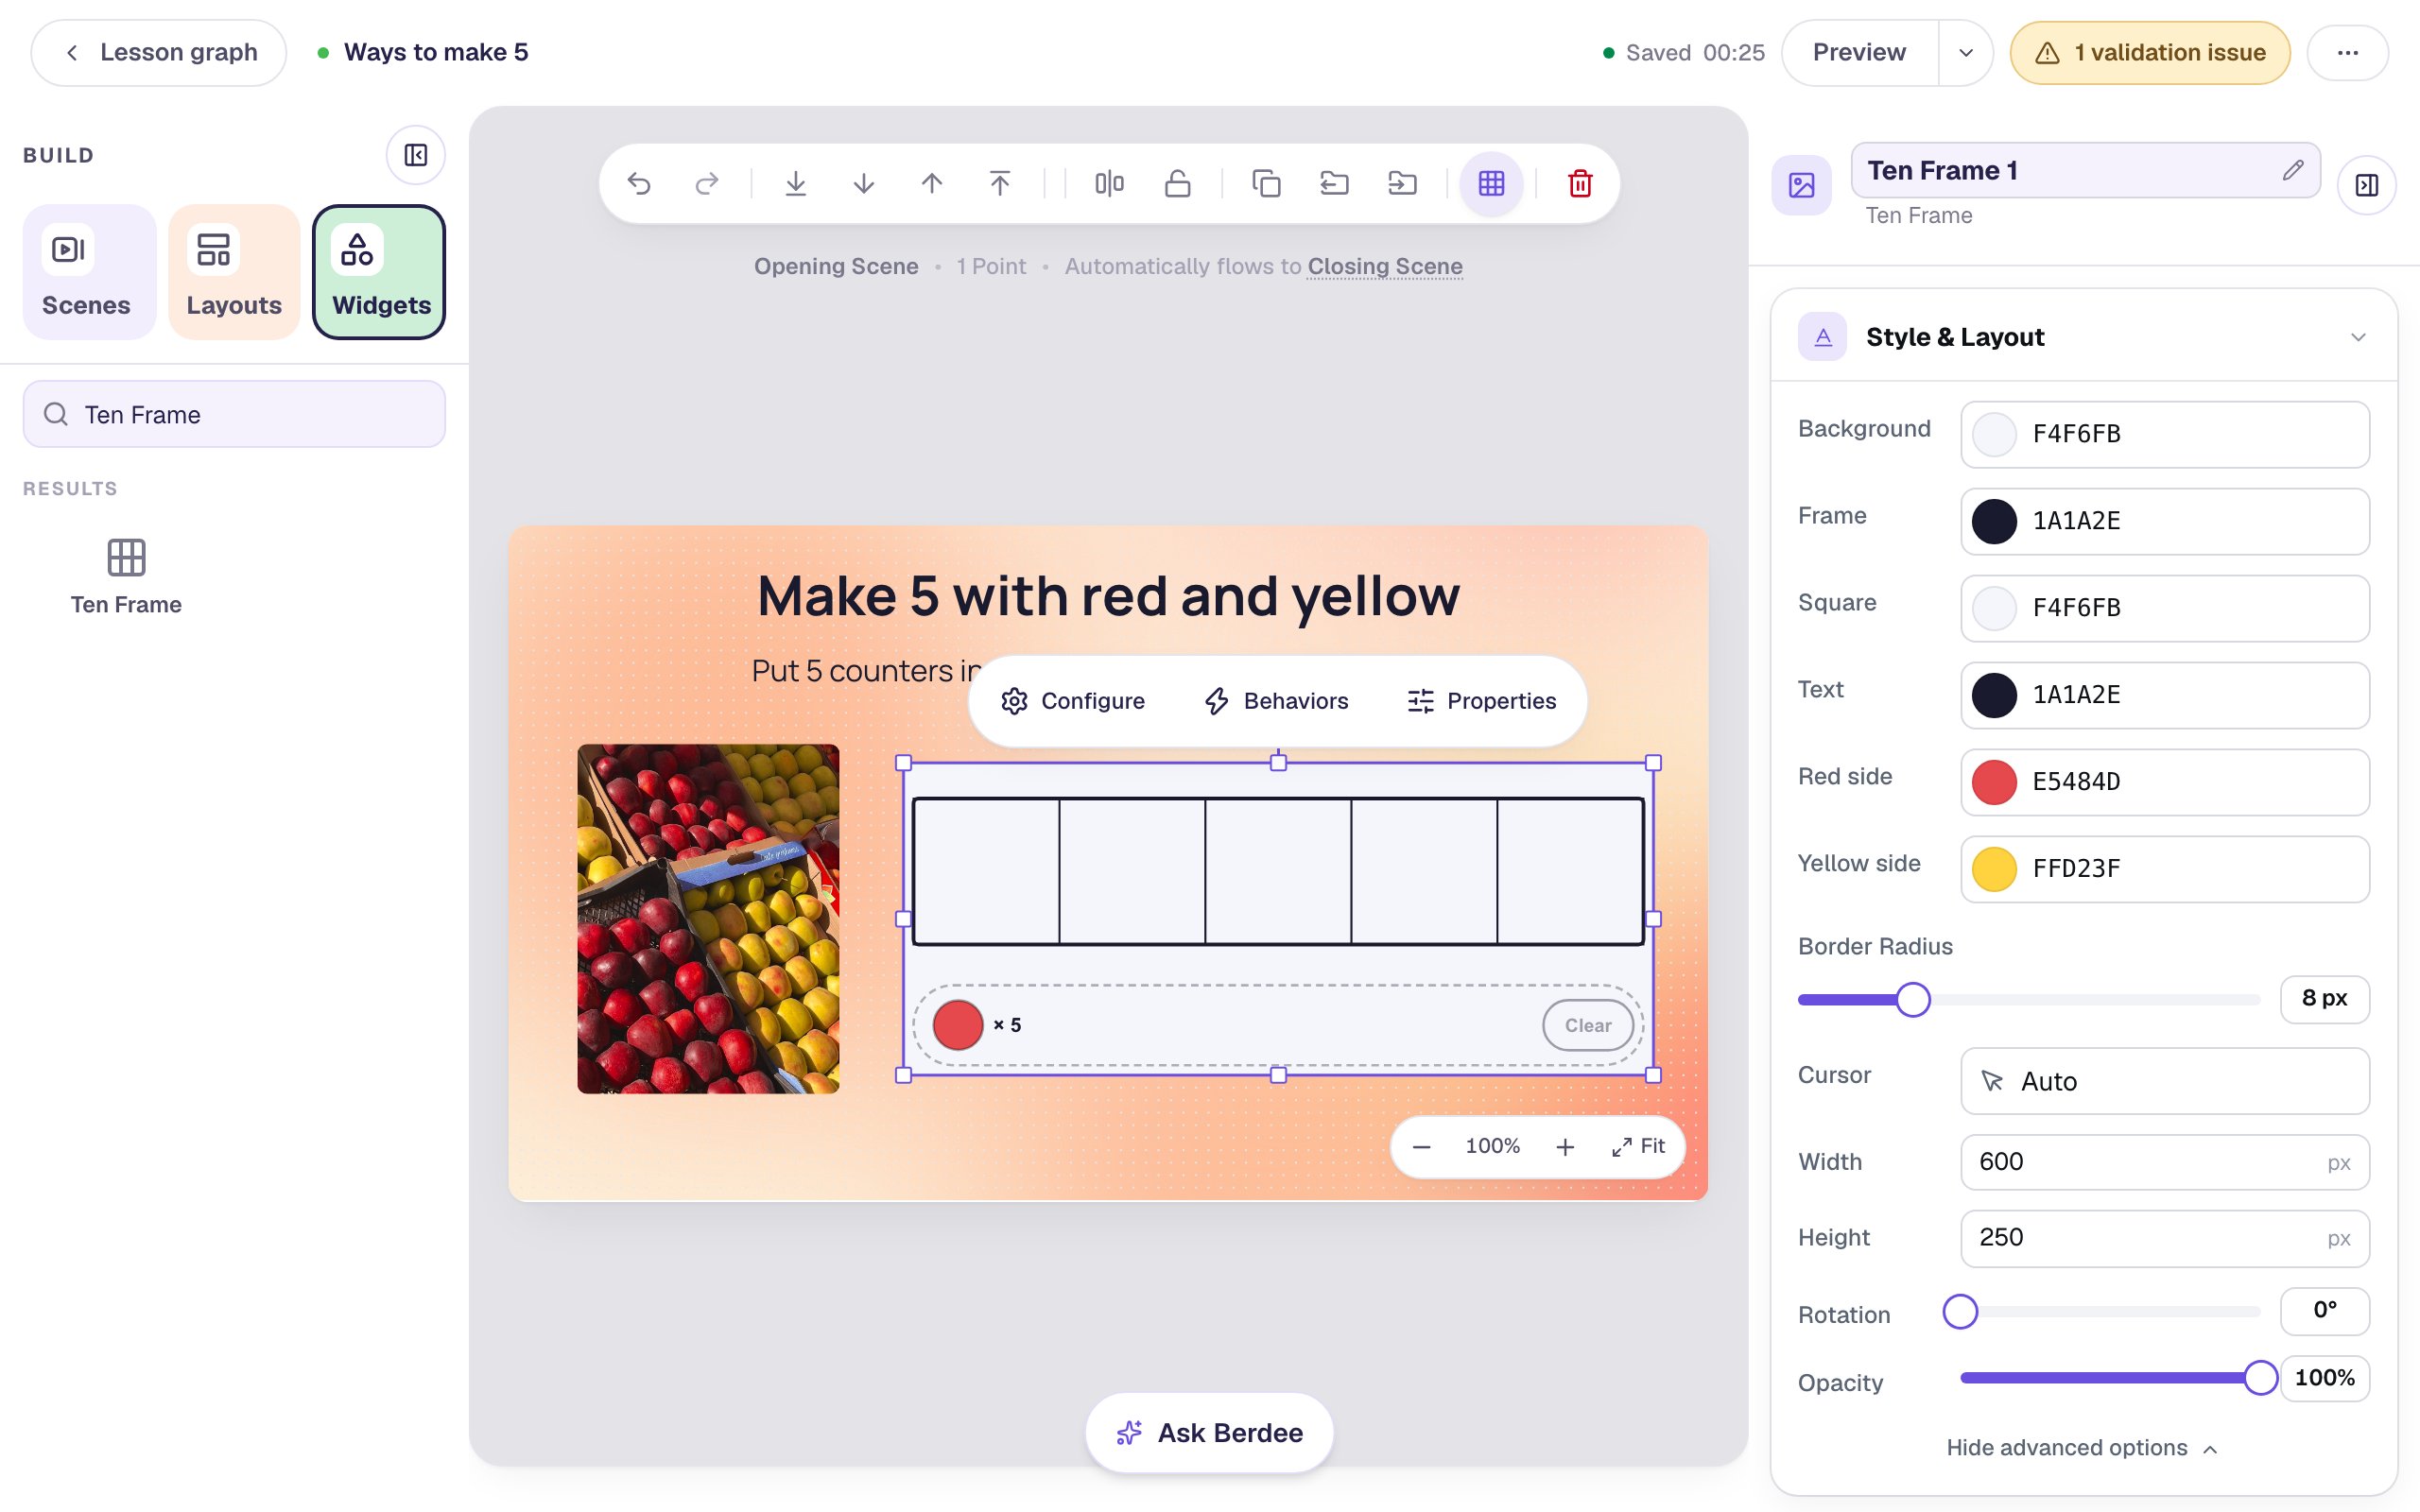
Keep the frame big. Its squares shrink to fit the widget, and young fingers need squares at least 44 pixels across. The Configure window warns you if they get smaller than that.
Step 3: Ask for 3 red and 2 yellow
Click ⚙ Configure in the pill above the frame. The window has every setting on the left and a live preview on the right.
- Leave Mode on Build. That's the mode that asks students to make something and grades it.
- Under Target, click Red + yellow.
- Set Counters to
5. - Set Red counters to
3. The hint underneath now reads Students show 5: 3 red and 2 yellow.
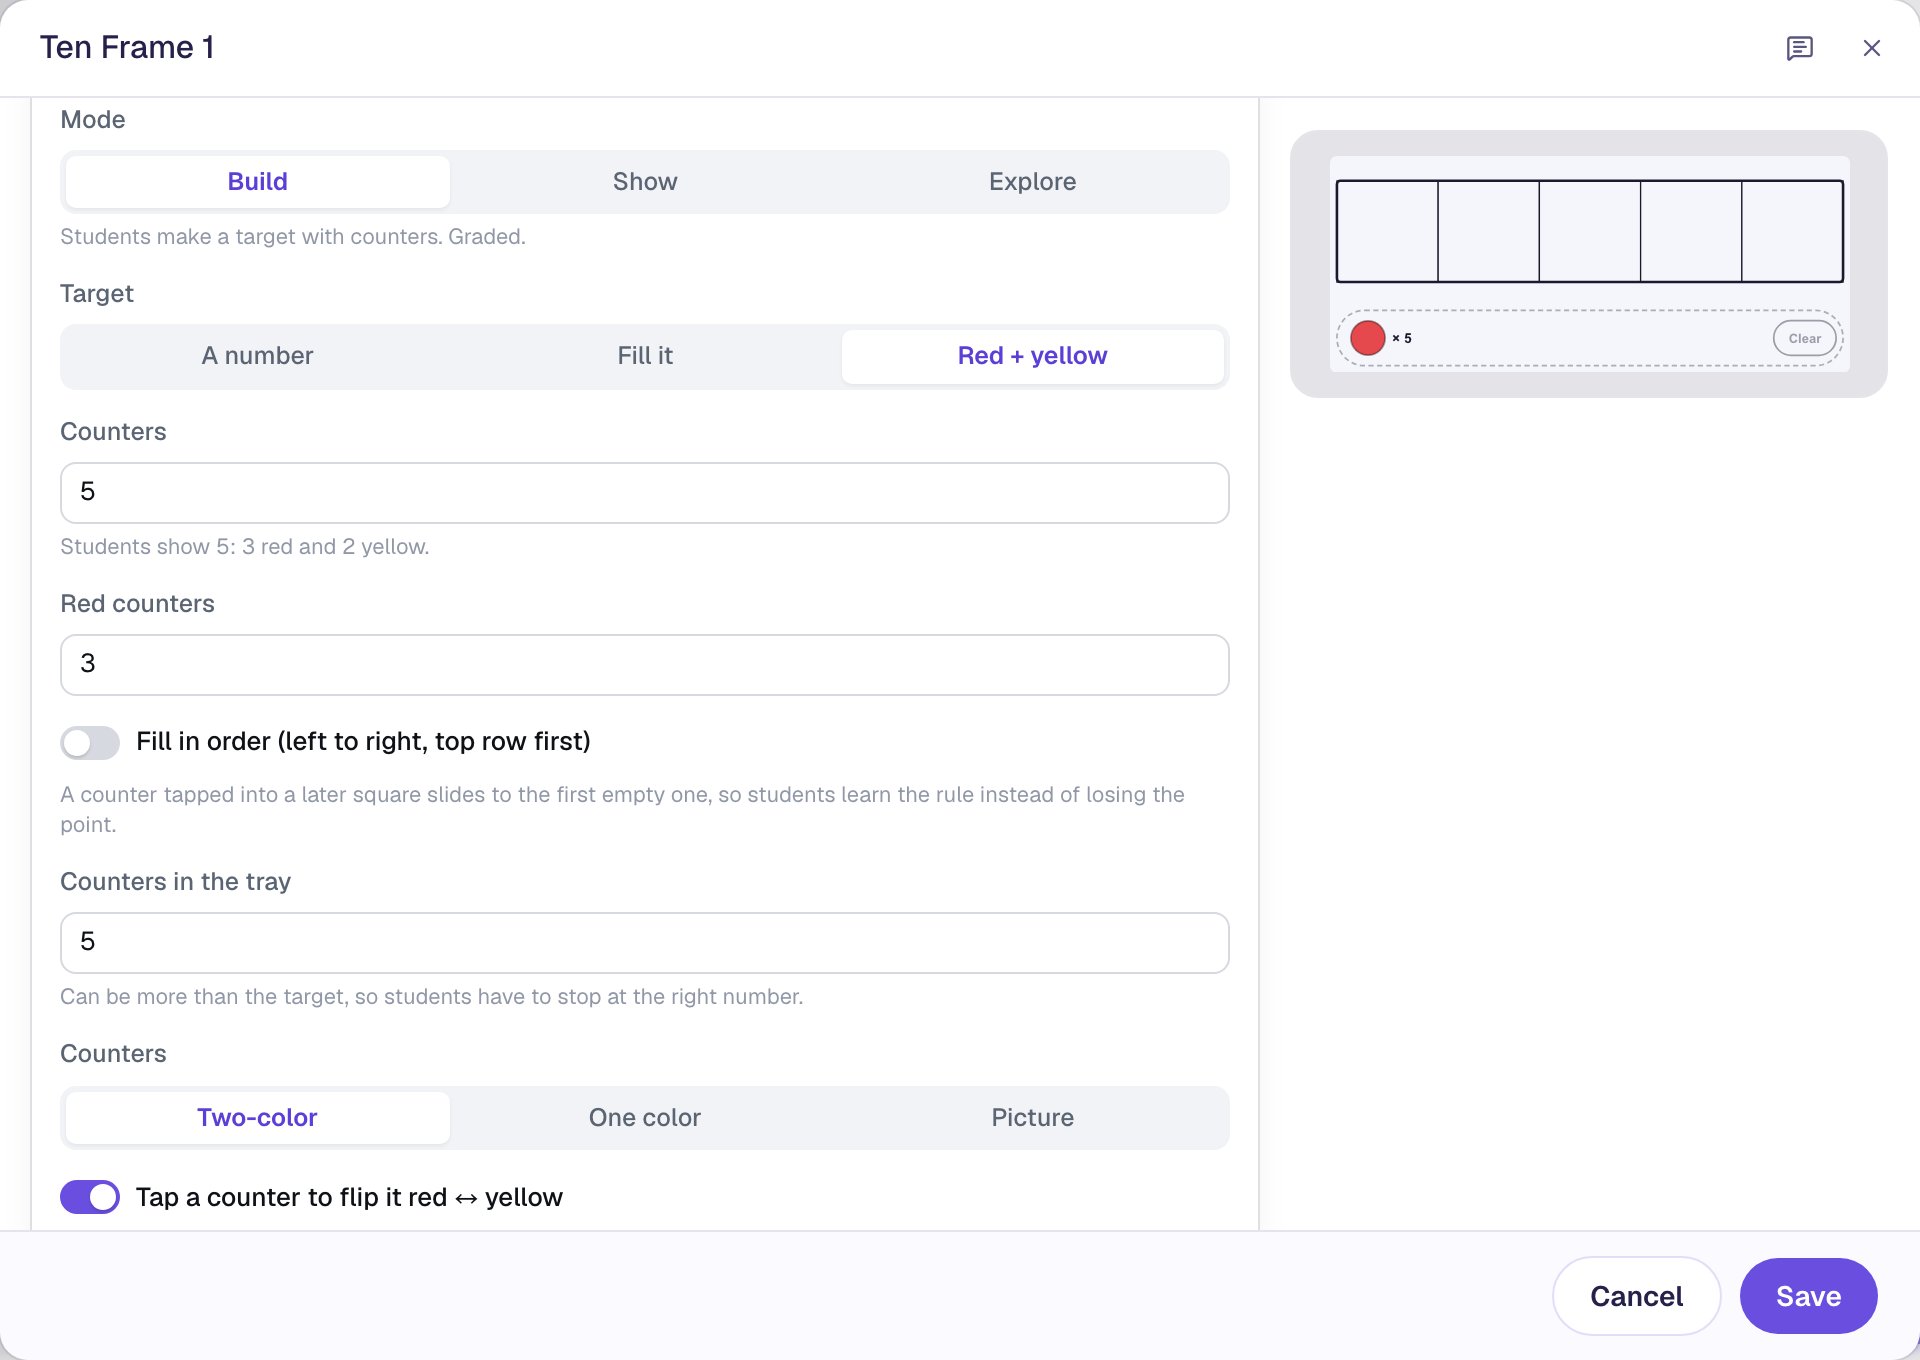
Every counter lands red, so the only way to get a yellow one is to tap it and flip it. That's why Tap a counter to flip it red ↔ yellow must stay on for a red + yellow target; if you turn it off, the window tells you the target can't be reached.
Counters in the tray stays at 5. A 5-frame only has five squares, so the tray can't hold more. On a 10-frame, give students more counters than the target, so they have to stop at the right number.
Step 4: Fill in order and show the numeral
Scroll down the same window and turn on two switches:
- Fill in order (left to right, top row first). Children learn to fill a ten frame the same way every time, so that a glance tells them how many there are. With this on, a counter tapped into a later square slides to the first empty one, so students learn the rule instead of losing the point.
- Show the numeral when done. When the frame is right, the number 5 appears in the tray, linking the counters to the written numeral.
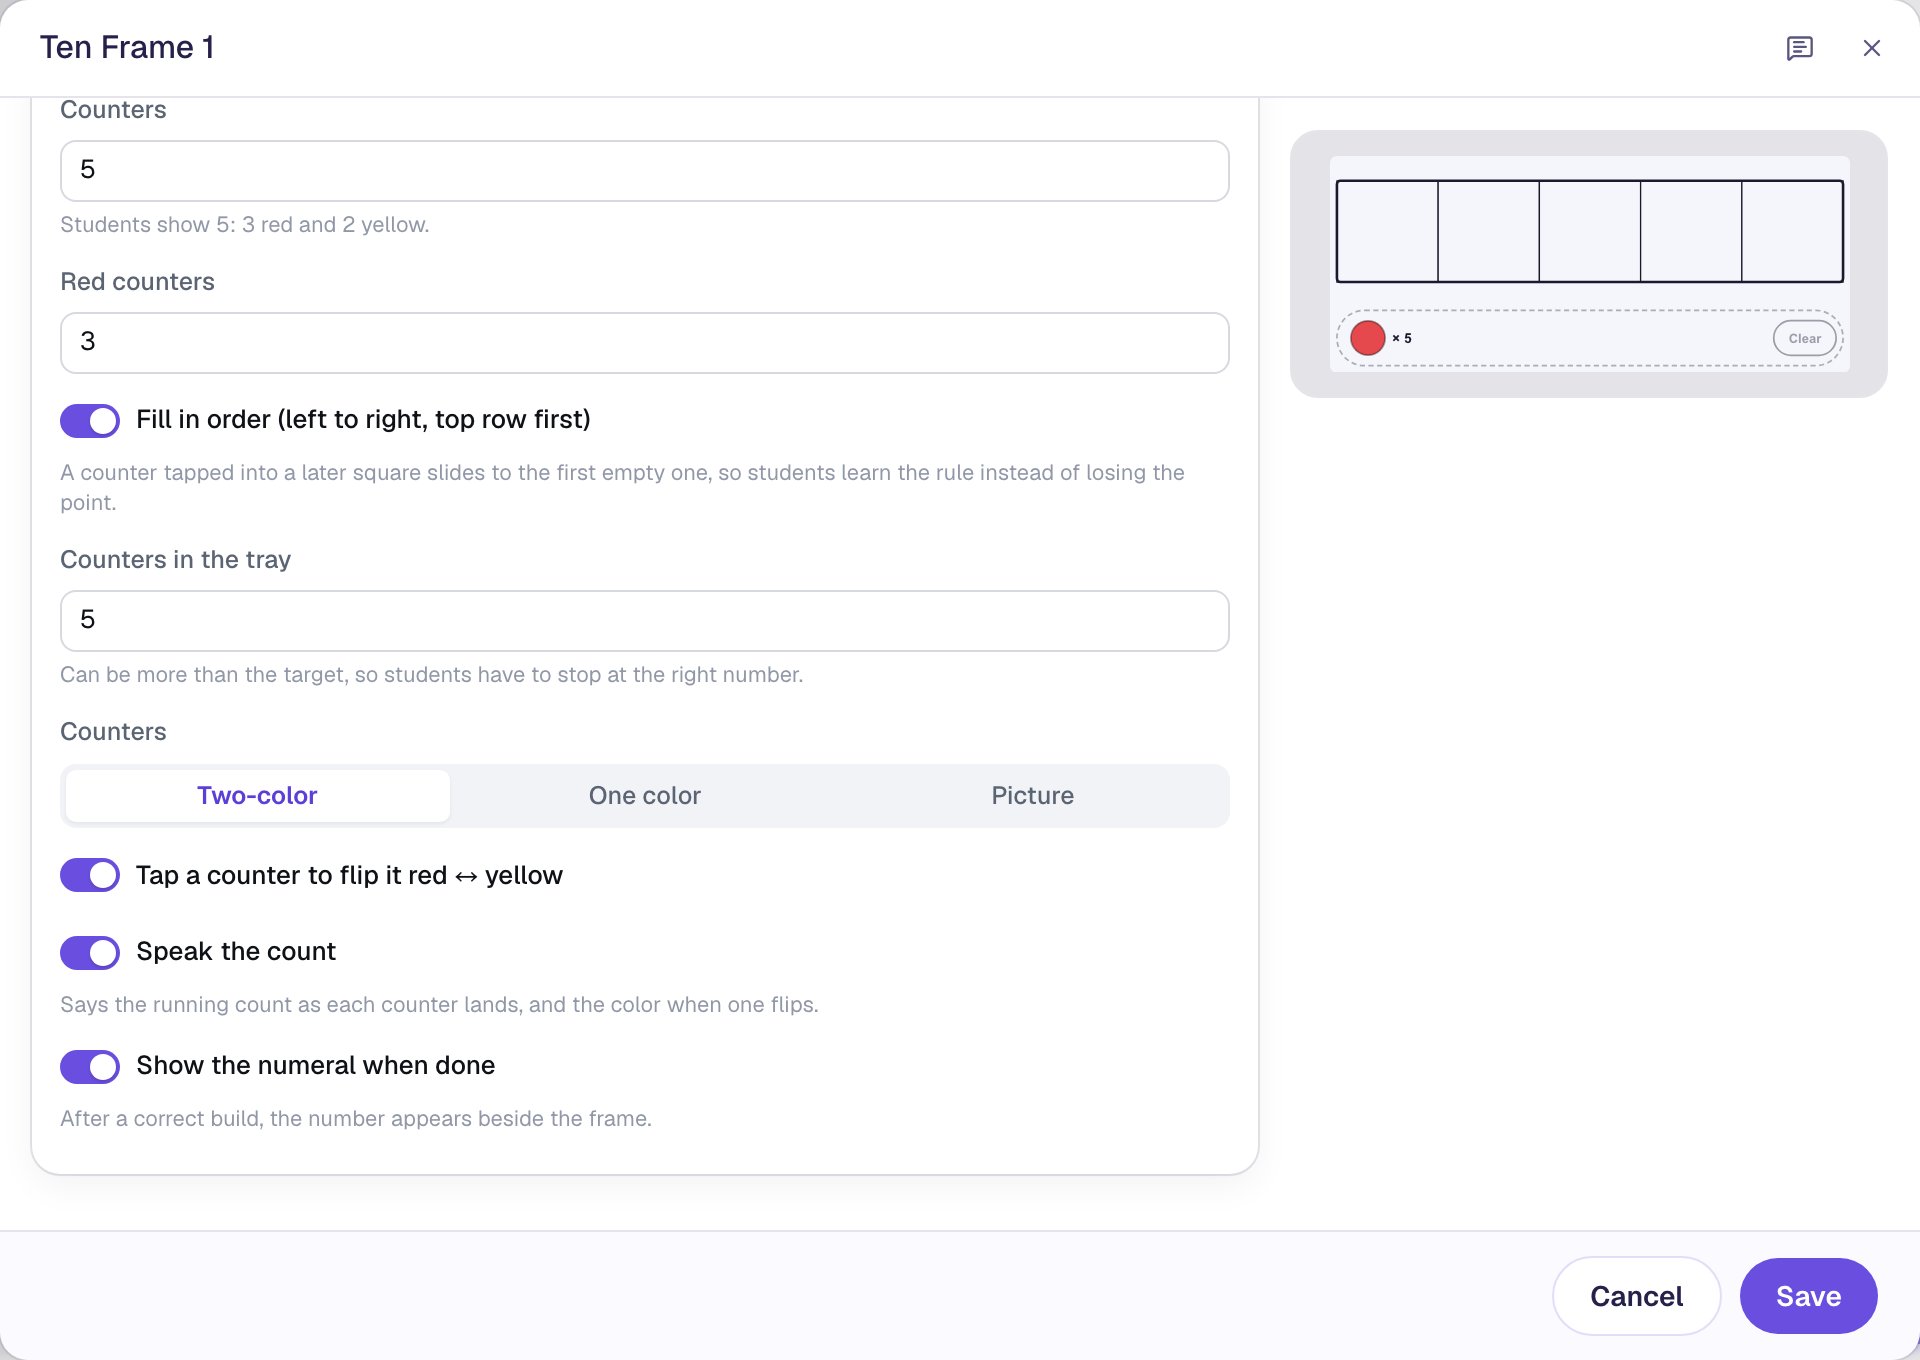
Speak the count is already on: the device says "one… two… three…" as each counter lands, and the color when one flips. Leave it on for children who are still learning to count aloud.
Click Save.
Step 5: Give students a moment to see the 5
This scene moves on by itself as soon as the frame is right. The line above the canvas says Automatically flows to Closing Scene. By default it waits only 0.6 seconds, which is too quick for a child to notice the numeral that just appeared.
Click an empty spot on the scene to see its settings. In Progression, click Show more options and set Advance delay to 2500 ms (two and a half seconds).
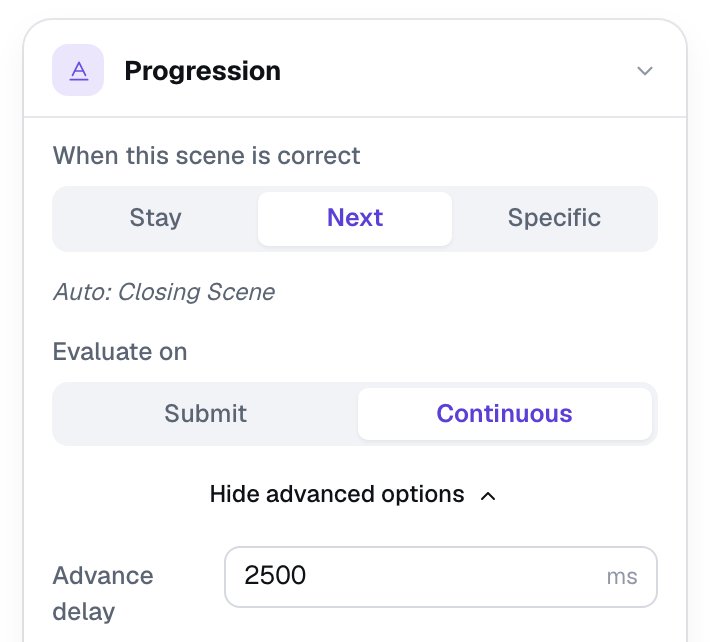
Evaluate on is Continuous, which means the scene checks the frame every time a student places or flips a counter. That suits a ten frame: students don't have to find a Check button, and they can't get stuck with a wrong answer locked in.
Step 6: Add an "I'm done" button
Every lesson needs one button that lets a student finish, even a lesson that ends by itself. It's also a way out for a student who gets stuck.
- Search the Widgets tab for
Submit Buttonand click it. - In Content, change Label to
I'm doneand set Submits to Lesson. - Set its Font Size to
18and drag it under the photo, so it's there if needed but doesn't compete with the frame.
Step 7: Try it as a student
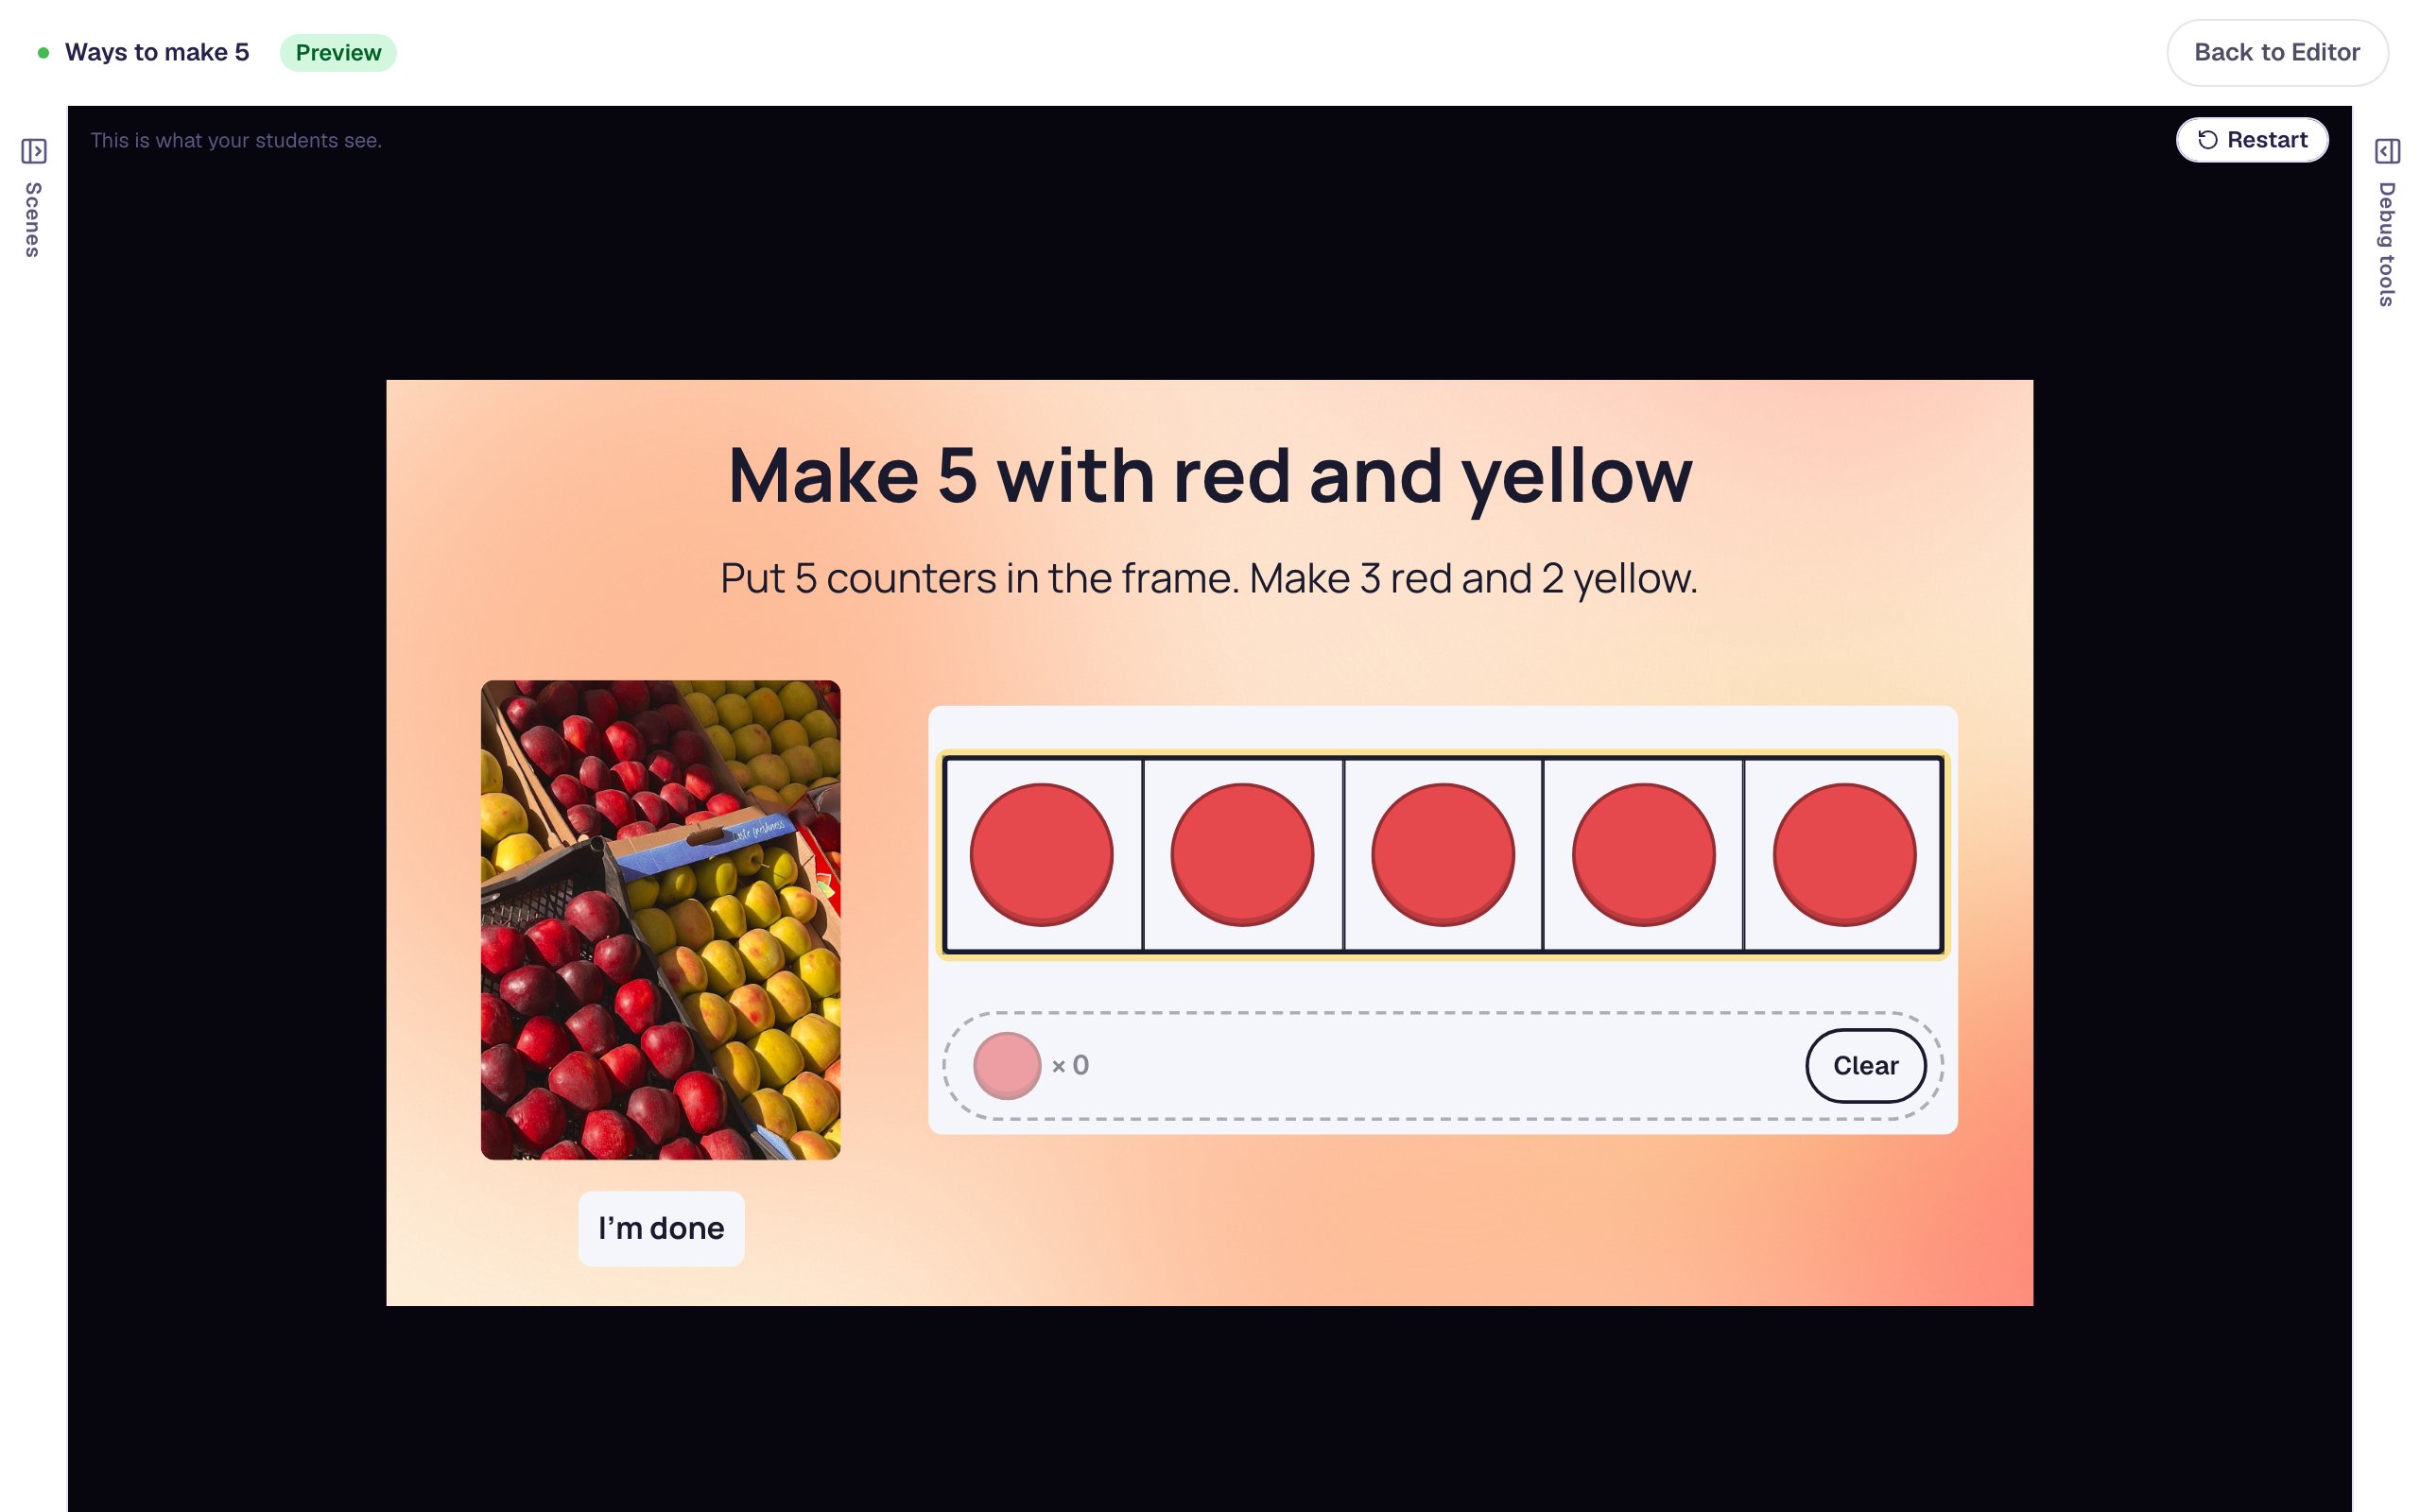
Click Preview. First tap the five squares, one at a time:
All five counters are red, so the frame isn't right yet, and nothing happens. The tray shows × 0 and the full frame glows.
Now tap the last two counters to flip them to yellow:
The moment the frame shows 3 red and 2 yellow, 5 appears in the tray. Thanks to the longer delay, it stays on screen for a moment before the lesson moves on.
The last counter a student taps is outlined, with an × to remove it and a Remove button in the tray, in case they flipped the wrong one.
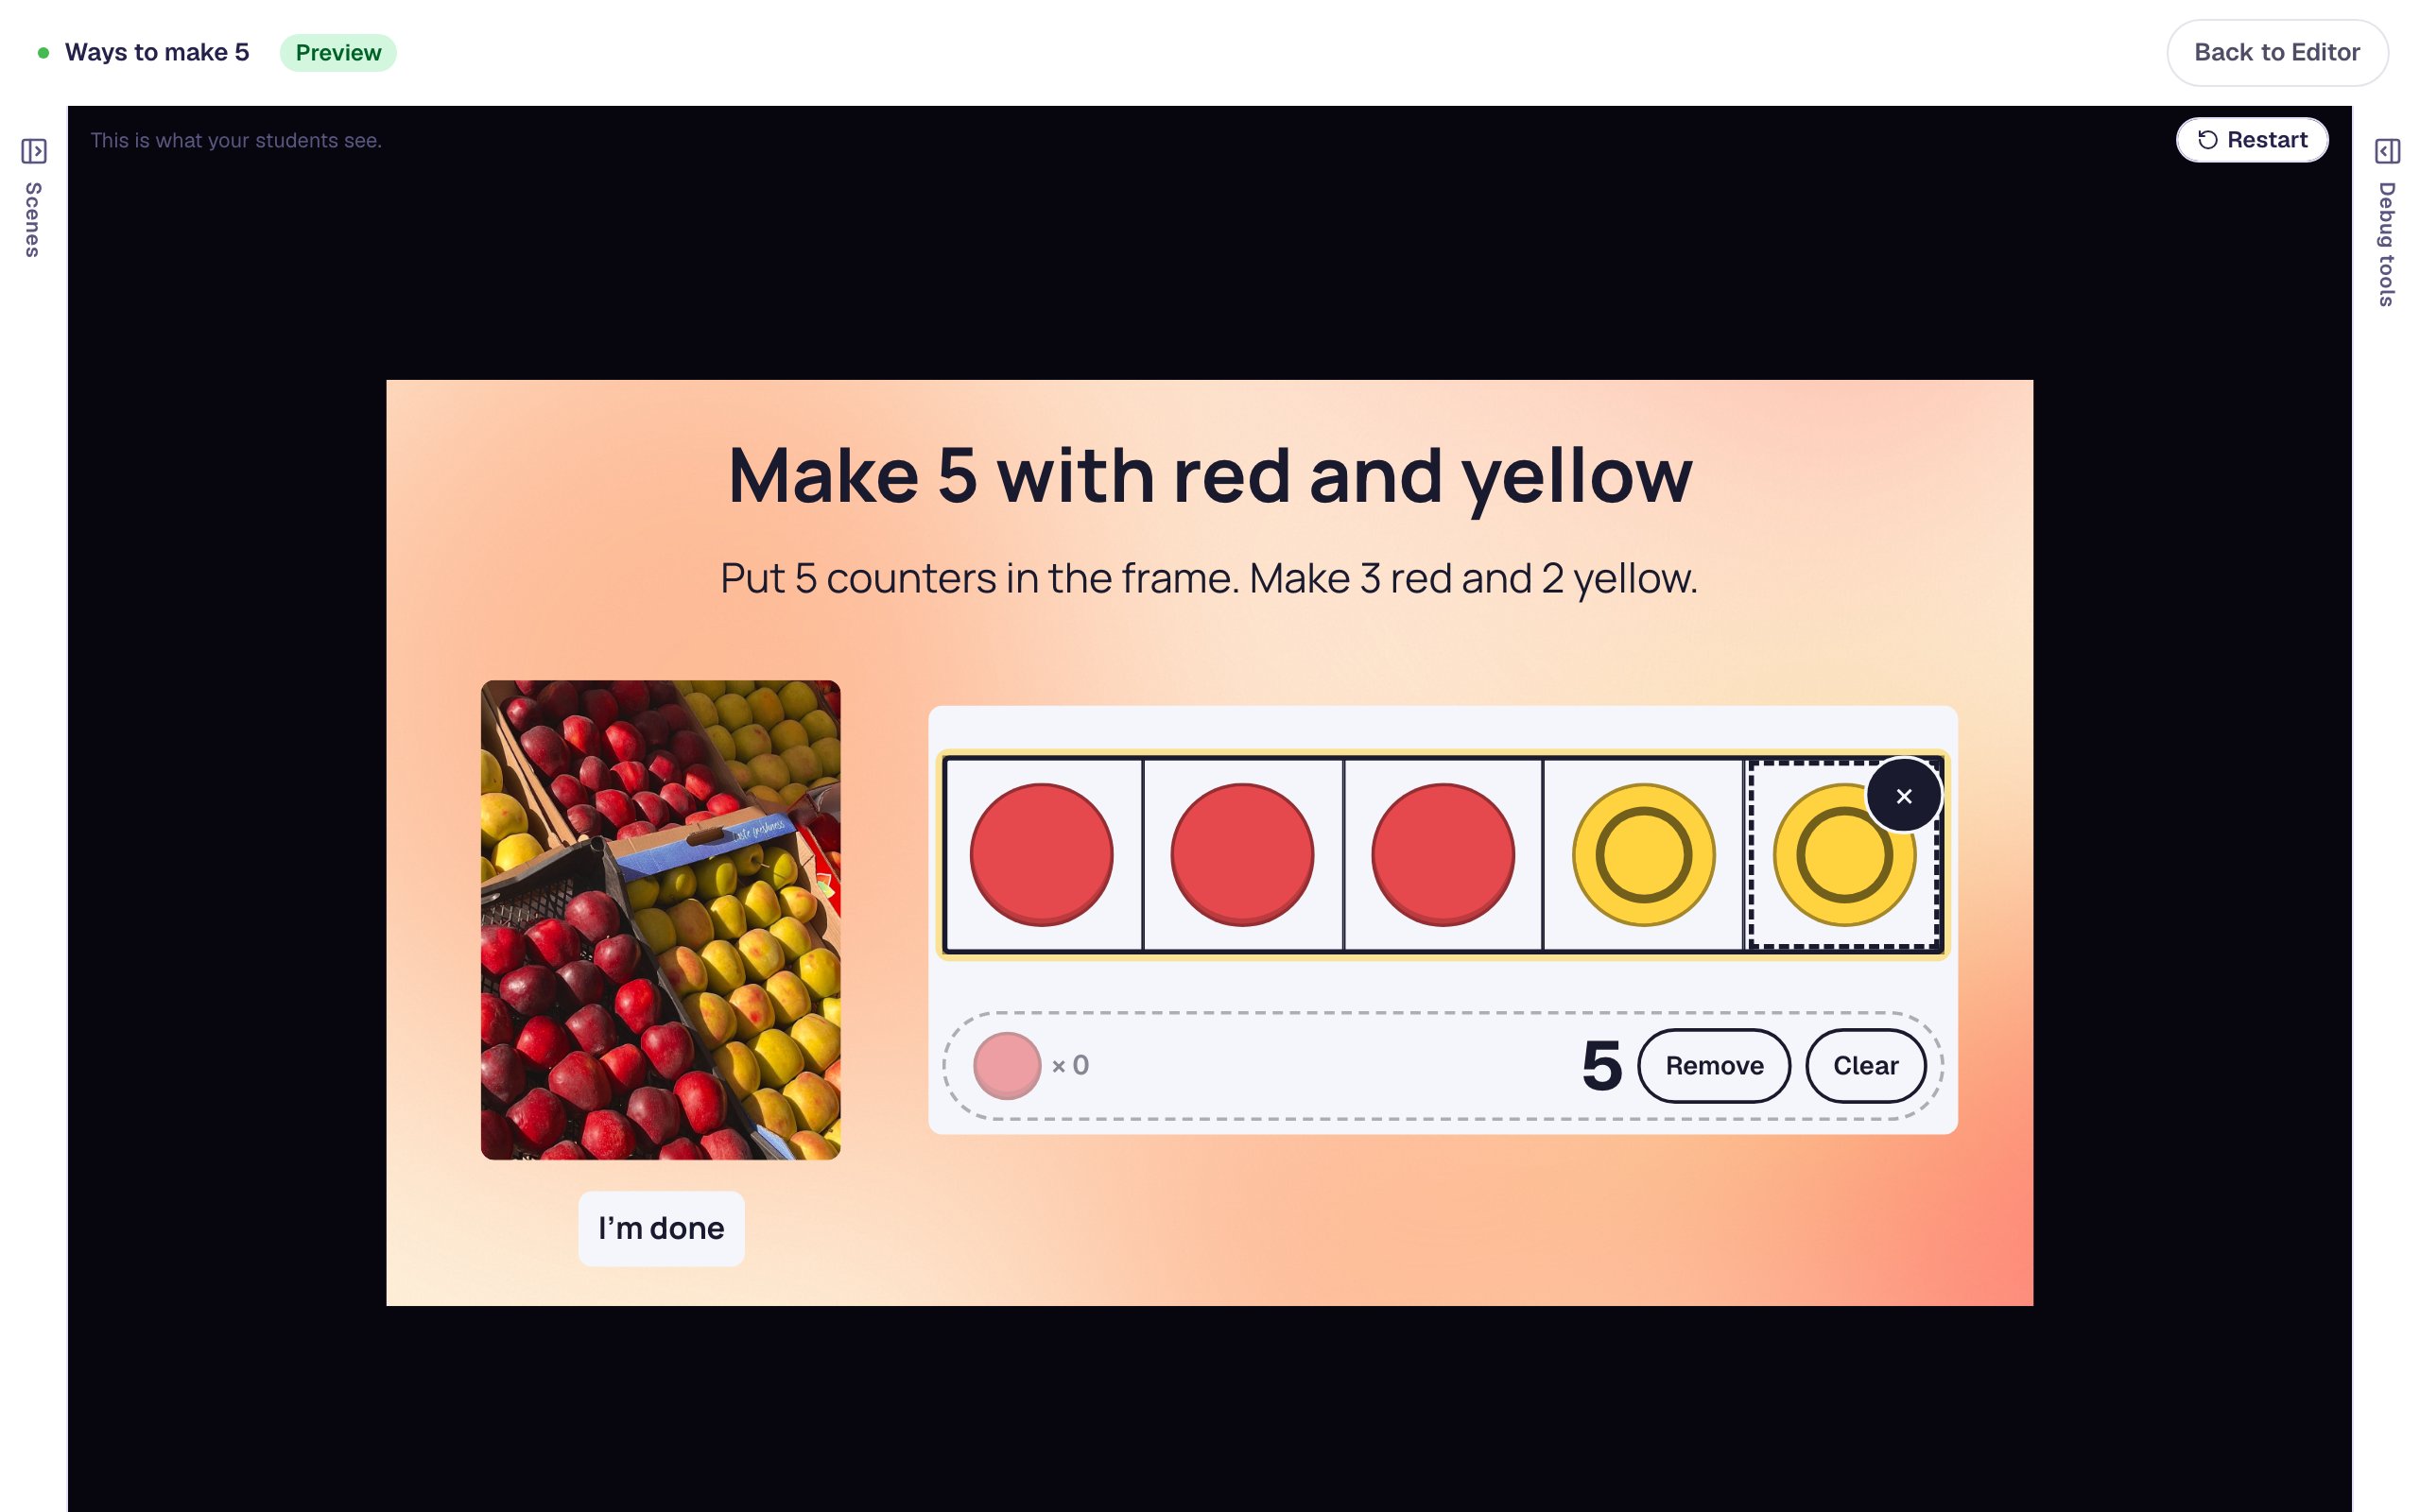

The order of the flips doesn't matter. Flip any two counters and the frame is right: it checks how many are red and how many are yellow, not which squares they're in. Click Restart to try a mistake, like flipping three, and see that the lesson waits until the frame is right.
What you built
You built a one-scene math activity with:
- a Ten Frame in Build mode that asks for 5 as 3 red and 2 yellow,
- Fill in order, so children practice filling a frame the standard way,
- the numeral appearing when the frame is right, and a longer Advance delay so students see it,
- a photo with alt text, and an I'm done button as a way out.
To practice more ways to make 5, duplicate the scene and change Red counters to 4, 2 or 1 on each copy: Build a three-question quiz by duplicating a scene shows how. For bigger numbers, set Frame to 10-frame and Number of frames to 2: two 10-frames show numbers up to 20. To show a number for students to read instead, switch Mode to Show and ask "How many?" with a Number Input.
Make this lesson yours
Add the lesson you just watched being built to your account, then change it for your class: your questions, your pictures, your colors.
Free to sign up, and you'll come straight back here. I have an account