Find every living thing in a pond picture
Build a graded Find in Picture question where students tap the living things in a pond scene. Draw a region around each one, add two near-misses that aren't alive, and give a hint when a student taps the wrong thing.
- Level
- Beginner
- Time
- About 12 min
- Steps
- 9
- Updated
- Oct 16, 2026
A "Who lives at the pond?" scene where students tap the cattails, the duck, the frog and the fish, the sun and the rock answer "Not this one" with a hint, and finding all four moves the lesson on to the ending.
Get the finished lesson
Skip straight to the result, or keep it open beside the steps. Add this tutorial's lesson to your account and explore how it works in the studio.
Free to sign up, and you'll come straight back here. I have an account
"Is it alive?" is one of the first big ideas in early science. Children sort the world into living and non-living things long before they can explain why, and the sun and rocks are the classic mix-ups: the sun moves across the sky, and a rock can look like a sleeping turtle.
In this tutorial you'll build a one-scene question called Living things at the pond with the Find in Picture widget. Students tap every living thing in a picture of a pond: the cattails, the duck, the frog and the fish. Each one they find gets a check mark. The sun and a rock are near-misses: tapping one gives a gentle "Not this one" and a hint, and you see the wrong tap on the student's attempt page. Find in Picture is graded, so the question counts toward the lesson's score.
Step 1: Set the scene
Start a blank lesson (New lesson, then Start from scratch) and name it Living things at the pond by clicking Untitled lesson at the top left.
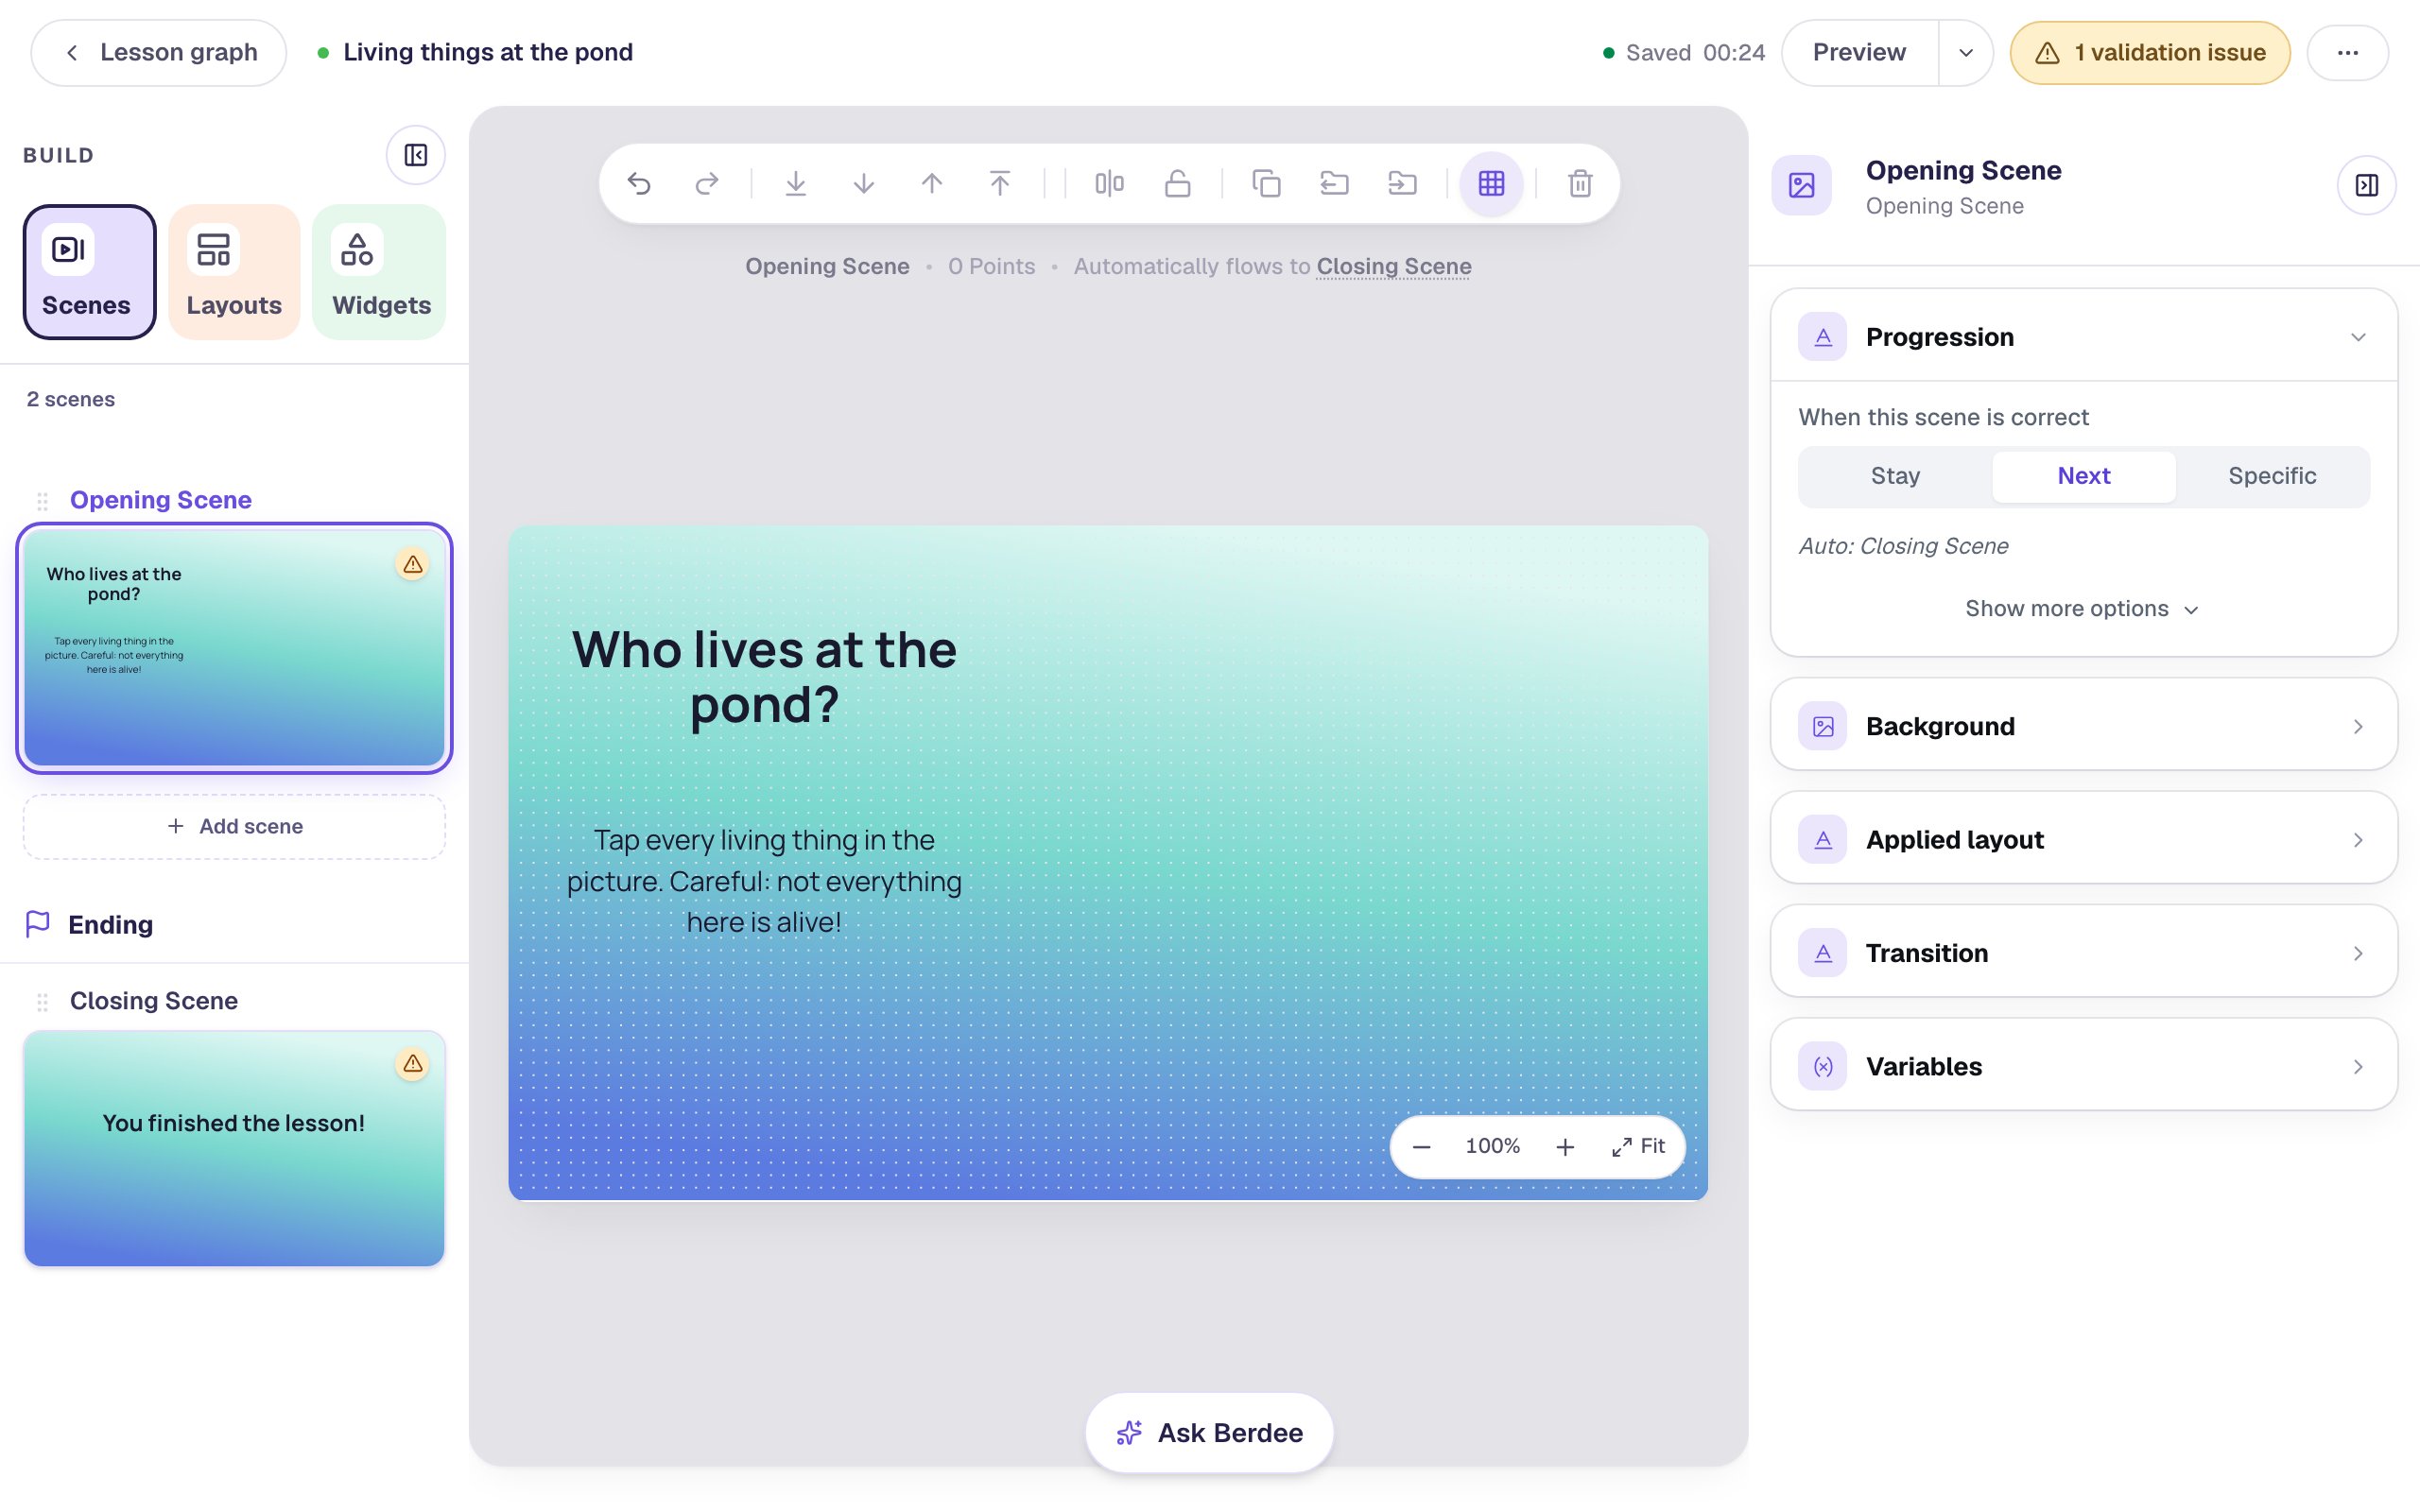
Give the scene a background that suits a pond. Click an empty spot on the scene, open Background, click Choose a style, and pick Lagoon gradient. Give the Closing Scene the same background so the ending matches.
Then add the question and the task on the left side of the scene, leaving the right side free for the picture:
- A Heading:
Who lives at the pond?. Set it to Fixed width, about330wide, and set its Font Size to40. - A Body under it:
Tap every living thing in the picture. Careful: not everything here is alive!. Set it to Fixed width,330wide, with a Font Size of22.
The warning in the instruction matters. It tells children there are traps in the picture, so they stop and think before each tap instead of tapping everything.
Step 2: Add a Find in Picture
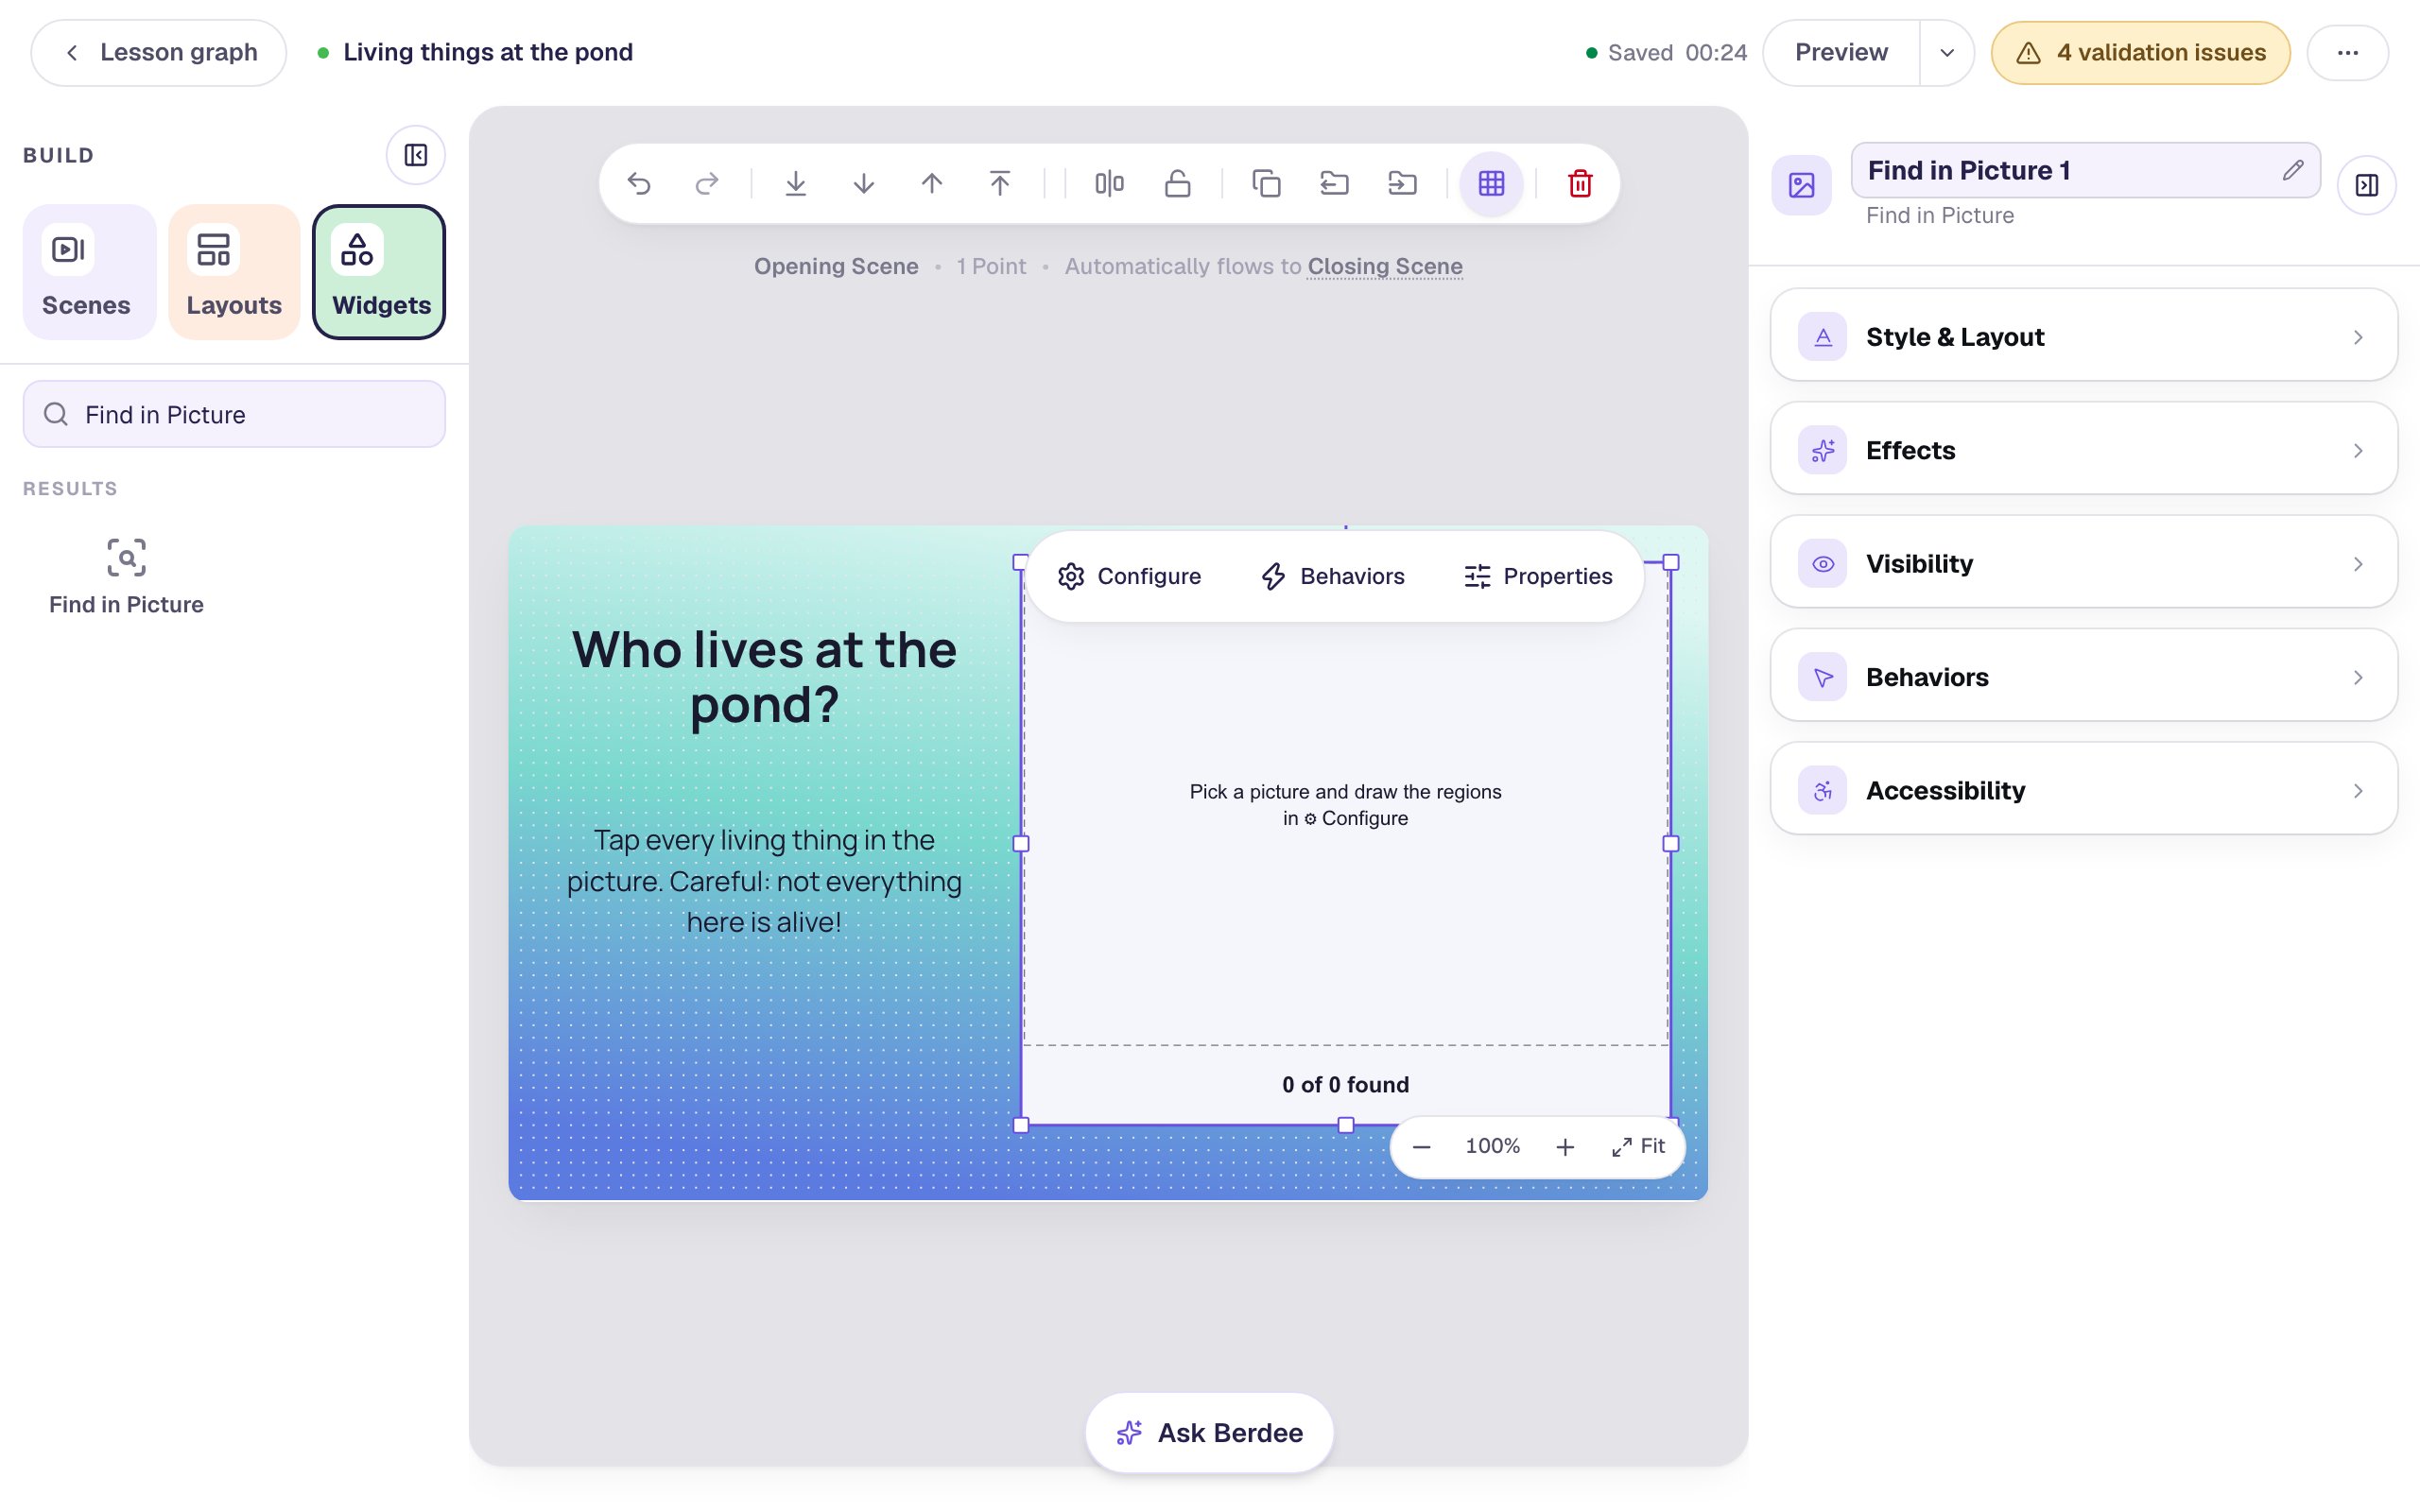
Search the Widgets tab for Find in Picture and click it. It arrives empty, with Pick a picture and draw the regions in ⚙ Configure in the middle and 0 of 0 found along the bottom.
Make it big: the picture is what students search, and small things are hard for small fingers to tap. Under Style & Layout, click Show more options and set Width to 520 and Height to 450, then drag it to the right half of the scene.
While it's selected, open Accessibility and set Alt Text to A picture of a pond. A screen reader says it when a student reaches the picture, before it reads the things in it.
Step 3: Choose the picture
Click ⚙ Configure in the pill above the widget. The window has the settings on the left and a live preview on the right.
Under Picture, click Choose a picture (a playground, a kitchen…). Pick a picture from your media library, or upload your own on the Upload tab, as here:
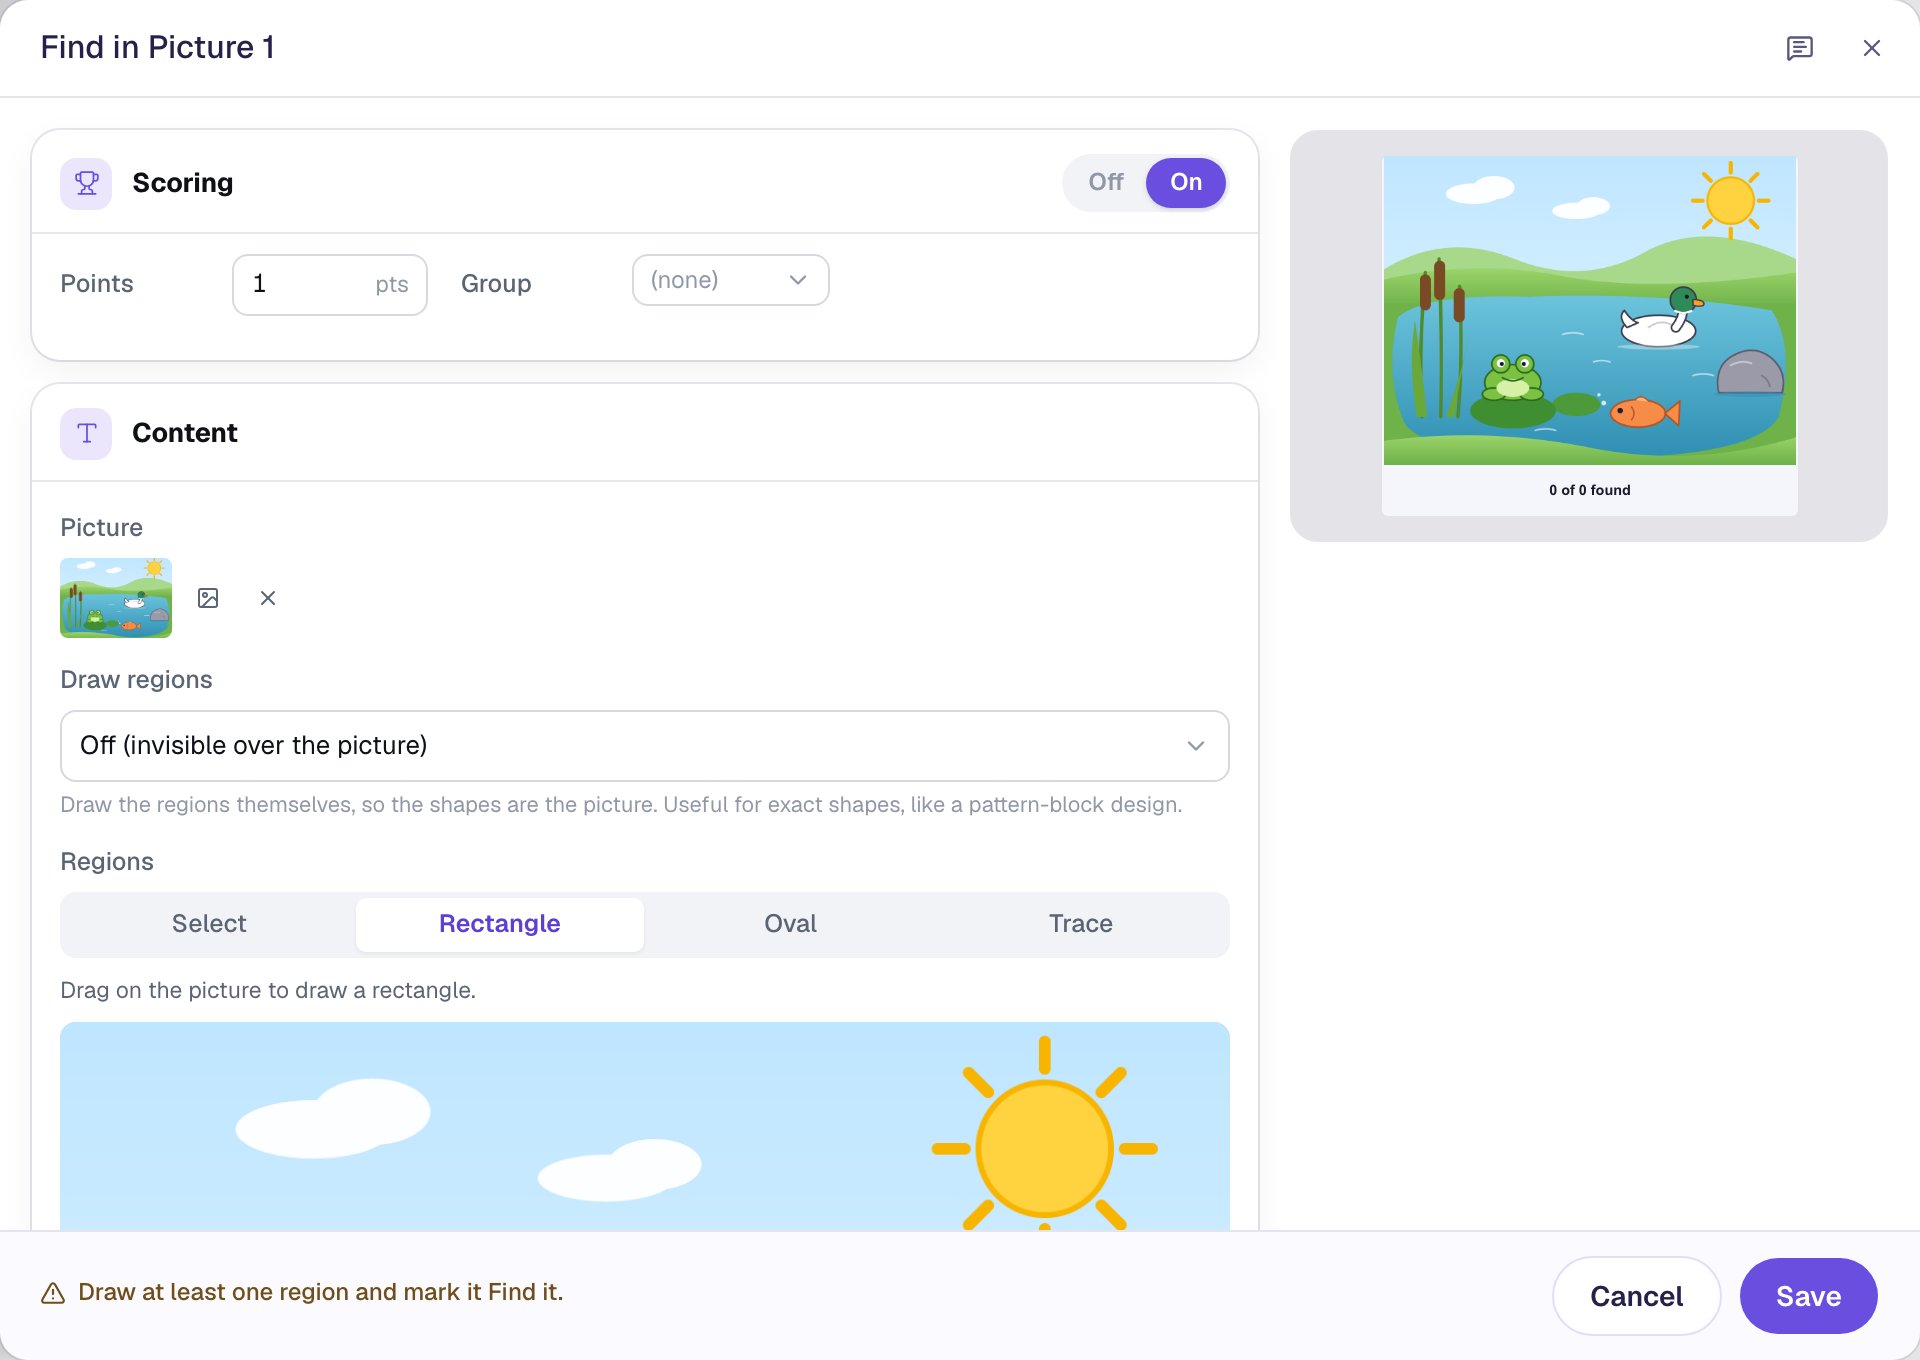
A good picture for this has a few clear, separate things in it, each big enough to tap. A busy photo works too, as long as the things you ask for aren't tiny.
Scoring is already On: a new Find in Picture is a graded question worth 1 point. Leave Draw regions on Off, so the regions you draw next are invisible to students and they search the picture itself.
Step 4: Draw a region around each living thing
A region is the part of the picture a student has to tap. Draw one around each living thing with the tools above the picture, then name it in the row that appears under the picture:
- Click Rectangle and drag across the cattails, from above the tallest cattail to the bottom of the leaves. Name it
the cattails. - Click Oval and drag across the duck. Name it
the duck. - Draw ovals around the frog and the fish the same way, and name them
the frogandthe fish.
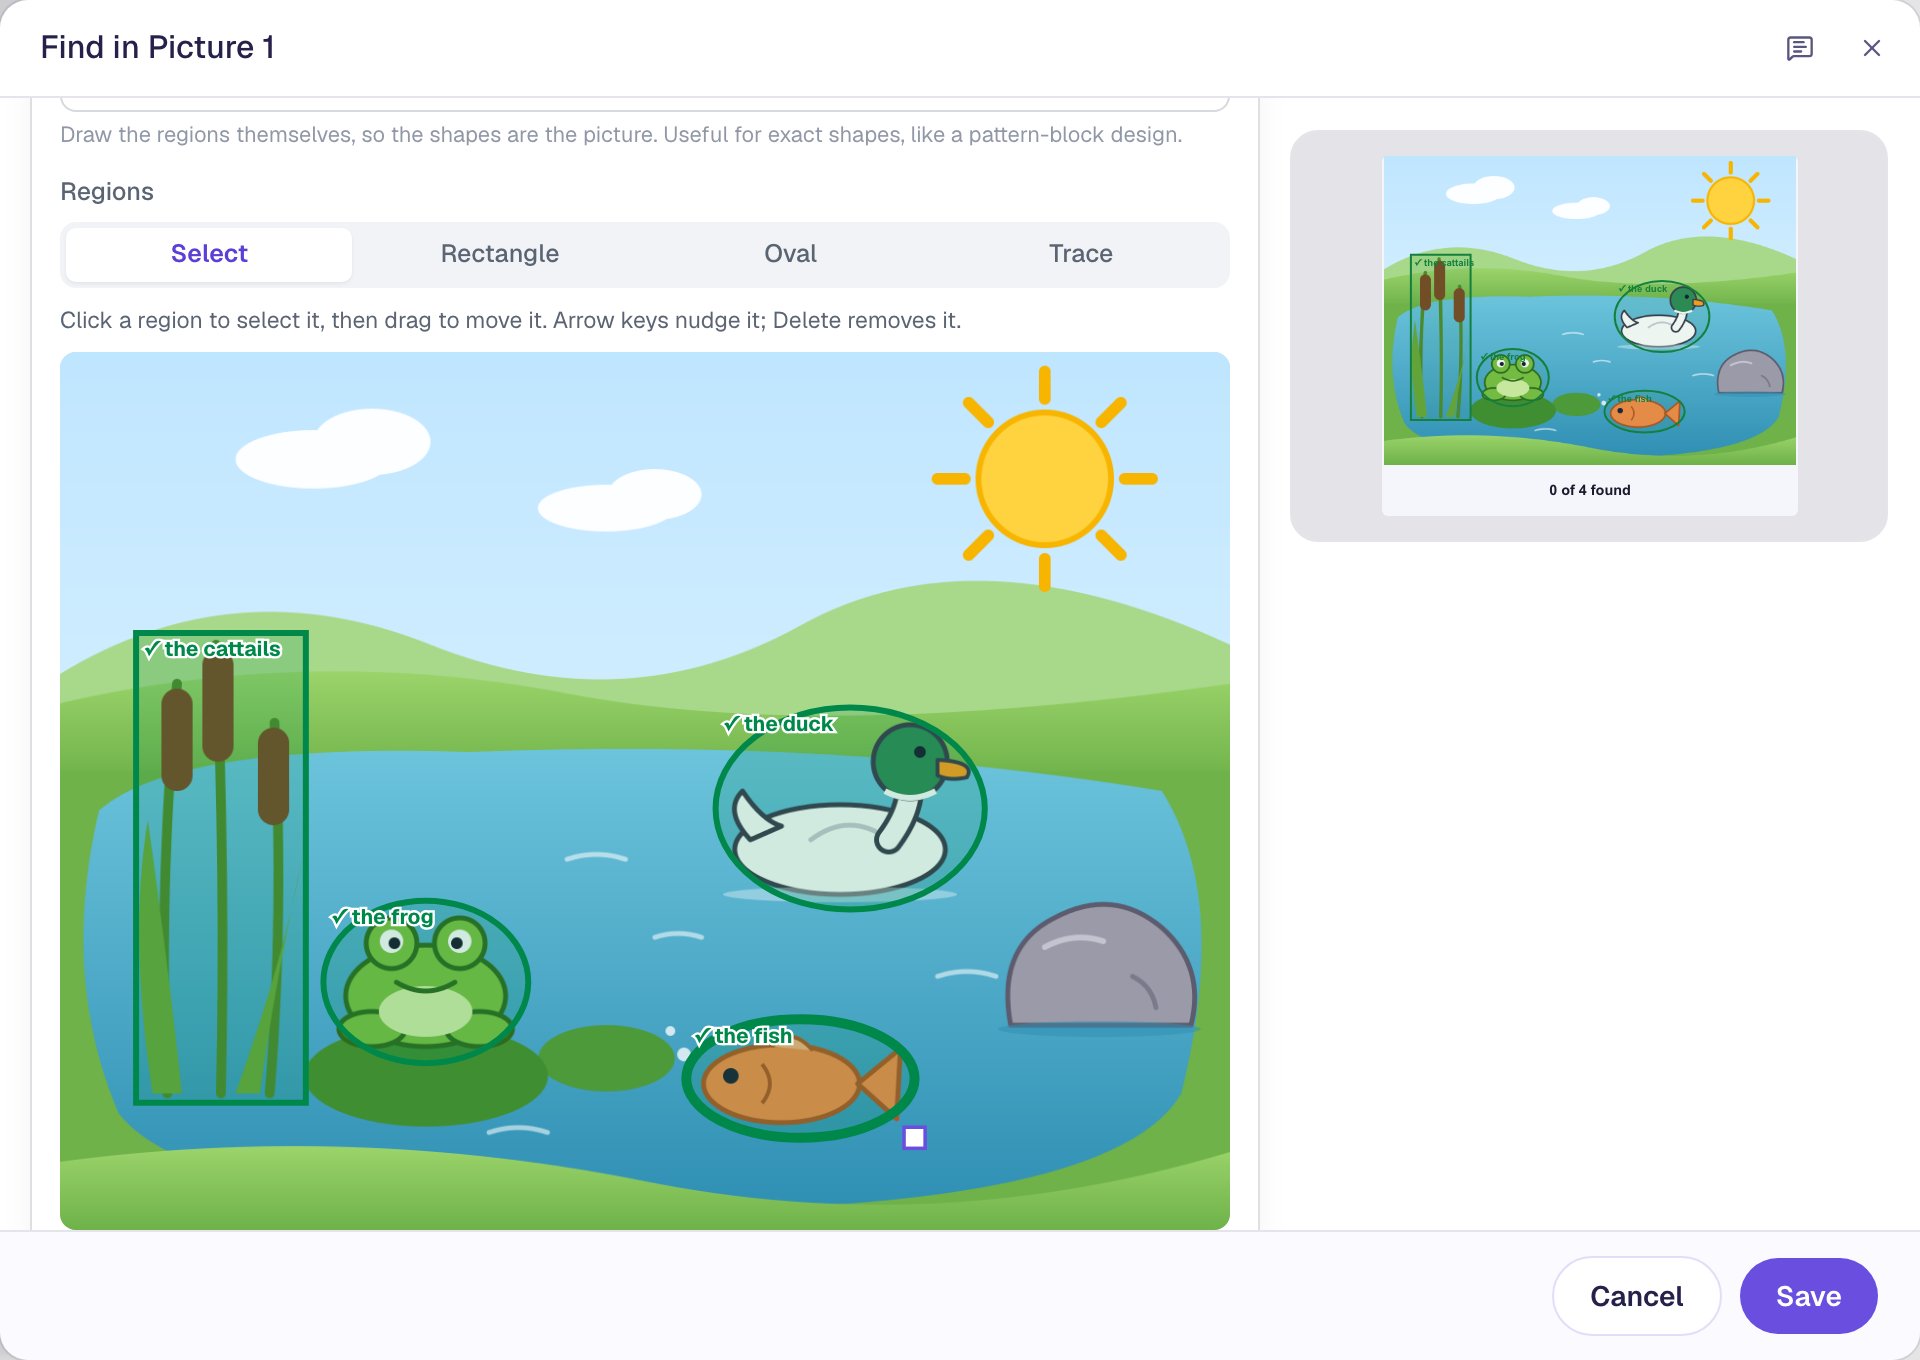
Every new region starts as Find it, drawn in green with a check mark. Make each one a little bigger than the thing itself: a tap on the edge of the duck should still count.
Name every region with what the thing is, like the duck. A screen reader reads the name when a student reaches it, and you see it on the student's attempt page. Until you name one, the window warns you that a screen reader can only say "Thing 2 of 2".
Step 5: Add the near-misses
A near-miss is something students might tap by mistake. Here, that's the sun and the rock: neither is alive, but young children often think they are.
- Click Trace and click around the rock's outline, point by point. Click the first point again to close the shape (or press Enter). Name it
the rock. - In the rock's row, click Not this one. The region turns red and dashed.
- With Oval, draw a region around the sun, name it
the sun, and switch it to Not this one too.
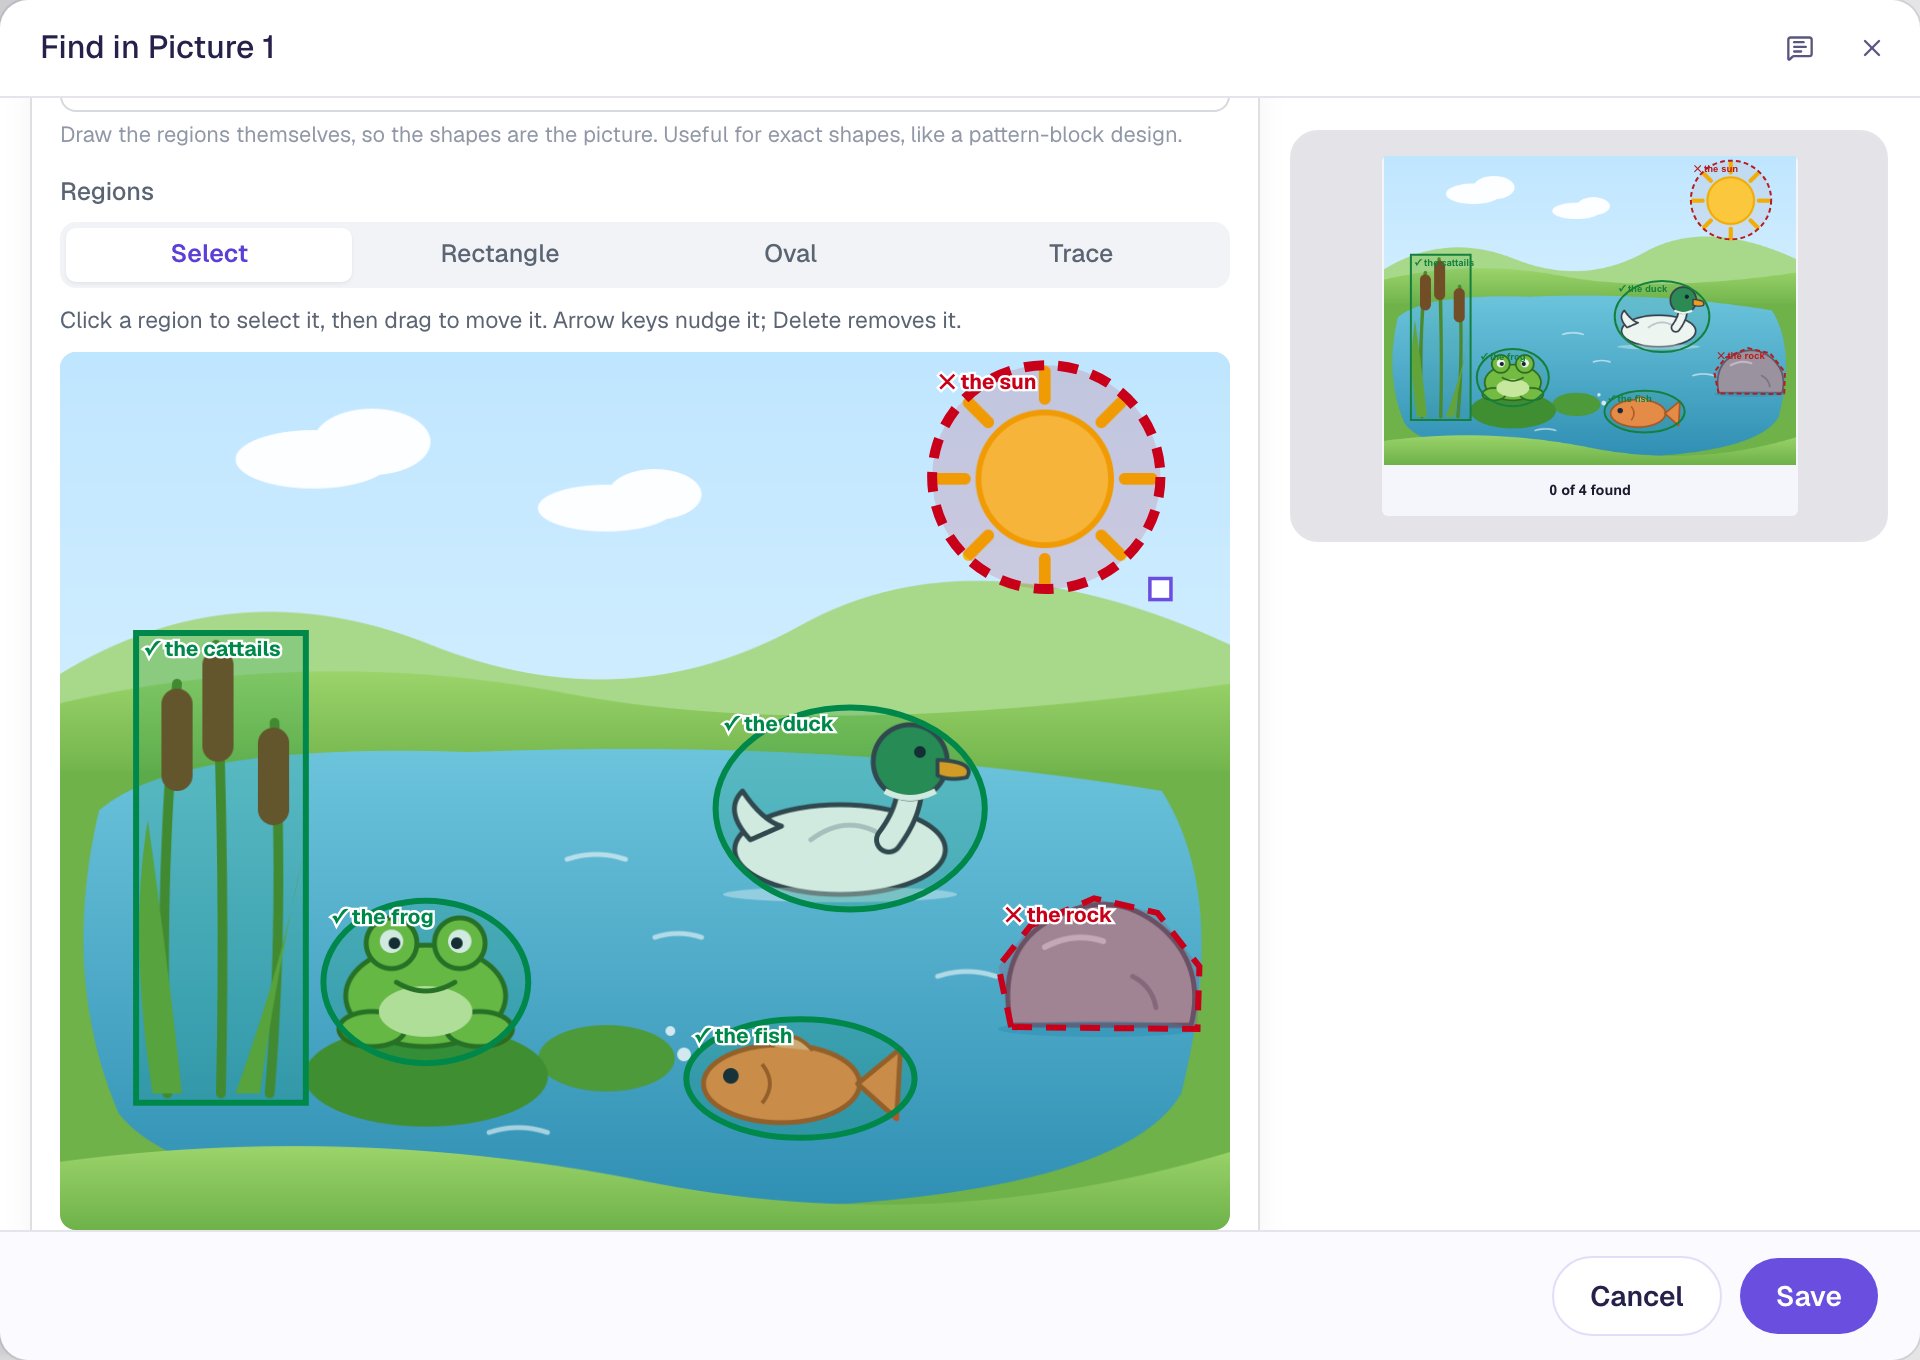
Taps anywhere else in the picture, like the sky or the water, count for nothing, so a child who taps the clouds isn't marked wrong. Mark only the near-misses you'd want to hear about.
Step 6: Check how it marks
Scroll down in the same window to see how the question checks:
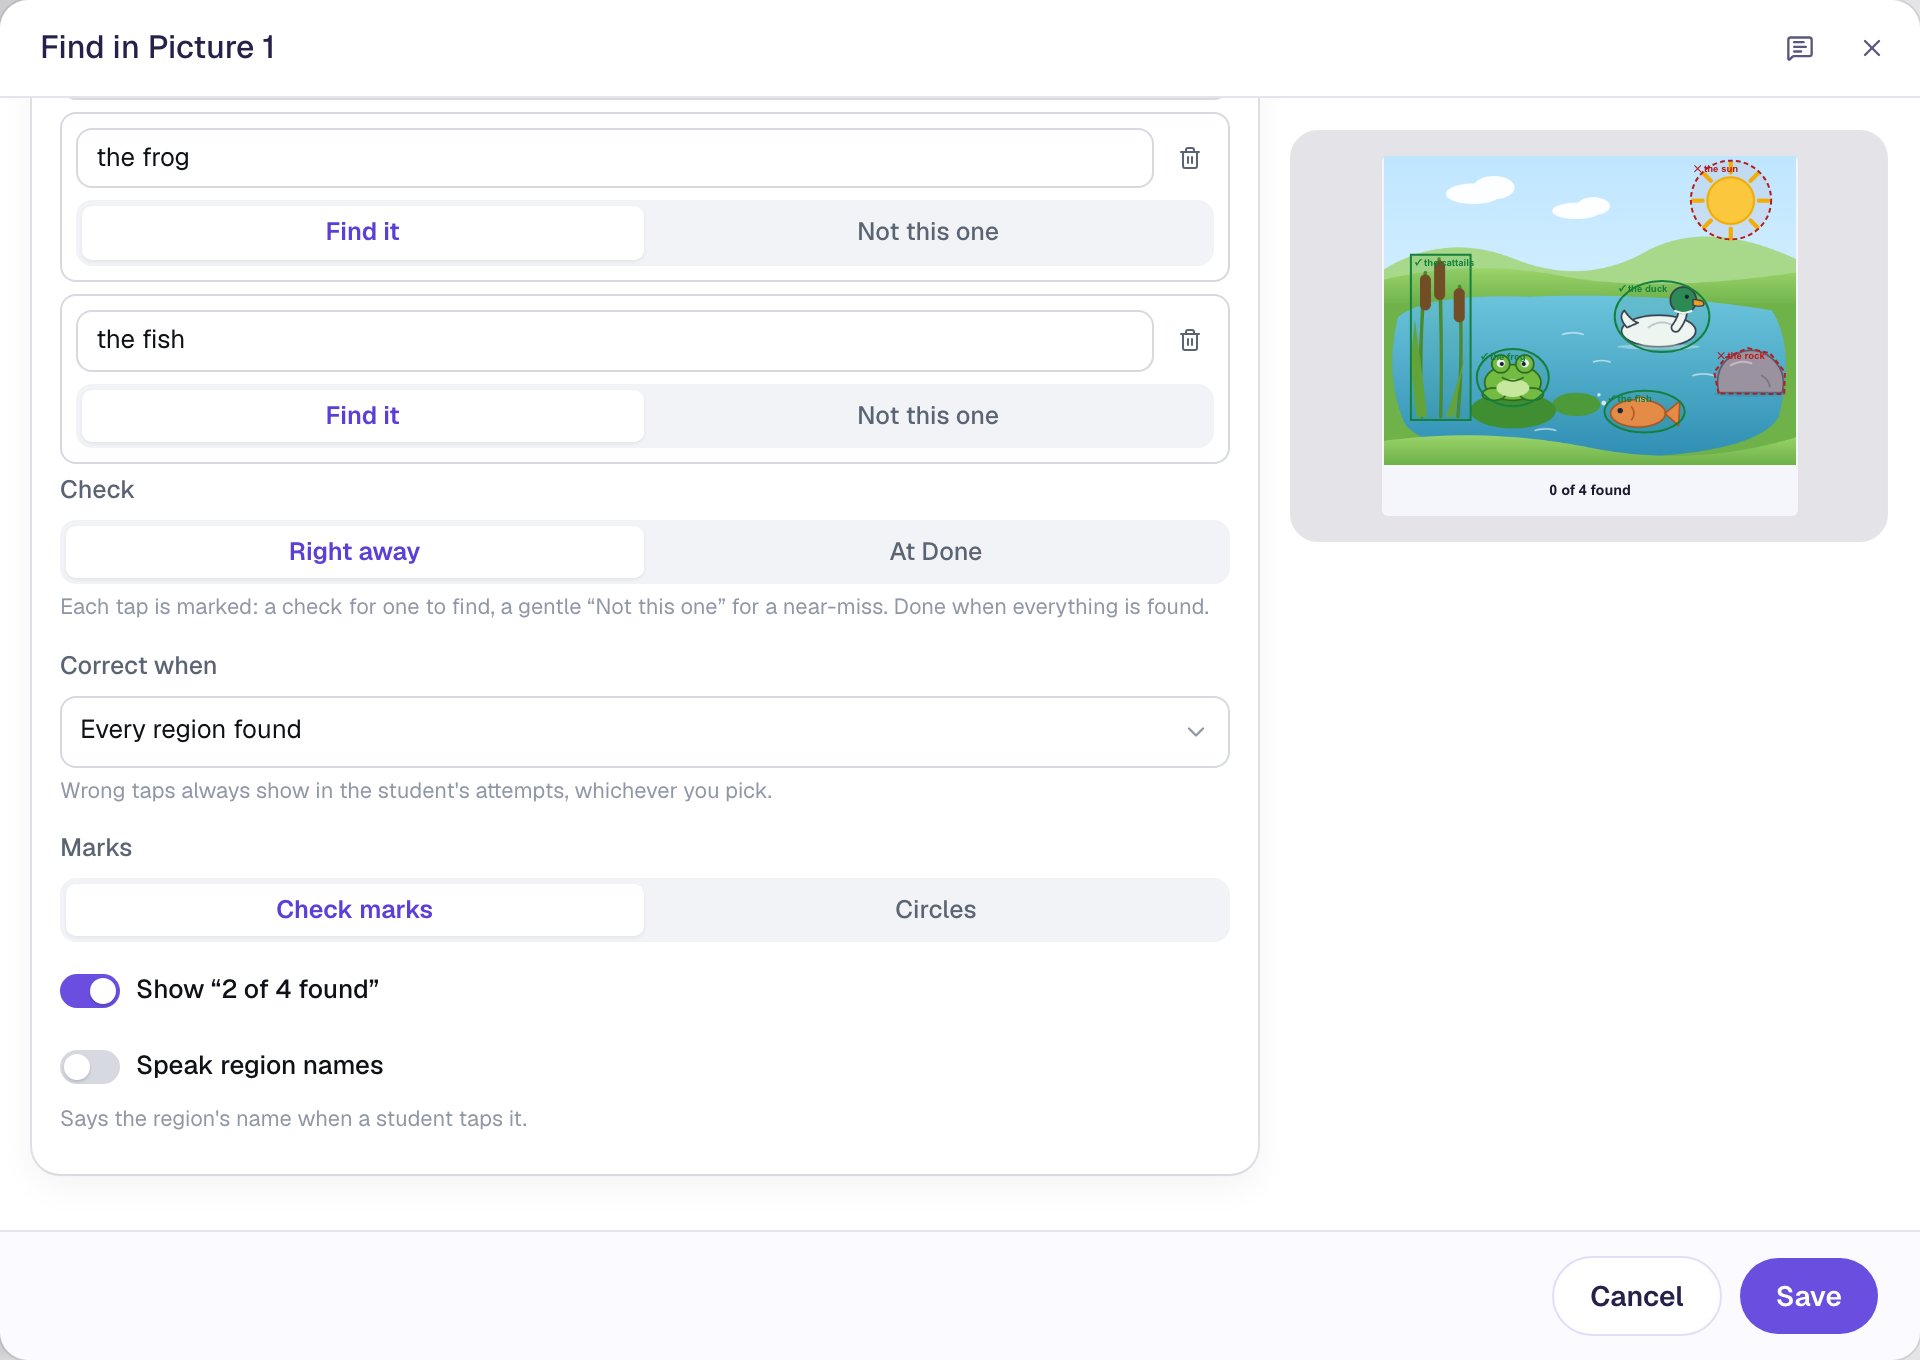
The defaults are right for this question:
- Check is Right away: each tap is marked as it happens, and the question is done when every living thing is found.
- Correct when is Every region found, so a student who taps the sun first still gets the point once they find all four. The wrong tap still shows on their attempt page. Choose Every region found, no wrong taps for a stricter check.
- Show "2 of 4 found" is on, so students know how many are left.
Turn on Speak region names if your students can't read yet: the device says each thing's name as it's tapped. Click Save.
Step 7: Give a hint on a wrong tap
The "Not this one" bubble tells a student the sun isn't right, but not why. Add a hint that reminds them what makes something alive.
With the Find in Picture selected, open Behaviors in the properties panel. Click Add Behavior and choose On Wrong Tap. The new behavior starts with a Display Message action: type Living things grow, eat and breathe. Look again! into its message box.
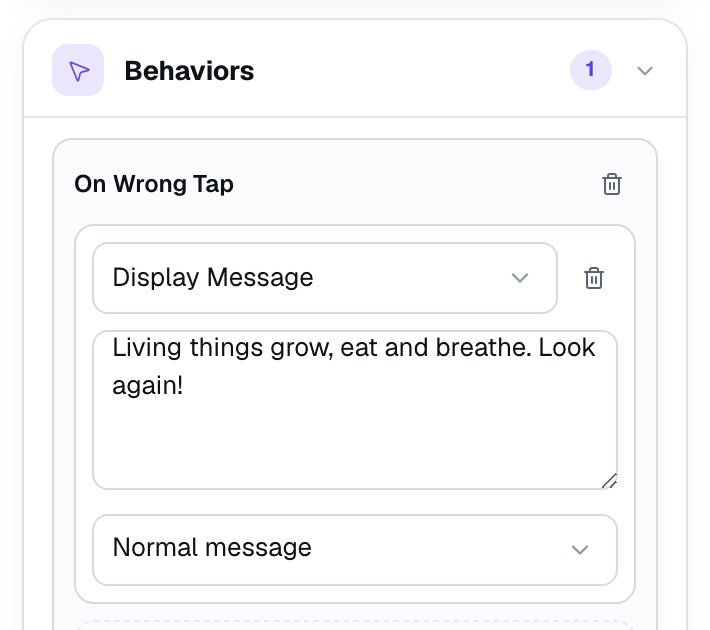
On Wrong Tap runs for any Not this one region, so write a hint that fits both the sun and the rock. Taps on the sky or the water don't trigger it.
Step 8: Leave time to see the last check, and add a Finish button
The scene moves on by itself as soon as the last living thing is found. By default it waits only 0.6 seconds, which is too quick to see the fourth check mark. Click an empty spot on the scene, open Progression, click Show more options, and set Advance delay to 2500 ms.
Every lesson also needs one button that ends it, as a way out for a student who gets stuck. Search the Widgets tab for Submit Button, change its Label to Finish and Submits to Lesson, set its Font Size to 20, give it a dark navy Background and white Text, and drag it under the instruction.
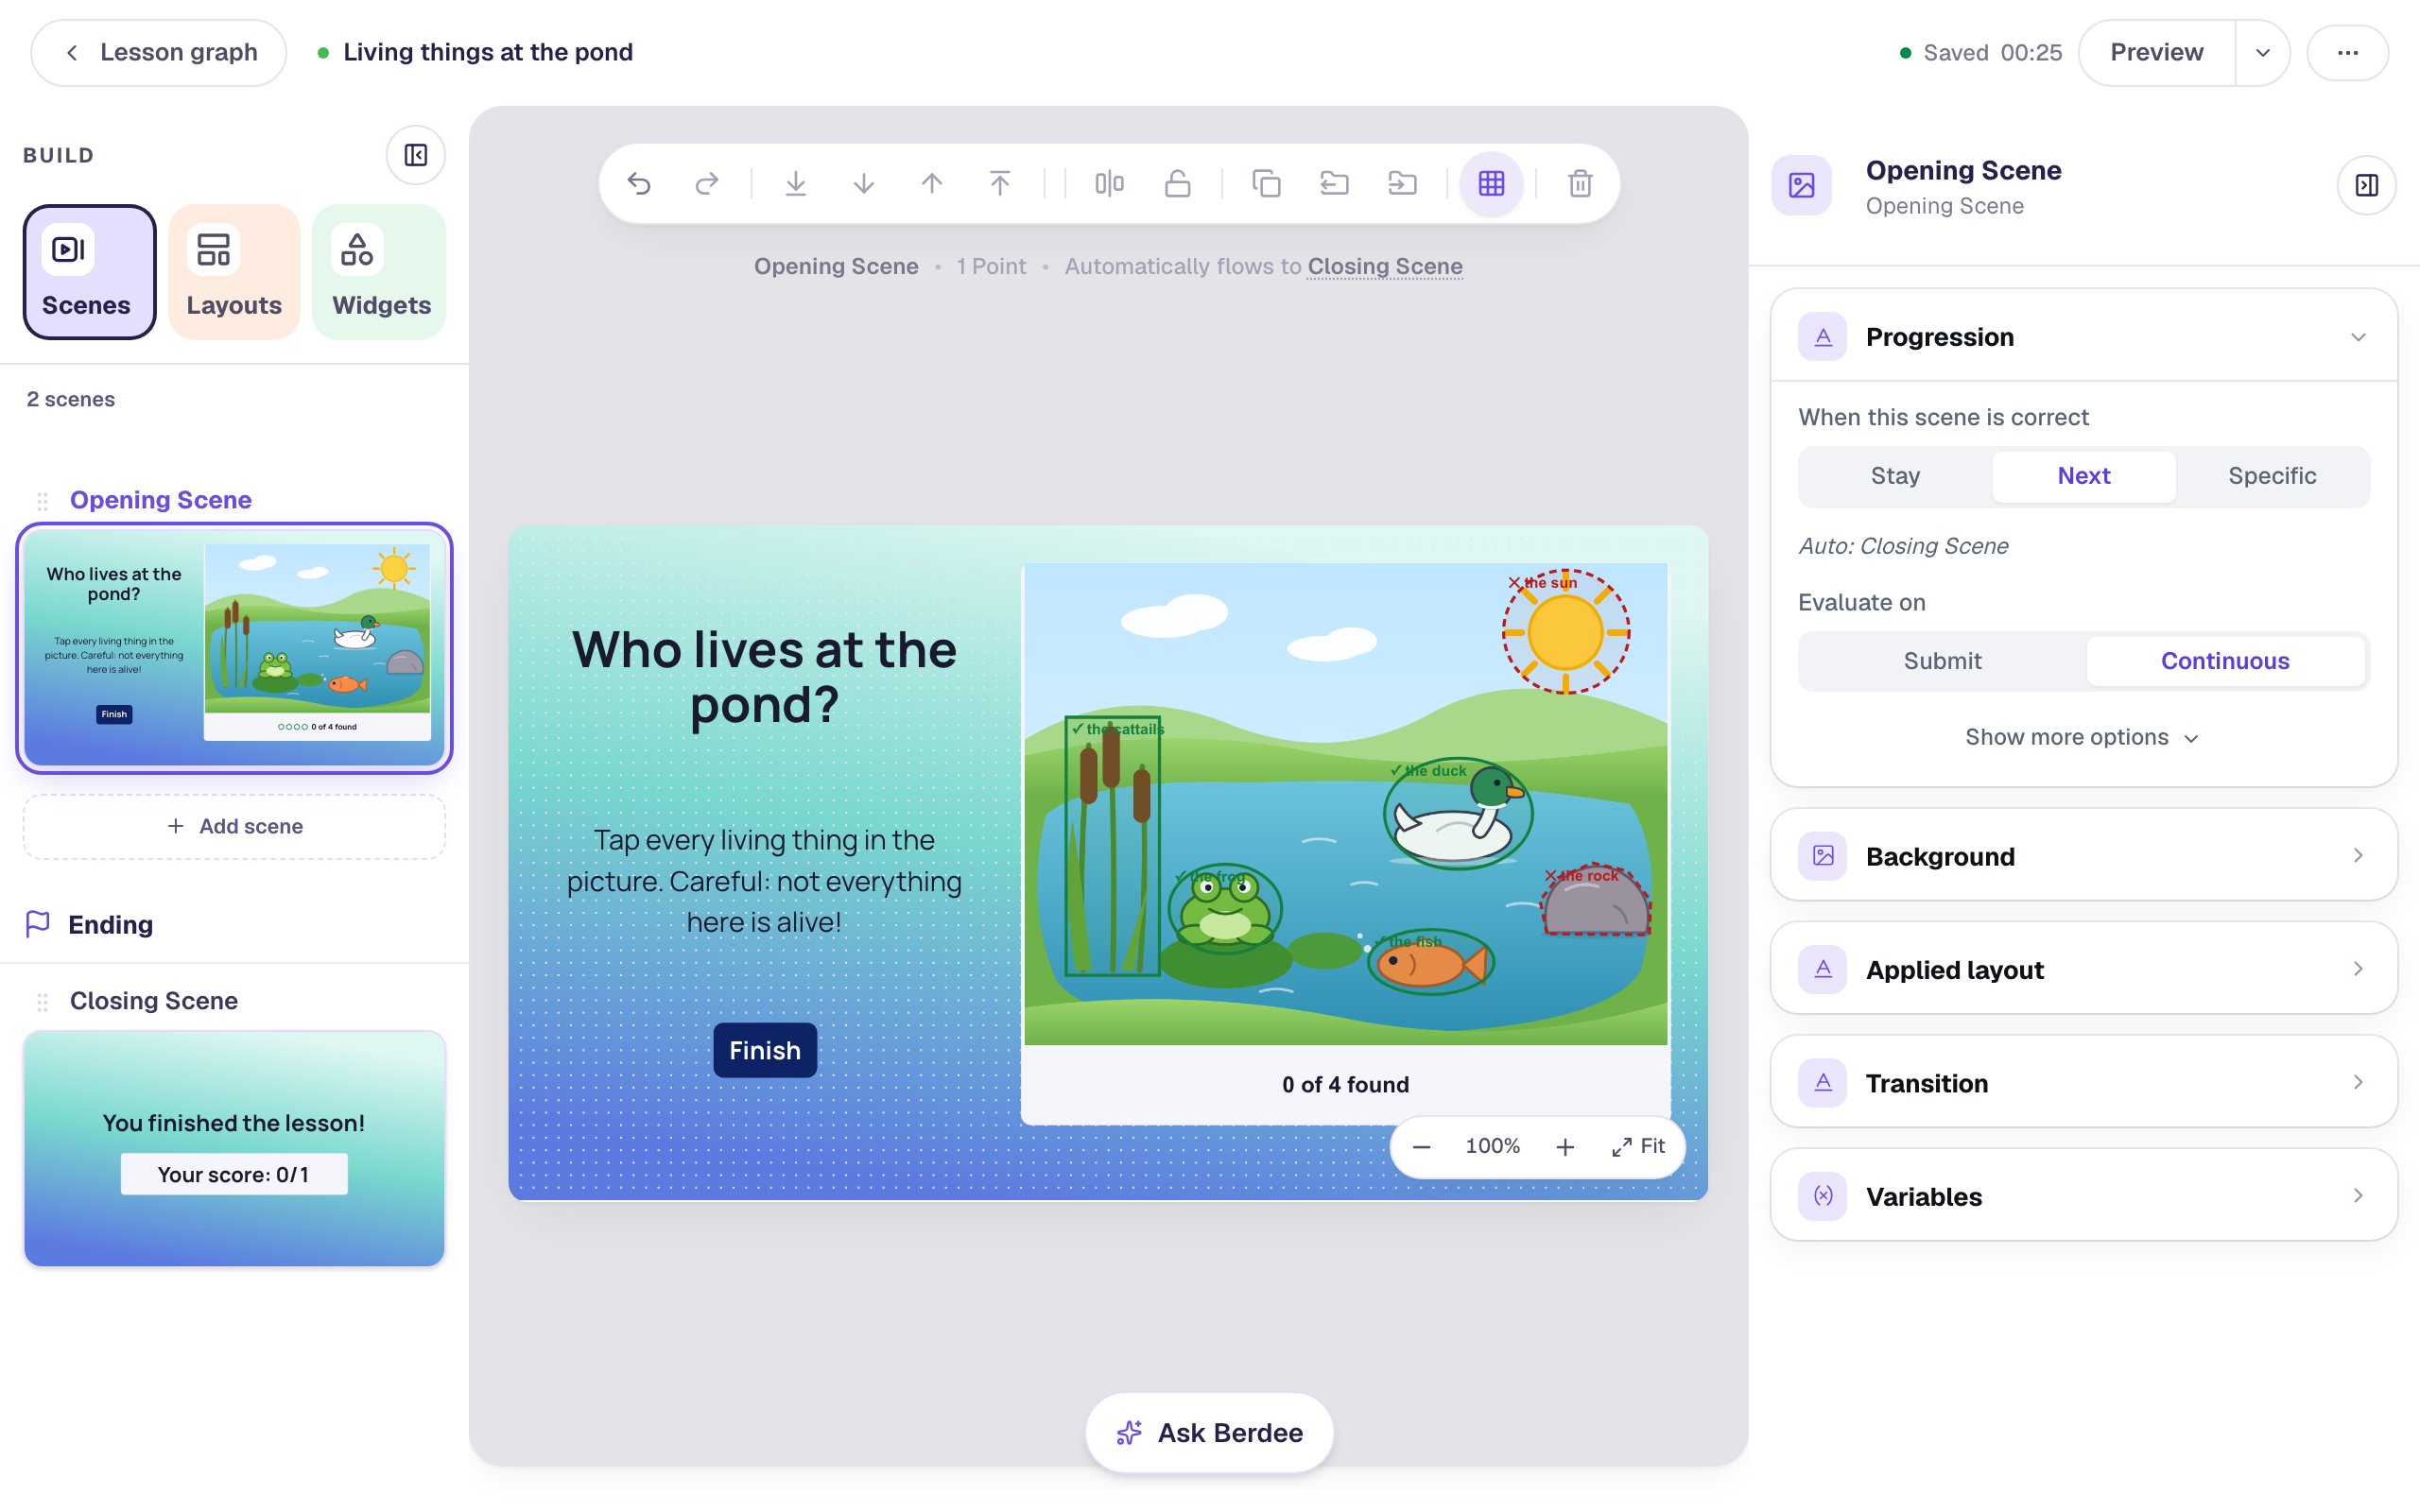
In the studio, the canvas draws your regions and their names over the picture so you can check them at a glance. Students see only the picture.
Step 9: Try it as a student
Click Preview. Tap the frog, then tap the sun, as a child who thinks the sun is alive might:
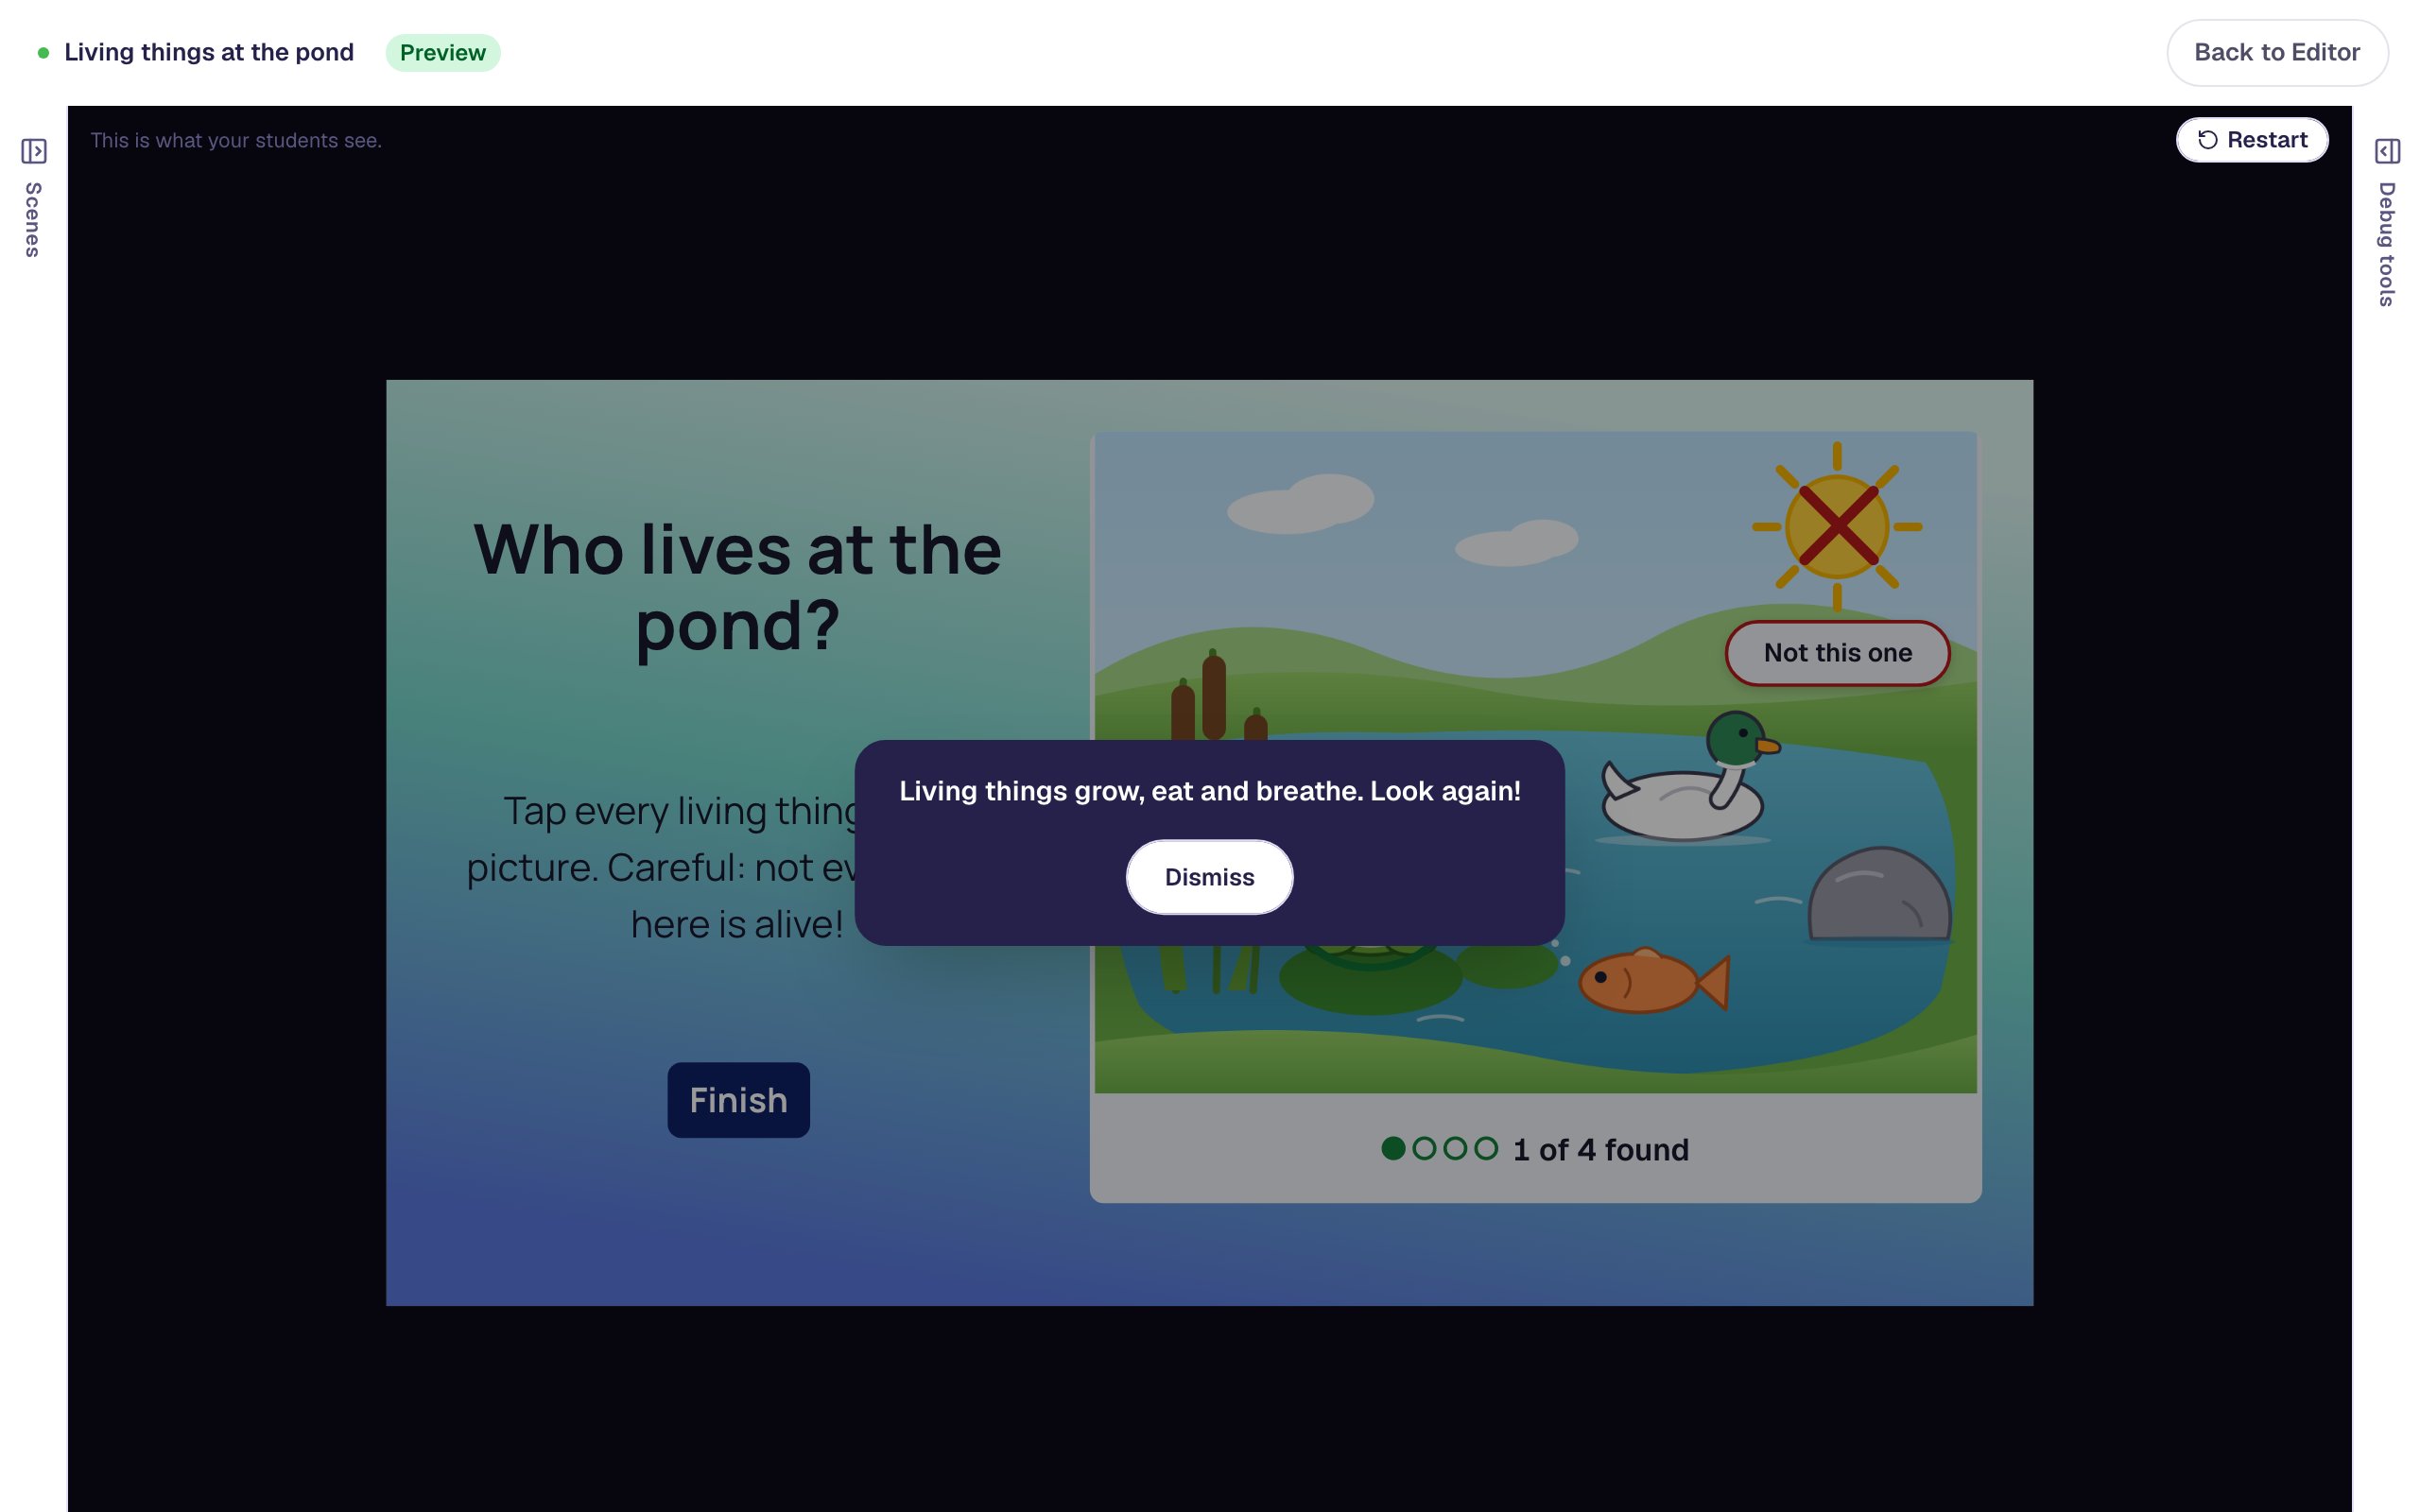
The sun doesn't stay marked. After the bubble, it goes back to normal, and the counter still says 1 of 4 found. Click Dismiss and find the rest:
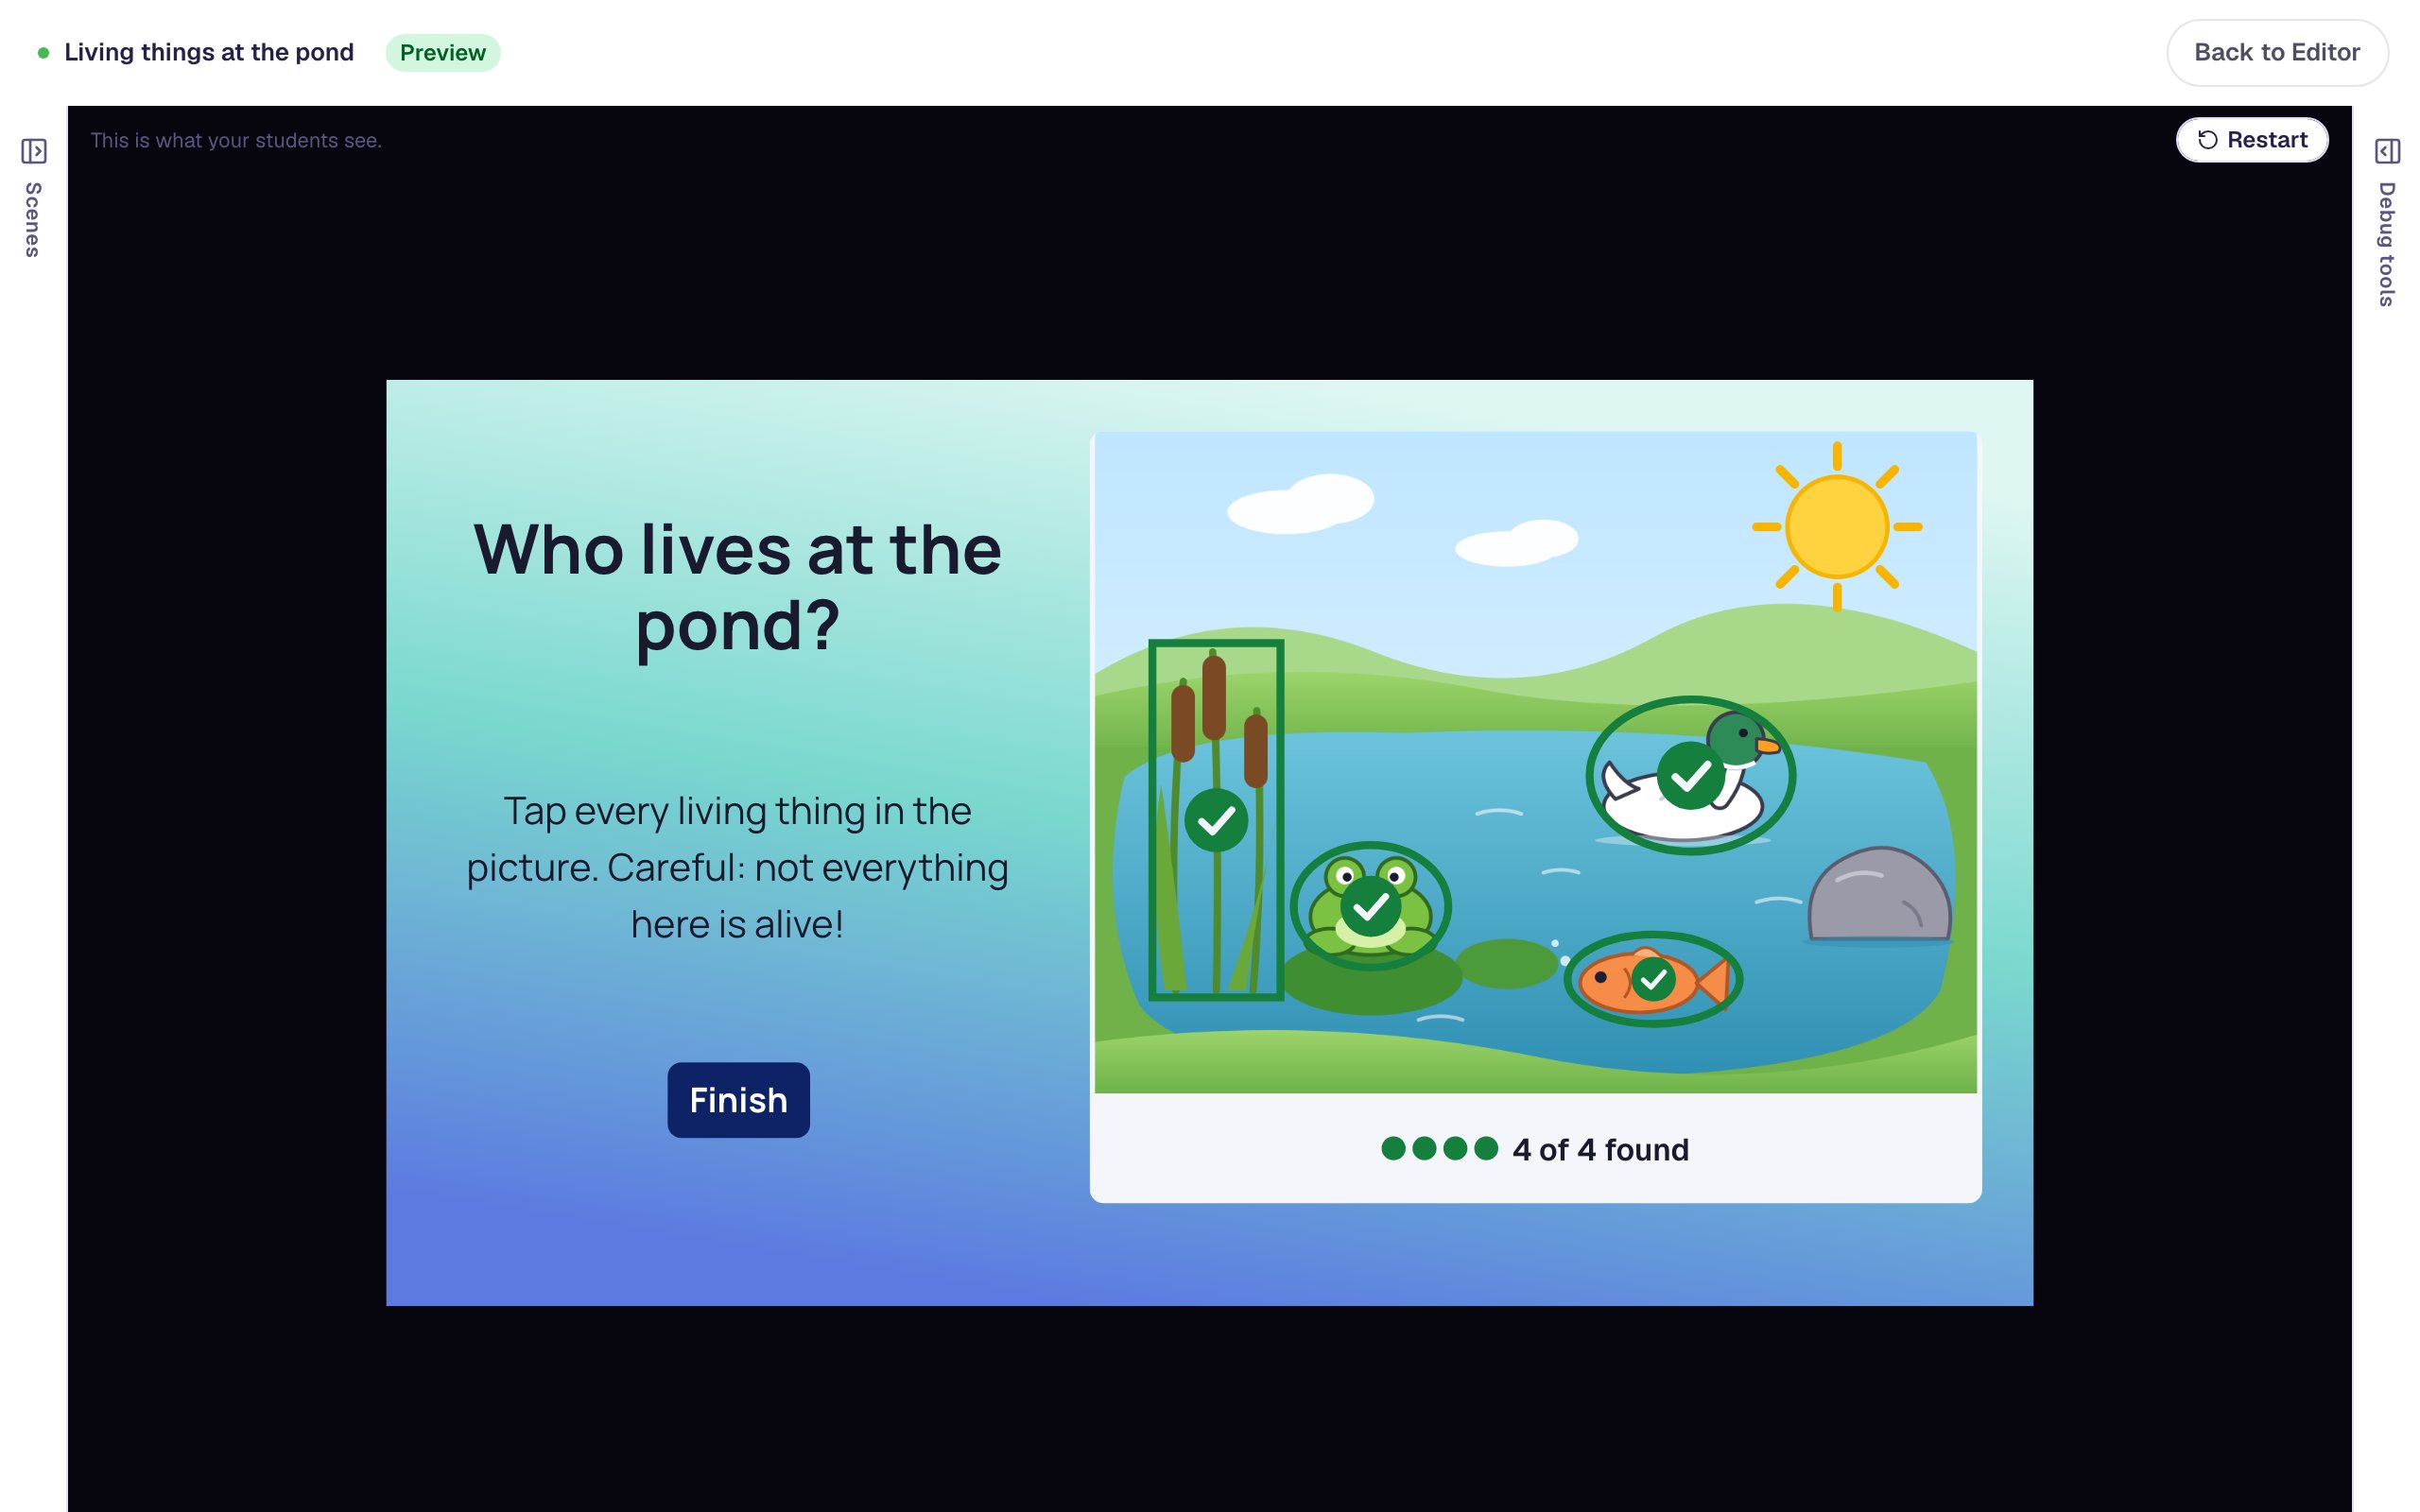
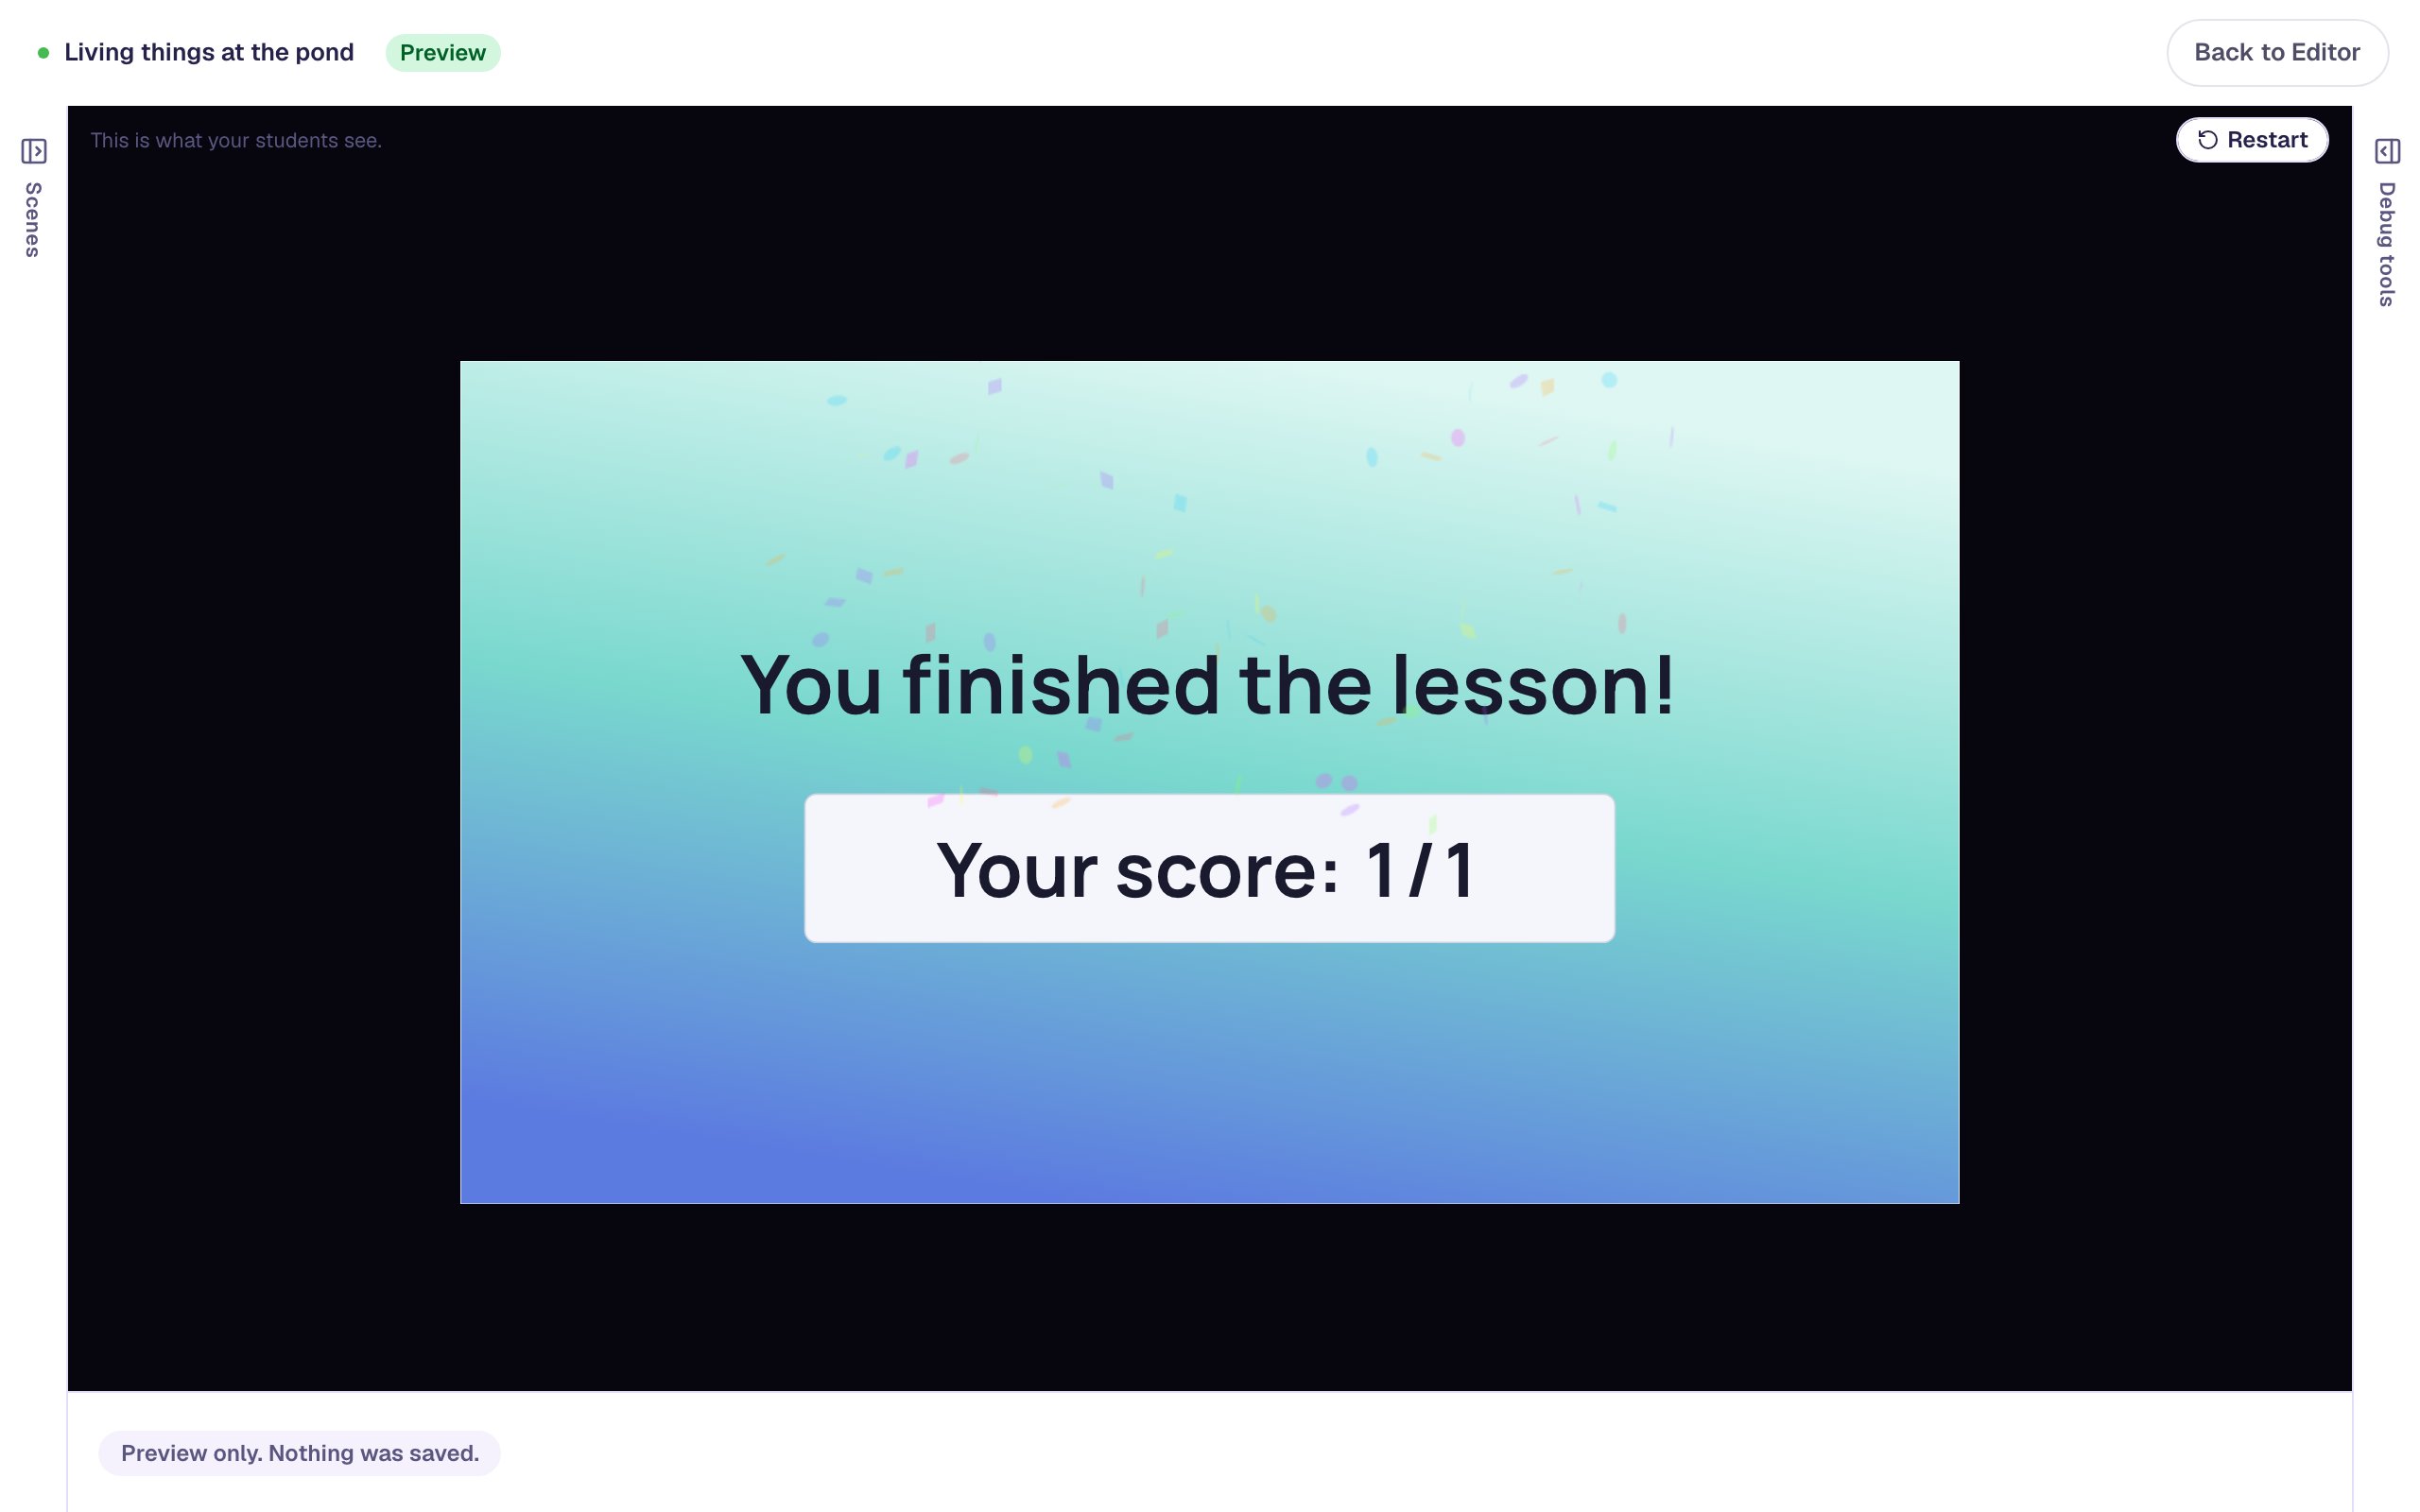
The student got the point even though they tapped the sun first, because Correct when is Every region found. On the student's attempt page, the question gets one line, like Found 4 of 4 · 1 wrong tap (the sun), so you know who still thinks the sun is alive.
What you built
You built a one-scene science question with:
- a Find in Picture of a pond, with alt text for screen readers,
- four Find it regions (a rectangle, and ovals) around the living things, each named,
- two Not this one near-misses, a traced rock and the sun,
- checks Right away, with a "2 of 4 found" counter,
- an On Wrong Tap hint, a longer Advance delay, and a Finish button.
To see what children believe without hinting along the way, set Check to At Done: taps circle things with no feedback, like circling on a worksheet, and a Done button checks the whole set. If you want students to explore a picture rather than answer a question, with no wrong taps at all, try Make a picture students can tap to explore, which uses the Hotspot instead.
Make this lesson yours
Add the lesson you just watched being built to your account, then change it for your class: your questions, your pictures, your colors.
Free to sign up, and you'll come straight back here. I have an account