Find out why a button won't work in Preview
Build a one-question lesson with a small mistake in it, then use Preview's Debug tools to find the mistake. Read the Event Log, the Conditions view and the Scoring view, fix the answer, and test it again.
- Level
- Beginner
- Time
- About 10 min
- Steps
- 8
- Updated
- Oct 14, 2026
A "Count the arms" octopus question whose Check button moves a right answer on to the ending and shows a "Not quite" message for a wrong one, after you find and fix the wrong correct answer with Debug tools.
Get the finished lesson
Skip straight to the result, or keep it open beside the steps. Add this tutorial's lesson to your account and explore how it works in the studio.
Free to sign up, and you'll come straight back here. I have an account
Sooner or later, a button in one of your lessons won't do what you expect. You press Check with the right answer, and the lesson says "Not quite." You could click through every setting looking for the problem. It's faster to ask the lesson what happened.
Preview has a Debug tools panel that does exactly that. Its Event Log lists everything the lesson just did, one line at a time. Its Conditions view shows which conditions passed and which failed. Its Scoring view shows how each question was marked.
In this tutorial you'll build a short lesson with a mistake in it on purpose. The question asks how many arms an octopus has, but its correct answer is set to 10 (that's a squid). Then you'll use Debug tools to find the mistake, fix it, and check the fix.
If you haven't used the studio before, start with Build your first quiz question. This tutorial moves quickly through the parts it already covers.
Step 1: Build the question, mistake included
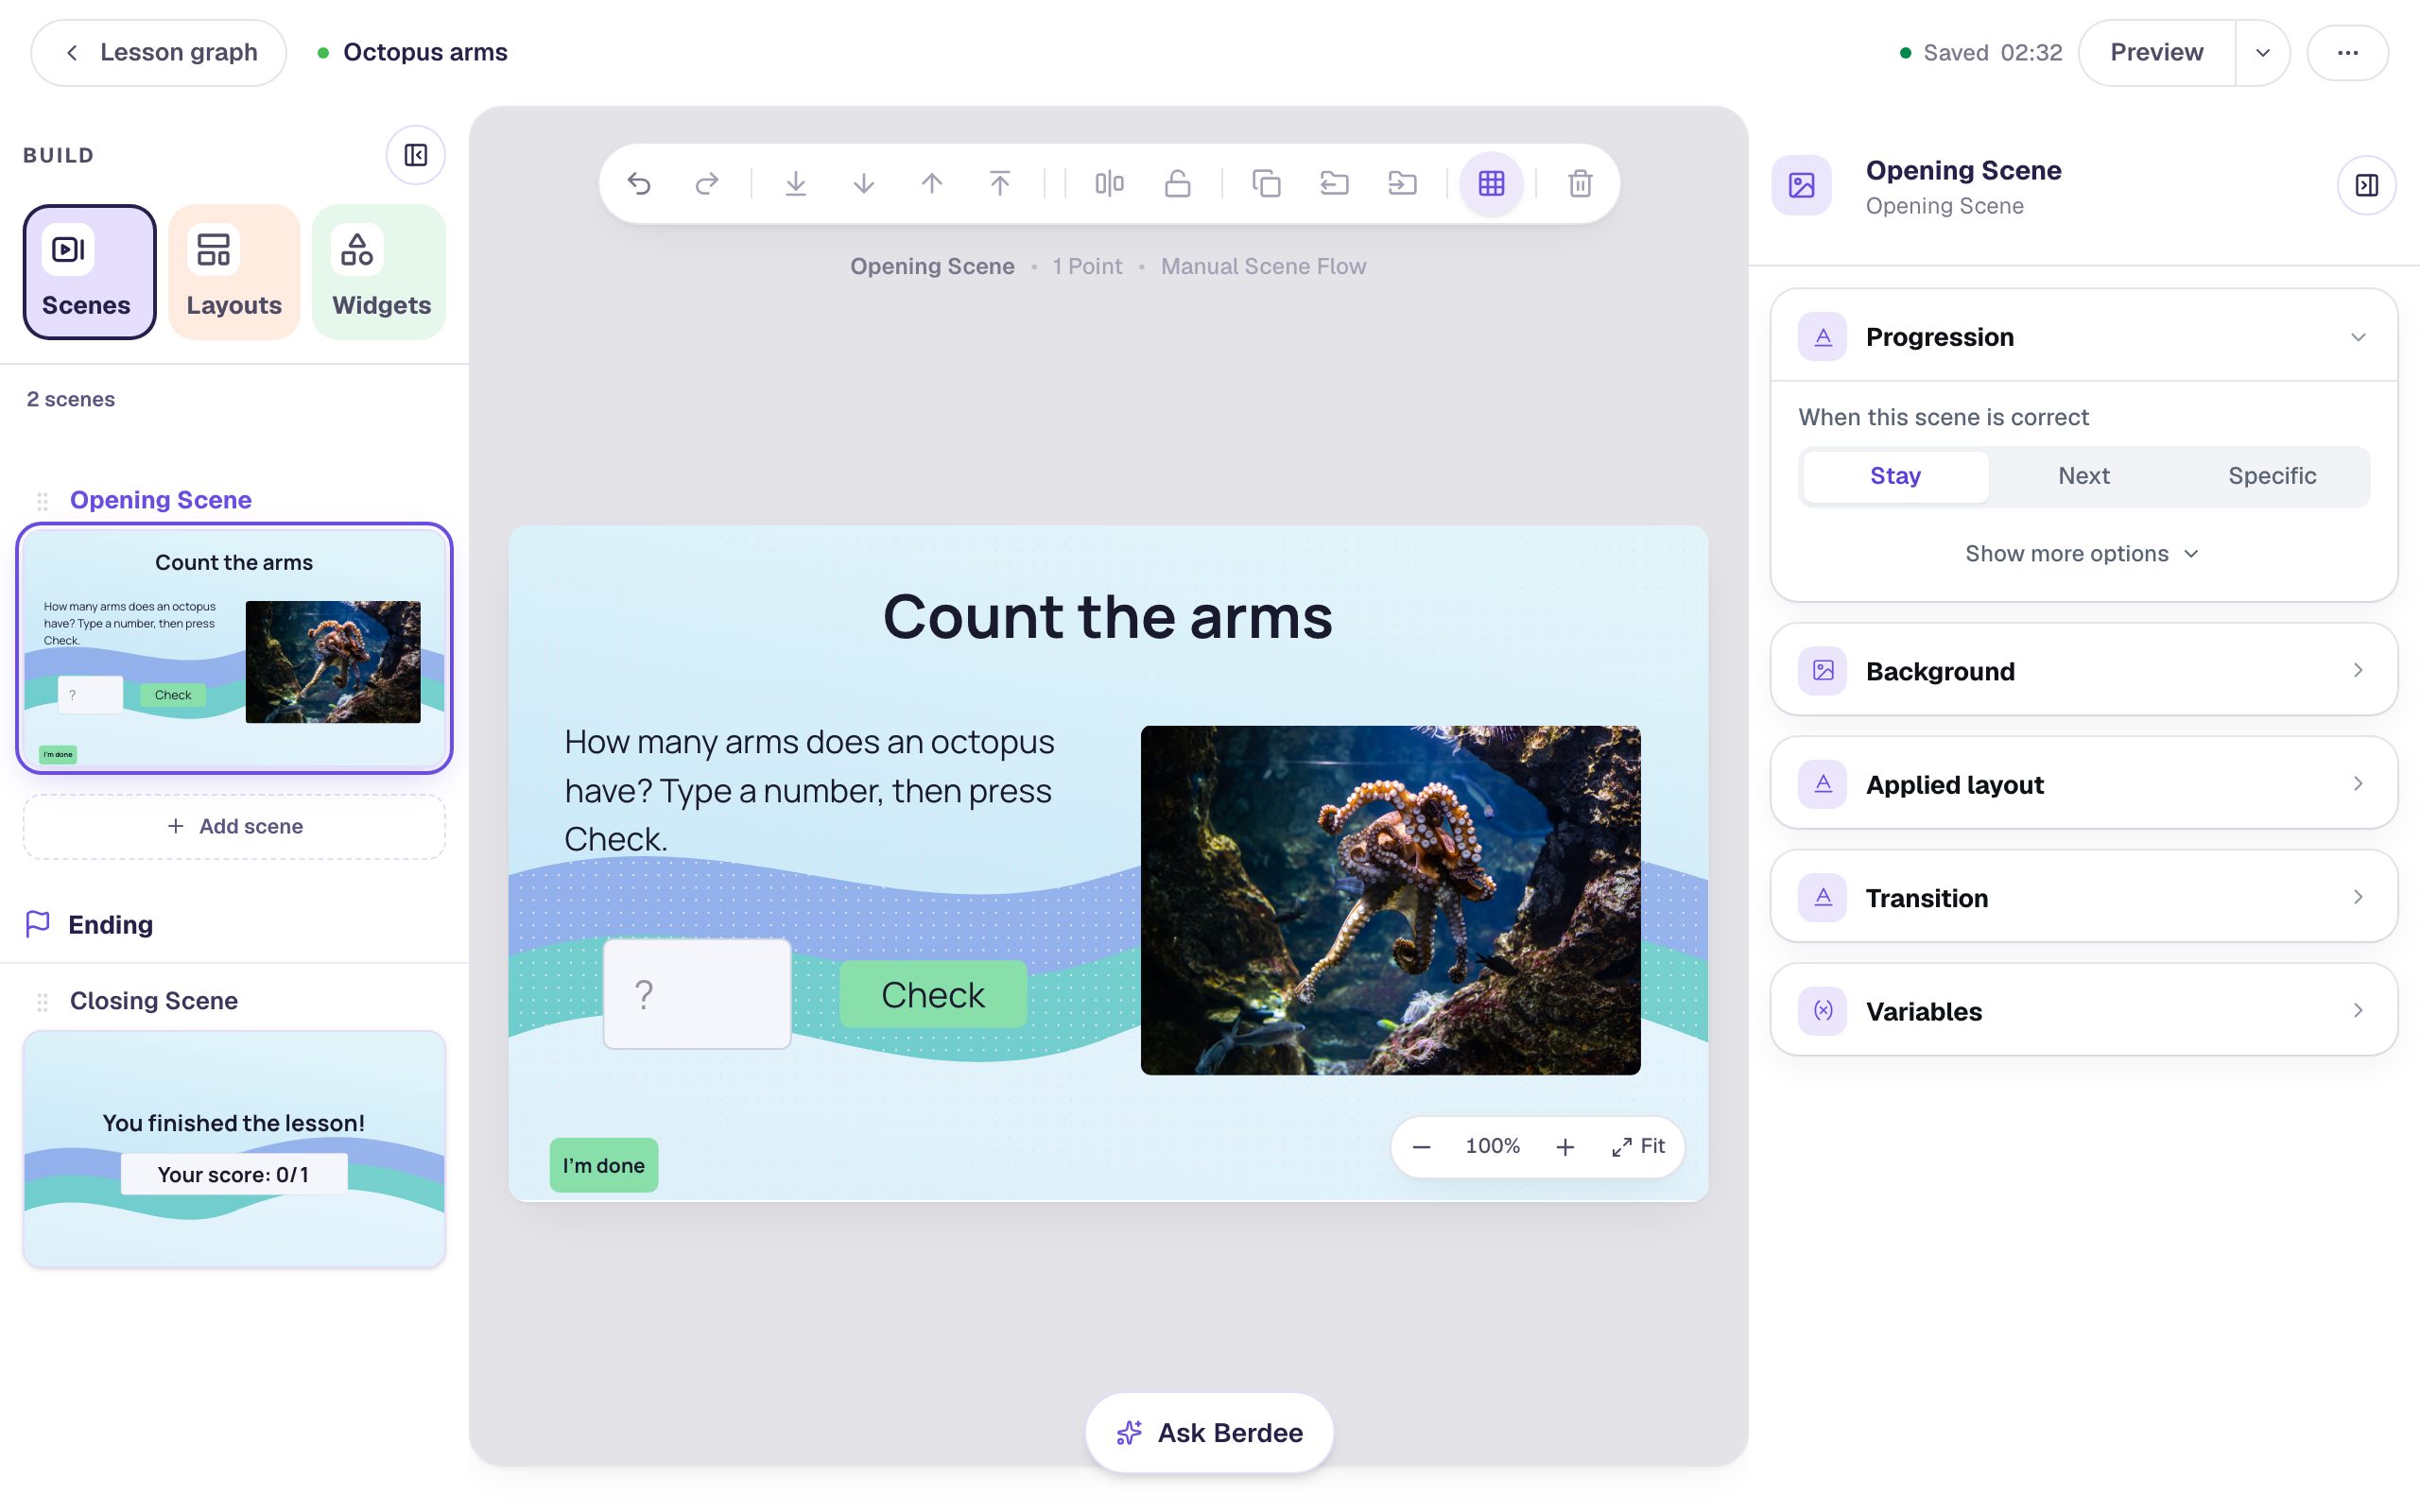
Start a blank lesson (New lesson, then Start from scratch) and name it Octopus arms by clicking Untitled lesson at the top.
Give both scenes a background: with nothing selected, open Background, click Choose a style, pick Nature, then Layered waves, and click Apply background. Do the same on the Closing Scene.
Back on the Opening Scene, under Progression, set When this scene is correct to Stay. The Check button will decide when students move on, not the scene.
Then add:
- A Heading that says
Count the arms. - A Body under it:
How many arms does an octopus have? Type a number, then press Check. - An Image on the right. Click Choose image, search the stock photos for
octopus underwater, and import one. In Accessibility, describe it in Alt Text, for exampleAn orange octopus swimming between rocks, its arms curling all around it. - A Number Input under the text. Click ⚙ Configure, turn Show Step Buttons off, set Placeholder to
?, and set Correct Value to10.
That last number is the mistake. Type it anyway: it's the kind of slip that happens when you copy a question from a squid lesson, and this tutorial is about finding it.
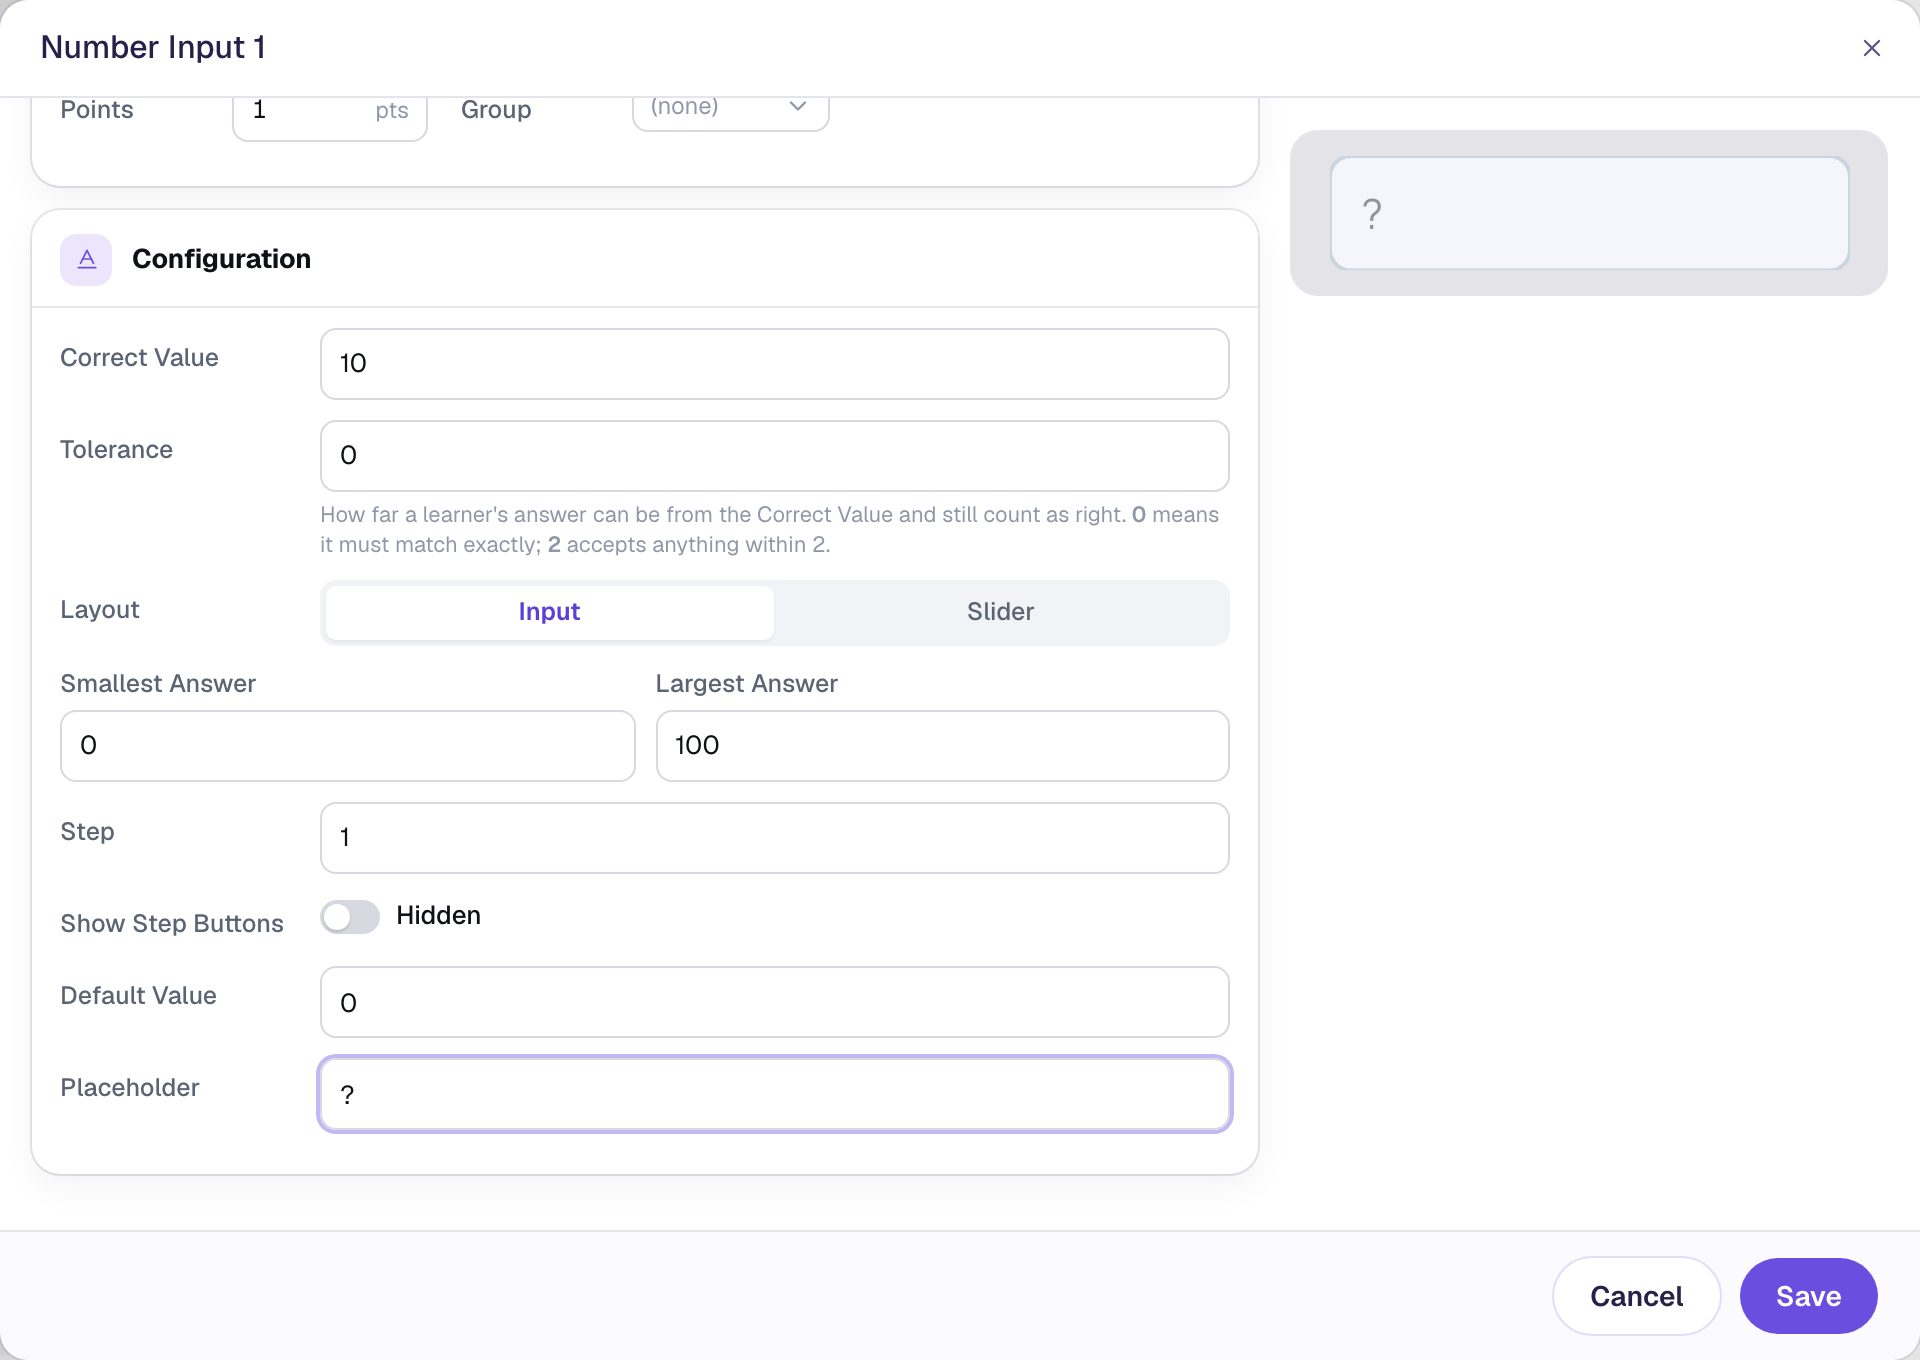
Click Save, and rename the widget Octopus arms by clicking its name at the top of the properties panel. A clear name makes the Debug tools much easier to read.
Step 2: Give the Check button two behaviors
Add a Button, set its Label to Check in ⚙ Configure, and rename it Check button. Give it a green Background in Style & Layout and put it beside the answer box.
Now give it two behaviors, each with its own condition. (Let students check their work and start over builds the same pattern step by step.)
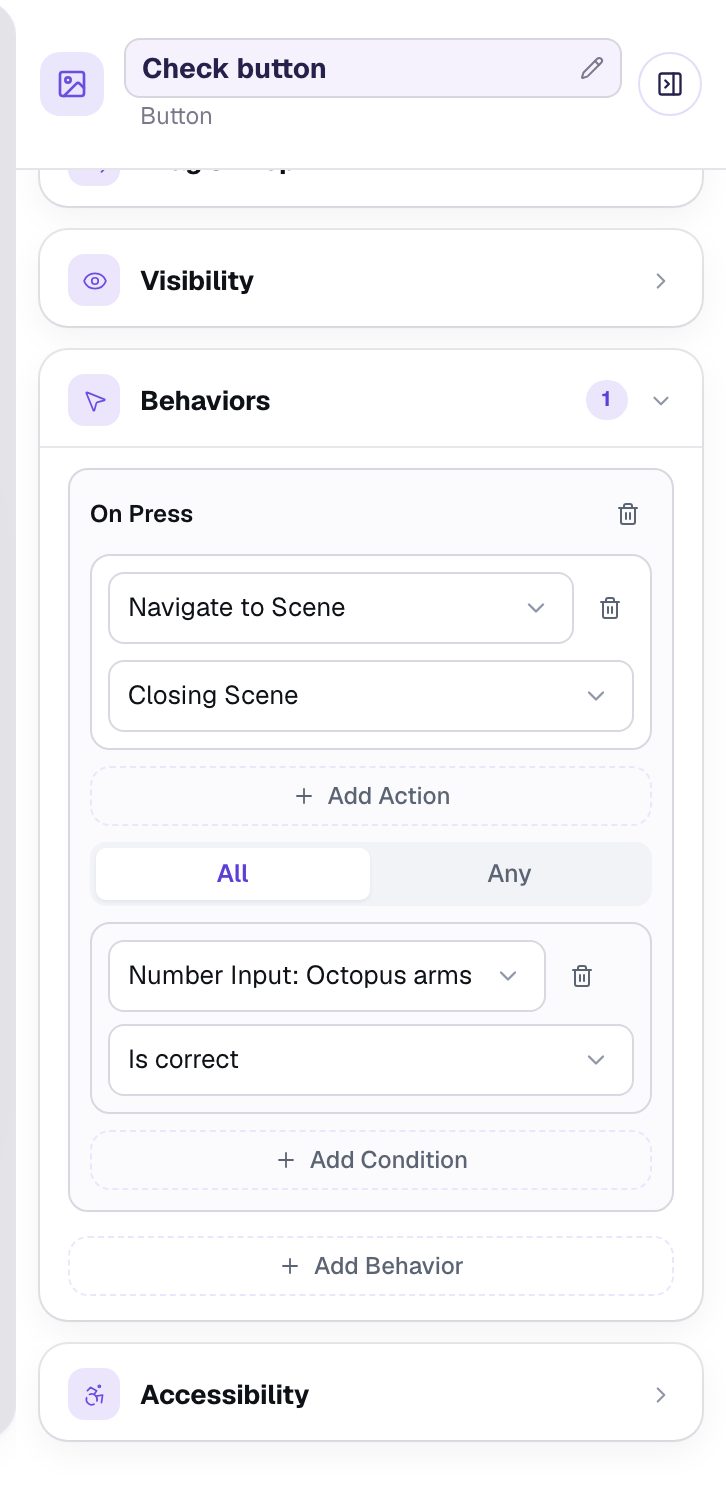
- Open Behaviors, click Add Behavior, and choose On Press. Change Display Message to Navigate to Scene and pick Closing Scene. Click Add Condition, pick Number Input: Octopus arms, and set it to Is correct.
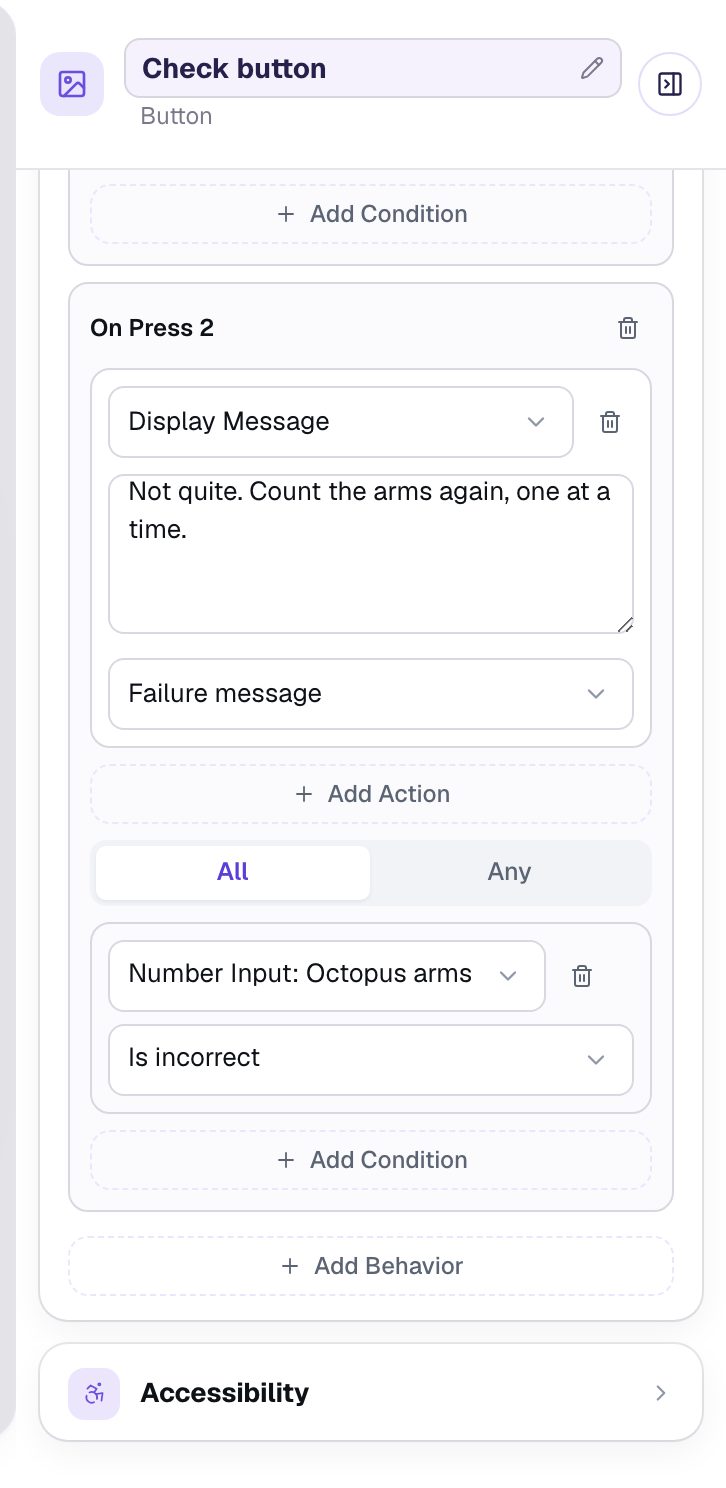
- Click Add Behavior and On Press again. Leave it on Display Message, type
Not quite. Count the arms again, one at a time., and choose Failure message. Add a condition on Number Input: Octopus arms set to Is incorrect.
Finally, add a small Submit Button in a corner, label it I'm done, and set Submits to Lesson. A lesson needs one to publish.
Step 3: Spot that something is wrong
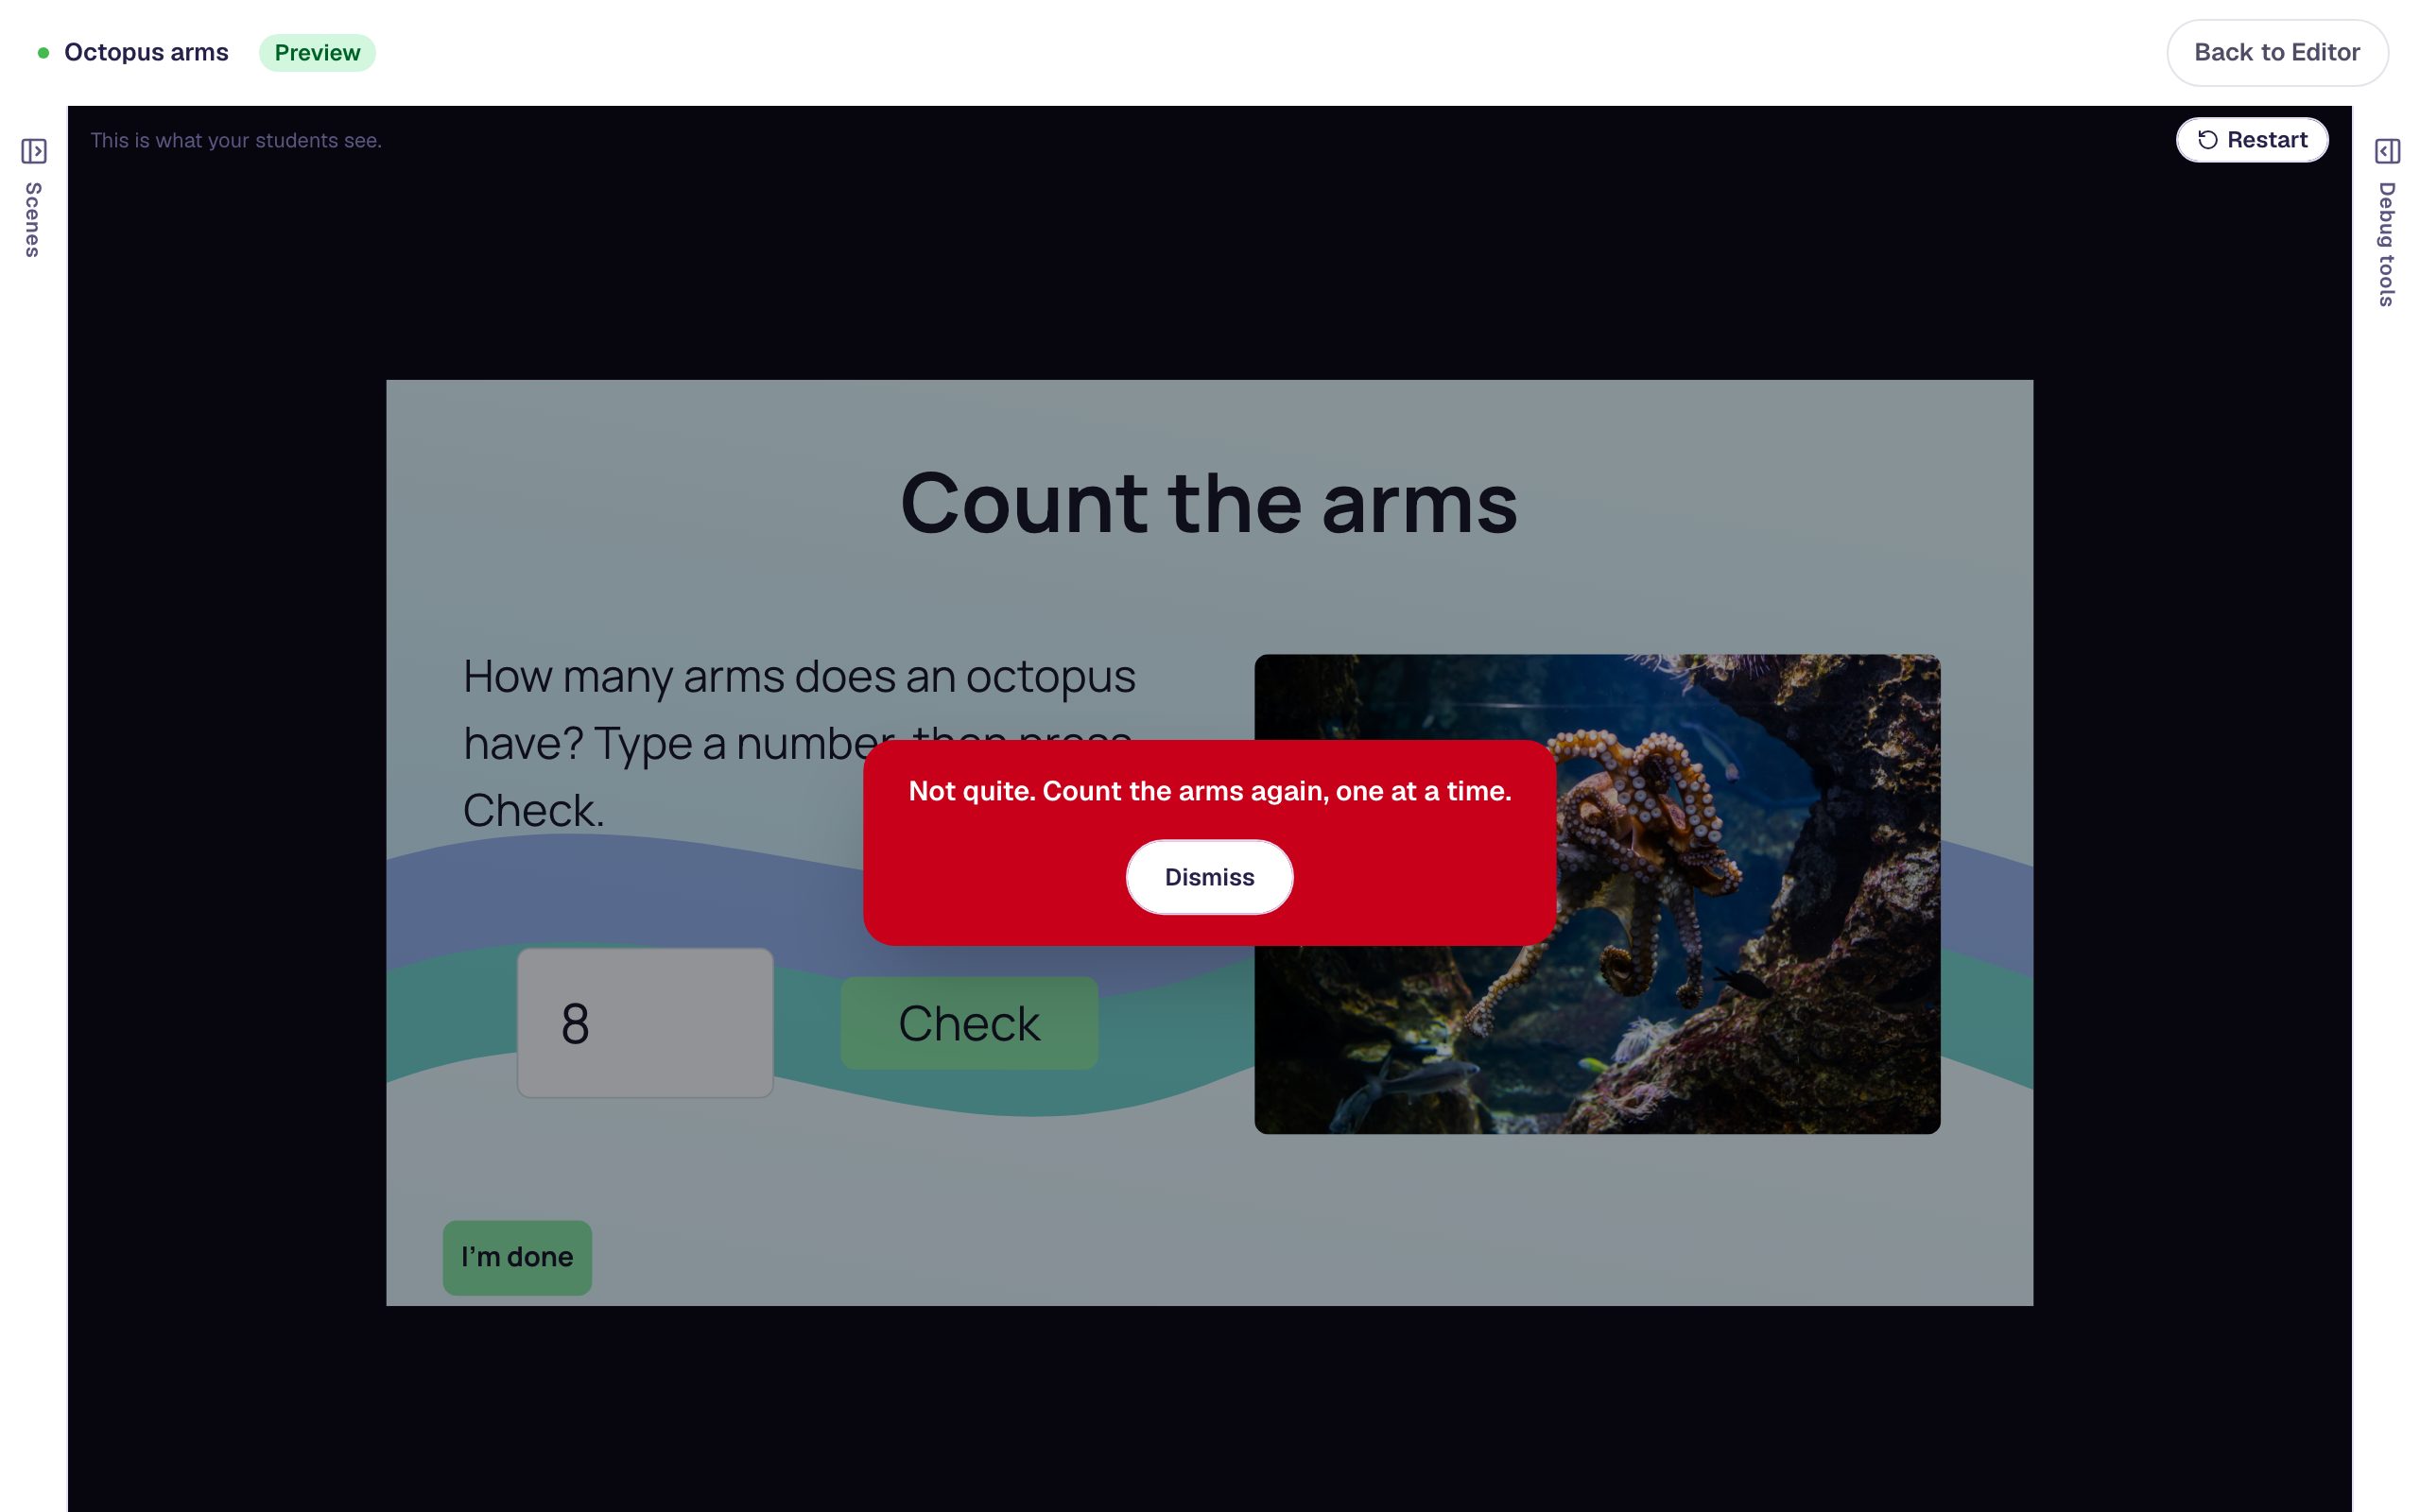
Click Preview. Type 8 in the box, the right answer, and press Check.
The lesson says "Not quite." Something is wrong, but the scene doesn't show what. It could be the button, either of its conditions, or the question.
Step 4: Read the Event Log
Click Dismiss, then click the Debug tools strip on the right edge of Preview. The panel slides open on the Event Log.
The newest line is at the top, so read it from the bottom up:
- Octopus arms: value set to 8 — the box got your answer.
- Octopus arms answered incorrectly — 0 of 1 point — the lesson marked
8as wrong. - Check button was pressed, but its condition was not met — one behavior, tagged Nothing happened, didn't run.
- Check button was pressed and its condition was met — the other behavior did run.
- Show the message "Not quite…" — and that's the message you saw.
Click a line to open it and see the details behind it, such as which widget and why.
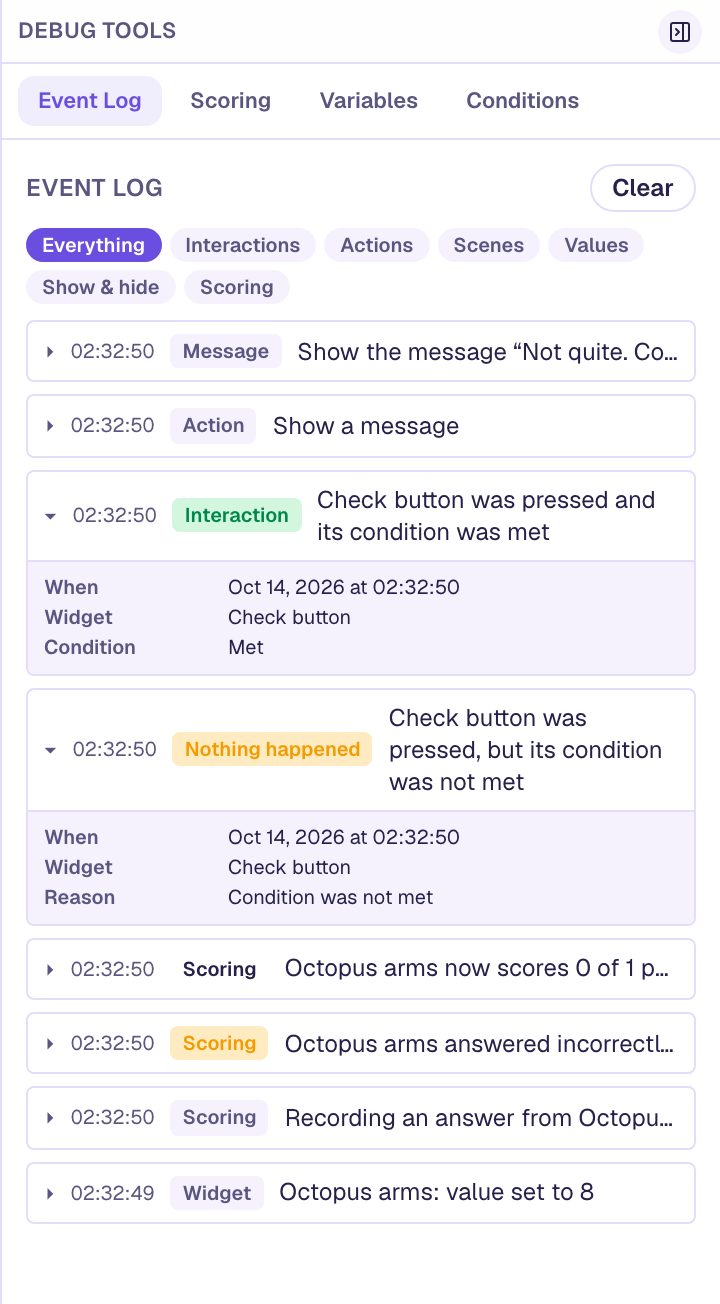
So the button worked, and both of its behaviors were checked. The surprise is further down: answered incorrectly. The problem is in how the question is marked.
Step 5: See which condition failed
Click the Conditions tab. It lists every behavior on this scene that has a condition, with a dot for each: green for pass, orange for fail.
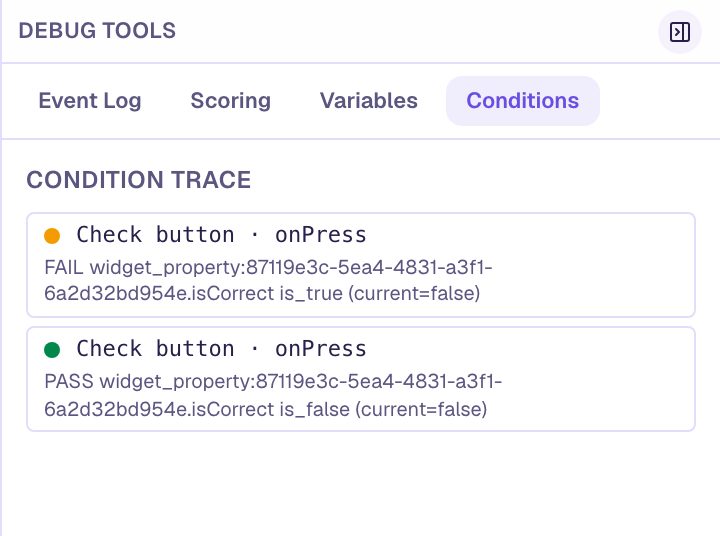
The rows are in the same order as the button's behaviors. The first, On Press (go to the ending if the answer is correct), FAILs. The second, On Press 2 (show the message if it's incorrect), PASSes. The line under each is written in the lesson's own shorthand, but its end tells you the key fact: current=false. Berdee thinks "is the answer correct?" is false.
Step 6: Check how the question was marked
Click the Scoring tab. It lists every graded question with whether it was answered, whether it was right, and its points.
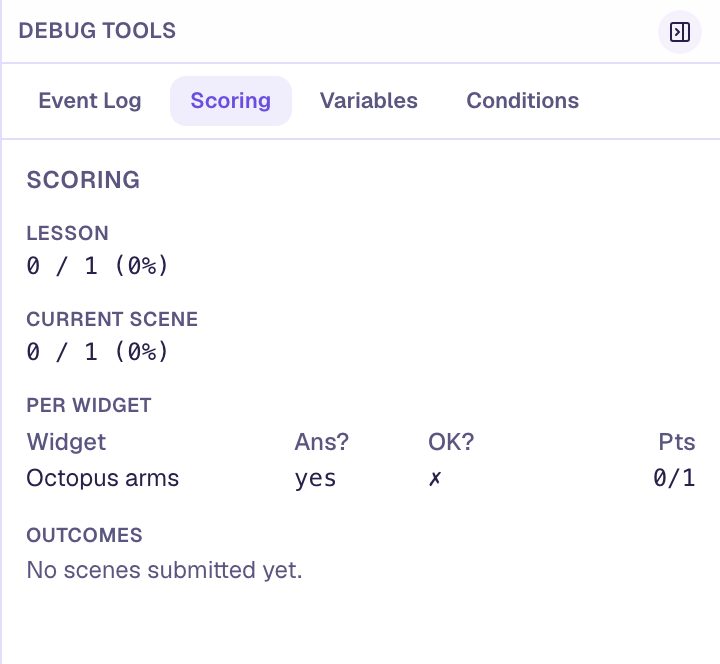
Octopus arms was answered, marked with a cross, and earned 0/1. A right answer marked wrong almost always means the question's correct answer is wrong. Time to look at it.
Step 7: Fix the correct answer
Click Back to Editor. Select the answer box, click ⚙ Configure, and change Correct Value from 10 to 8.
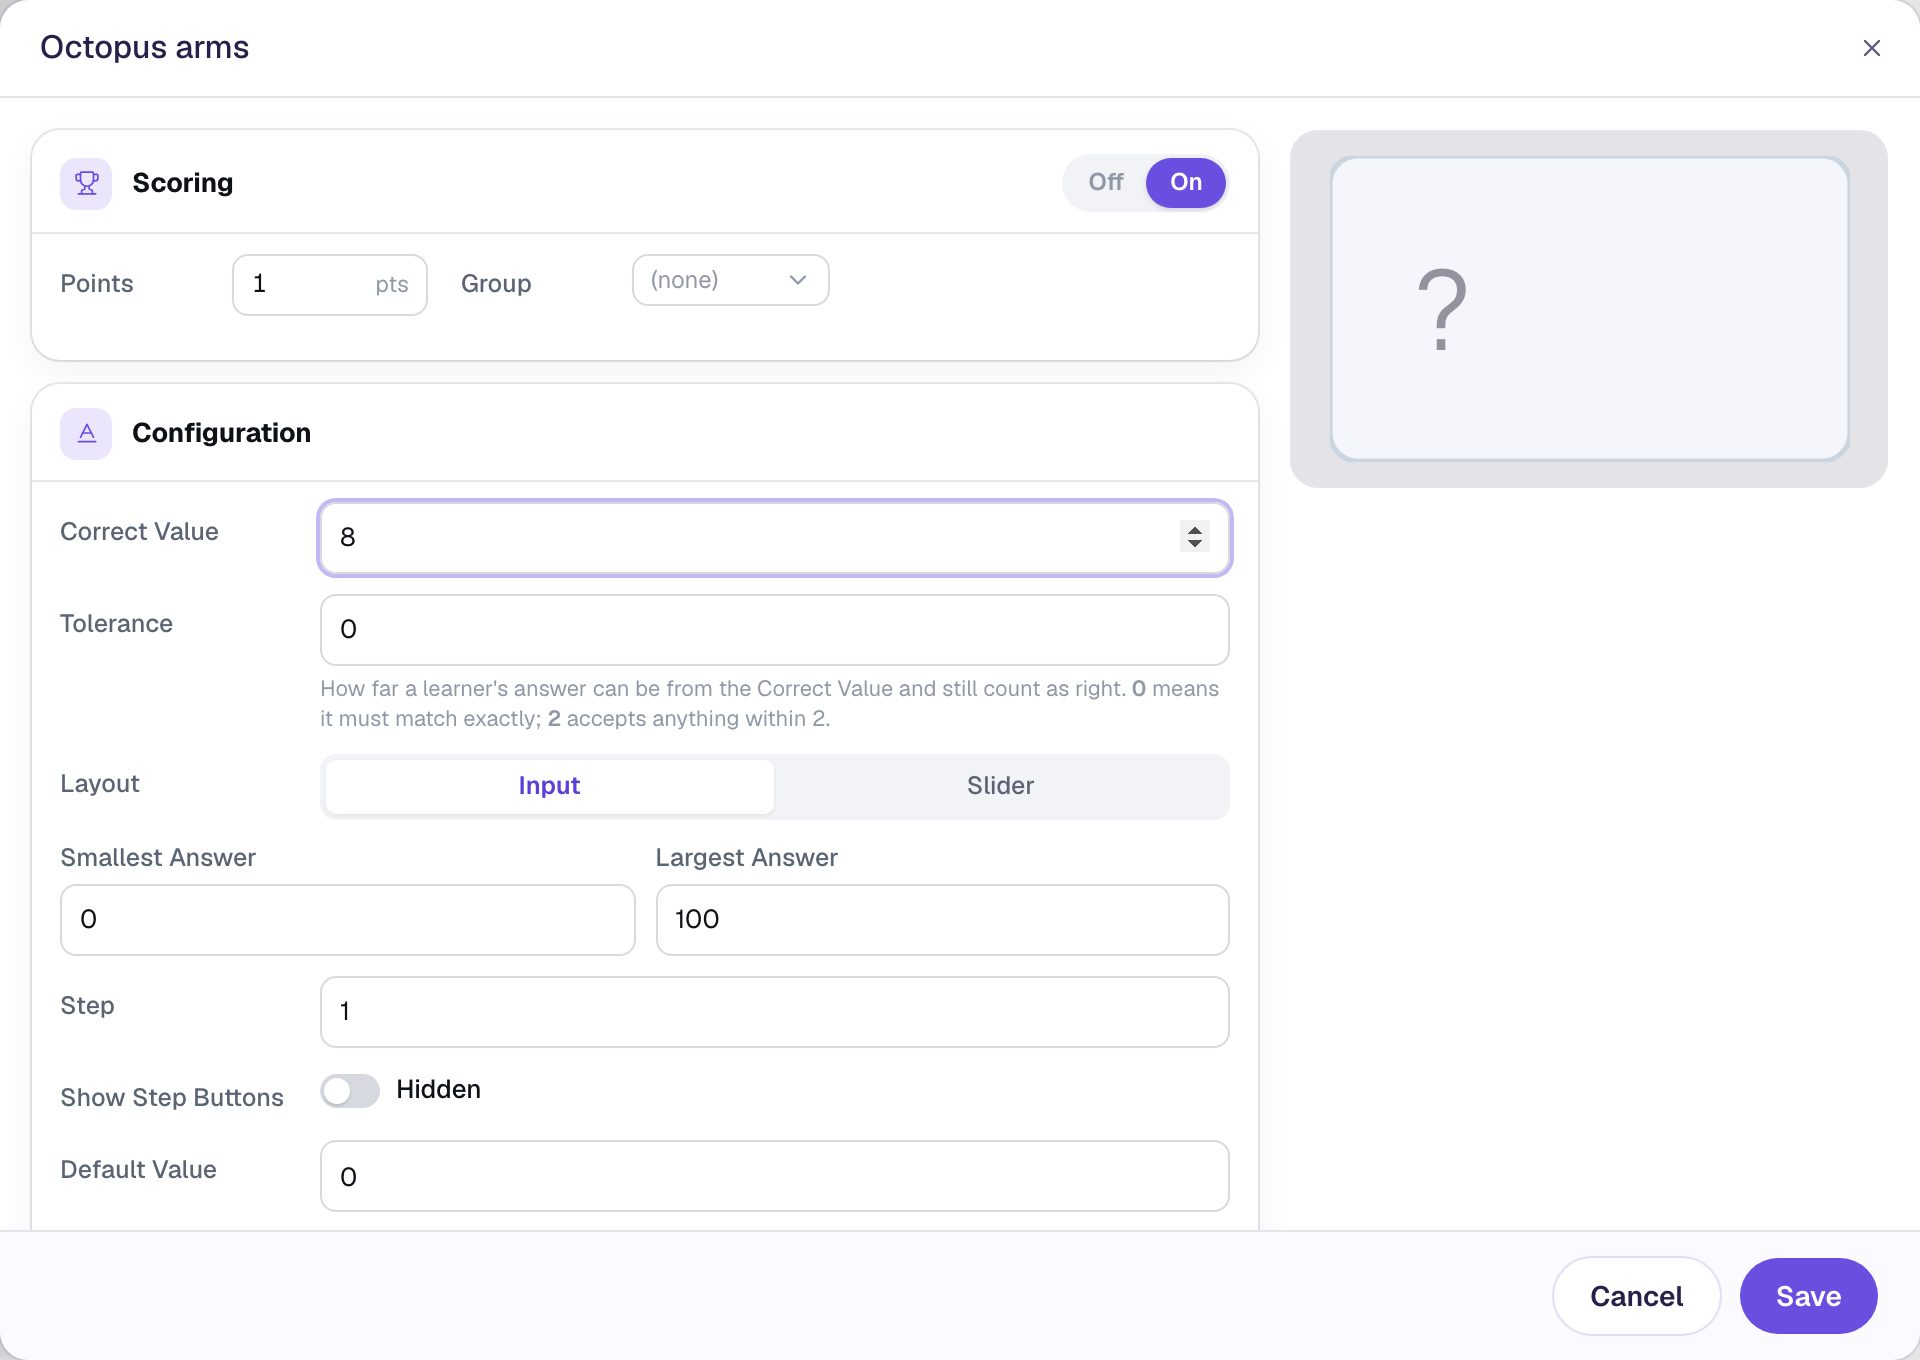
Click Save.
Step 8: Test both answers again
Click Preview again. Debug tools stays open: Berdee remembers that you opened it.
Test the wrong answer first: type 10 and press Check. You should still get "Not quite." Click Dismiss, then Restart at the top right of the lesson. Restart clears the answer, the score, and the Event Log, so the next lines you read belong to the next try. Now type 8 and press Check.
The lesson moves on to the ending with Your score: 1/1. The ending's celebration adds a lot of lines to the Event Log, so click the Scenes filter at the top of the log to see only scene changes. Moved from Opening Scene to Closing Scene is your proof that the fix worked.
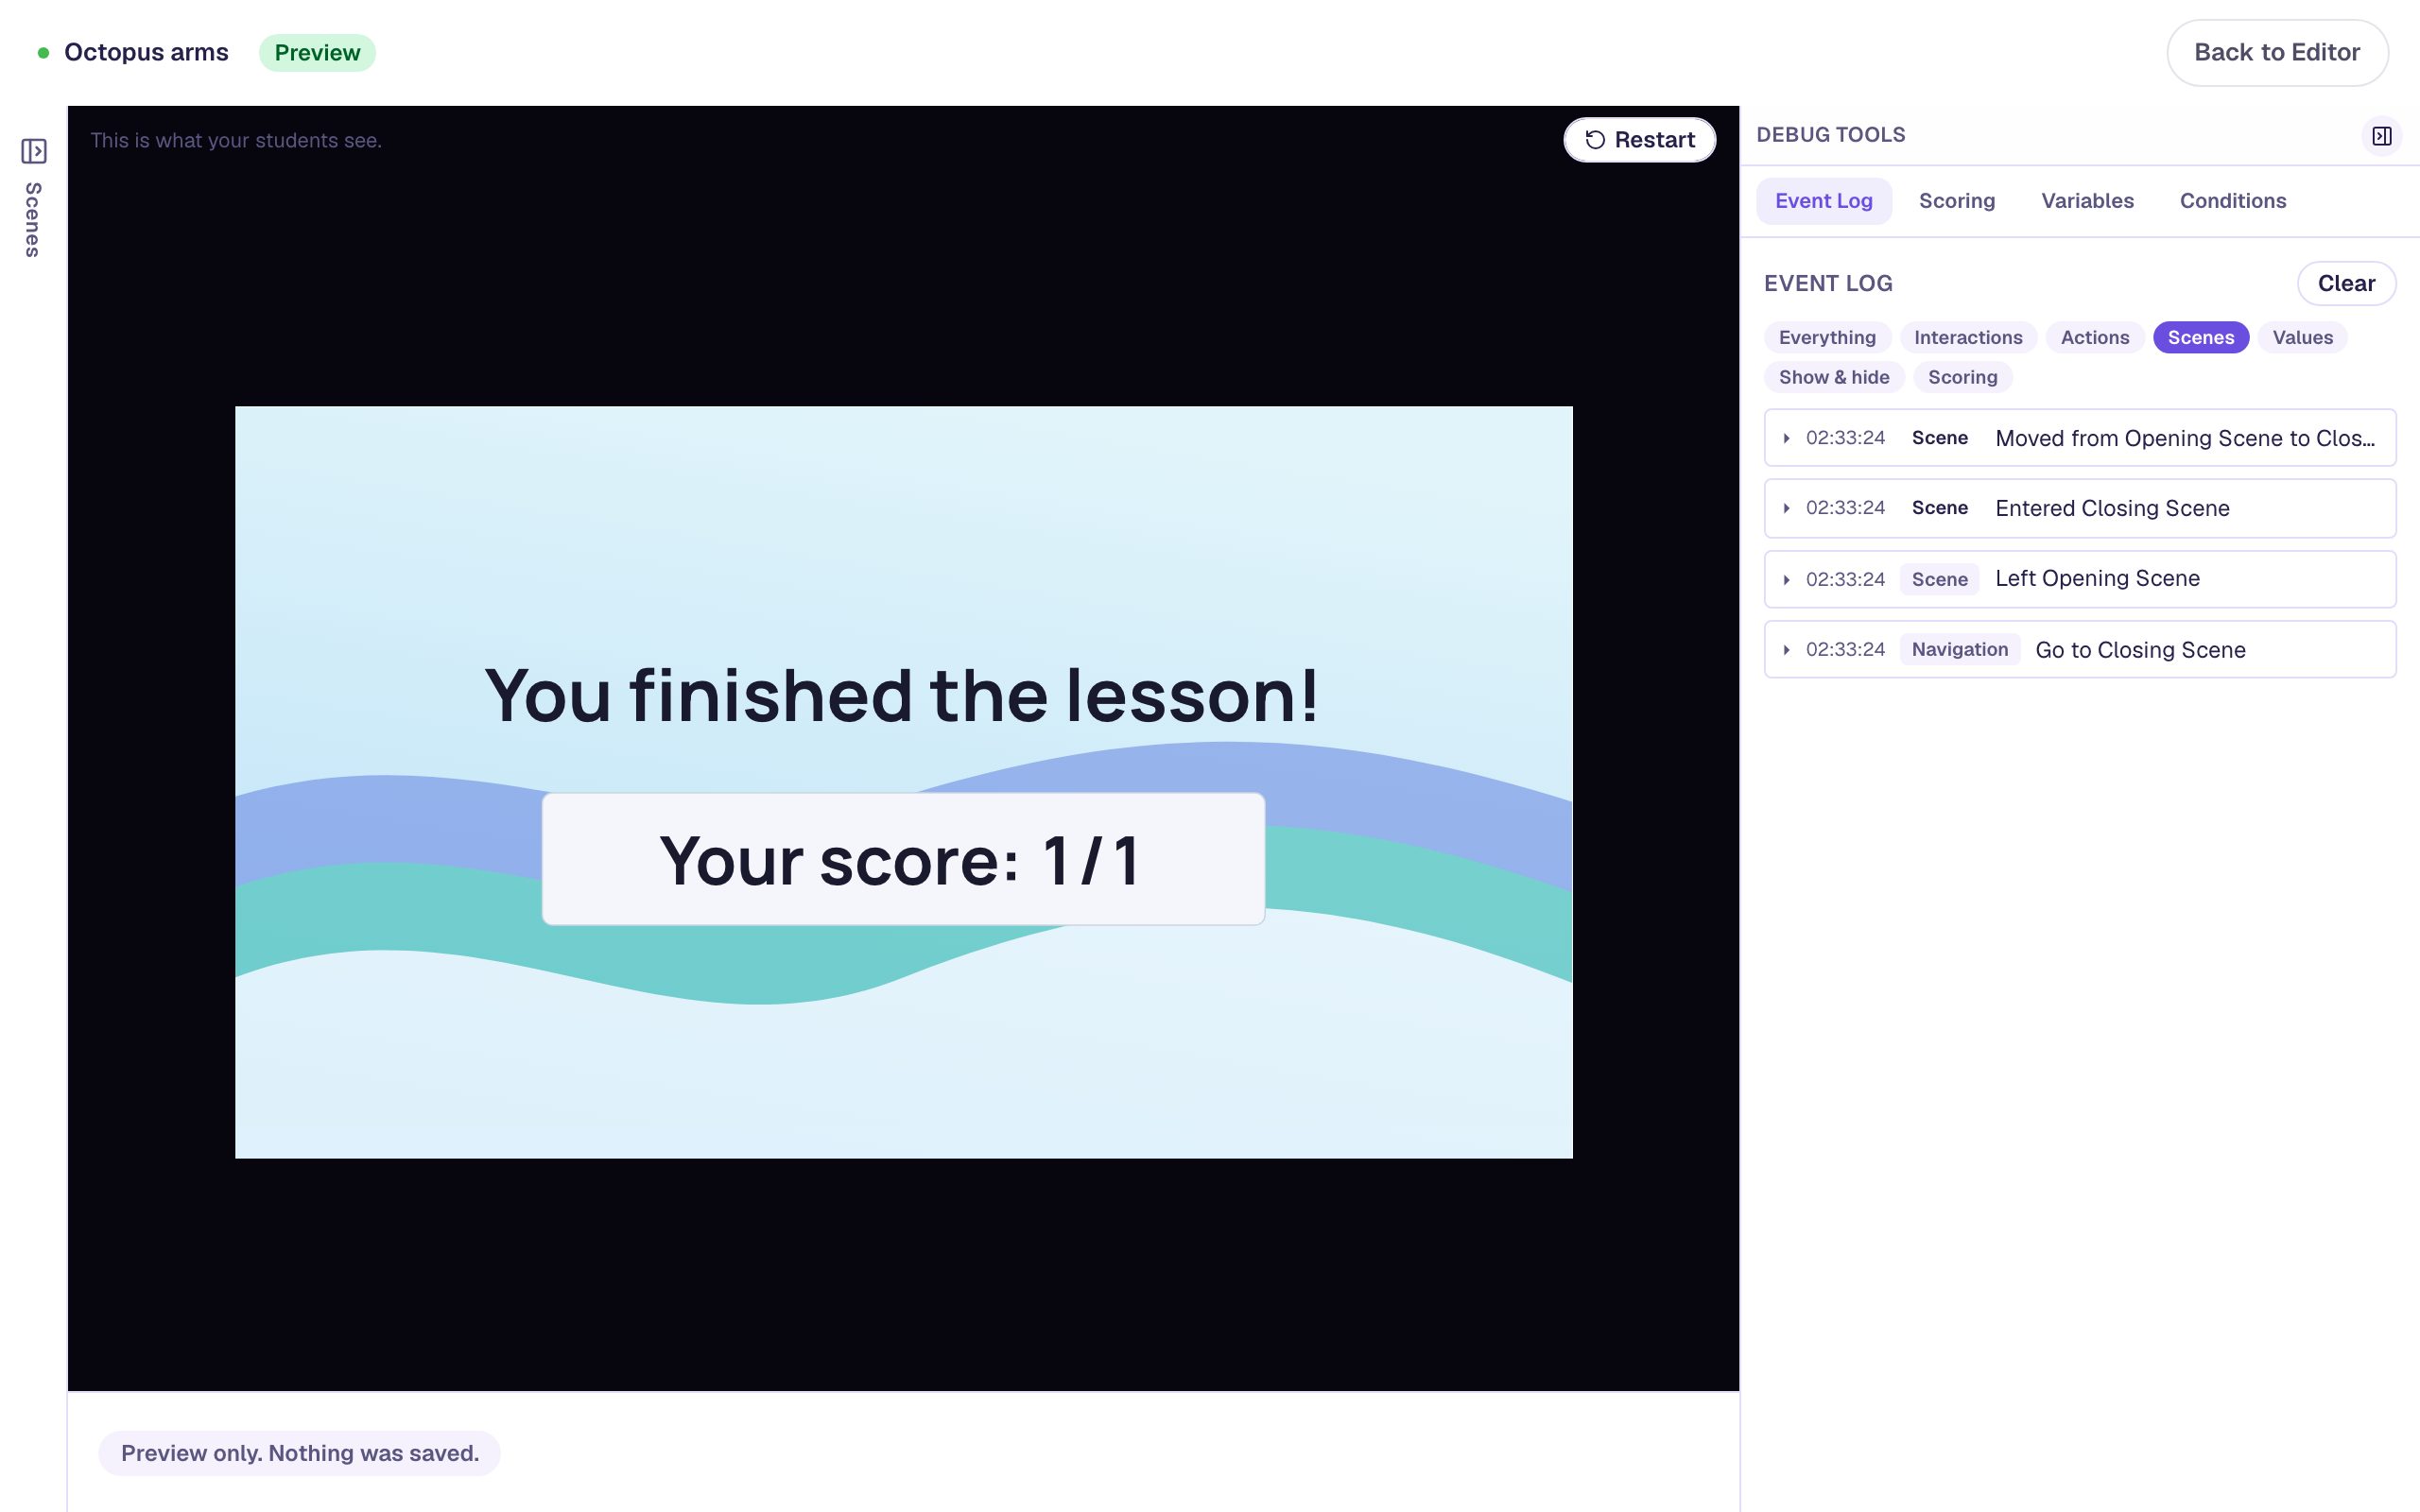
Preview never records an attempt, so you can test as many times as you like.
What you built
You built a one-question lesson about octopus arms:
- a Number Input named Octopus arms, whose Correct Value is now
8, - a Check button with two behaviors: go to the ending when the answer Is correct, and show "Not quite" when it Is incorrect, and
- a scene set to Stay, so only the button moves students on.
More useful than the lesson is the habit: when something doesn't work, open Debug tools before changing anything.
- The Event Log says what happened, in order. "Pressed, but its condition was not met" means the button worked and a condition stopped it. "Nothing is set up to happen" means the button has no behavior at all.
- Conditions shows which condition failed and what it saw.
- Scoring shows how each question was marked.
- Restart between tries gives you a clean log for each.
Next, try Let students check their work and start over, which builds a Check button for three answers at once.
Make this lesson yours
Add the lesson you just watched being built to your account, then change it for your class: your questions, your pictures, your colors.
Free to sign up, and you'll come straight back here. I have an account