Show a live count of what students discover
Build rock-pool riddle cards that each add 1 to a number variable when tapped, show the running total in text with {{ found }}, and reveal a Finish button once every creature is found.
- Level
- Intermediate
- Time
- About 15 min
- Steps
- 8
- Updated
- Oct 13, 2026
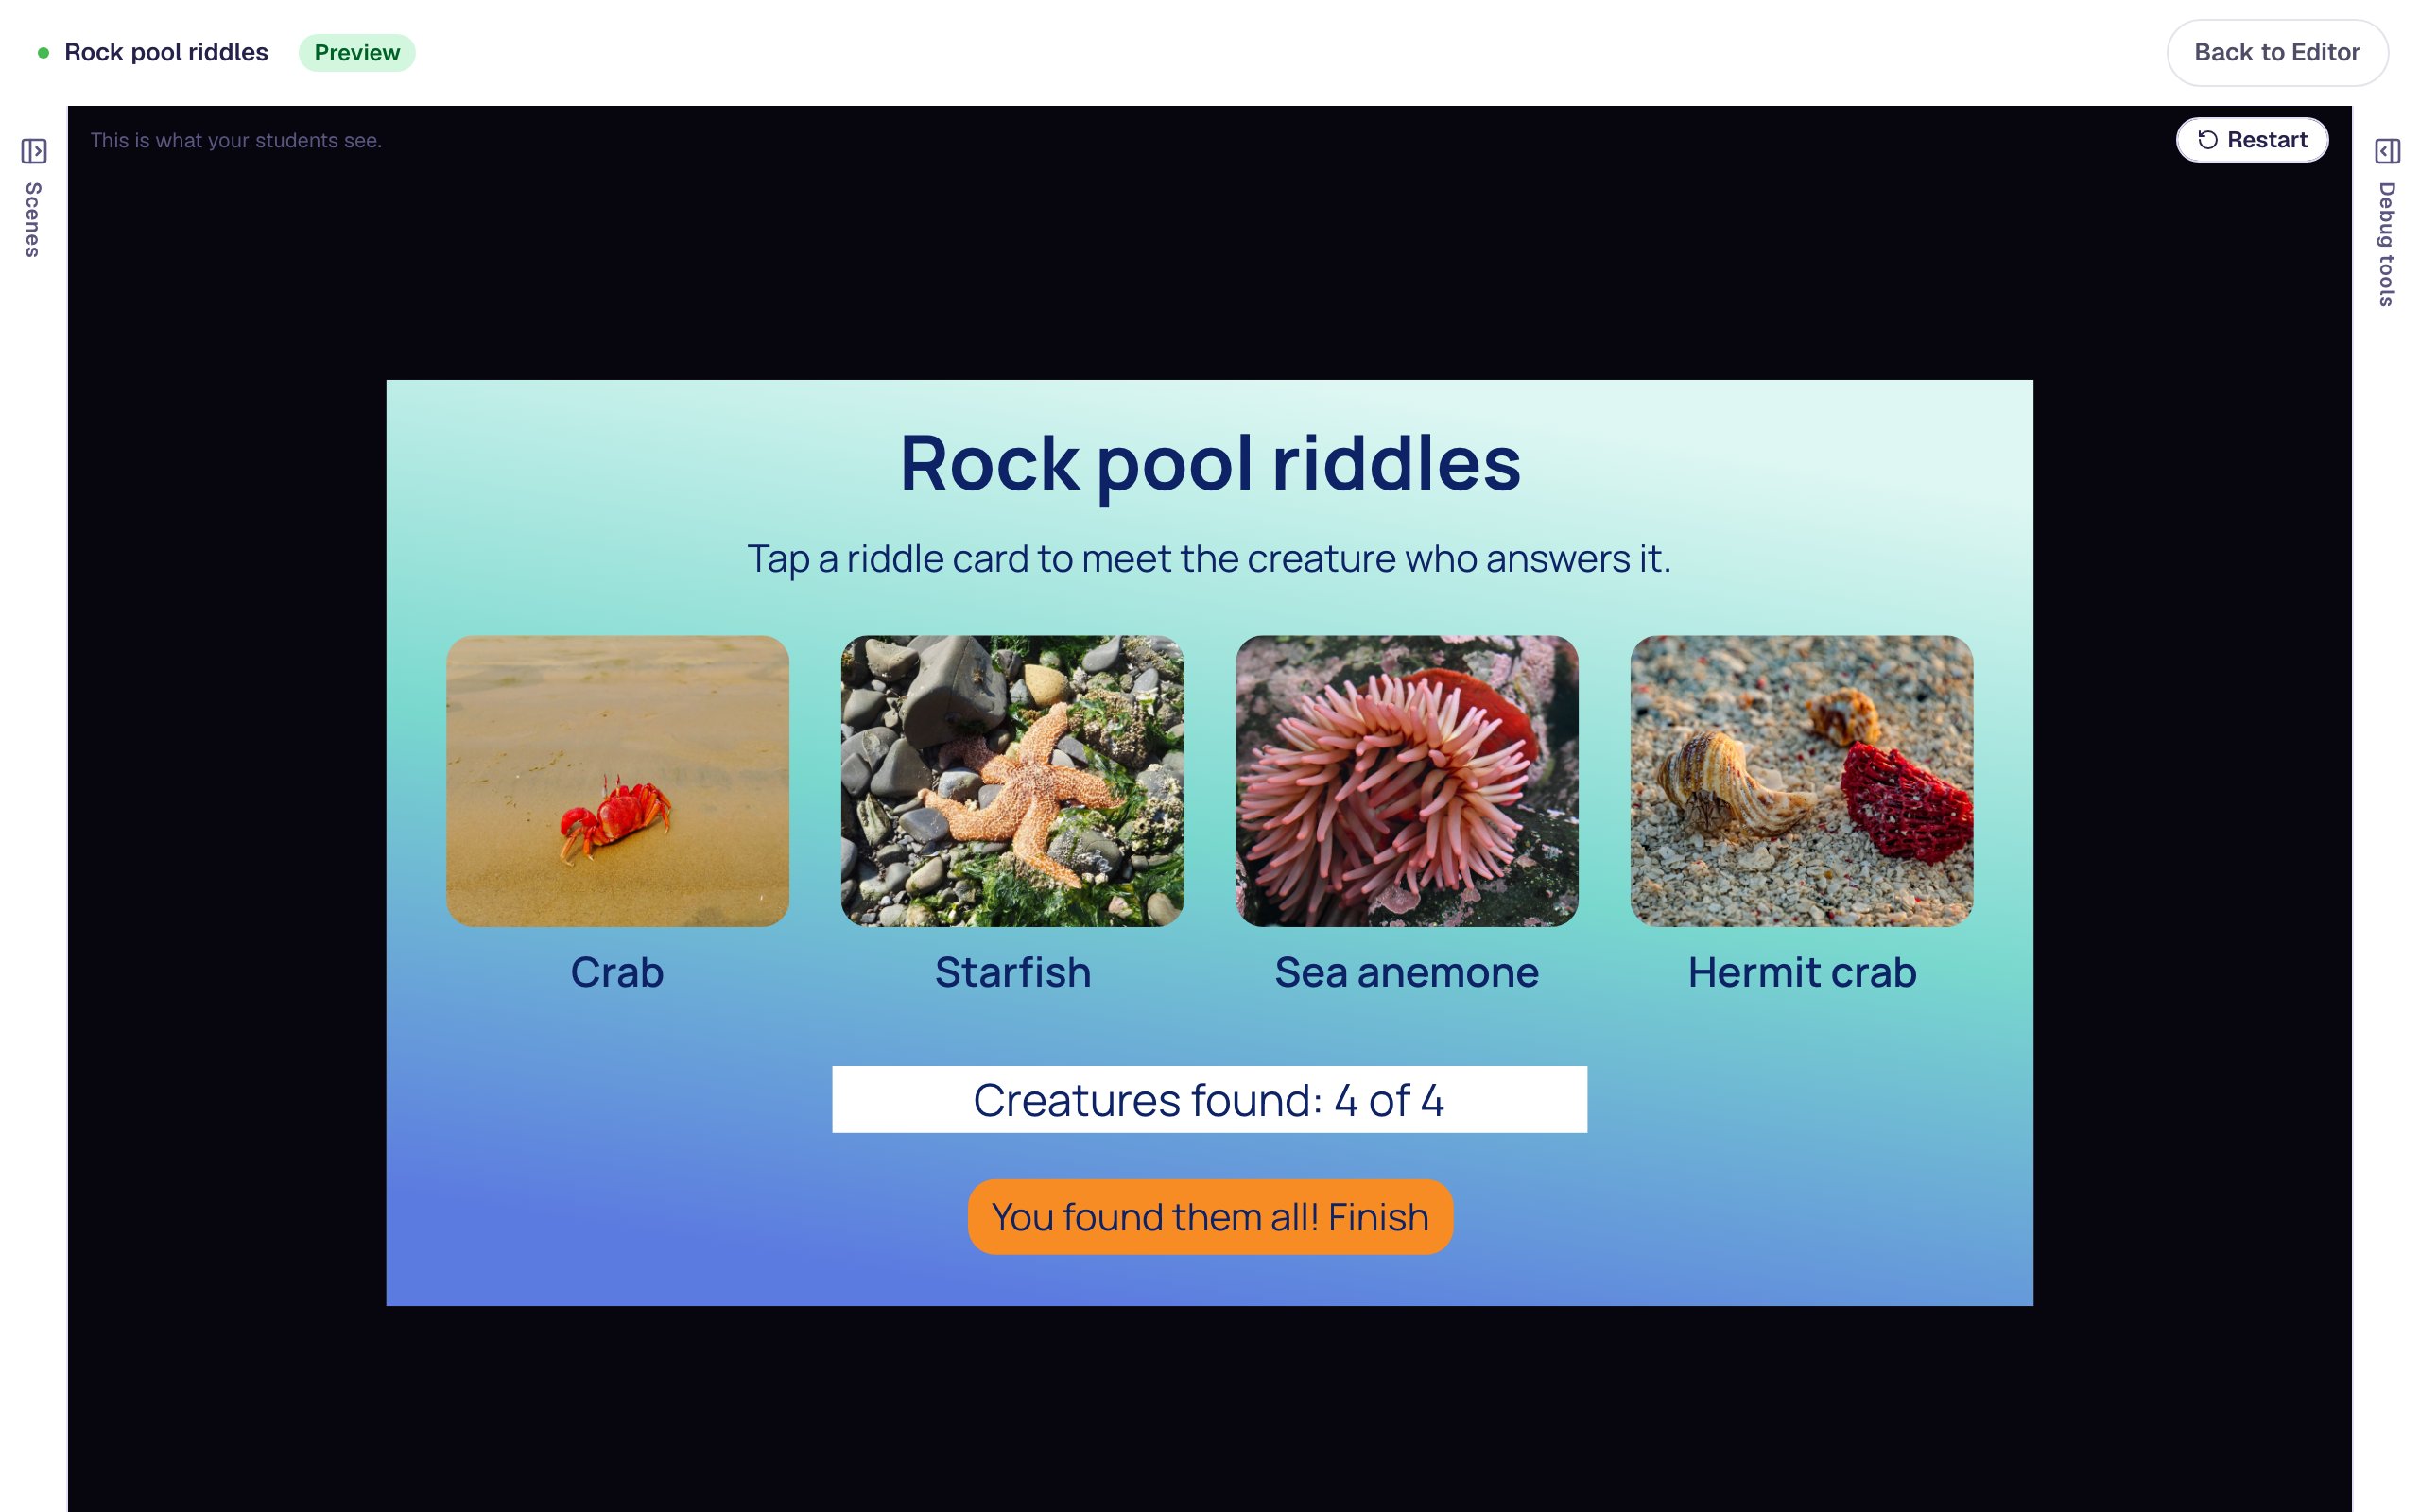
A "Rock pool riddles" scene with four riddle cards that each disappear to reveal a creature, a "Creatures found" line that counts up with every card, and a Finish button that appears once all four are found.
Get the finished lesson
Skip straight to the result, or keep it open beside the steps. Add this tutorial's lesson to your account and explore how it works in the studio.
Free to sign up, and you'll come straight back here. I have an account
Students keep going when they can see their progress. A line that reads "Creatures found: 2 of 4" tells them they're halfway there, and that two more are waiting.
In this tutorial you'll build a "Rock pool riddles" scene. Four navy riddle cards sit over four photos. When a student taps a card, it disappears to reveal the creature that answers the riddle, and the count under the cards goes up by one. Once all four are found, a Finish button appears.
Four pieces do the work:
- a number variable called
found, which starts at 0, - an On Press behavior on each card with two actions: Increment Variable adds 1 to
found, and Widget Method hides the card, so it can't be counted twice, - a text that shows the variable with a placeholder:
Creatures found: {{ found }} of 4, and - a Conditional visibility rule on the Finish button: show it when
foundis at least 4.
This builds on Show a hint after two wrong tries, where a variable counts behind the scenes. Here students see the count change as they go.
Step 1: Set the scene
Start a blank lesson (New lesson, then Start from scratch) and name it Rock pool riddles by clicking Untitled lesson at the top.
With nothing selected, open Background, click Choose a style, and pick Lagoon gradient under Gradients. Give the Closing Scene the same background, so the ending matches.
Back on the Opening Scene:
- Add a Heading that says
Rock pool riddles, and a Body under it:Tap a riddle card to meet the creature who answers it.Set both to dark navy in Style & Layout, so they read well on the pale water. - Add an Image,
200wide and170tall (Style & Layout → Show more options). In Image Source, click Open Media Library, search forred crab beachand insert a photo. Set Fit to Cover and Border Radius to16, and in Accessibility give it the Alt TextA bright red crab on golden sand. - Add a Subheading under the photo that says
Crab. - Do the same for three more creatures in a row: a Starfish (
starfish rock pool), a Sea anemone (sea anemone pink) and a Hermit crab (hermit crab shell). Give each photo alt text that says what it shows, such asAn orange starfish on rocks and seaweed at the shore.
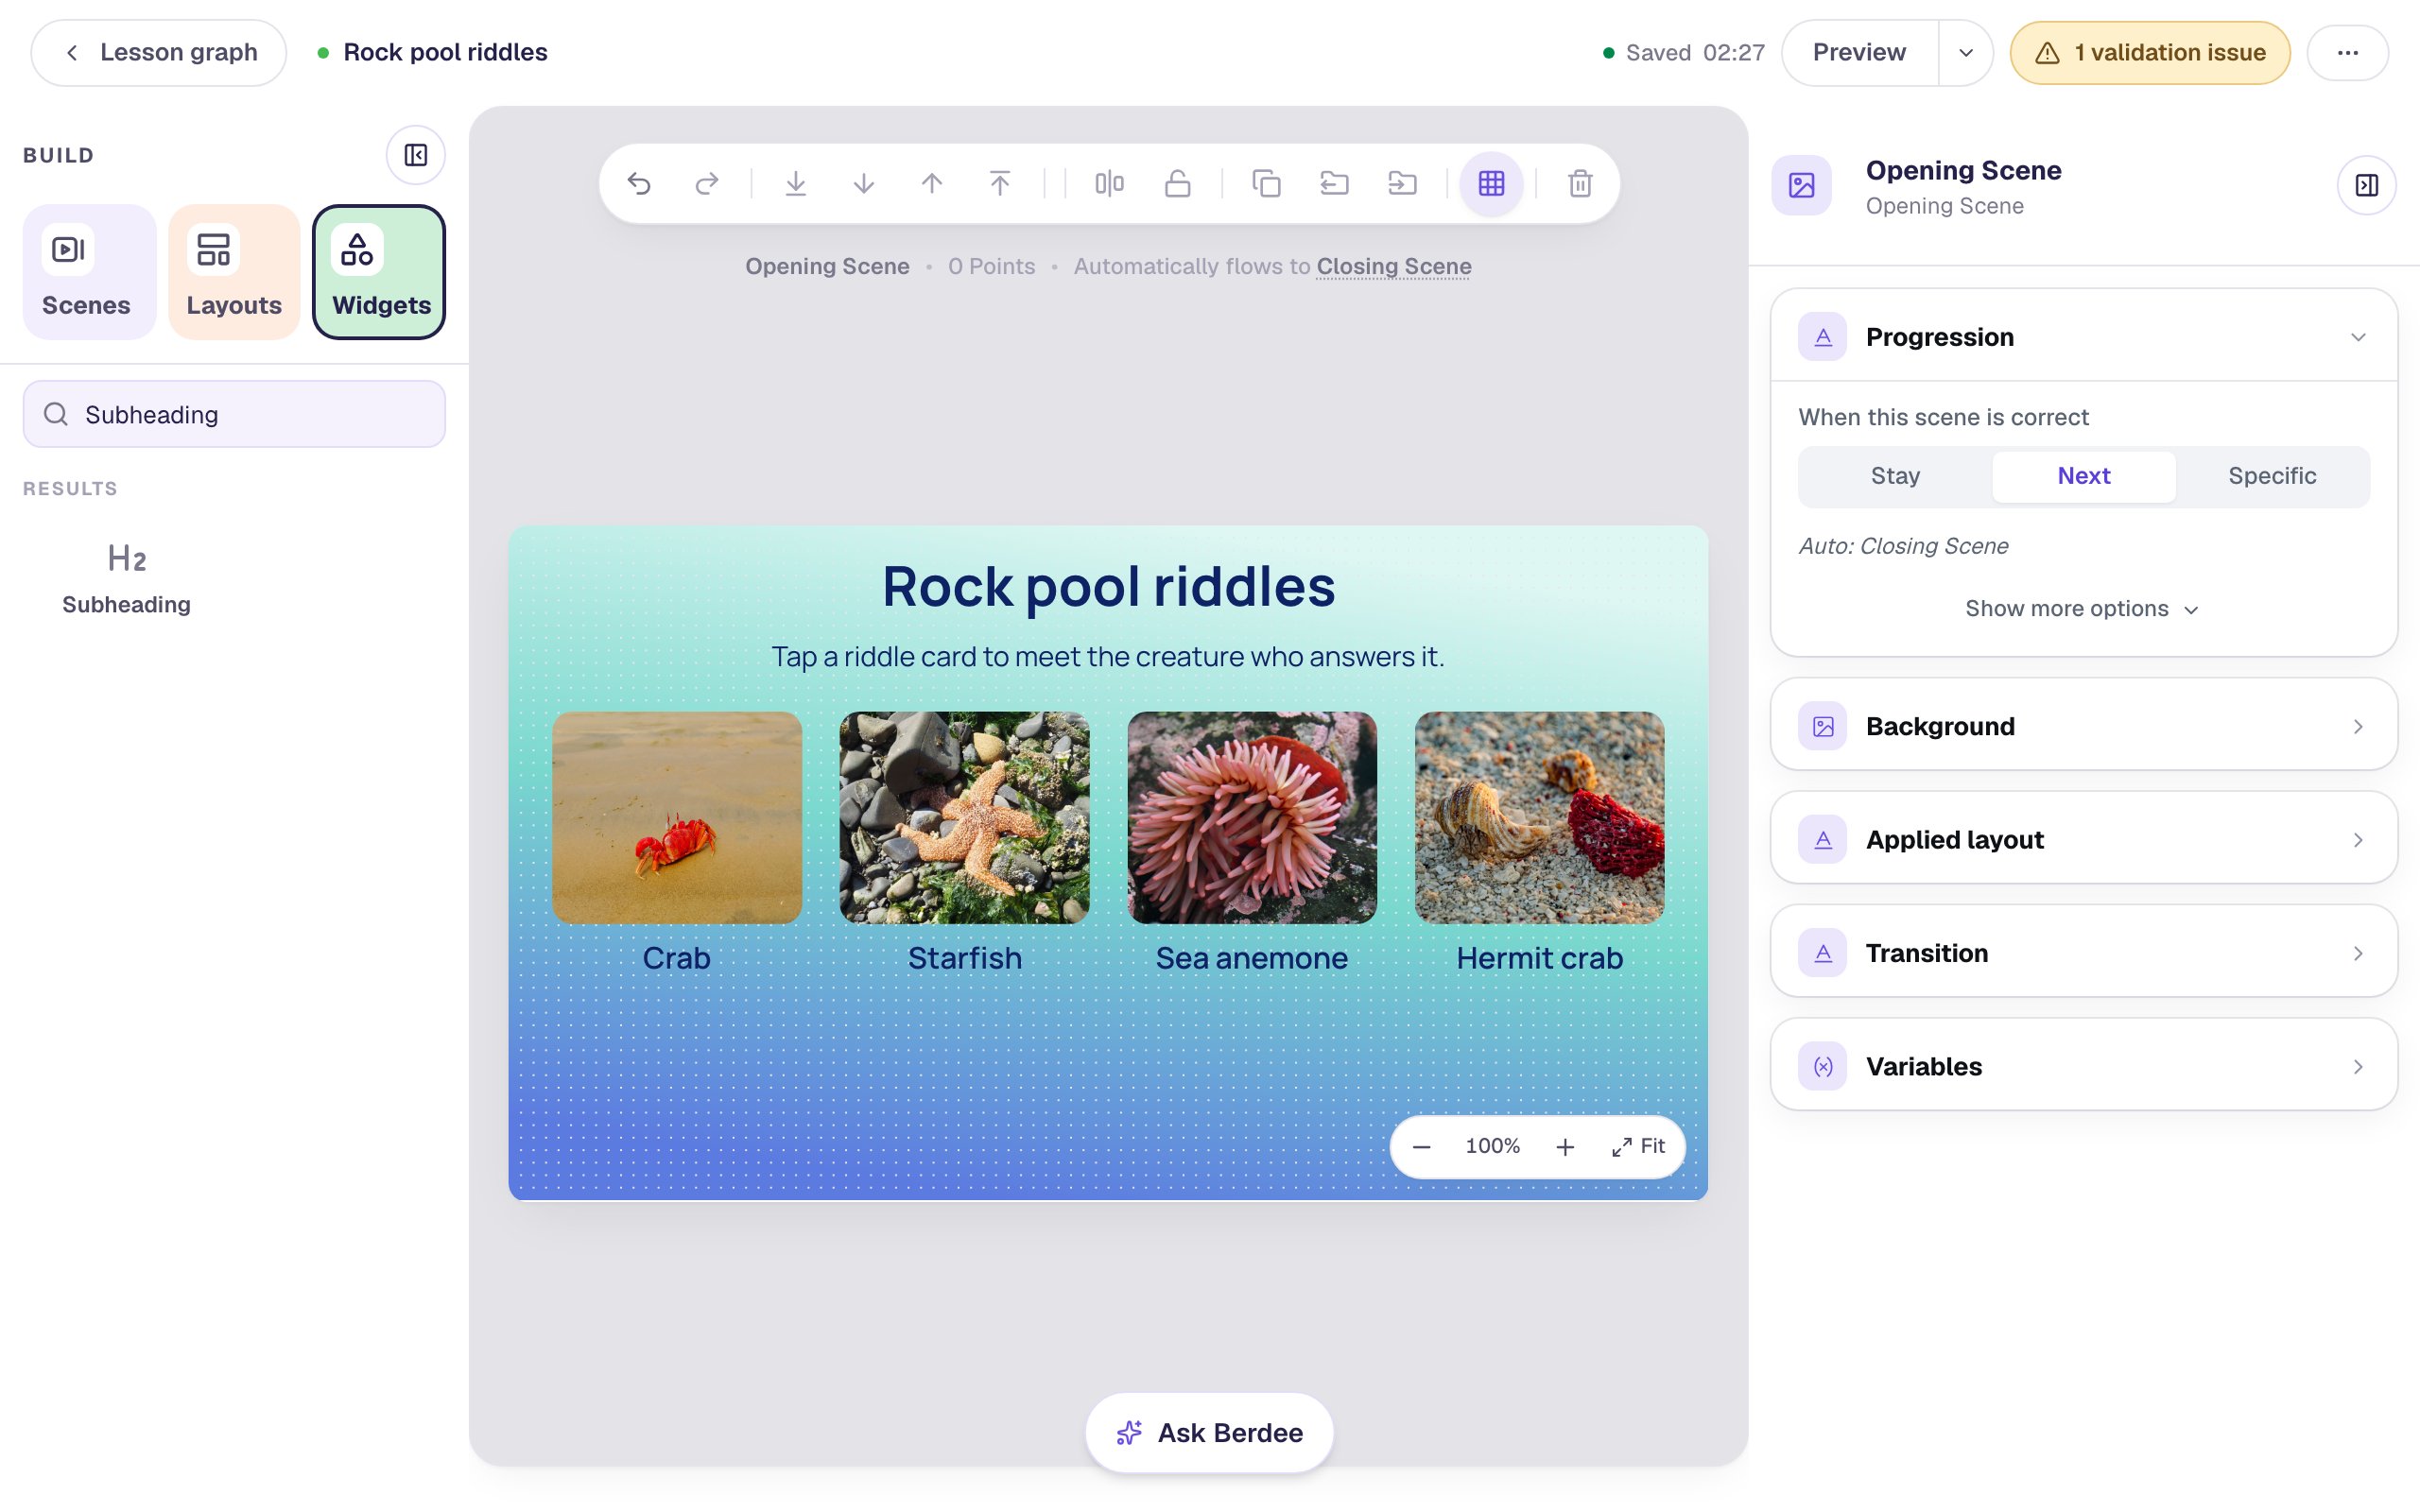
Students who use a screen reader hear the alt text when a creature is revealed, so describe what's in the photo rather than repeating its name.
Step 2: Cover each creature with a riddle card
Each riddle card is a Button laid on top of a photo and its name. A button can be tapped, and it can be hidden, which is everything a card needs to do.
- Click an empty spot on the scene, then add a Button. Click ⚙ Configure and set its Label to
I walk sideways. - Rename it
Crab card(click its name at the top of the properties panel). You'll pick it from a list in Step 4, and "Crab card" is much easier to find there than "Button 1". - In Style & Layout, set Font Size to
24, choose Fixed width, and set Width to200and Height to230, just big enough to cover the photo and its name. - Set Background to navy and Text to white, then drag the card over the crab.
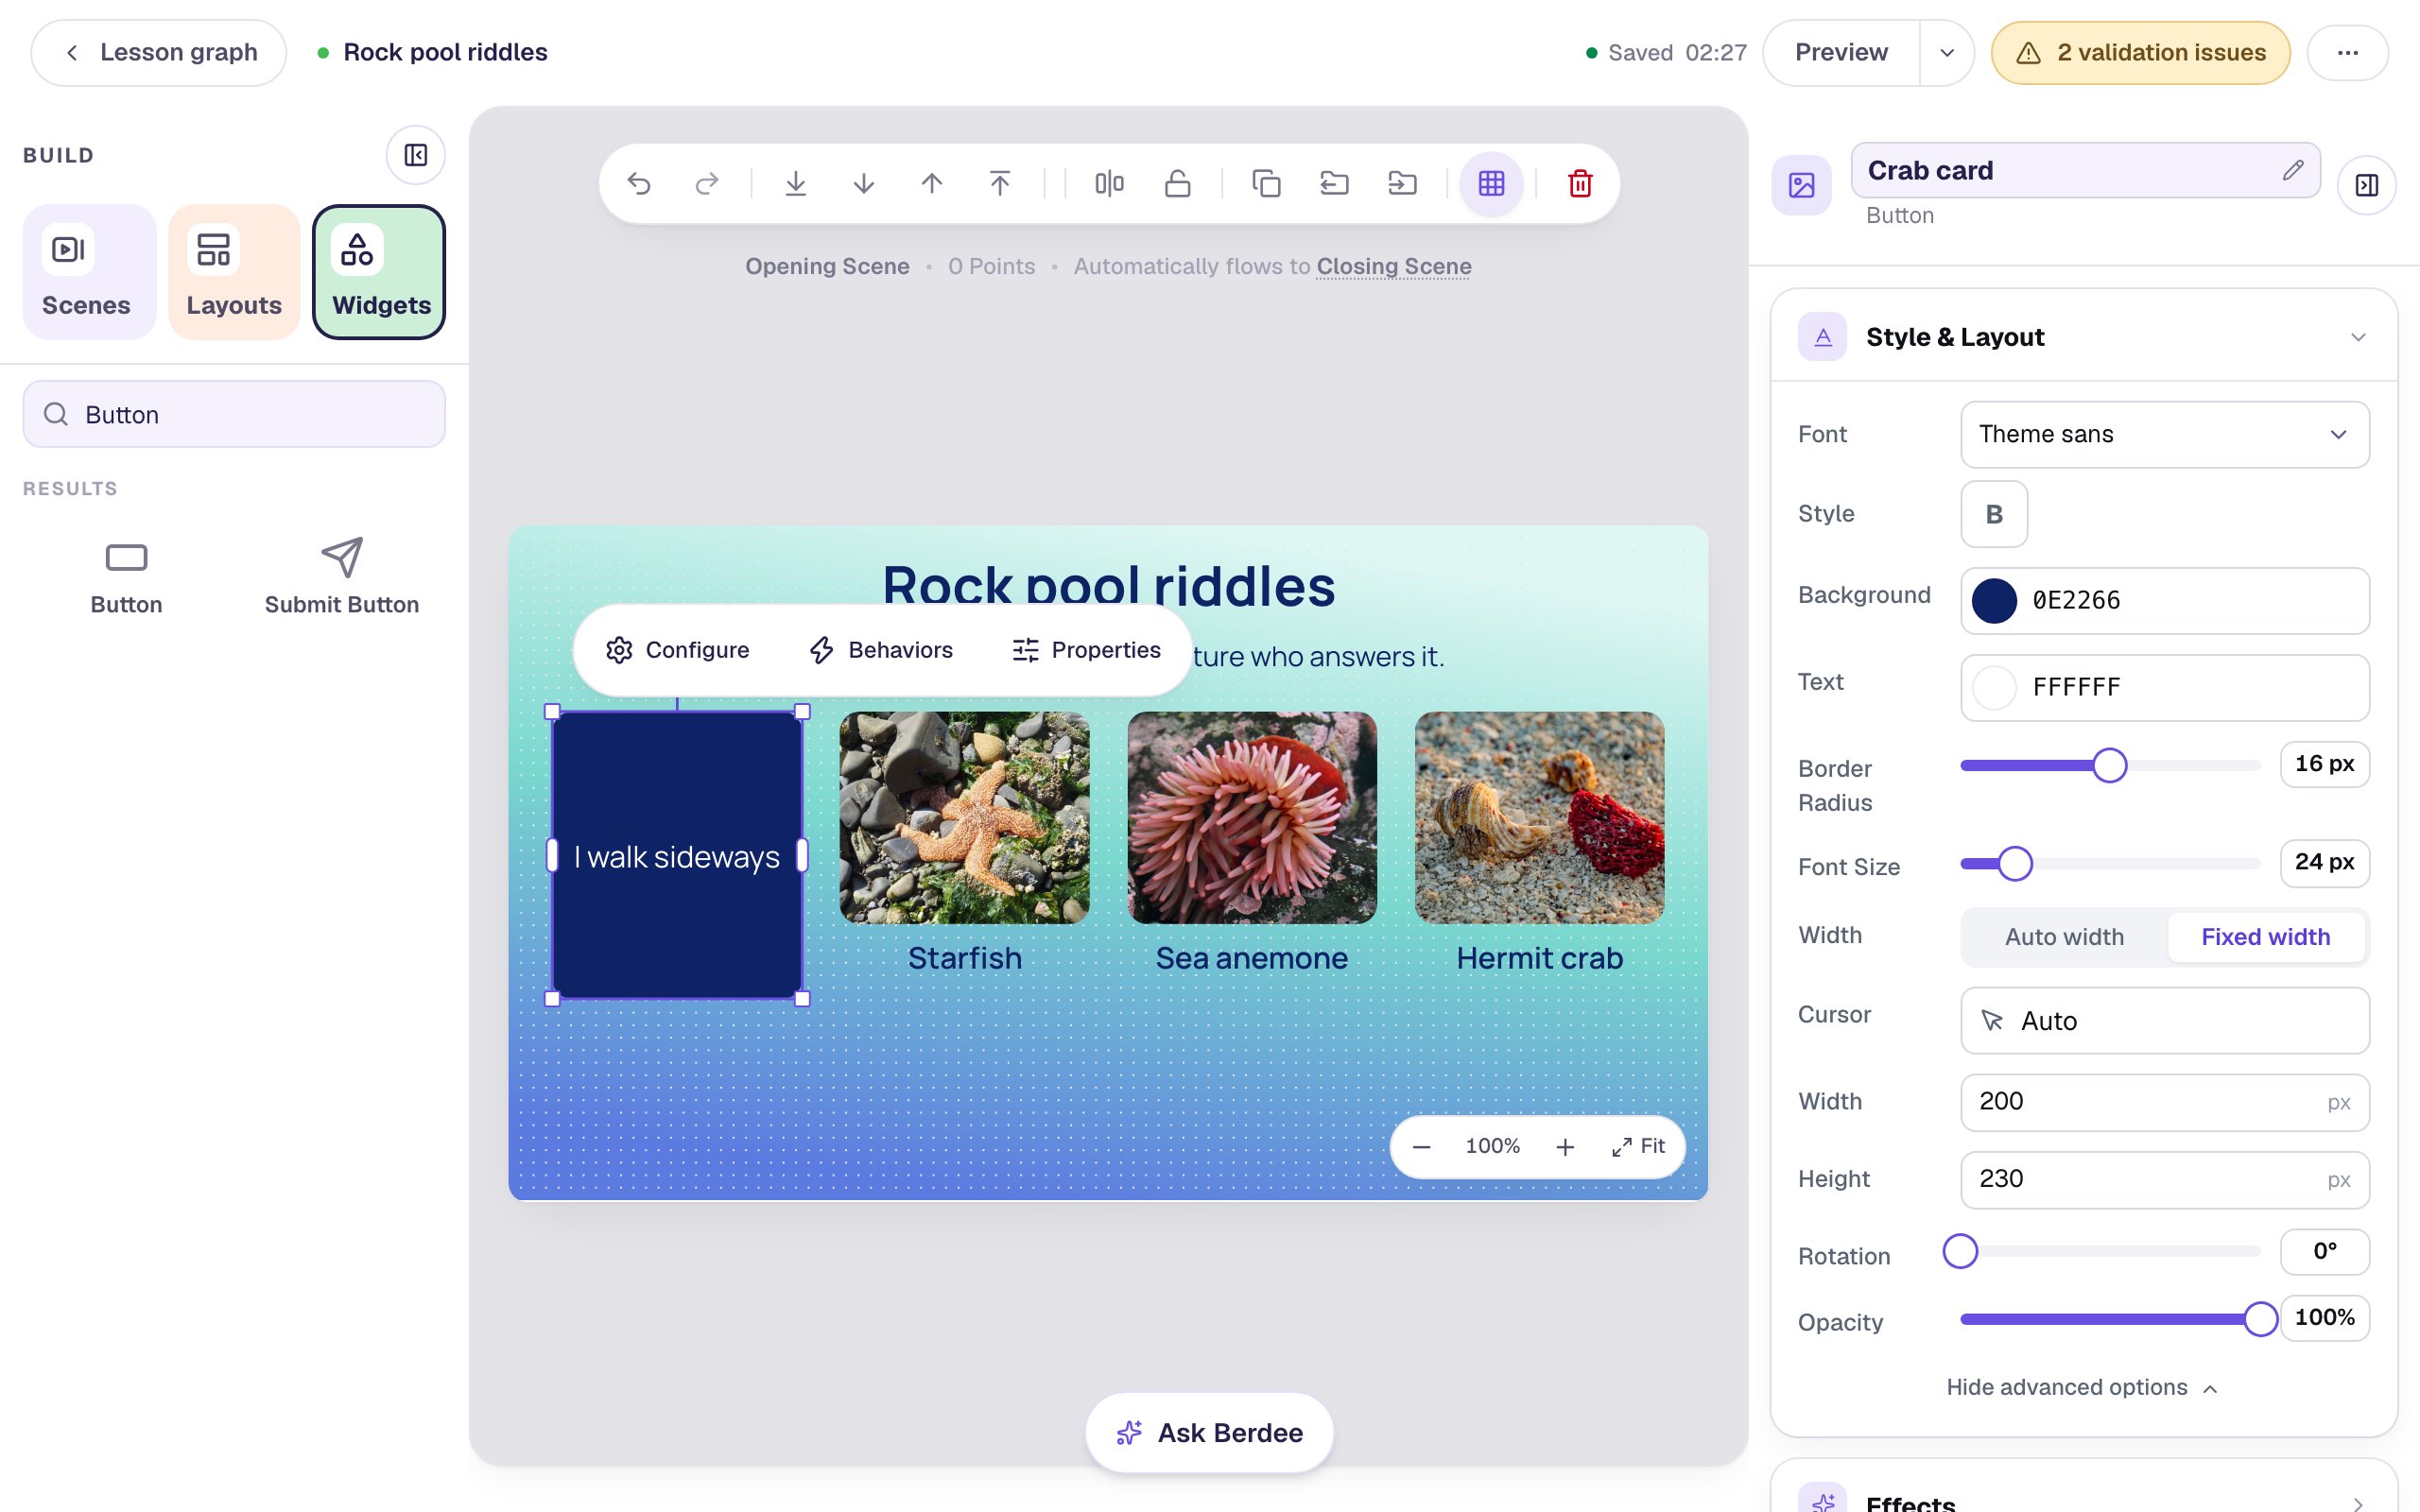
Now copy it for the other three. Press ⌘ D (Ctrl + D on Windows) to duplicate the card, rename the copy, change its label in ⚙ Configure, and drag it over the next creature:
| Card | Label | Covers |
|---|---|---|
Starfish card | I have five arms | Starfish |
Anemone card | I look like a flower | Sea anemone |
Hermit crab card | I carry my home | Hermit crab |
A two-line label makes a card a little taller, so set its Height back to 230 after changing the label.
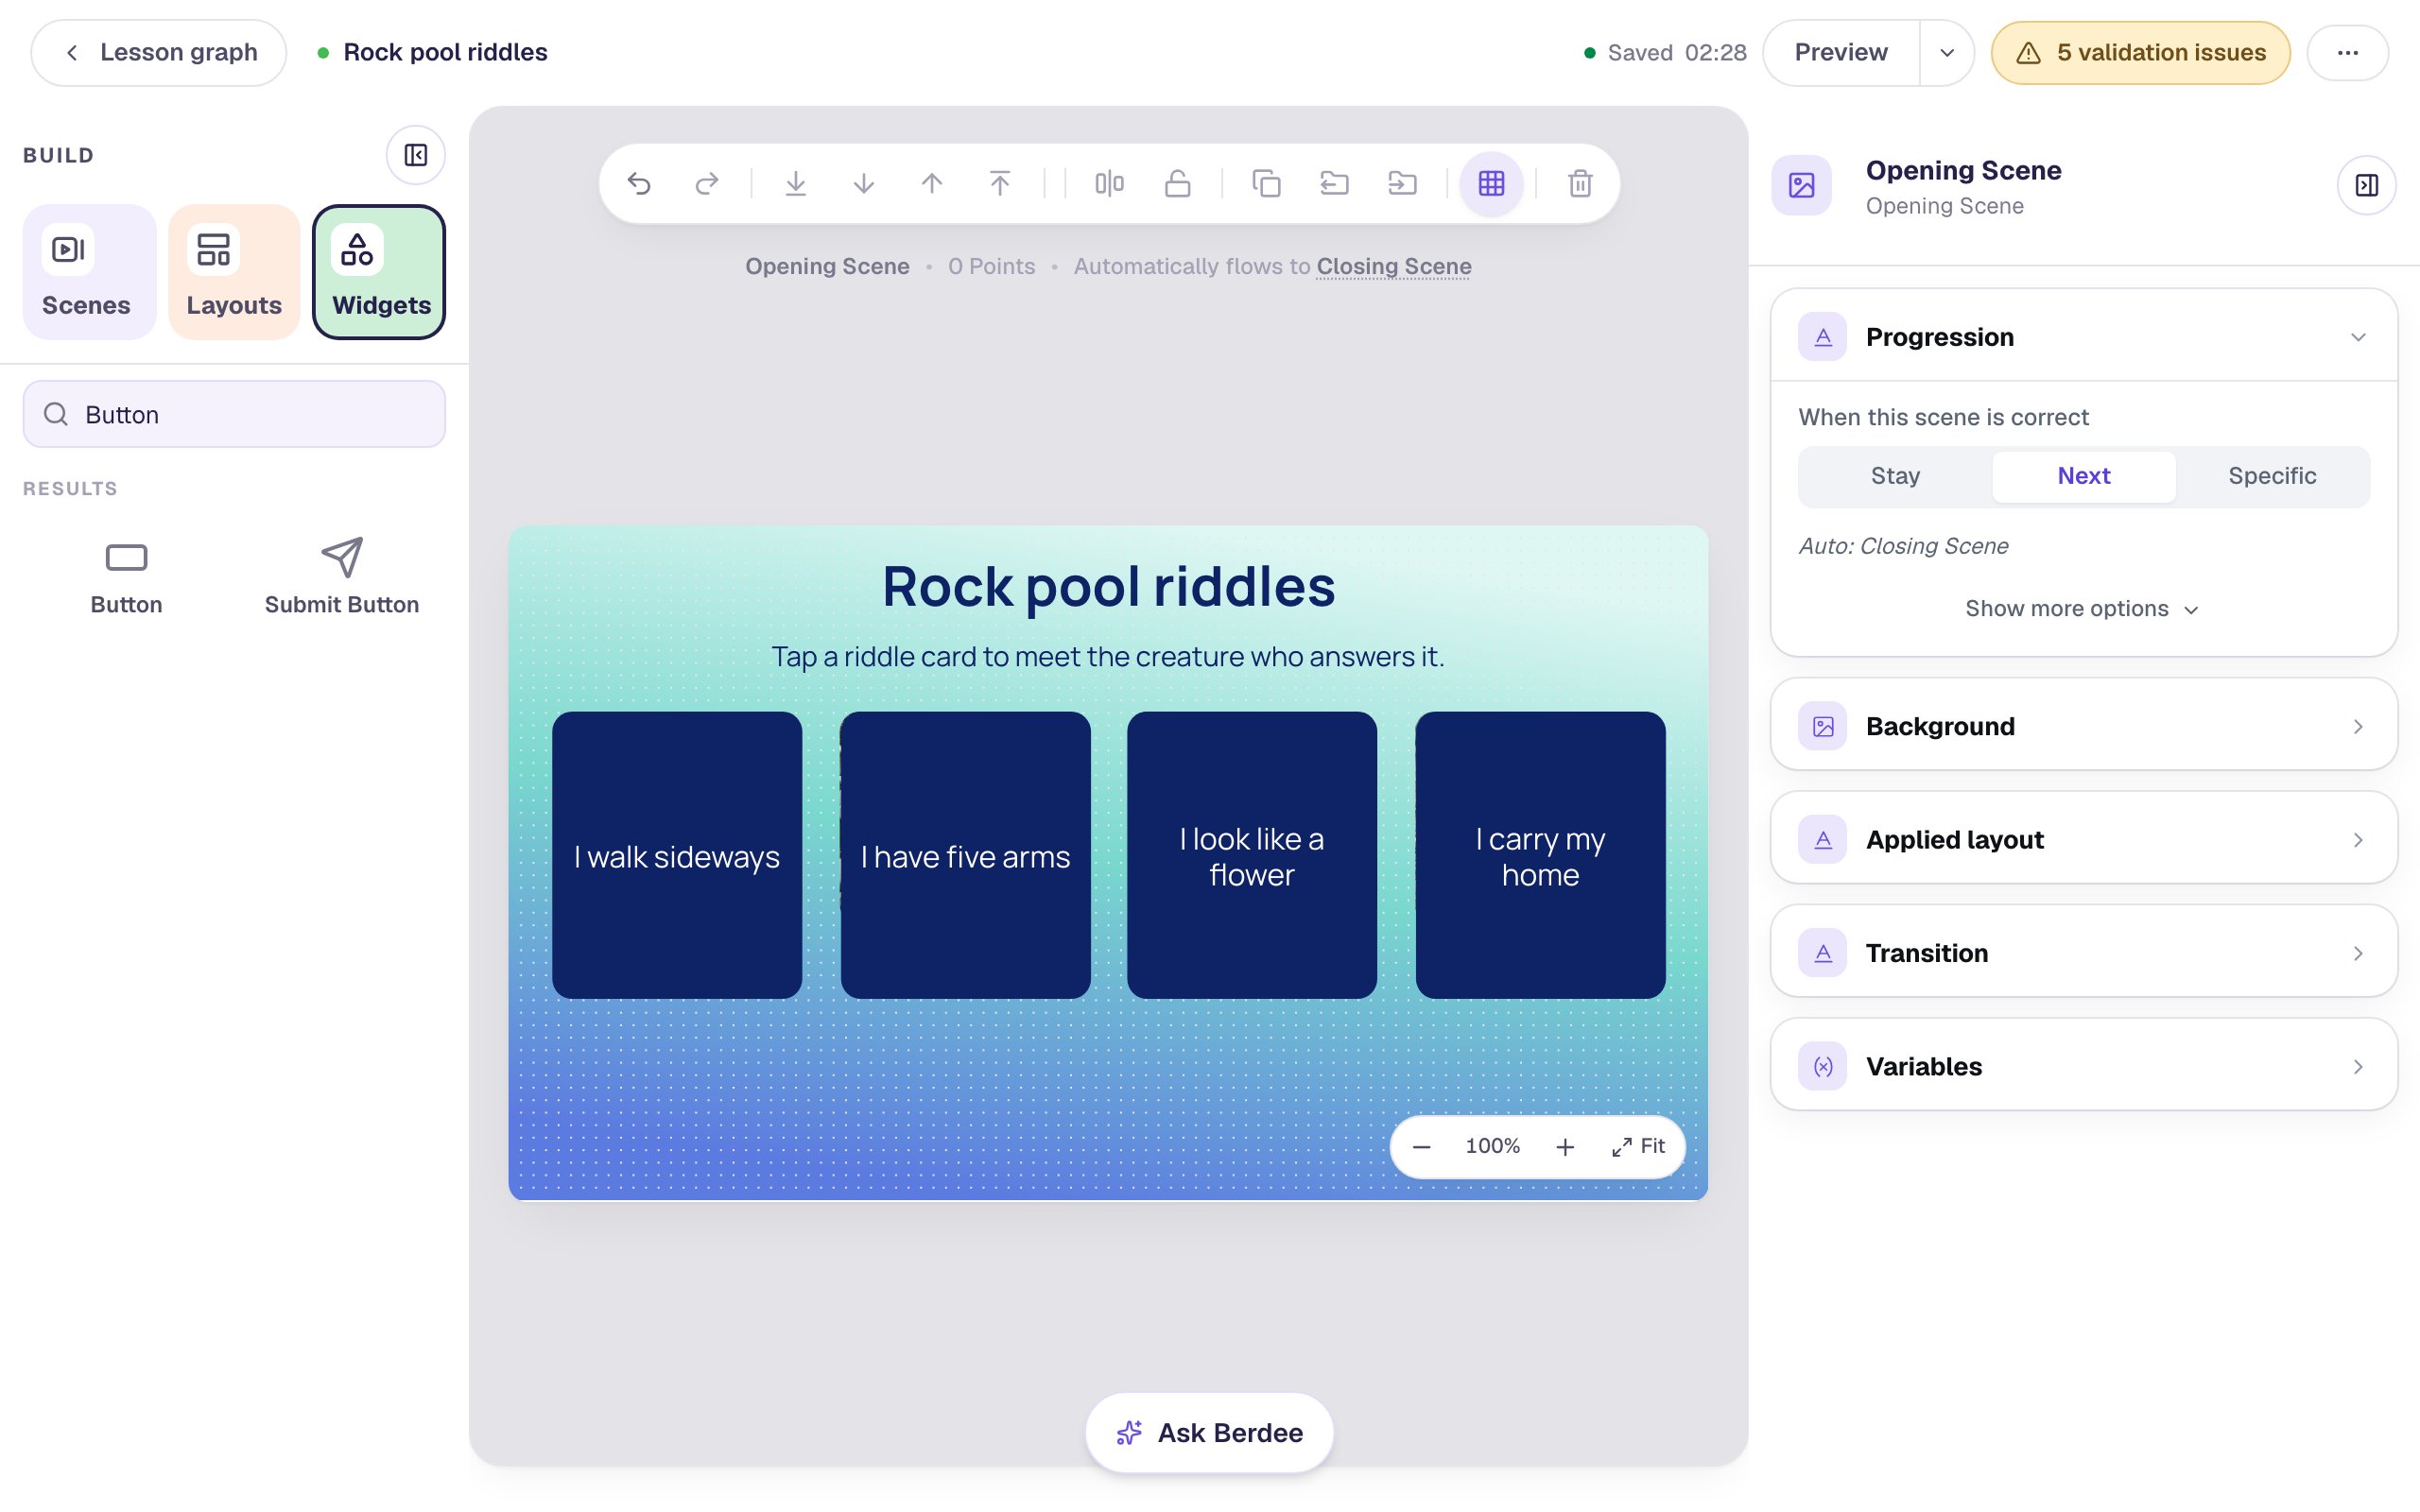
Copy the cards before you give them behaviors. A copy keeps its original's behaviors, and in the next steps each card hides itself by name, so a copied behavior would hide the crab card instead of its own.
Step 3: Create a variable that counts
A variable is a named place where the lesson keeps a value while a student works. This one holds how many creatures the student has found.
- Click ⋯ (More lesson options) at the top right of the studio and choose Variables.
- Click New variable, then A number.
- Leave What number should it start as? at
0. Every student starts with nothing found. - Under What is this variable called?, type
found.
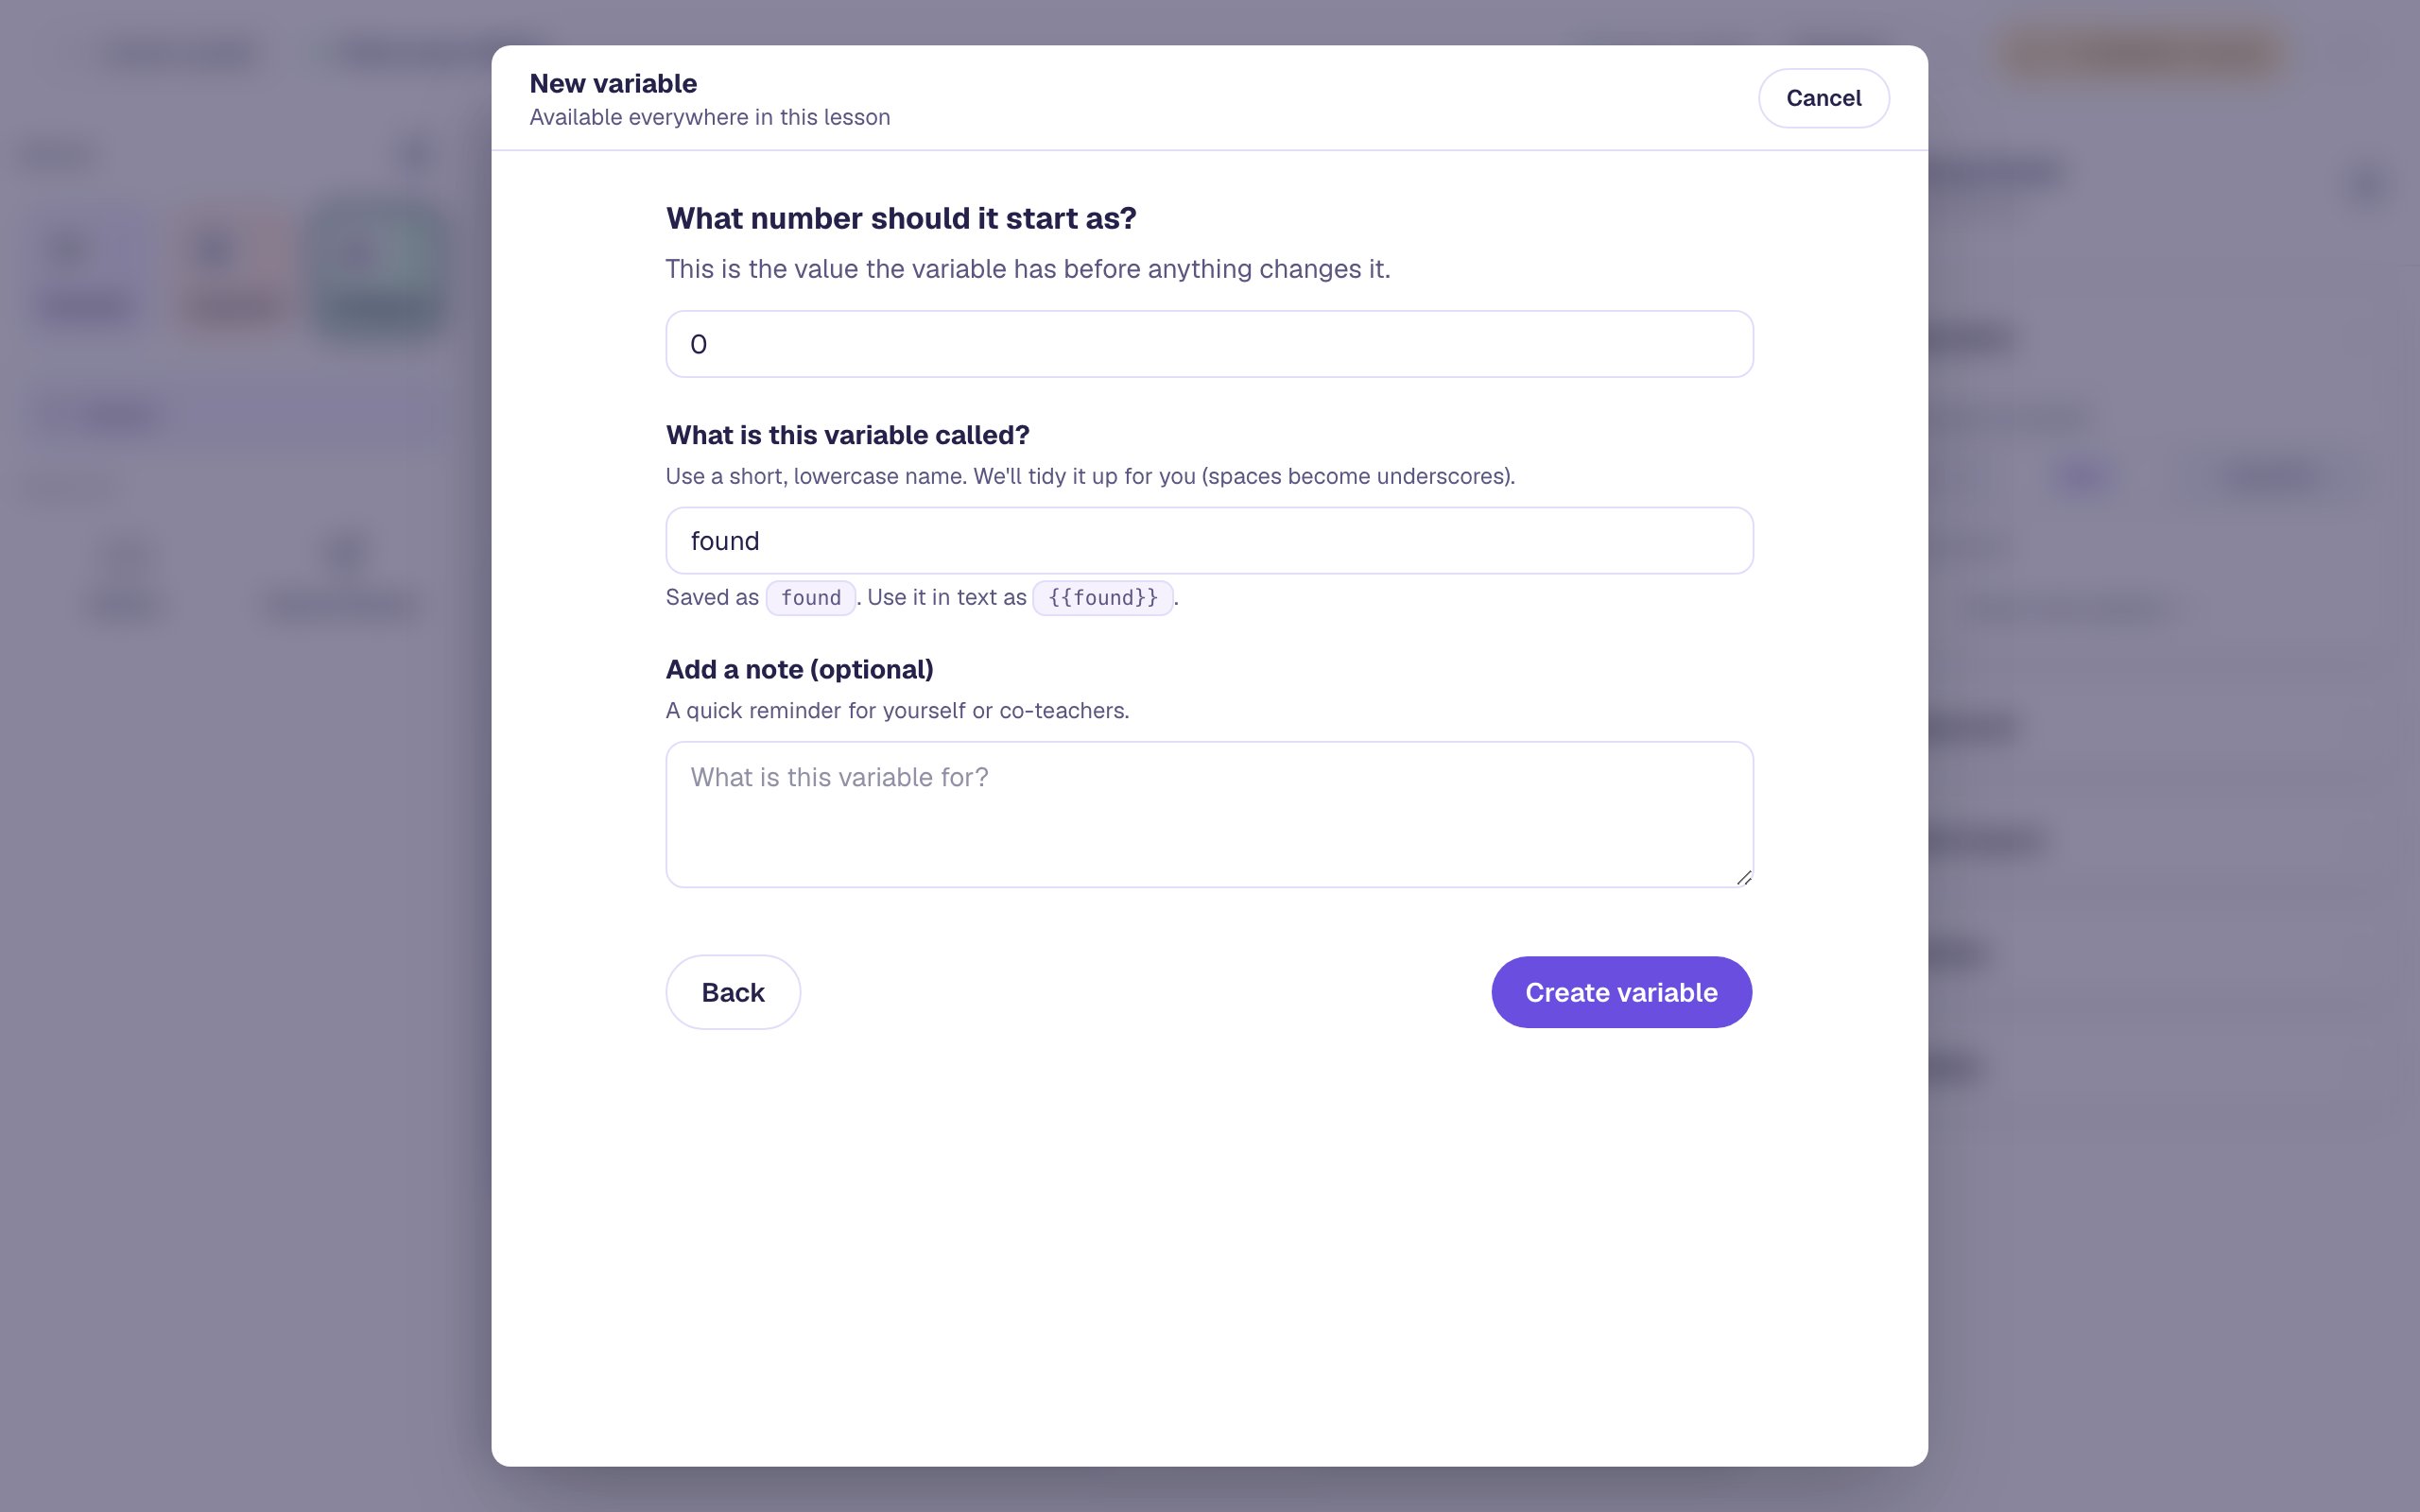
Click Create variable, then close the window with Close. Notice the note under the name: {{found}} is how you'll show the number in text in Step 6.
Step 4: Make a card count and disappear
A tap on the crab card should do two things: add 1 to found, then hide the card so the crab shows through. One behavior can run both actions, in order.
Click the Crab card to select it, and open Behaviors in the properties panel:
- Click Add Behavior and choose On Press. A new behavior starts with a Display Message action.
- Change Display Message to Increment Variable, and in the variable list pick found · Number. Leave the amount at
1. - Click Add Action. Change the new action to Widget Method.
- In the first list, pick Button: Crab card, the card itself. In the second, pick Hide.
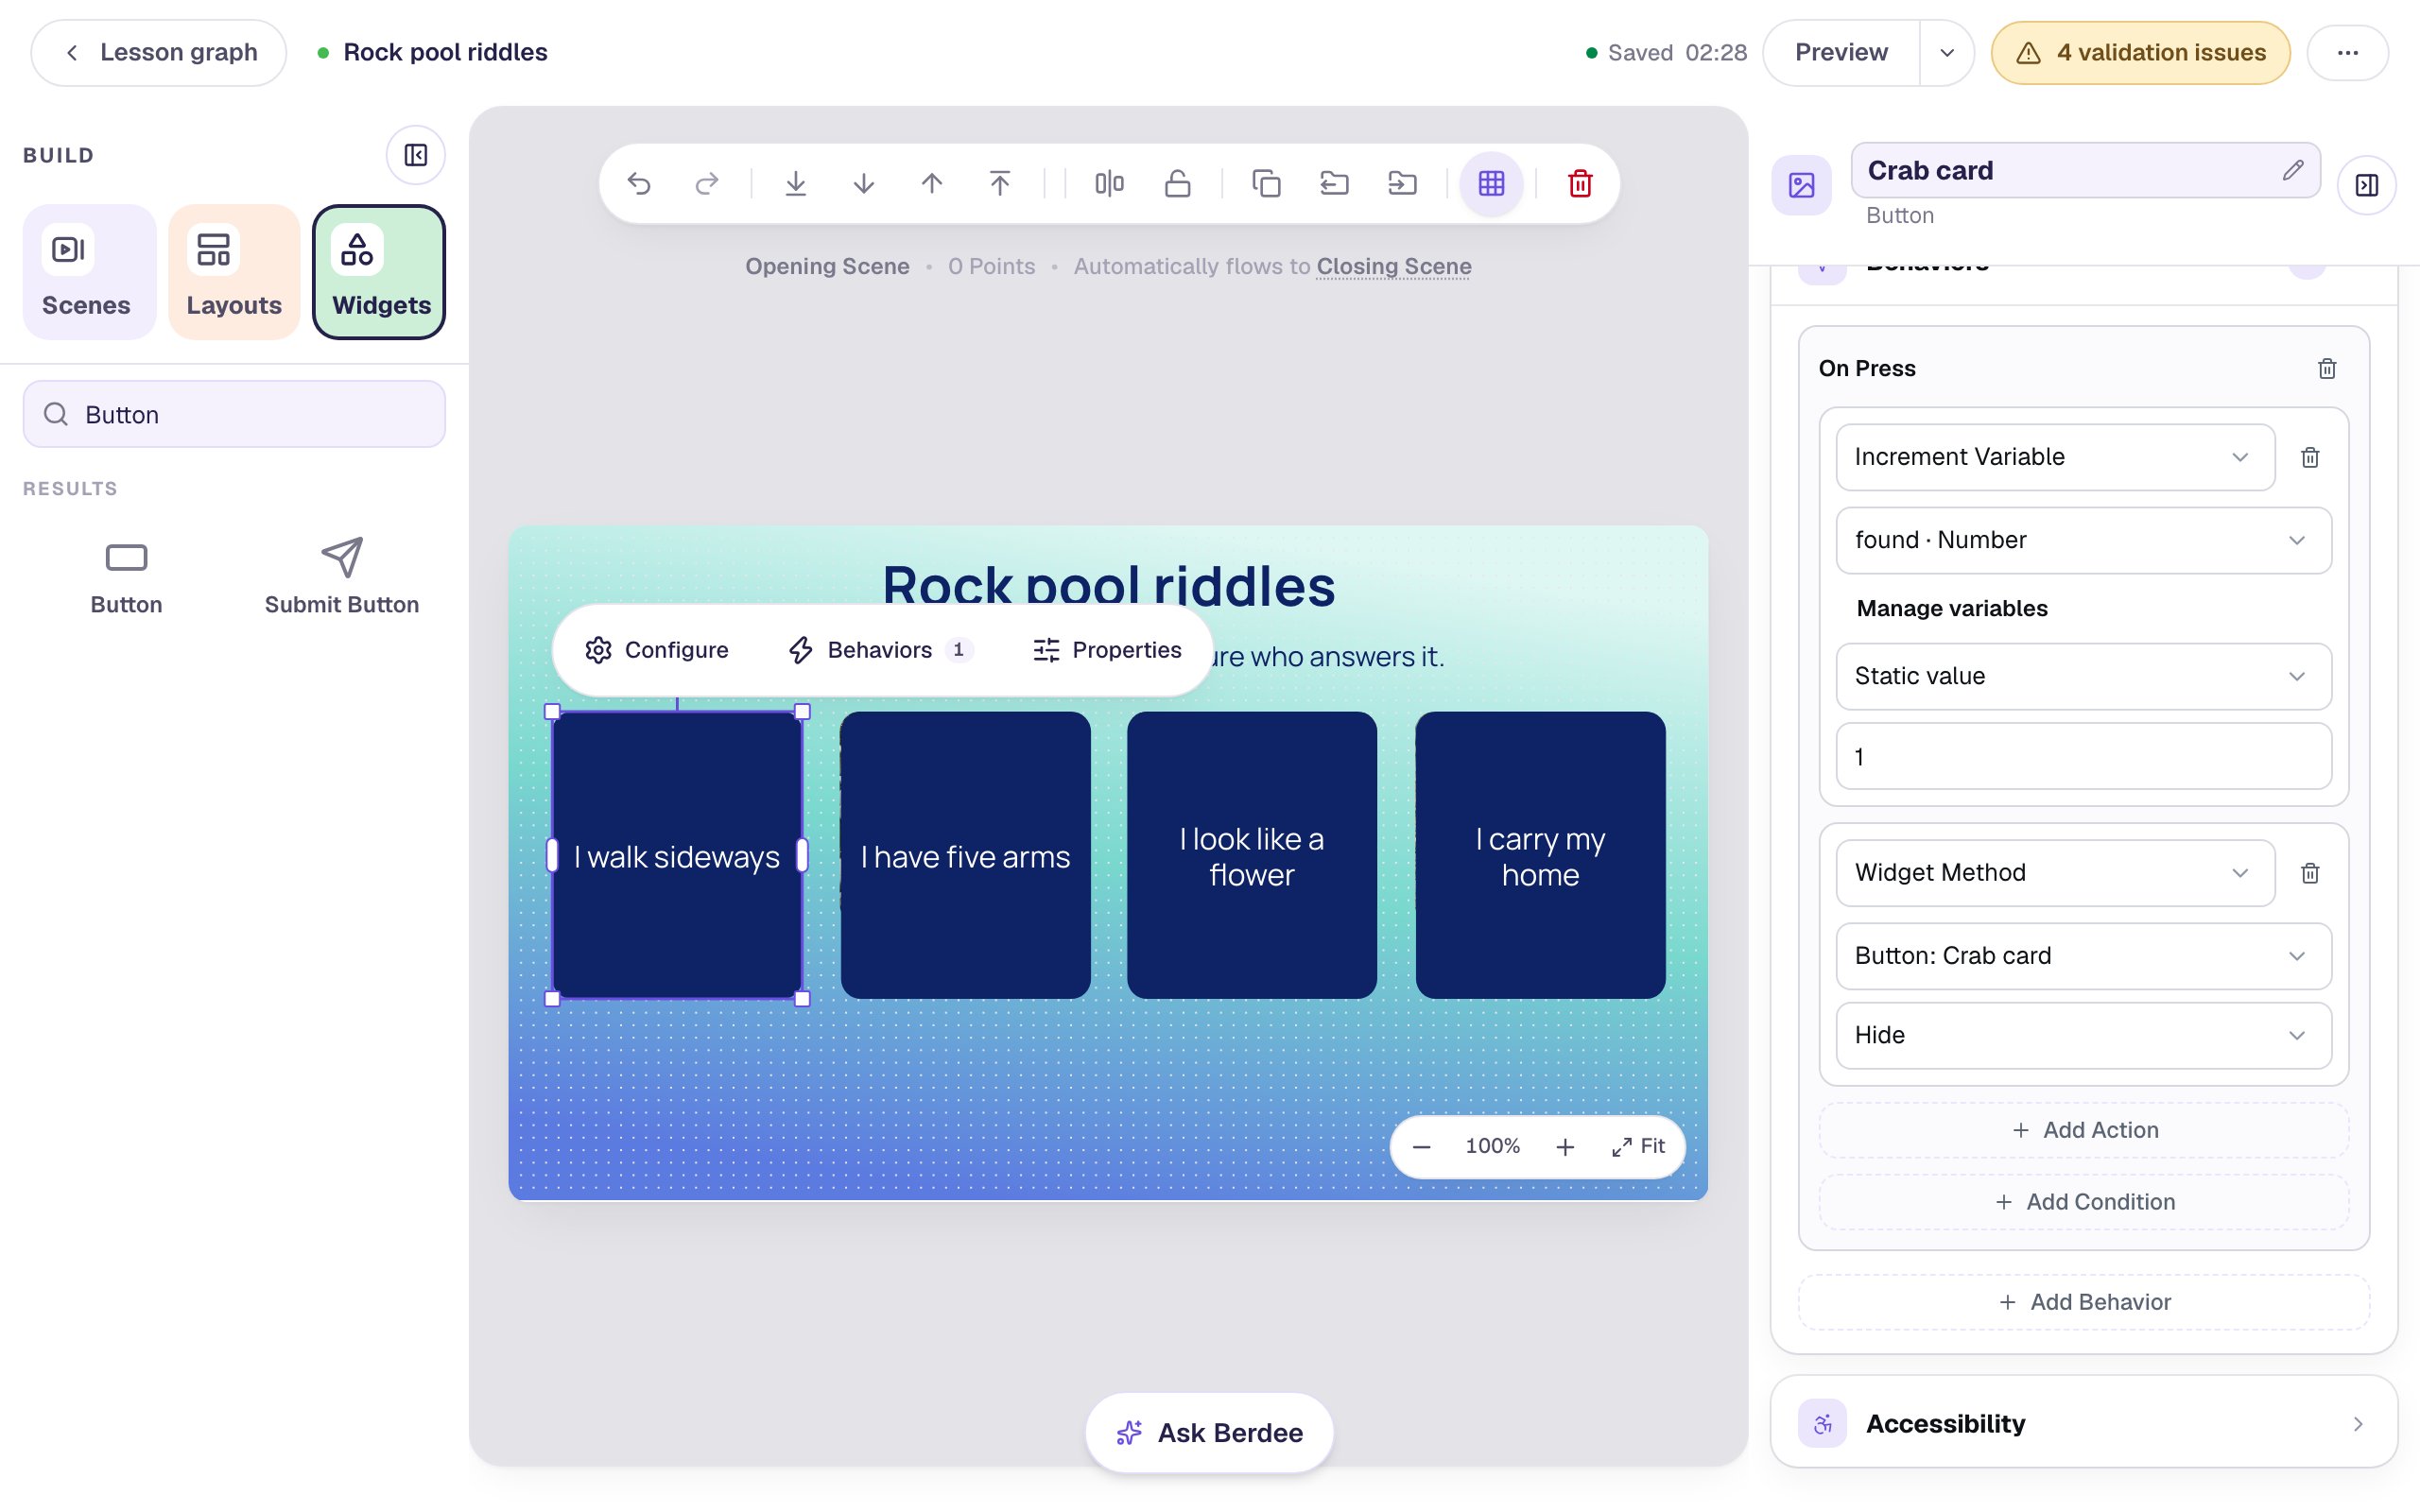
Hiding the card is what makes each creature count only once. Once the card is gone, there's nothing left to tap, so a student who taps the crab photo again doesn't add to the total.
Step 5: Do the same for the other three cards
Select each of the other cards in turn and add the same behavior: On Press, Increment Variable on found, then Widget Method → Hide. The one thing that changes is the card in the Widget Method list. Each card hides itself: Button: Starfish card on the starfish card, and so on.
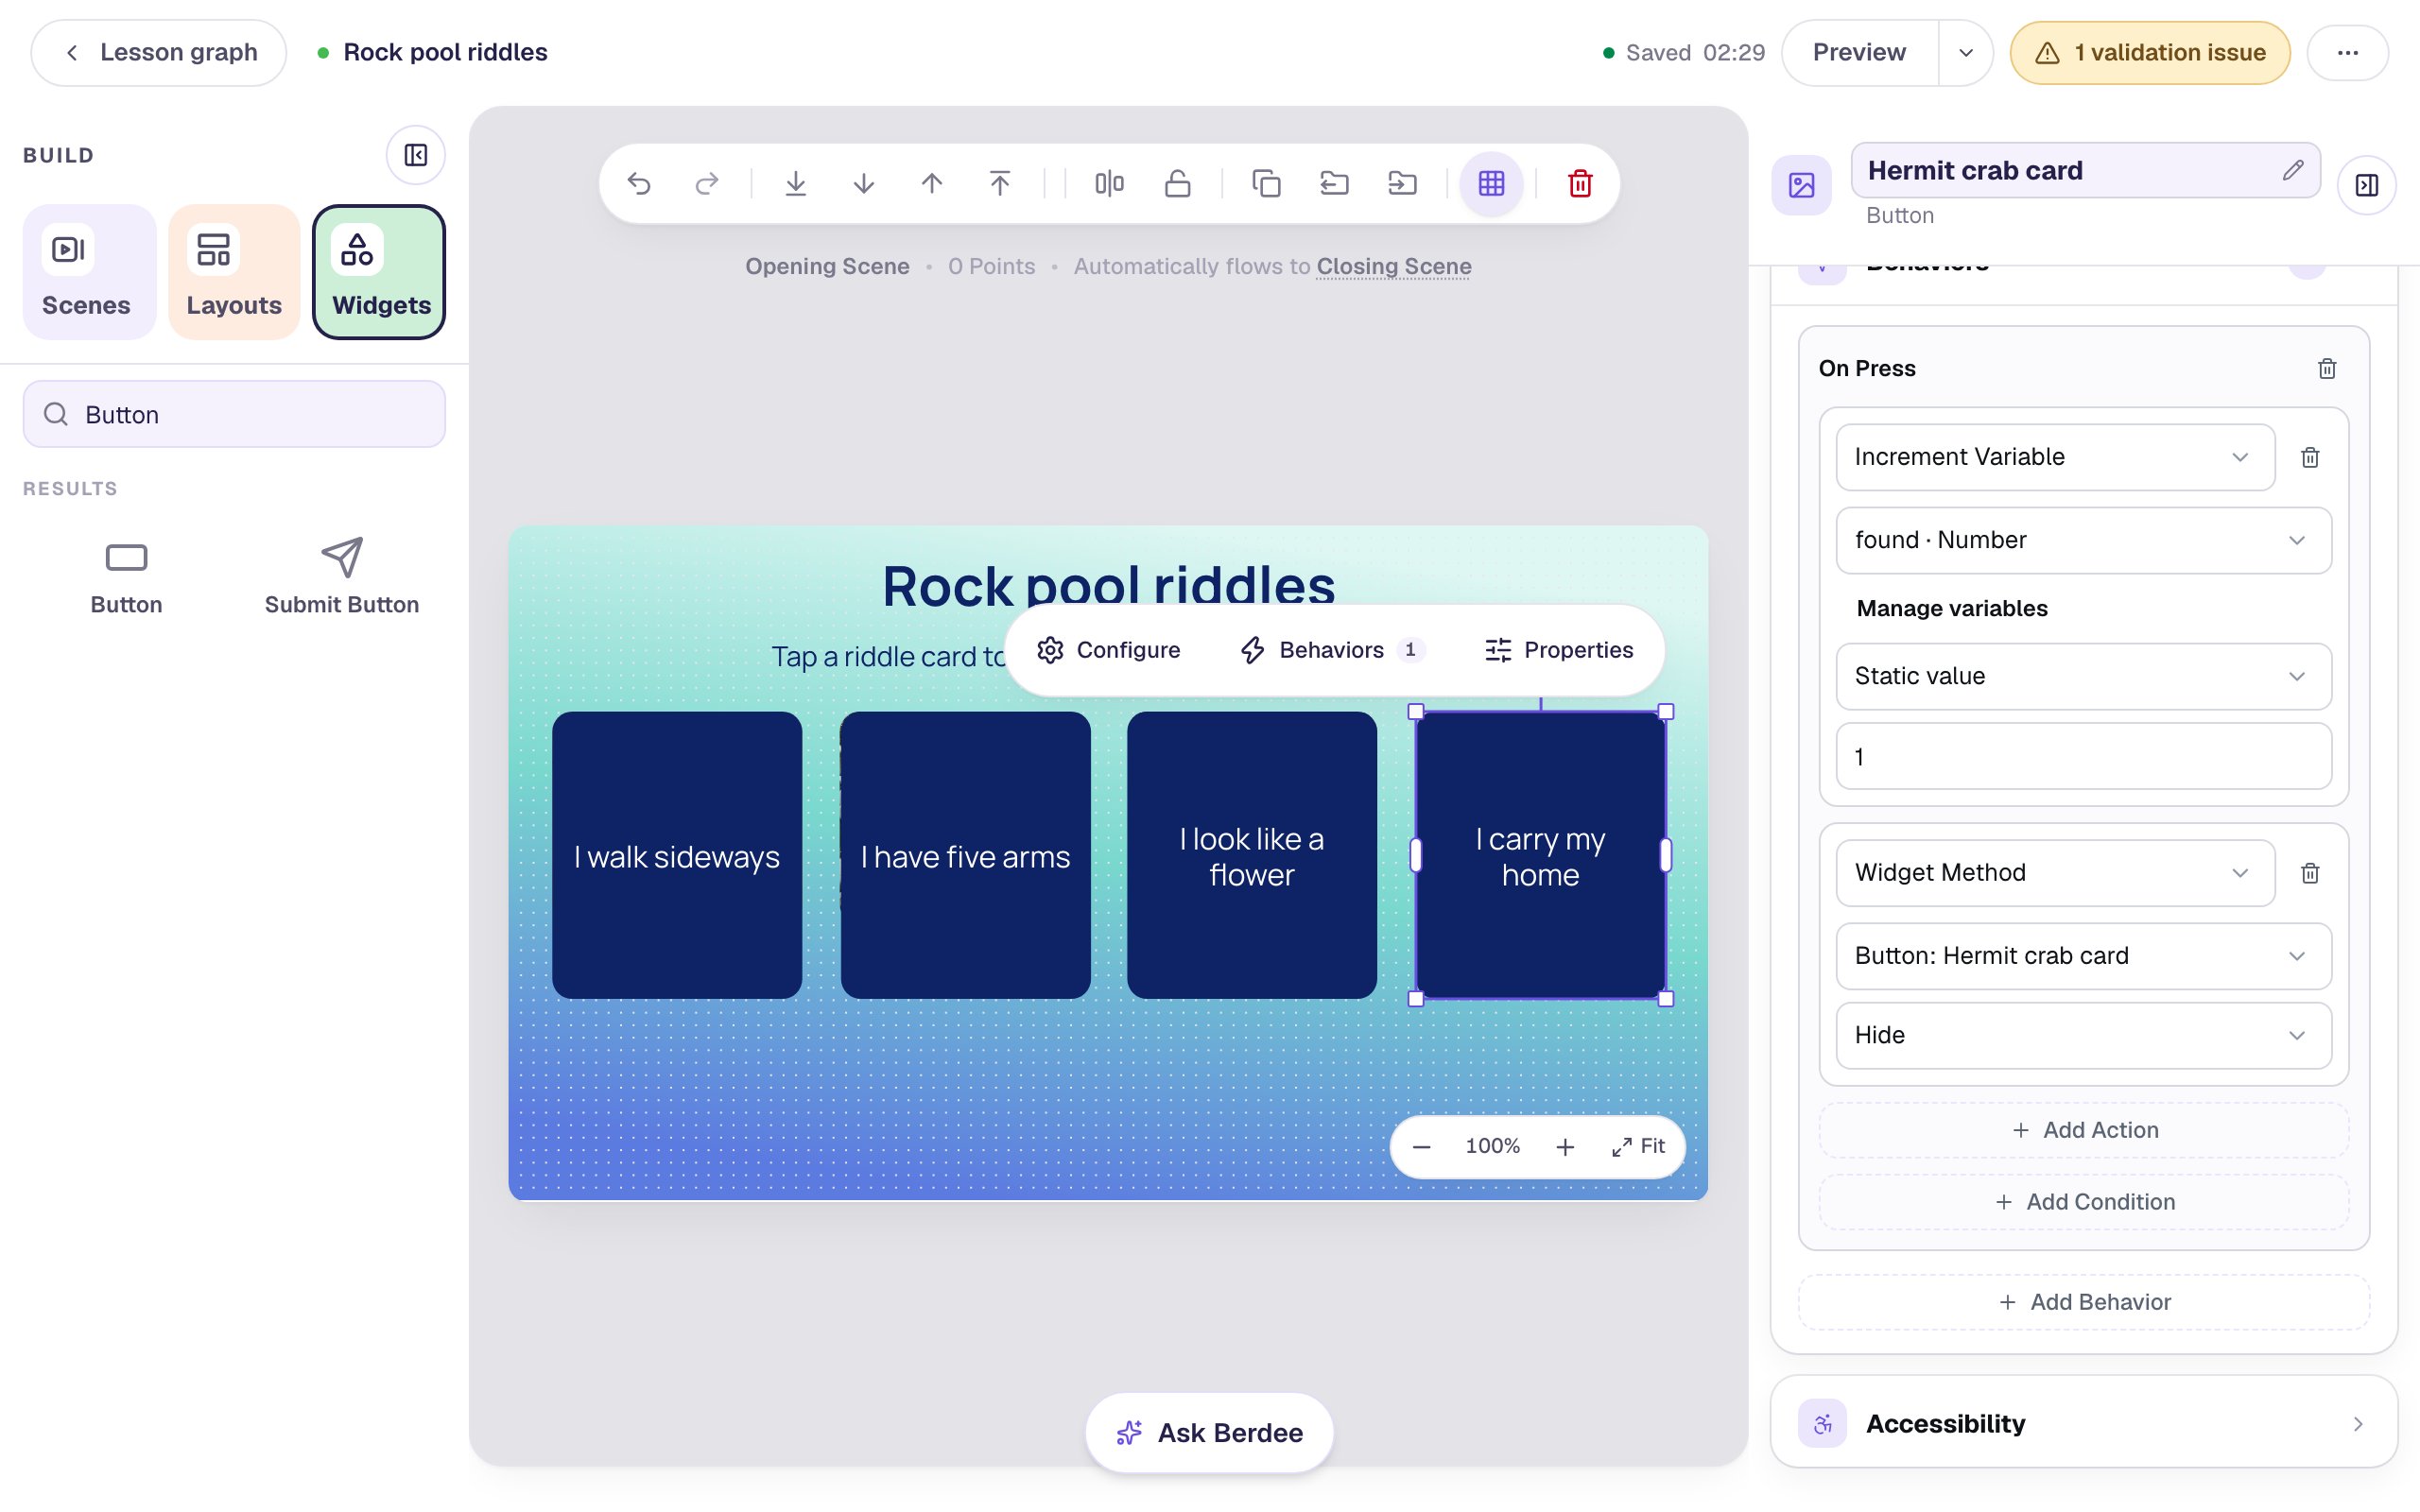
If a card picks the wrong name, tapping it hides a different card and leaves itself on screen, and a student can tap it again and again to run up the count. When you test in Step 8, check that every card disappears when you tap it.
Step 6: Show the count
Click an empty spot on the scene and add a Body text. Type:
Creatures found: {{ found }} of 4
The part in double curly braces is a placeholder. Wherever students see {{ found }}, they see the current value of the variable instead: 0 at the start, then 1, 2, and so on as they tap. The text updates the moment the variable changes, with no button to press.
Then style it so it stands out under the cards:
- Rename it
Count. - In Style & Layout, choose Fixed width and set Width to
440. A fixed width keeps the line from wrapping when the number changes. - Set Font Size to
26, Text Color to navy and Background Color to white. - Drag it under the cards.
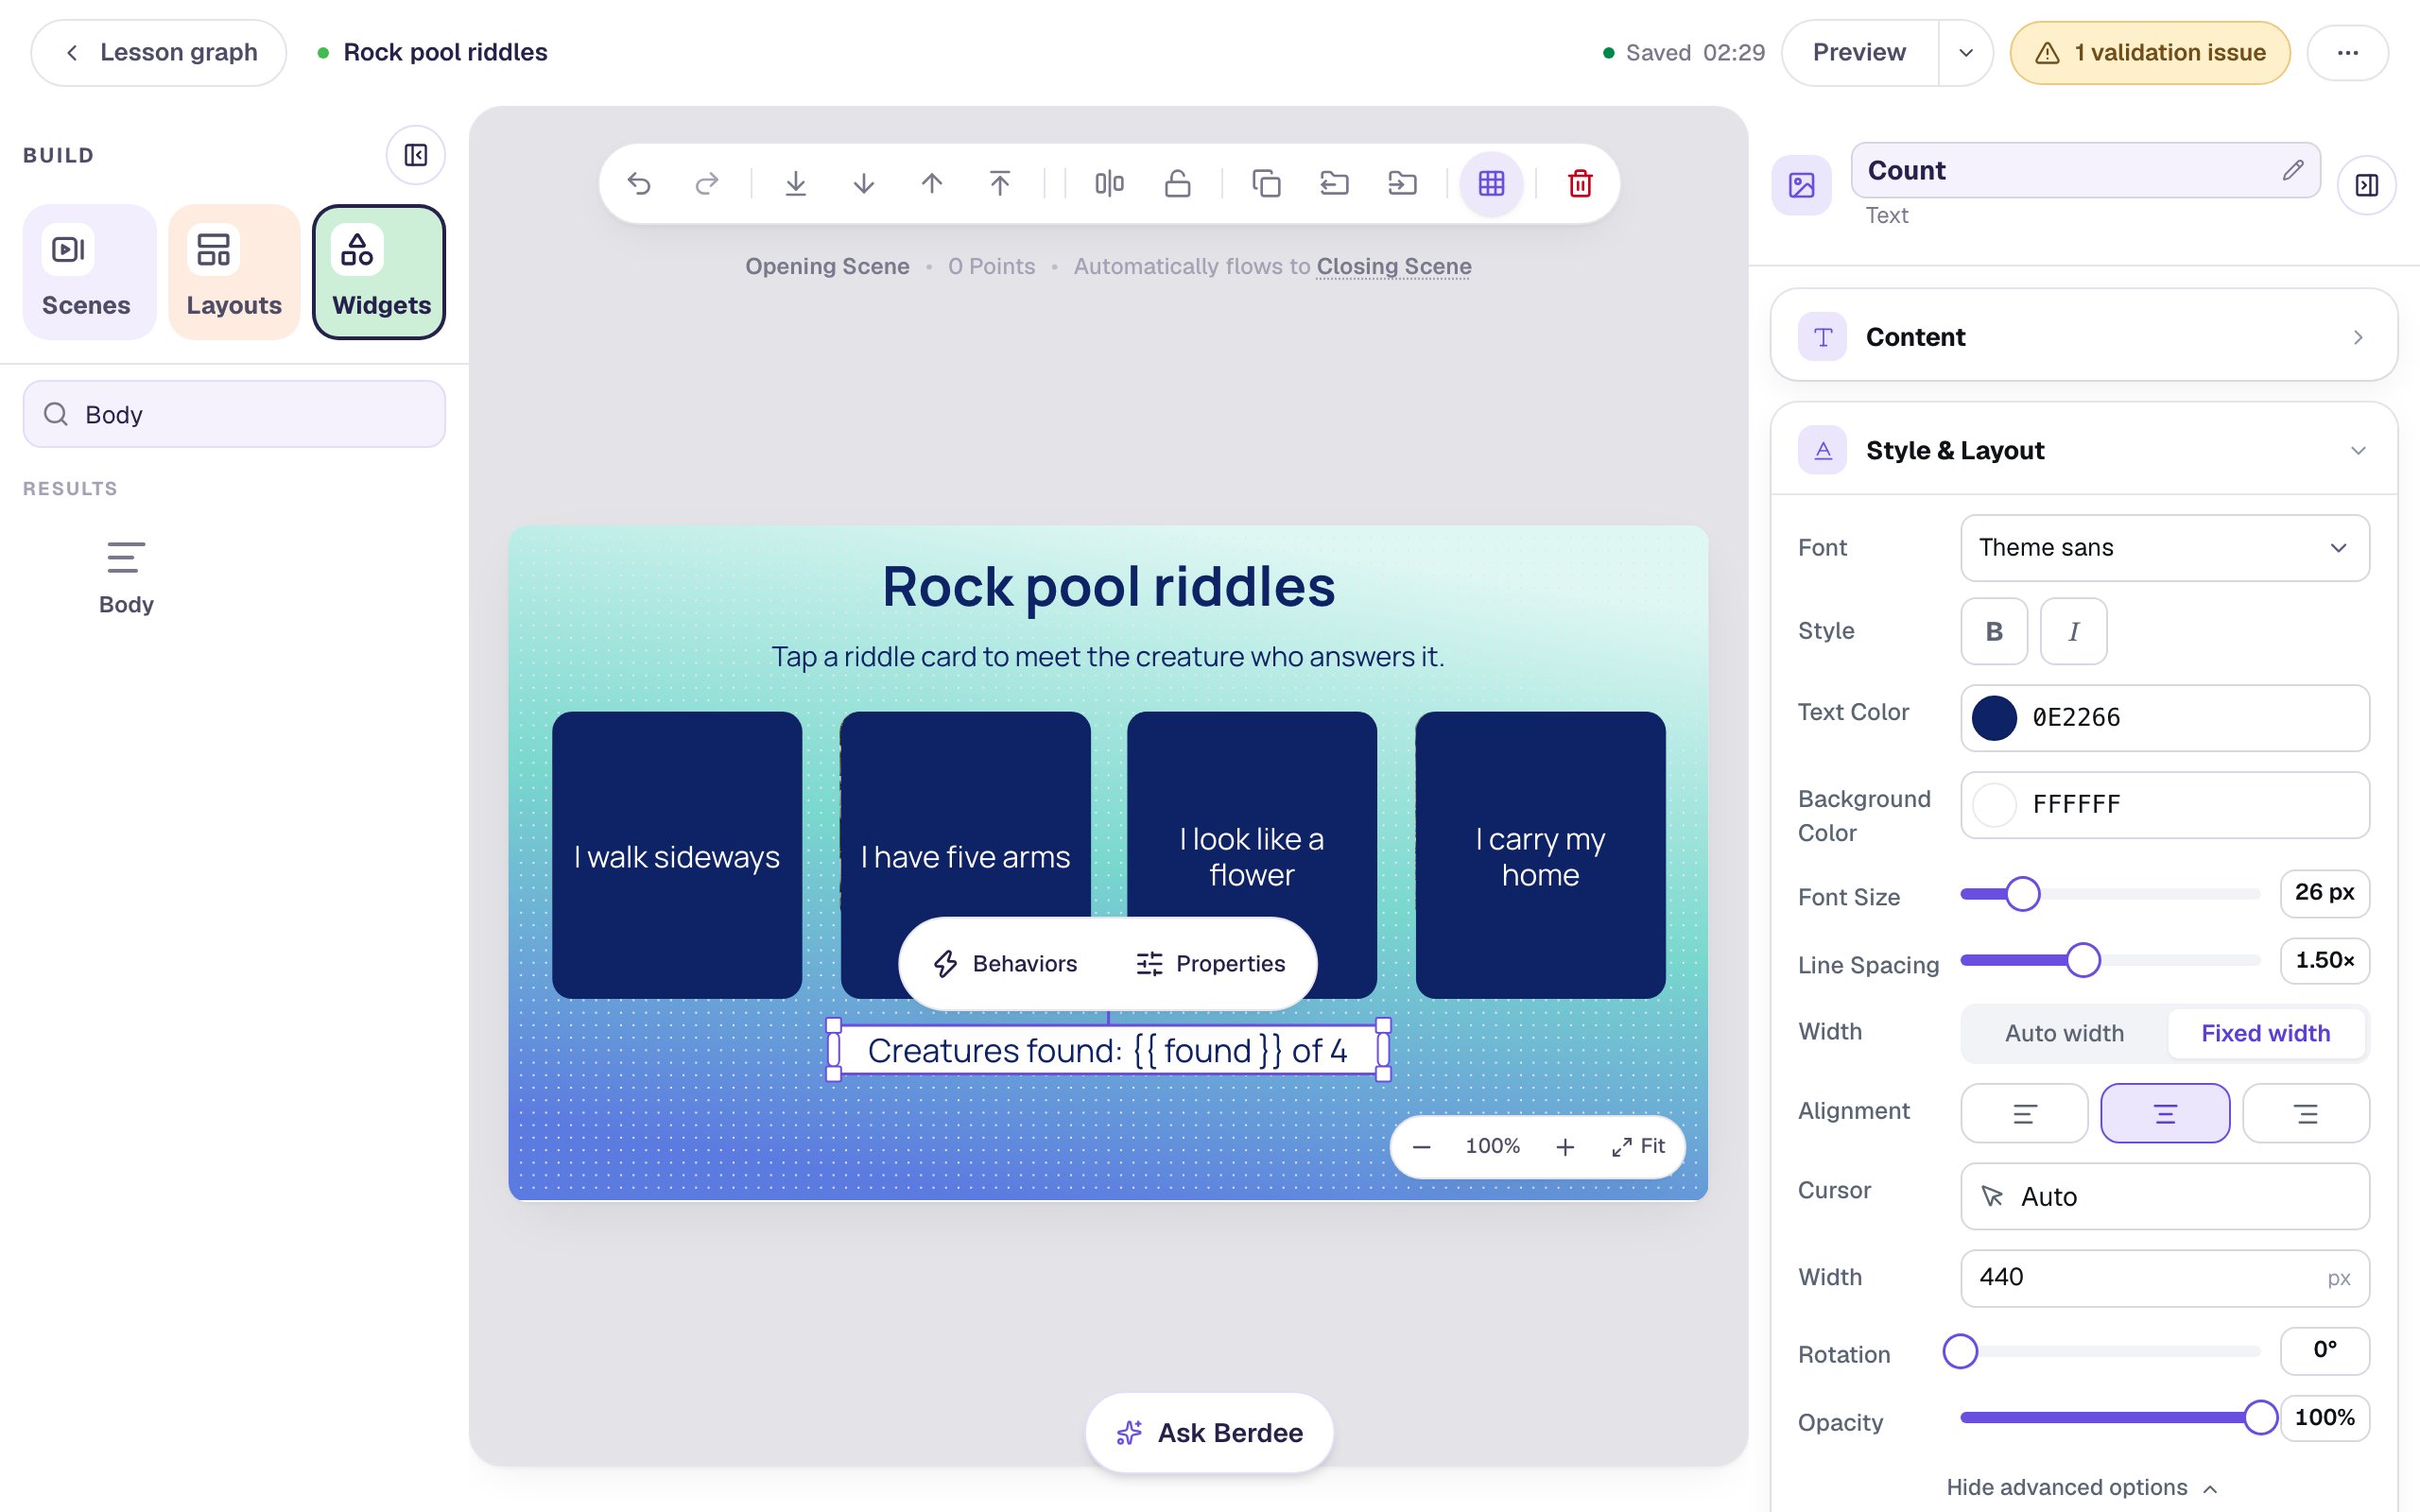
The studio doesn't know what a student has found yet, so the canvas shows the placeholder exactly as you typed it, braces and all. You'll see the real number in Preview.
Spell the variable's name exactly as you created it. {{ Found }} or {{ found_count }} doesn't match found, and students would see a blank where the number should be.
Step 7: Show a Finish button once all four are found
Click an empty spot on the scene and add a Button. In ⚙ Configure, set its Label to You found them all! Finish. Rename it Finish, set Font Size to 22, Background to orange and Text to navy.
To make it go to the ending, click Behaviors on the canvas pill, choose Make this a "Next" button, and click Add behavior. Drag it under the count.
Now hide it until the count reaches 4. With the button selected, open Visibility:
- Change Mode to Conditional. Behavior is already Show: show the button when the condition is true, and hide it otherwise.
- In the first condition list, pick Variable: found · Number. It's near the bottom of the list, after the widgets.
- Change the comparison to is at least.
- The value type starts as Text. Change it to Number.
- Type
4in the value box.
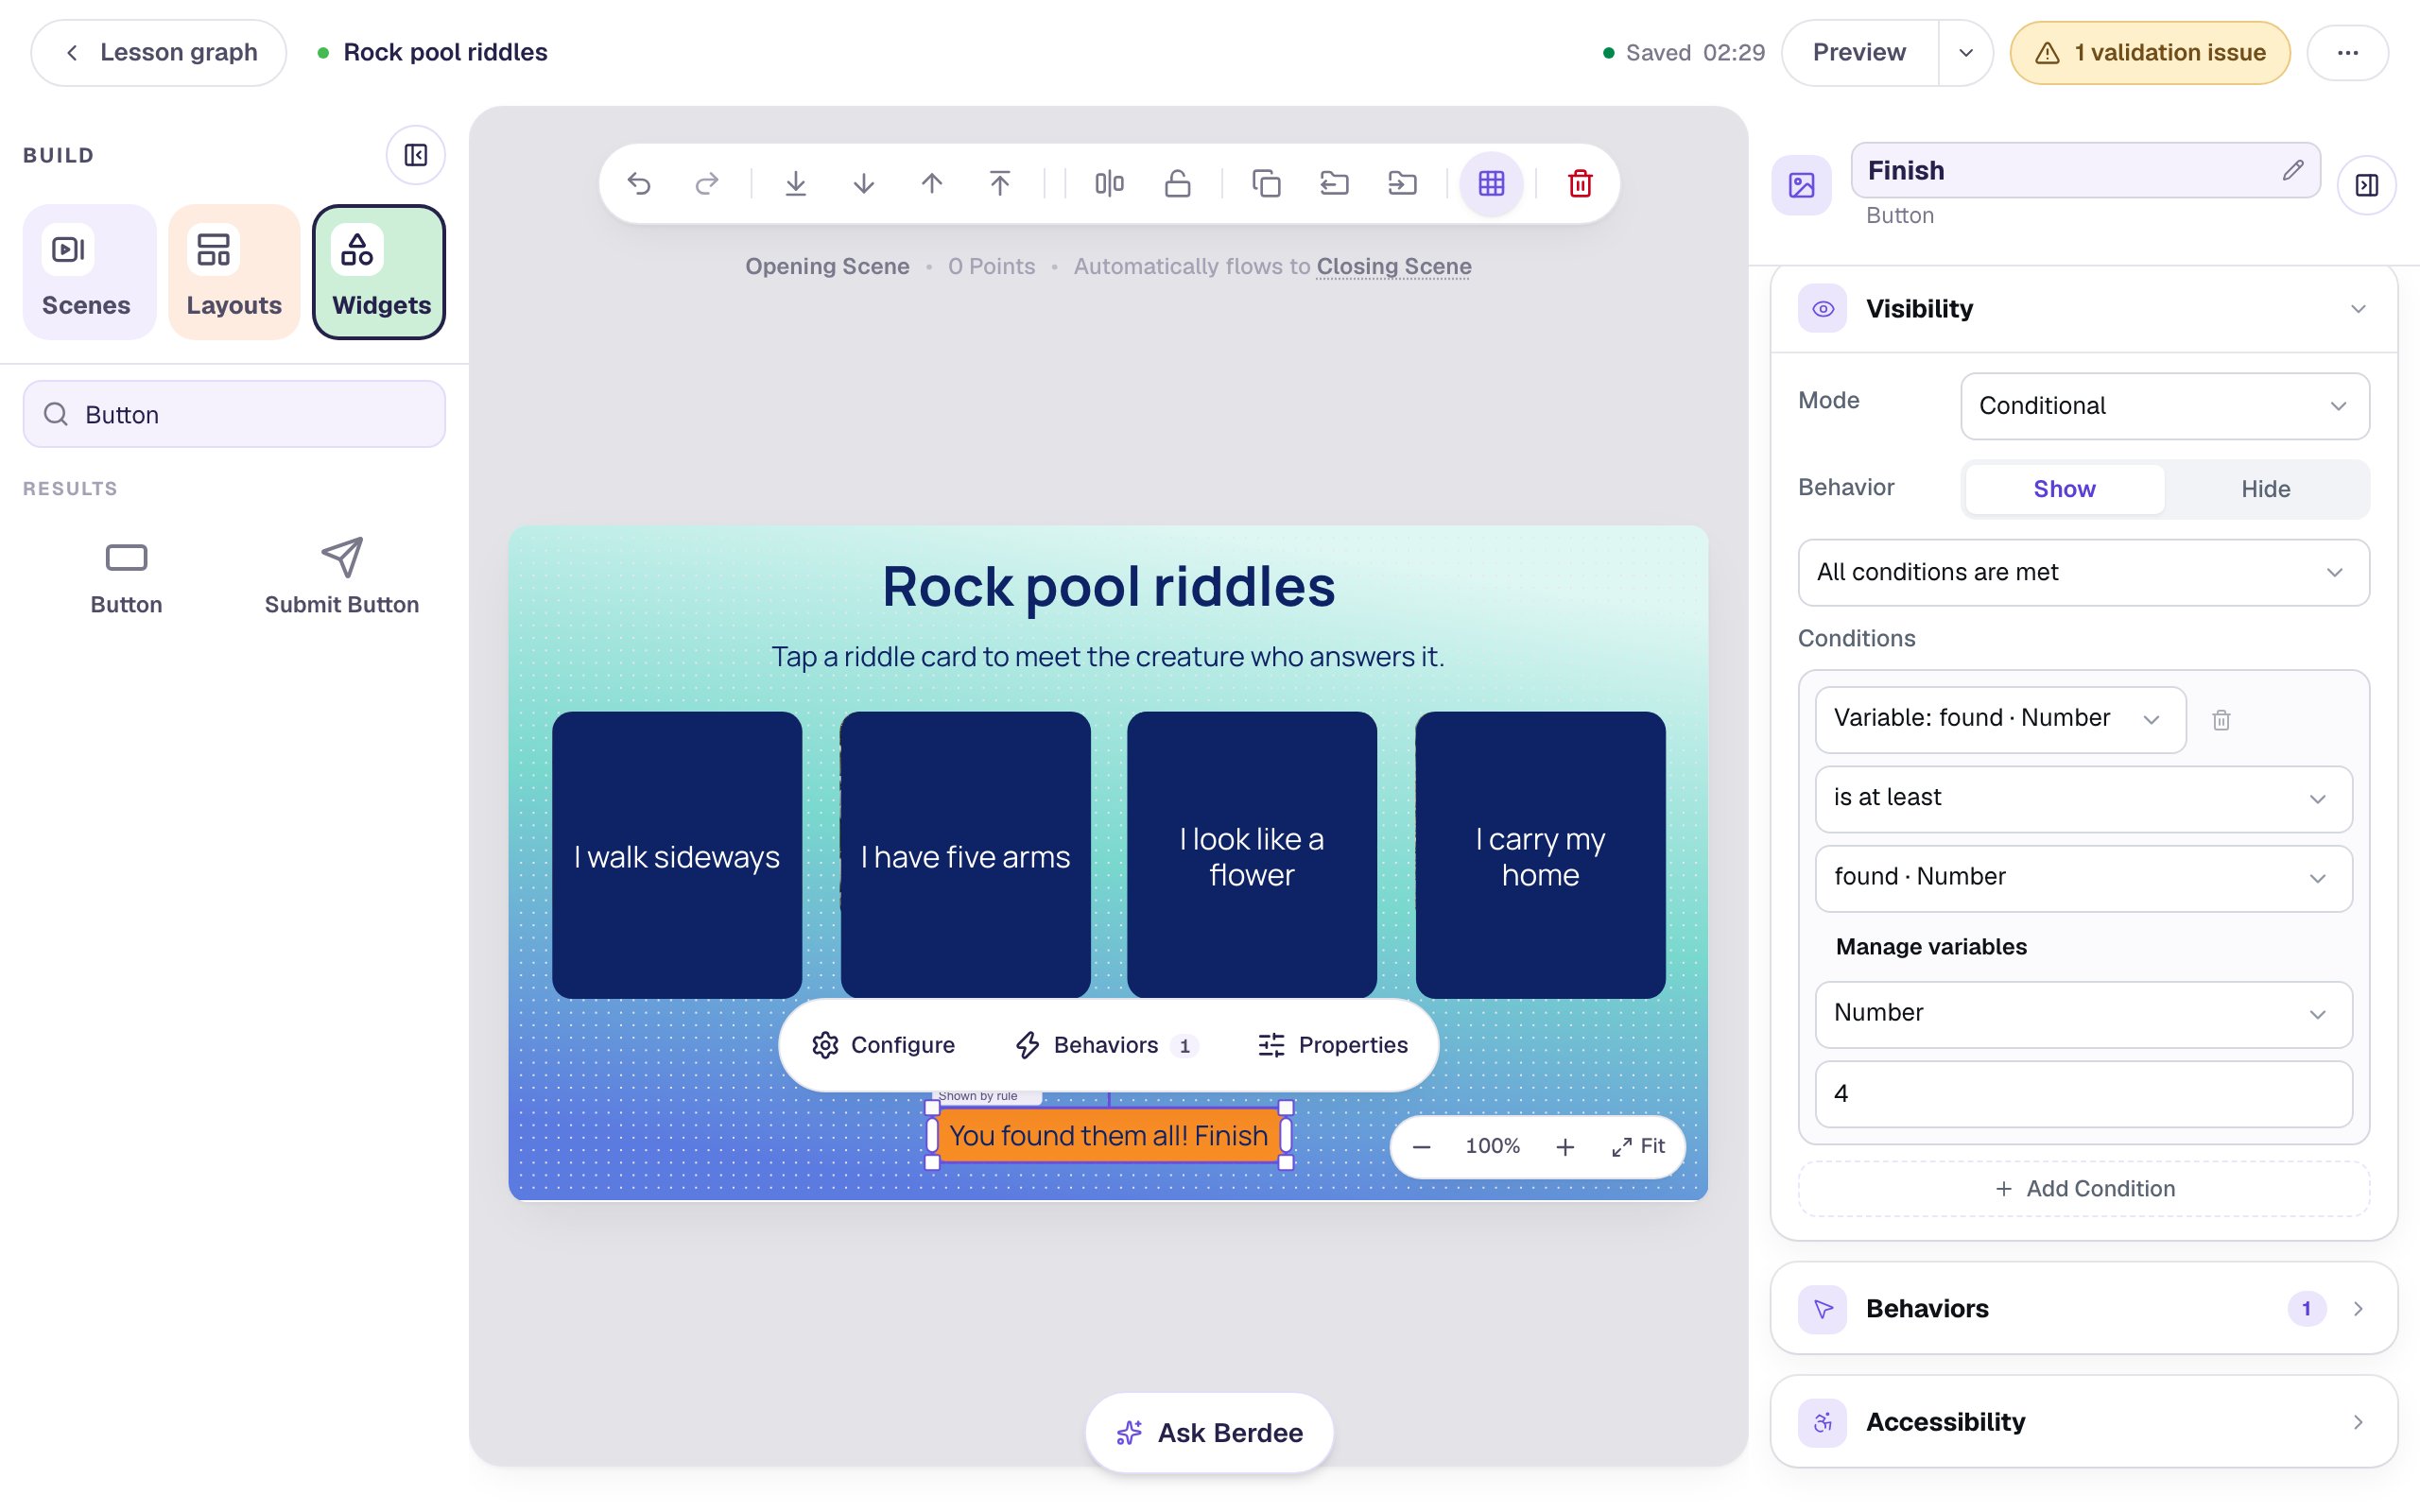
Don't skip the Number step: compared as text, found would never count as "at least" 4, and the button would never appear.
Step 8: Try it as a student
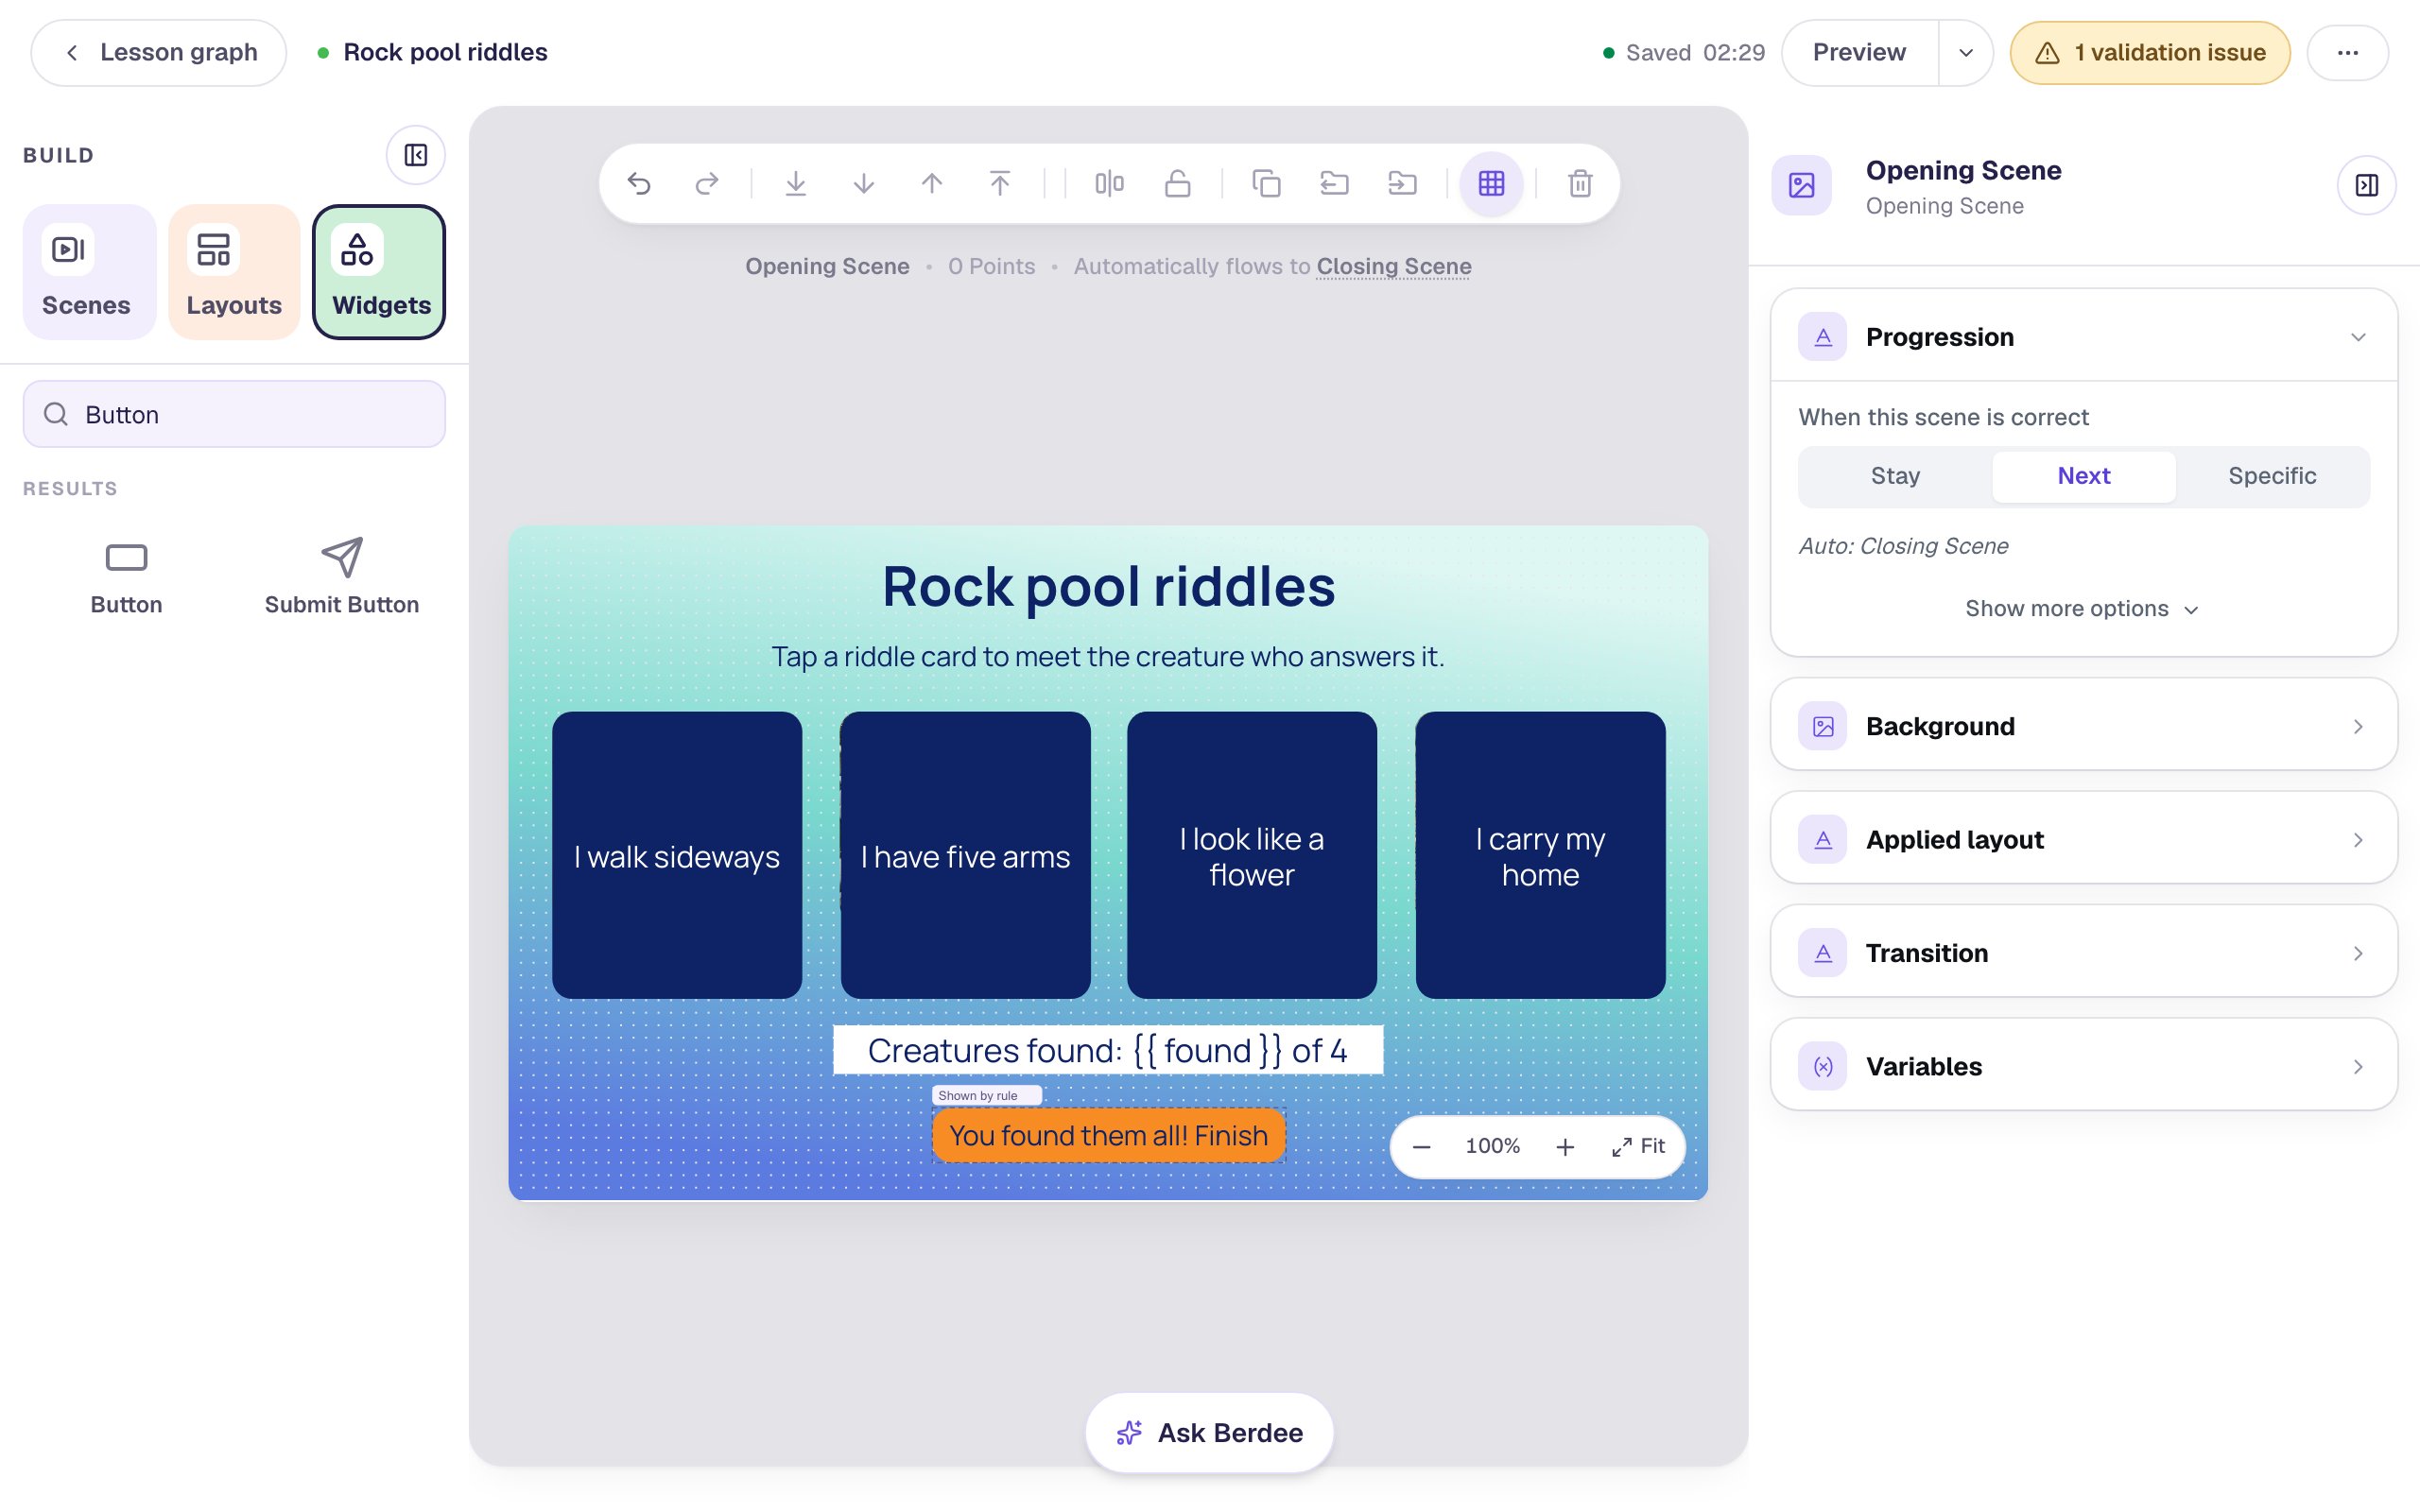
The yellow 1 validation issue pill at the top is about publishing: before you publish, Berdee needs a Submit button set to Lesson somewhere in the lesson. Build your first quiz question shows where it goes. It doesn't stop you previewing.
Click Preview and play it through:
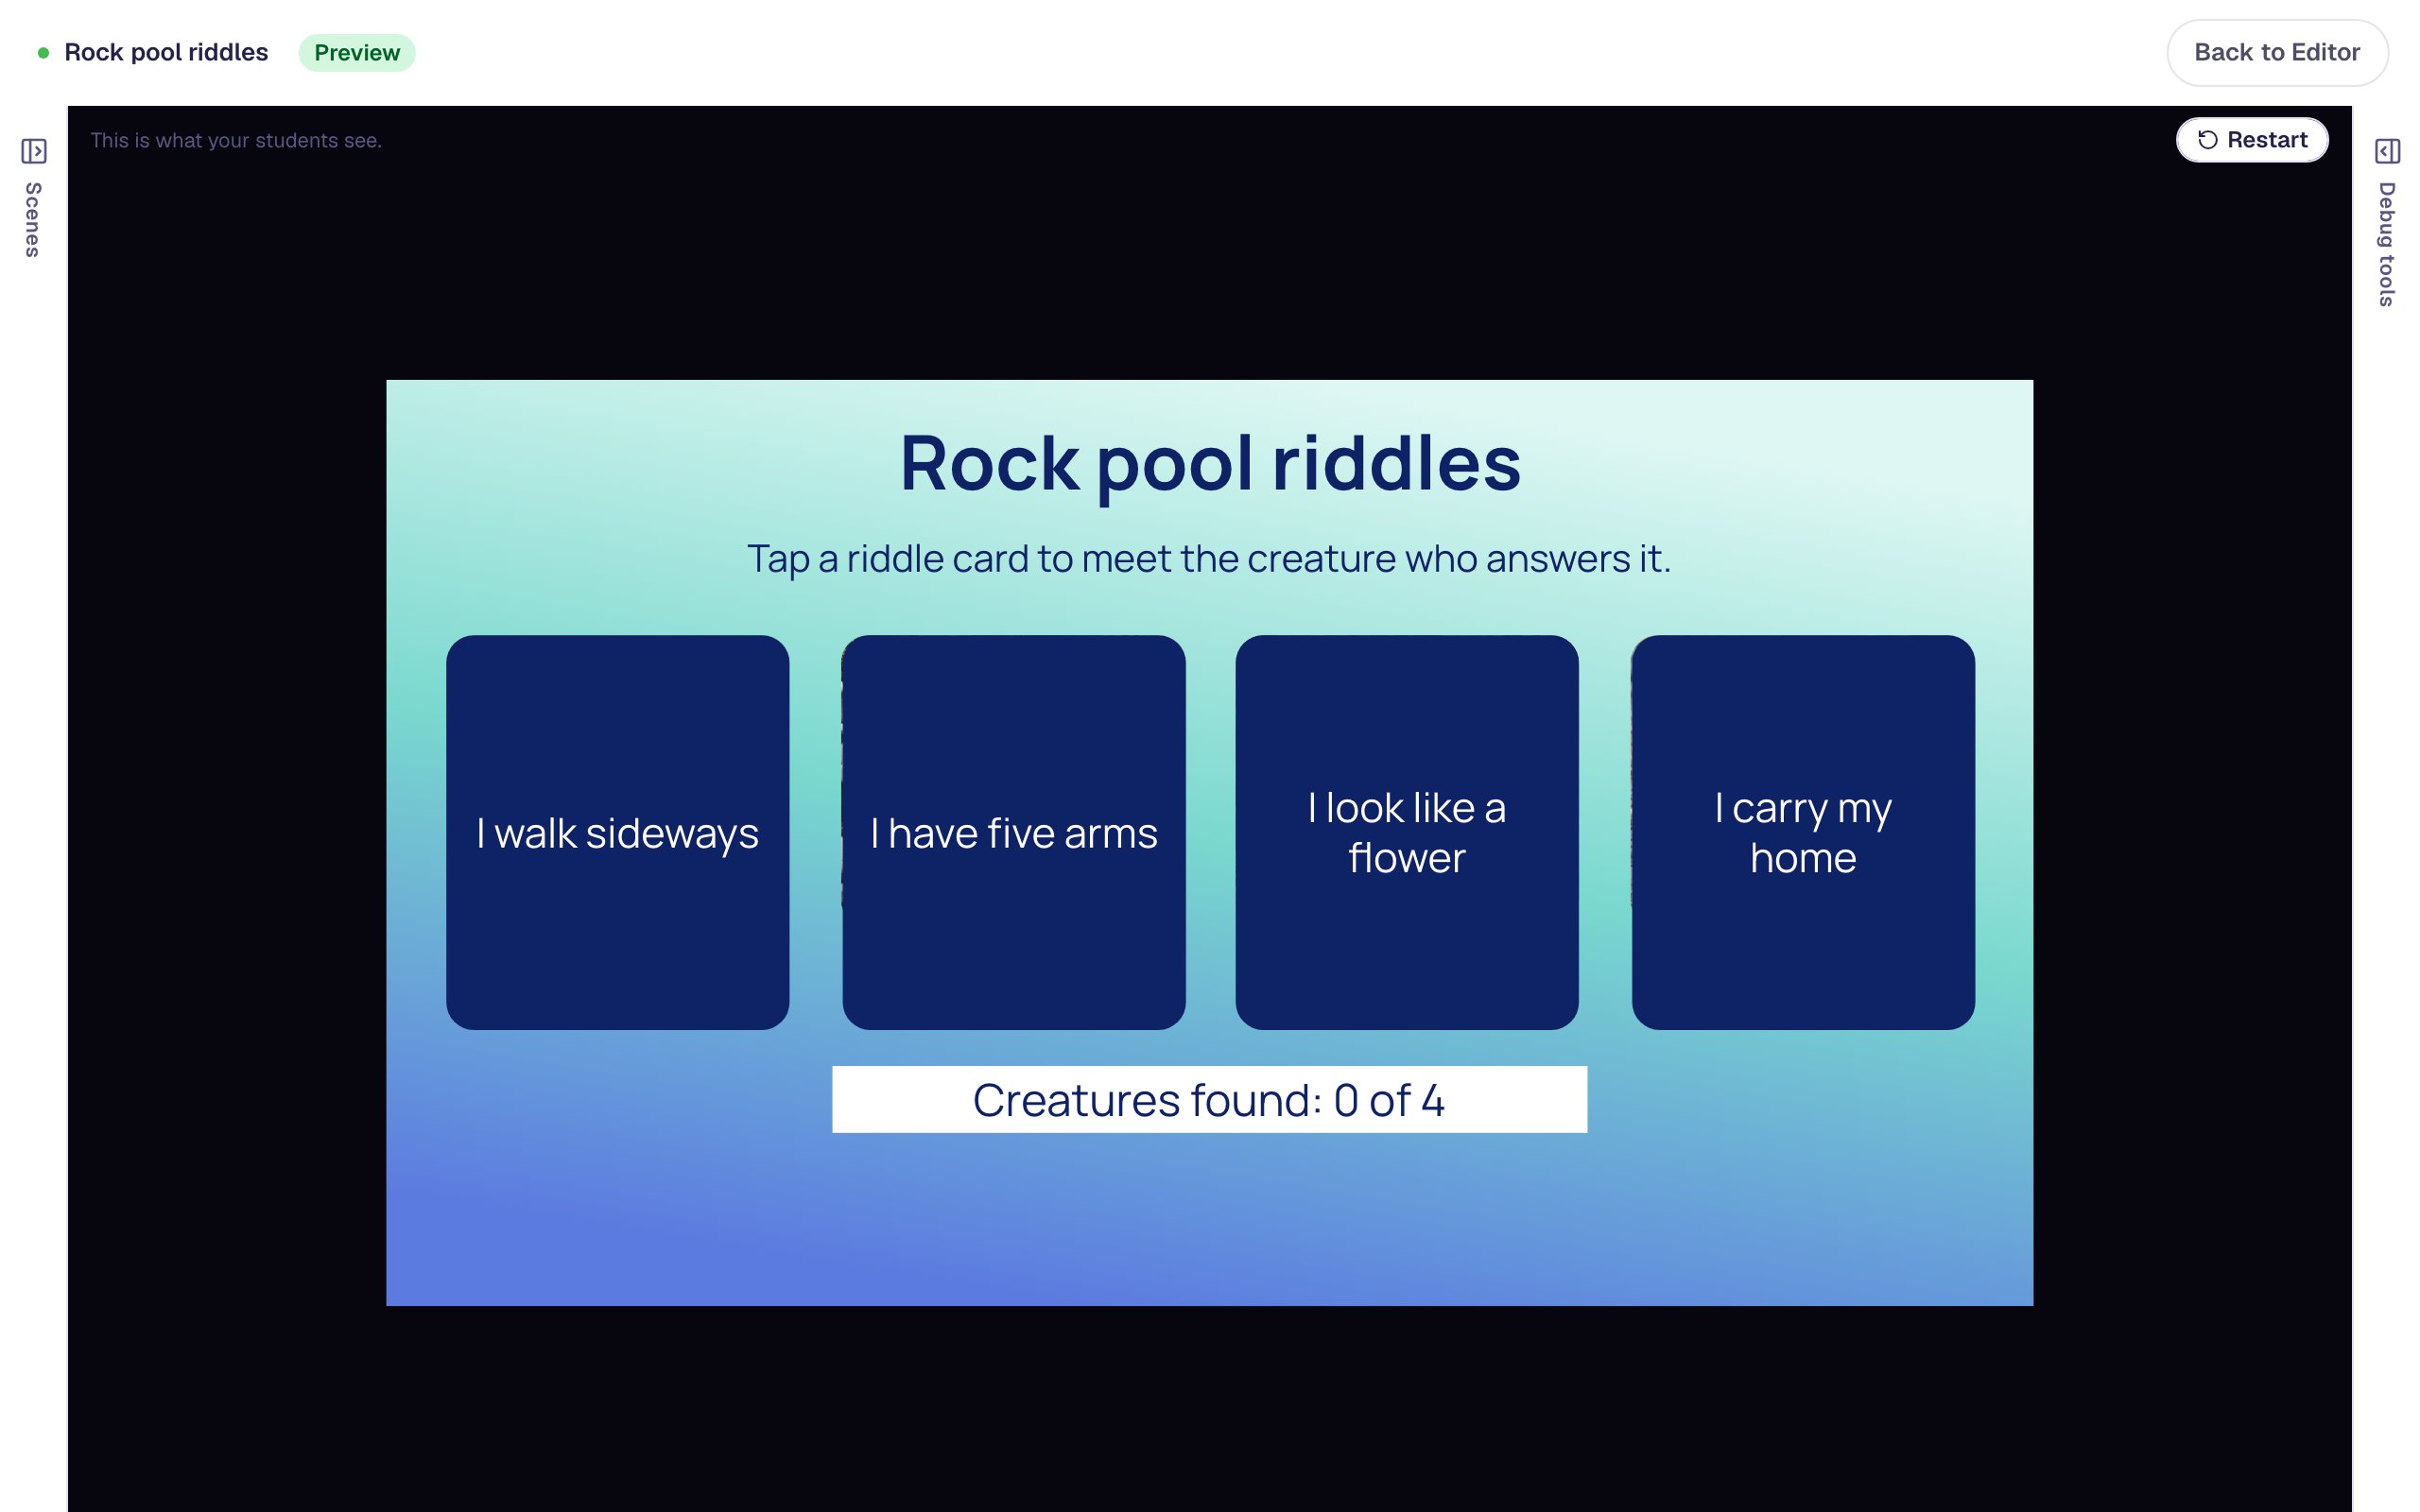
- The scene opens with every creature hidden and the count at 0.
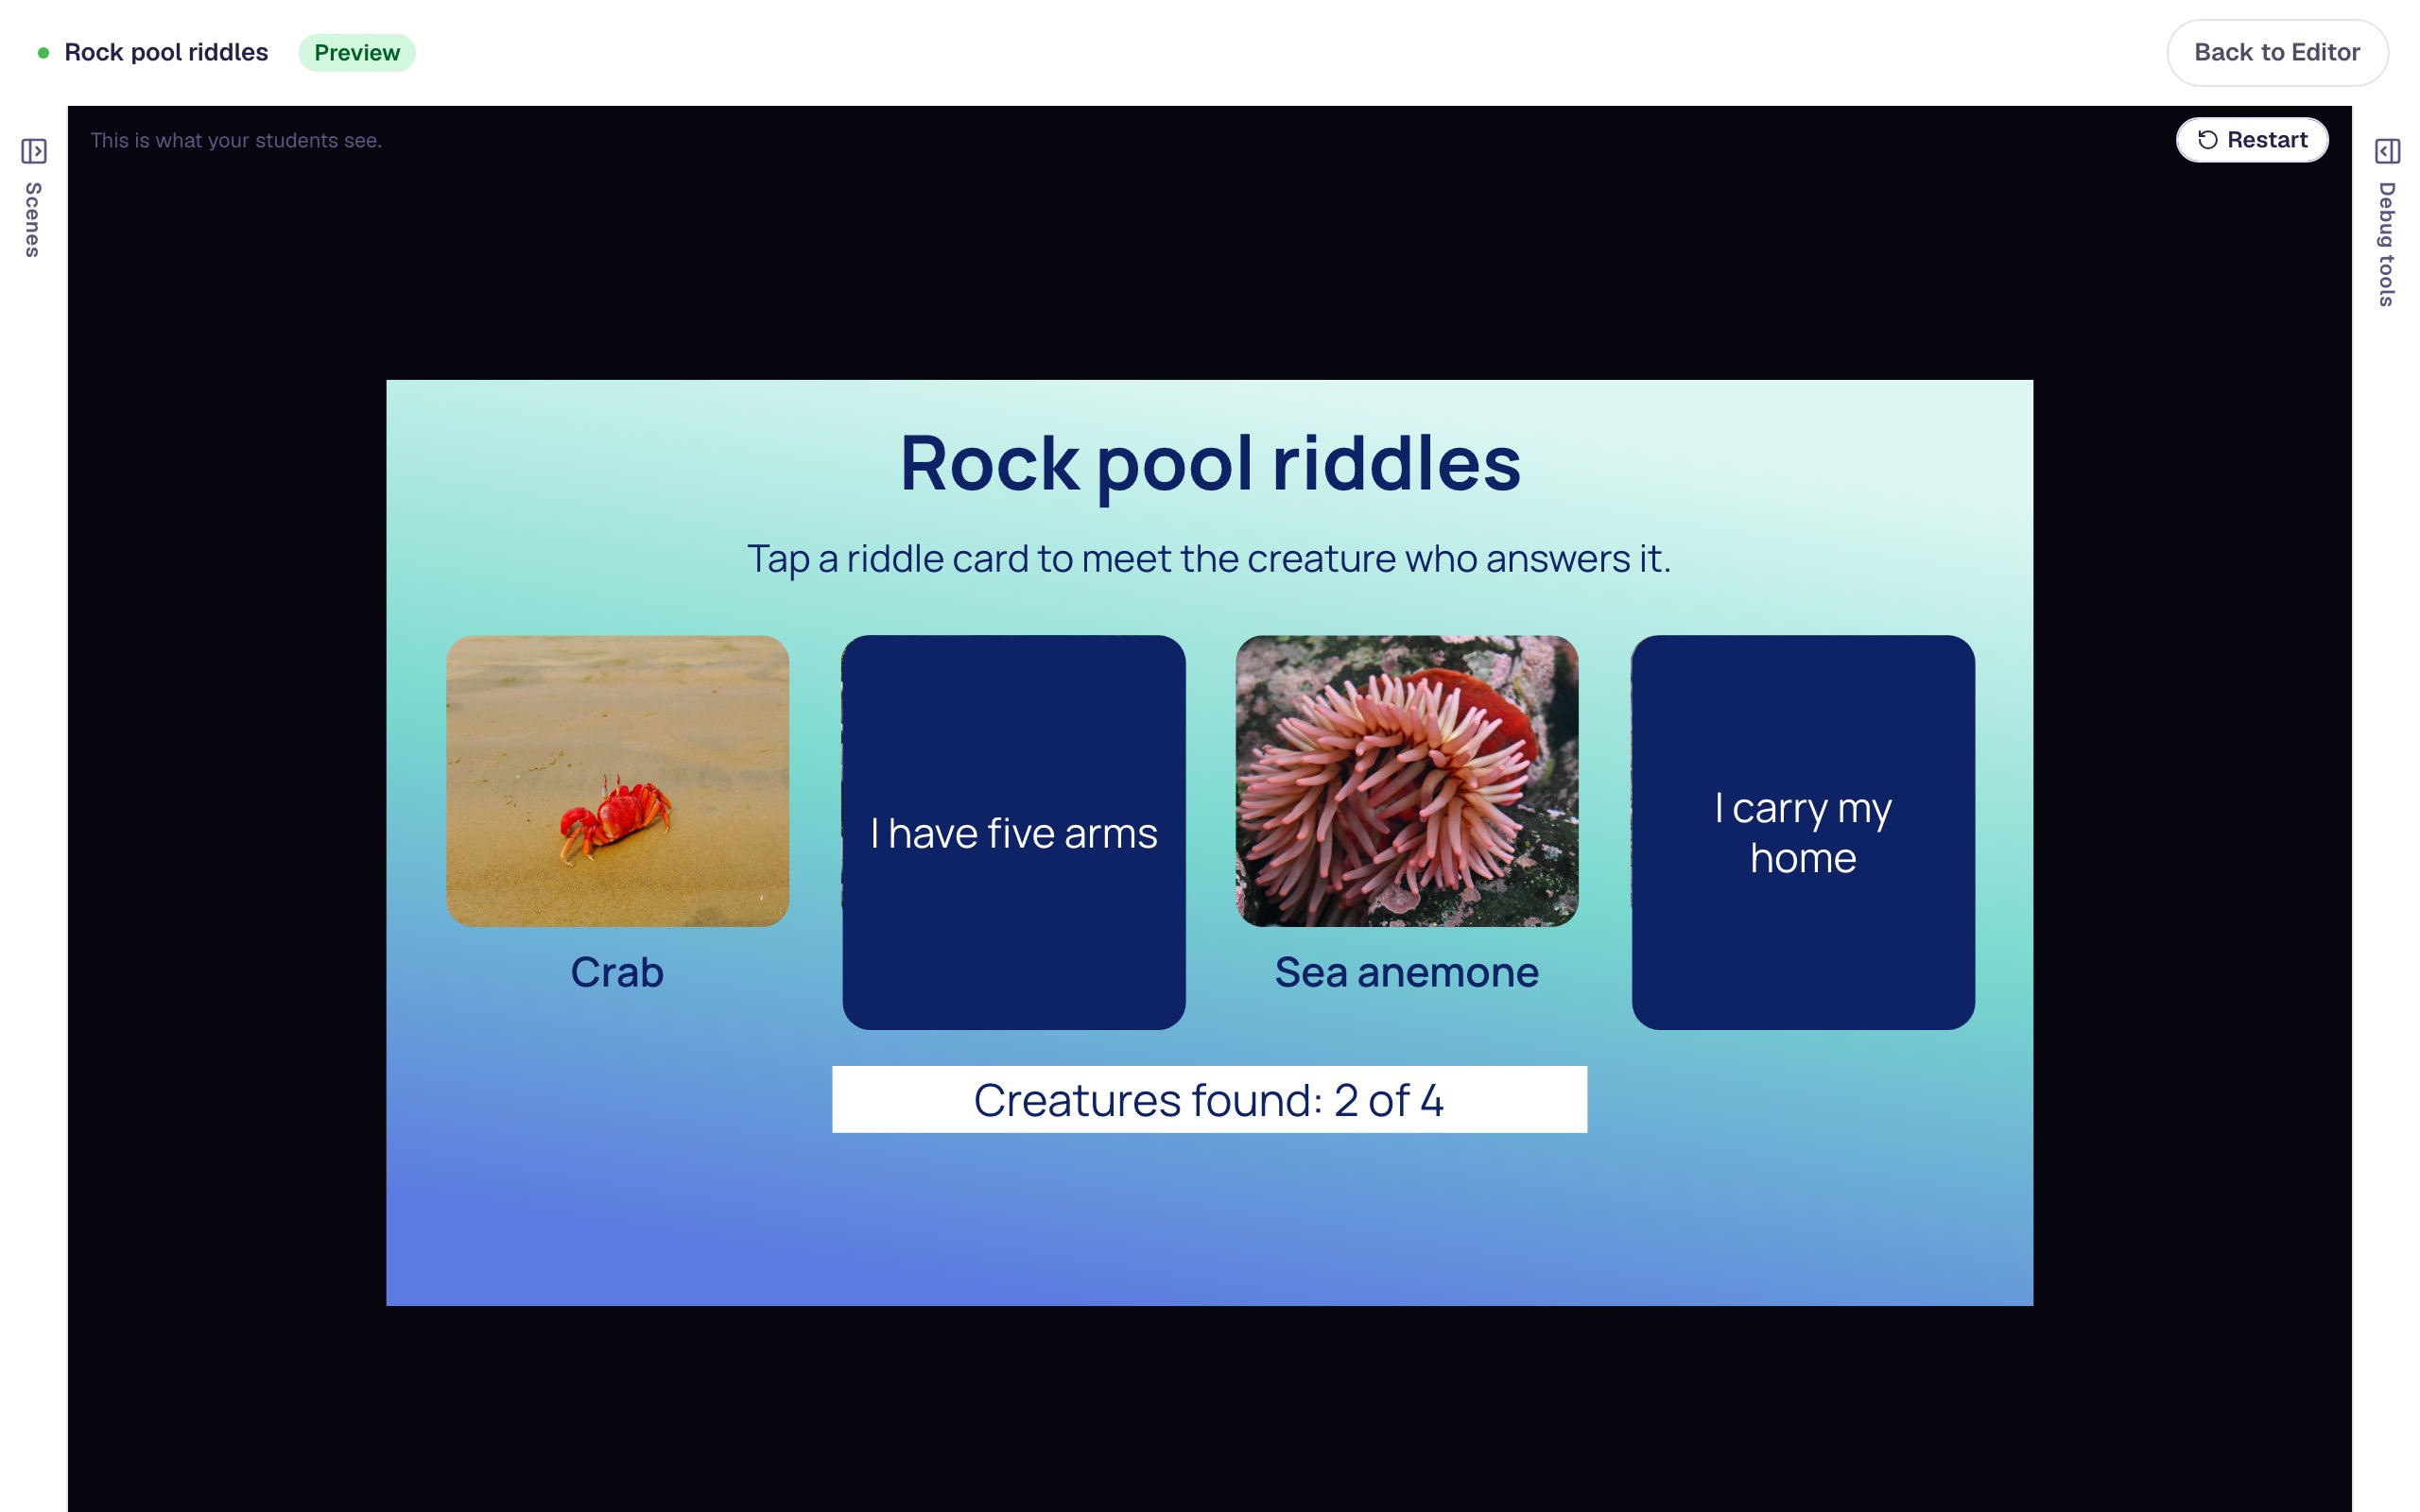
- Tap I walk sideways, then I look like a flower. Each card disappears, its creature appears with its name, and the count goes up. Tap the crab photo now: nothing happens, because its card is already gone.
- Tap the last two cards. When the count reaches 4, the Finish button appears.
- Tap You found them all! Finish to go to the ending.
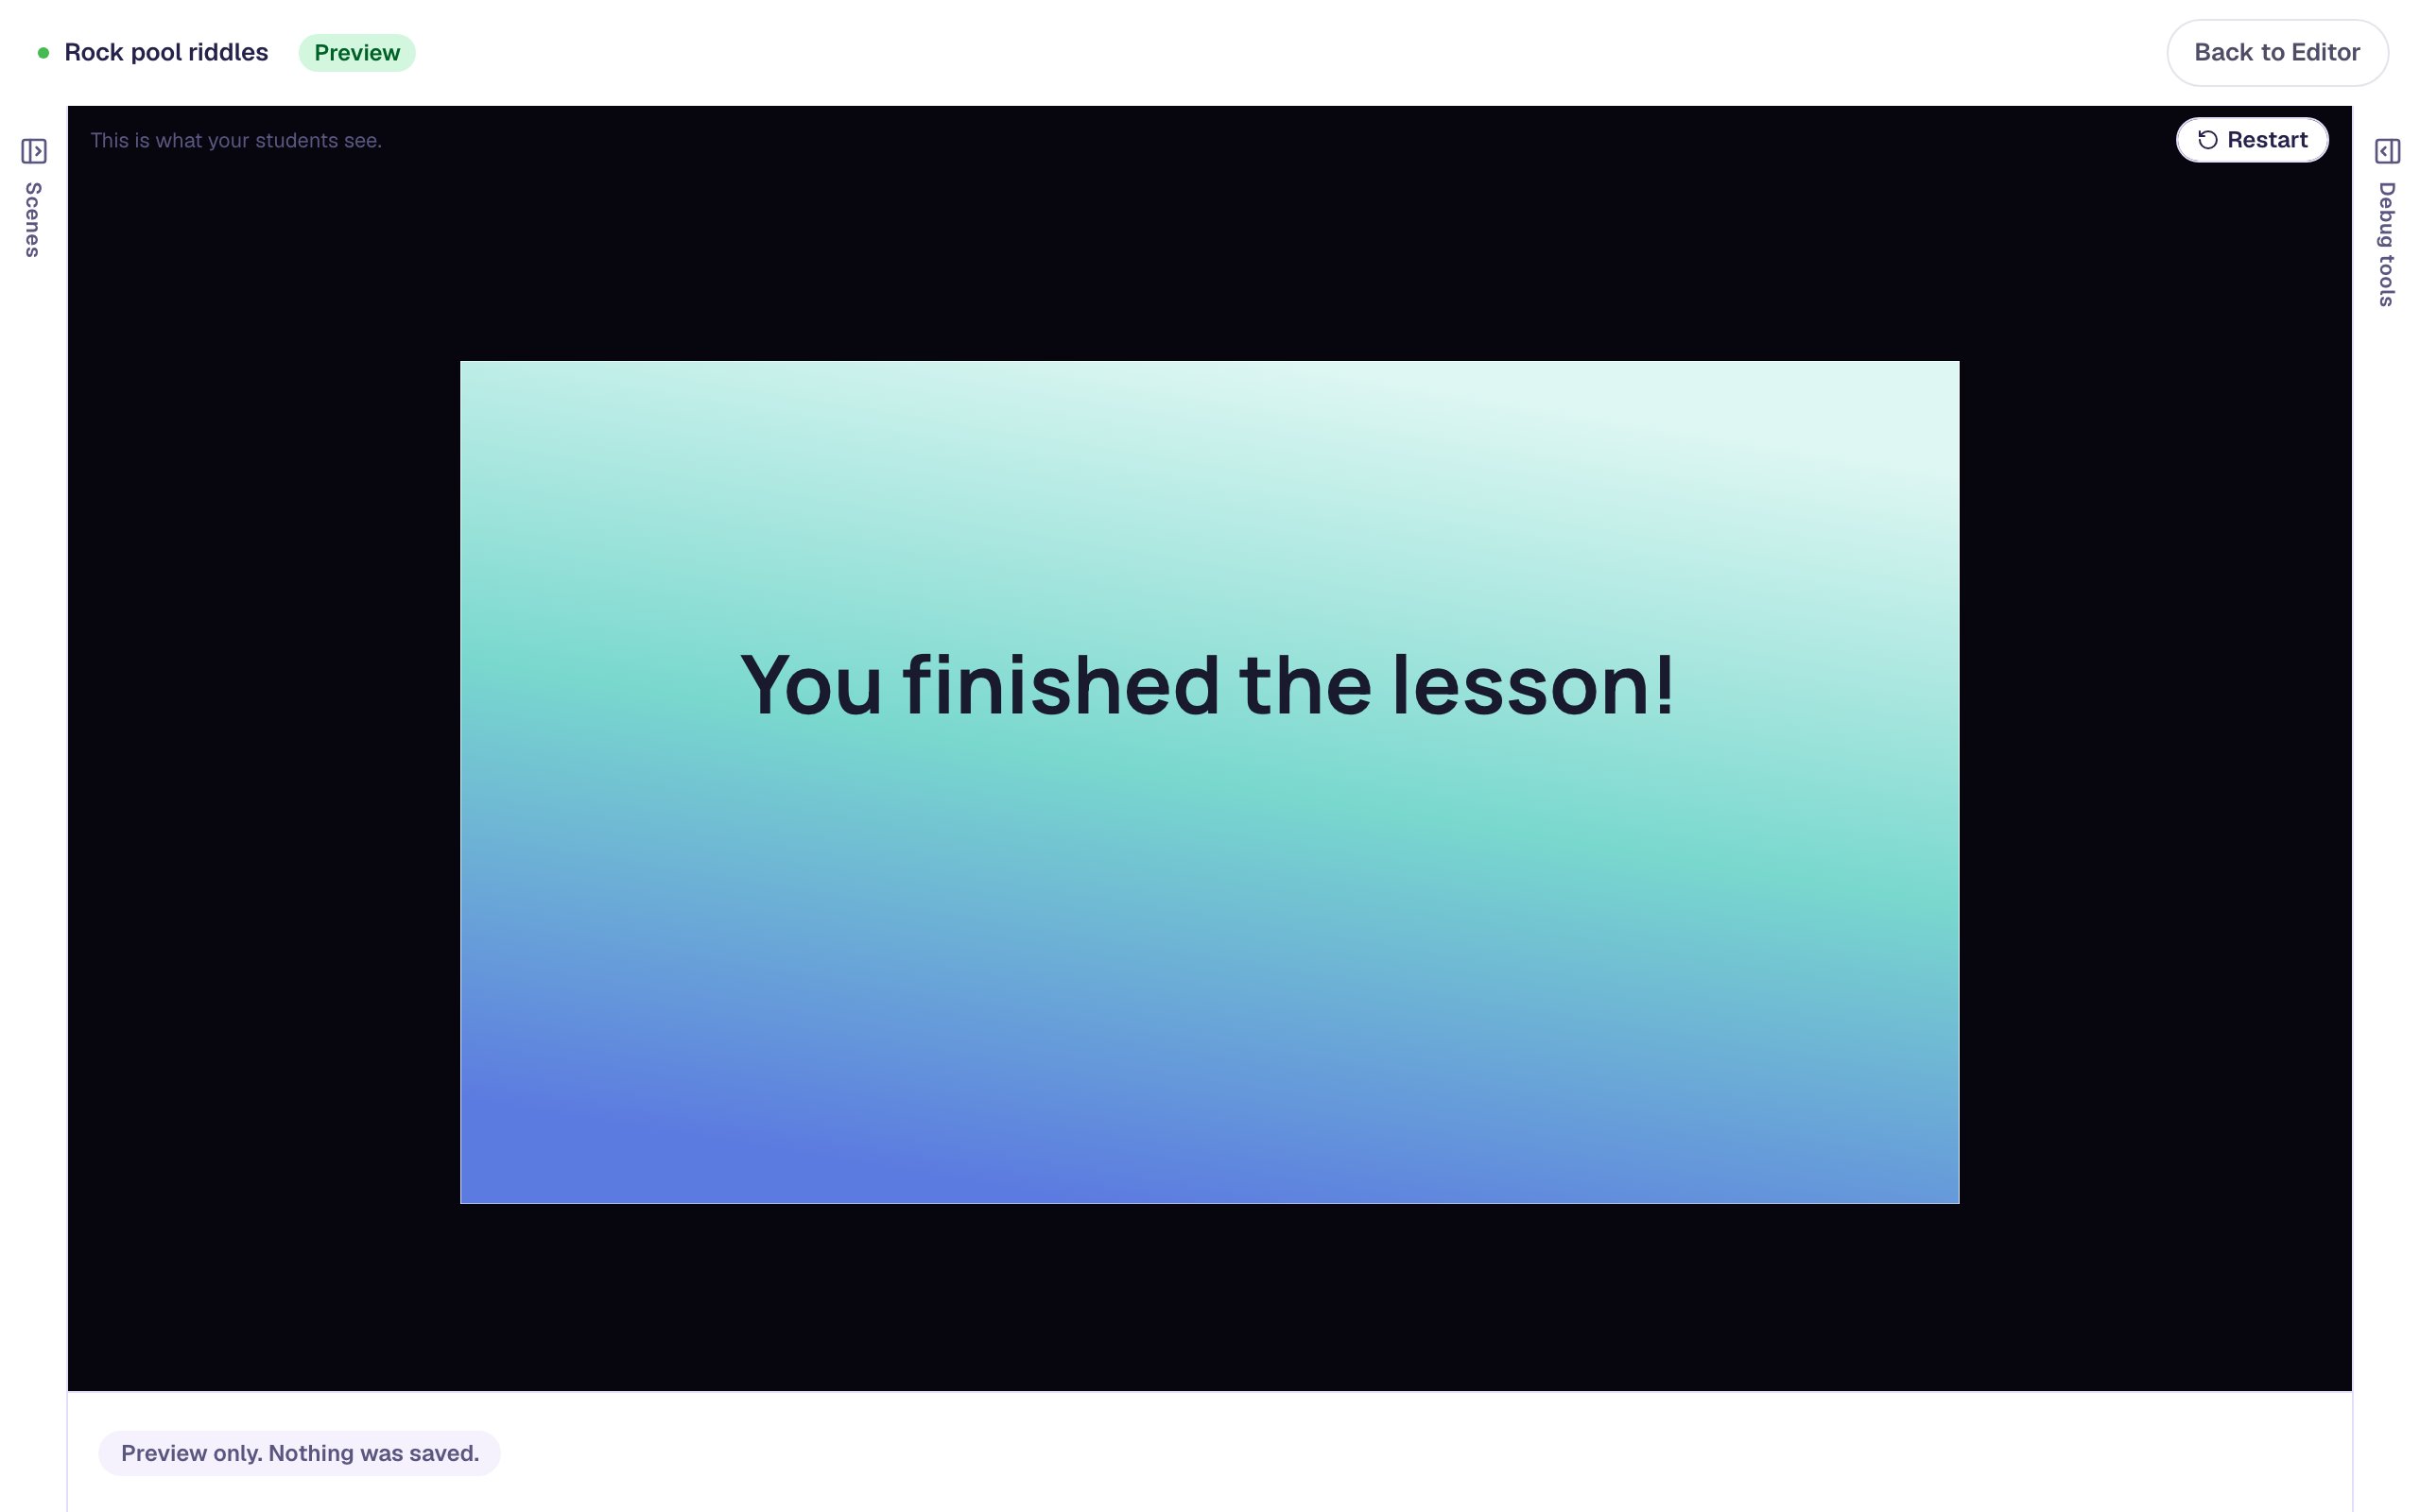
To try again from 0, click Restart at the top right of the preview. Show debug tools at the side of the preview has a Variables tab where you can watch found change as you tap.
What you built
A scene that shows students their progress as they explore:
- a number variable,
found, starting at 0, - four riddle cards, each with an On Press behavior that runs Increment Variable on
foundand then hides the card itself with Widget Method → Hide, - a text,
Creatures found: {{ found }} of 4, that shows the current count wherever the placeholder sits, and - a Finish button with a Conditional visibility rule, Show when
foundis at least 4.
The same pattern fits any "find them all" activity: label the parts of a plant, spot the nouns in a picture, or visit every station on a map. Change the 4 in the text and in the rule when you add or remove cards.
To let students explore across several scenes instead of one, see Finish only after students explore every part, which uses a router to send them back until they've seen everything.
Make this lesson yours
Add the lesson you just watched being built to your account, then change it for your class: your questions, your pictures, your colors.
Free to sign up, and you'll come straight back here. I have an account