Draw a rectangle from a clue on dot paper
Use the Dot Paper widget to ask young learners for a rectangle with 2 long sides and 2 short sides. Berdee checks every shape they draw, refuses a square, and accepts a tilted rectangle as readily as a flat one.
- Level
- Beginner
- Time
- About 10 min
- Steps
- 8
- Updated
- Oct 17, 2026
A one-scene geometry lesson where students draw on dot paper from a clue, hear "Not yet" for a square, see "Yes! A rectangle." for any rectangle with 2 long and 2 short sides, and move on to the ending.
Get the finished lesson
Skip straight to the result, or keep it open beside the steps. Add this tutorial's lesson to your account and explore how it works in the studio.
Free to sign up, and you'll come straight back here. I have an account
Choosing a rectangle from a list shows a child can recognize one. Drawing one shows they know what makes it a rectangle: four square corners, and sides that come in pairs. That's why K–2 student books use dot paper. Children join dots with straight sides, and every shape comes out exact.
The Dot Paper widget brings that page onto the screen. Children tap a dot, then another, to draw each side, and tap Done when the shape is finished. Berdee counts the sides and corners, names the shape, and checks it against your clue. You never list the right answers: every shape that fits the clue is right, and nothing else is.
In this tutorial you'll build a one-scene lesson called Rectangles on dot paper. Its clue is "Draw a rectangle with 2 long sides and 2 short sides." A square doesn't fit, so Berdee says Not yet. A long flat rectangle fits, and so does a tilted one.
Step 1: Set the scene
Start a blank lesson (New lesson, then Start from scratch) and name it Rectangles on dot paper by clicking Untitled lesson at the top left.
Give the scene a calm background. Click an empty spot on the scene, open Background, click Choose a style, and pick Lagoon gradient. Give the Closing Scene the same background so the ending matches.
Then add what students read:
- A Heading at the top left:
Draw a rectangle. Set its Font Size to36. - A Body on the right:
Tap a dot, then another dot, to draw a side. Tap Done when your shape is finished.Set it to Fixed width,230wide, and Font Size22.
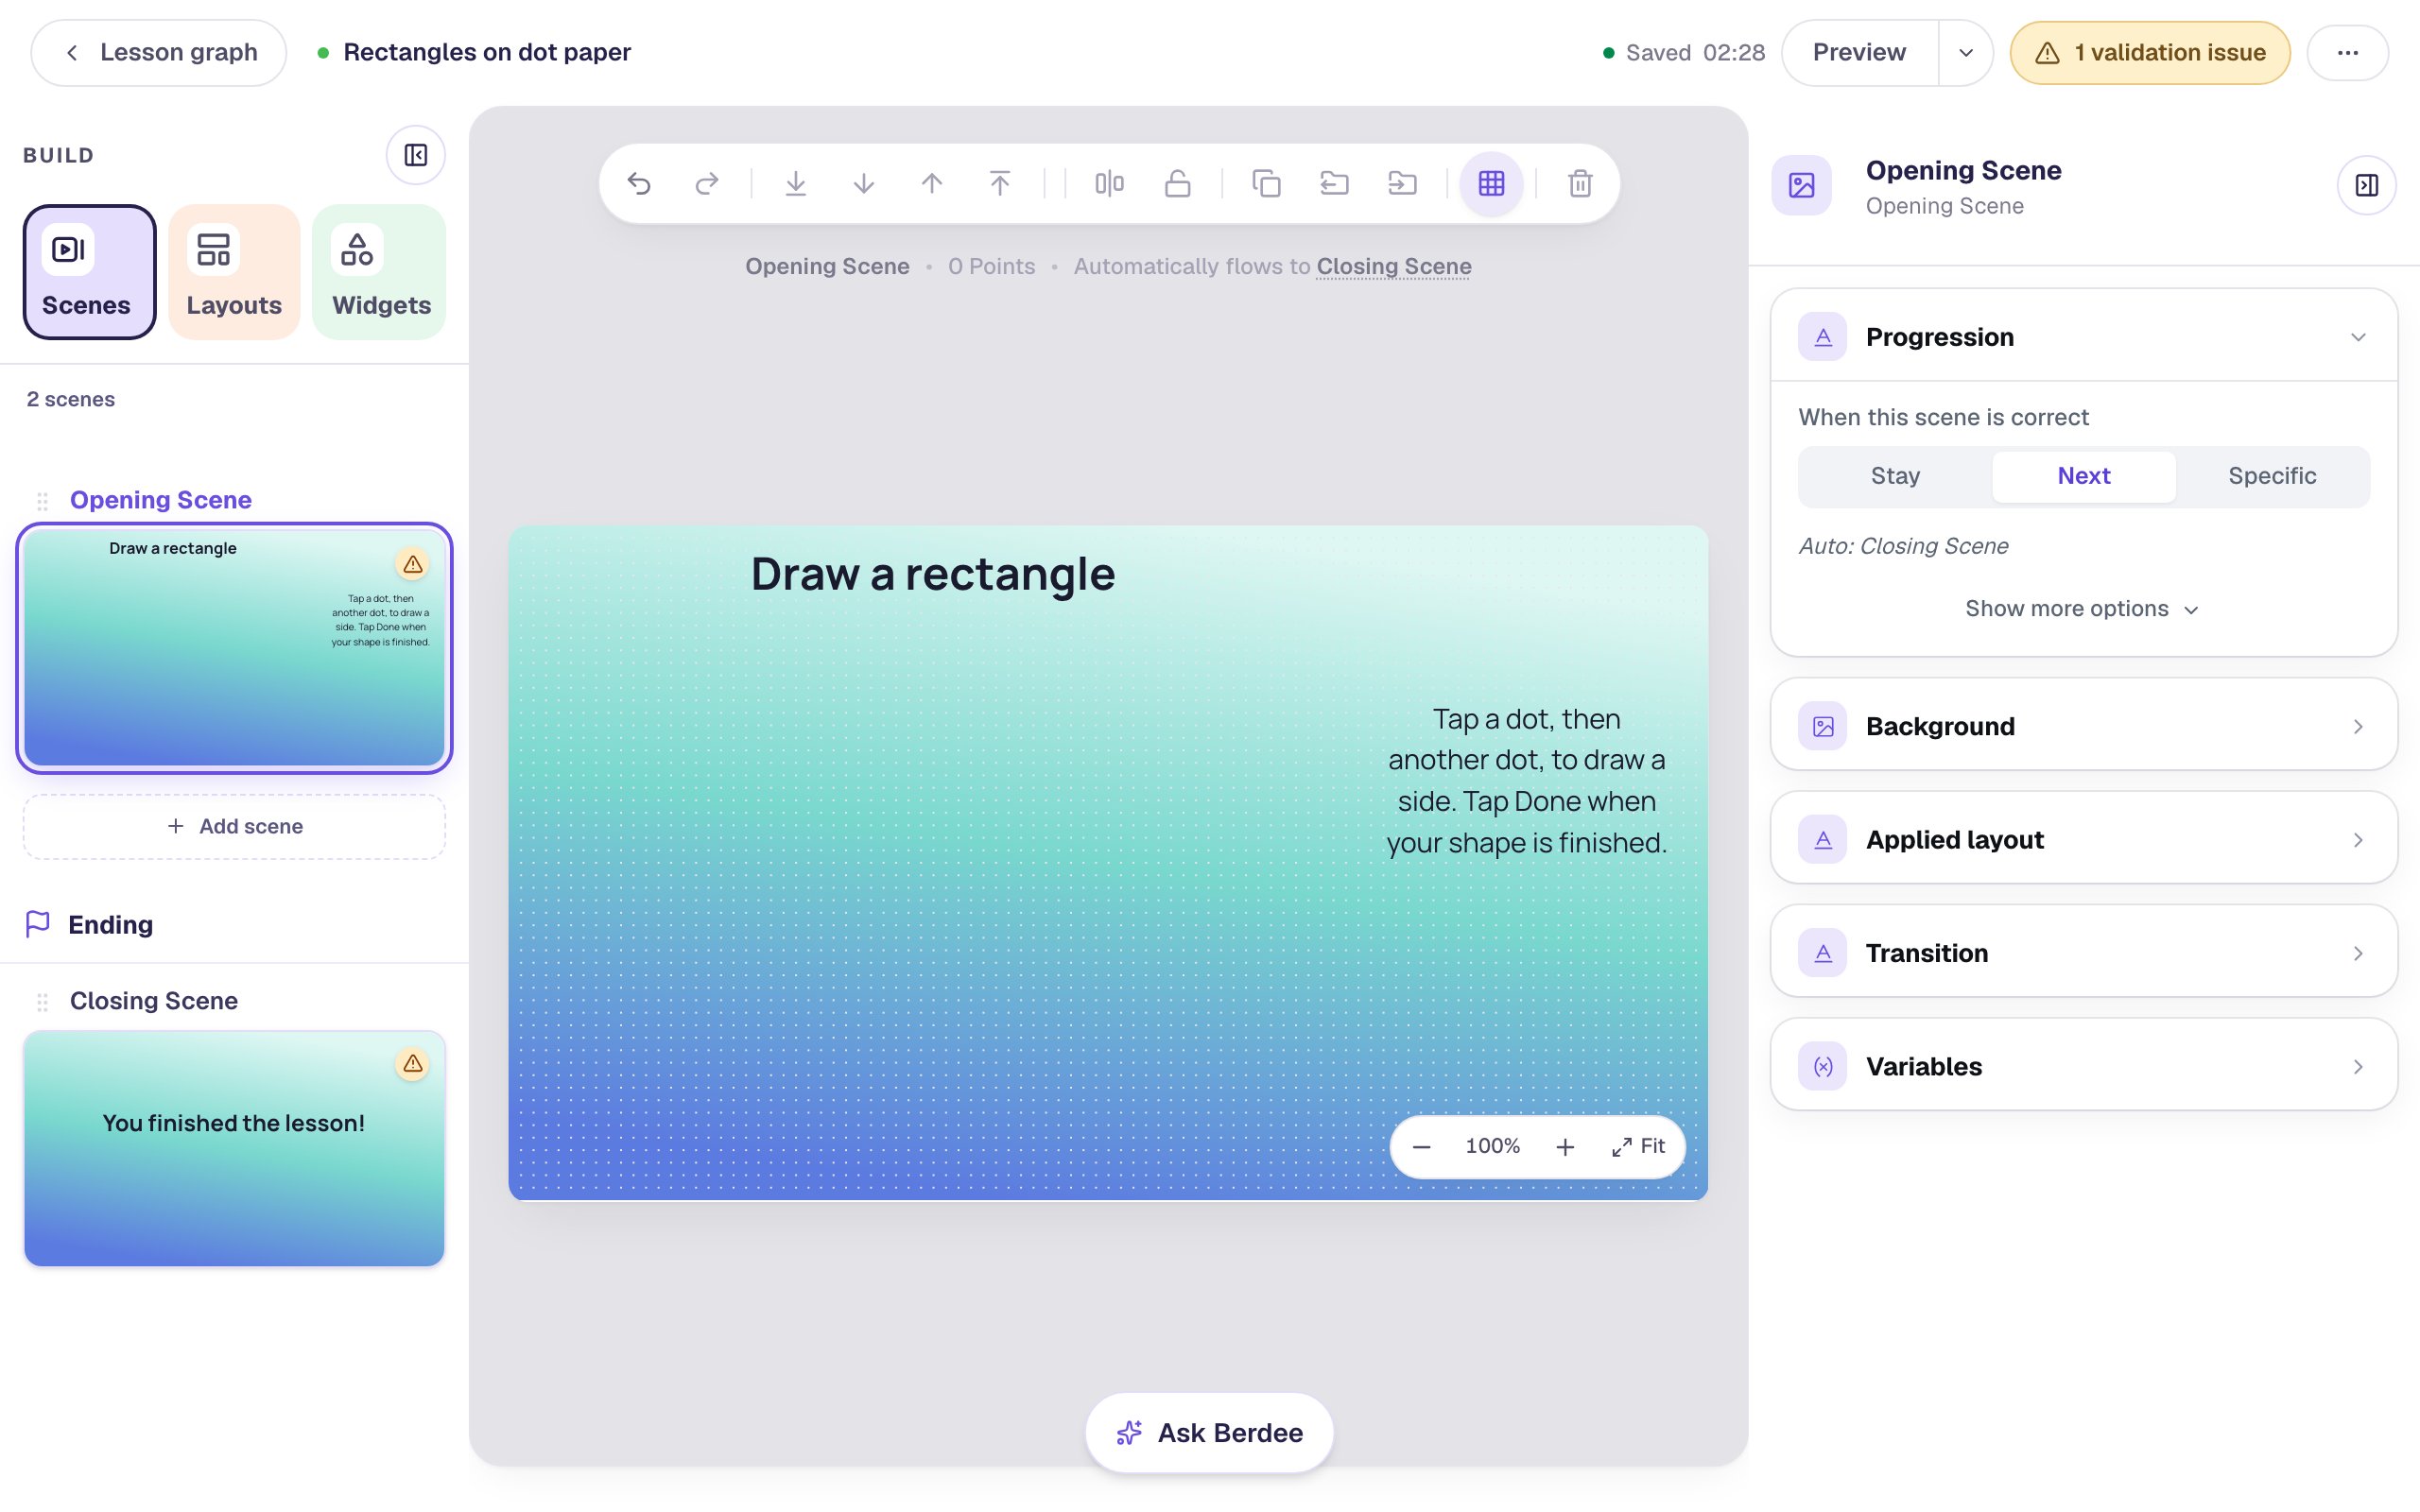
The dot paper will take the left of the scene. The right-hand column holds the instruction and, later, the I'm done button.
Step 2: Add a Dot Paper widget
Search the Widgets tab for Dot Paper and click it. A sheet of 7 dots across and 5 down lands on the scene, with Undo, Clear and Done buttons beside the dots. Drag it to the left, under the heading.
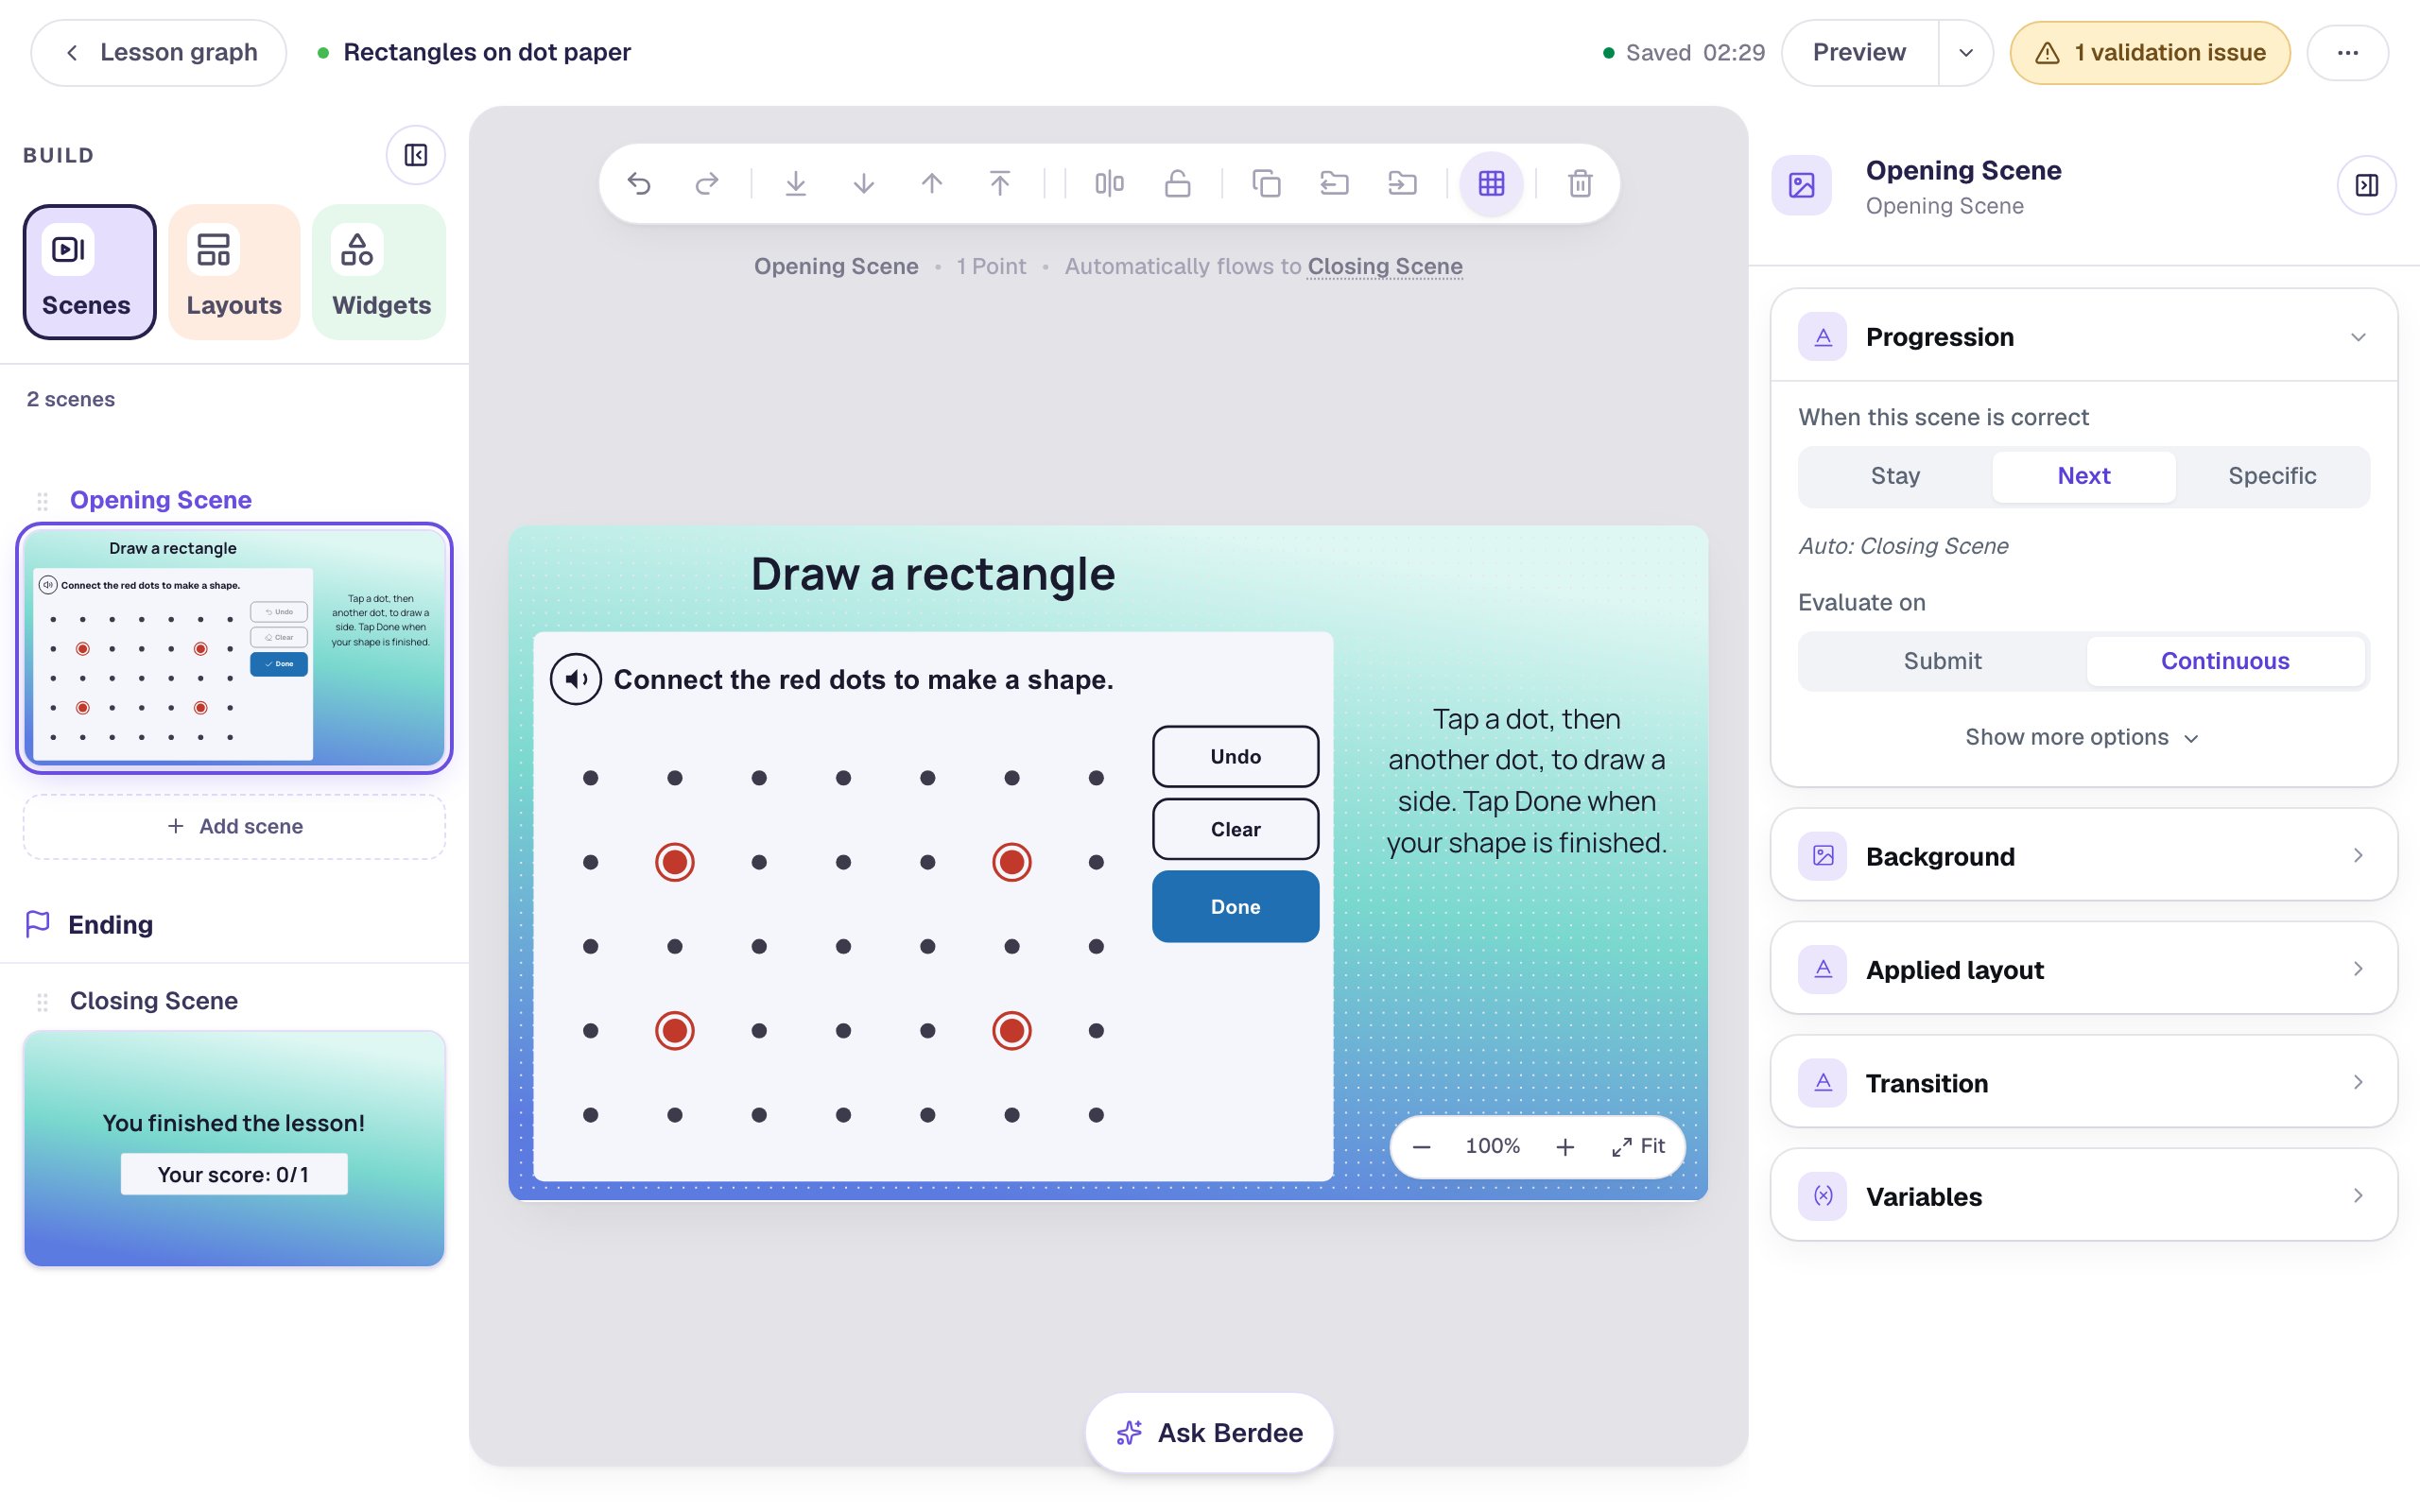
A new Dot Paper starts in Connect the dots, with four red dots for children to join. You'll change that next.
Its default size, 640 by 440, keeps the dots far enough apart for a young child's finger. If you make it smaller, the Configure window warns you when the dots get too close.
While the widget is selected, open Accessibility and set its Alt Text to Dot paper for drawing a rectangle. A screen reader says that name, then how many dots there are, when a student reaches the paper.
Step 3: Ask for a rectangle with 2 long sides and 2 short sides
Select the widget and click the floating ⚙ Configure button.
- Under What children do, choose Draw a shape.
- Under The shape to draw, set Shape to Rectangle (squares count).
- Set Side rule to 2 long sides and 2 short sides.
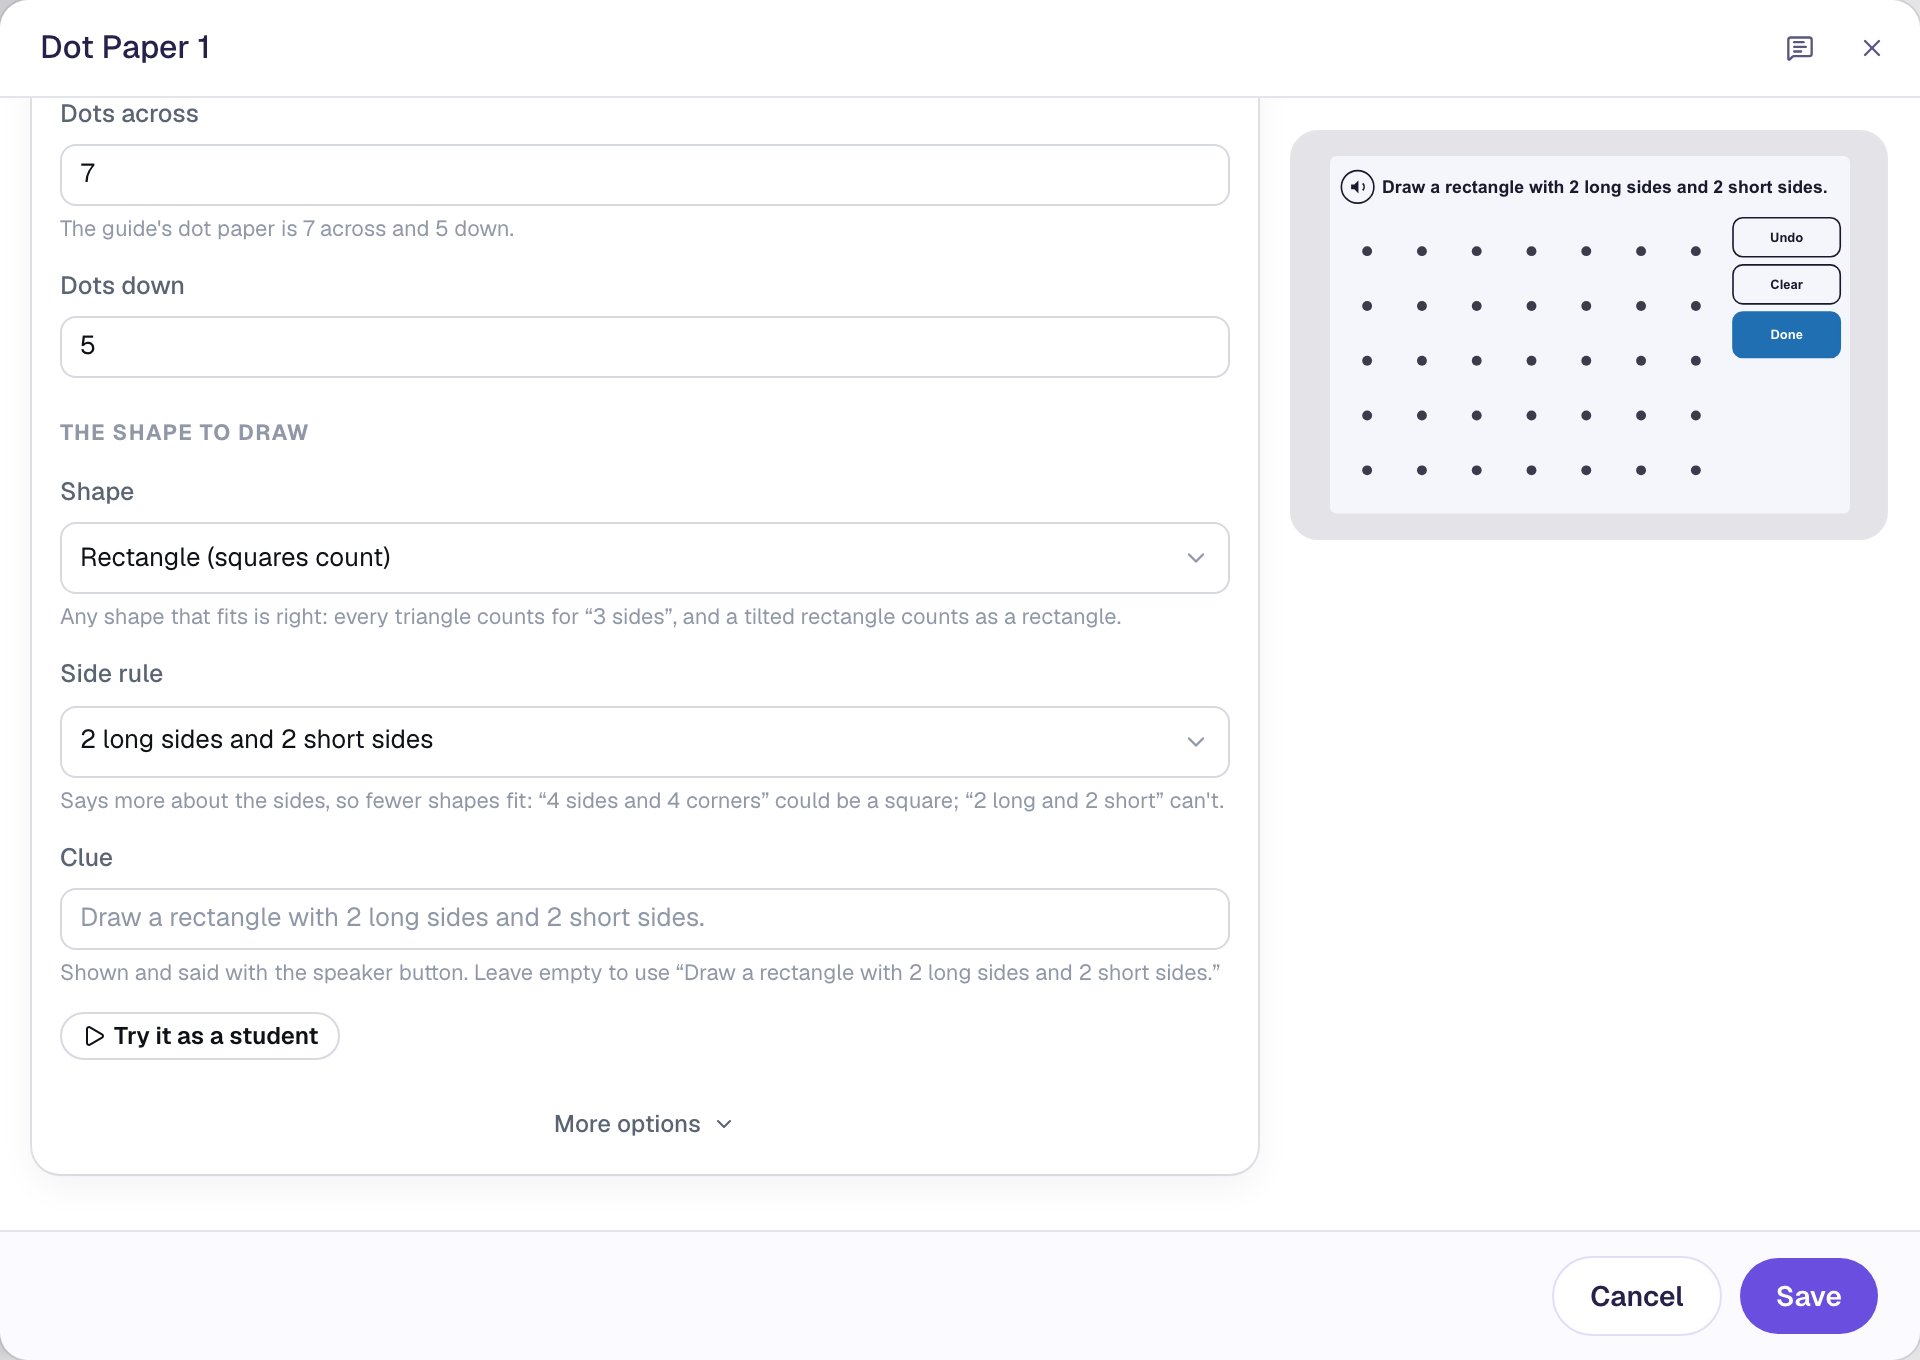
Leave Clue empty. Berdee writes it from your choices, "Draw a rectangle with 2 long sides and 2 short sides.", and children can hear it again with the speaker button. Type your own words in Clue only if you want to say it differently.
Why the side rule? On its own, Rectangle accepts squares, because a square is a rectangle. "2 long sides and 2 short sides" says more about the sides, so a square no longer fits. That's the idea this lesson is about. To ask for any rectangle instead, set Side rule back to None.
Step 4: Try it as a student
Under the clue, press Try it as a student. The real widget appears in the window, exactly as students will meet it.
Draw a long, flat rectangle: tap a dot in the second row, then the dot four spaces to its right, then the dot two spaces below that, then the dot four spaces back to the left. Tap the first dot again to close the shape, then tap Done.
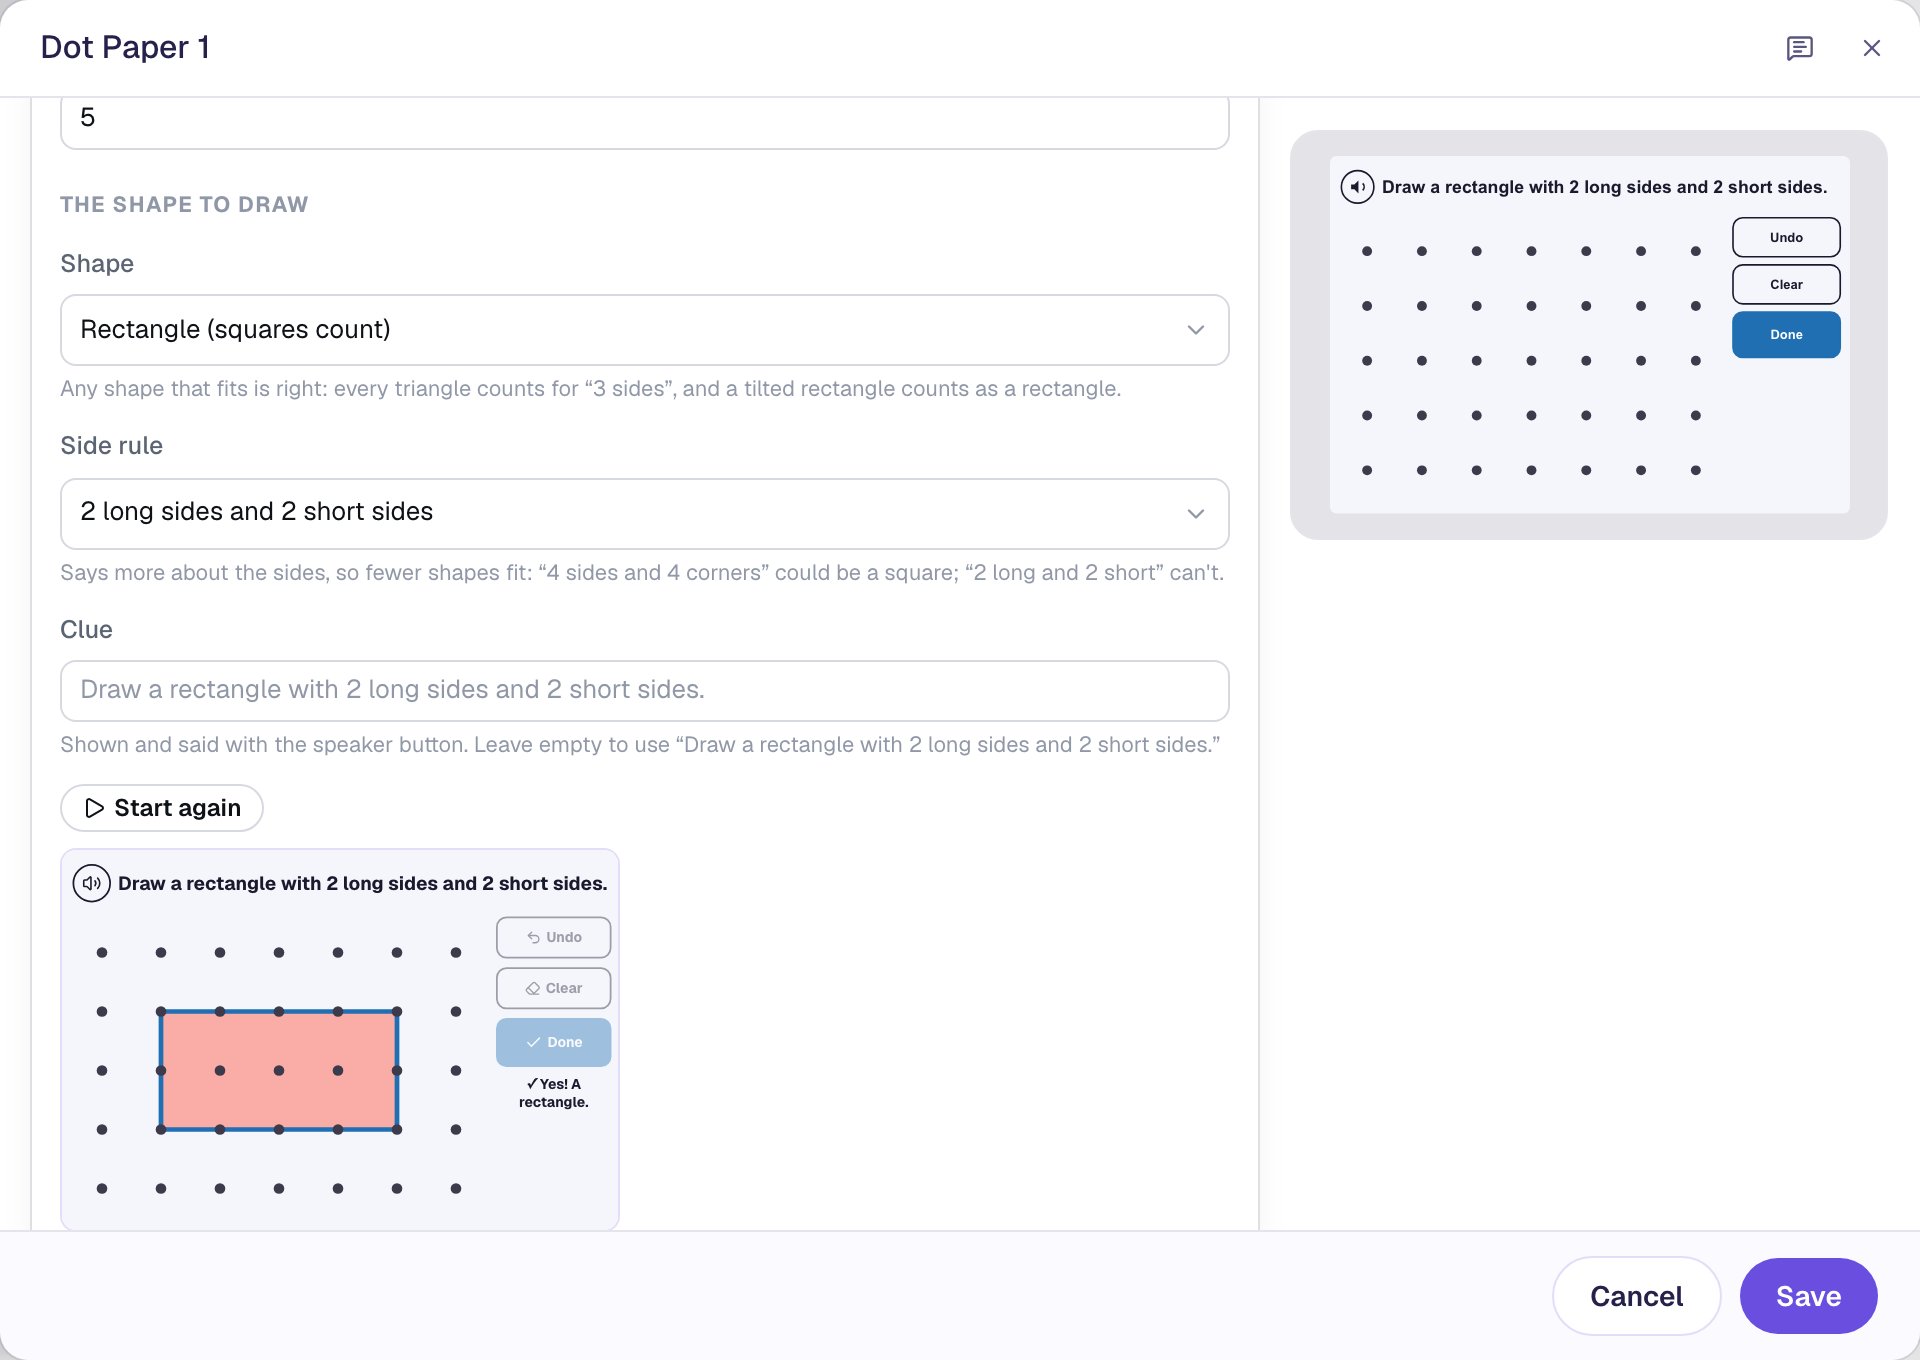
A side can pass straight through dots on the way, so a child doesn't have to tap every dot along a long side. When the shape closes it fills with color, and Berdee counts the sides aloud: "1, 2, 3, 4 sides." That counting is on by default to model counting for kindergarten. Turn it off under More options when counting the sides is the task.
Click Save.
Step 5: Color the sides and the fill
The colors start from the lesson's palette. Pick ones that match your lesson and stand out on the paper.
With the widget selected, open Style & Layout:
- Click Sides and pick a bright purple. The Done button takes the same color, so the button children need most is easy to find.
- Click Fill and pick a pale lilac from the same column. A closed shape fills with it.
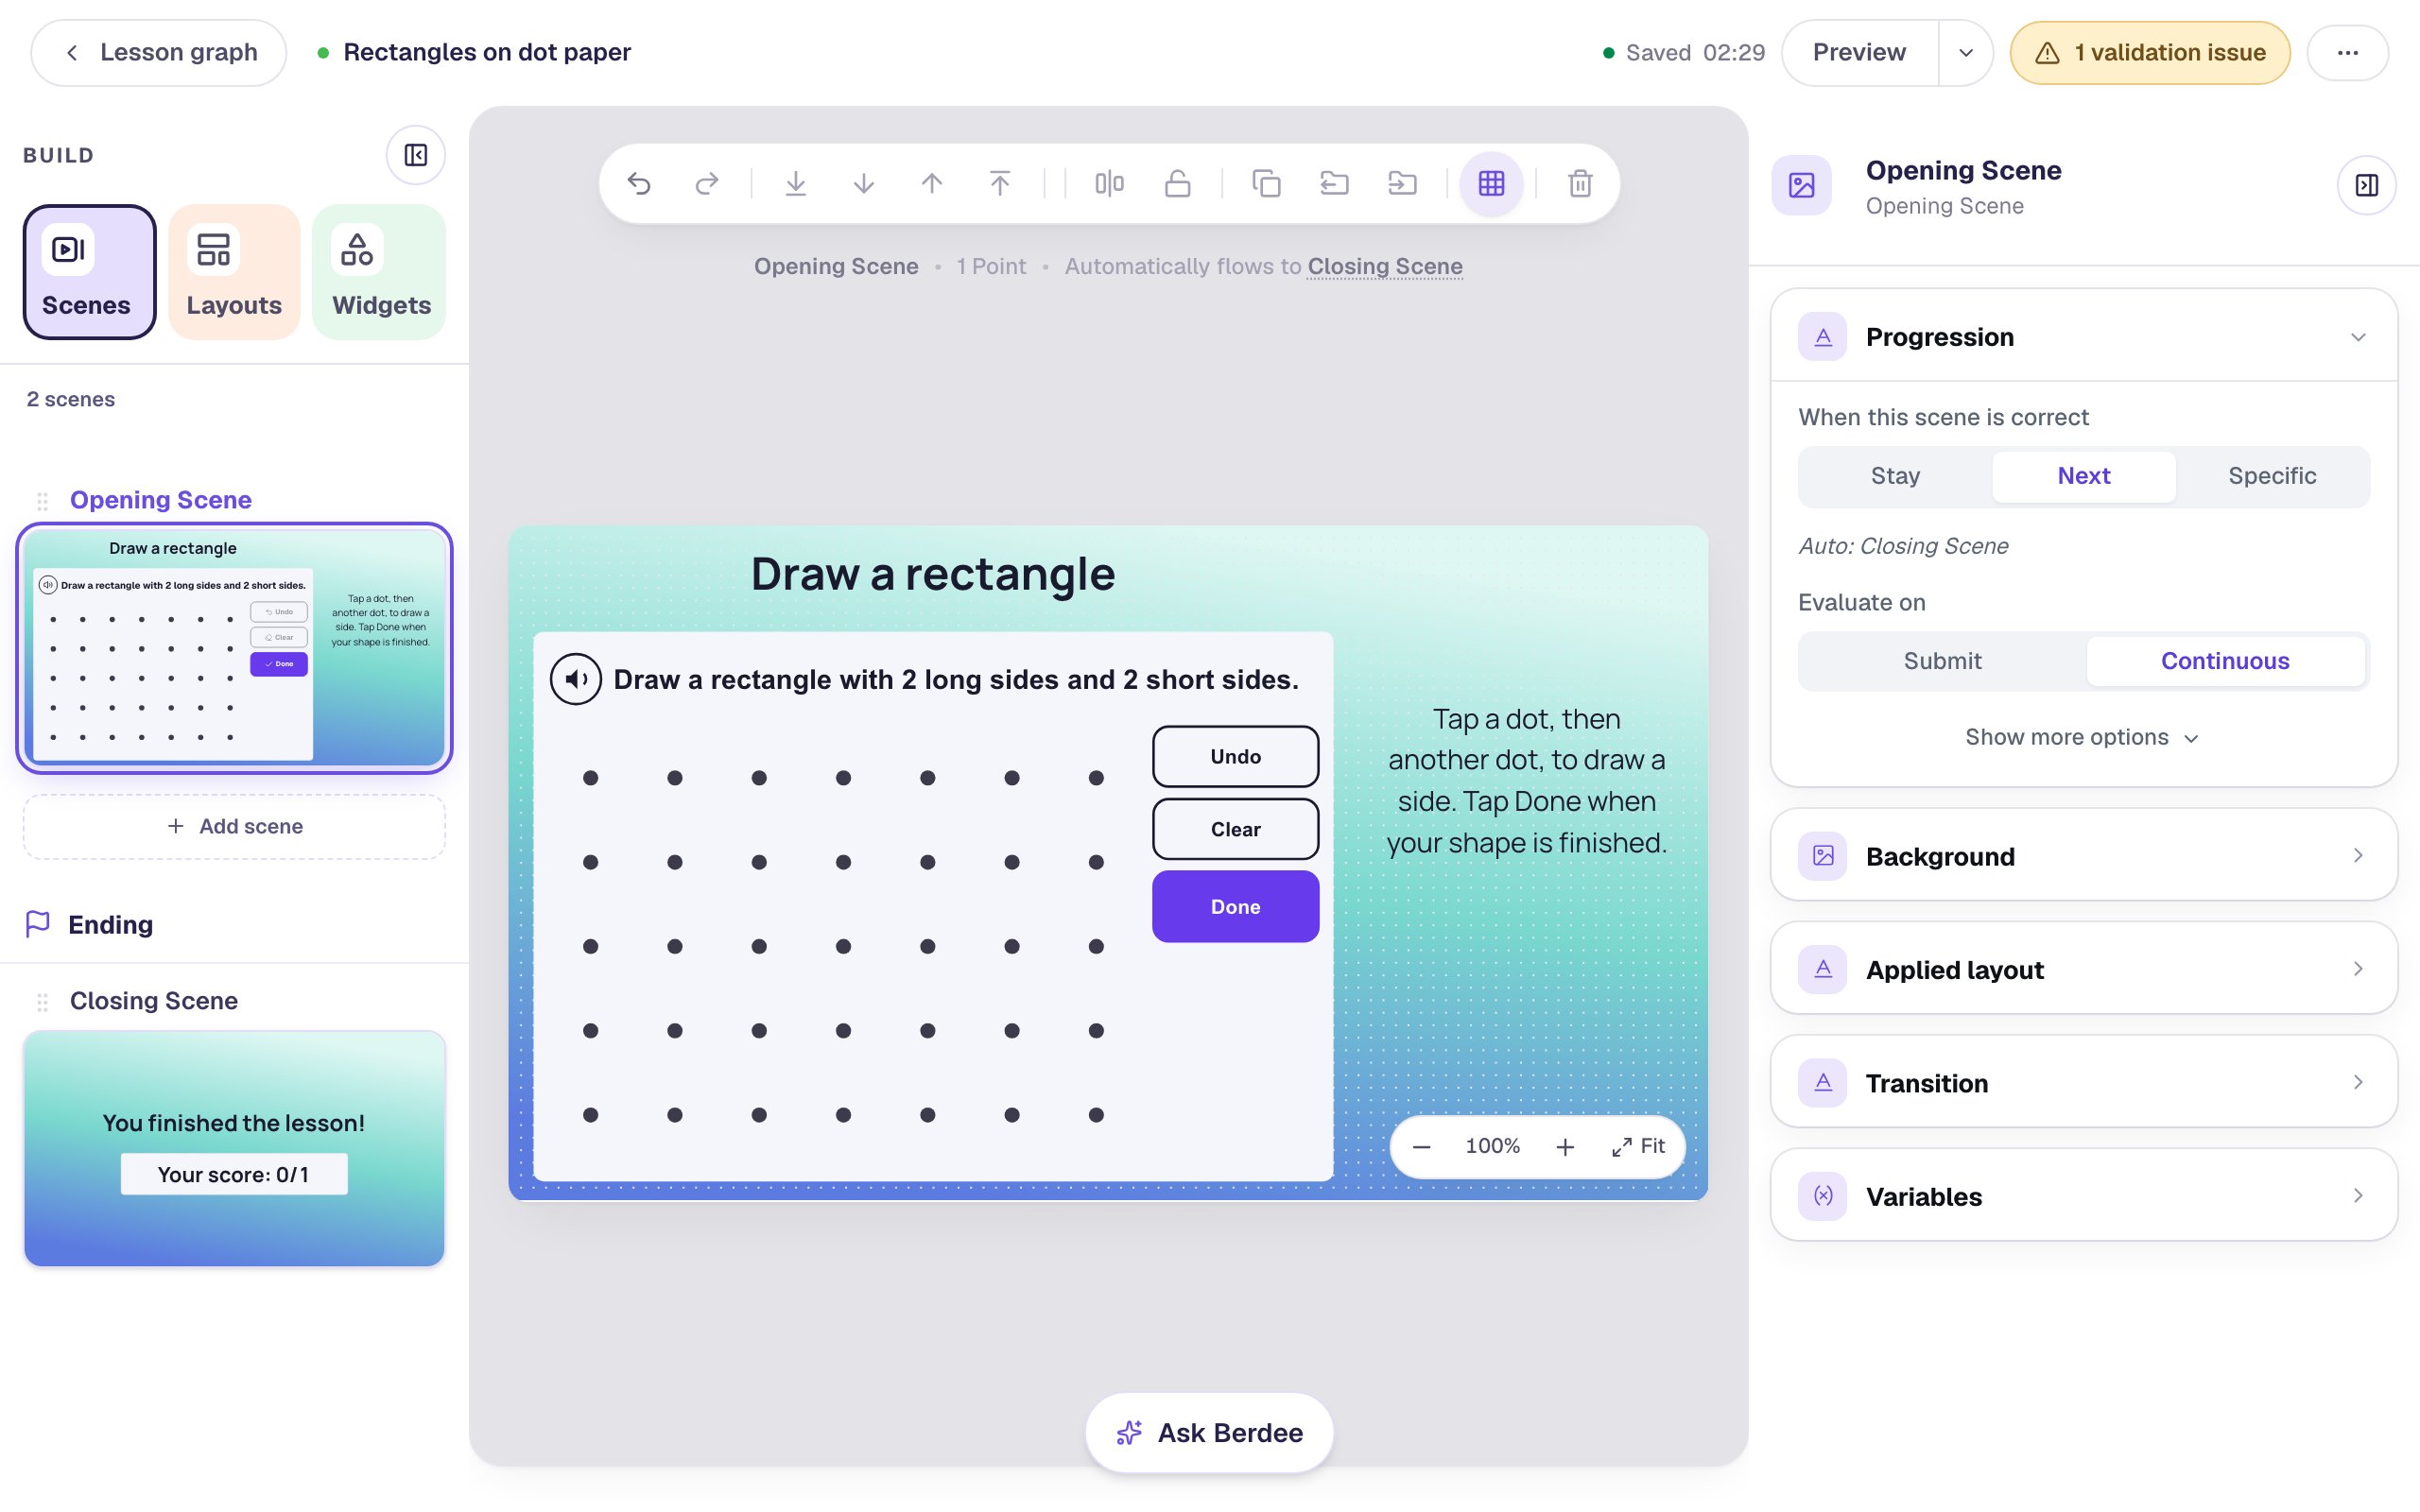
Keep the Paper pale and the Dots dark, so every dot is easy to see and tap.
Step 6: Add an "I'm done" button
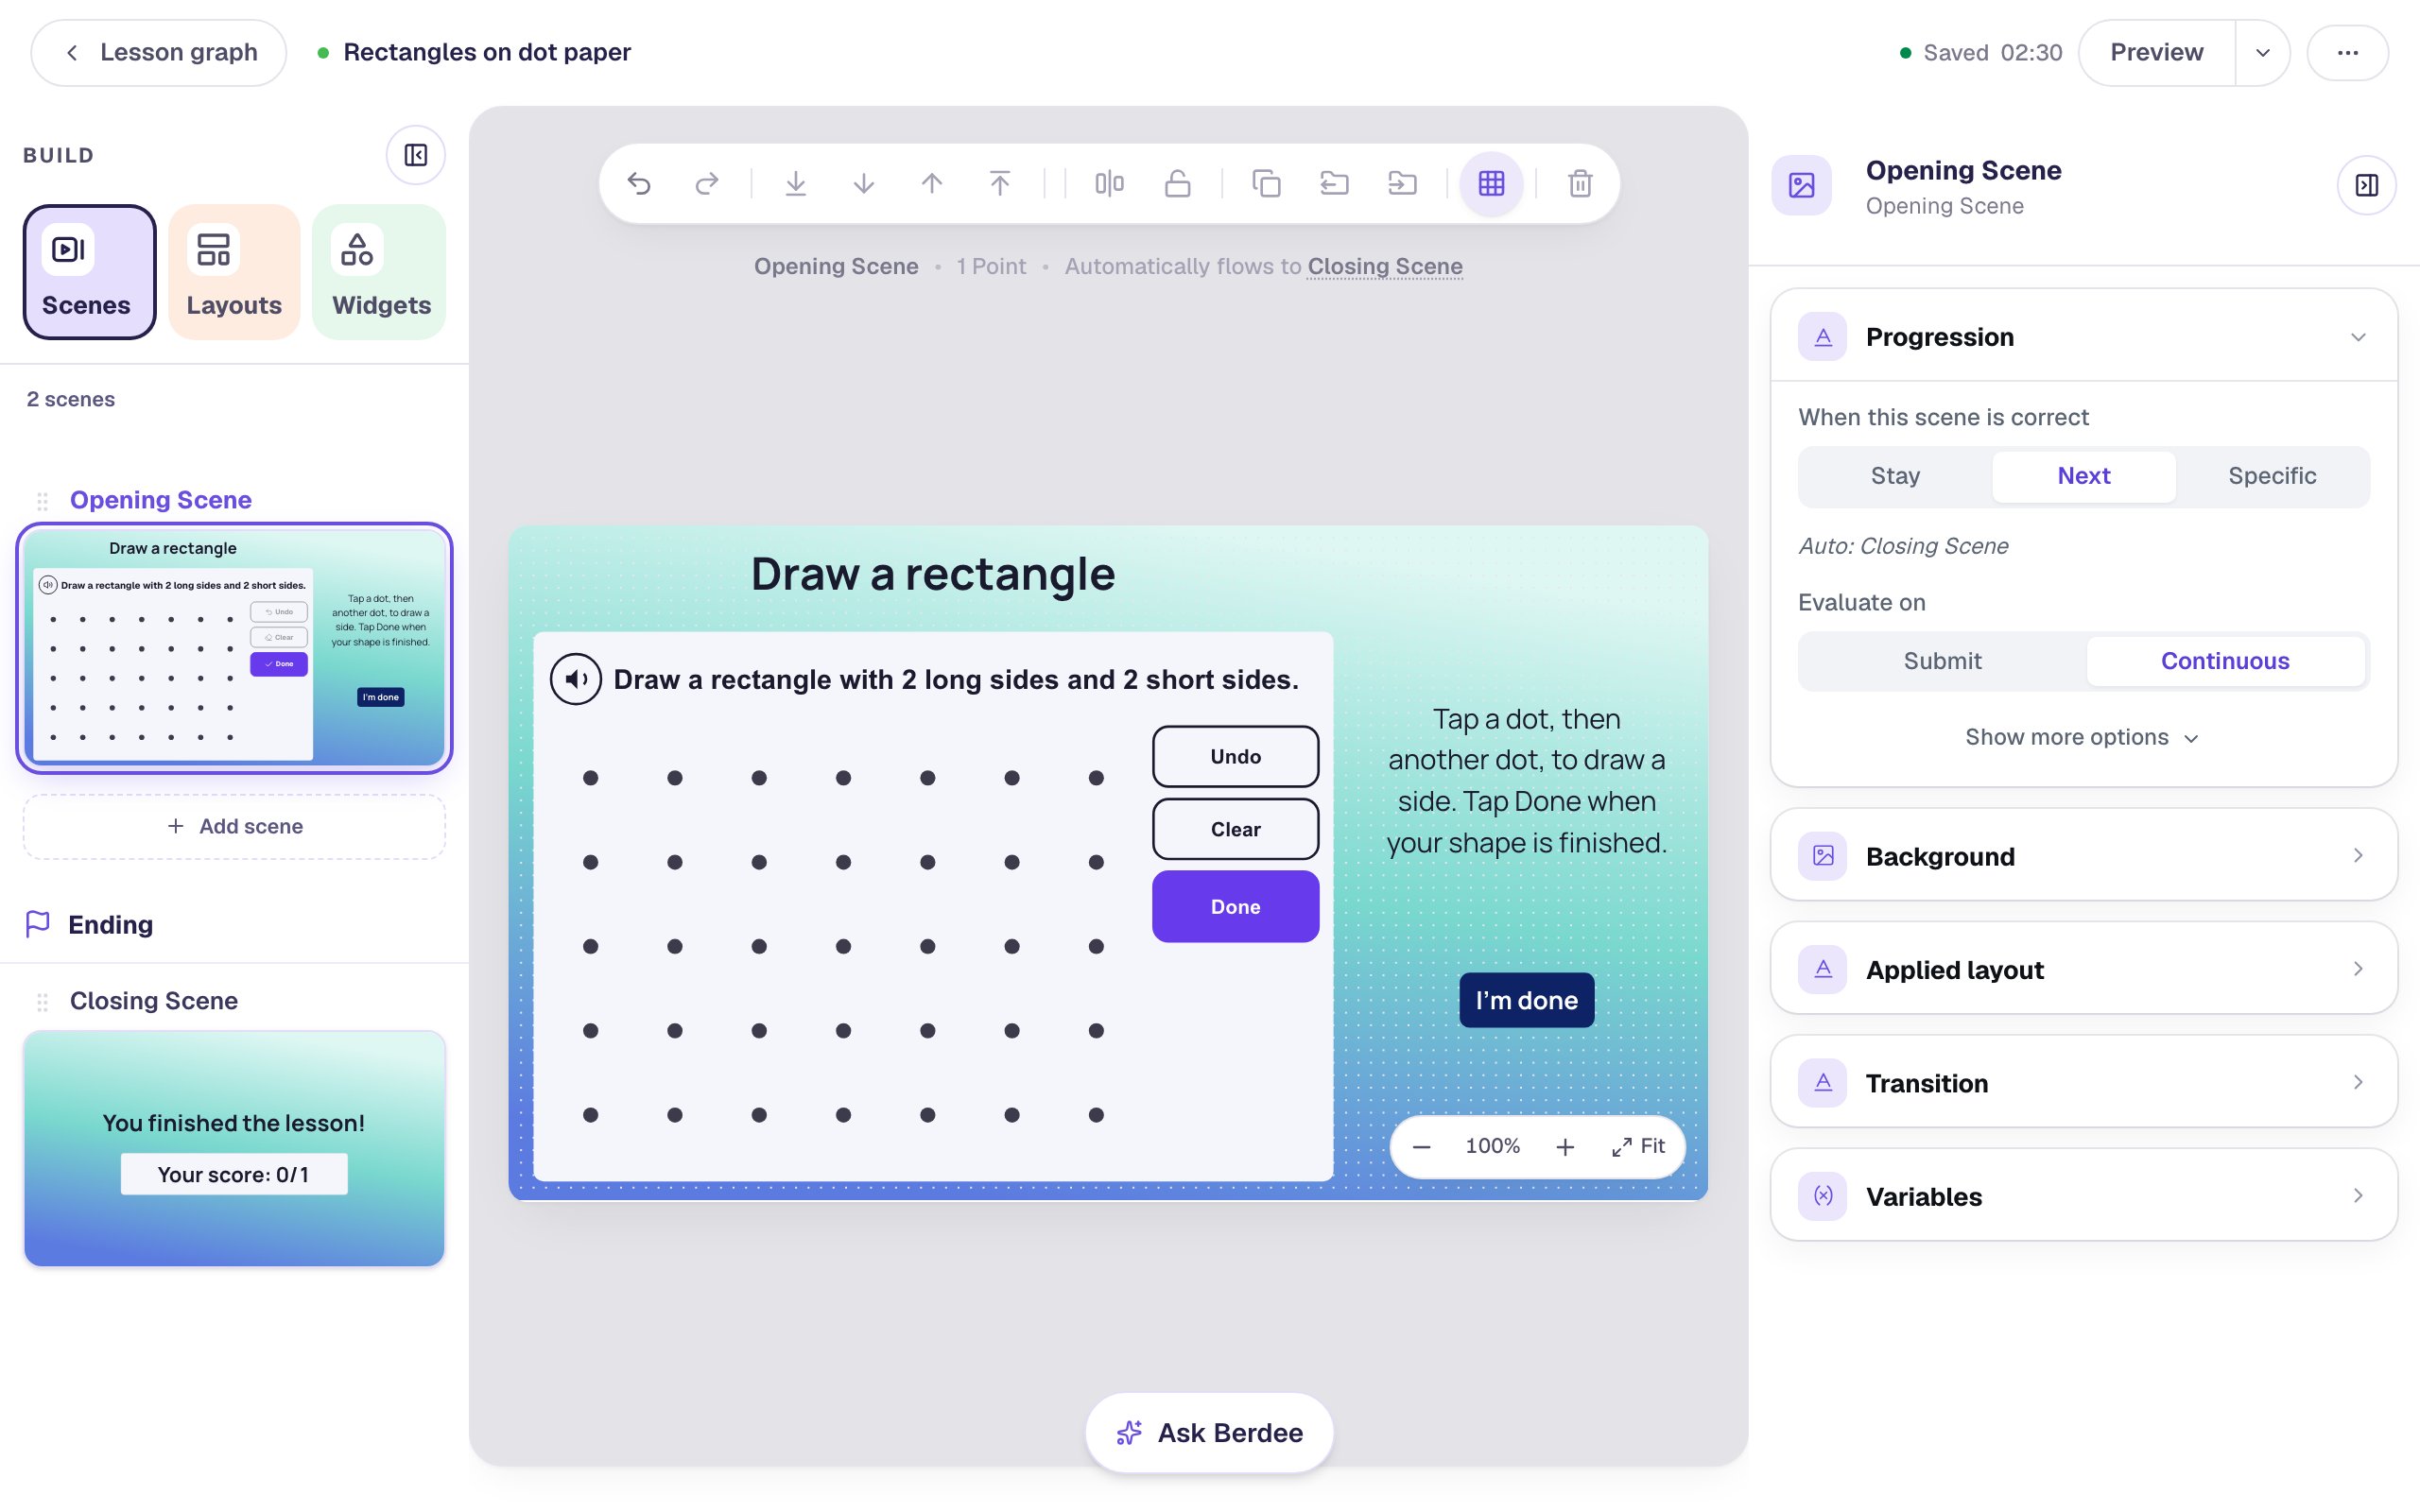
Every lesson needs one button that lets a student finish. Until it has one, the studio shows a validation warning at the top right. It's also a way out for a student who gets stuck.
- Search the Widgets tab for
Submit Buttonand click it. - In Content, change Label to
I'm doneand set Submits to Lesson. - Set its Font Size to
20. In Style & Layout, set Background to a dark navy and Text to white. Drag it under the instruction on the right.
Step 7: Give students a moment to read "Yes!"
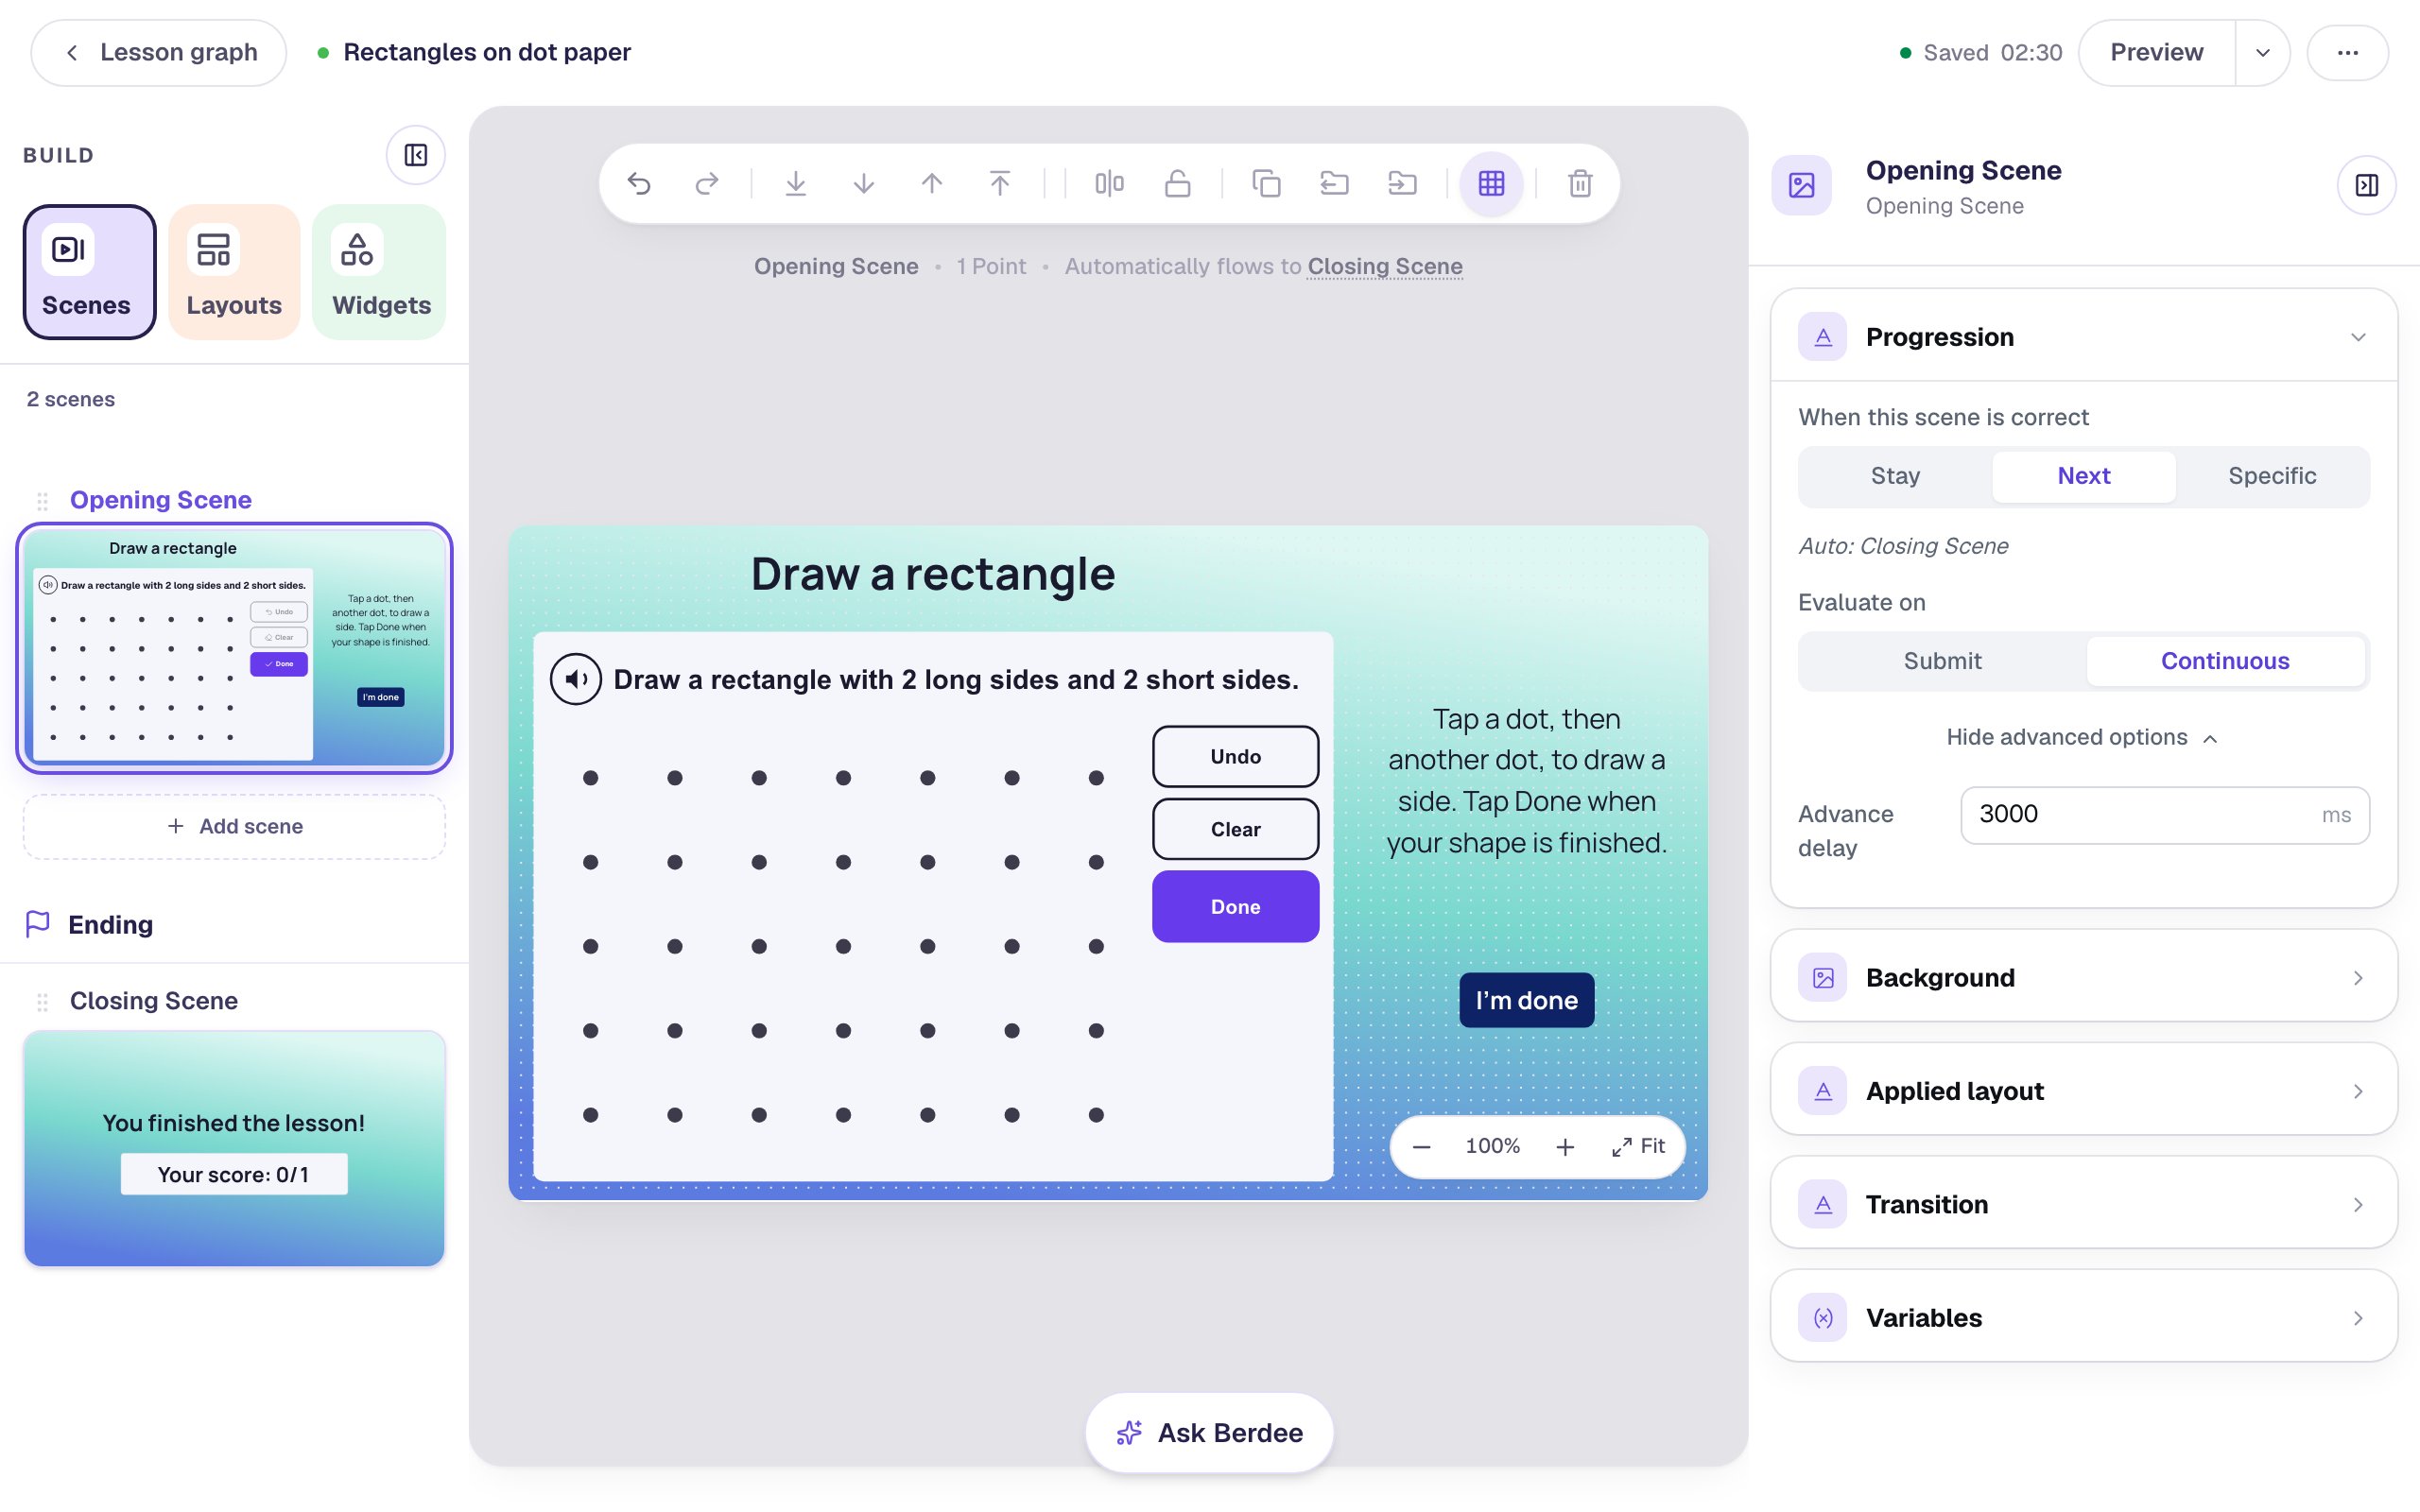
The dot paper is graded: it's right when a student taps Done on a shape that fits. When it is, the scene moves on by itself, as the line above the canvas says: Automatically flows to Closing Scene. By default that happens after 0.6 seconds, too quickly for a child to read "Yes! A rectangle."
Click an empty spot on the scene. In Progression, click Show more options and set Advance delay to 3000 ms.
Step 8: Draw in Preview
Click Preview. Students see the clue with its speaker button, the dots, and the three buttons.
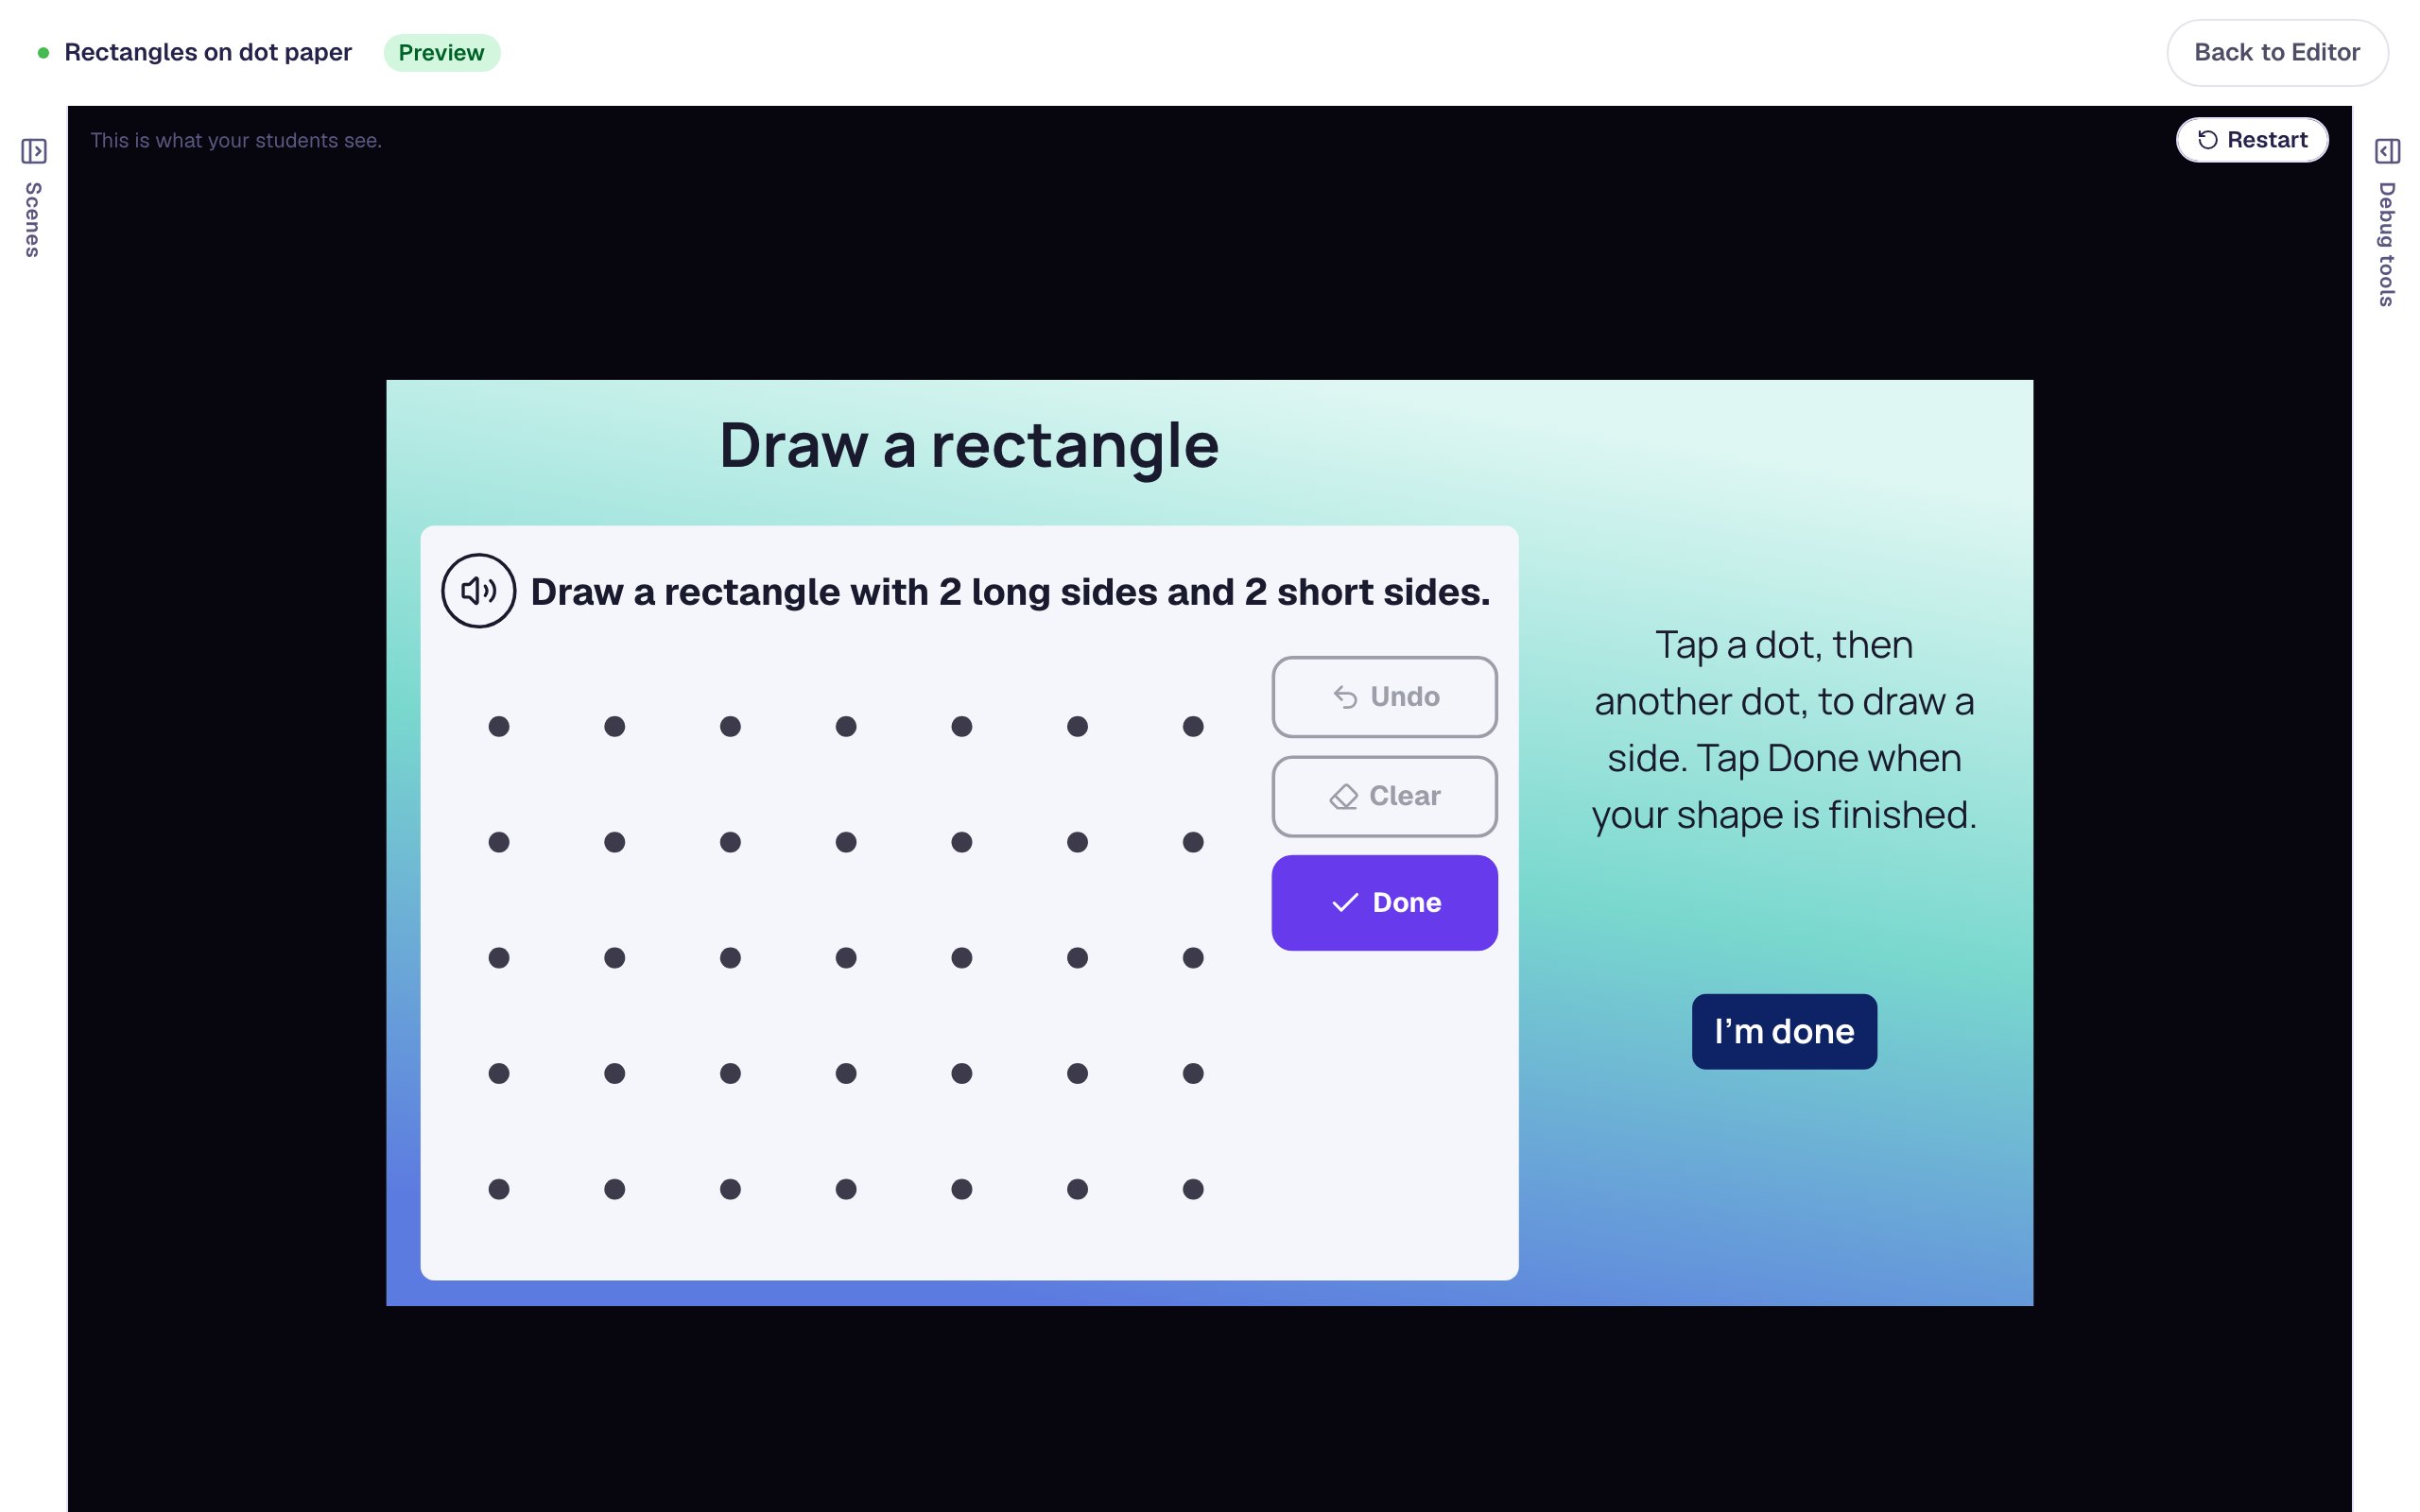
First, draw what many children try first: a square. Tap four dots two spaces apart and close the shape, then tap Done.
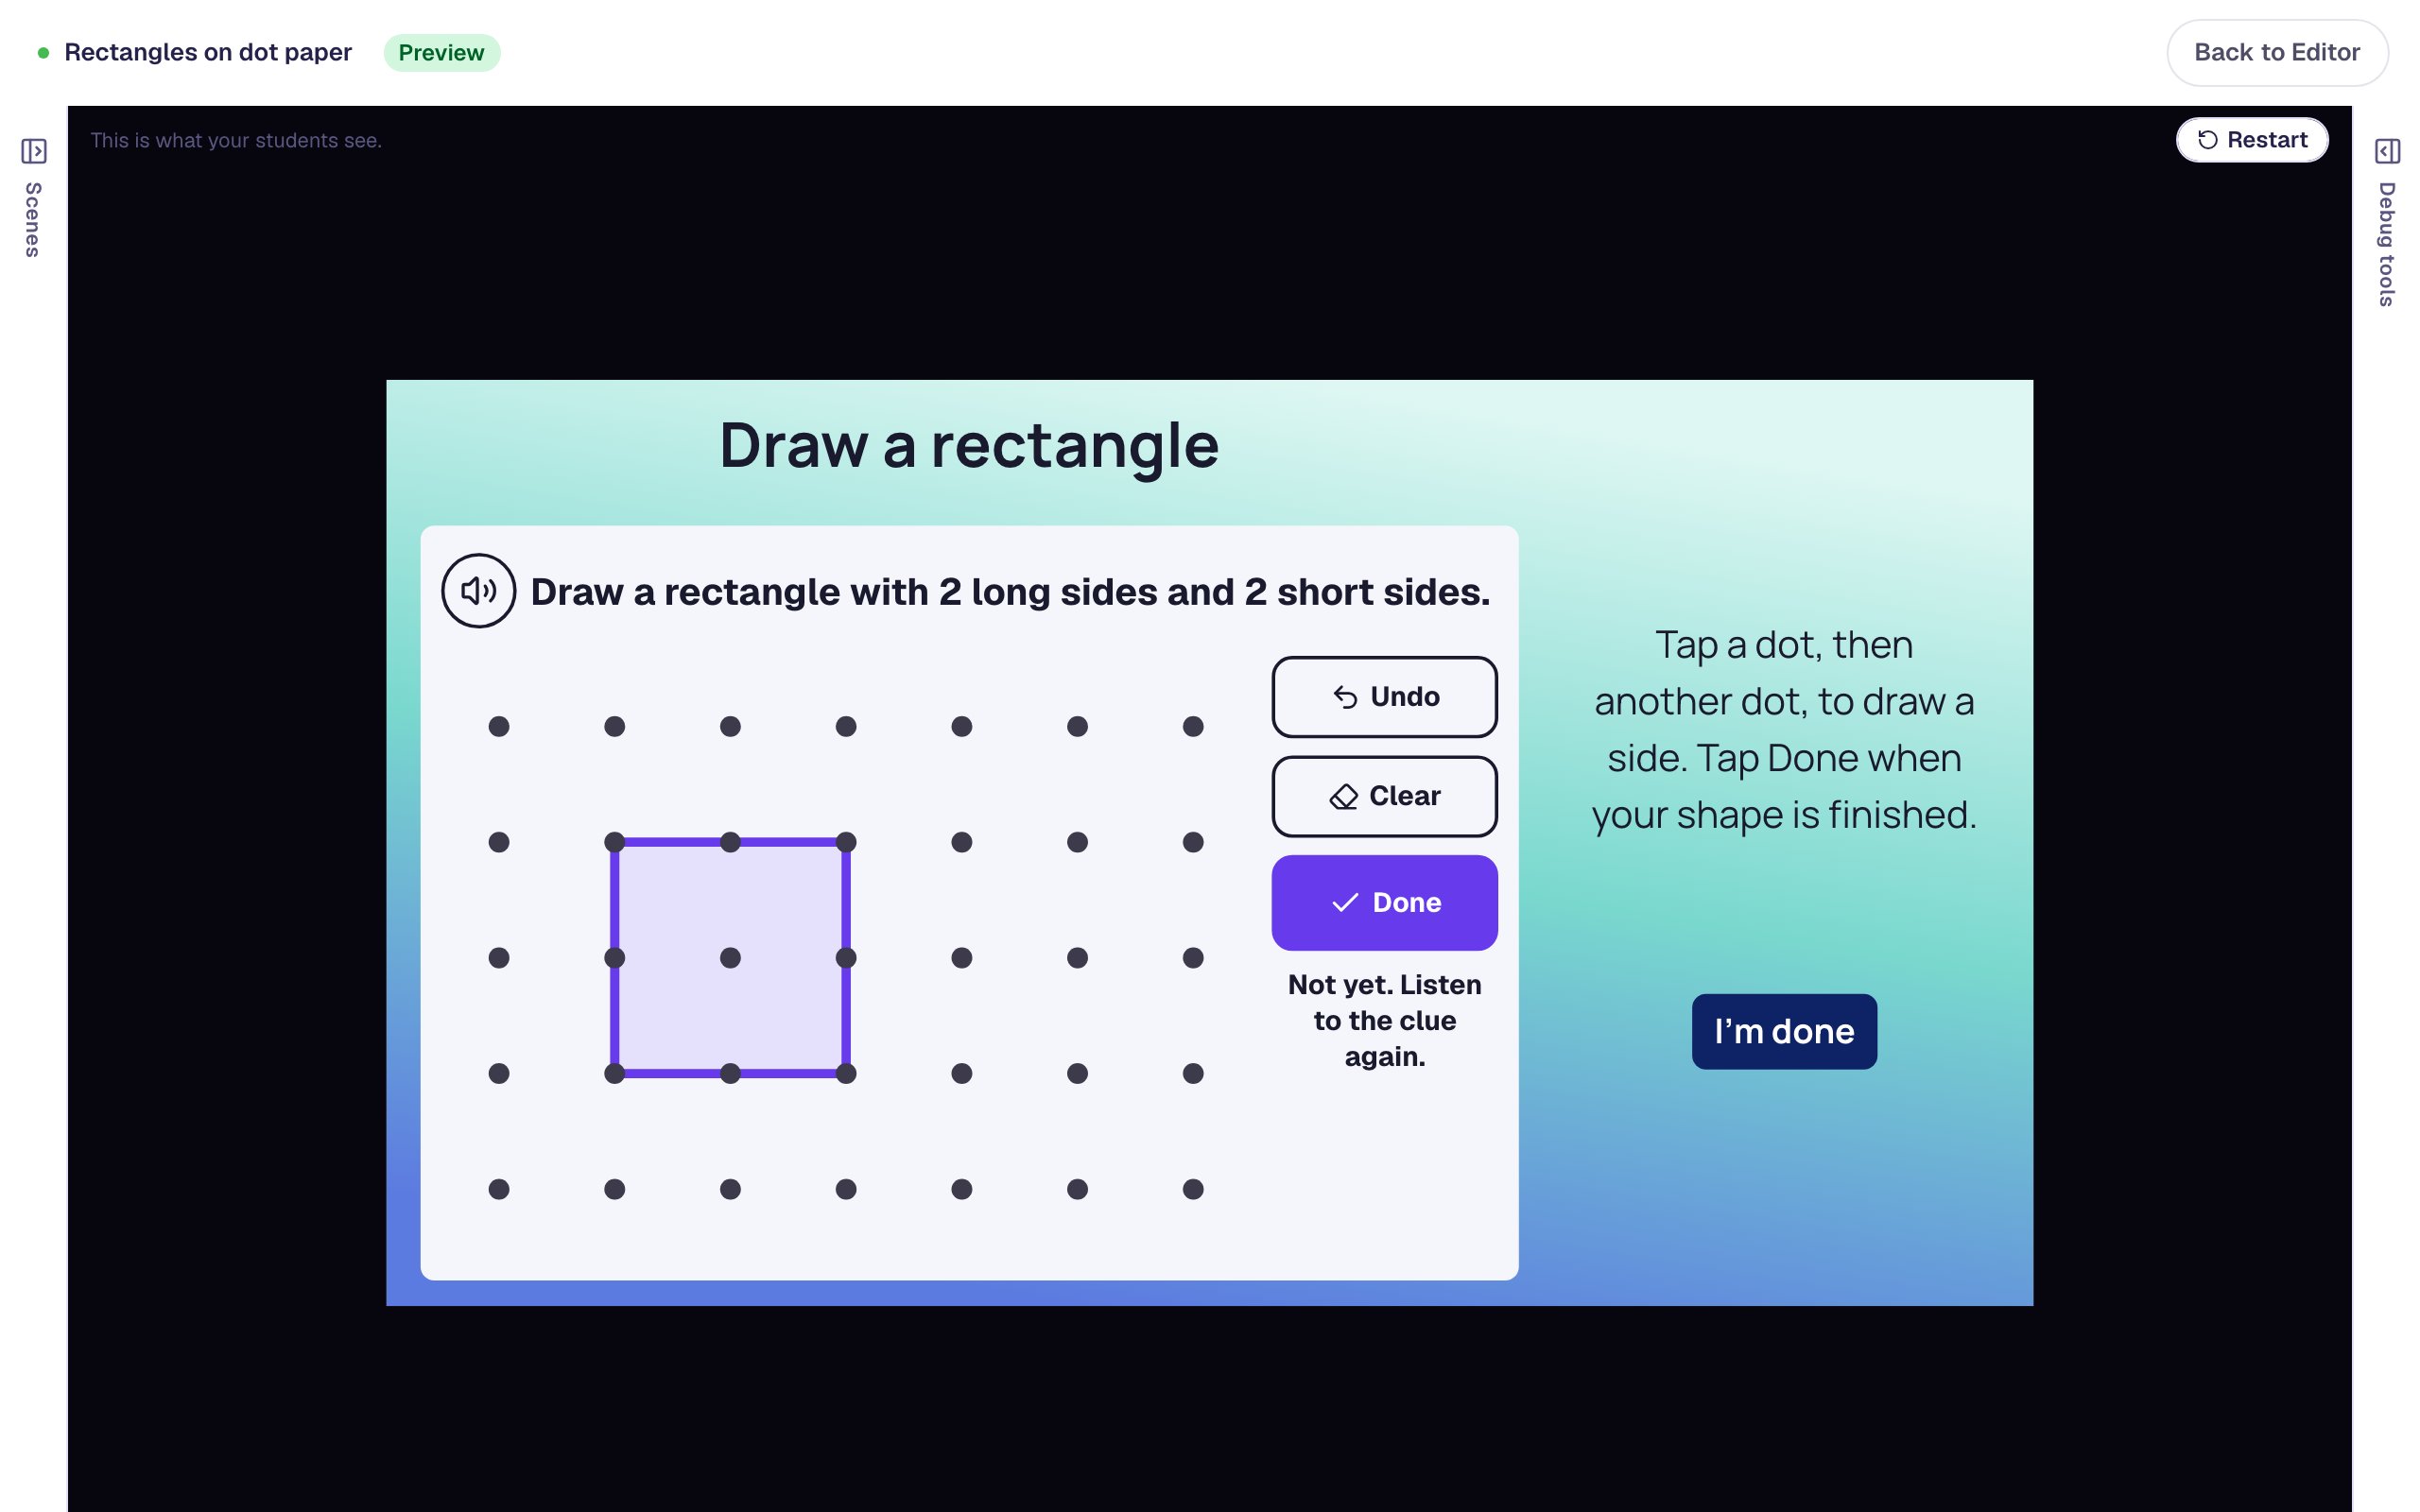
The square stays on the paper so the child can look at it again, and the message sends them back to the clue: its sides are all the same length, and the clue asks for 2 long and 2 short. Undo takes away the last side; Clear starts over.
Now tap Clear and draw a rectangle that leans. Start on a dot in the fourth row. Go up two rows and right two dots, then down one and right one, then down two and left two, and tap the first dot to close the shape. Tap Done.
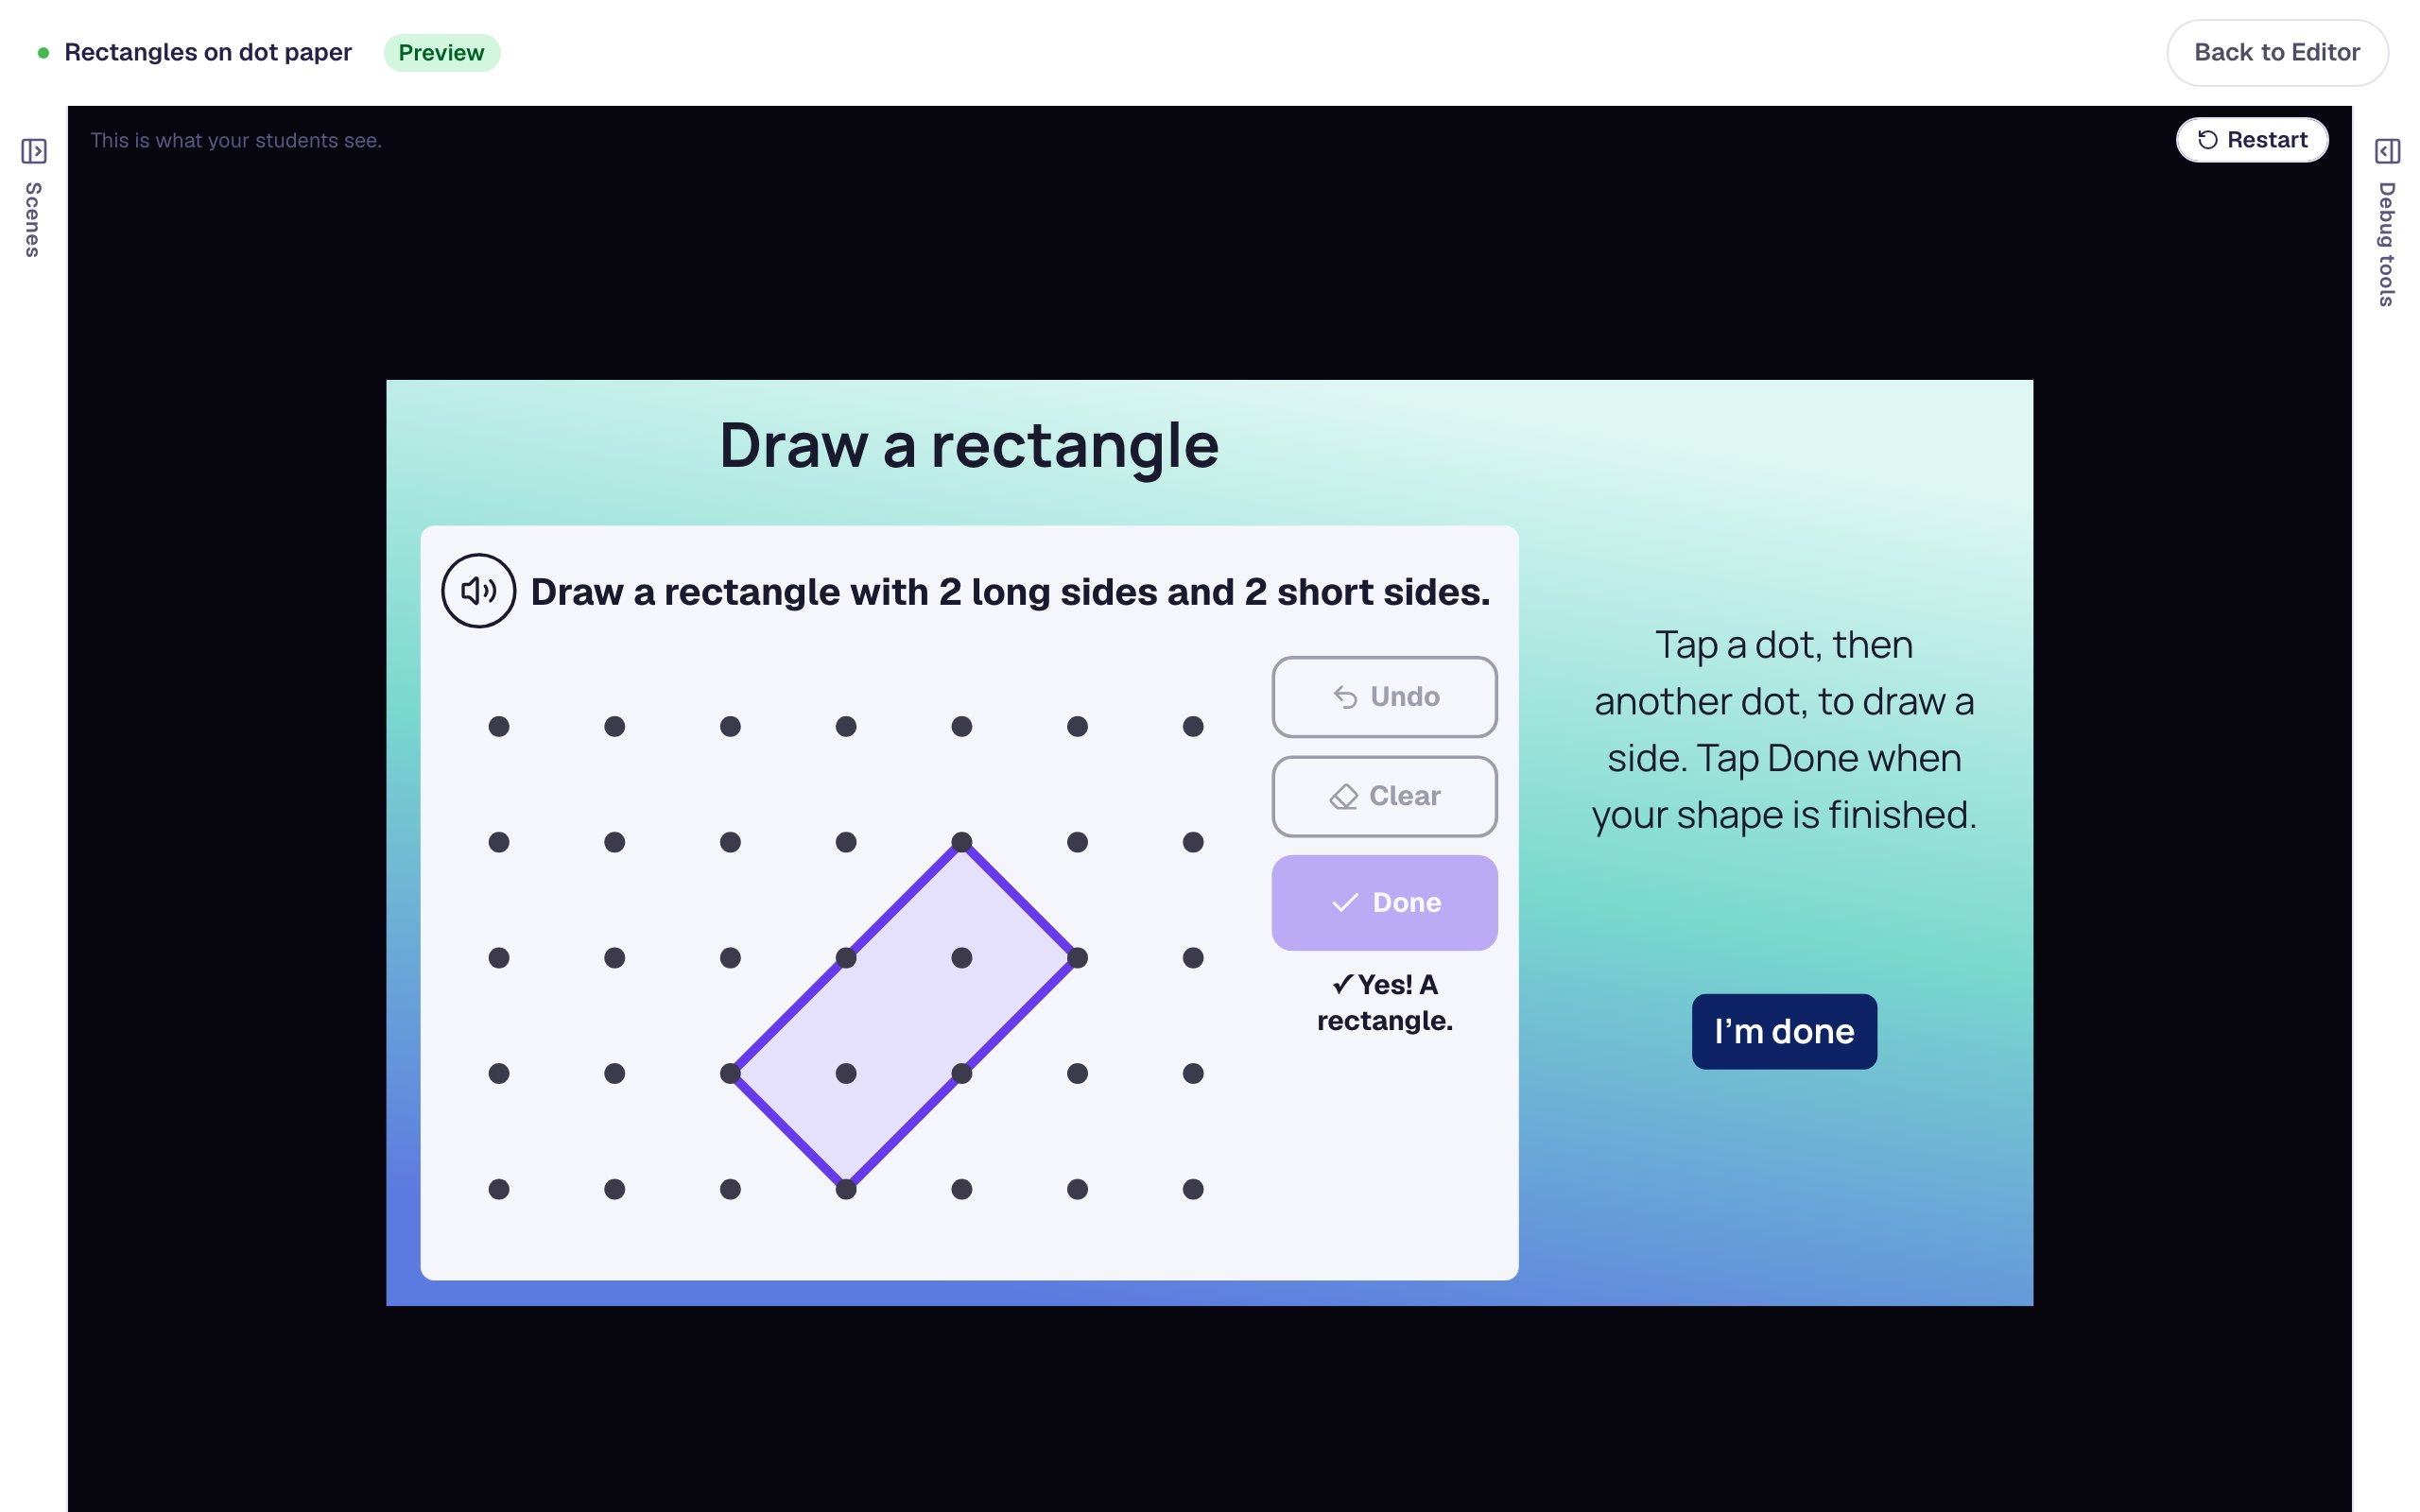
Berdee checks for four square corners, not for sides that run along the rows, so a tilted rectangle is a rectangle. Children who draw one are often surprised it counts, which is a good thing to talk about.
After three seconds, the lesson moves on to the ending.
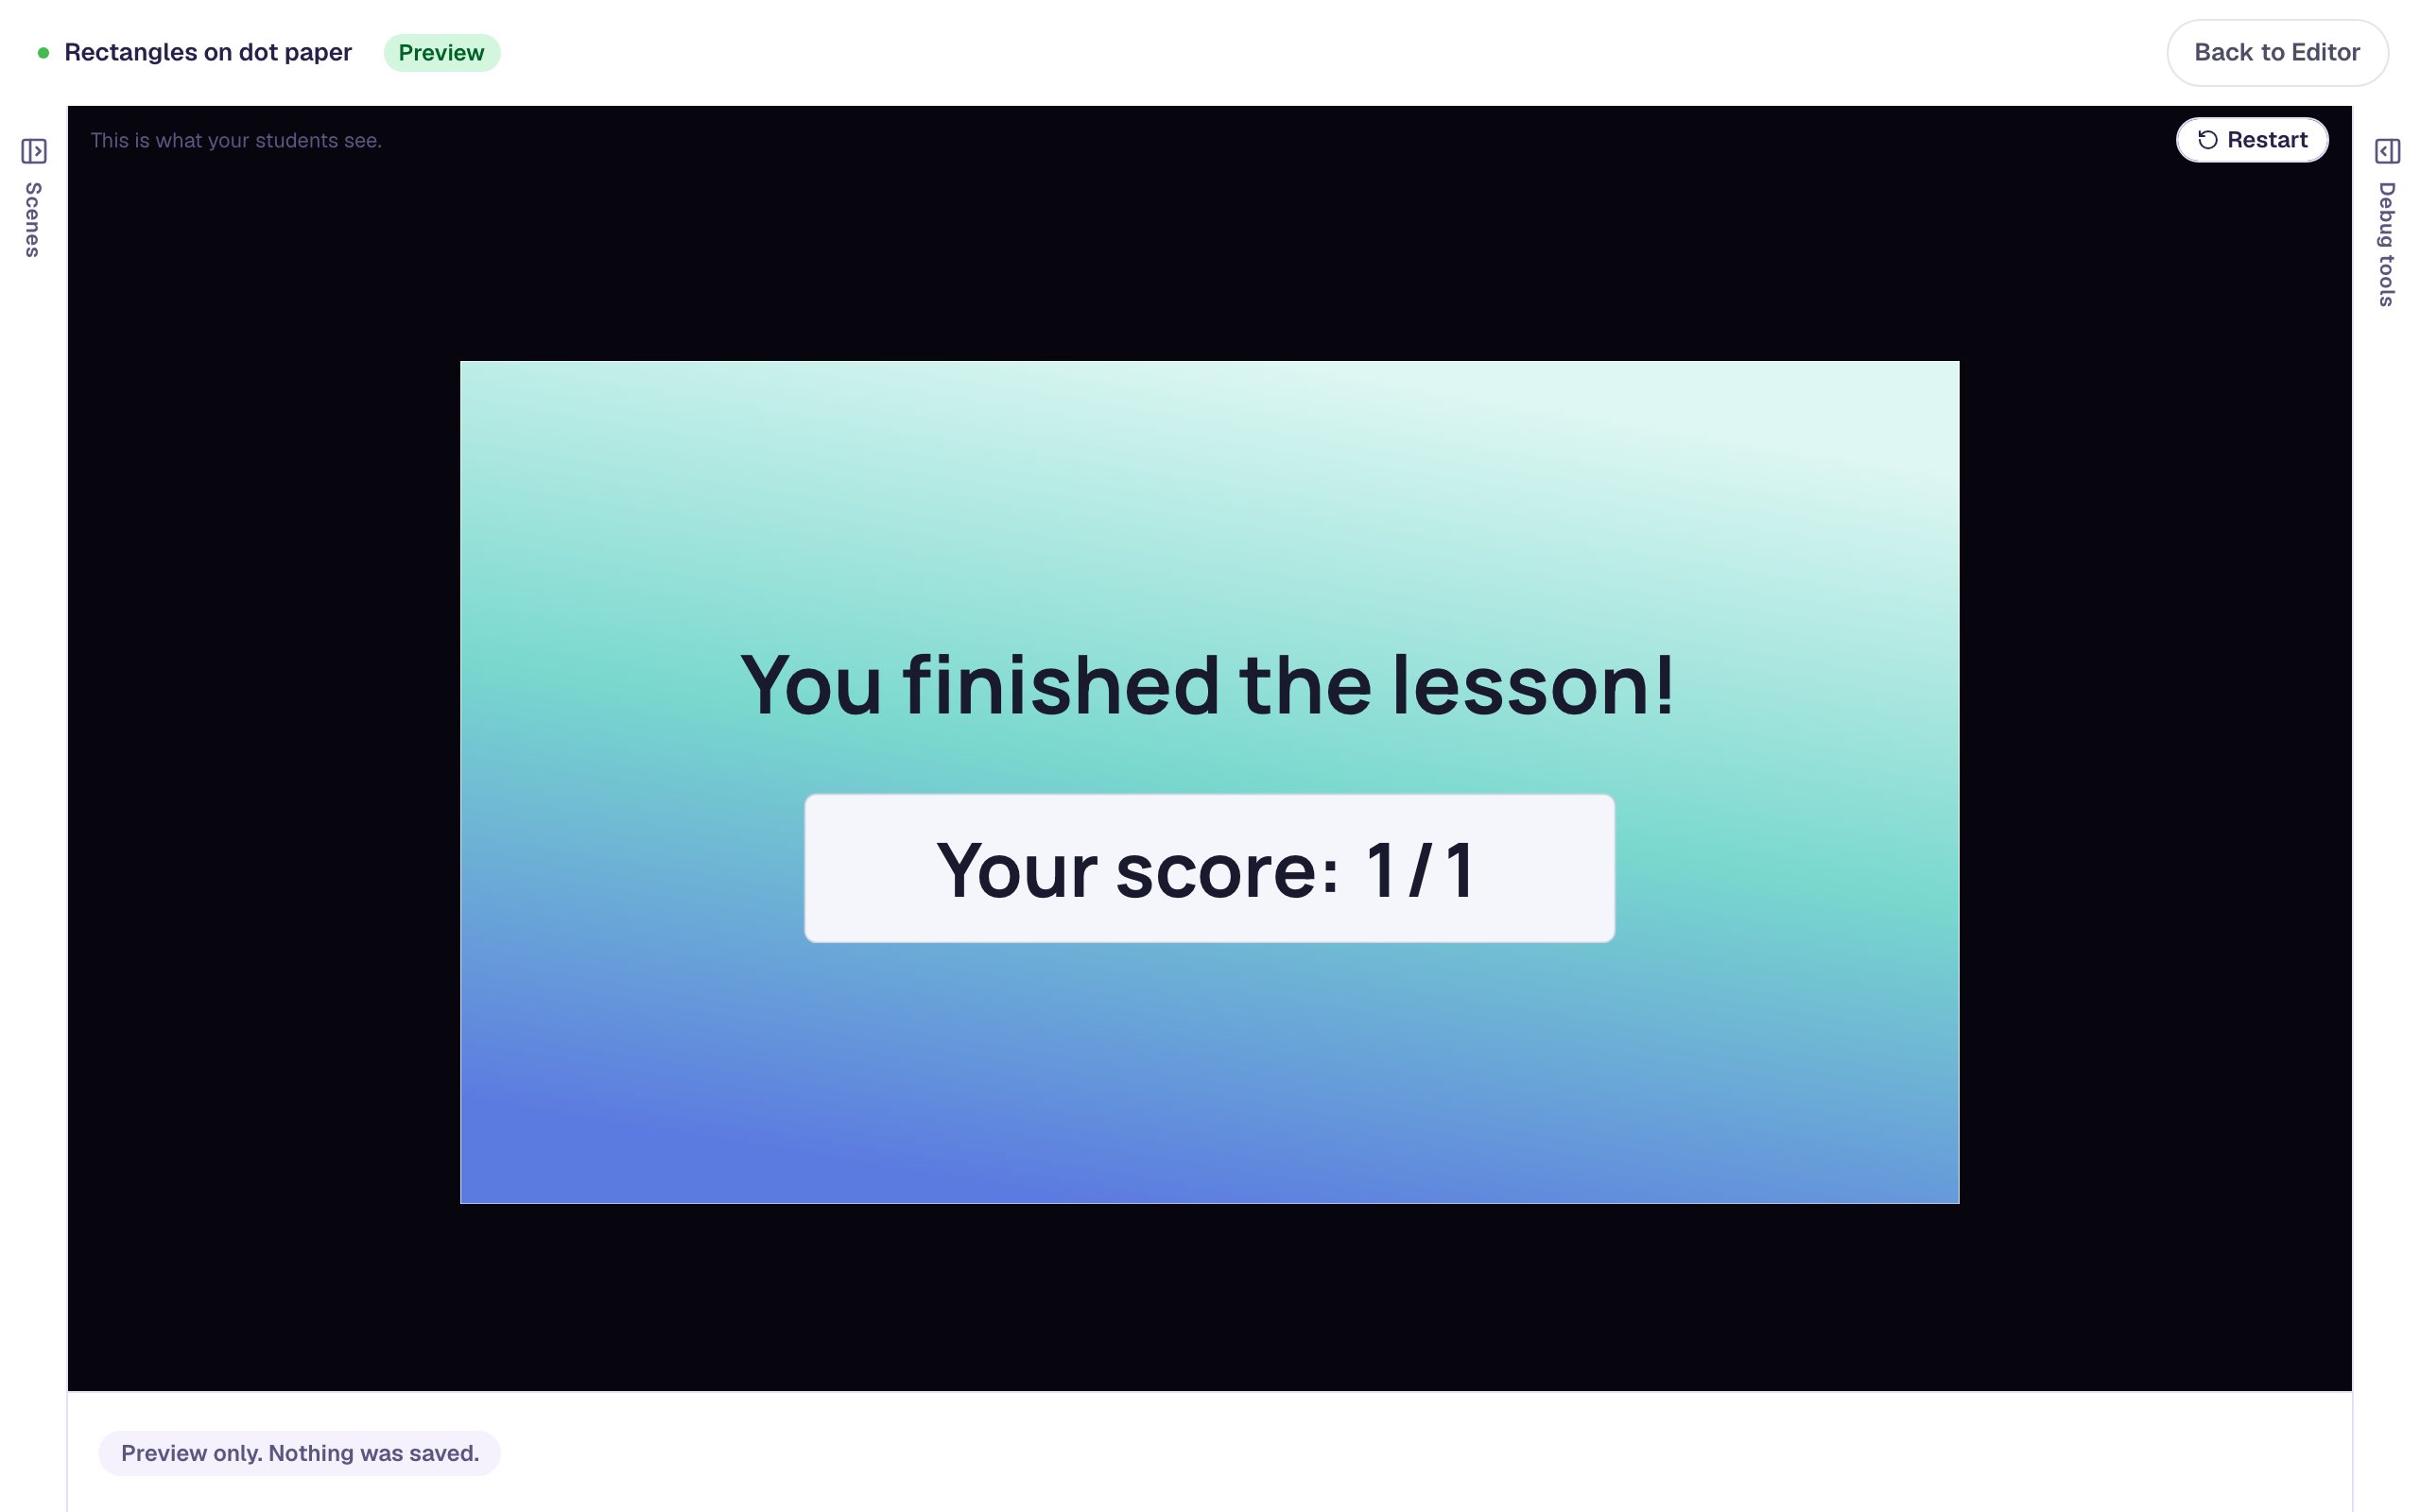
Each tap on Done counts as one attempt, so this run took 2. Drawing, undoing and clearing never count, and Done on empty paper just says "Draw a shape first." On each student's attempt page you'll see one line, such as "Drew a rectangle · 4 sides · 2 long, 2 short ✓" or "Drew a 4-sided shape, not a rectangle (no square corners) ✗", so you can see who drew a square first and who drew a rectangle straight away.
What you built
You built a one-scene geometry lesson with:
- a Dot Paper widget in Draw a shape mode, asking for a Rectangle with the side rule 2 long sides and 2 short sides, and a clue Berdee wrote and reads aloud,
- a check you tried yourself with Try it as a student before saving,
- purple sides and a lilac fill, an I'm done button, and a longer Advance delay so children read "Yes!" before the lesson moves on.
For the next question, try Triangle (3 sides) with no side rule: every triangle counts, and children find out how different two right answers can look. To have children join dots you choose, switch What children do to Connect the dots and tap the red dots on the grid in the Configure window. To build shapes from blocks instead of sides, follow Make a pattern block puzzle.
Make this lesson yours
Add the lesson you just watched being built to your account, then change it for your class: your questions, your pictures, your colors.
Free to sign up, and you'll come straight back here. I have an account