Make a pattern block puzzle
Use the Pattern Blocks widget to turn a ready-made flower into a puzzle, add a sun of your own on the working board, and let young learners fill every outline by tapping or dragging, with gentle feedback when a shape doesn't fit.
- Level
- Beginner
- Time
- About 10 min
- Steps
- 9
- Updated
- Oct 17, 2026
A one-scene kindergarten puzzle where students fill a pattern block flower and sun, see a wrong shape slide out with "That shape doesn't fit", and move on to the ending when every outline is filled.
Get the finished lesson
Skip straight to the result, or keep it open beside the steps. Add this tutorial's lesson to your account and explore how it works in the studio.
Free to sign up, and you'll come straight back here. I have an account
Pattern blocks are the wooden shapes in every K–2 classroom: the yellow hexagon, red trapezoid, blue rhombus, green triangle, orange square and tan rhombus. A pattern block puzzle is an outline children fill with the right blocks. It builds the shape vocabulary and spatial sense that later work on fractions and geometry stands on, and it's a favorite center activity because children can tell for themselves when they're done.
The Pattern Blocks widget brings the real shapes and angles onto the screen. You arrange blocks on a board only you see, press Make outline, and students get the outlines to fill.
In this tutorial you'll build a one-scene lesson called Fill the flower: a flower made of a yellow hexagon and six green triangles, with a yellow hexagon sun in the corner. Students fill each outline by tapping it and then a block, or by dragging a block onto it. A block that doesn't fit slides back out, and the lesson moves on when every outline is filled.
Step 1: Set the scene
Start a blank lesson (New lesson, then Start from scratch) and name it Fill the flower by clicking Untitled lesson at the top left.
Give the scene a warm background. Click an empty spot on the scene, open Background, click Choose a style, and pick Mesh sunrise. Give the Closing Scene the same background so the ending matches.
Then add what students read:
- A Heading at the top left:
Fill the flower and the sun!. Set its Font Size to34. - A Body on the right:
Tap an outline, then the block that fits. Or drag a block onto it.Set it to Fixed width,230wide, and Font Size22.
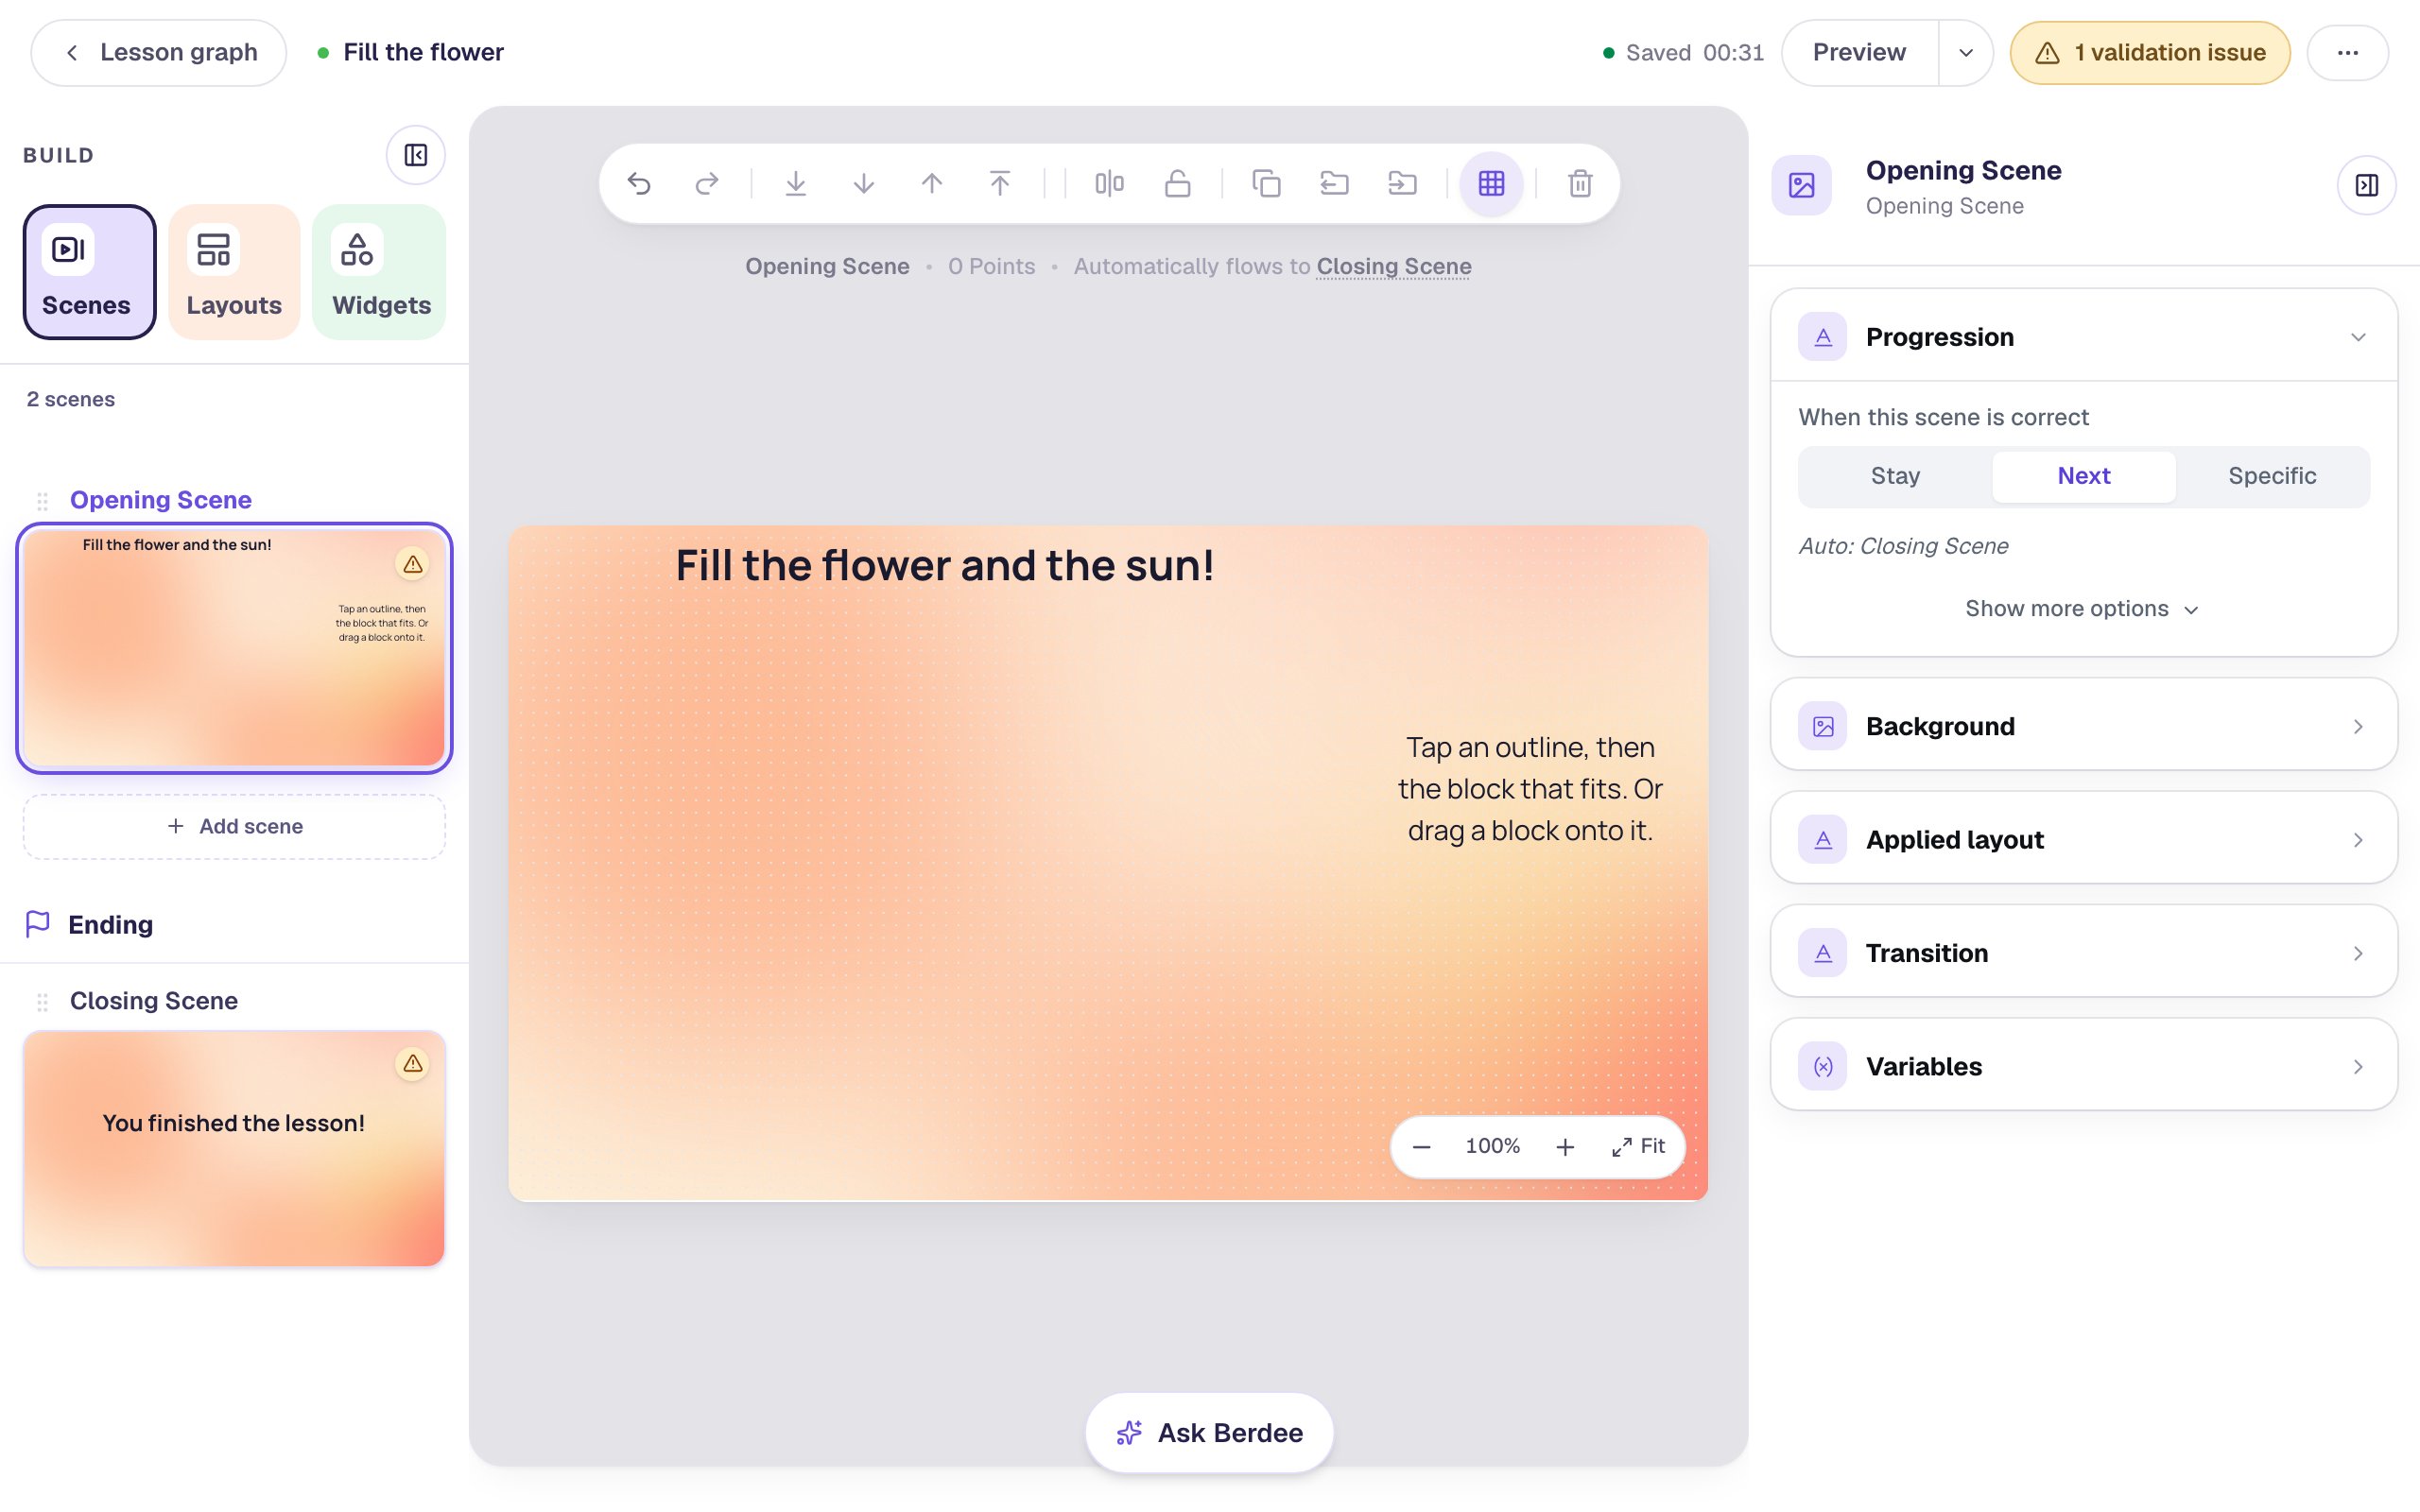
The puzzle will take the left of the scene, and the right-hand column holds the instructions and, later, the I'm done button.
Step 2: Add a Pattern Blocks widget
Search the Widgets tab for Pattern Blocks and click it. A board with a tray of all six blocks lands on the scene.
In Style & Layout, click Show more options and set Width to 640. Drag the widget to the left, under the heading.
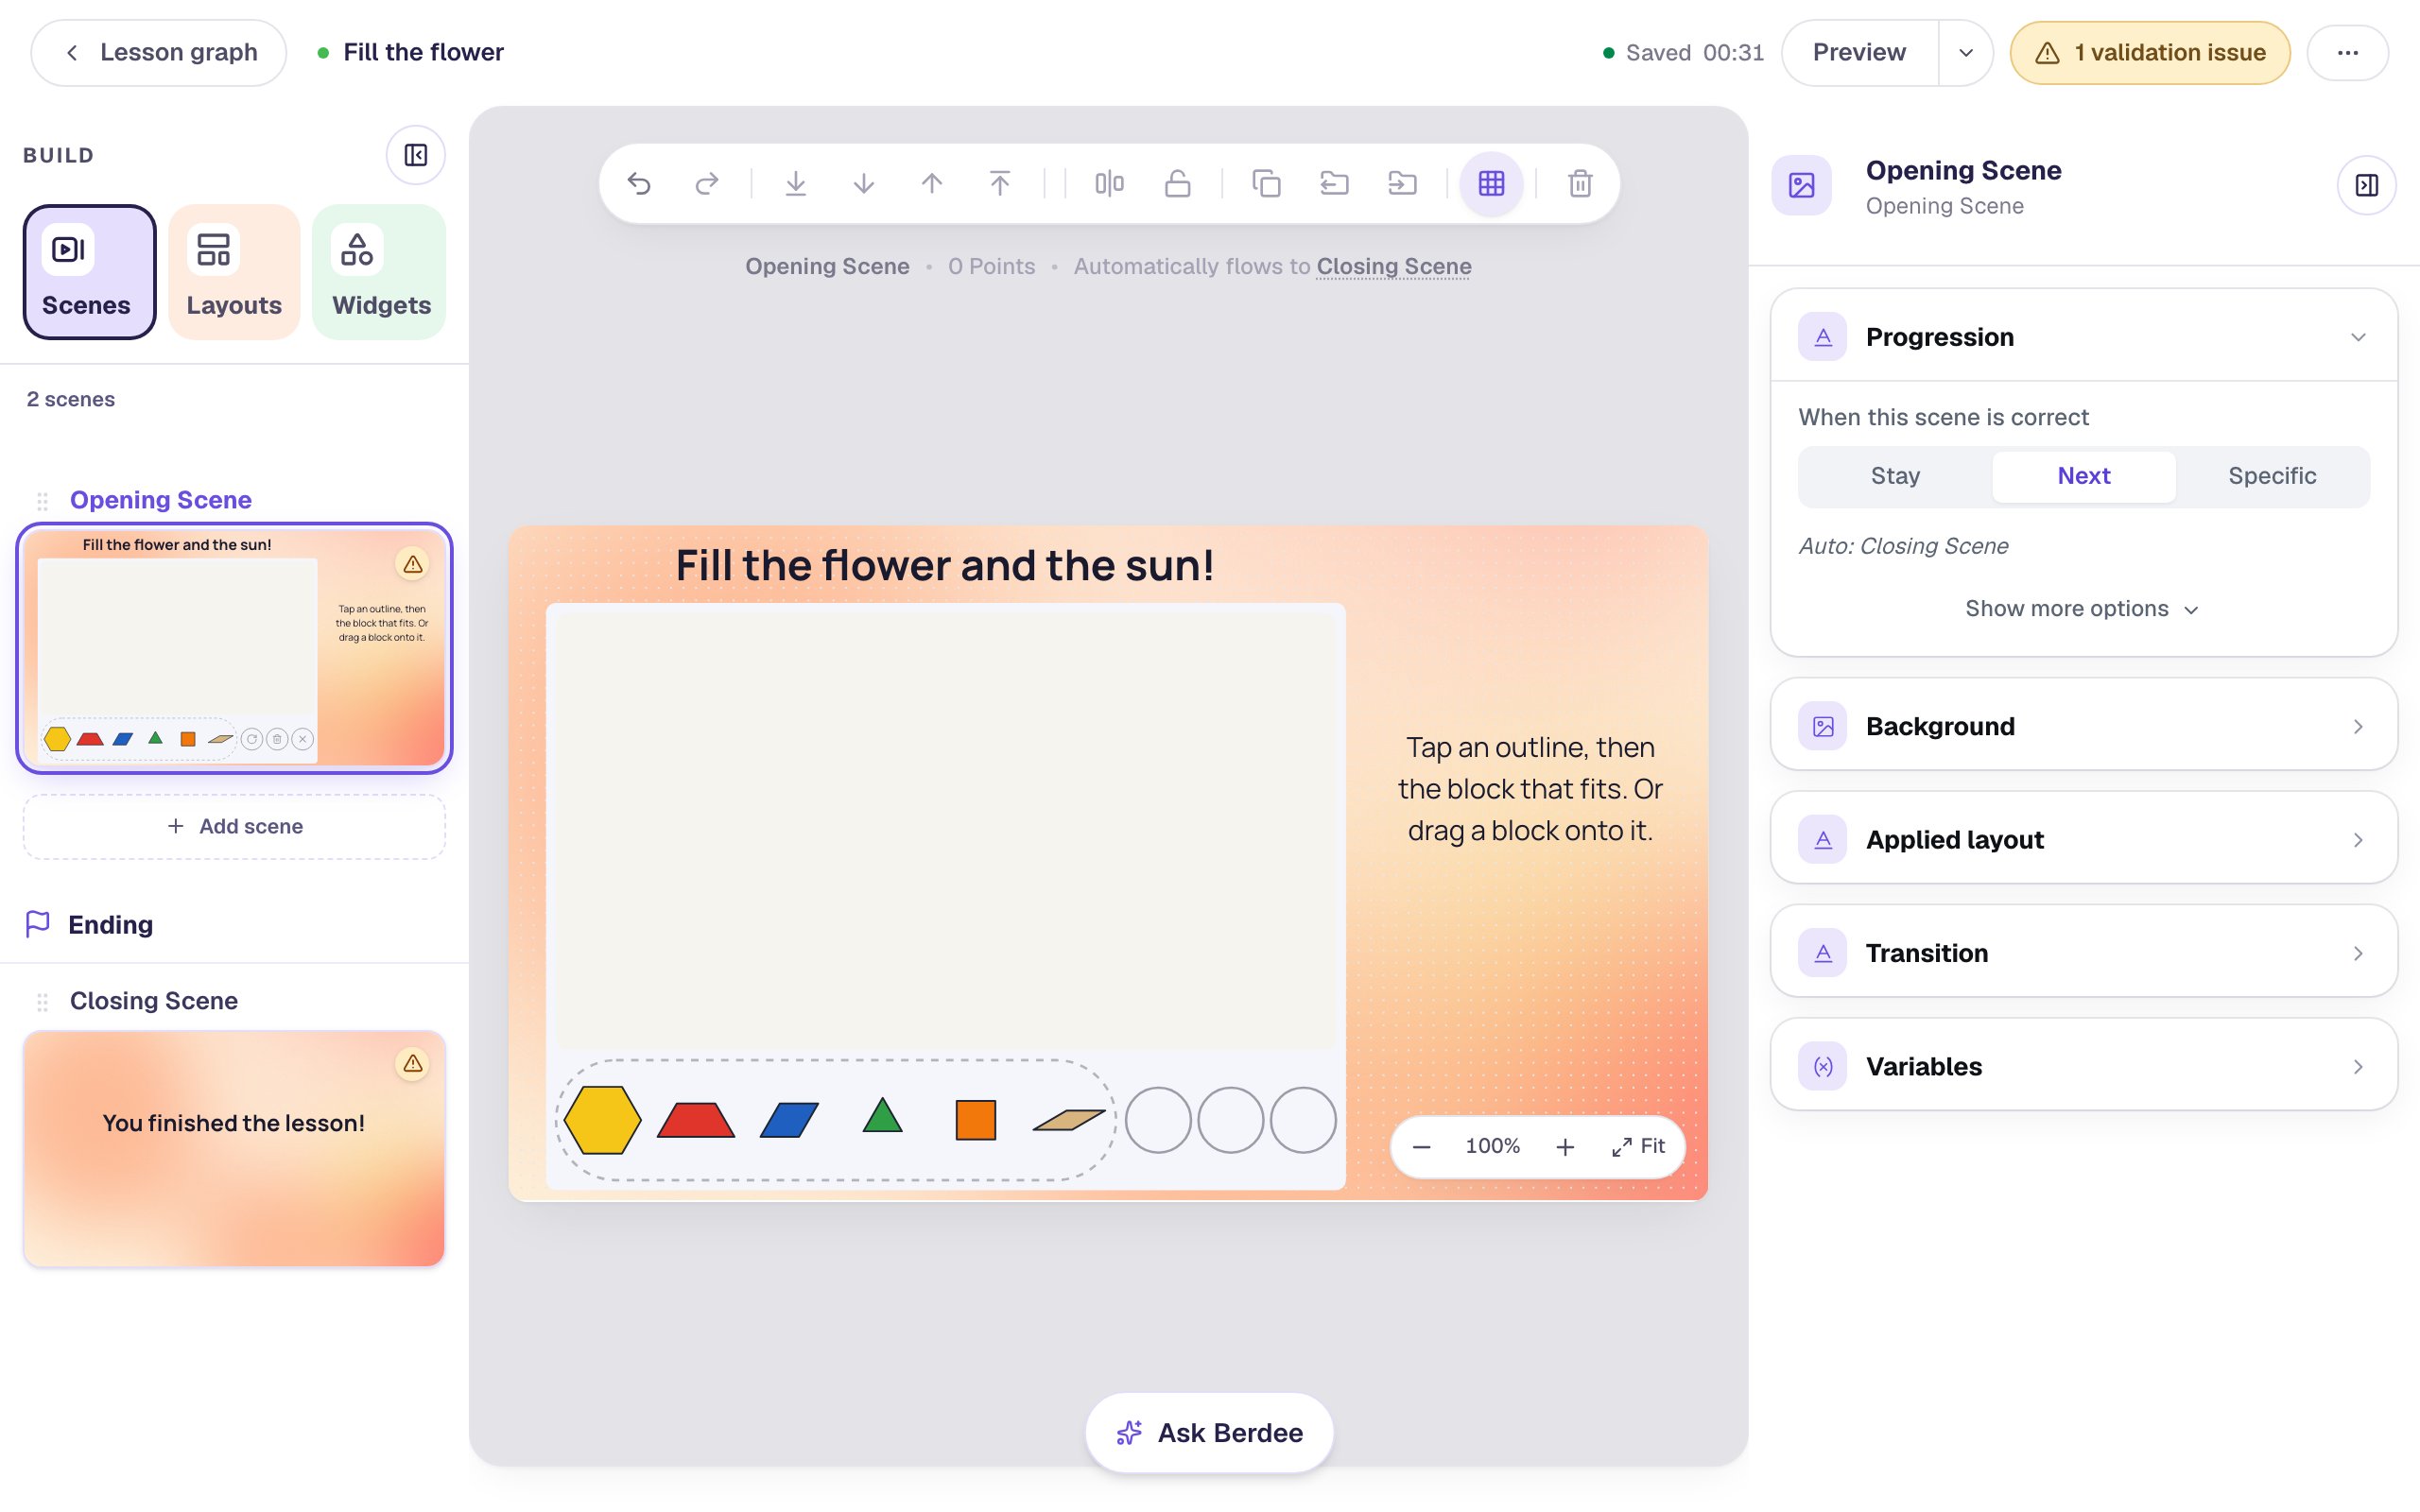
A new Pattern Blocks widget starts in Explore, where students build anything. You'll make it a puzzle next.
Keep the widget's bottom right corner clear of anything else on the scene: that's where the turn, bin and clear buttons sit.
Step 3: Make it a puzzle and start from the flower
Select the widget and click the floating ⚙ Configure button. The window asks things in the order you decide them.
- Under What students do, choose Puzzle.
- Under The puzzle, open Start from a ready-made puzzle and pick Flower: a hexagon and six triangles.
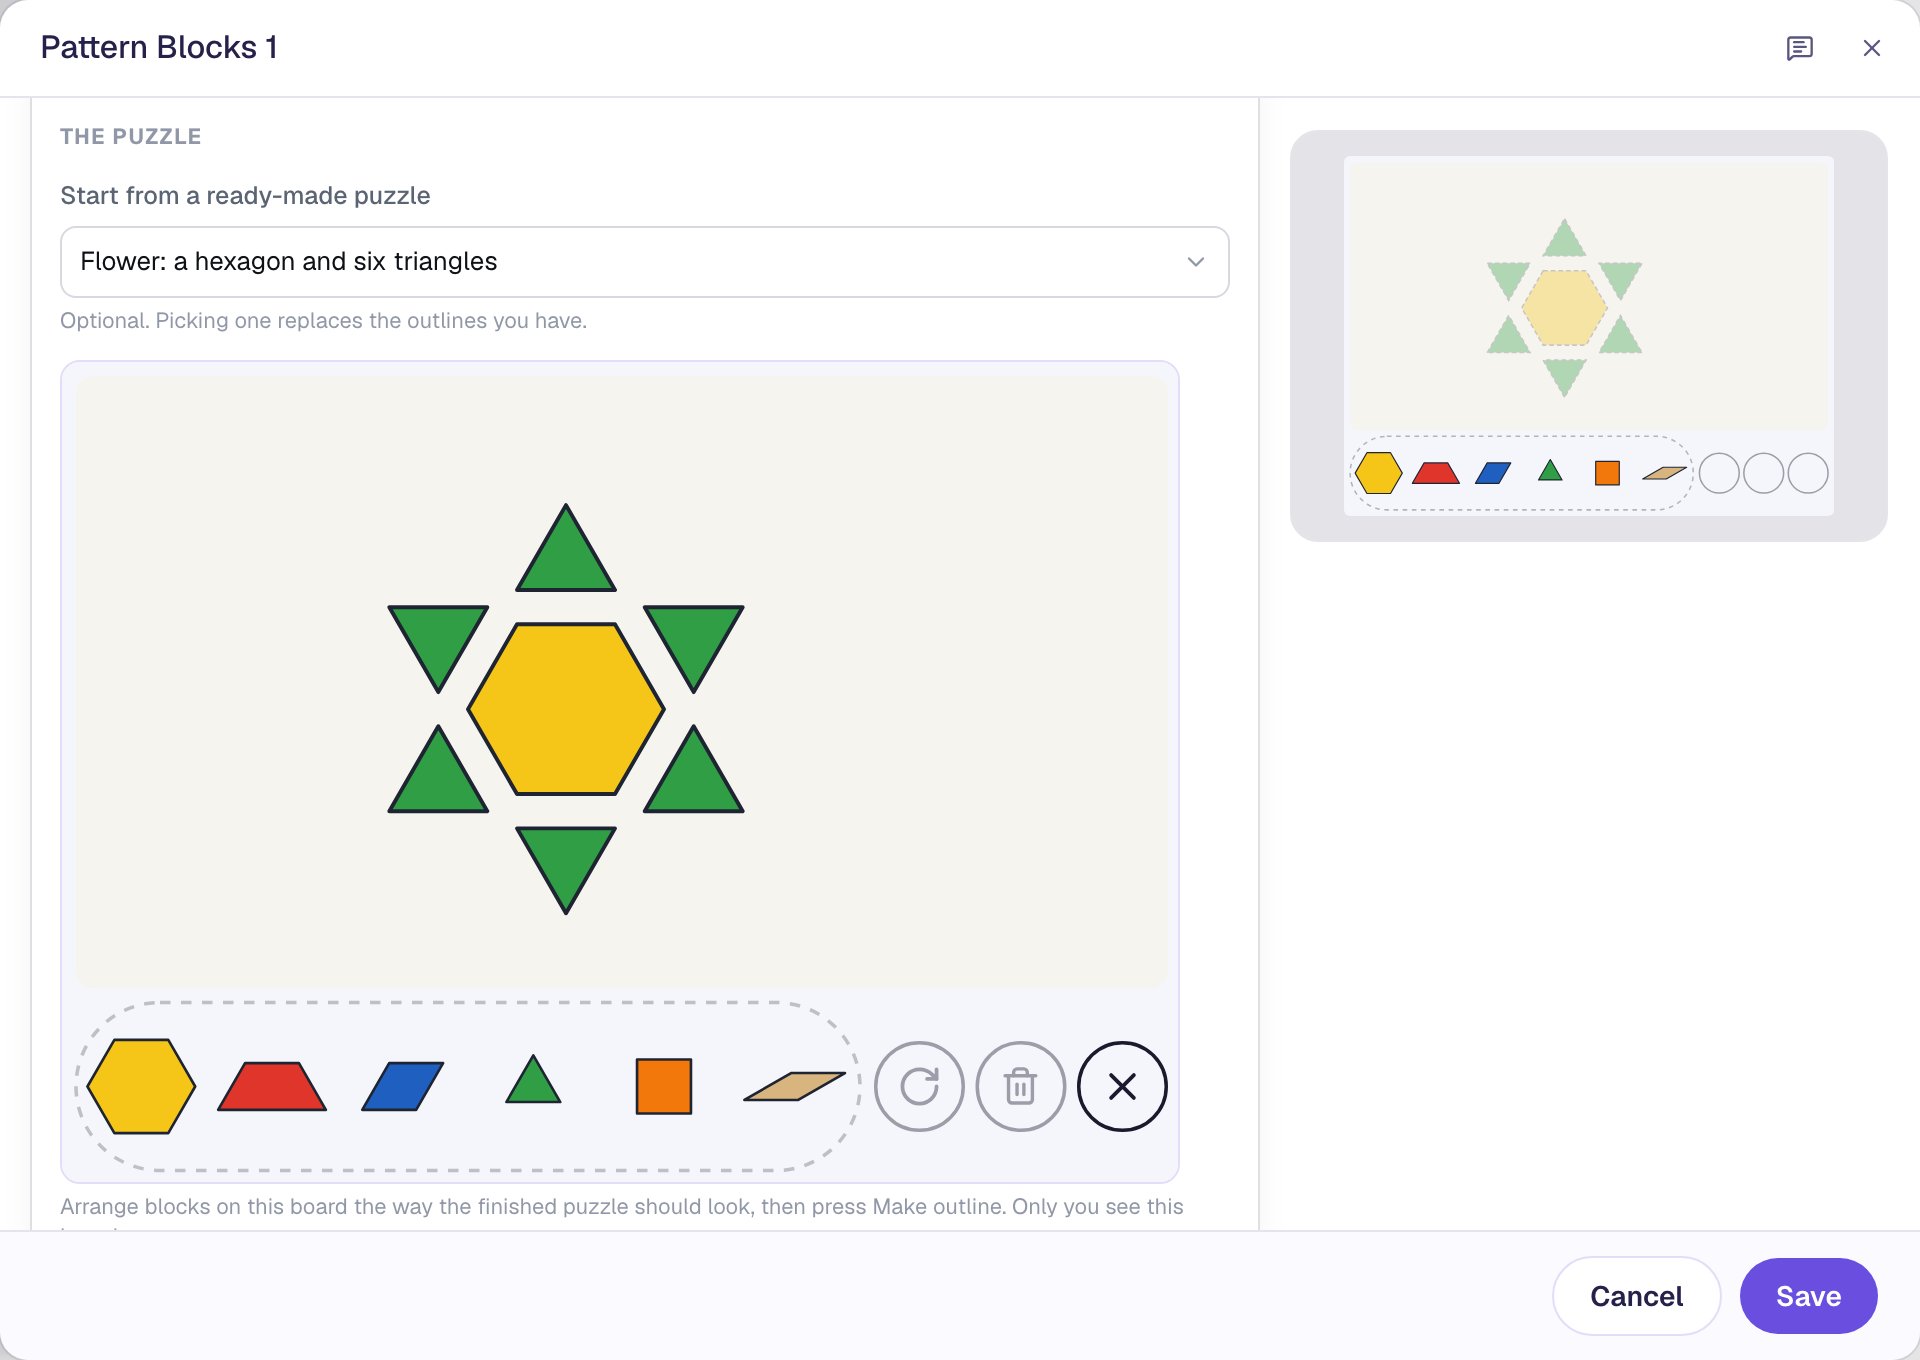
The board in the window is your working board. Only you see it. The preview on the right shows what students get: each block has become an outline. The flower's blocks don't touch each other, so each one is its own outline, seven in all.
Step 4: Add a sun of your own
Ready-made puzzles are a starting point. Anything you arrange on the working board can become part of the puzzle.
- Drag a yellow hexagon from the working board's tray to the top right of the board. That's the sun.
- Press Make outline. The line beside it changes to 8 outlines in the puzzle.
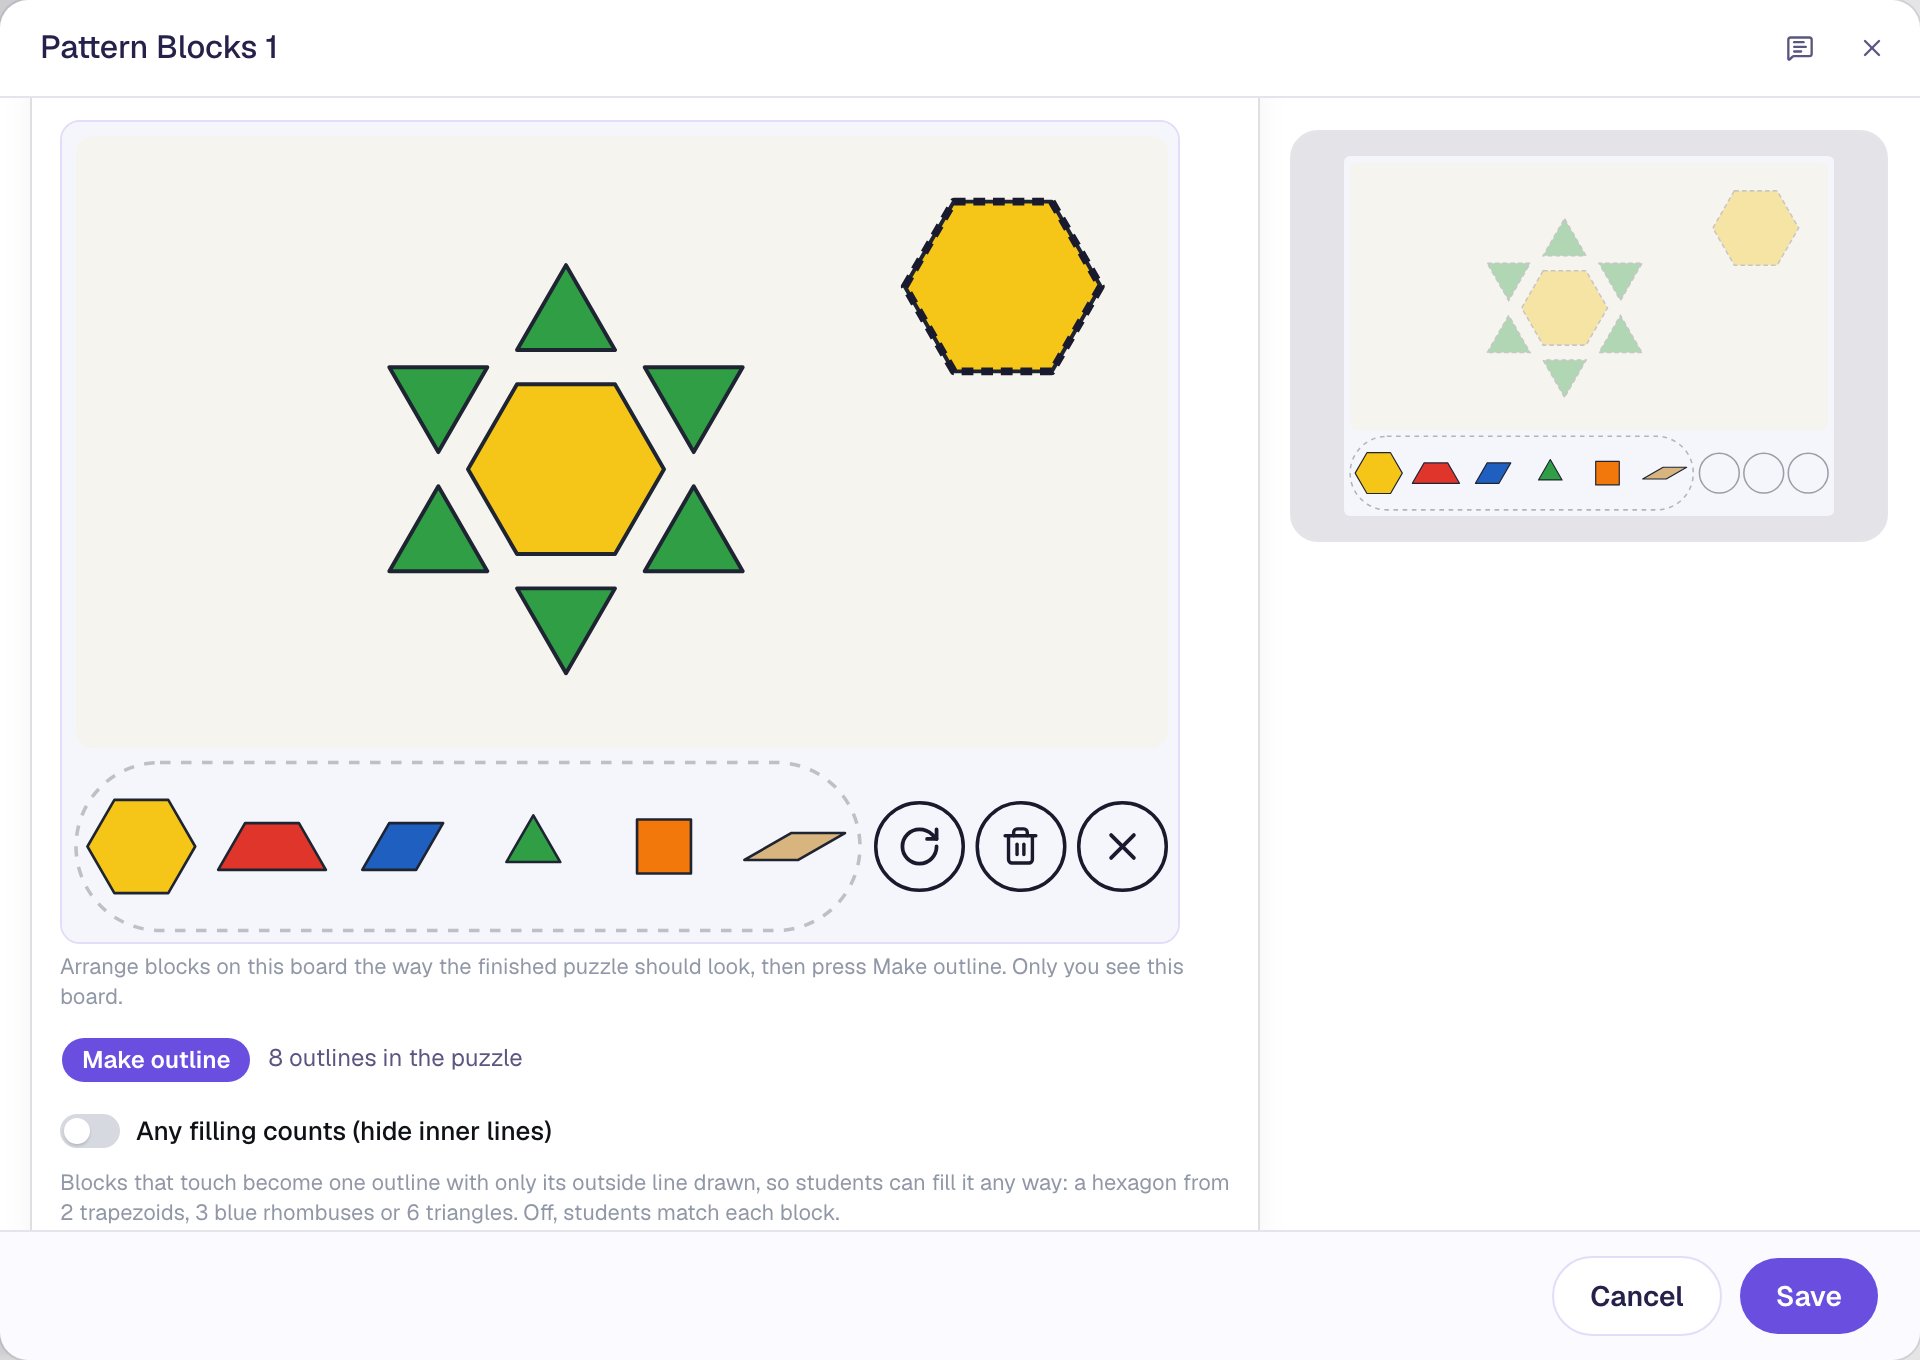
Blocks that touch along a side become one outline together; blocks kept apart, like the sun and the flower, become one outline each. If you change the board and forget to press Make outline, the window reminds you, because students only see the outlines you made.
Leave Any filling counts (hide inner lines) off for this puzzle. Turned on, it draws only the outside line of blocks that touch, so a hexagon could be filled with two trapezoids or six triangles. That's a great next puzzle once children know the shapes.
Step 5: Choose how hard it is and which blocks students get
Scroll down the same window.
- Under How hard, keep Outline color on Colored. A yellow outline is a hint to use a yellow block, which suits kindergarten. Gray makes children match by shape alone.
- Keep Turn blocks to fit for students on. A triangle dropped pointing the wrong way turns itself to fit, so the task is recognizing the shape. Turn it off when turning the block is the skill you're practicing.
- Under Blocks students can use, untick Orange square and Tan rhombus.
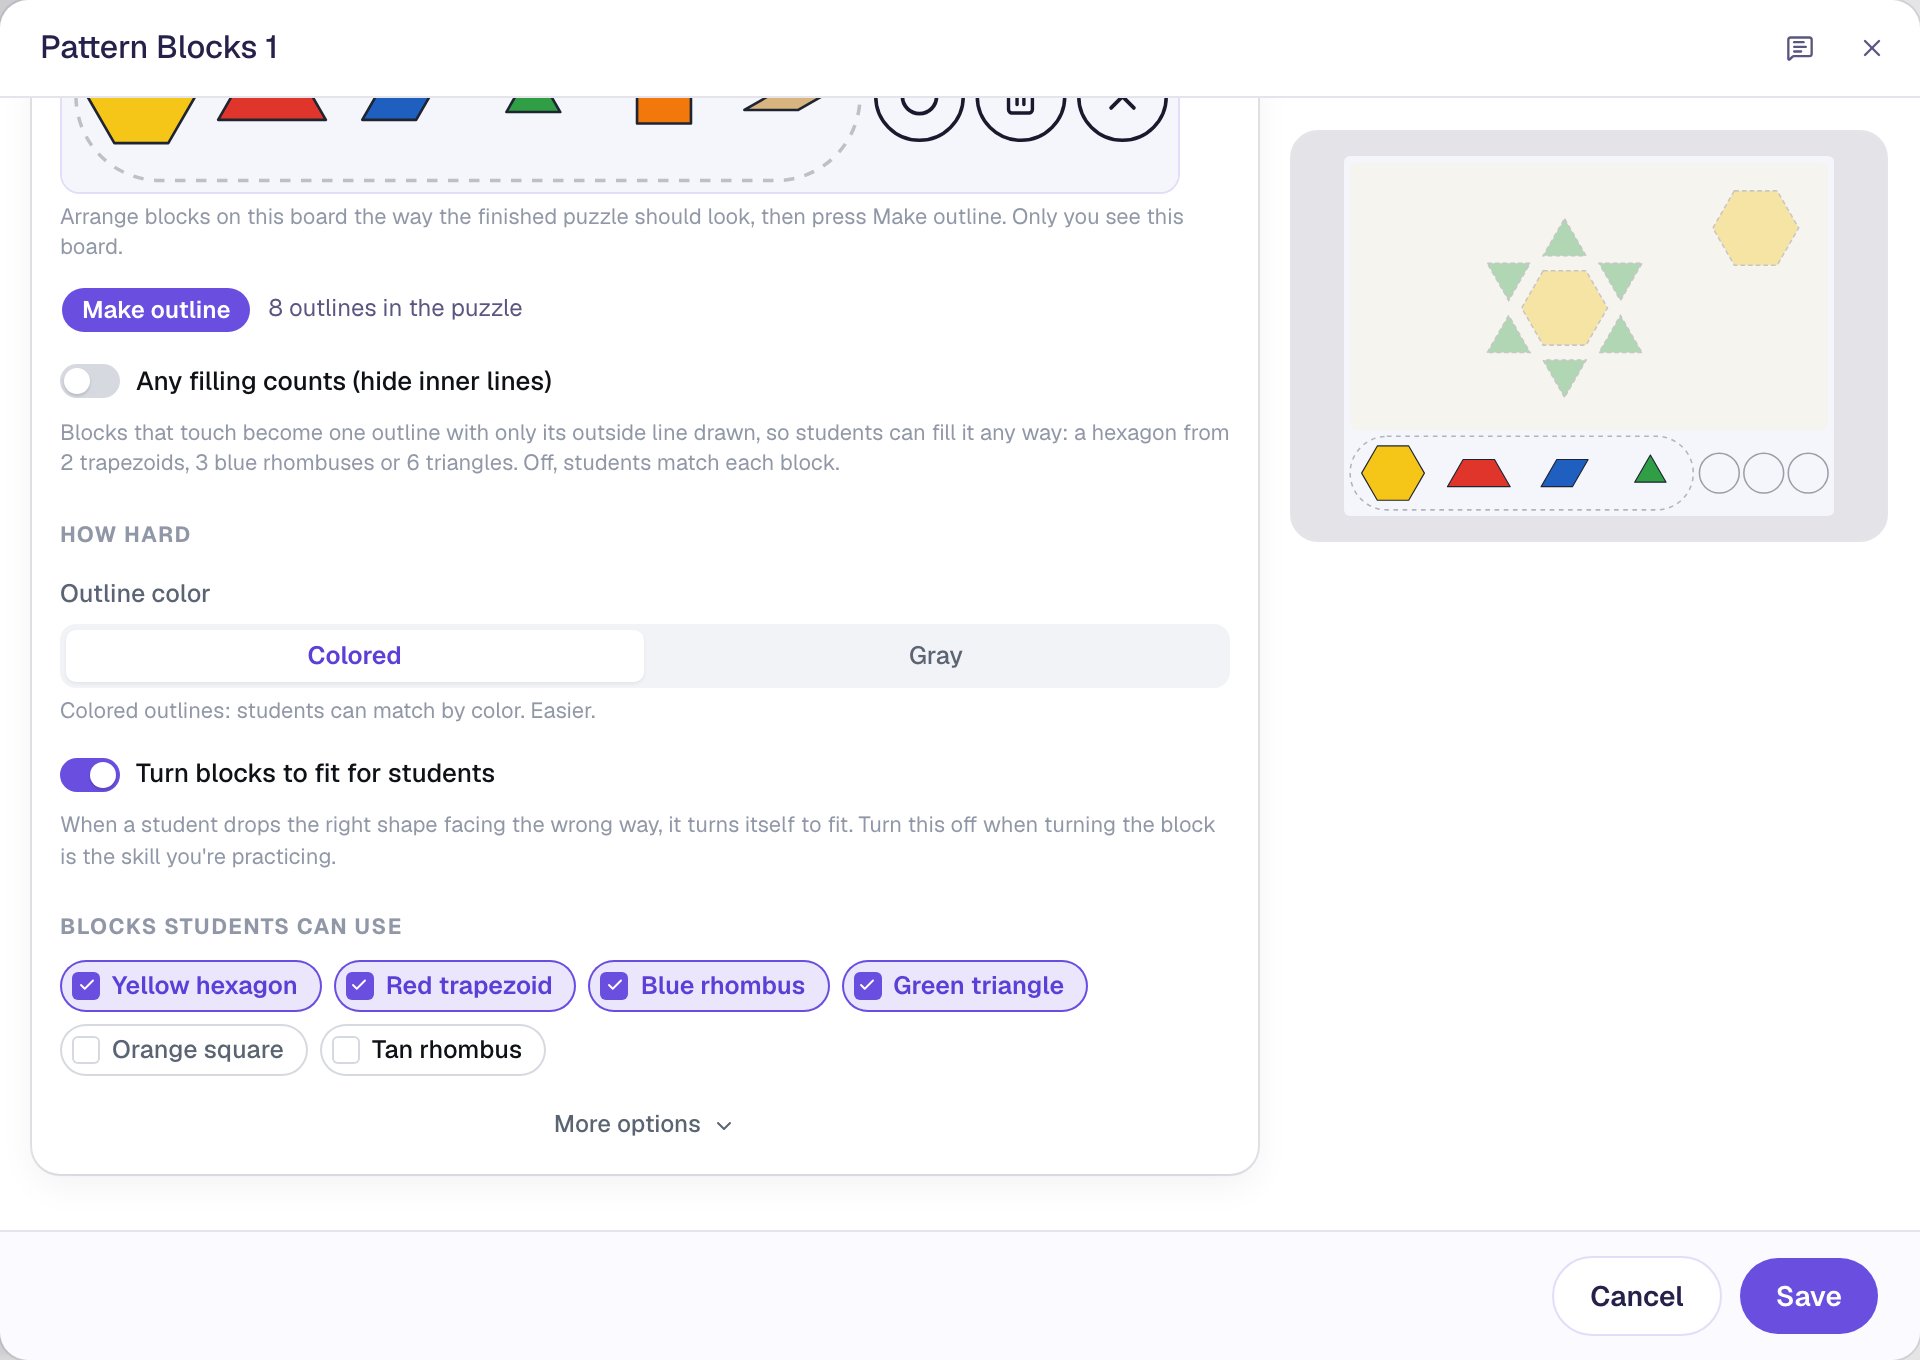
The tray now holds the two blocks the puzzle needs and two that don't belong: the red trapezoid and the blue rhombus. A few wrong choices are part of the task. Children try a shape, see it doesn't fit, and try another.
Click Save.
Step 6: Give the board a sky color
The board is off-white to start. A pale blue makes the flower and the sun look like they're outside.
With the widget selected, open Style & Layout, click the Board color and pick the palest blue in the grid.
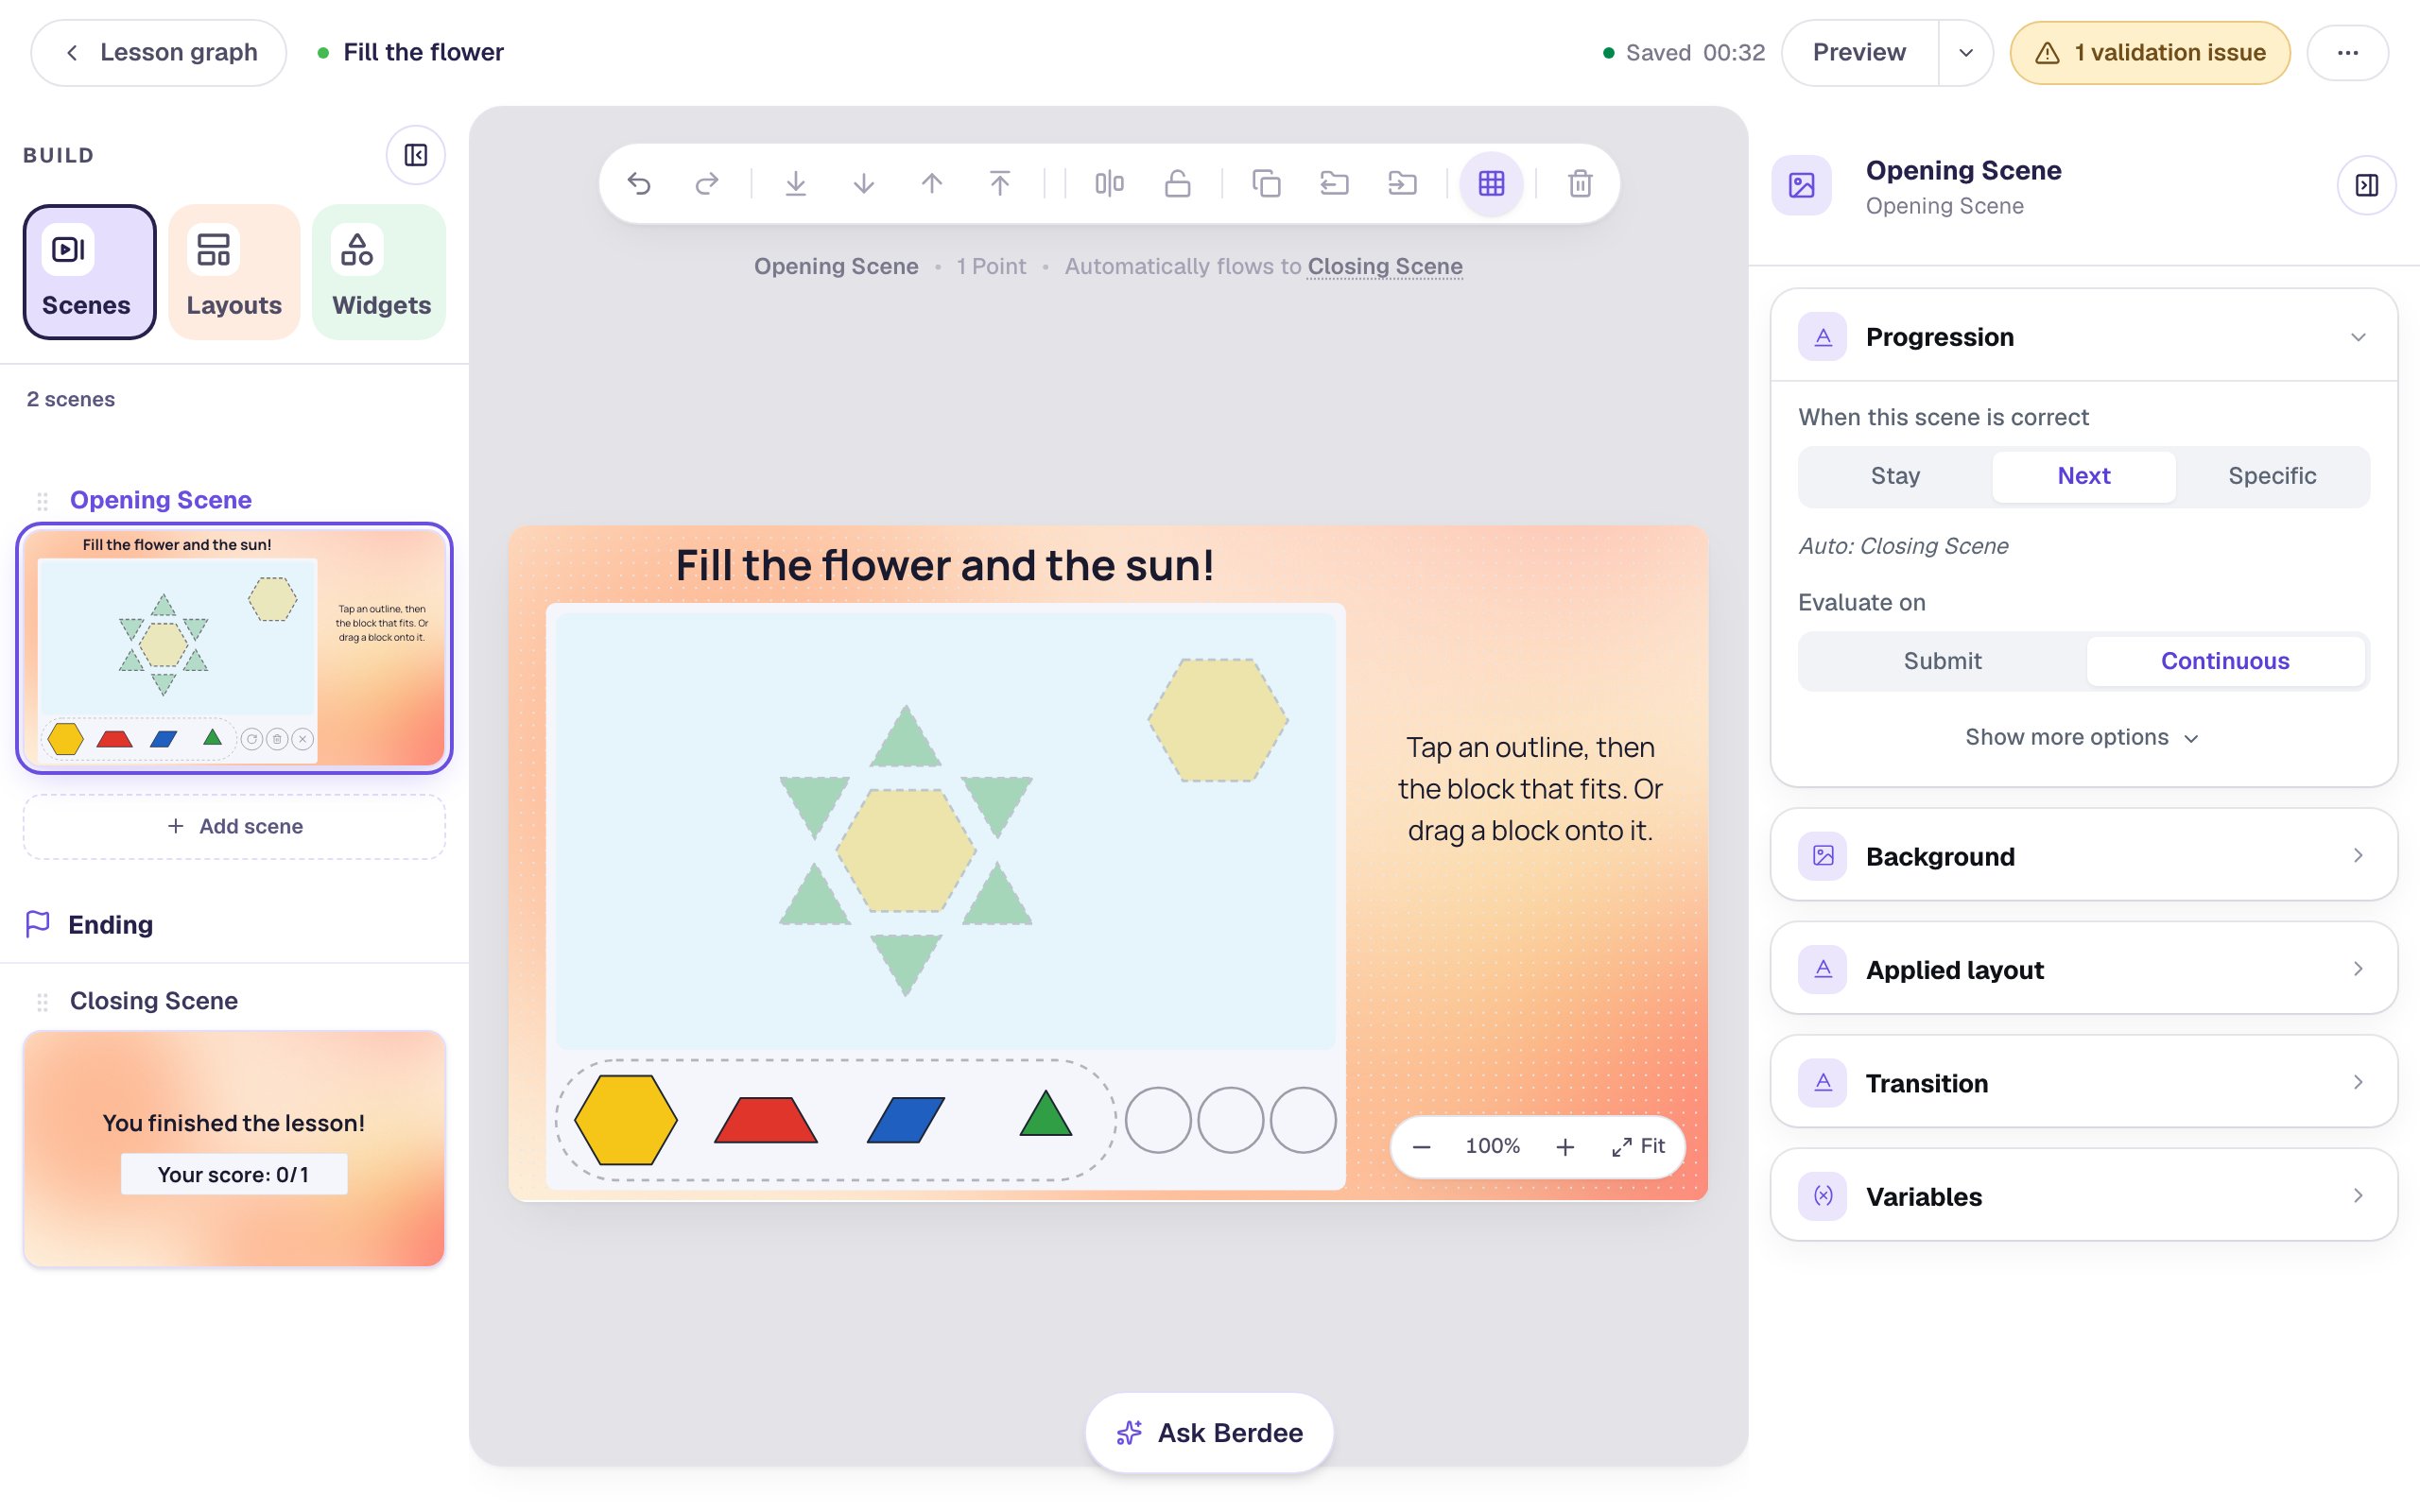
The blocks always keep their classroom colors, whatever colors you pick around them, because children and teachers name them by color.
Step 7: Add an "I'm done" button
Every lesson needs one button that lets a student finish. It's also a way out for a student who gets stuck.
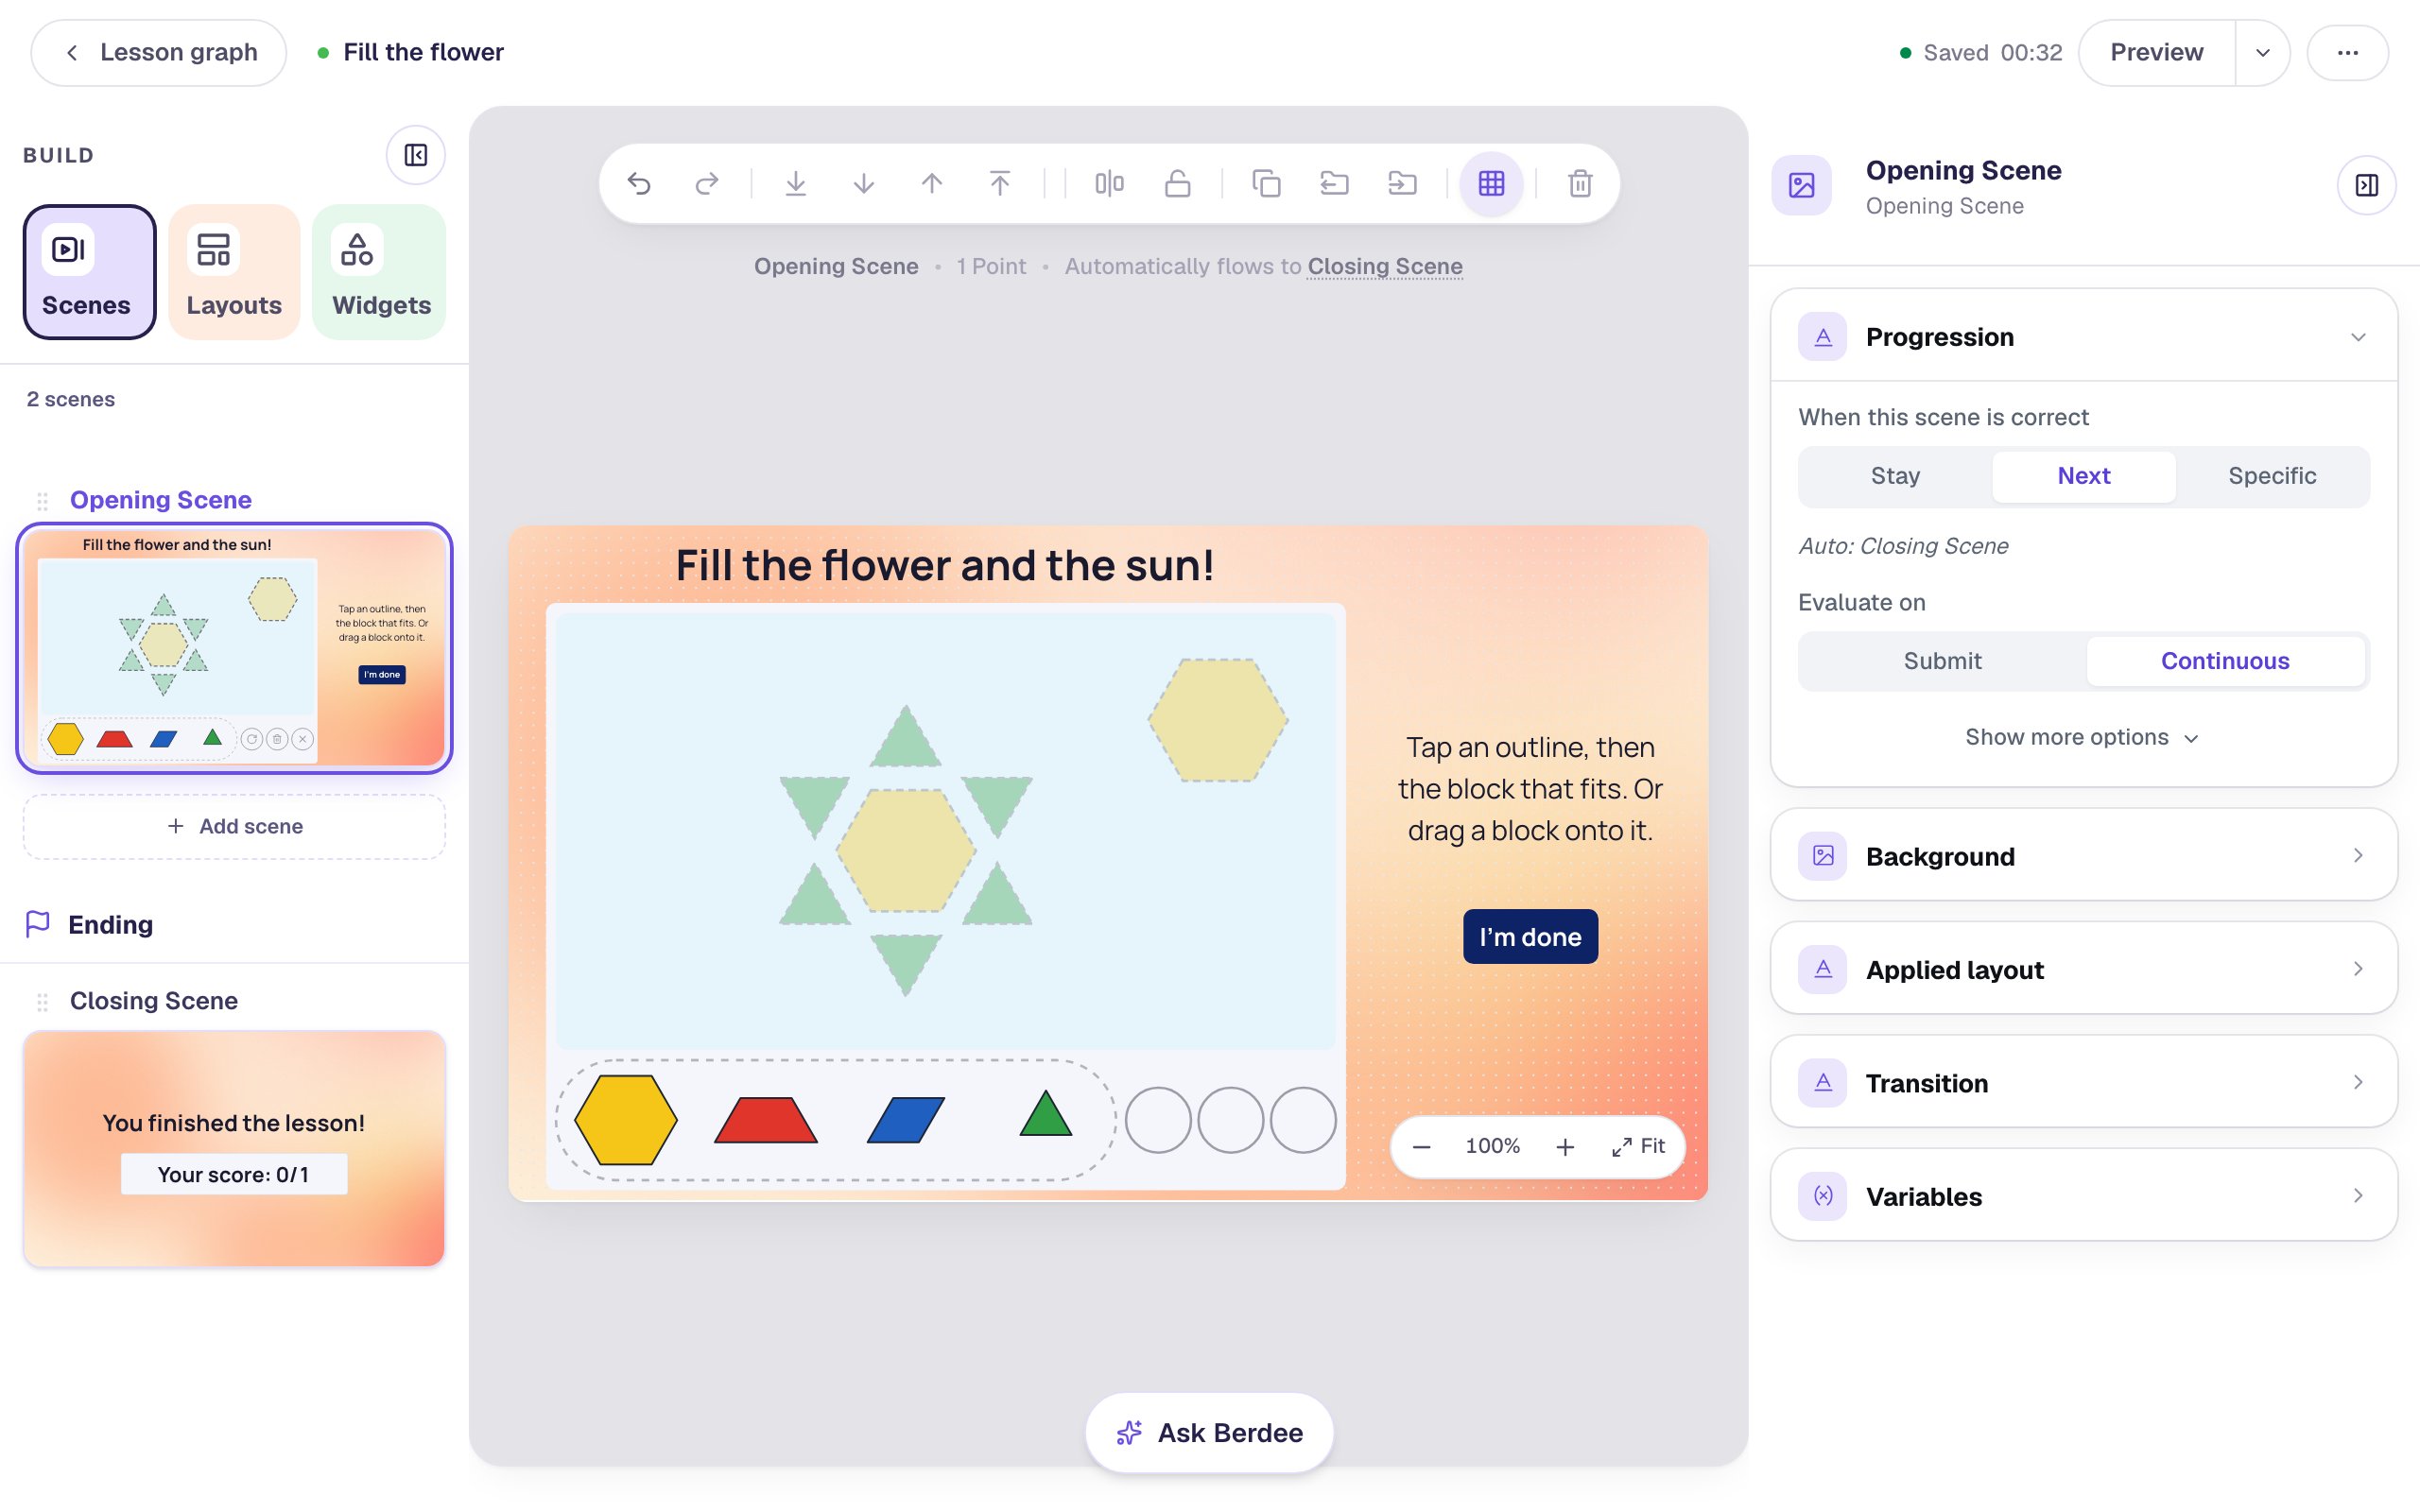
- Search the Widgets tab for
Submit Buttonand click it. - In Content, change Label to
I'm doneand set Submits to Lesson. - Set its Font Size to
20. In Style & Layout, set Background to a dark navy and Text to white. Drag it under the instructions on the right.
Step 8: Give students a moment to see their flower
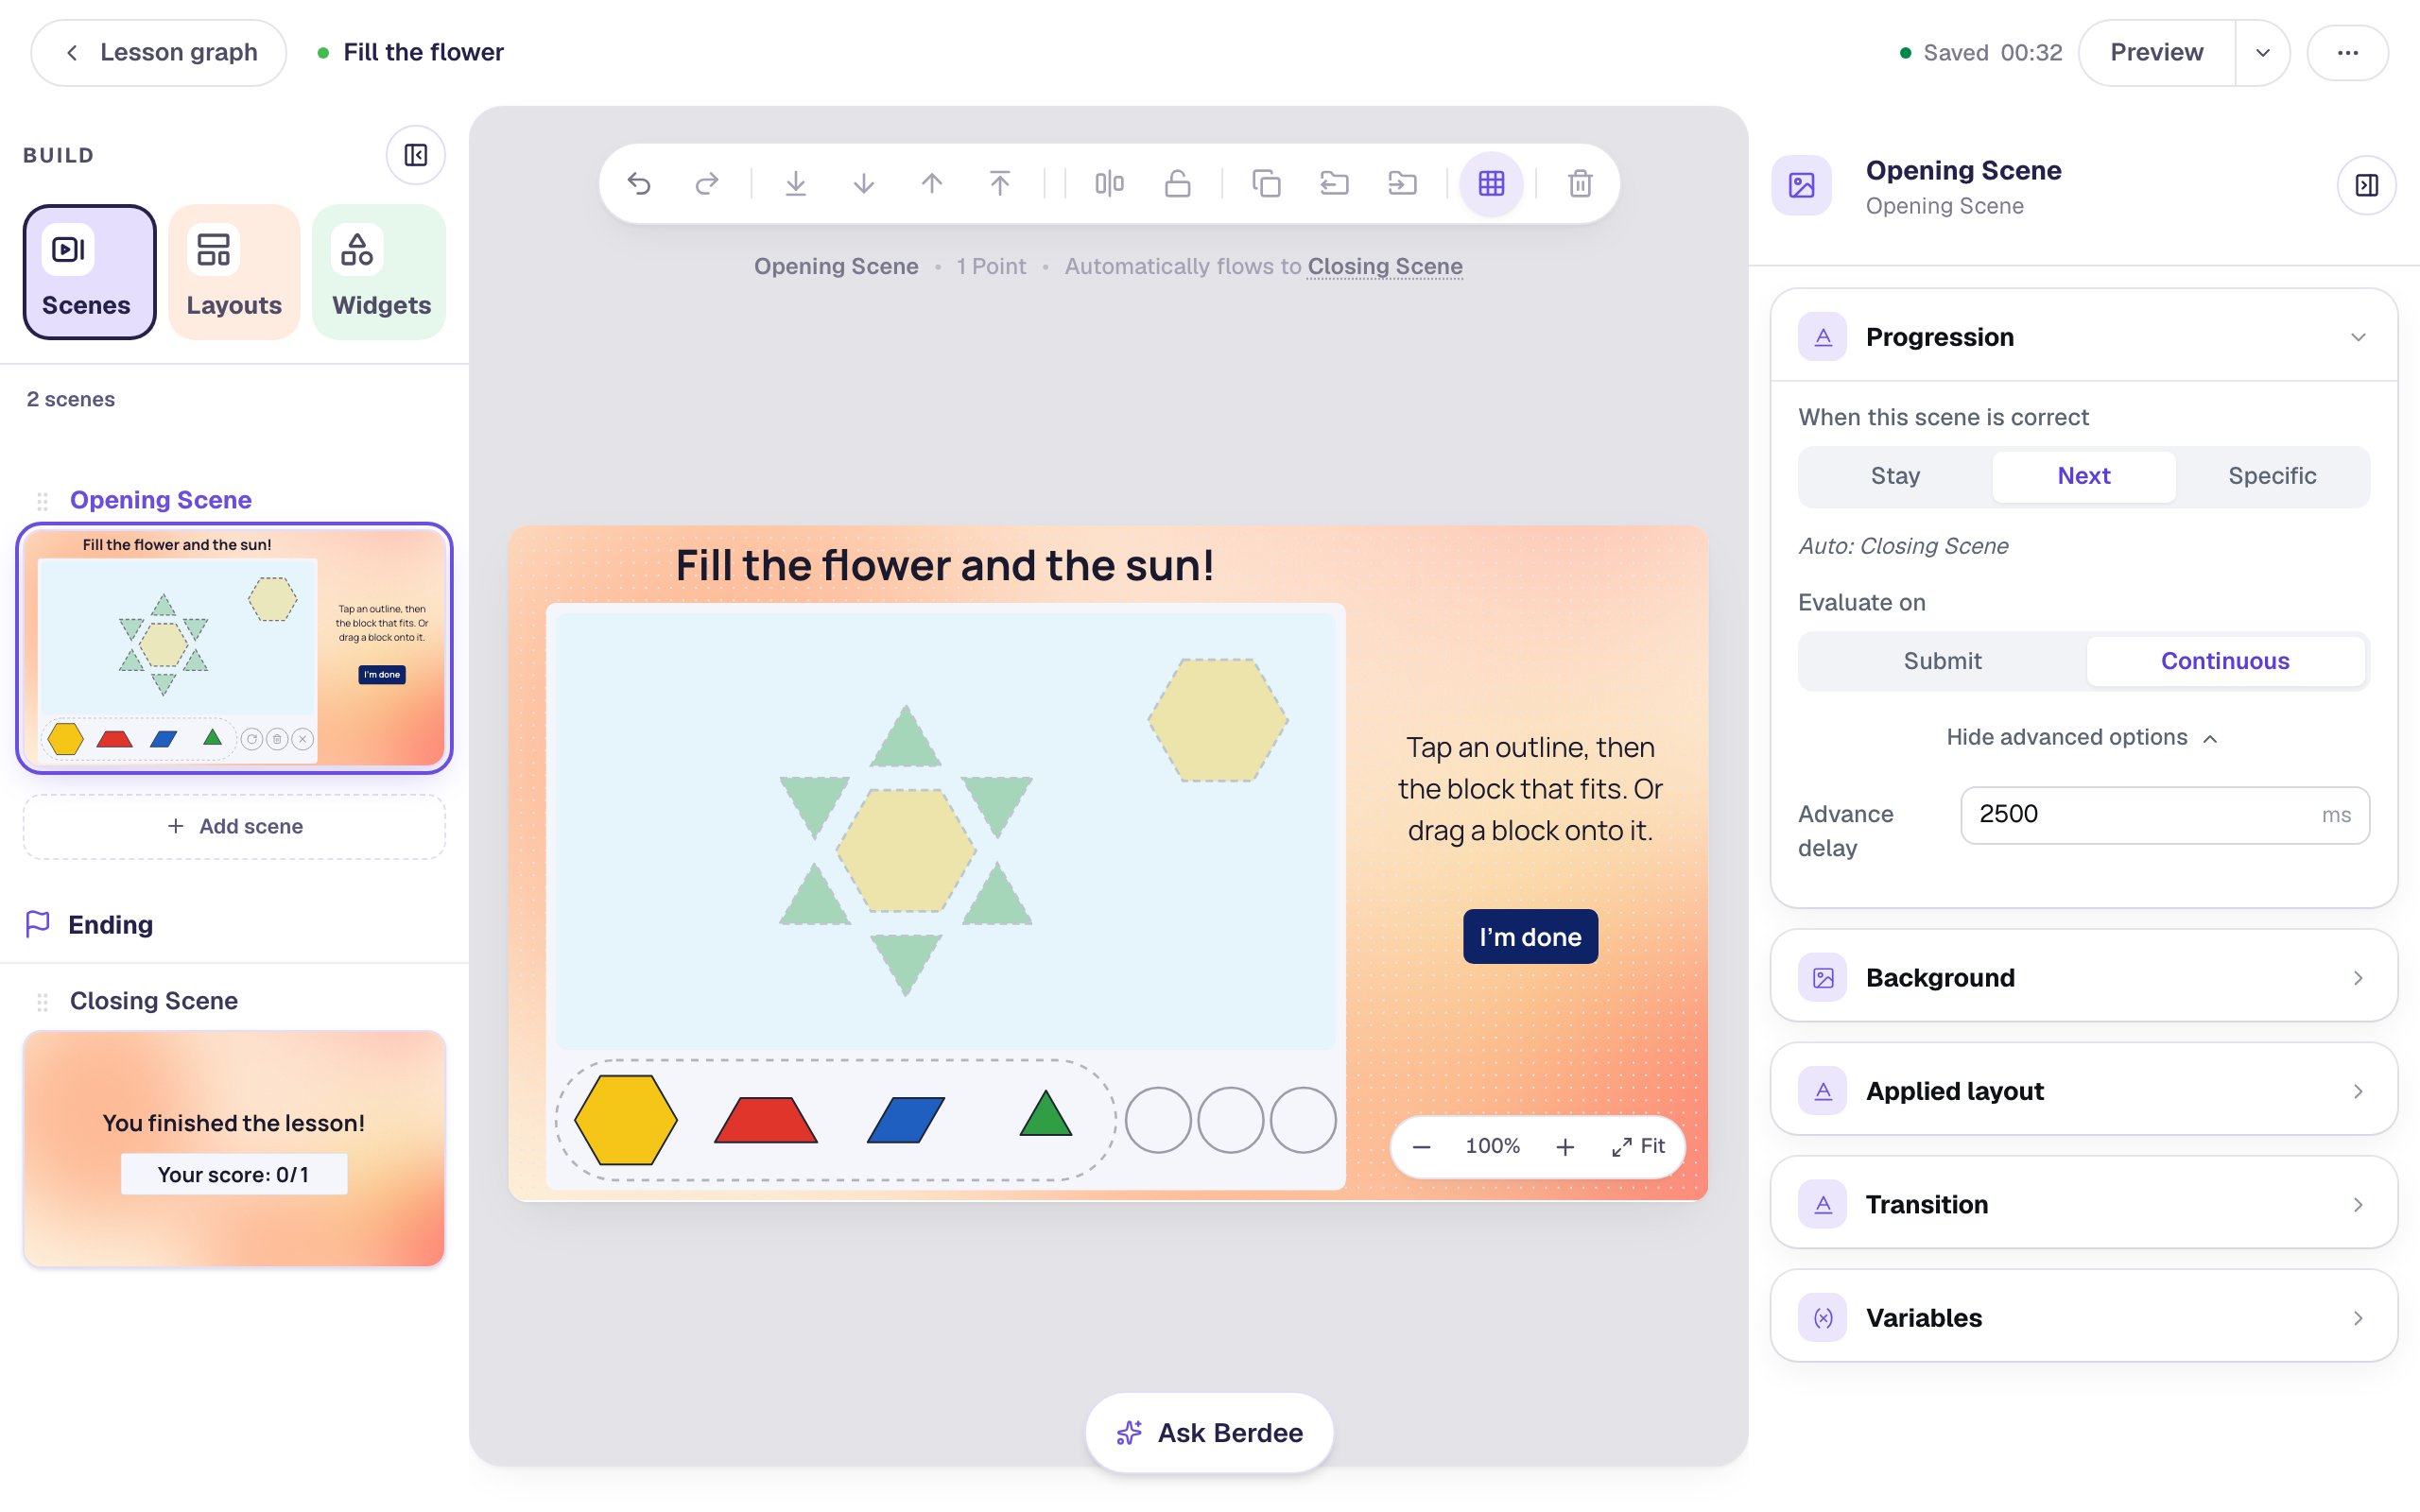
The puzzle is graded: it's right when every outline is filled. When it is, the scene moves on by itself, as the line above the canvas says: Automatically flows to Closing Scene. By default that happens after 0.6 seconds, which is too quick for a child to admire what they made.
Click an empty spot on the scene. In Progression, click Show more options and set Advance delay to 2500 ms.
Step 9: Play the puzzle in Preview
Click Preview. Students see the outlines, the tray and the three buttons.
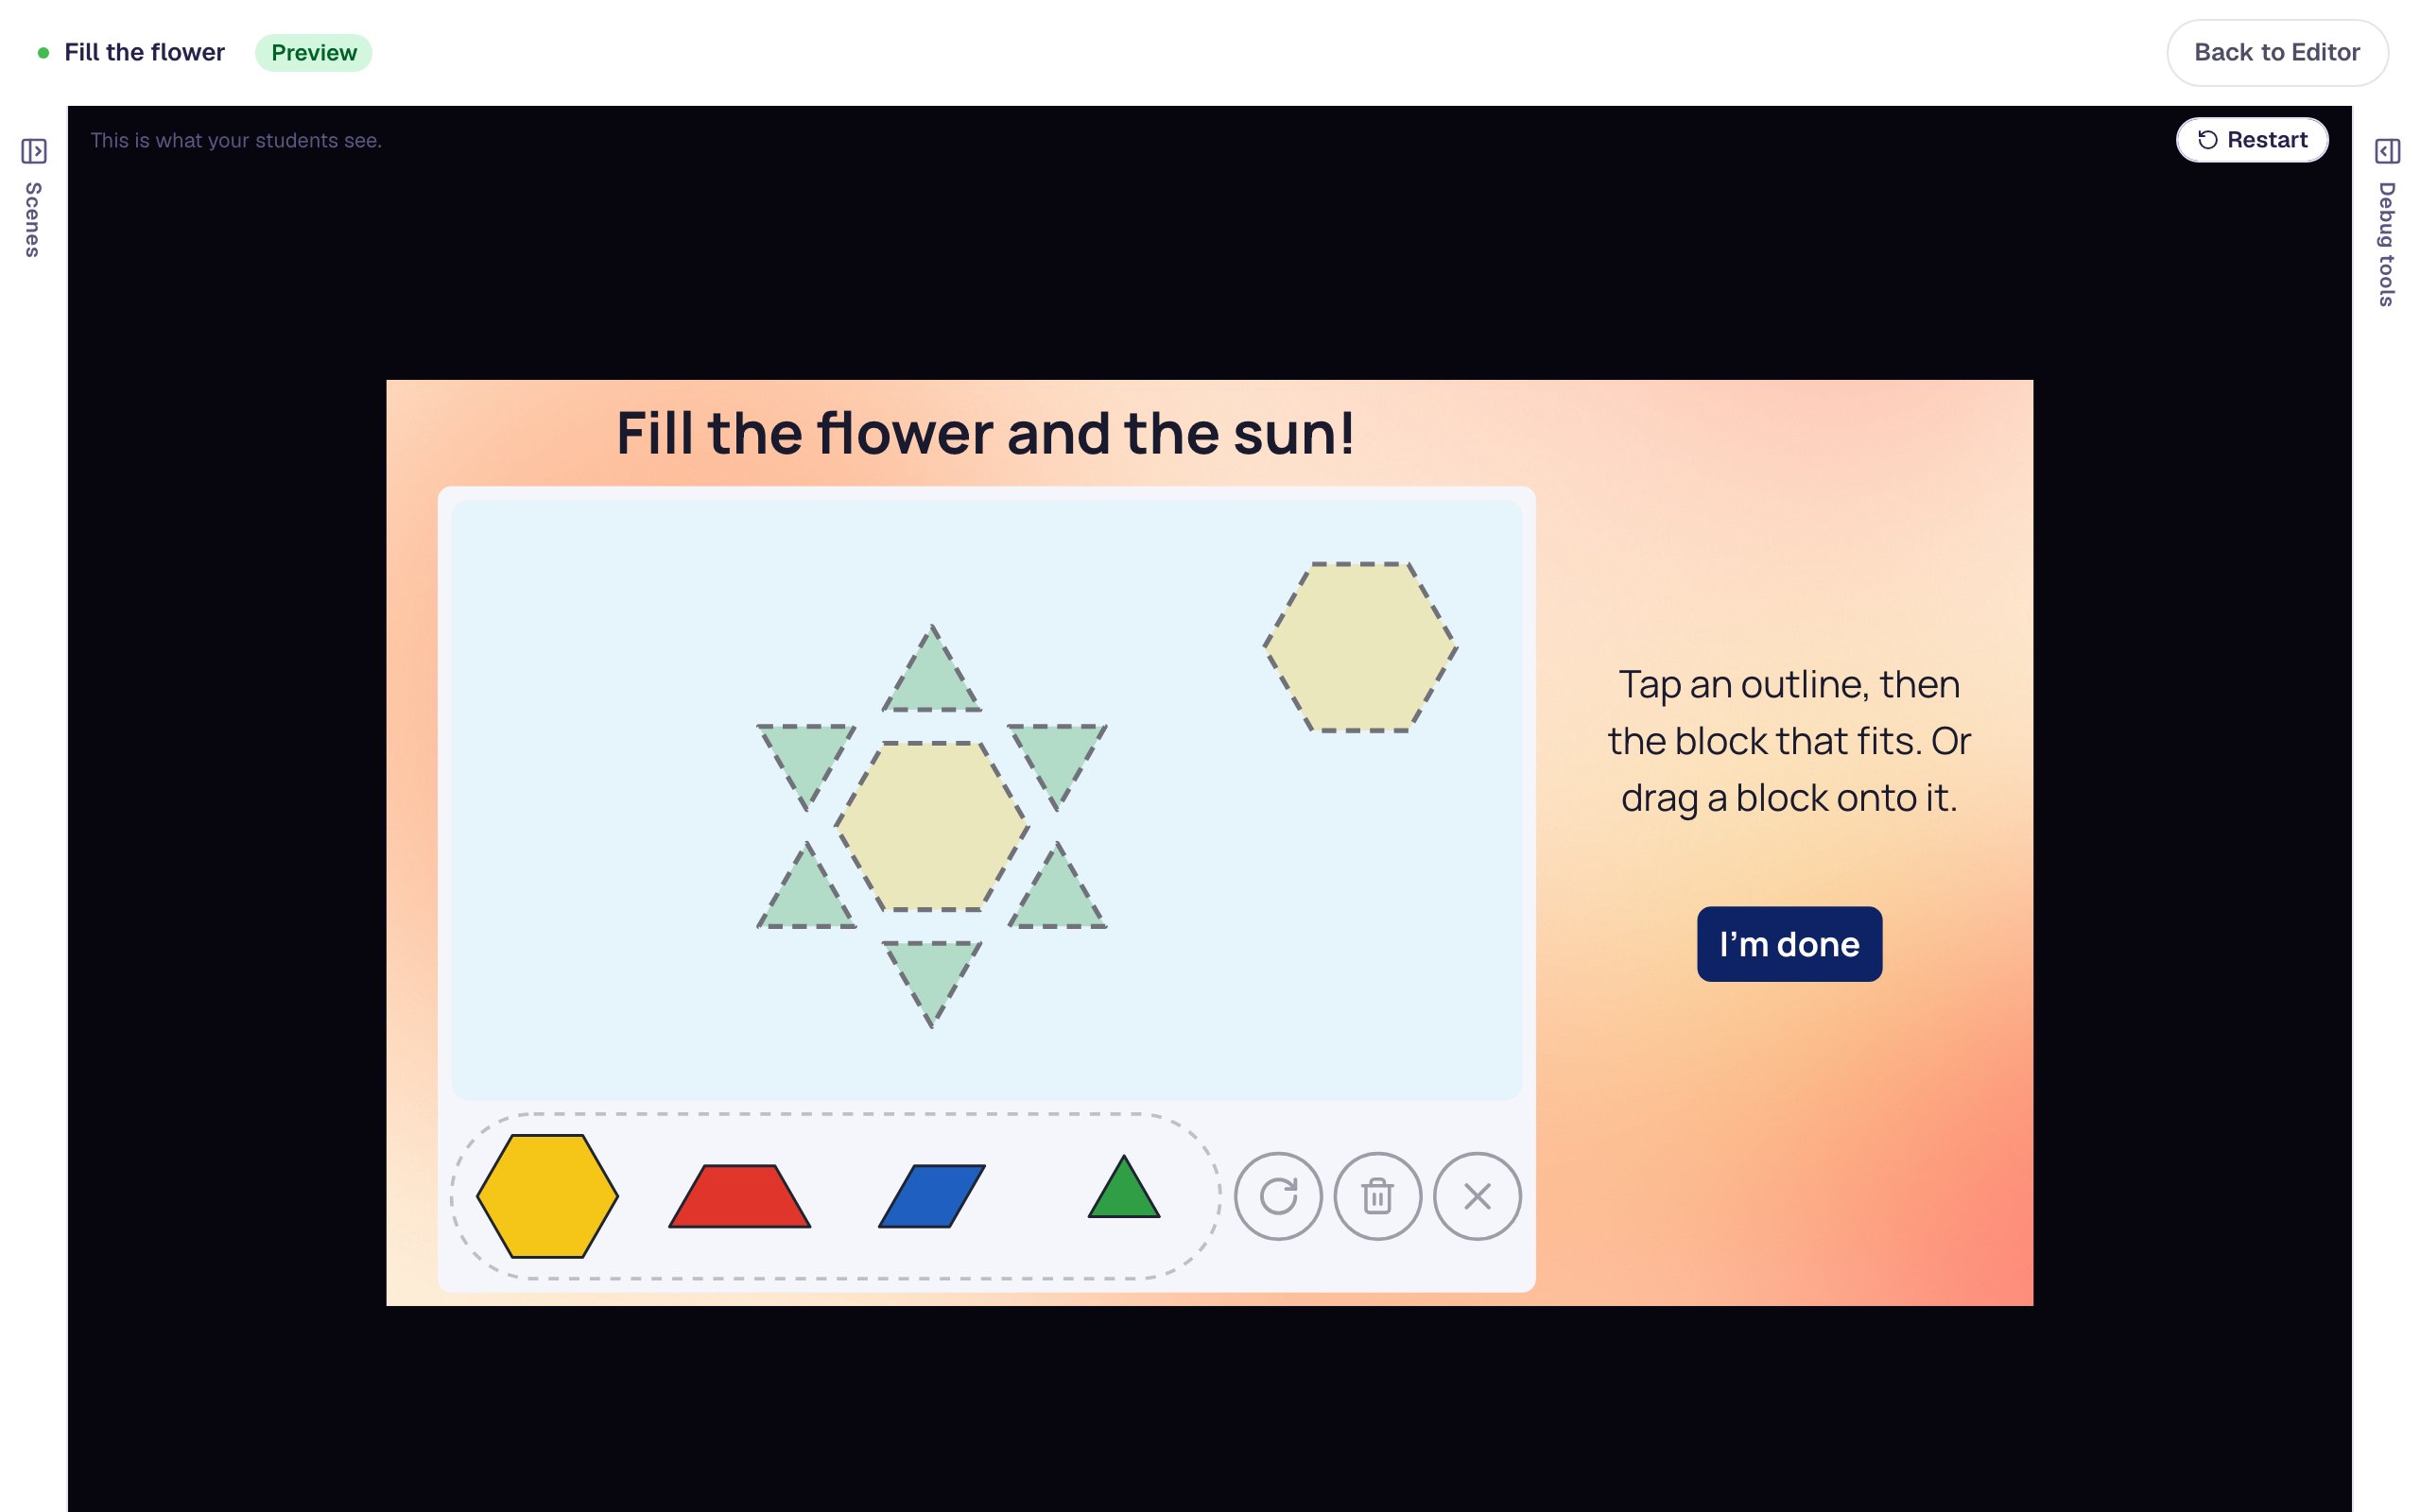
Fill the flower's middle the tapping way: tap the hexagon outline, then the yellow hexagon in the tray. Do the same for a triangle. Then drag a triangle from the tray straight onto another outline:
Now try a wrong shape. Drag the blue rhombus onto a triangle outline:
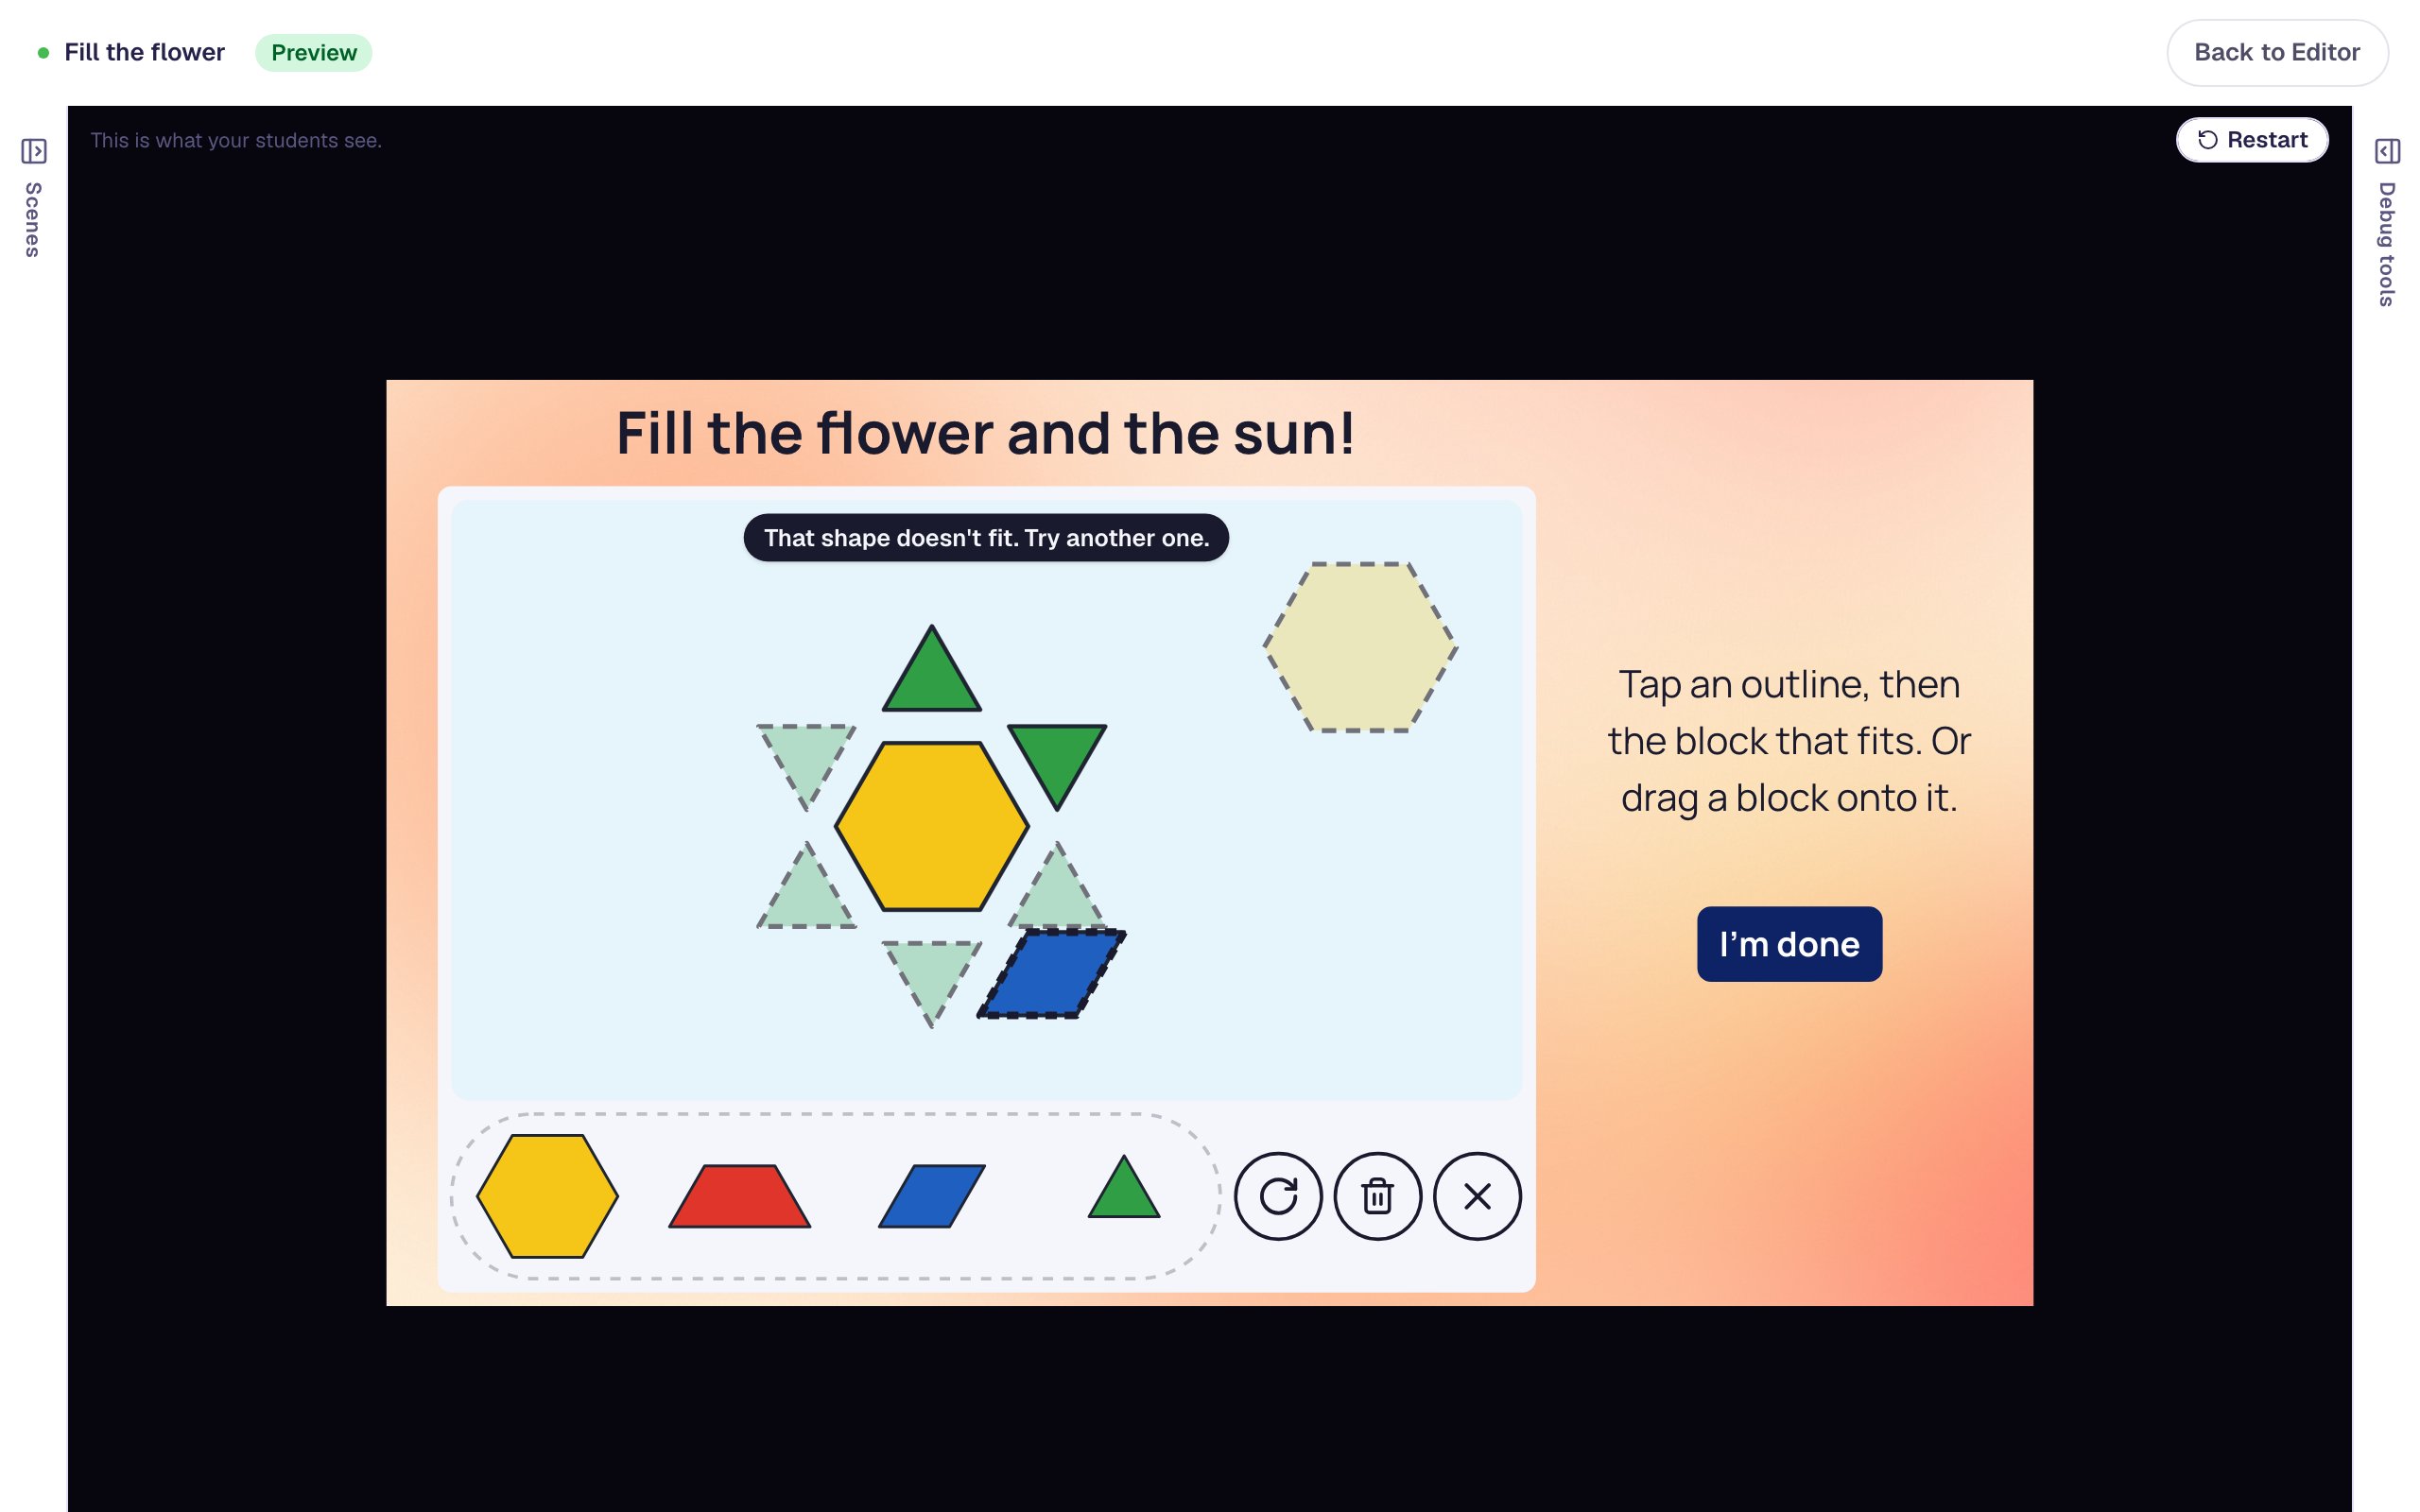
The rhombus slides out beside the outline with a little wiggle, and the board says That shape doesn't fit. Try another one. Drag it back to the tray (or select it and tap the bin), then fill the rest of the flower and the sun:
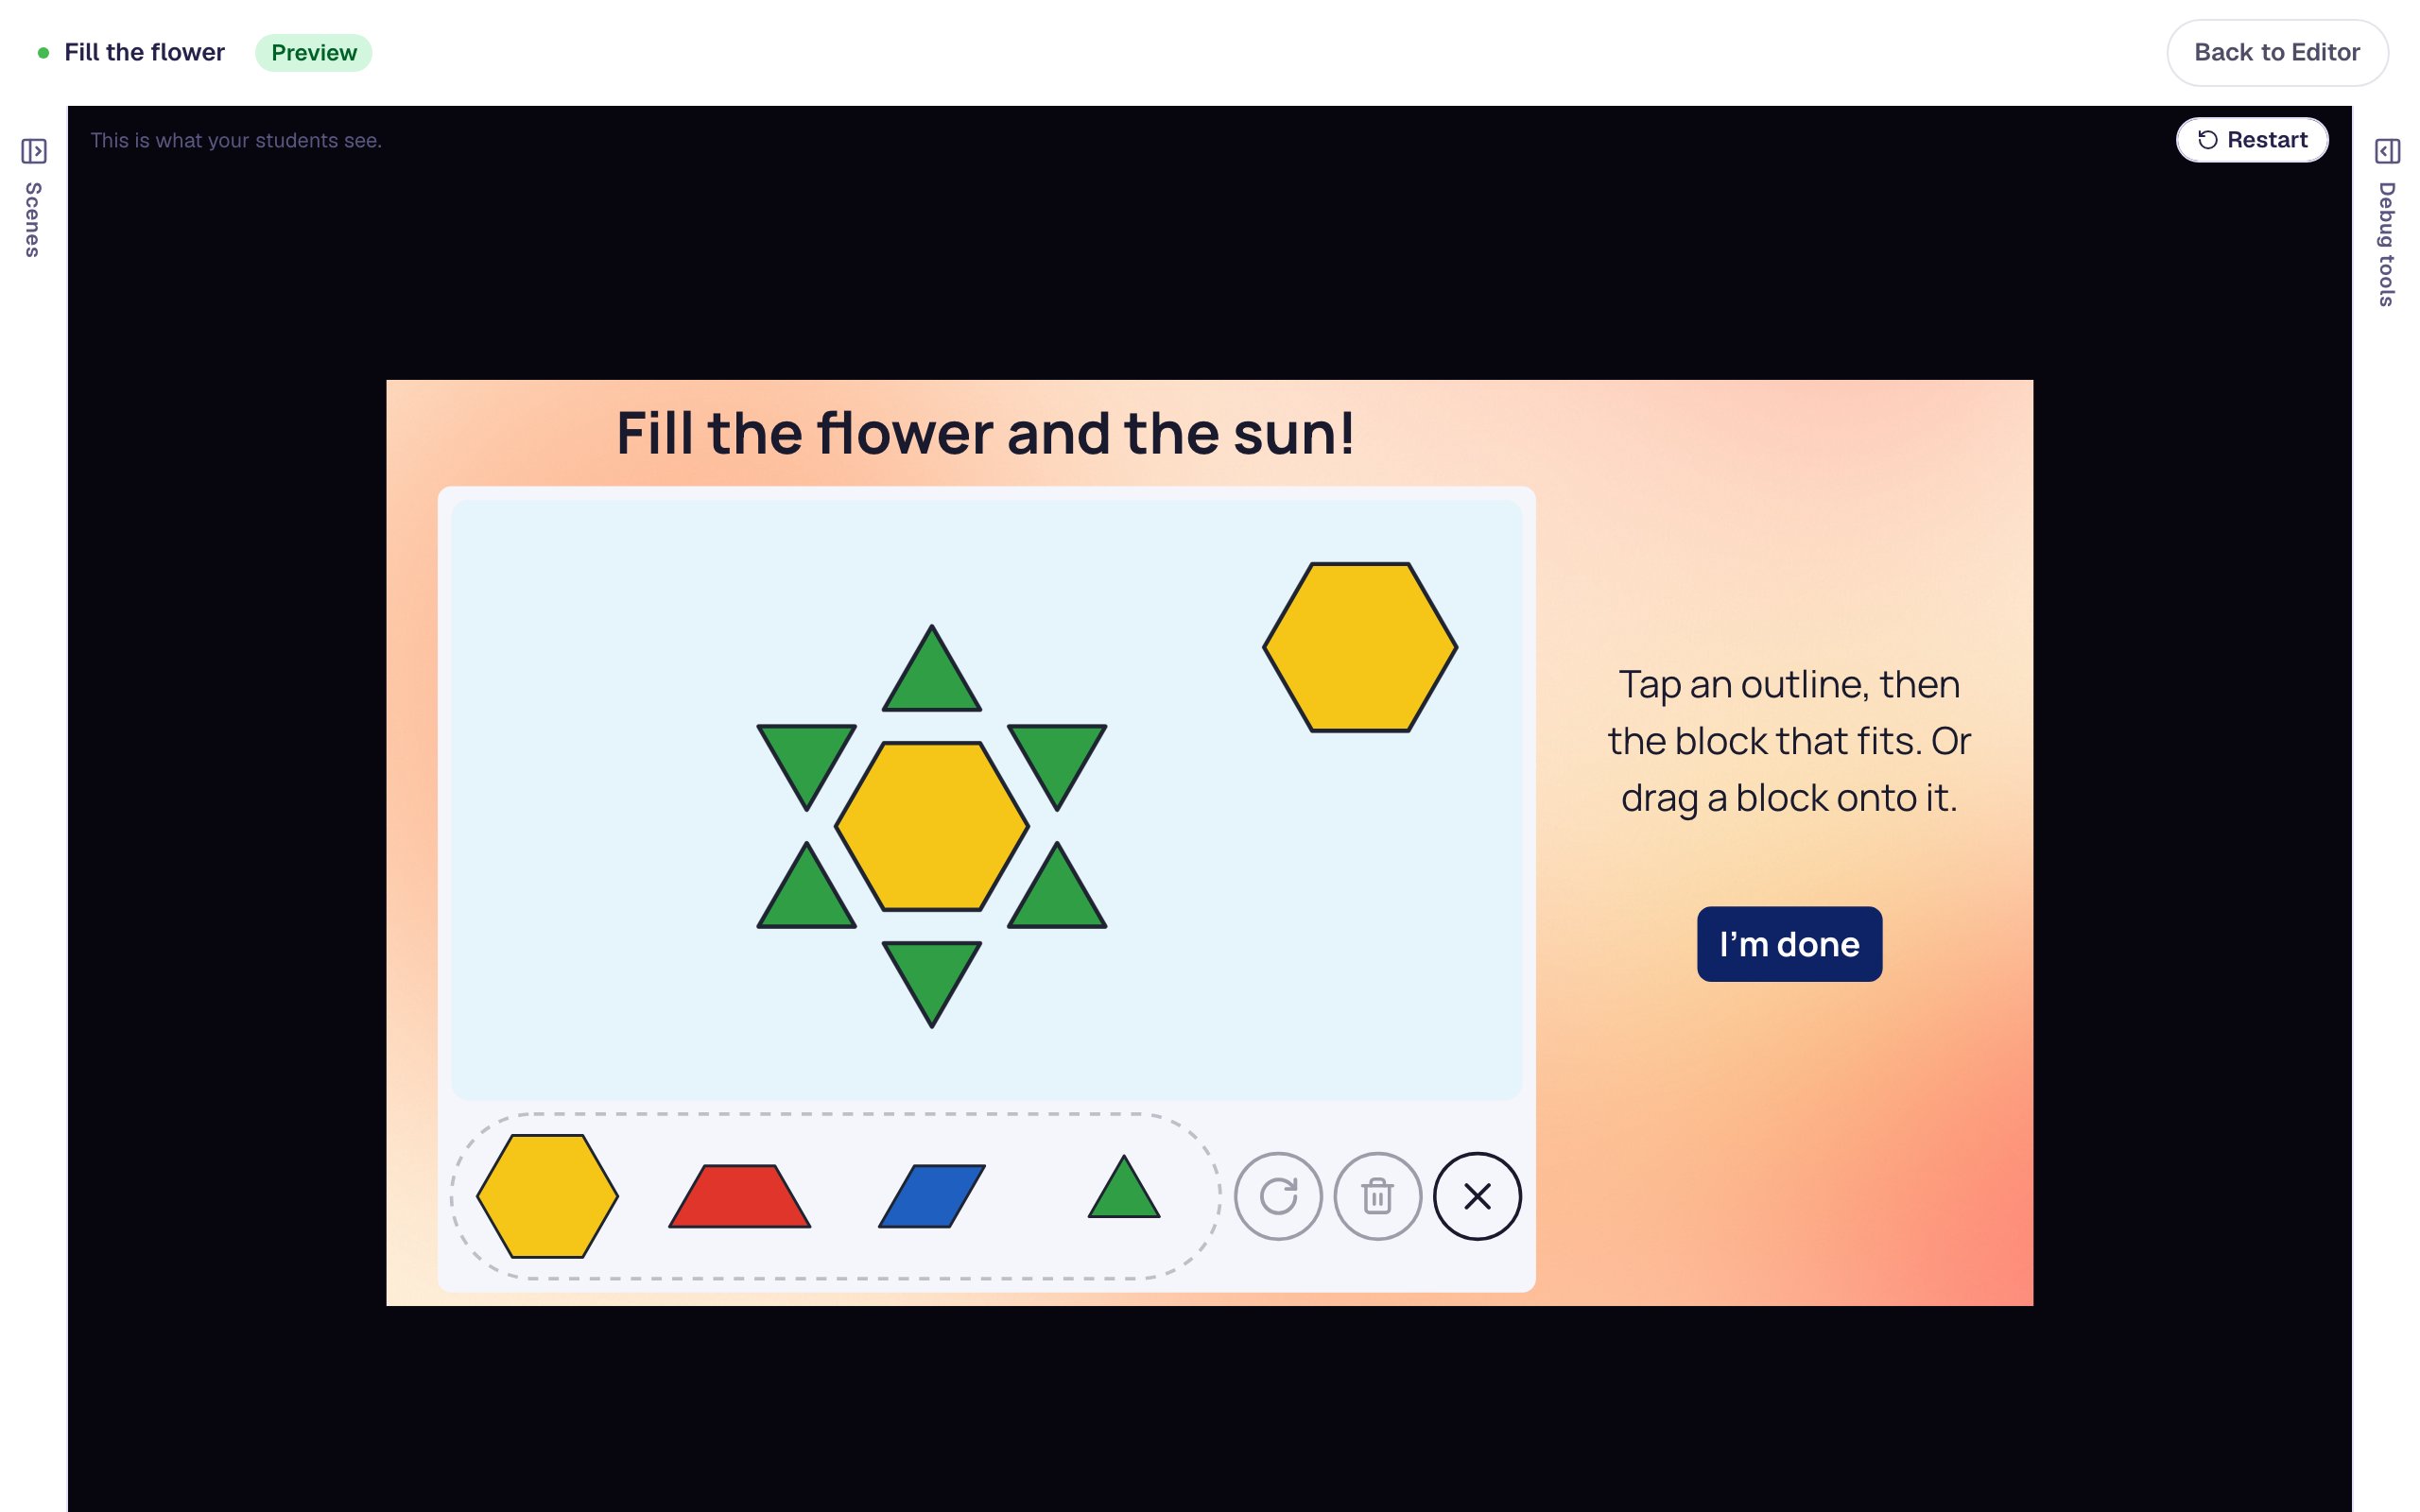
After two and a half seconds, the lesson moves on to the ending.
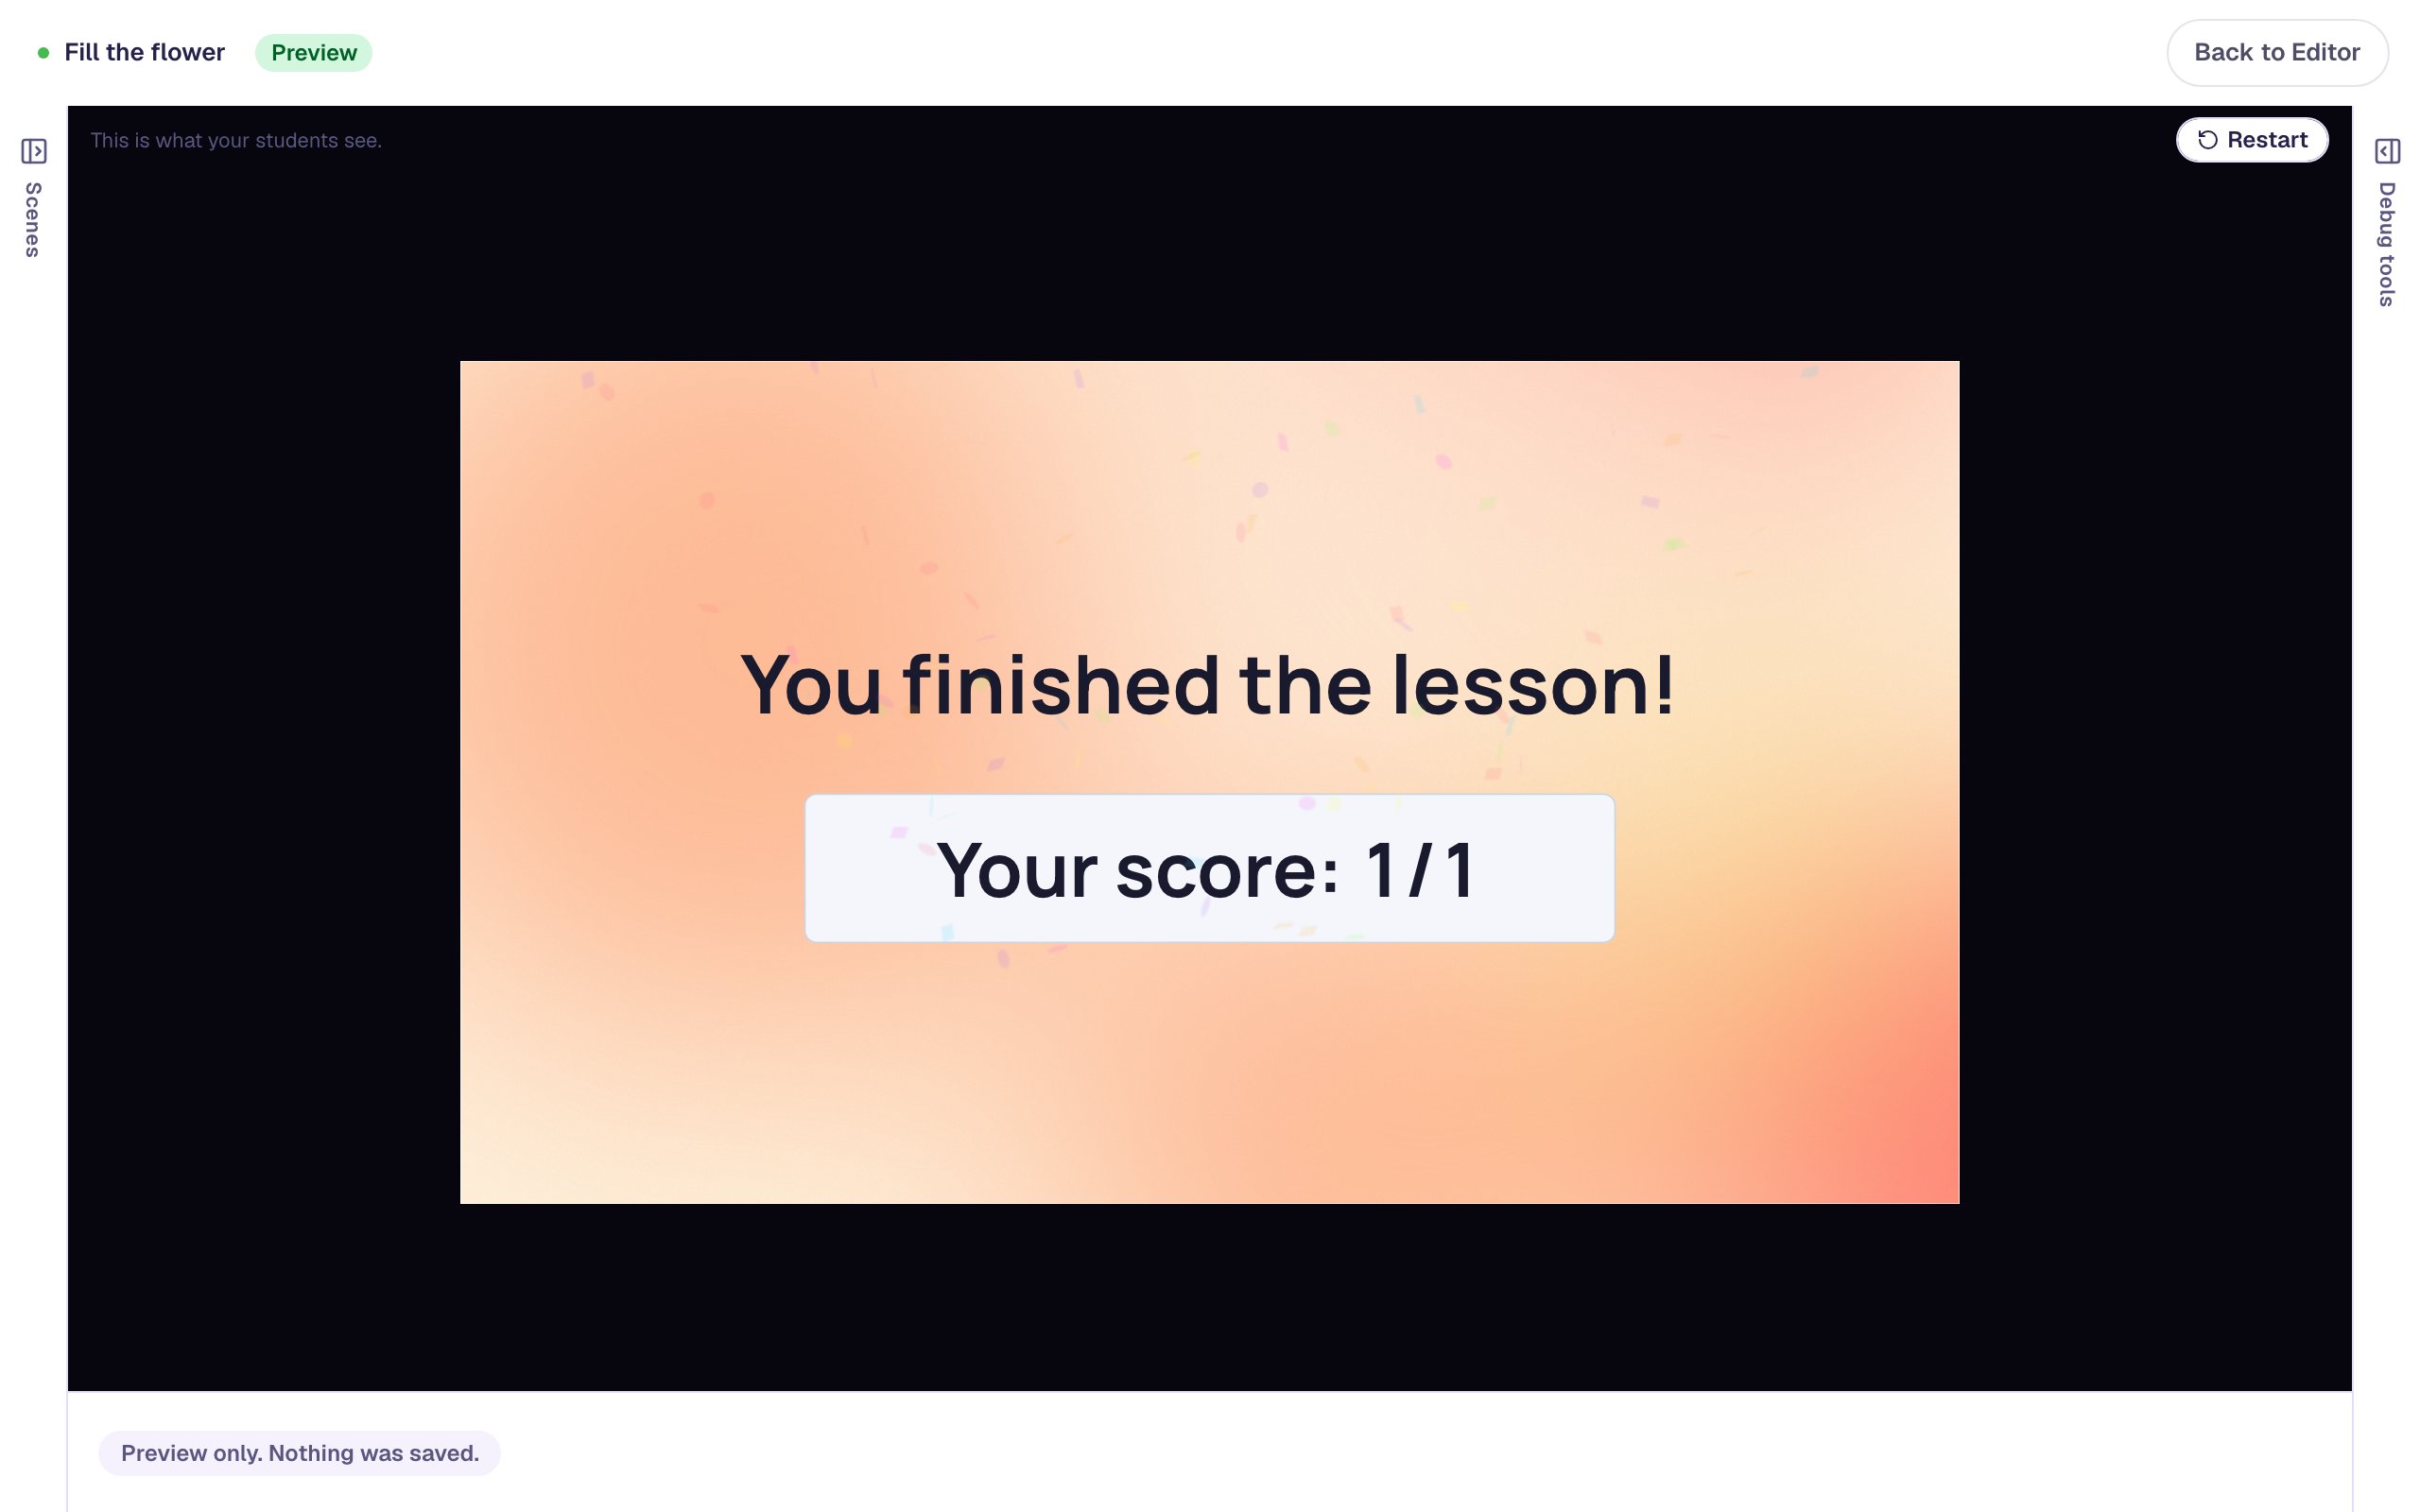
Each block dropped on an outline counts as one try, so a child who fills all eight outlines with no wrong shapes made 8 tries. On each student's attempt page you'll see a small picture of their board and a summary like "Puzzle done · 8 blocks · 1 wrong shape tried", so you know who matched shapes straight away and who needed some trial and error.
What you built
You built a one-scene kindergarten puzzle with:
- a Pattern Blocks widget in Puzzle mode, started from the ready-made Flower and given a hexagon sun of your own with Make outline,
- colored outlines and Turn blocks to fit to keep it friendly for young learners, and a tray with two shapes that don't fit,
- a sky-blue board, an I'm done button, and a longer Advance delay so children see their finished flower.
To make the next puzzle harder, switch Outline color to Gray, or turn off Turn blocks to fit so children turn each triangle themselves. For a puzzle with more than one right answer, pick Fill a hexagon any way from the ready-made puzzles: a hexagon outline children can fill with one hexagon, two trapezoids, three blue rhombuses or six triangles. To practise counting next, follow Build a number on a ten frame. To have children draw shapes side by side instead, follow Draw a rectangle from a clue on dot paper.
Make this lesson yours
Add the lesson you just watched being built to your account, then change it for your class: your questions, your pictures, your colors.
Free to sign up, and you'll come straight back here. I have an account