Build and compare towers of connecting cubes
Use the Connecting Cubes widget to ask young learners for a tower of 6, give a gentle "count your cubes" hint when it's off, then have them build a tower longer than yours and say which is longer.
- Level
- Beginner
- Time
- About 12 min
- Steps
- 7
- Updated
- Oct 17, 2026
A two-scene kindergarten lesson where students build a tower of 6 connecting cubes, then build a tower longer than a green tower of 4 and tap the longer one.
Get the finished lesson
Skip straight to the result, or keep it open beside the steps. Add this tutorial's lesson to your account and explore how it works in the studio.
Free to sign up, and you'll come straight back here. I have an account
Connecting cubes are the snap-together cubes every kindergarten has by the tub. Children stack them into towers to show a number, then stand two towers side by side to see which is longer. A tower of 6 is 6 a child can see and count, and a tower that's taller than another is "more" they can point at.
The Connecting Cubes widget puts those cubes on the screen. Children pick a color, tap a square, and the cube snaps into place. Berdee checks the tower when they tap ✓ Done, and the cube colors never change with your lesson's theme, so a red cube is always red.
In this tutorial you'll build a two-scene lesson called Cube towers:
- Build a tower! Students build a tower of 6 cubes, in any colors. If they stop at 5, they get a hint and keep going.
- Make it longer! Students see a green tower of 4, build their own tower that's longer, and tap the longer one.
Step 1: Set the scene
Start a blank lesson (New lesson, then Start from scratch) and name it Cube towers by clicking Untitled lesson at the top left.
Give the scene a calm background. Click an empty spot on the scene, open Background, click Choose a style, and pick Lagoon gradient. Give the Closing Scene the same background so the ending matches.
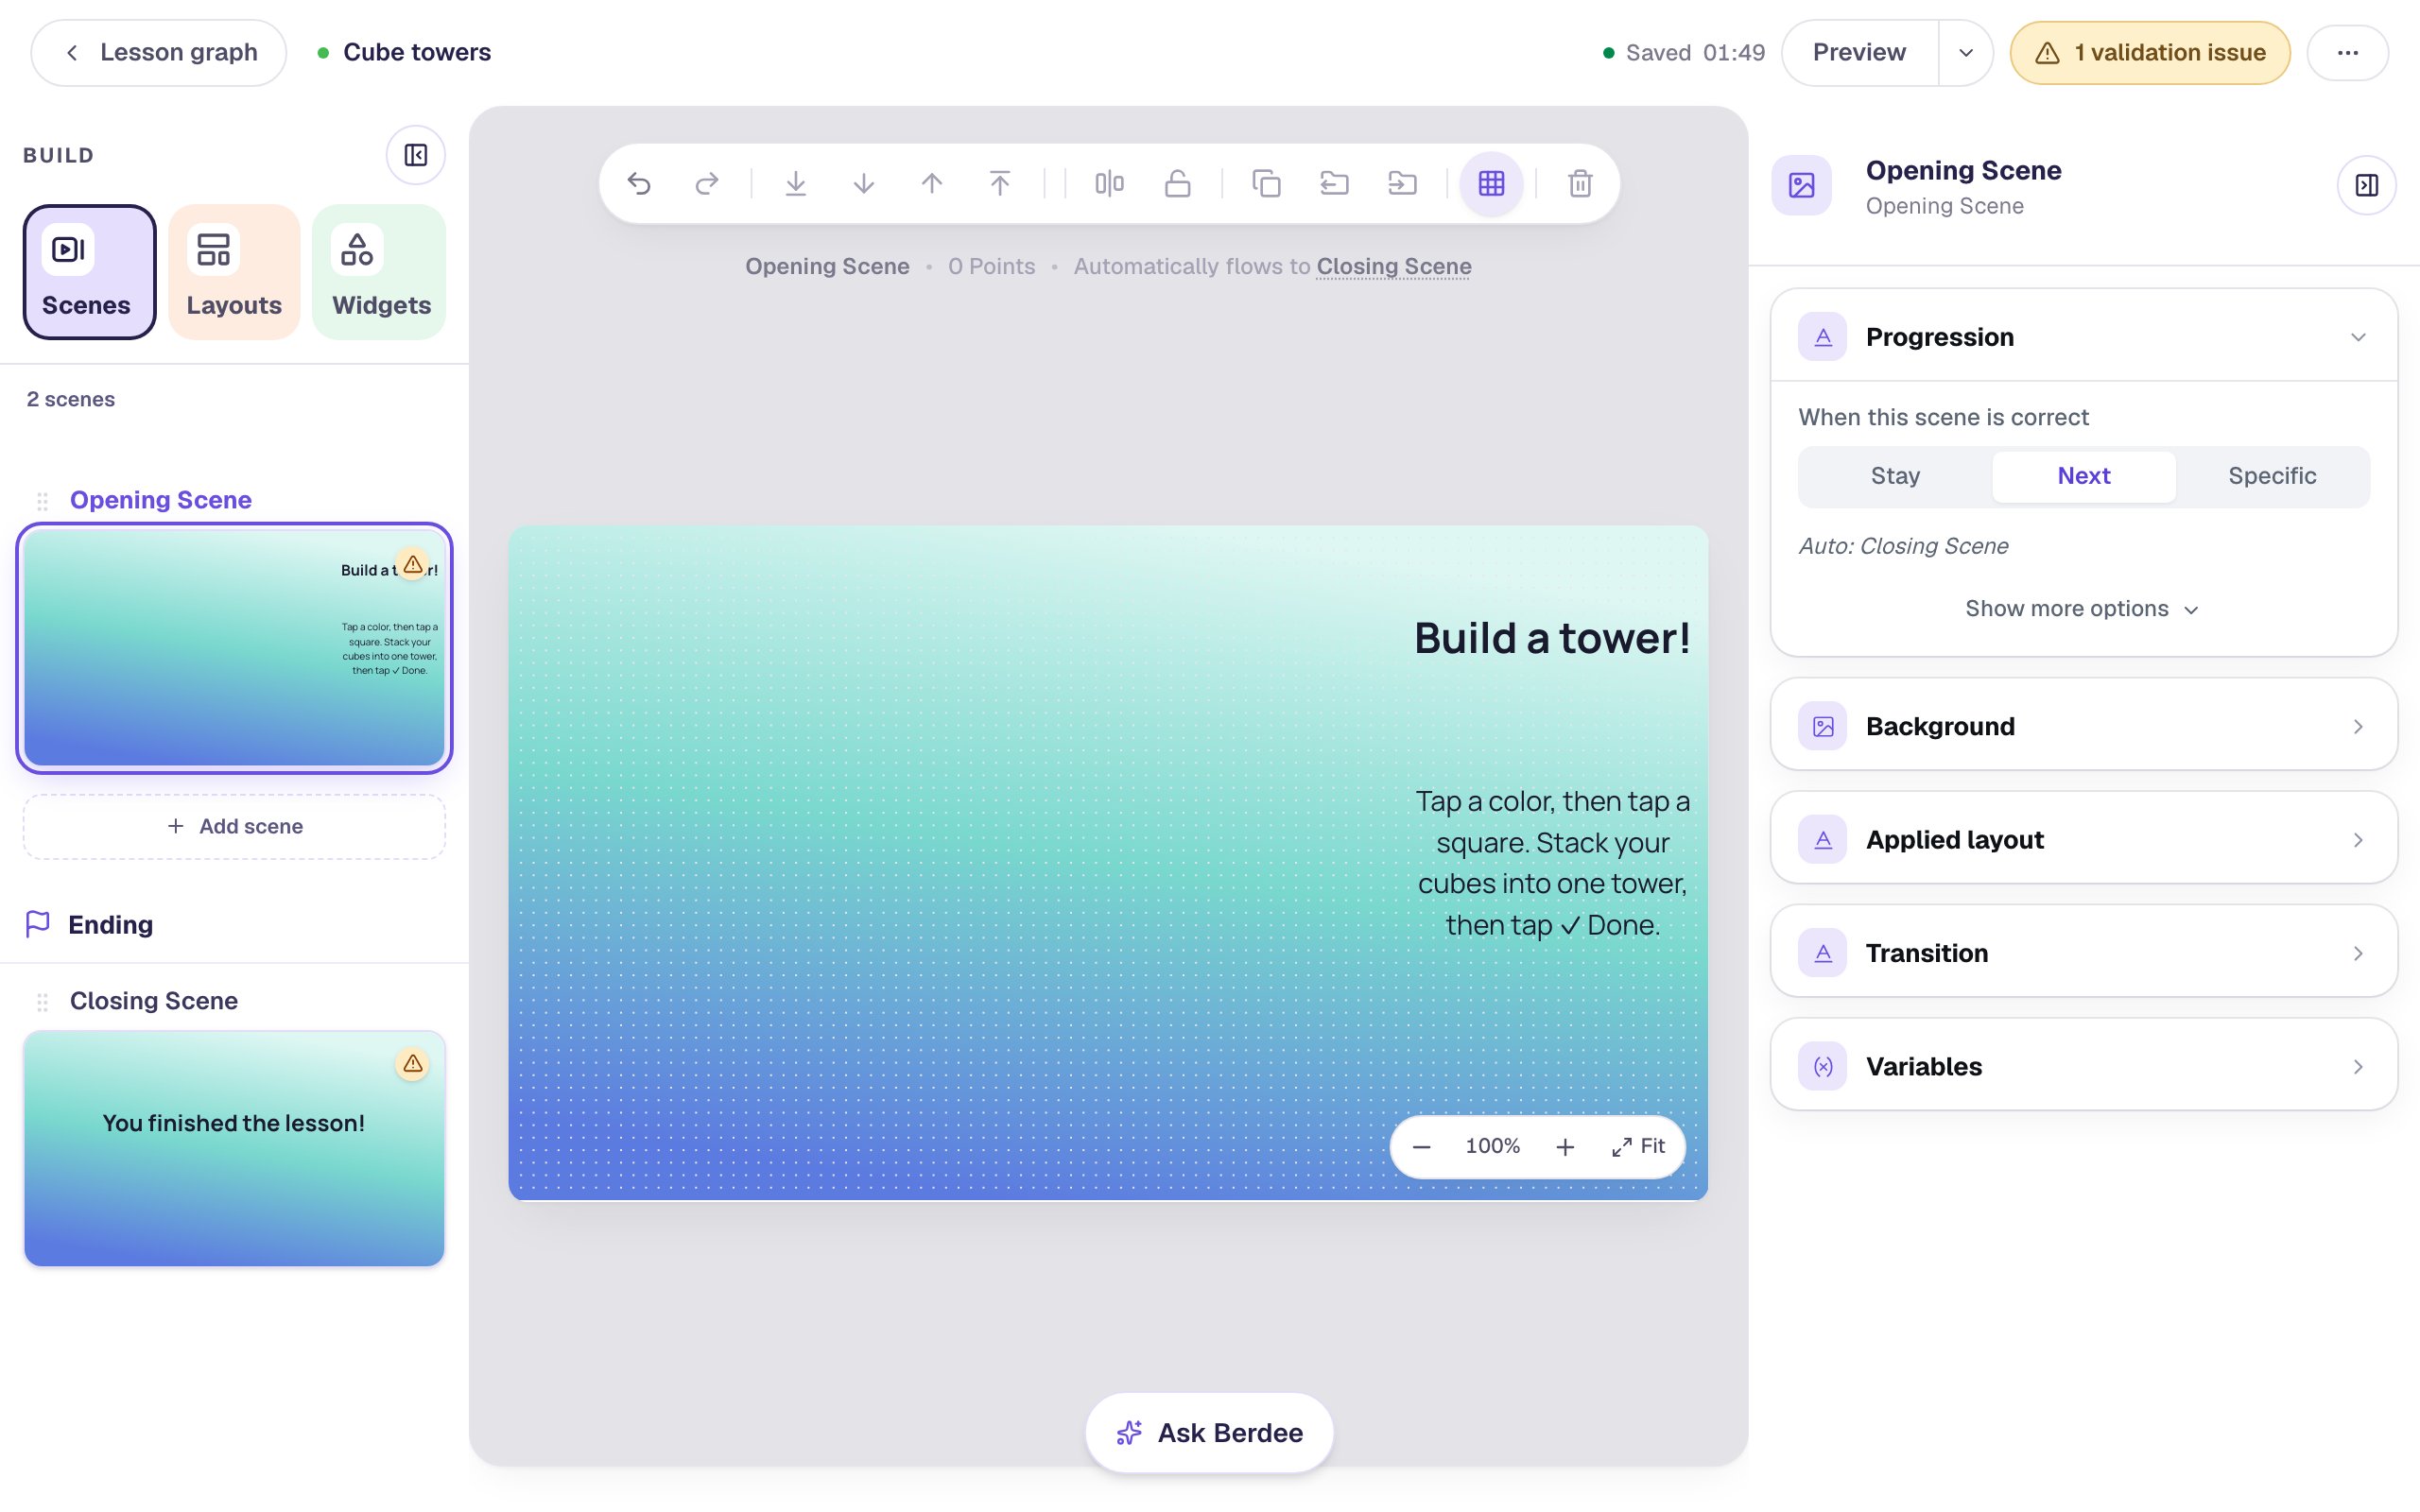
The cubes will take the left of the scene, so put the words in a column on the right:
- A Heading:
Build a tower!. Set it to Fixed width,230wide, and Font Size34. - A Body under it:
Tap a color, then tap a square. Stack your cubes into one tower, then tap ✓ Done.Set it to Fixed width,230wide, and Font Size22.
Step 2: Add a Connecting Cubes widget
Search the Widgets tab for Connecting Cubes and click it. A board and a tray of four colors land on the scene, filling most of it.
In Style & Layout, click Show more options and set Width to 690 and Height to 480. Drag the widget to the left of the scene, beside the words.
Then open Accessibility and change Alt Text to Connecting cubes: build a tower of 6 cubes. Screen readers say it before they read the board.
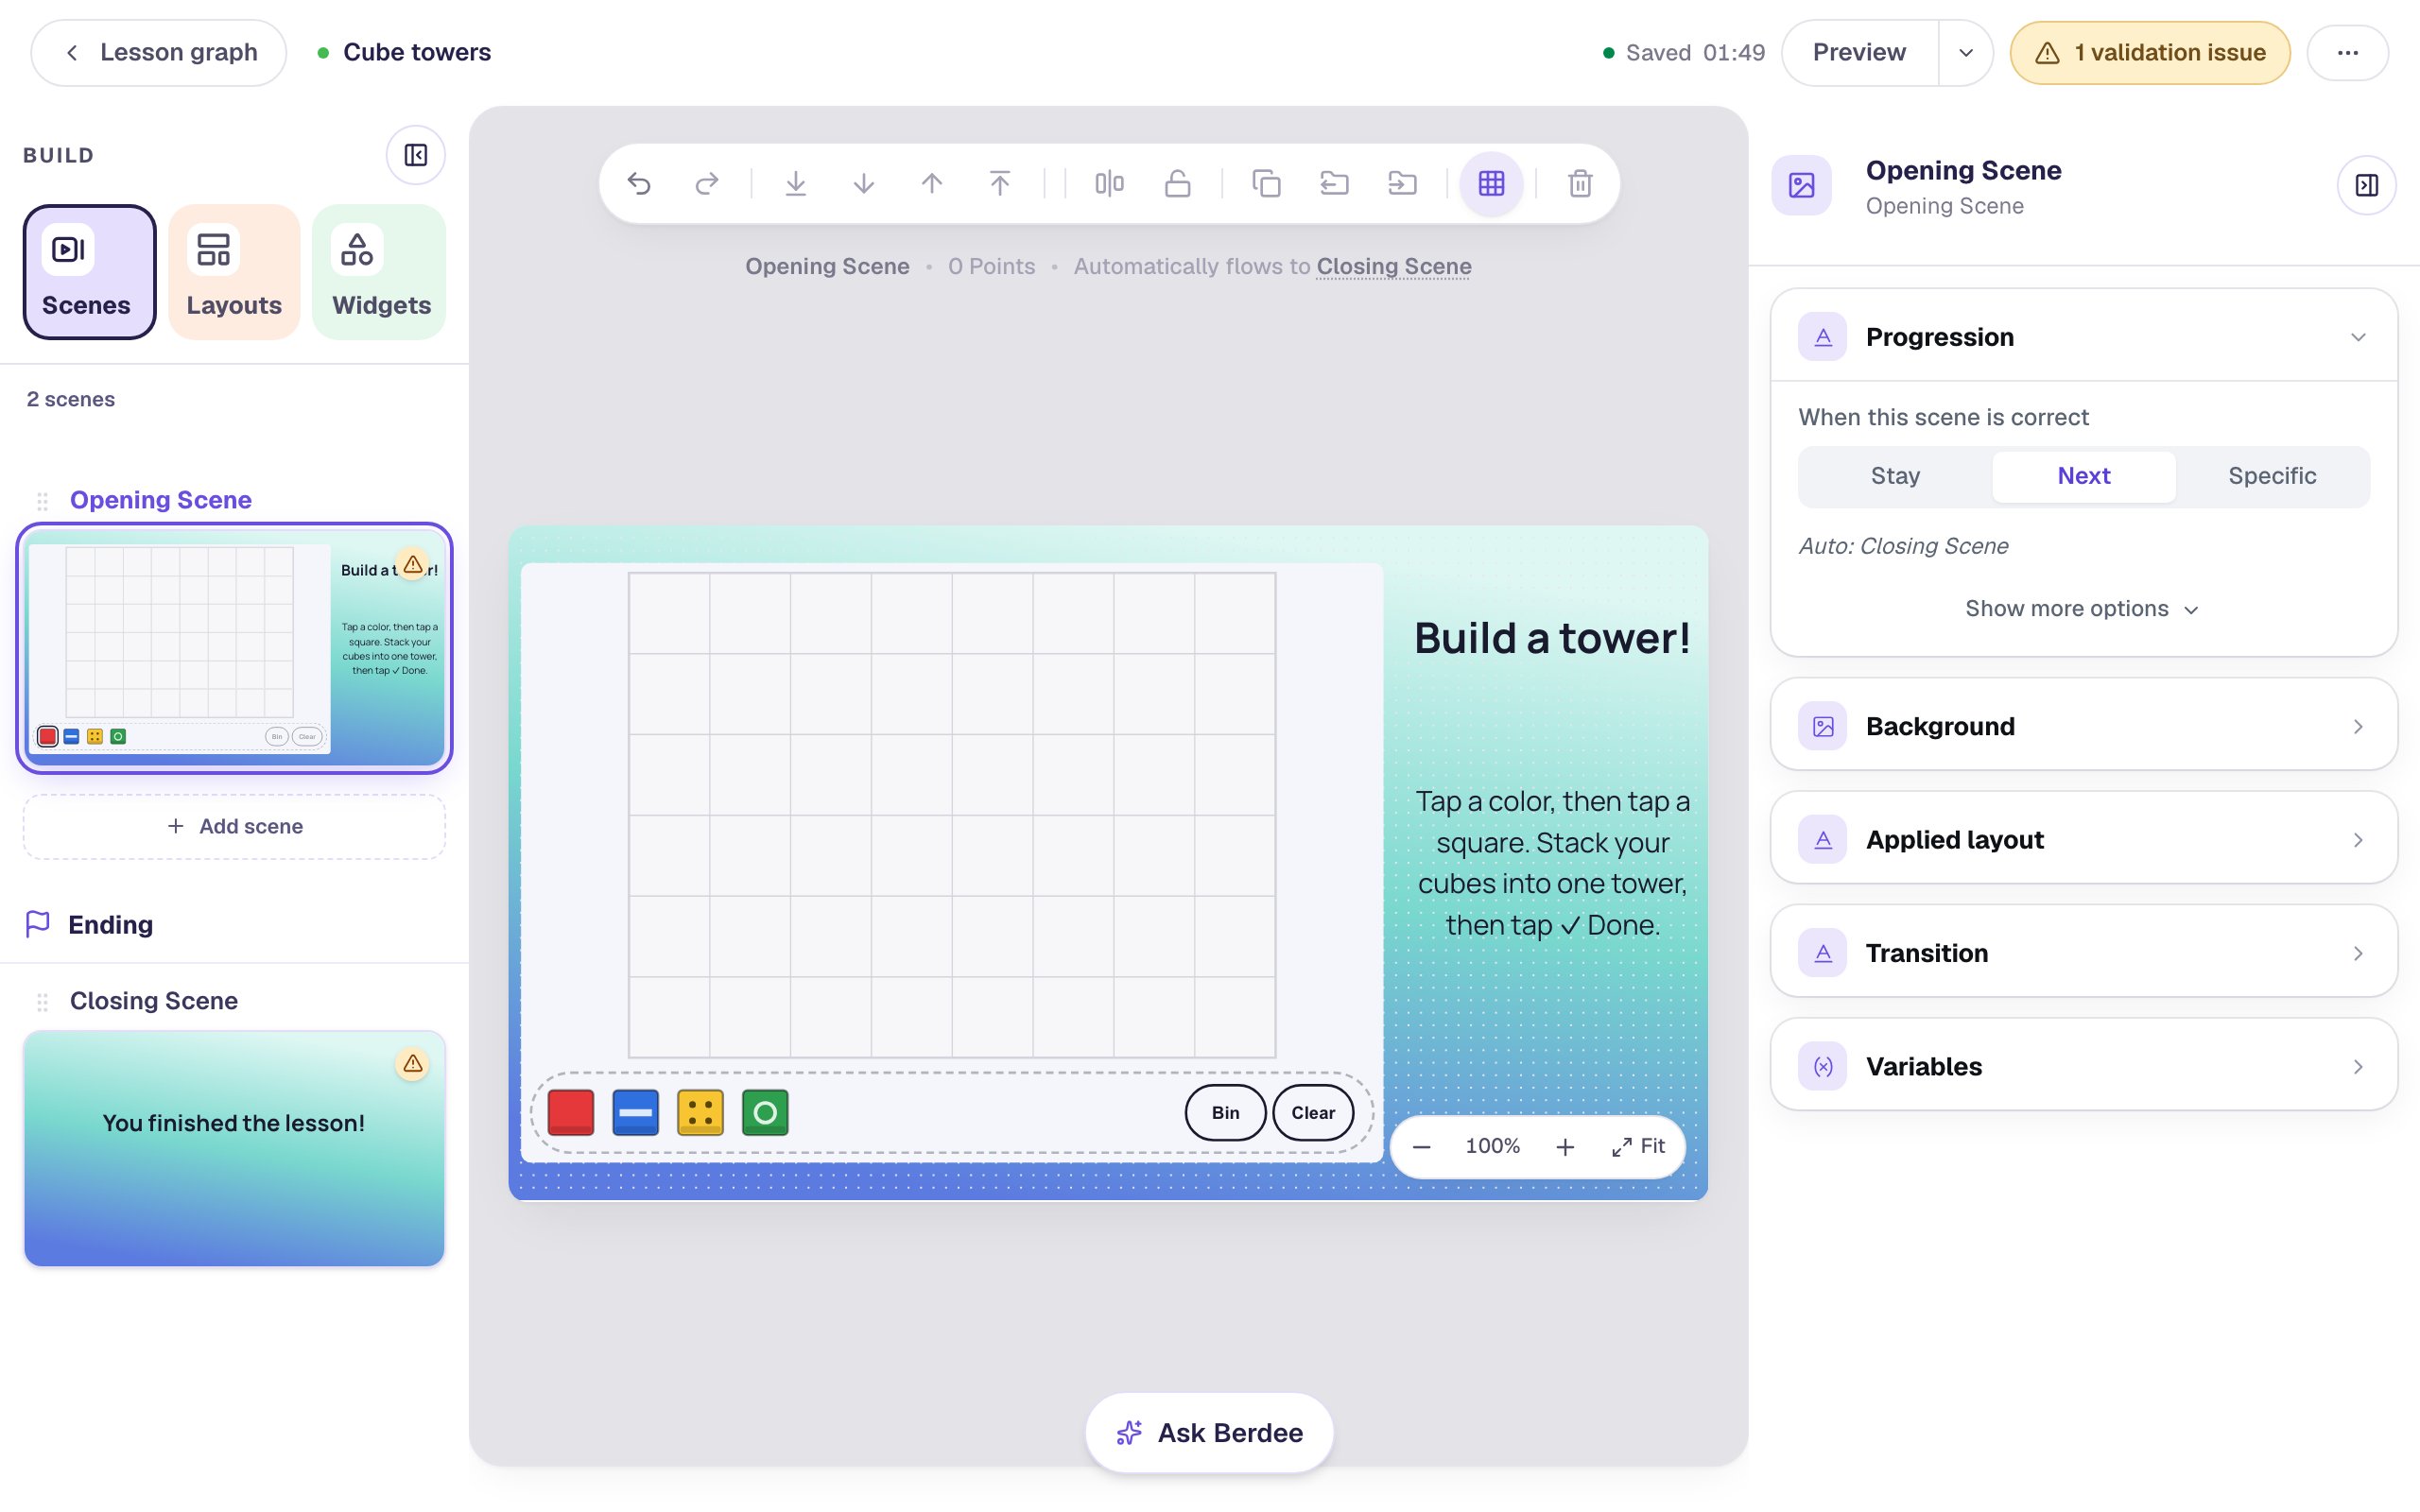
A new widget starts in Explore, where children build anything and nothing is graded. Each color has its own mark too (a stripe on blue, dots on yellow, a ring on green), so children who can't tell red from green can still tell the cubes apart.
Step 3: Ask for a tower of 6
Select the widget and click the floating ⚙ Configure button.
- Set Mode to Tower.
- Set Cubes to
6. - Under Board, set the first box (squares across) to
6. The second box (squares up) is already6, which is just tall enough for a tower of 6.
Leave Color on Any colors and Direction on Tower (up).
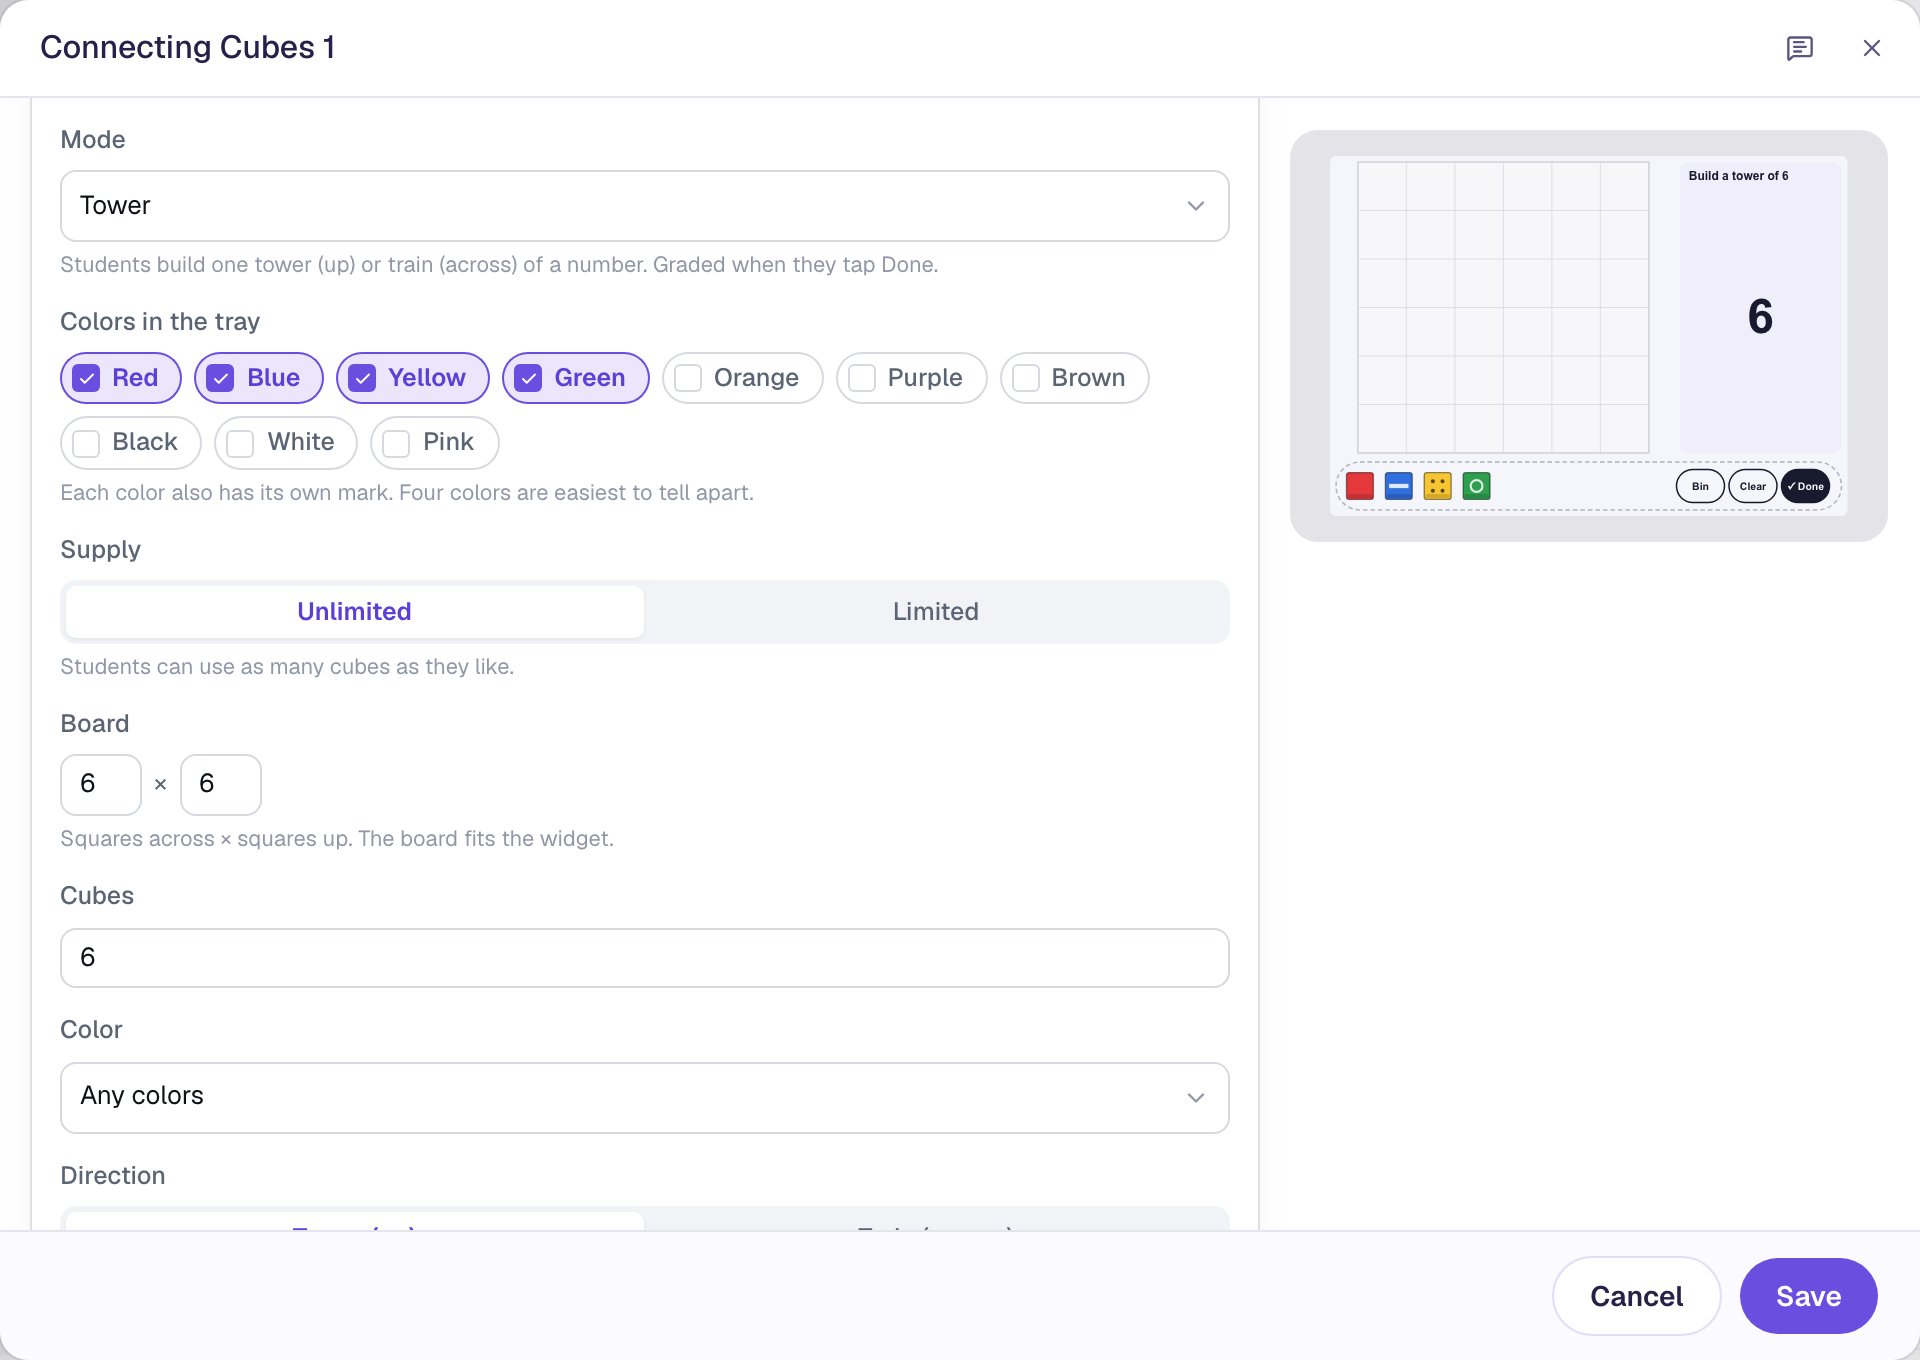
Why a smaller board? The board always fits the widget, so fewer squares means bigger cubes. Six squares across and six up keeps every cube big enough for a small finger to tap. If the cubes get too small, the Configure window tells you.
Any colors lets children mix colors, which makes the counting easier to see. Choose All red (or another color) when the task is "a red tower of 6".
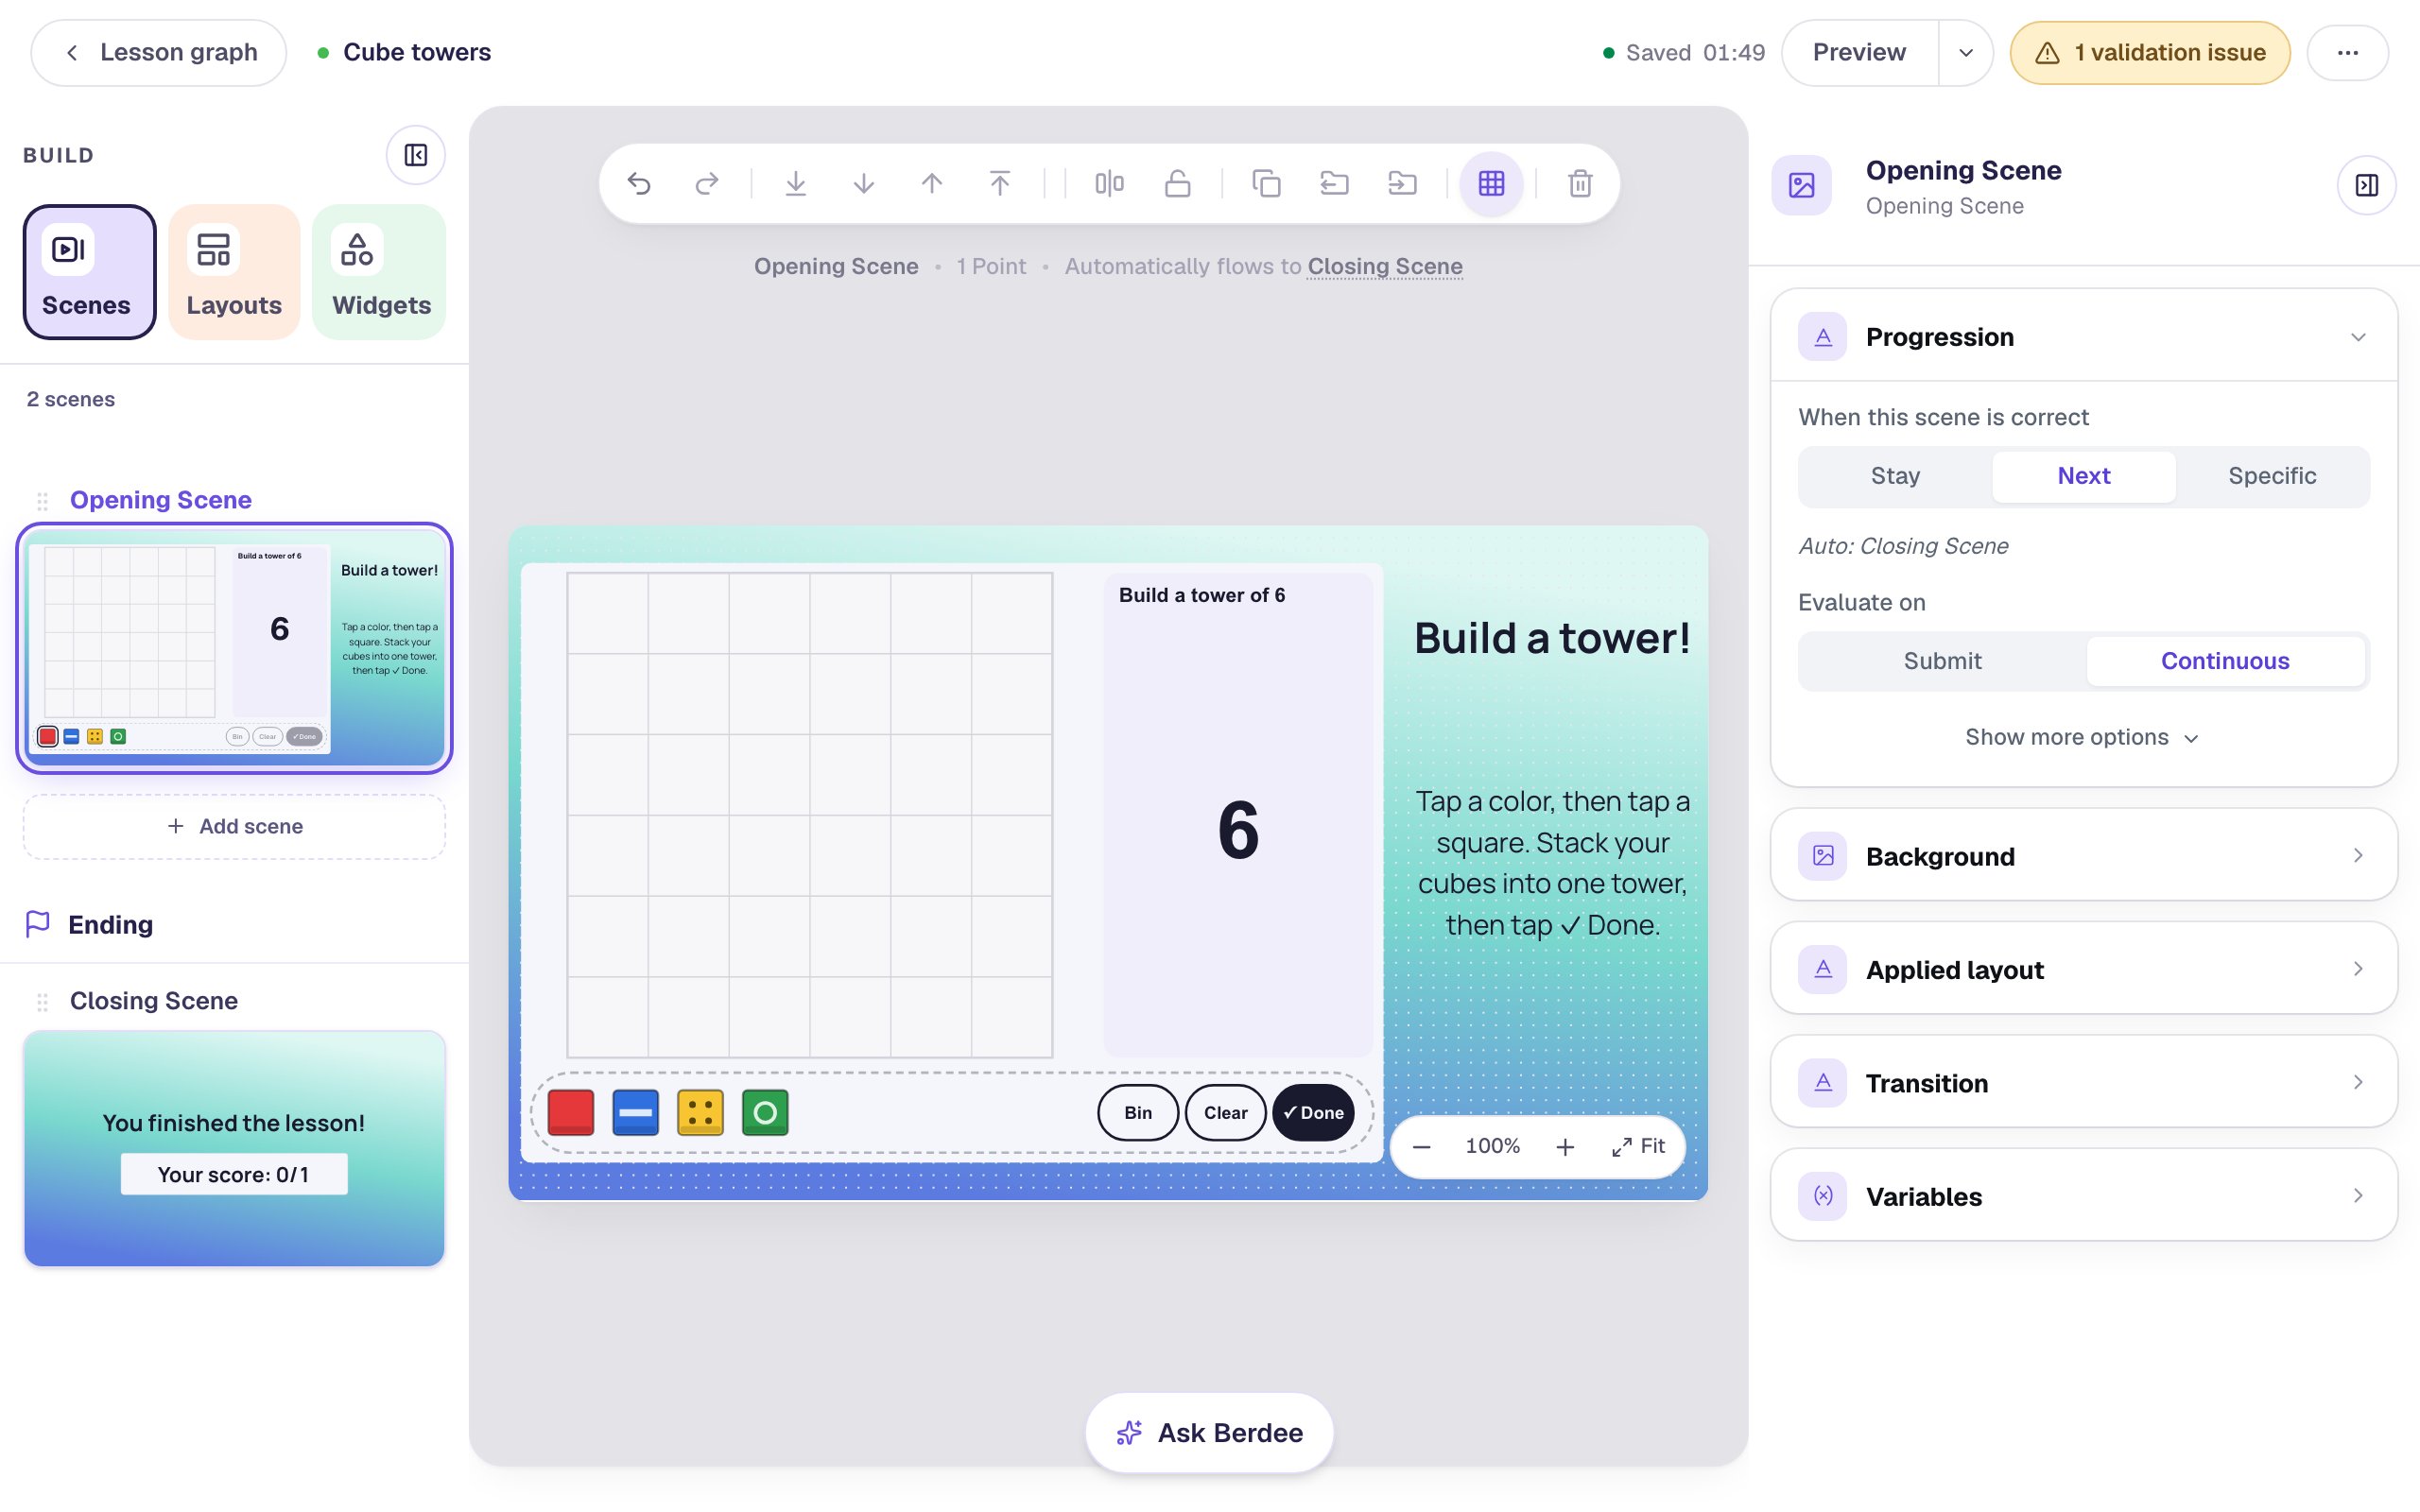
Click Save. The card beside the board now reads Build a tower of 6, with a big 6 children can count up to.
Step 4: Give students a moment to see they're right
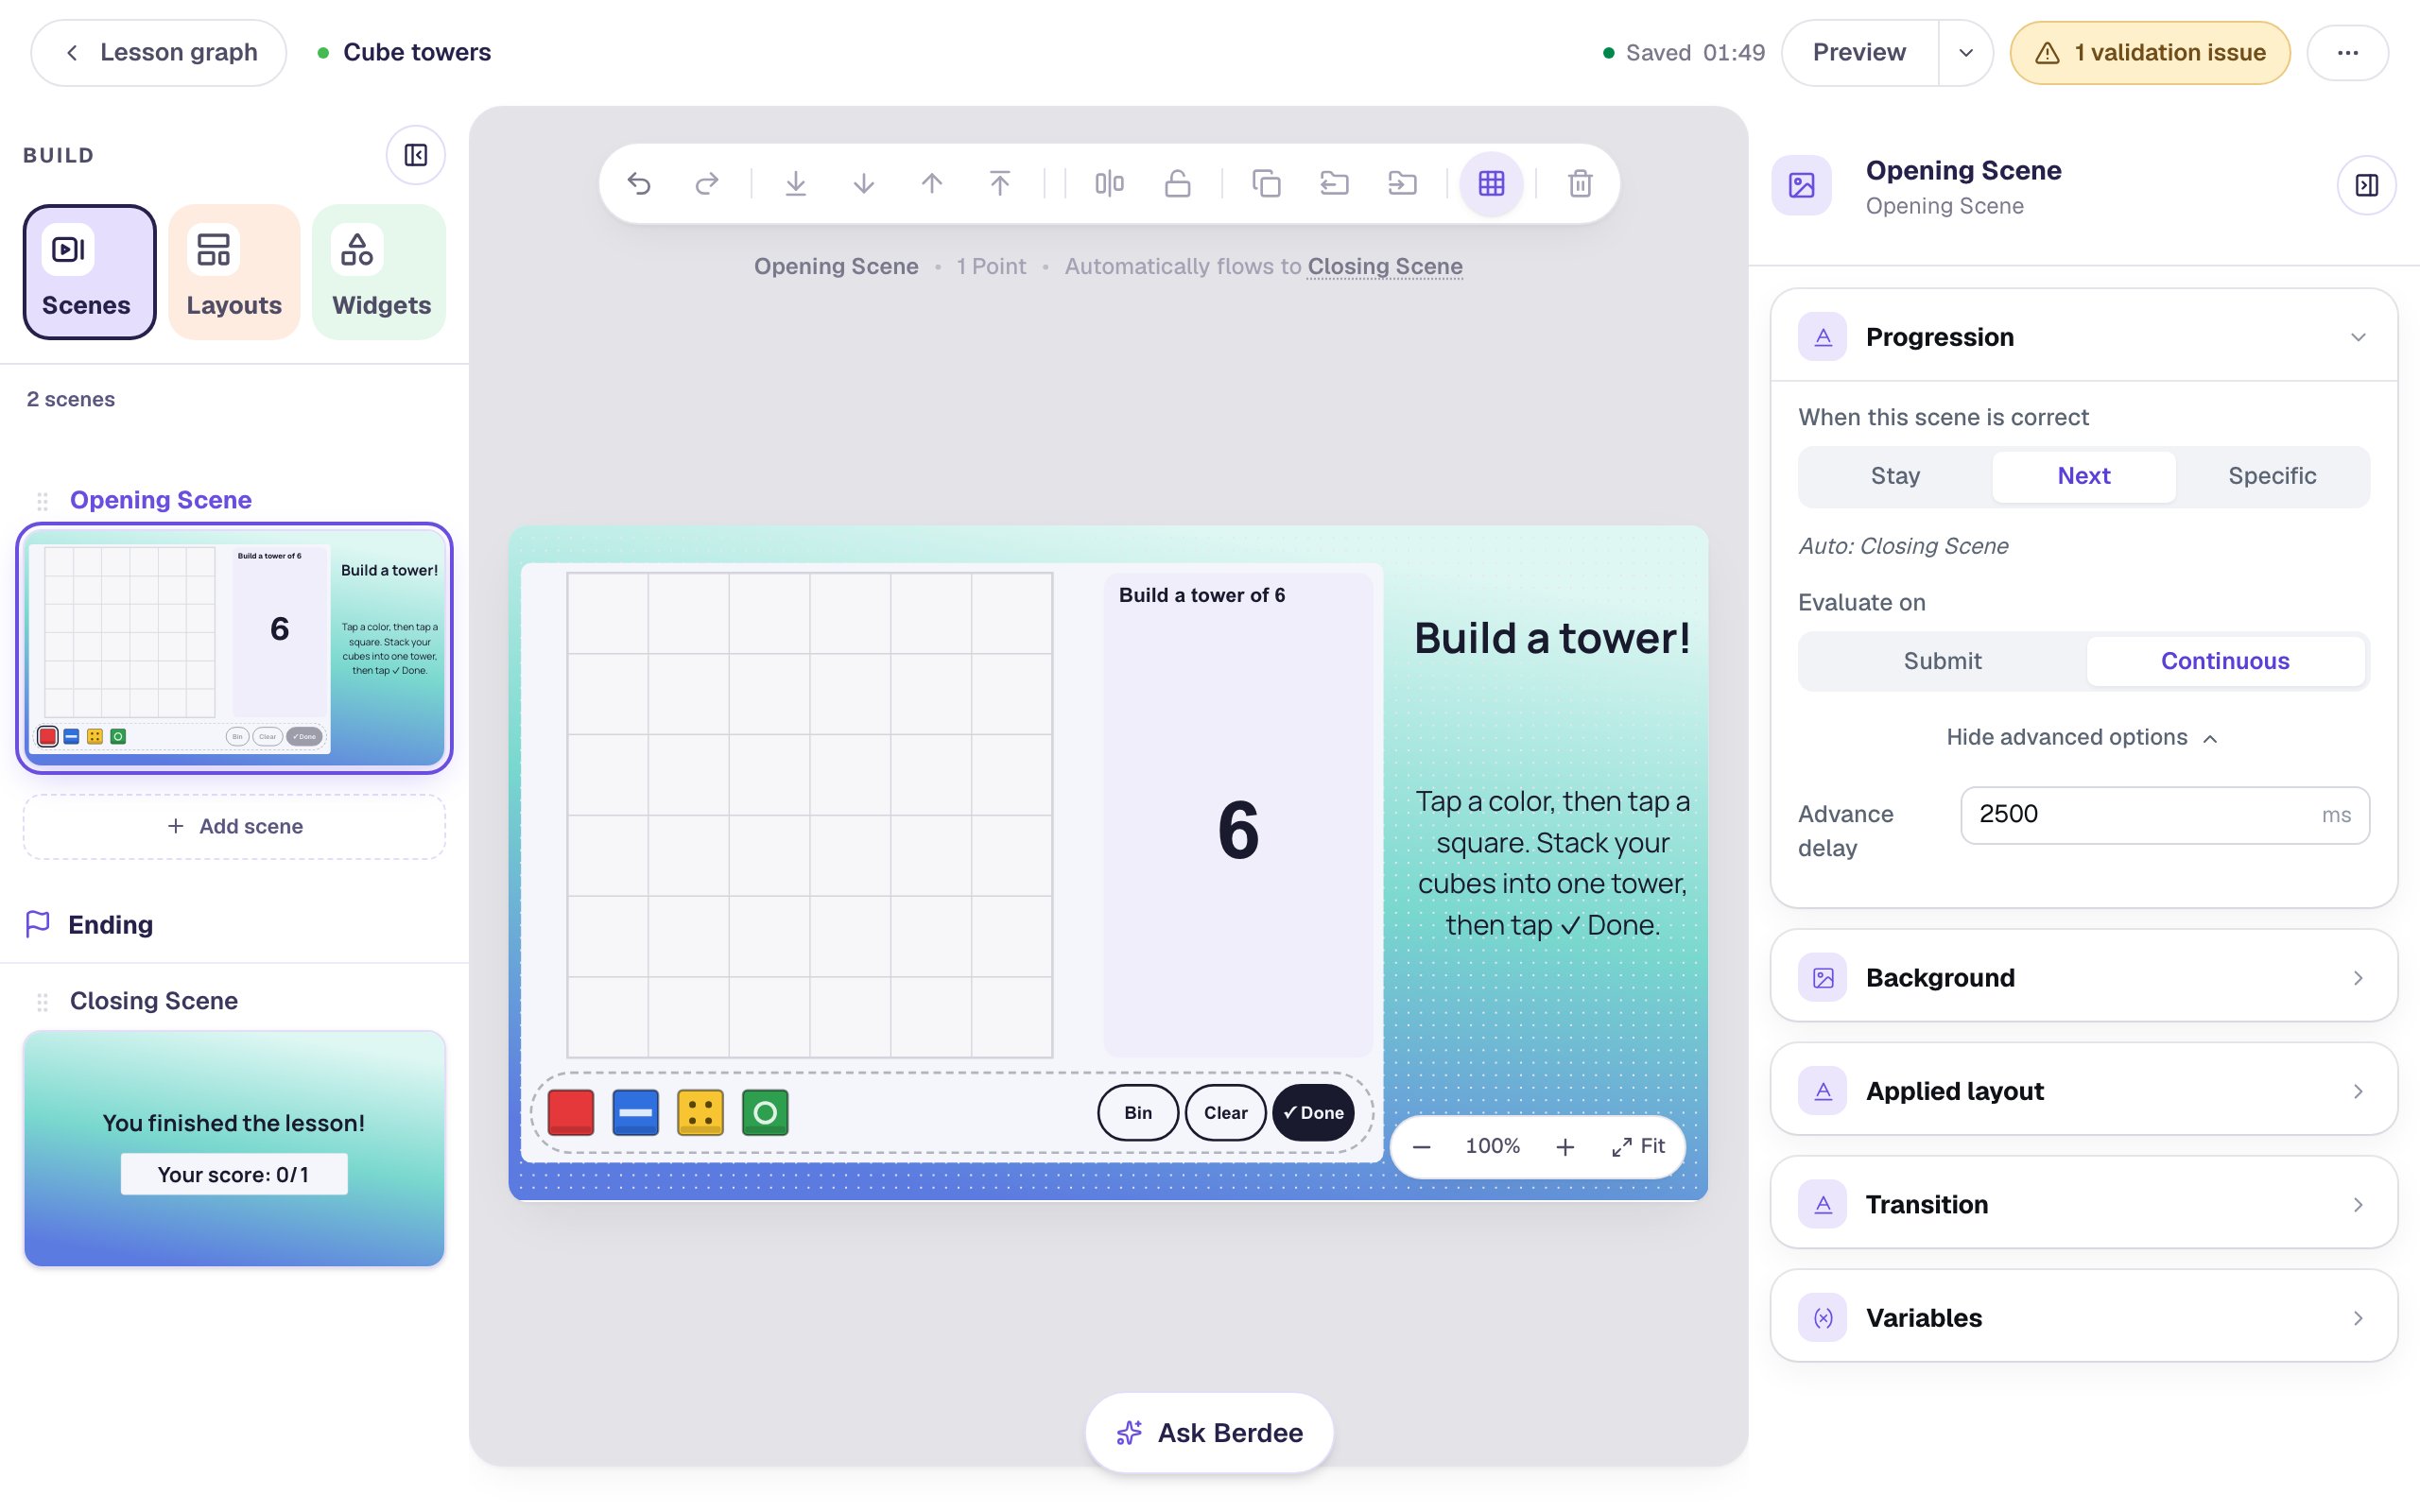
The tower is graded when a child taps ✓ Done: right is one tower of exactly 6 cubes. When it's right, the scene moves on by itself, as the line above the canvas says. By default that happens after 0.6 seconds, before a child can read That's a tower of 6!
Click an empty spot on the scene. In Progression, click Show more options and set Advance delay to 2500 ms.
Step 5: Add a scene that compares two towers
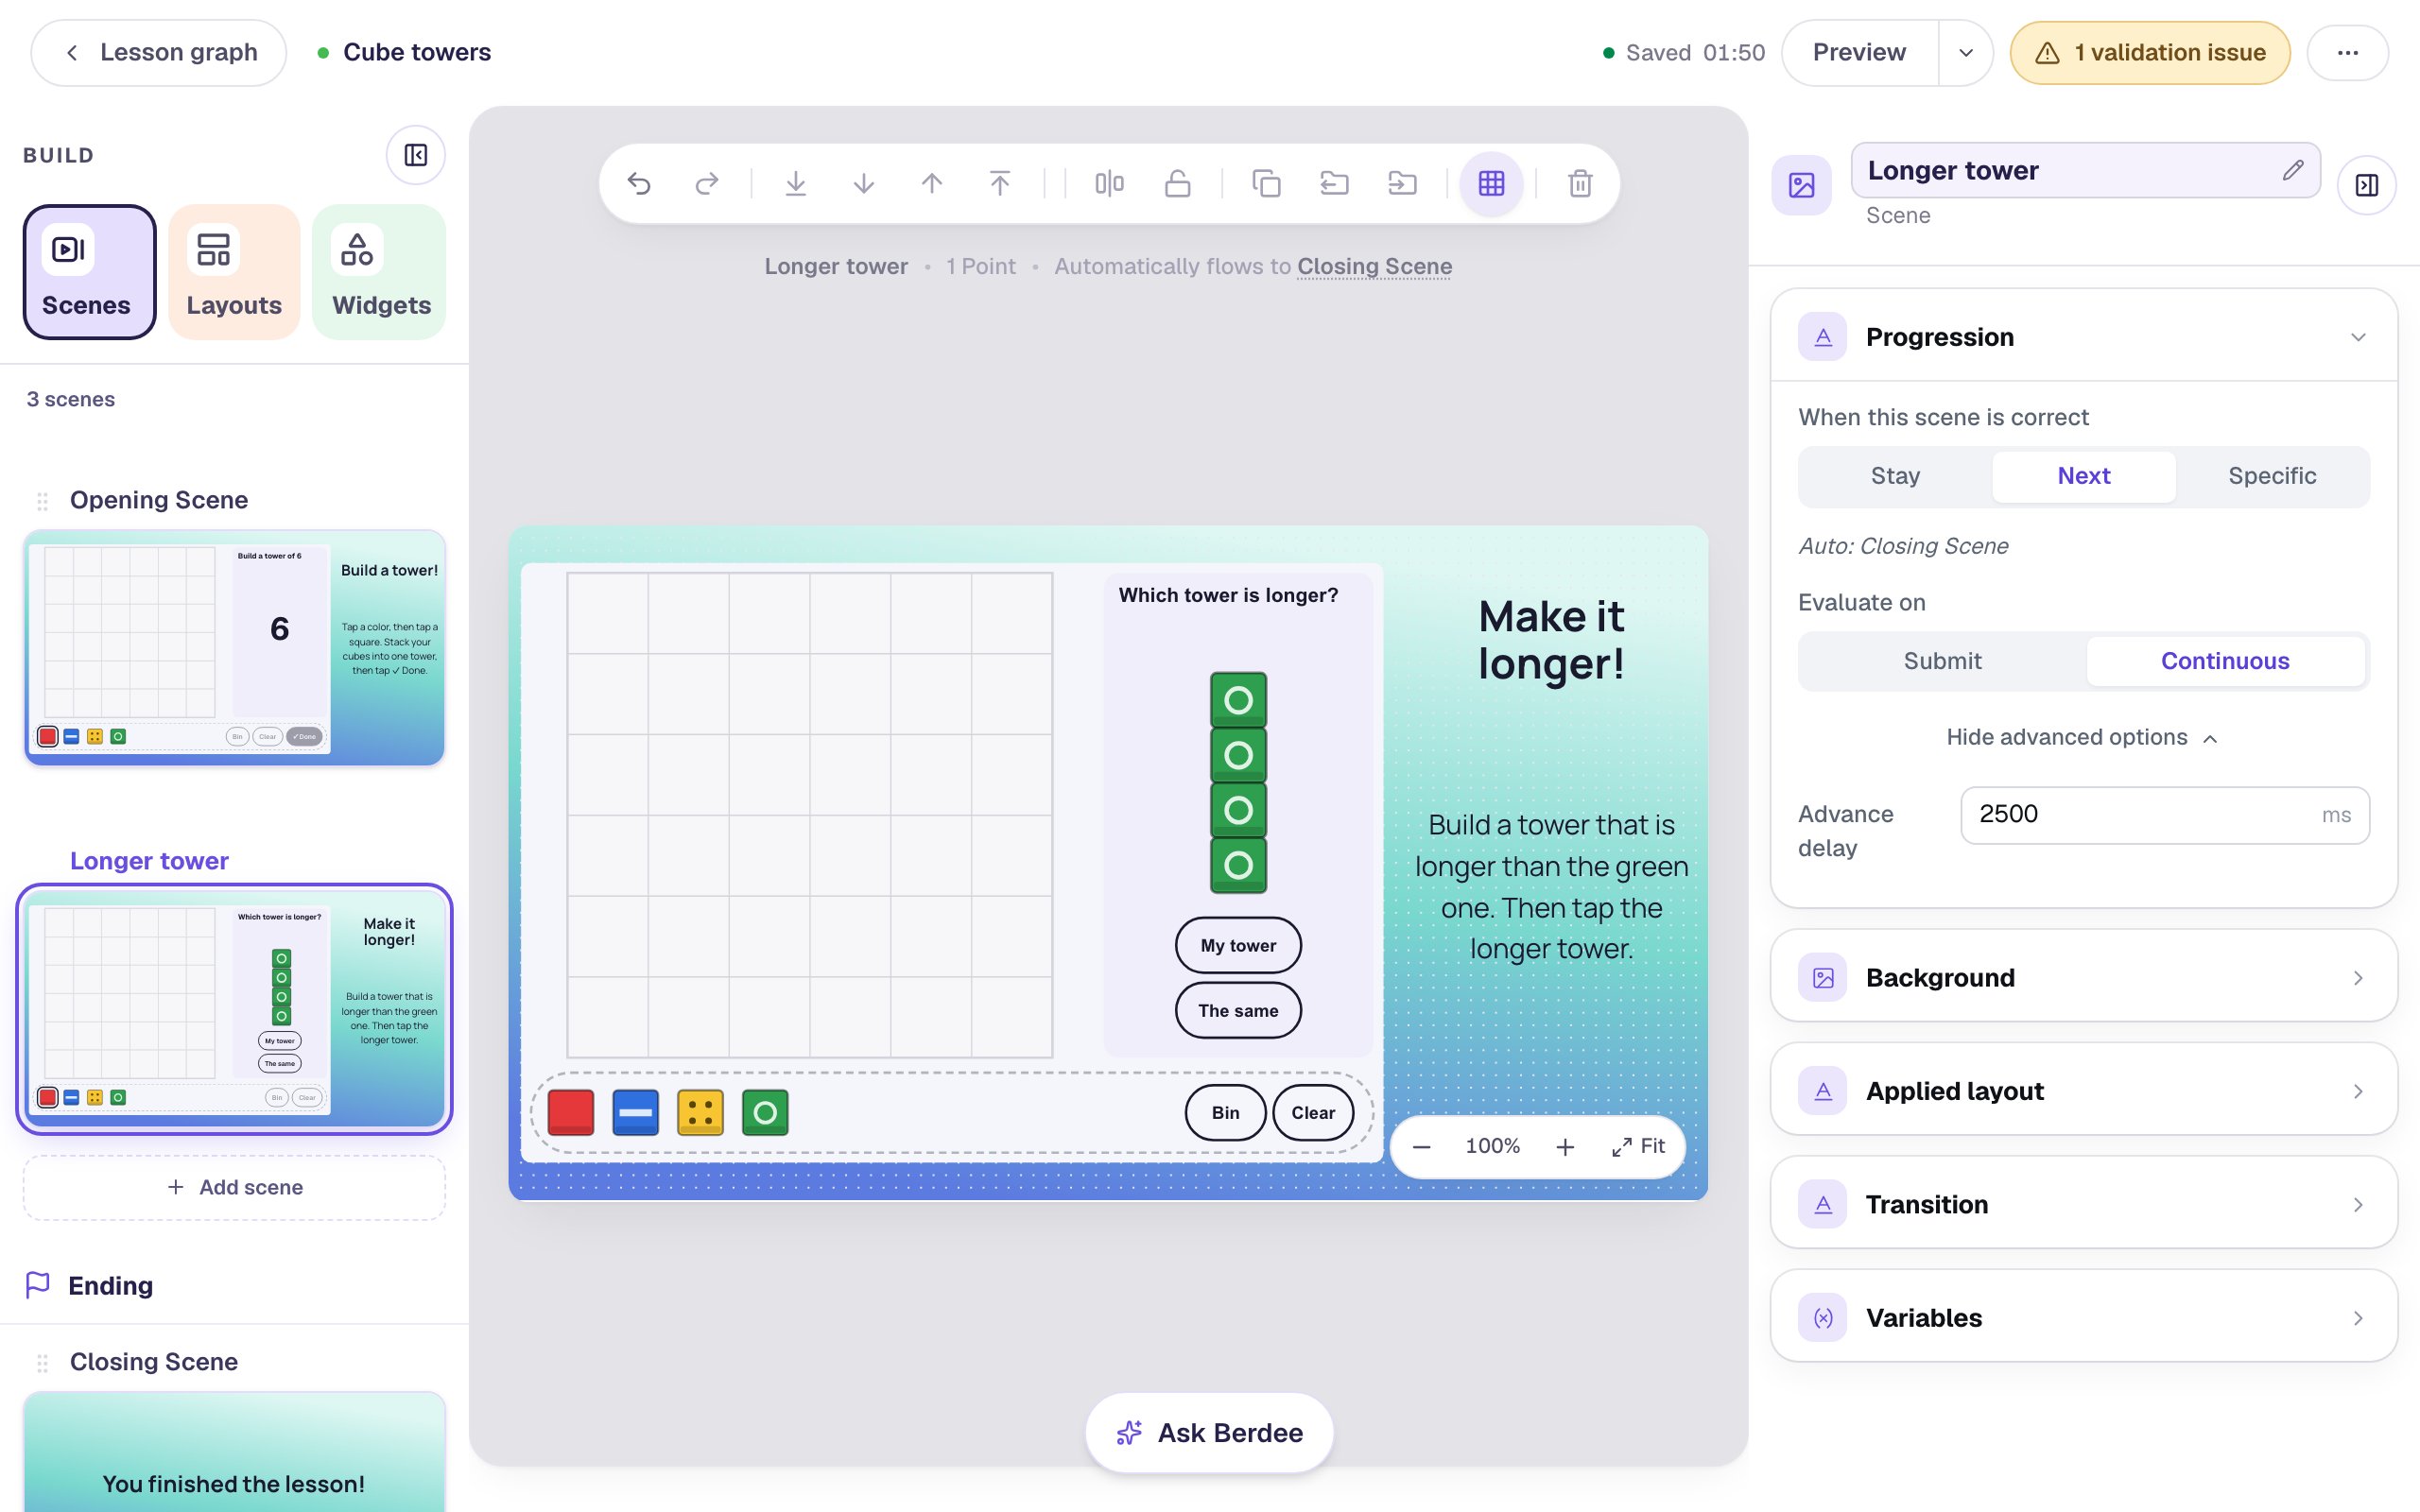
Open the Scenes tab and click Add scene. The new scene lands between the Opening Scene and the ending, so a right tower moves students straight to it. Double-click its name and call it Longer tower.
Set it up like the first scene:
- Background: Lagoon gradient.
- A Heading
Make it longer!and a BodyBuild a tower that is longer than the green one. Then tap the longer tower., both Fixed width230, sizes34and22, in the right-hand column. - A Connecting Cubes widget, Width
690, Height480, on the left, with Alt TextConnecting cubes: build a tower longer than a green tower of 4.
Now make it a comparison. Select the new widget, click ⚙ Configure, and:
- Set Mode to Compare.
- Set Towers to One given + theirs. You show one tower; students build the other.
- Under Given tower, set the number to
4and the color to Green. - Set the board's squares across to
6, as before.
Leave Question on Which is longer?.
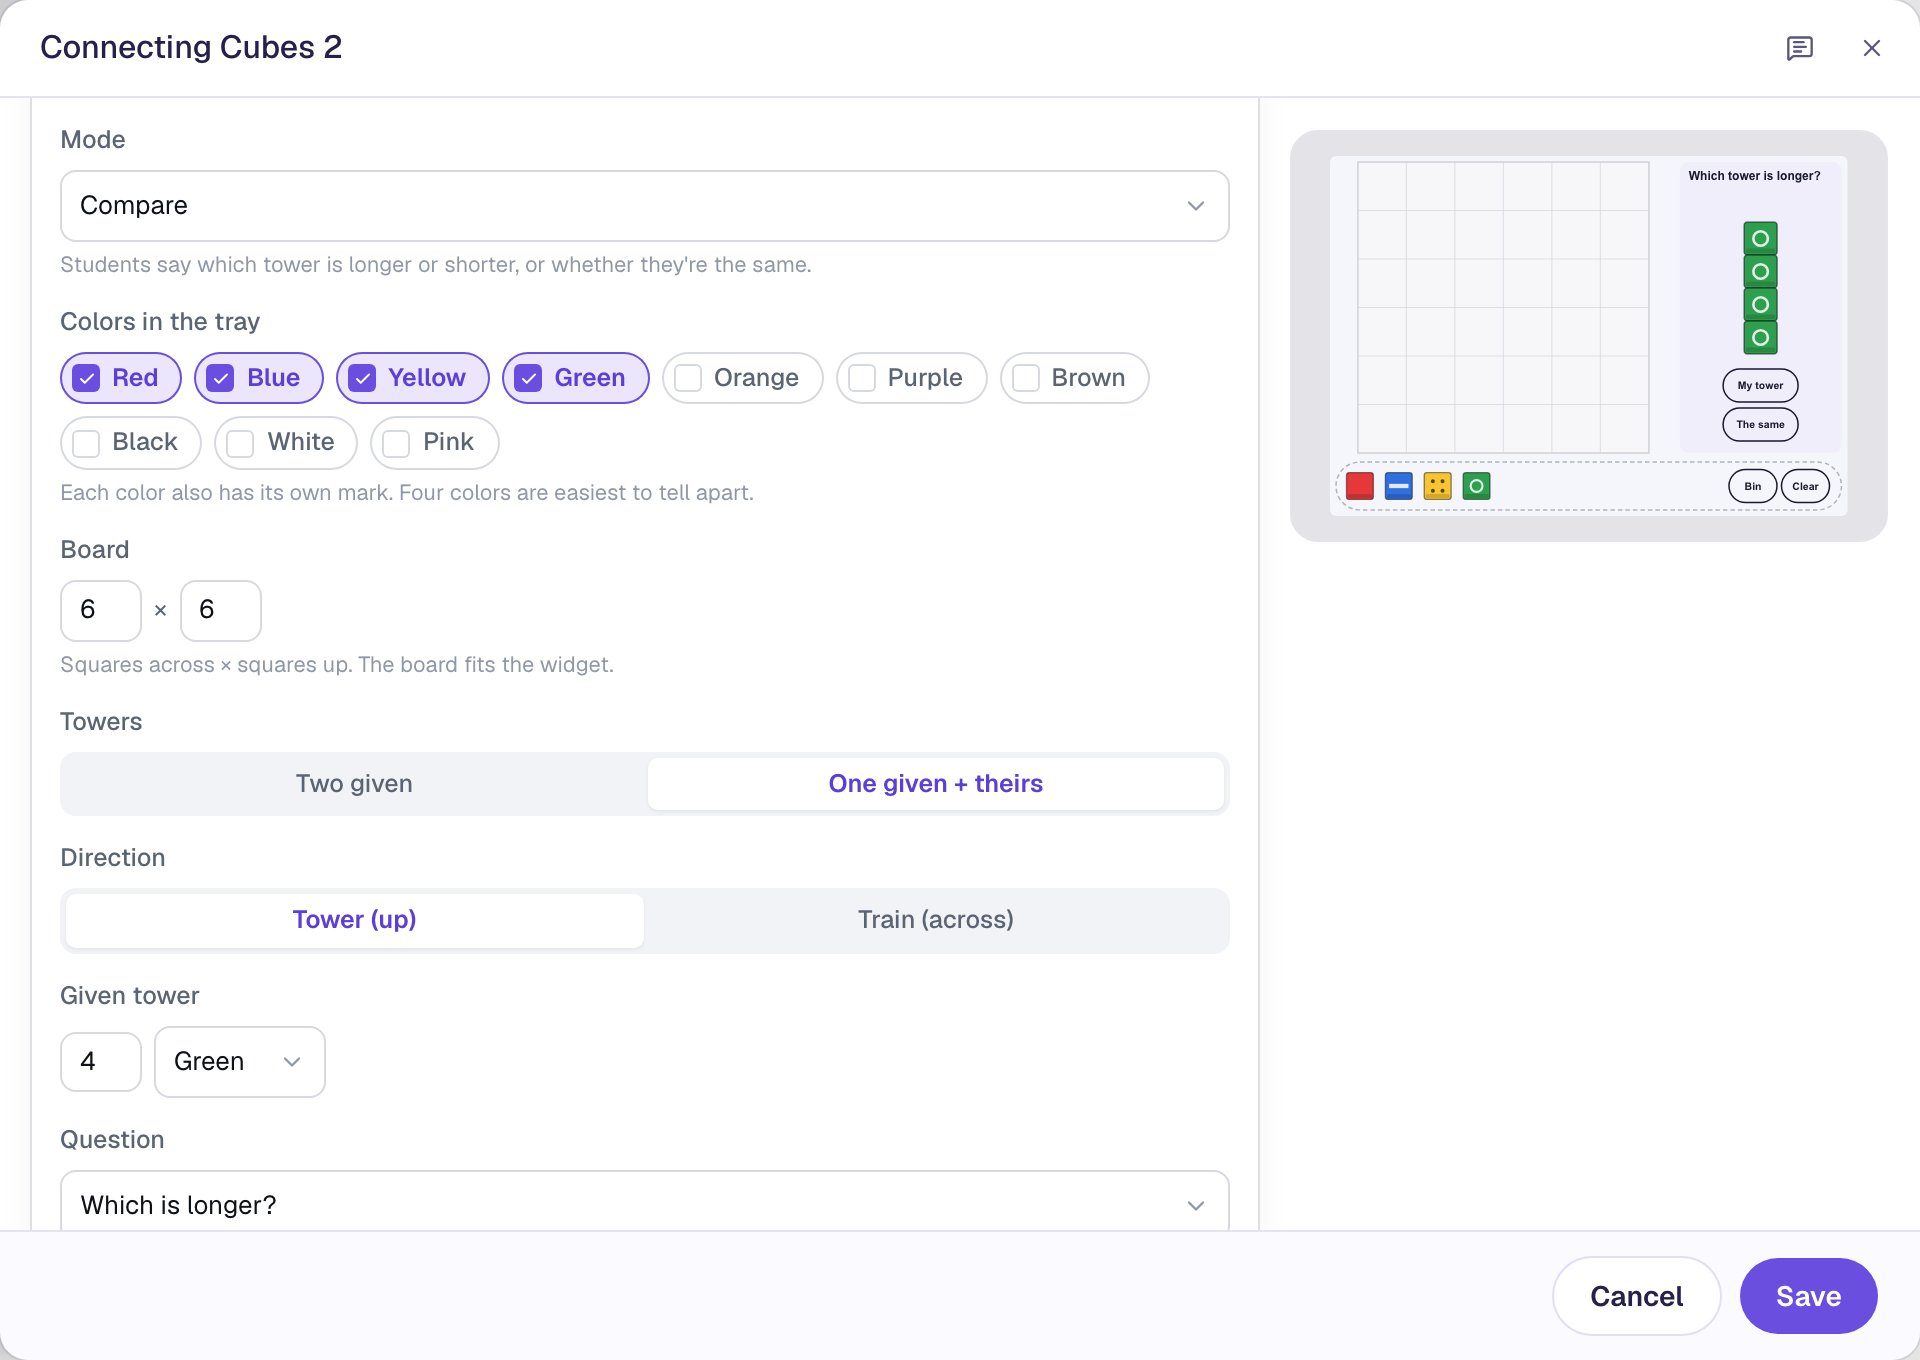
With One given + theirs, there's no single right answer to set: it depends on what the child builds. A tower of 5 or 6 makes My tower right; a tower of 4 makes The same right; a shorter tower makes the green tower right. Berdee checks each answer against the child's own tower, so a child is marked right for comparing honestly, whatever they built.
Click Save. Then give this scene the same Advance delay of 2500 ms.
Step 6: Add an "I'm done" button
Every lesson needs one button that finishes it: Berdee won't publish a lesson without one. It's also a way out for a child who gets stuck.
- Search the Widgets tab for
Submit Buttonand click it. - In Content, change Label to
I'm doneand set Submits to Lesson. - Set its Font Size to
20. In Style & Layout, set Background to a dark navy and Text to white. Drag it under the instructions on the right.
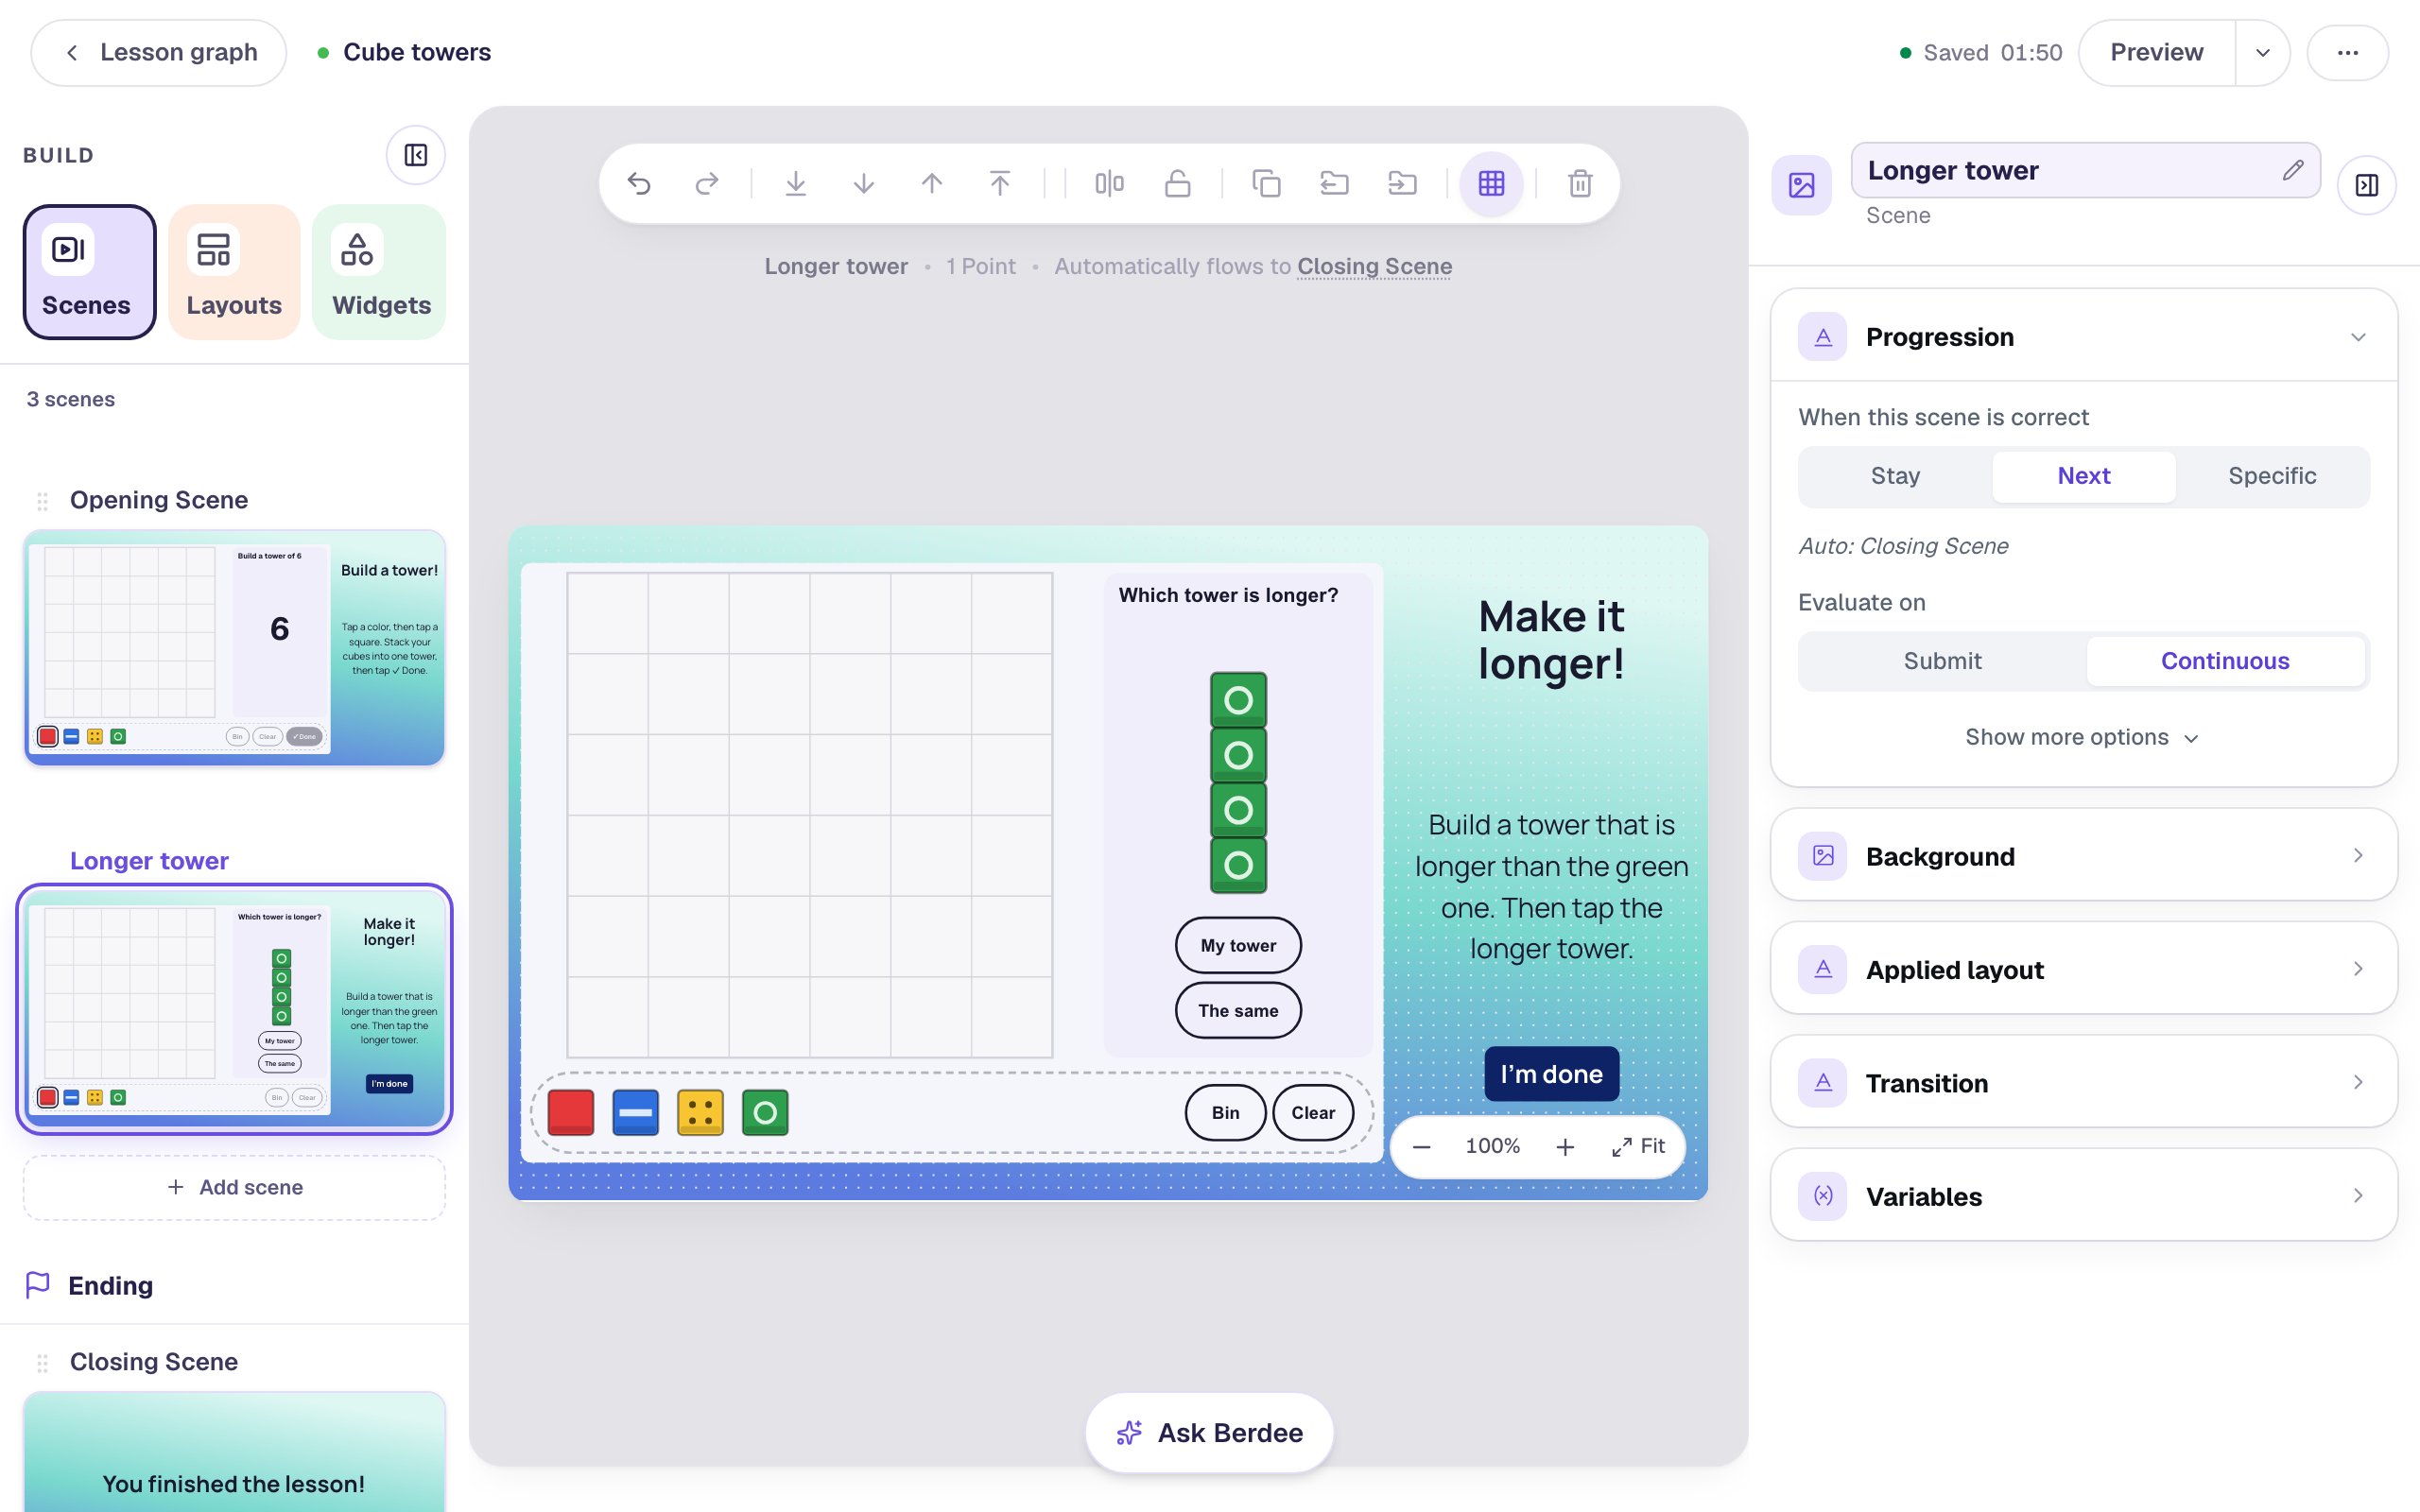
The cubes still move the lesson on by themselves when a child answers right; I'm done is only there for a child who wants to stop.
Step 7: Play the lesson in Preview
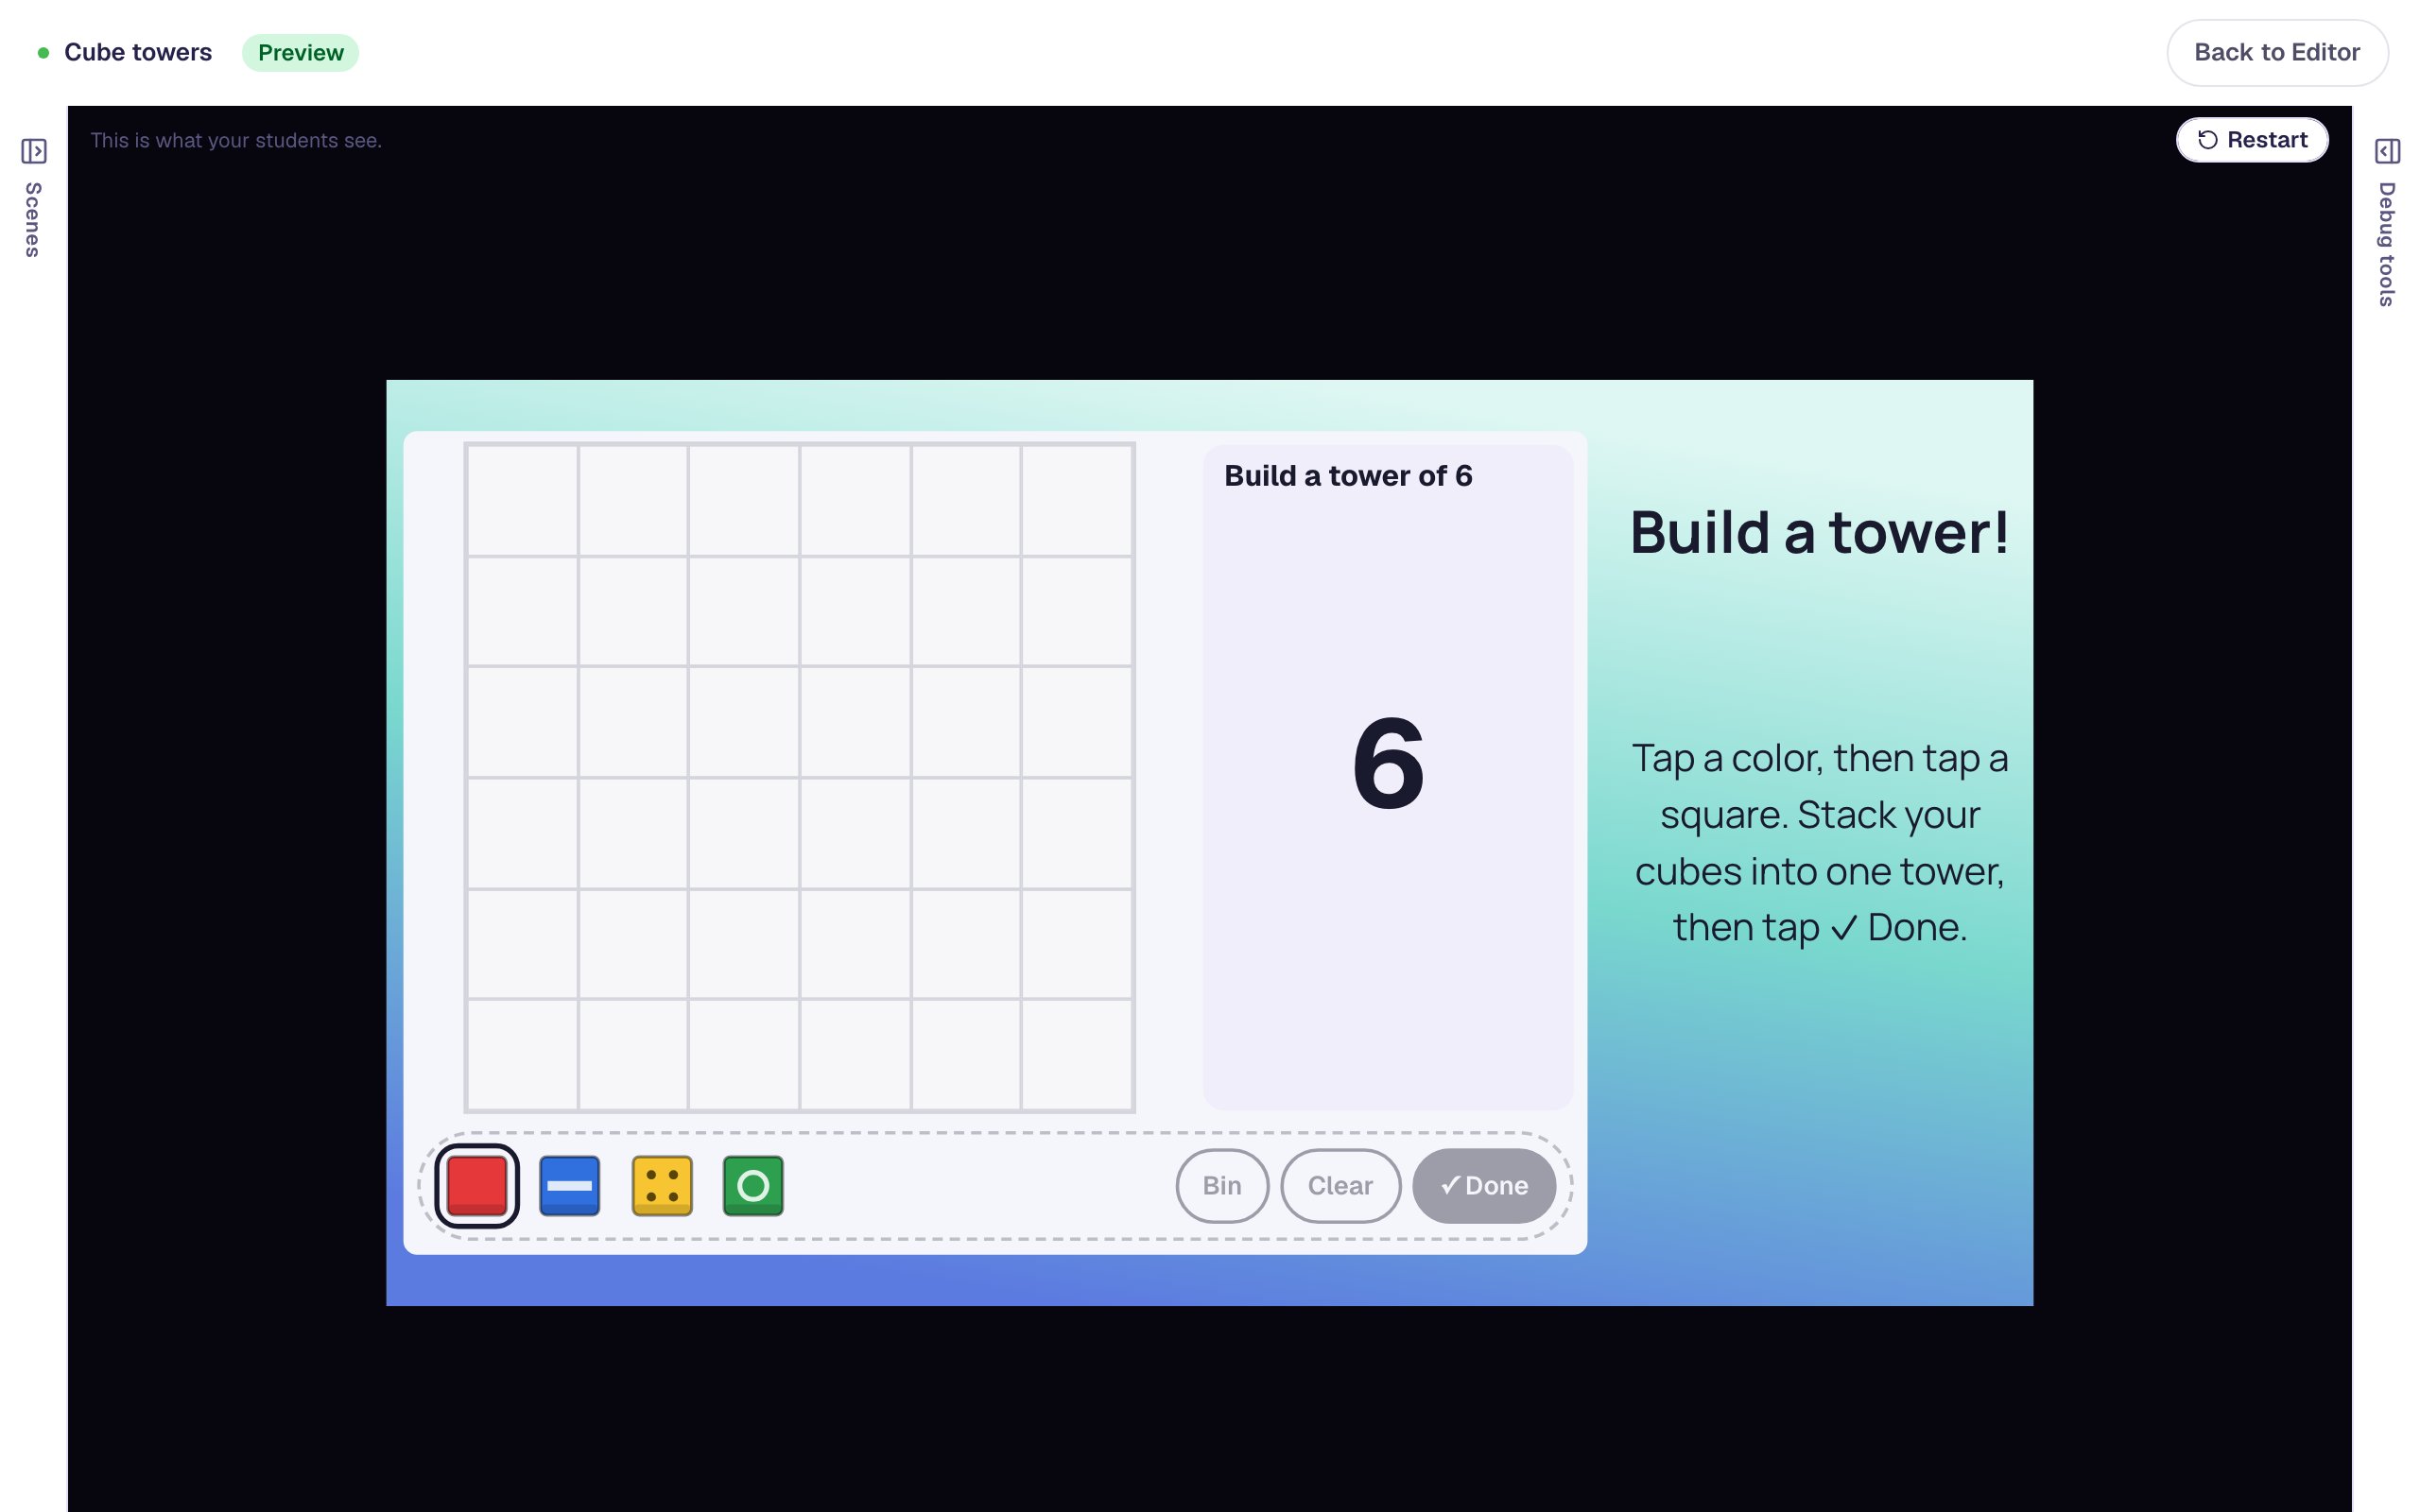
Go back to the Opening Scene and click Preview. Students see an empty board, the card, and the tray.
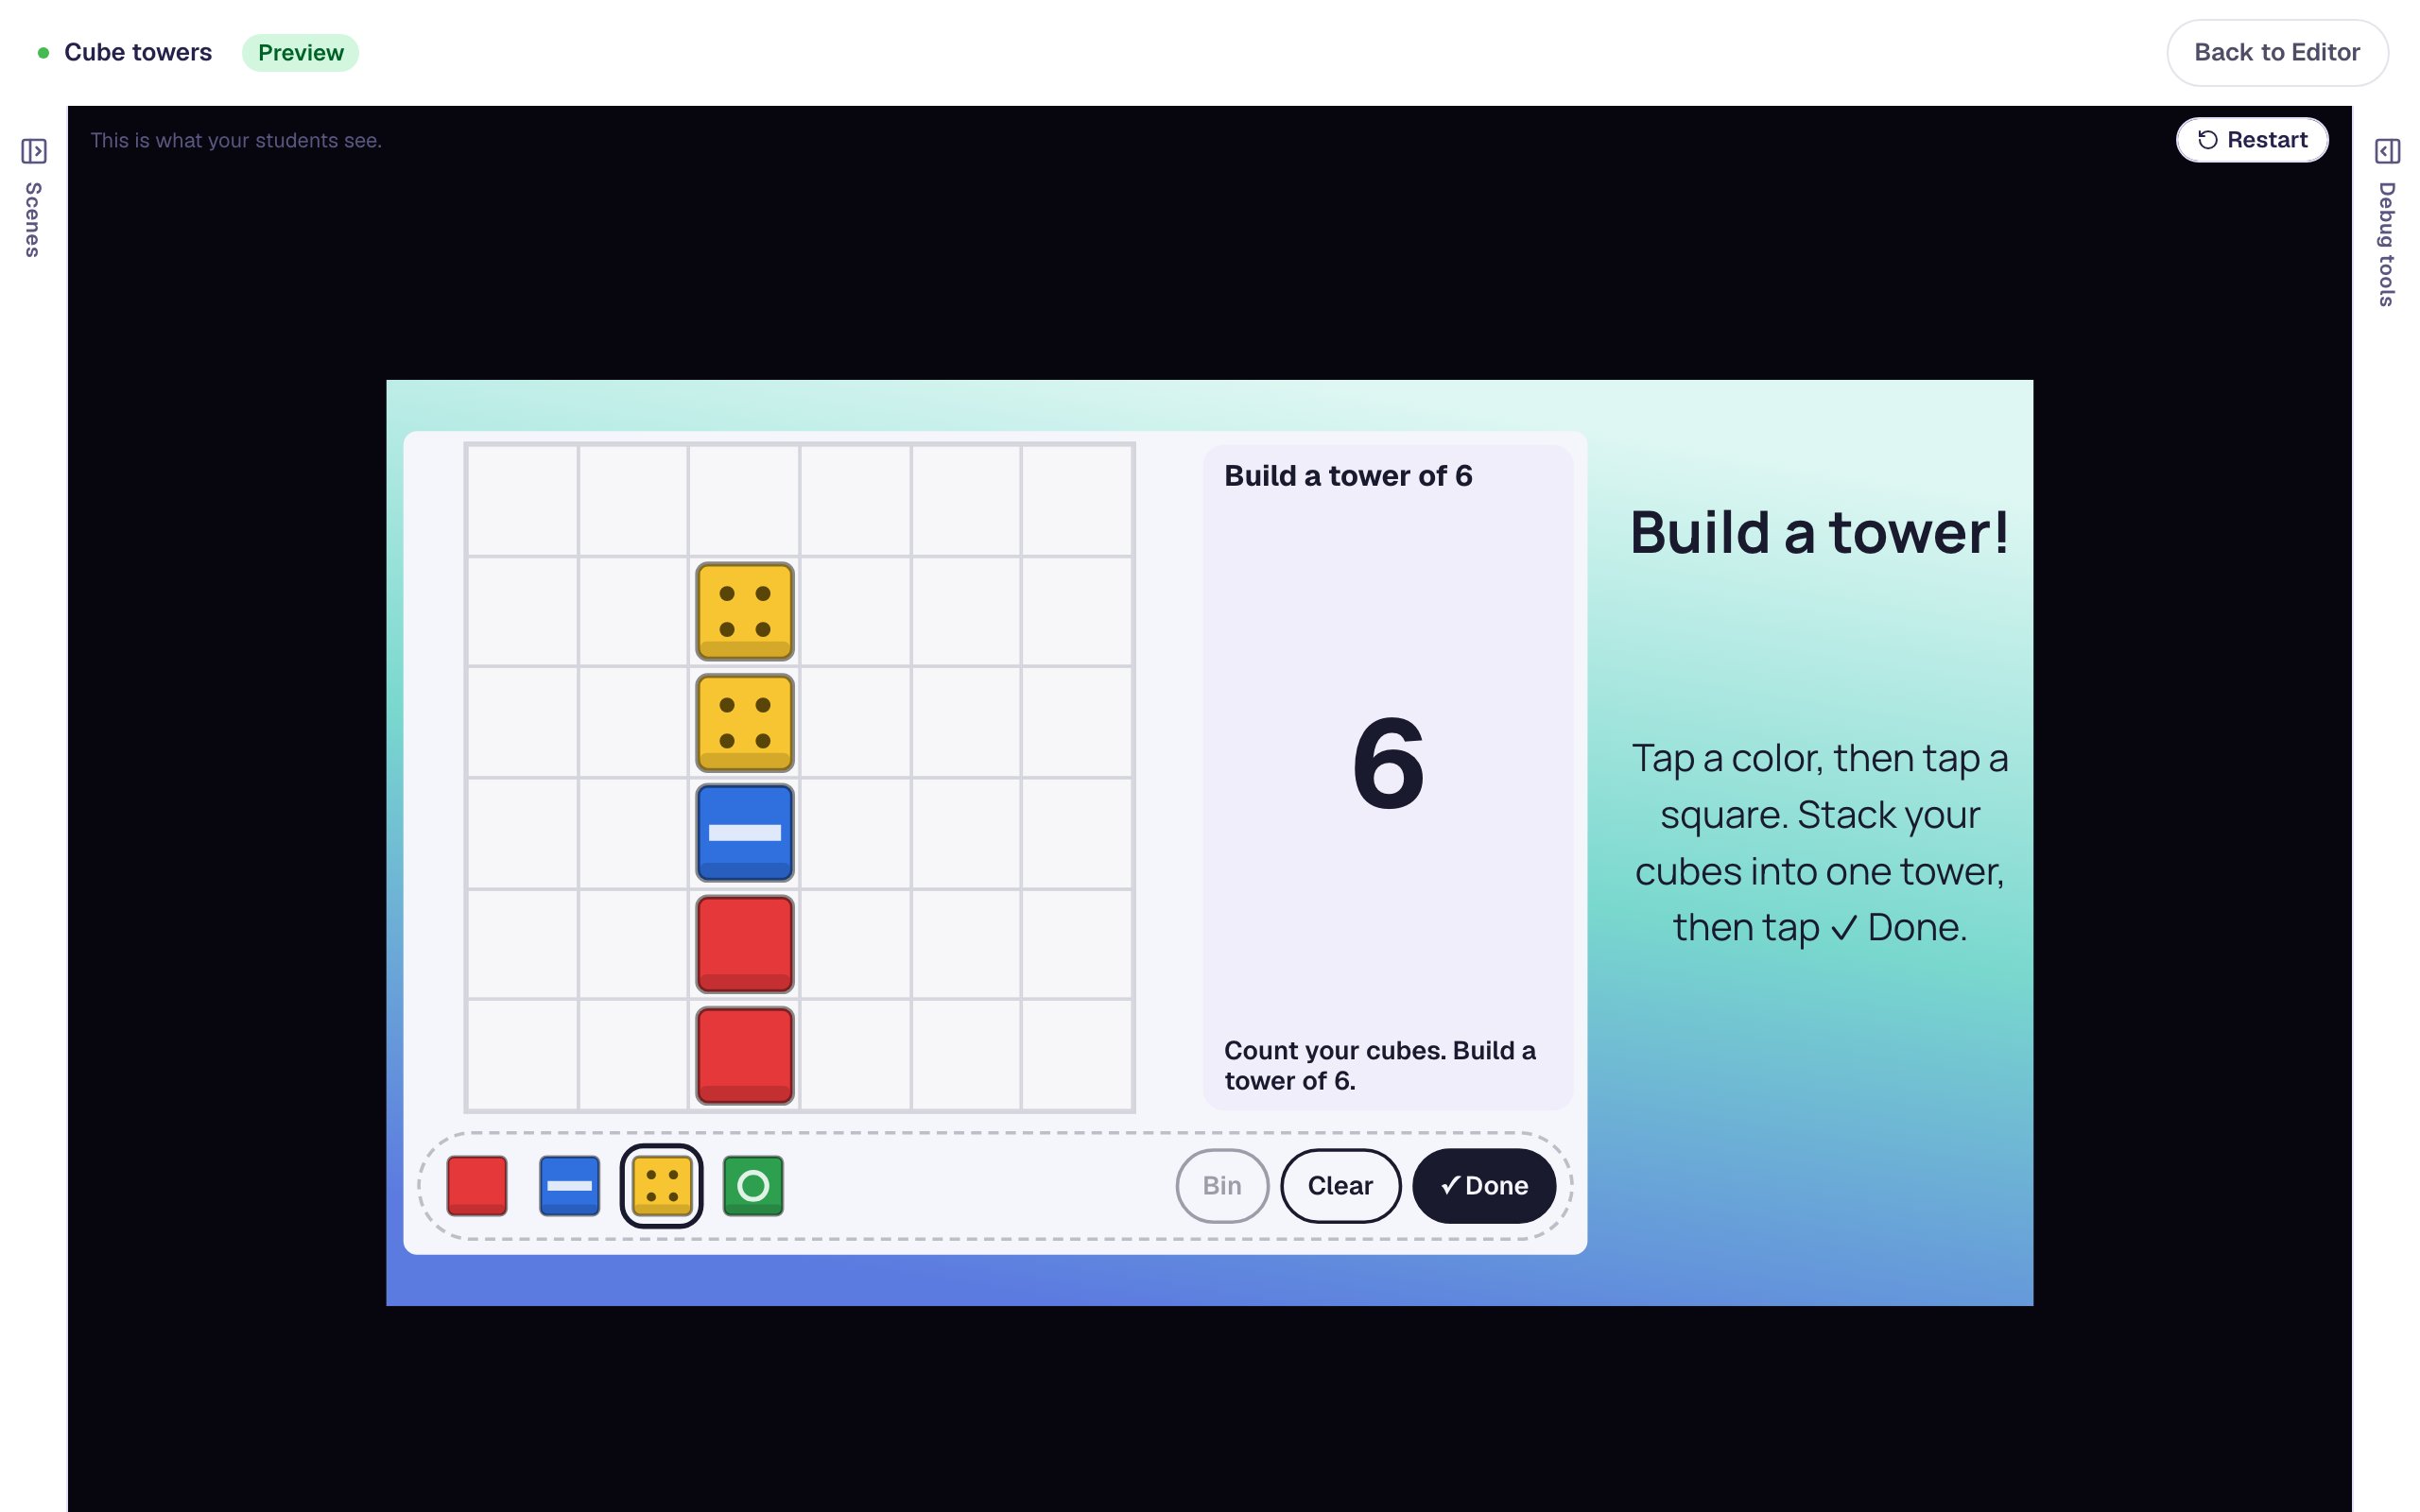
Build a tower one short, the way a child might. Tap red and then two squares in the bottom of a column. Drag a blue cube from the tray onto the square above them (dragging works too, but it's never needed). Tap yellow and add two more. That's 5. Tap ✓ Done:
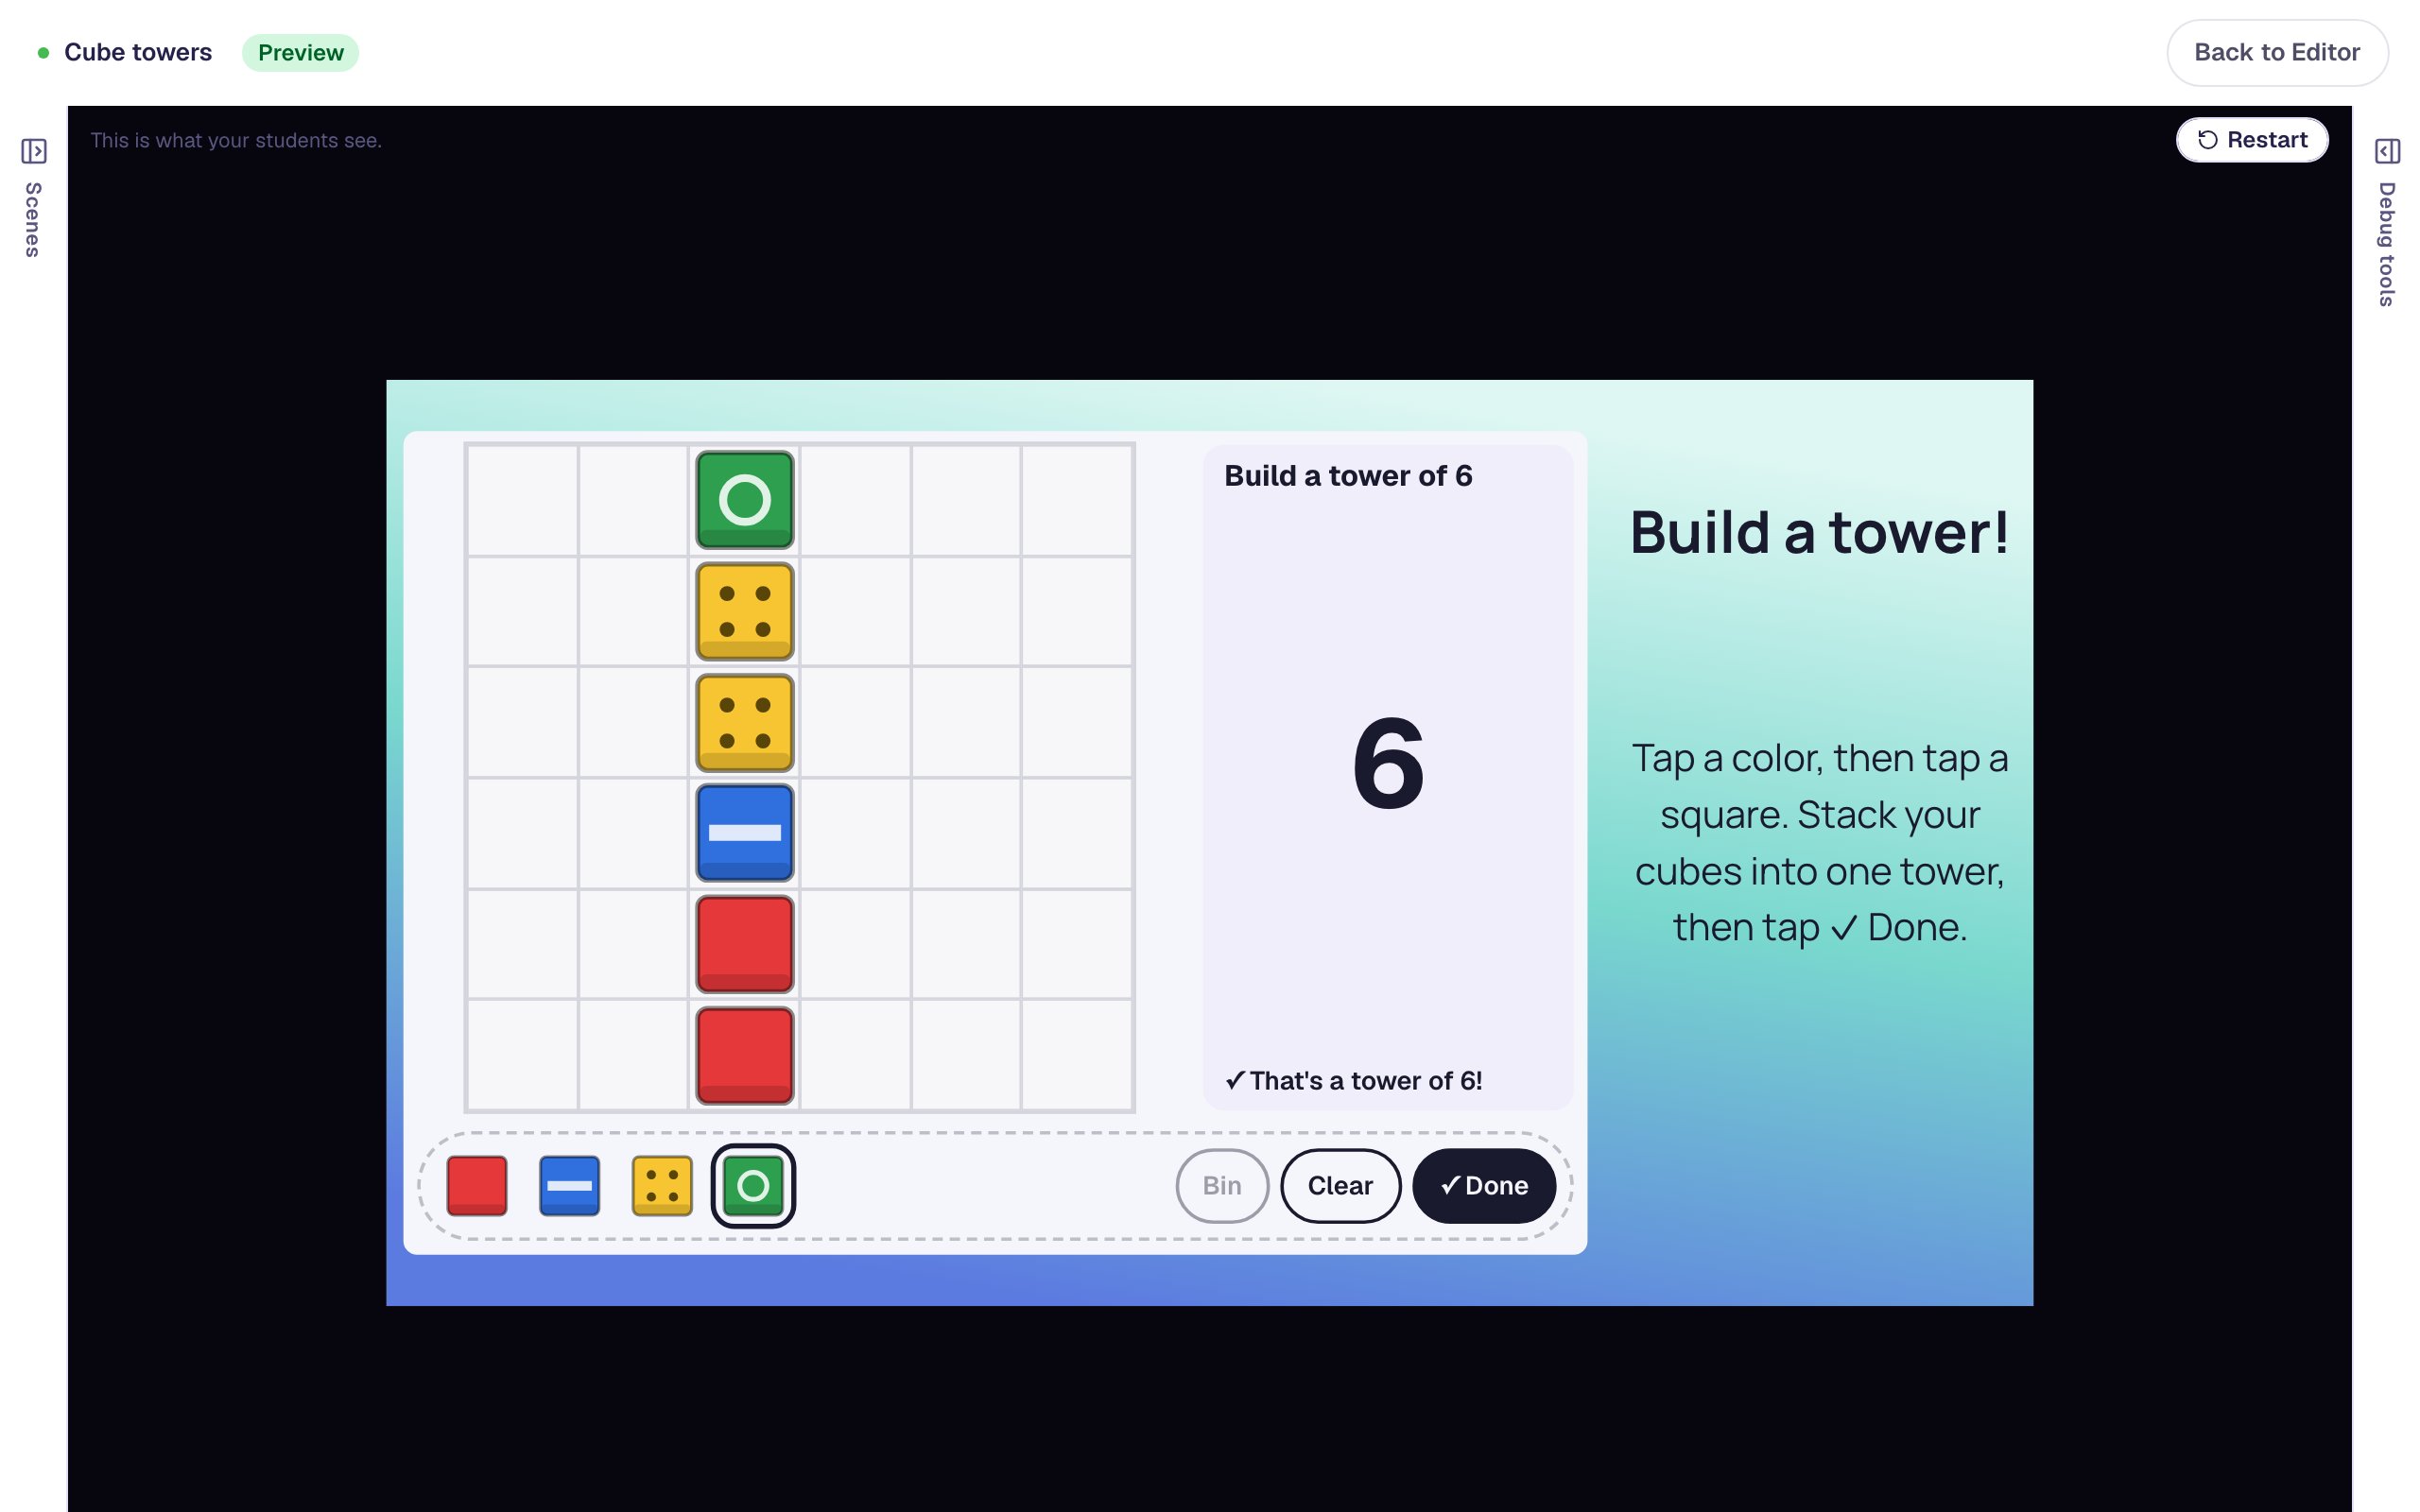
The card says Count your cubes. Build a tower of 6. The cubes stay where they are, so the child counts again and adds one, instead of starting over. Tap green, tap the square on top, and tap ✓ Done again:
After two and a half seconds the lesson moves on to Make it longer! The card shows the green tower of 4, with My tower and The same under it, and your I'm done button sits on the right.
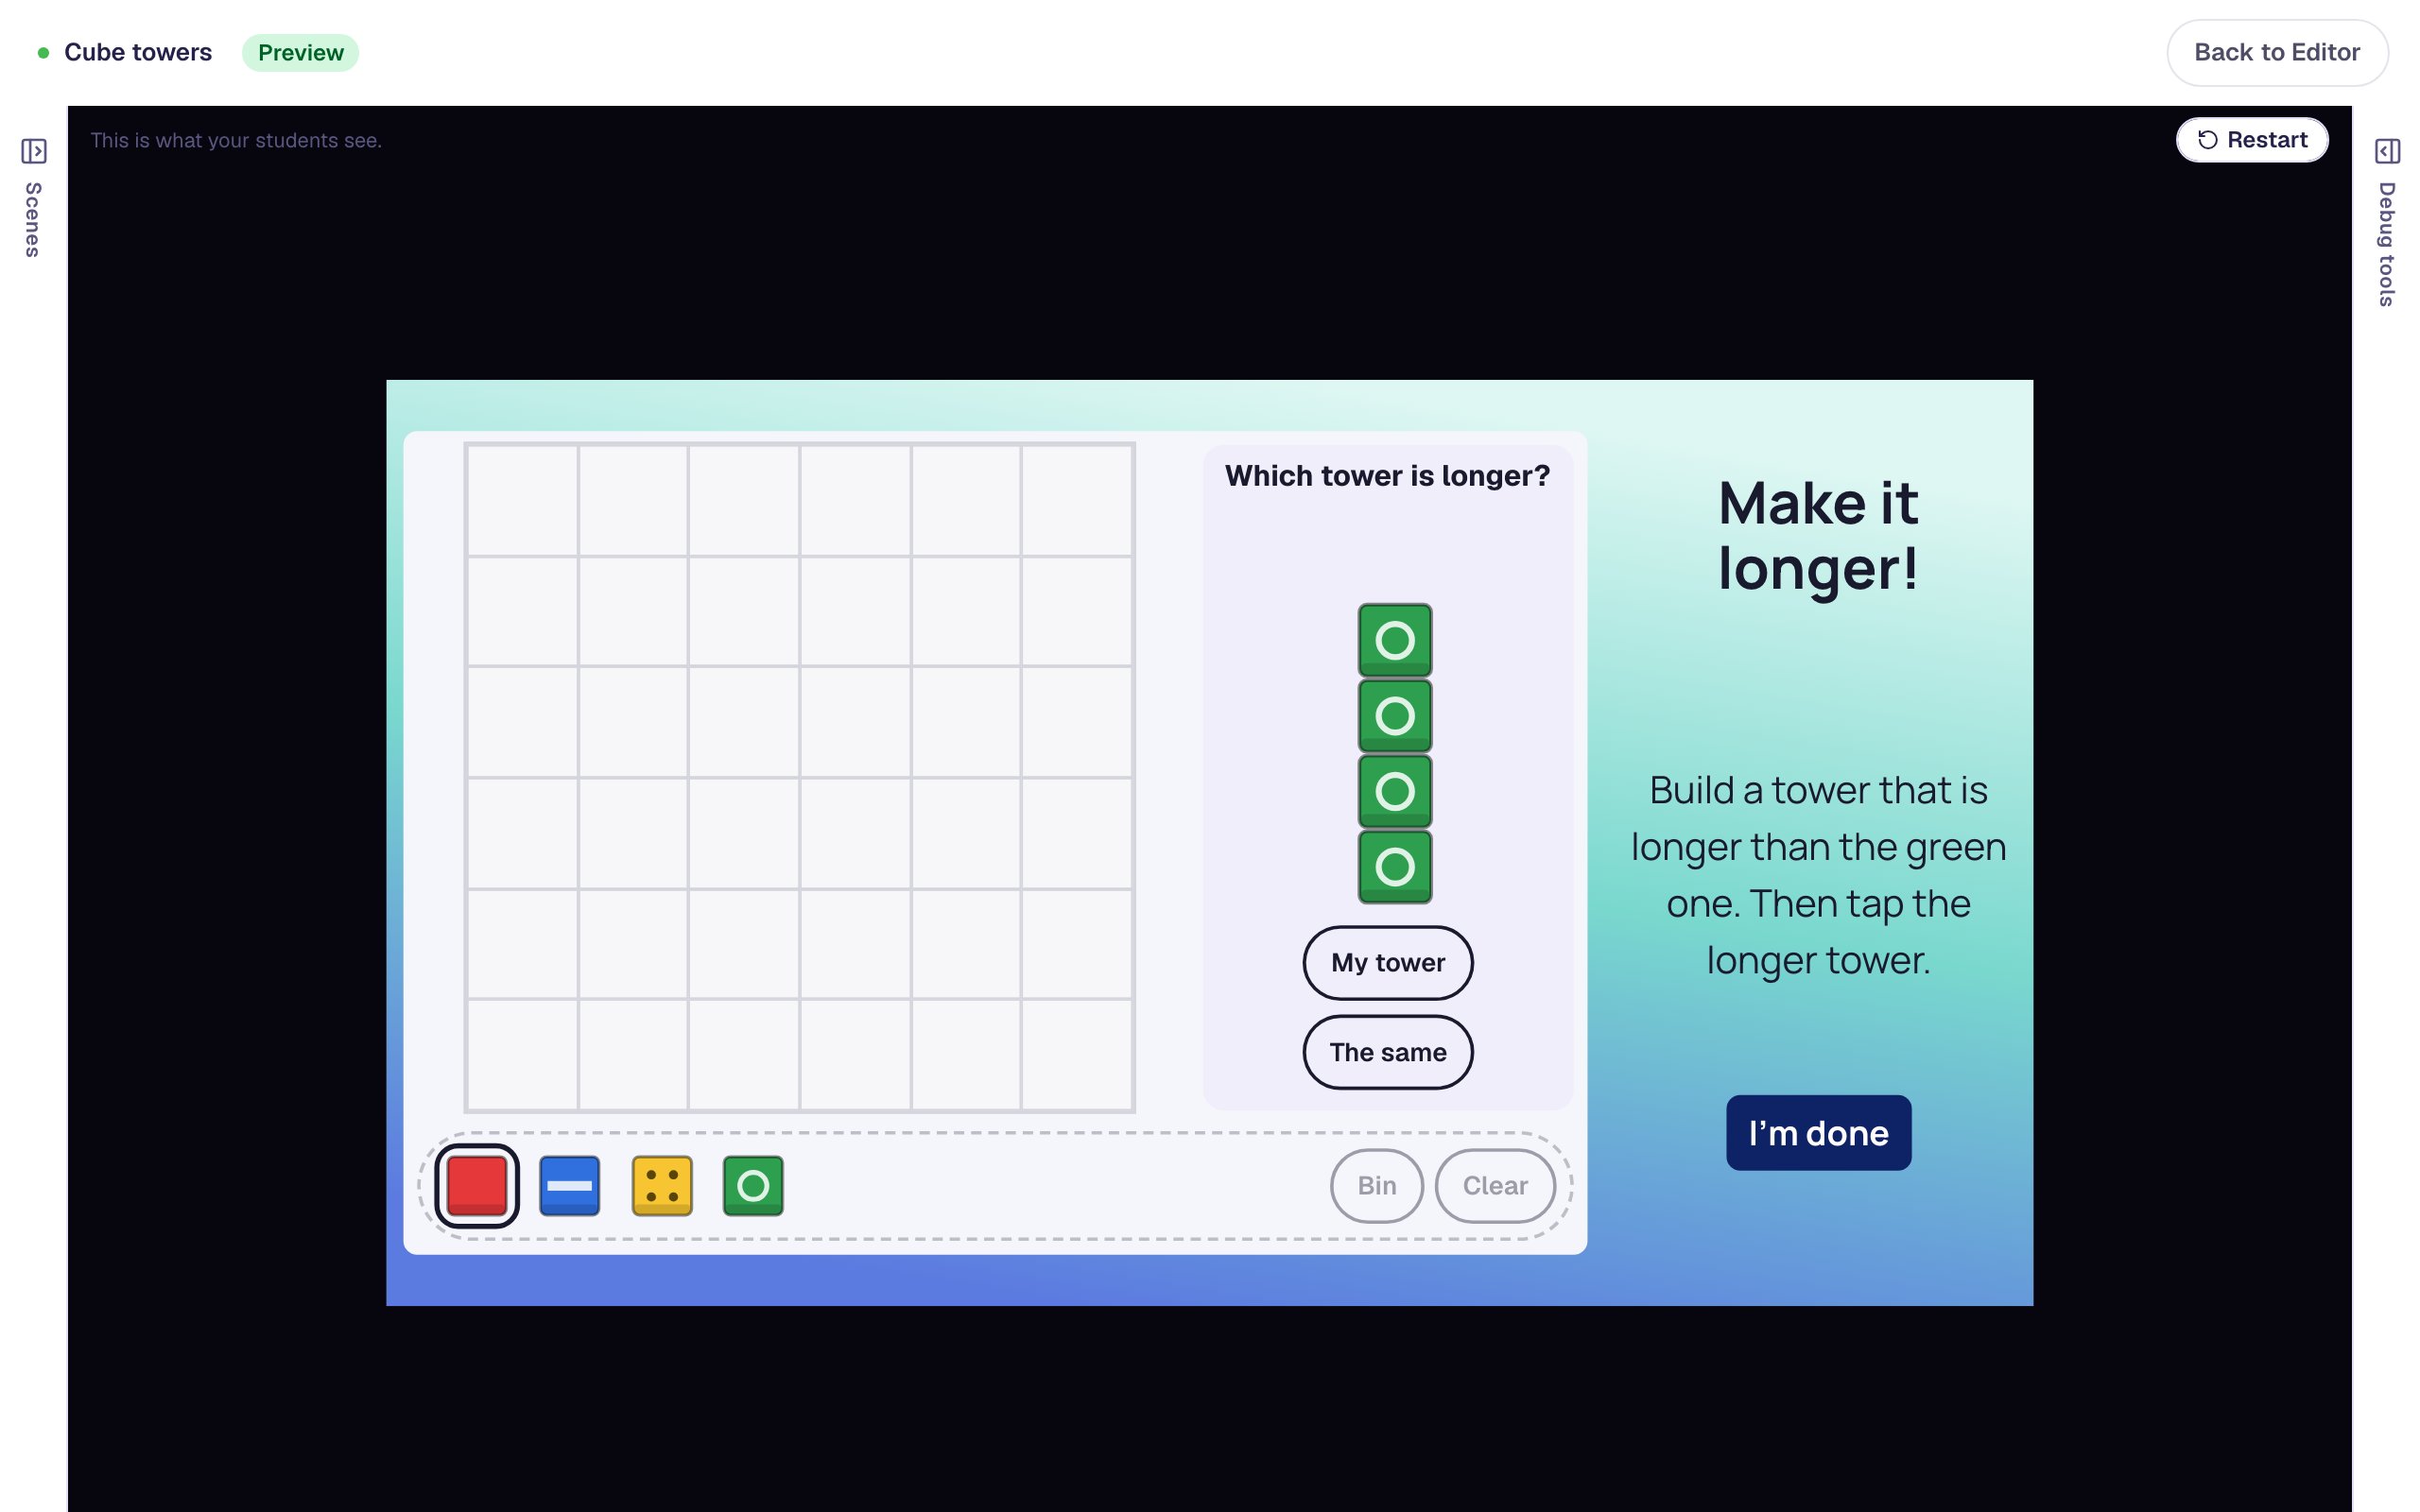
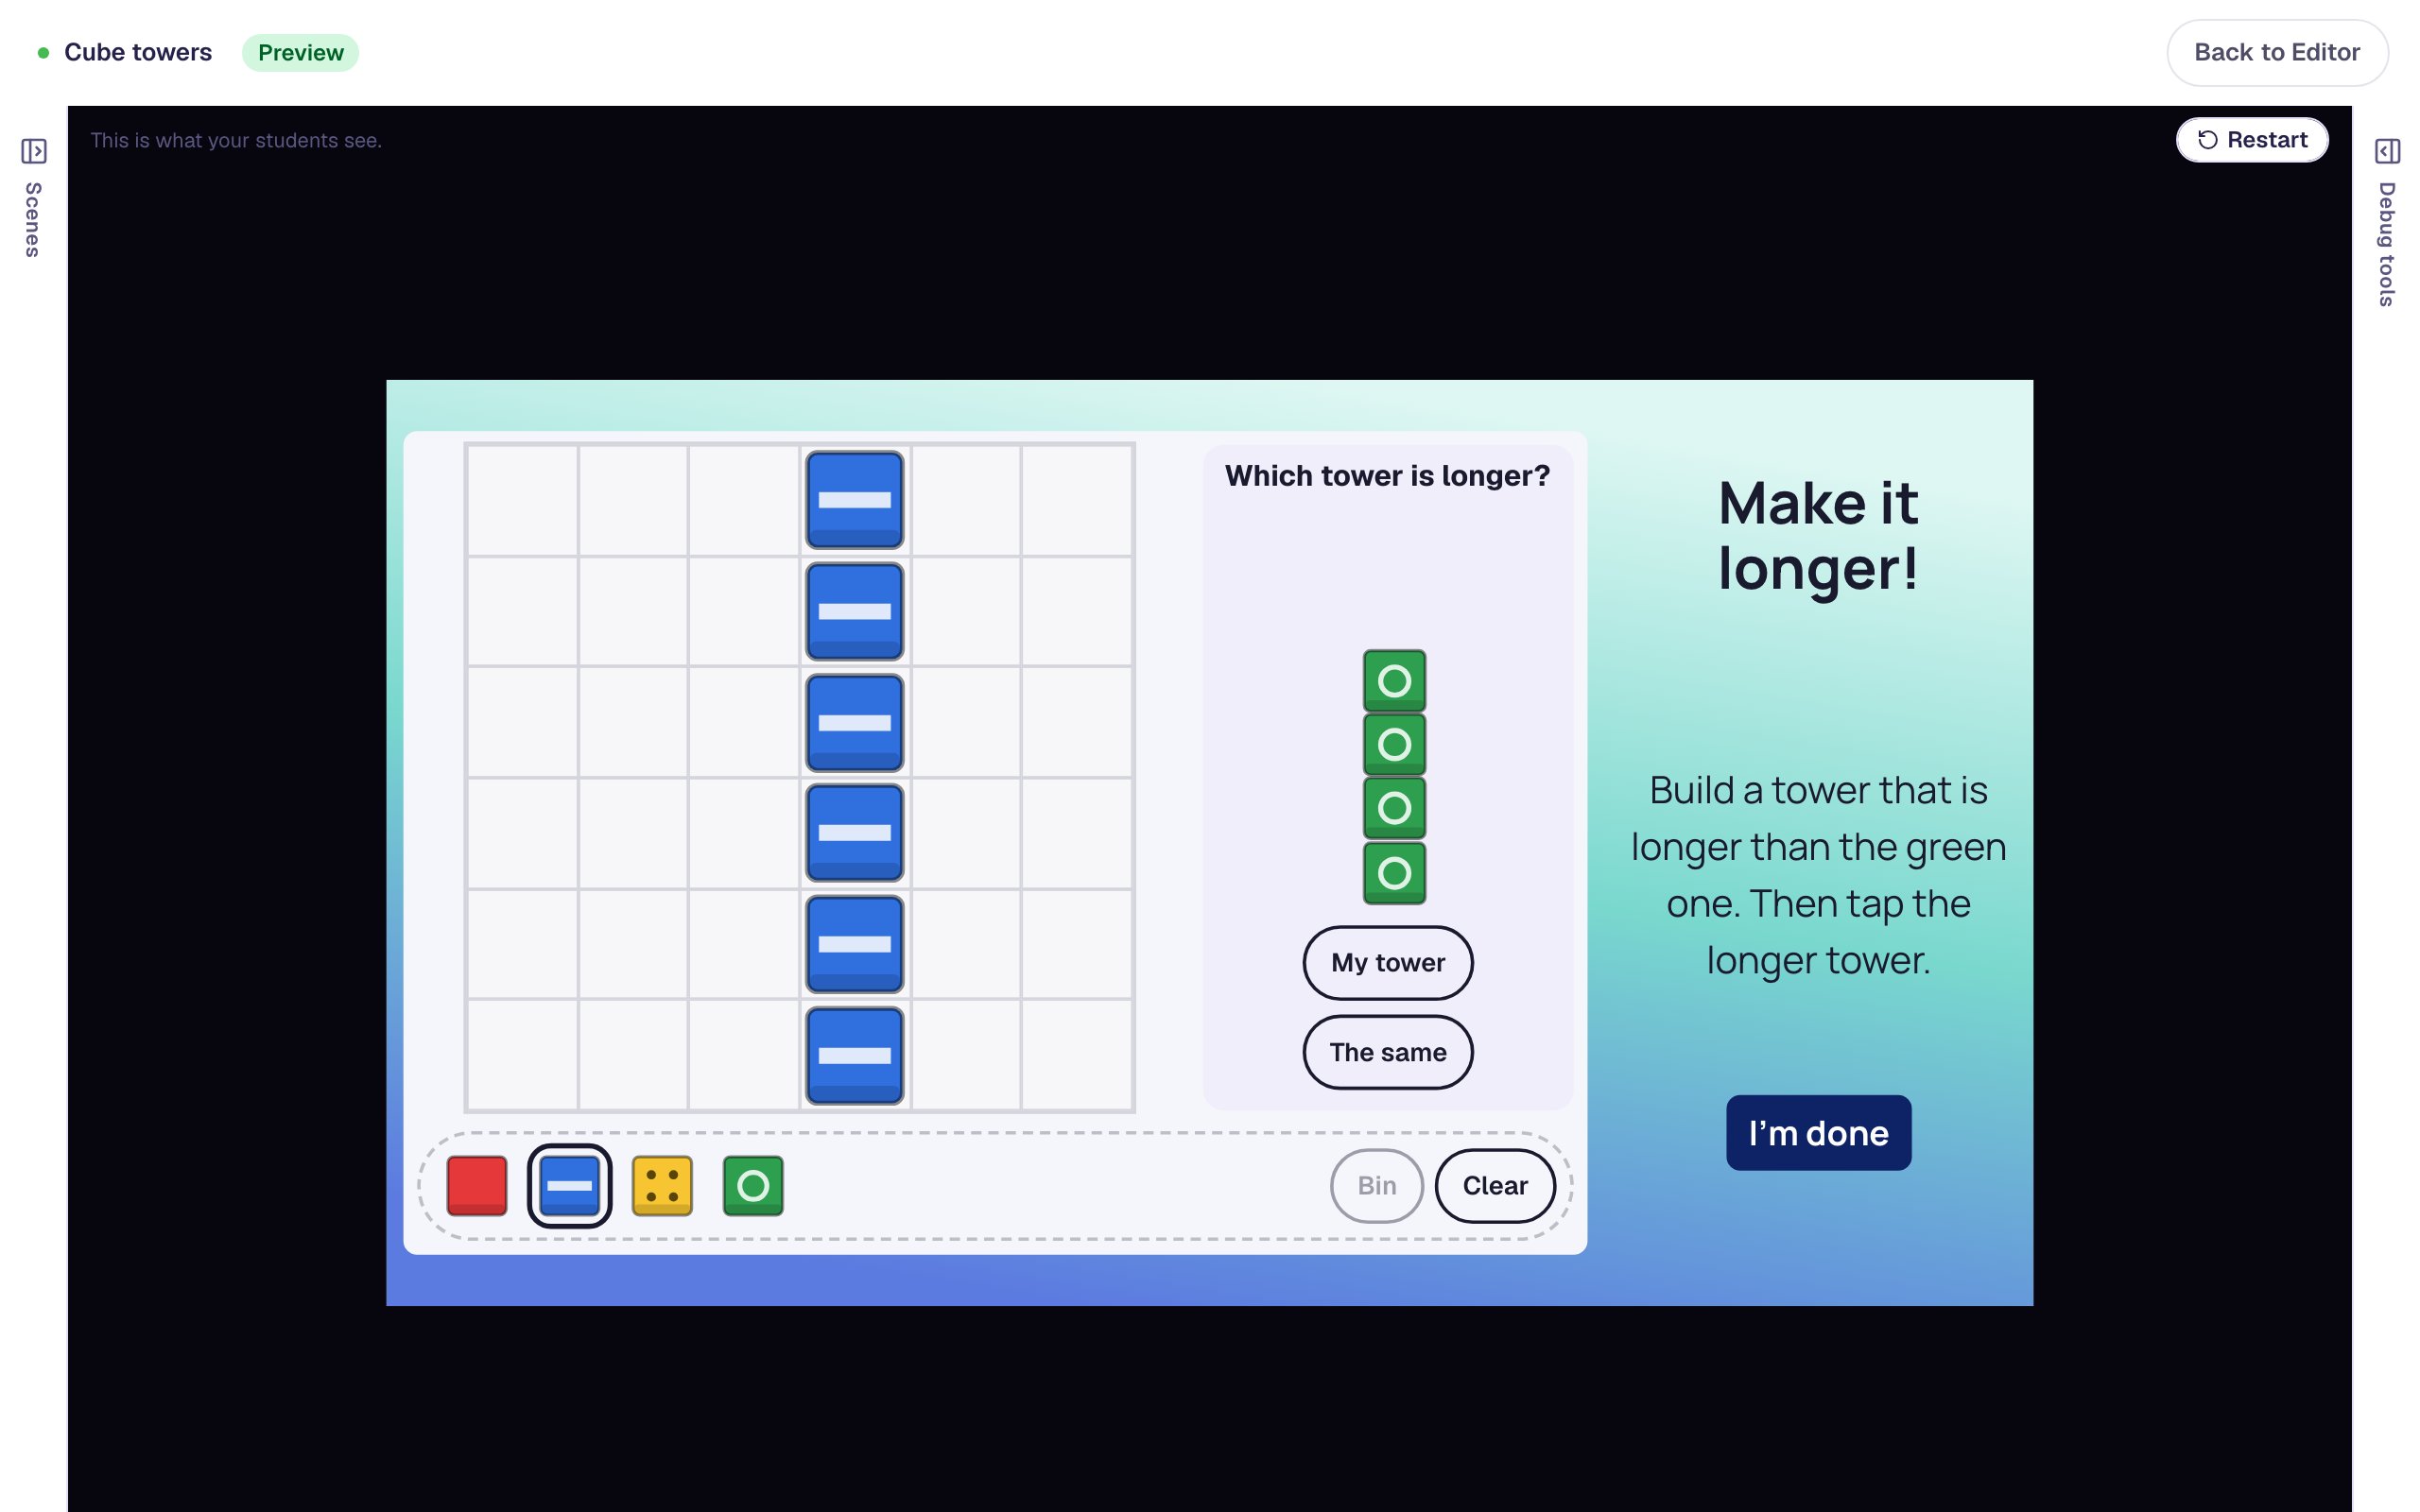
Students answer by tapping the longer tower: the green tower itself, or My tower for the one they built. Until there's at least one cube on the board, the answers don't respond: there's nothing to compare yet. Tap blue and build a tower of 6, then tap My tower:
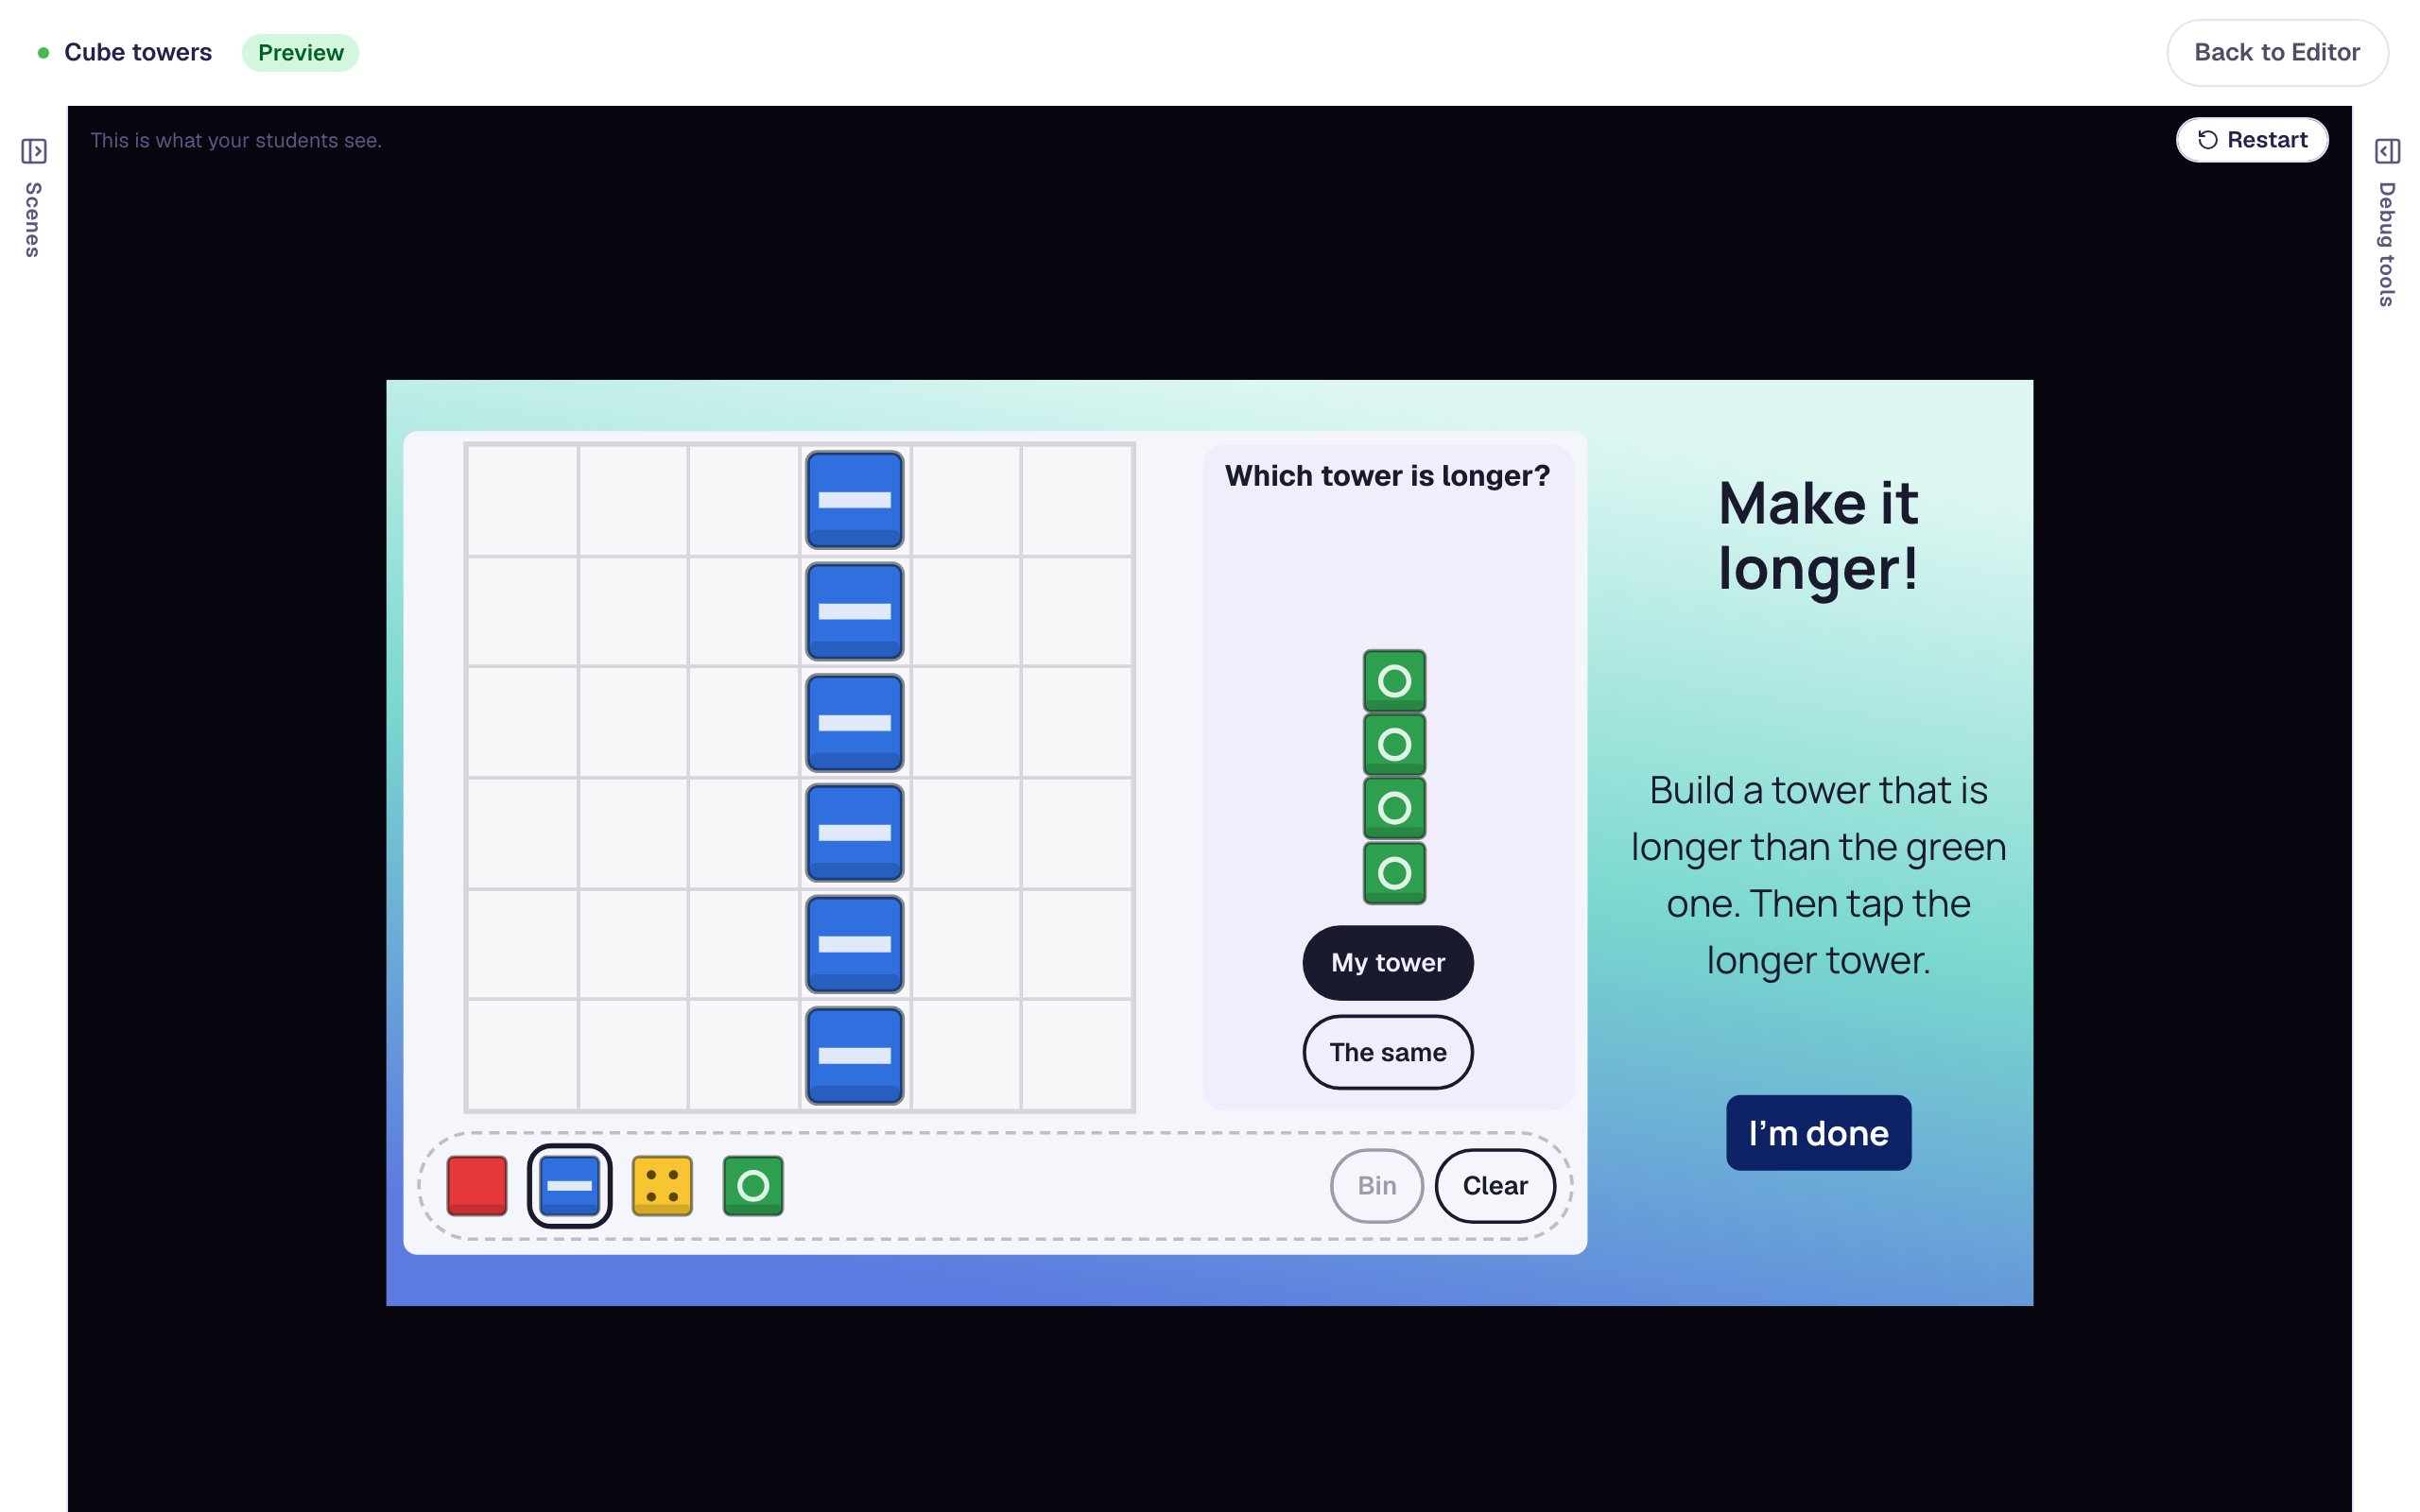
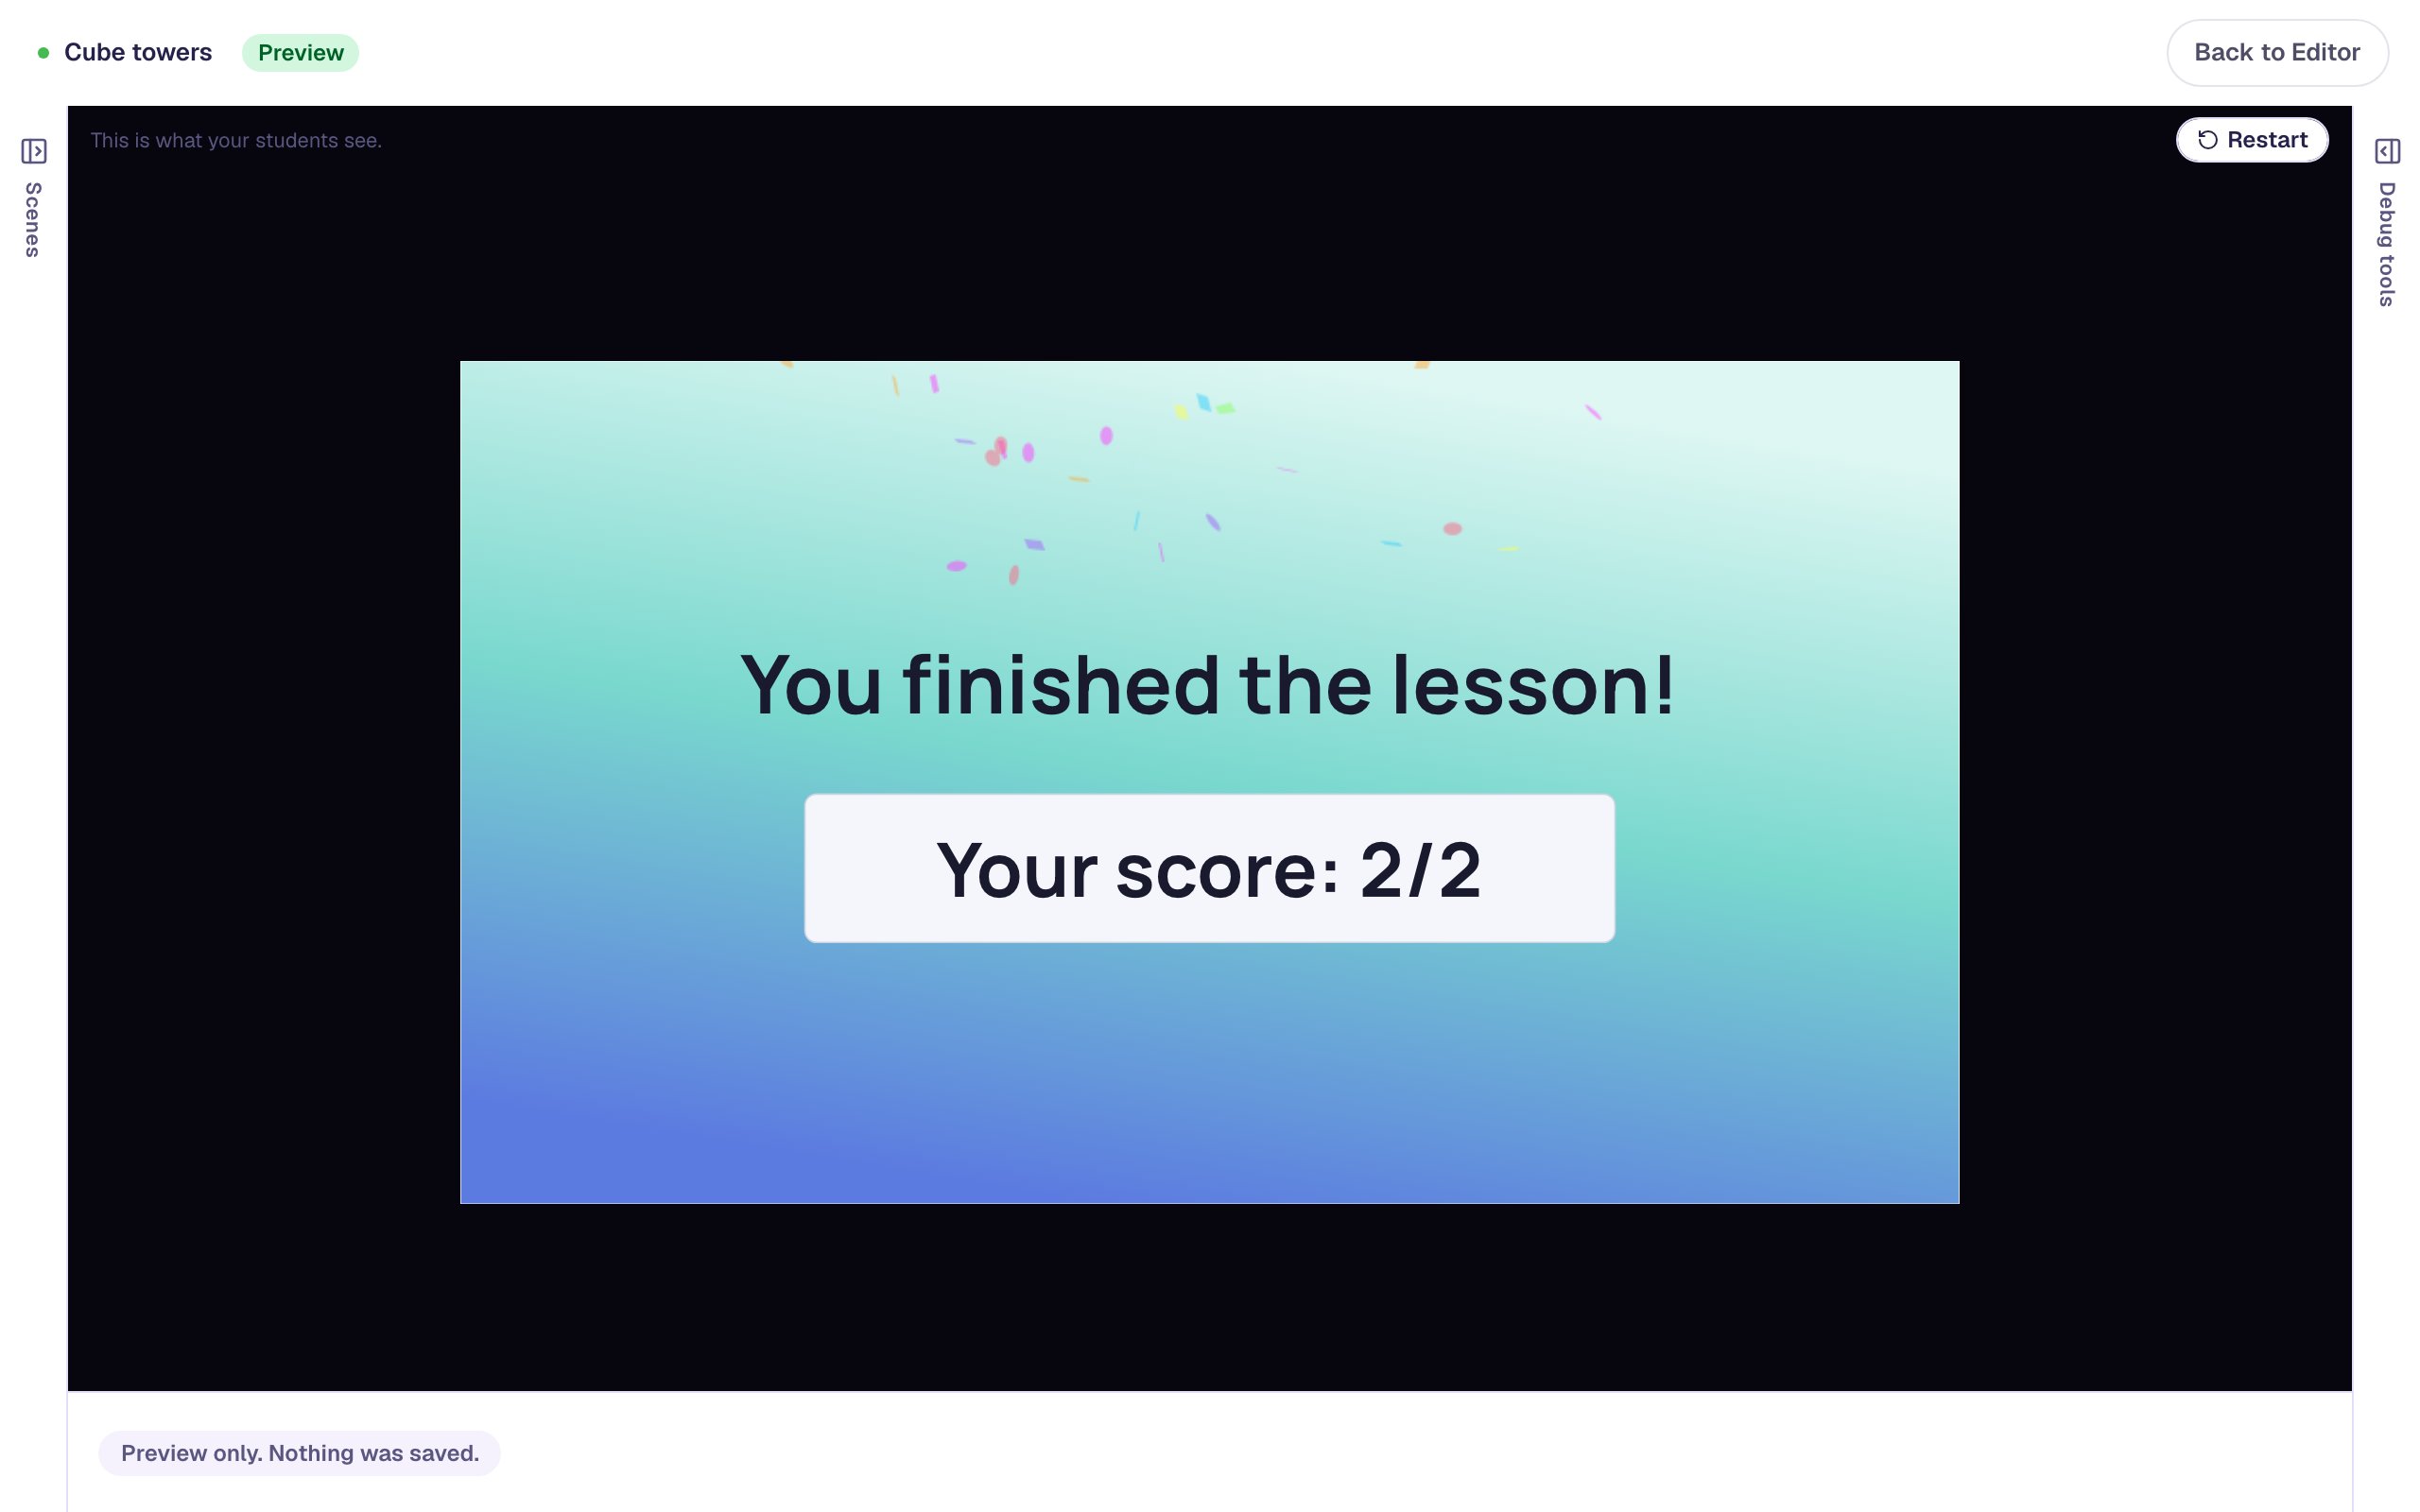
The lesson ends with a score of 2 out of 2: one point for the tower of 6, one for comparing the towers.
On each student's attempt page you'll see a small picture of what they built and a line like "Built a tower of 6 ✓". Each tap on Done counts as one try, so a child who needed the hint shows 2 tries, so you can see who counted carefully the first time.
What you built
You built a two-scene kindergarten lesson with:
- a Connecting Cubes widget in Tower mode that asks for a tower of 6 in any colors, on a 6 by 6 board with cubes big enough for small fingers,
- a hint that keeps the child's cubes on the board, and an Advance delay so they see That's a tower of 6!,
- a second scene in Compare mode with One given + theirs, where children build a tower longer than a green tower of 4 and tap the longer one,
- an I'm done button that finishes the lesson, so it can be published.
To make the next lesson different, set Direction to Train (across) for trains instead of towers, set Color to All red for a one-color tower, or switch Question to Which is shorter?. For more counting practice, follow Build a number on a ten frame, try fitting shapes together in Make a pattern block puzzle, or act out a story on a drawn hand in Act out a story problem on fingers.
Make this lesson yours
Add the lesson you just watched being built to your account, then change it for your class: your questions, your pictures, your colors.
Free to sign up, and you'll come straight back here. I have an account