Show how a clock's hands move as time passes
Build a worked example with a Clock and three buttons. Each button turns the hands forward or sets them back, so students watch half an hour pass before they read a clock on their own.
- Level
- Beginner
- Time
- About 15 min
- Steps
- 7
- Updated
- Nov 4, 2026
A two-scene telling-time lesson where students tap buttons to watch the hands turn from 3:00 to half past 3 and on to 4:00, then read a clock at 4:30 themselves, with a hint on a wrong answer.
Get the finished lesson
Skip straight to the result, or keep it open beside the steps. Add this tutorial's lesson to your account and explore how it works in the studio.
Free to sign up, and you'll come straight back here. I have an account
Children usually learn that at half past, the long hand points to the 6. The harder idea is what happens to the short hand: it doesn't stay on the 3, it creeps halfway to the 4. A still picture can't show that, but a clock that turns in front of them can.
In this tutorial you'll build a "watch, then try" lesson with two scenes:
- Watch half an hour go by. A clock shows 3 o'clock. Students tap Half past 3 and watch both hands turn to 3:30, tap 4 o'clock to watch them carry on, and tap Start again to go back.
- When does soccer start? Students read a clock at 4:30 on their own and tap the time, with a hint if they pick the wrong one.
The buttons work through the Clock's own actions, Turn the hands to and Set the time, which you can use in any button's behavior.
Step 1: Set the scene
Start a blank lesson (New lesson, then Start from scratch) and name it Watch half an hour go by by clicking Untitled lesson at the top.
With nothing selected, open Background, click Choose a style, then under Gradients pick Mesh sunrise and click Apply background. Do the same on the Closing Scene, so the ending matches.
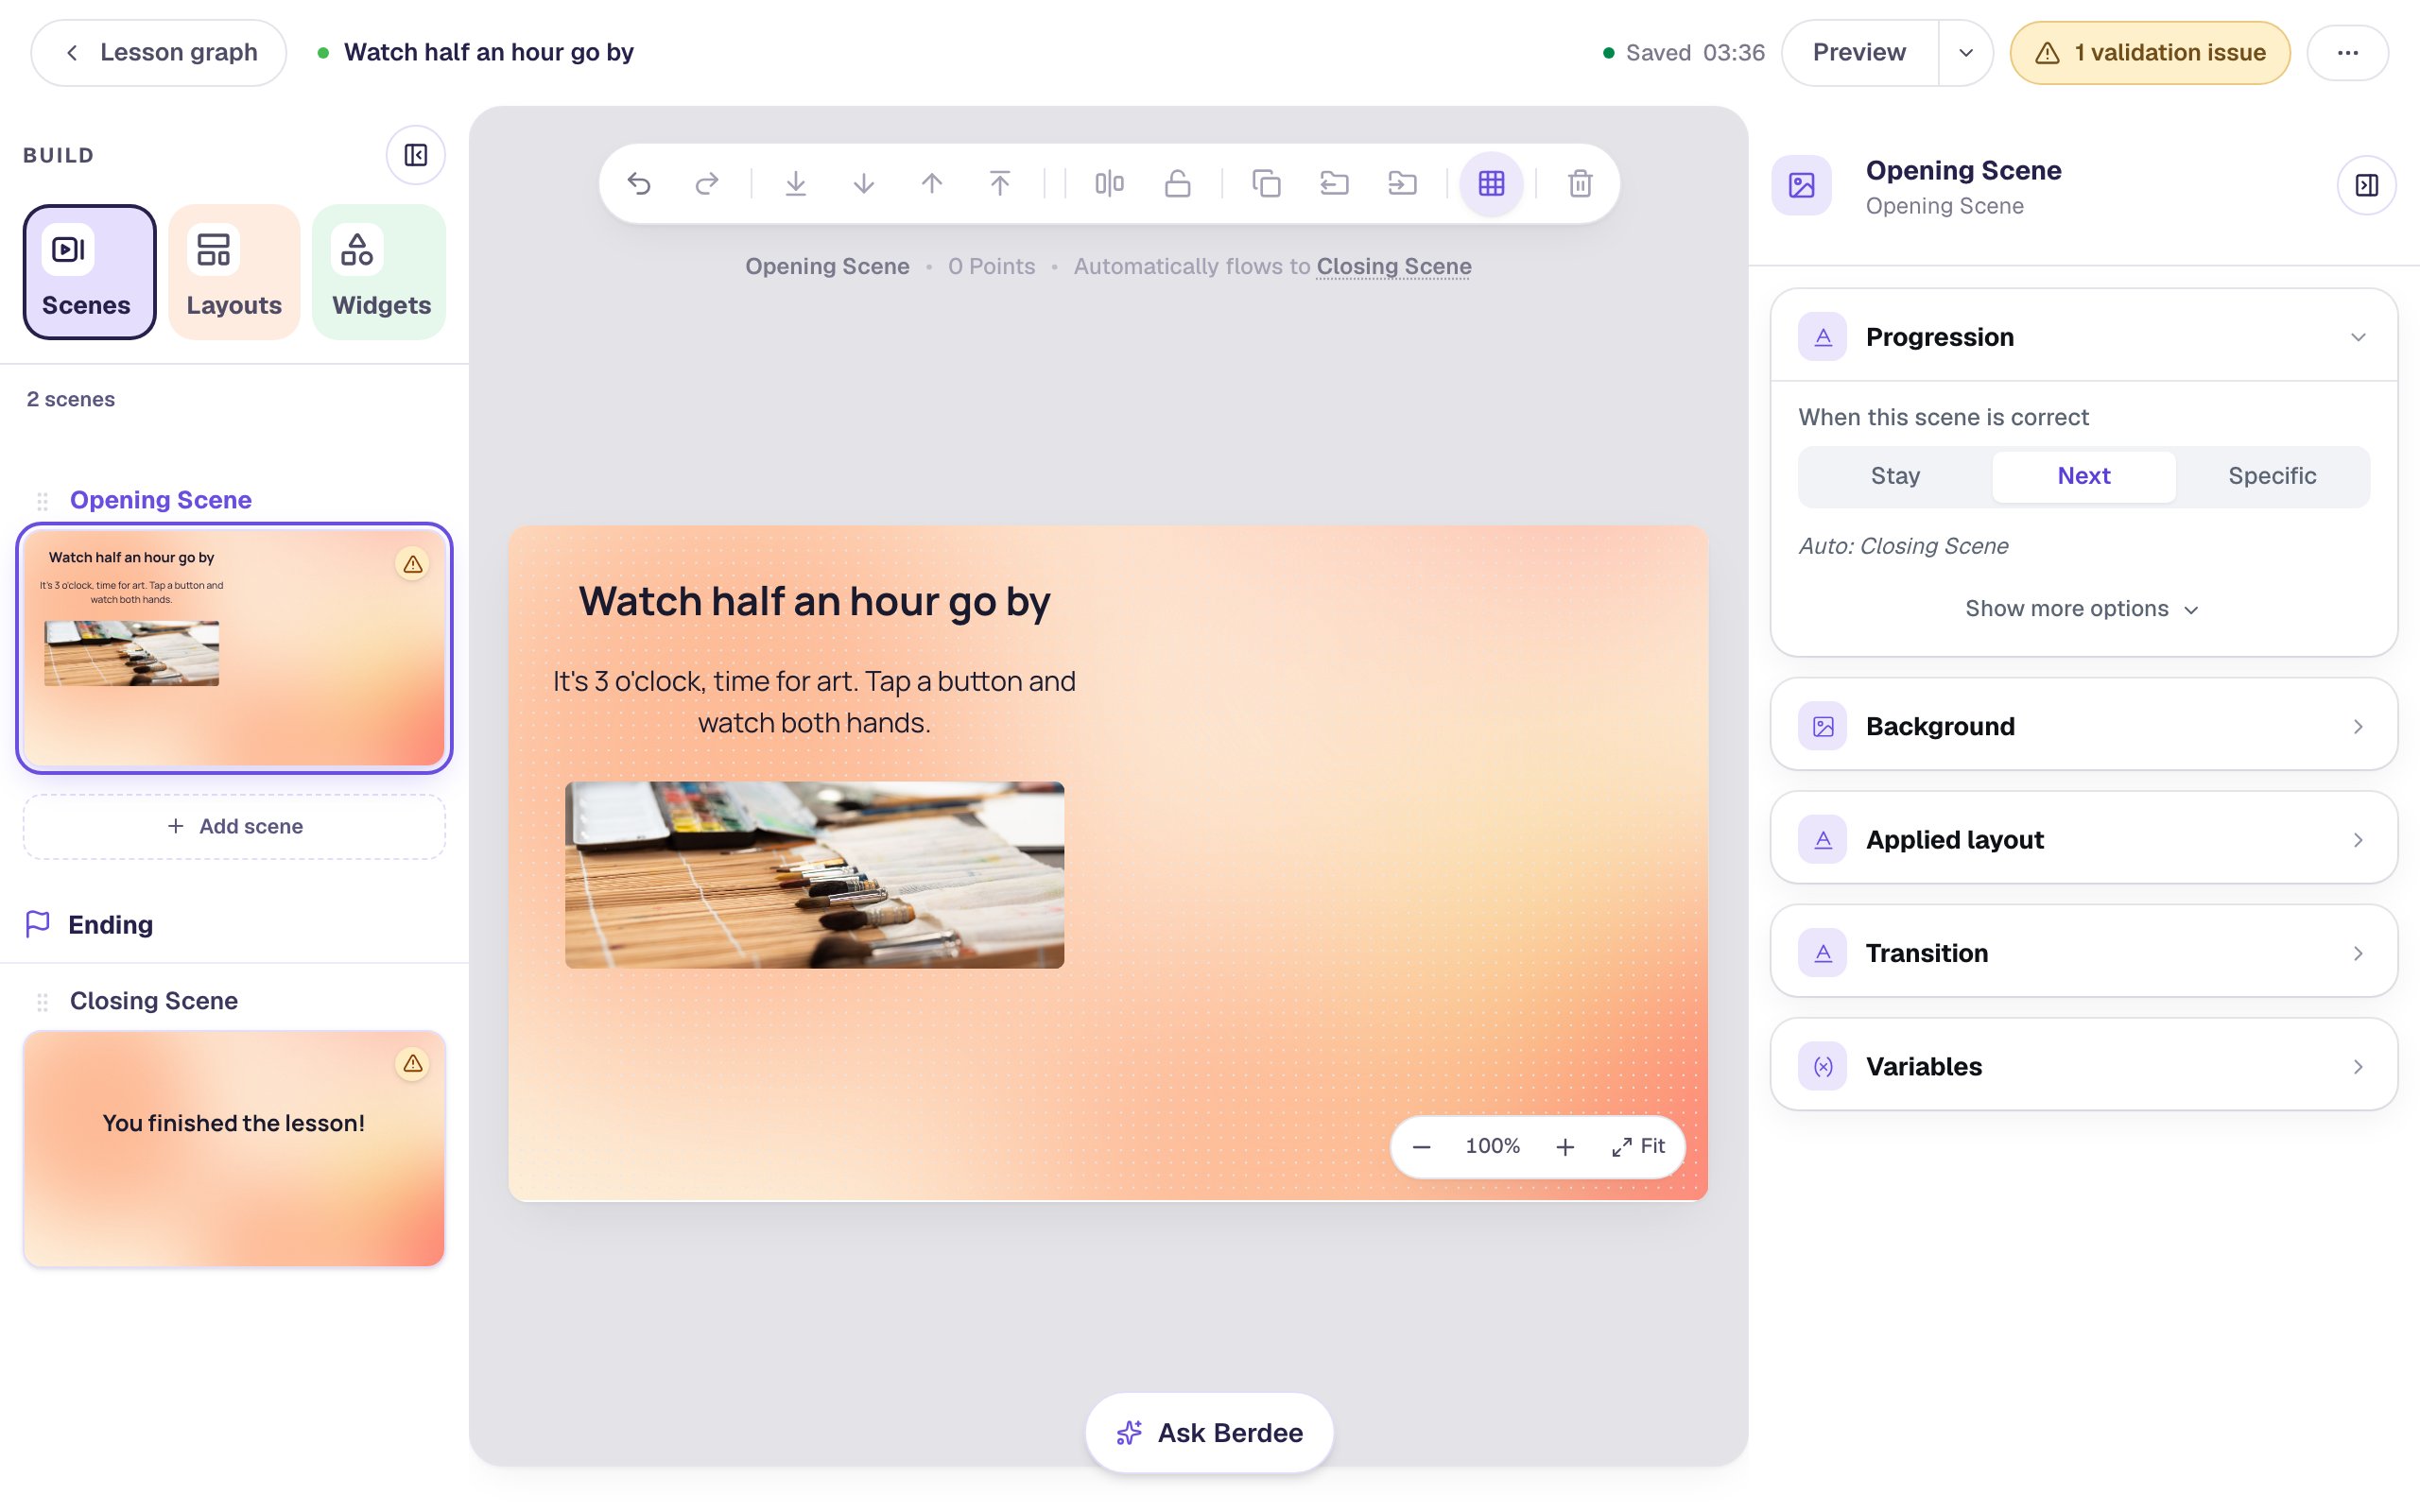
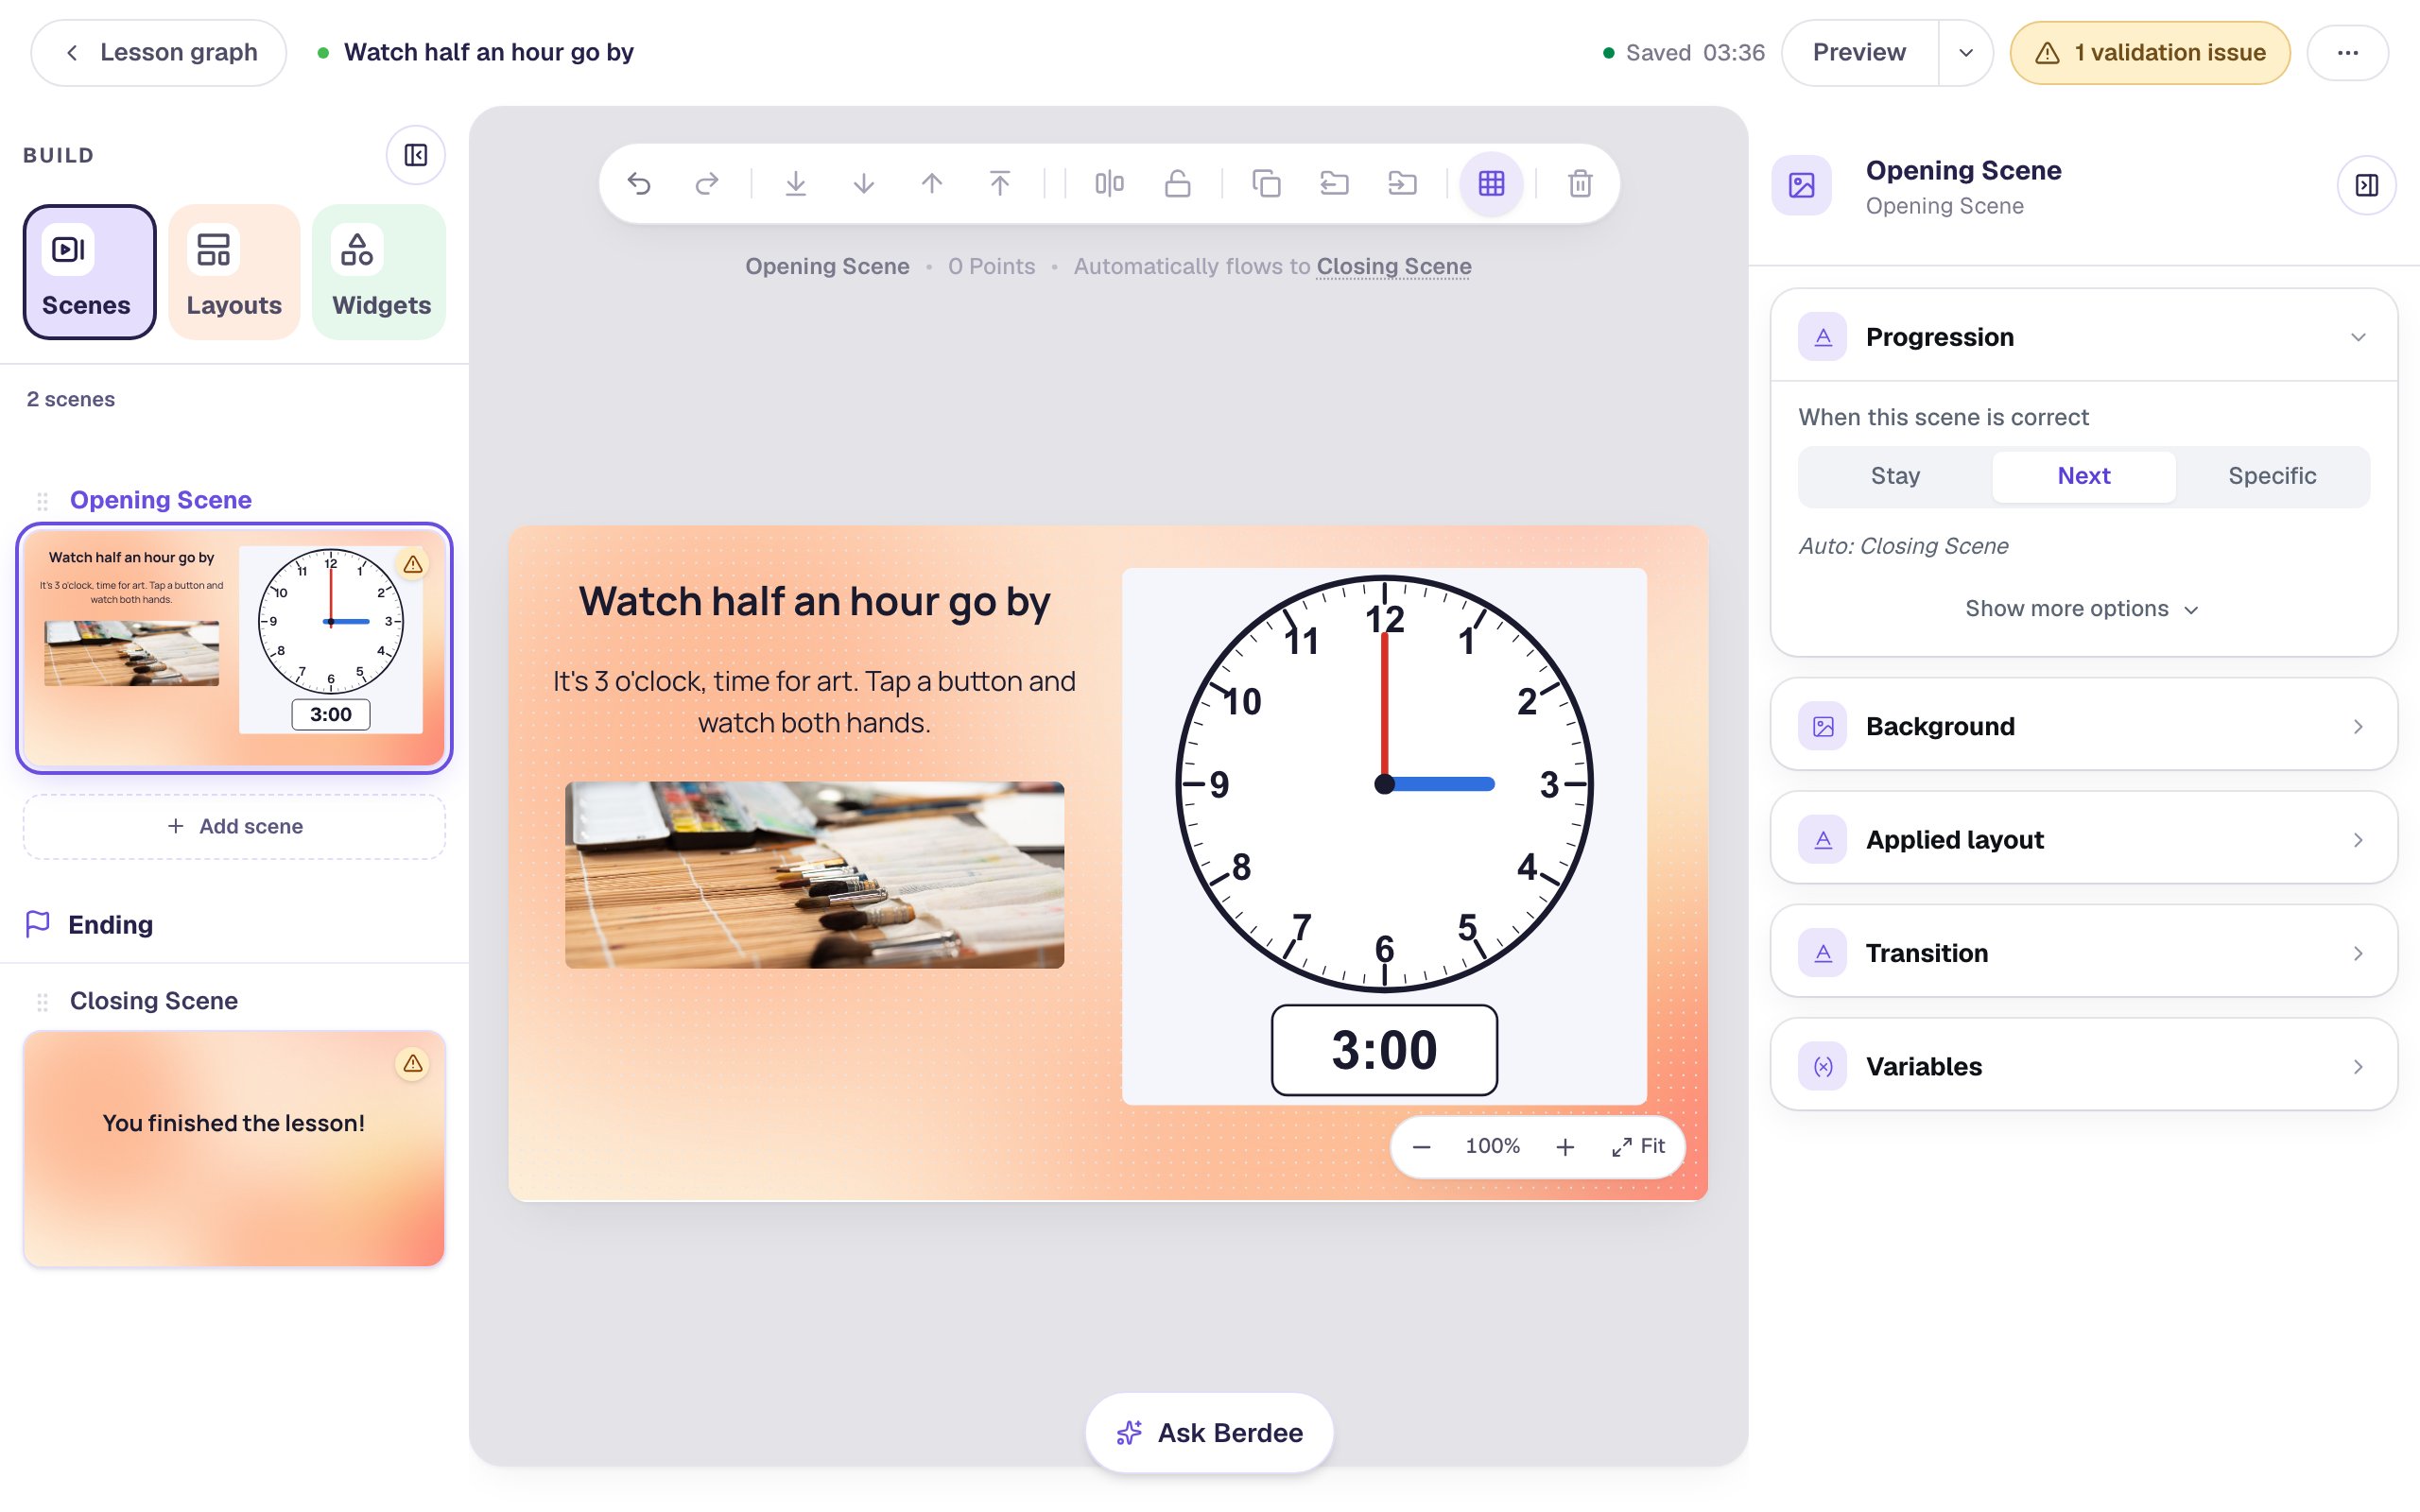
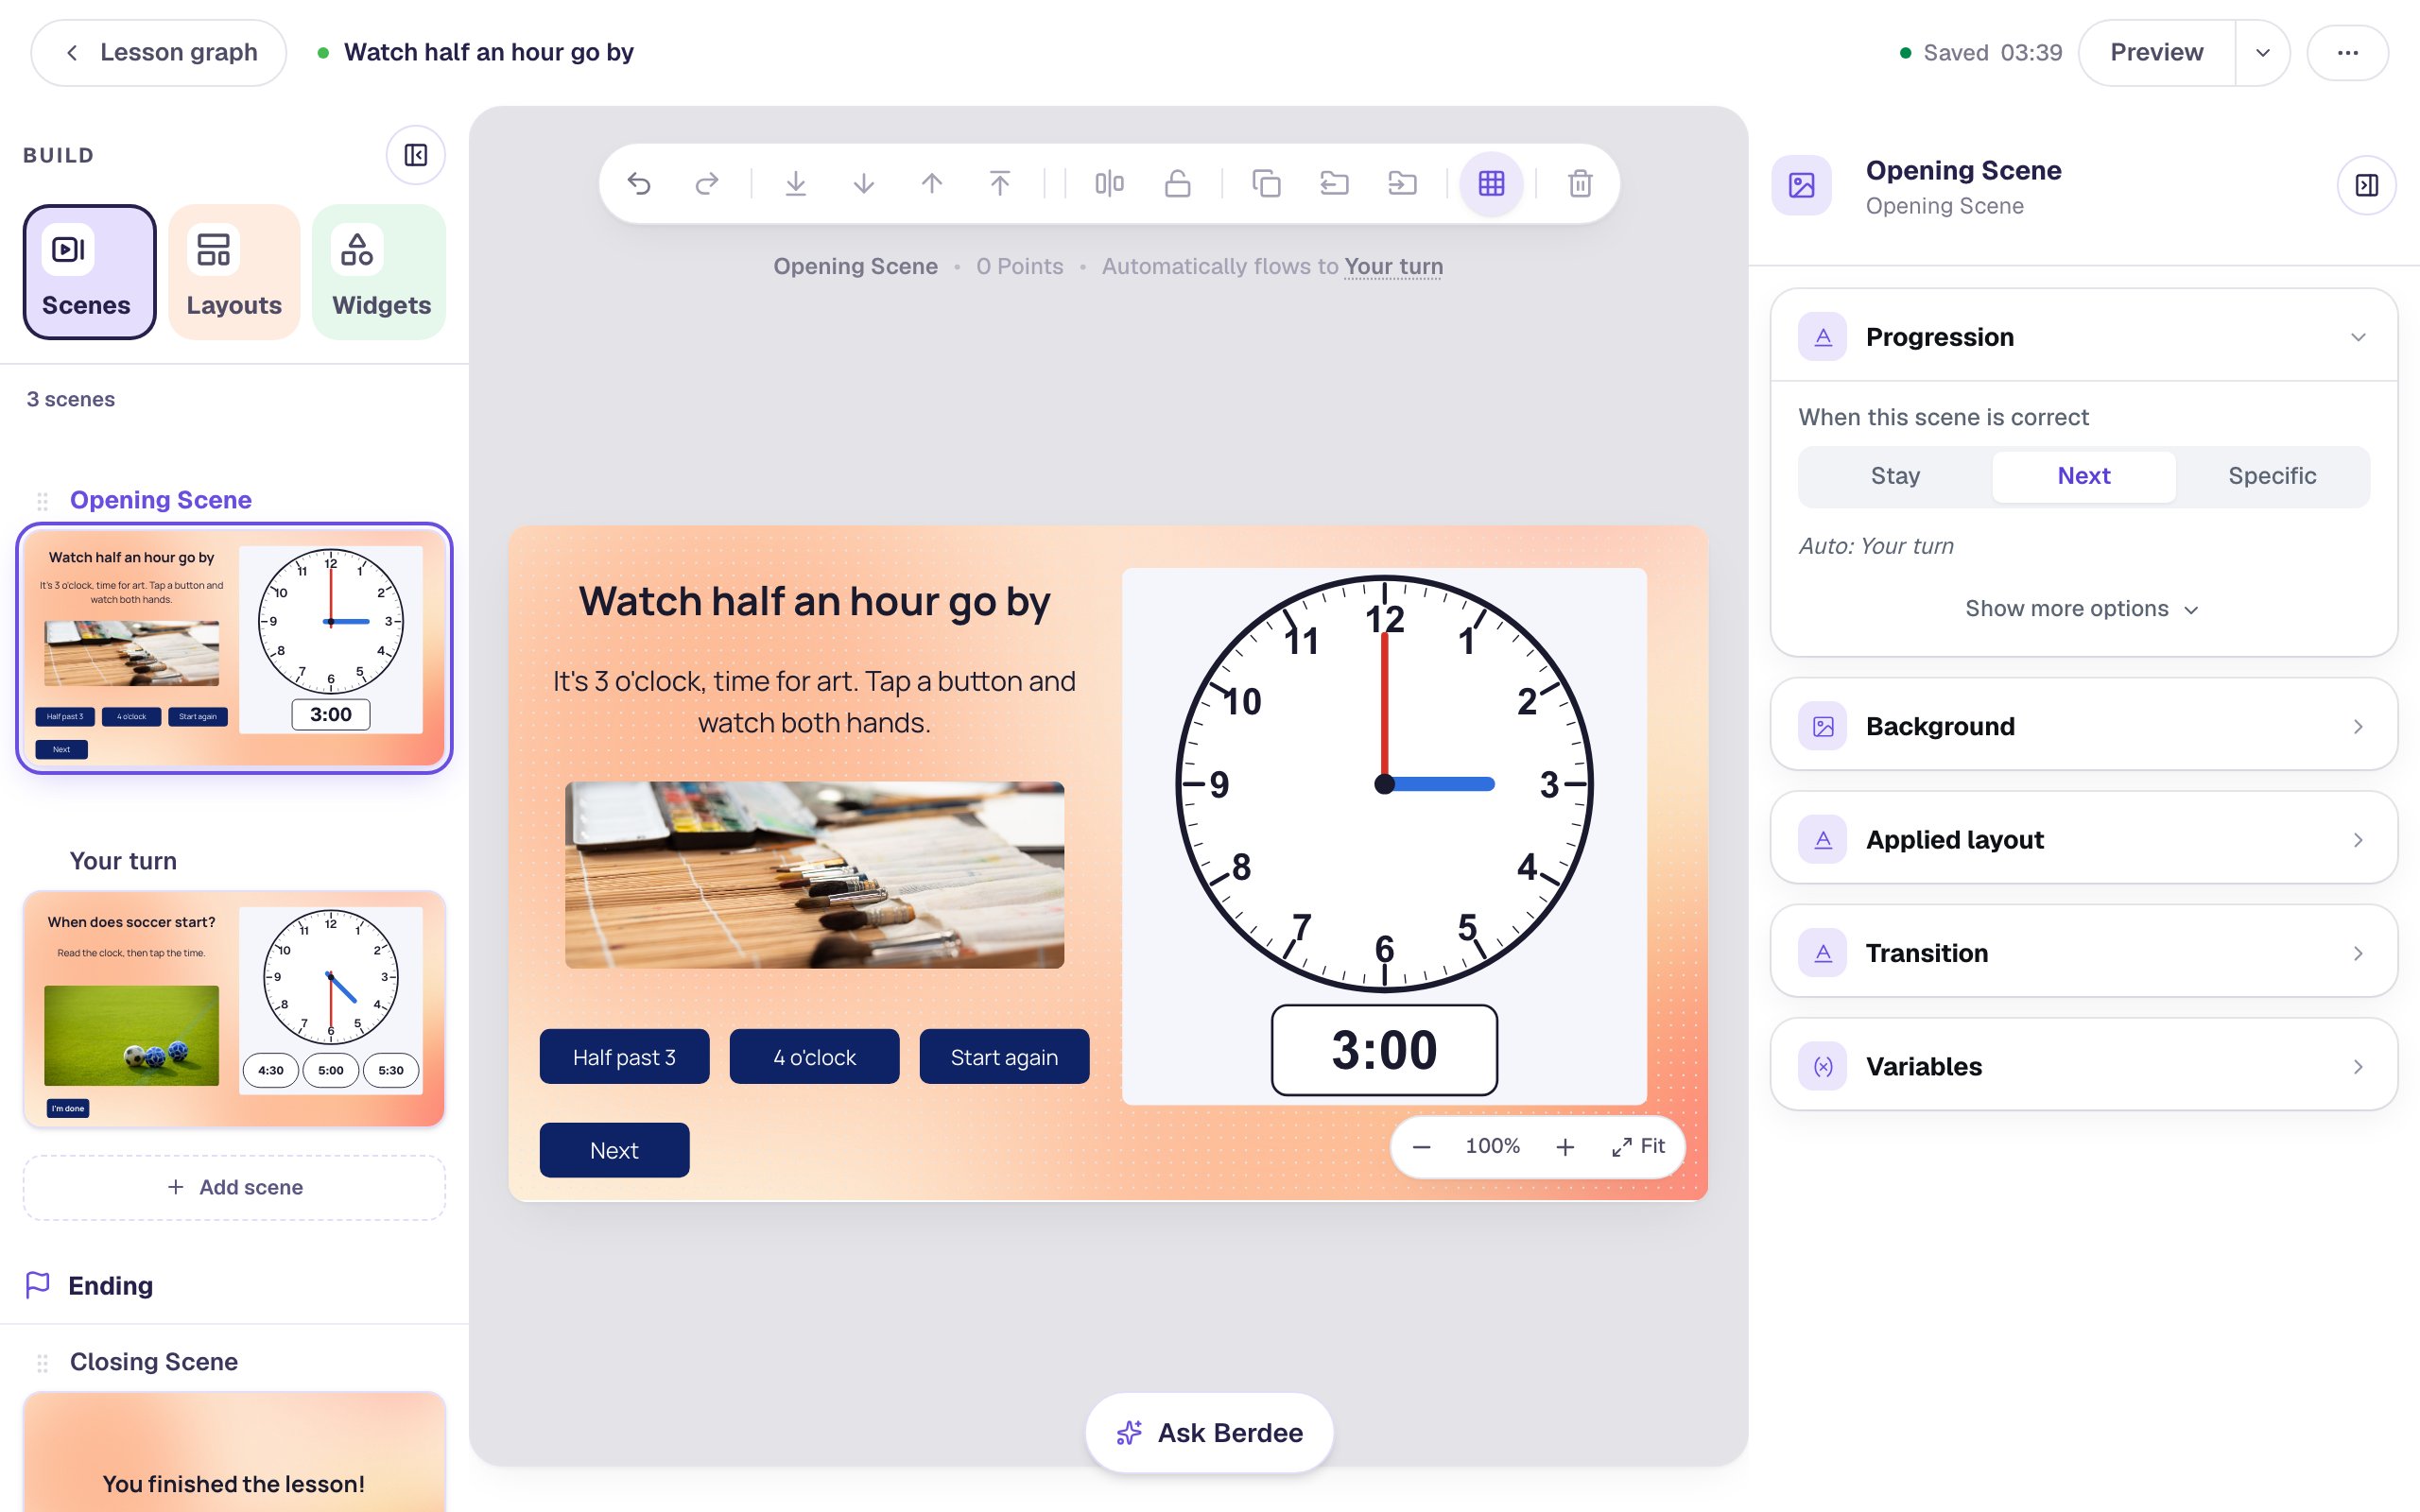
Back on the Opening Scene, keep the left side for the words, a picture and the buttons, because the clock will go on the right:
- Add a Heading that says
Watch half an hour go by, set its Font Size to32, and drag it to the top left. - Add a Body under it that says
It's 3 o'clock, time for art. Tap a button and watch both hands.and set its Font Size to22. - Add an Image, click Choose image, search the stock photos for
paint brushes watercolor, and pick one. Set its Width to400and Height to150and drag it under the words. Leave room below it for a row of buttons. - Open Accessibility and replace the photo's file name in Alt Text with what a student would see, such as
Paint brushes lying beside a box of watercolour paints on a bamboo mat.
Step 2: Add a clock that shows 3 o'clock
In Widgets, search for Clock and click it. A large clock lands on the scene showing 4:30.
- Click its name at the top of the properties panel and rename it
Art clock. You'll pick it by this name in the buttons' behaviors. - In Style & Layout, click Show more options and set Width to
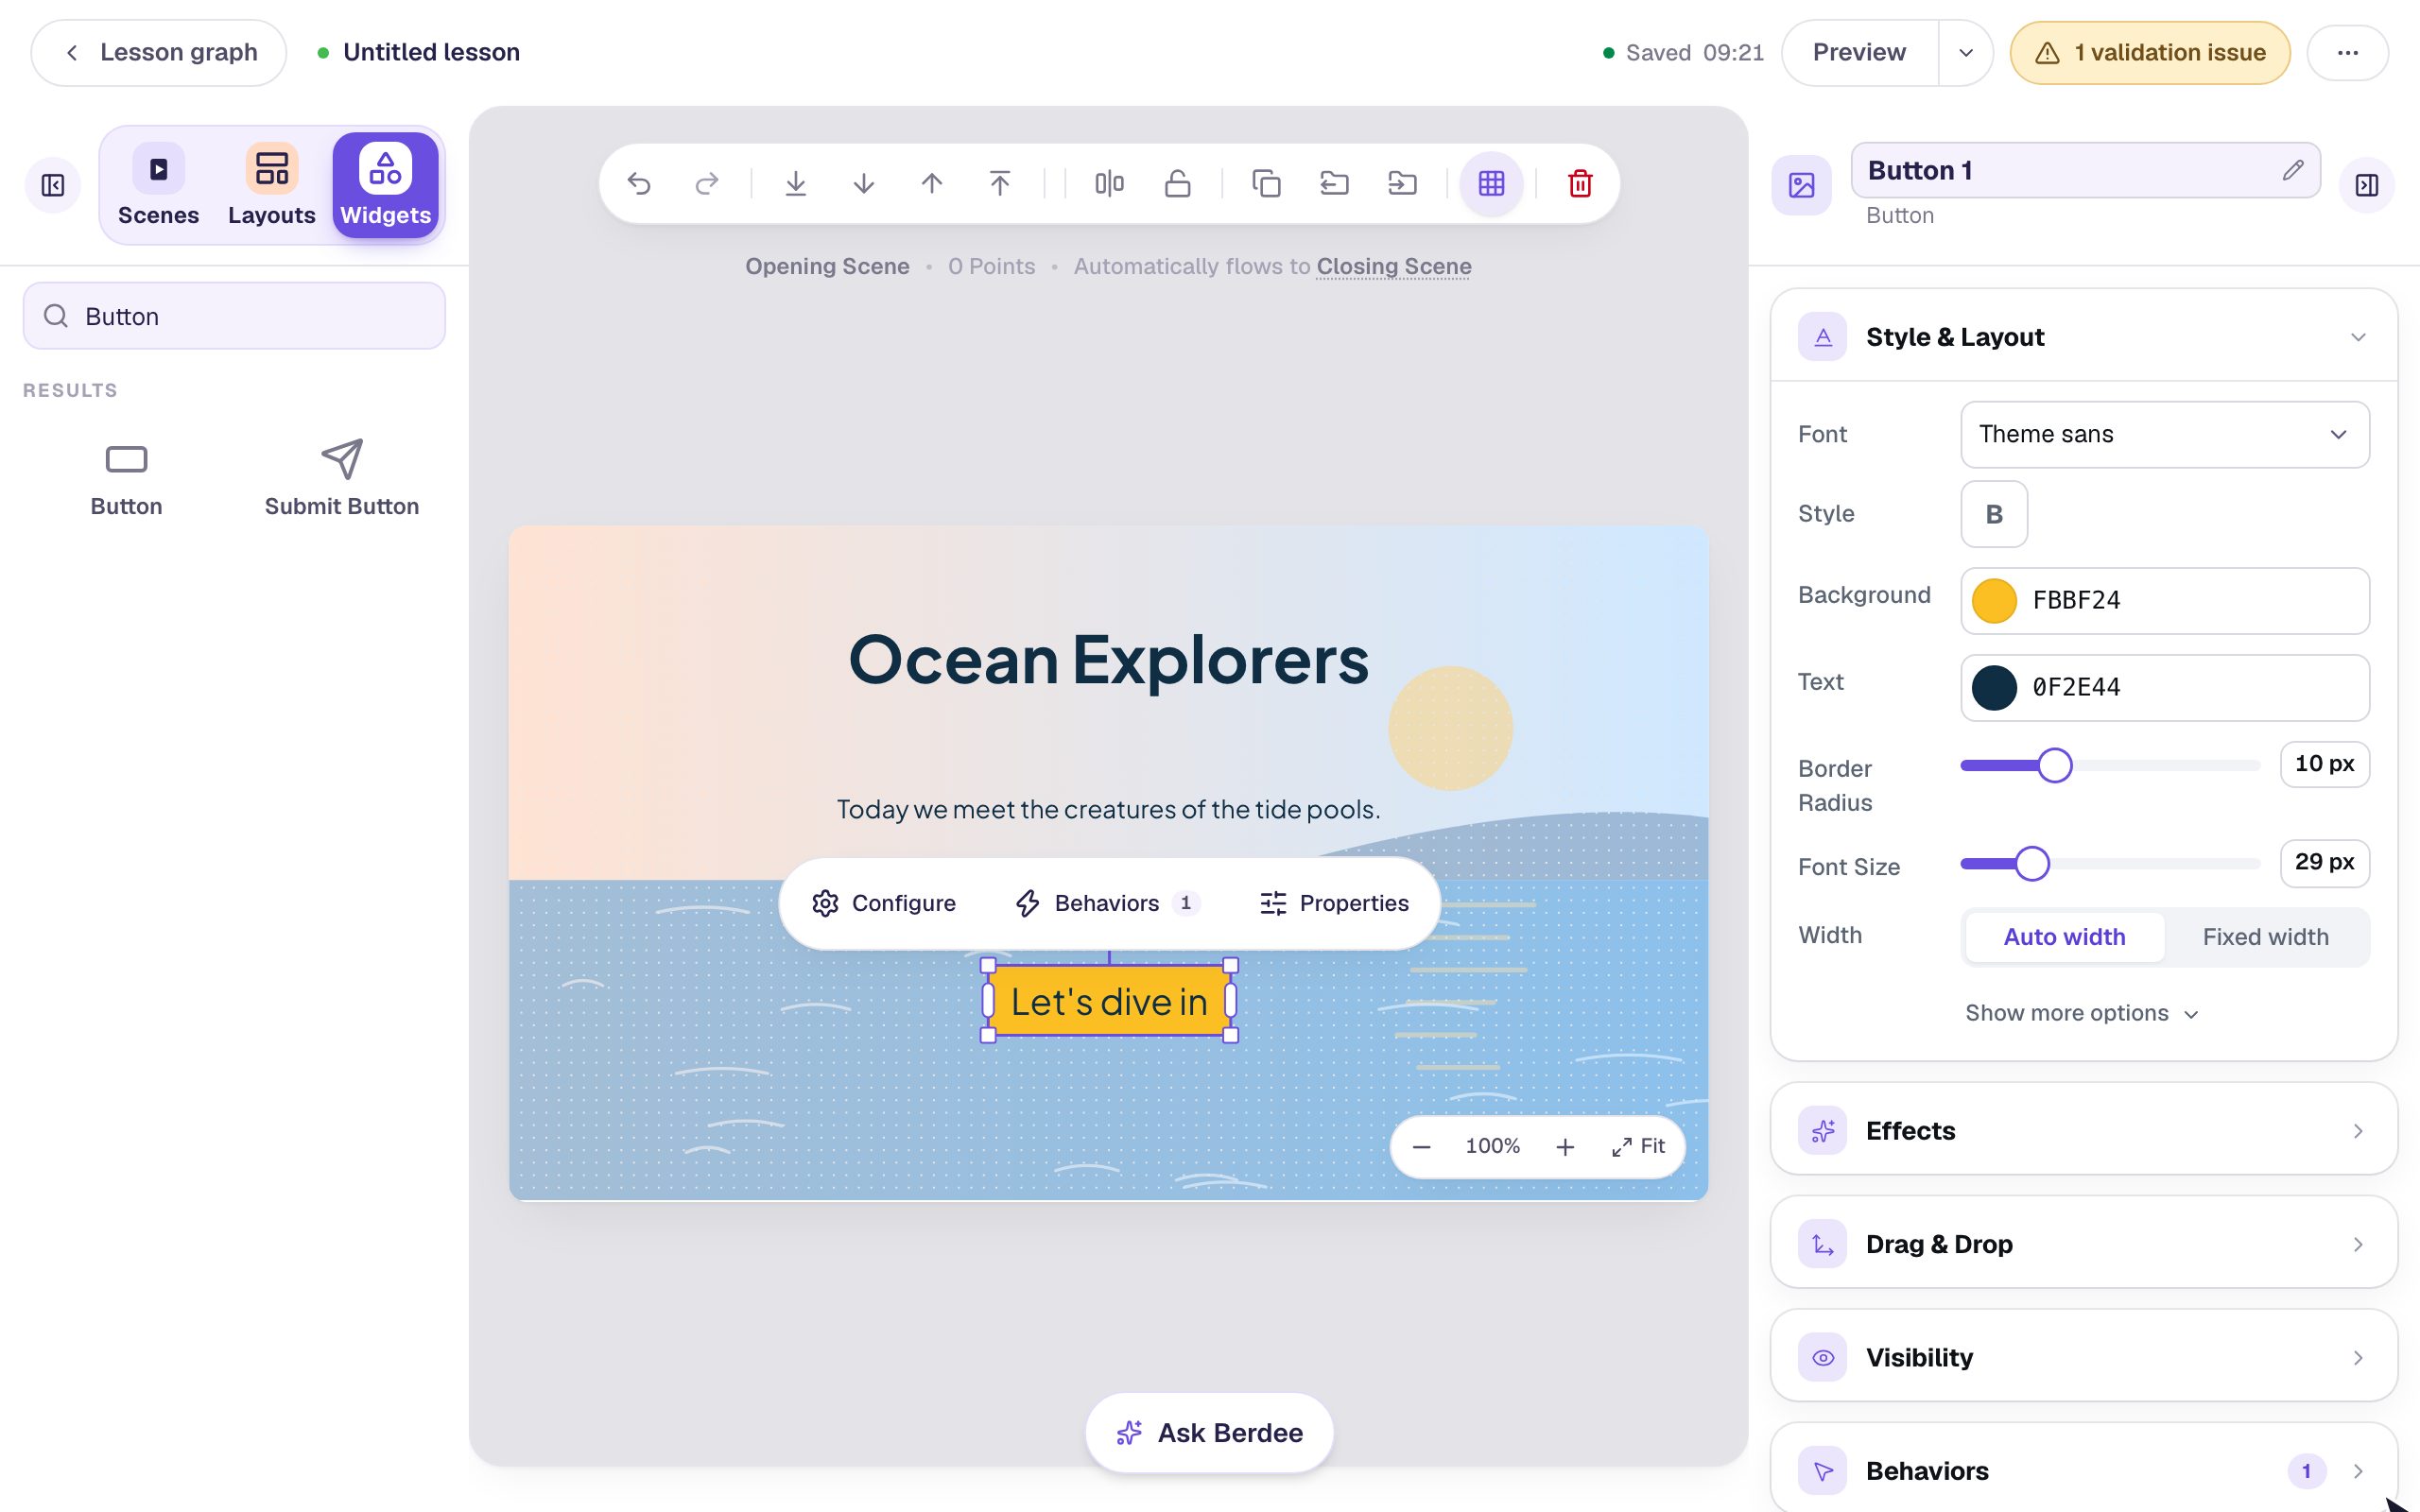
420and Height to430. Drag it to the right of the words. - Click ⚙ Configure.
What students do is already Show: the clock shows a time and students don't turn the hands themselves. That's what you want for a demonstration, and Show isn't graded, so this scene doesn't count toward the score.
Under The time, set Hour to 3 and Minutes to o'clock (:00). Then, under What the clock looks like, switch on Show a digital clock and Shade the part the minute hand has passed.
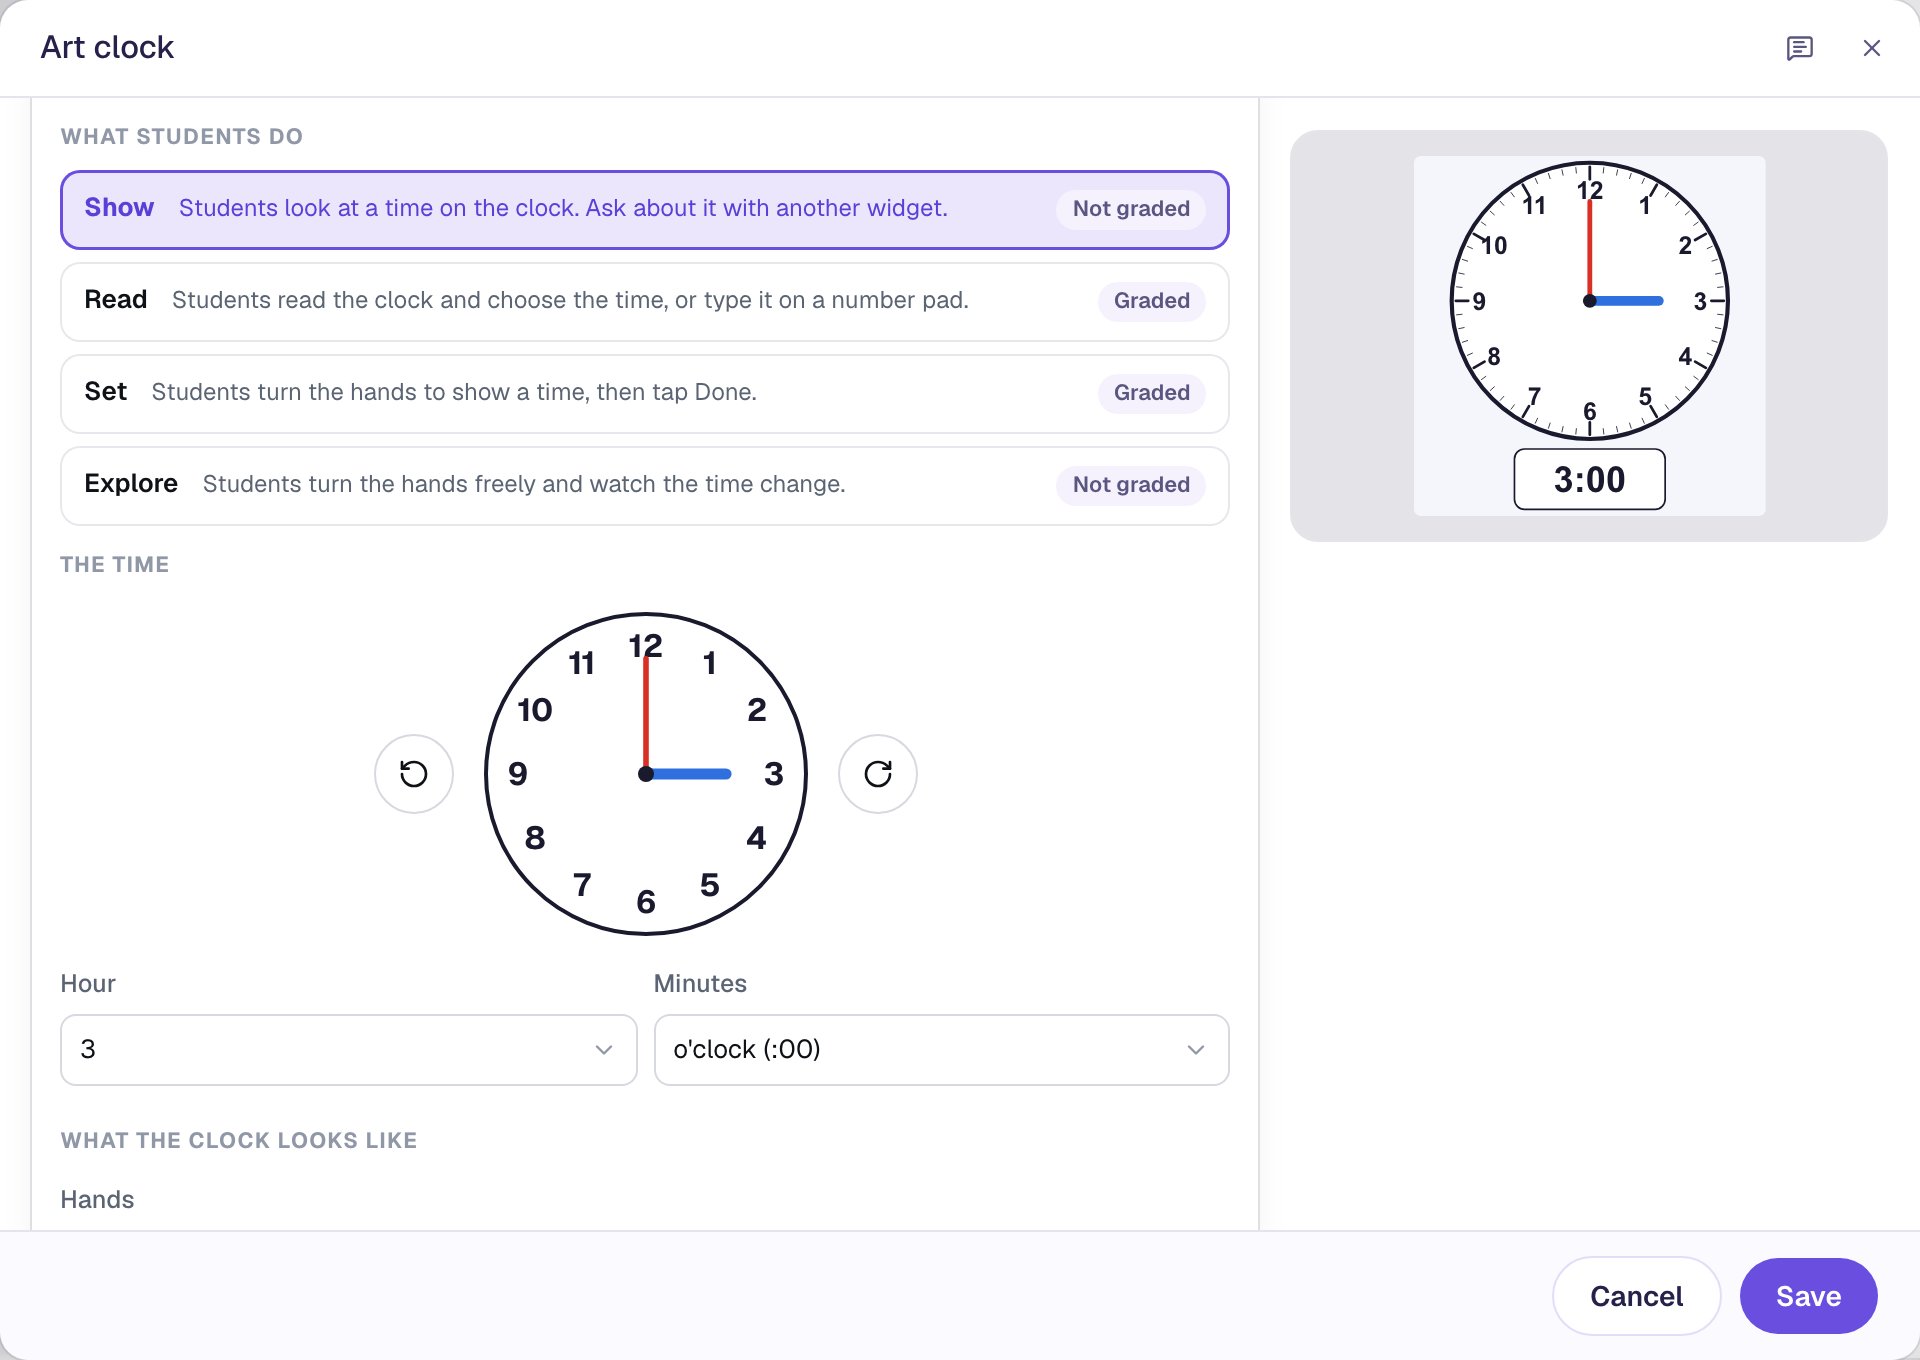
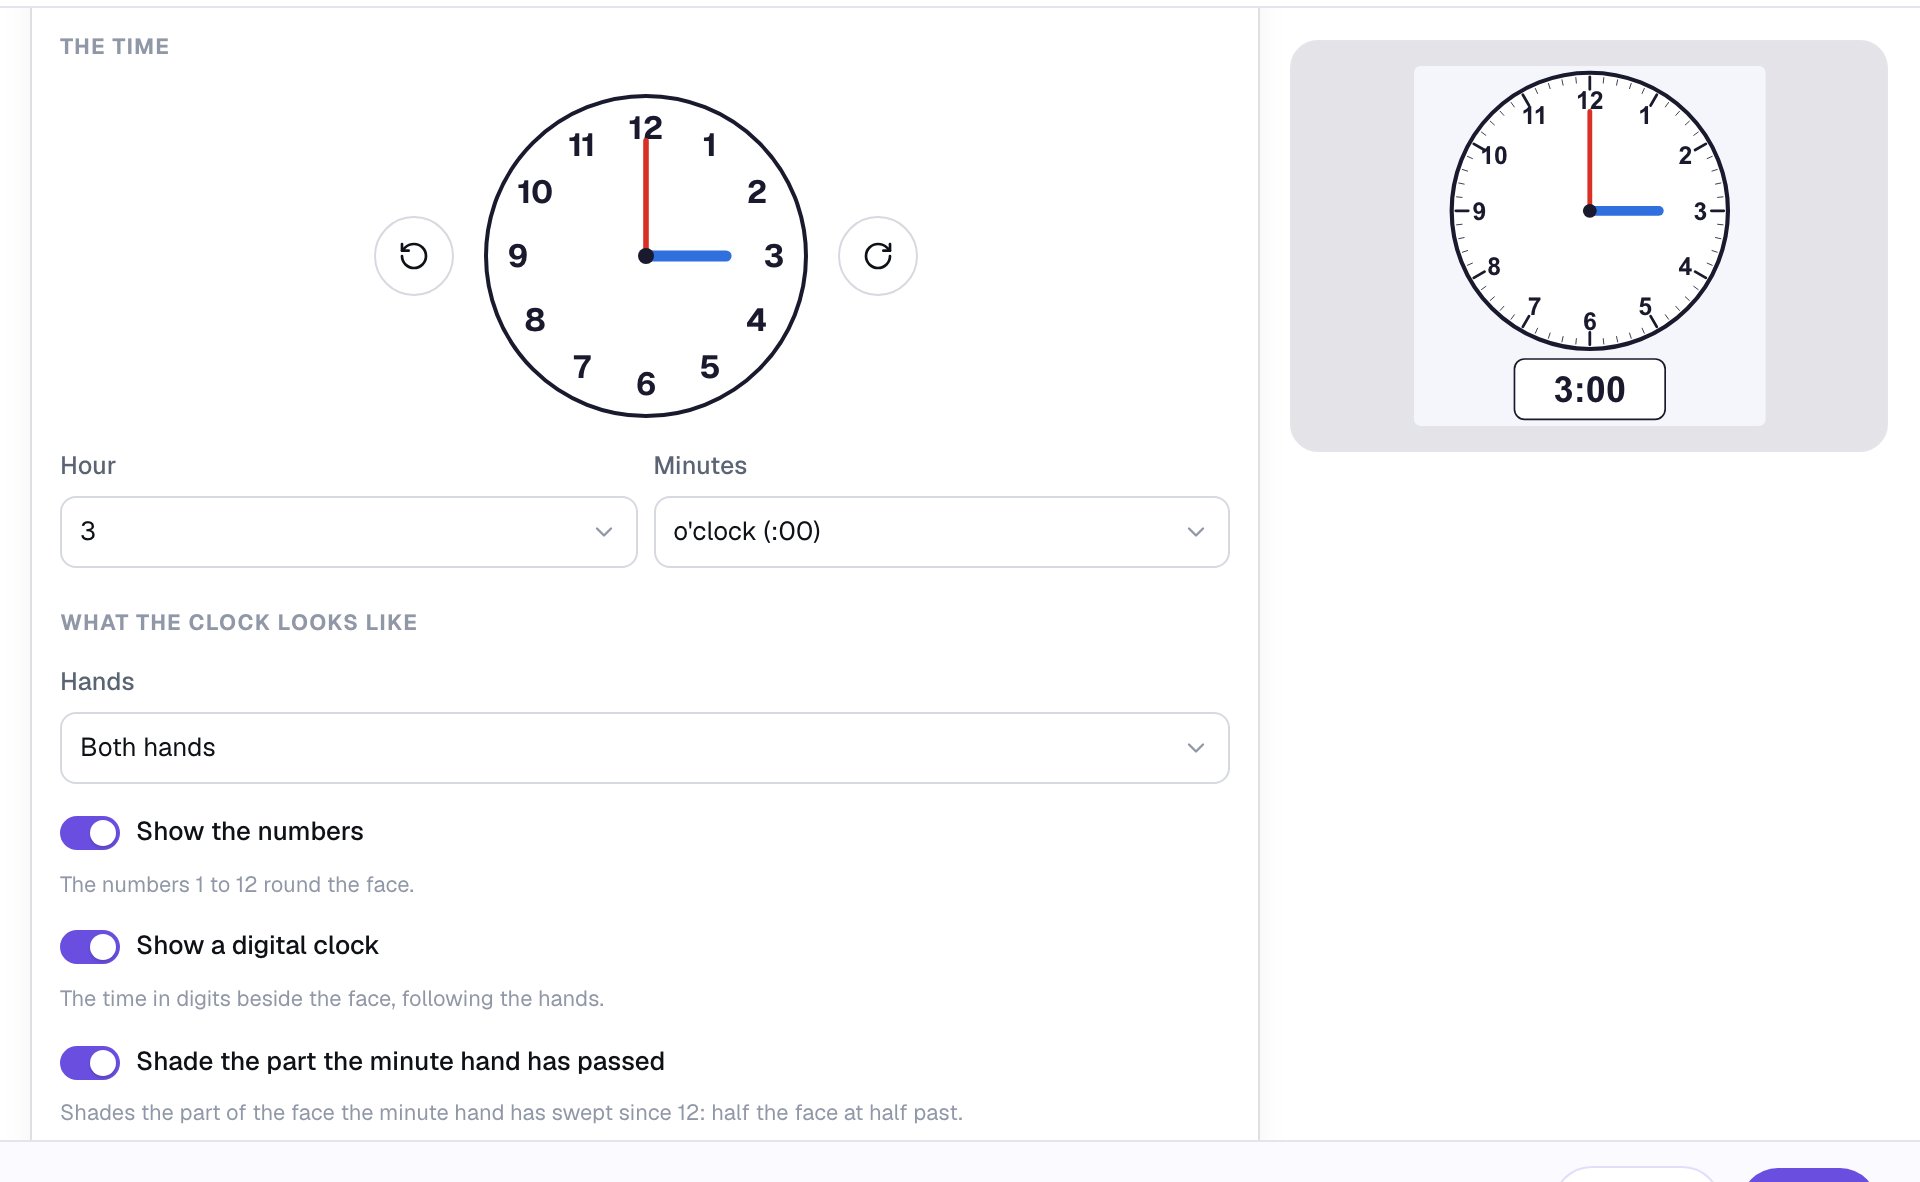
Both switches help students connect the turning hands to the time. The digits change when the hands land, and the shading fills the part of the face the minute hand has swept since 12, so half past is half the face.
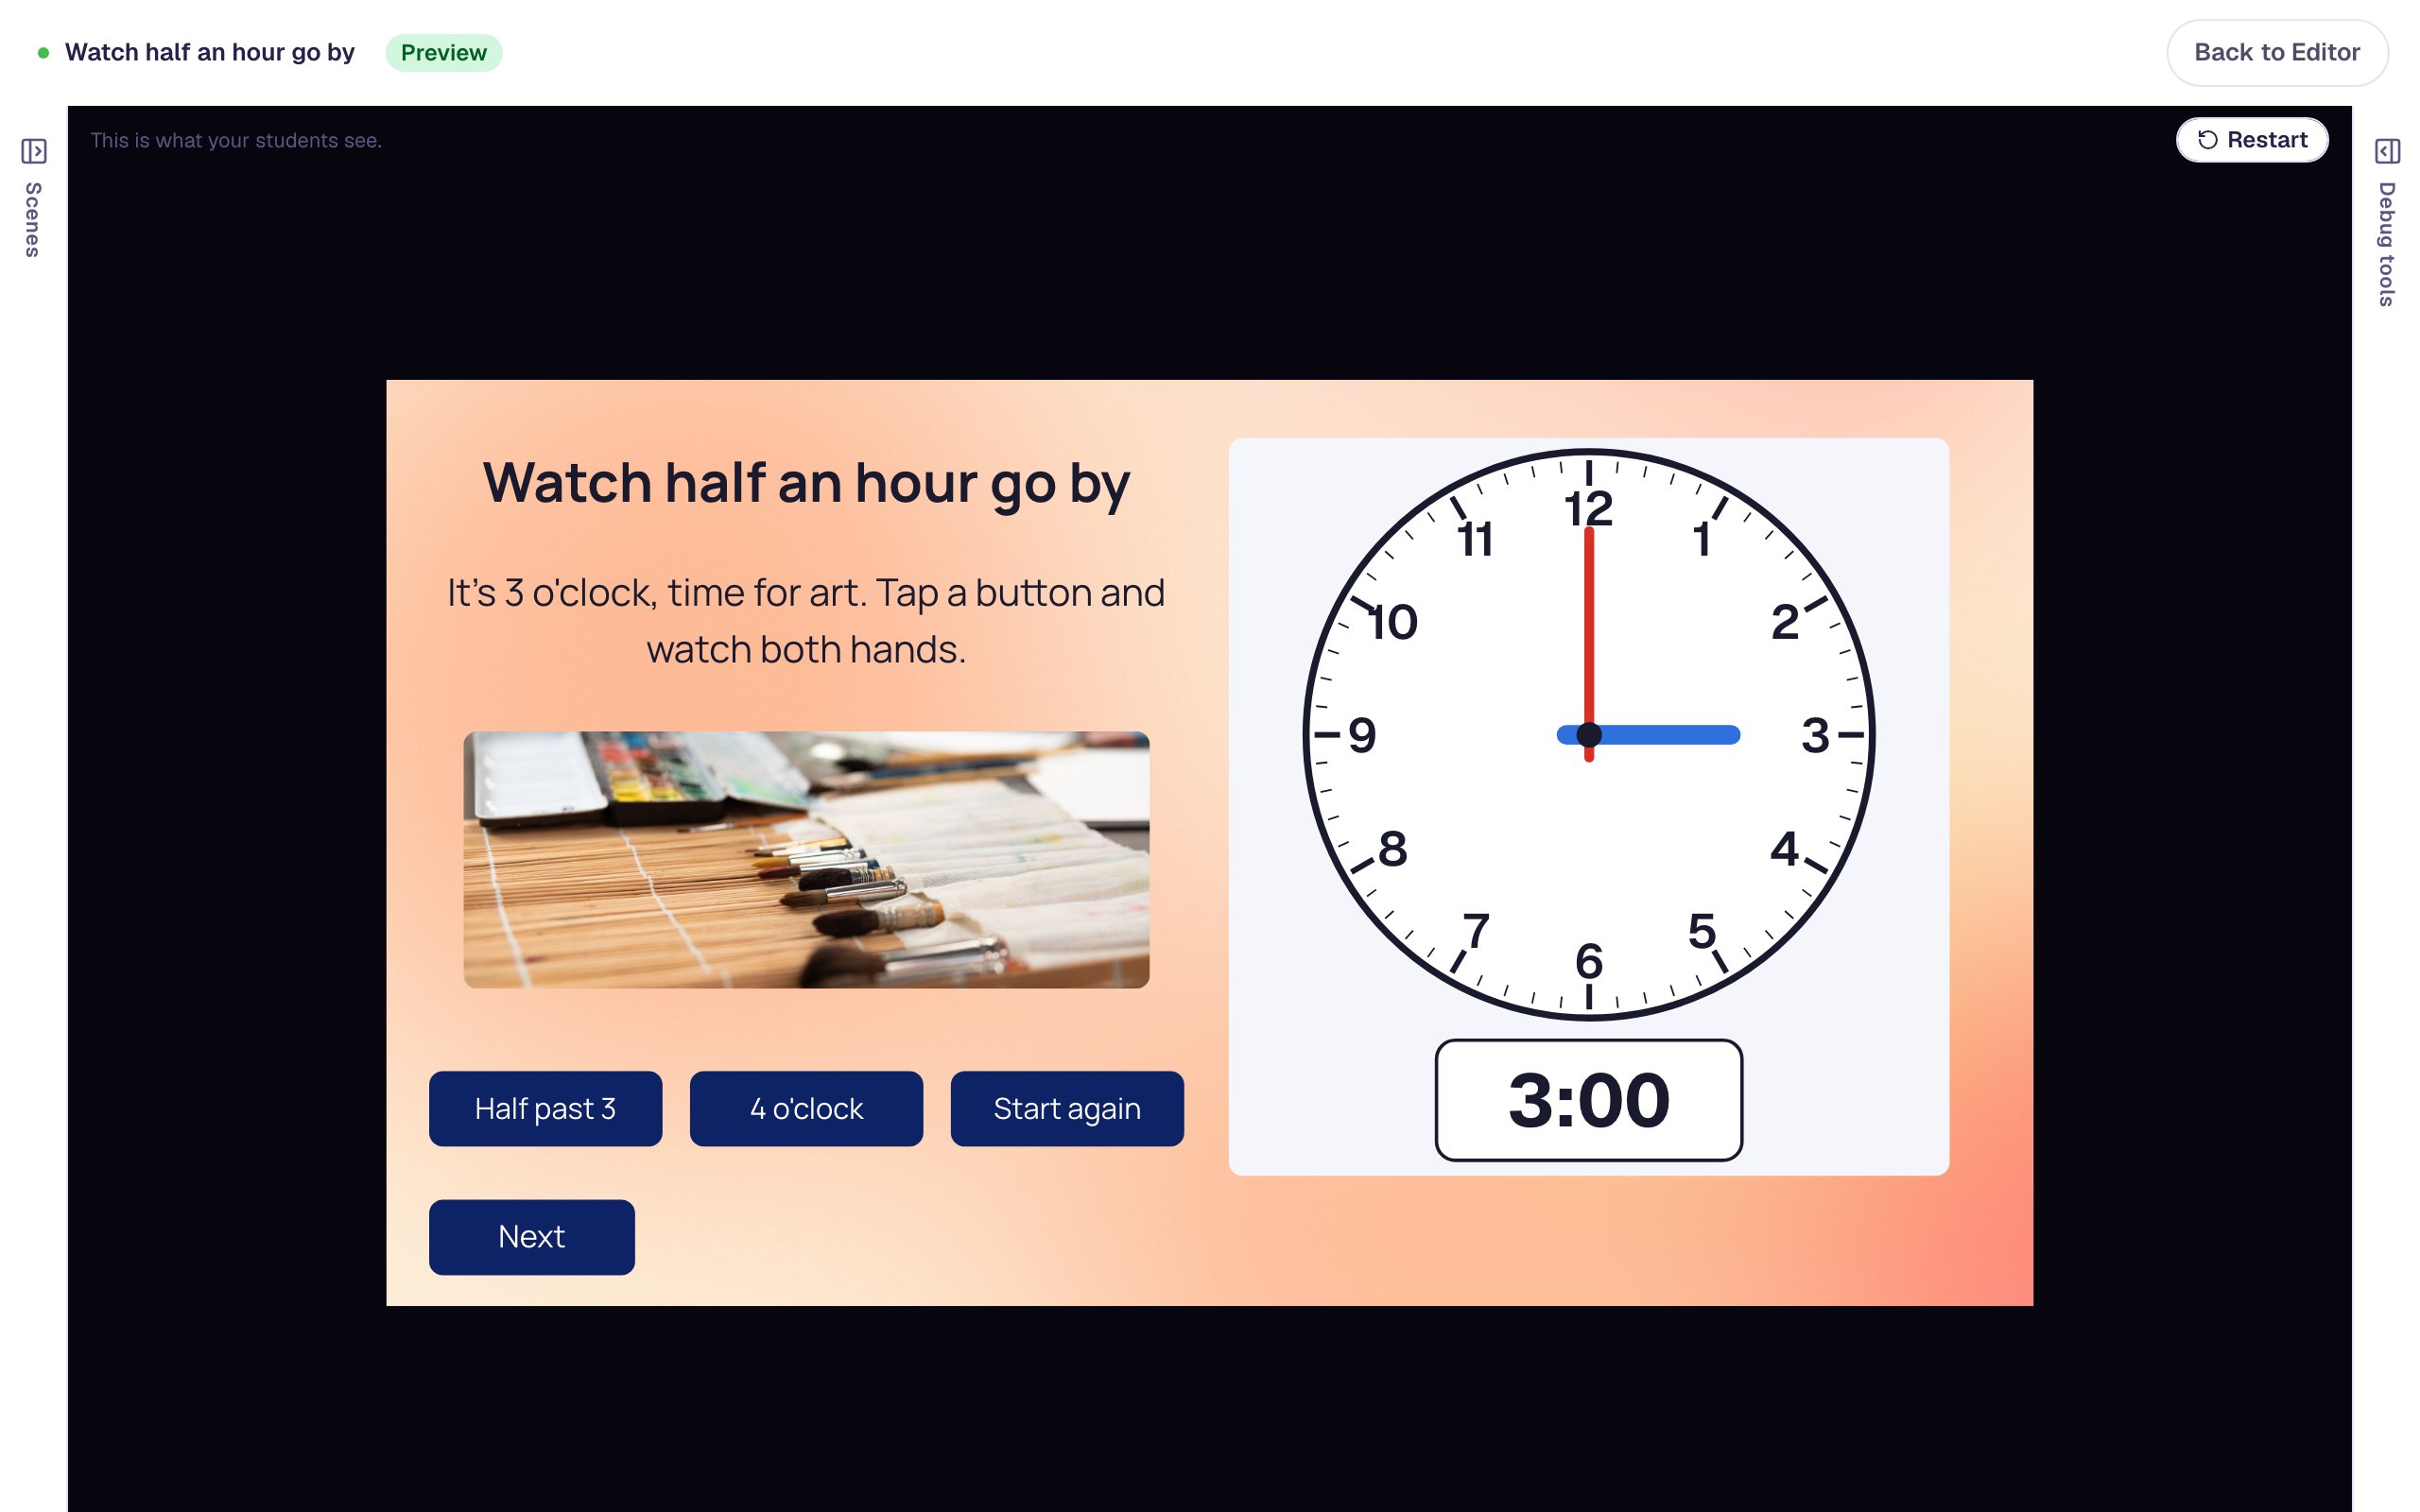
Click Save. The clock shows 3:00, with the digits underneath.
Step 3: Add a button that turns the hands
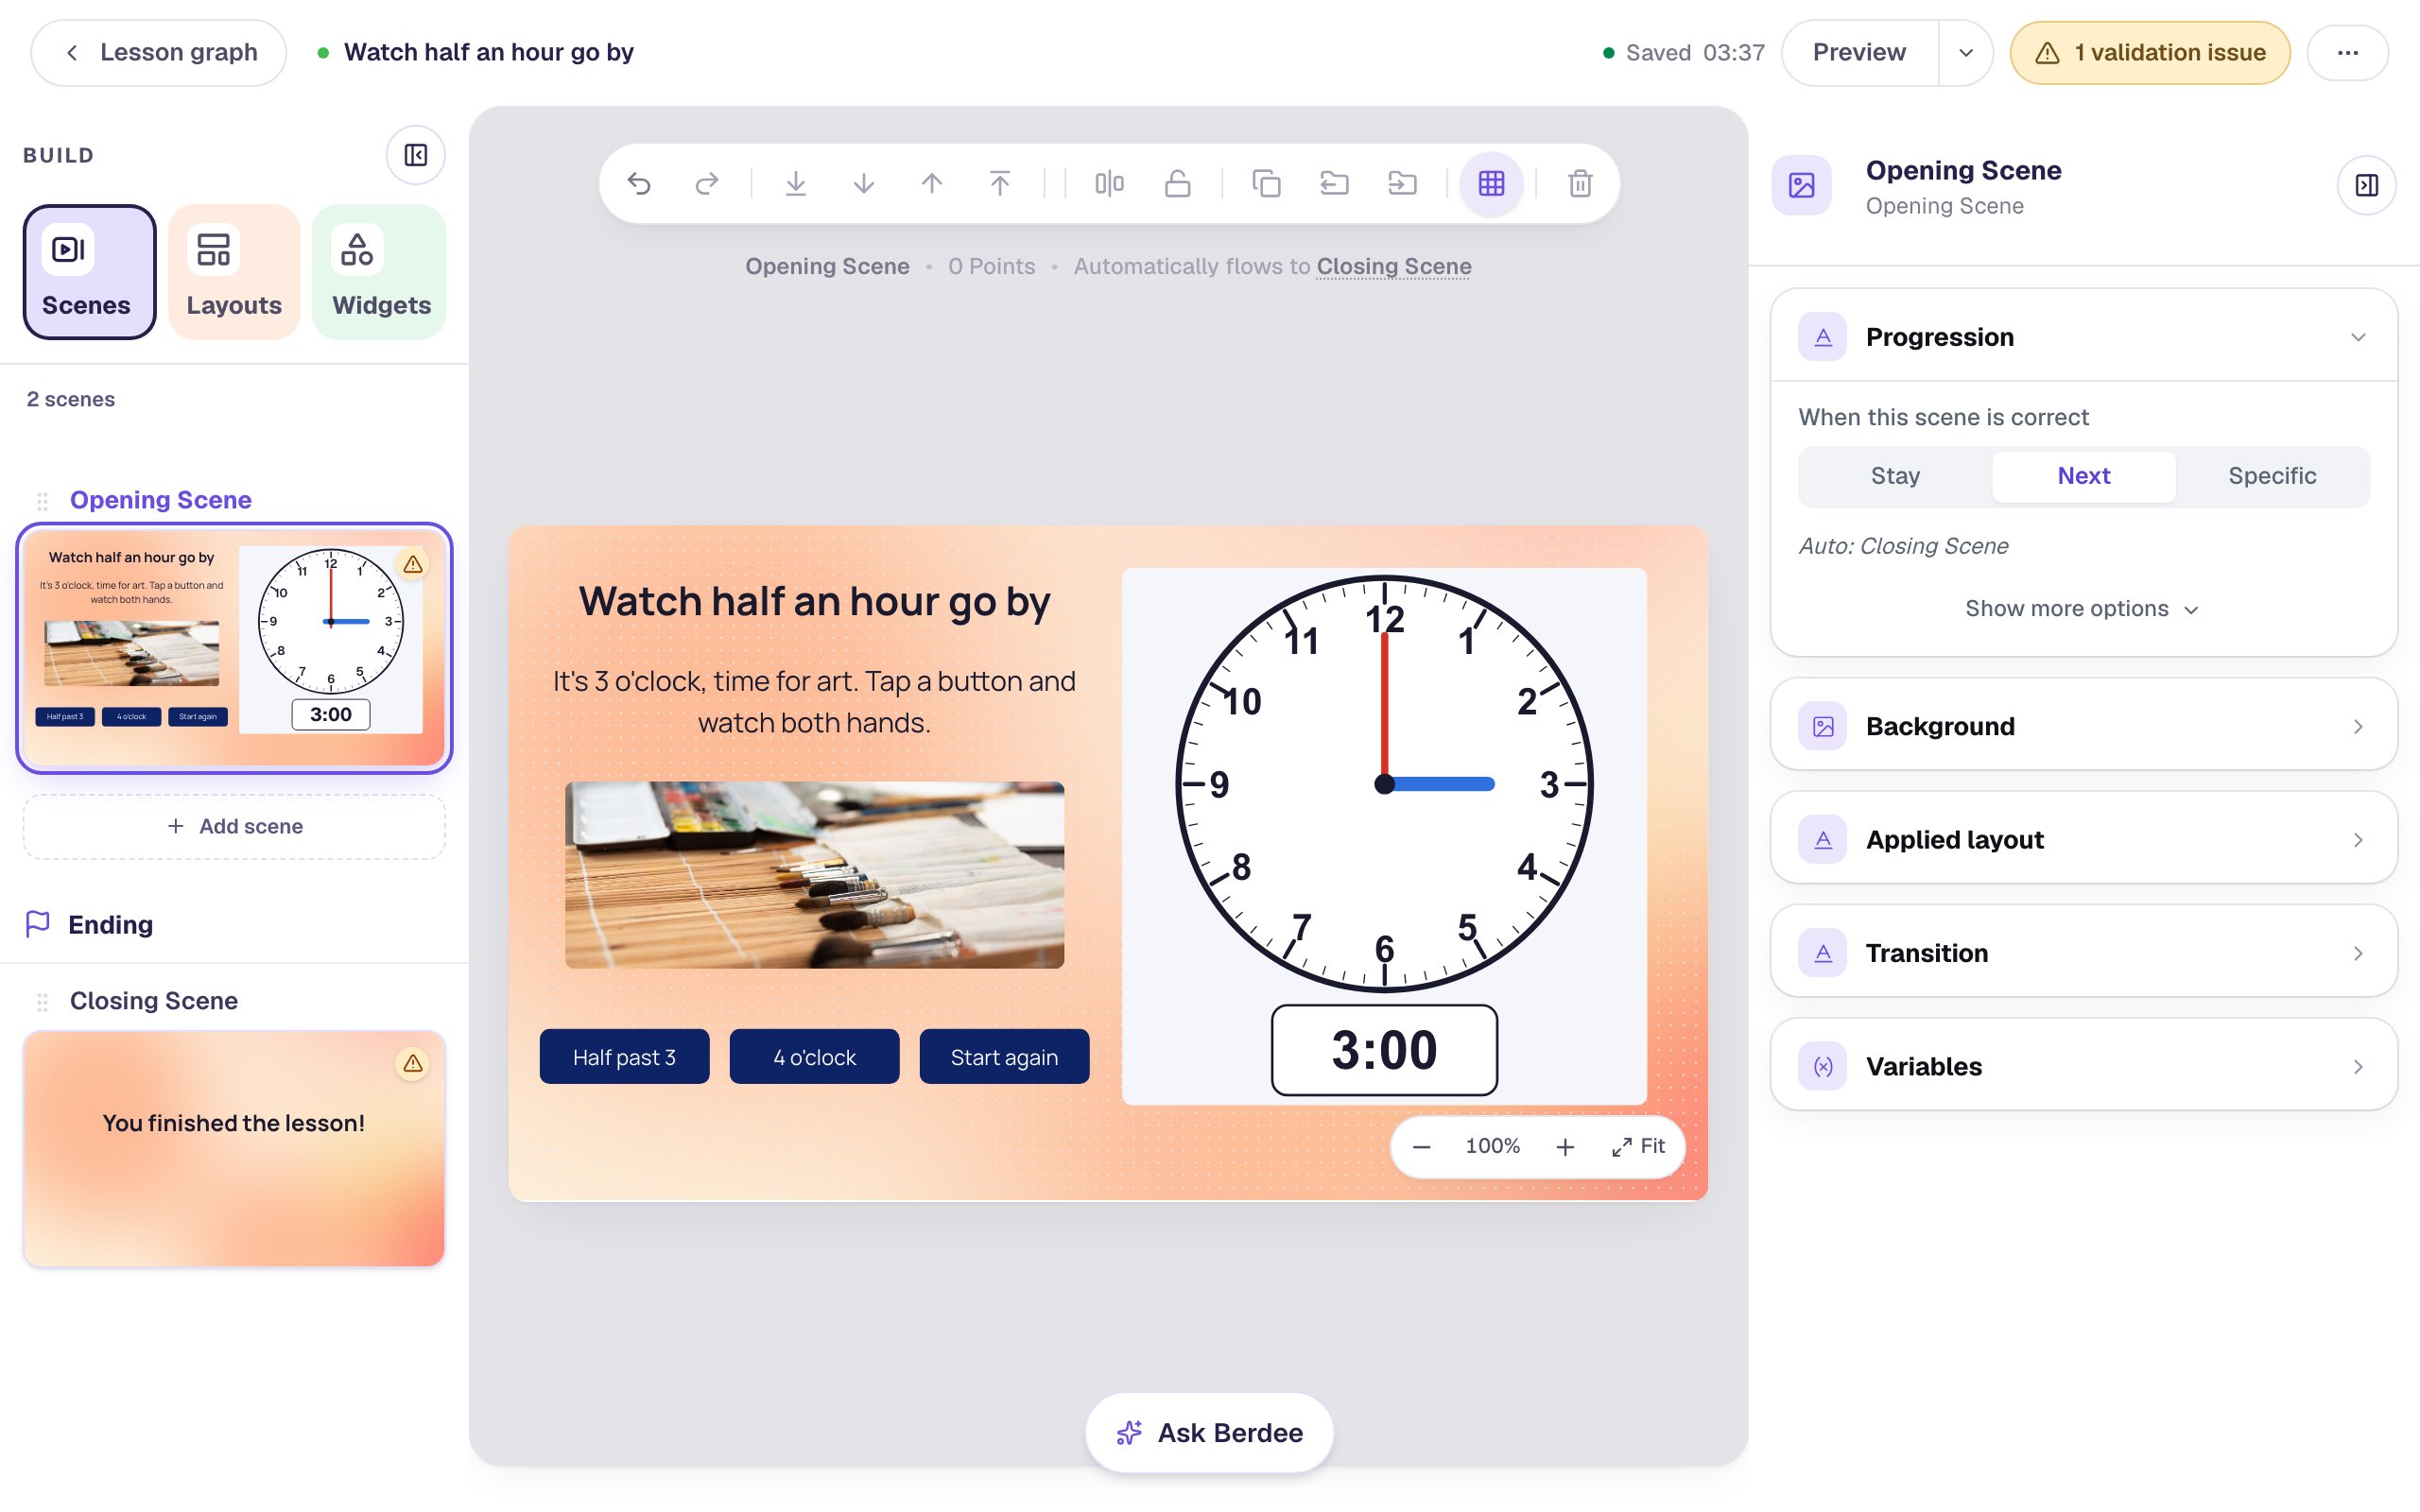
Add a Button. Click ⚙ Configure, set its Label to Half past 3, and click Save. Rename it Half past 3 button, then in Style & Layout set it to Fixed width with a Width of 136, a Font Size of 17, a dark navy Background and white Text. Drag it under the left end of the photo.
Now tell it what to do. With the button selected, open Behaviors in the properties panel:
- Click Add Behavior, then On Press. The new behavior starts with a Display Message action.
- Change Display Message to Widget Method. This action runs something another widget can do.
- Pick Clock: Art clock, then Turn the hands to.
- Two number boxes appear, each under Static value. The first is the hour: type
3. The second is the minute: type30.
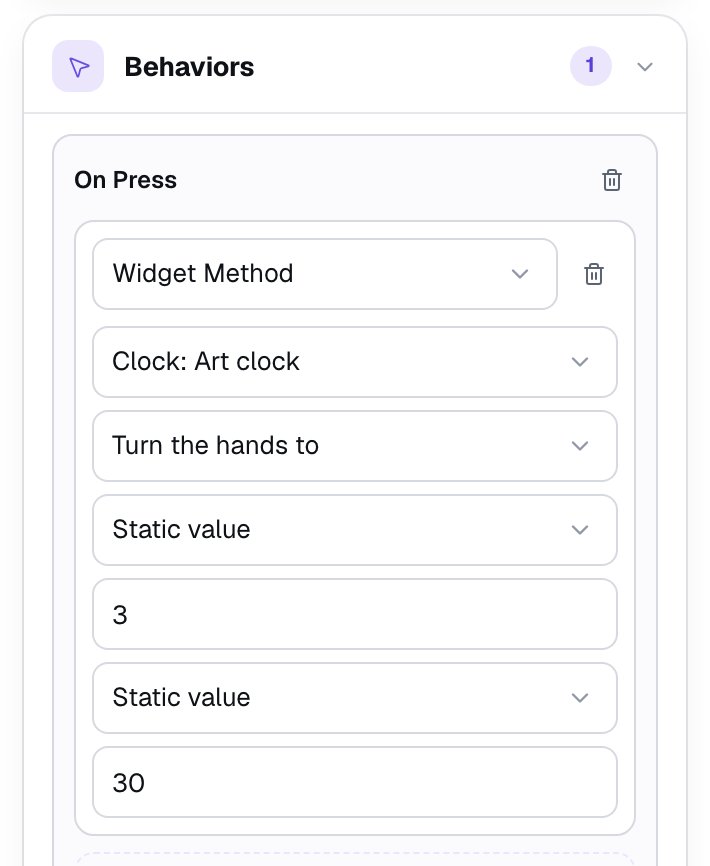
The number boxes aren't labelled, so remember the order: hour first, then minute.
Turn the hands to turns the hands forward at a steady pace, the way a real clock moves, so students see the long hand sweep round to the 6 while the short hand slides from the 3 toward the 4. Its sibling, Set the time, makes the hands jump there at once. You'll use that one in the next step.
Step 4: Add 4 o'clock and Start again
With Half past 3 button still selected, press ⌘D (Ctrl+D on Windows) to make a copy, and drag it to the right of the first one. The copy keeps the style and the behavior.
- Click ⚙ Configure and change its Label to
4 o'clock. Rename it4 o'clock button. - In its Behaviors, change the hour box to
4and the minute box to0.
Copy it once more for the third button:
- Change its Label to
Start againand rename itStart again button. - In its Behaviors, change Turn the hands to to Set the time. The number boxes reset, so type
3for the hour and0for the minute.
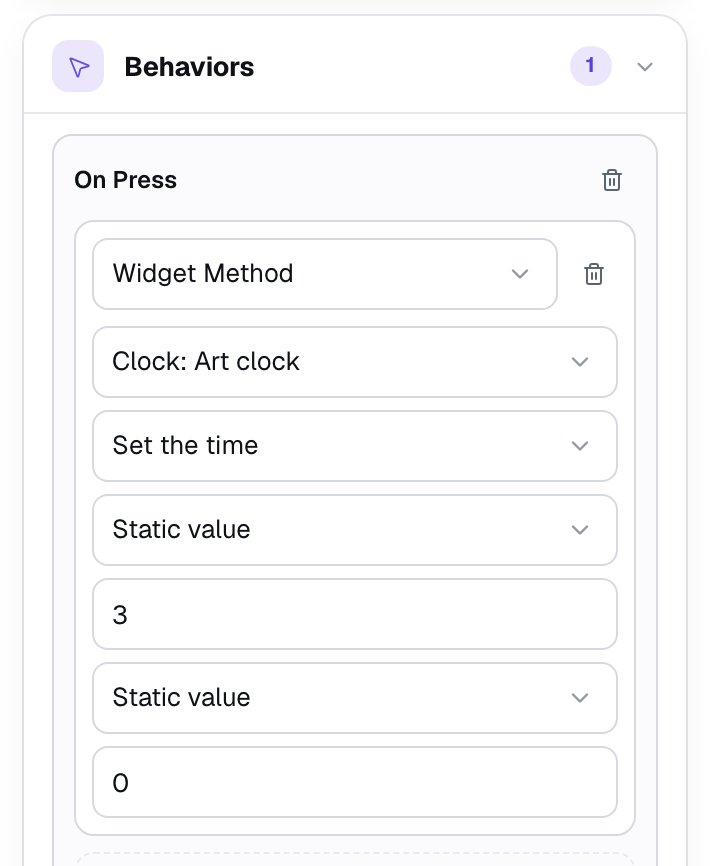
Start again uses Set the time because Turn the hands to only turns forward: going from 4:00 back to 3:00 that way would take the hands eleven hours round the clock.
Step 5: Add a scene where students read the clock
Watching is the first half. Now students try it on their own.
- In Scenes, click Add scene. Double-click the new scene's name and rename it
Your turn. - Give it the same Mesh sunrise background.
- Add a Heading that says
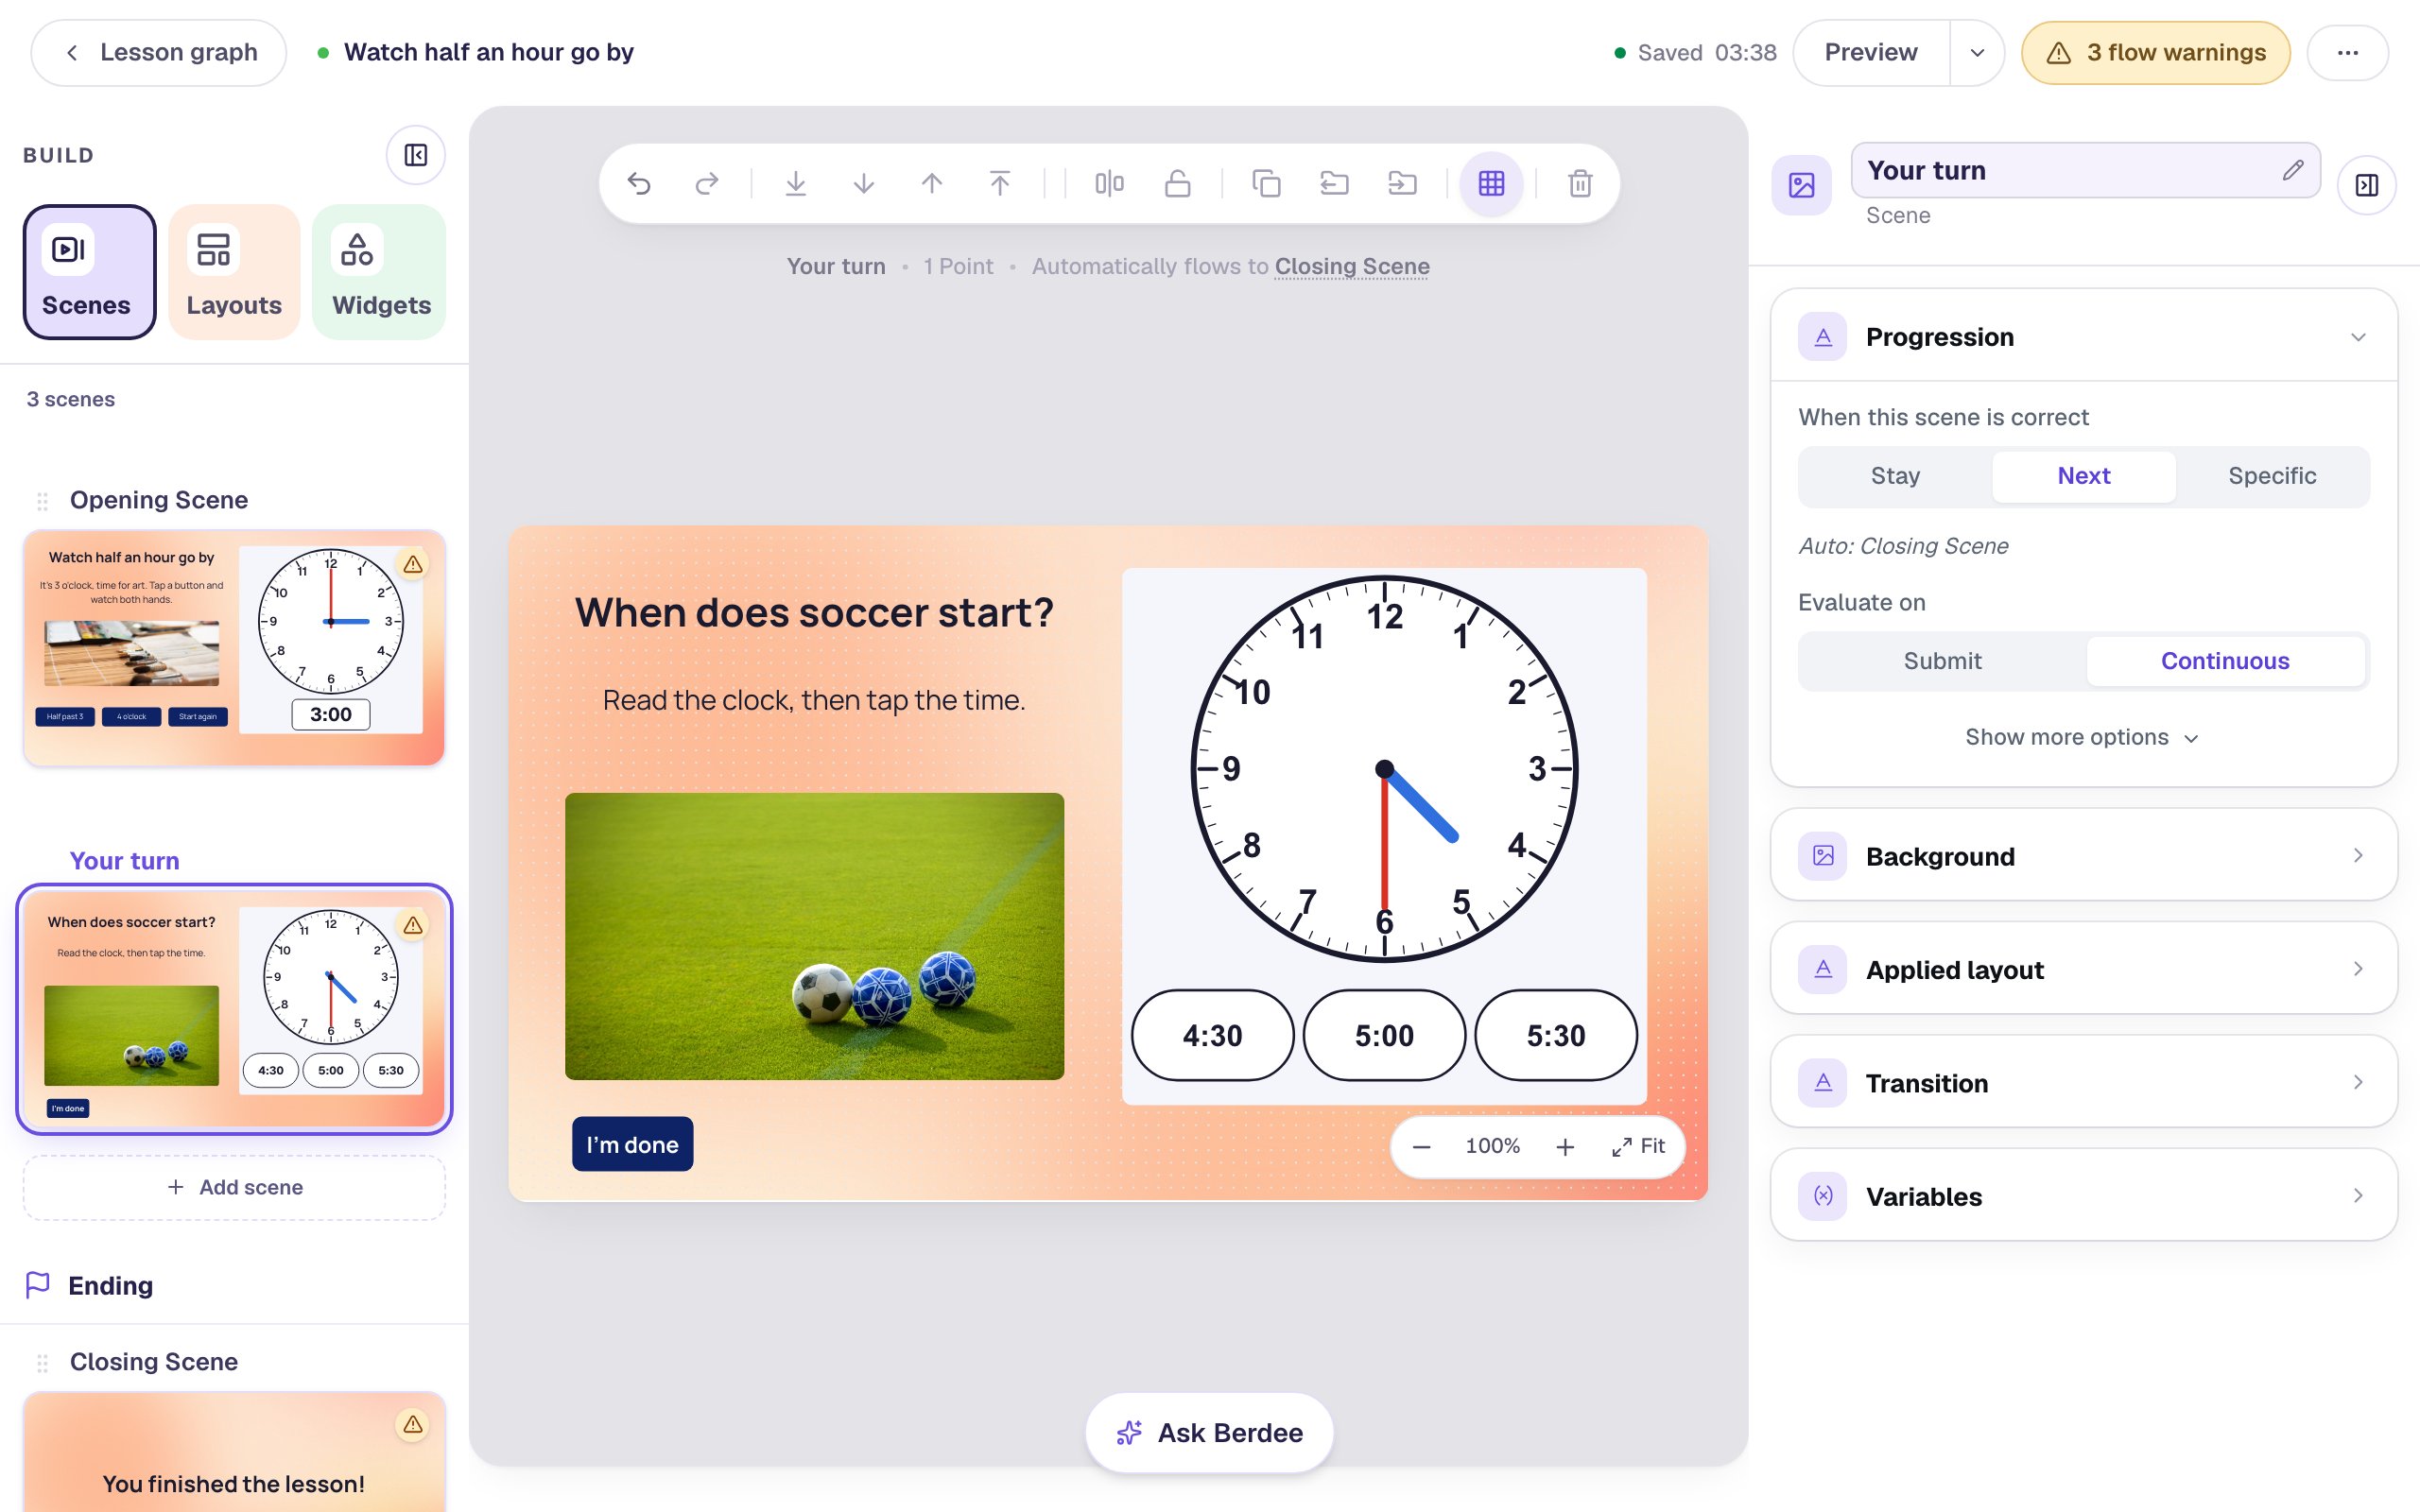
When does soccer start?at Font Size32, a Body that saysRead the clock, then tap the time.at22, and a photo of soccer balls (searchsoccer ball grass) with a Width of400and Height of230. Write its Alt Text too, such asThree soccer balls, one black and white and two blue, on a sunny green field. - Add another Clock, rename it
Soccer clock, and give it the same size and place as the first one.
Click ⚙ Configure, click Read under What students do, and set the time to 4 and half past (:30). Under How students answer, click Use the time, the next hour and half past the next hour, so the choices are 4:30, 5:00 and 5:30, the mistakes students really make. Click Save.
Then give a hint on a wrong answer. With Soccer clock selected, open Behaviors:
- Click Add Behavior, then On Answer.
- Type the hint:
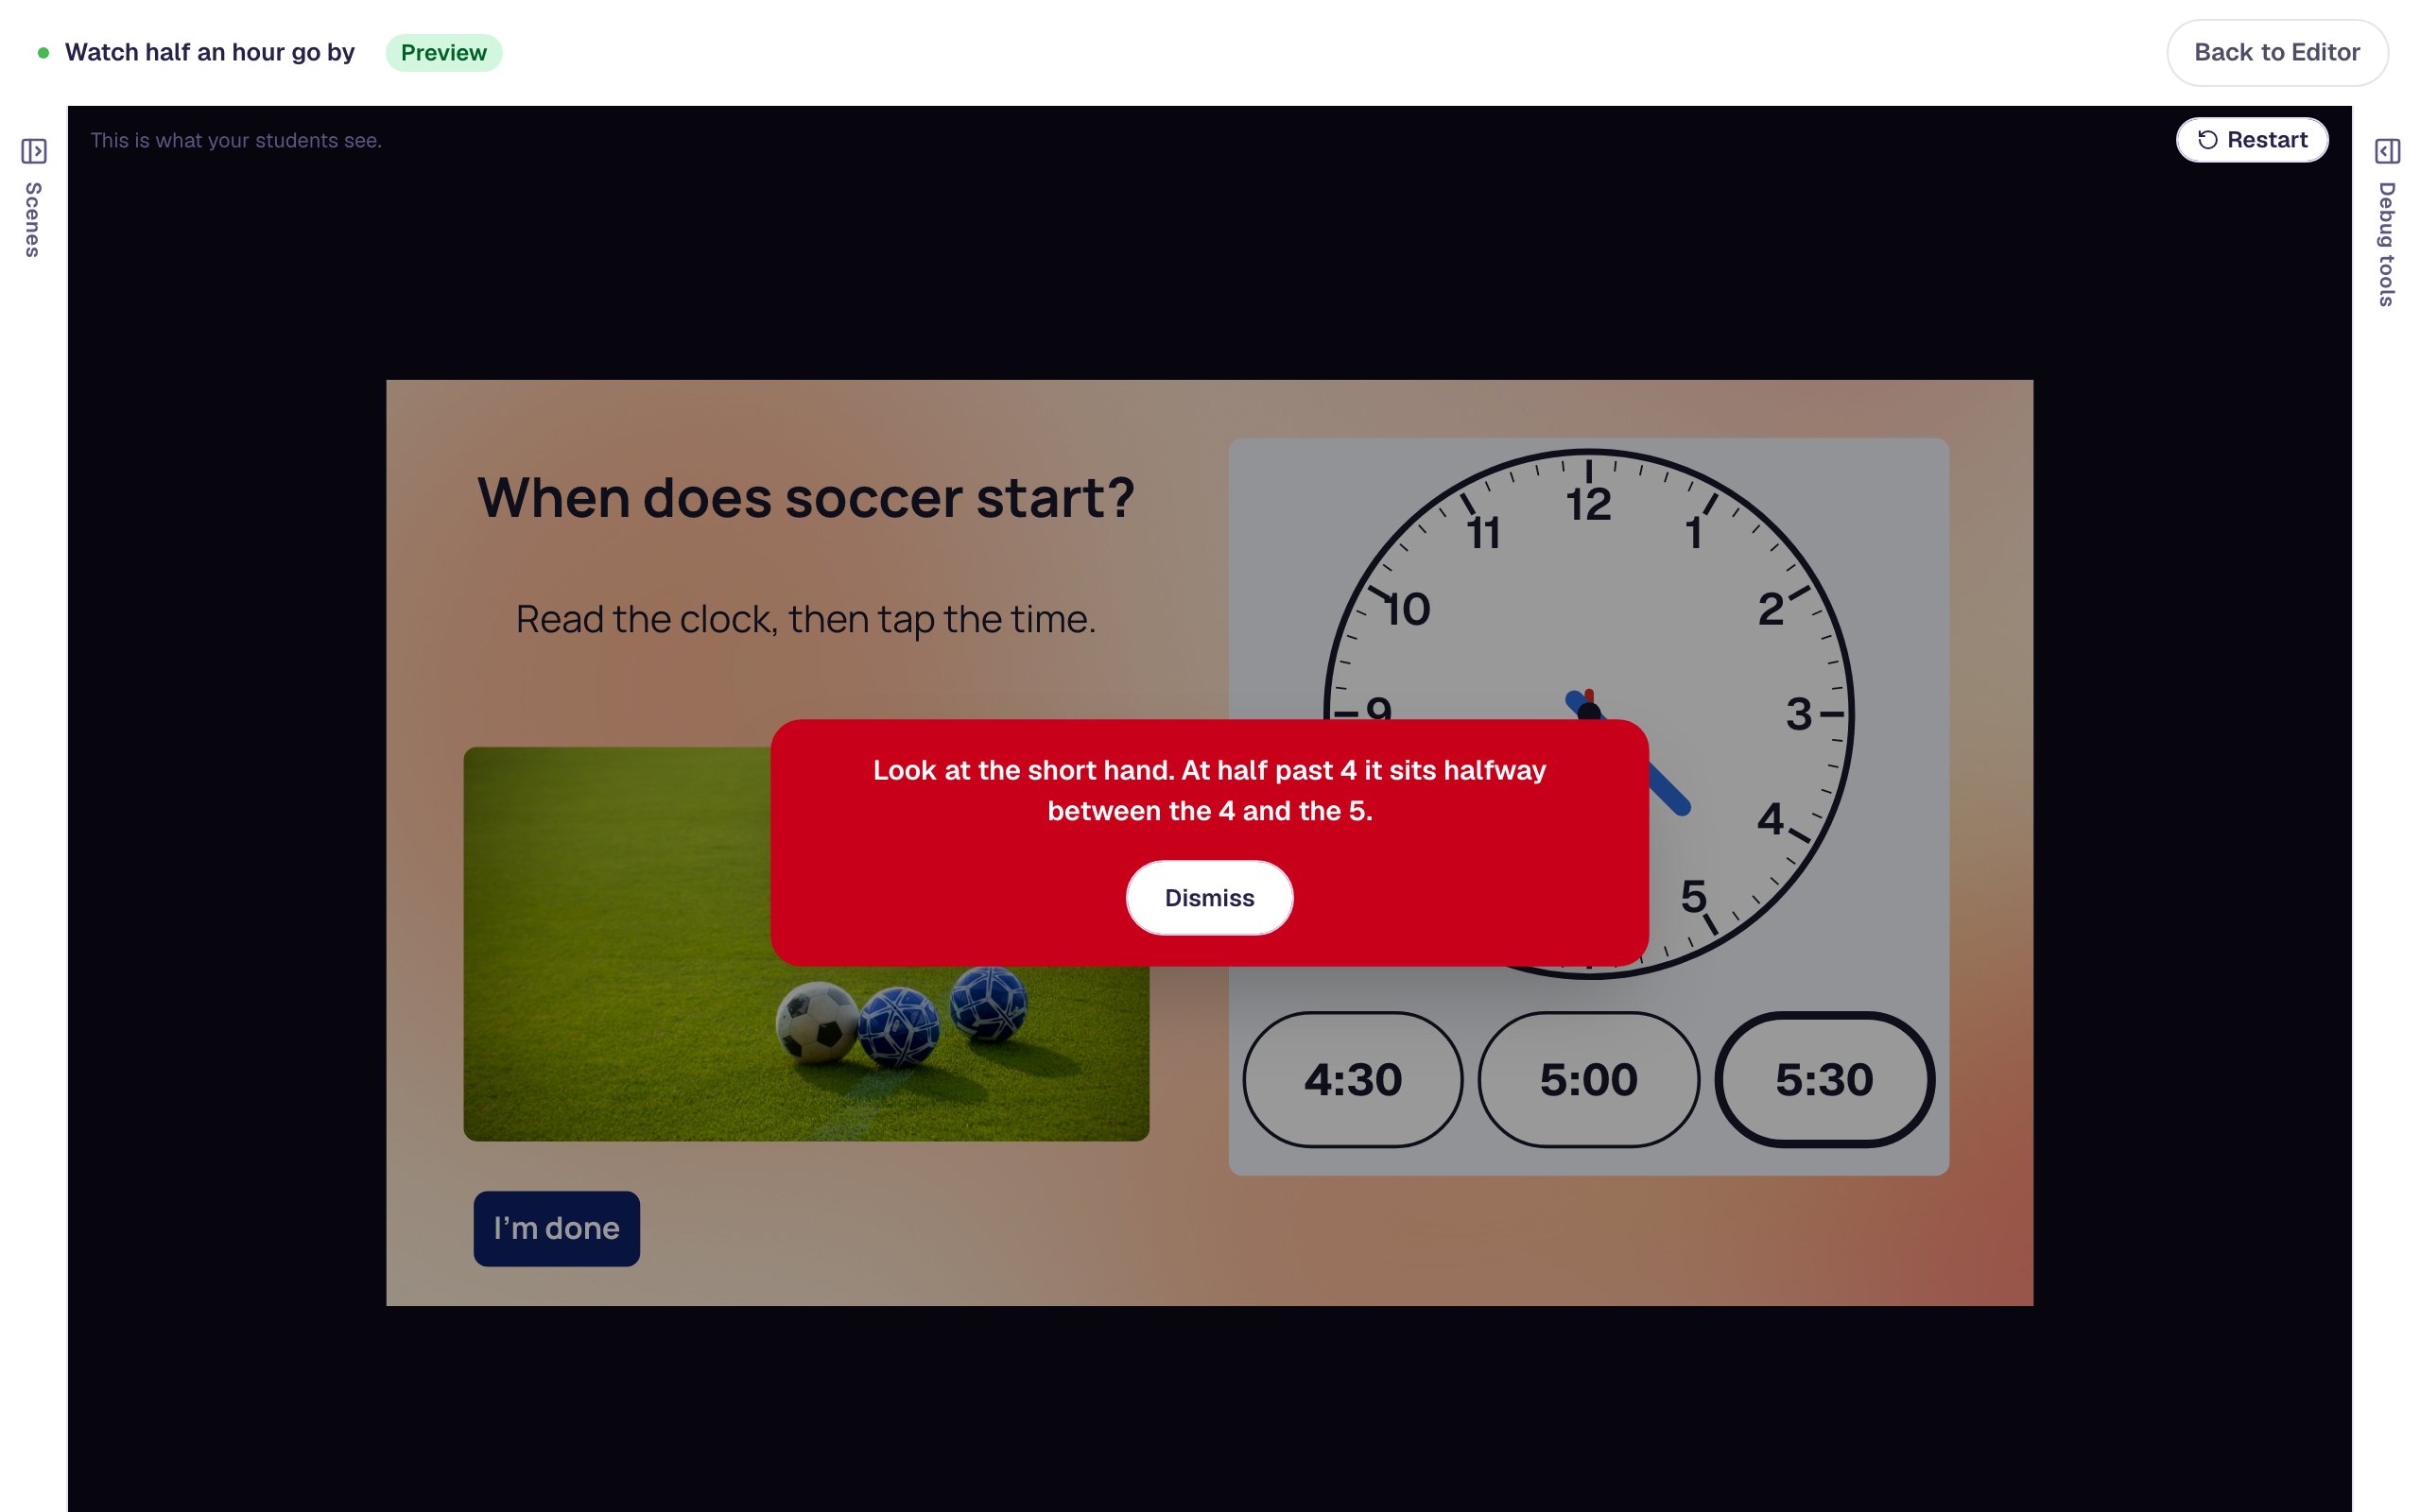
Look at the short hand. At half past 4 it sits halfway between the 4 and the 5. - Change the message style to Failure message.
- Click Add Condition, choose Clock: Soccer clock, then Is incorrect.
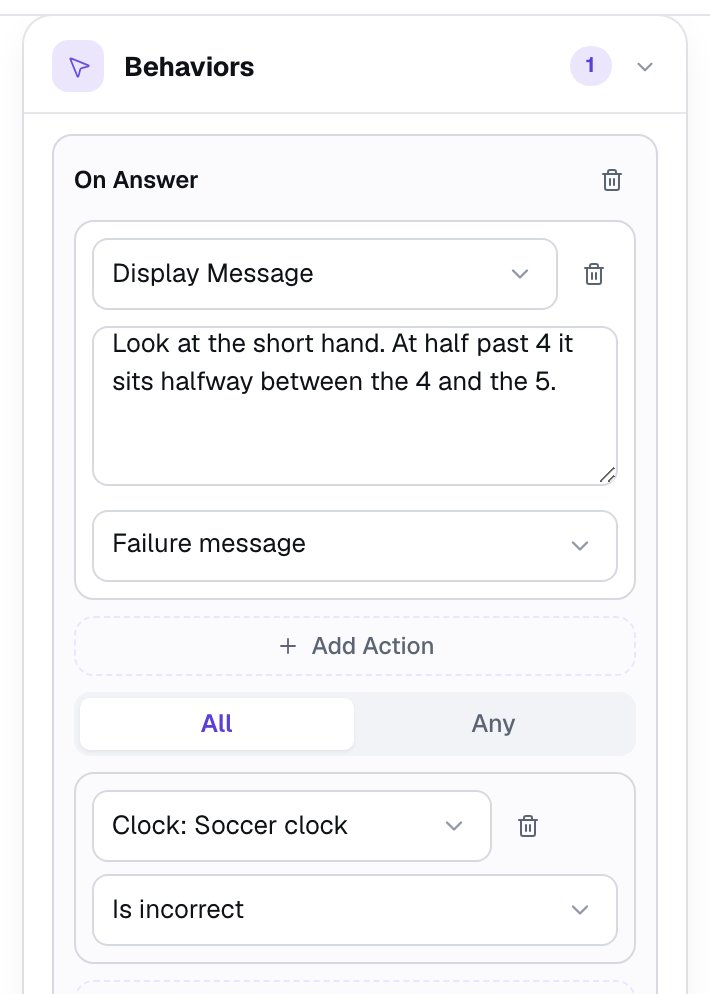
The hint uses the same idea students just watched on the first scene: at half past, the short hand is halfway to the next number.
Berdee needs a button that lets a student finish the lesson before it will publish. Add a Submit Button, and in Content set its Label to I'm done and Submits to Lesson. Set its Font Size to 18, give it the same navy Background and white Text, and put it in the bottom-left corner.
Step 6: Add a Next button to the first scene
The first scene has no question, so it never moves on by itself. Give students a way forward.
Go back to the Opening Scene and add one more Button. Set its Label to Next, rename it Next button, and style it like the others with a Width of 120 and a Font Size of 18. Drag it into the bottom-left corner, under the row of buttons.
Then click Behaviors on the button's toolbar. In the window that opens, click Make this a "Next" button, check that it goes to Your turn, and click Add behavior.
Step 7: Try it as a student
Click Preview. The clock shows 3:00.
Tap Half past 3. The long hand sweeps round to the 6, shading the right half of the face as it goes, and the short hand slides from the 3 to halfway between the 3 and the 4. Then tap 4 o'clock: the long hand carries on to the 12 and the short hand arrives at the 4.
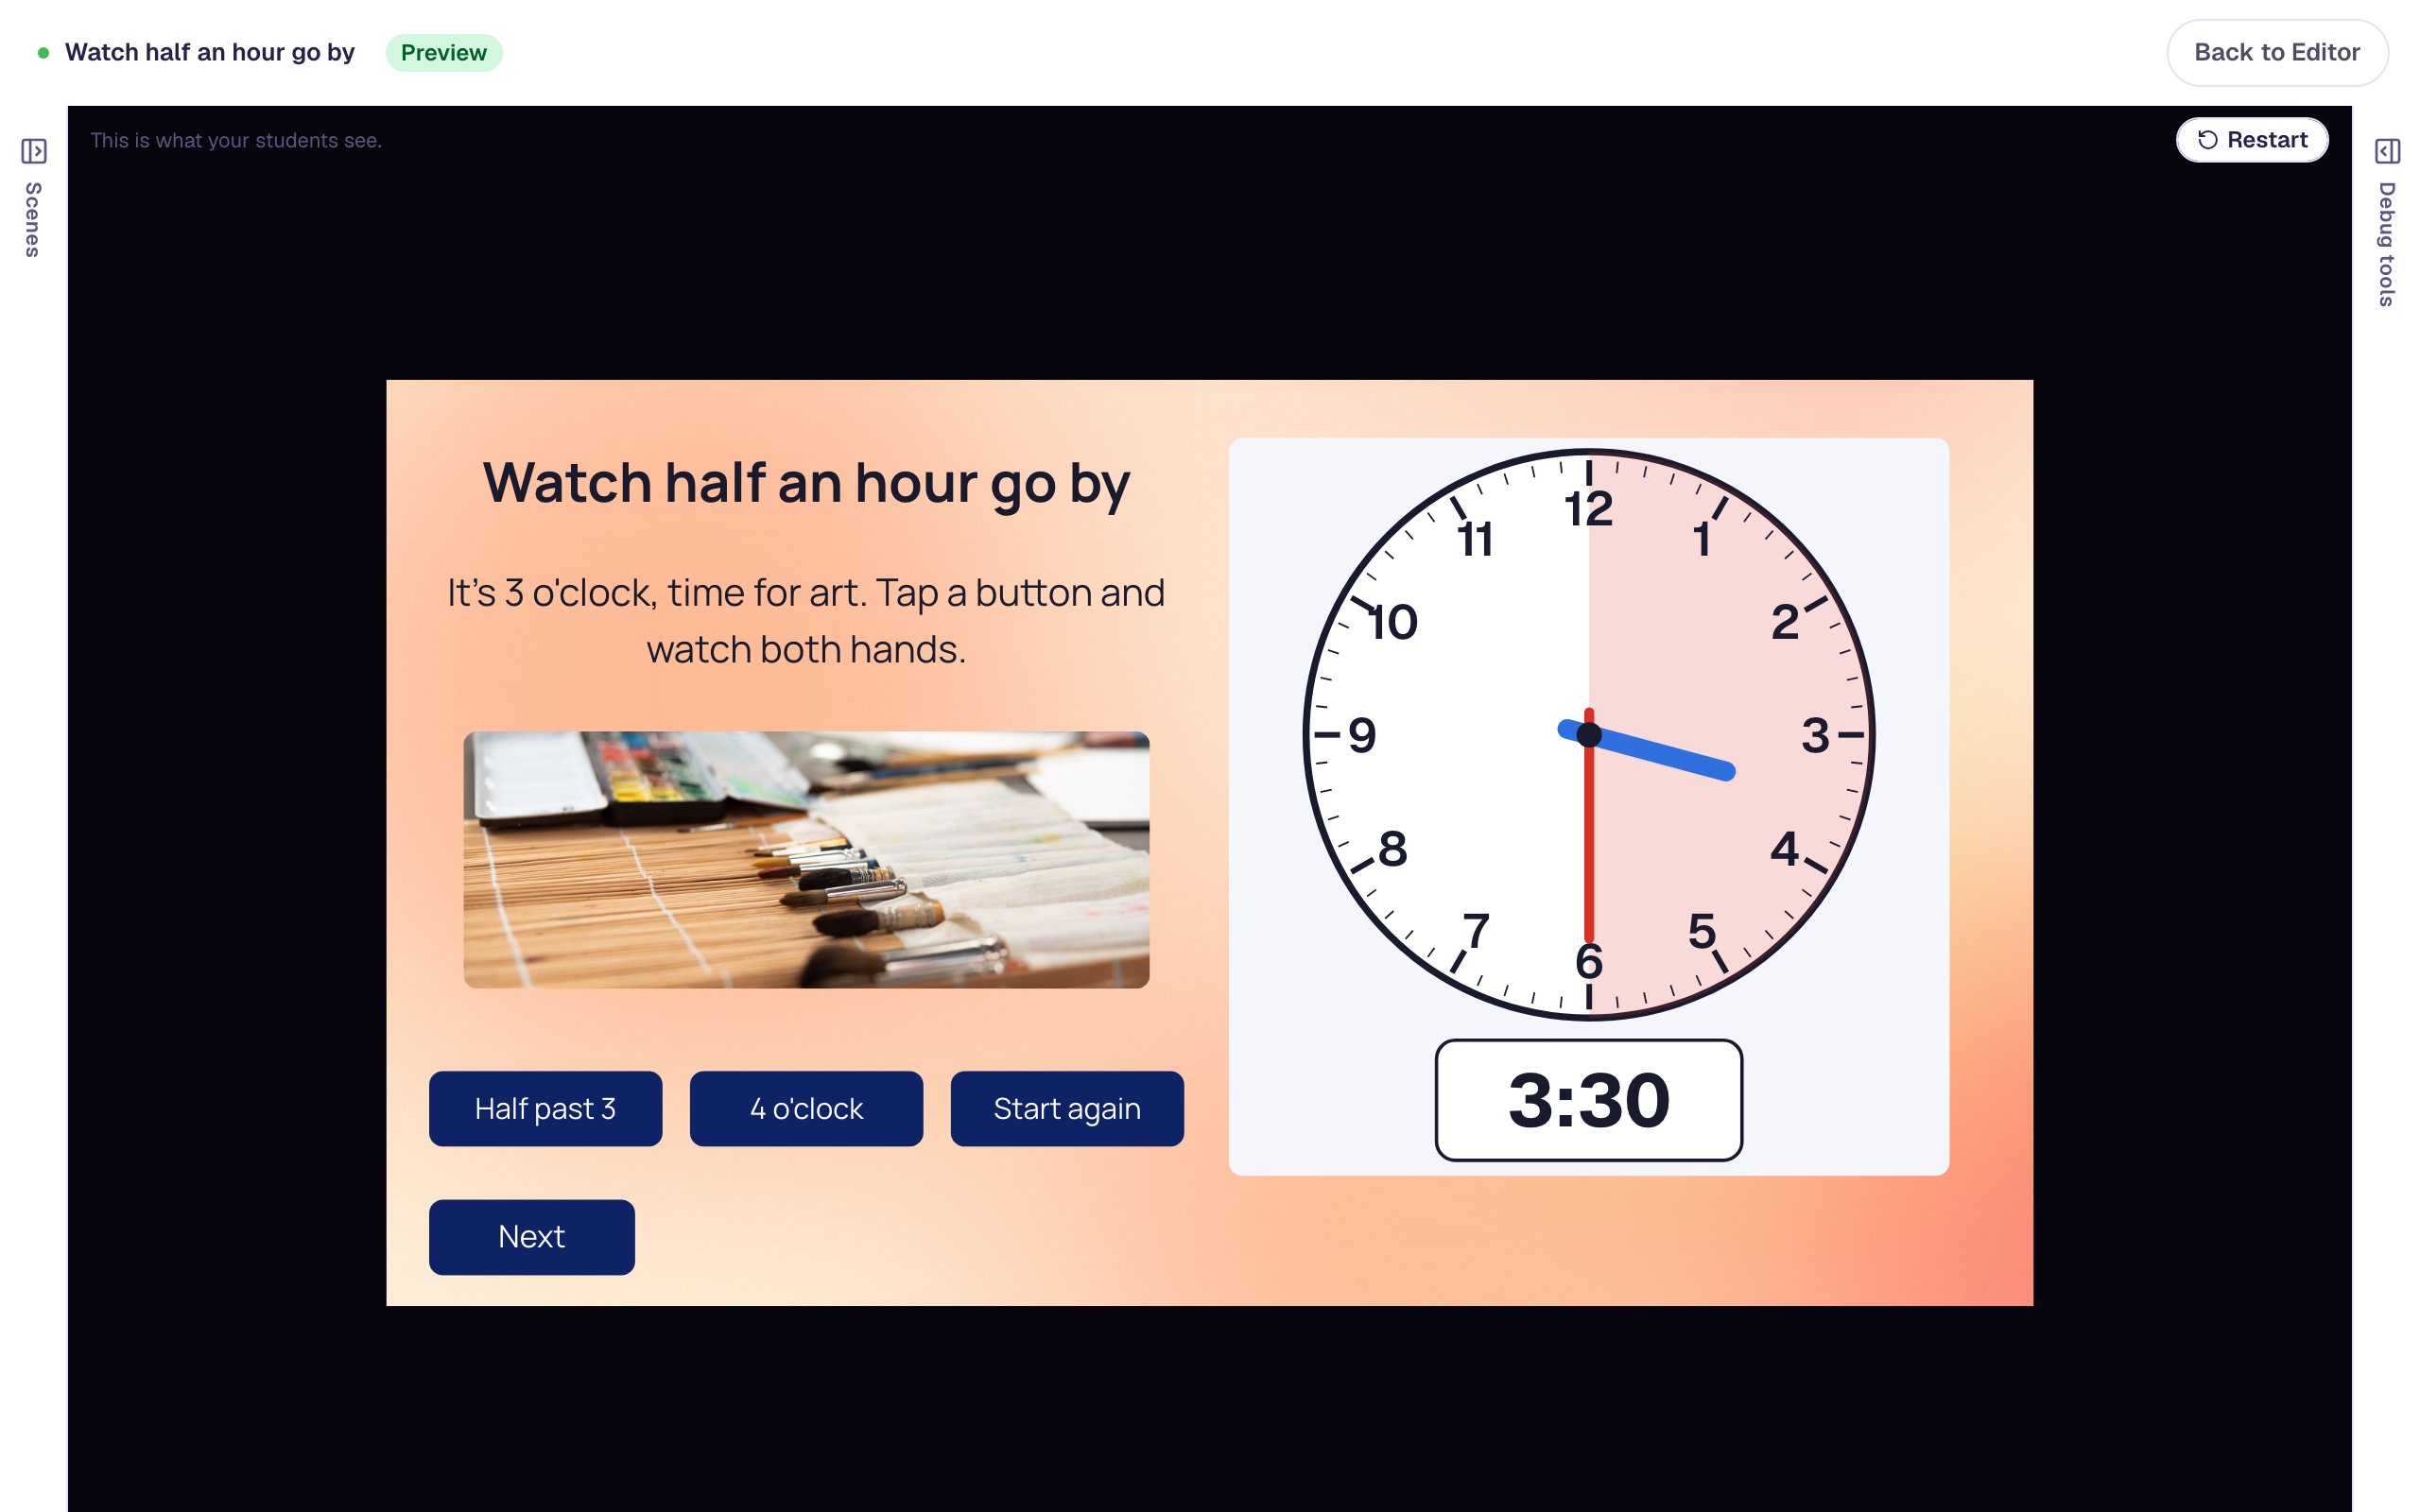
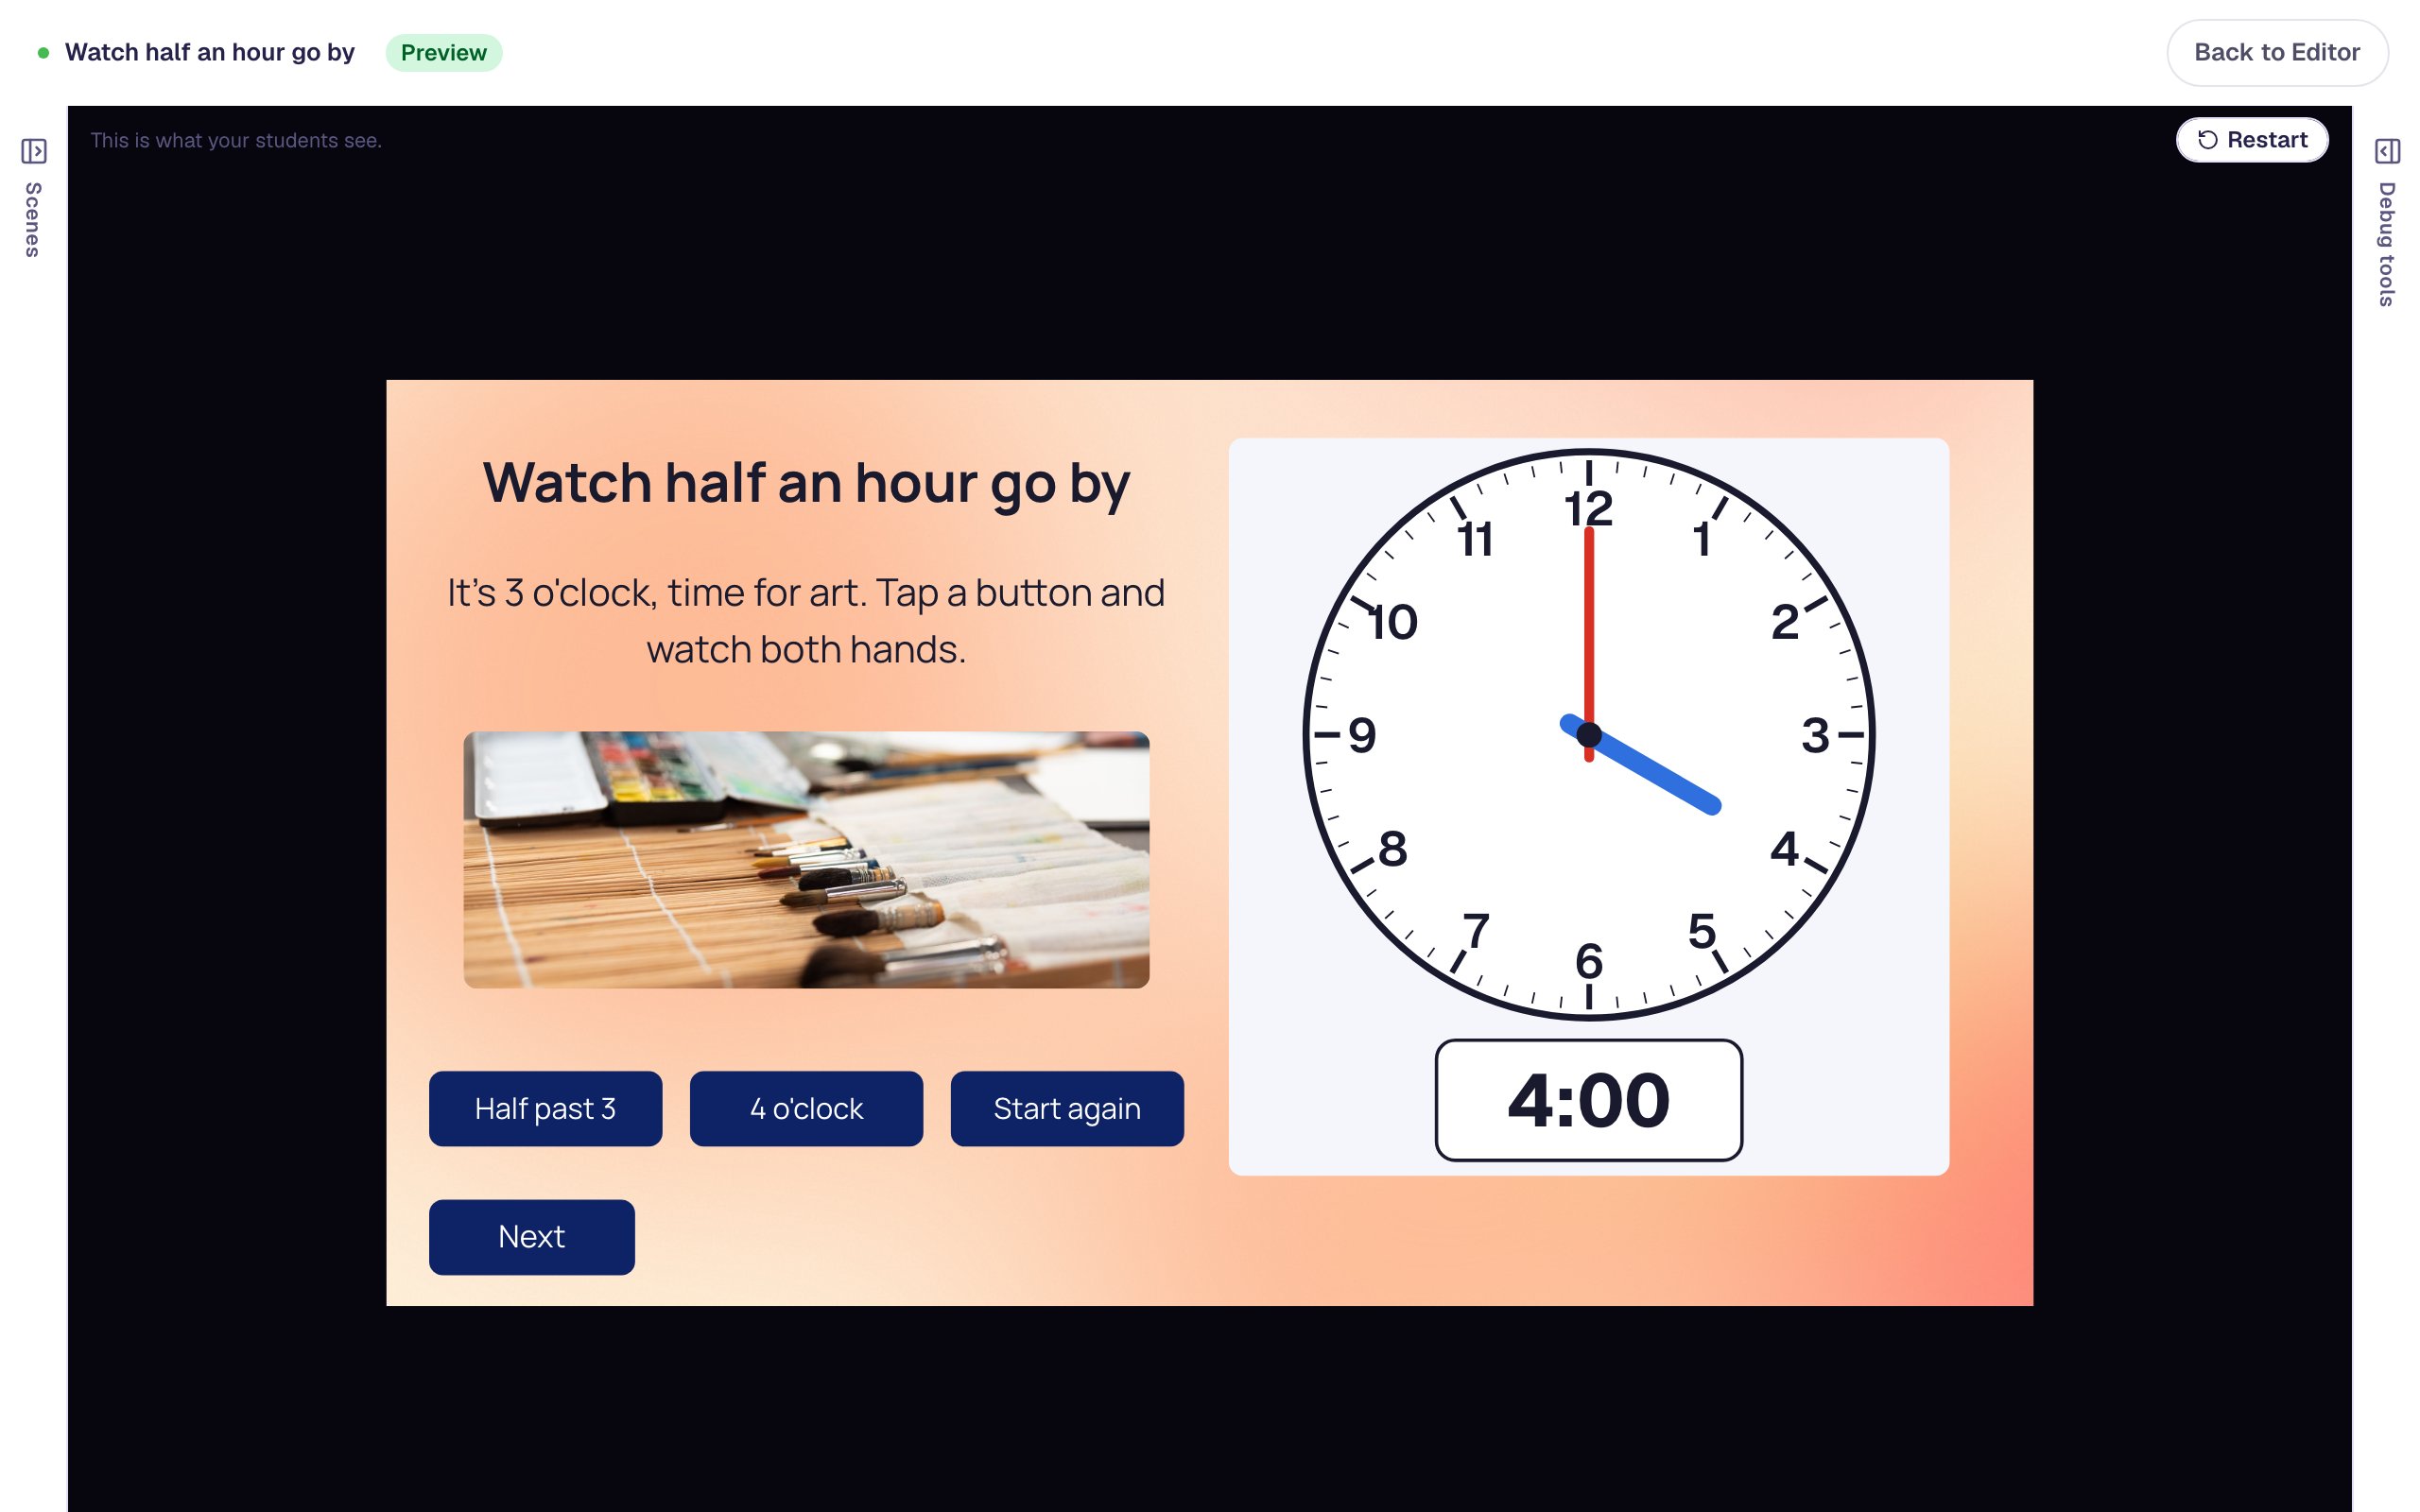
Tap Start again, and the hands jump back to 3:00. Students can watch as many times as they like.
Tap Next. On Your turn, tap 5:30, the classic mistake of following the short hand to the bigger number. The hint appears. Click Dismiss, then tap 4:30, and the lesson moves to the ending.
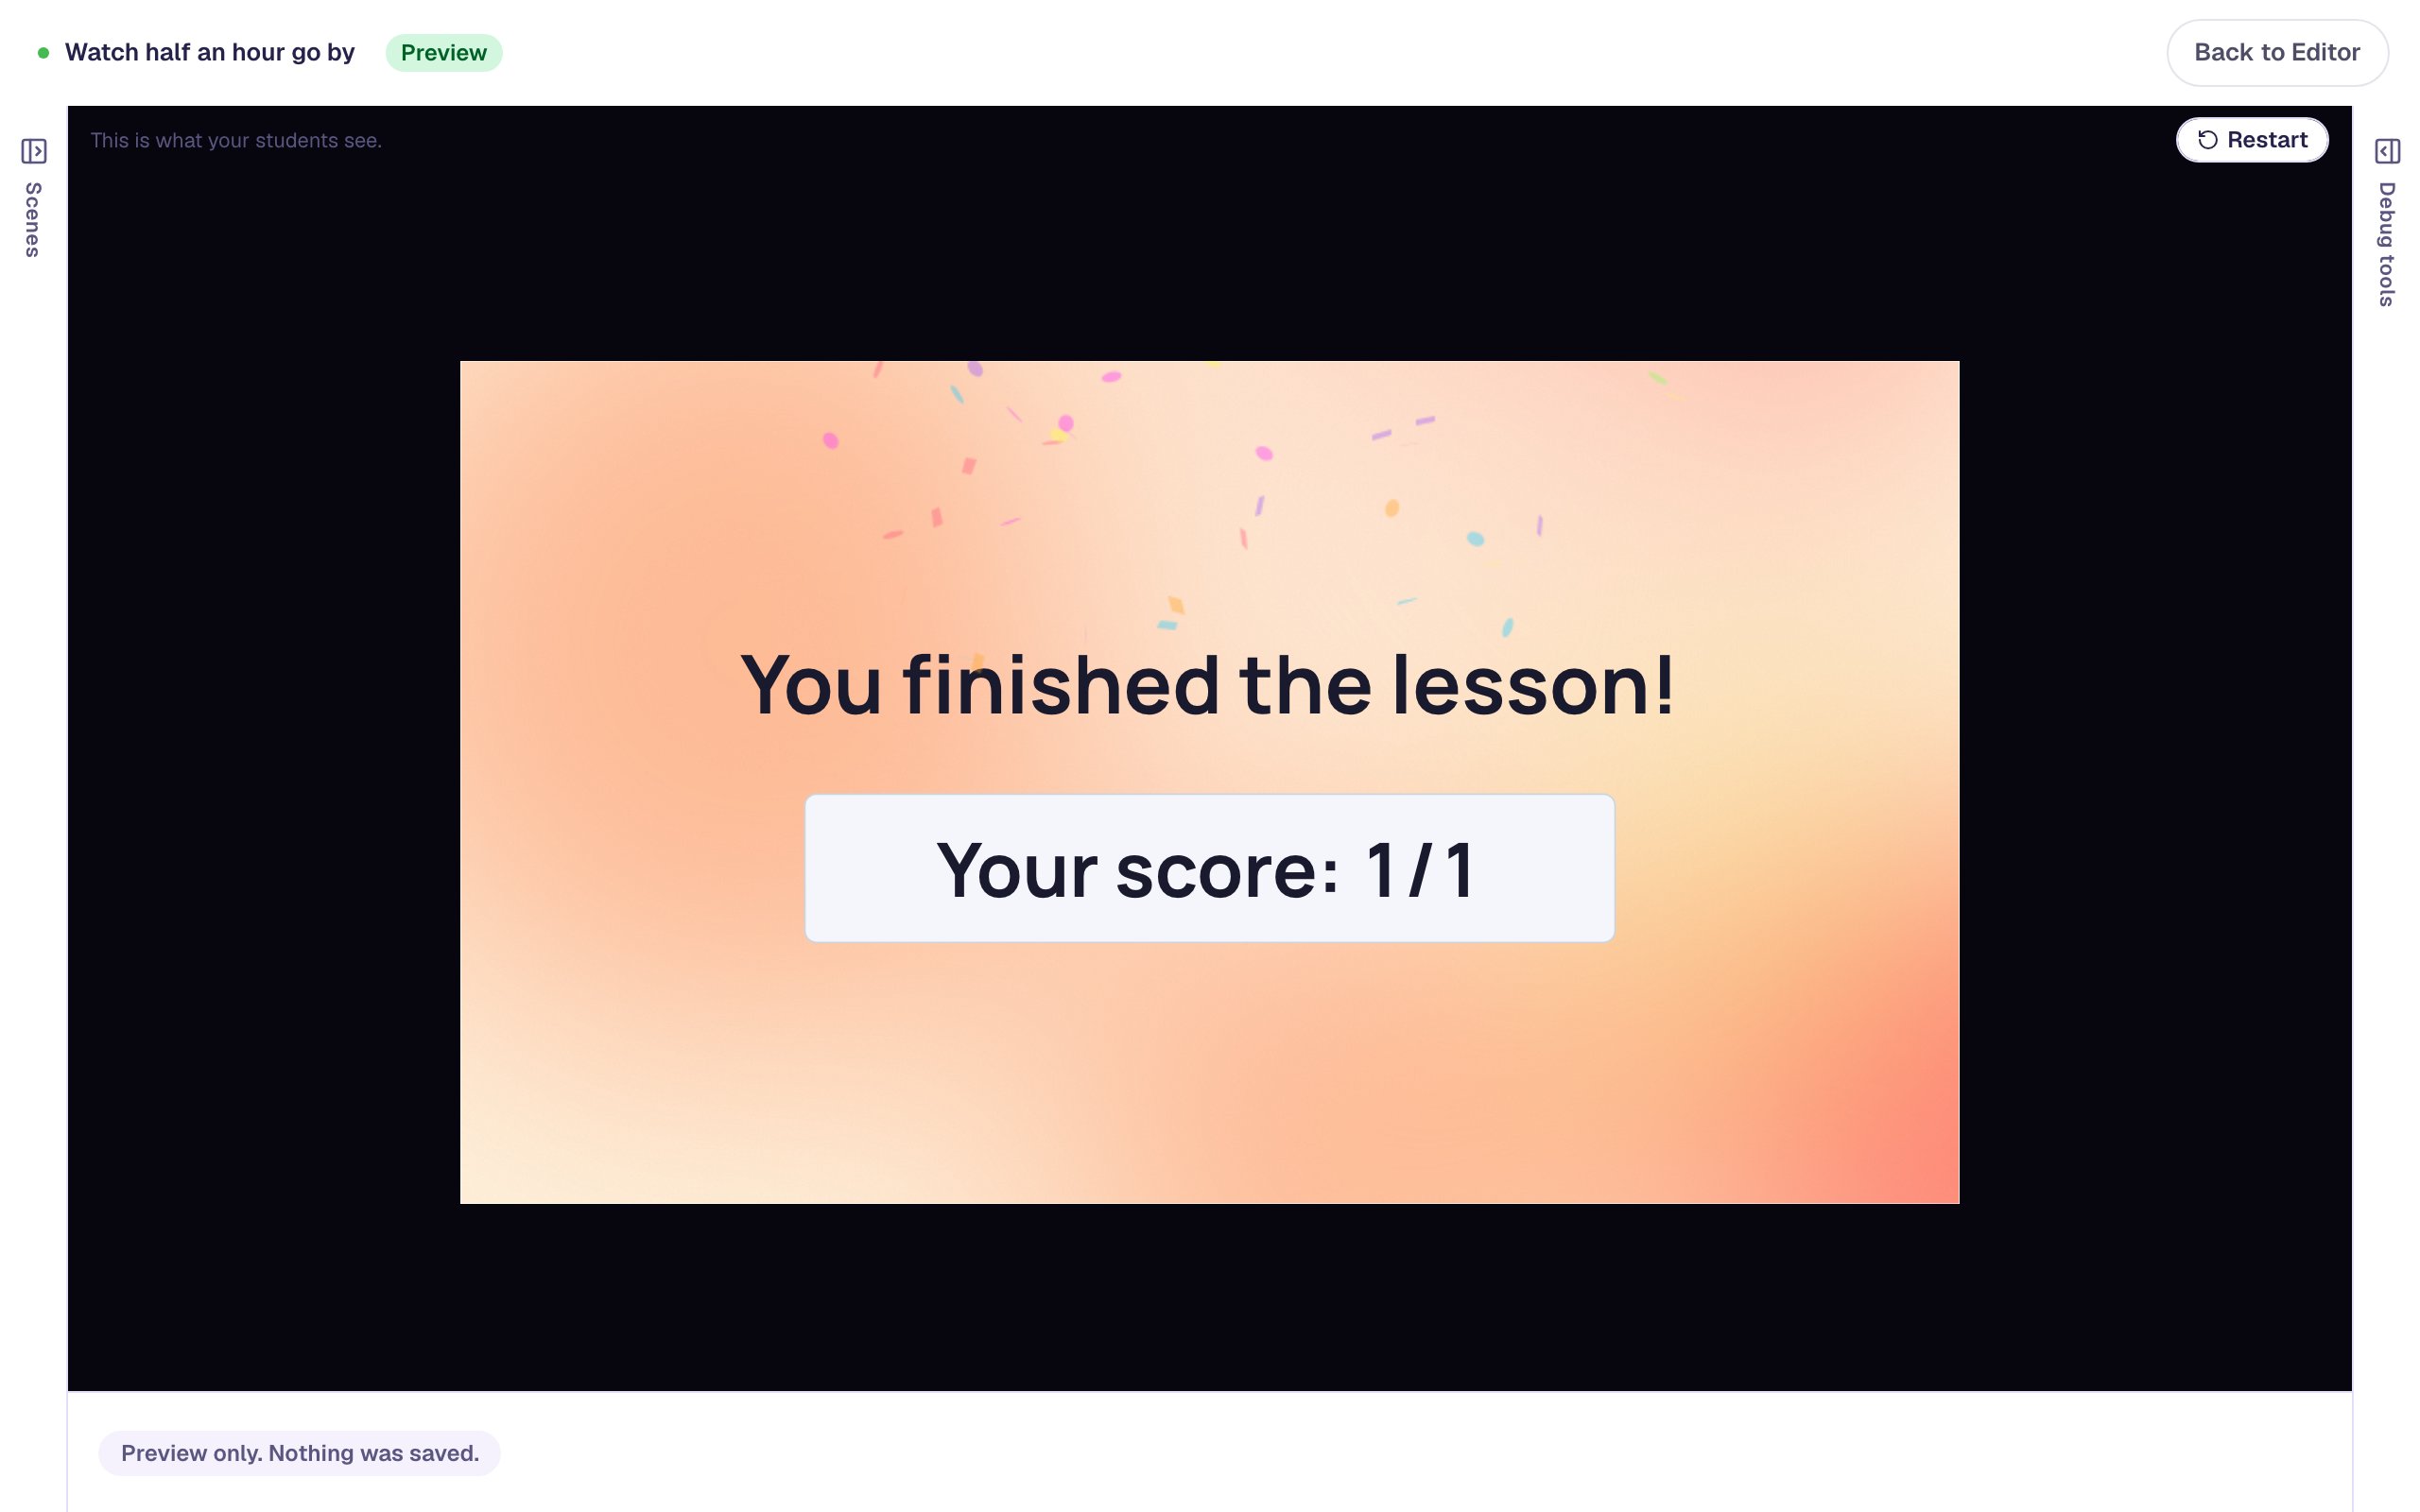
The score is 1 out of 1 because only the Read clock is graded. The Show clock and the buttons are there to teach.
What you built
A "watch, then try" telling-time lesson:
- a Show clock with a digital clock and shading, which students watch rather than answer,
- three buttons whose On Press behaviors use the clock's own actions: Turn the hands to for half past 3 and 4 o'clock, and Set the time to start again,
- a Read clock at 4:30 with the choices students really confuse, and a hint that points back to the short hand, and
- photos with alt text that describes them for students using screen readers.
The same pattern works for any worked example: a button that runs a widget's action before students try it themselves. Other widgets have demonstration actions too, such as Solve the puzzle on pattern blocks and Reveal the answers on find in picture; see Widget State and Actions. To have students turn the hands themselves, see Tell time to the half hour with a clock.
Make this lesson yours
Add the lesson you just watched being built to your account, then change it for your class: your questions, your pictures, your colors.
Free to sign up, and you'll come straight back here. I have an account