Make a celebration screen with text effects
Turn a lesson's ending into a celebration. A headline in a shimmering gradient types itself out, and a line of praise underneath keeps changing to a new cheer.
- Level
- Beginner
- Time
- About 10 min
- Steps
- 7
- Updated
- Oct 18, 2026
A one-question planet quiz whose ending types out "You did it!" in a shimmering pink, gold and teal gradient over the score, with a gold line under it that cycles through three cheers.
Get the finished lesson
Skip straight to the result, or keep it open beside the steps. Add this tutorial's lesson to your account and explore how it works in the studio.
Free to sign up, and you'll come straight back here. I have an account
The last screen of a lesson is the one students remember. Berdee gives every lesson an ending with a headline, the student's score and a burst of confetti. With a few text effects, you can make that ending a real celebration.
In this tutorial you'll finish a short planet quiz with an ending whose headline, You did it!, types itself out letter by letter in a gradient that slowly shifts between pink, gold and teal. Under the score, a gold line moves through three cheers: Super star! ⭐, Planet pro! 🪐 and Out of this world! 🚀. You'll use three effects: Aurora gradient, Typing and Morph between.
Step 1: Build a one-question quiz
Start a blank lesson (New lesson, then Start from scratch) and name it Planet quiz. Click an empty part of the canvas, open Background, click Choose a style, and pick Starfield from Nature.
Then add:
- a Heading that says
Planet quiz, set to 44 px and white, - a Body that asks
Which planet is called the Red Planet?, set to 34 px and white, - a Multi Choice with three answers,
Mars(marked correct),SaturnandEarth. Set it to 720 wide and 120 tall so the answers sit in one row.
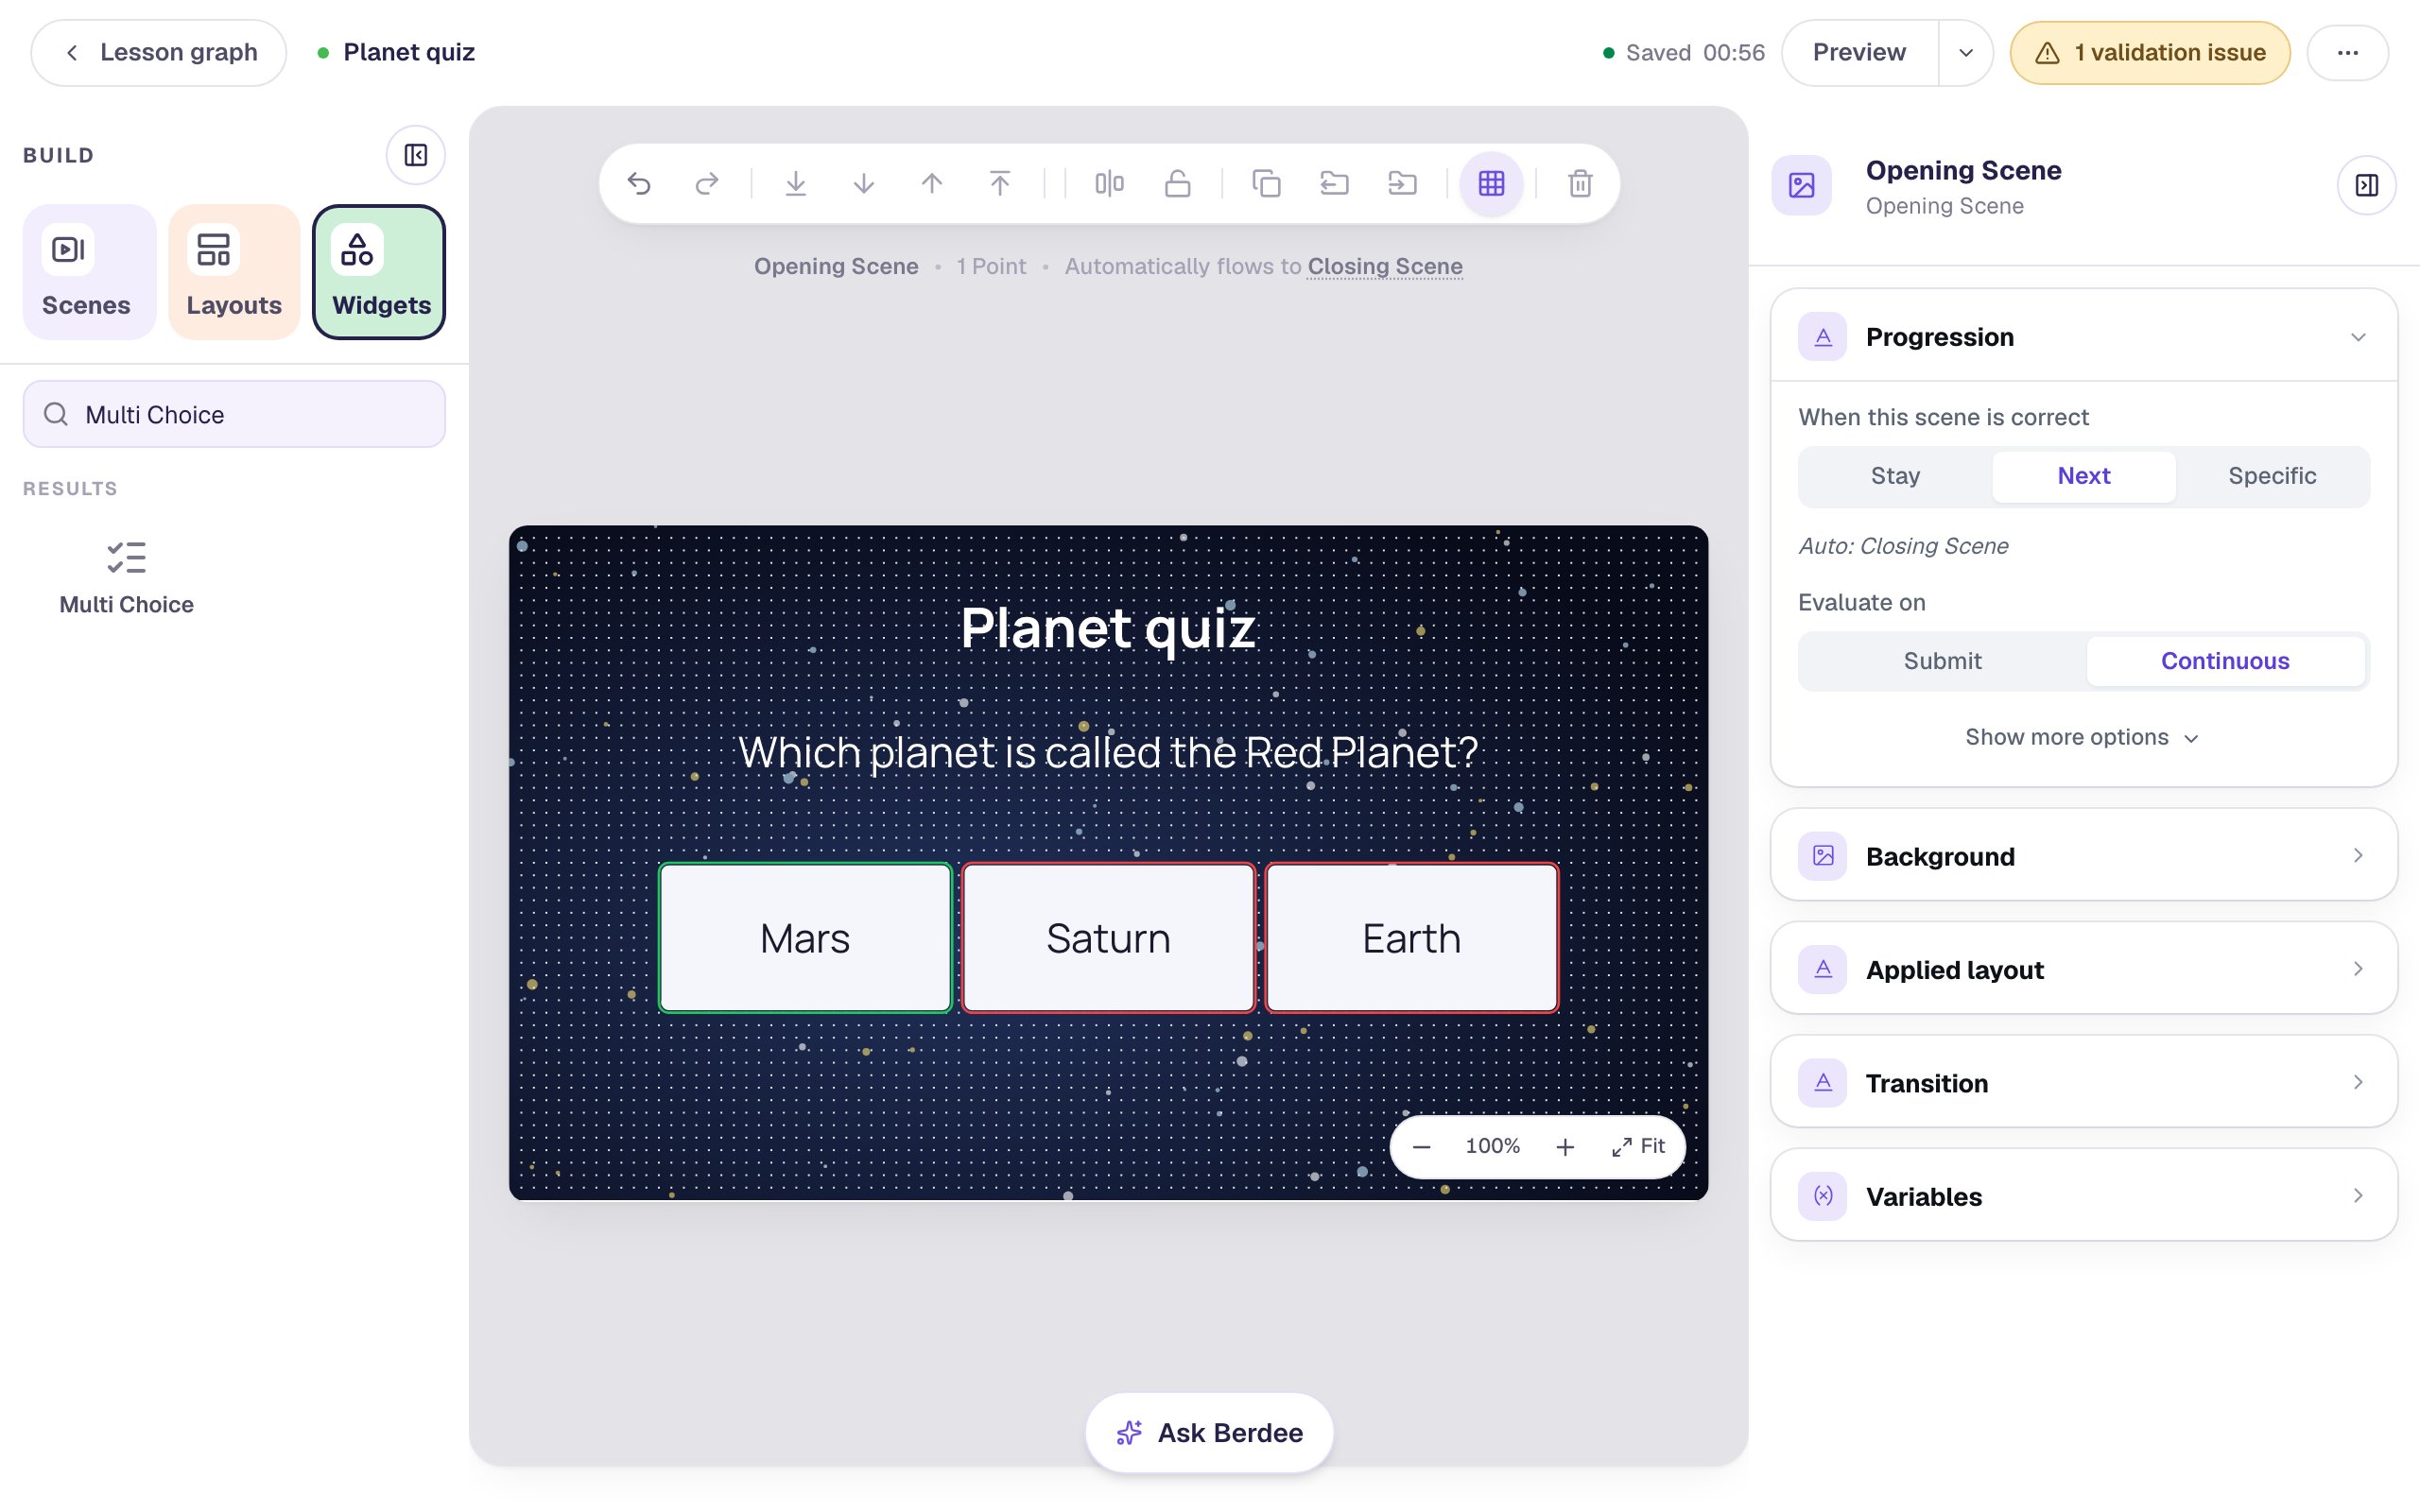
You don't need a Next button. When a student picks the right answer, the scene moves on by itself to the ending.
The badge at the top says the lesson isn't ready to publish: a published lesson needs a Submit Button set to Lesson. That doesn't matter while you practise. Add one before you publish.
Step 2: Open the ending
In the Scenes panel, open the Closing Scene under Ending, and give it the same Starfield background.
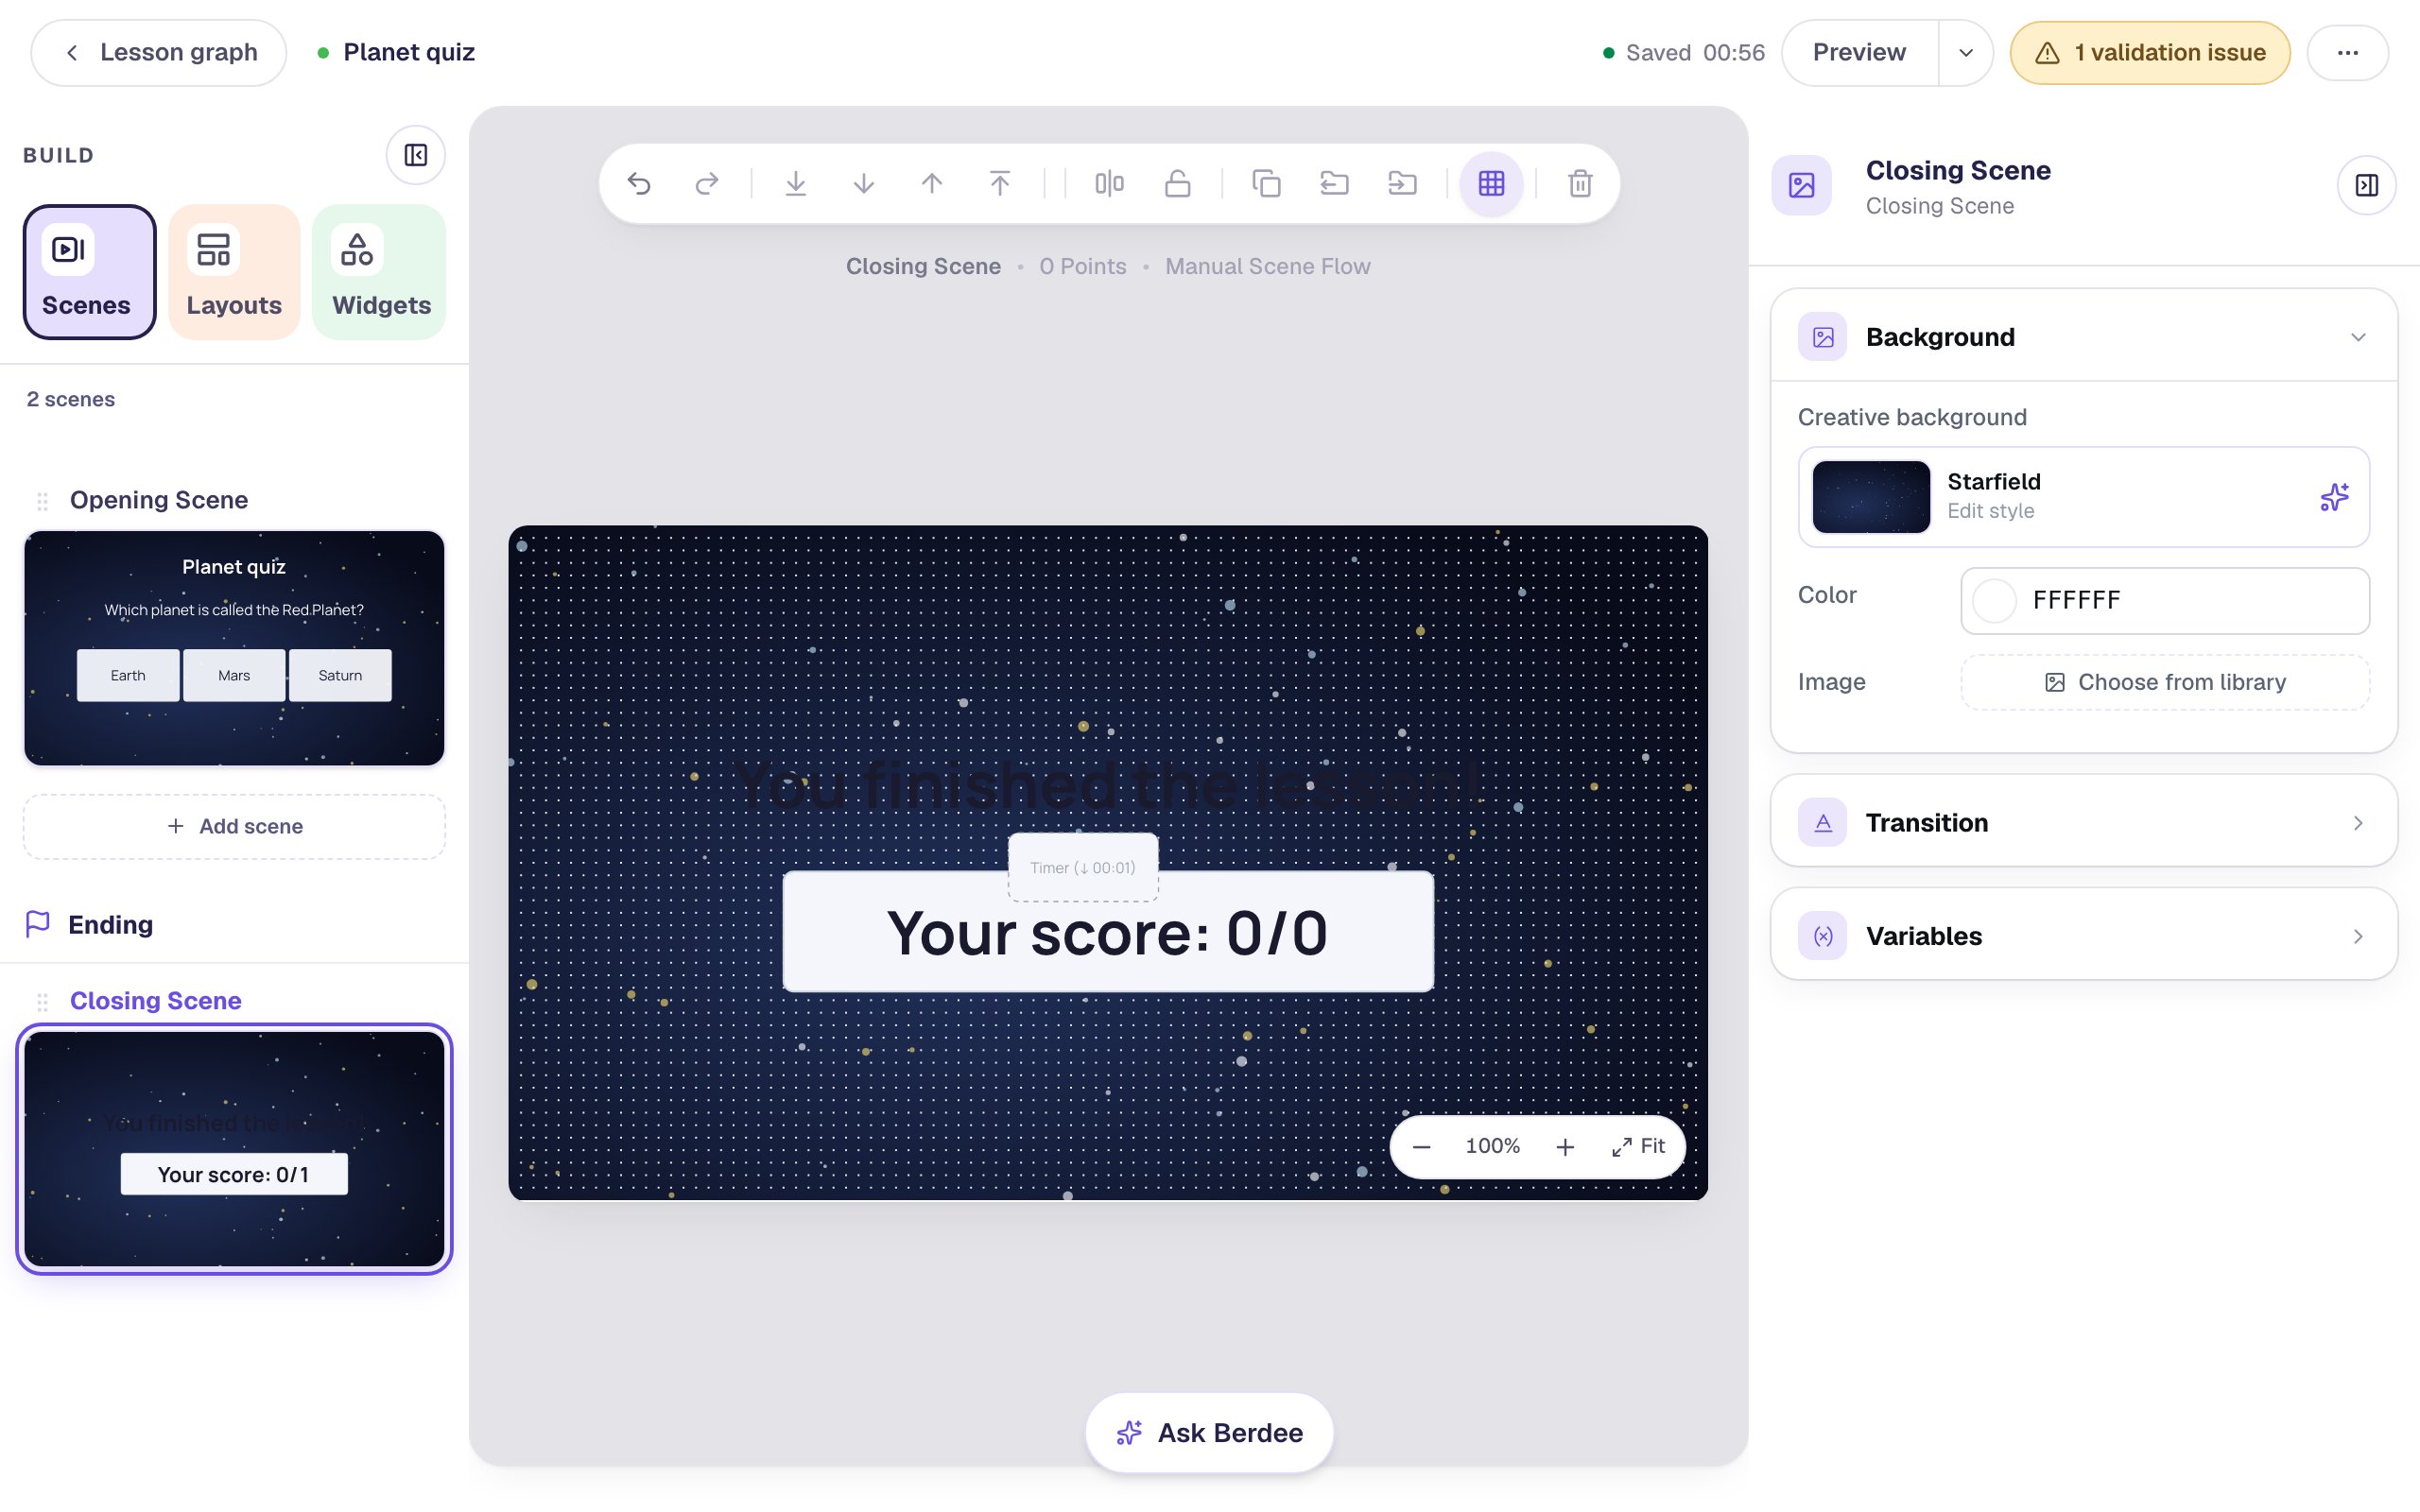
Every new lesson's ending has three widgets: the Ending headline, the Ending score, and a hidden timer (the small dashed Timer box) that plays the confetti a second after the student arrives. The score reads 0/0 here because nobody has played yet.
Step 3: Give the headline a party font
Click the headline to select it. Then:
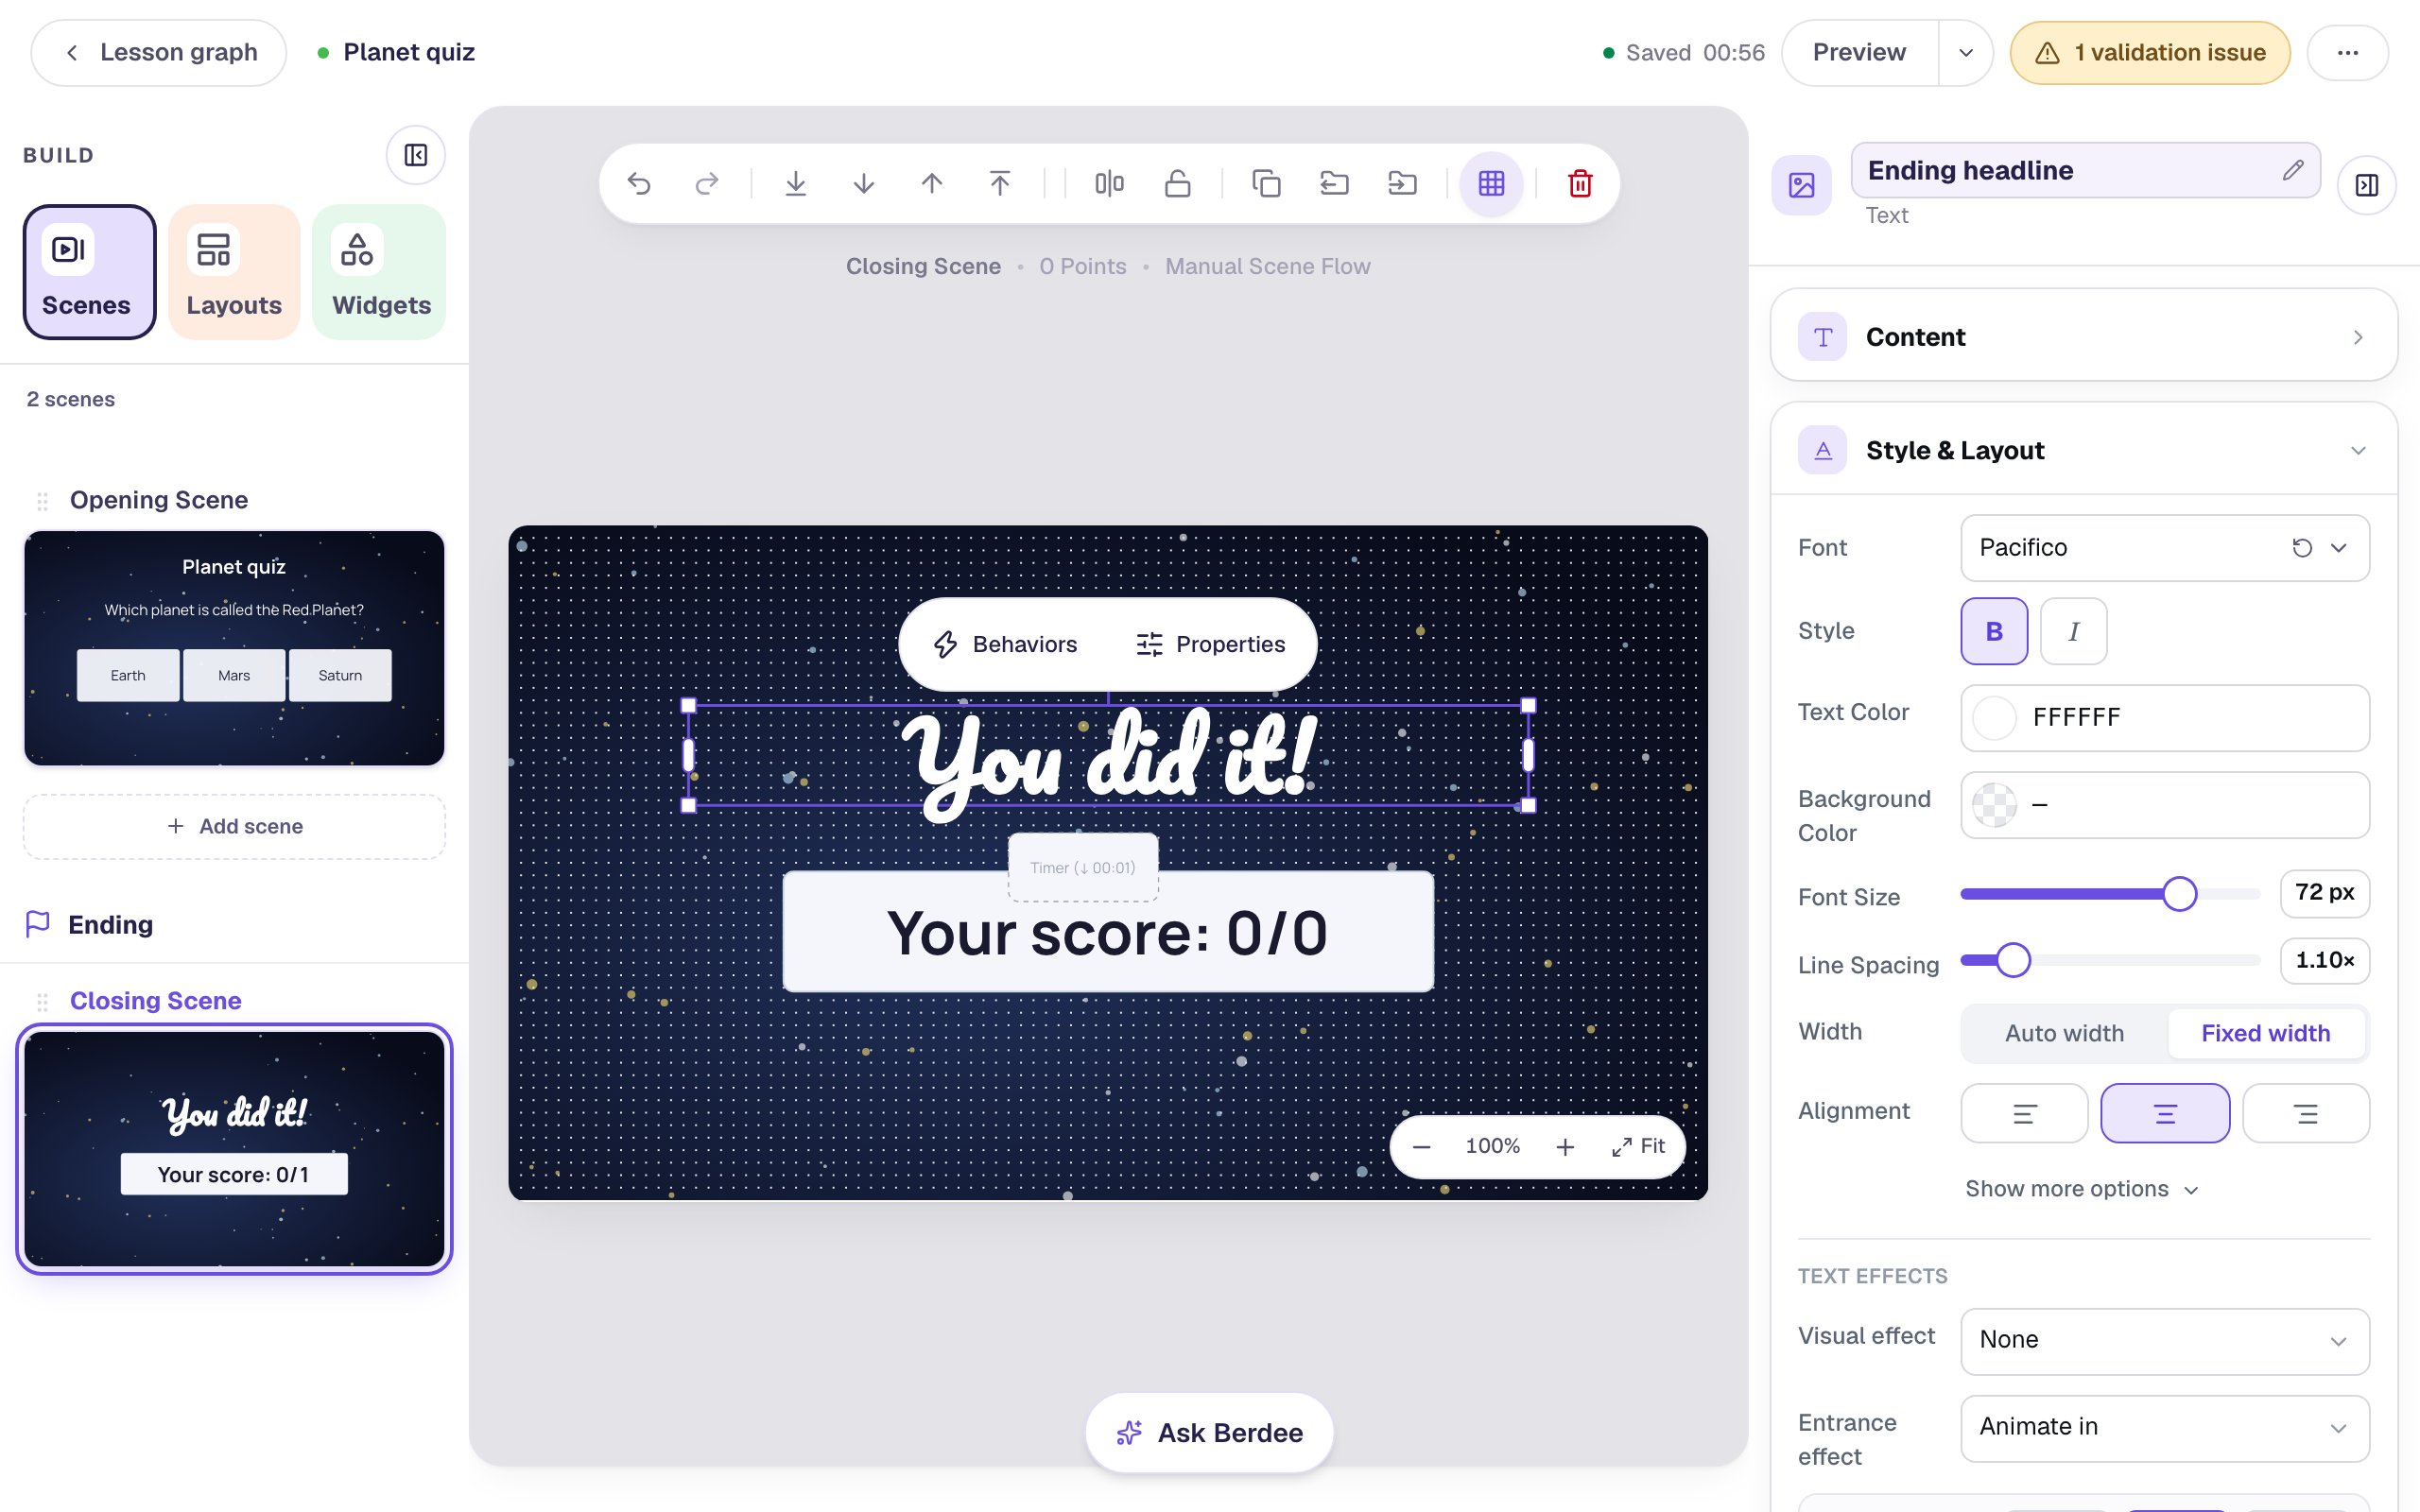
- Open Content and replace the text with
You did it!. - Under Style & Layout, open Font, type
Pacifico, and pick it. Pacifico is one of the Fun fonts, made for titles like this one. - Set Font Size to 72 px and Text Color to white.
- Drag the headline up a little. Pacifico's curly tails hang below the box, and you want them clear of the score.
Save fonts like Pacifico for titles. A whole paragraph in a script font is hard for young readers.
Step 4: Add an aurora gradient
With the headline still selected, scroll down Style & Layout to Text effects. Here's the whole step:
- Set Visual effect to Aurora gradient. The letters fill with a gradient that slowly drifts across them.
- It starts with three Colors. Click the second color and pick a gold, then click the third and pick a teal. Keep the first one, the pink. Pick colors that are bright against your background, so the words stay easy to read.
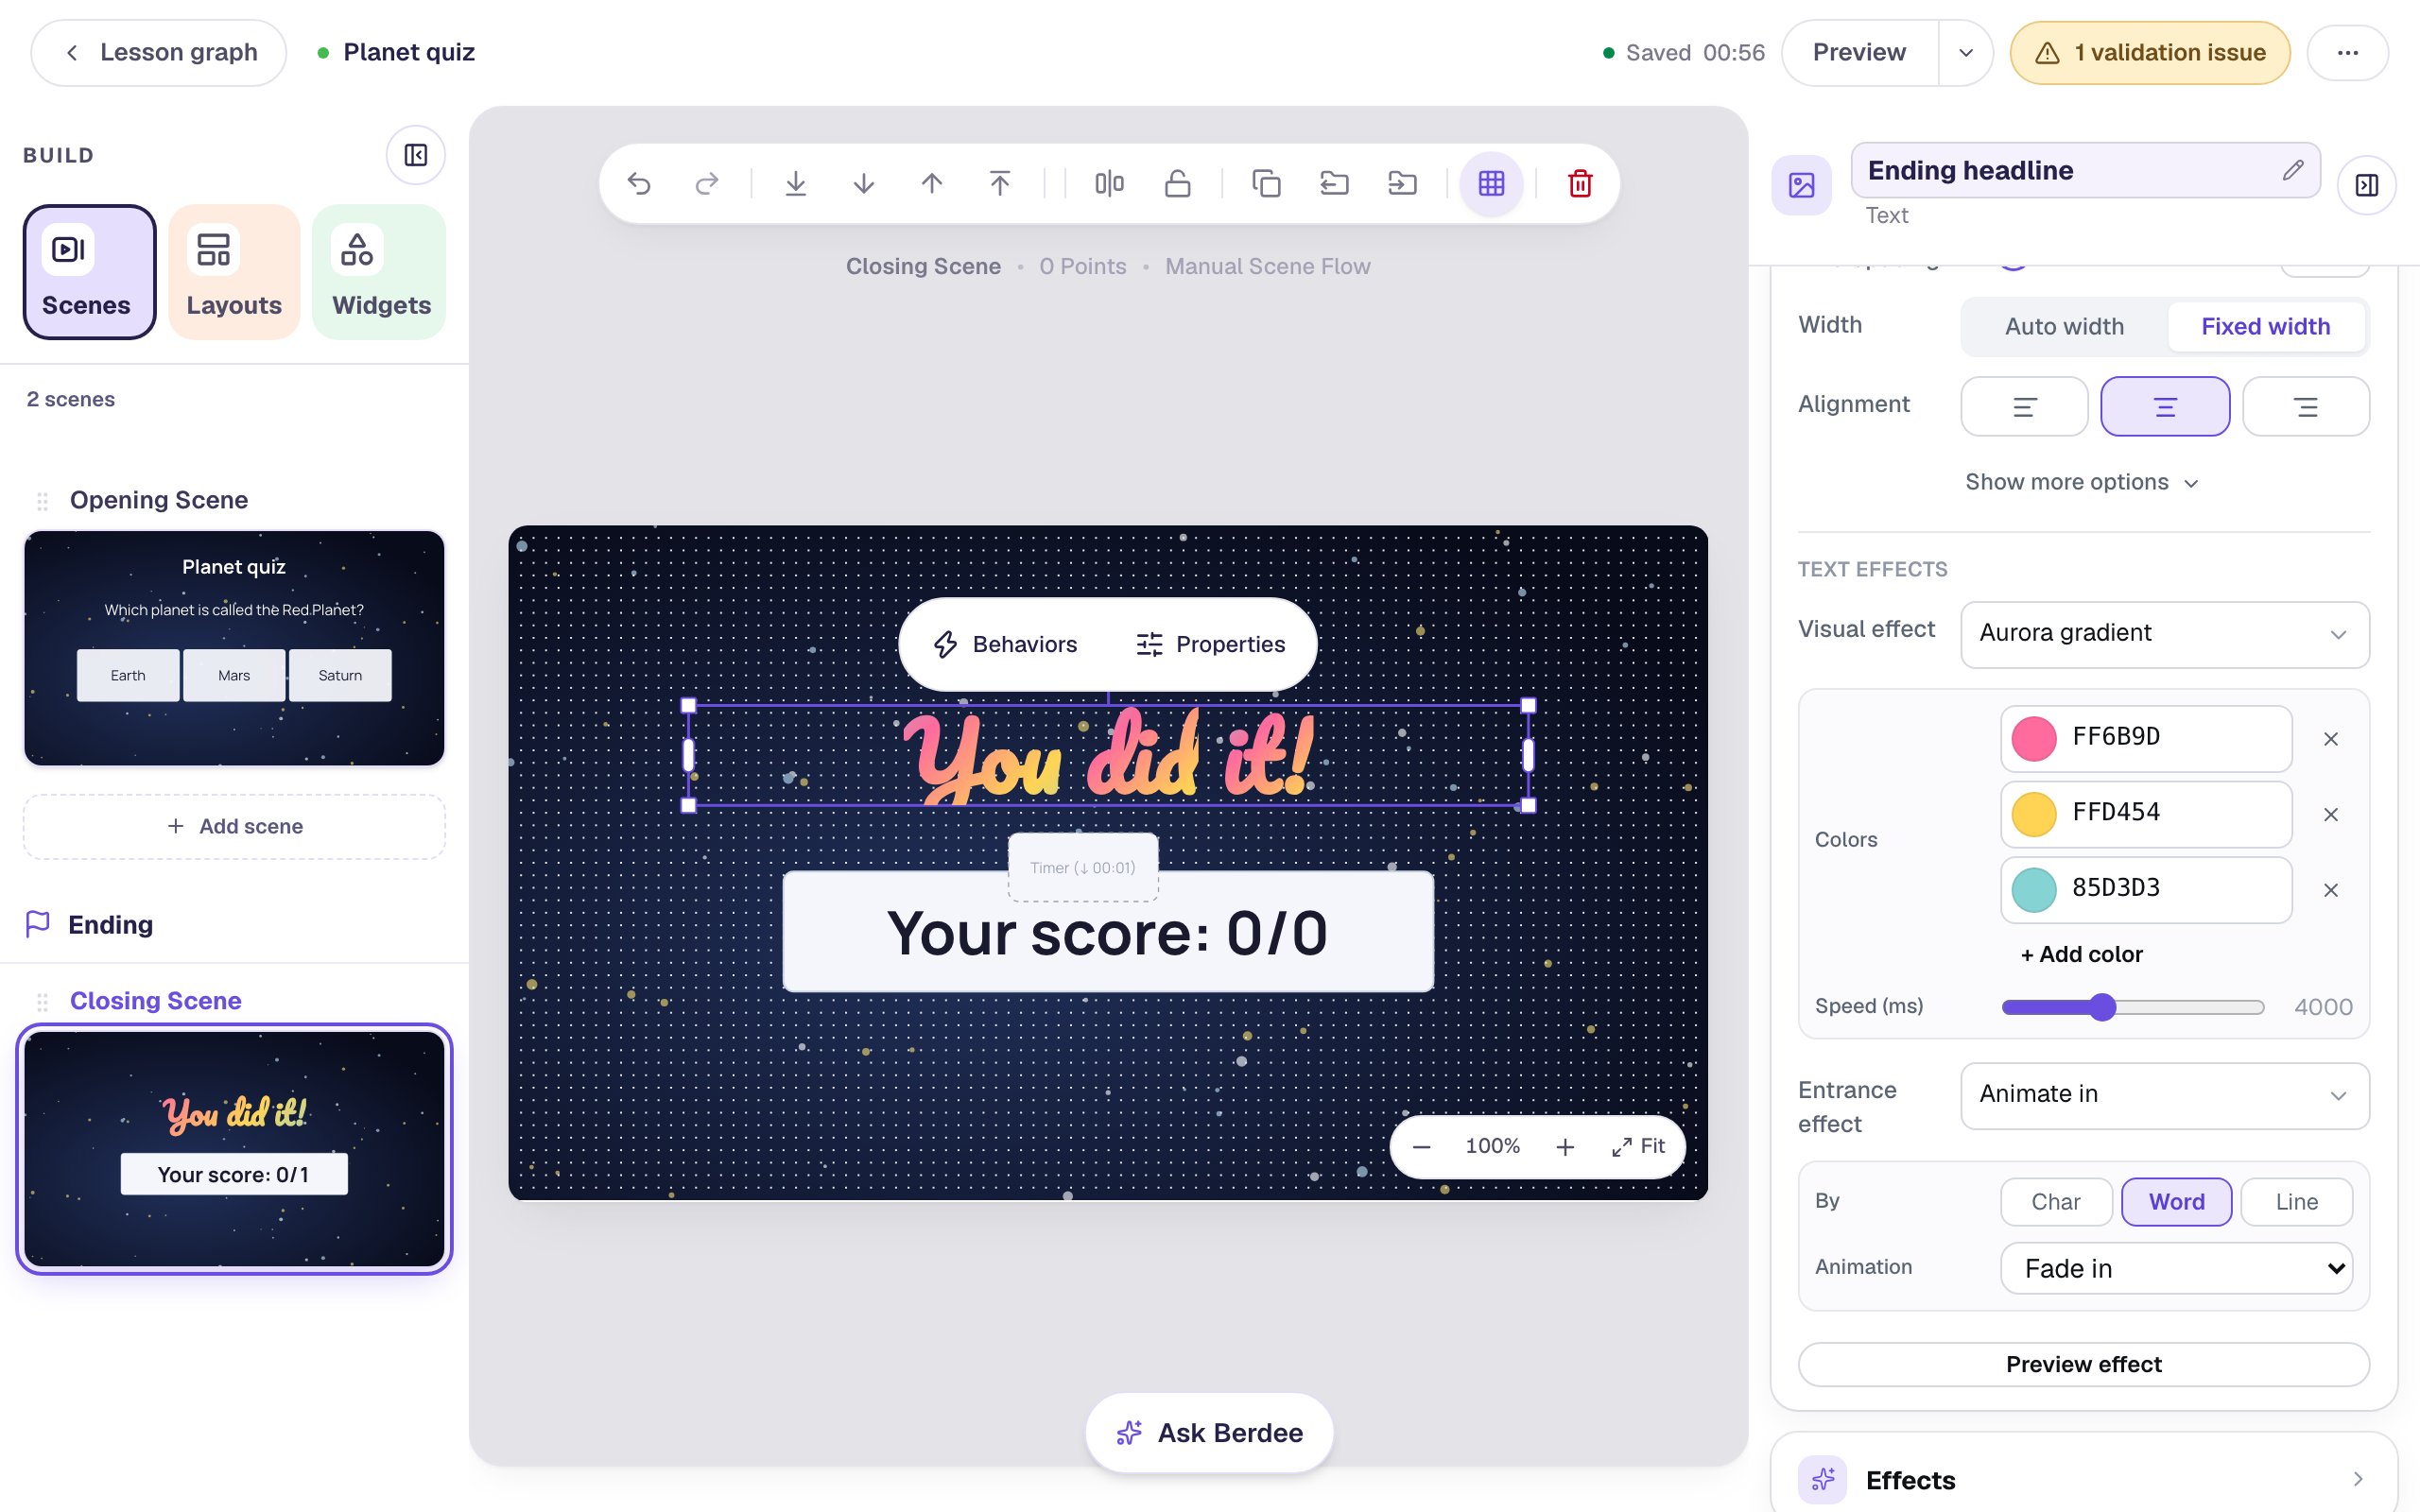
Speed is how long the gradient takes to sweep across once, in milliseconds. 4000 (four seconds) is a gentle drift. A lower number moves faster.
A visual effect changes how the text looks the whole time it's on screen. The other visual effects are Line shadow, Sparkles and Spinning circle.
Step 5: Make the headline type itself out
Just below Visual effect is Entrance effect. It shows Animate in, because Berdee fades the ending's headline in word by word. An entrance effect plays once, when the text first appears. Swap it for a typewriter:
- Set Entrance effect to Typing.
- Under Strings (cycled), click Add string and type
You did it!. Typing shows these strings instead of the headline's own text, so use the same words. - Drag Speed (ms/char) to 120, the time each letter takes, so the words arrive at a pace students can follow.
- Leave Loop off. The headline then types once and stays on screen.
- Click Preview effect to watch it play on the canvas.
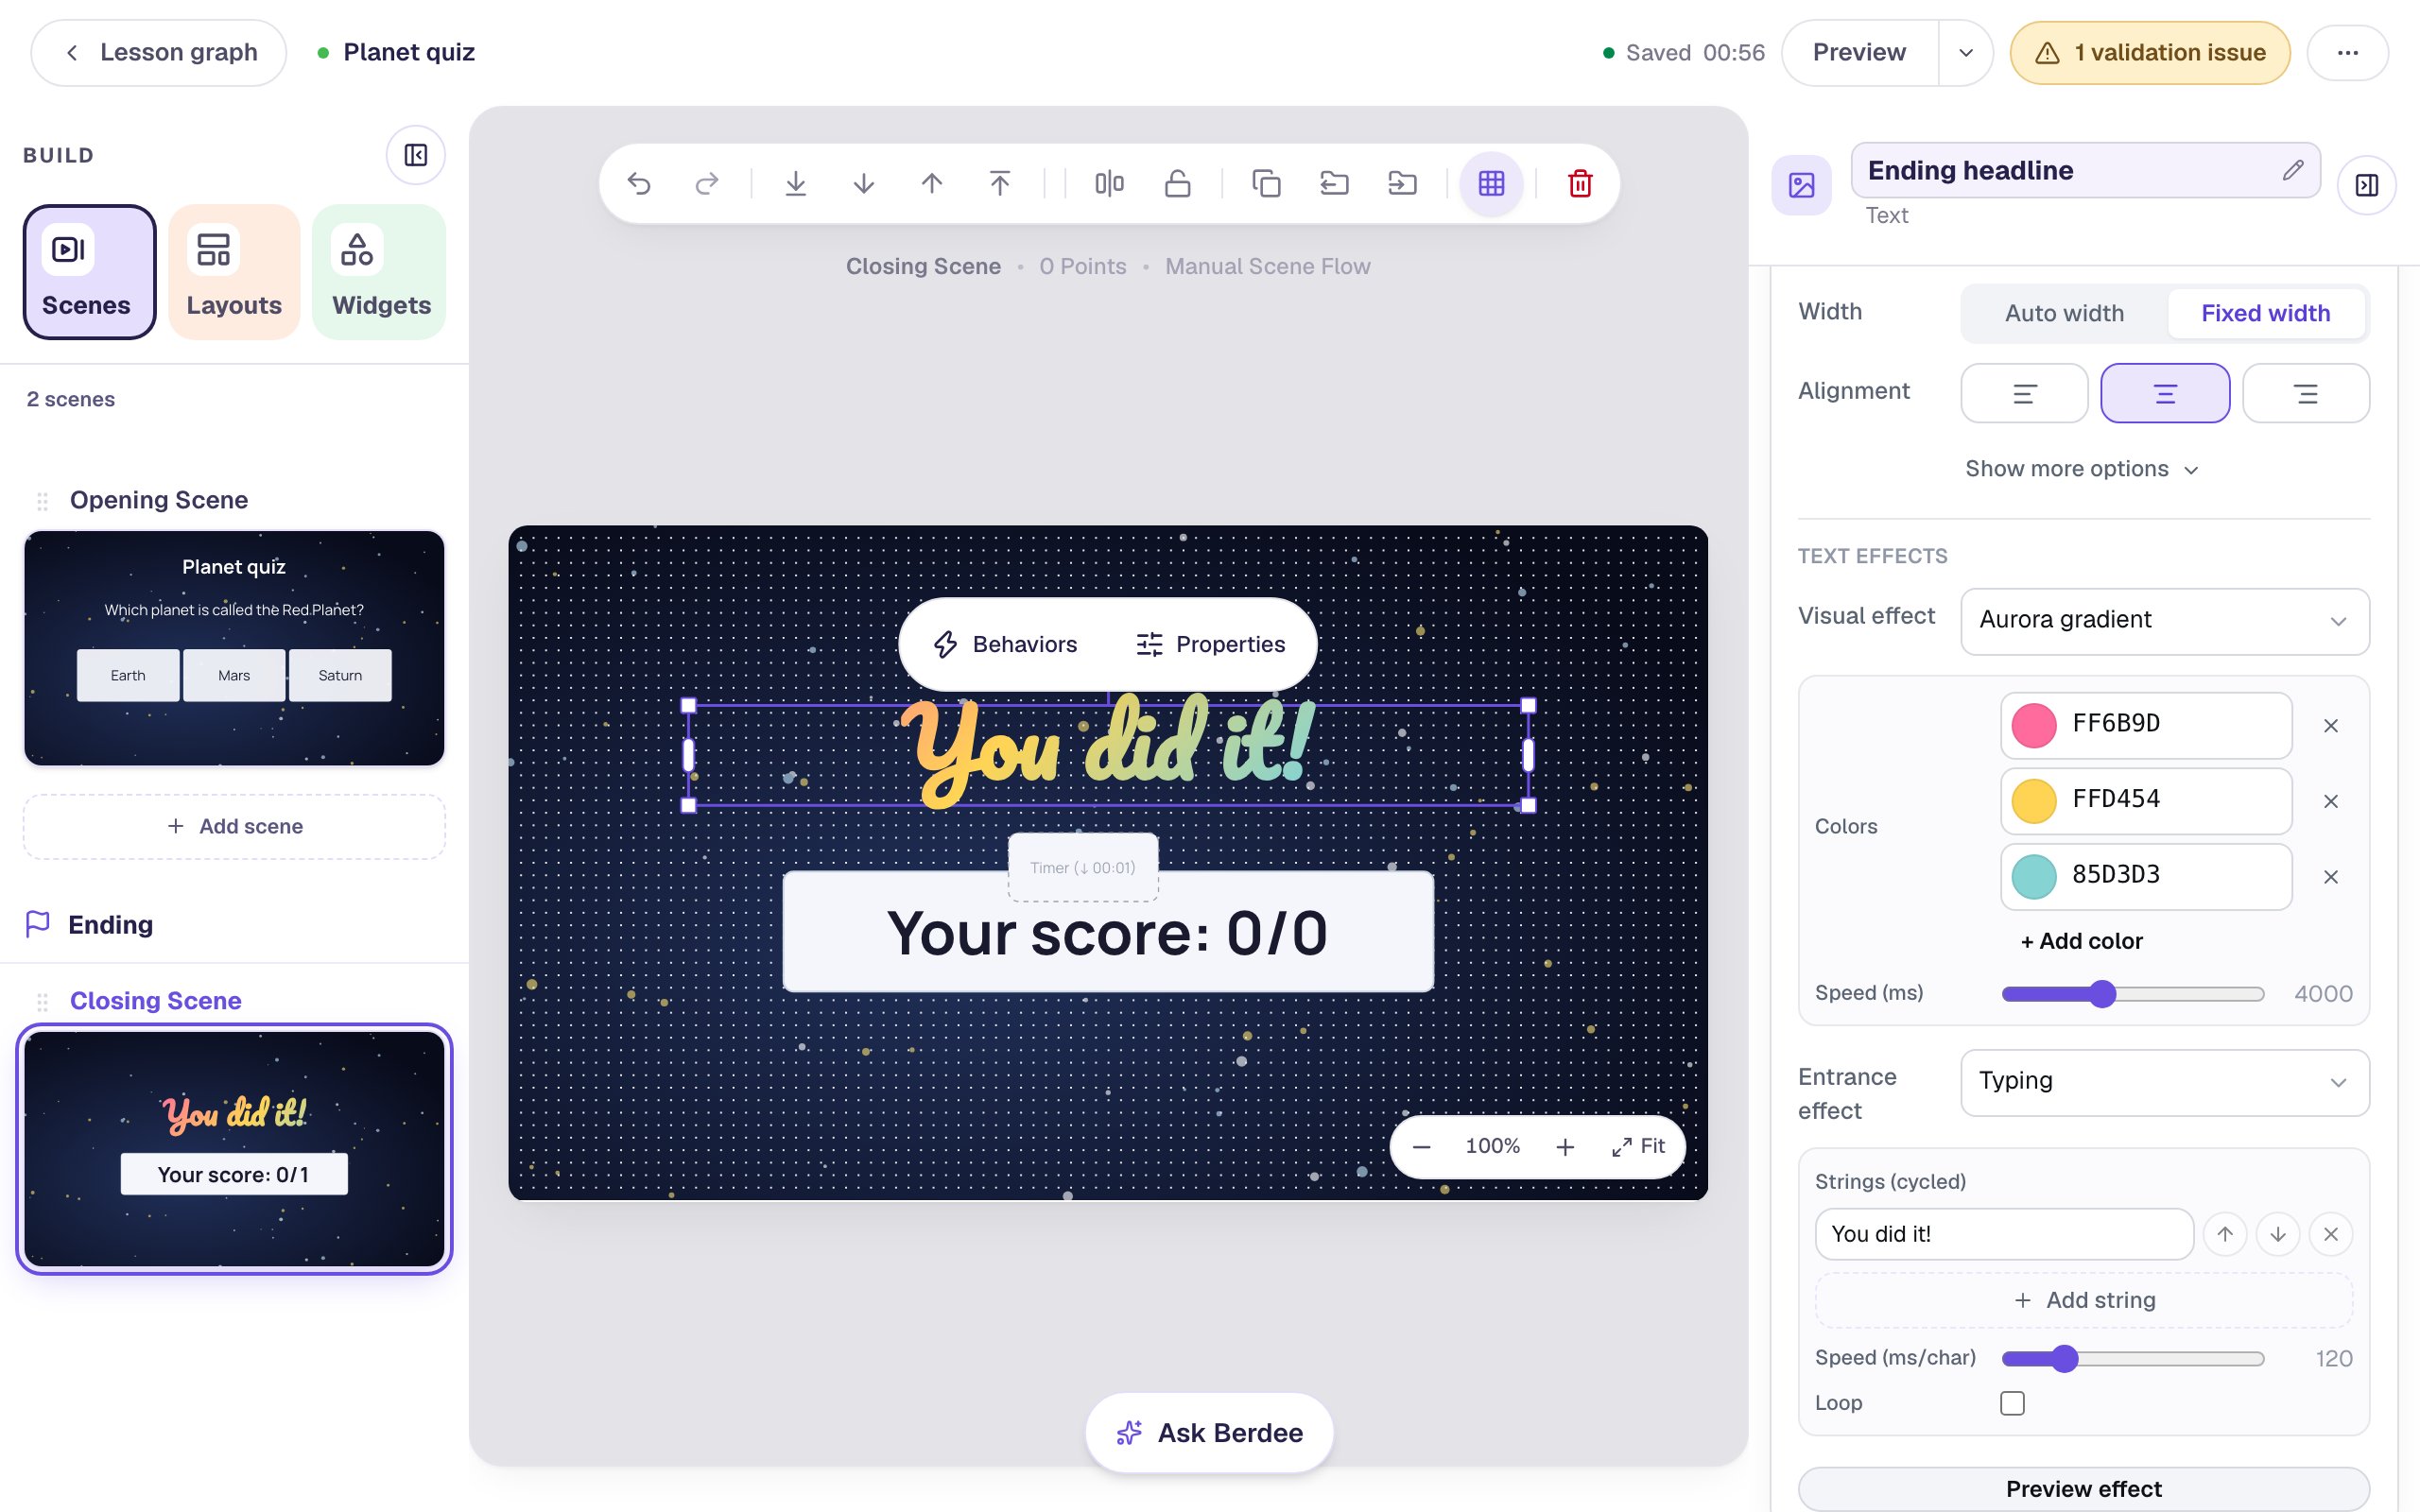
The two effects work together: the letters type in already wearing the gradient.
Step 6: Add a line of praise that changes
Click an empty part of the scene so nothing is selected, then add a Body from the Widgets tab and type Super star! ⭐. Set it to Fixed width, 640 wide, 40 px and a gold Text Color, and drag it below the score.
The new text arrives in Pacifico, because smart styling copies the font of the text already on the scene. It doesn't copy the headline's effects: those belong to the headline. That's what you want here, because two shimmering gradients would compete for attention. Give this line a different effect:
- Leave Visual effect on None, so the line shows its gold.
- Set Entrance effect to Morph between.
- Click Add string three times and type
Super star! ⭐,Planet pro! 🪐andOut of this world! 🚀.
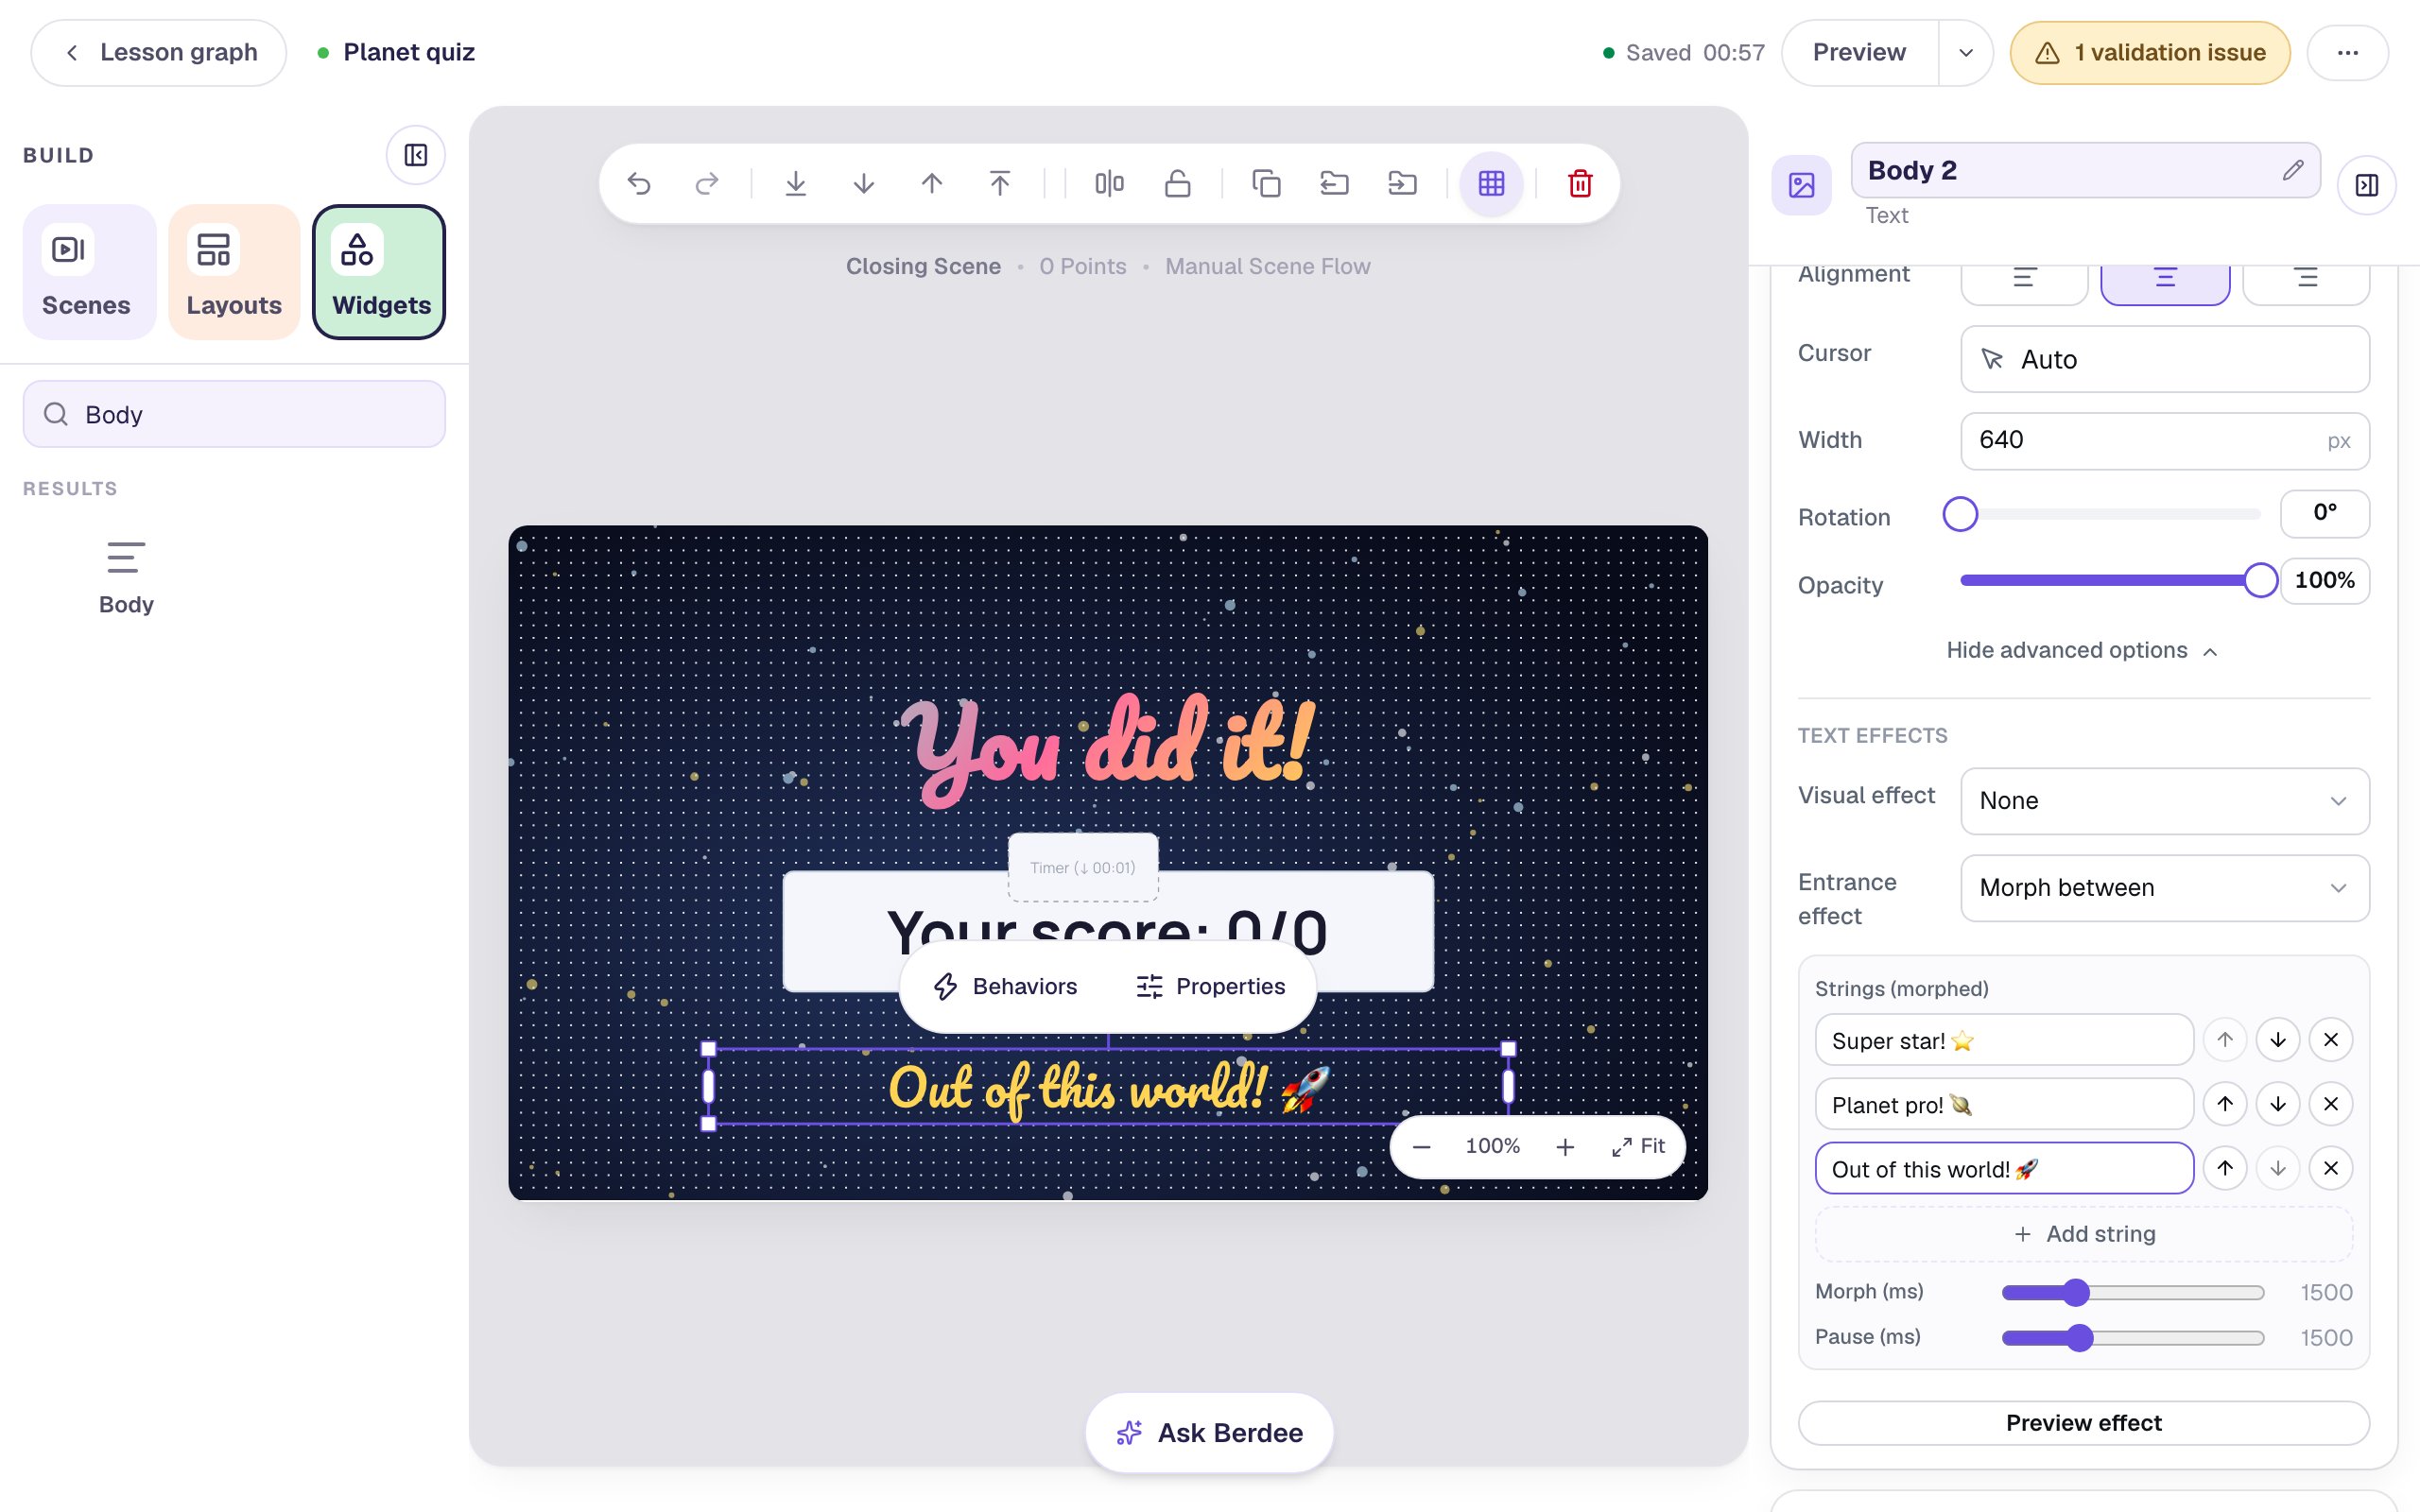
Morph between blurs from one string to the next, over and over, for as long as the ending is open. Morph is how long each change takes, and Pause is how long each cheer stays still. Leave both at 1500 ms.
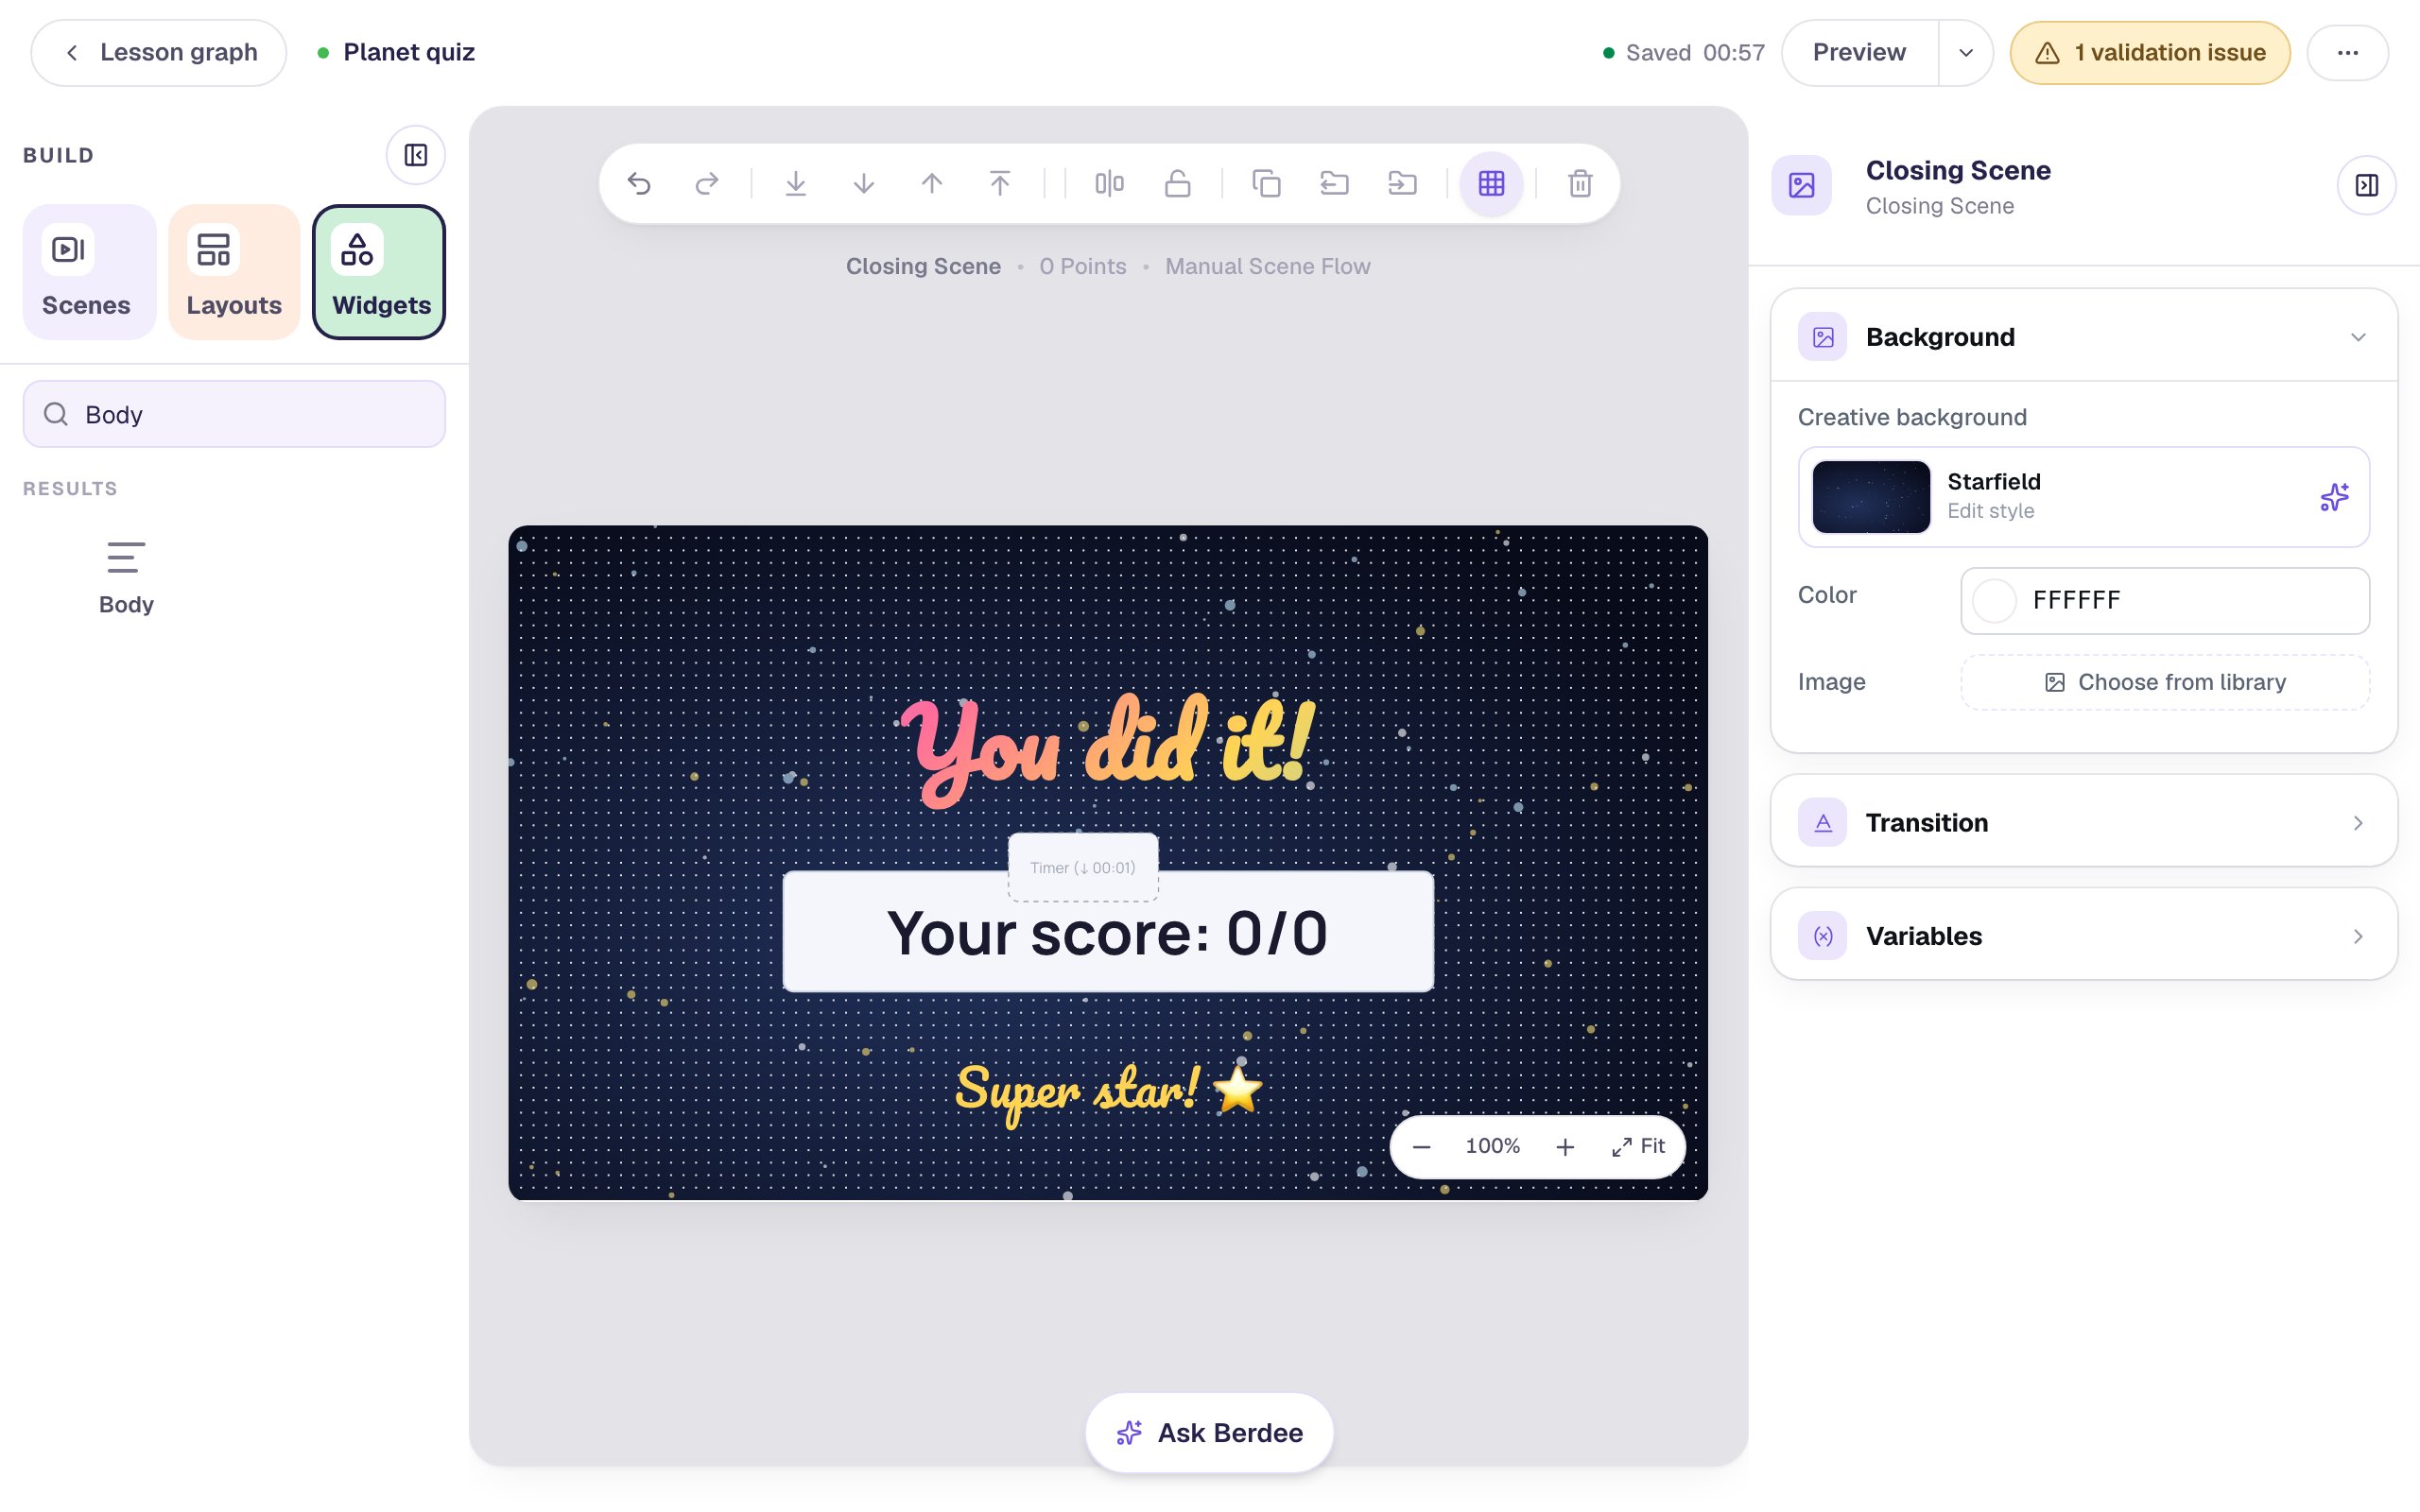
Click an empty part of the canvas to see the finished ending:
Step 7: Celebrate in Preview
Go back to the Opening Scene and click Preview. Pick Mars:
The headline types itself out, the confetti falls, and the line under the score takes turns with each cheer.
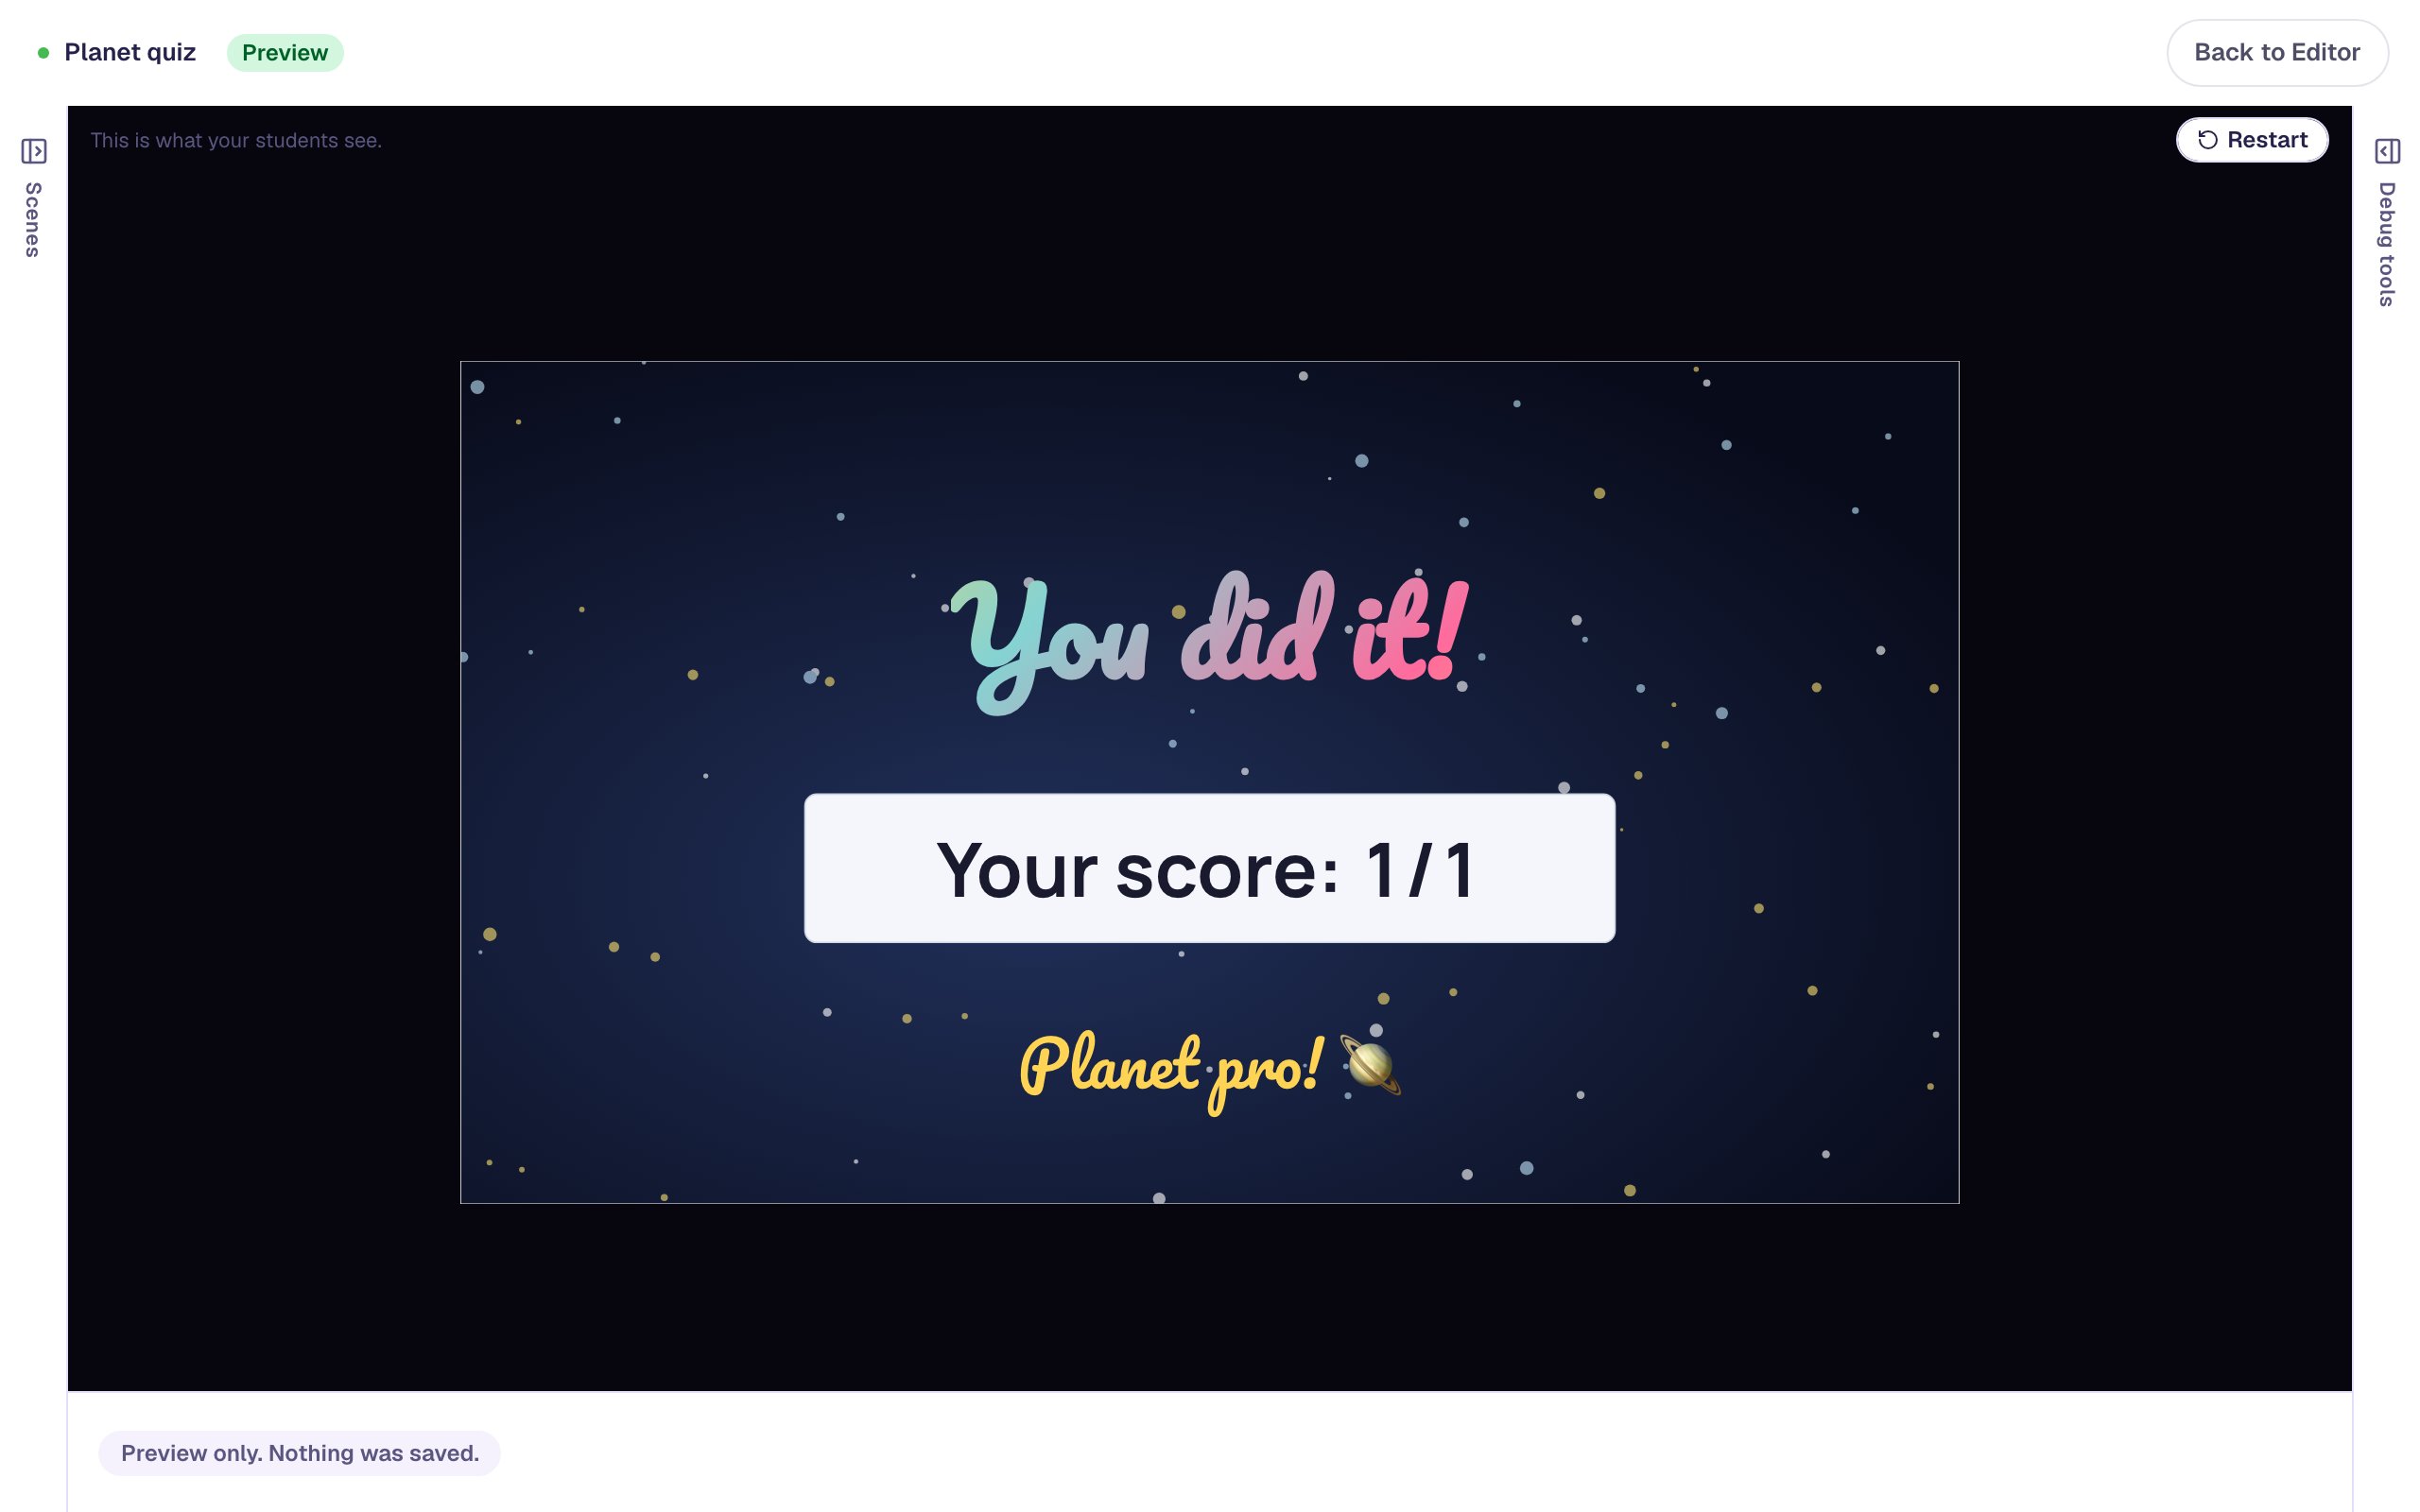
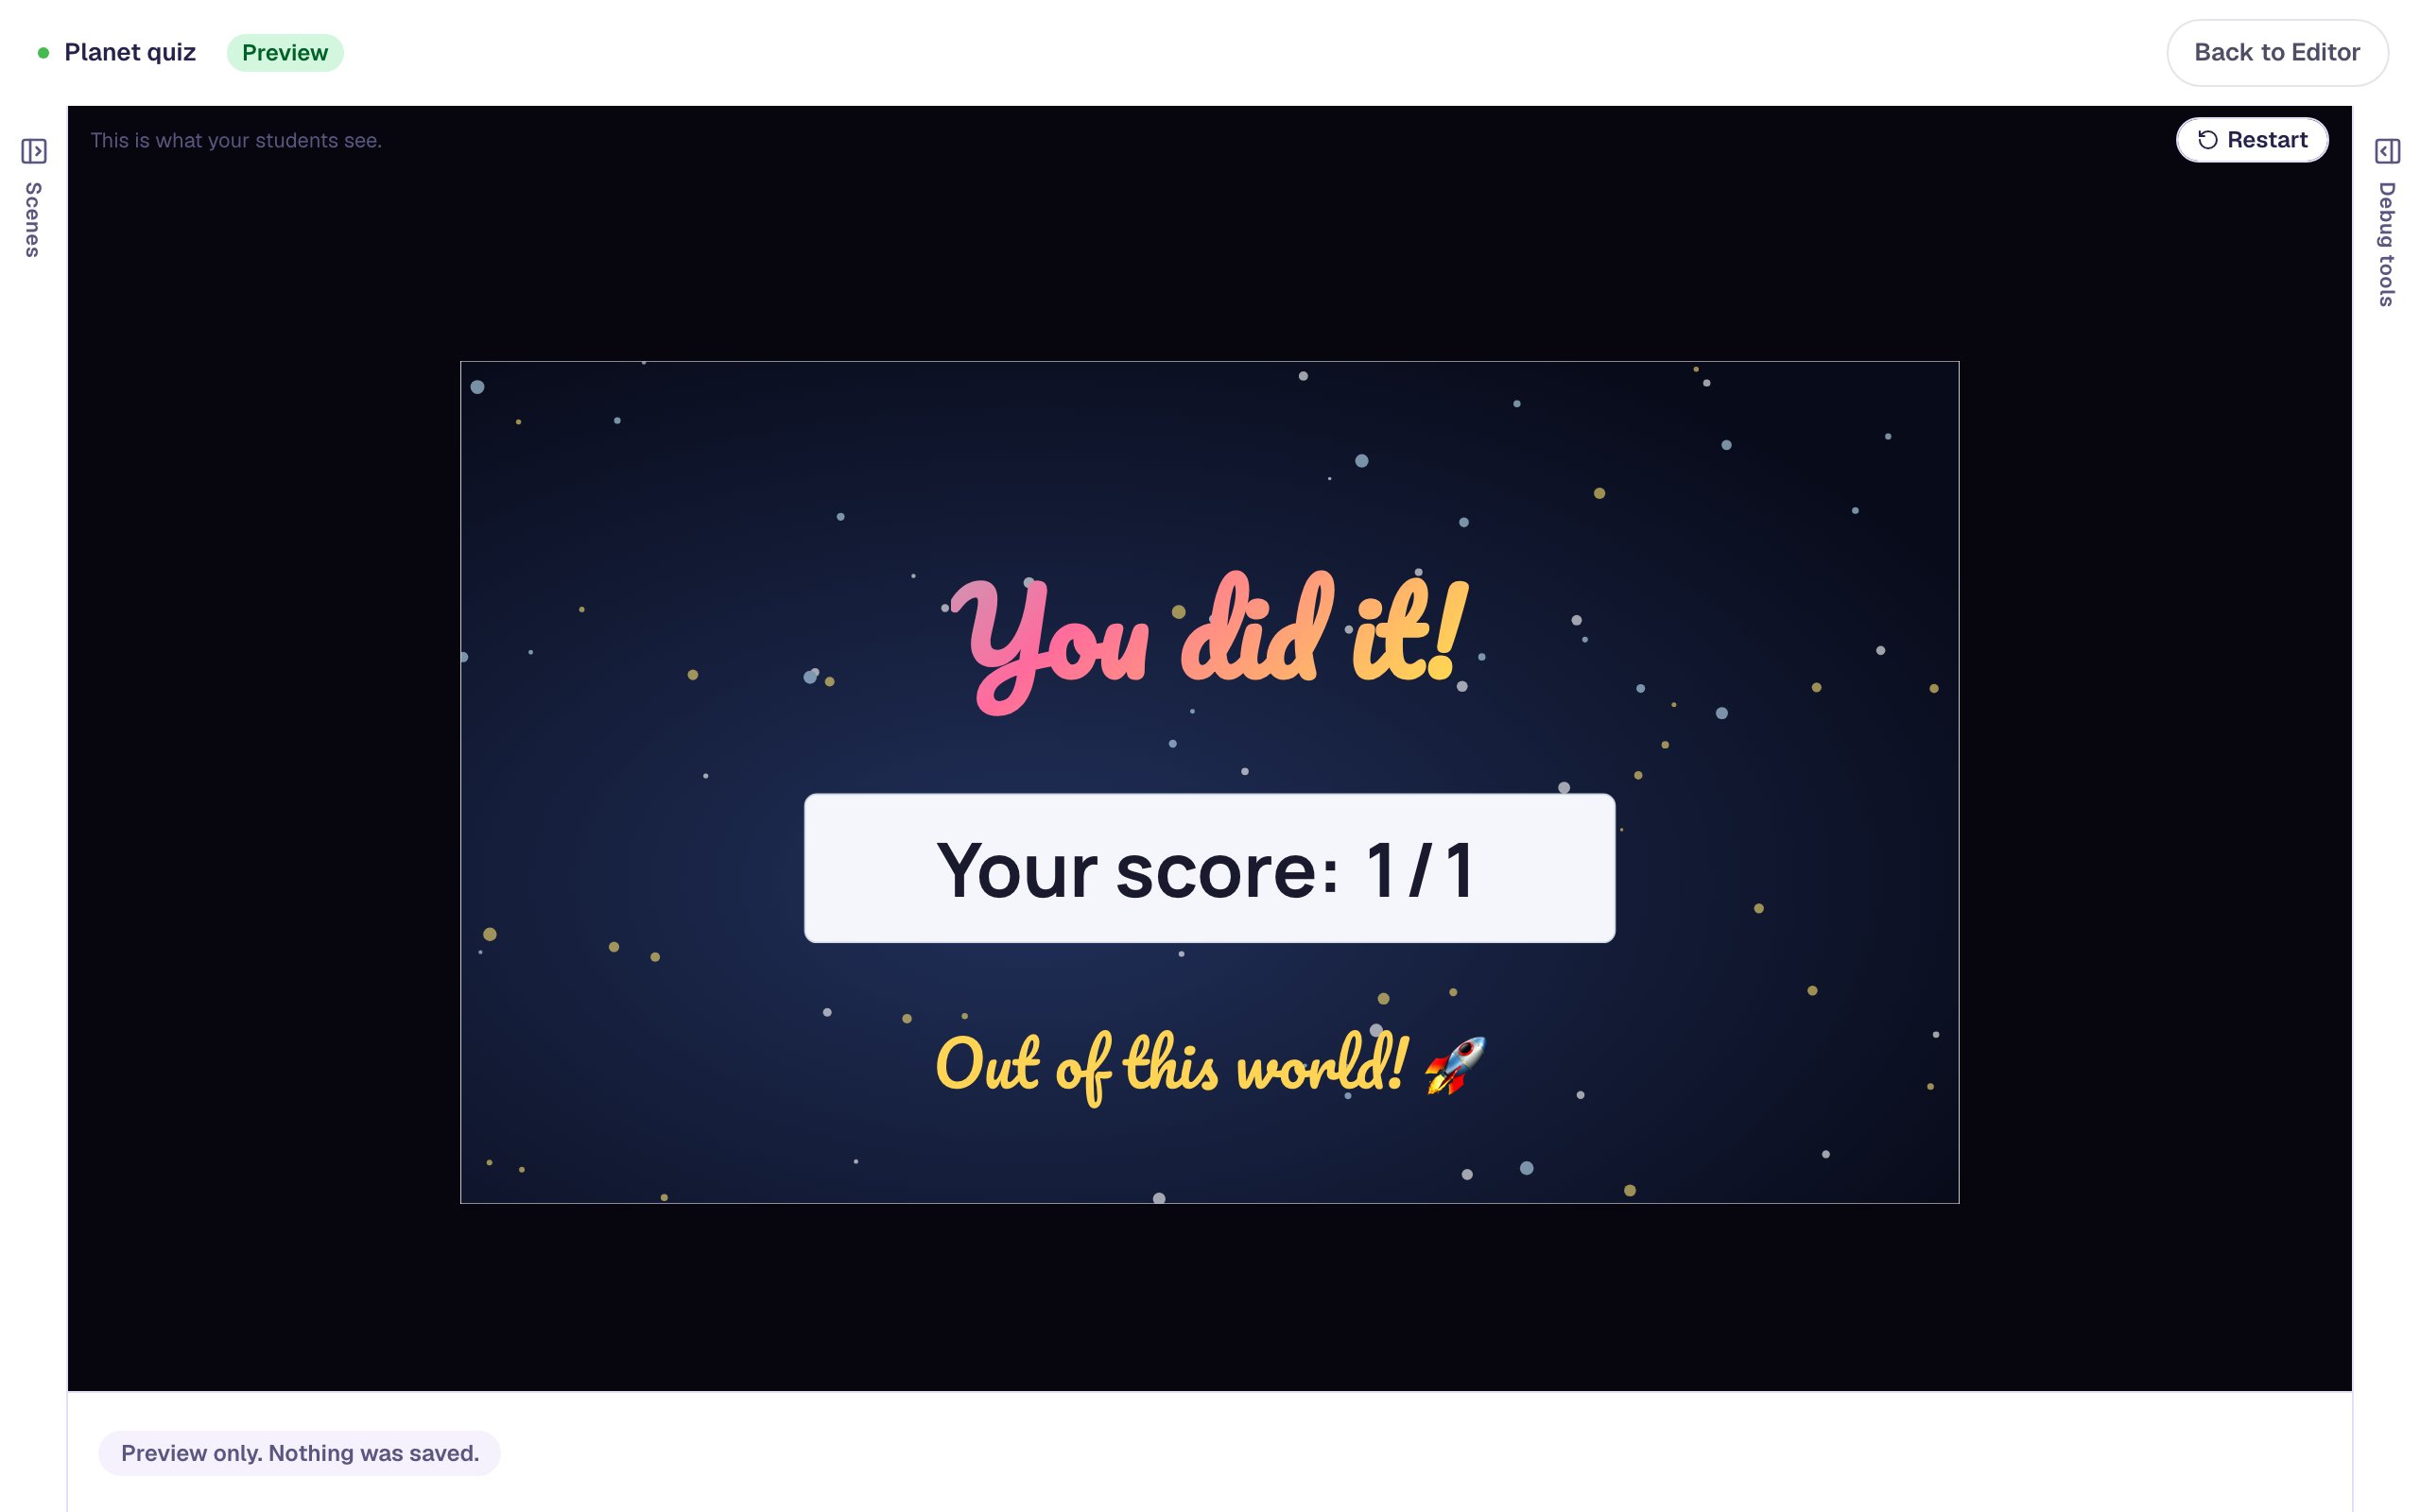
Students who turn on Reduce motion on their device see the ending without the movement: the whole headline at once, in one color, and the first cheer. You don't need to set anything for that.
What you built
An ending worth reaching:
- a headline in Pacifico with an Aurora gradient in pink, gold and teal that keeps gently shifting,
- a Typing entrance with Loop off, so
You did it!types itself out once, - a gold line under the score with Morph between, which takes turns with three cheers, and
- a matching Starfield background on the question and the ending.
Use effects for the moments that matter, like a title or a celebration. If every text on every scene moves, students stop noticing, and it's harder to focus on the questions.
To show the celebration only to students who did well, continue with Cheer a high score and encourage a low one. To make the pictures and buttons on a scene move as well, see Make a scene come alive with effects.
Make this lesson yours
Add the lesson you just watched being built to your account, then change it for your class: your questions, your pictures, your colors.
Free to sign up, and you'll come straight back here. I have an account