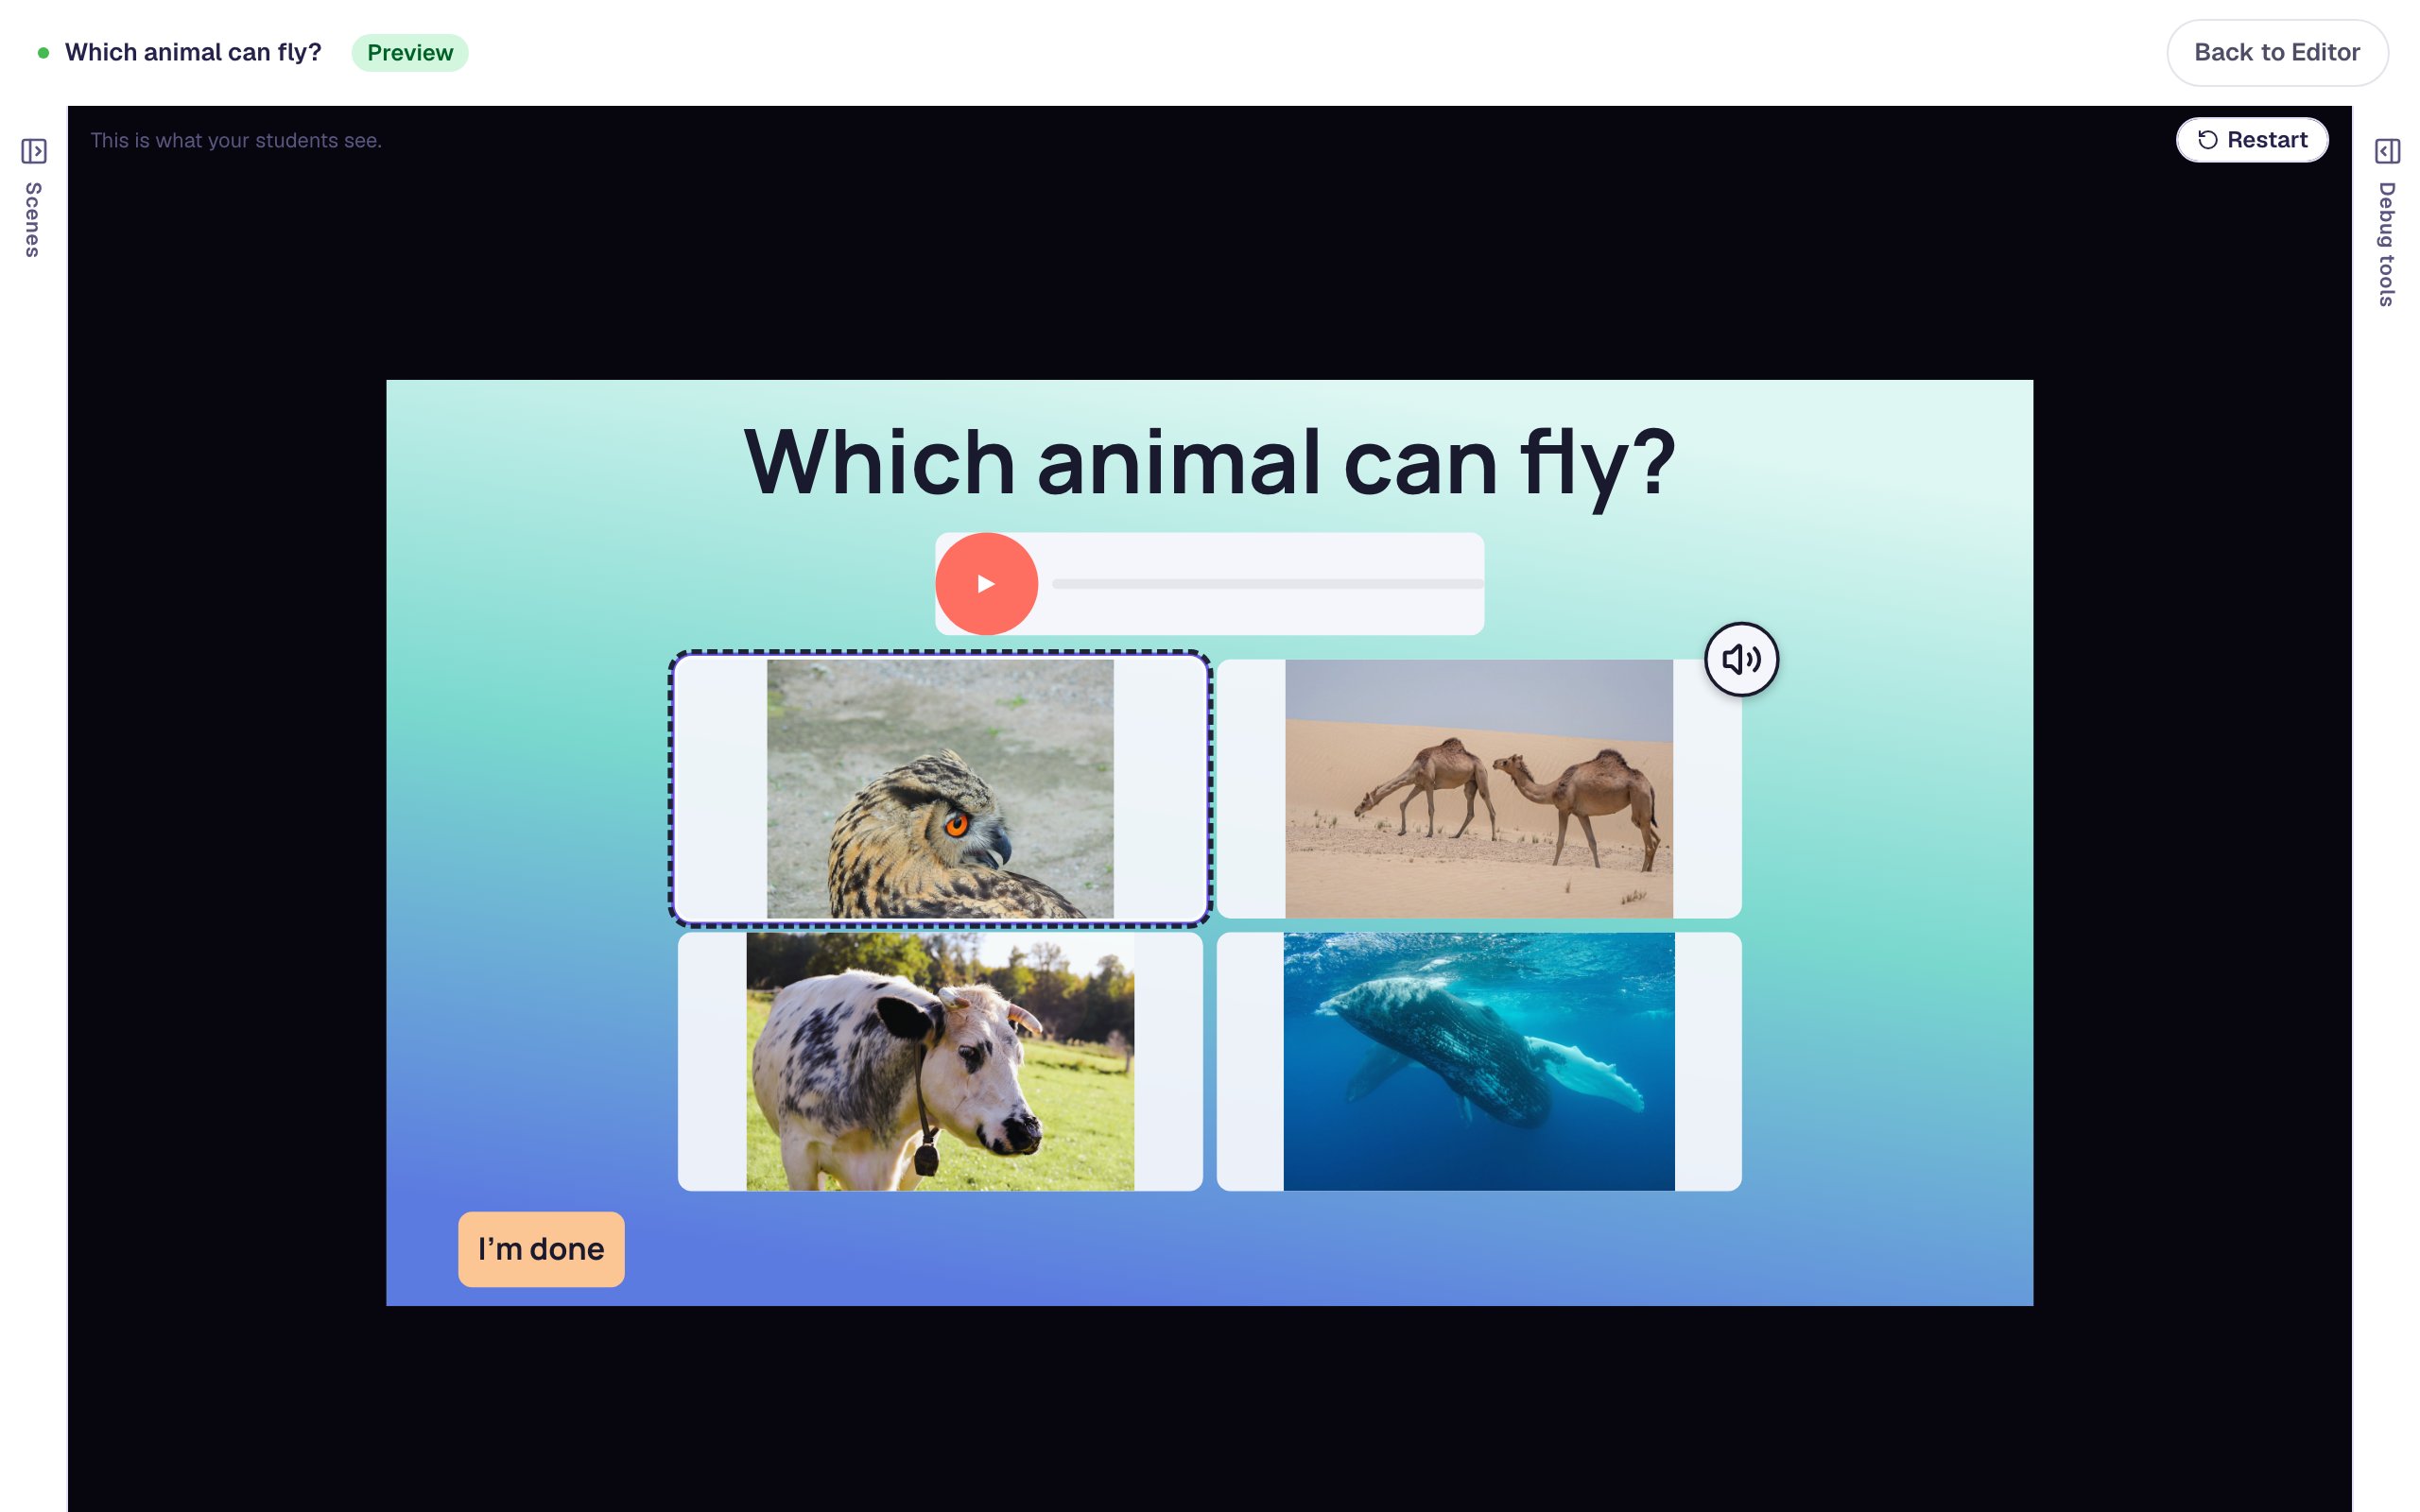
Ask students to tap all the triangles
Turn Multiple Choice answers into shapes Berdee draws for you, then mix real triangles (turned, smaller, skinny) with near-misses like a pizza slice and an open shape, so students sort by the rule, not the look.
- Level
- Beginner
- Time
- About 10 min
- Steps
- 8
- Updated
- Oct 18, 2026
A "Tap all the triangles" scene with six drawn shapes. Students pick every triangle, see each pick outlined right or wrong, and move on once they have all three triangles and none of the near-misses.
Get the finished lesson
Skip straight to the result, or keep it open beside the steps. Add this tutorial's lesson to your account and explore how it works in the studio.
Free to sign up, and you'll come straight back here. I have an account
Young children often decide a shape is a triangle because it _looks like_ the triangles they've seen: point up, sitting on a flat side. Turn one upside down and they say it isn't a triangle. Show them a pizza slice and they say it is.
In this tutorial you'll build a question that checks the real rule, 3 straight sides and 3 corners. Students see six shapes: three triangles that don't all look alike, and three near-misses that look almost right. You don't need any pictures: Berdee draws every shape for you, exactly, from a few settings.
If you've never built a Multiple Choice question, start with Build your first quiz question; this tutorial picks up where it leaves off.
Step 1: Set the scene
Start a blank lesson and name it (we used Is it a triangle?). Then set up the Opening Scene:
- Click an empty part of the canvas, open Background in the properties panel, and click Choose a style. Open the Patterns tab and pick Dot grid: a quiet dotted paper that suits a geometry lesson. Give the Closing Scene the same background, so the ending matches.
- From the Widgets tab, add a Heading and type
Tap all the triangles. - Add a Body text under it that states the rule:
A triangle has 3 straight sides and 3 corners.Set its Font Size to26.
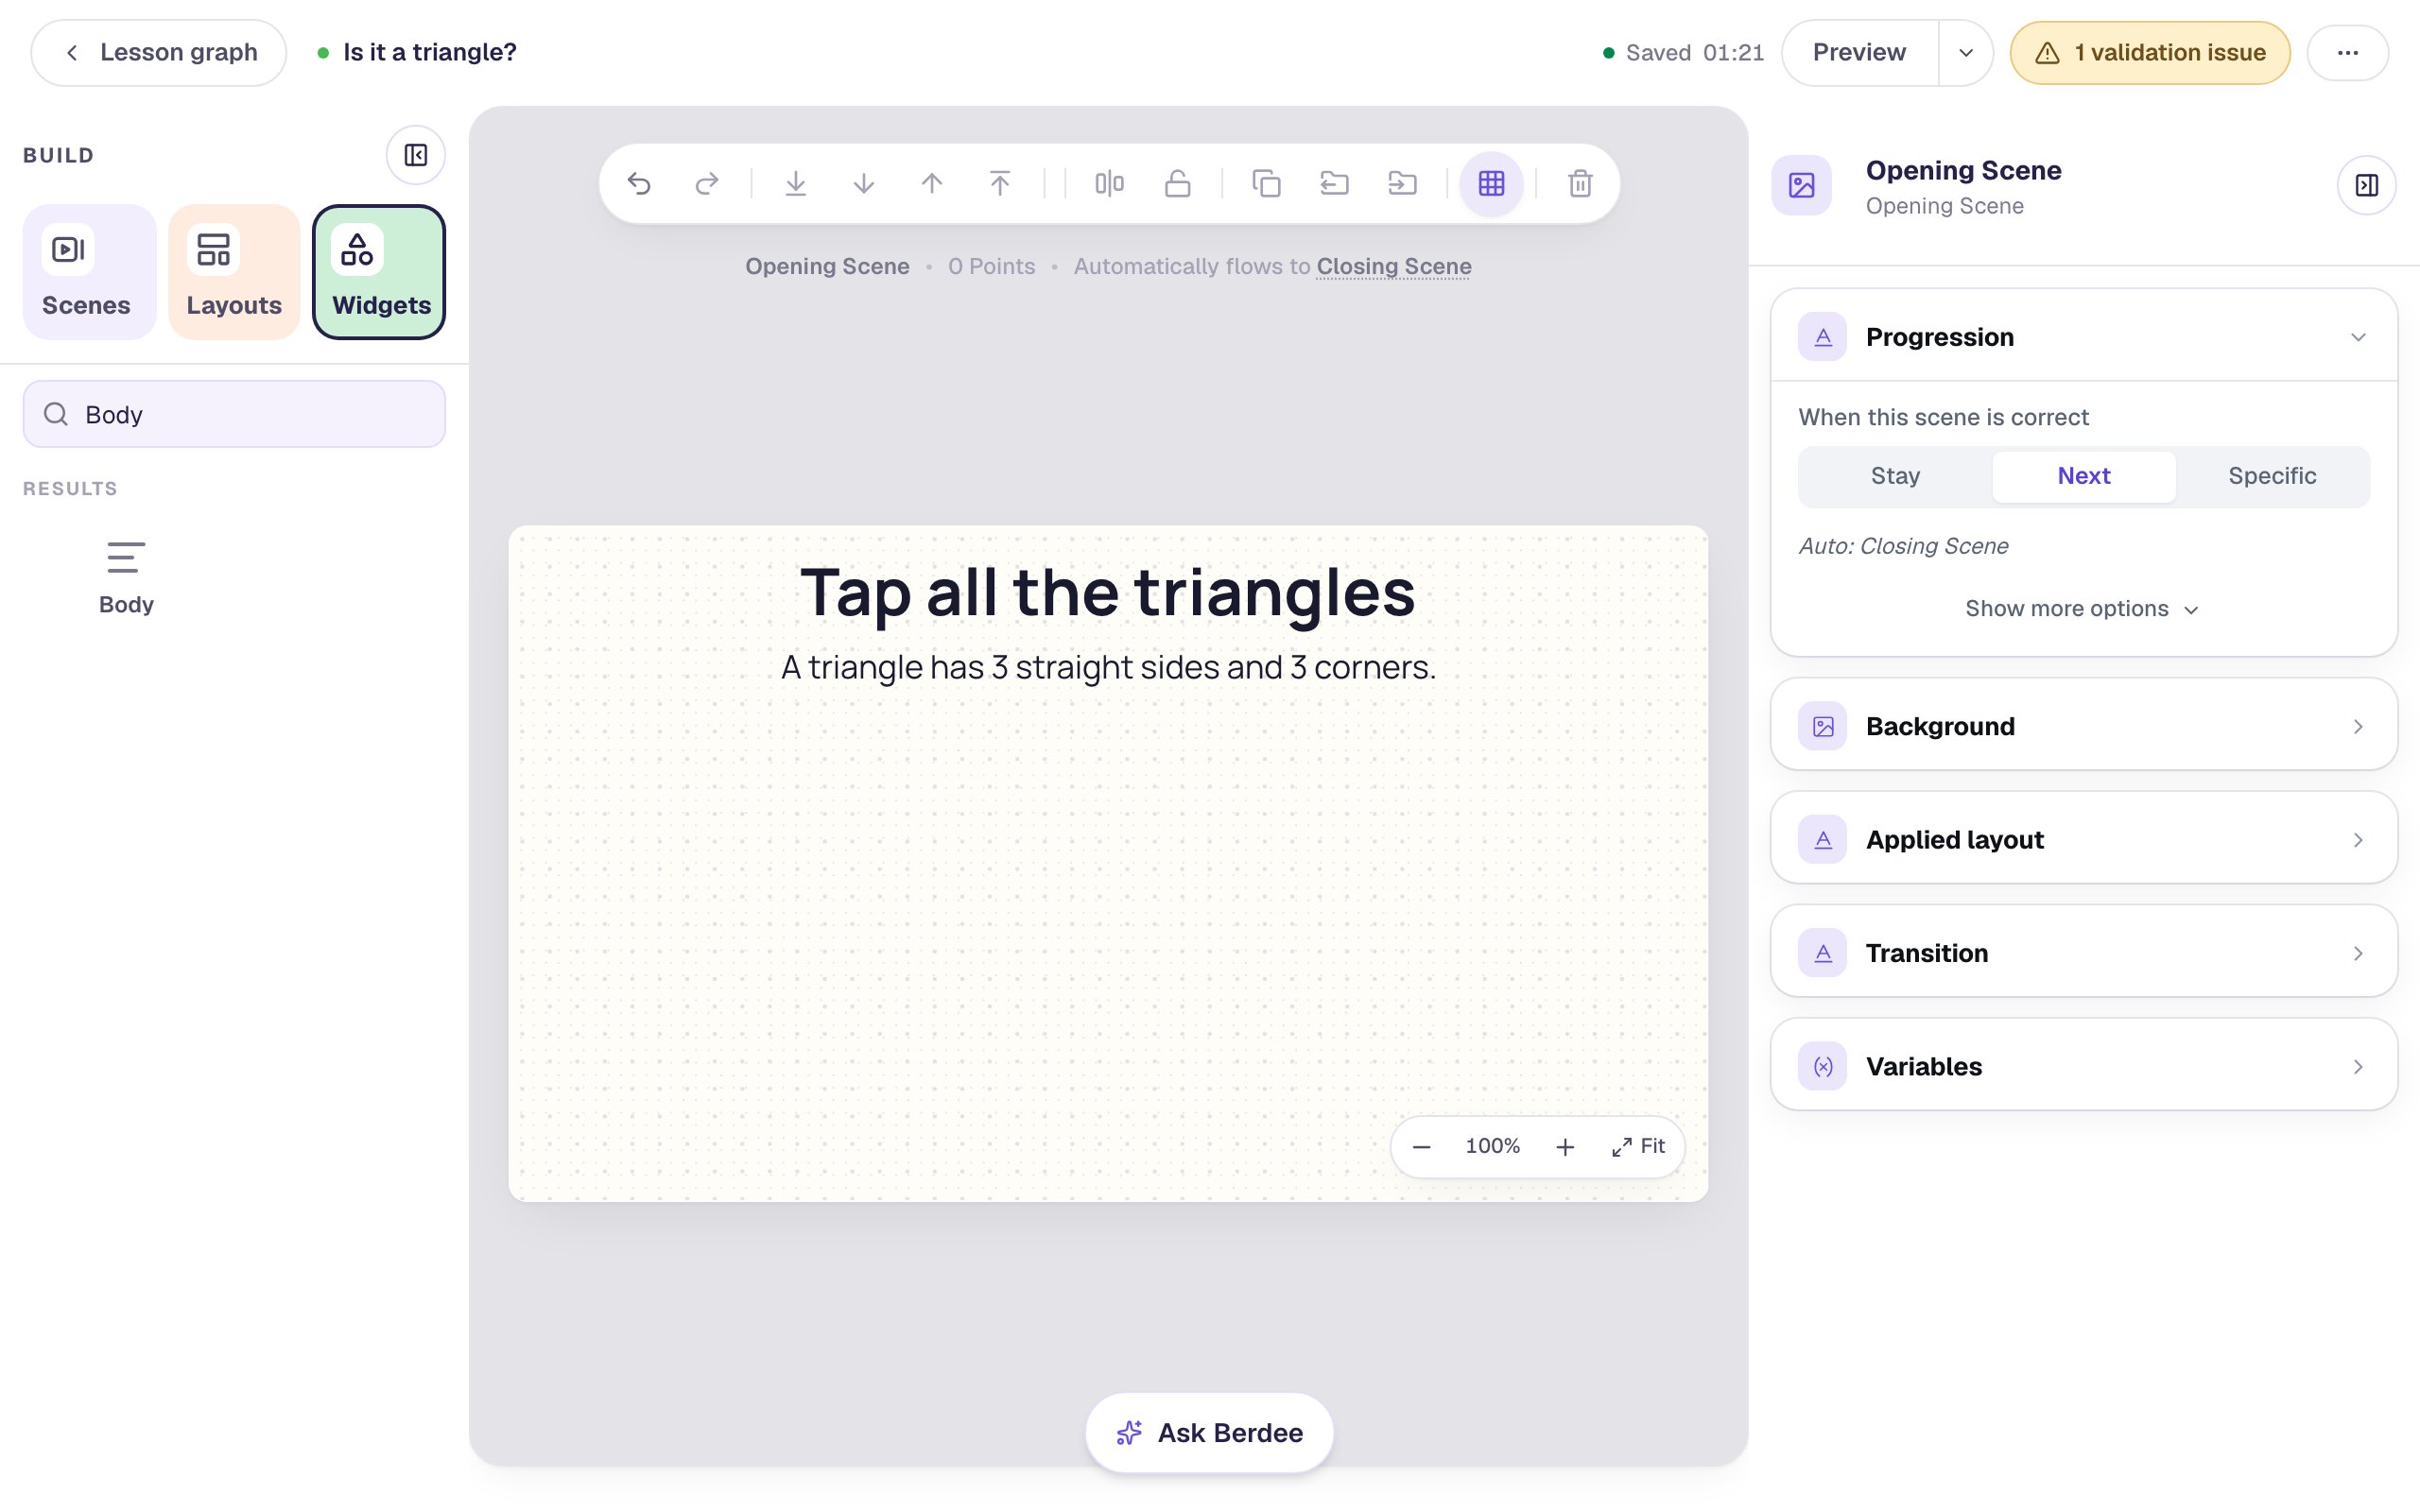
Step 2: Add a Multiple Choice question and give it room
Search the Widgets tab for Multi Choice and click it. With the question selected, open Style & Layout, click Show more options, and set Width to 720 and Height to 290. Drag it under the rule.
A question arranges its answers to fit its box. This wide, short box will hold six answers in two rows of three once you add the last two.
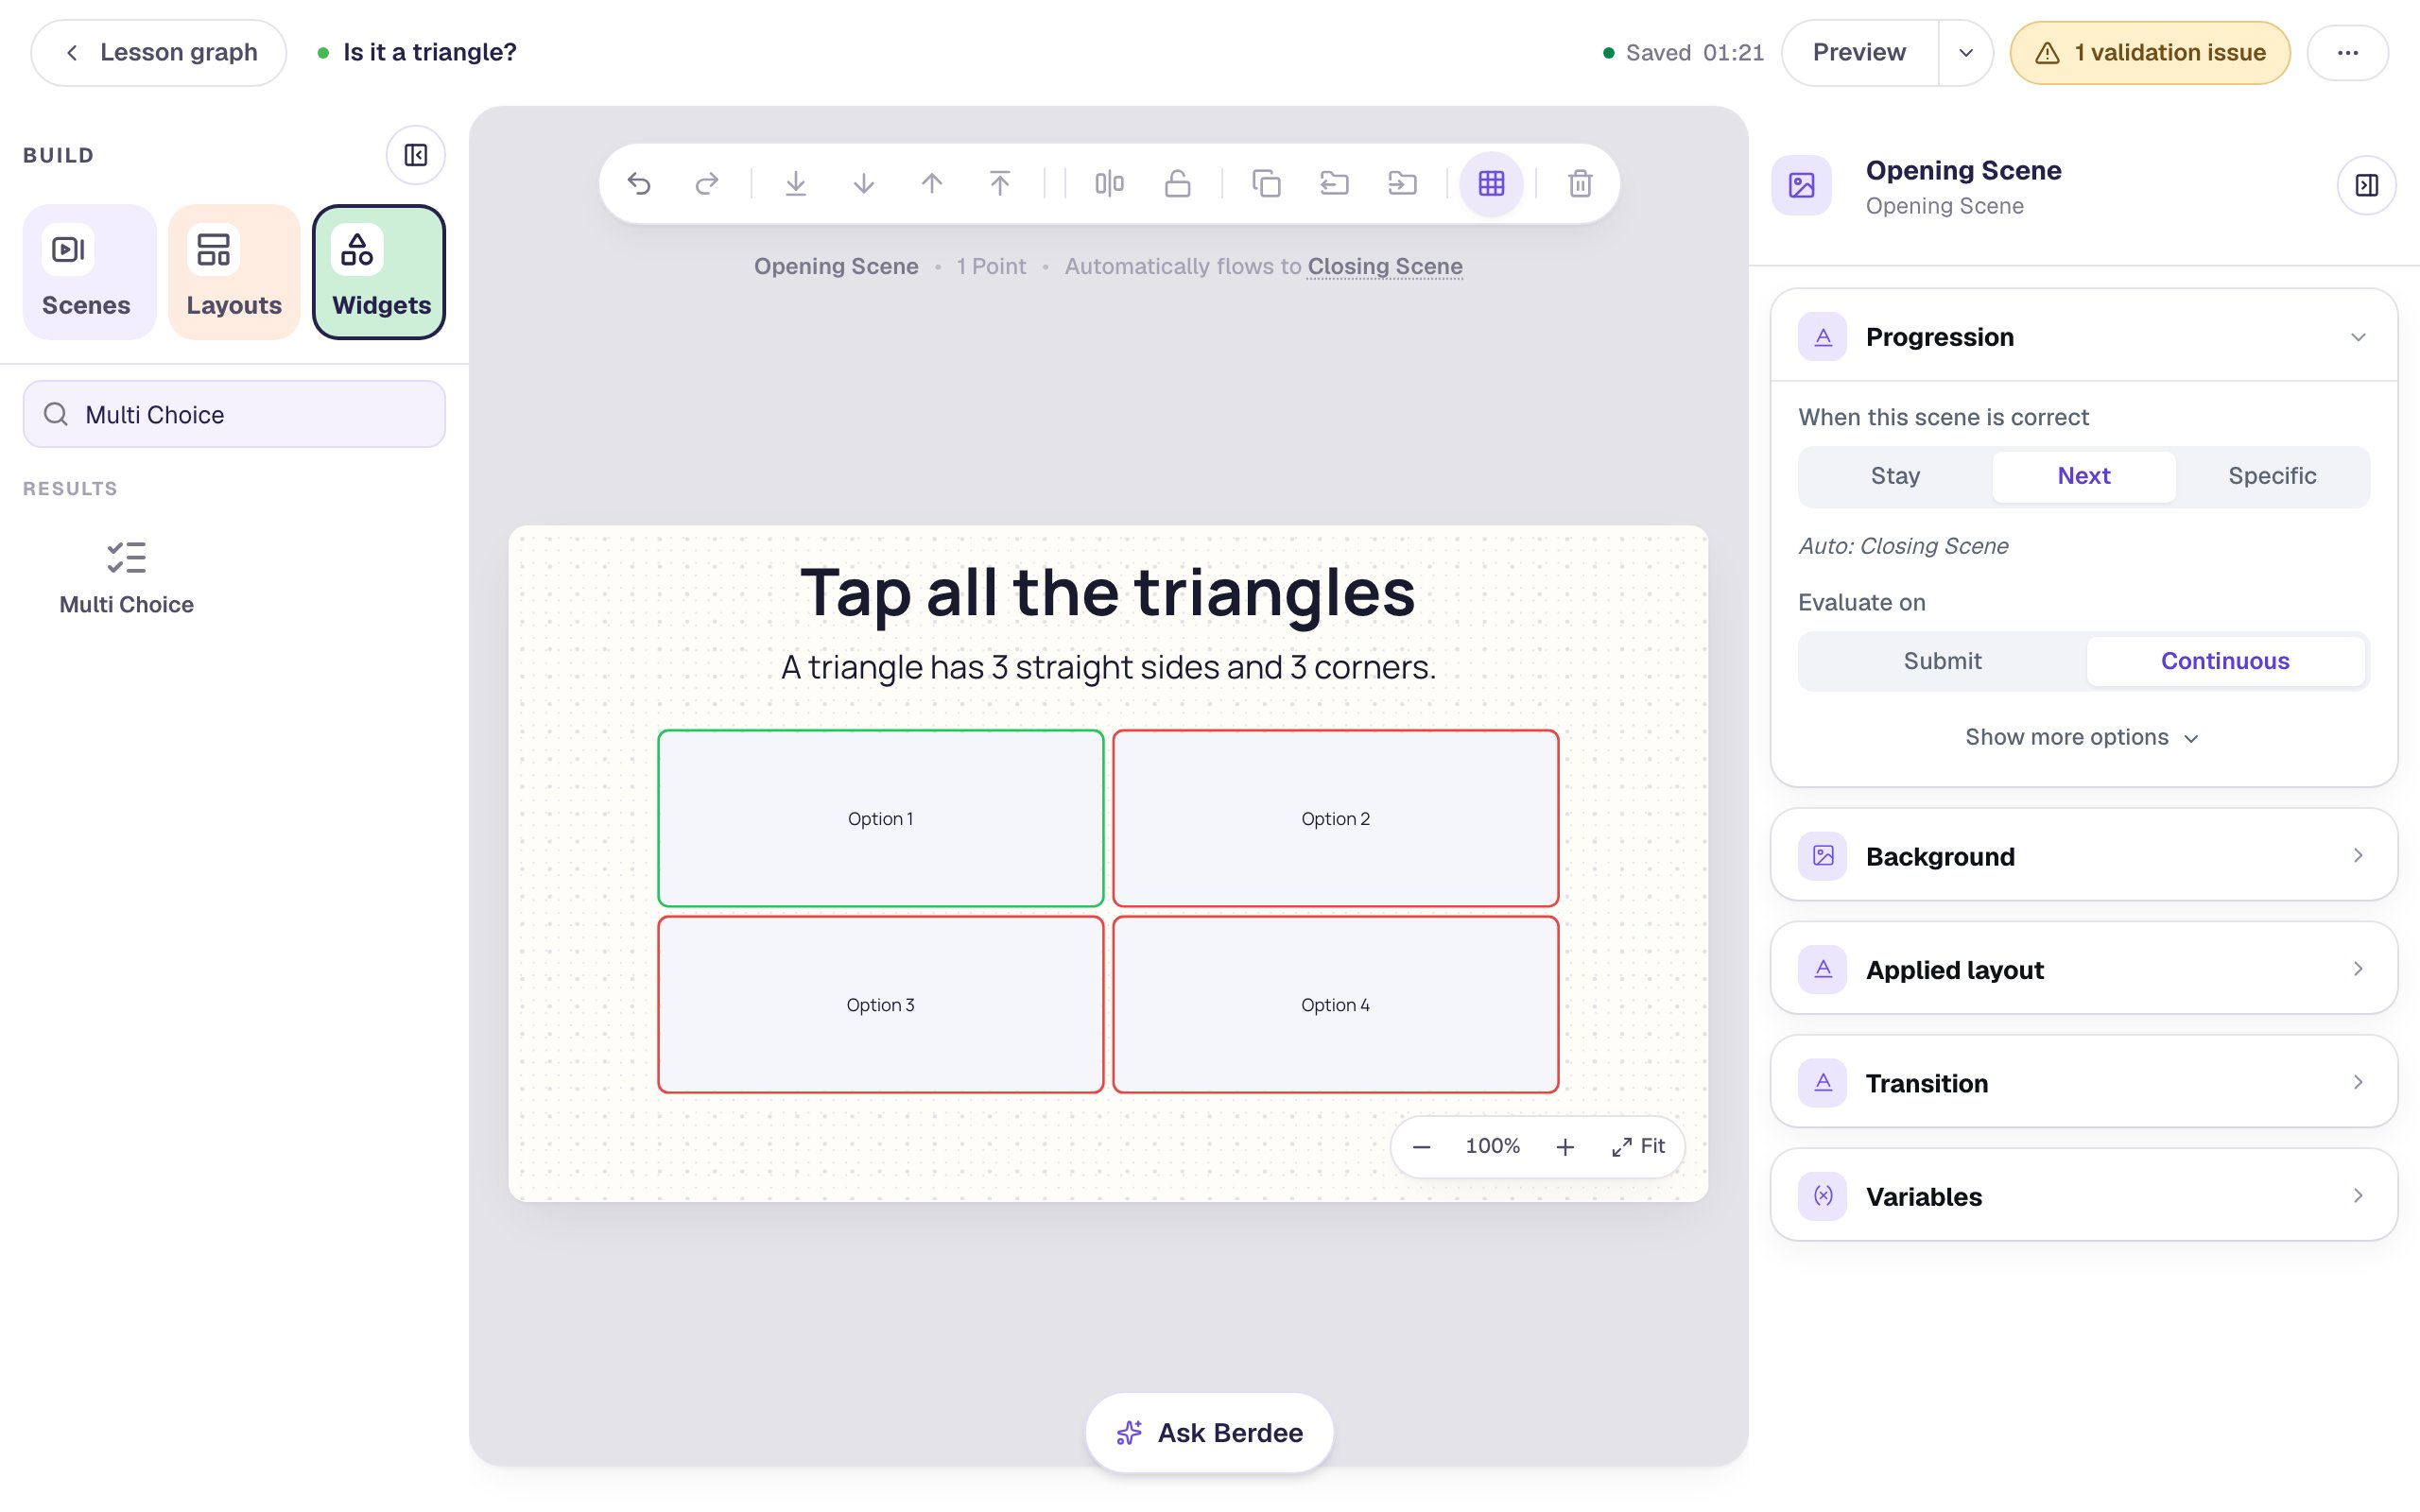
Step 3: Turn the first answer into a triangle
Click Configure in the pill above the question. In the Content section:
- Set Selection to Multi, so students can pick more than one answer.
- Click Add Option twice, for six answers.
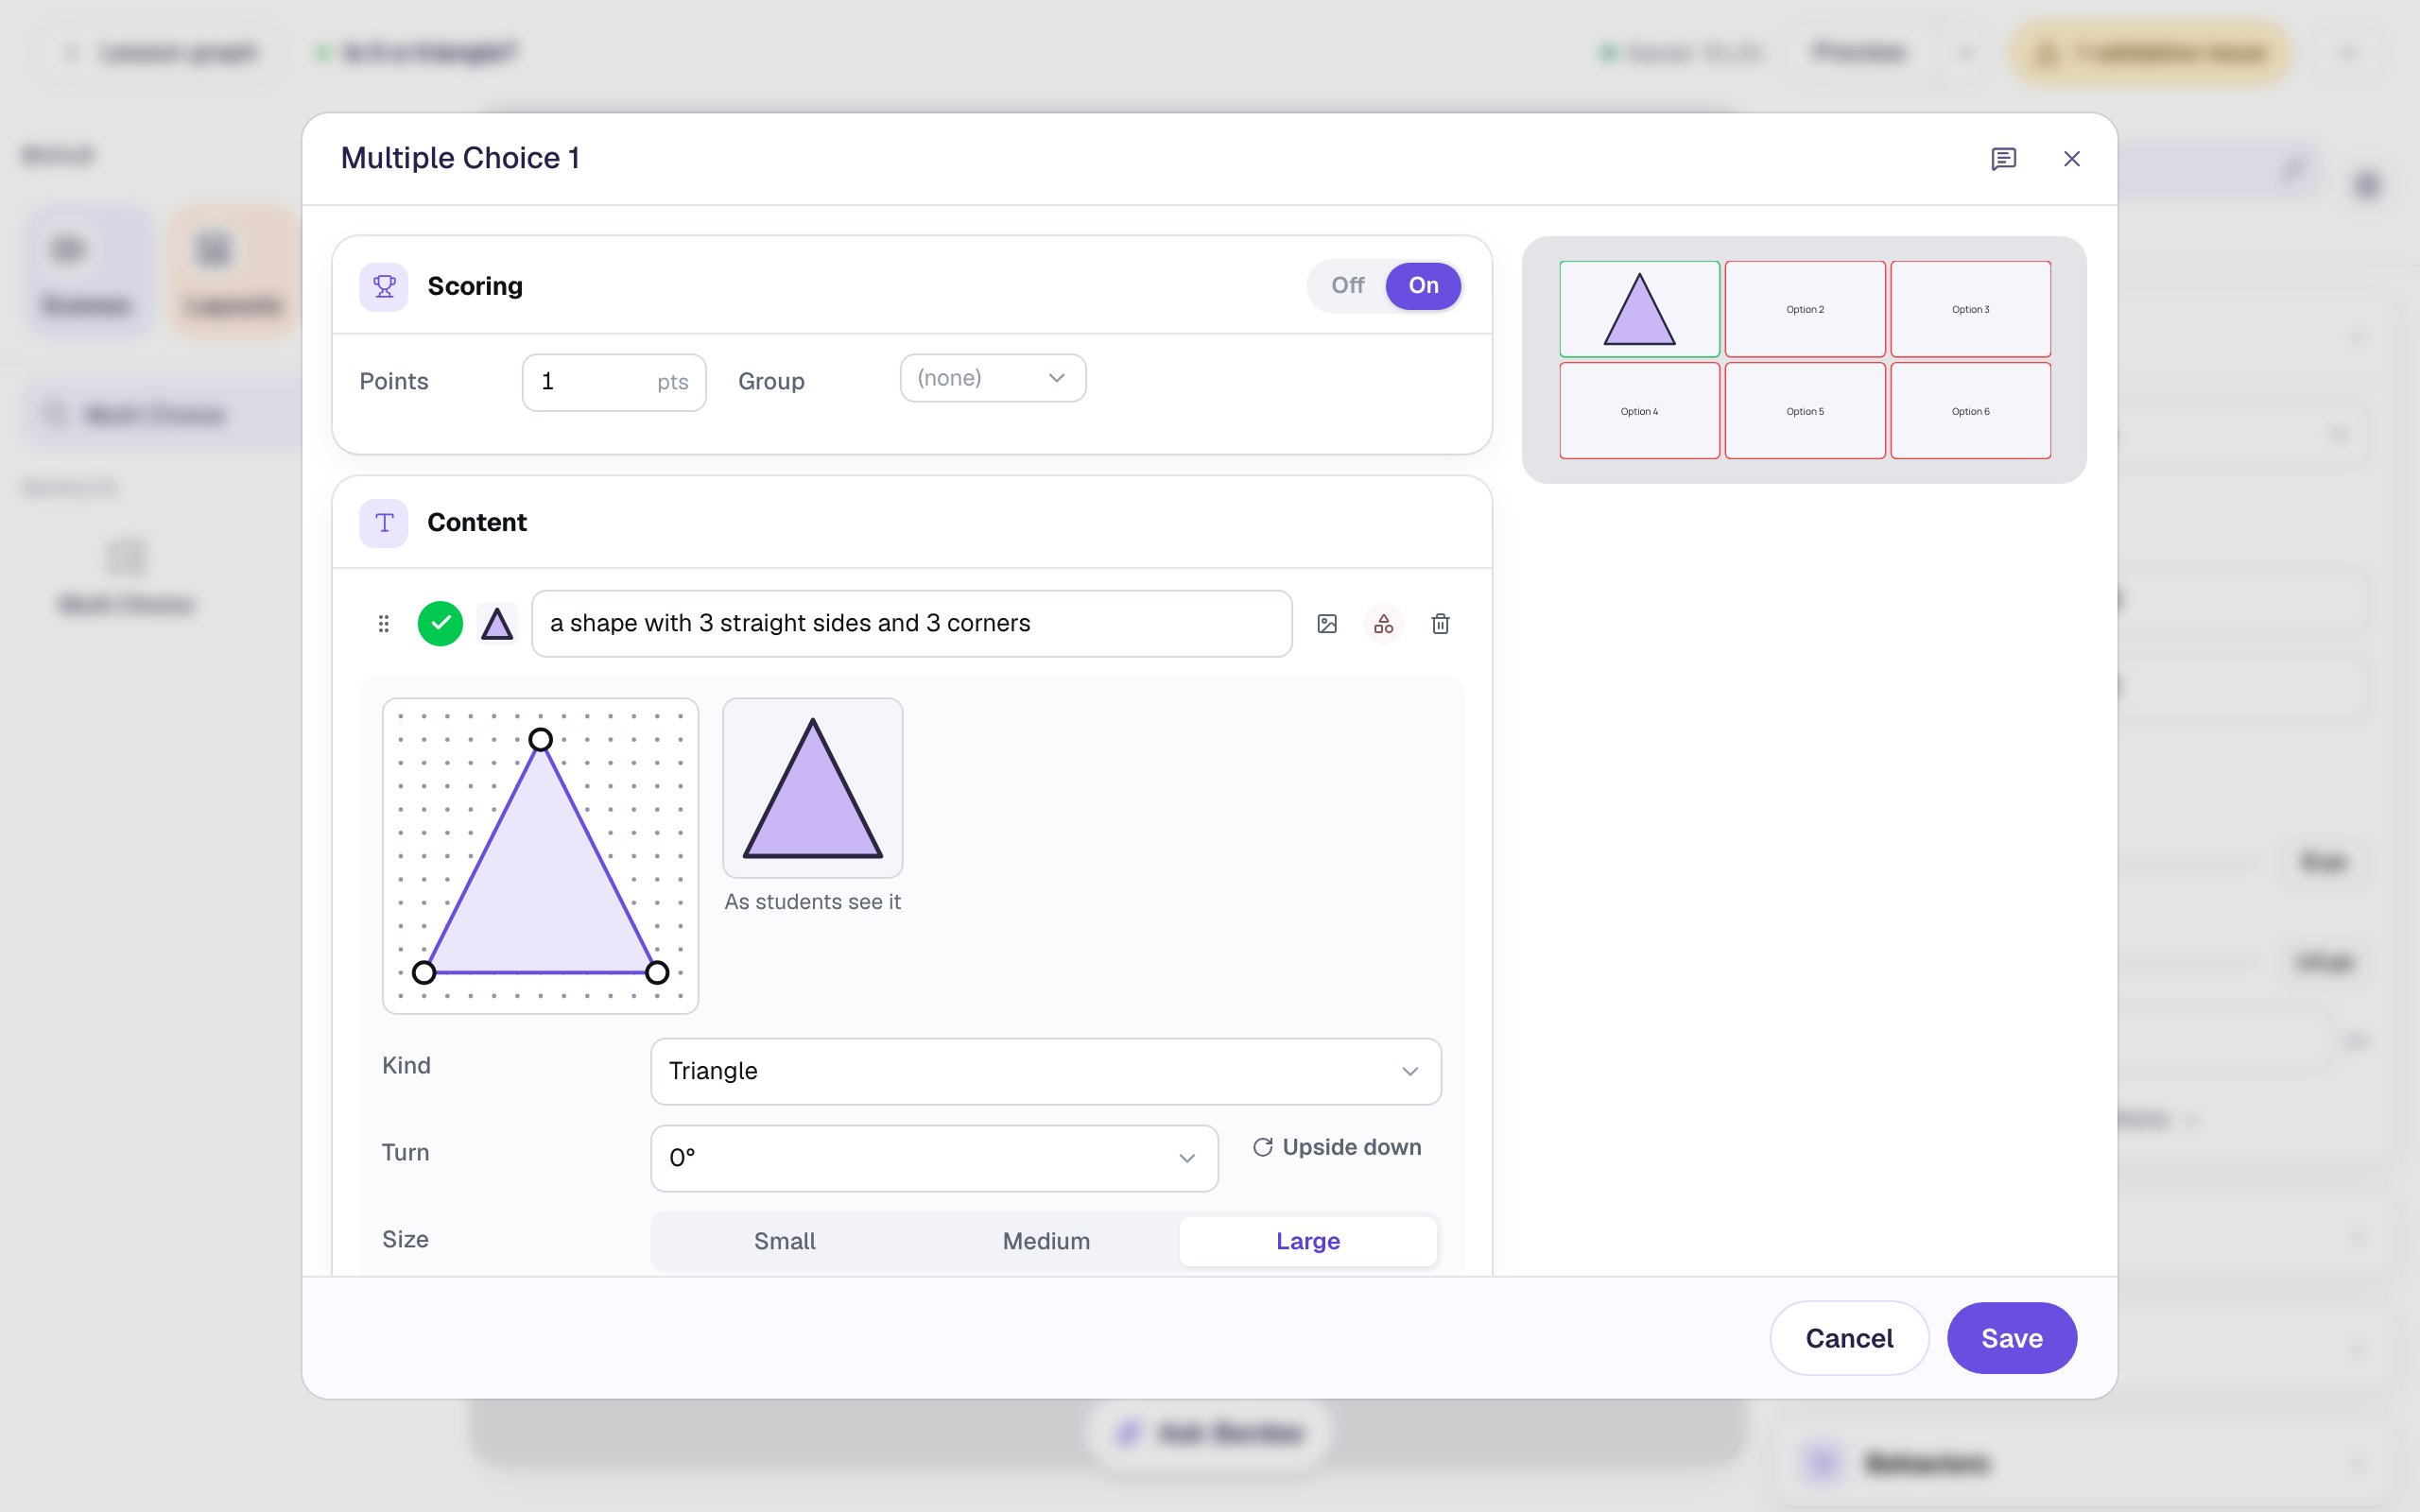
- On the first answer, click Draw a shape: the small triangle, circle and square button beside the picture button.
The answer becomes a triangle, and a shape editor opens under it.
The editor shows the shape twice. On the left, a dotted grid with a handle on every corner; on the right, the shape As students see it. Below them:
- Kind is what the shape is: triangle, rectangle, square, hexagon and more, or Custom for any number of corners.
- Turn and Upside down turn it.
- Size makes it Small, Medium or Large.
The answer's text box now says a shape with 3 straight sides and 3 corners. That's what a screen reader says for the shape, and it's written by sides and corners on purpose: if it said "a triangle", it would read the answer aloud.
Step 4: Add near-misses that look almost right
A near-miss is the most useful wrong answer in a shape lesson: it looks like a triangle, but it breaks the rule. Berdee draws three kinds for a triangle.
Click Draw a shape on the second answer. It starts as a triangle too. Open Near-miss and choose One curved side. One side bends outward, like a slice of pizza.
Do the same for two more answers:
- Fourth answer: Near-miss → Gap in one side. The shape isn't closed, so it isn't a triangle.
- Sixth answer: Near-miss → Cut corner. One corner is snipped off, so it has 4 sides and 4 corners.
Leave Fill and Outline as they are, the same on every shape. If the near-misses were a different color, a student could find the answer by color without thinking about sides.
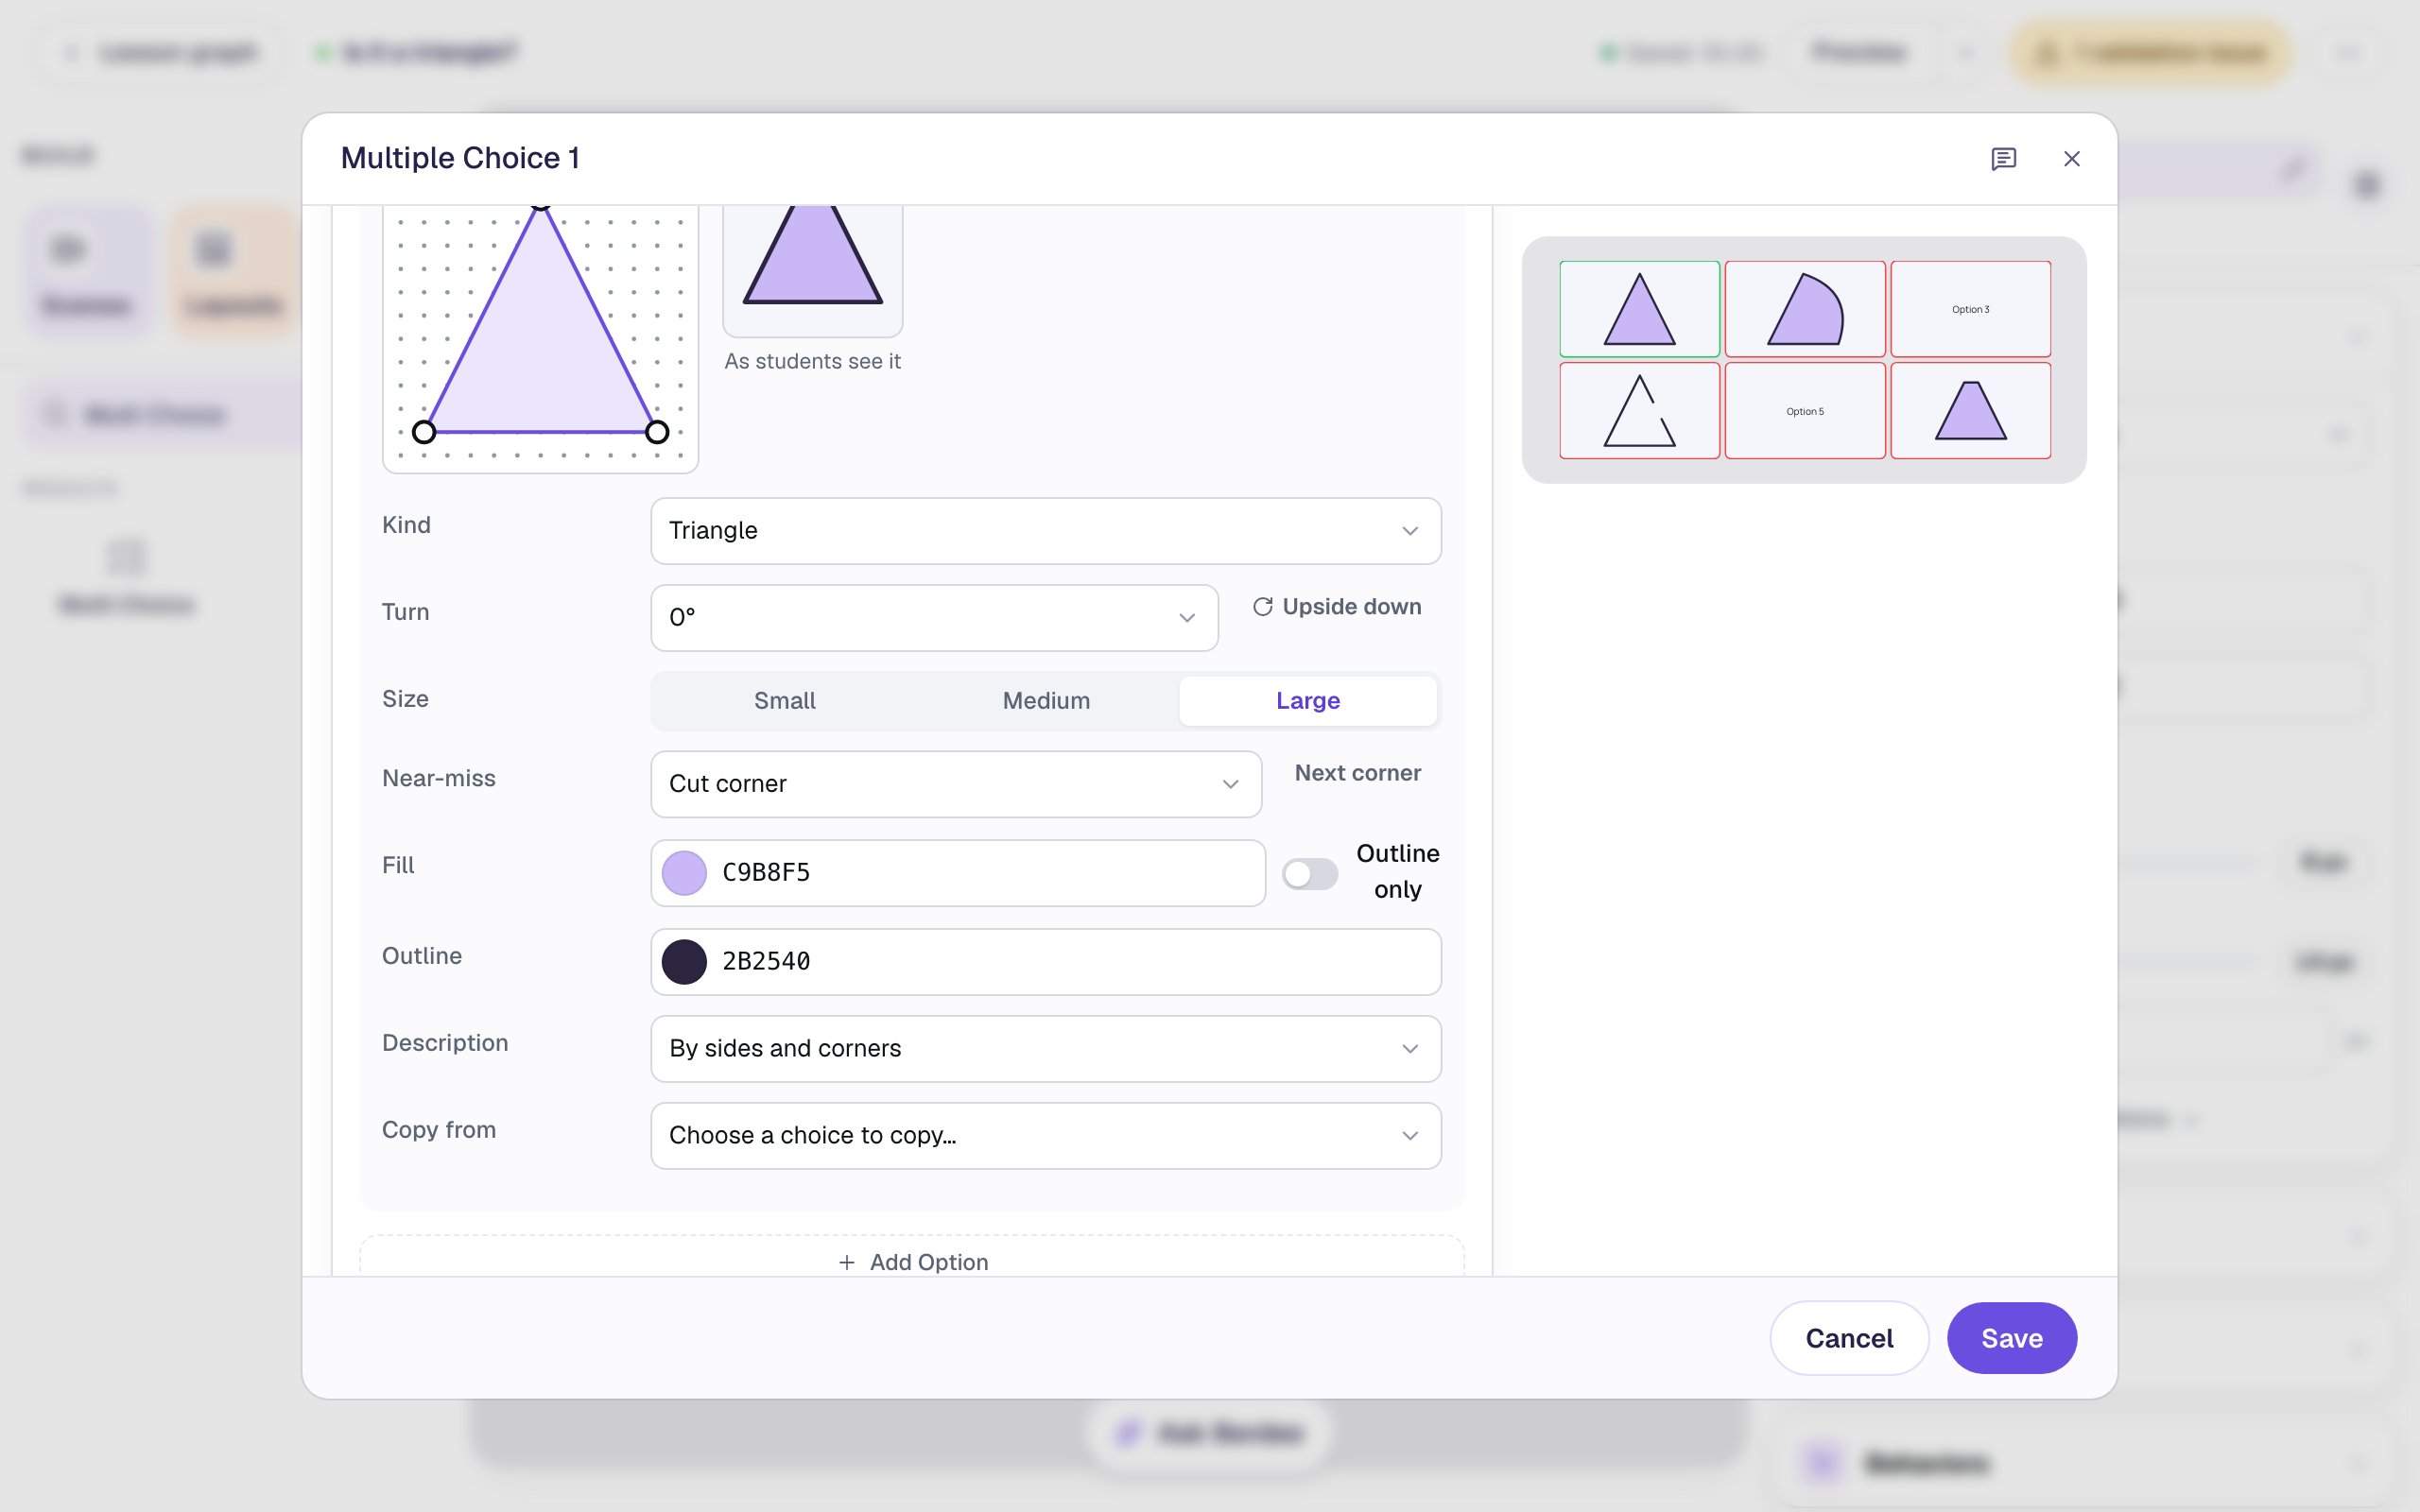
Next side (or Next corner) beside Near-miss moves the curve, gap or cut to a different side, if you want the near-misses to look less alike.
Step 5: Make triangles that don't look alike
Now the right answers. If every triangle points up, students learn "pointy at the top" instead of the rule. Make two triangles that look different from the first.
The same triangle, turned and smaller. Click Draw a shape on the third answer. Then:
- Open Copy from and choose Option 1. The third answer becomes an exact copy of the first triangle.
- Click Upside down.
- Set Size to Medium.
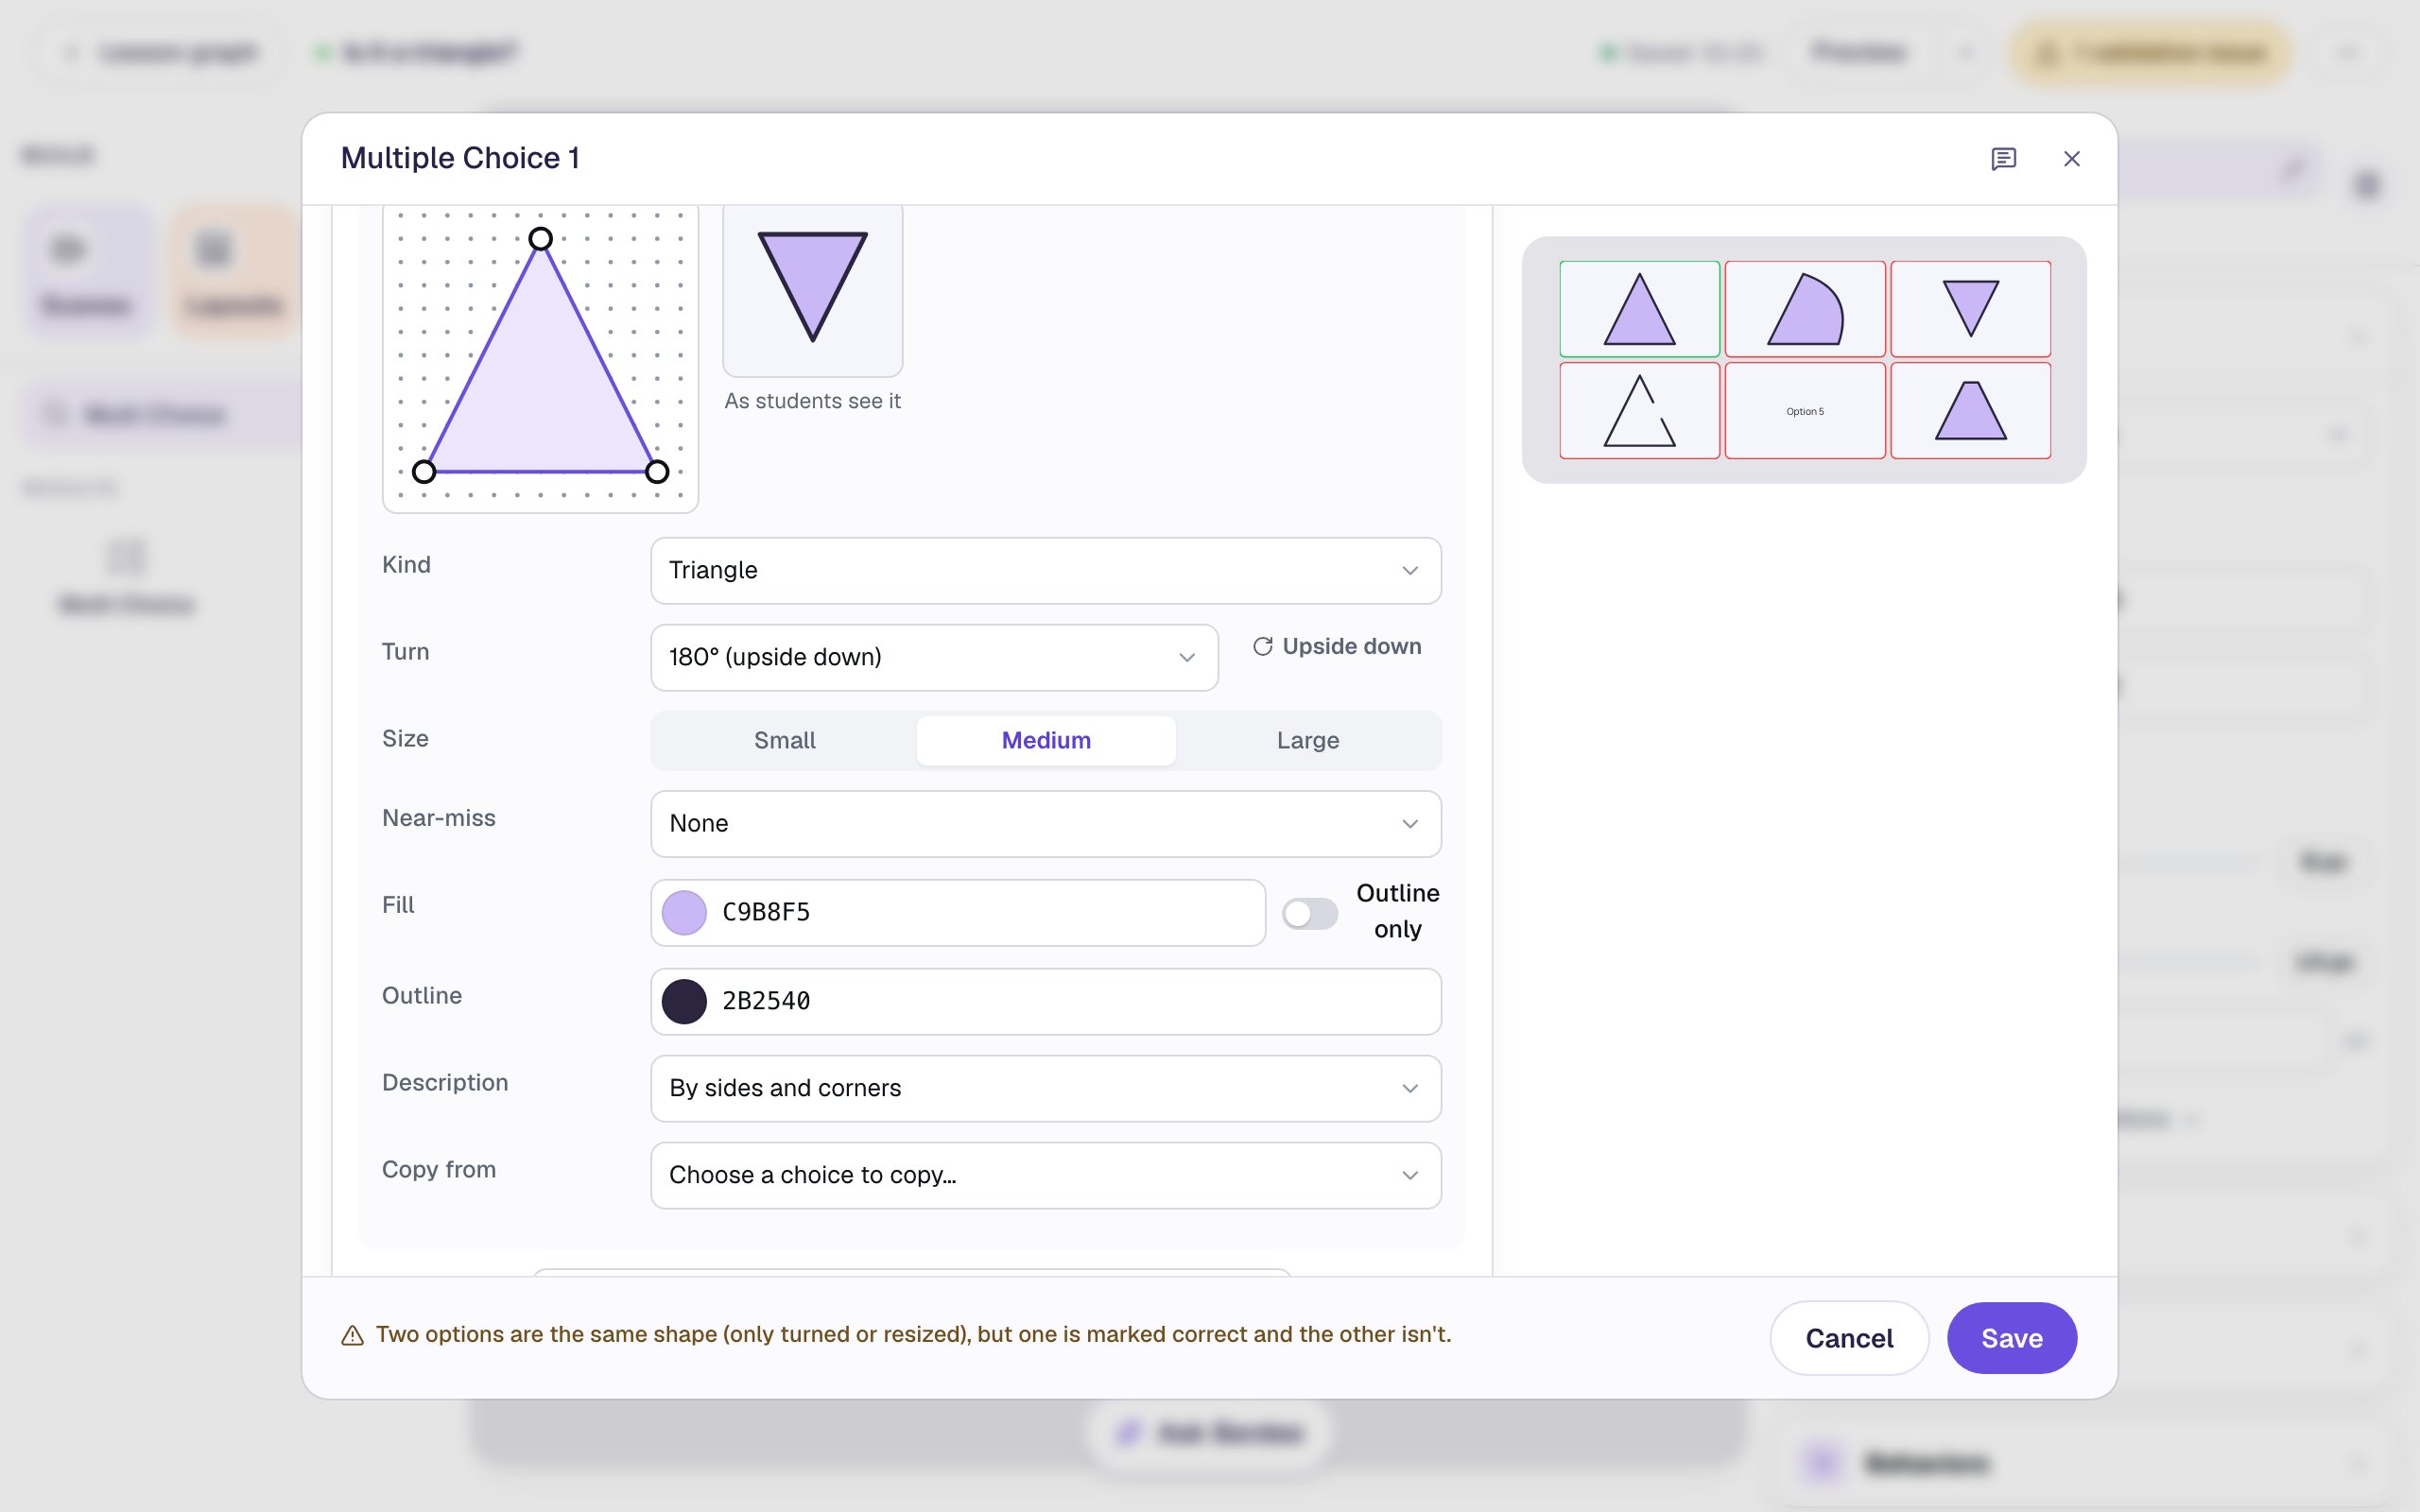
The warning at the bottom says two options are the same shape, only turned or resized, but one is marked correct and the other isn't. Berdee is right: the upside-down copy is still a triangle, and you haven't marked it yet. It goes away in the next step.
A skinny triangle. Click Draw a shape on the fifth answer. On the corner grid, drag the bottom-right corner three dots to the left, and the bottom-left corner three dots to the right. The triangle gets tall and thin. Every corner snaps to a dot, so the sides stay straight and the shape stays exact.
You can also click a corner and move it with the arrow keys.
Step 6: Mark every triangle correct
Click Close shape editor (the shape thumbnail beside the open answer) to see all six answers at once. The first answer is already marked correct. Click the round check mark beside the third and fifth answers too, so all three triangles are green. The warning disappears.
Leave Correct when on All Correct: the answer counts only when a student has picked every triangle and no near-miss.
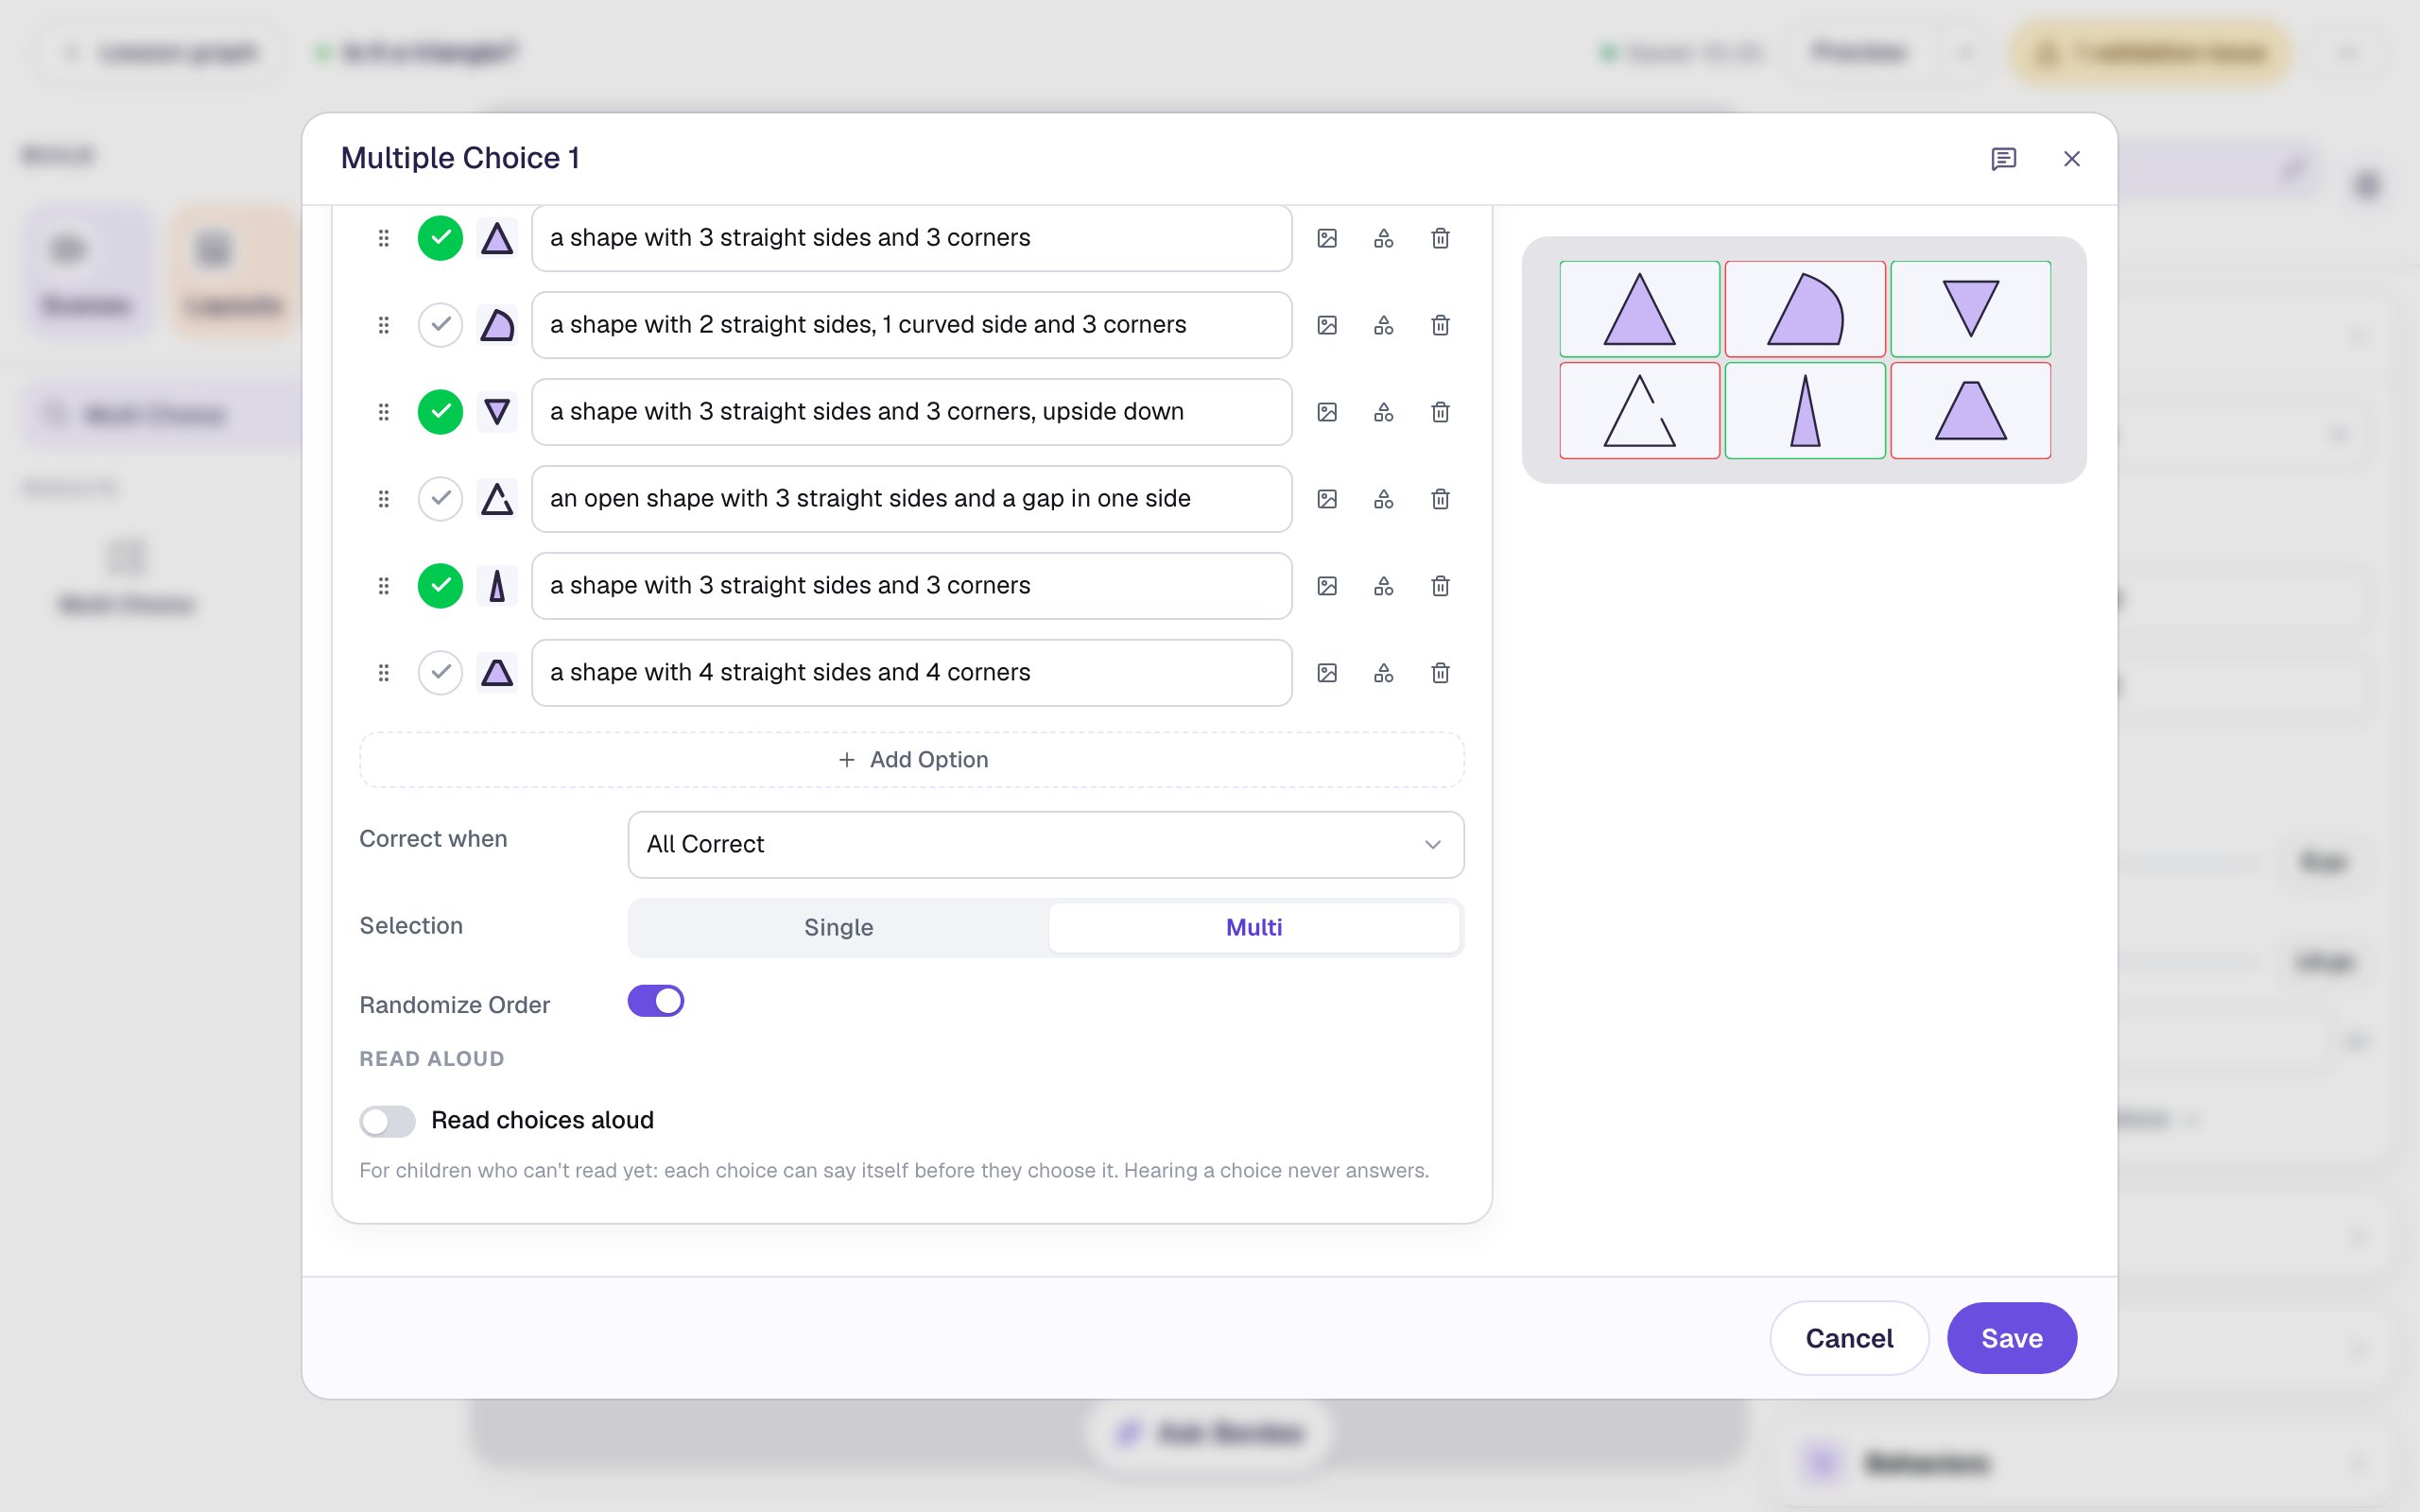
Read the descriptions down the list. The triangles say a shape with 3 straight sides and 3 corners, the pizza slice says 2 straight sides, 1 curved side, and the cut corner says 4 straight sides and 4 corners. A student using a screen reader solves the same puzzle by the same rule as everyone else.
Two answers have the same words. That's fine: a skinny triangle and a wide one are both "3 straight sides and 3 corners". If you'd rather name them yourself, type in the text box; the shape's Description switches to My own words.
Click Save.
Step 7: Show which picks are right, and add a way out
With the question still selected, open Style & Layout and turn on Show correctness. Each pick is then outlined the moment a student taps it: green for a triangle, red for a near-miss.
The yellow pill at the top says 1 validation issue: every lesson needs a button that finishes it. Search the Widgets tab for Submit Button and add one. In Content, change Label to I'm done and set Submits to Lesson. Set its Font Size to 18, give it a warm Background so it reads as a button on the pale paper (we picked a soft orange), and drag it to the bottom-left corner. It's a way out for a student who is stuck, not the main way forward.
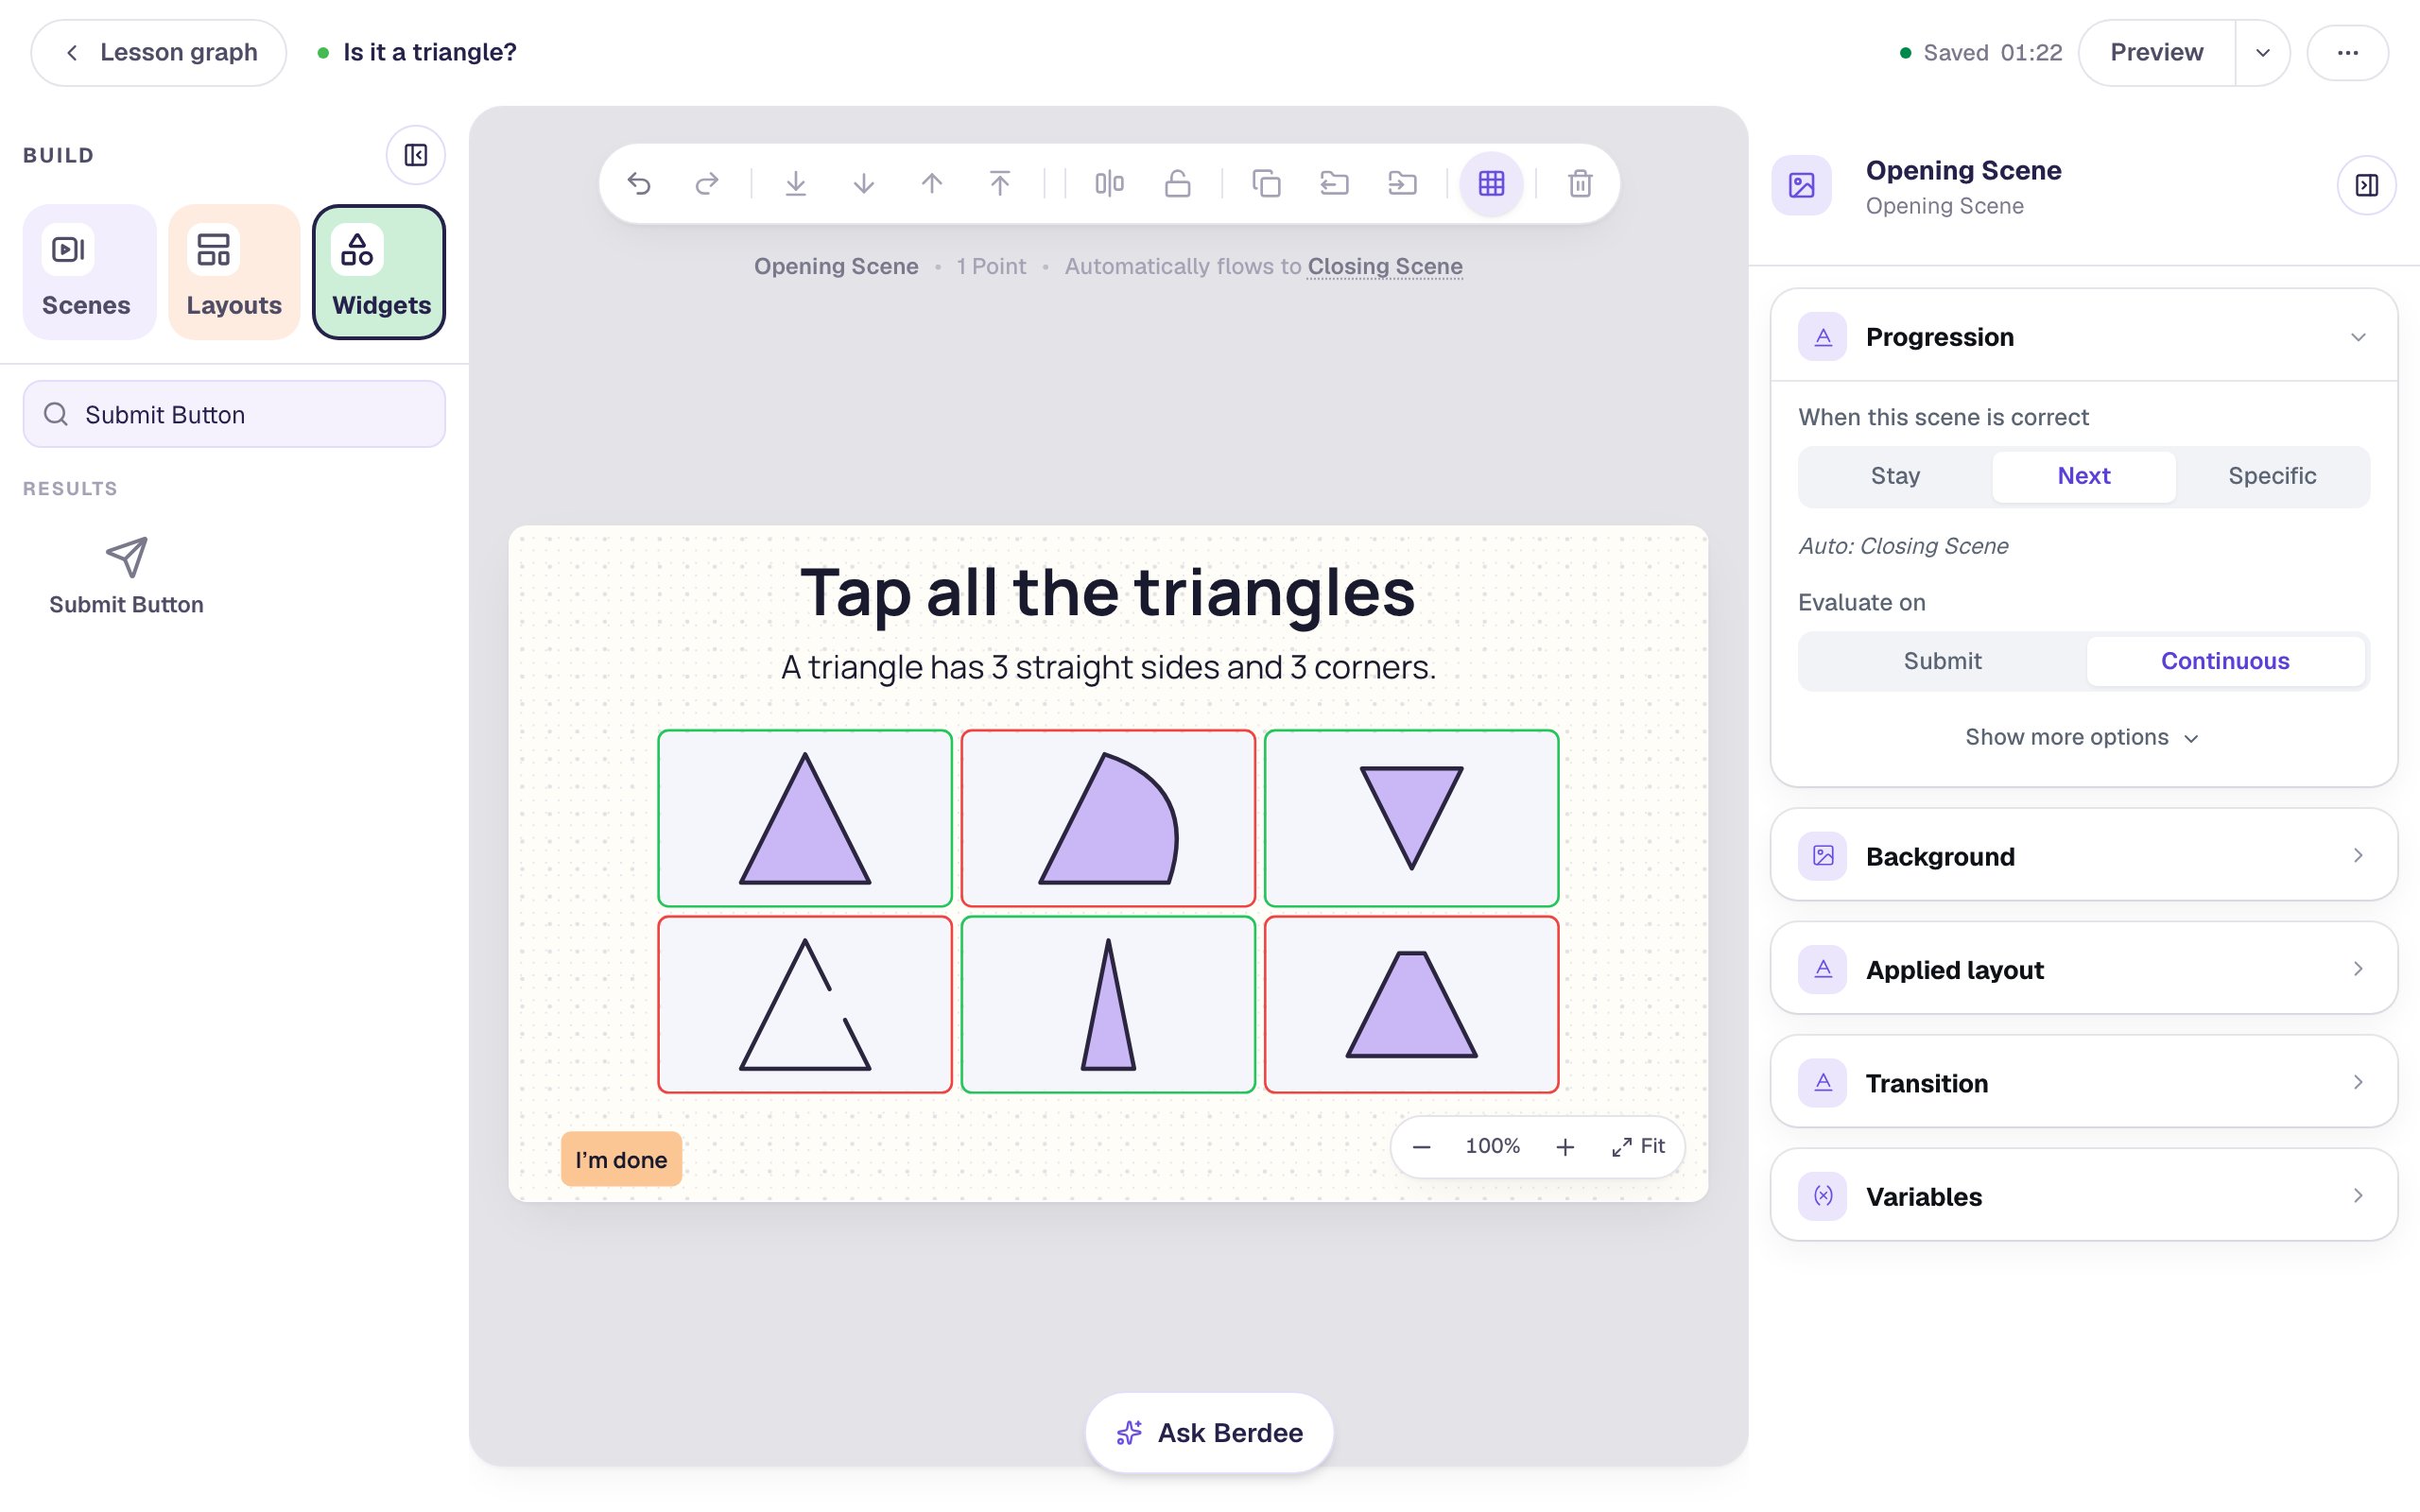
You don't need a Next button. With Evaluate on left at Continuous, Berdee checks the answer after every tap and moves on to the Closing Scene the moment it's right.
Step 8: Try it as a student
Click Preview and answer like a student who isn't sure about the pizza slice: tap a triangle, then the pizza slice.
The answers are shuffled for each student, because Randomize Order is on, so your shapes may be in a different order from ours.
The triangle turns green and the pizza slice red. The scene doesn't move on: the pizza slice is still picked, and All Correct allows no wrong picks.
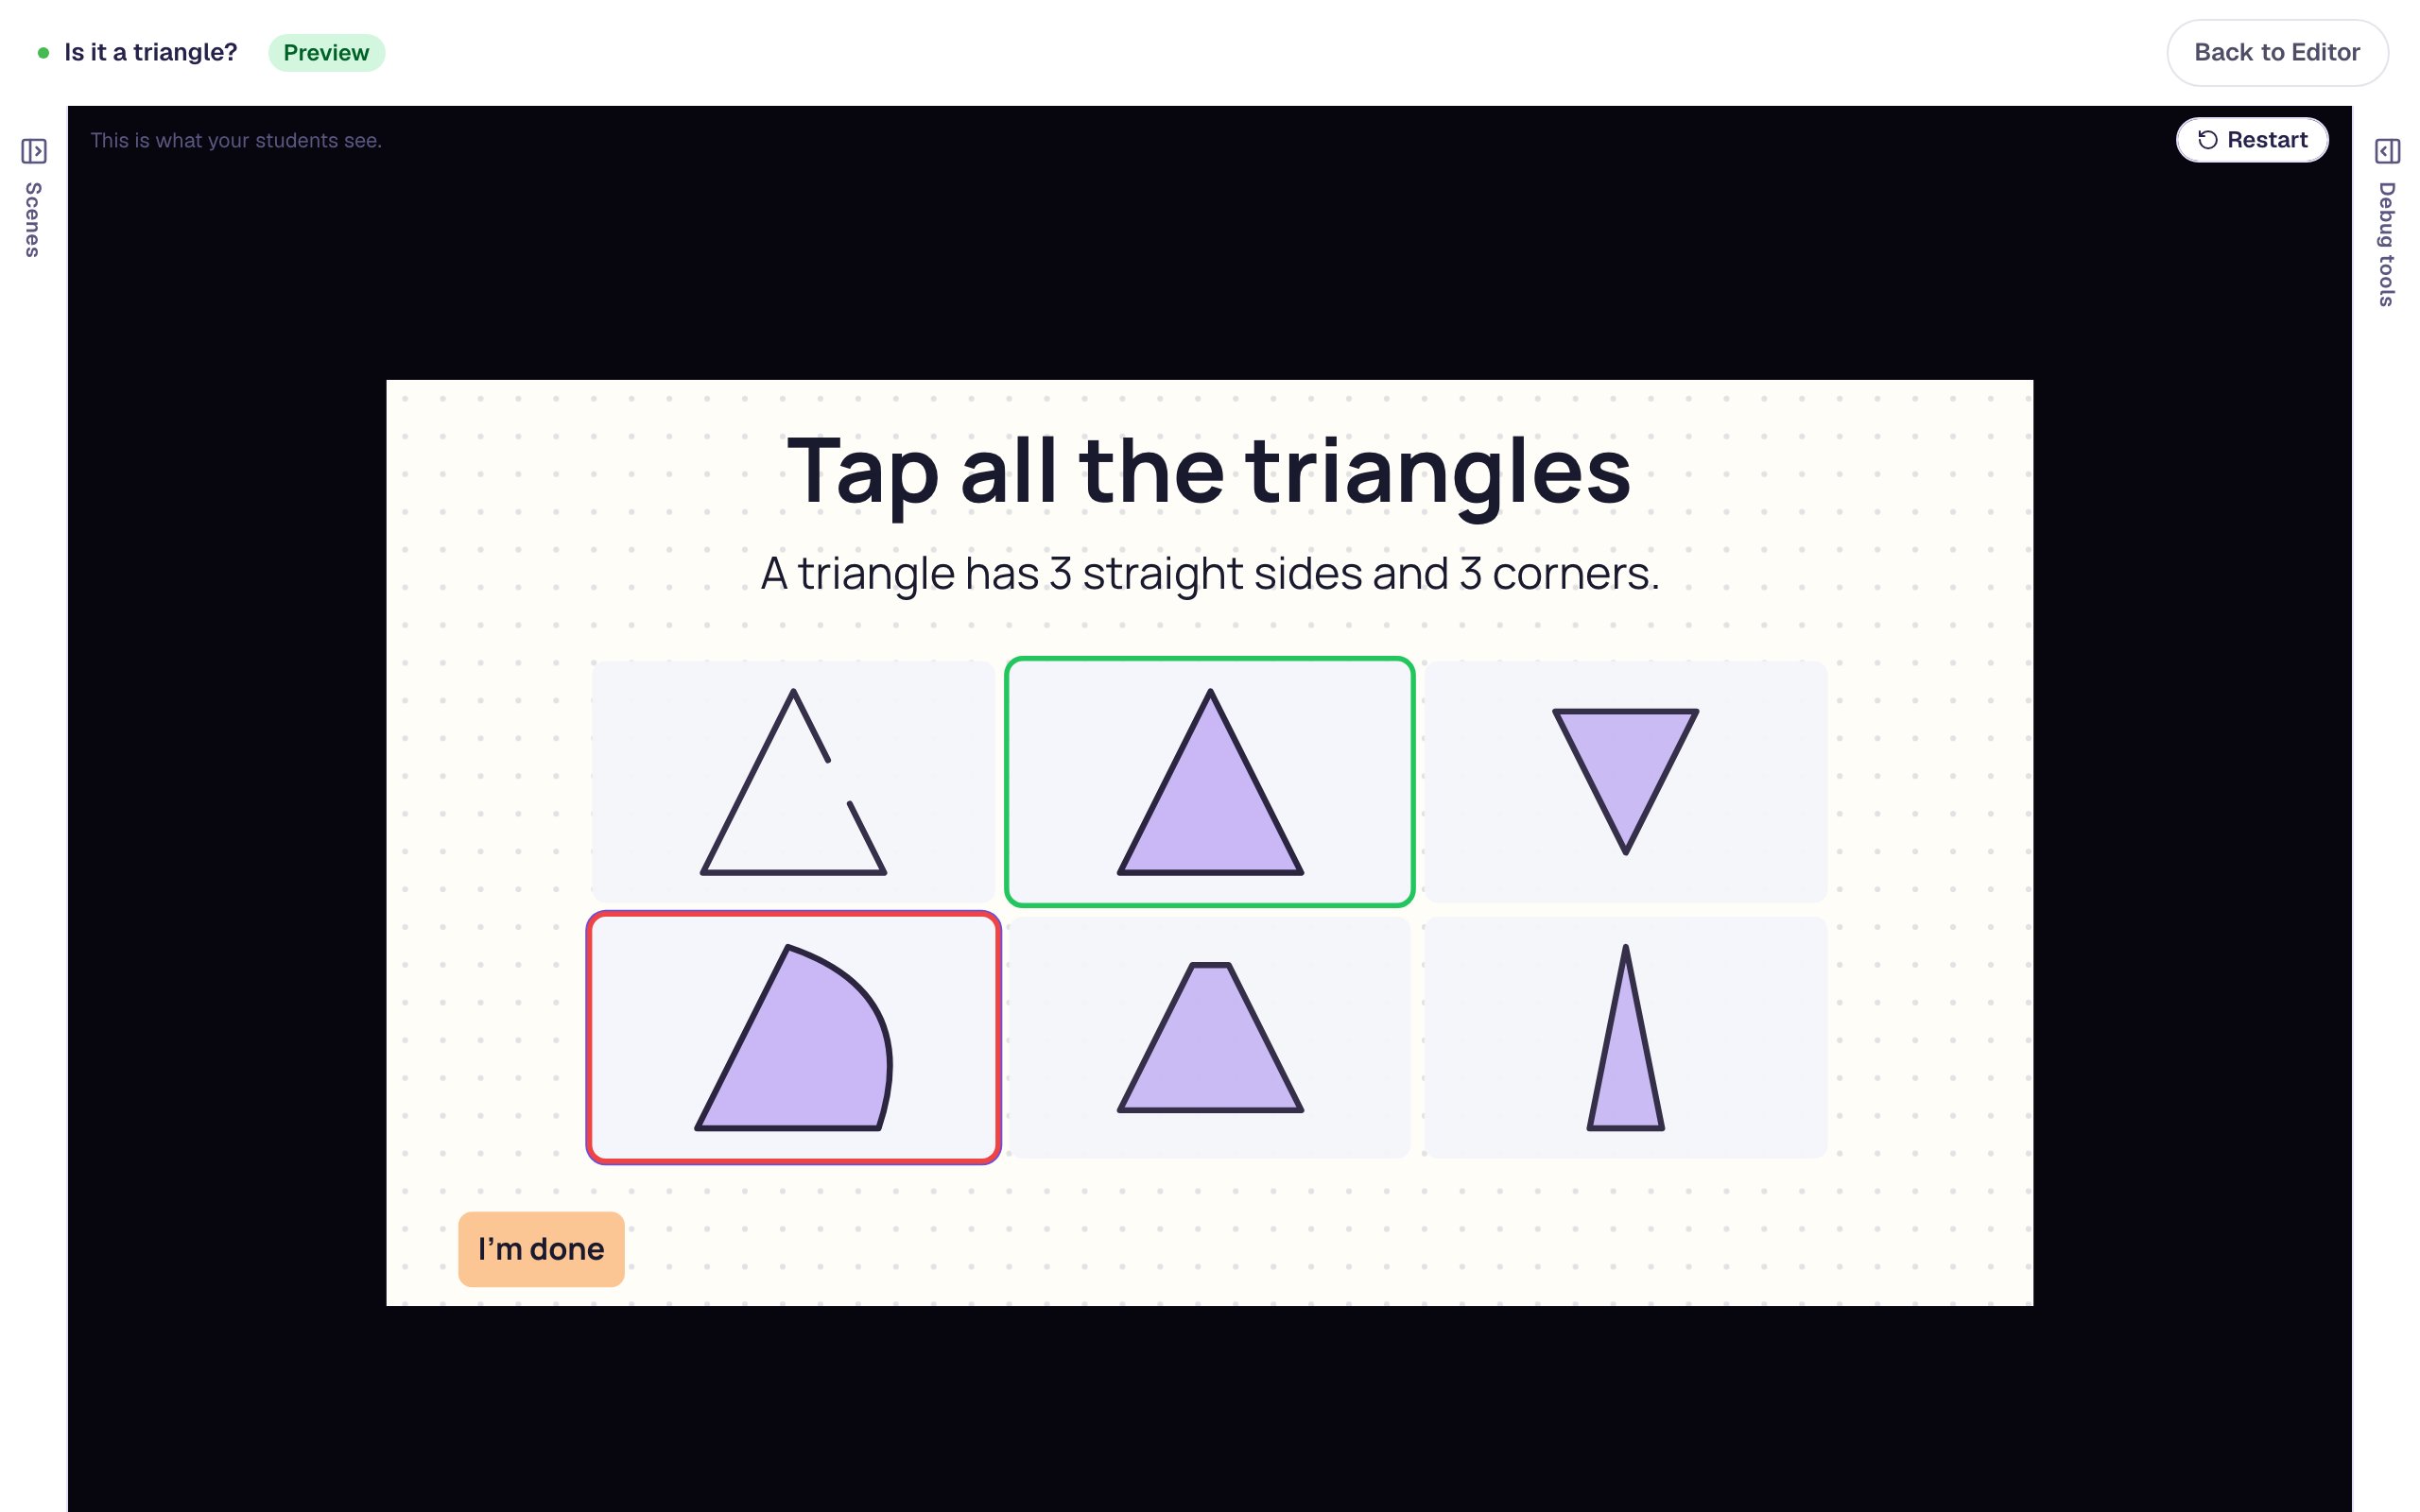
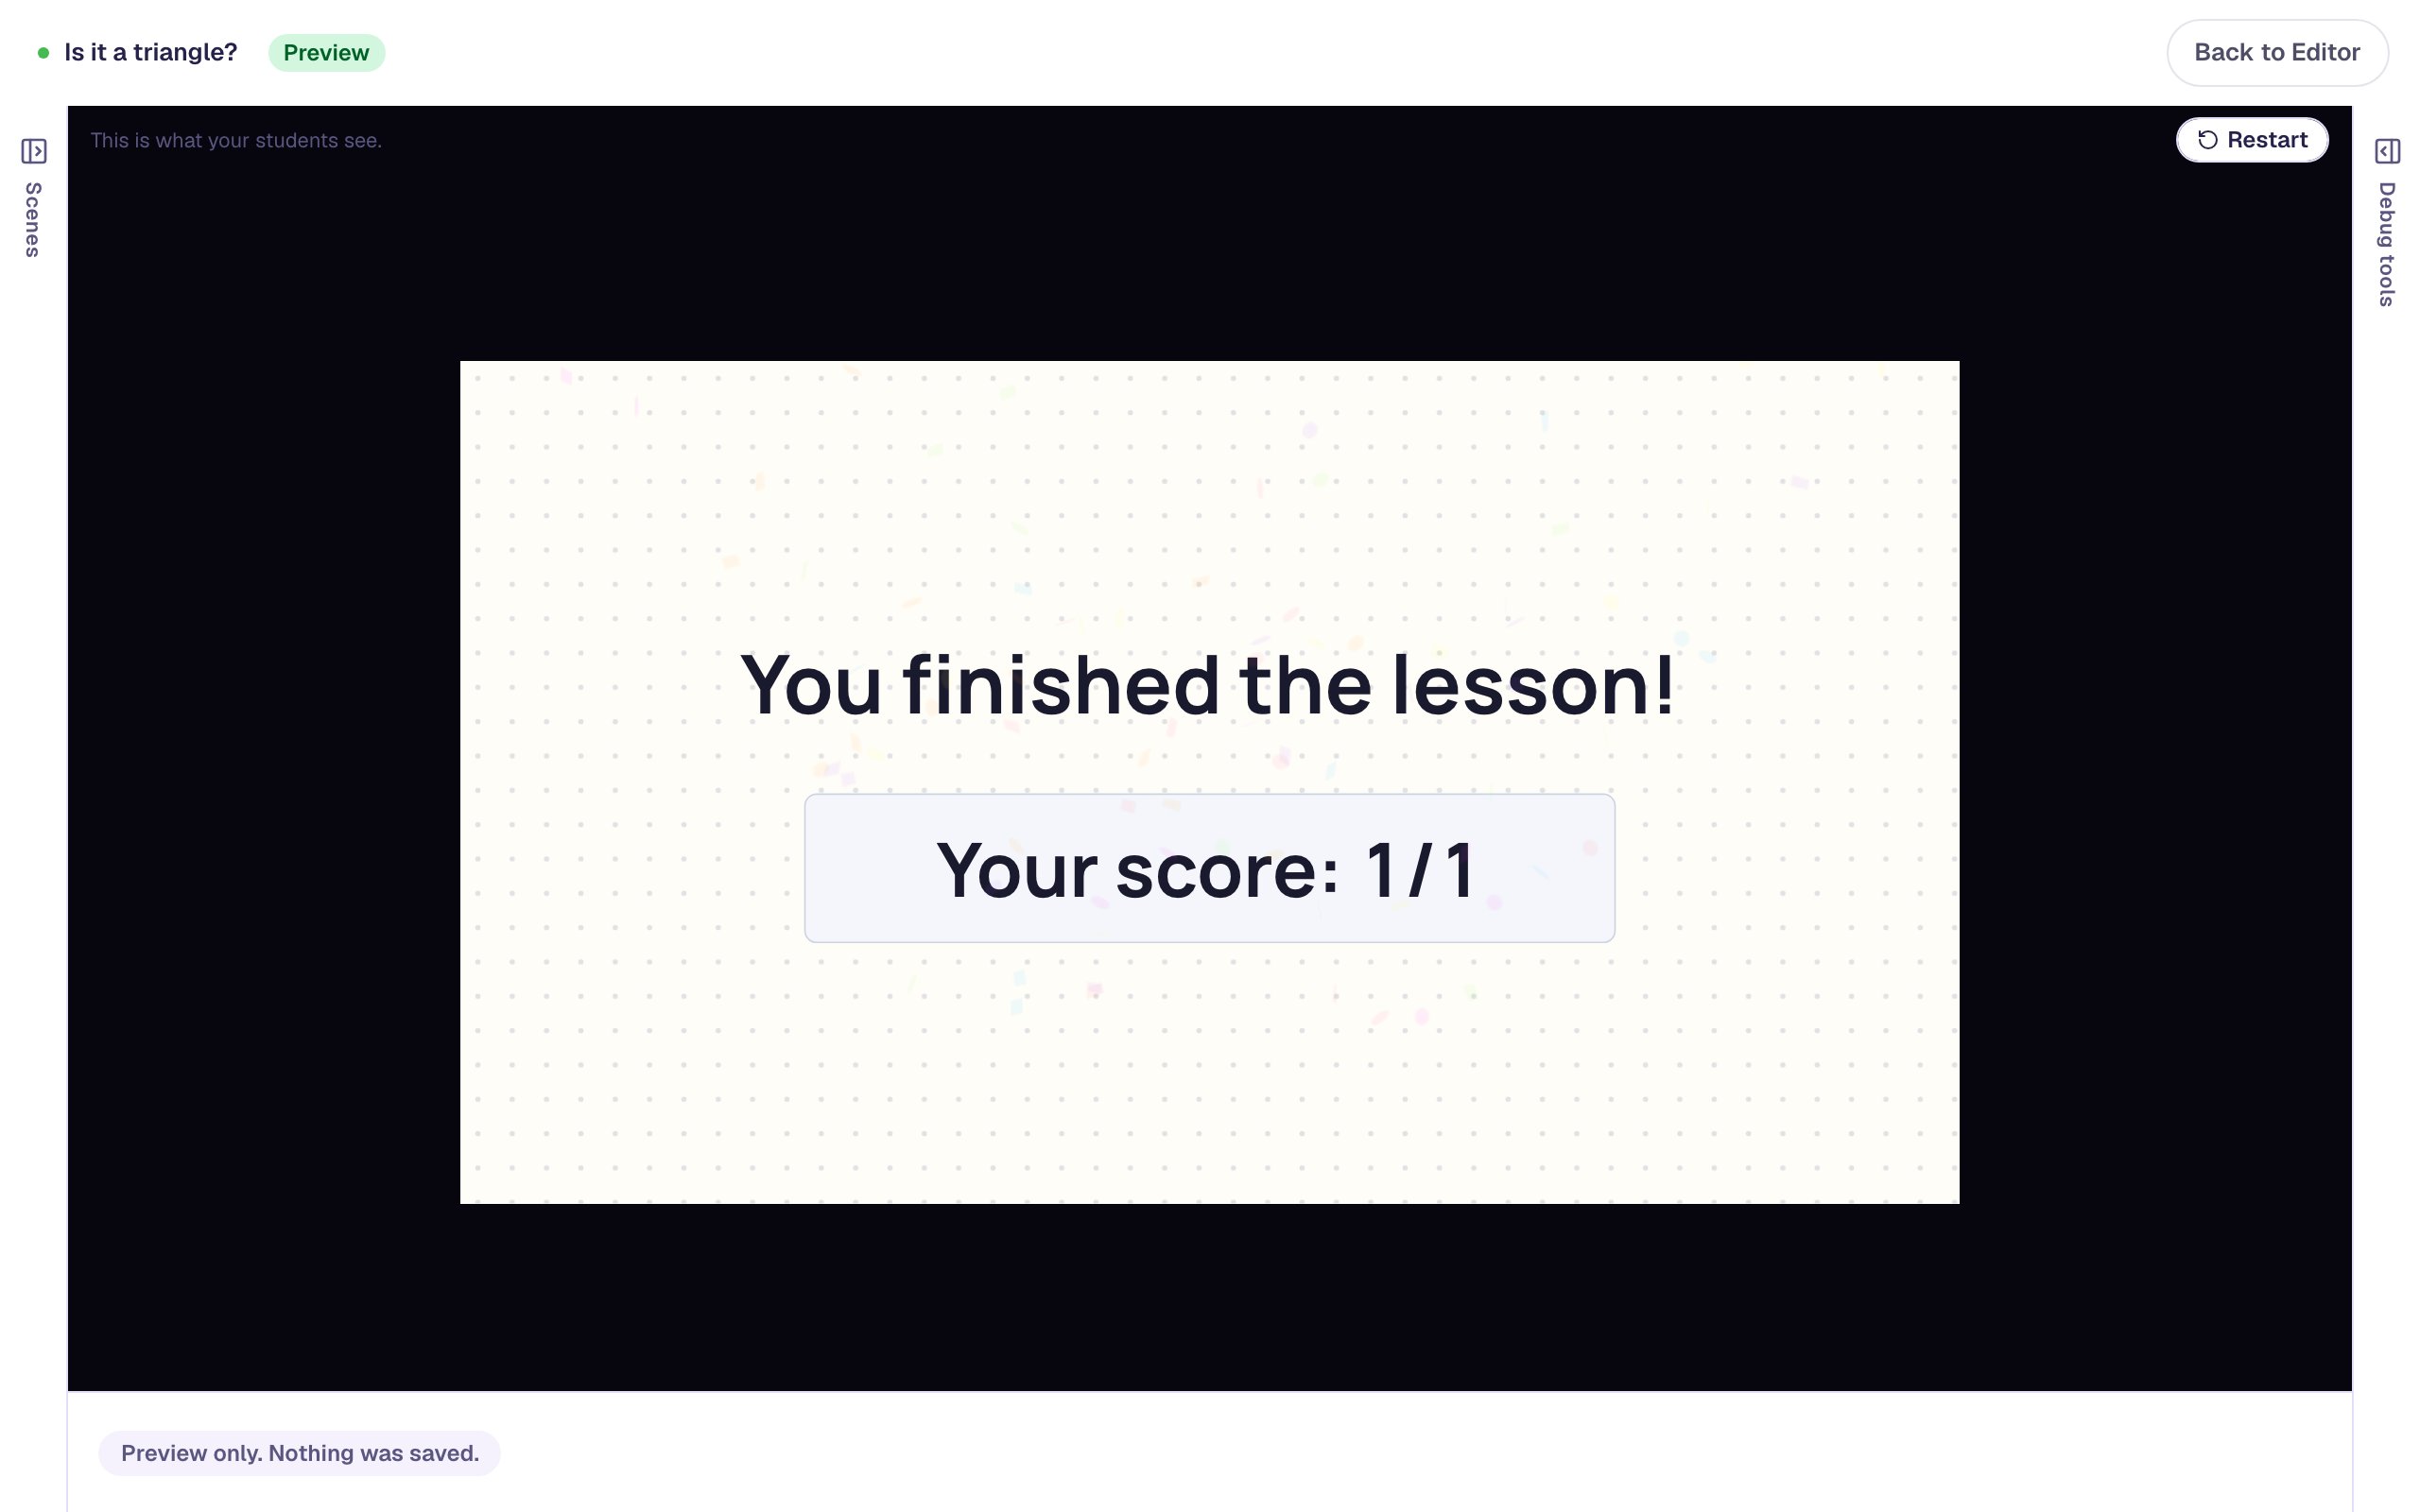
Tap the pizza slice again to take it back, then tap the upside-down triangle and the skinny one. Now every triangle is picked and nothing else, so Berdee moves to the Closing Scene.
The upside-down and skinny triangles are the ones to watch when your class plays it. A child who skips them is still sorting by look, which is a good conversation to have.
What you built
You built a shape question that checks the rule, not the look:
- answers that are shapes Berdee draws, all in one color,
- three near-misses (a curved side, a gap, a cut corner) that look almost right,
- triangles that don't look alike, made with Copy from, Upside down, Size, and by dragging corners,
- descriptions by sides and corners, so screen-reader users solve the same puzzle,
- Multi selection with All Correct, Show correctness, and an I'm done button.
The same recipe works for any shape: set Kind to Rectangle and add a Rounded corners near-miss, or ask "Which one is the same shape?" with a turned, smaller copy. To have children draw the shape themselves instead of picking it, follow Draw a rectangle from a clue on dot paper.
Make this lesson yours
Add the lesson you just watched being built to your account, then change it for your class: your questions, your pictures, your colors.
Free to sign up, and you'll come straight back here. I have an account