Ask students to catch a counting mistake
Use the Counting Collection's Watch and judge mode to have the lesson count a row of buttons out loud, slip in a mistake, and ask students "Did I count right?". A second count that's right keeps students from guessing No every time.
- Level
- Beginner
- Time
- About 10 min
- Steps
- 7
- Updated
- Nov 5, 2026
A two-scene "Did I count right?" lesson where students watch 7 buttons counted with one button counted twice, answer No, see a hint if they say Yes, then watch 6 buttons counted correctly and answer Yes.
Get the finished lesson
Skip straight to the result, or keep it open beside the steps. Add this tutorial's lesson to your account and explore how it works in the studio.
Free to sign up, and you'll come straight back here. I have an account
Young children learn a lot by checking someone else's counting. To spot a mistake, a child has to know the rules of counting: every object gets exactly one number, nobody gets skipped, and the last number says how many. Kindergarten teachers often play this as a game, counting a pile out loud and getting it wrong on purpose.
In this tutorial you'll build that game as a two-scene lesson called Did I count right?. On the first scene, the lesson counts 7 buttons out loud and says two numbers for the fourth one, so it ends on 8. Students answer No. A student who answers Yes sees a hint to watch again. On the second scene, the lesson counts 6 buttons correctly, so the answer is Yes. That way students can't pass by saying No every time.
If you haven't used a Counting Collection before, Count a collection of shells, then say how many introduces it in its everyday counting mode.
Step 1: Set the scene
Start a blank lesson (New lesson, then Start from scratch) and name it Did I count right? by clicking Untitled lesson at the top left.
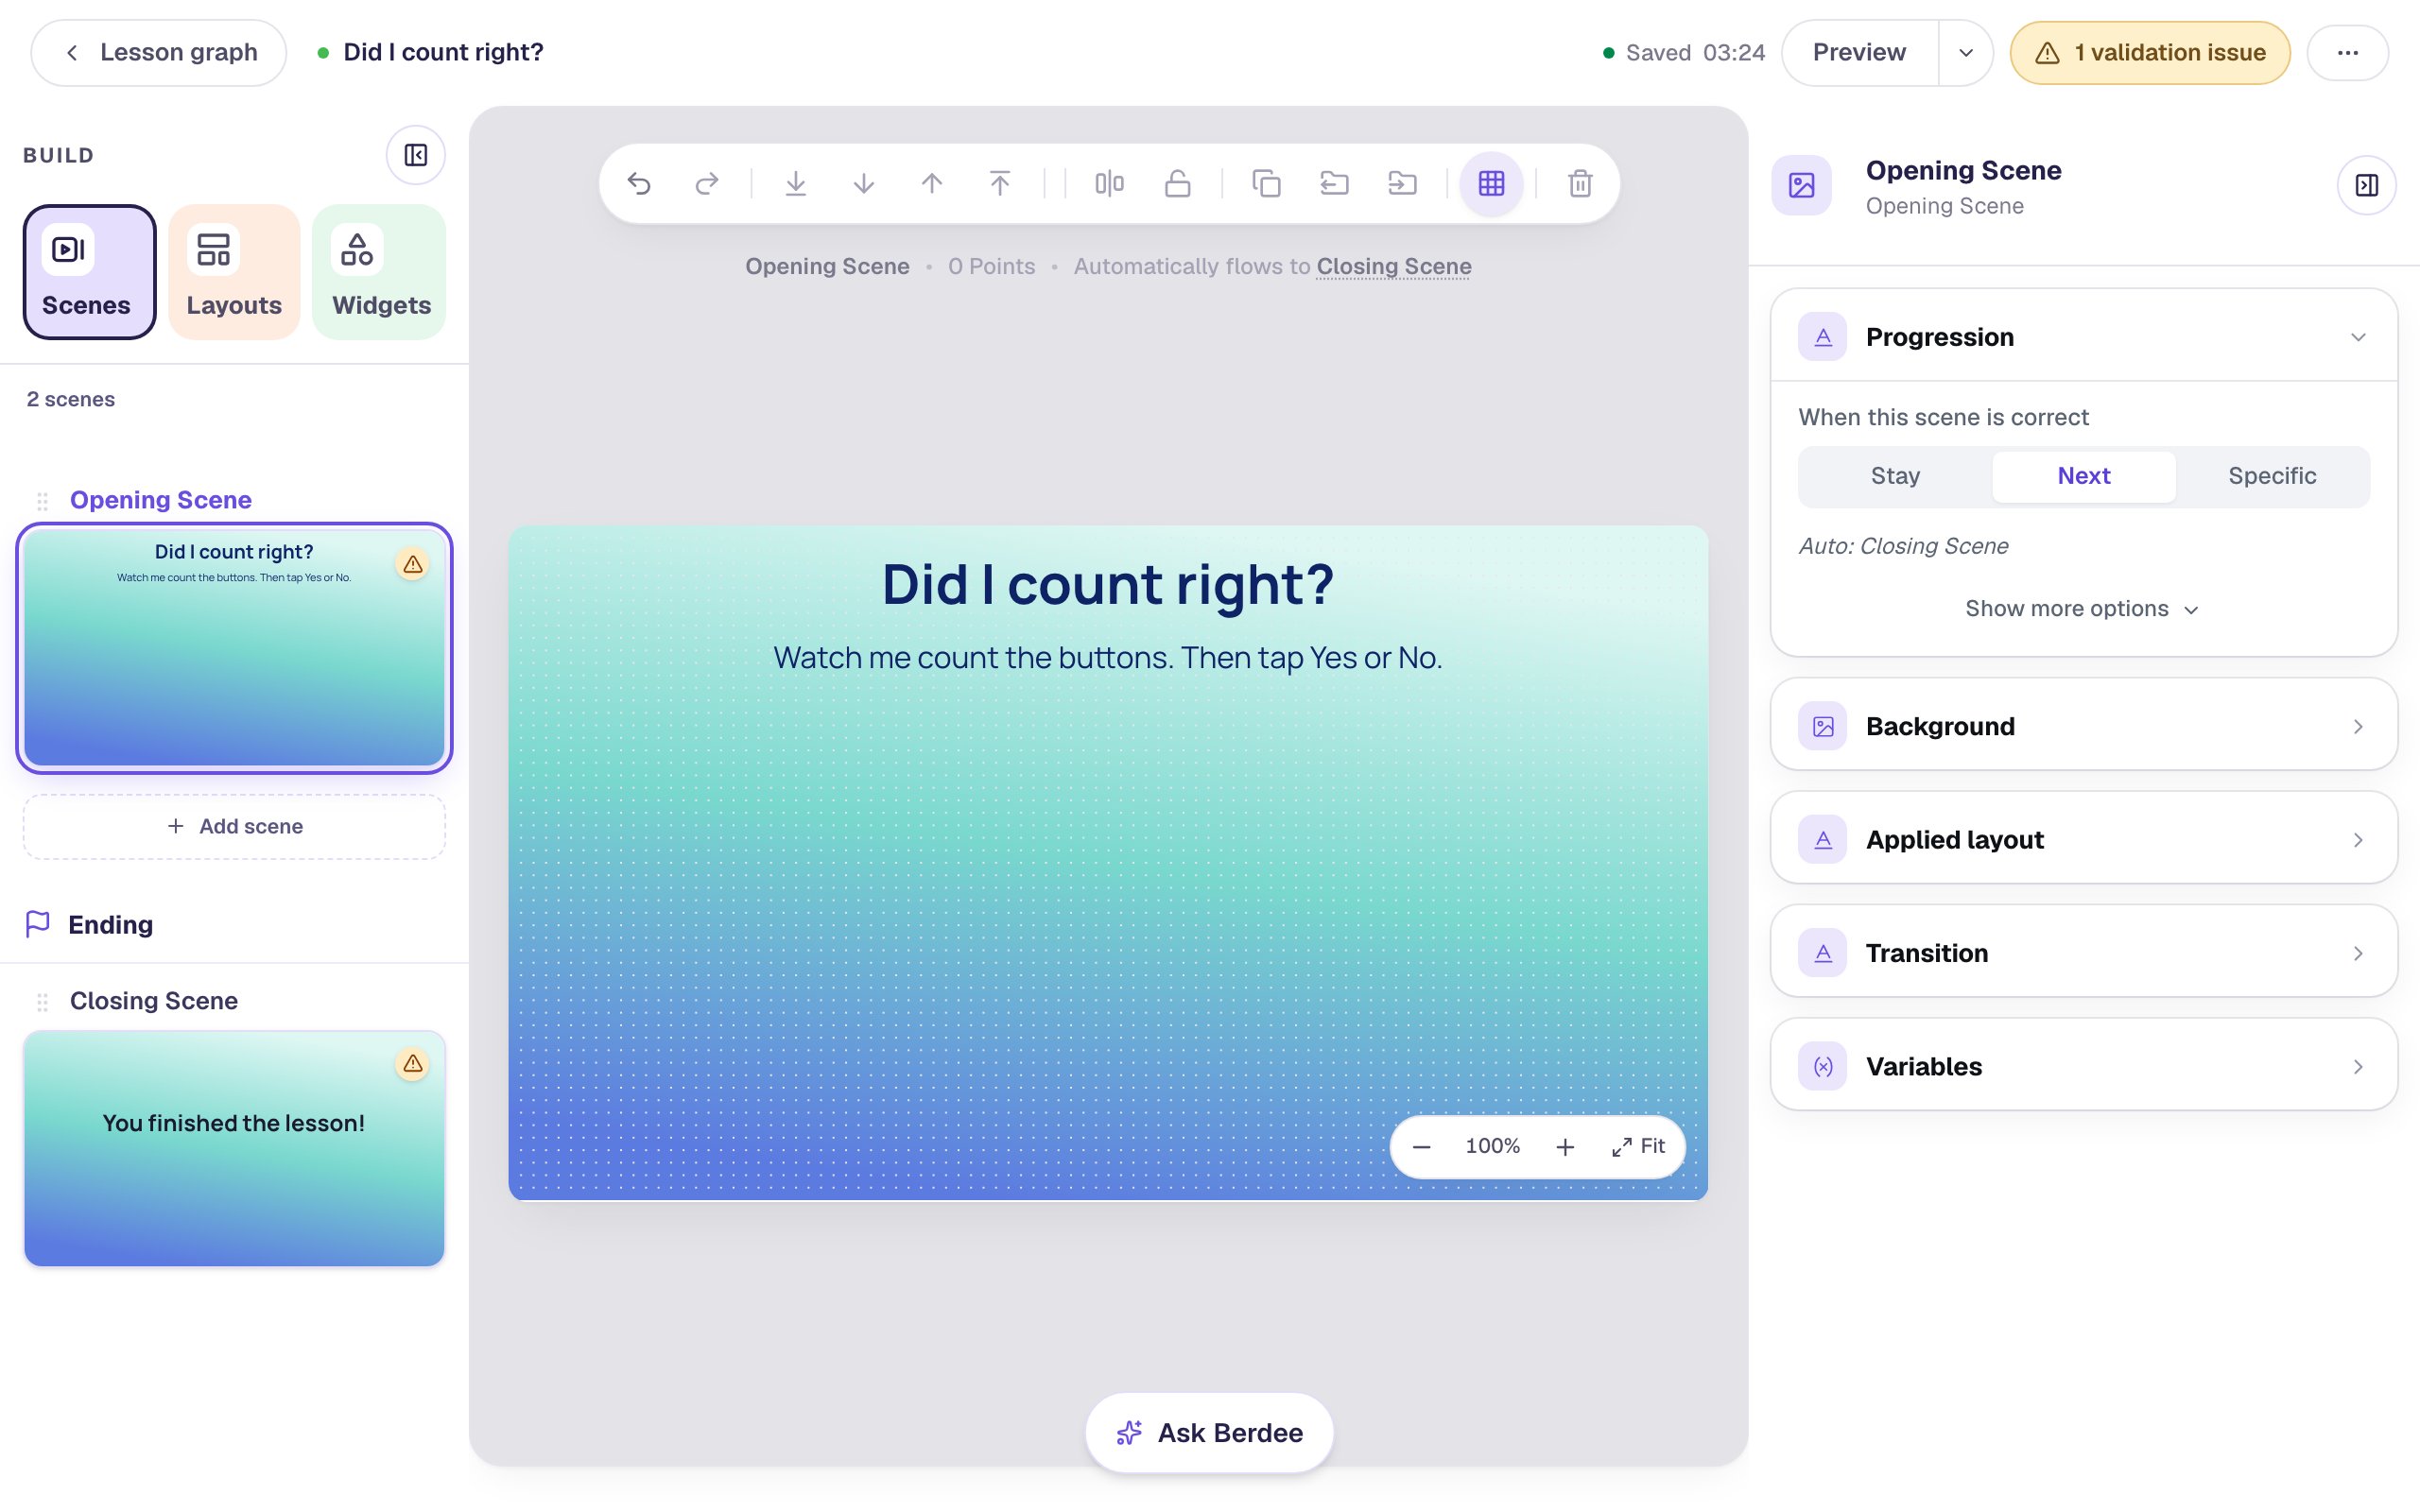
Give the scene a background. Click an empty spot on the scene, open Background, click Choose a style, and pick Lagoon gradient under Gradients. Give the Closing Scene the same background so the ending matches.
Then add the title and the instruction:
- A Heading at the top:
Did I count right?. Set its Font Size to44and its Text Color to dark navy. - A Body under it:
Watch me count the buttons. Then tap Yes or No.Set it to Fixed width, about880wide, then set its Font Size to24and its Text Color to the same navy.
Step 2: Add a Counting Collection
Search the Widgets tab for Counting Collection and click it. Click the name at the top of the properties panel and rename it Buttons: the hint in Step 6 finds it by that name.
Under Style & Layout, click Show more options and set Width to 760 and Height to 370. Drag it to the left, under the instruction, which leaves a column on the right for a hint and a button. Then set its Background to a pale blue.
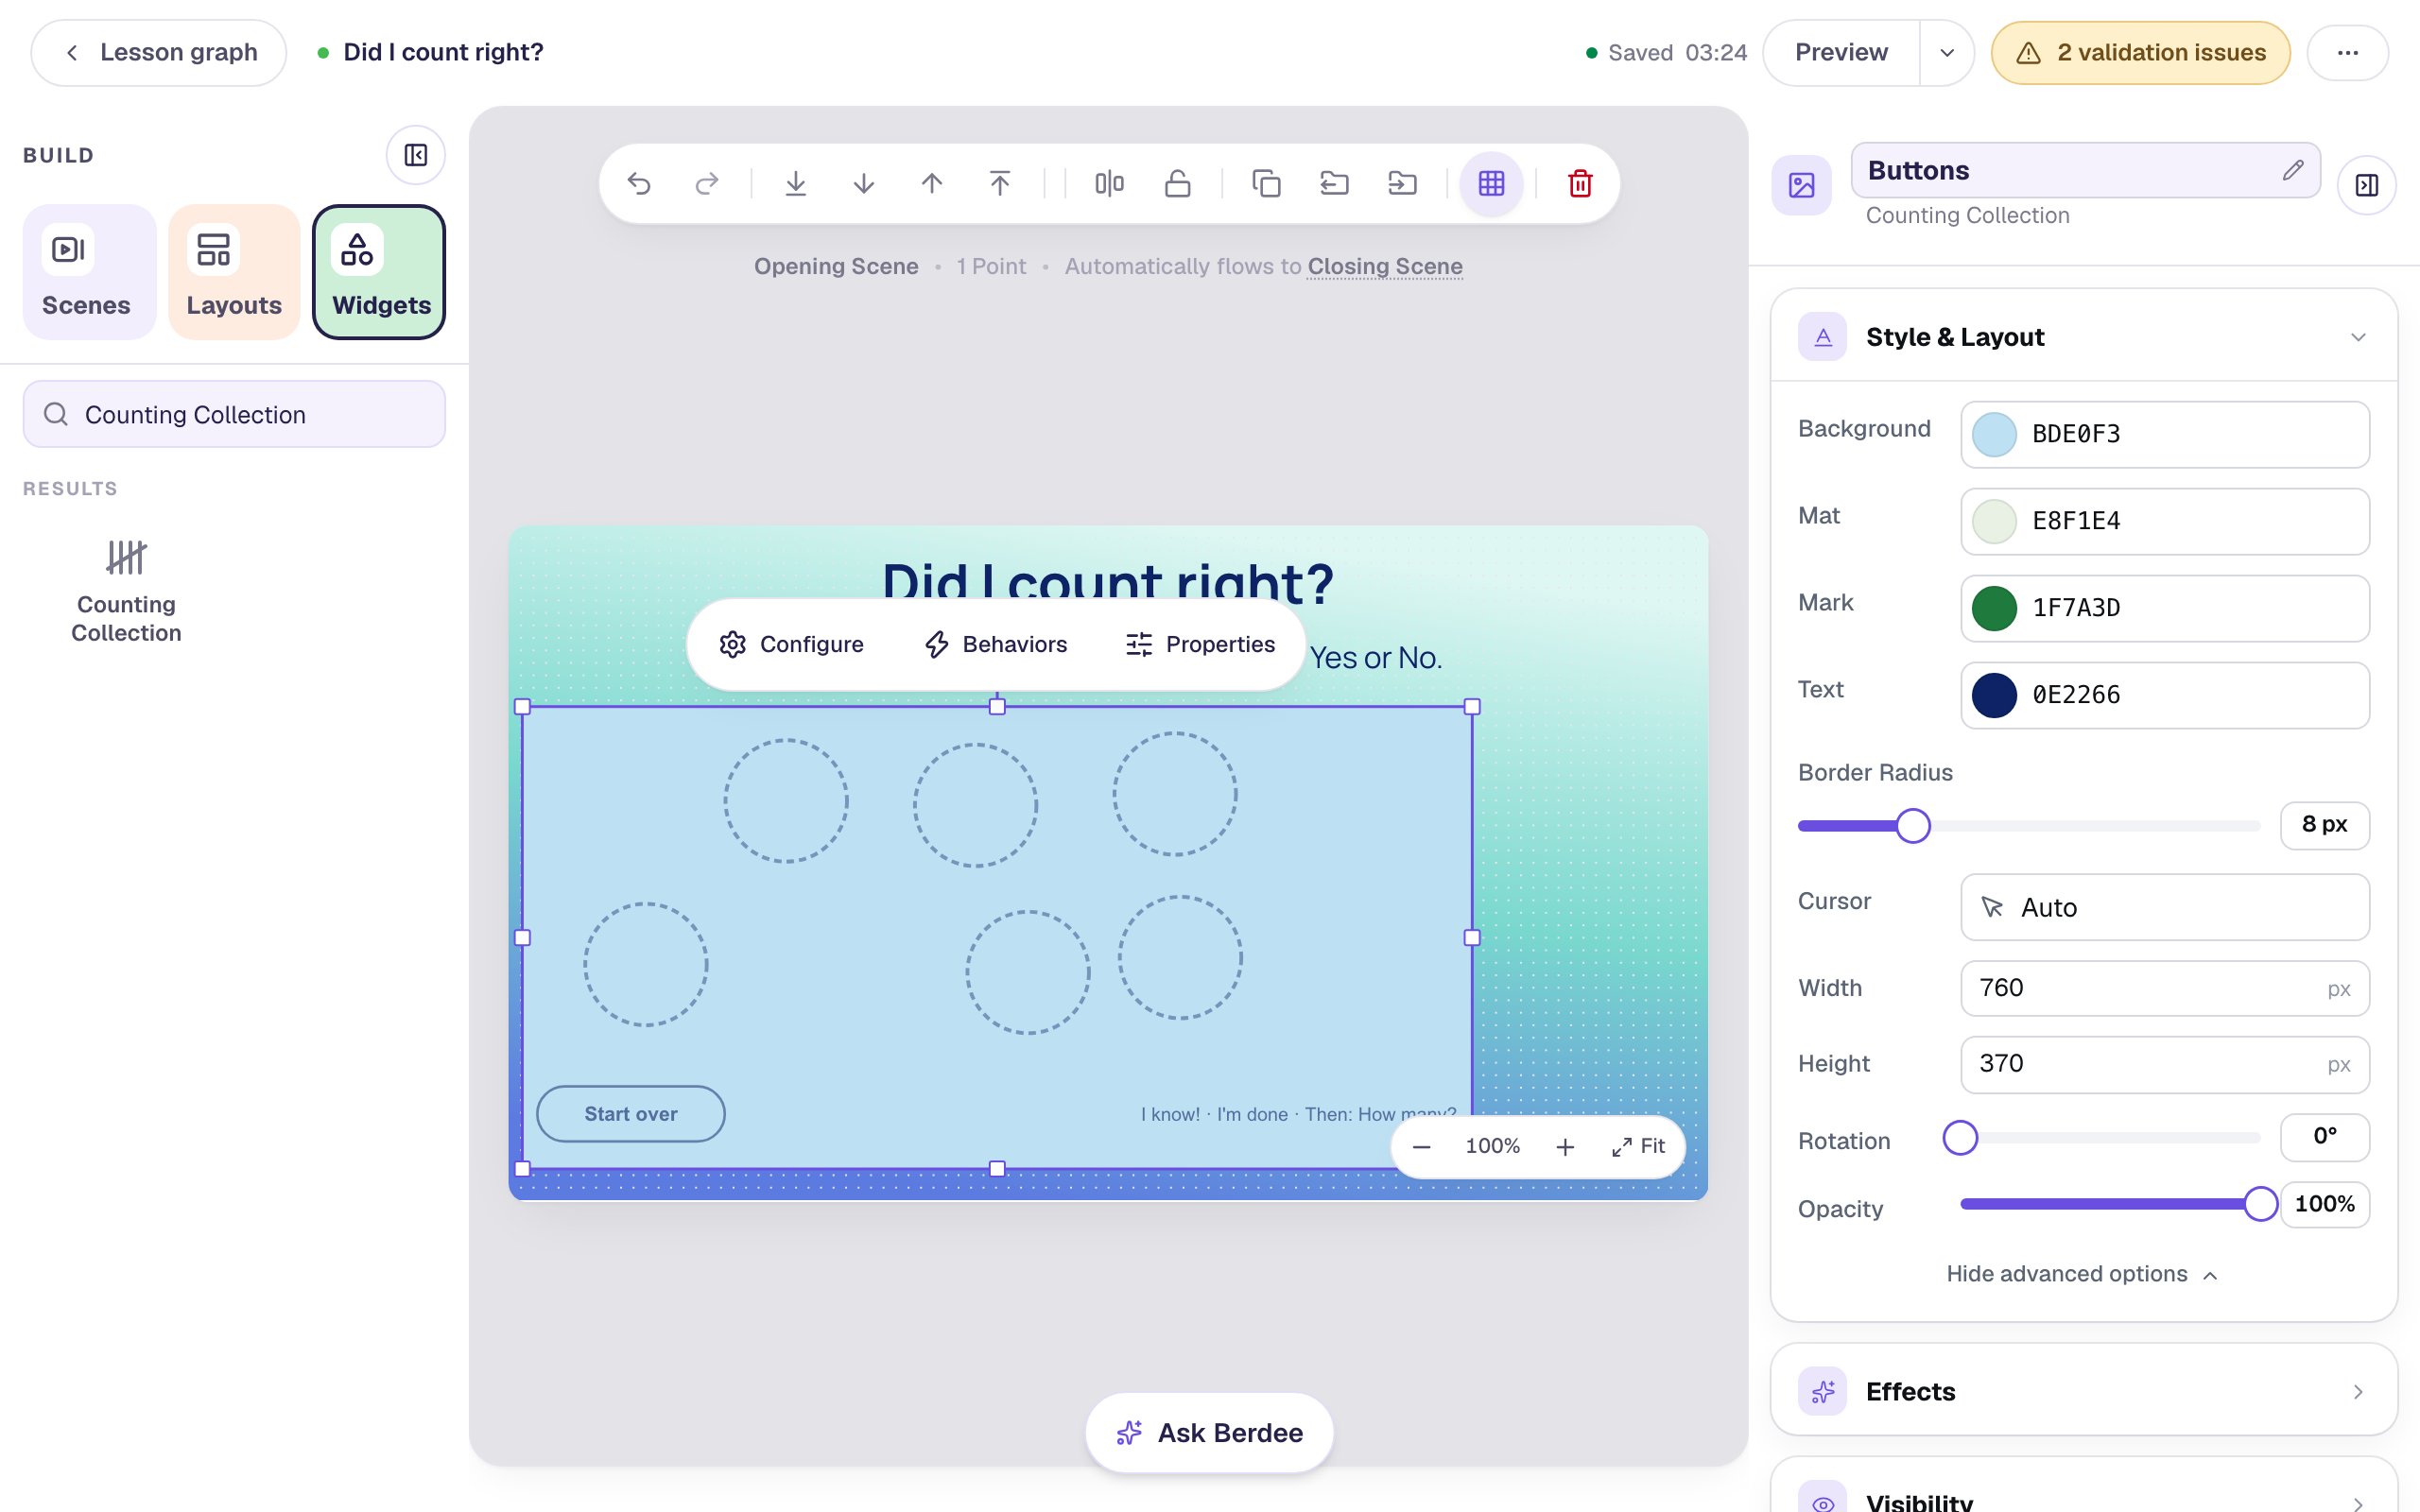
Keep the collection wide. Its bottom bar holds Watch me count, the question Did I count right? and the Yes and No buttons, and they need room to sit in one row.
Step 3: Choose Watch and judge and a button
Click ⚙ Configure in the pill above the collection.
- Under What students do, click Watch and judge: "Watch the widget count, then say if it was right."
- Under Picture, click Choose a picture (a shell, a button, a bear…) and pick a picture of one button. A picture with a transparent background looks best. Upload your own from the Upload tab, or pick one from your media library.
- Type
buttonas the name for one. The name for more than one,buttons, fills in by itself.
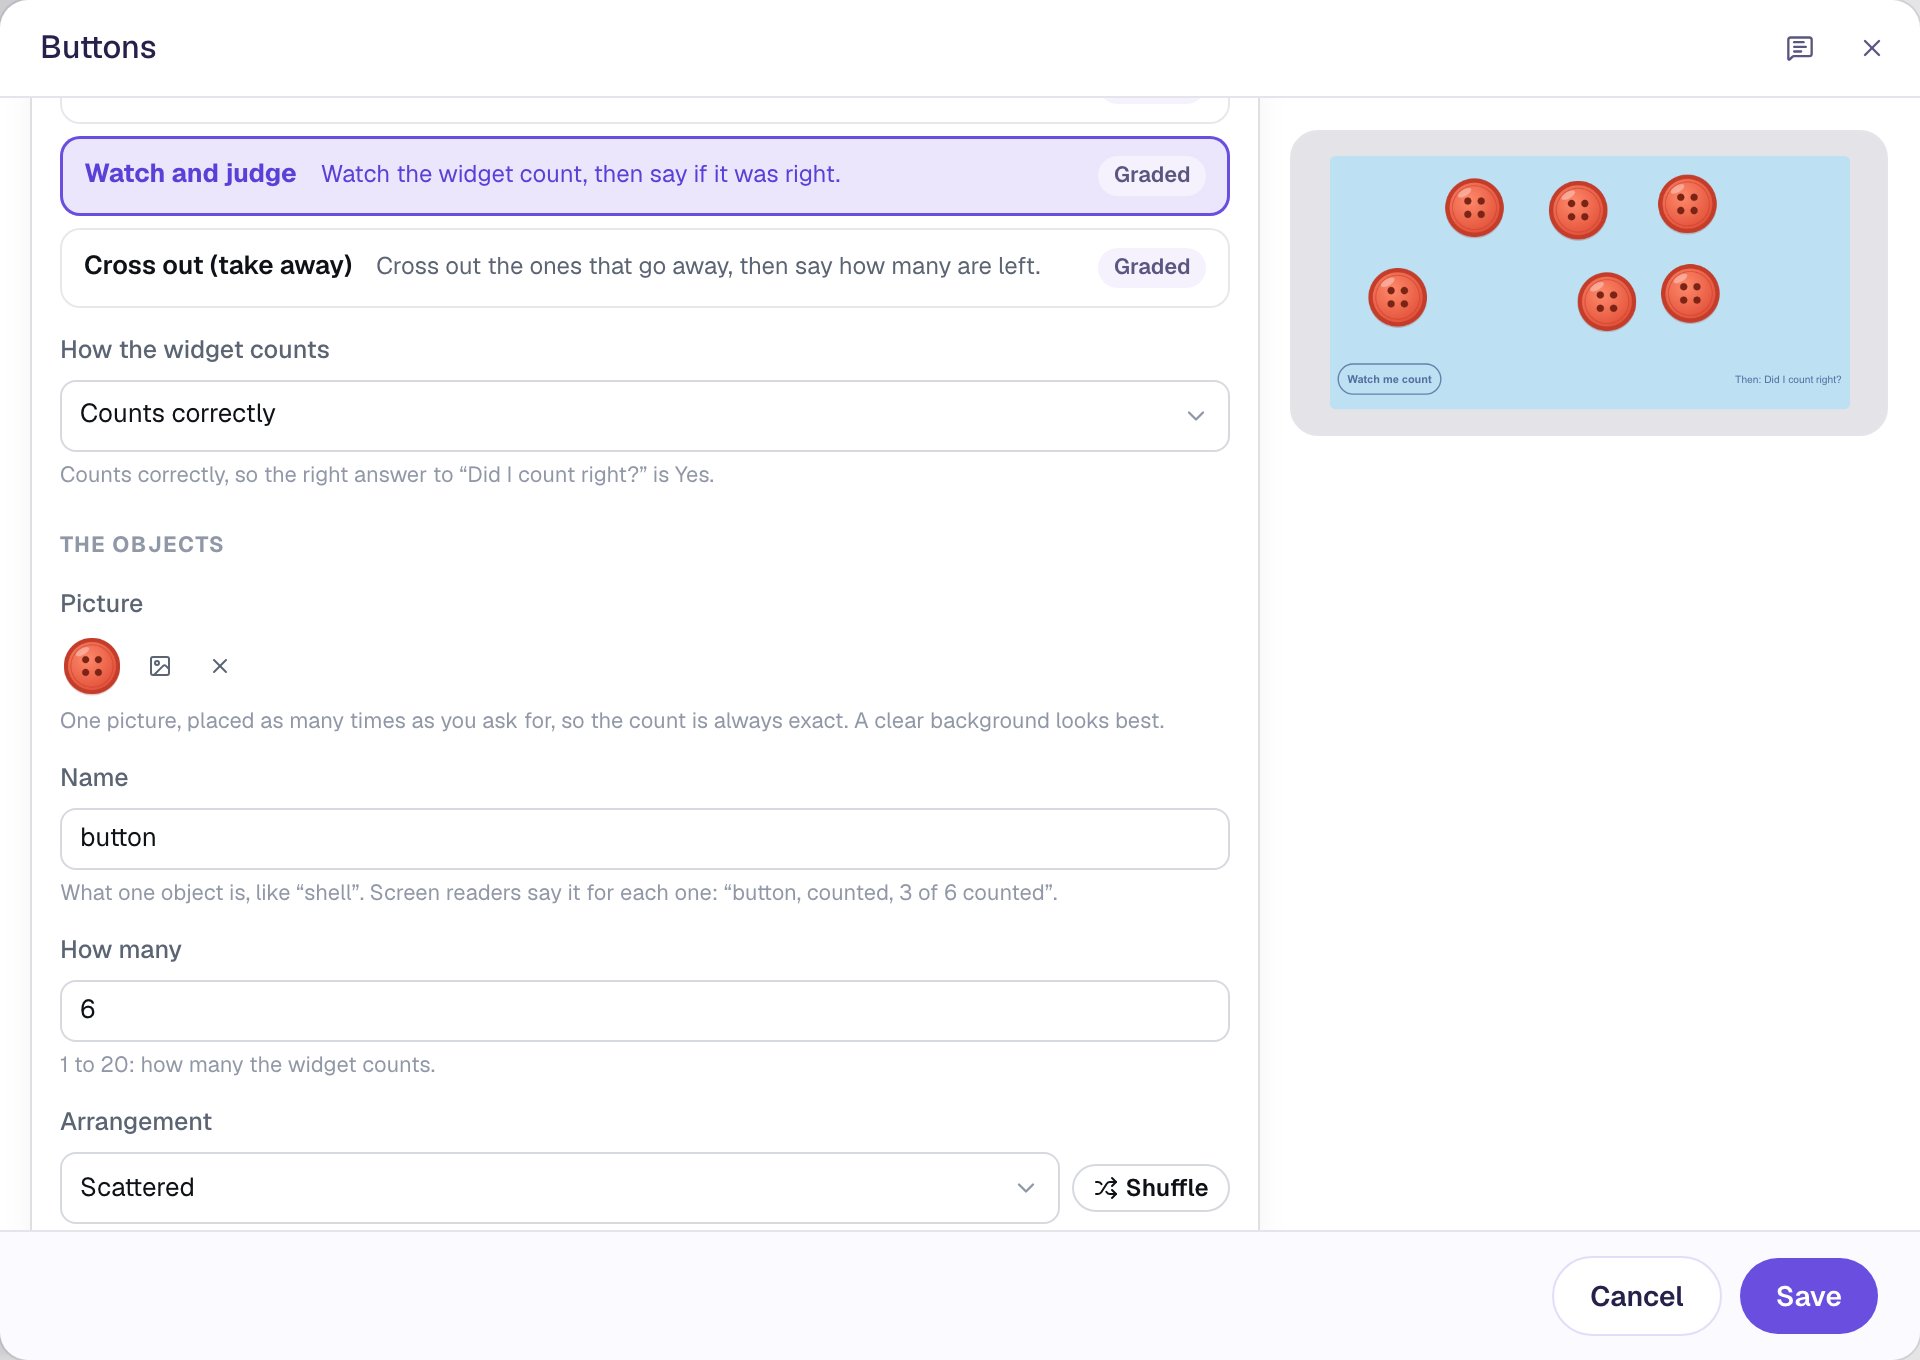
The name is what a screen reader says for each button, so it works like alt text for the picture.
Step 4: Count 7 buttons, and count one twice
Scroll down in the same window:
- Set How many to
7. - Set Arrangement to In a line. A line is the easiest layout for young children to follow the count across.
- Set How the widget counts to Says two numbers for one object.
- Set The mistake is on object to
4. Objects are numbered left to right, so this is the fourth button.
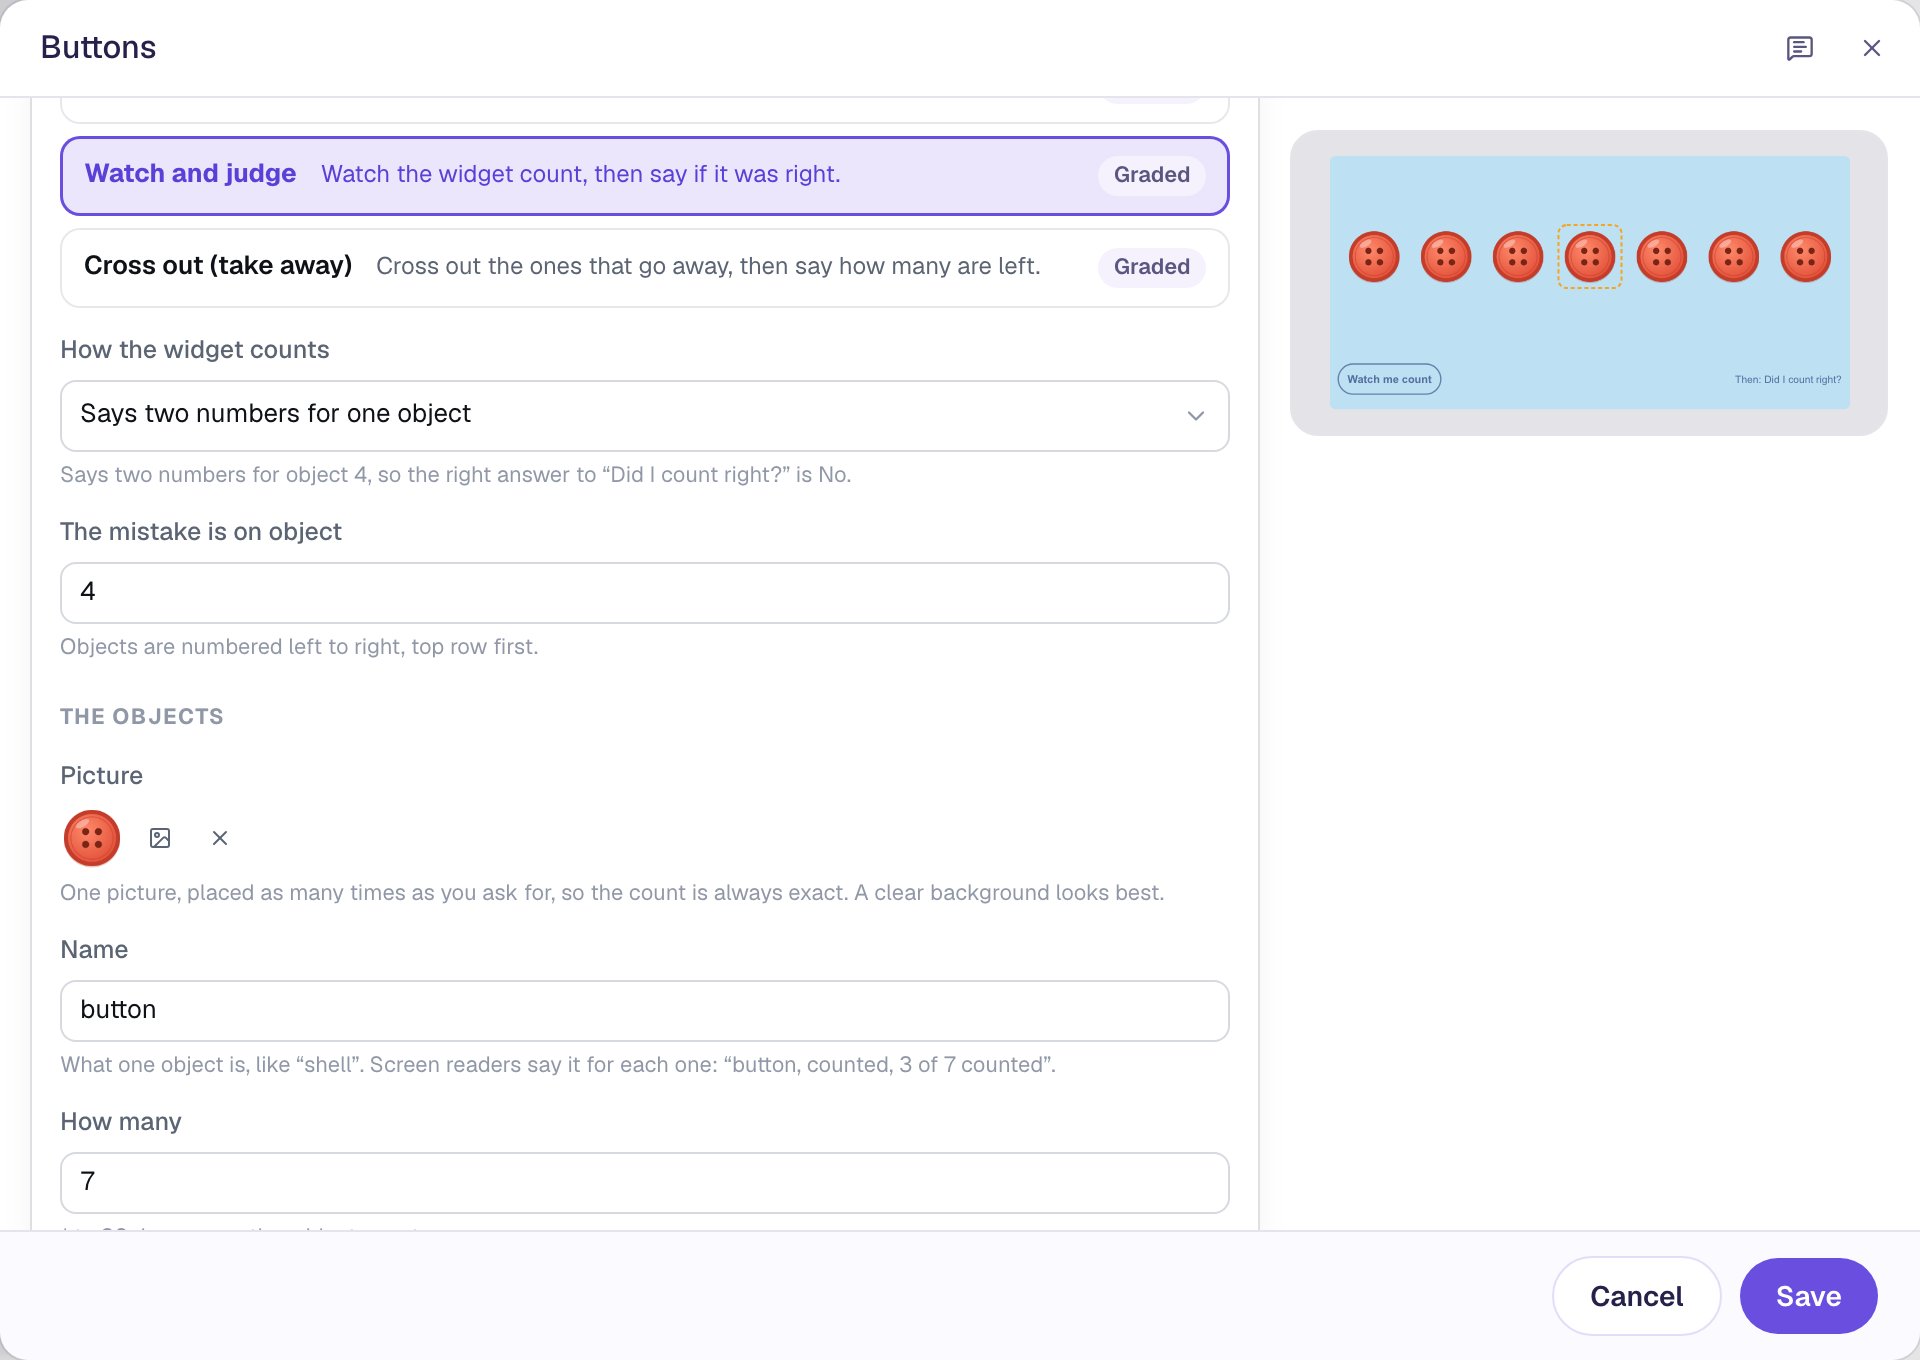
The line under How the widget counts tells you what the lesson will do and what the right answer is, so you never have to work it out. The other choices make other mistakes:
- Skips an object jumps over one button, so the count comes up one short.
- Says the wrong total at the end counts every button correctly, then says the wrong number. This one checks whether a child knows the last number counted is how many there are.
- Counts correctly is the one where the answer is Yes. You'll use it in Step 5.
Click Save.
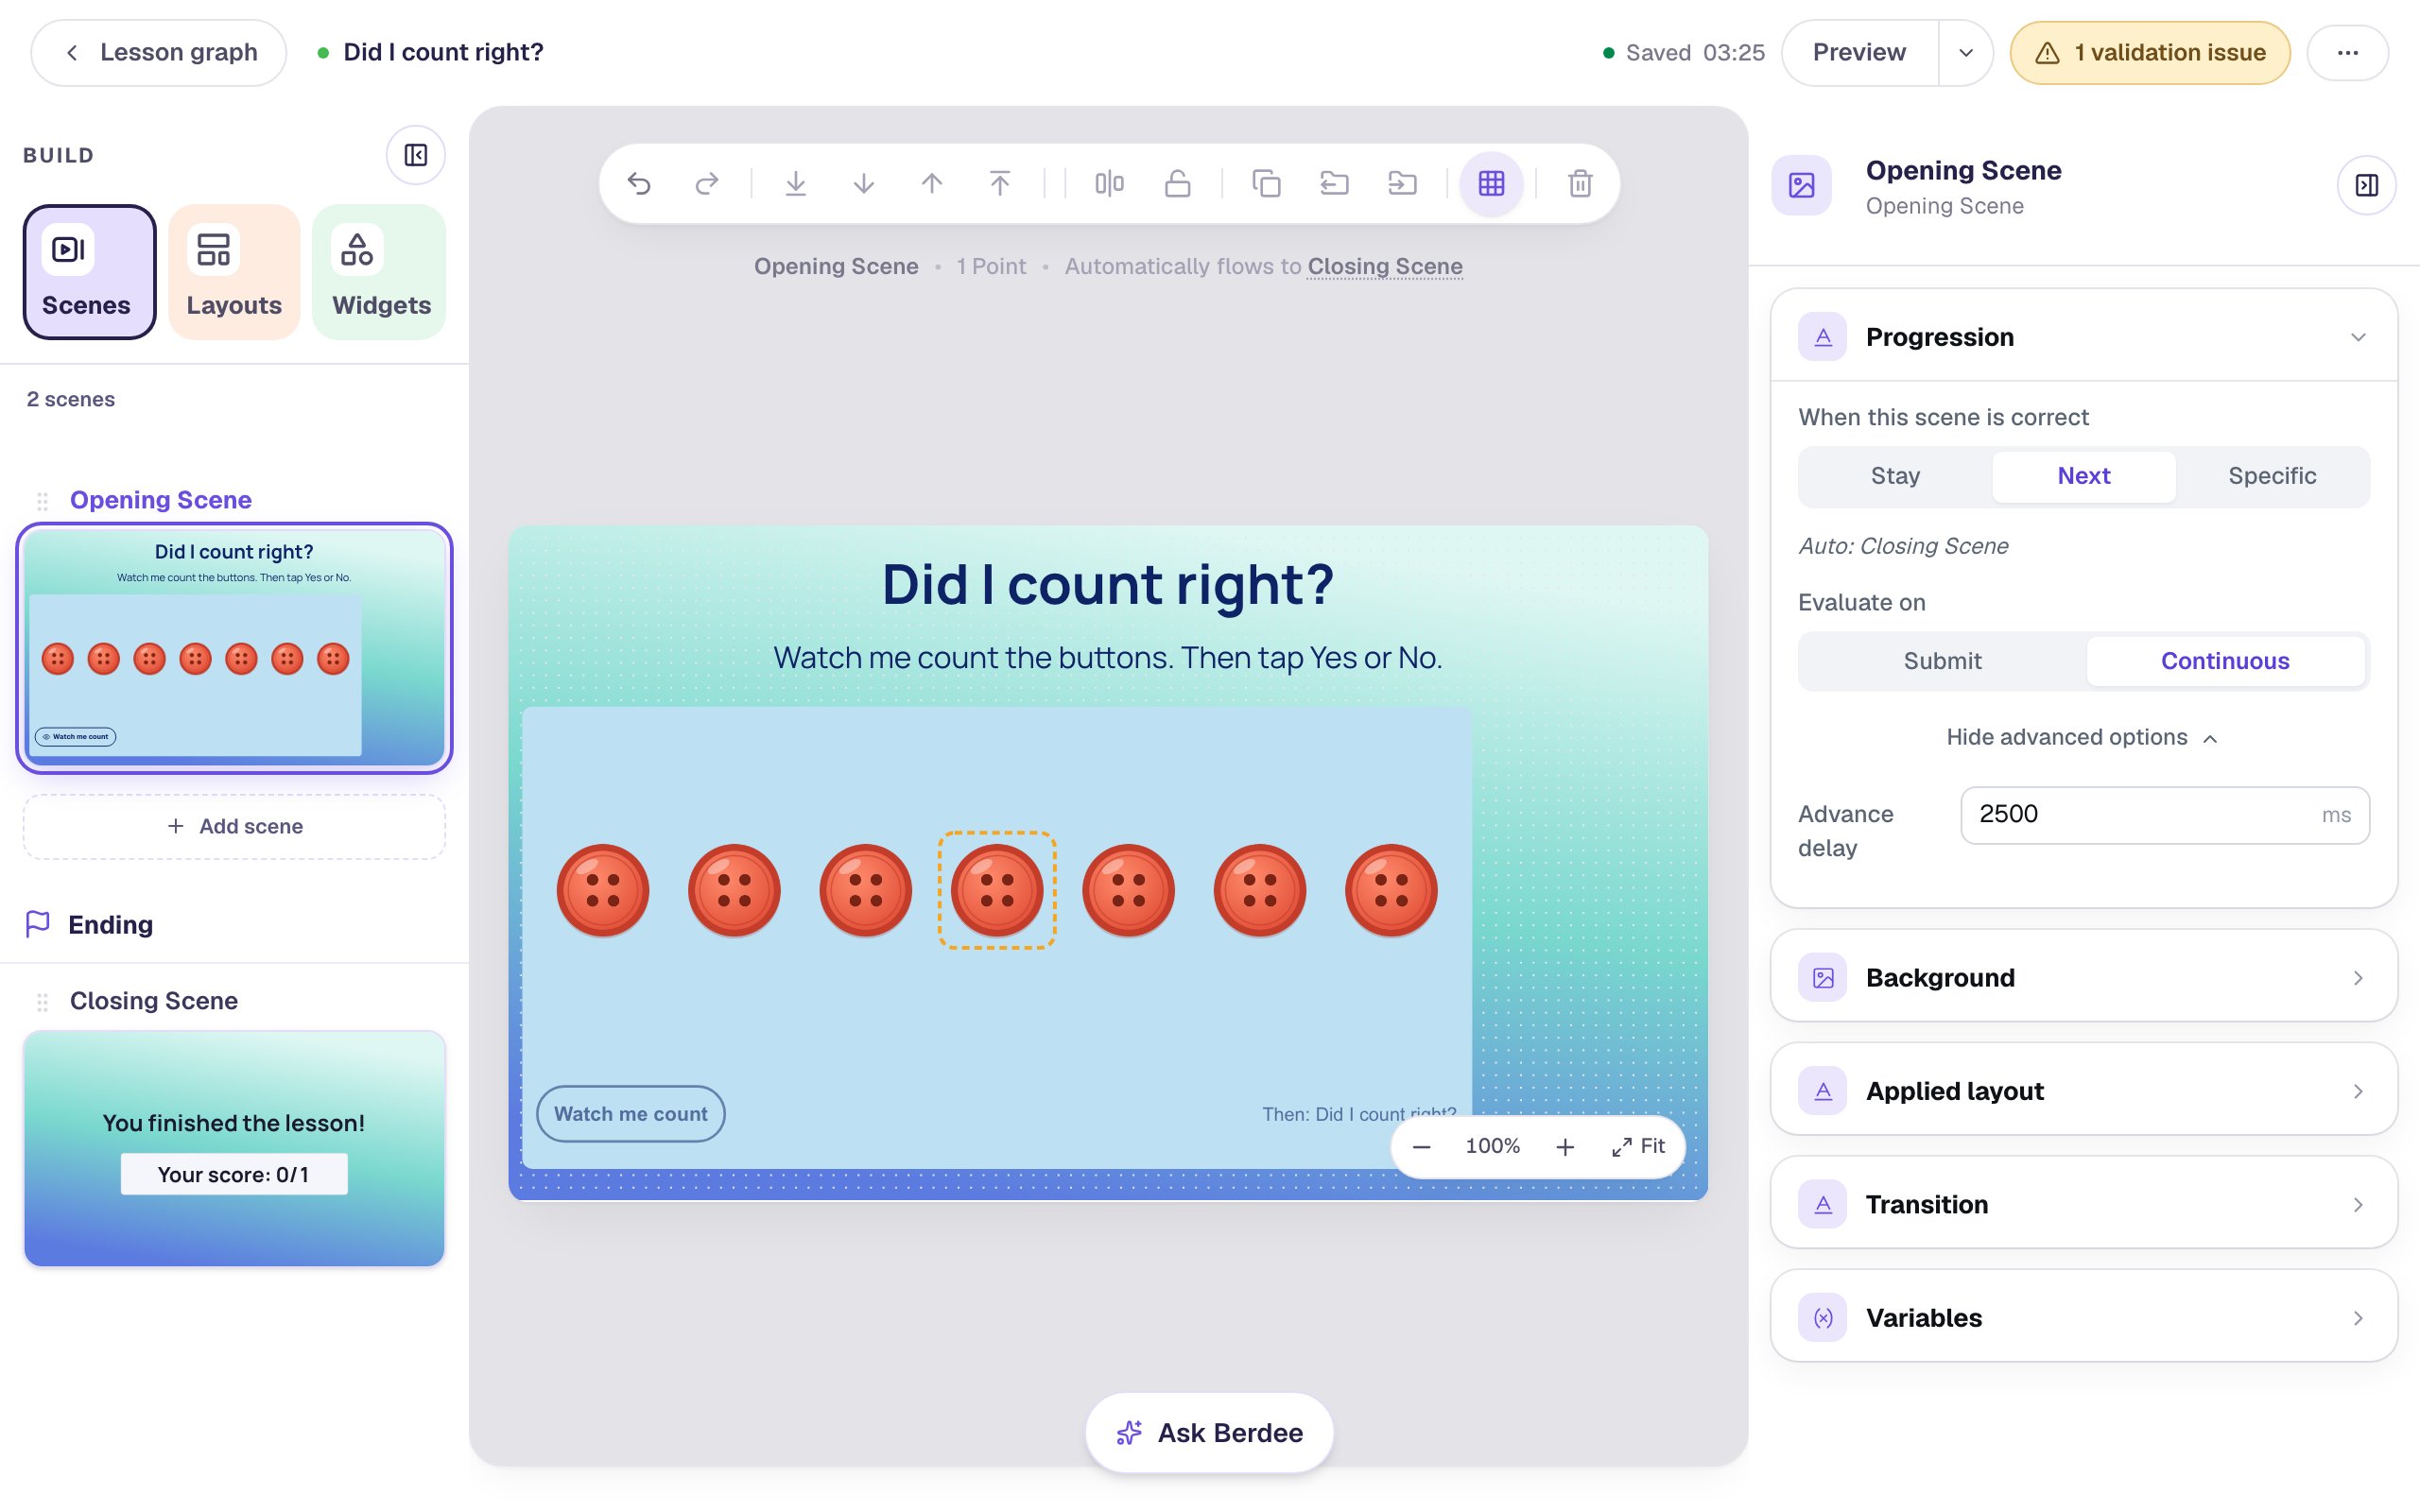
The scene moves on by itself once the answer is right. It waits only 0.6 seconds by default, so click an empty spot on the scene, open Progression, click Show more options, and set Advance delay to 2500 ms. That gives students time to see their answer.
Step 5: Add a second count that's right
If every count in the lesson is wrong, a student can pass by tapping No every time without watching. A count that's right fixes that.
- In the Scenes panel, click Add scene. Rename it
Count two, give it the Lagoon gradient background, and set its Advance delay to2500too. - Go back to the Opening Scene. Drag a box around the heading, the instruction and the collection to select all three, click Copy to Scene in the toolbar (the folder with an arrow), and pick Count two from the list.
On Count two, change the copies:
- Click the instruction and change it to
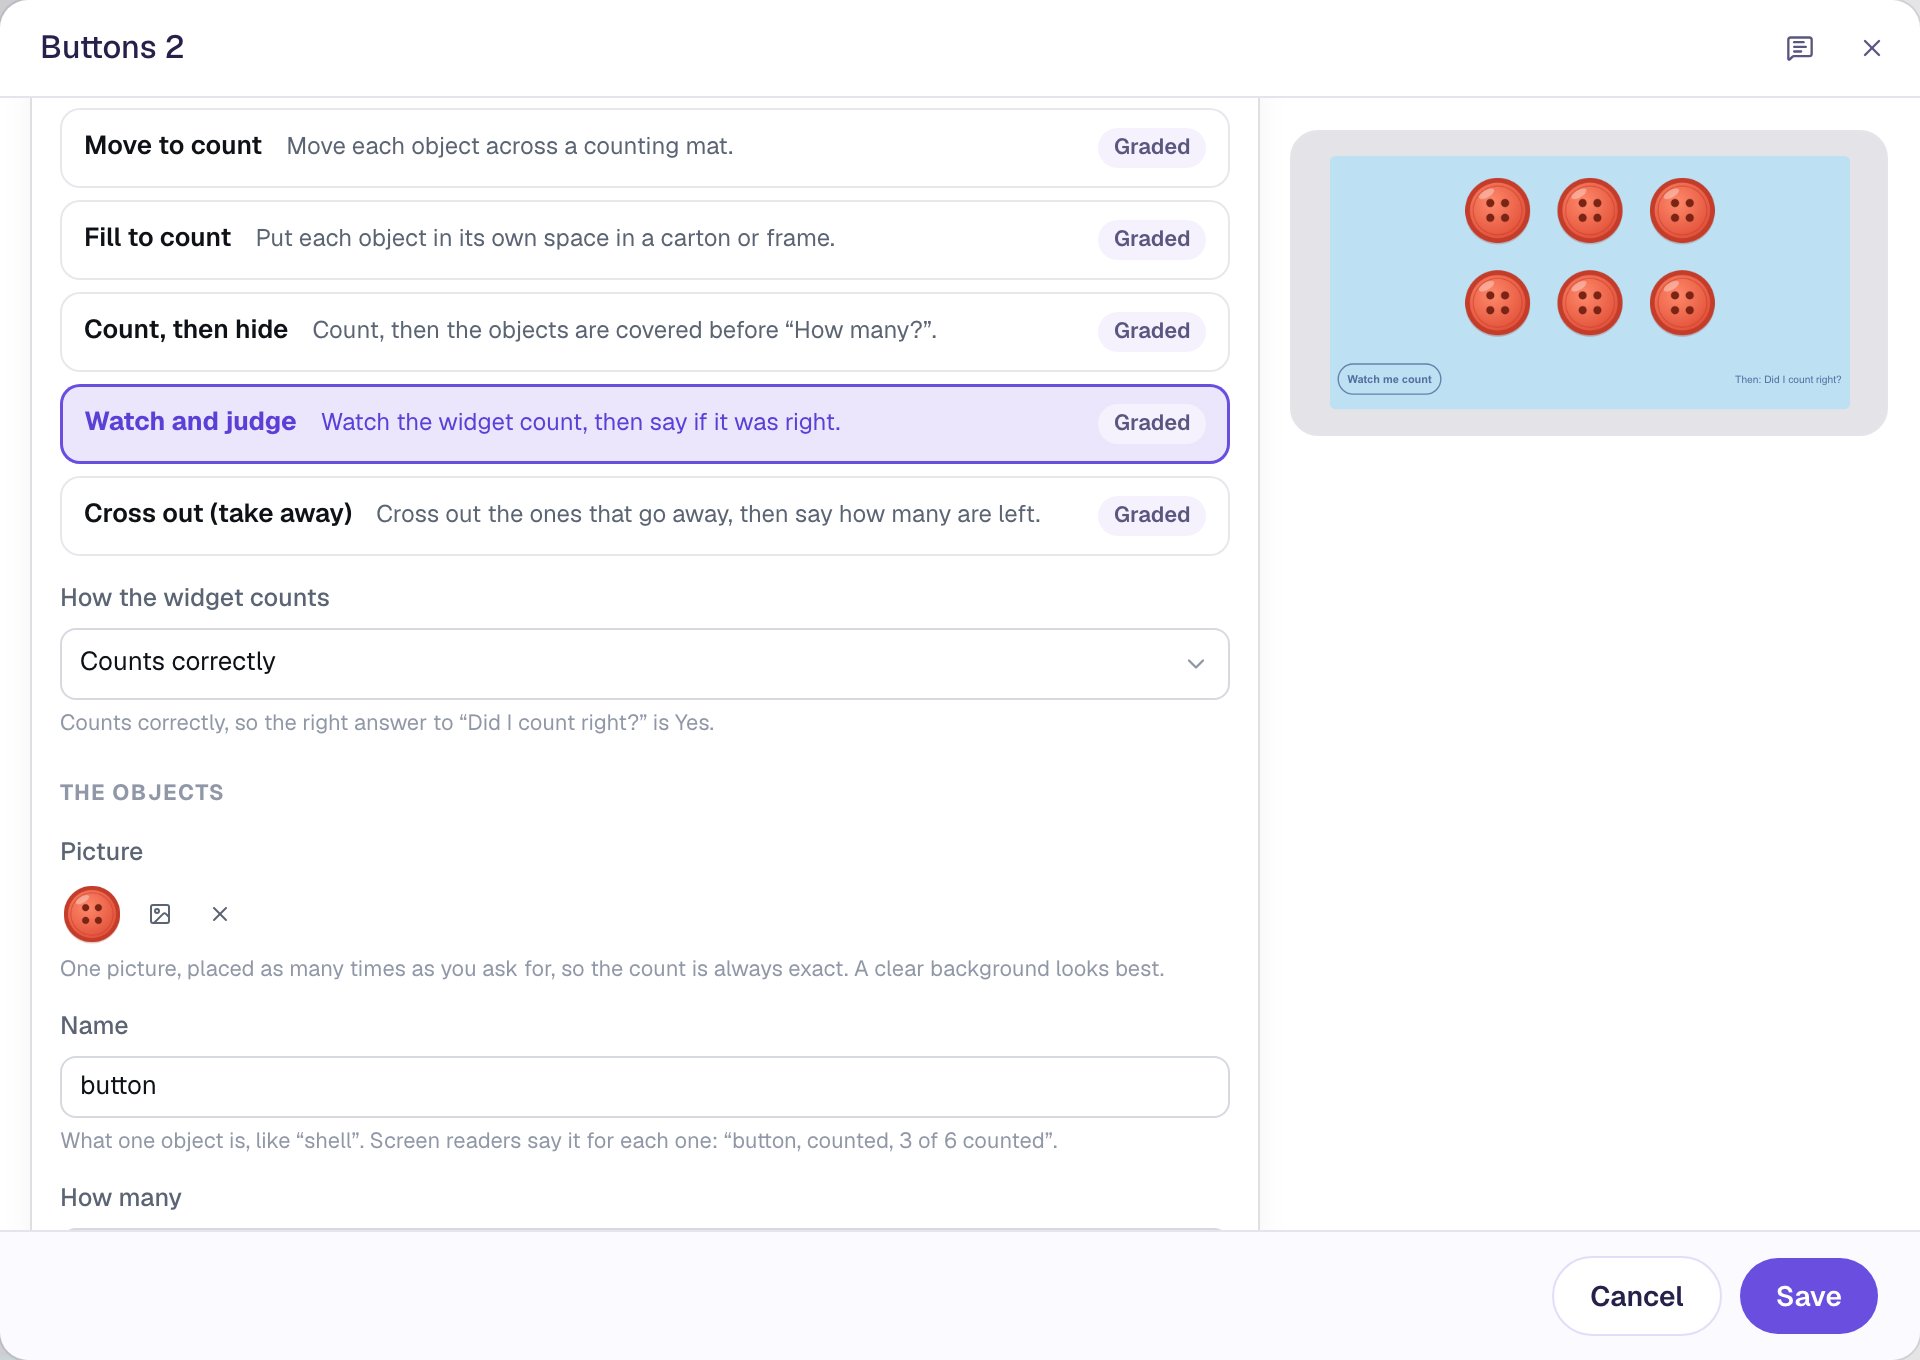
Watch me count these buttons too. Then tap Yes or No. - Select the collection (the copy is named Buttons 2), click ⚙ Configure, set How many to
6, Arrangement to Two rows, and How the widget counts to Counts correctly. Click Save.
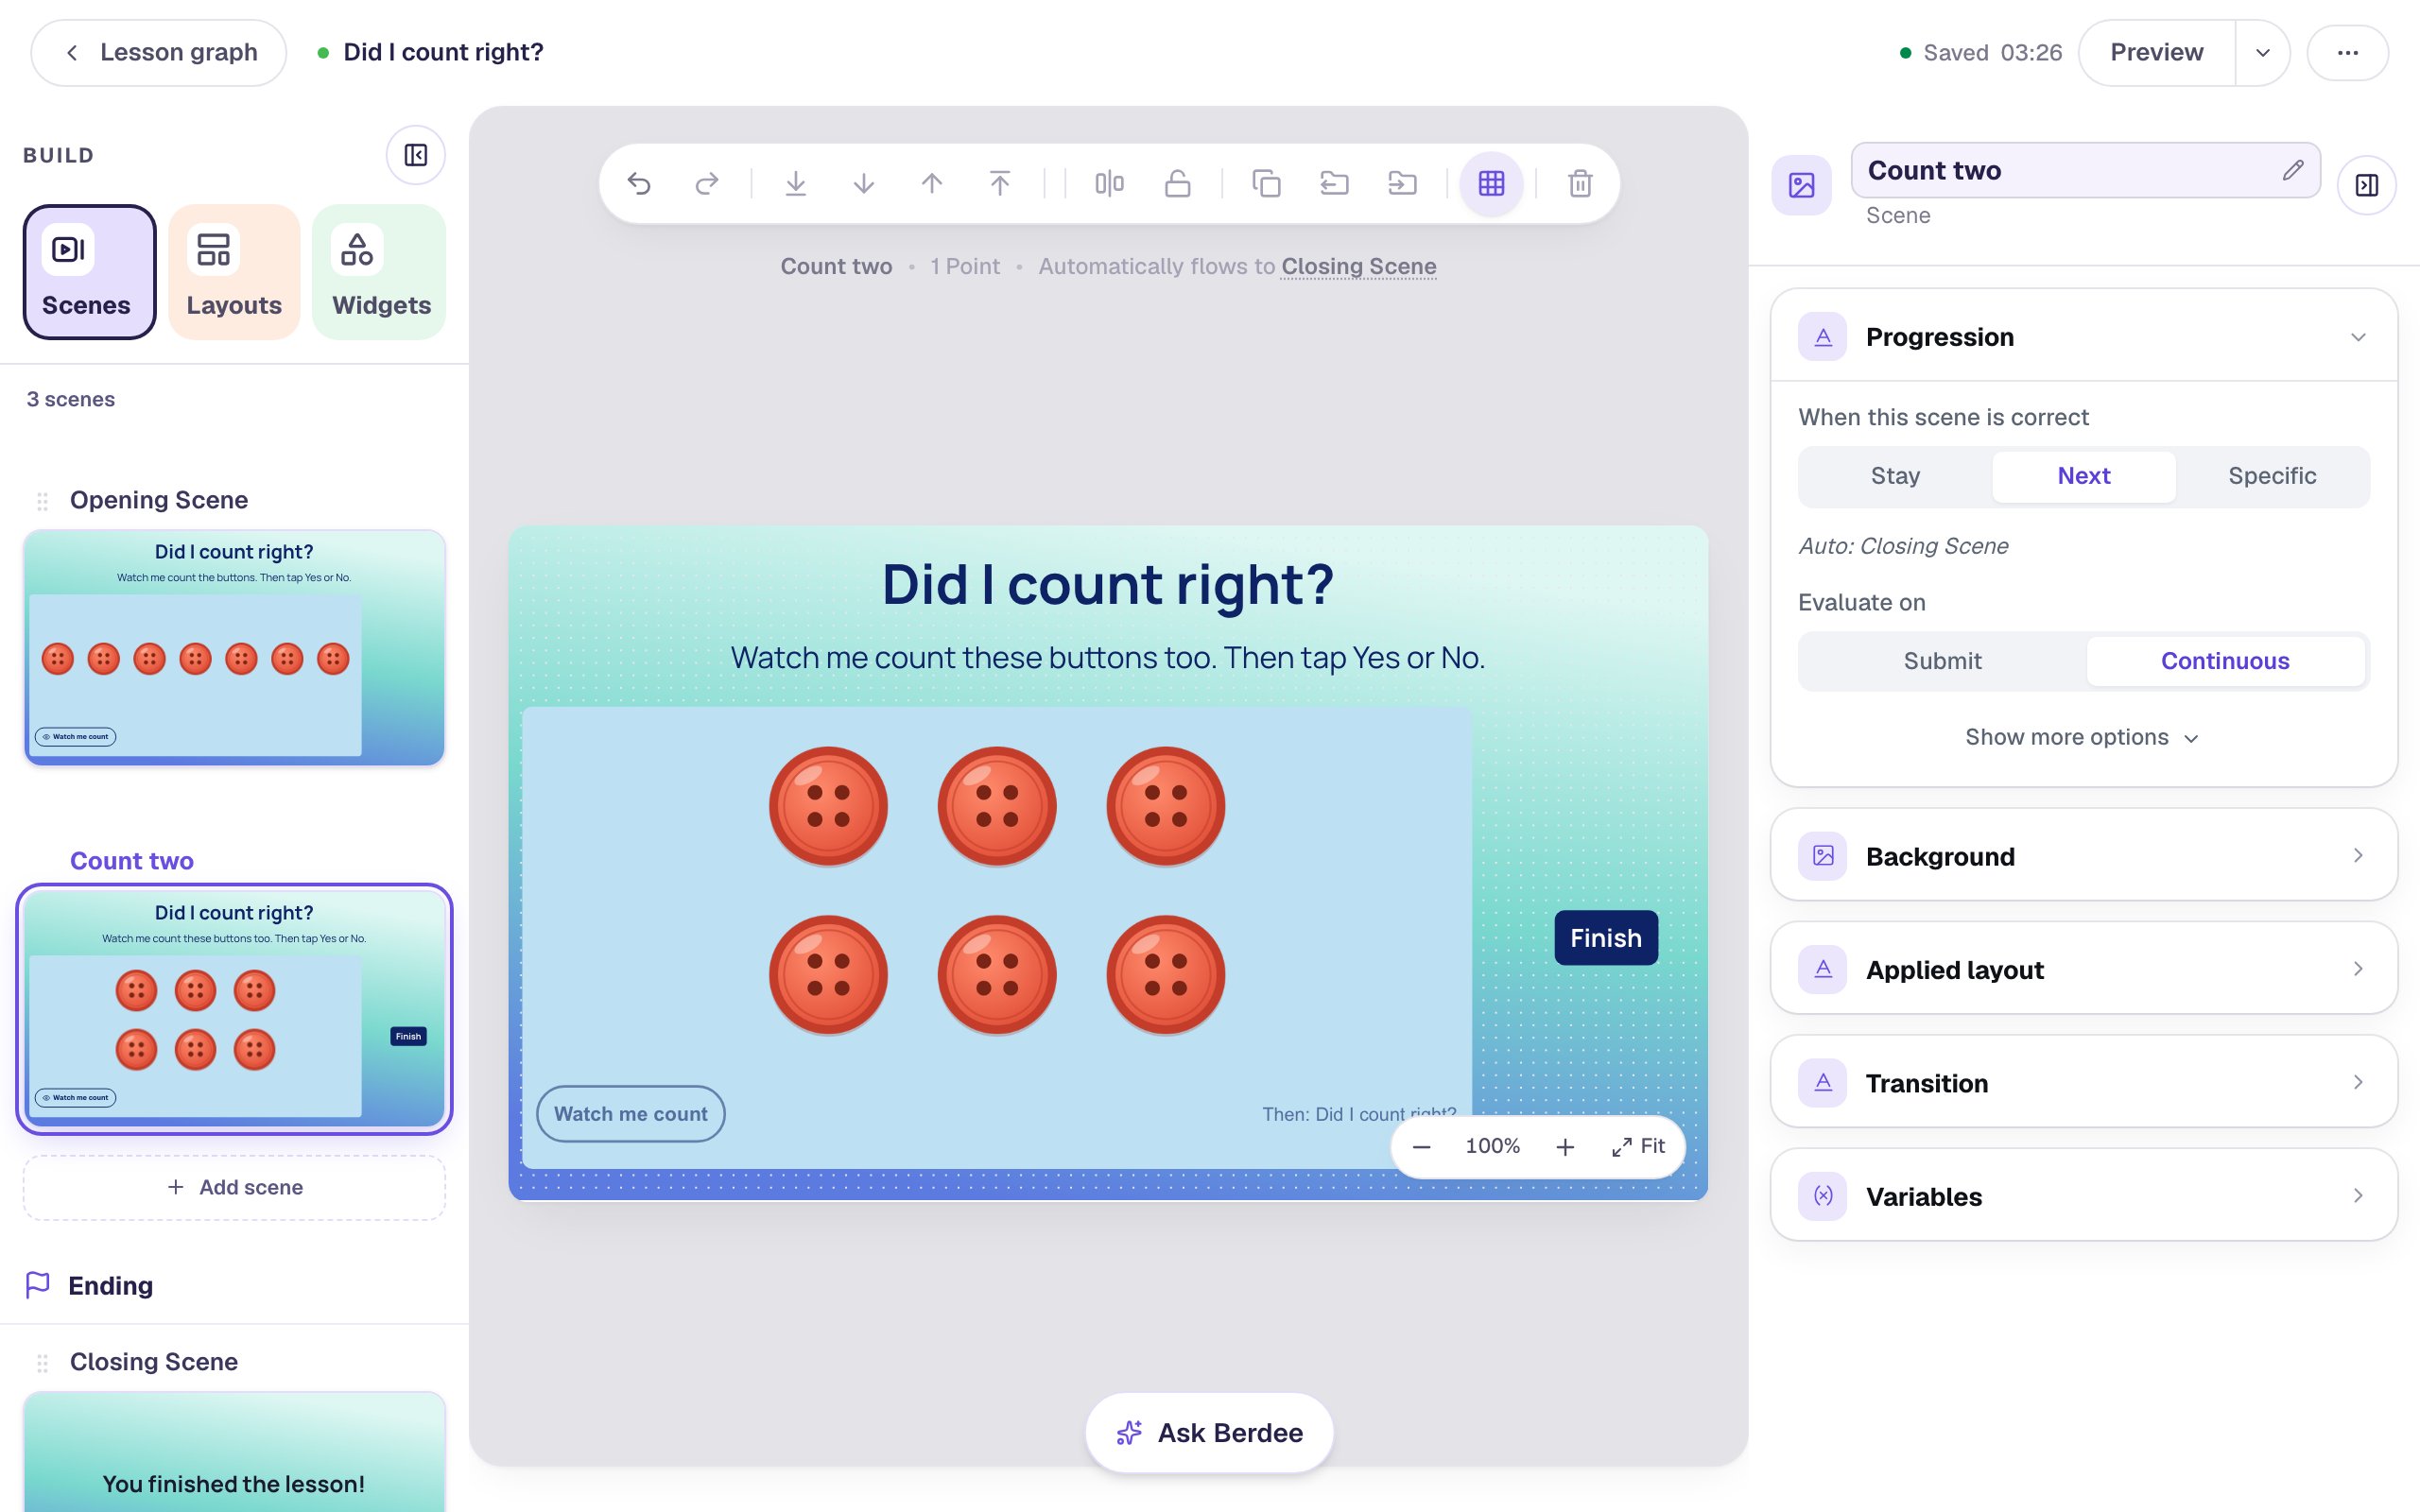
Every lesson needs a button that ends it, so add one here:
- Search the Widgets tab for
Submit Buttonand click it. - In Content, change Label to
Finishand set Submits to Lesson. - Set its Font Size to
20, give it a navy Background and white Text, and drag it into the column to the right of the collection.
Step 6: Show a hint after a wrong answer
Back on the Opening Scene, a student who answers Yes can tap No instead, and the scene waits for the right answer. A hint tells them what to look for.
- Add a Body and type
Watch again! Does each button get just one number?Rename itHint. - Set it to Fixed width,
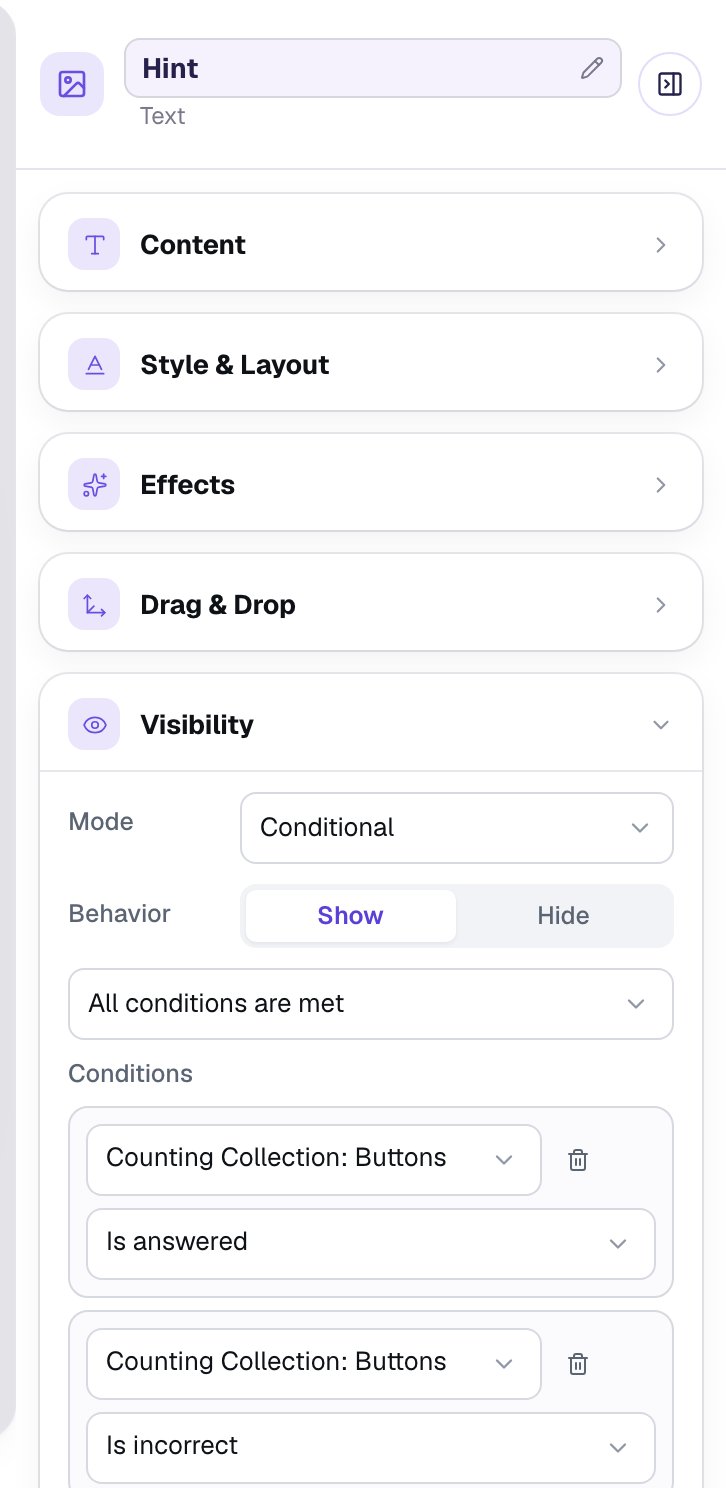
160wide, Font Size20, bold, in navy, and drag it into the column to the right of the collection. - Open its Visibility section and set Mode to Conditional. Leave Behavior on Show and the match on All conditions are met.
- Set the first condition to Counting Collection: Buttons and Is answered. Click Add Condition, and set the second to Counting Collection: Buttons and Is incorrect.
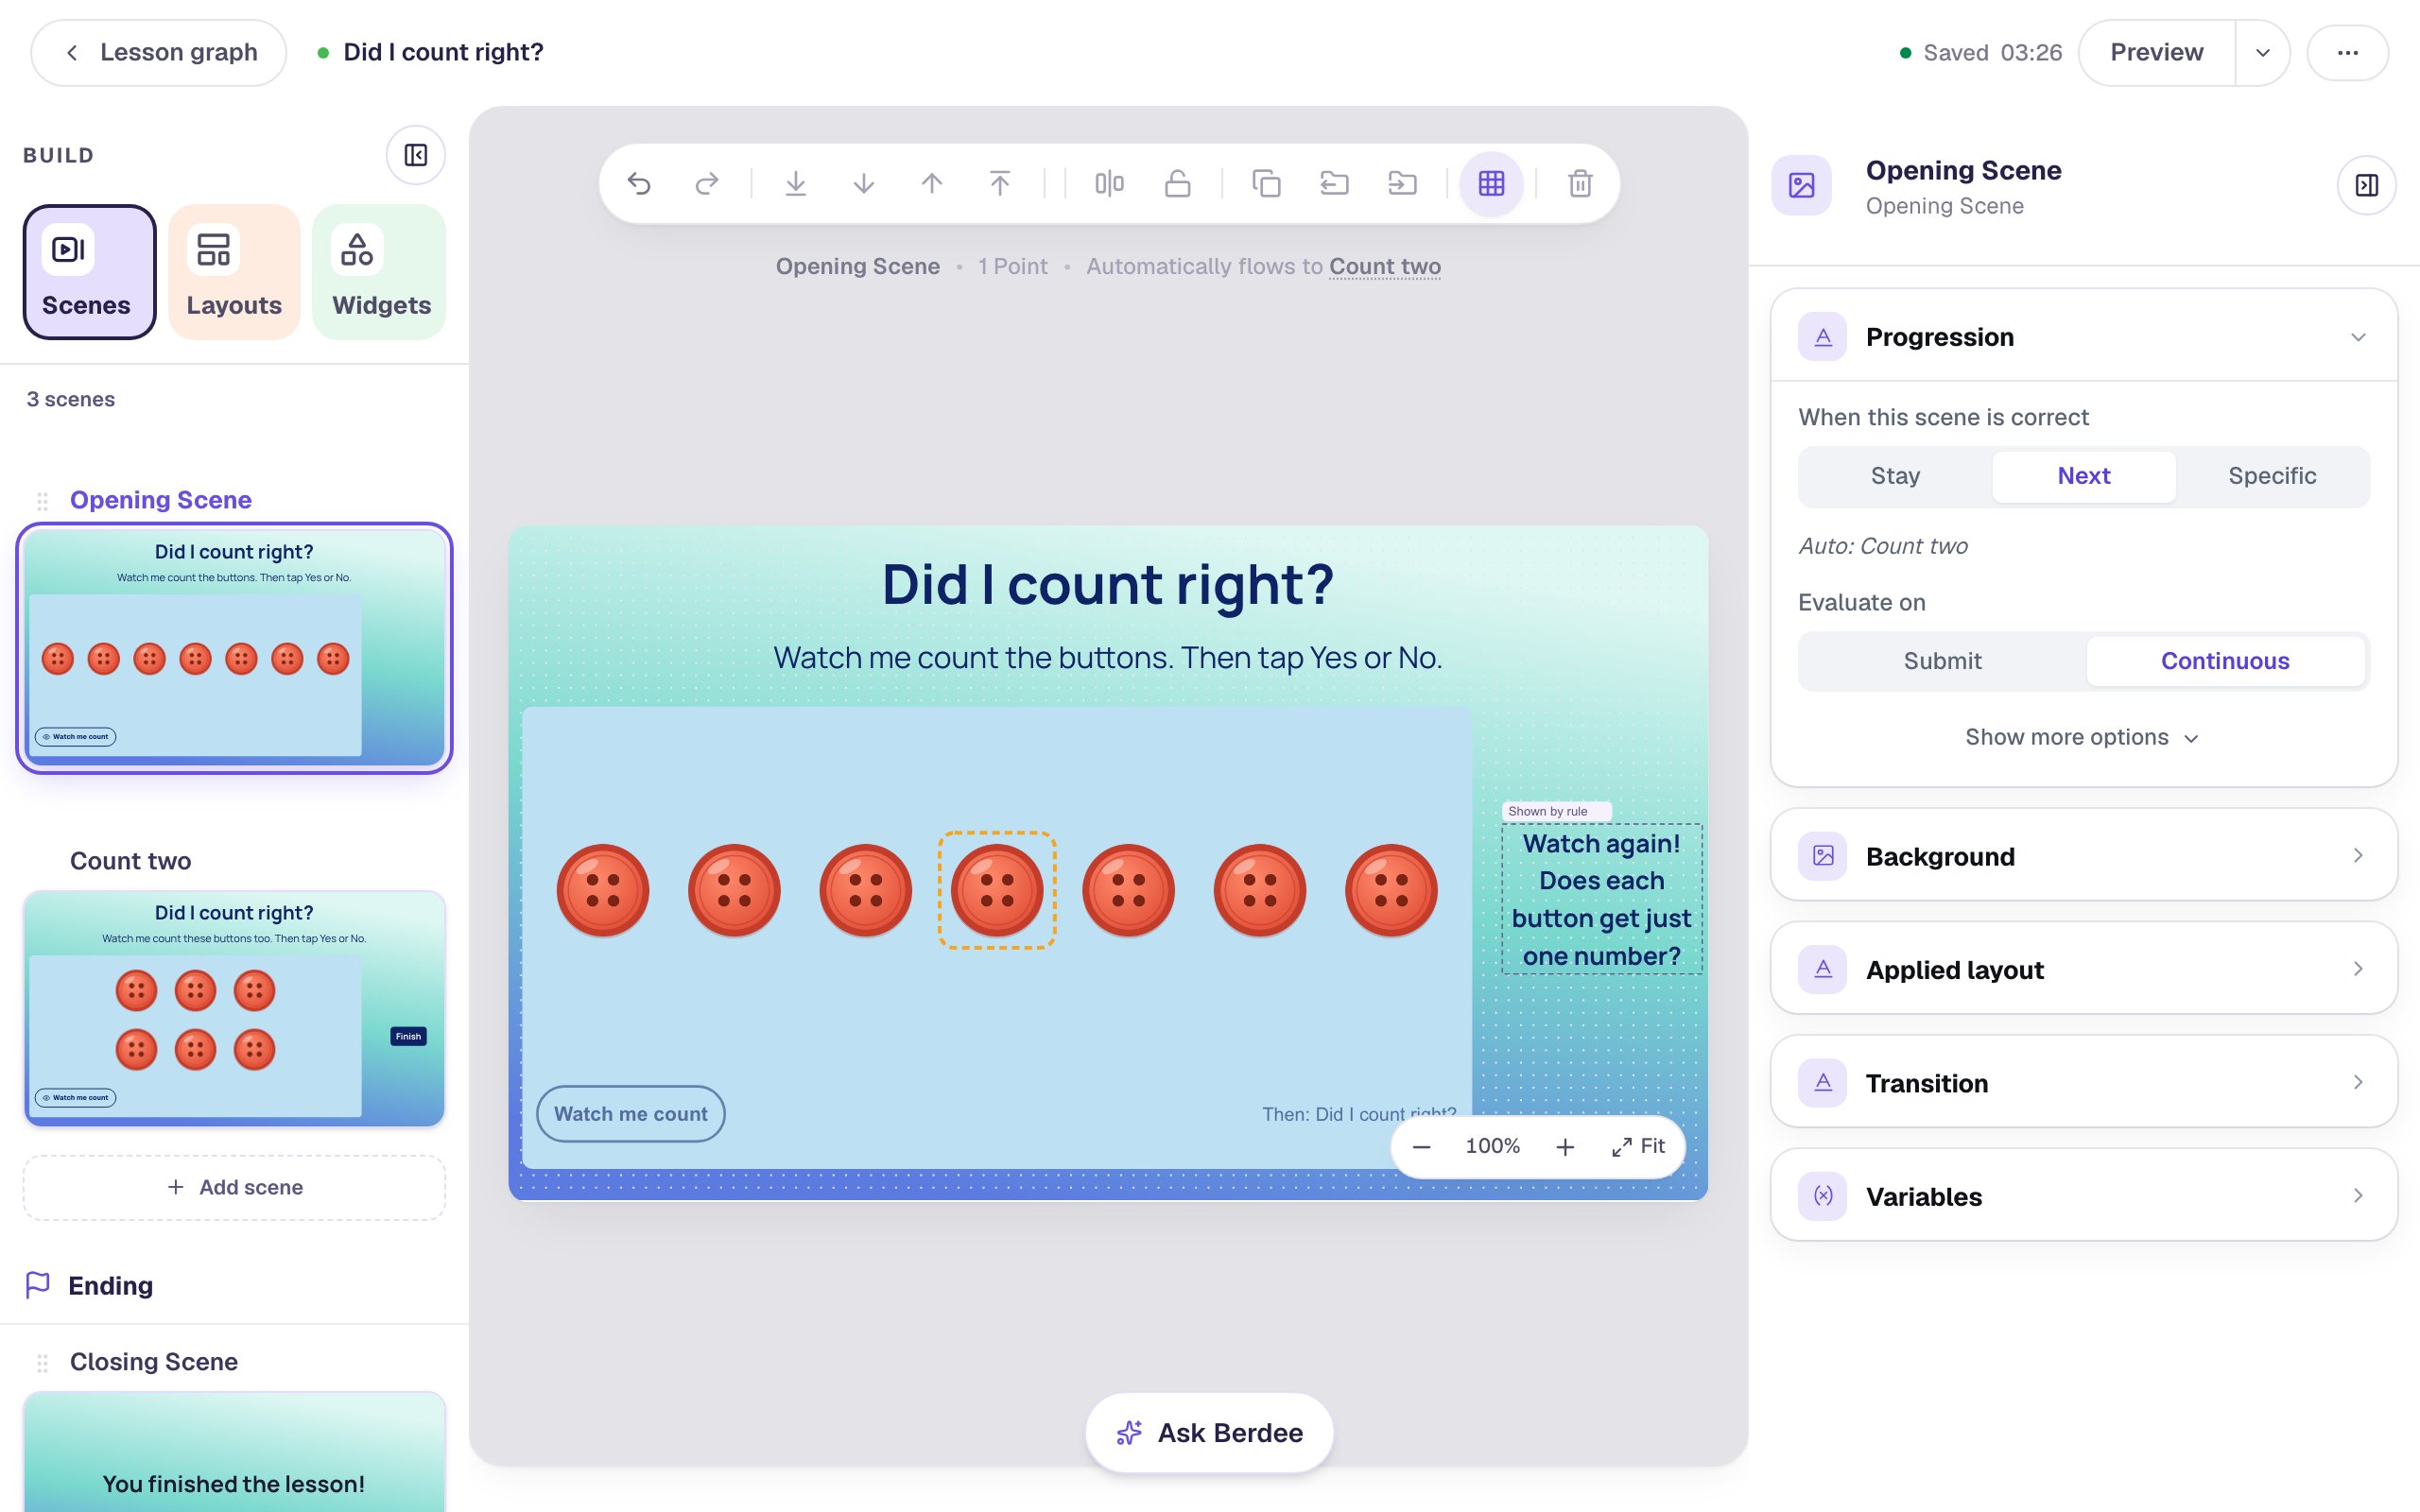
The hint asks a question instead of giving the answer away. The student still has to watch the count again and find the button that got two numbers.
Step 7: Try it as a student
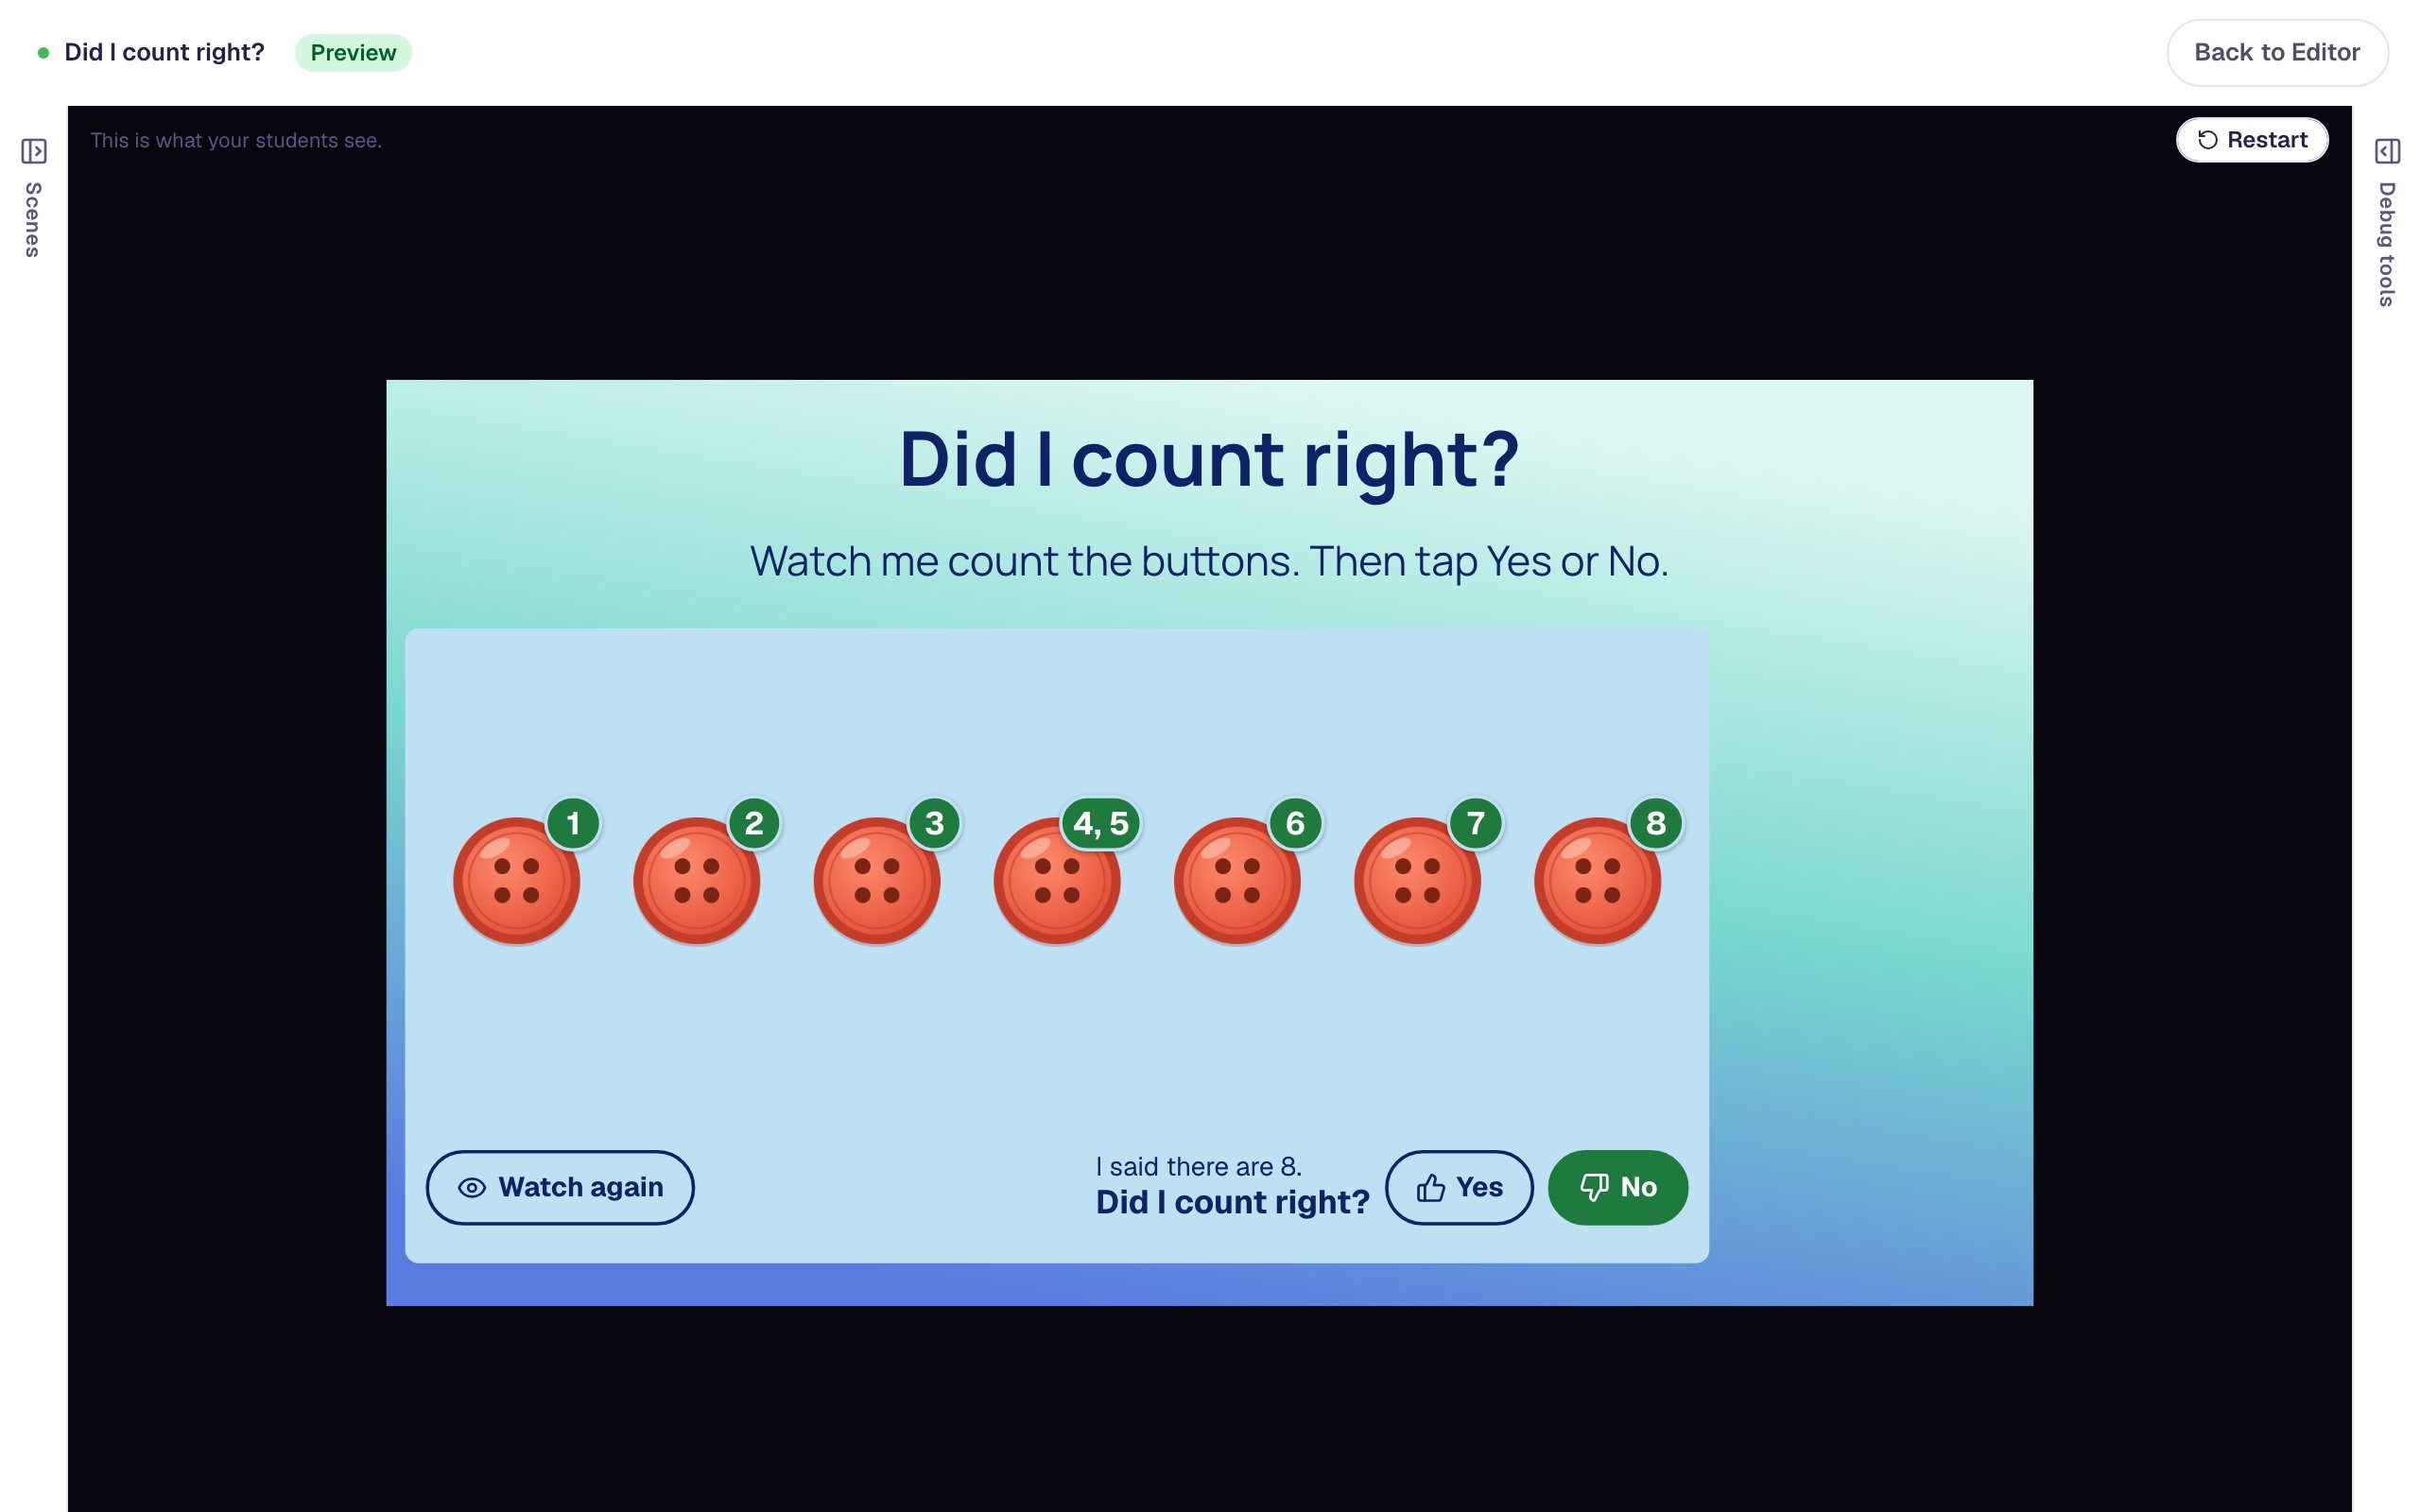
Click Preview and press Watch me count. The collection points at each button in turn and says its number. At the fourth button it says two numbers, so it ends on 8: the bar reads I said there are 8. and asks Did I count right?.
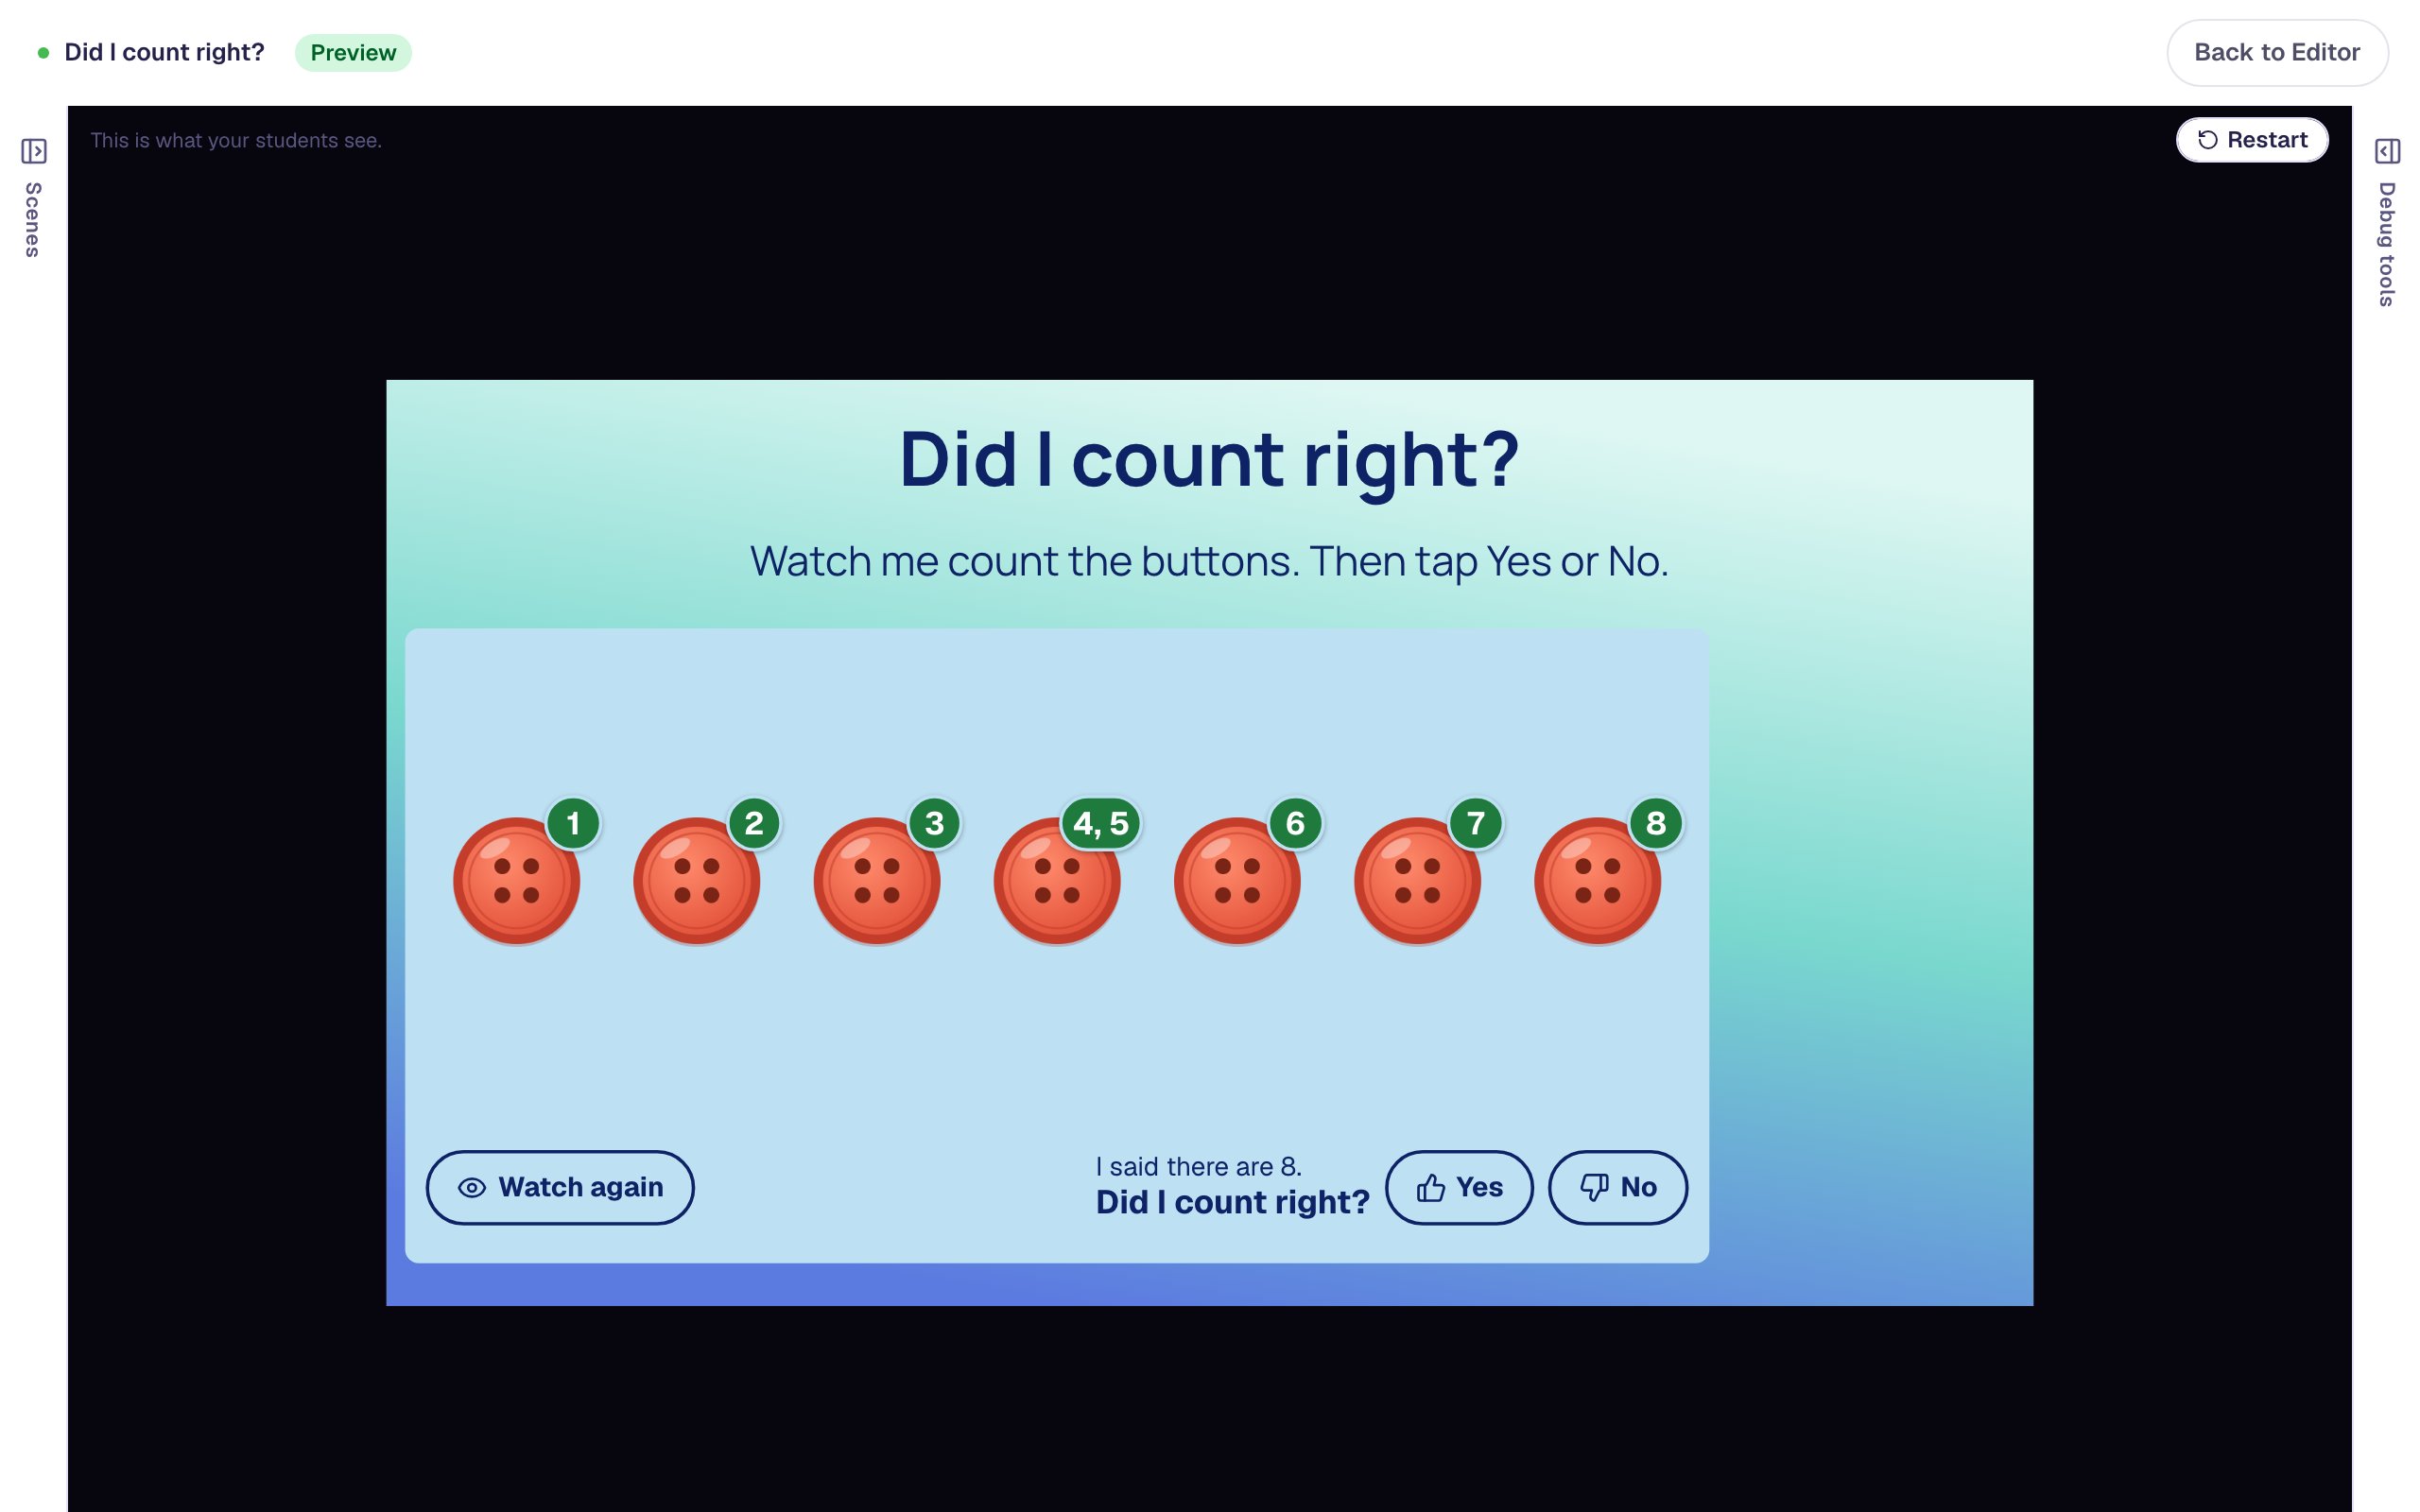
Students can press Watch again as many times as they like before answering. Now tap Yes, the answer a child gives when they weren't watching closely:
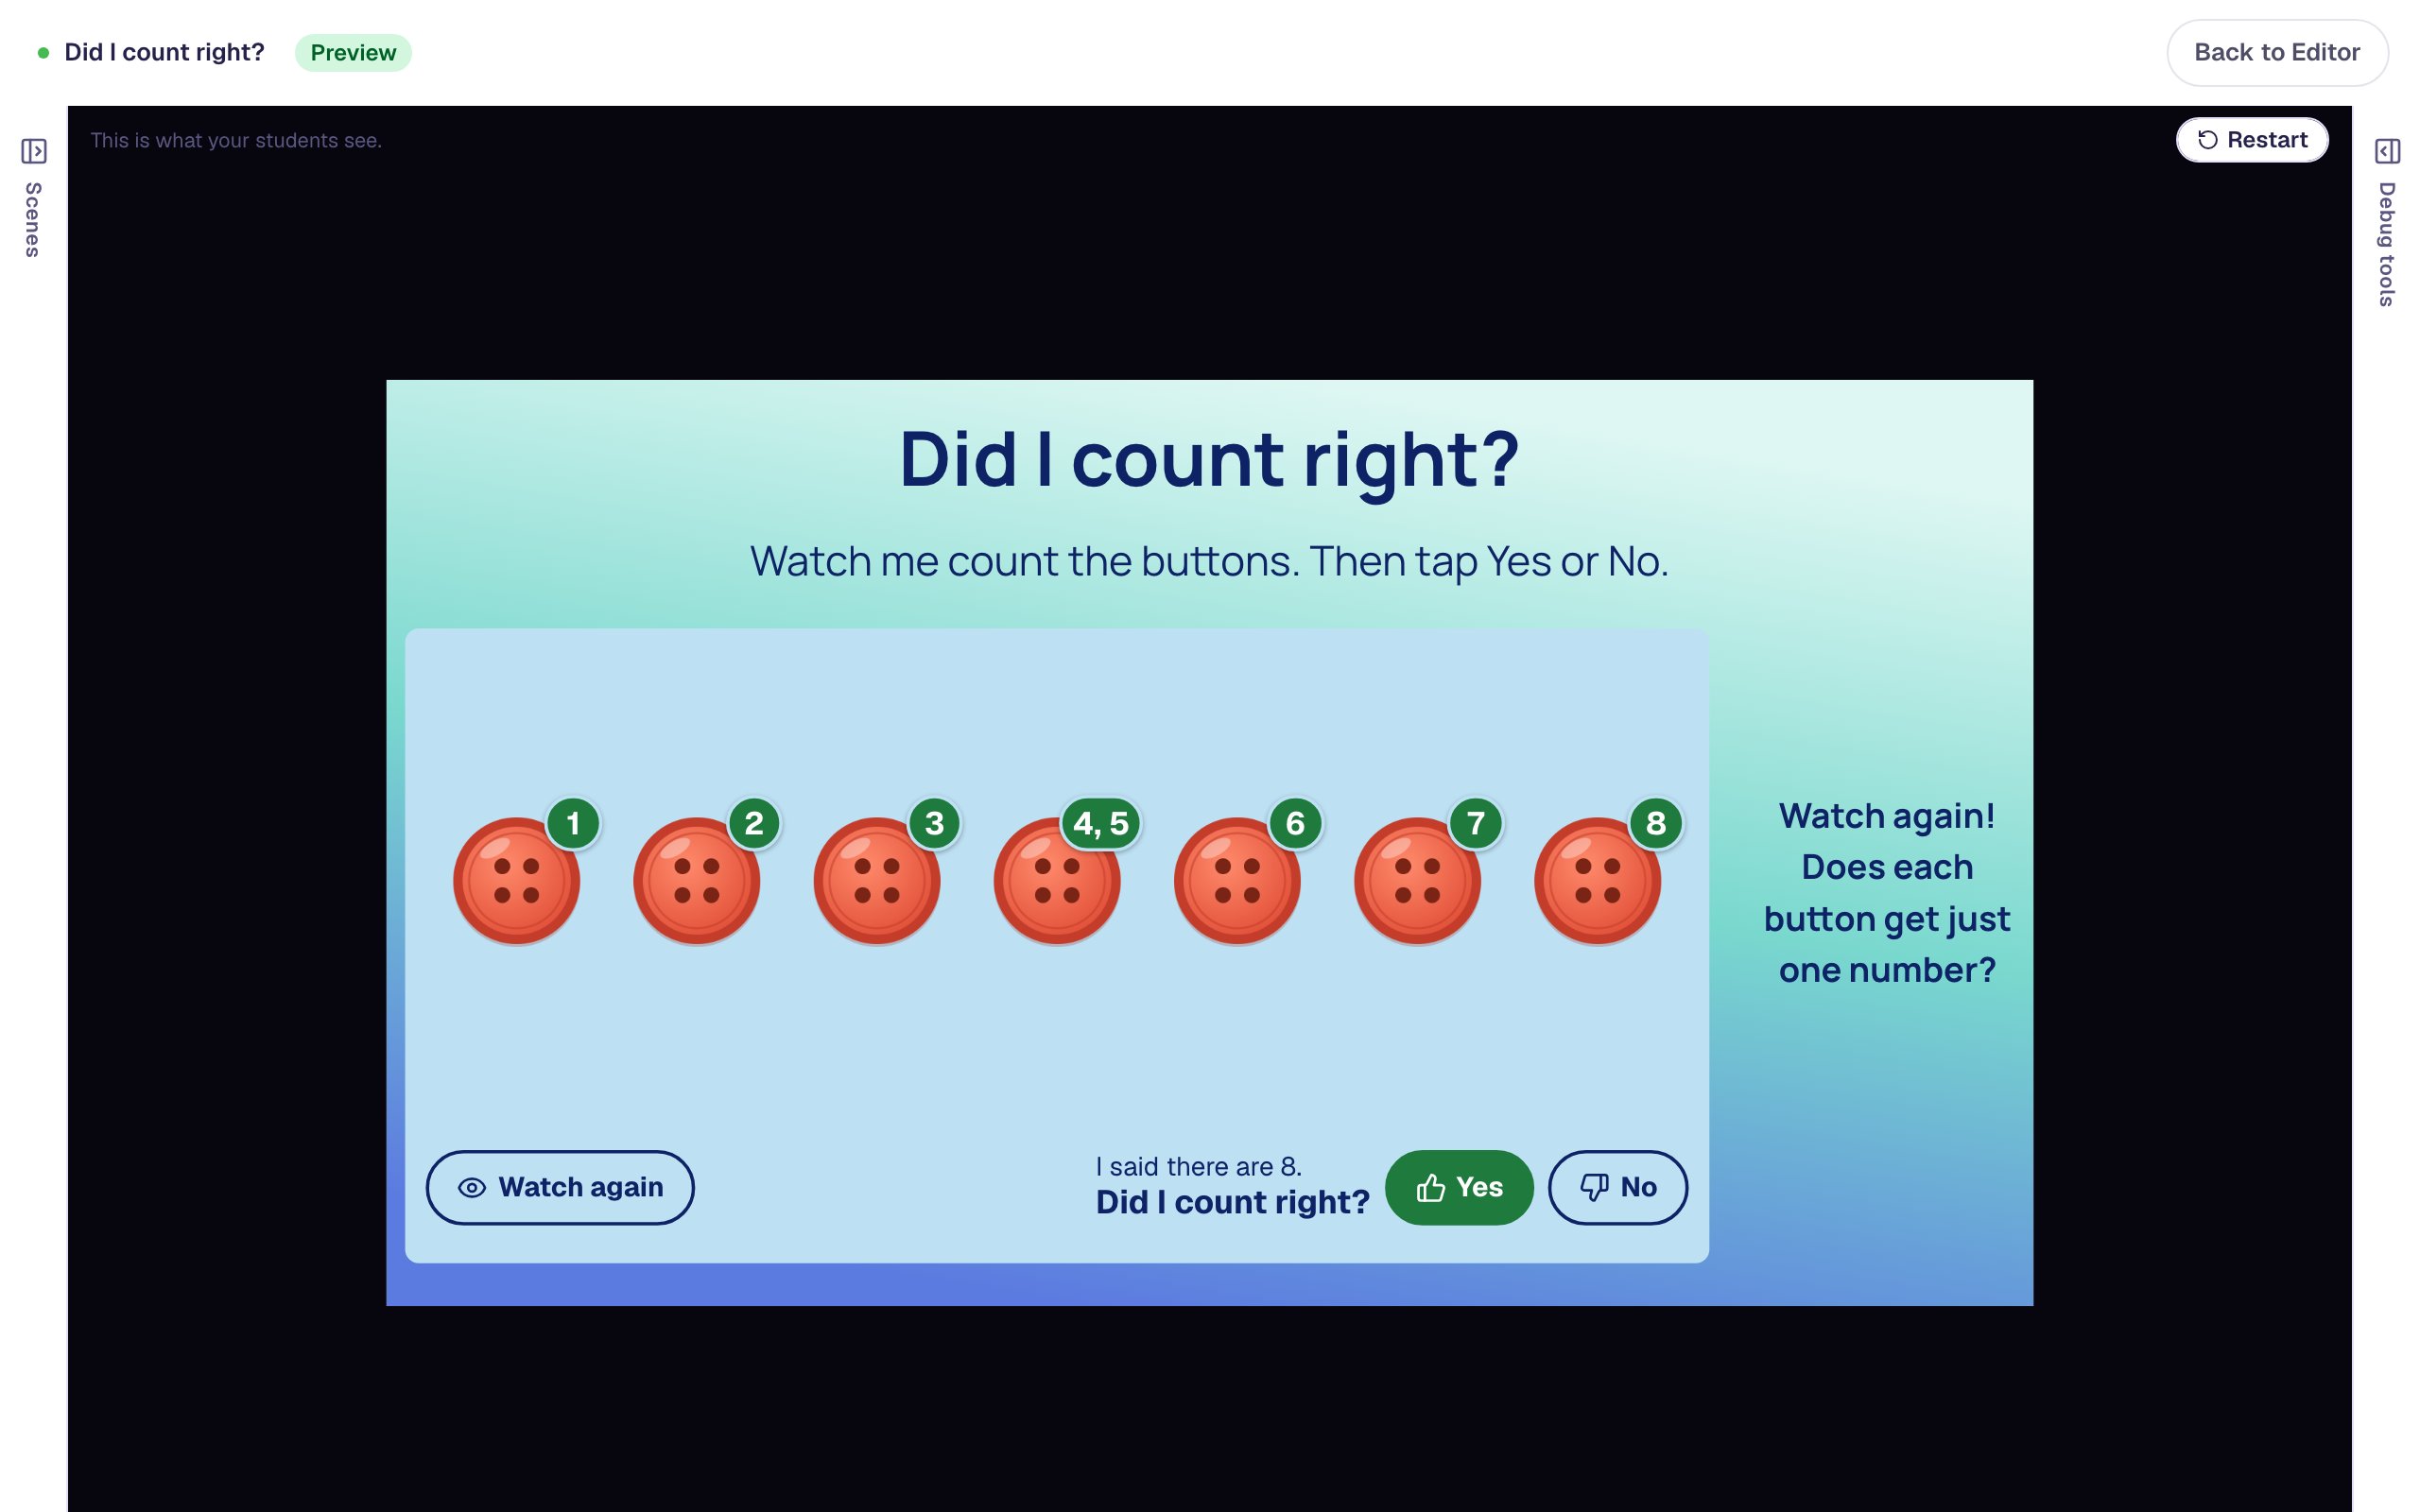
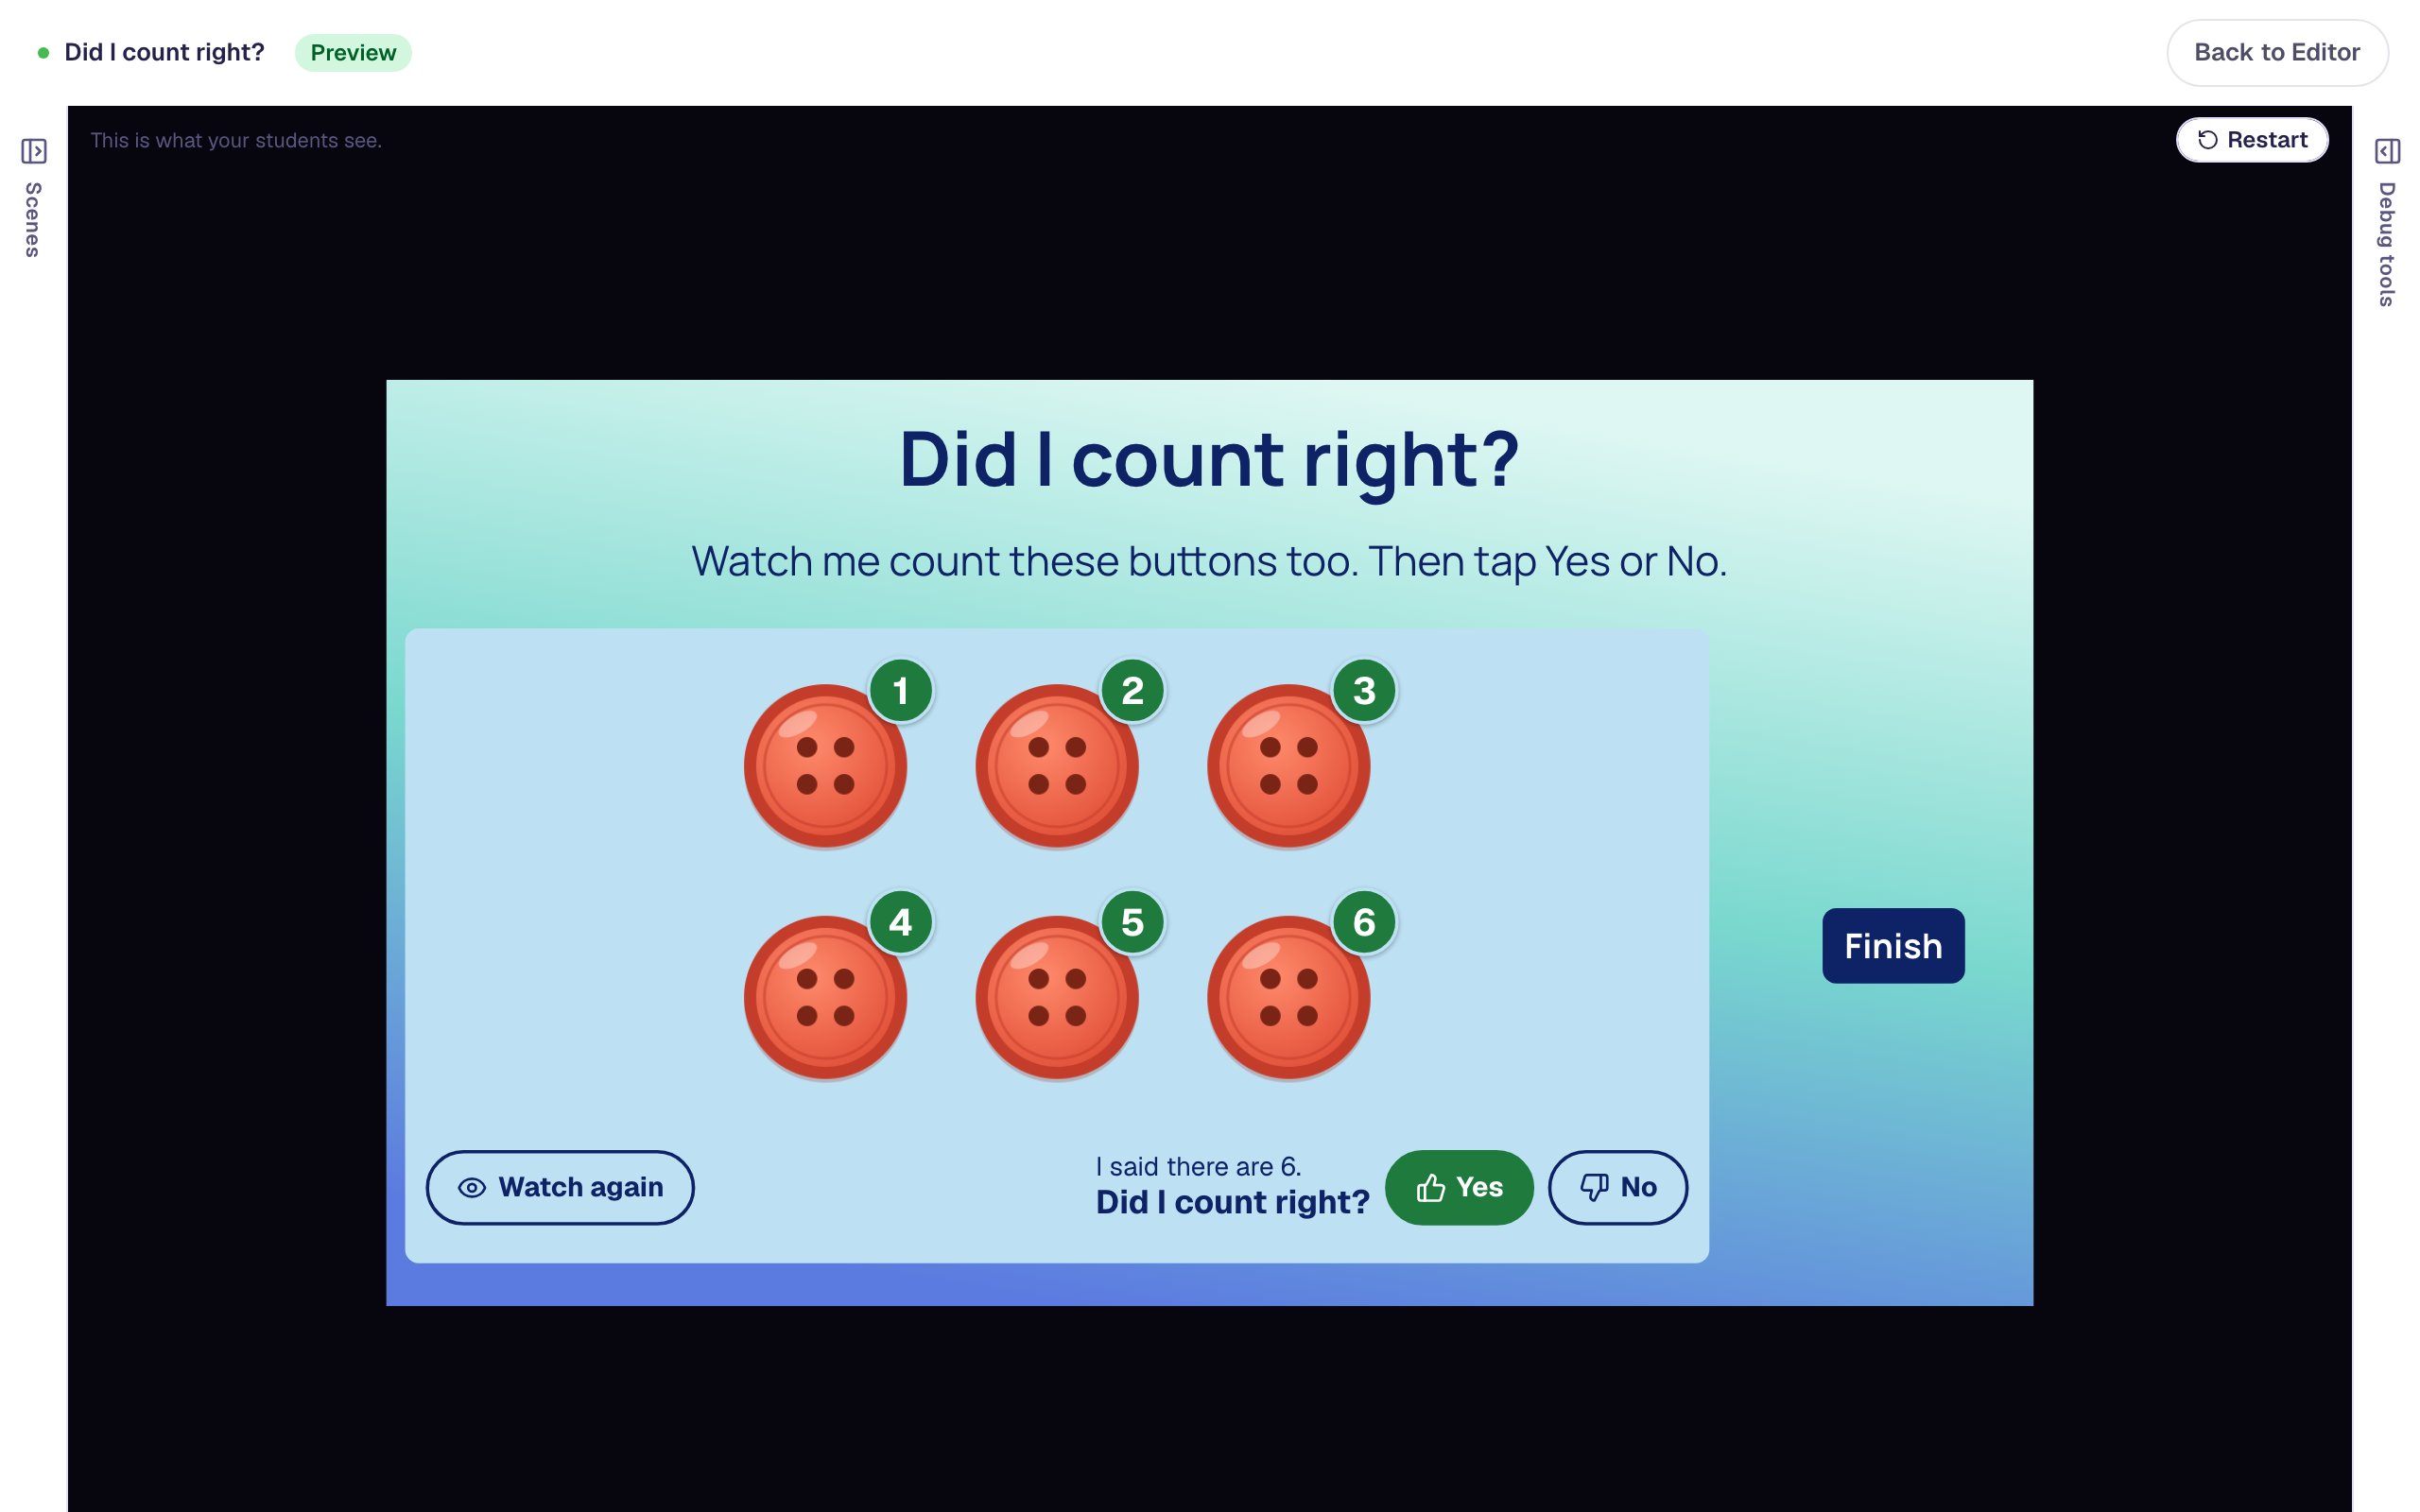
Tap No. The hint goes away, and after a short pause the lesson moves on to Count two. Press Watch me count again: this time every button gets one number, and the count ends on 6. Tap Yes.
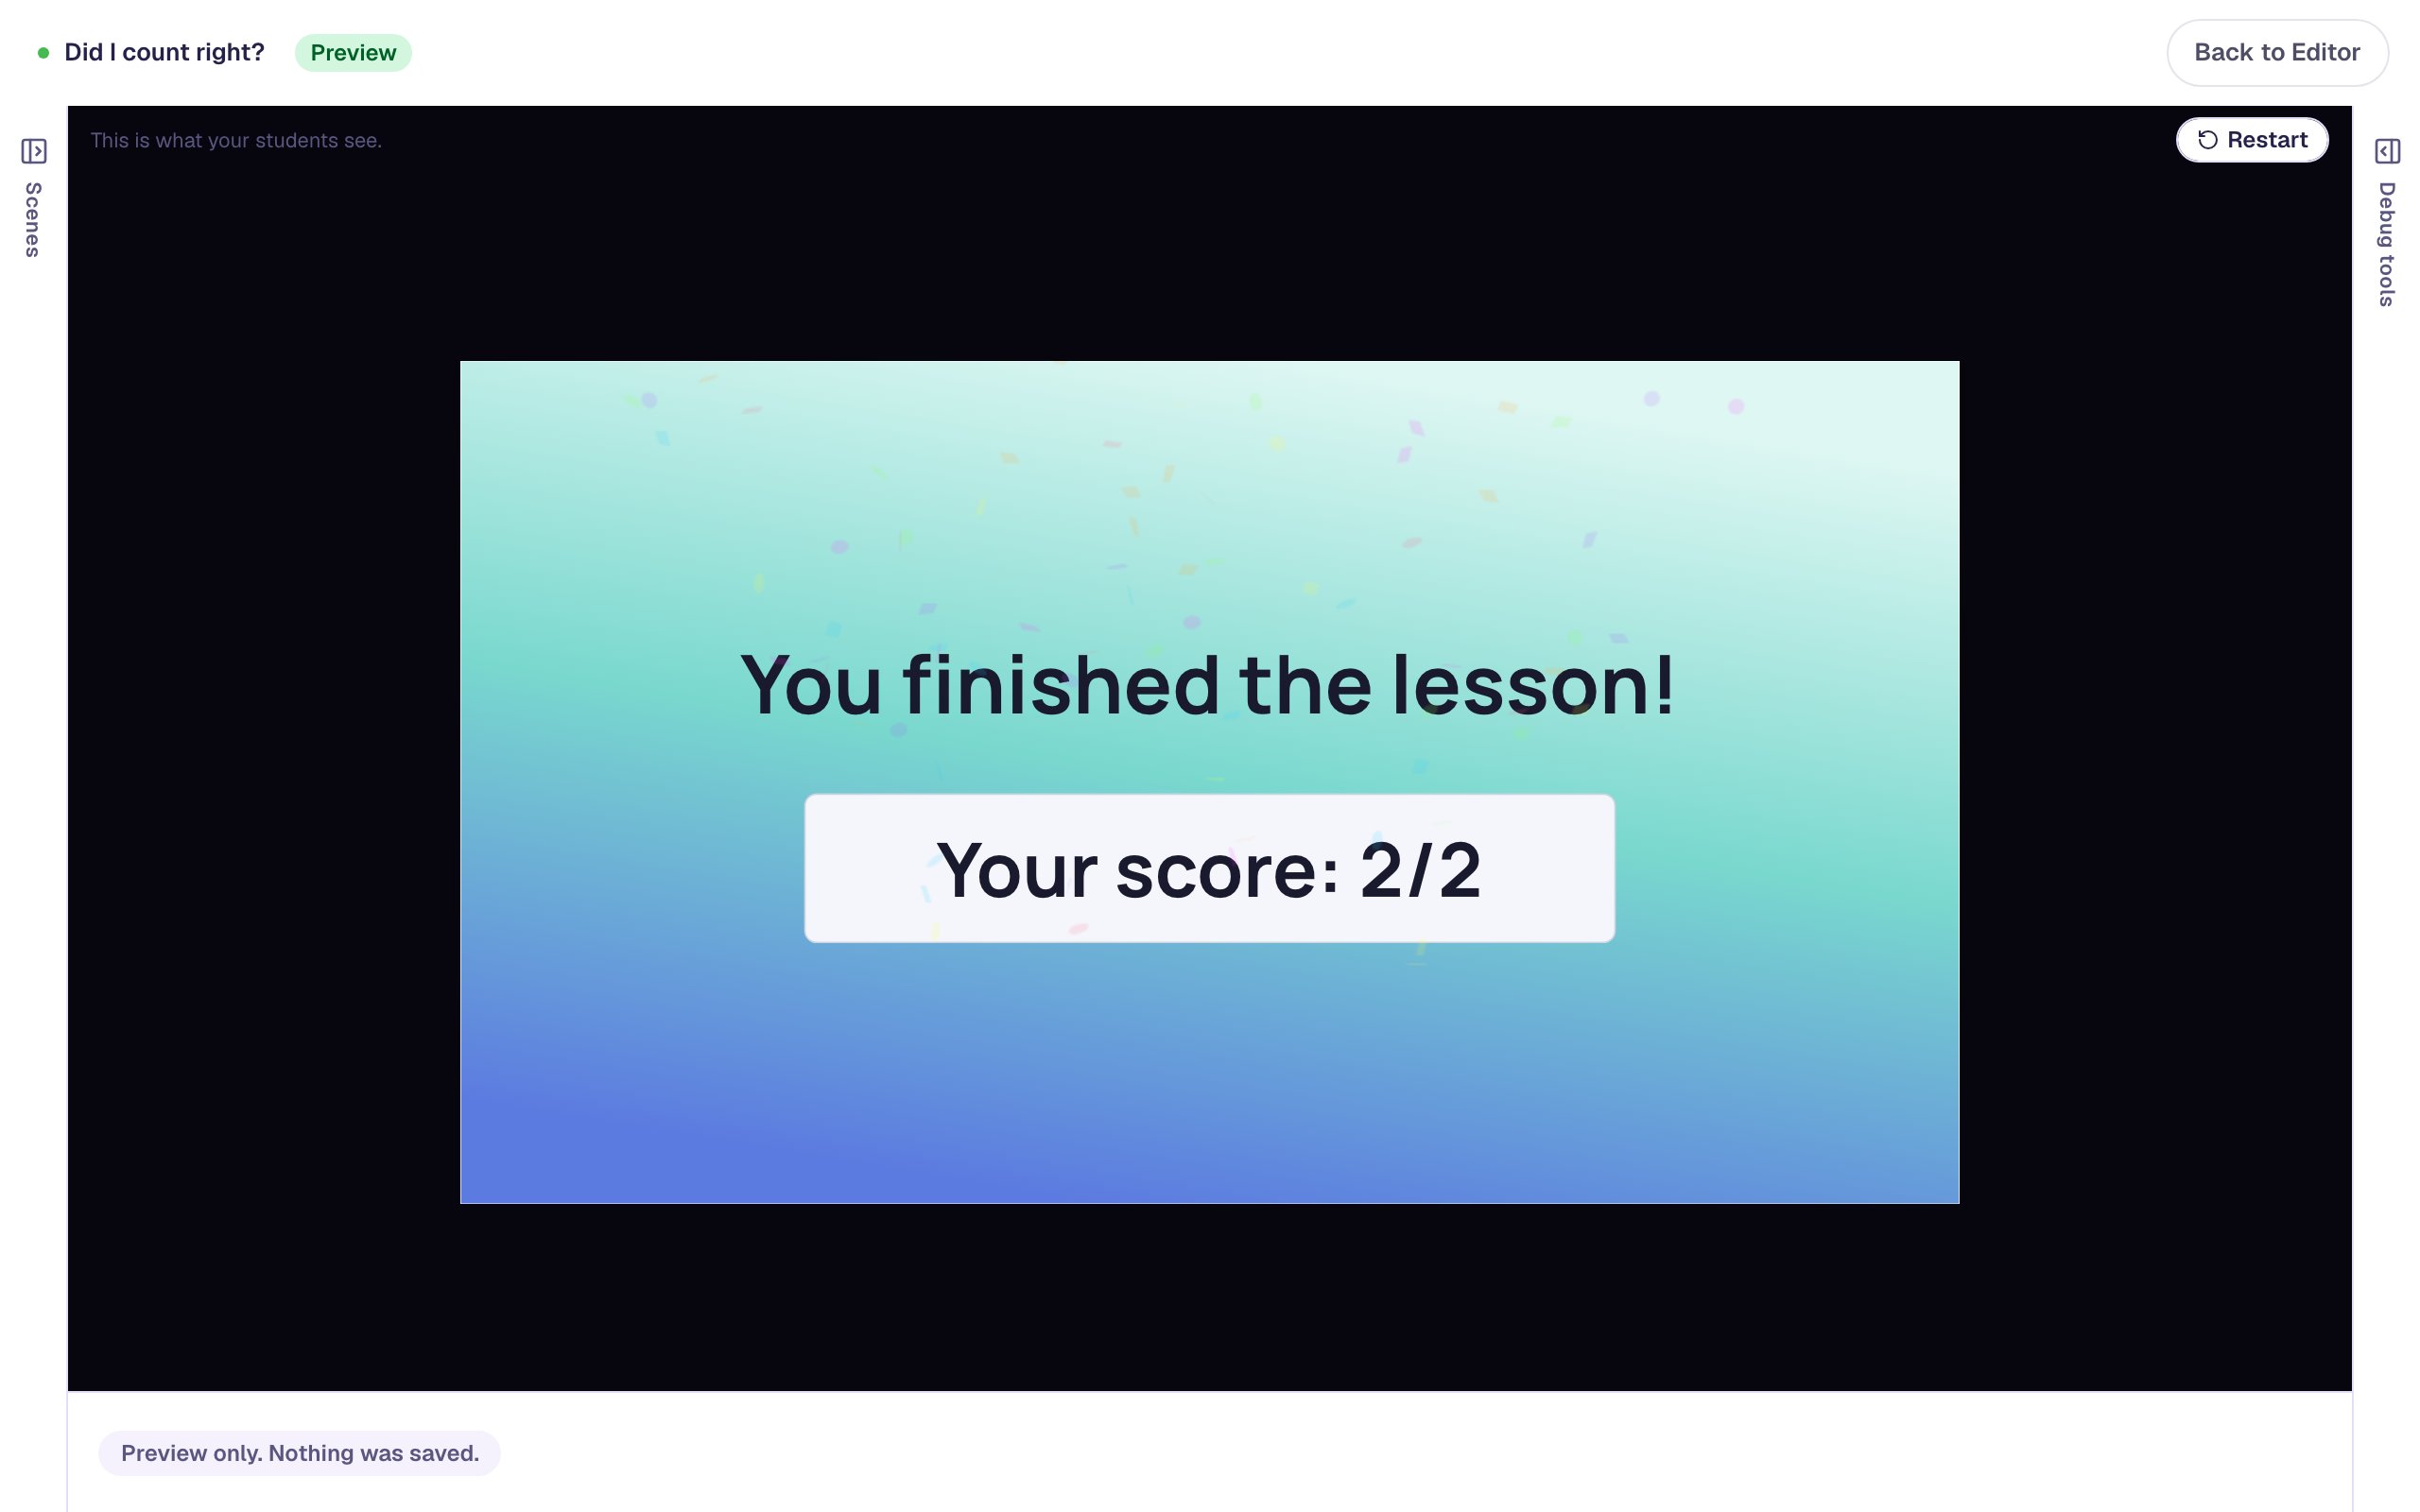
The first wrong answer doesn't cost the point: the scene waited for No, and the score is 2 out of 2. Click Restart to try it again.
What you built
You built a two-scene counting game with:
- a Counting Collection in Watch and judge mode, with 7 buttons in a line and Says two numbers for one object on the fourth,
- a second count, copied with Copy to Scene and changed to Counts correctly with 6 buttons, so No isn't always the answer,
- a Hint that shows only after a wrong answer, using two Visibility conditions,
- a longer Advance delay on both scenes and a Finish button.
To make the game longer, add more scenes with the other mistakes: Skips an object, or Says the wrong total at the end for children who still recount to answer "how many?". For counting children do themselves, try Cross out pictures to solve a take-away story.
Make this lesson yours
Add the lesson you just watched being built to your account, then change it for your class: your questions, your pictures, your colors.
Free to sign up, and you'll come straight back here. I have an account