Give each character in a story their own voice
Add the characters in your story to Lesson settings, give each one a voice, then choose who says each Text To Speech line with Spoken by, so a dialogue sounds like two different speakers.
- Level
- Beginner
- Time
- About 15 min
- Steps
- 9
- Updated
- Nov 4, 2026
A Fox meets Owl scene where a narrator sets the story, Fox asks a question in one voice, and Owl answers in a deeper one, each from a play button beside their speech bubble.
Get the finished lesson
Skip straight to the result, or keep it open beside the steps. Add this tutorial's lesson to your account and explore how it works in the studio.
Free to sign up, and you'll come straight back here. I have an account
When every line of a story is read in the same voice, young listeners have to work out who is talking. Give each character a voice of their own and they hear it straight away: Fox sounds like Fox, Owl sounds like Owl, and the narrator sounds like neither. The same goes for any lesson with dialogue: a role-play at a café, a conversation in a new language, or a polite way to ask for help.
In this tutorial you'll build one scene, Fox meets Owl. A narrator sets the story, Fox asks Owl why Owl is awake at dusk, and Owl explains being nocturnal. You'll add Fox and Owl as characters in Lesson settings, give each a voice, and then choose who says each Text To Speech line with Spoken by.
Making recordings is part of your plan's text-to-speech allowance, so Generate Audio is available on Plus and above (see AI and Voice). The finished lesson from this tutorial works on any plan: add it to your account and its recordings play as they are.
If you haven't used a Text To Speech player before, Read a question aloud for early readers covers it step by step.
Step 1: Put your characters on the scene
Start a blank lesson (New lesson, then Start from scratch) and name it Fox meets Owl by clicking Untitled lesson at the top.
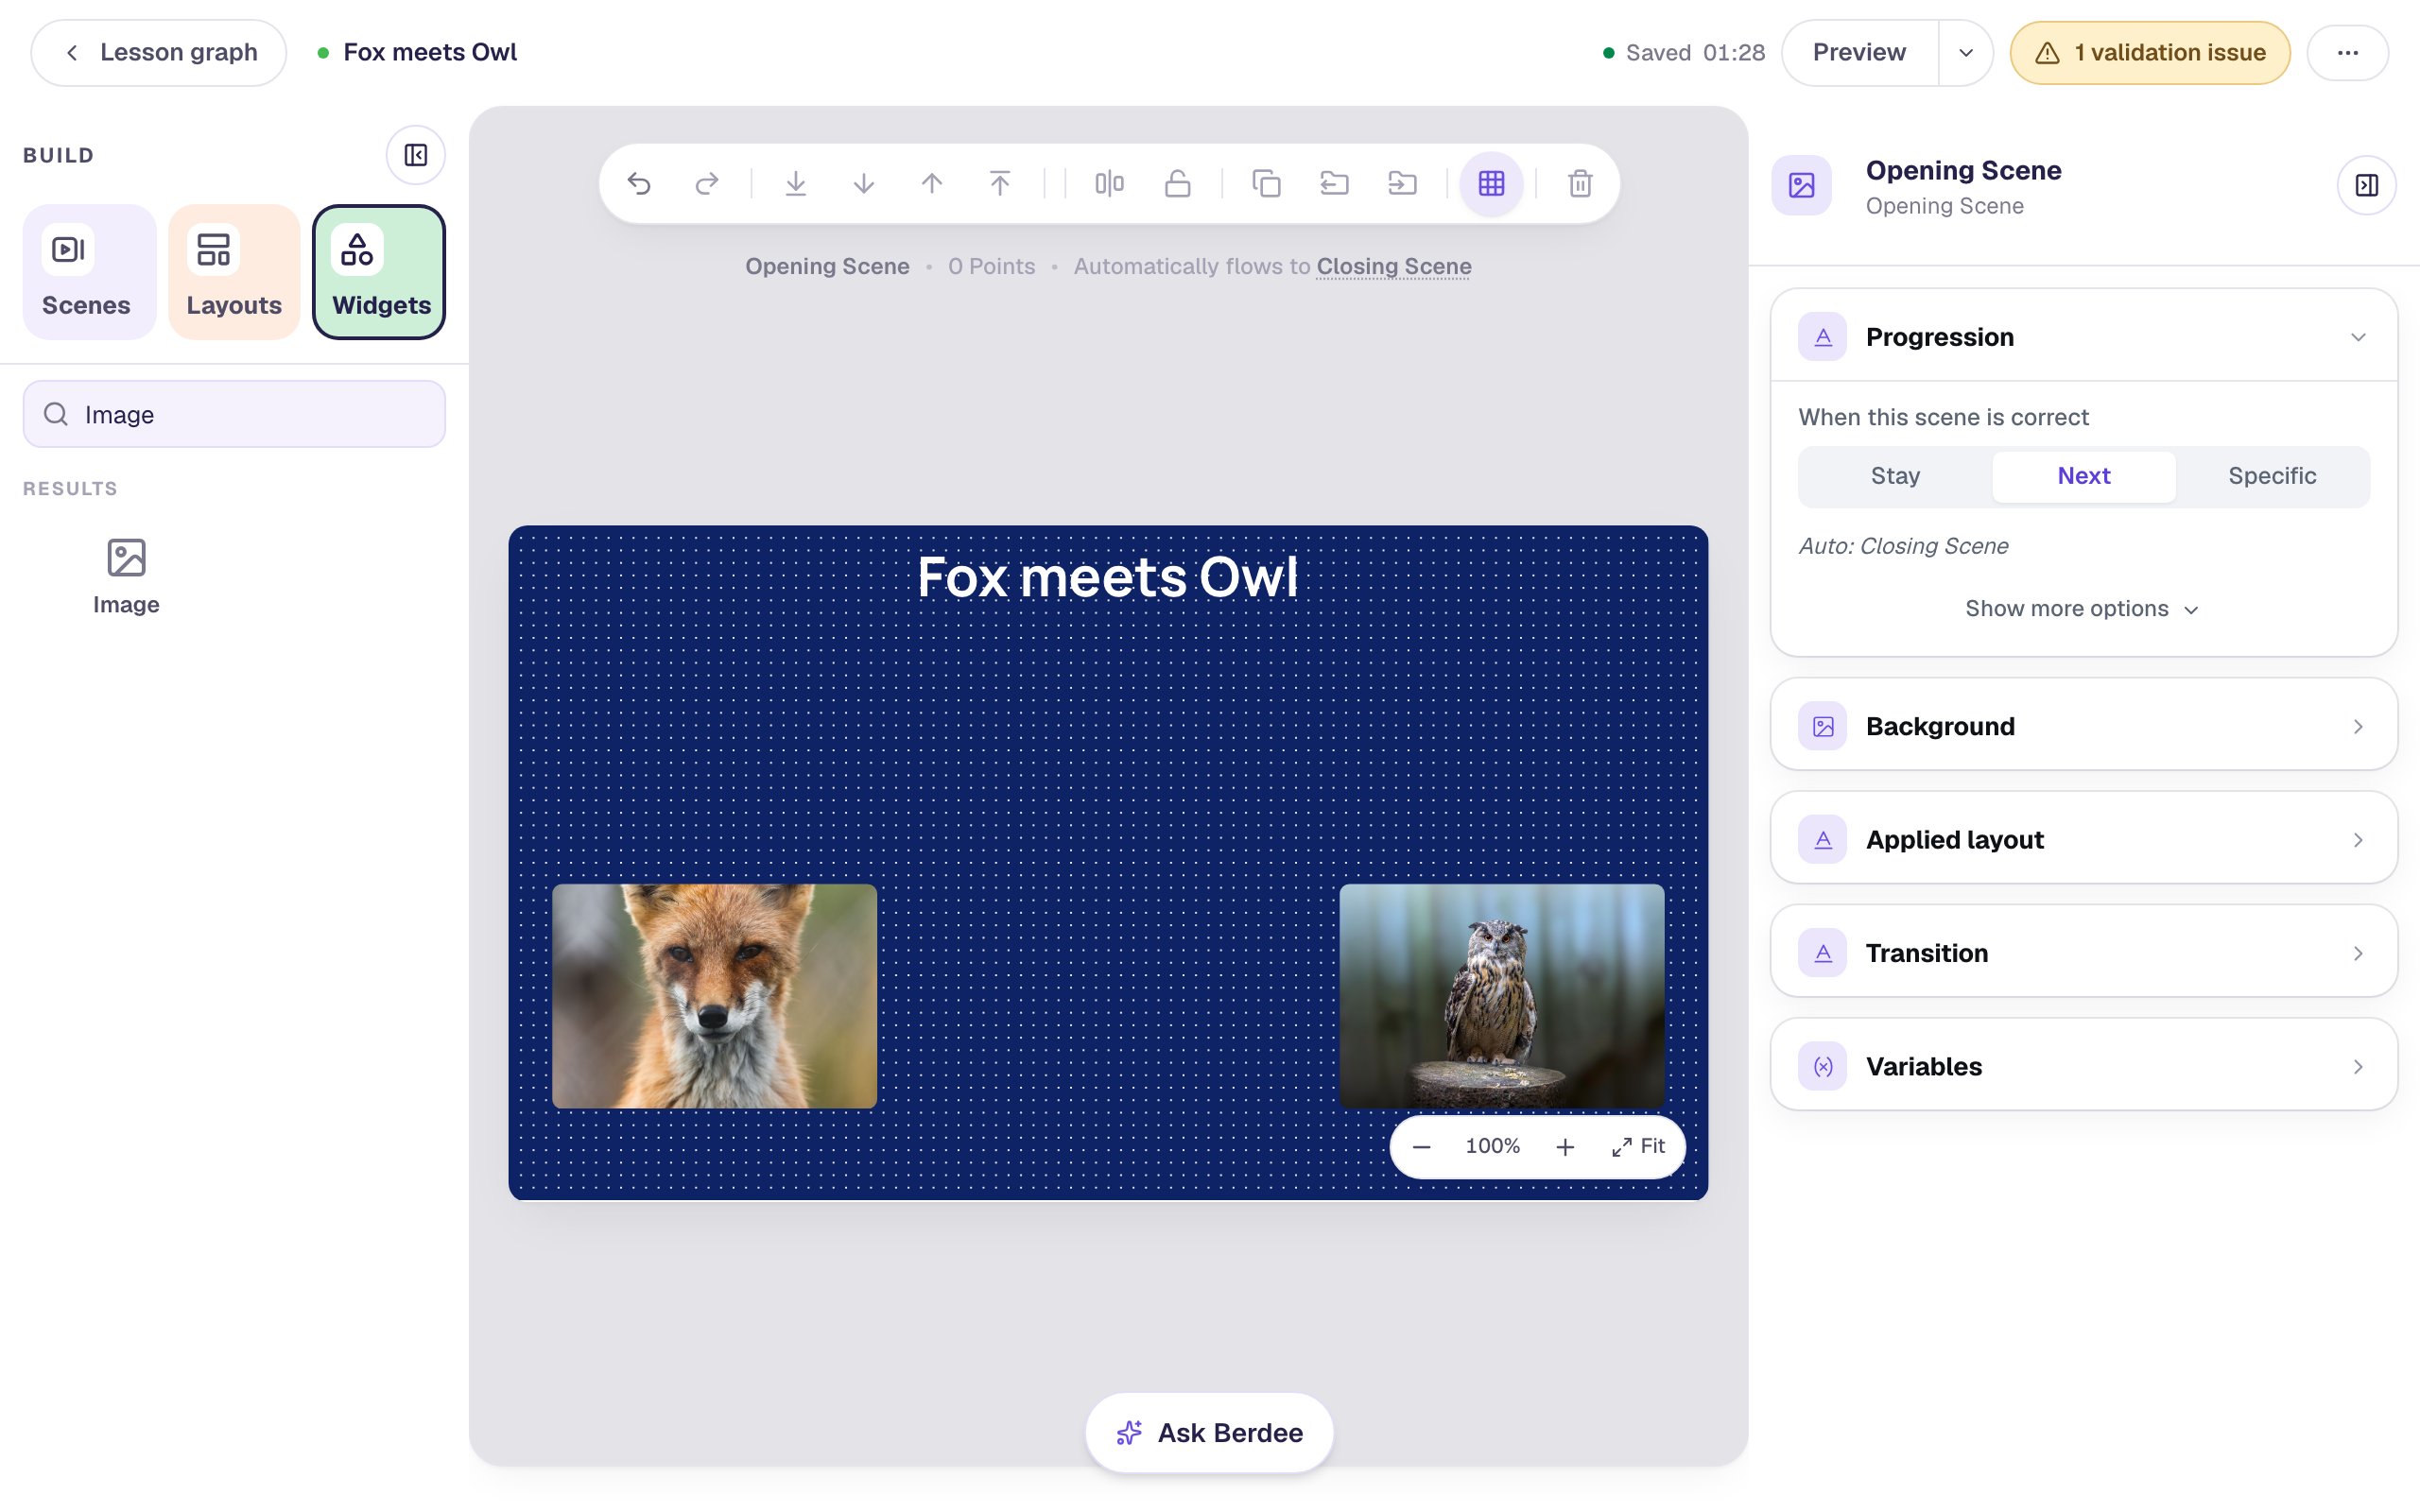
- Click the gray area around the scene so the scene itself is selected. Open Background, click the Color field, and pick a deep night blue. Do the same for the Closing Scene in the Scenes panel, so the ending matches.
- Back on the Opening Scene, add a Heading that says
Fox meets Owl, make its text white, and move it to the top. - Add an Image, click Choose image, search for
fox, and insert a photo of a red fox. Under Style & Layout, set the fit to Cover, make it about260wide and180tall, and move it to the left side of the scene. - Open Accessibility and write the photo's Alt Text, for example
A close-up of a red fox with a bright orange coat, looking alert. - Add a second Image with an owl photo on the right side, and give it alt text too.
Leave room above each photo: that's where their words will go.
Step 2: Write what each one says
Add a Shape, pick Speech bubble, and click Save. Make it white with a navy outline, about 380 wide and 150 tall, and type Fox's line in Text at the top of Style & Layout:
Owl, why are you awake? The sun is going down!
Set the words' Font Size to 24 and their Text Color to navy, then drag the bubble above the fox so its tail points down at it.
Add a second speech bubble for Owl with I'm nocturnal! I sleep all day and hunt at night. The tail starts near the bubble's left end, which would point at Fox. Before you click Save in the shape dialog, slide Tail position to about 66% so Owl's tail points down to the right, at the owl.
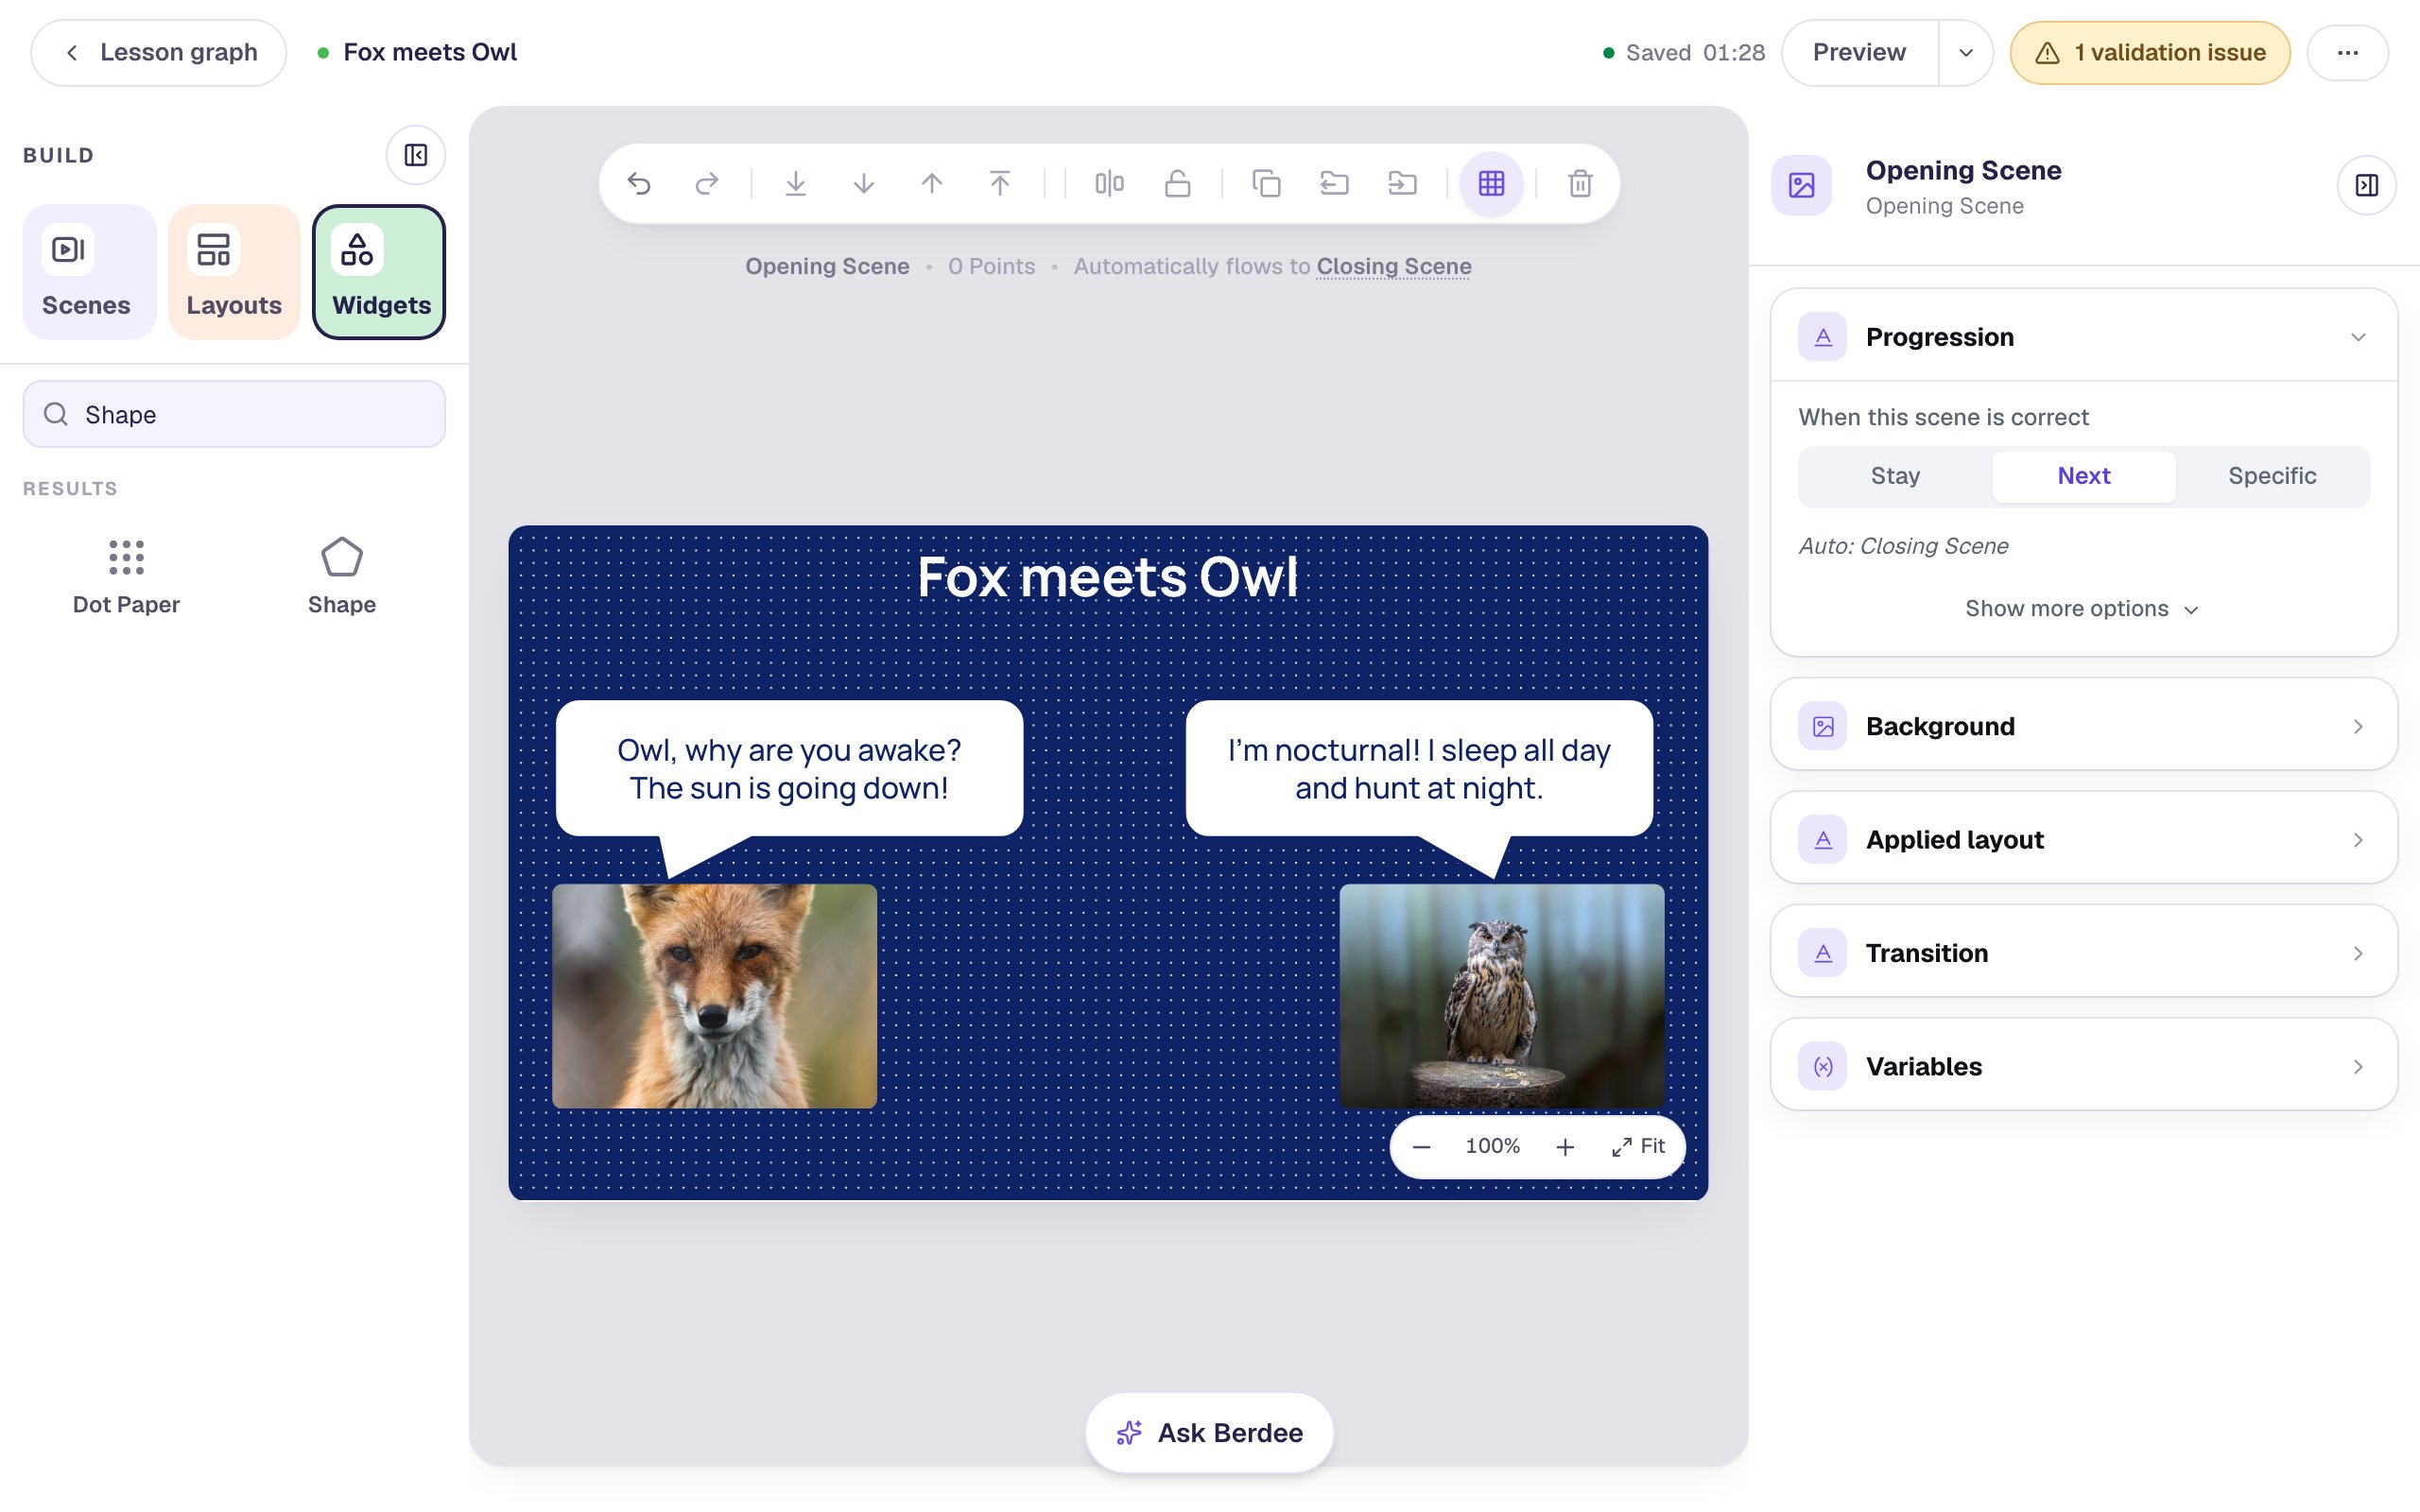
The bubbles are what students read. In the next steps you'll make each line something they can hear, in the right voice. If speech bubbles are new to you, Make a character talk with a speech bubble covers them in more detail.
Step 3: Add Fox and Owl as characters
Characters belong to the whole lesson, so you add them once in Lesson settings.
- Click the lesson's name, Fox meets Owl, at the top left to open Lesson settings.
- Scroll down to Voice. The voice there is the lesson's narrator. Leave it as it is.
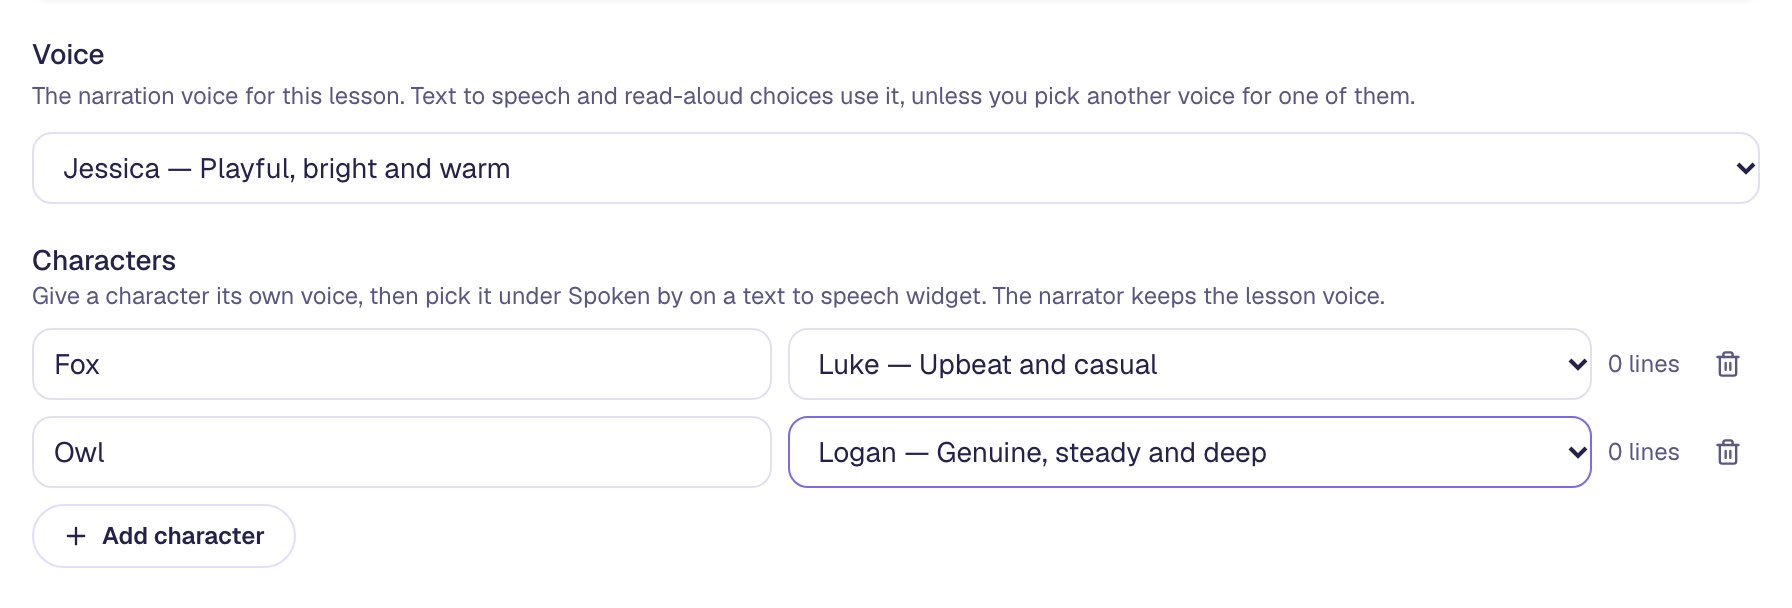
- Under Characters, click Add character. Type
Foxin the name box, then pick his voice. This tutorial uses Luke — Upbeat and casual. - Click Add character again, type
Owl, and pick Logan — Genuine, steady and deep.
Each new character starts with a voice nobody else in the lesson is using yet, so you can keep it if you like how it sounds. Pick voices that sound clearly different from each other and from the narrator, so a listener never has to guess who's talking.
Click Save changes.
Step 4: Record Fox's line in Fox's voice
- In the Widgets panel, search for
aloudand click Text To Speech. - Click ⚙ Configure on the new player.
- Type Fox's line in the text box:
Owl, why are you awake? The sun is going down! - Under Spoken by, choose Fox. Voice changes to Luke by itself.
- Click Generate Audio and wait a few seconds for the recording.
Spoken by only appears once the lesson has at least one character. Click Preview in the dialog to hear the line before you save.
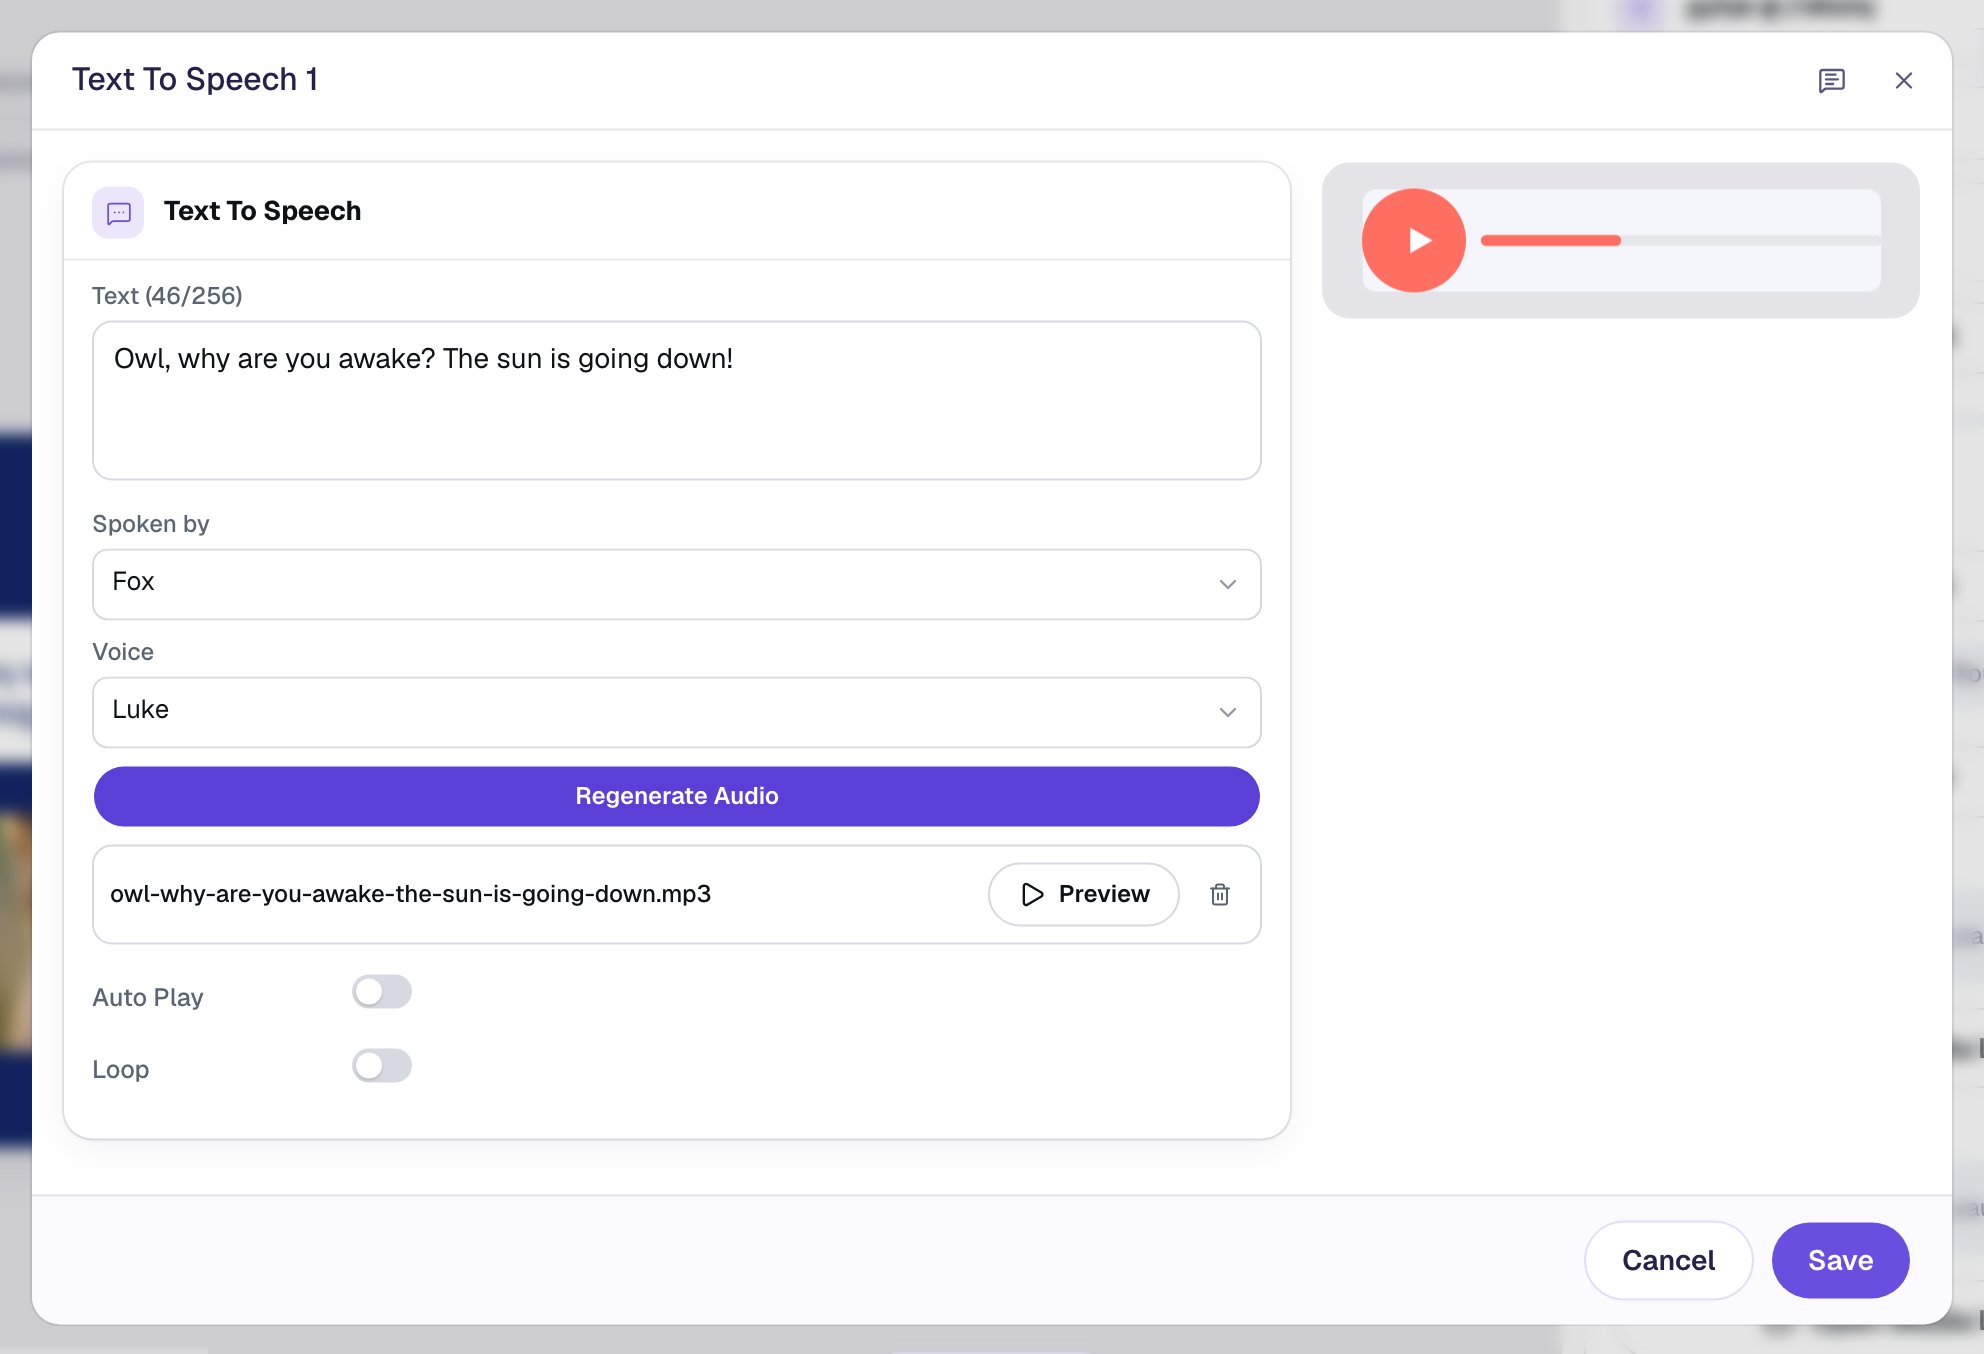
Click Save.
Step 5: Turn the player into a round play button
A full player with a progress bar is a lot for every line of dialogue. A single round button beside each bubble is tidier, and it's clear whose line it plays.
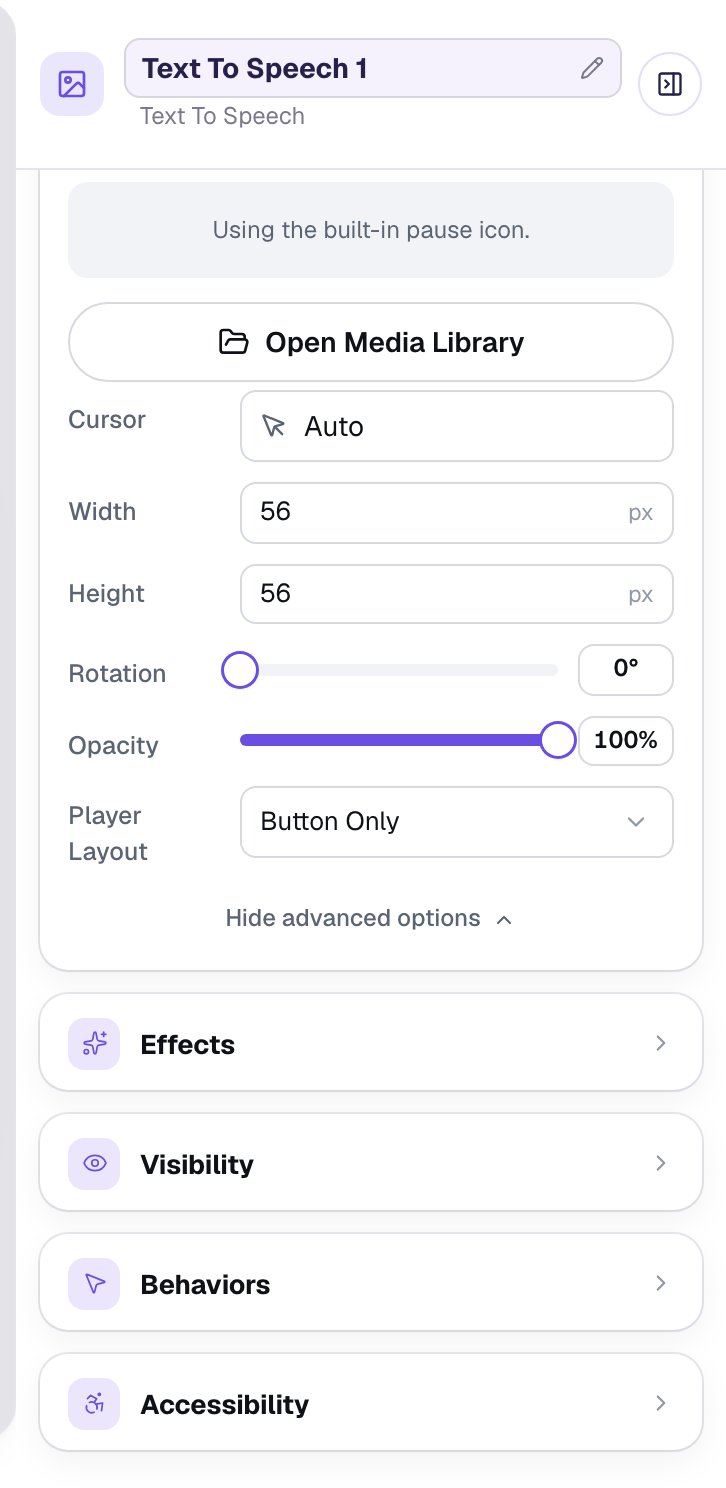
- With the player selected, open Style & Layout, click Show more options, and set Player Layout to Button Only.
- Set Button Color to a warm orange, and Background to the same night blue as the scene so no pale square shows behind the button.
- Open Accessibility and set Alt Text to
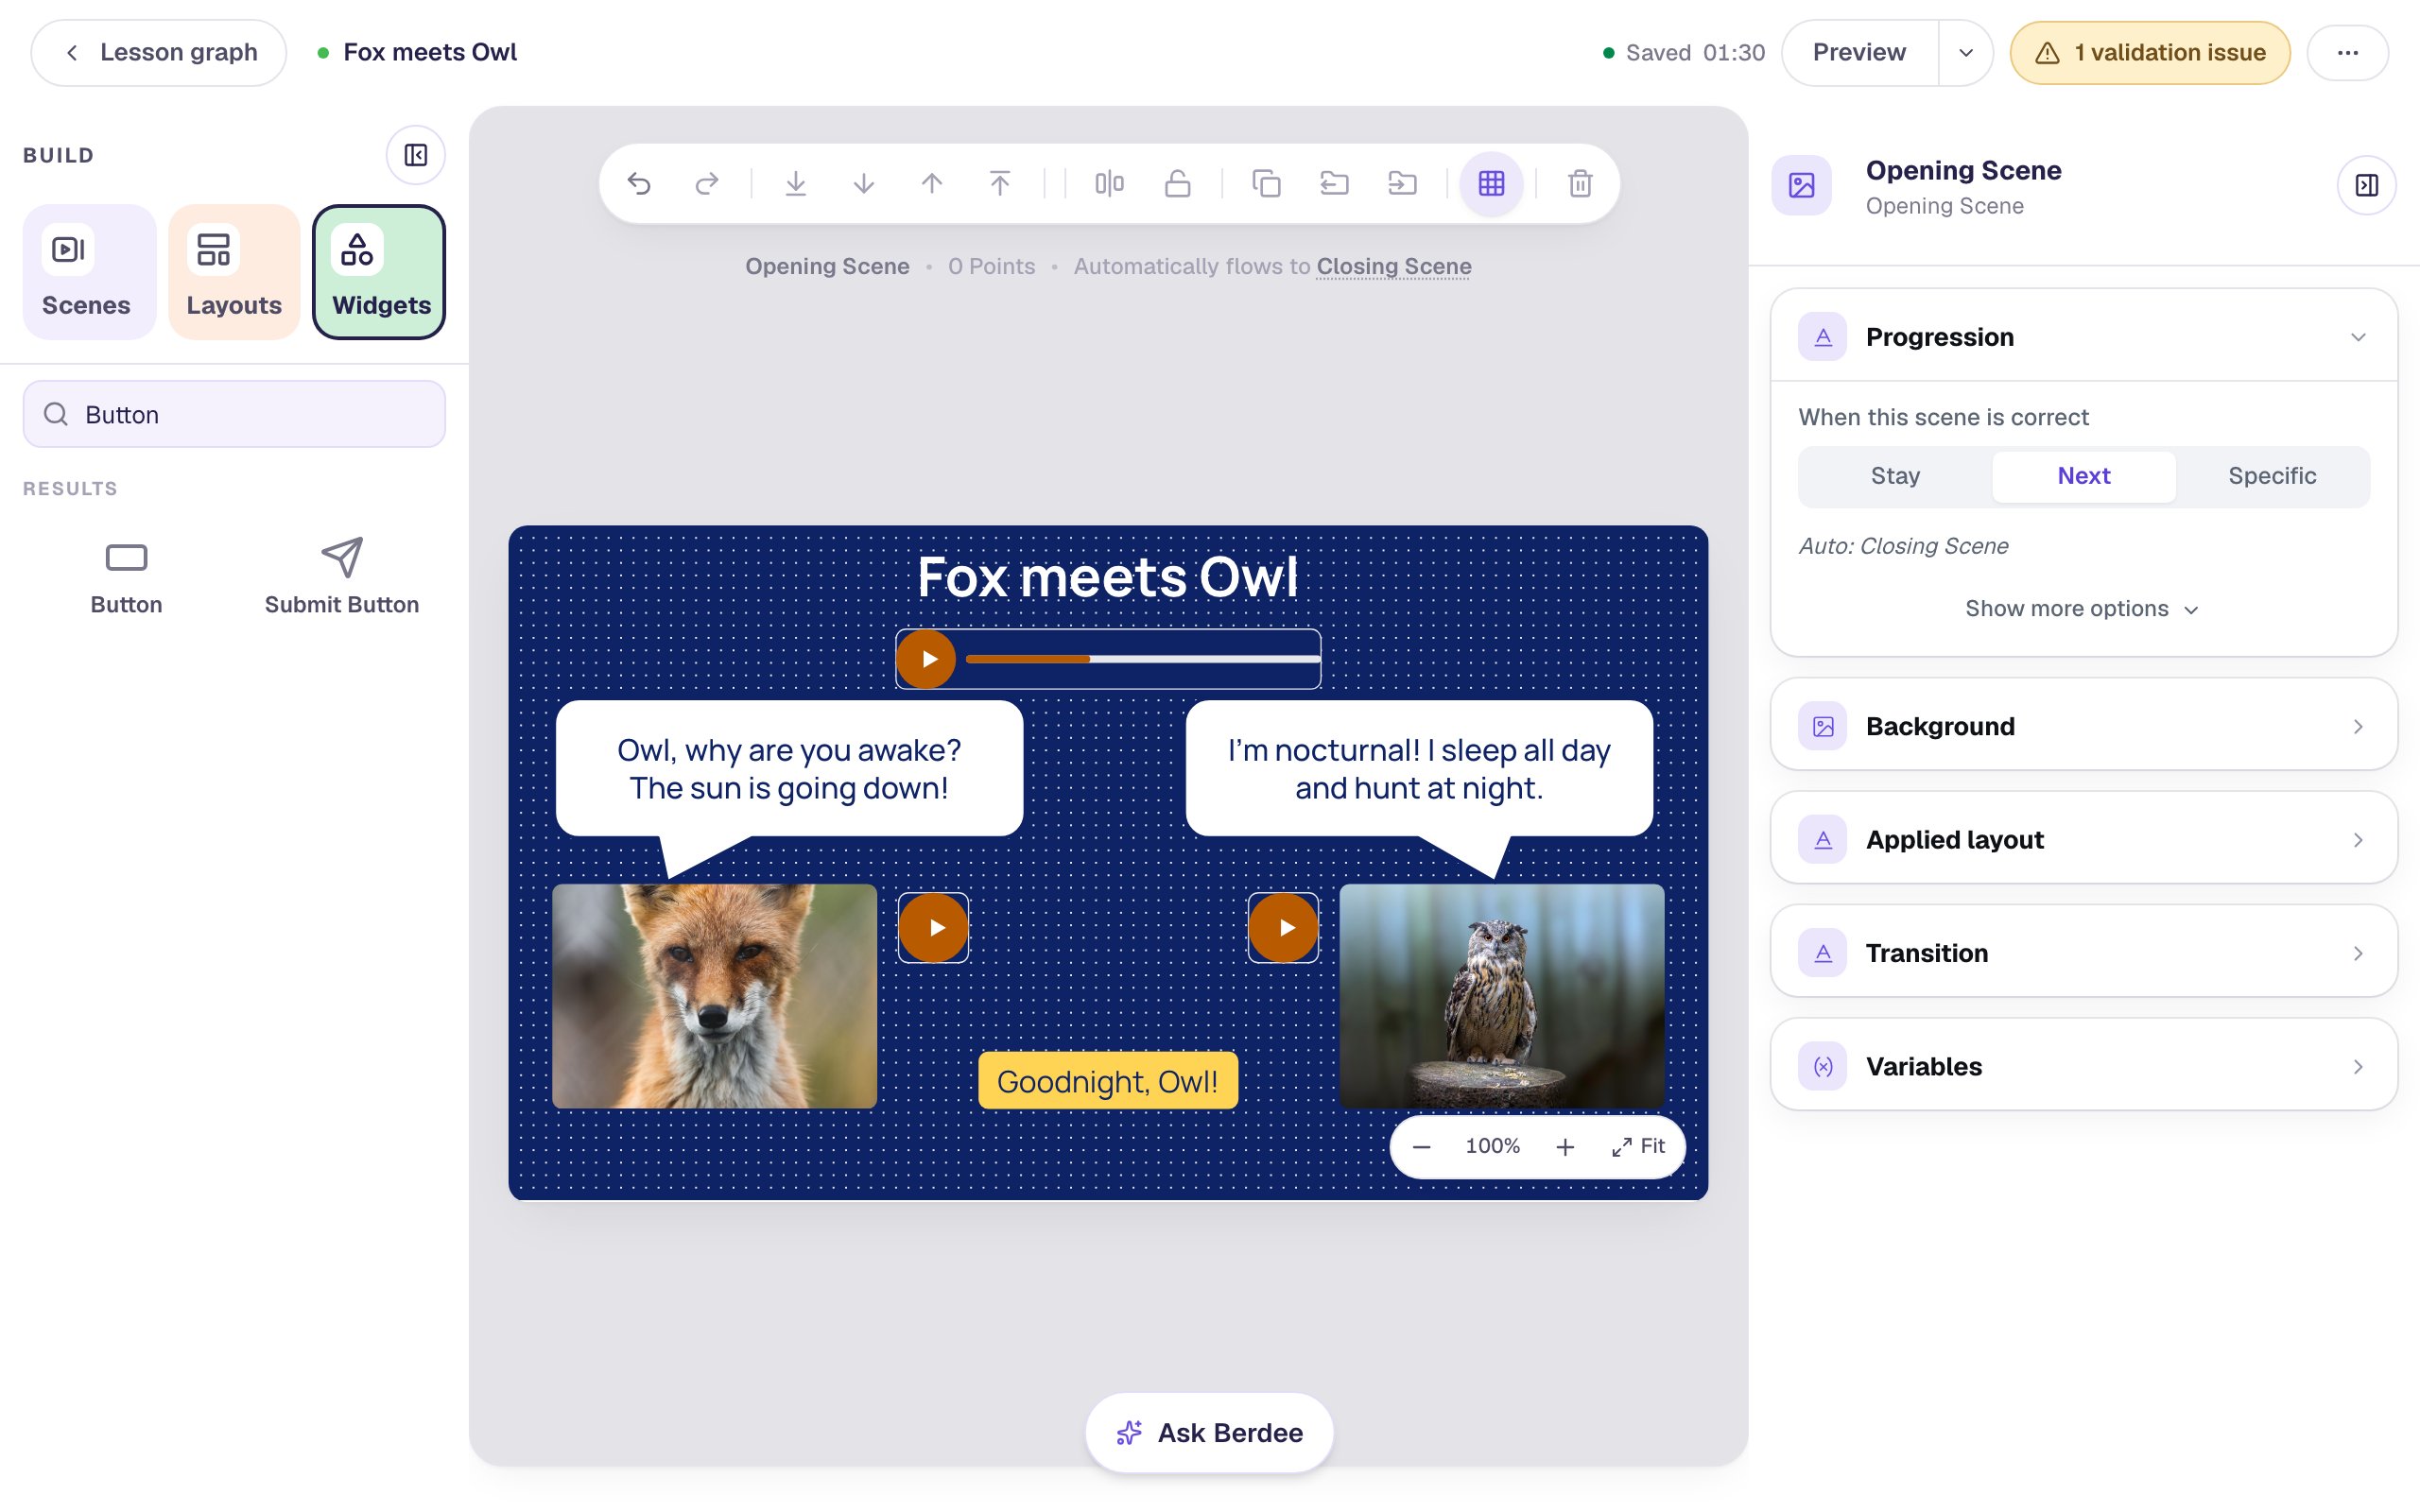
what Fox says. A screen reader announces the button as "Play what Fox says". - Drag the button next to Fox's photo, just under his bubble.
Step 6: Copy it for Owl's line
Owl's button looks the same, so copy Fox's instead of starting over.
- With Fox's button selected, press ⌘ D (Ctrl D on Windows) and drag the copy next to Owl's photo.
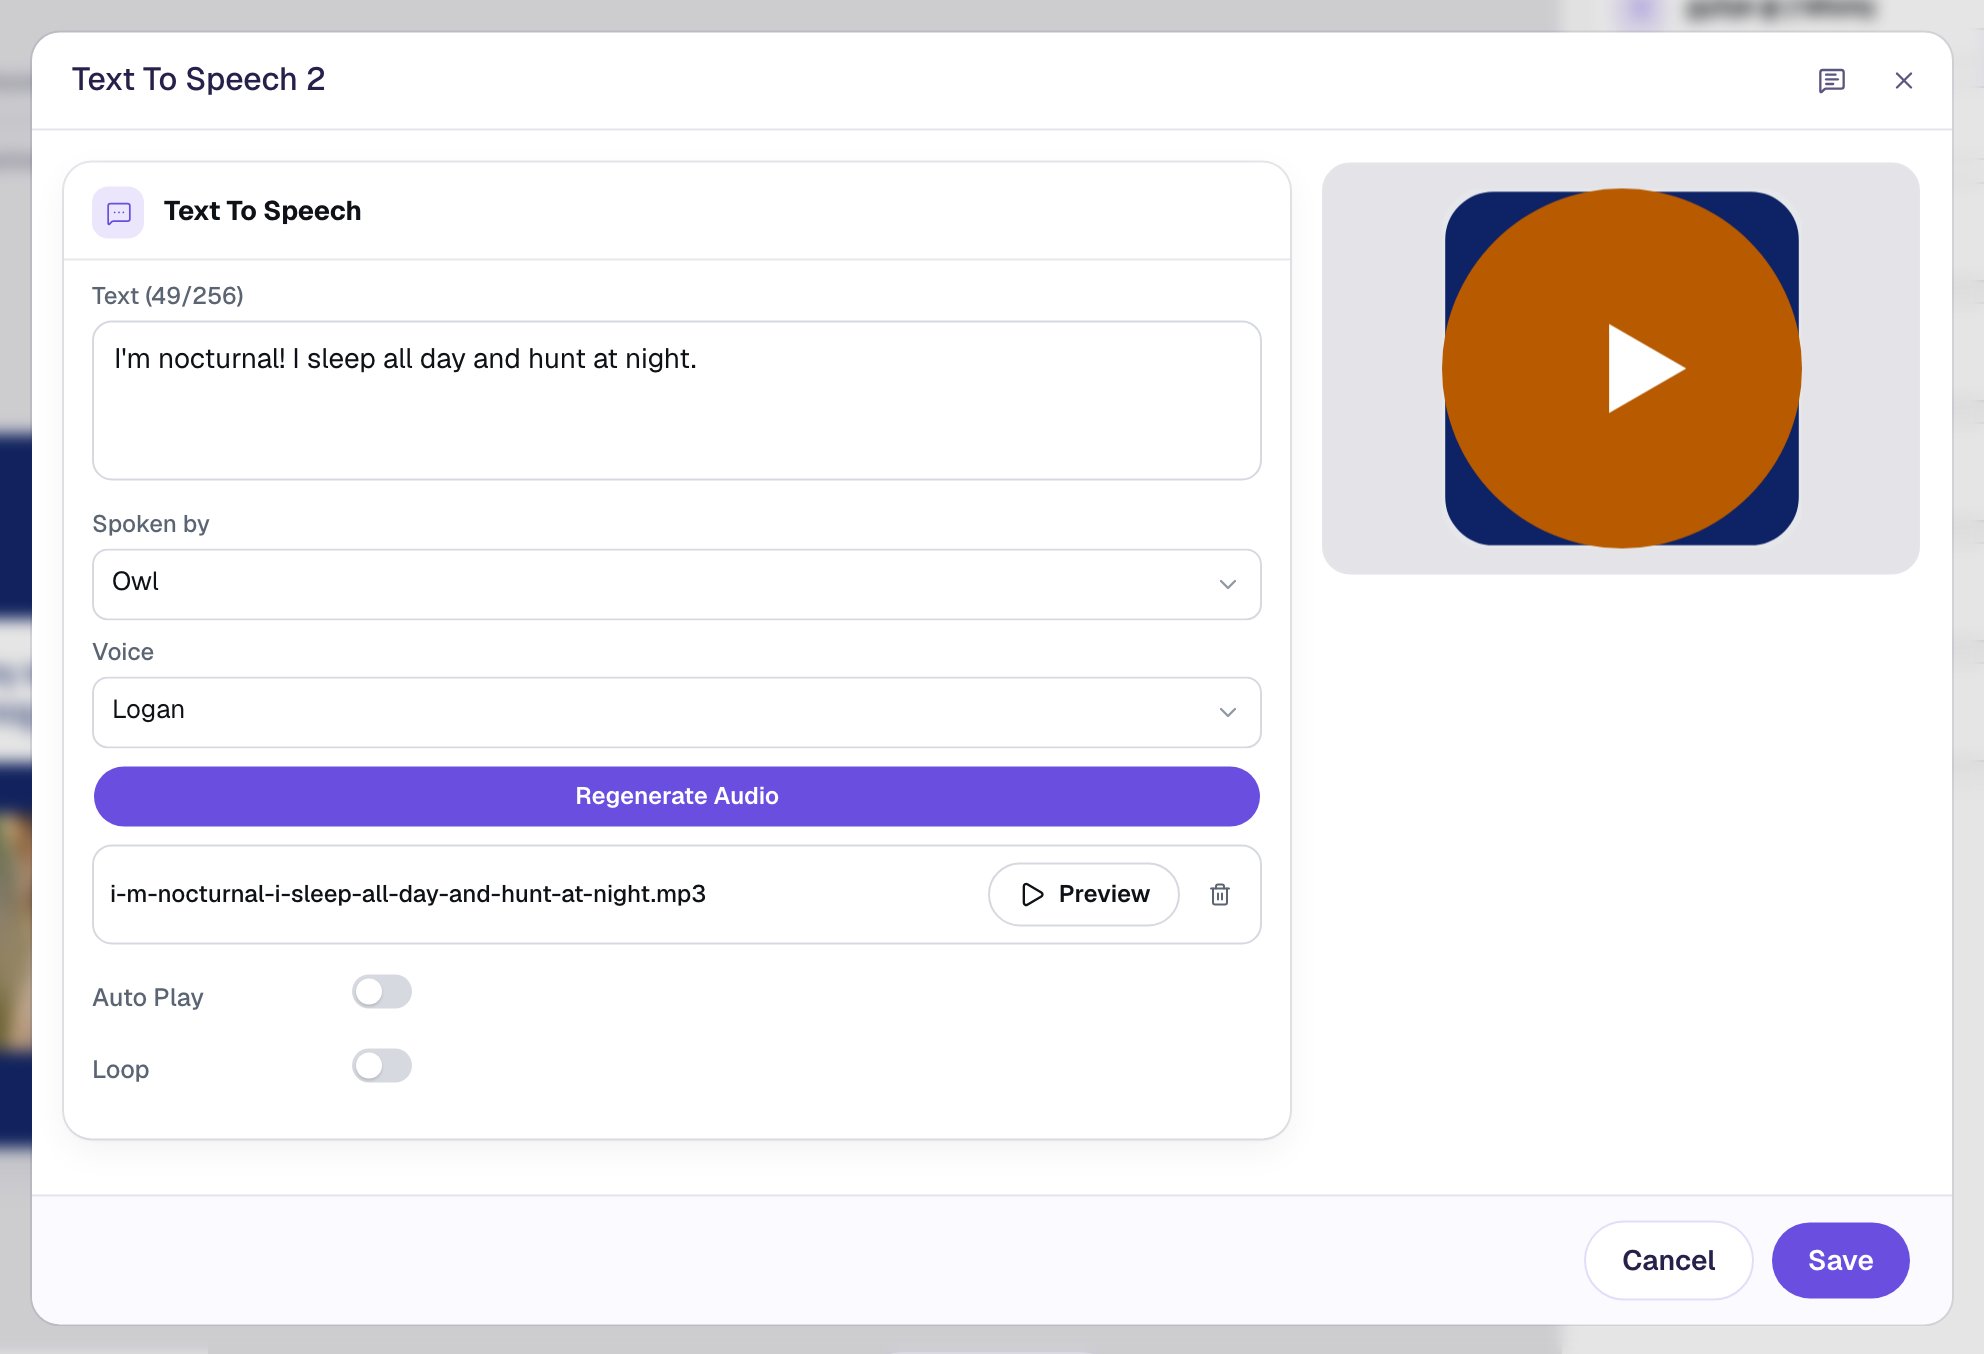
- Set its Alt Text to
what Owl says. - Click ⚙ Configure, replace the text with
I'm nocturnal! I sleep all day and hunt at night., and choose Owl under Spoken by. Voice changes to Logan. - Click Regenerate Audio, then Save. A copy keeps the original's recording until you make a new one, so don't skip this.
Step 7: Let the narrator set the story
The narrator is everyone who isn't a character. Their lines use the lesson's own voice.
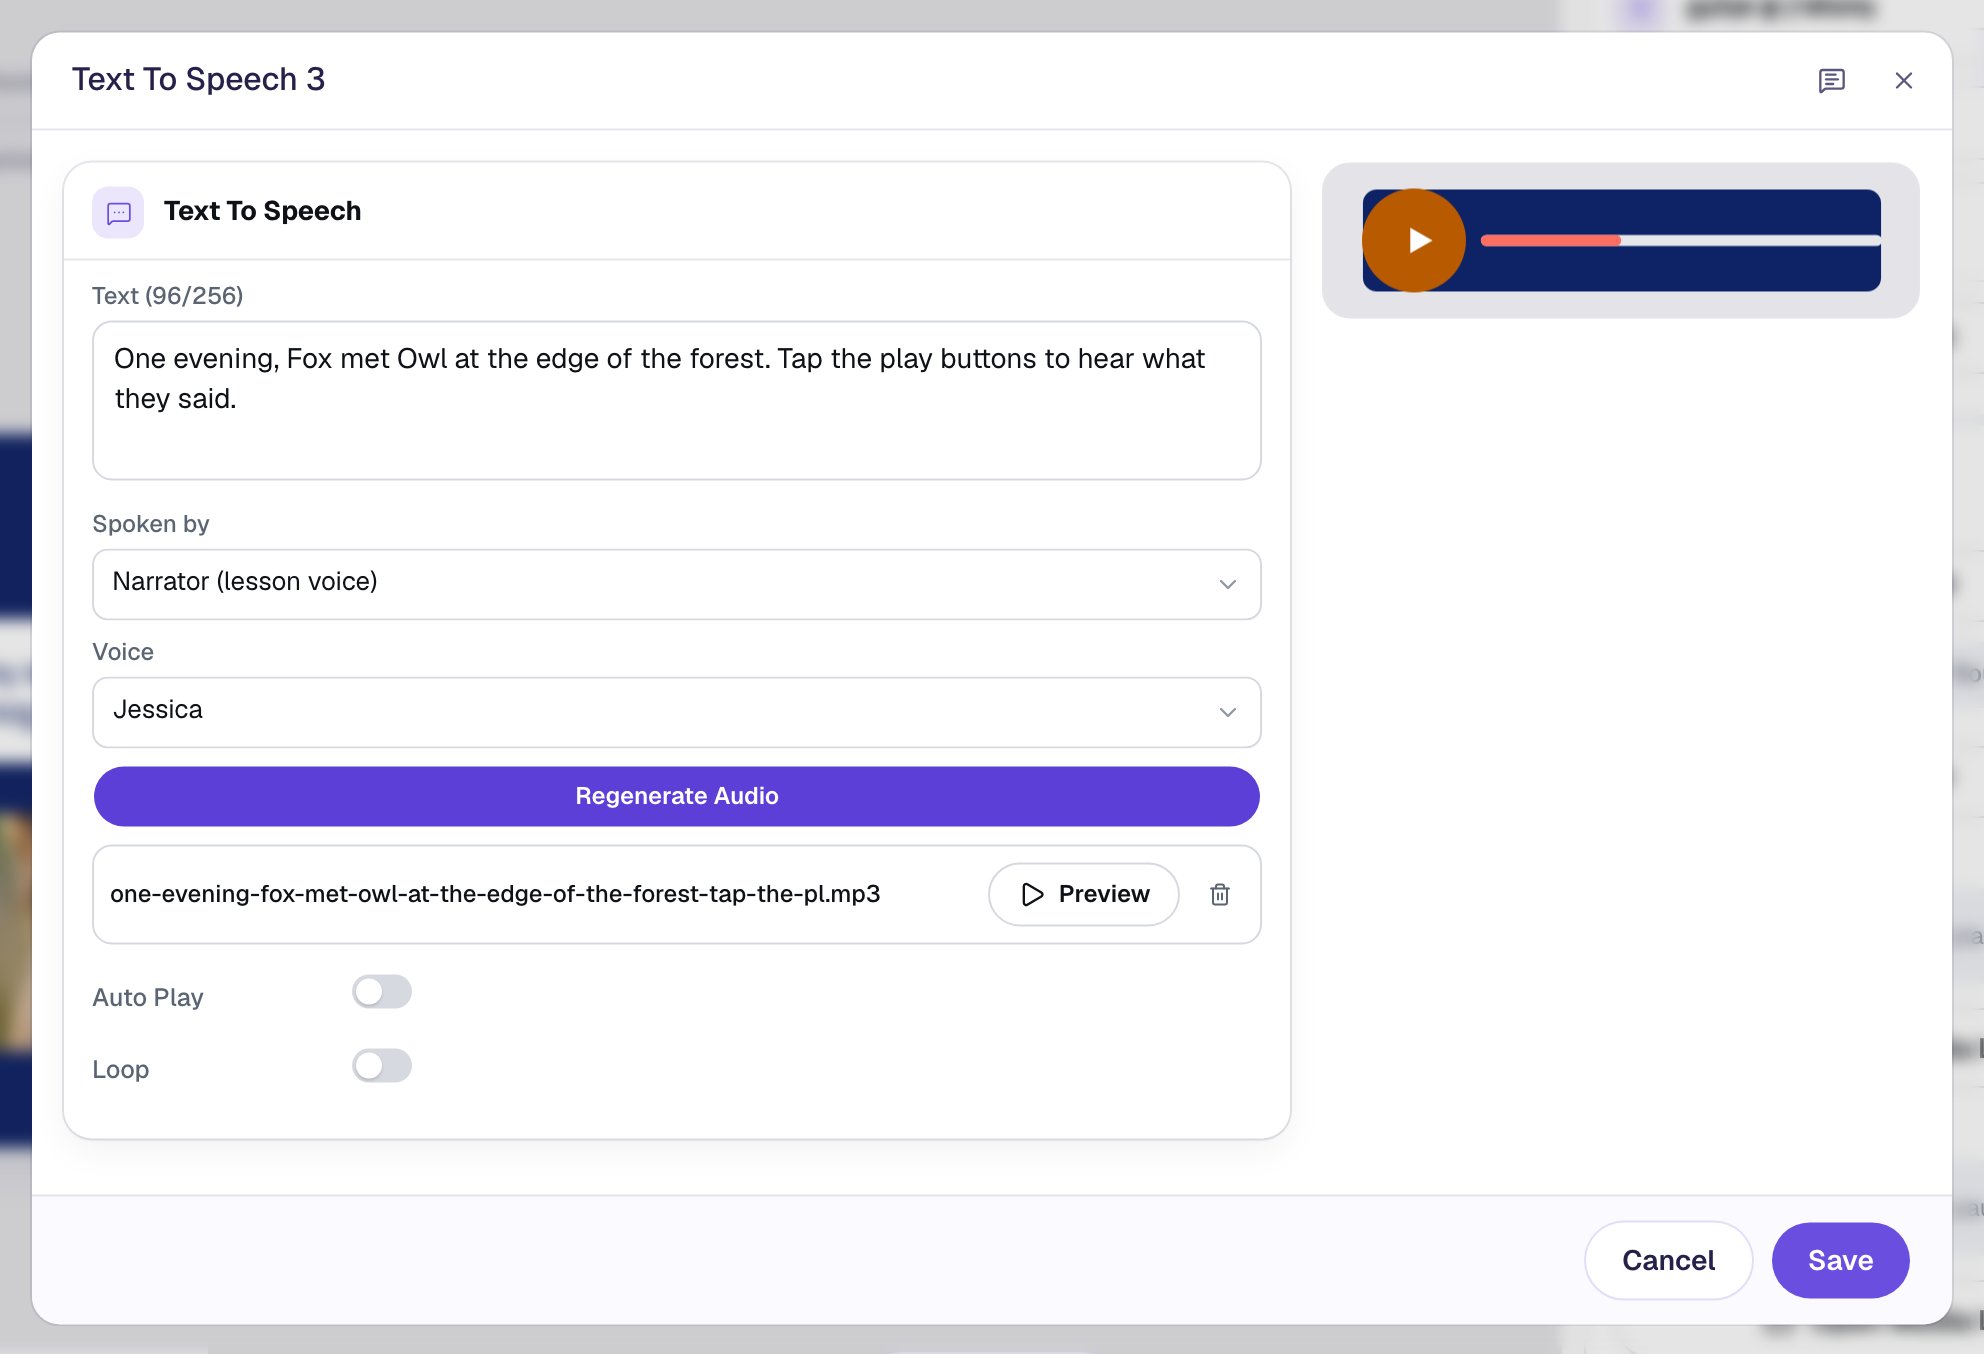
- Add another Text To Speech player and click ⚙ Configure.
- Type
One evening, Fox met Owl at the edge of the forest. Tap the play buttons to hear what they said. - Leave Spoken by on Narrator (lesson voice), and click Generate Audio, then Save.
- Keep this one as a full player, about
340wide and48tall, in the same orange, with the Alt Textthe story. Put it under the title, so students find it first.
Now open Lesson settings again. Each character shows how many lines they speak:
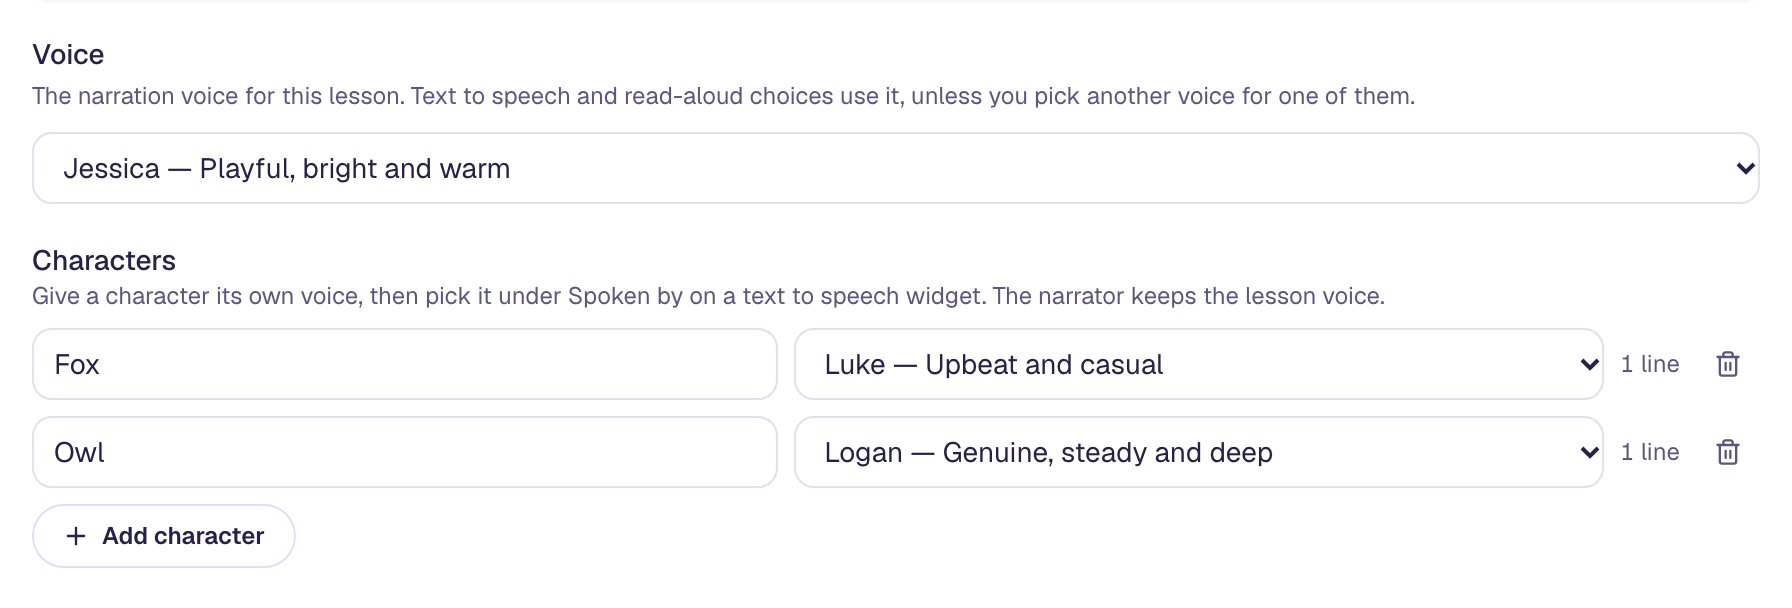
This is where characters save you work. If you decide Fox should sound different, pick a new voice for him here and every line he speaks moves to it. Settings then tells you which recordings are out of date, and Regenerate audio makes them all again in his new voice. You don't have to find each of his players. Changing the lesson's Voice changes the narrator, never a character.
Step 8: Add a way to finish
Add a Button labelled Goodnight, Owl!, make it sunny yellow with navy text, and put it between the two photos. Click Behaviors, then Make this a "Next" button, then Add behavior, so it takes students to the ending.
Step 9: Preview it as a student
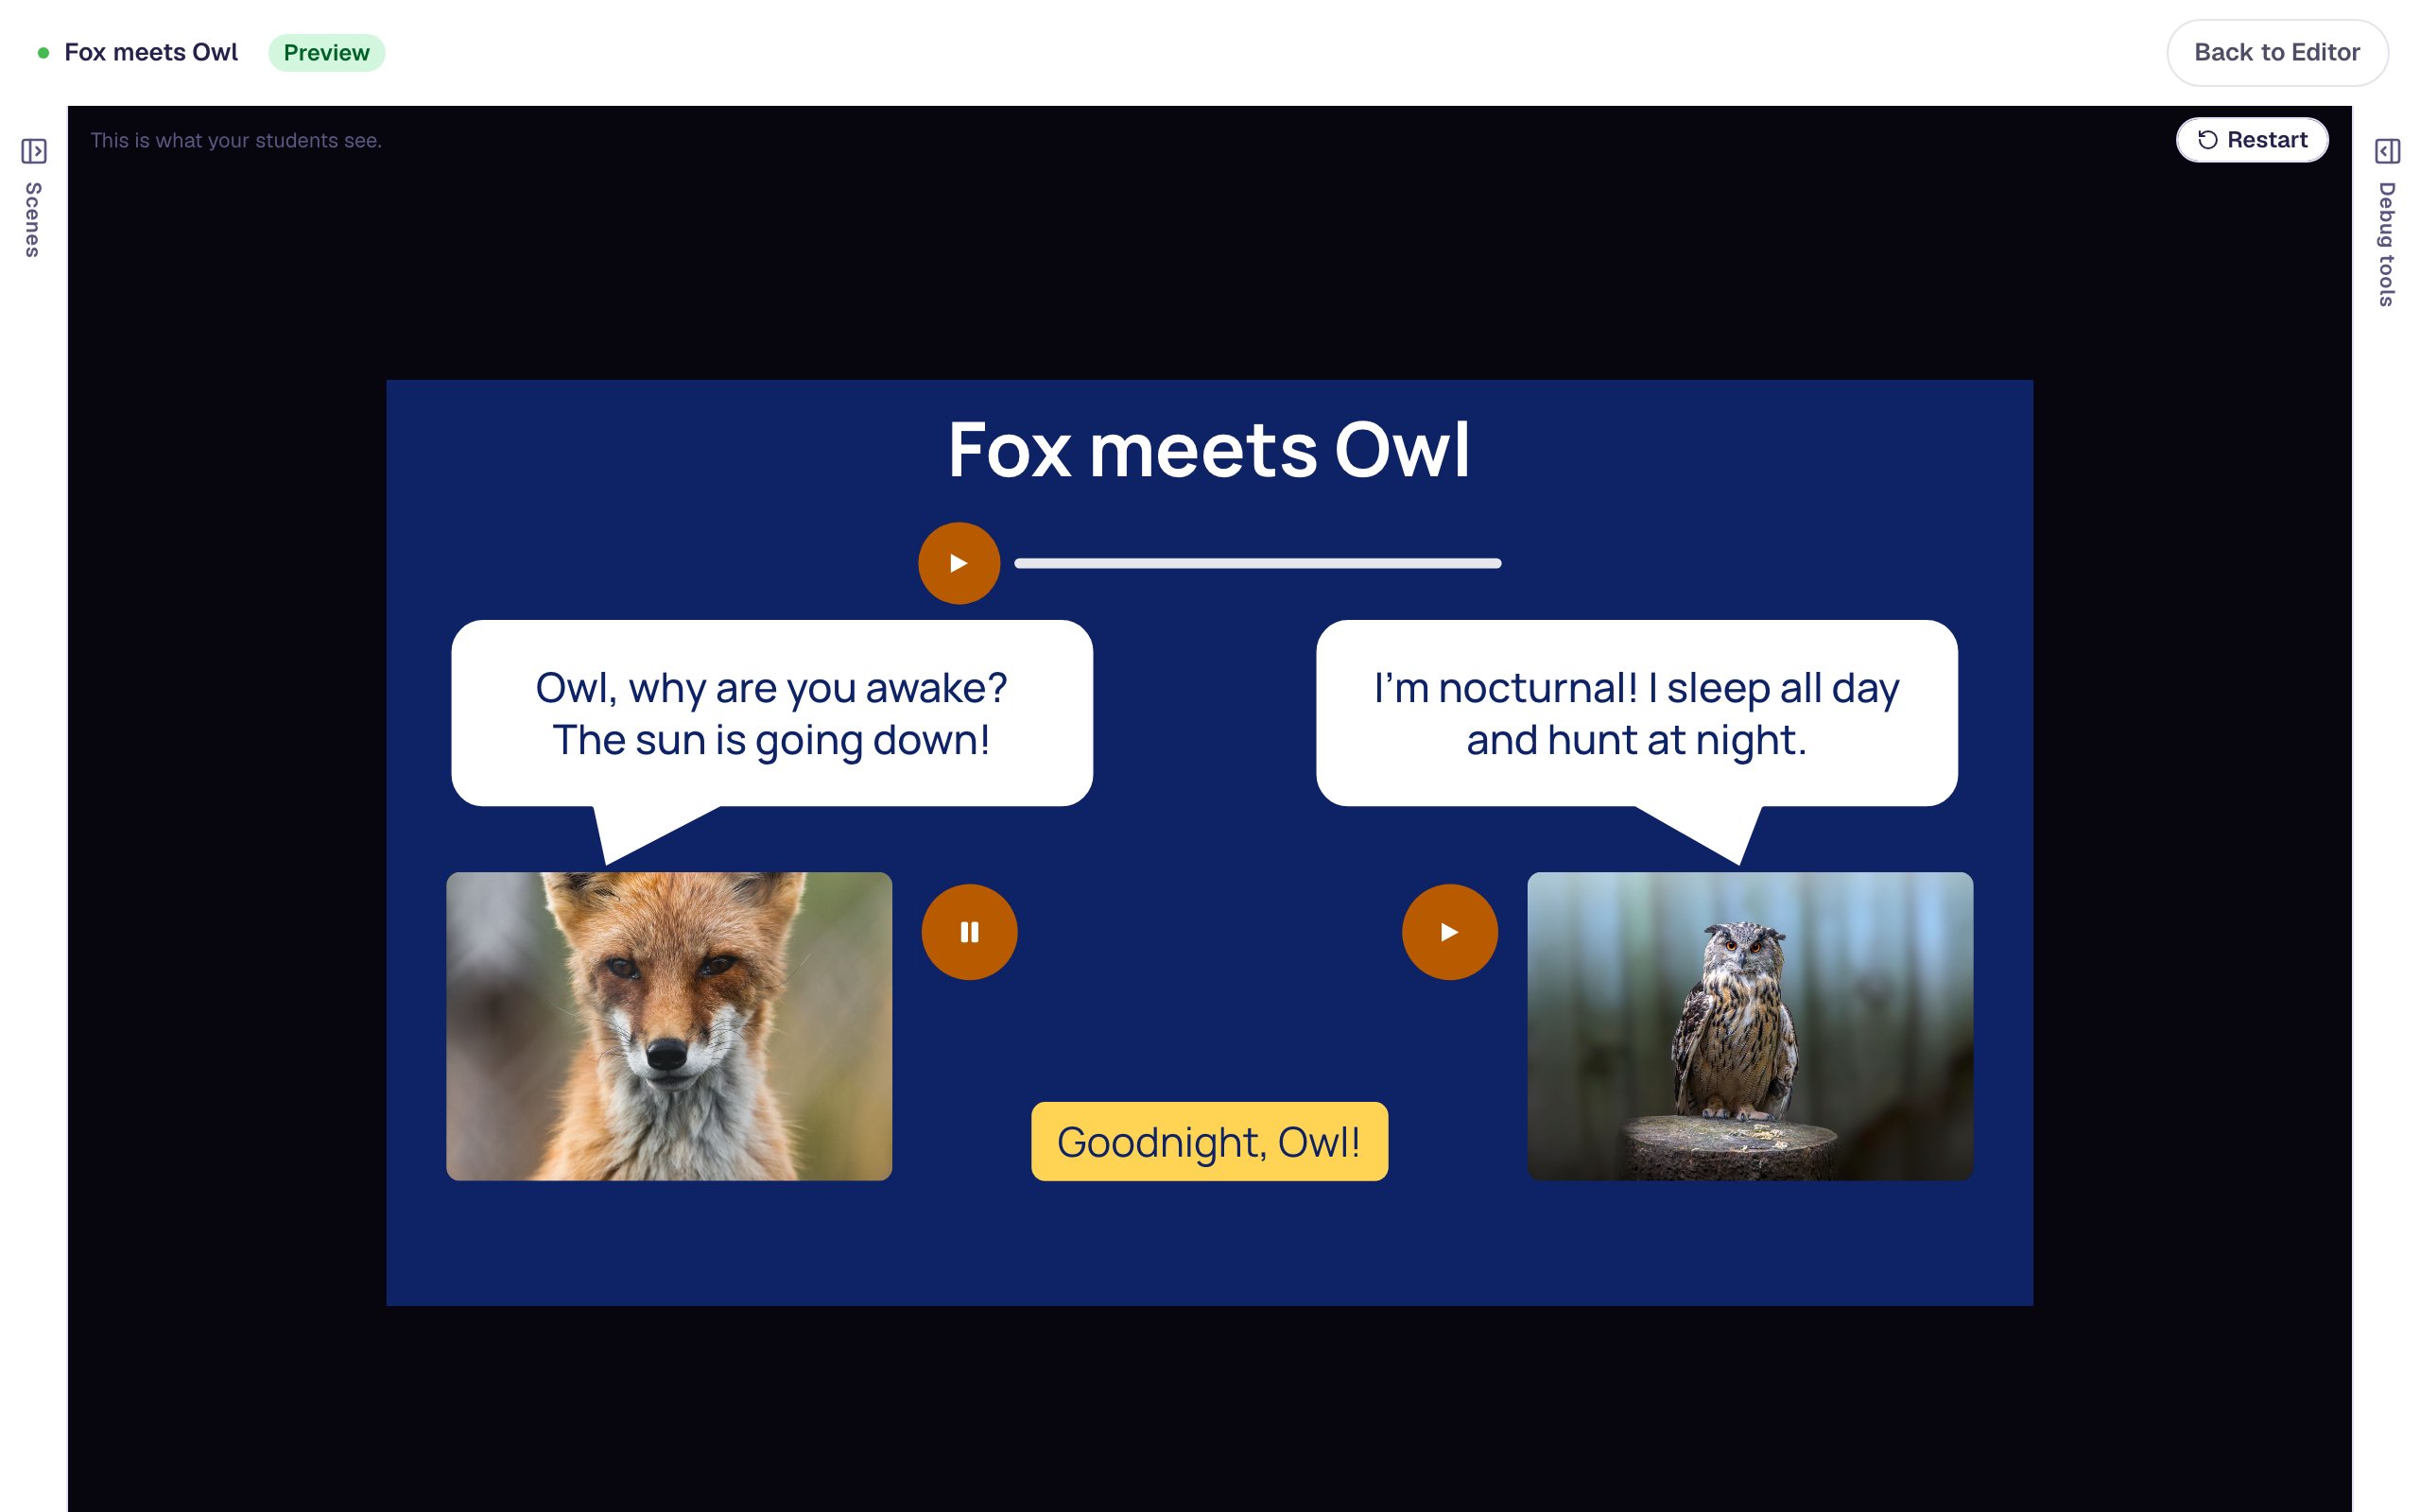
Click Preview. Play the narrator's line, then Fox's button, then Owl's. You'll hear three different voices: the narrator, Fox's upbeat voice, and Owl's deeper one. Students only ever hear one voice at a time, so tapping Owl while Fox is still talking stops Fox and starts Owl.
What you built
A short, spoken dialogue where every speaker sounds like themselves:
- Characters in Lesson settings, each with a voice of their own
- A Text To Speech player for each line, with Spoken by saying whose line it is
- A narrator who keeps the lesson's voice
- Round Button Only players that sit beside each speech bubble
Use the same pattern for a role-play students practise, a conversation in another language, or a story with a whole cast. Add as many characters as the story needs, and give each one a voice that's easy to tell apart.
Make this lesson yours
Add the lesson you just watched being built to your account, then change it for your class: your questions, your pictures, your colors.
Free to sign up, and you'll come straight back here. I have an account