Make picture flashcards that read aloud
Build farm-animal flashcards with a photo and a word on the front and a short fact on the back, then turn on Read the card aloud so children who can't read yet hear each side from a speaker on the card.
- Level
- Beginner
- Time
- About 15 min
- Steps
- 7
- Updated
- Nov 3, 2026
A "Meet the farm animals" scene with three picture flashcards (a cow, a pig and a sheep). Each card has a speaker that says the side that's showing, a mint back with a fact about the animal, and a Next button finishes the lesson.
Get the finished lesson
Skip straight to the result, or keep it open beside the steps. Add this tutorial's lesson to your account and explore how it works in the studio.
Free to sign up, and you'll come straight back here. I have an account
A flashcard with only words on it is no use to a child who can't read yet. Put a photo on the front and switch on Read the card aloud, and the same card works for a four-year-old: they see the cow, tap the little speaker to hear "Cow", flip the card, and tap the speaker again to hear what a cow does.
In this tutorial you'll build one scene of farm-animal flashcards:
🐄 Cow → "A cow says moo. It gives us milk." · 🐖 Pig → "A pig says oink. It rolls in mud to keep cool." · 🐑 Sheep → "A sheep says baa. Its wool keeps us warm."
You'll make the first card with a stock photo, give it narration for both sides, then copy it for the other two animals. If you haven't built a flashcard before, Make a deck of vocabulary flashcards covers the basics more slowly.
Step 1: Set the scene
Start a blank lesson (New lesson, then Start from scratch) and name it Farm animals by clicking Untitled lesson at the top.
With nothing selected, open Background, click Choose a style, pick Nature, then Rolling hills, and click Apply background. Select the Closing Scene in the Scenes panel and give it the same background, so the ending matches. Creative Backgrounds covers the rest of the gallery.
Back on the Opening Scene, add a Heading that says Meet the farm animals and a Body text under it: Tap the speaker to hear the word. Tap the card to flip it. Set the Body's Font Size to 22. Rolling hills has a sun on its left, so drag both texts to the right of it, lined up with the right edge of the scene.
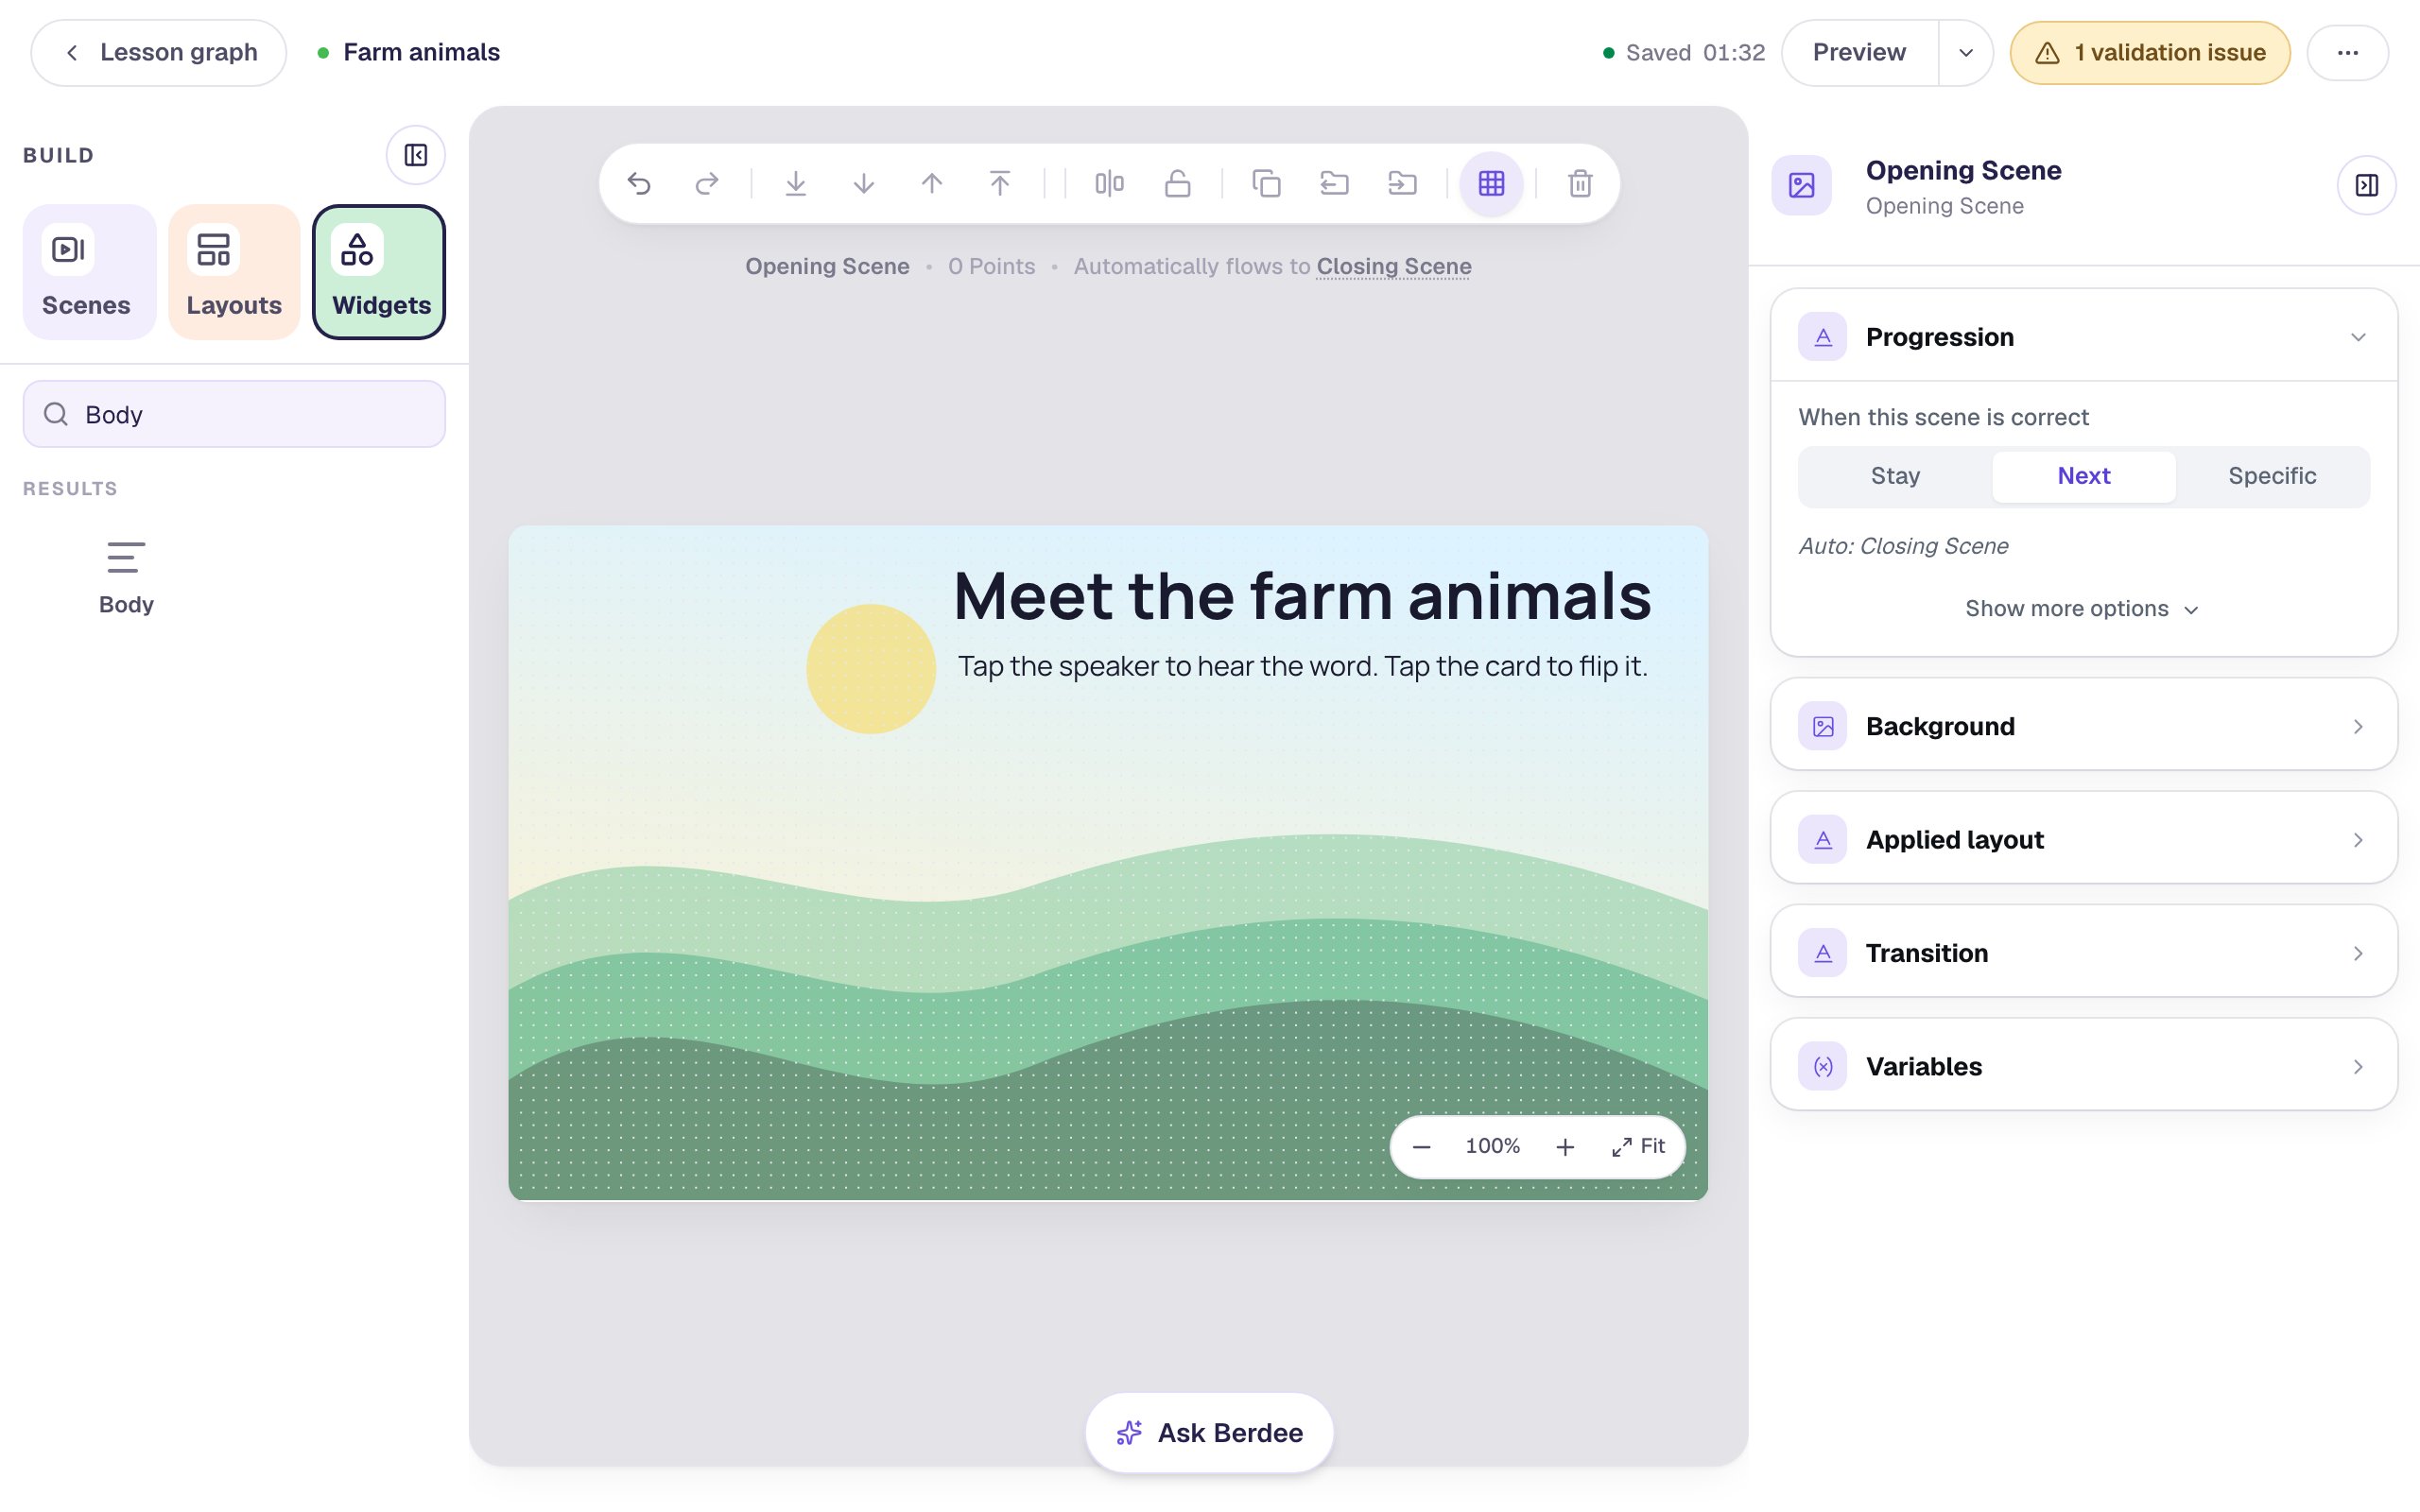
The instruction is for the adult sitting with the child as much as for the child. Your students will learn the two taps quickly once they've seen them once.
Step 2: Put a photo on the front
In Widgets, search for Flashcard and click it. A plain white card appears.
Click ⚙ Configure above the card. Under Front Image, click Set image. The image picker opens on Search: type cow in a field, press Enter, and click a photo with one cow that's easy to see. Wide photos fit the card best. Click Import & insert.
Choose photos where the animal fills a good part of the picture and nothing else competes with it: no people, no herd of twenty, nothing a child might name instead. The card shows the whole photo above the word, without cropping it.
Step 3: Write both sides and style the card
Still in the Configure window, replace Front Text with Cow and Back Text with A cow says moo. It gives us milk.
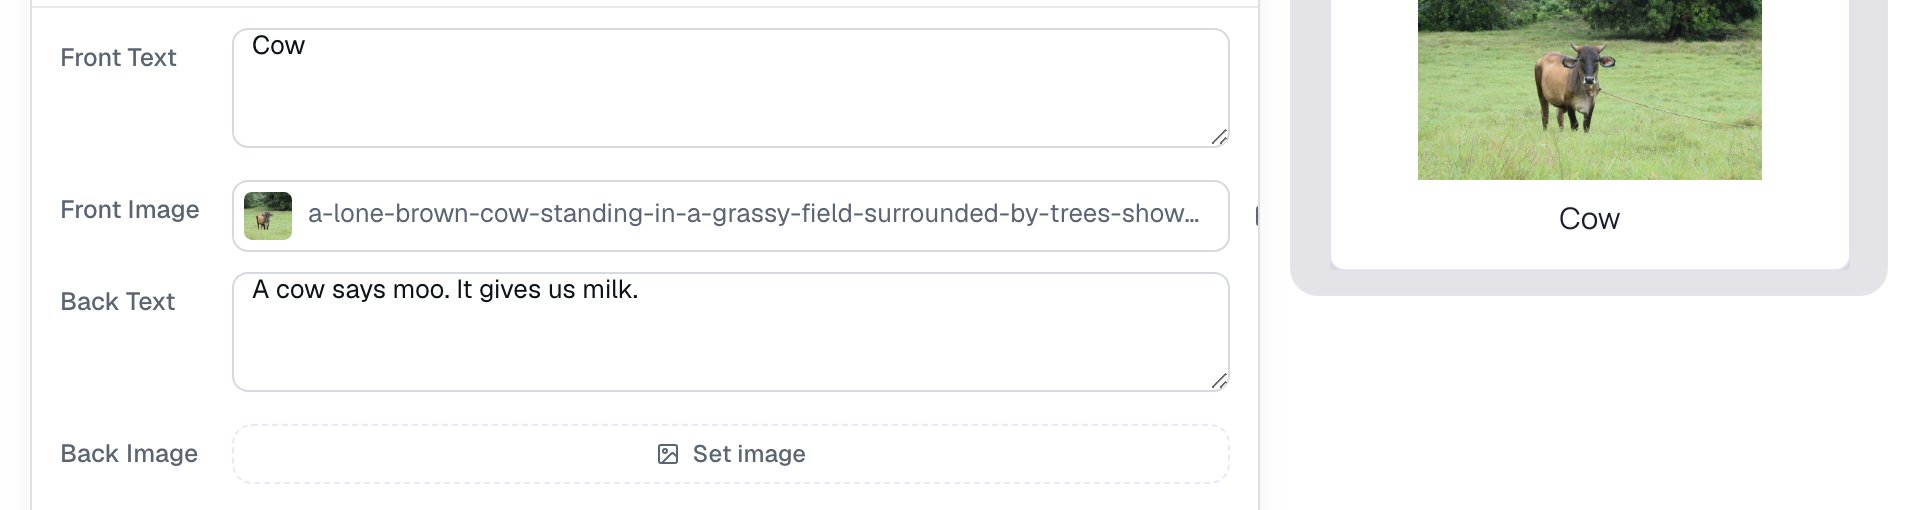
The word on the front is more than a label. It's what a screen reader says for the photo, and it's what the speaker will say in Step 4, so keep it to the animal's name.
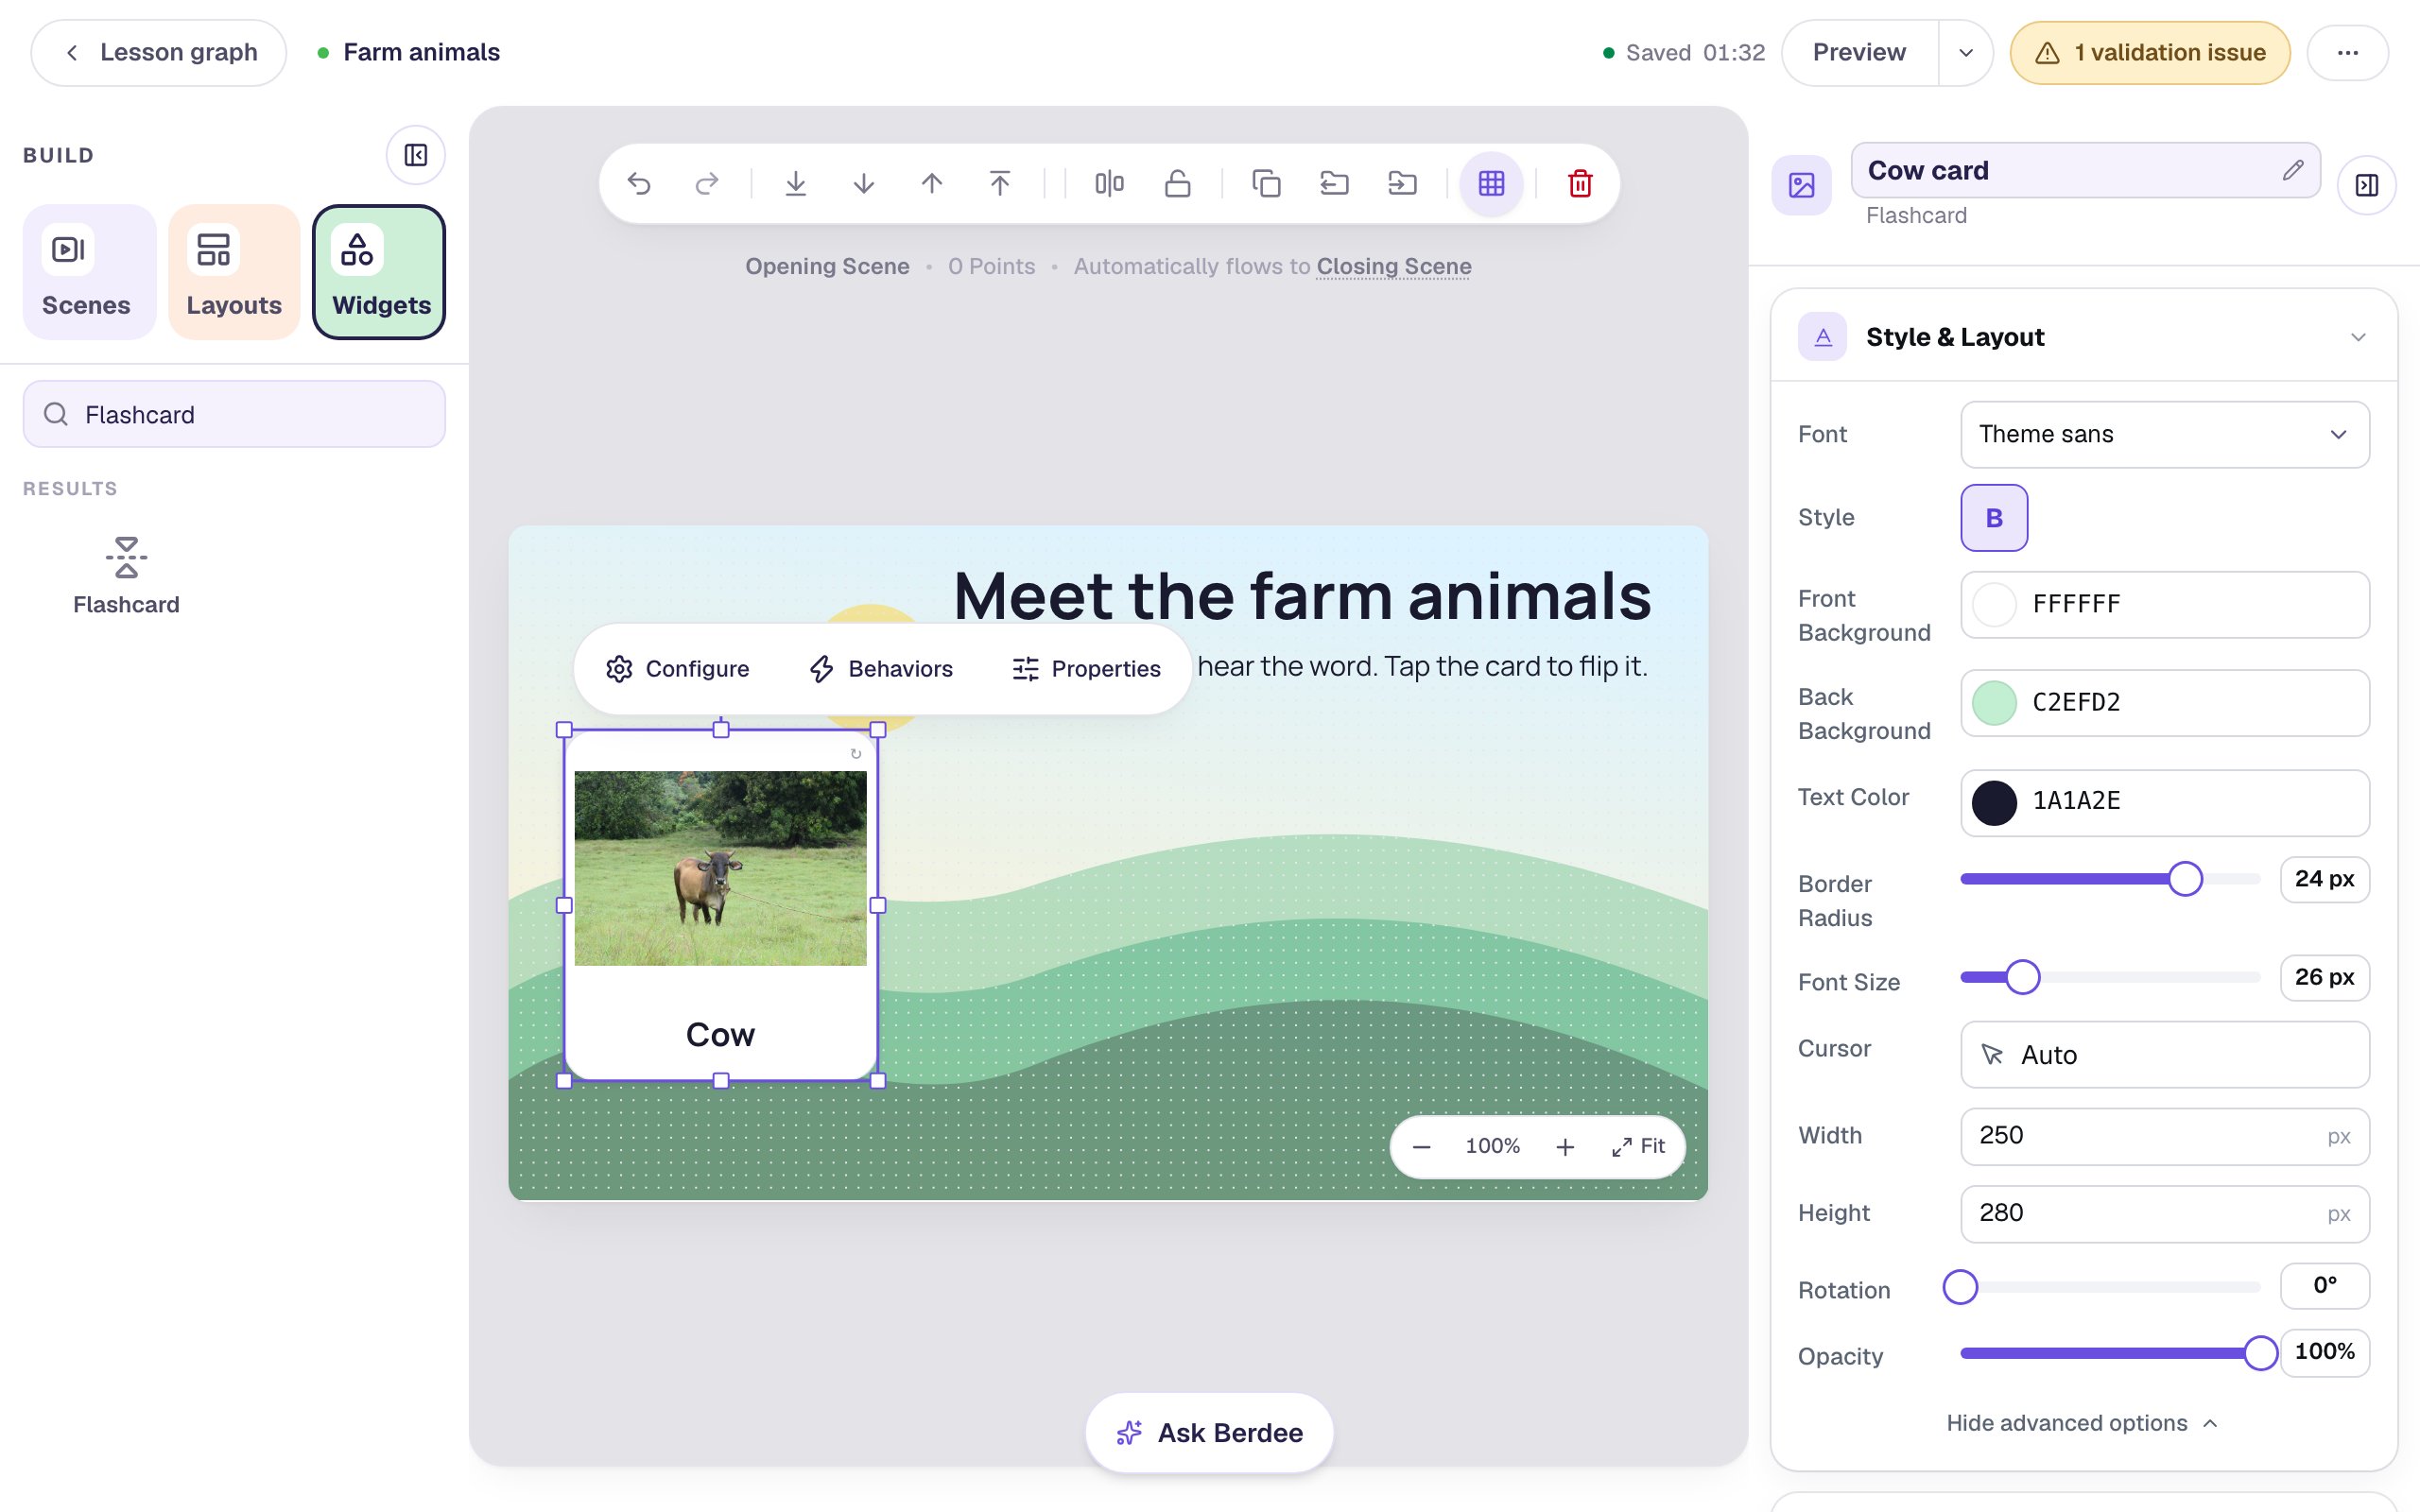
Click Save, then rename the card Cow card by clicking its name at the top of the properties panel. With the card selected, open Style & Layout:
- Set Font Size to
26and turn on bold (B). - Set Border Radius to
24for soft corners. - Click the Back Background colour and pick a soft mint (
#c2efd2). Leave Front Background white. - Click Show more options and set Width to
250and Height to280, so the photo and the word both have room.
Drag the card to the left side of the scene, under the heading.
Step 4: Turn on Read the card aloud
Click ⚙ Configure again and scroll to Read aloud at the bottom. Turn on Read the card aloud.
Leave Voice on Narration voice and click Generate audio for both sides. Berdee records the front ("Cow") and the back ("A cow says moo. It gives us milk.") in the lesson's narration voice. When it's done, the line under the button says 2 of 2 sides have audio. Click Save.
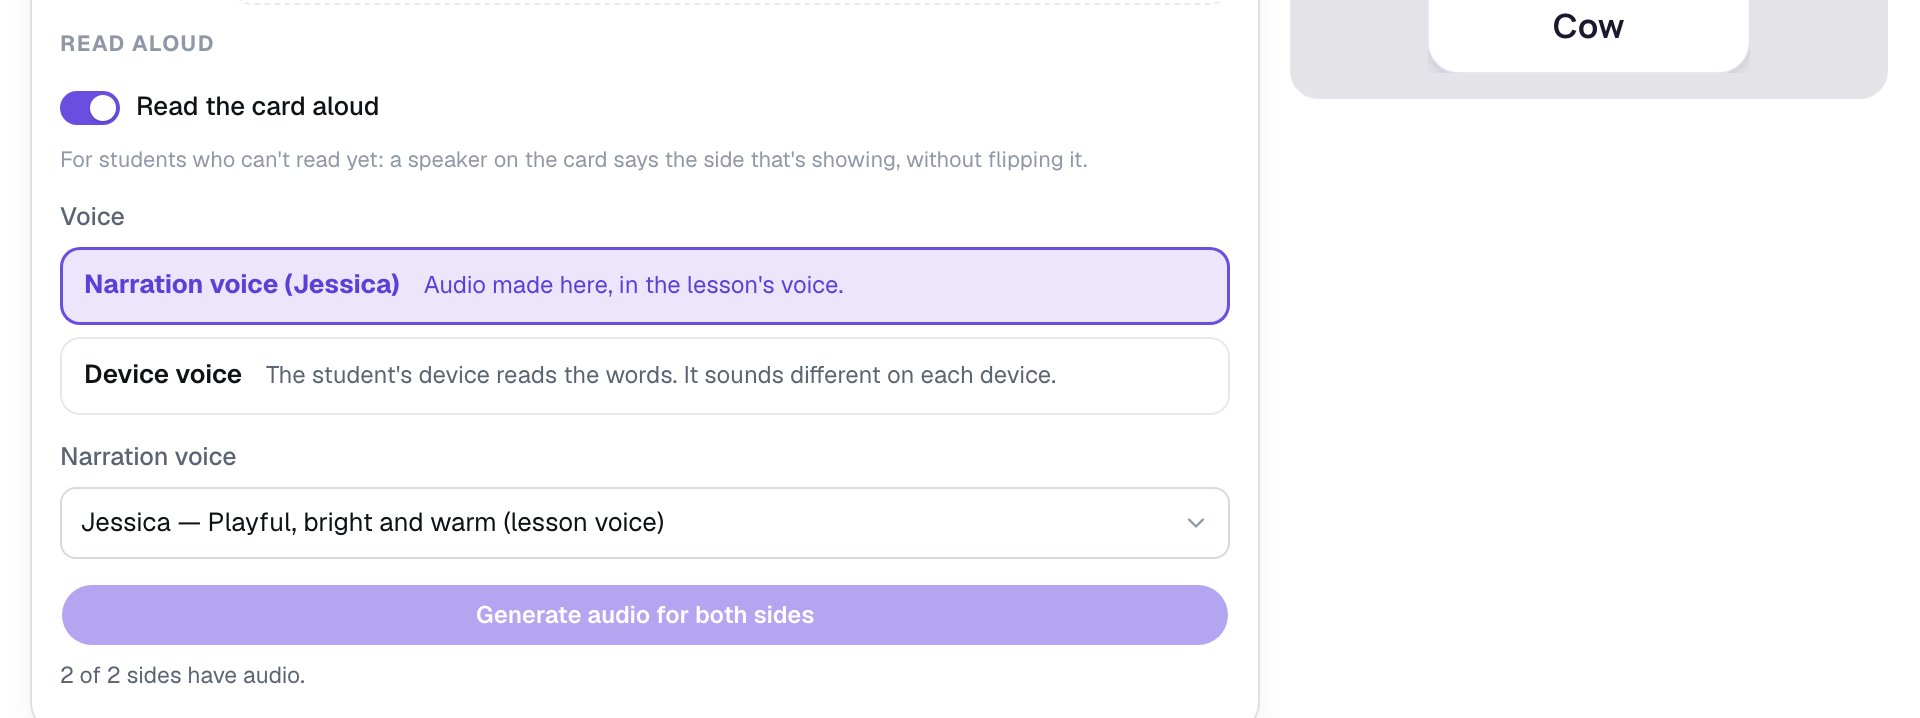
A few things worth knowing:
- Spoken words. With read-aloud on, each side gets a small Spoken words box under its text. Leave it empty and the speaker says the text. Type something else and it says that instead, such as
It's a cow!. Say nothing keeps one side quiet. - Device voice is the other choice. The student's tablet or computer reads the words in its own voice, so there's nothing to generate, but it sounds different on every device. Narration clips come from your plan's text-to-speech allowance, which the Free plan doesn't include: on Free, choose Device voice. See AI and Voice.
- Change a word, generate again. If you edit a side after making its clip, that side goes back to the device's voice until you press Generate audio for both sides again. Publishing reminds you.
Step 5: Copy the card for the pig and the sheep
Every card should look the same, so copy the one you styled. With Cow card selected, press ⌘ D (Ctrl + D on Windows). The copy lands beside the original with its style and read-aloud setting. Drag it to the middle, then click ⚙ Configure:
- Click the image button next to Front Image to change the photo, search
pig on a farm, and import a photo of one pig. - Change Front Text to
Pigand Back Text toA pig says oink. It rolls in mud to keep cool. - Click Generate audio for both sides. The copy came with the cow's clips, which no longer match its words.
- Click Save, and rename the card
Pig card.
Do the same for the right-hand card: a photo of sheep (sheep in a meadow), Sheep on the front, A sheep says baa. Its wool keeps us warm. on the back, new audio, named Sheep card.
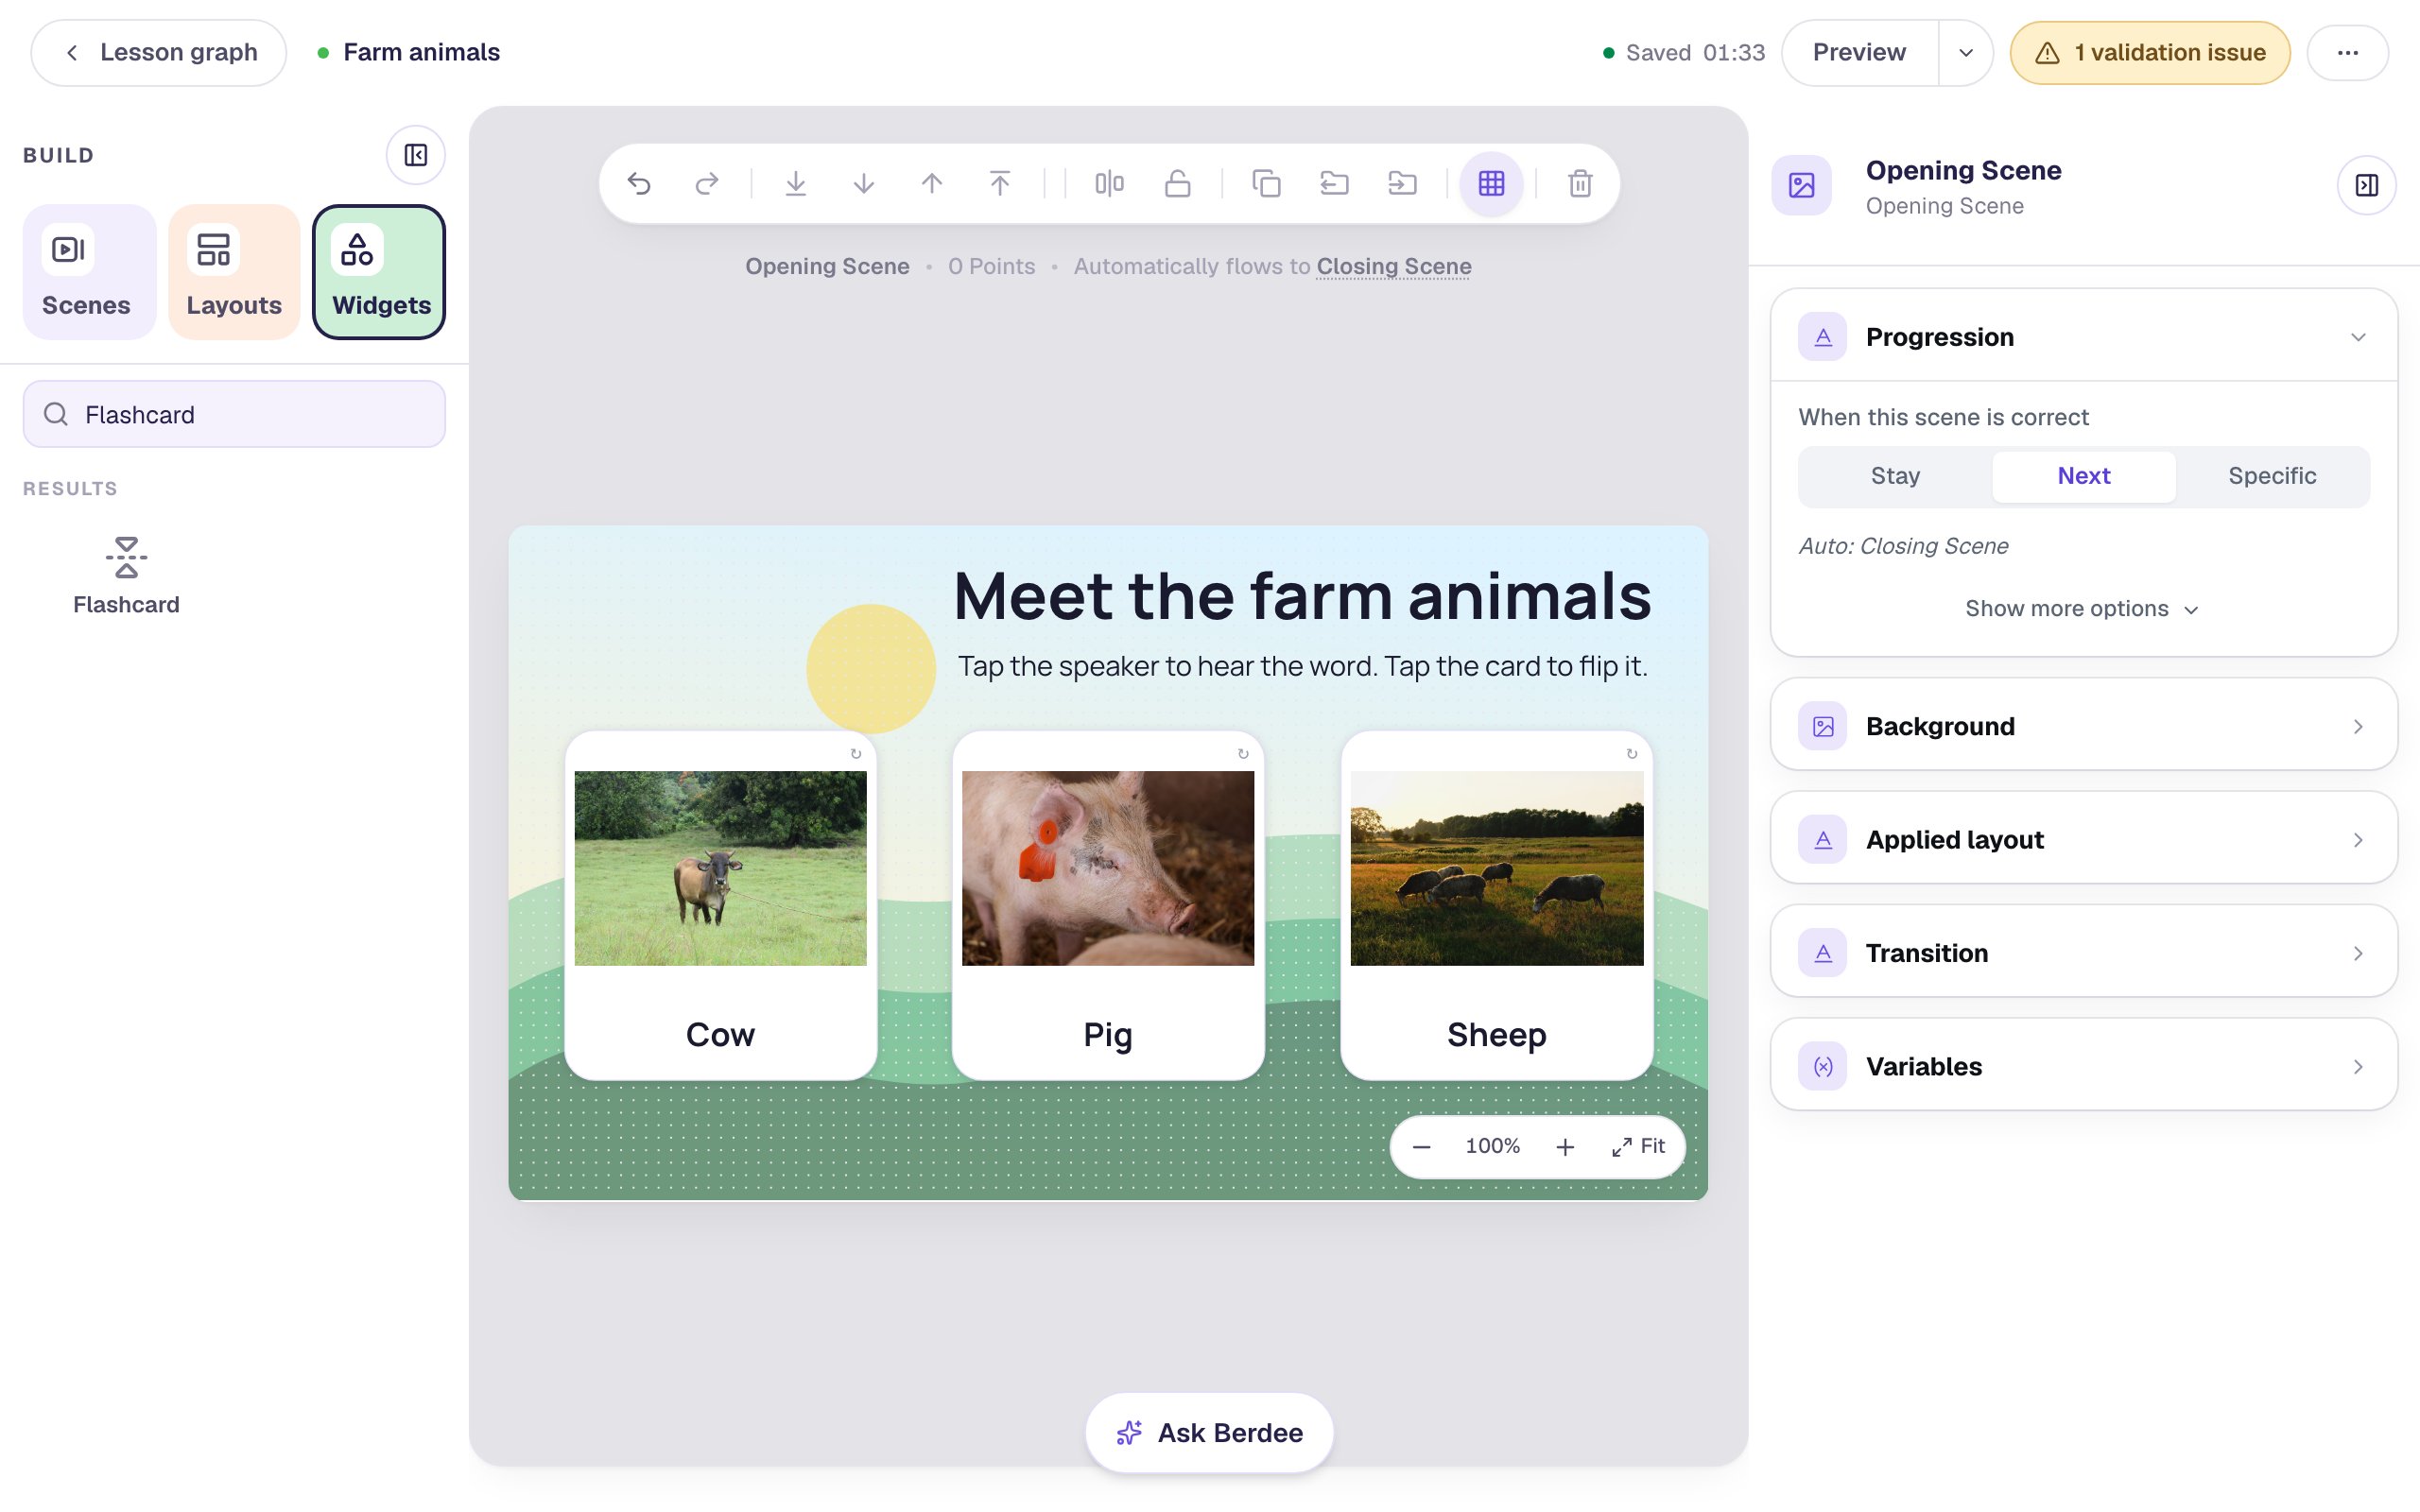
Don't skip the third step. Berdee won't play the cow's clips on the pig card: a side whose words changed is read by the device's voice until you generate its audio again, and publishing reminds you about any side that's missing its clip.
Step 6: Add a Next button
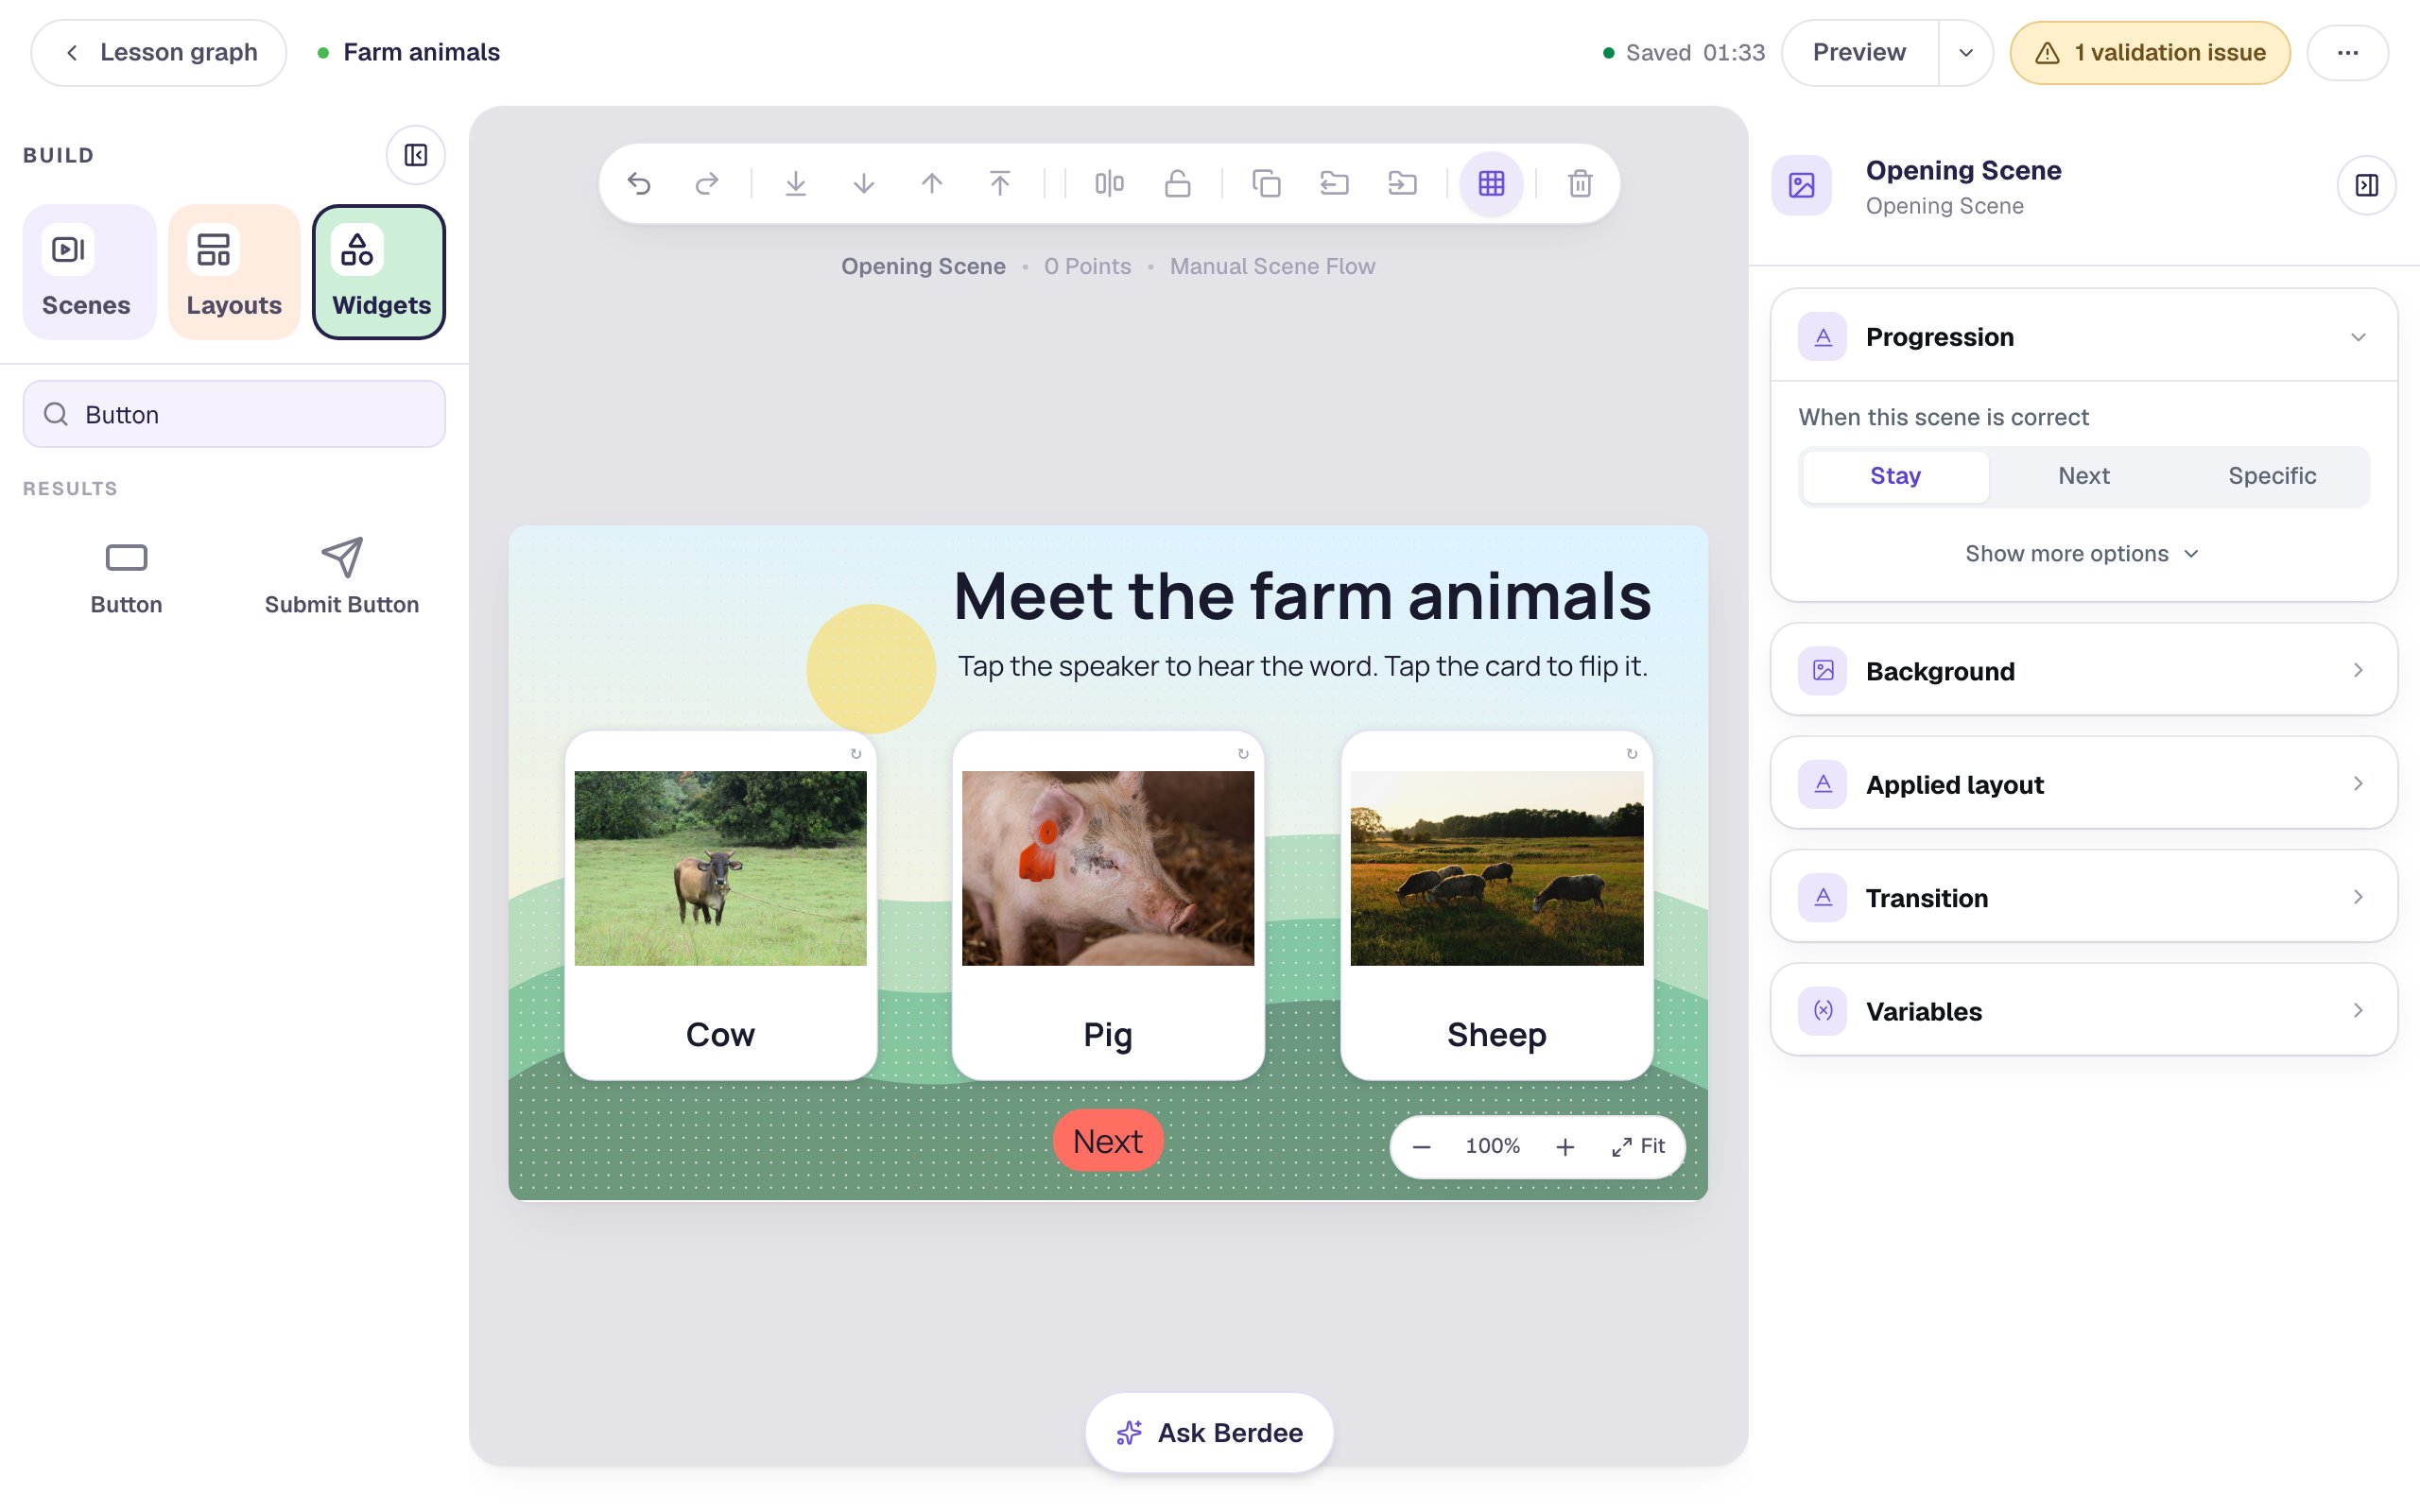
Click an empty spot on the scene and, in Progression, change When this scene is correct from Next to Stay. Flashcards aren't graded, so the student moves on with a button instead.
Add a Button, click ⚙ Configure, change its Label to Next, and click Save. Click Behaviors above it, then Make this a "Next" button, check that Goes to says Closing Scene, and click Add behavior. Set its Font Size to 26 and drag it under the middle card.
To keep Next hidden until every card has been flipped, give it a Visibility rule, as in Make a deck of vocabulary flashcards.
Step 7: Try it as a student
Click Preview. Each card now has a speaker in its top-right corner.
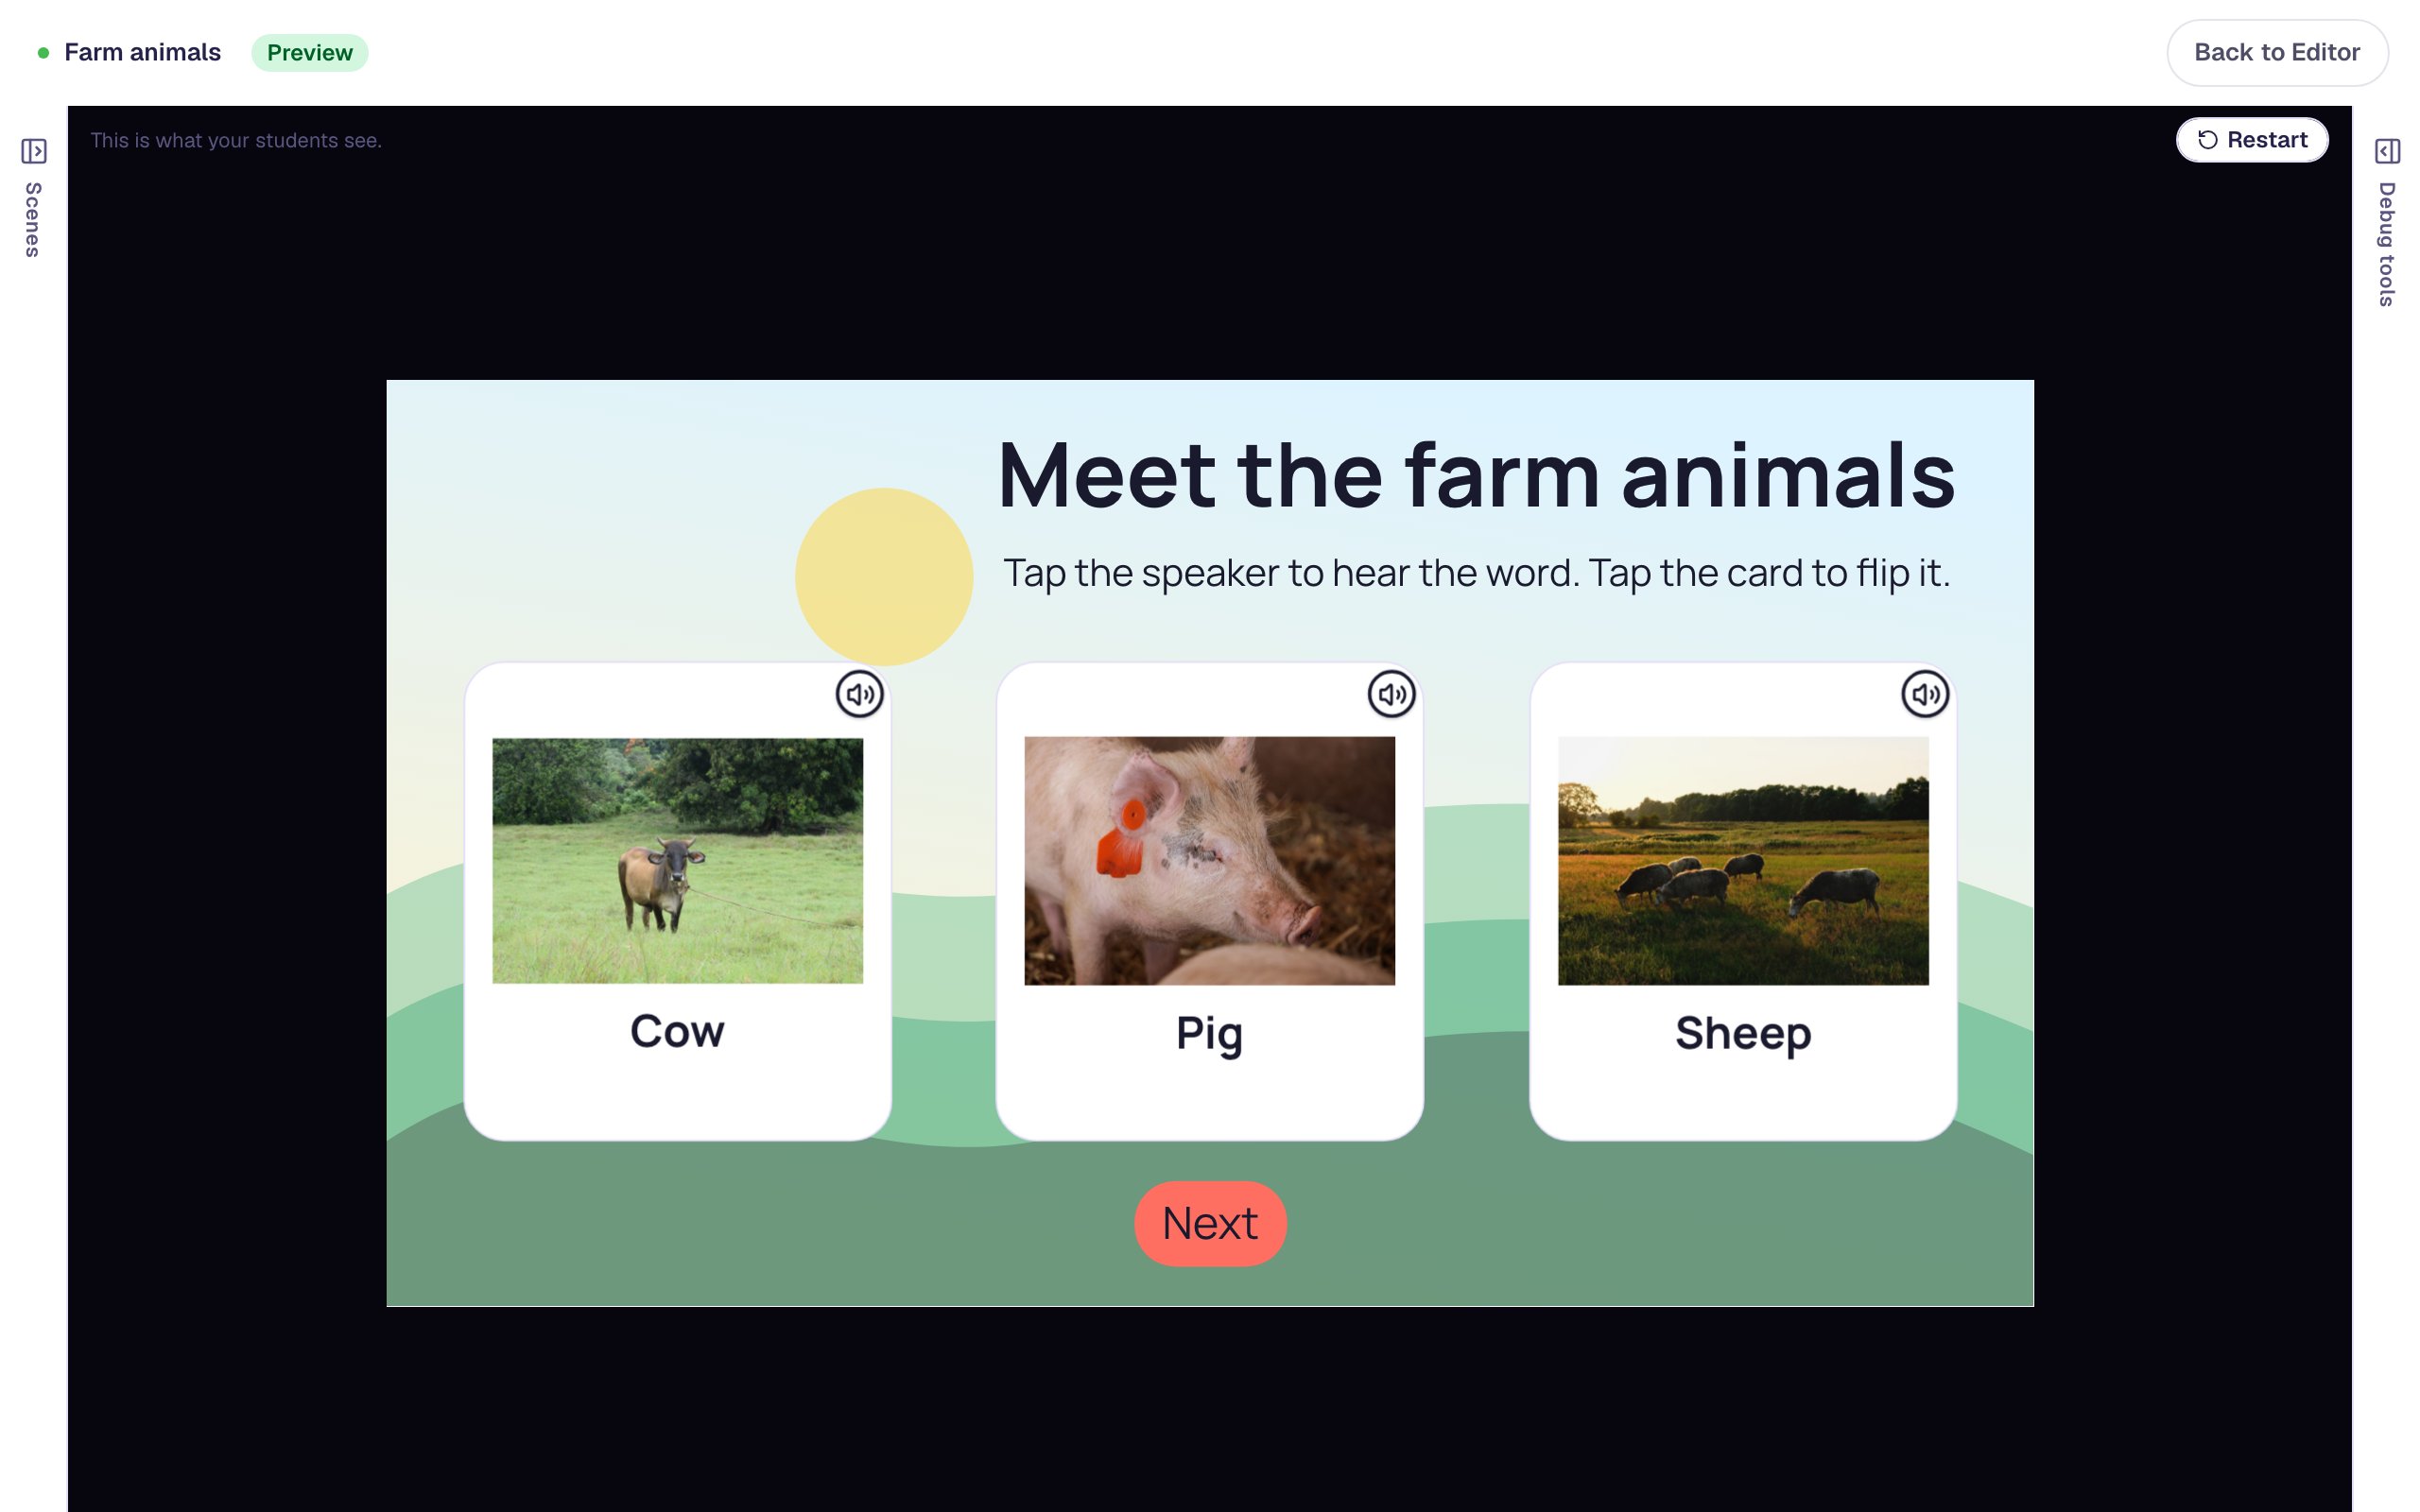
Tap the speaker on the cow card to hear "Cow". Tapping the speaker never flips the card. Tap anywhere else on the card to turn it over, then tap the speaker again to hear the back:
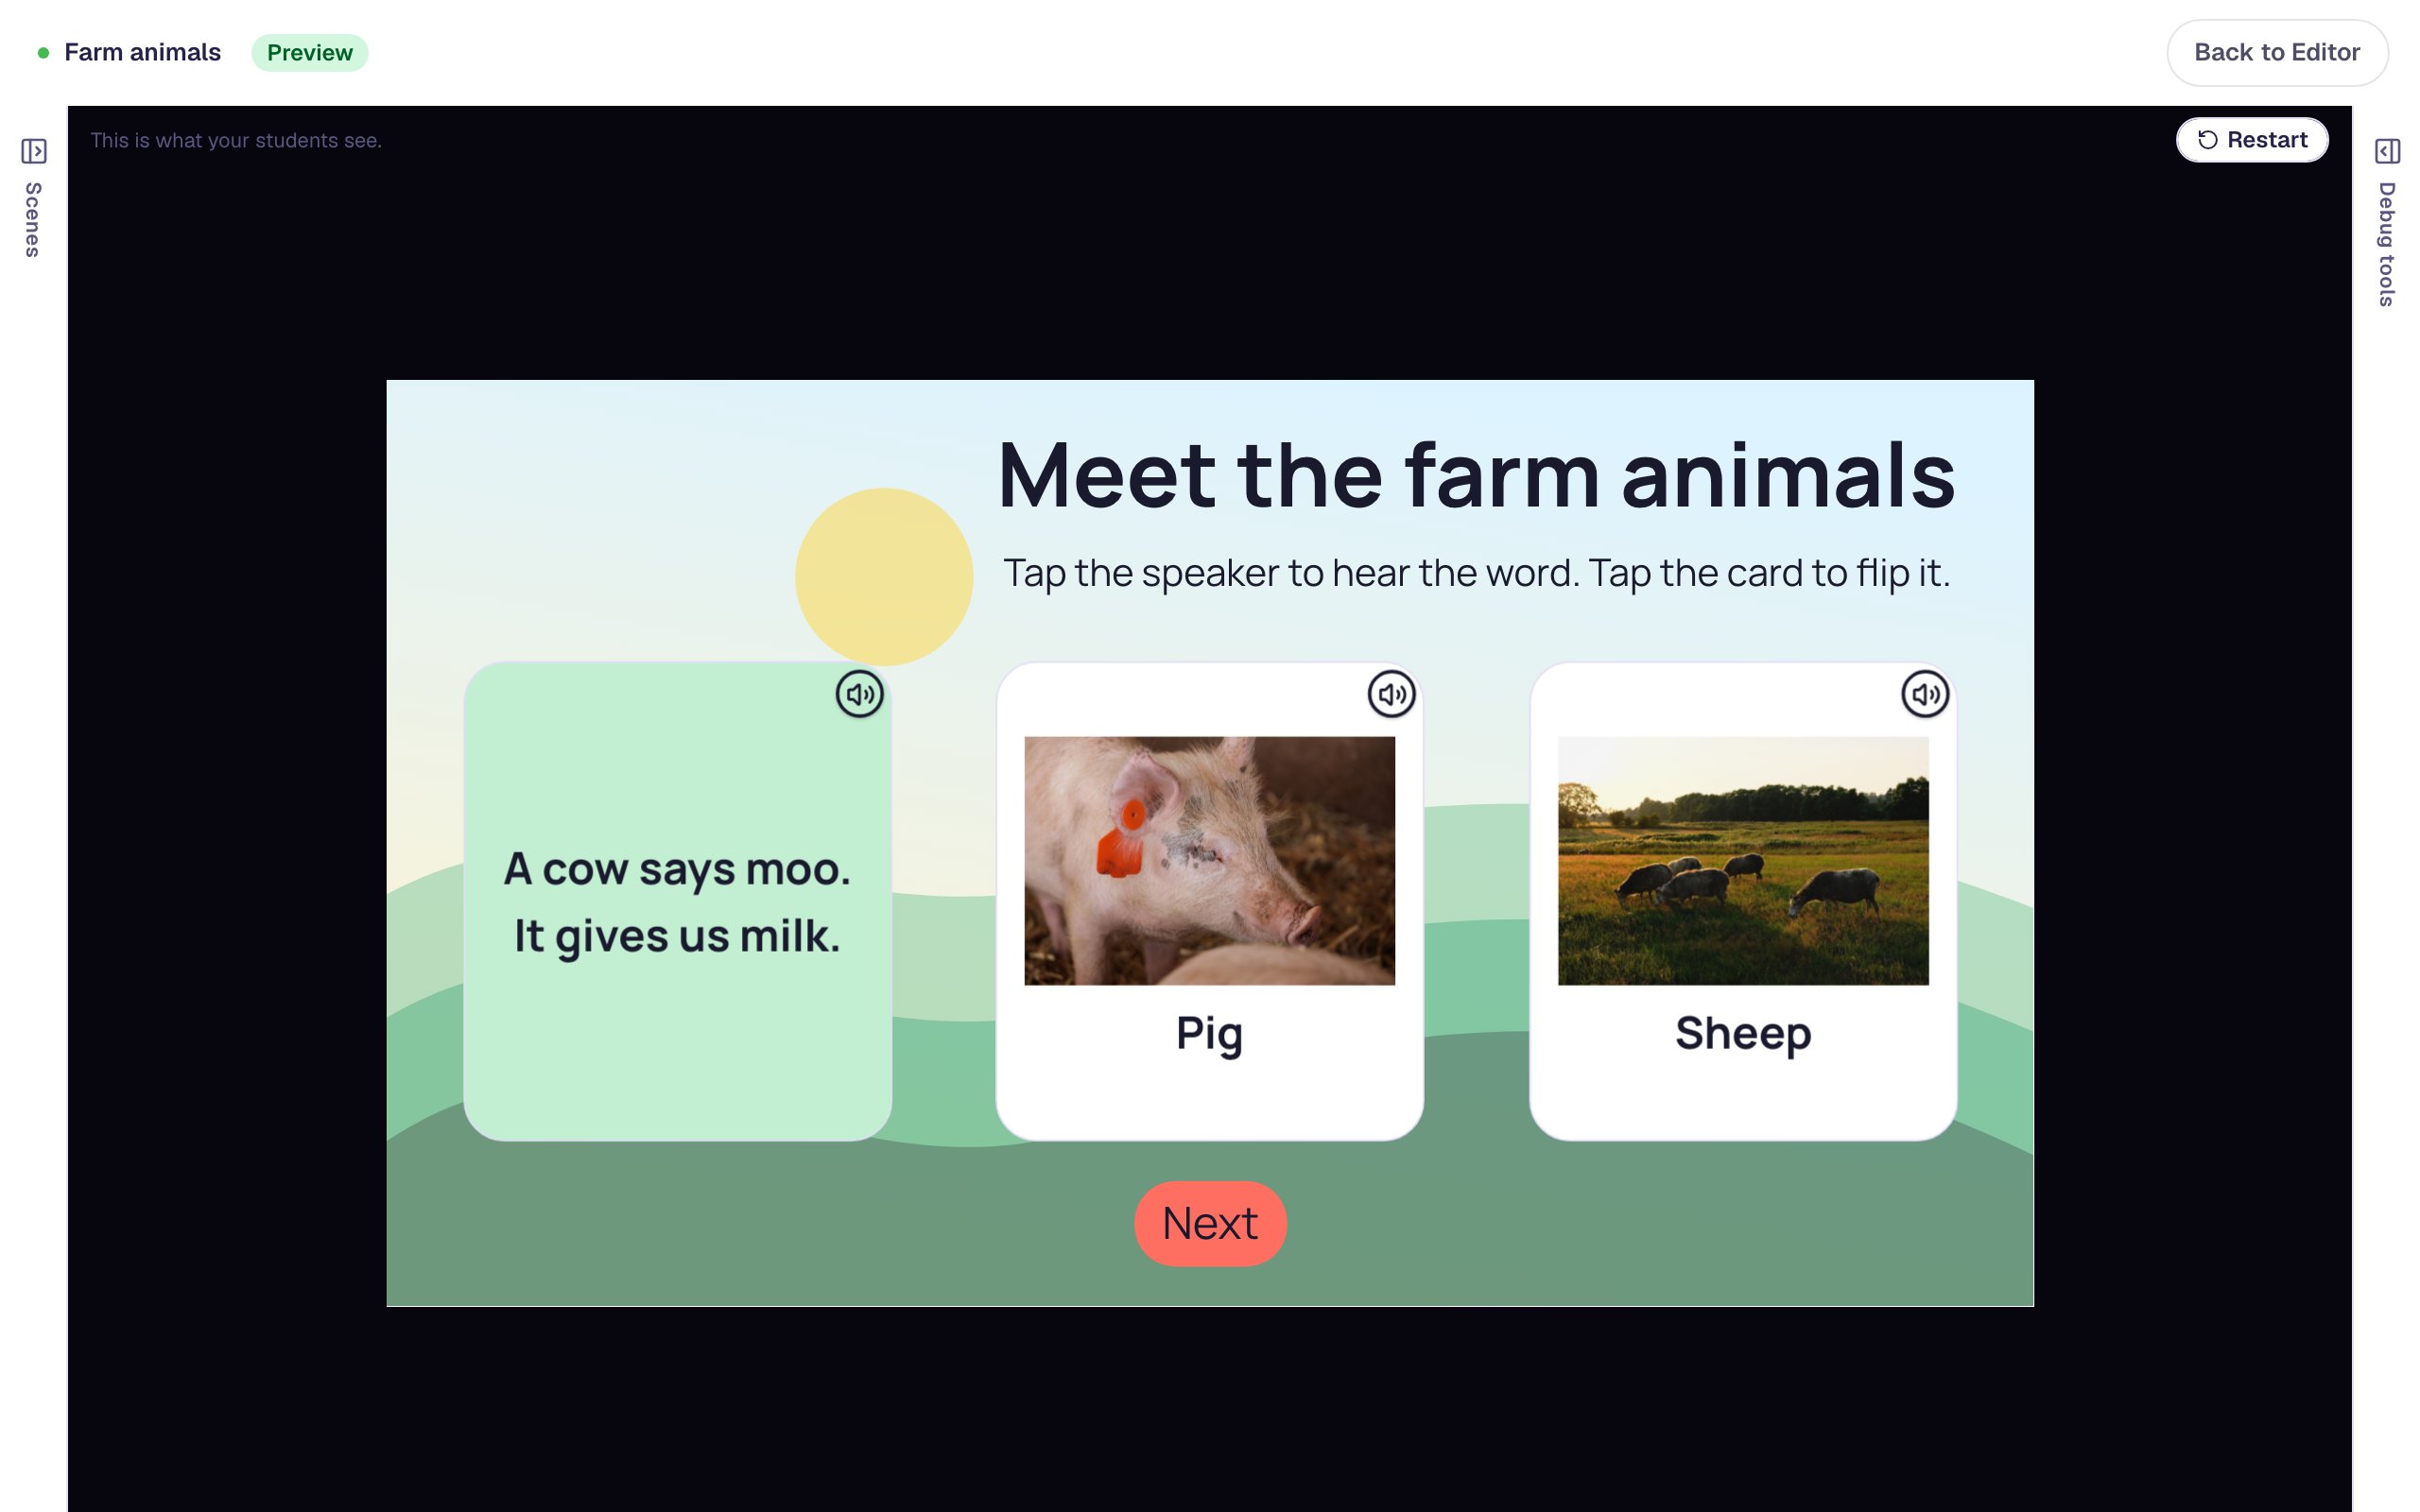
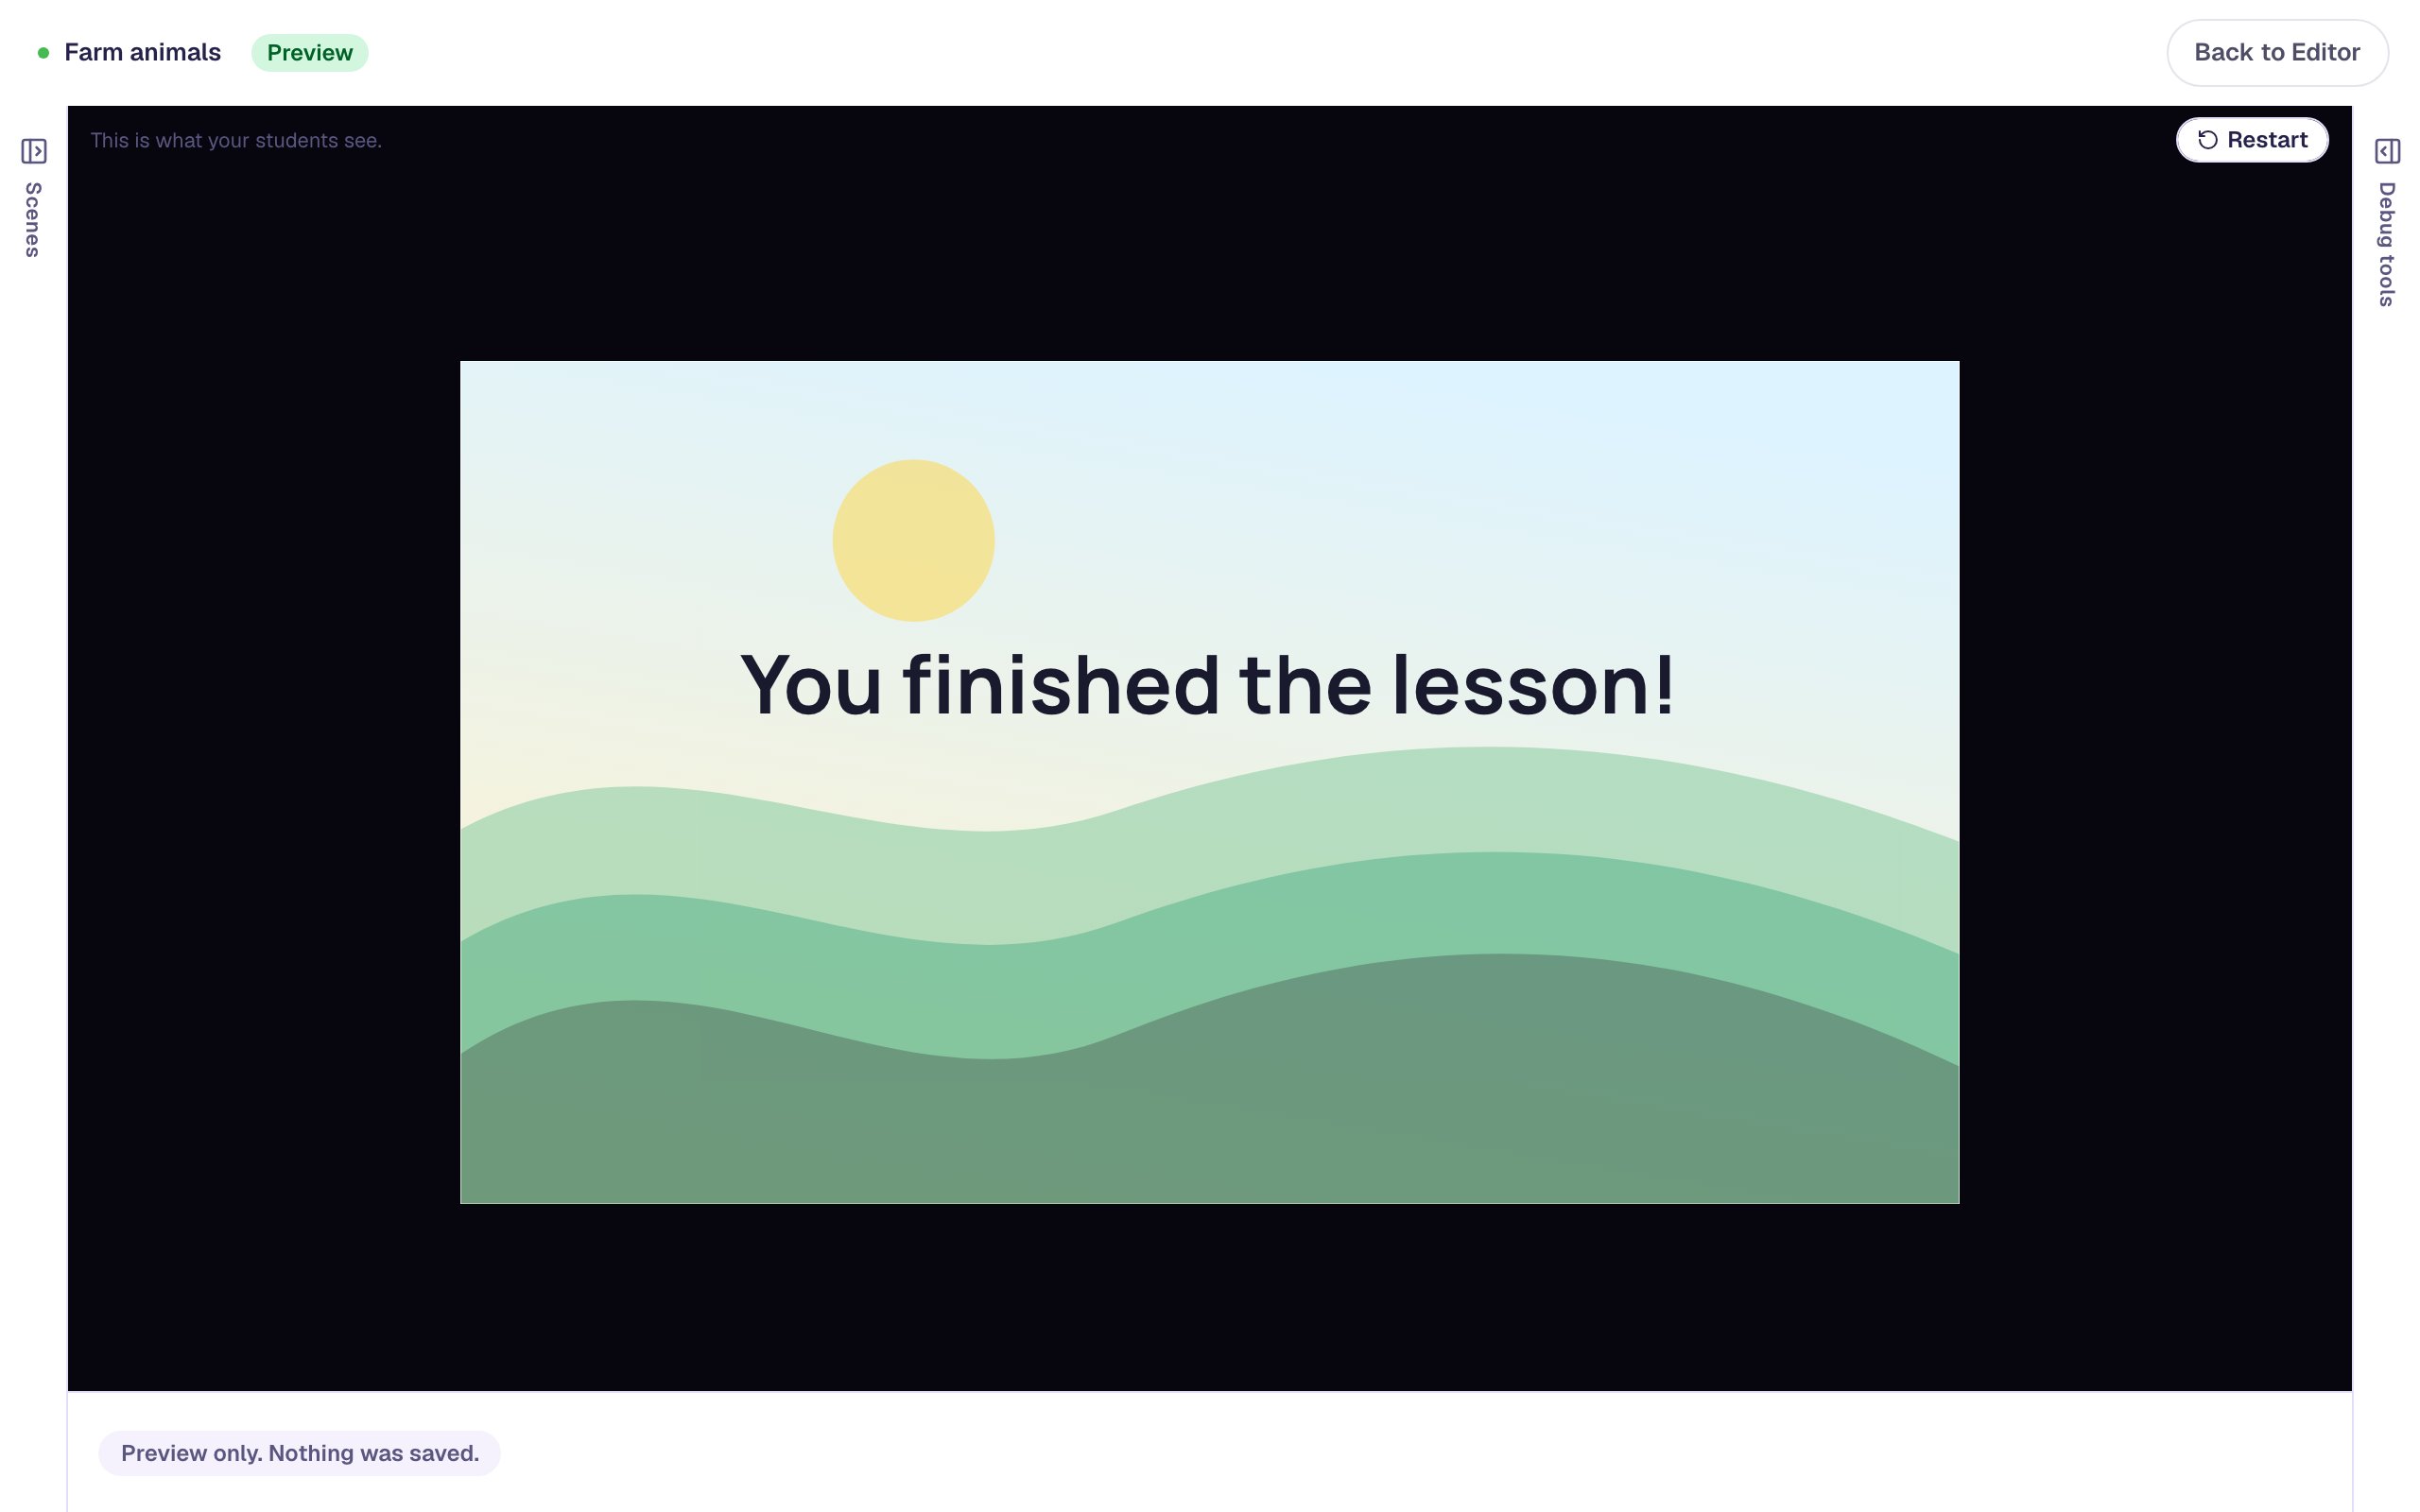
Press Next to reach the ending. Flashcards aren't graded, so it doesn't show a score.
Keyboard users can do the same without a mouse: Tab to a card, press H to hear the side that's showing, and Space or Enter to flip it. Hearing a side is never recorded as an answer.
What you built
A scene of picture flashcards for children who can't read yet, with:
- a stock photo and the animal's name on the front of each card, and a short fact on a mint back,
- Read the card aloud on every card, with narration clips for both sides, so a speaker in the corner says whichever side is showing,
- one card built and styled, then copied with ⌘ D, with a new photo, new words and new audio for each copy, and
- a Next button on a Stay scene.
The same pattern works for anything a young child can name from a picture: shapes, colours, feelings, community helpers. Once the cards are learned, check them with a question that also reads aloud: Let pre-readers hear every answer choice builds a picture question where every answer says its own name. Before you publish, the lesson also needs an I'm done button (a Submit Button that submits the Lesson); that's the one validation issue showing at the top of the studio.
Make this lesson yours
Add the lesson you just watched being built to your account, then change it for your class: your questions, your pictures, your colors.
Free to sign up, and you'll come straight back here. I have an account