Ask a short-answer question that coaches a wrong try
Build a Text Input question that accepts more than one way of writing the answer, then add a "try again" message that appears only after a wrong answer.
- Level
- Beginner
- Time
- About 10 min
- Steps
- 7
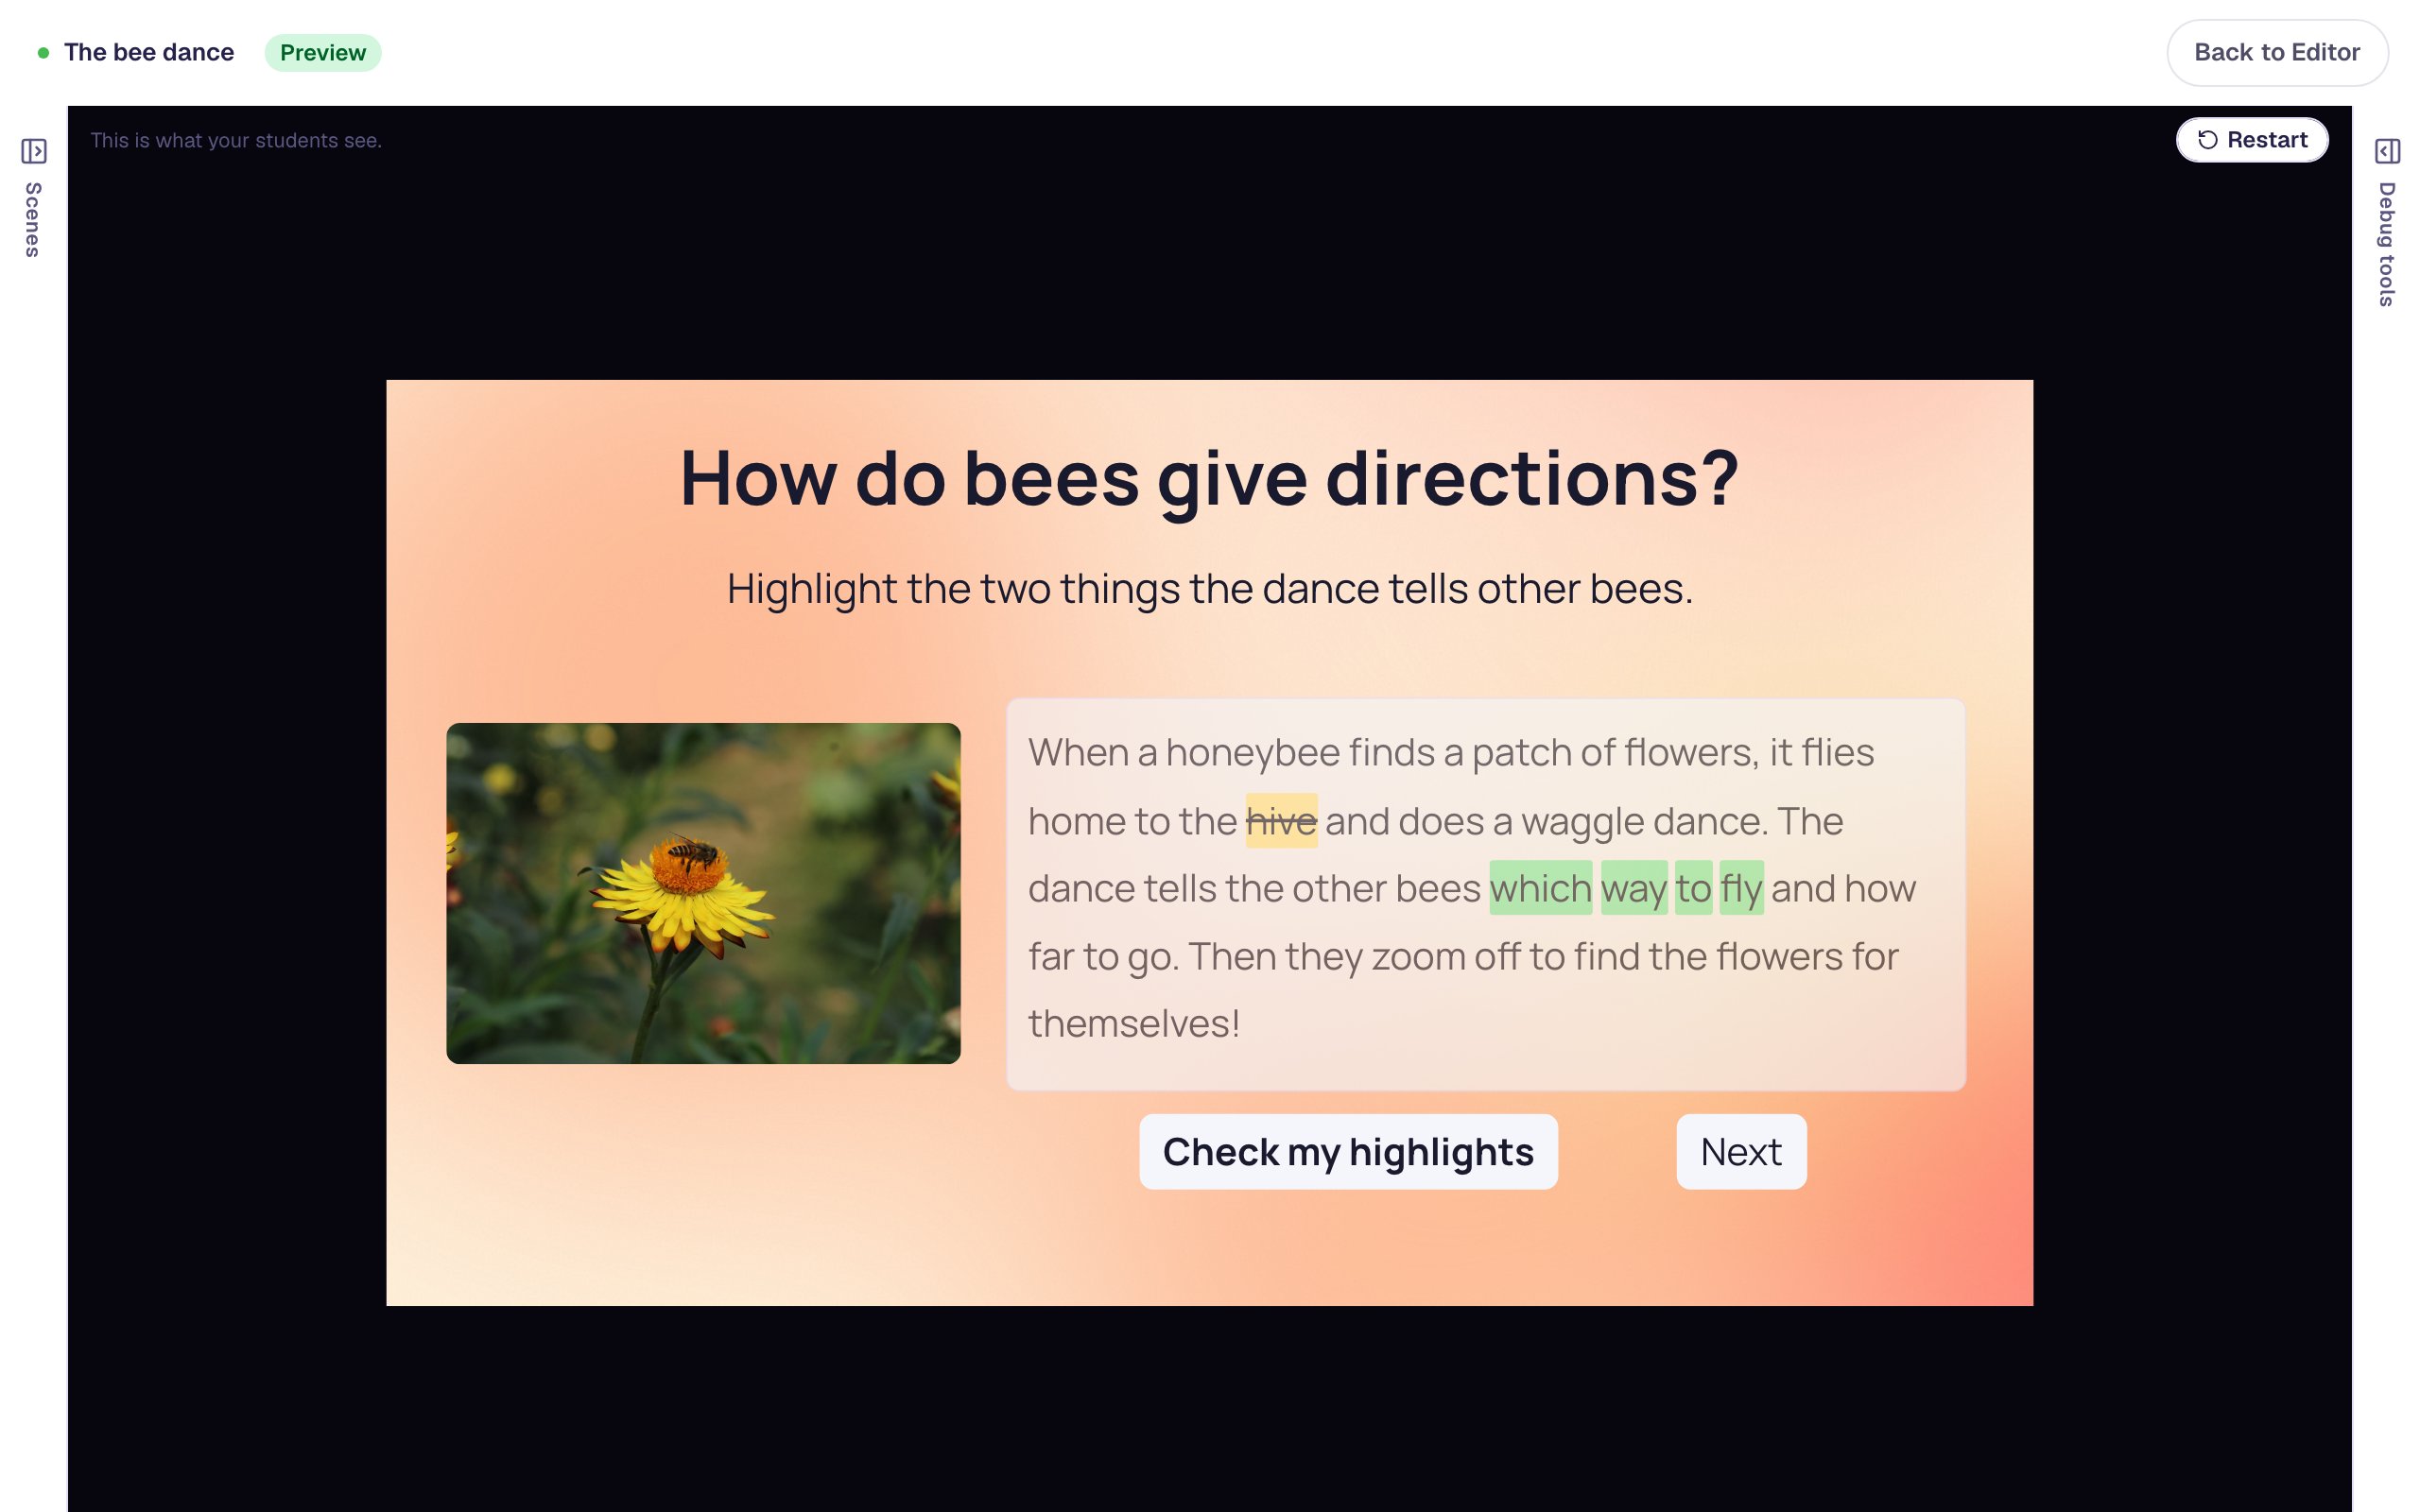
A photosynthesis question where students type the gas plants take in, both "carbon dioxide" and "CO2" count, and a wrong answer shows a hint to try again.
Get the finished lesson
Skip straight to the result, or keep it open beside the steps. Add this tutorial's lesson to your account and explore how it works in the studio.
Free to sign up, and you'll come straight back here. I have an account
A multiple-choice question lets a student recognize the answer. A short-answer question makes them recall it, which tells you much more about what they know. In this tutorial you'll build one about photosynthesis:
Plants take in one gas from the air to make their food. Which gas is it?
Students type their answer into a Text Input. You'll accept both carbon dioxide and CO2, so a right answer is never marked wrong, and add a short message that appears only after a wrong answer, so students know to try again.
If you haven't used the studio before, start with Build your first quiz question. This tutorial moves quickly through the parts it already covers.
Step 1: Set the scene
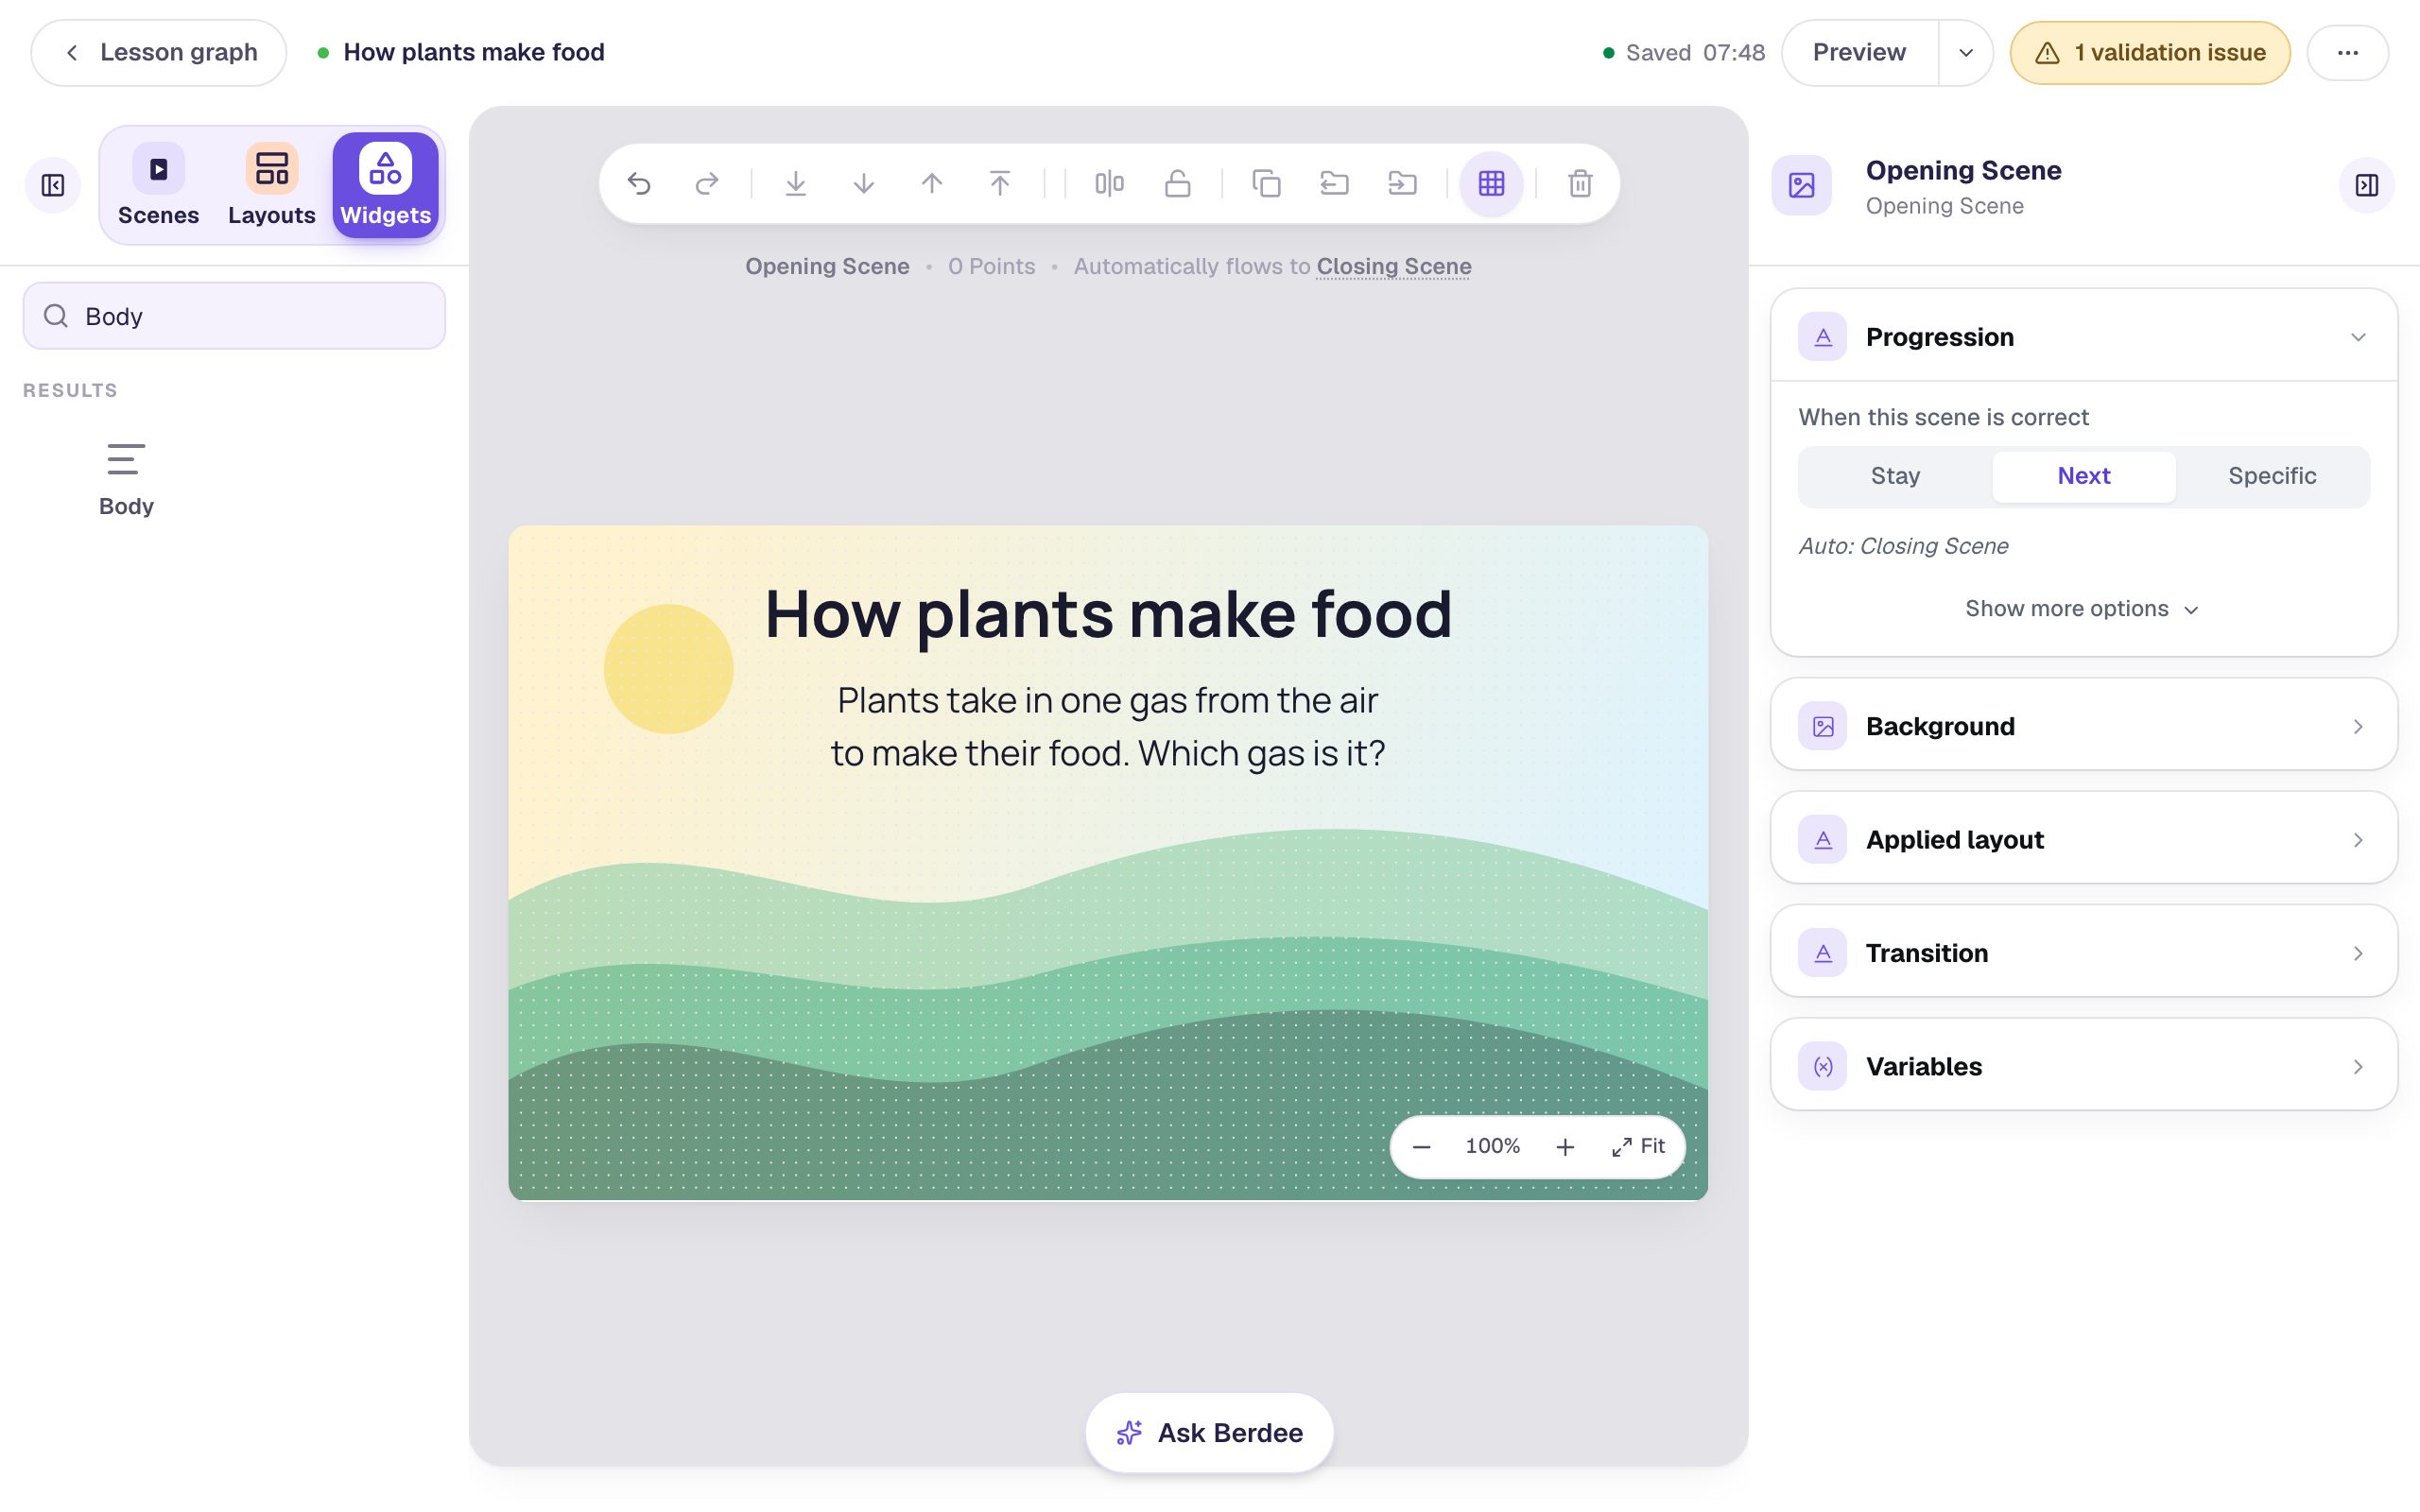
Start a blank lesson (New lesson, then Start from scratch) and name it How plants make food by clicking Untitled lesson at the top.
Give the Opening Scene a background that fits the topic. With nothing selected, open Background, click Choose a style, pick Nature, then Rolling hills, and click Apply background. If the sun lands behind where your words will go, click Randomize composition until it sits off to one side. Then select the Closing Scene in the Scenes panel and give it the same background, so the ending matches.
Back on the Opening Scene, add a Heading that says How plants make food. Under it, add a Body text with the question, Plants take in one gas from the air to make their food. Which gas is it?, and set its Font Size to 28. Press Enter after "air" while typing, so the question sits on two even lines.
Step 2: Add a Text Input and name it
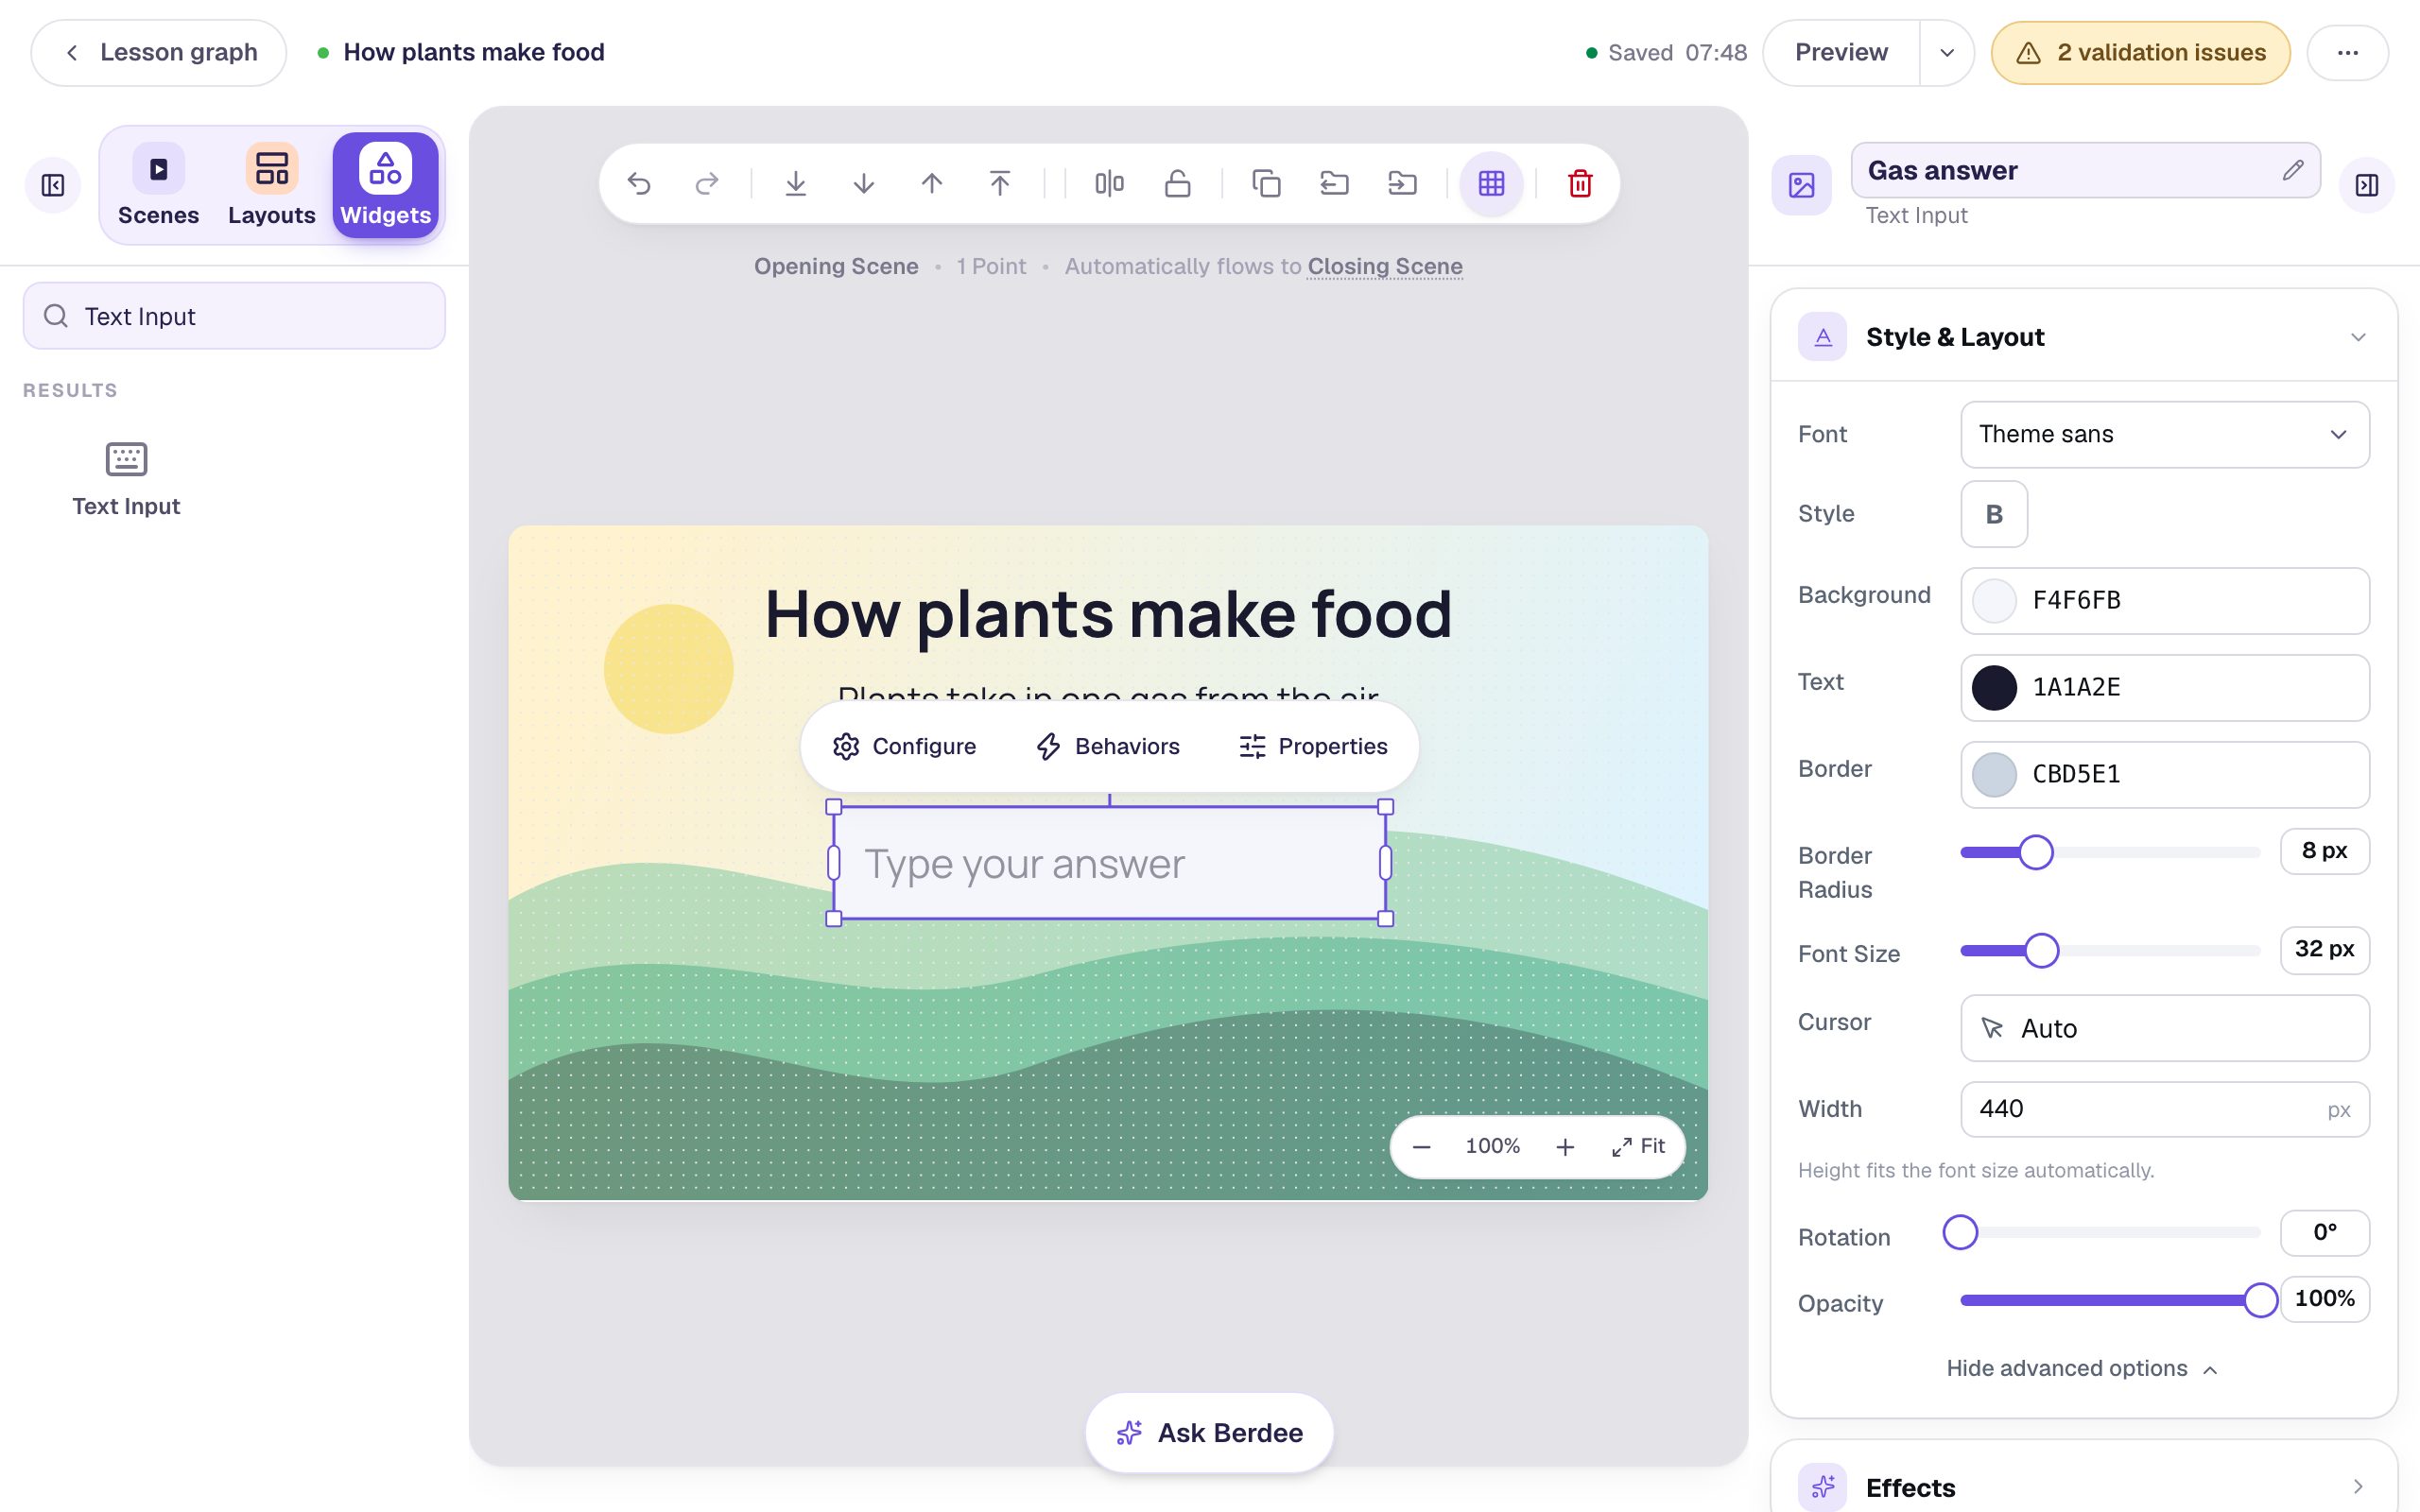
In Widgets, search for Text Input and click it. A box that says Type your answer appears on the scene.
With it selected, open Style & Layout:
- Set Font Size to
32, so students can read what they type from across the room. The box grows taller to fit; its height always follows the font size. - Set Width to
440. The width is a hint in itself: a box this size says "a word or two", not "a paragraph".
Drag the box under the question. Then give it a name you'll recognize: click the name at the top of the properties panel (it starts as Text Input 1), type Gas answer and press Enter. You'll pick this name from a list in Step 5.
Step 3: Write the answer key
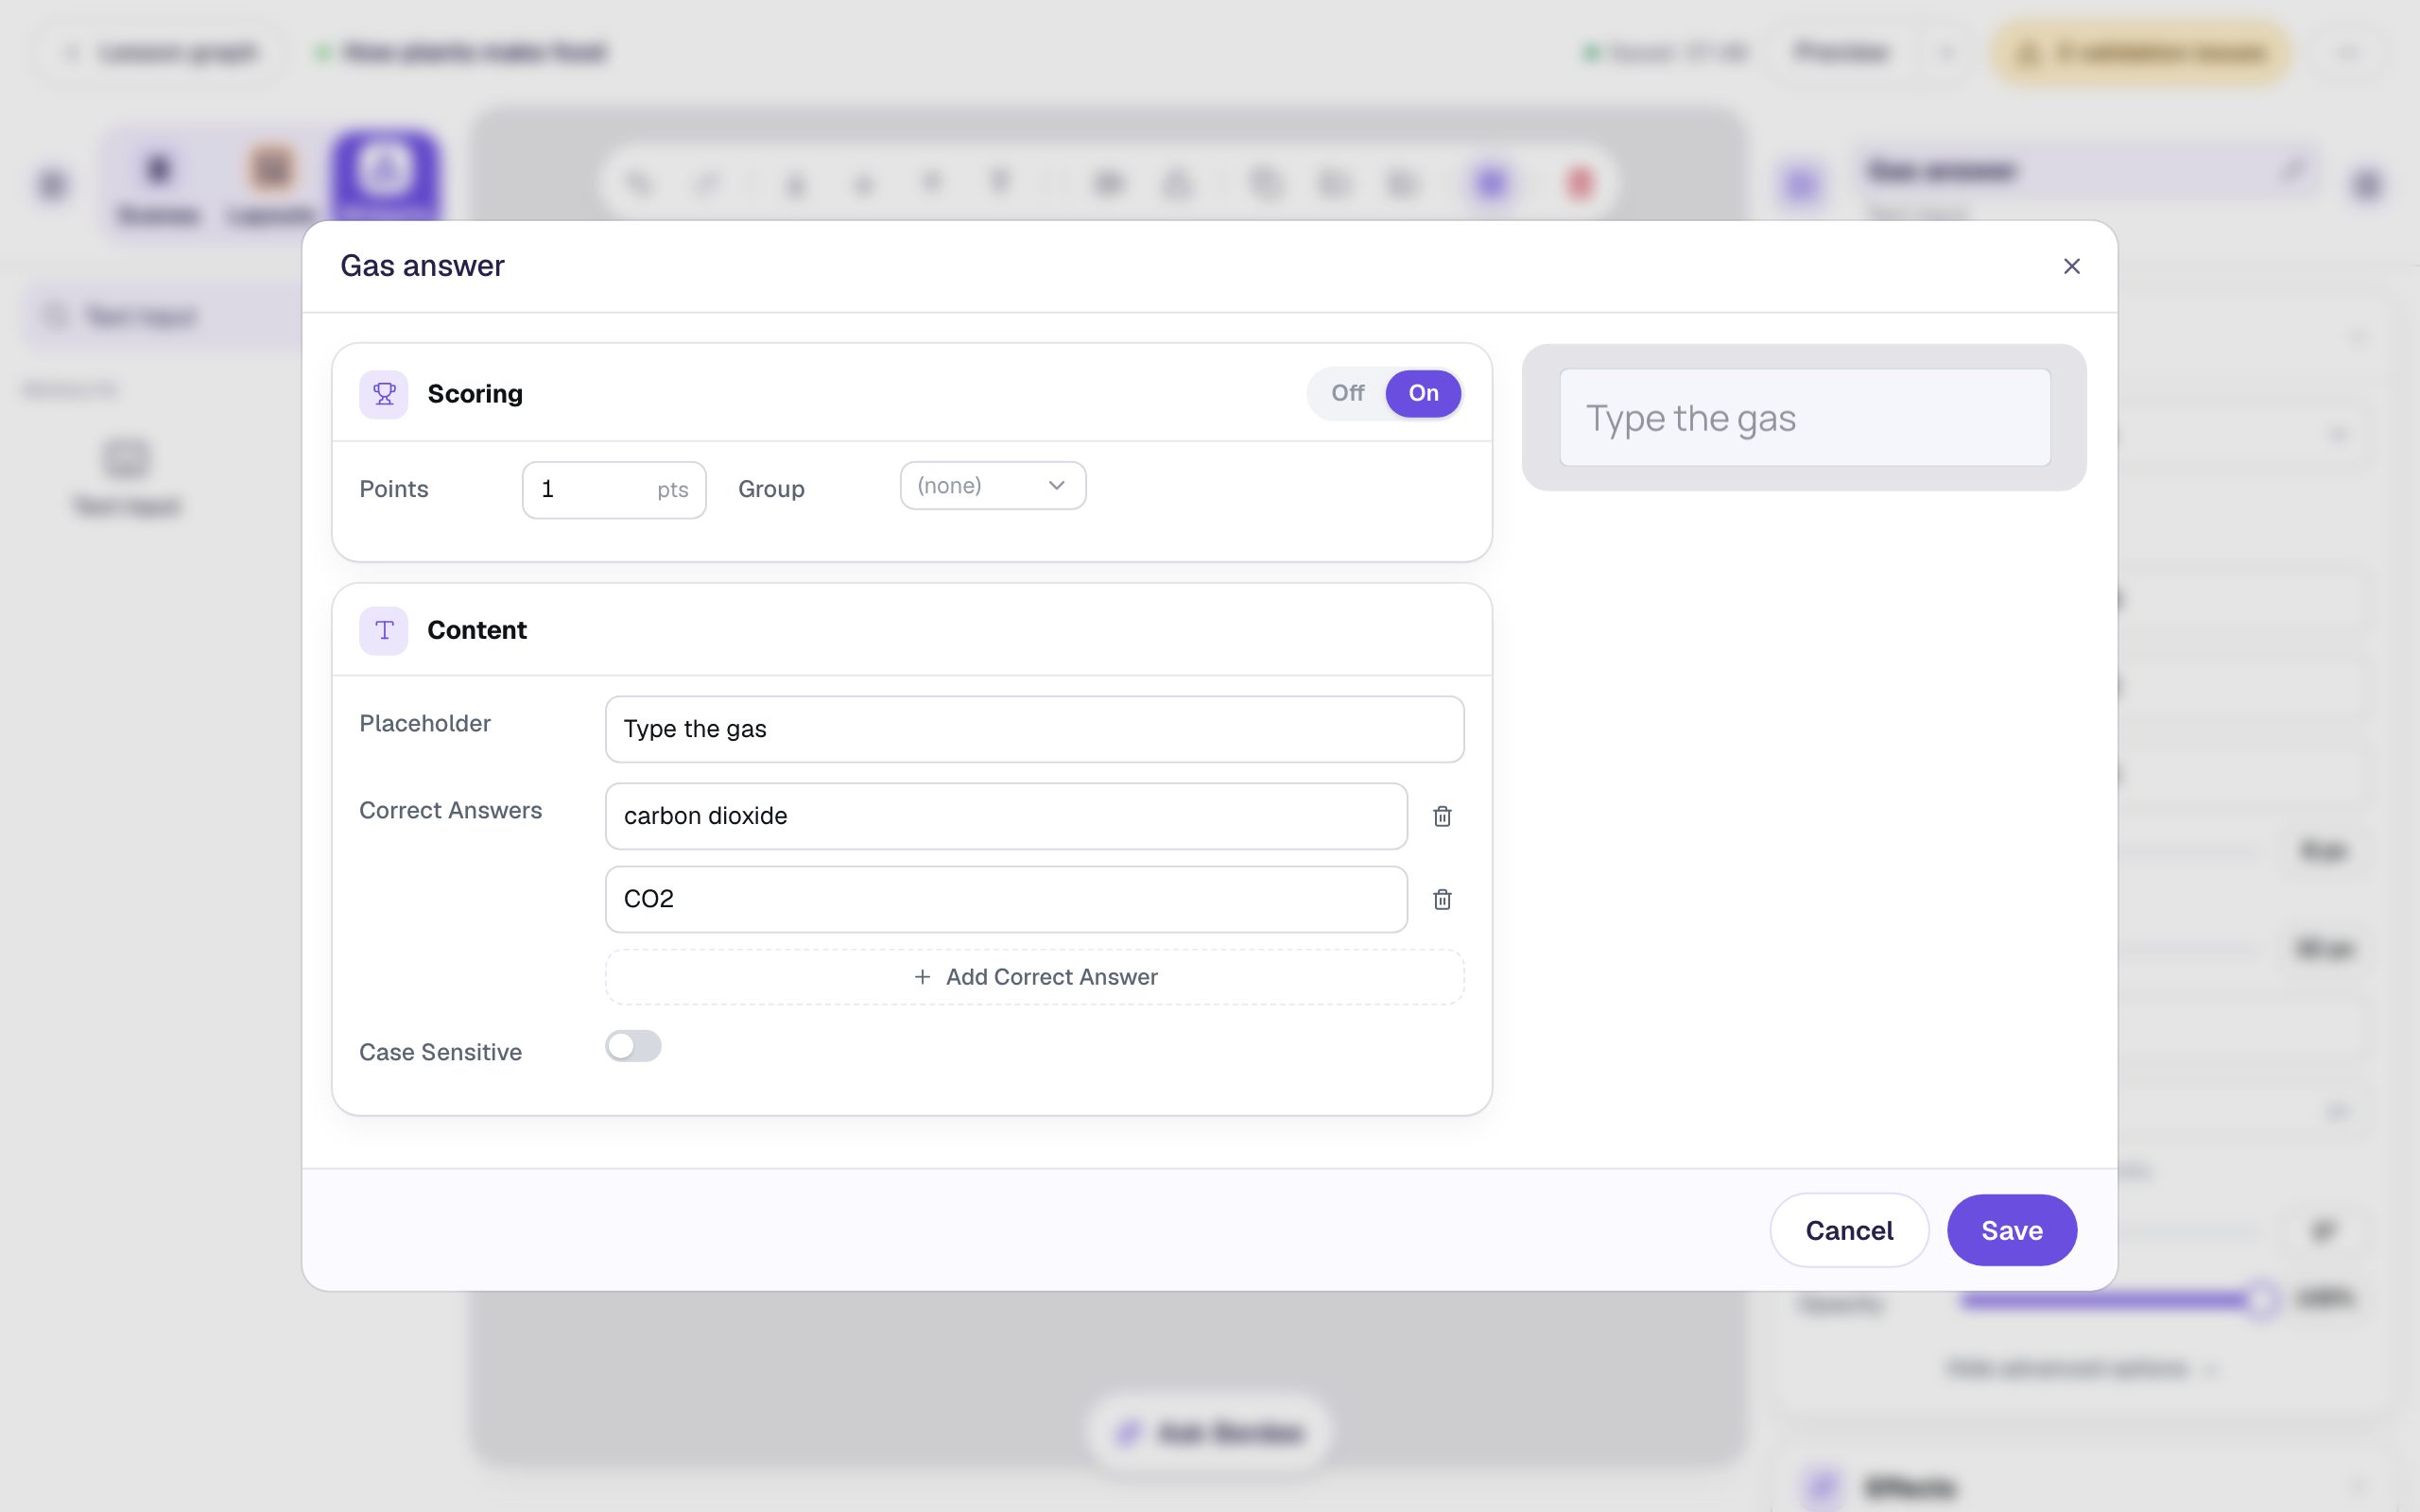
Click ⚙ Configure in the pill above the box. Everything about the question's answer lives in this window:
- Replace the Placeholder with
Type the gas. It's the faint hint students see in the empty box. Make it a cue, never the answer. - Type
carbon dioxideinto the first Correct Answers field. - Click Add Correct Answer and type
CO2into the new field.
Leave Case Sensitive off. Then Carbon Dioxide, co2 and CO2 all count, which is what you want for a science answer. Spaces before or after an answer never cost a point either, so the space a tablet keyboard sometimes adds is ignored. Scoring is already on and worth 1 point.
Click Save.
Think about what students will really type. If you'd accept a spelling ("carbon dioxid") or a different word, add it as another correct answer. A student who knows the answer should never be marked wrong by a typo you'd let pass in class.
Step 4: Write the "try again" message
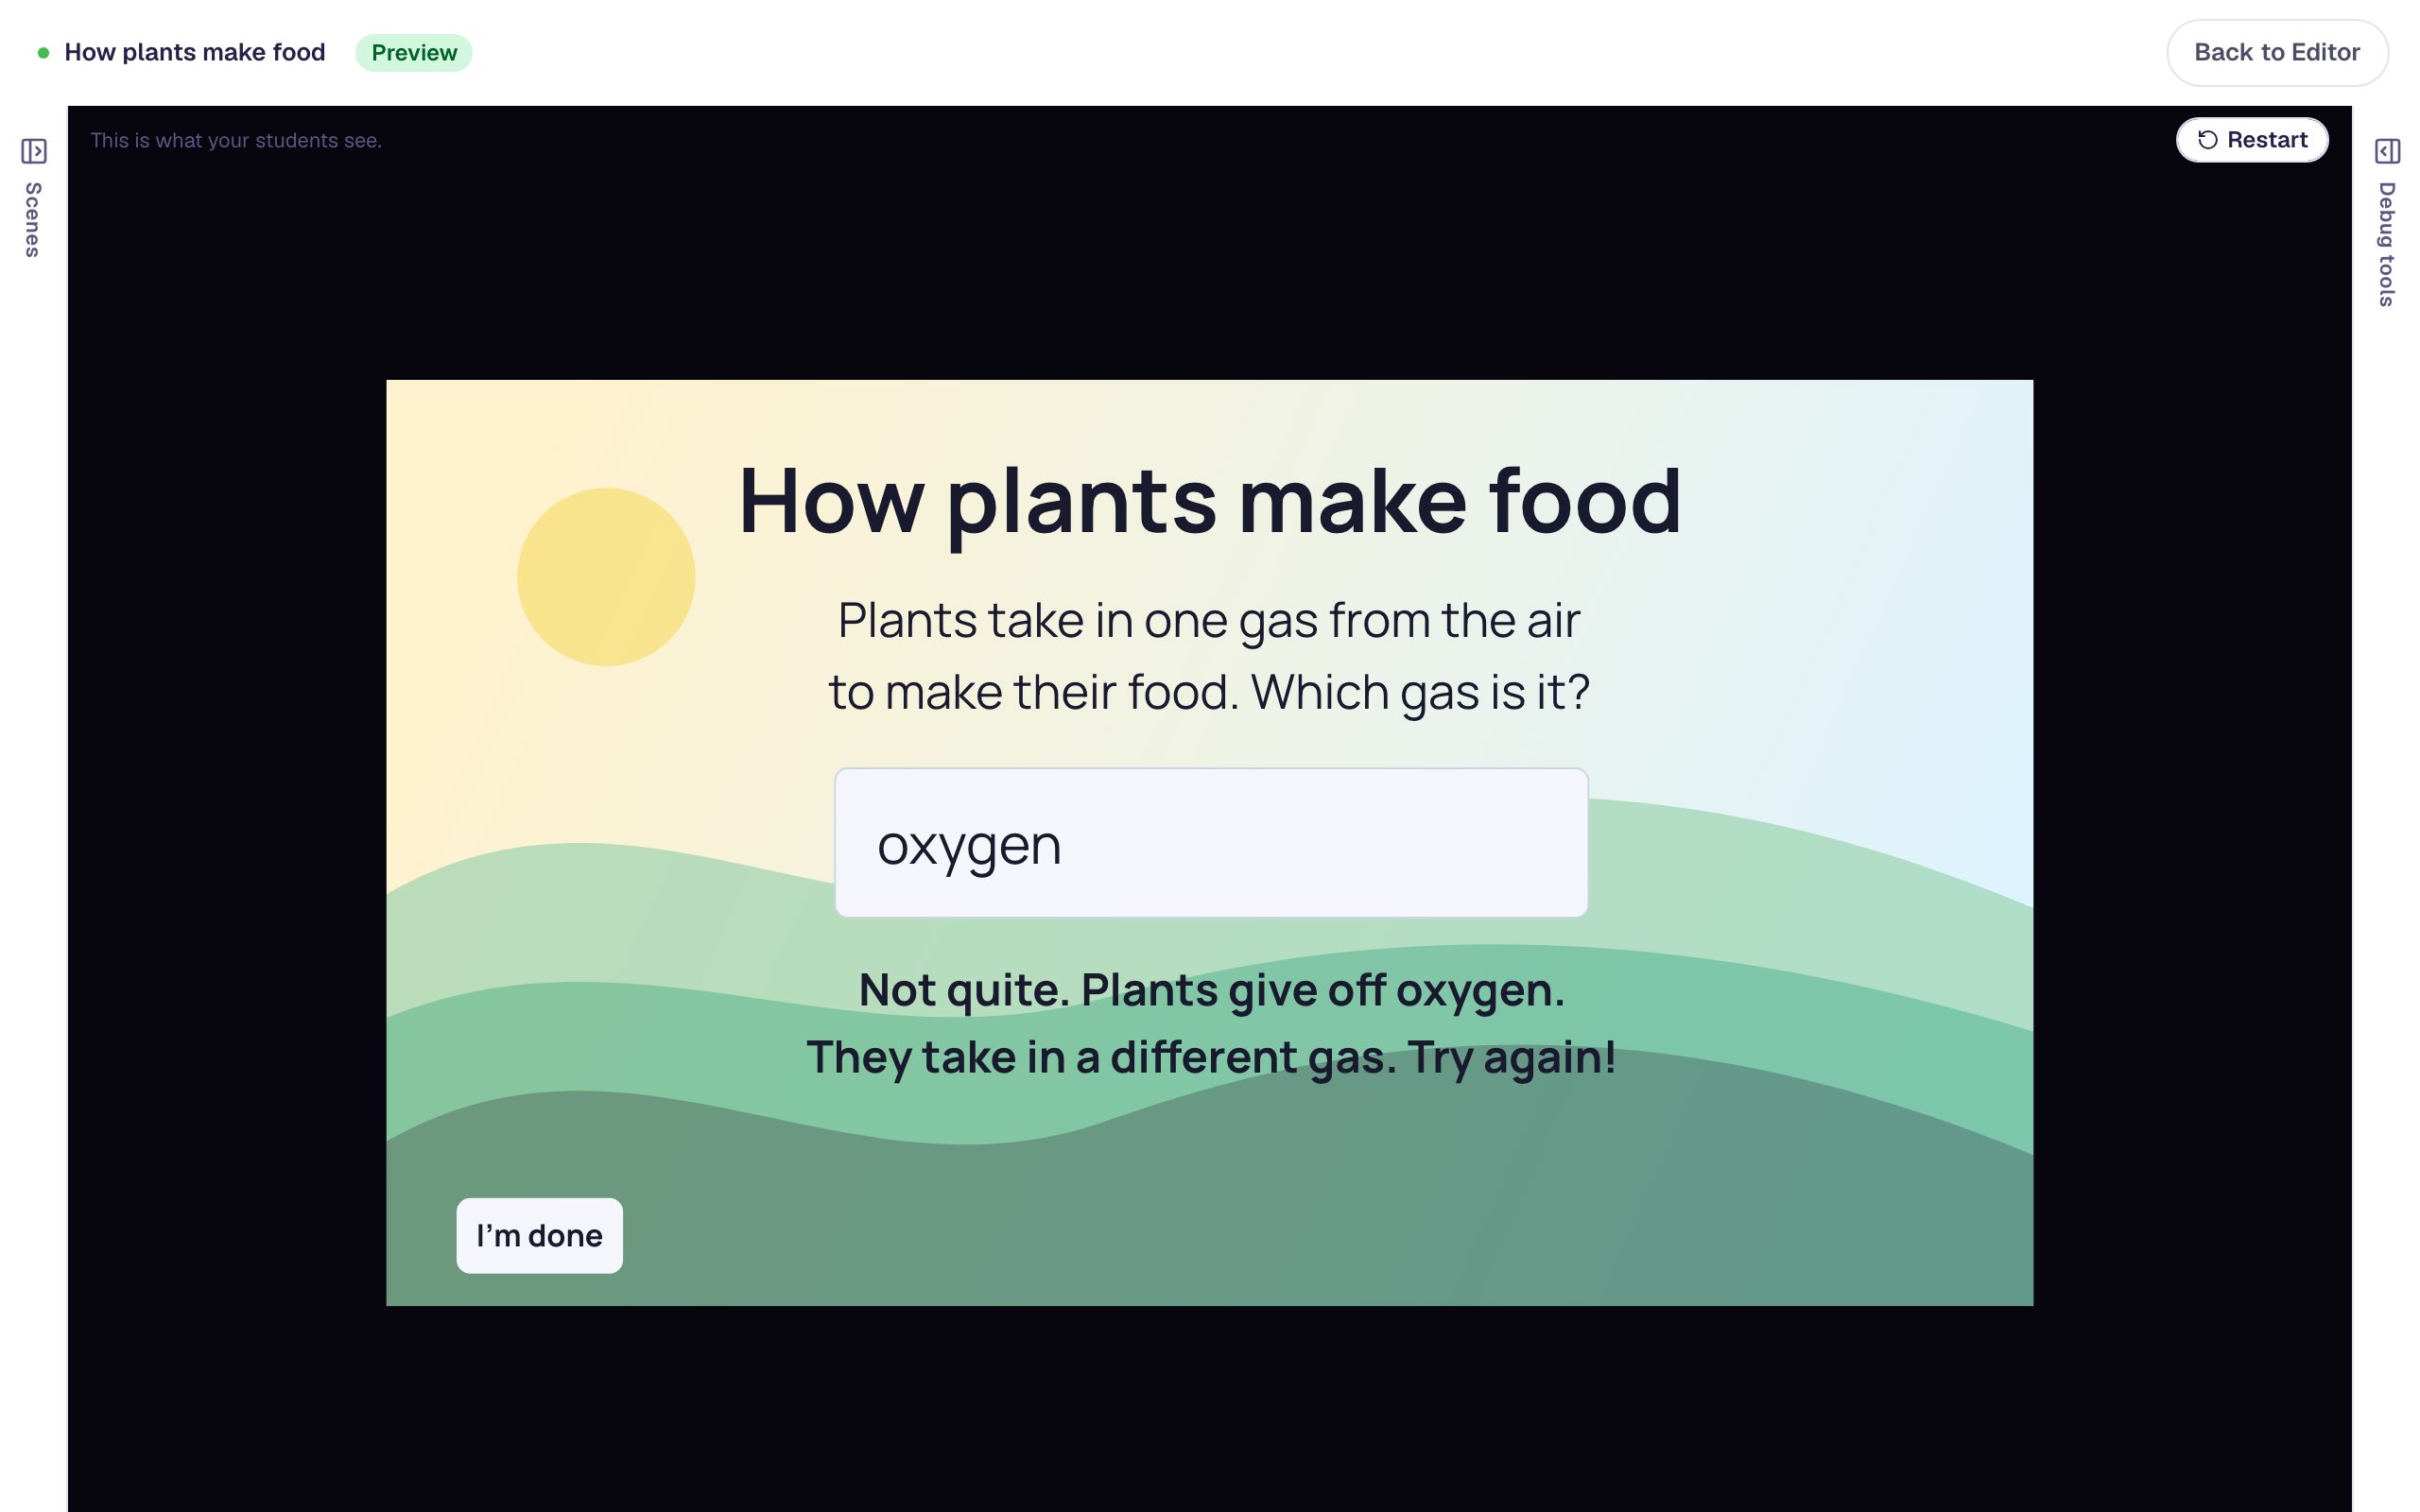
Add another Body text under the answer box: Not quite. Plants give off oxygen. They take in a different gas. Try again! Press Enter after "oxygen." so it sits on two lines, set its Font Size to 26, and click B under Style & Layout to make it bold, so it stands out from the question.
Rename it Try again message, the same way you named the answer box.
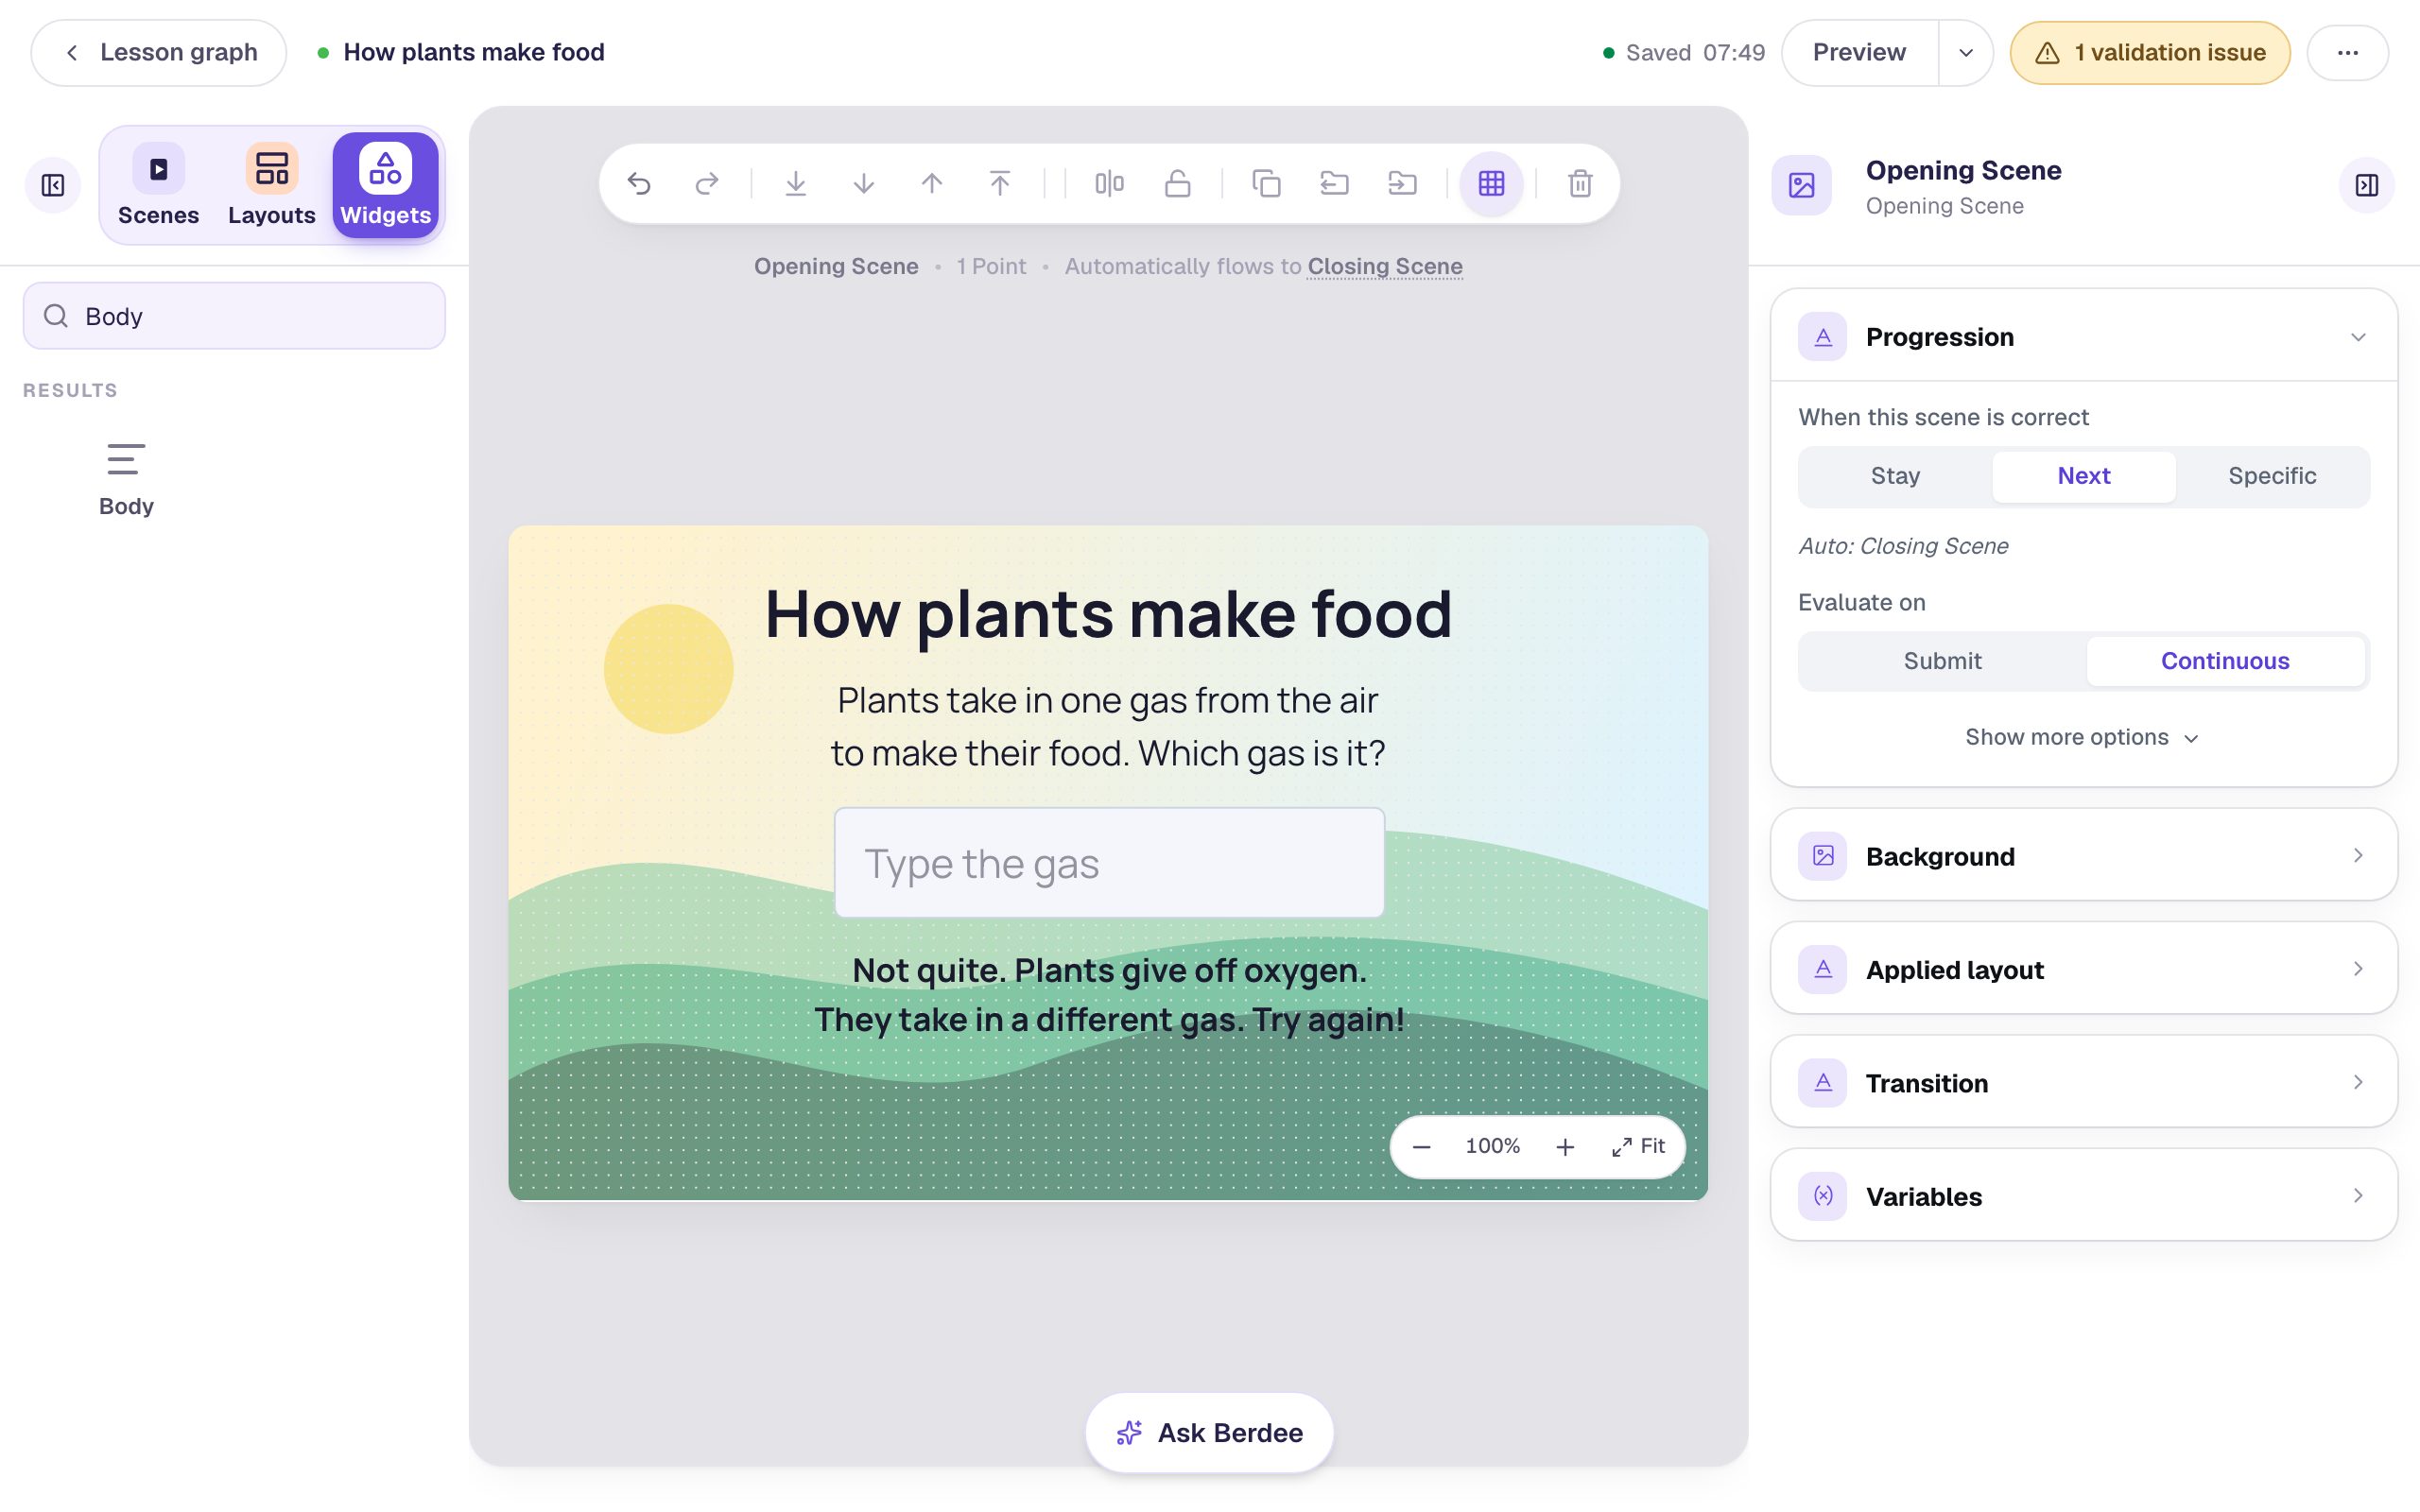
The message names the most common wrong answer and explains why it's wrong, without giving away the right one. Students get a reason to think again, not just a red cross.
Step 5: Show the message only after a wrong answer
With Try again message still selected, open Visibility in the properties panel and set it up like this:
- Set Mode to Conditional. Behavior stays on Show, and the rule stays on All conditions are met.
- In the first condition, pick Text Input: Gas answer, then Is answered.
- Click Add Condition. In the new row, pick Text Input: Gas answer again, then Is incorrect.
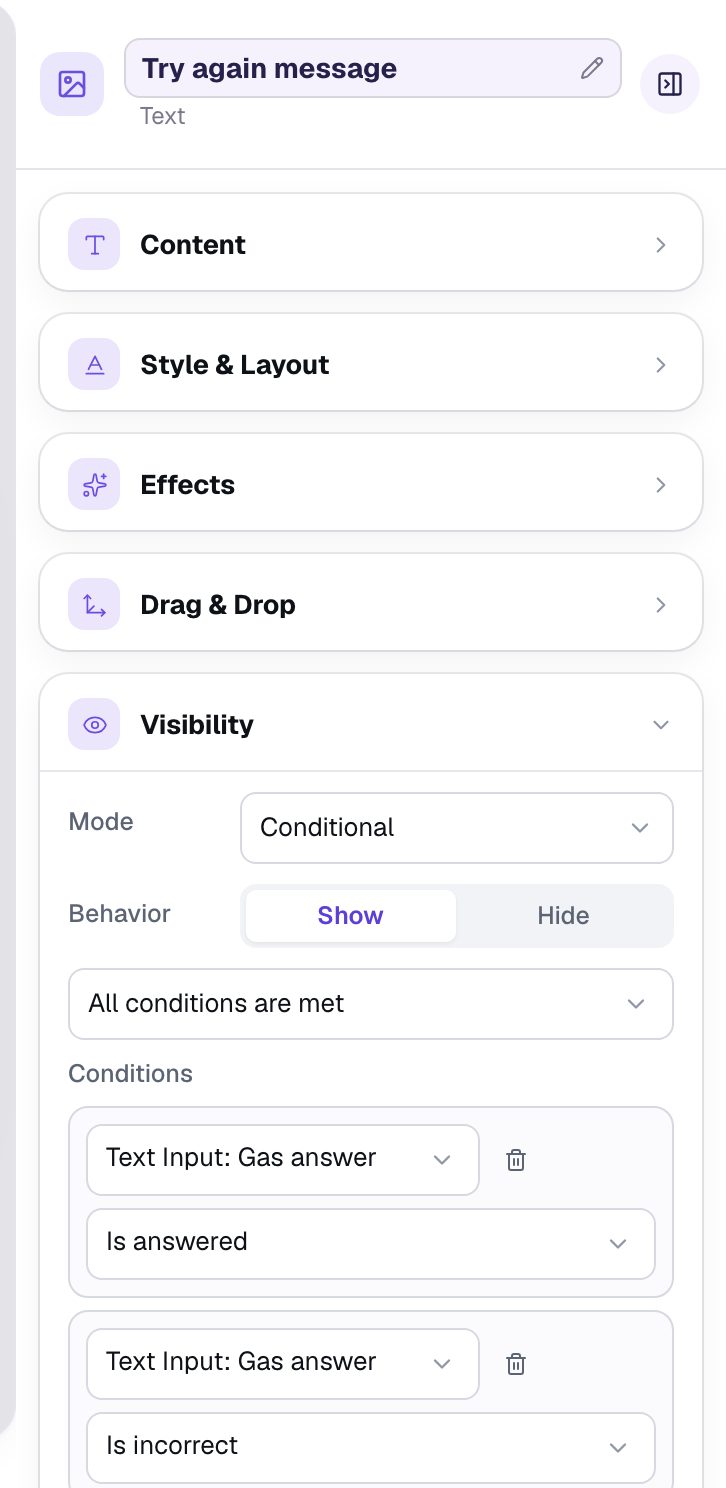
Why two conditions? Is incorrect on its own says nothing about whether the student has tried yet. Is answered keeps the message hidden until they've actually entered something, so nobody is told "Not quite" before they've typed a word.
A student's answer counts once they press Enter or click out of the box. That's the moment the message can appear, and the moment a right answer is checked.
Step 6: Add the "I'm done" safety net
Click the yellow validation pill at the top right. It lists one thing: No Lesson-Submit Button.
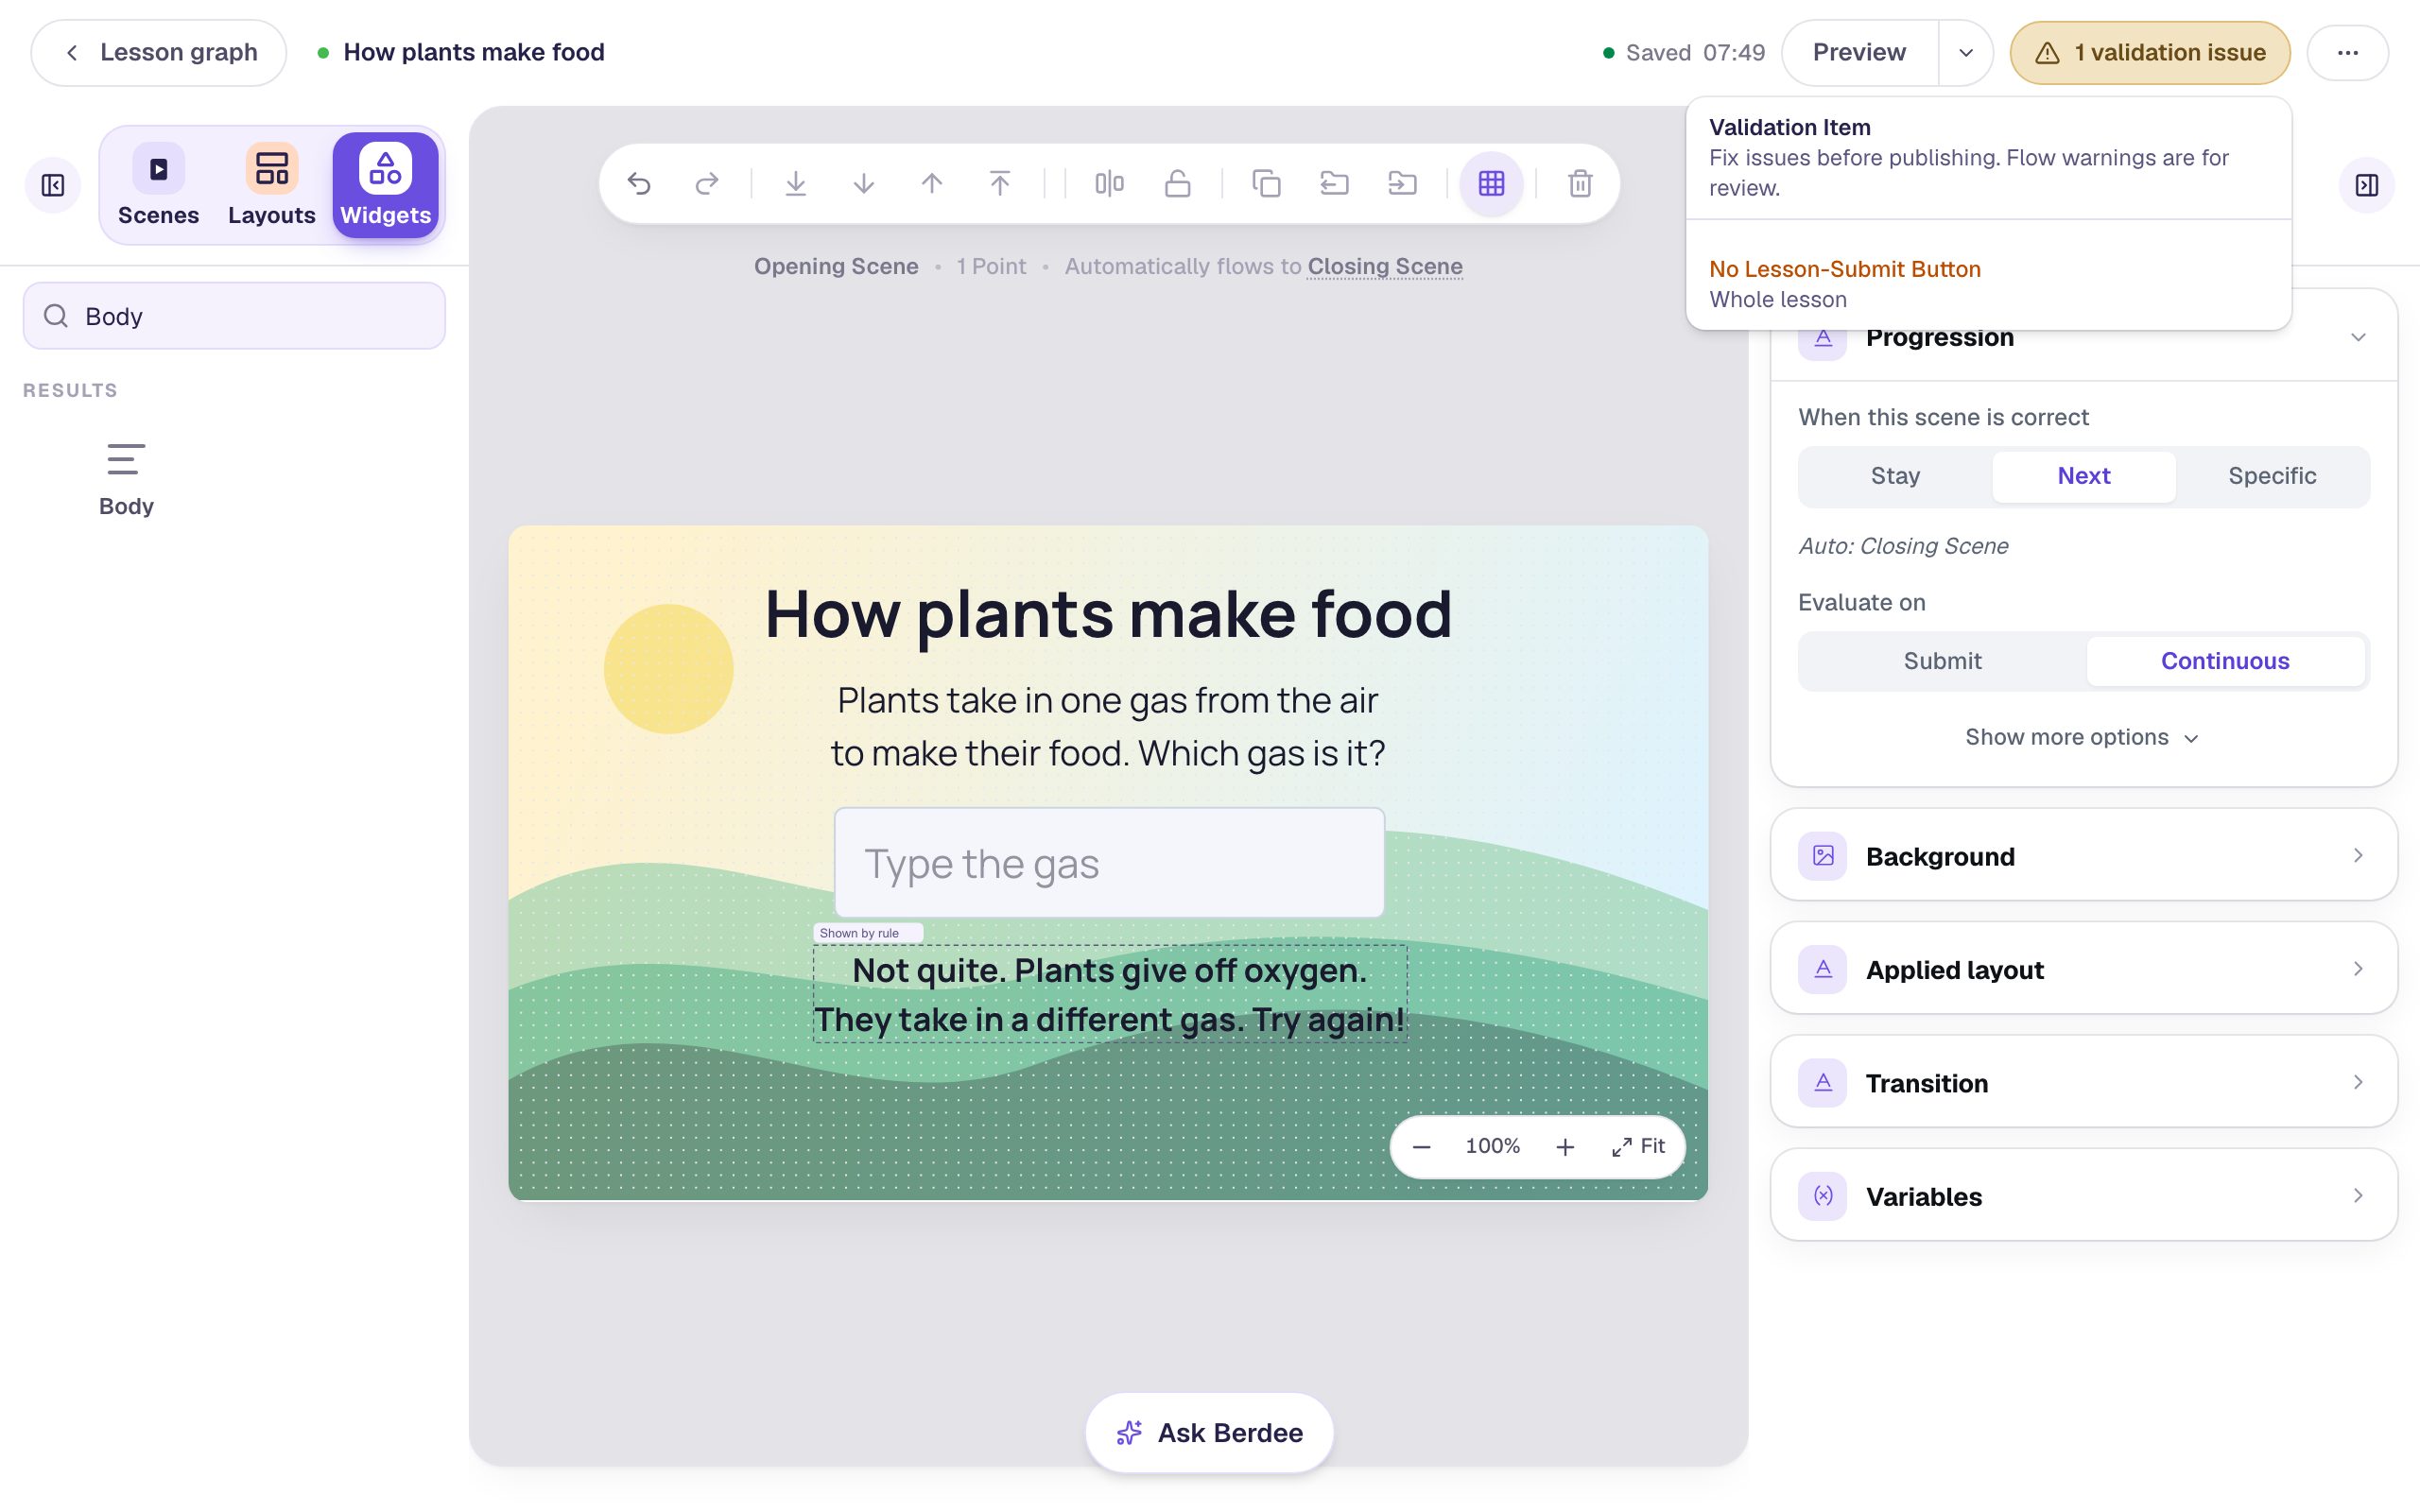
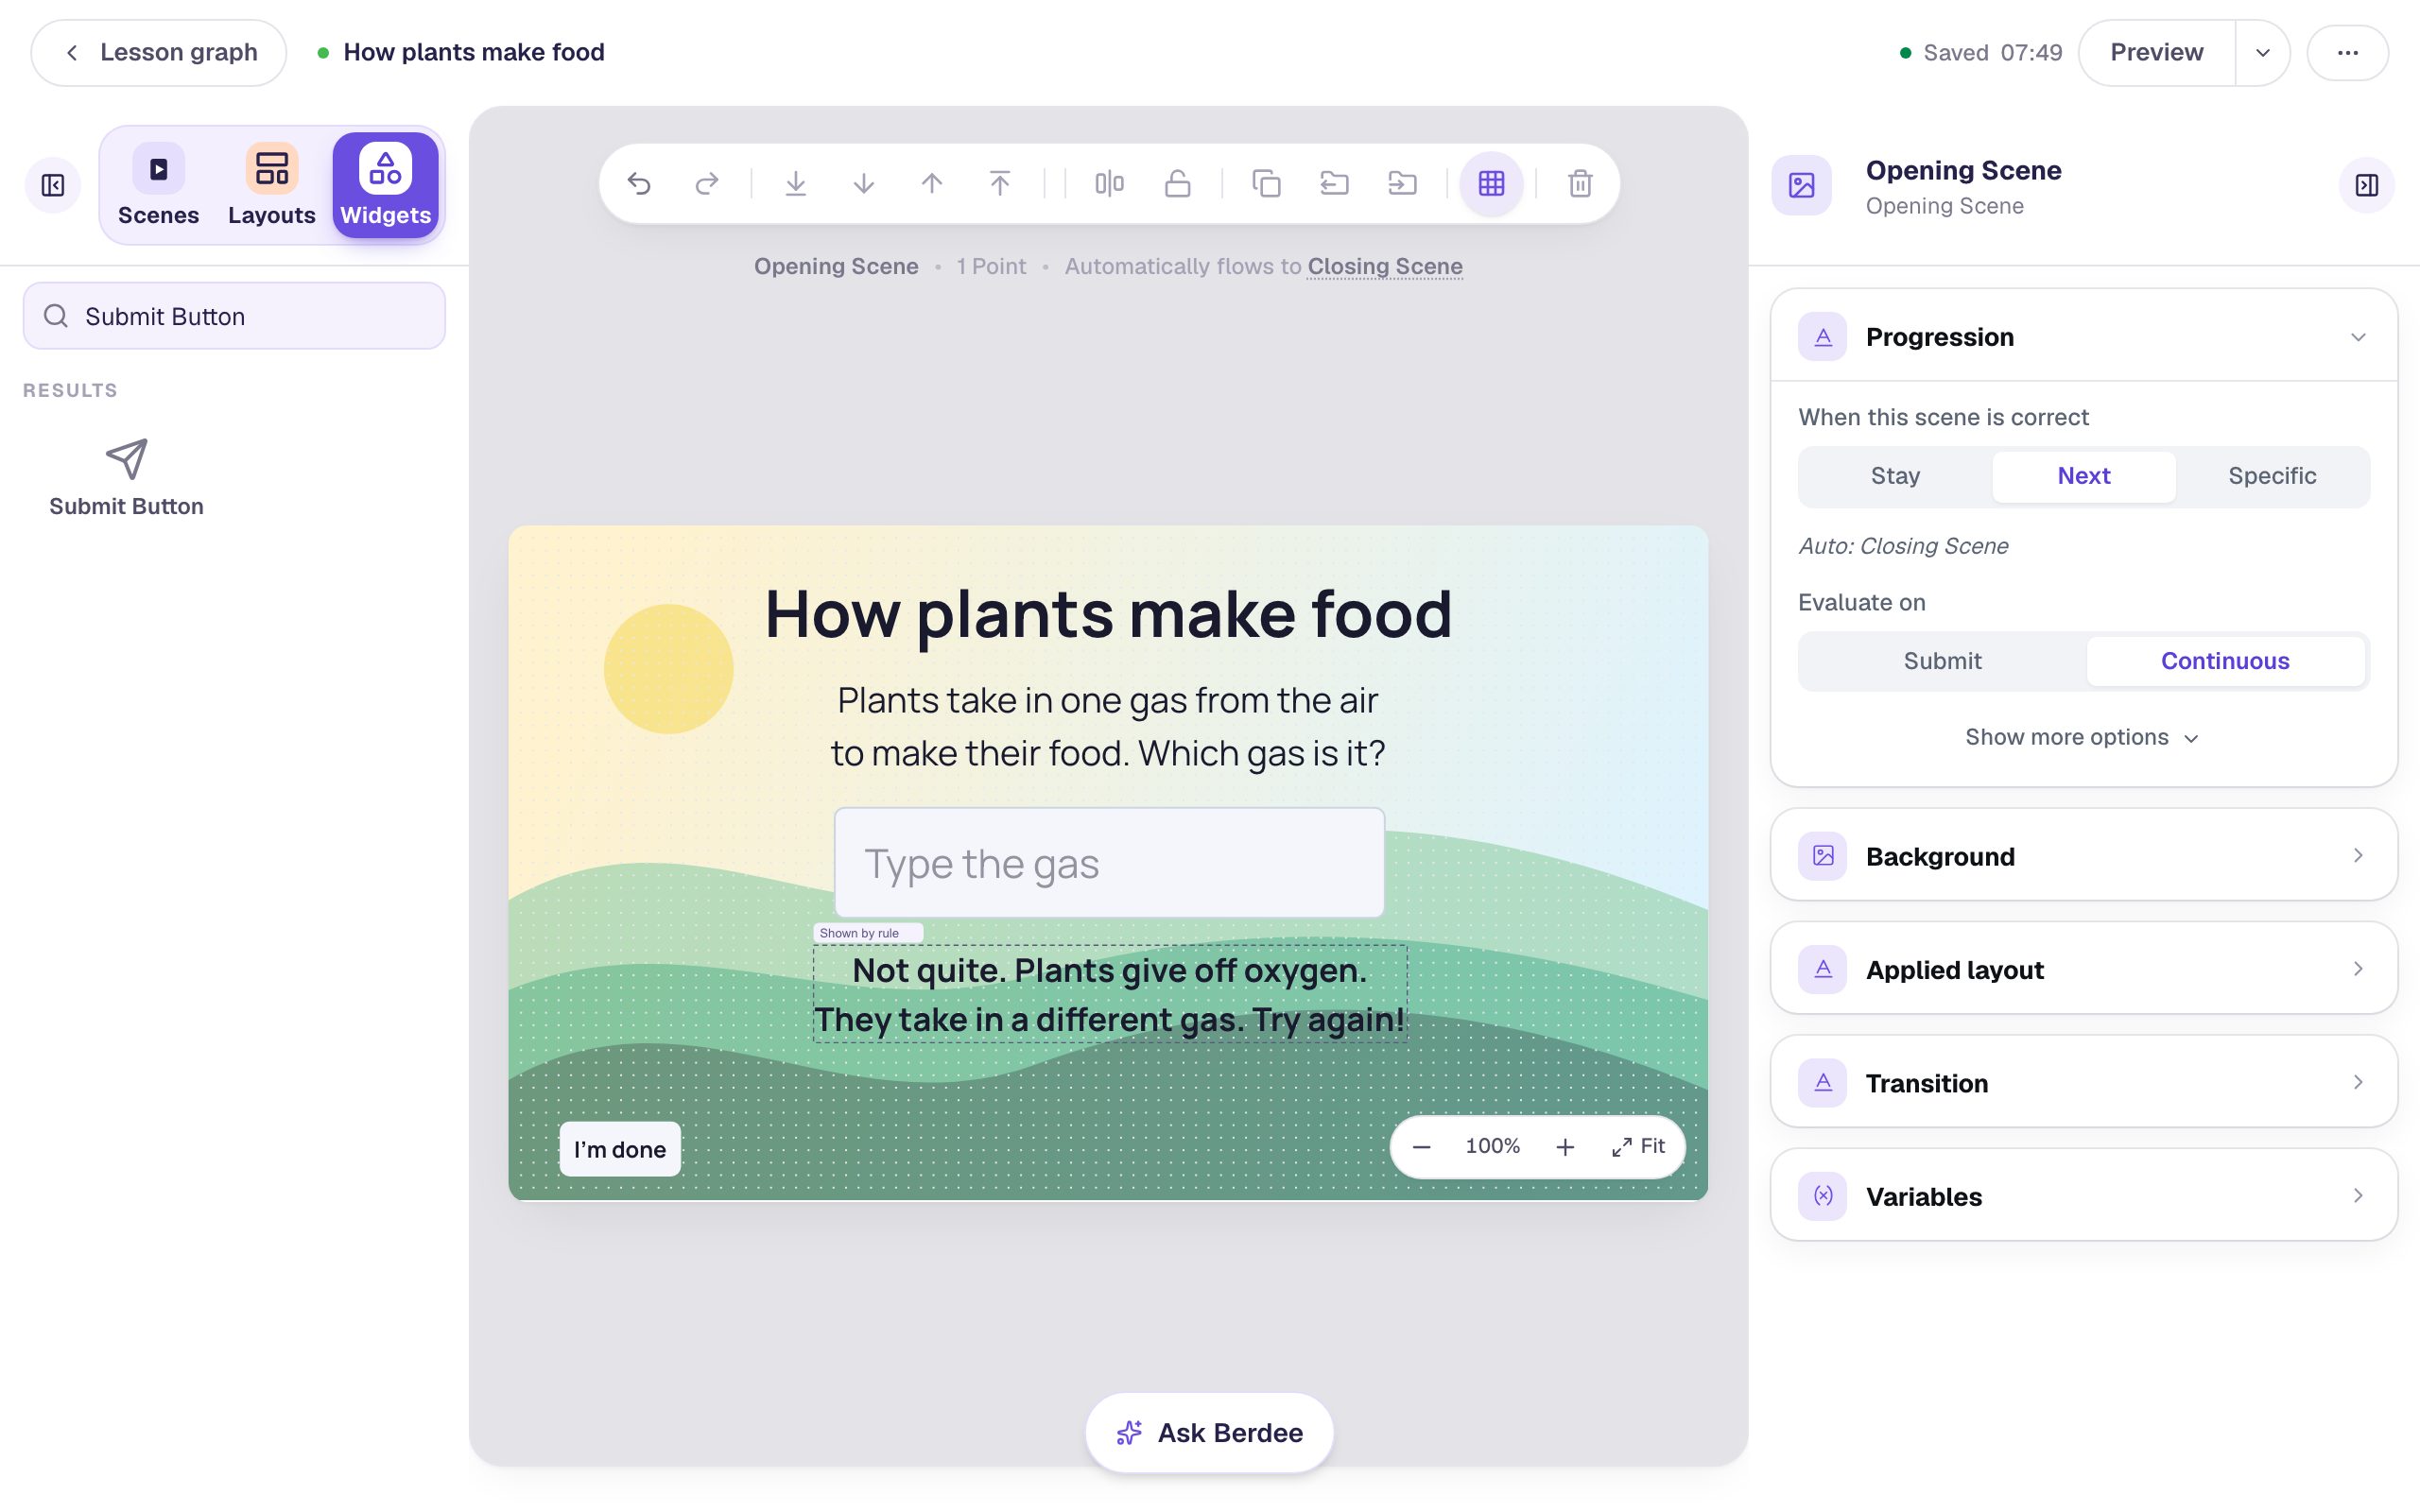
Every lesson needs a button that finishes it, even when it would end on its own. It's also a way out for a student who's stuck. In Widgets, add a Submit Button. In Content, change its Label to I'm done and set Submits to Lesson. Set its Font Size to 18 and drag it to the bottom-left corner, out of the way.
You don't need a Next button. The scene is set to Next, so as soon as the answer is right, Berdee carries the student to the Closing Scene.
Step 7: Try it as a student
Click Preview. Type a wrong answer first, then the short form of the right one:
The message is hidden when the scene opens. Type oxygen and press Enter, and it appears:
Now clear the box, type co2 in lowercase and press Enter. It counts, because Case Sensitive is off and CO2 is on the list, so Berdee moves on to the Closing Scene and the score.
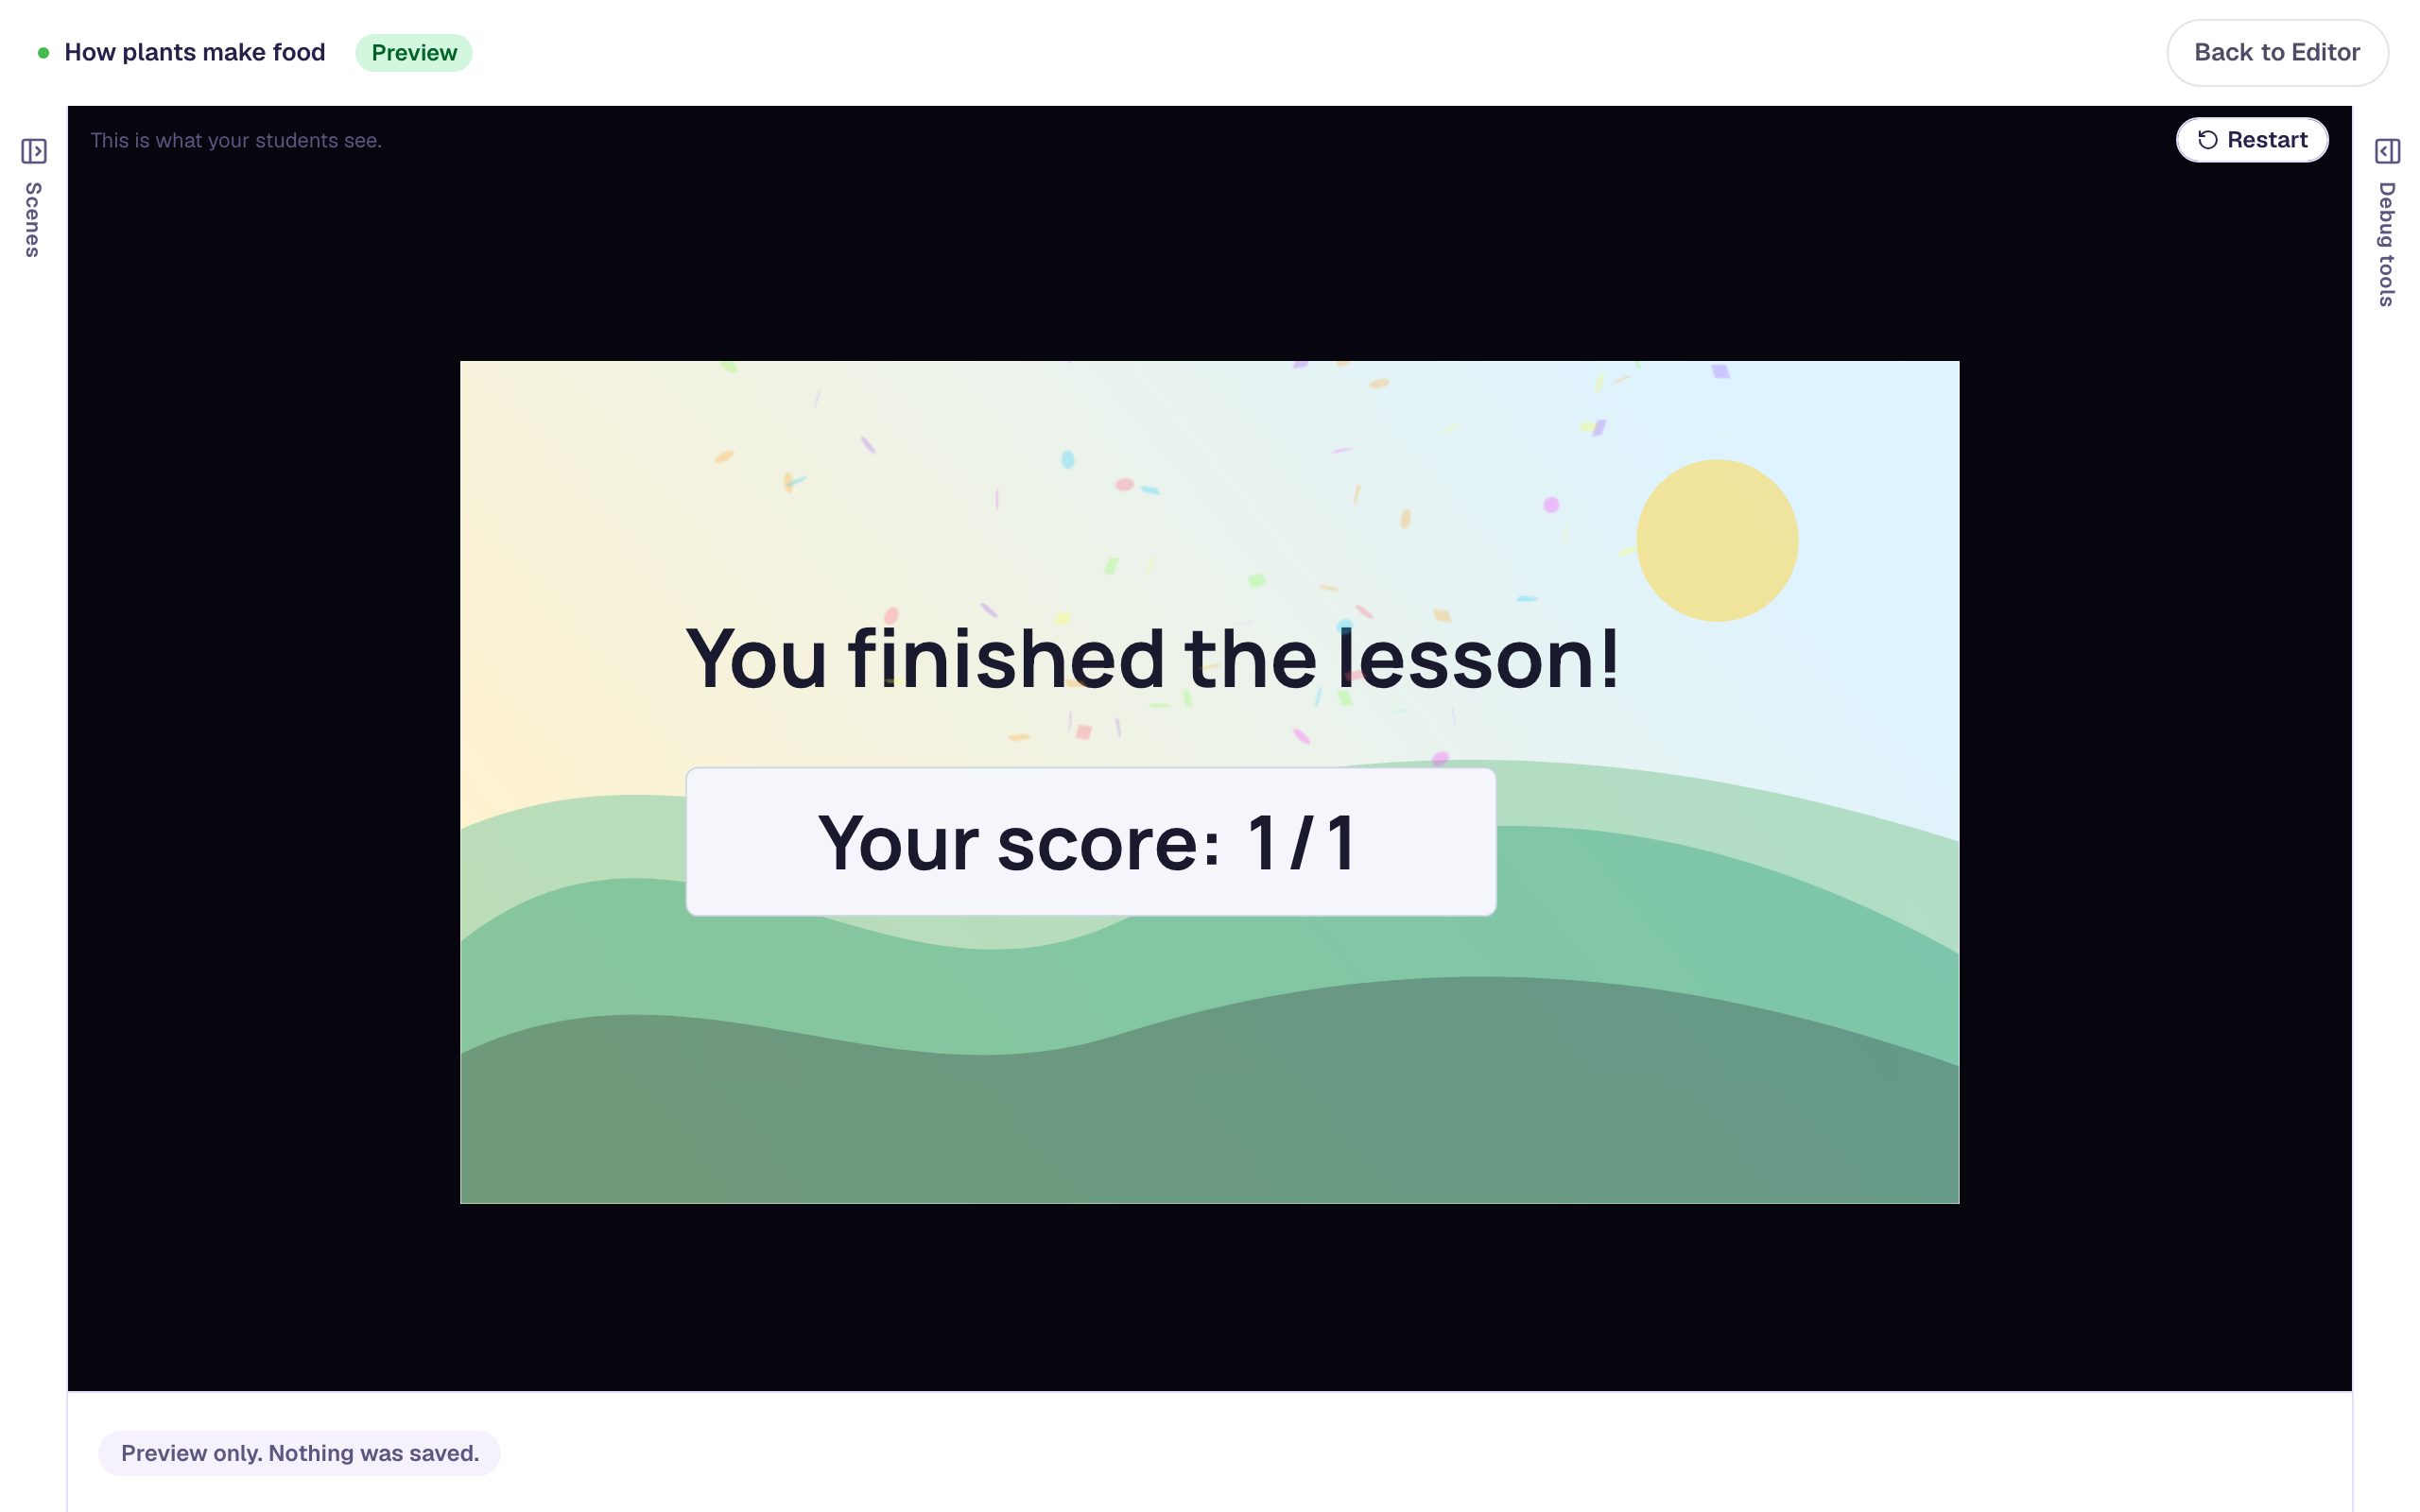
The score is 1 / 1 even though the first try was wrong. This scene checks the answer as soon as it's entered and moves on the moment it's right, so students can keep trying, which suits practice. If you want the first answer to count, have the scene check answers only when a Submit button is pressed: see When the check happens.
What you built
A short-answer question with:
- a Text Input sized for a one- or two-word answer,
- an answer key that accepts carbon dioxide and CO2, in any capitals,
- a try again message that appears only after a wrong answer, thanks to two Visibility conditions, and
- a scene that moves to the ending the moment the answer is right.
The same pair of conditions works for any question with a right answer: a Number Input, a Dropdown or a Fill in the Blank. For a number answer that should accept a small range, try Accept close-enough answers to a number question. For a sentence with more than one gap, try Write a fill-in-the-blank sentence that accepts more than one answer. To hold the hint back until a student has missed twice, see Show a hint after two wrong tries.
Make this lesson yours
Add the lesson you just watched being built to your account, then change it for your class: your questions, your pictures, your colors.
Free to sign up, and you'll come straight back here. I have an account