Build a conveyor-belt math game with a live score
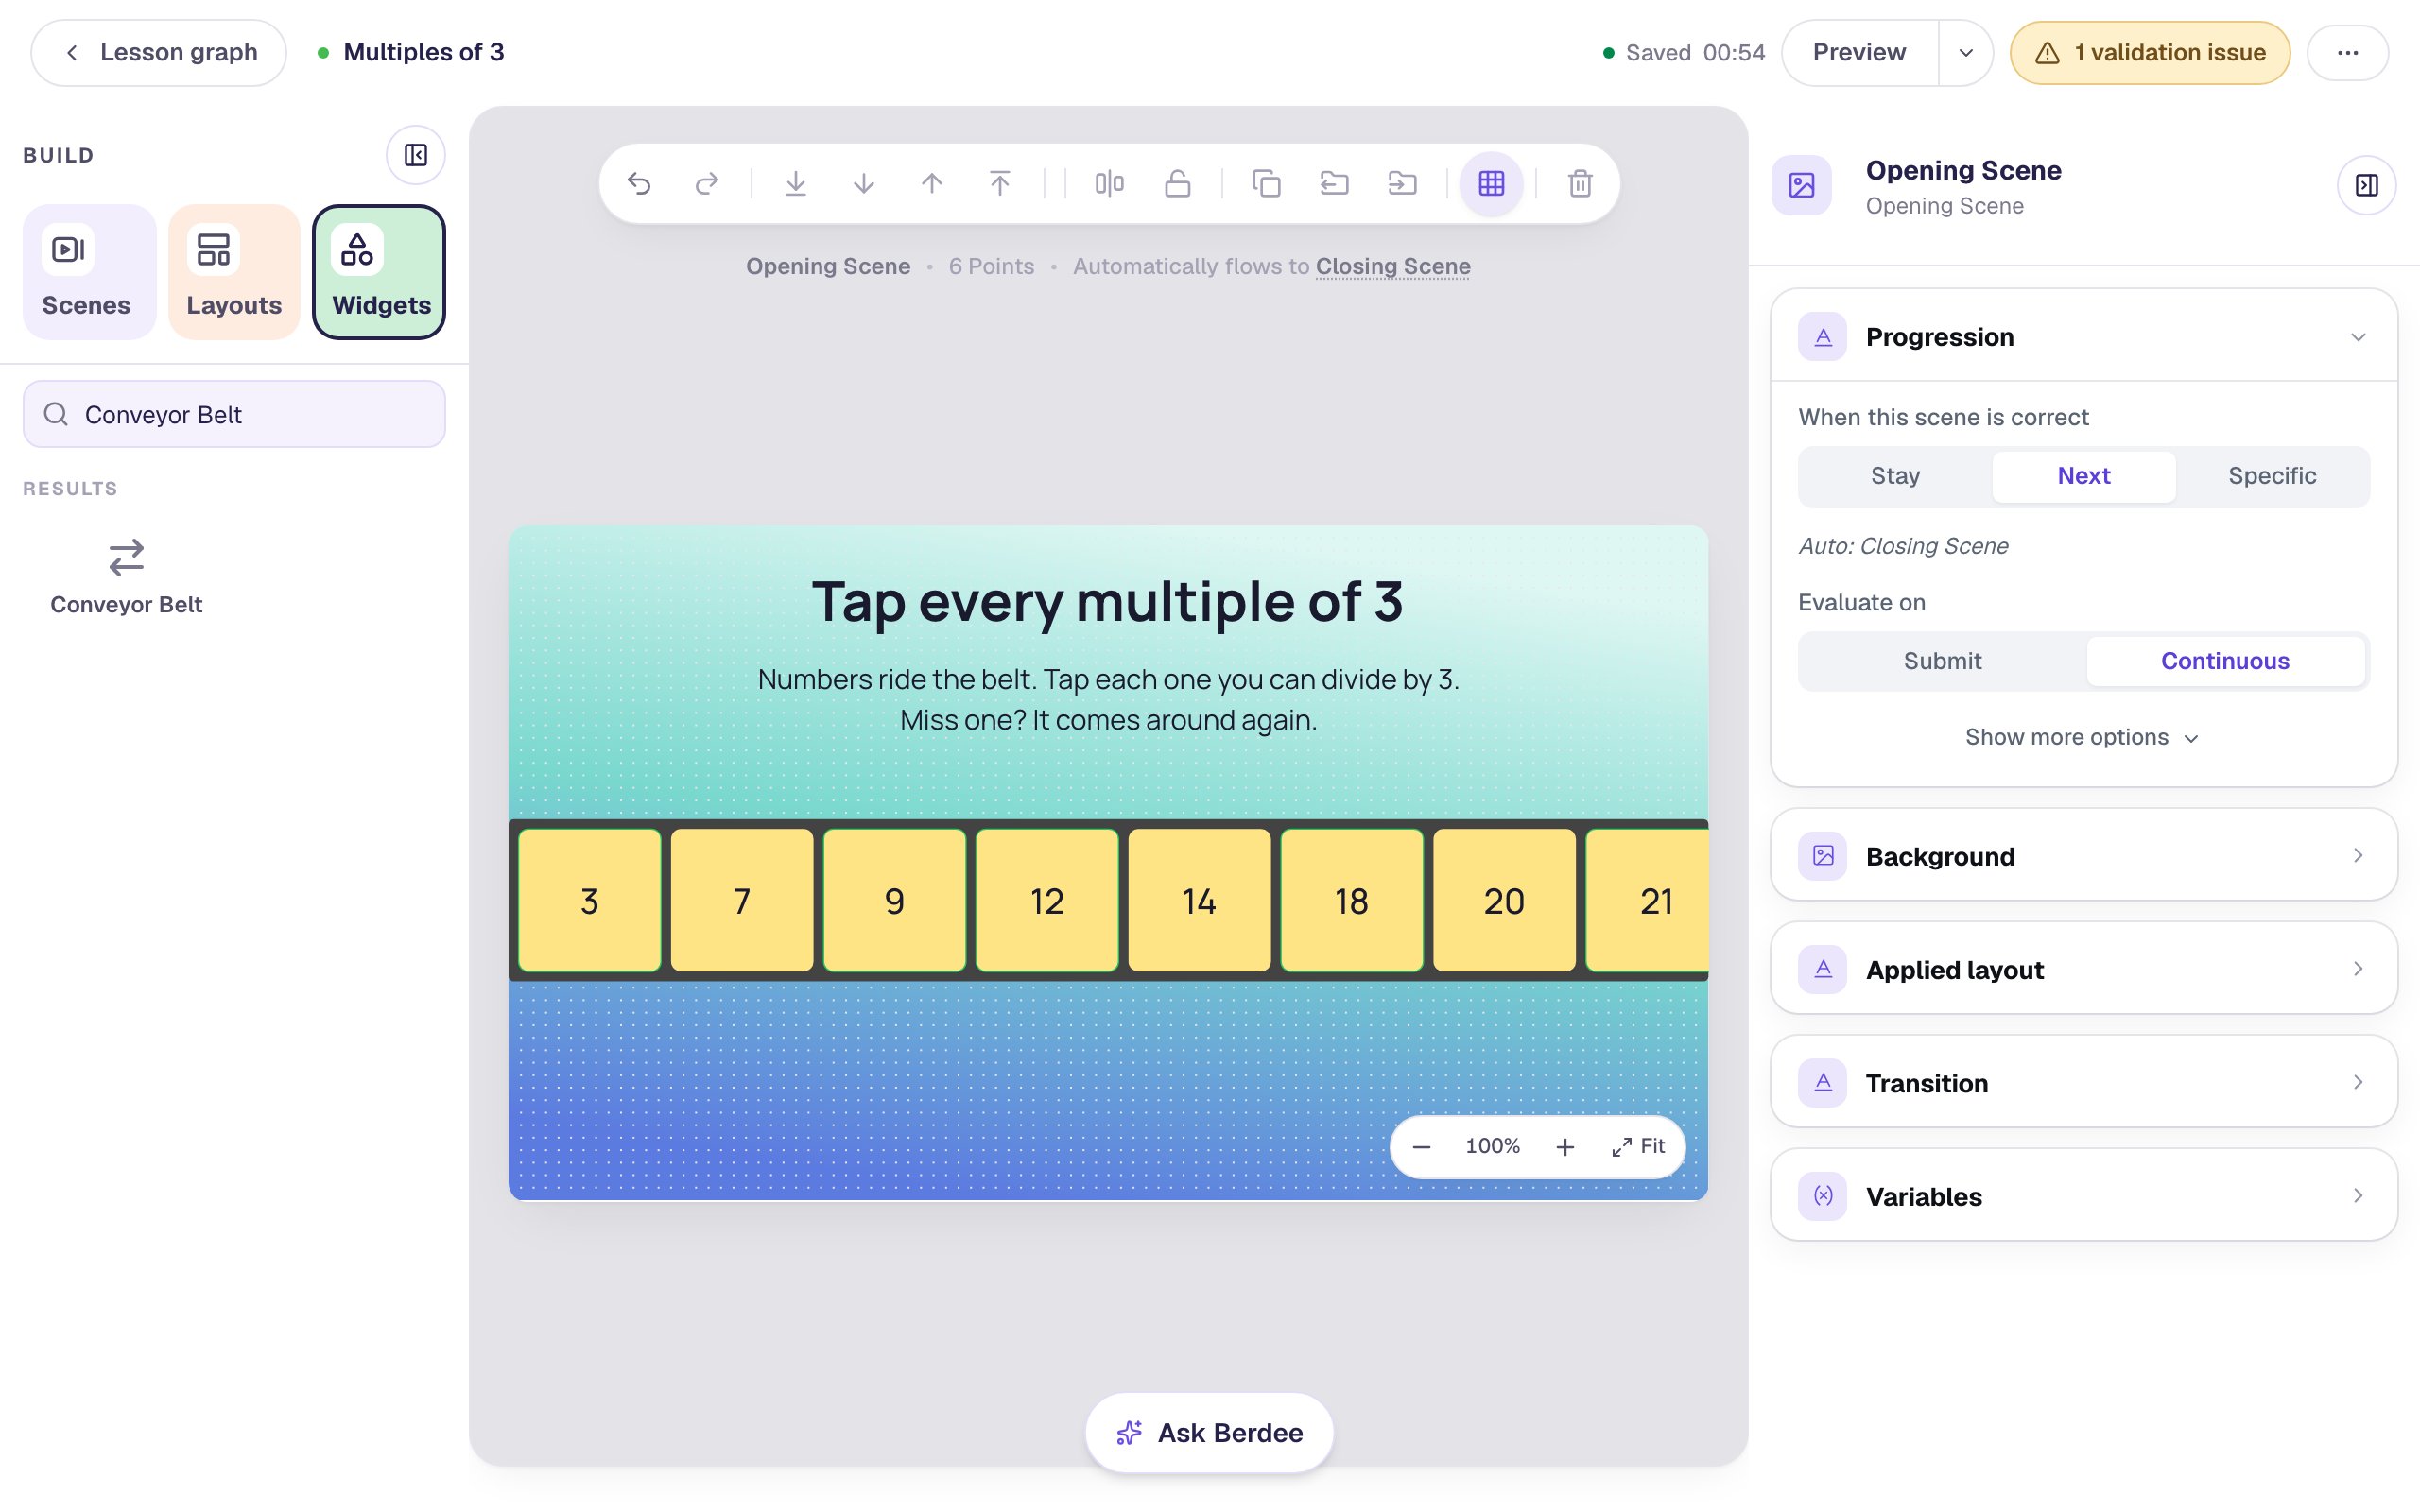
Turn times-table practice into a game. Numbers ride a Conveyor Belt, students tap every multiple of 3, a Score widget counts each find, and a Next button appears once the belt is done.
- Level
- Beginner
- Time
- About 12 min
- Steps
- 8
A "Multiples of 3" scene where ten numbers scroll past on a dark belt of yellow tiles, each right tap earns a point on a live score, and a Next button appears once every multiple has been found.
Get the finished lesson
Skip straight to the result, or keep it open beside the steps. Add this tutorial's lesson to your account and explore how it works in the studio.
Free to sign up, and you'll come straight back here. I have an account
Some practice is about speed as much as knowing: spotting a multiple of 3, a verb, or a prime number without stopping to work it out. A Conveyor Belt makes that practice feel like a game. Numbers scroll across the scene, and students tap the ones that fit the rule before they slide away.
In this tutorial you'll build a "Multiples of 3" round:
3 · 7 · 9 · 12 · 14 · 18 · 20 · 21 · 25 · 27
Students tap the six multiples (3, 9, 12, 18, 21 and 27) as they pass. Each right tap earns a point on a Score widget in the corner, a wrong tap flashes red, and a Next button appears once every multiple has been found. It takes three widgets working together, plus one visibility rule.
If you haven't used the studio before, start with Build your first quiz question: this tutorial moves quickly through the parts it already covers.
Step 1: Set the scene
Start a blank lesson (New lesson, then Start from scratch) and name it Multiples of 3 by clicking Untitled lesson at the top.
With nothing selected, open Background, click Choose a style, pick Gradients, then Lagoon gradient, and click Apply background. Select the Closing Scene in the Scenes panel and give it the same background, so the ending matches.
Back on the Opening Scene, add a Heading that says Tap every multiple of 3 (Font Size 44) and a Body text under it with the rules, on two lines:
Numbers ride the belt. Tap each one you can divide by 3. Miss one? It comes around again.
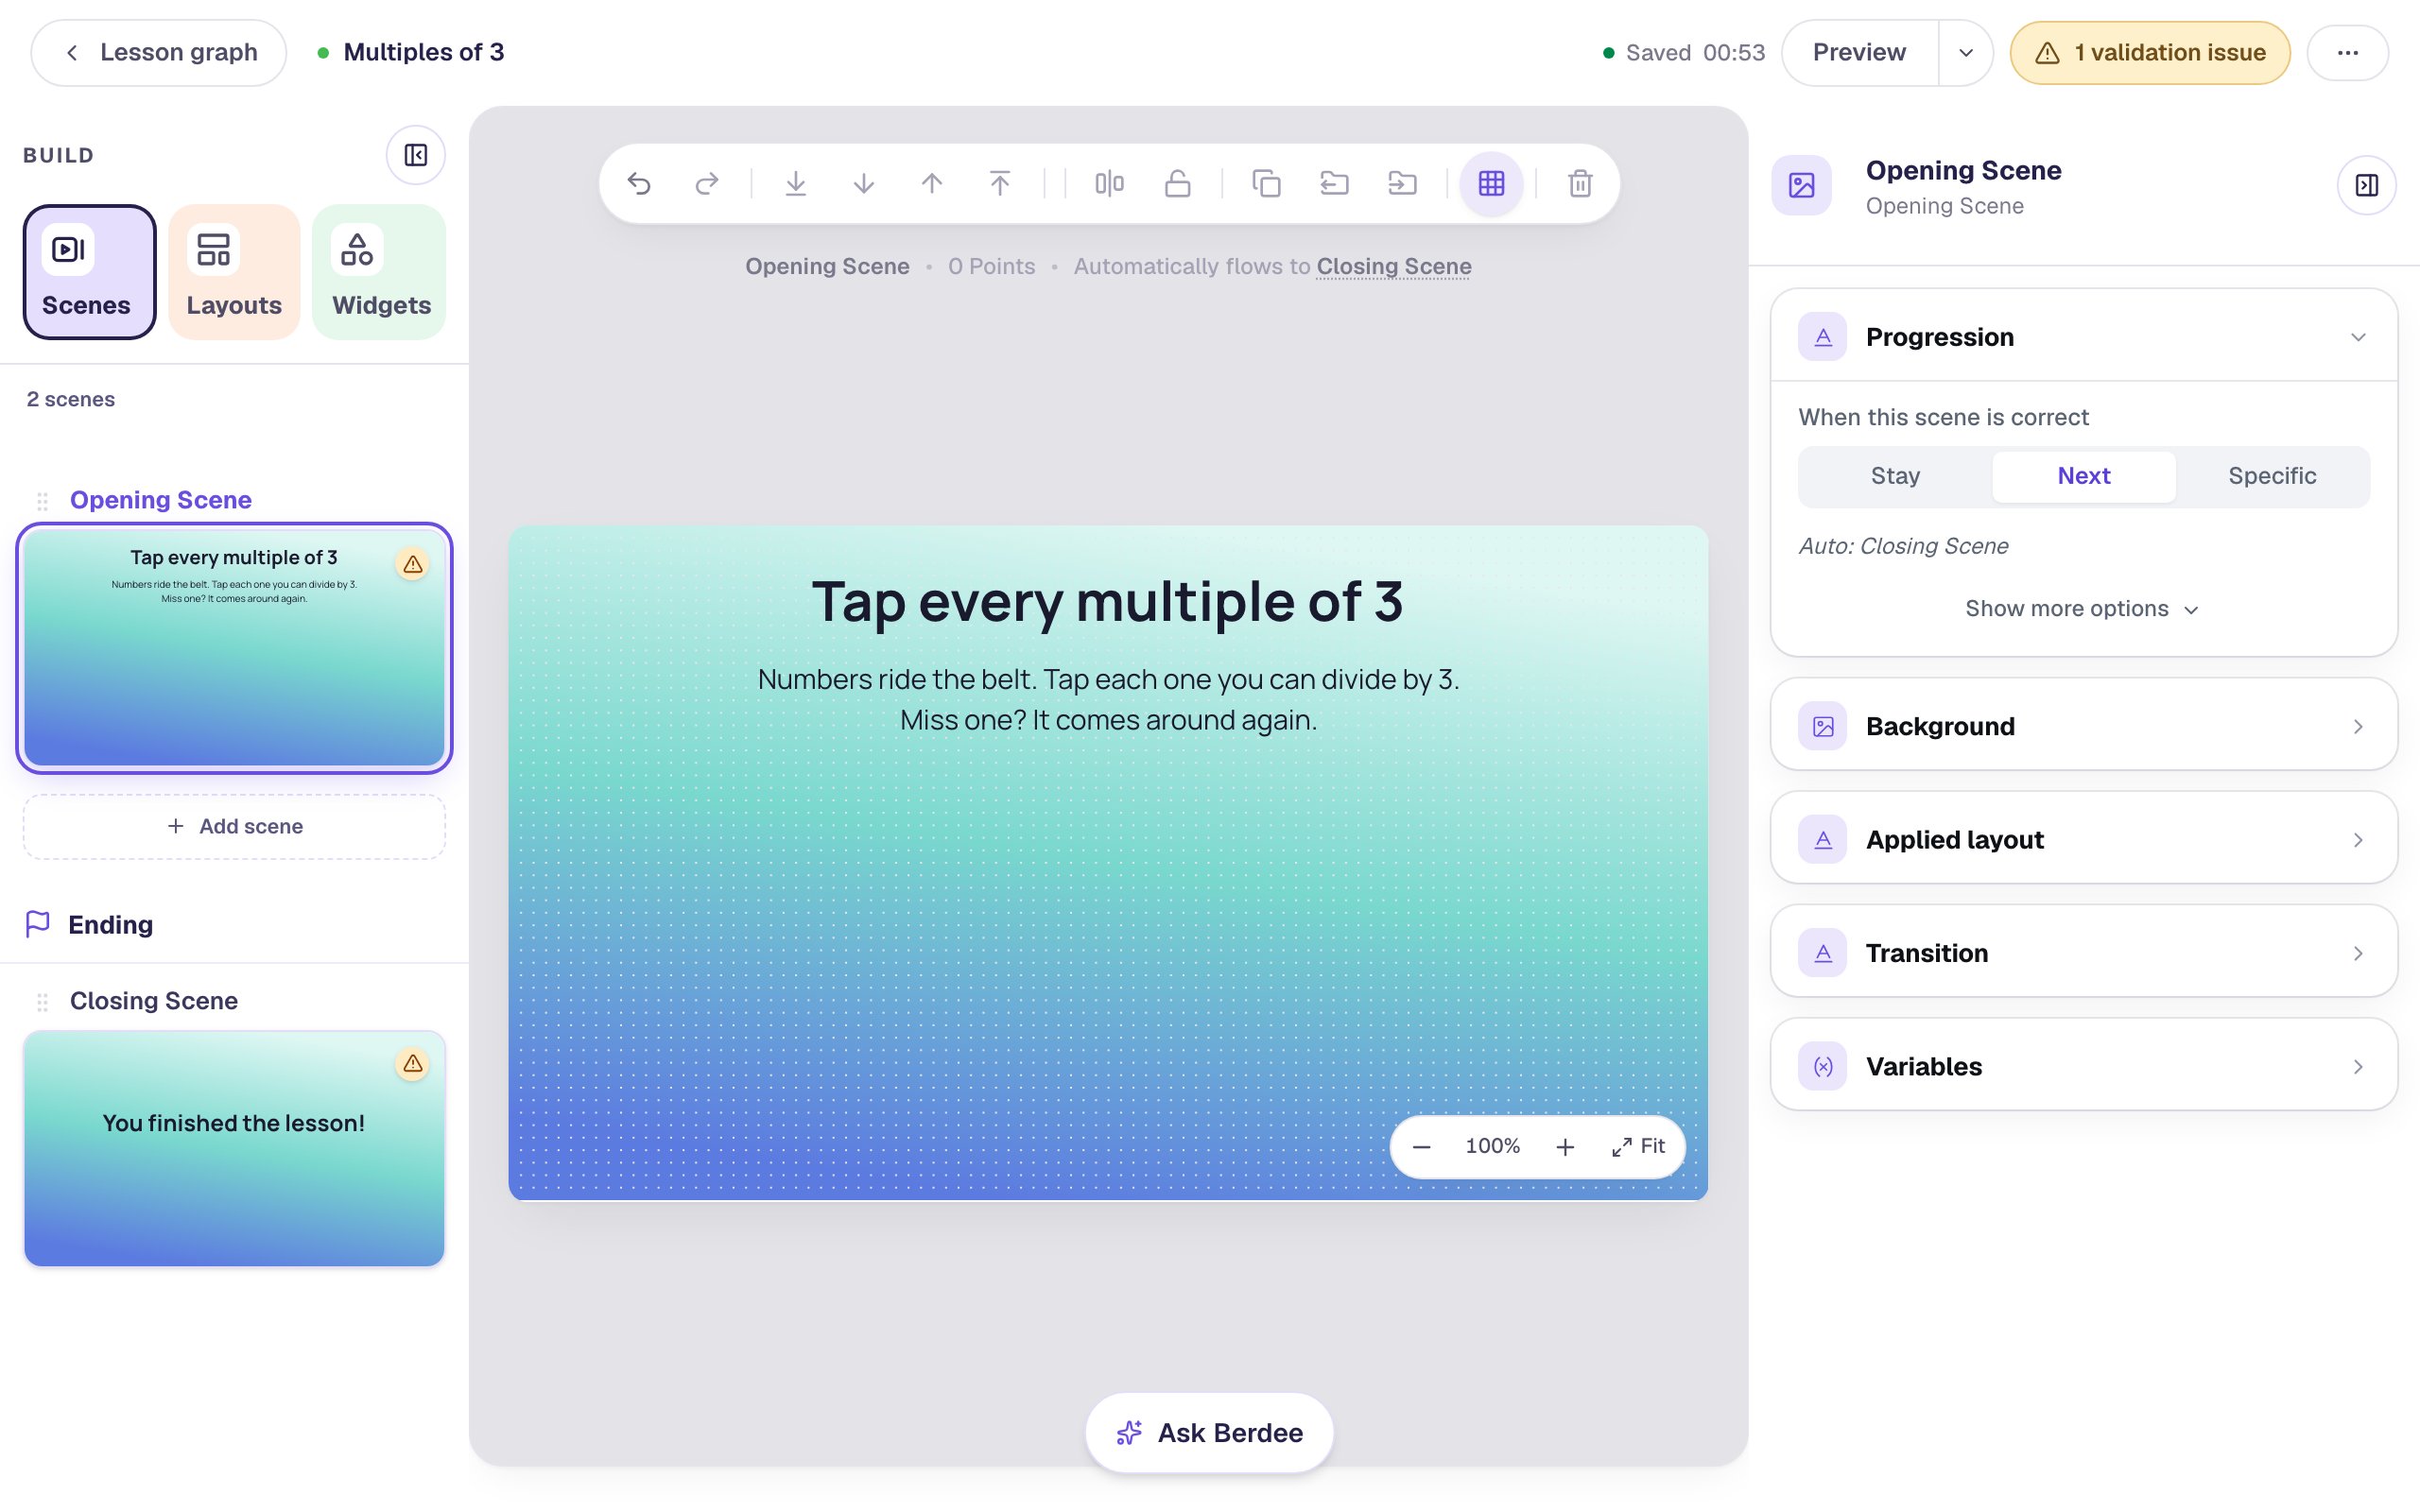
The second line matters. A belt loops, so a number a student misses comes back around, and saying so takes the panic out of a fast game.
Step 2: Add the belt and type the numbers
In Widgets, search for Conveyor Belt and click it. A belt appears across the full width of the scene, with ten options named Option 1 to Option 10. In Style & Layout, click Show advanced layout and set Height to 130, so the number tiles are big enough to tap. Drag the belt down so it sits under the instructions, and rename it Number belt by clicking its name at the top of the properties panel.
Click ⚙ Configure above the belt. Under Options, replace the ten placeholders with the numbers, in order: 3, 7, 9, 12, 14, 18, 20, 21, 25, 27.
Mix the right and wrong numbers together. If all the multiples arrive in a row, students learn the rhythm, not the rule.
Step 3: Mark the multiples of 3 as correct
Each option has a Correct tag in its top-right corner. Click it on 9, 12, 18, 21 and 27. The first option, 3, starts out marked, because a new belt always marks its first option correct, so leave it on. Check that 7, 14, 20 and 25 stay unmarked.
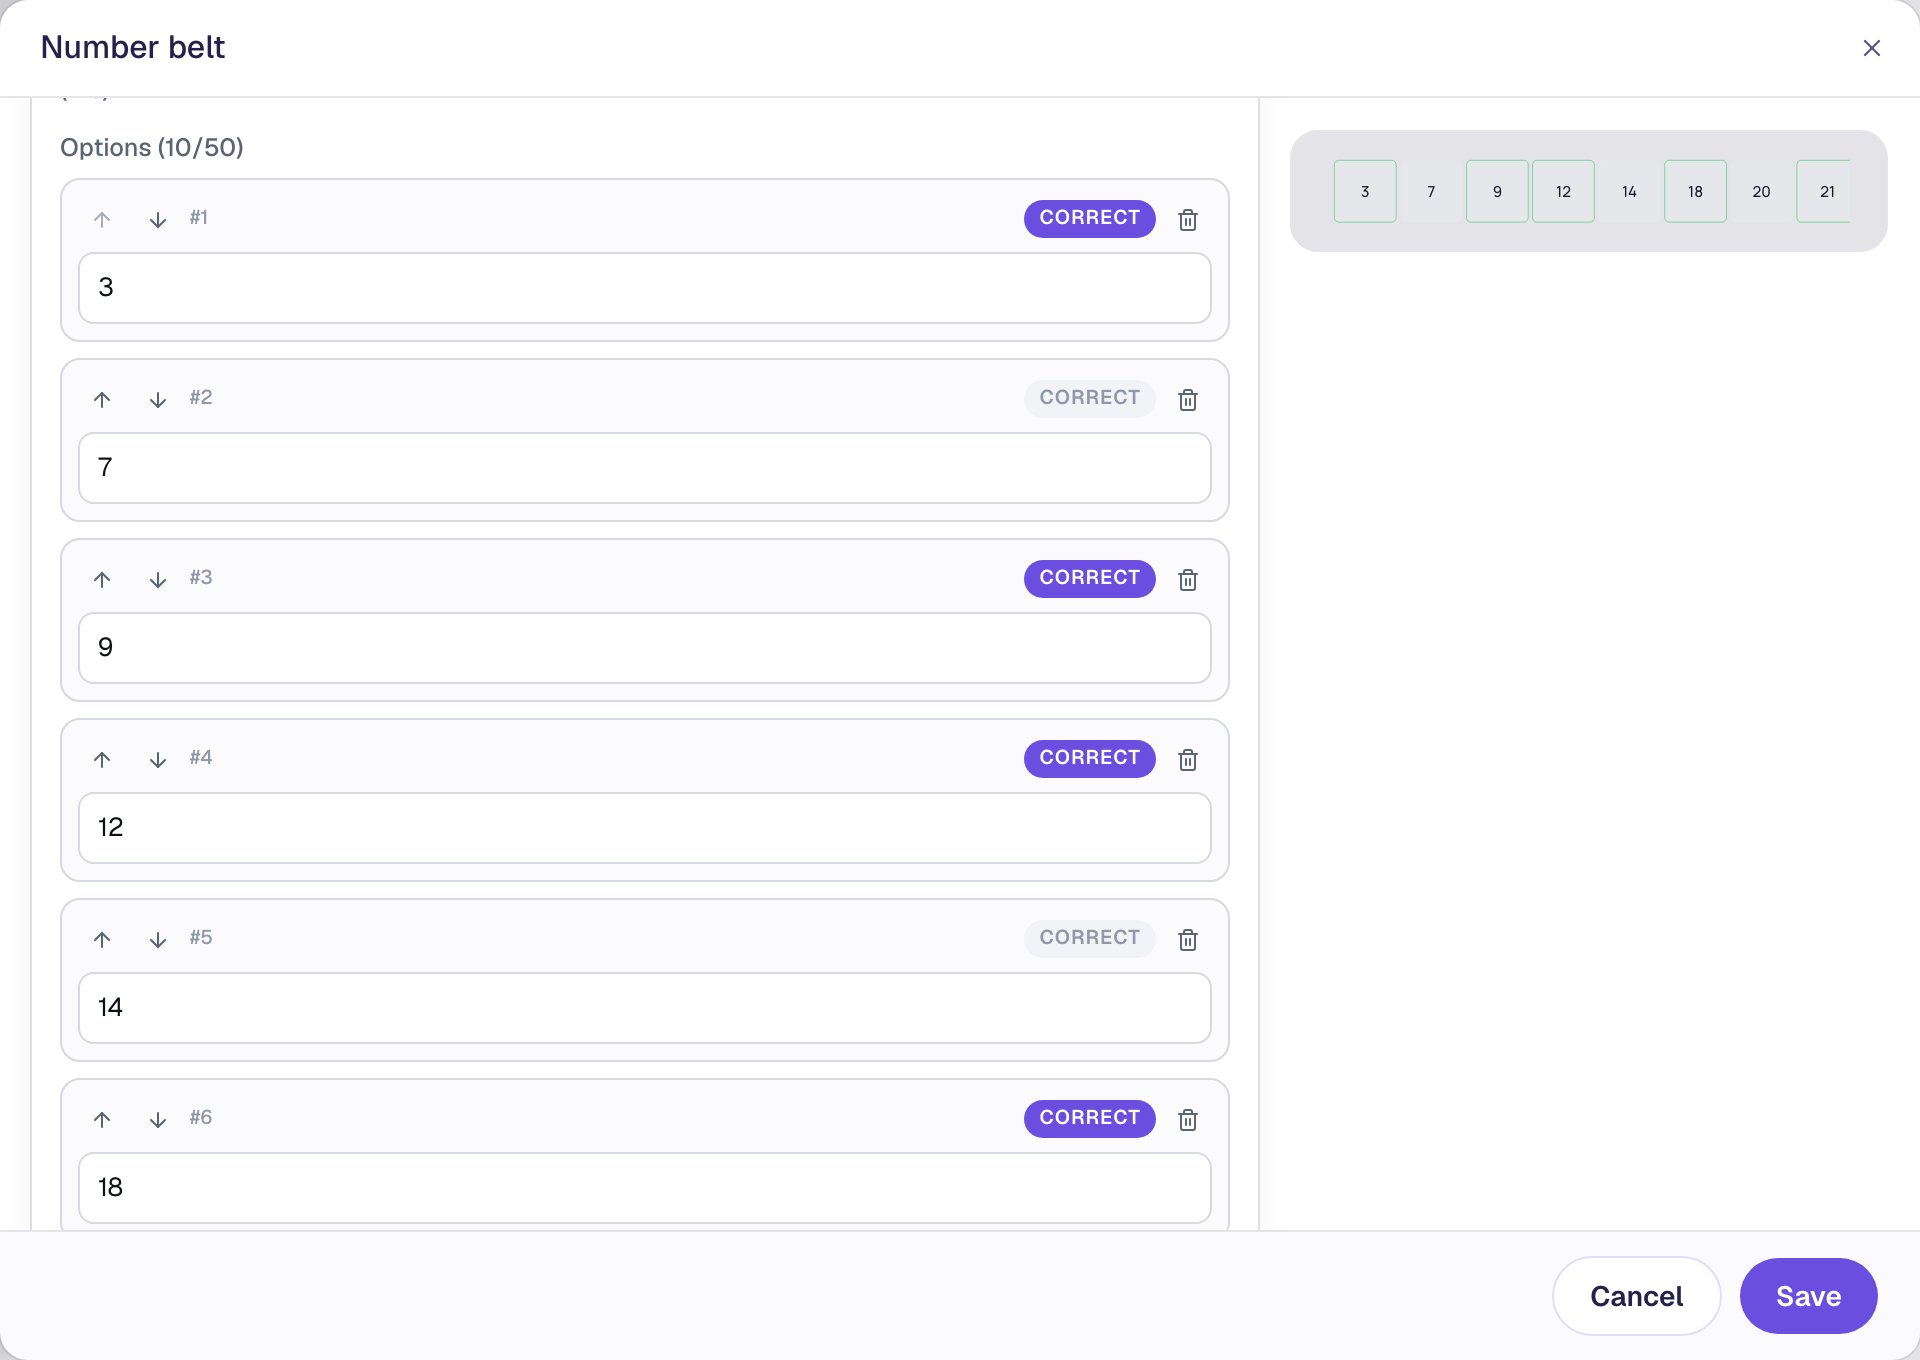
The green outlines only appear for you, in the studio. Students see plain yellow tiles until they tap one.
Step 4: Give a point for every find, at a readable speed
Scroll up to Scoring in the same window. Leave Correctness Mode on All correct: the belt finishes once a student has found every multiple. Then set Scoring Mode to Per option, so each right tap earns a point. The window shows Worth up to 6 points., one for each multiple.
Under Content, set Speed (px/s) to 60 (a little slower than the default 80, which suits a first round) and Feedback Duration (ms) to 1000, so the green or red outline after a tap stays on for a full second. Leave Feedback on Immediate. Then click Save.
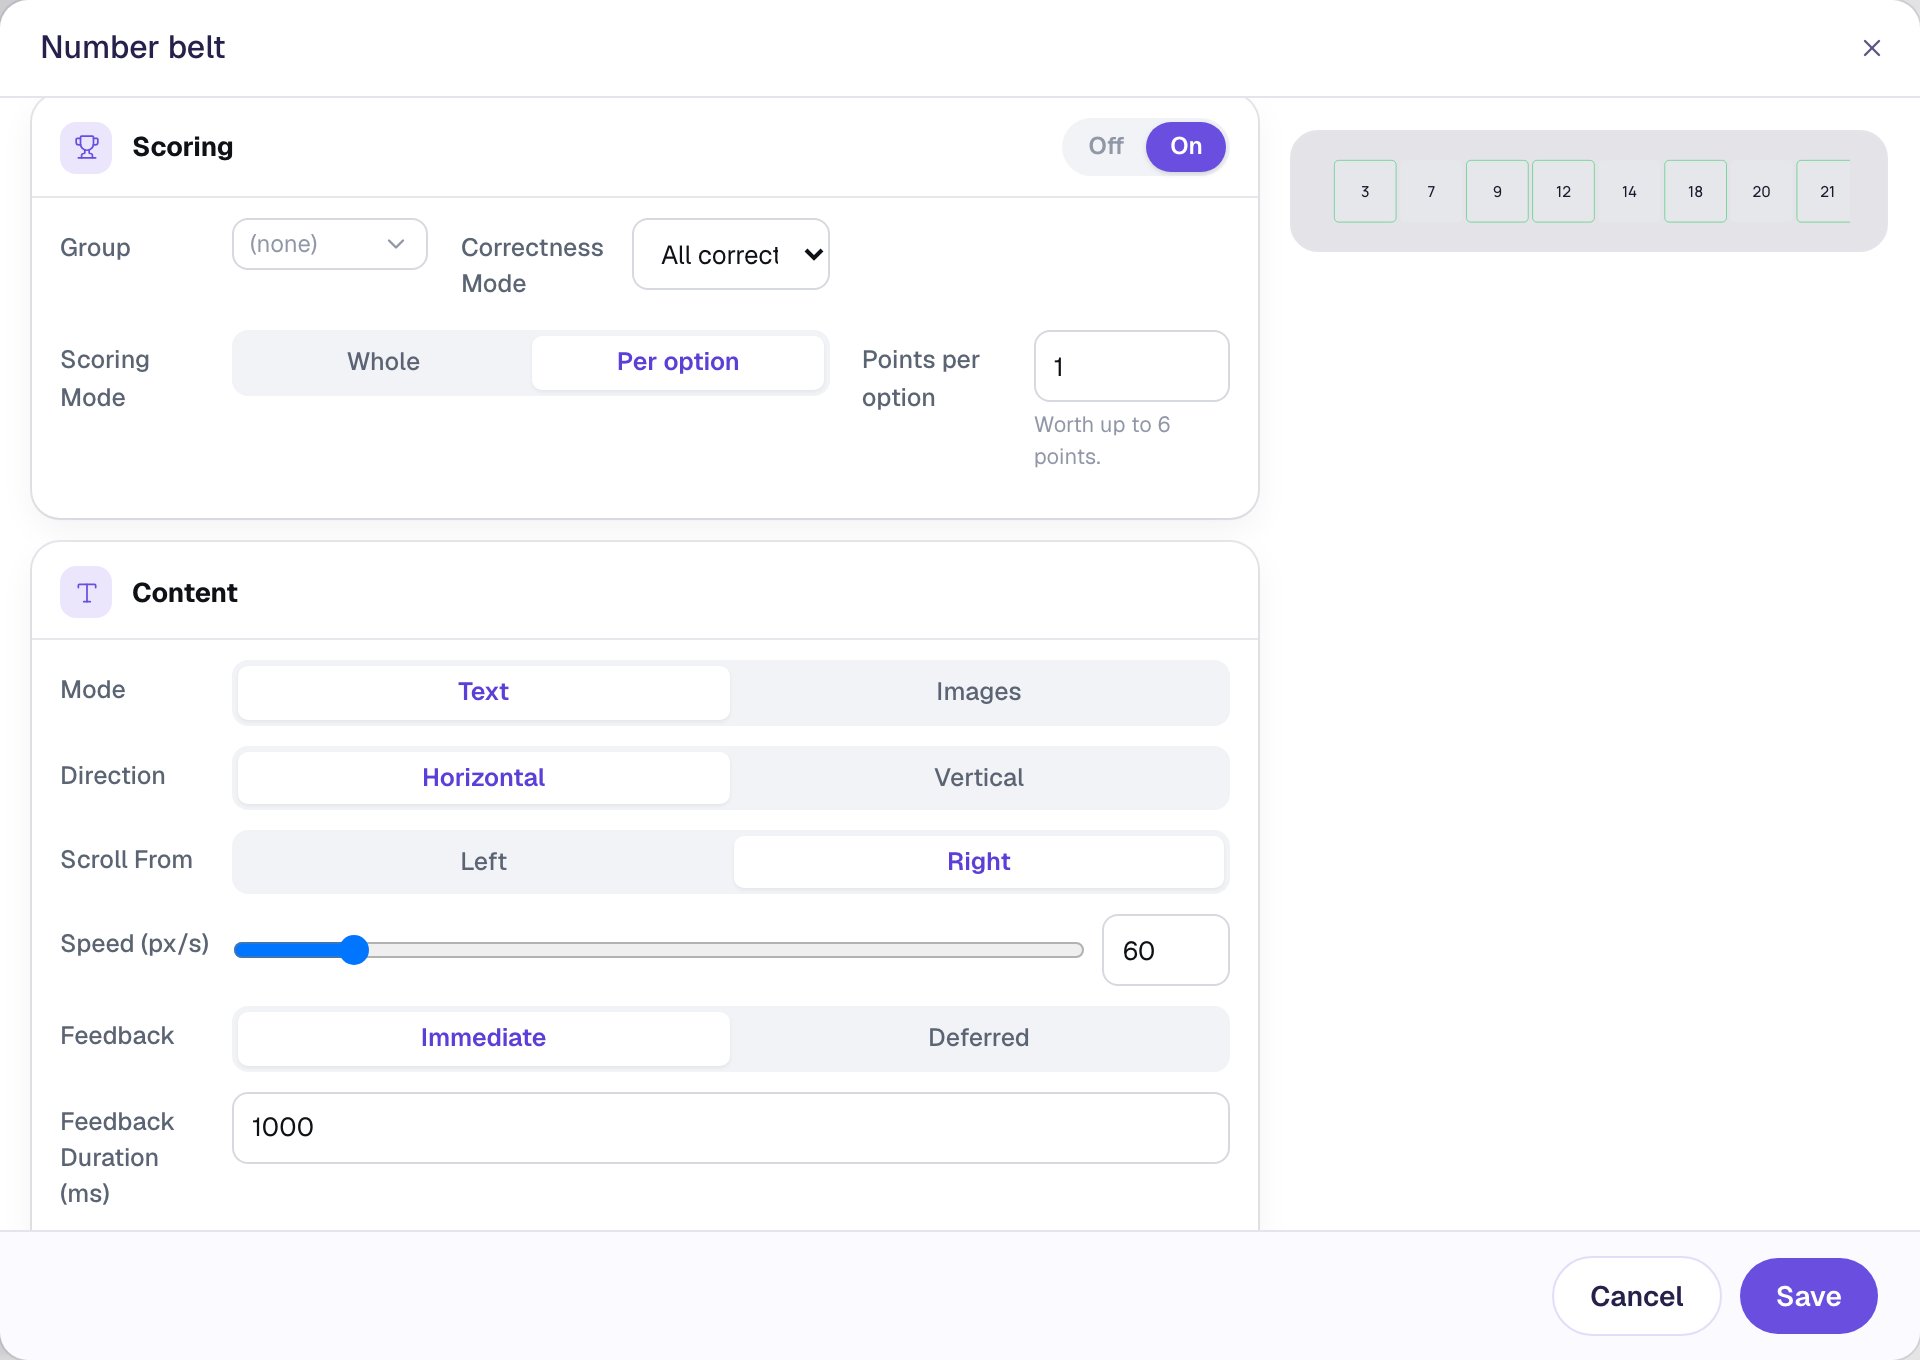
Per option or Whole? With Per option, a wrong tap is shown in red but costs nothing: a student who taps everything still collects all six points. That's friendly for practice. If guessing should cost something, choose Whole instead: the belt is then worth its Points only when every multiple is found and nothing wrong was tapped.
Step 5: Make it look like a belt
With the belt still selected, open Style & Layout in the properties panel. Set Background Color to a dark charcoal (#434343), which becomes the belt itself, and Cell Background to a warm yellow (#ffe486), so each number sits on its own bright tile. Leave Cell Text Color dark.
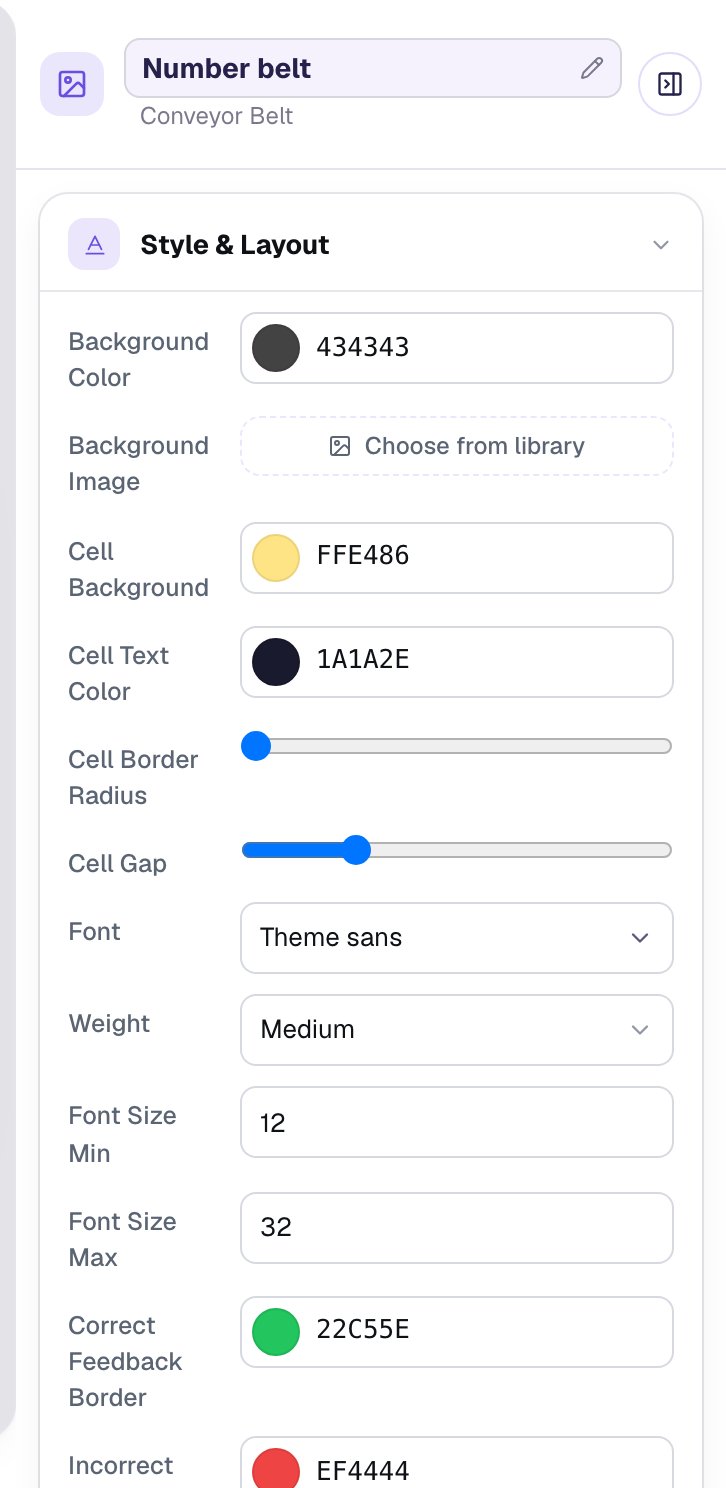
Below the colours you'll find the outline colours for right and wrong taps (Correct Feedback Border and Incorrect Feedback Border), if green and red don't suit your scene.
Step 6: Show the points as they go
Click an empty spot on the scene, then add a Score widget from Widgets. Click ⚙ Configure and:
- leave Scope on Scene, so it counts this scene's points,
- set Format to Fraction, so students see how many are left (
2/6), - change Label to
Points.
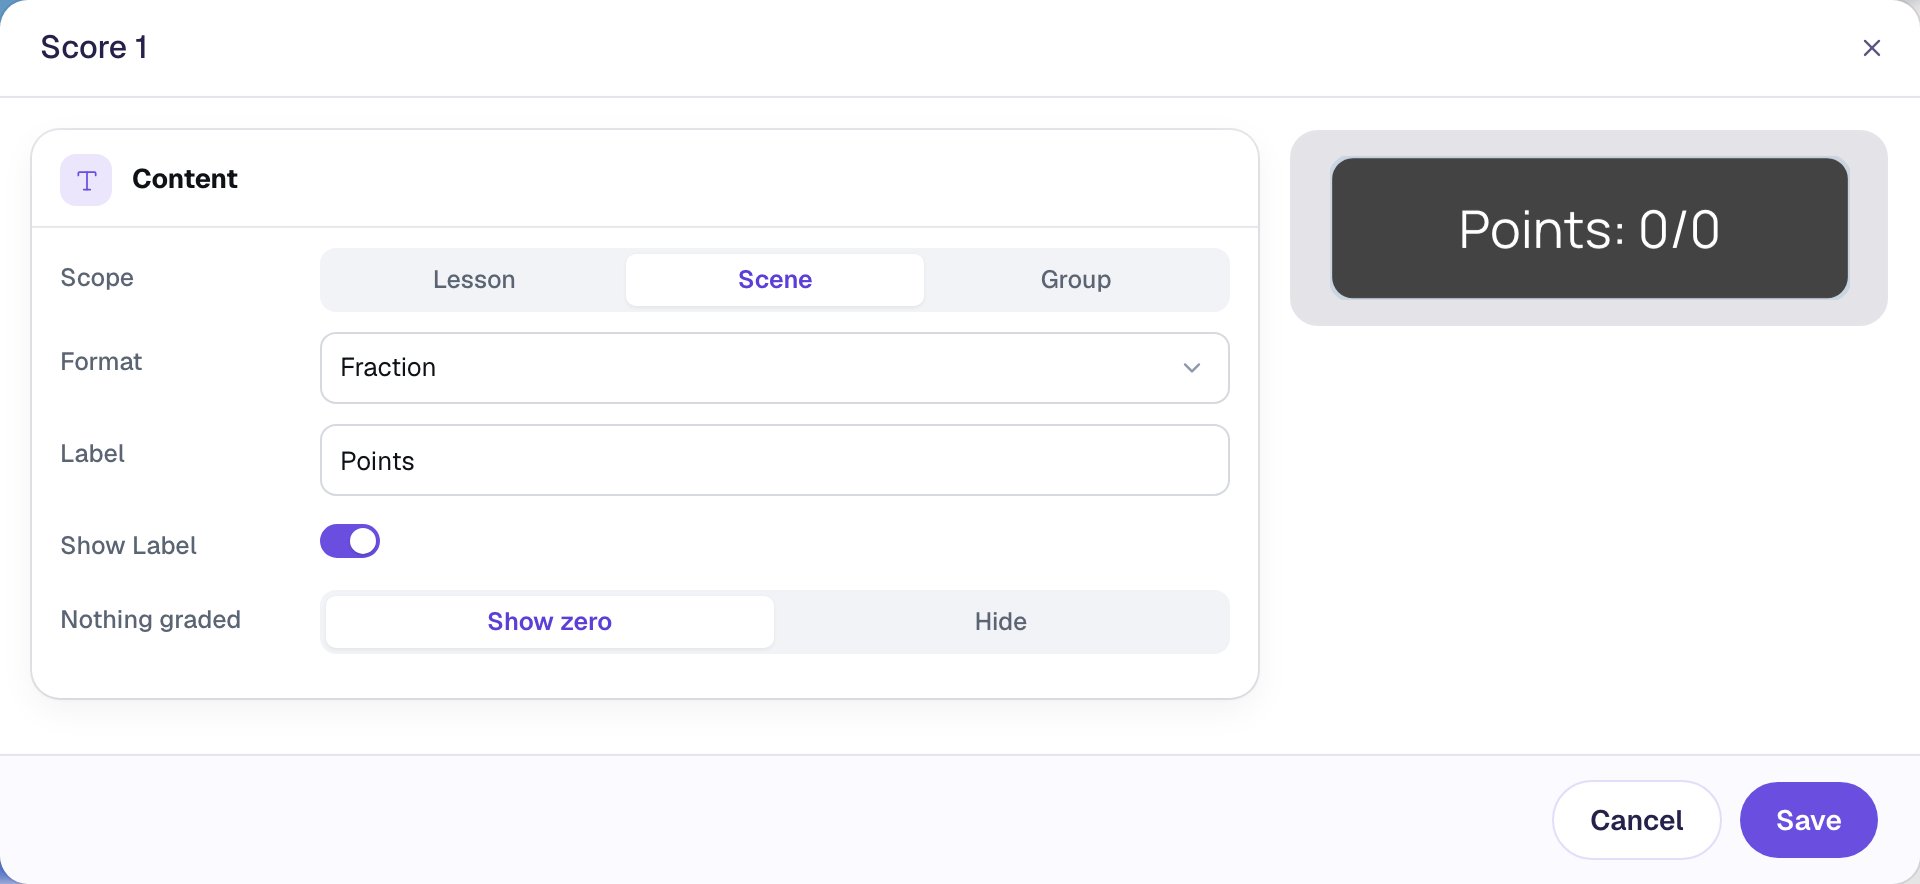
Click Save. In Style & Layout, set its Background to white and its Text Color to near-black (#1a1a1a), then drag it into the top-right corner of the scene.
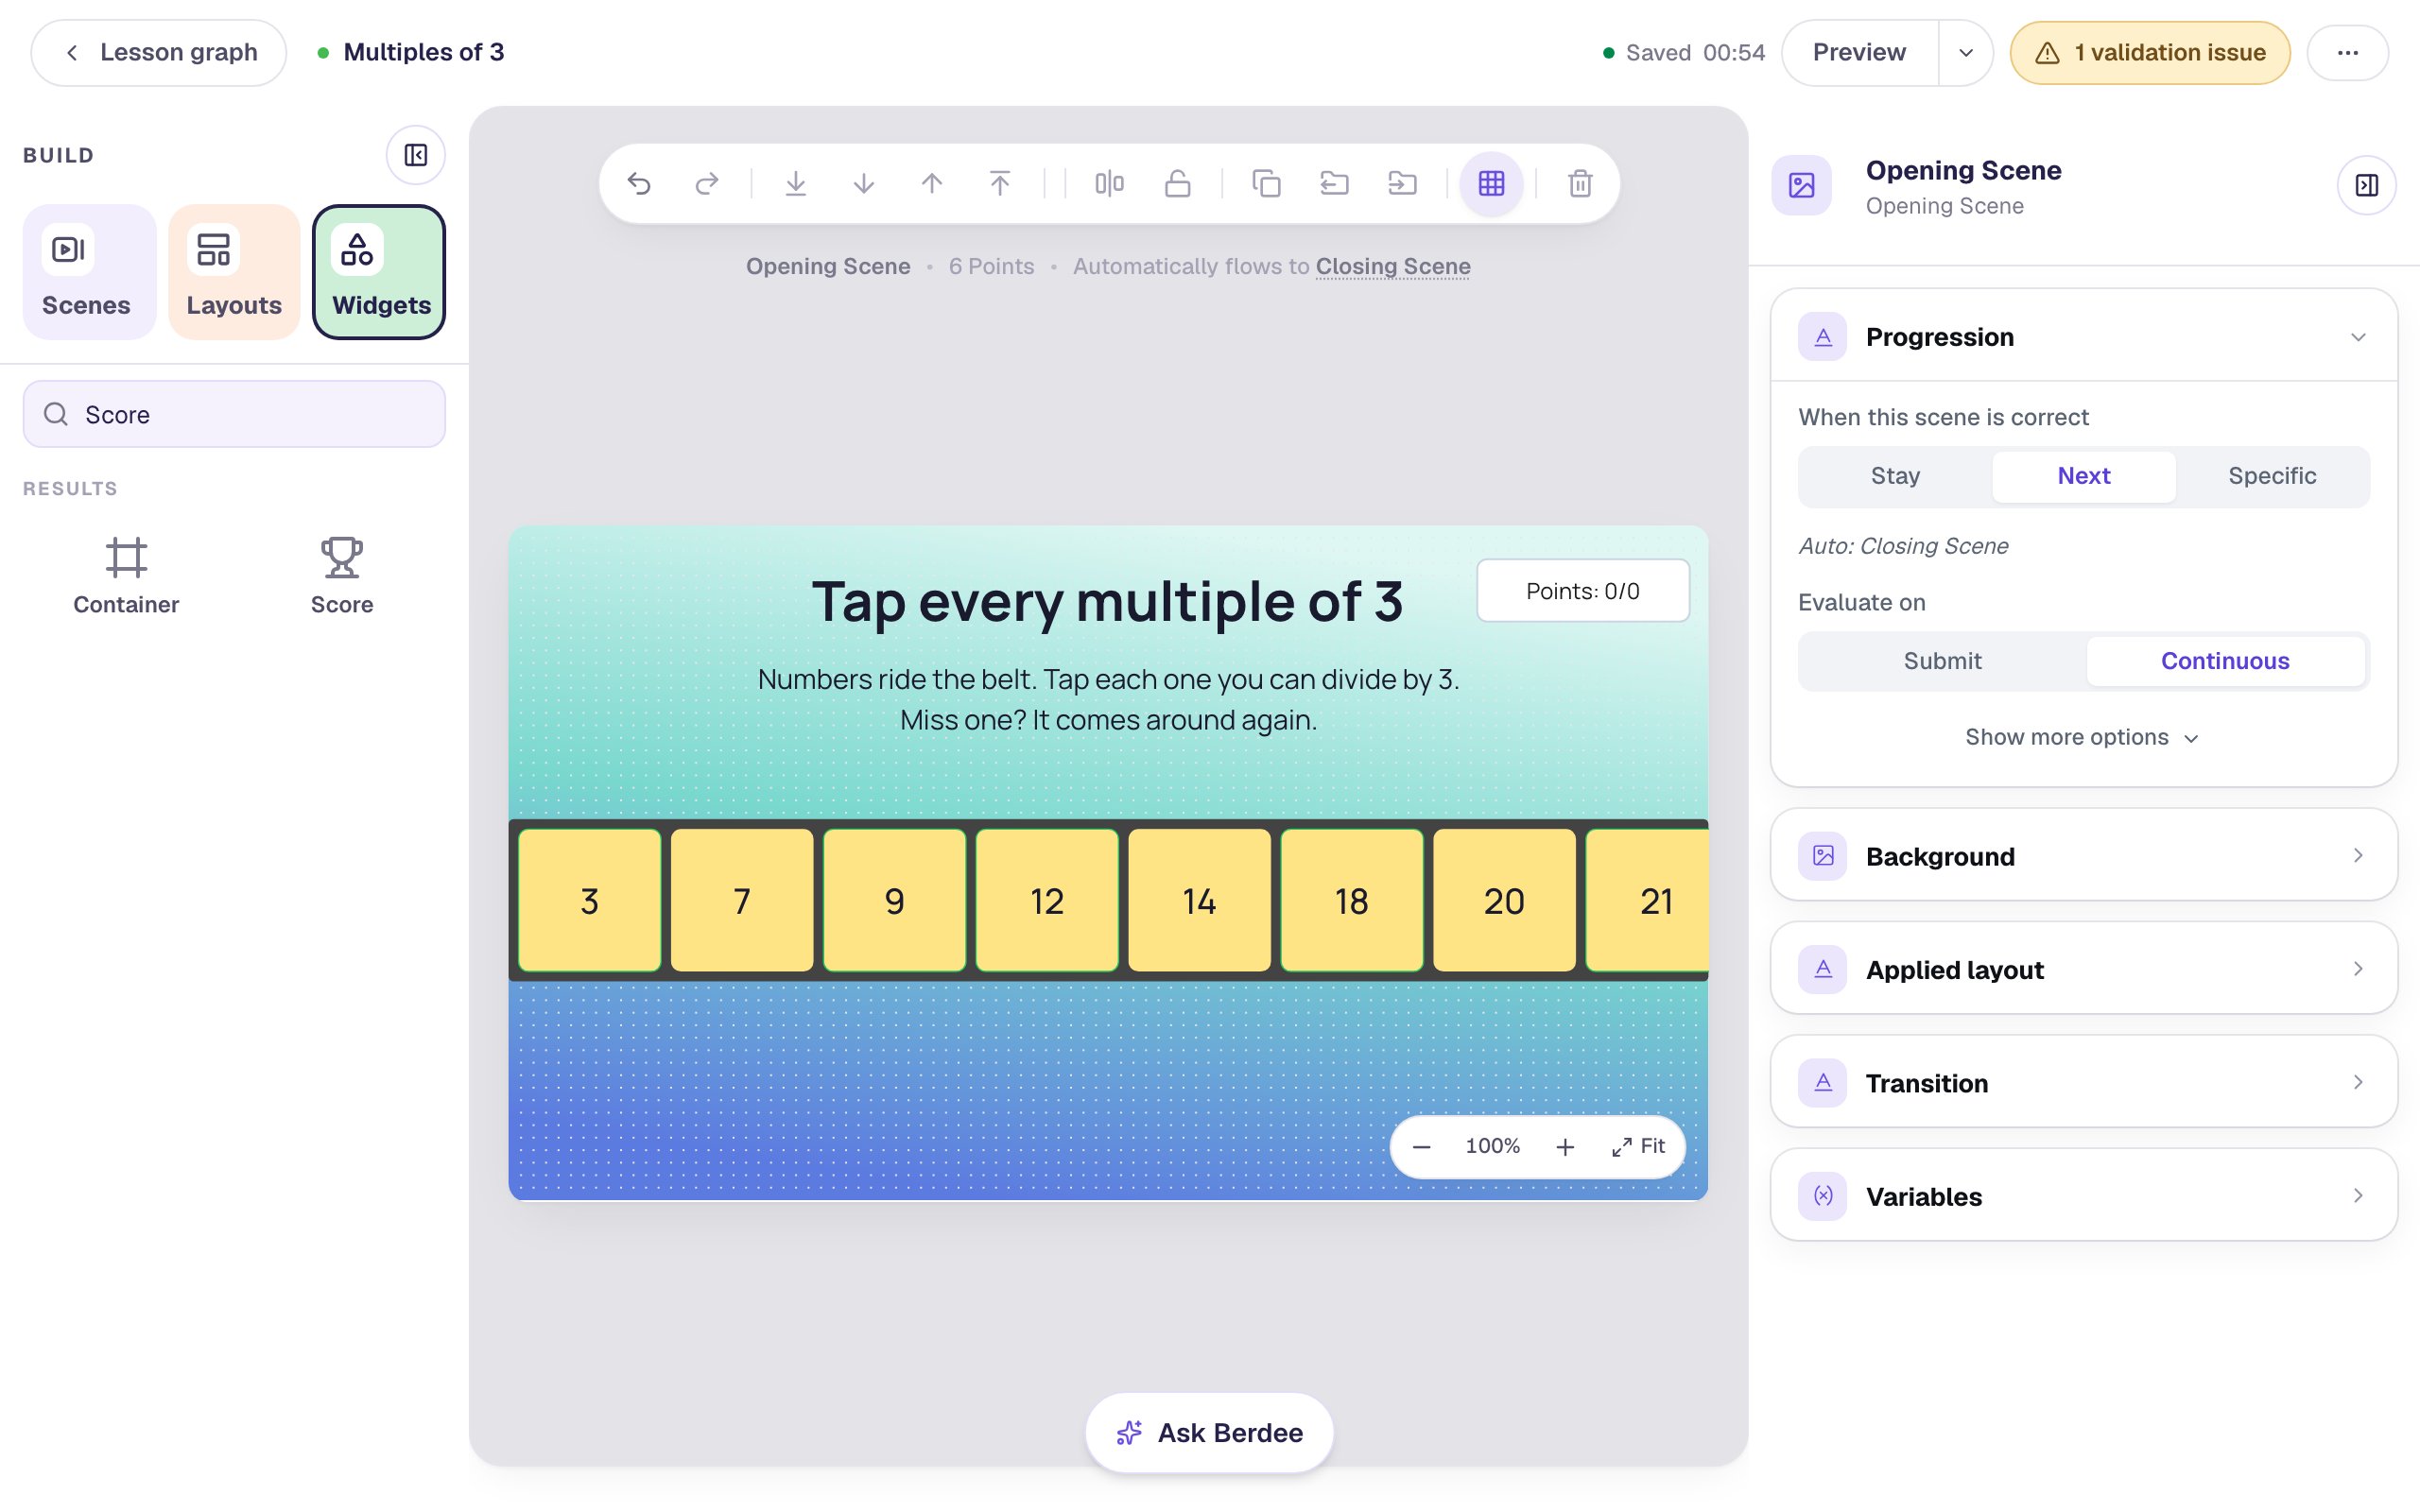
On the canvas a fraction score reads 0/0. Only Preview knows the real total, so don't worry when it looks empty here.
Step 7: Add a Next button that waits for the belt
Click an empty spot on the scene and, in Progression, change When this scene is correct from Next to Stay. Otherwise a student who finds every multiple without a slip would be whisked to the ending before seeing their full score, and one who slipped would never move on at all, because a wrong tap marks the belt as not correct.
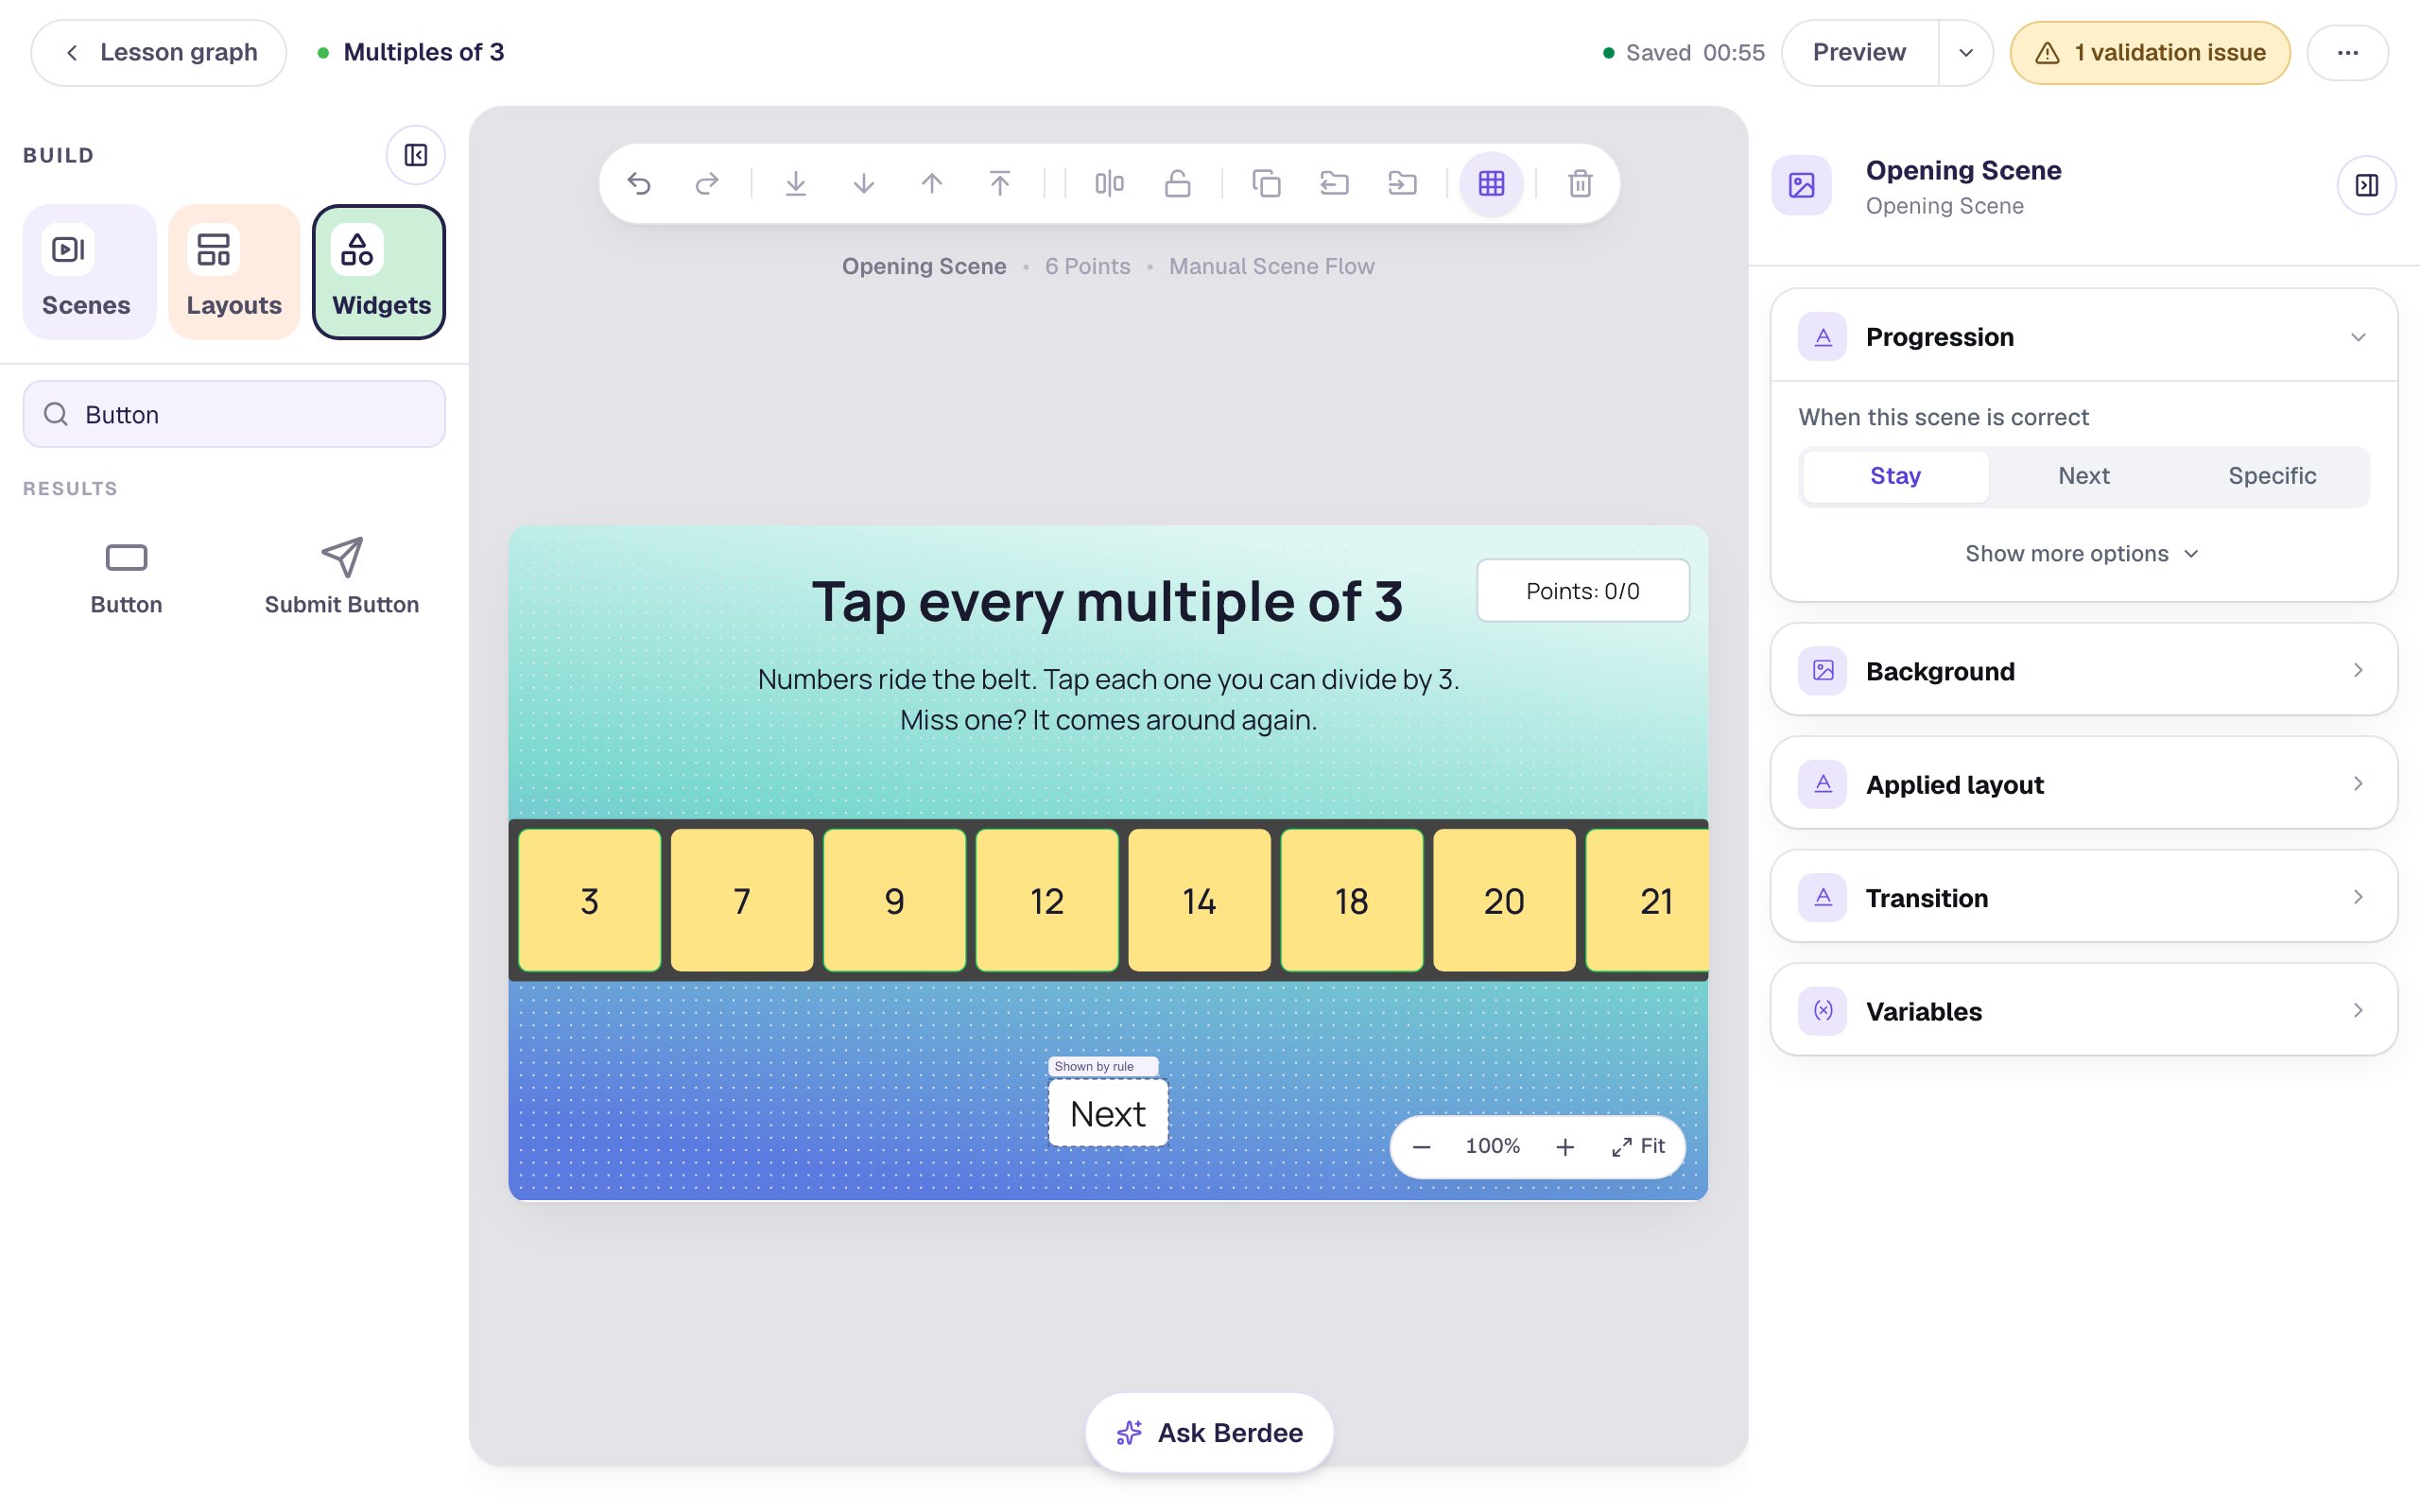
Add a Button, click ⚙ Configure, change its Label to Next, and click Save. Rename it Next. Click Behaviors above it, then Make this a "Next" button, check that Goes to says Closing Scene, and click Add behavior. Set its Font Size to 28 and drag it under the belt.
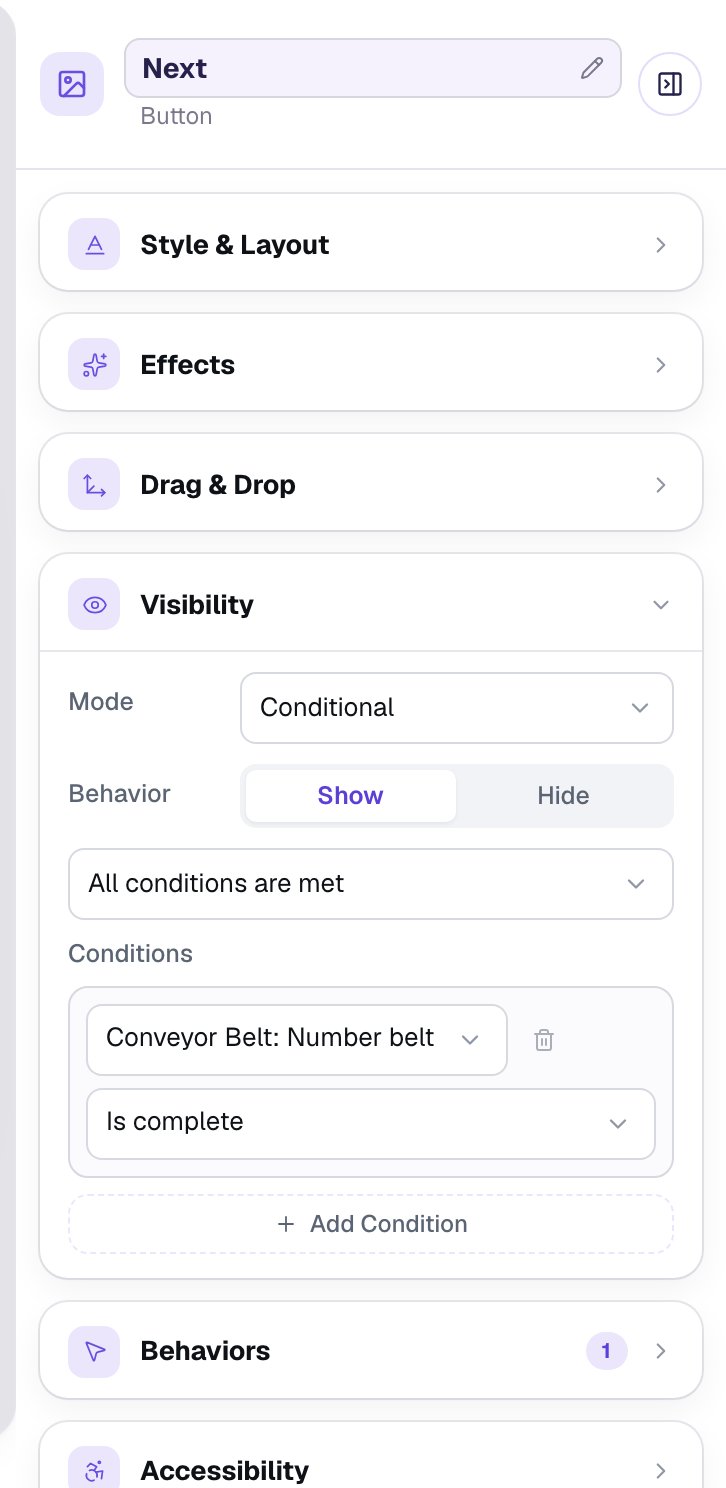
Now hide it until the belt is finished. With the button selected, open Visibility, set Mode to Conditional, and in the condition pick Conveyor Belt: Number belt, then Is complete.
With All correct, the belt is complete the moment the last multiple is tapped, even if a wrong number was tapped along the way. It keeps scrolling after that, but its tiles can't be tapped any more.
Step 8: Play it as a student
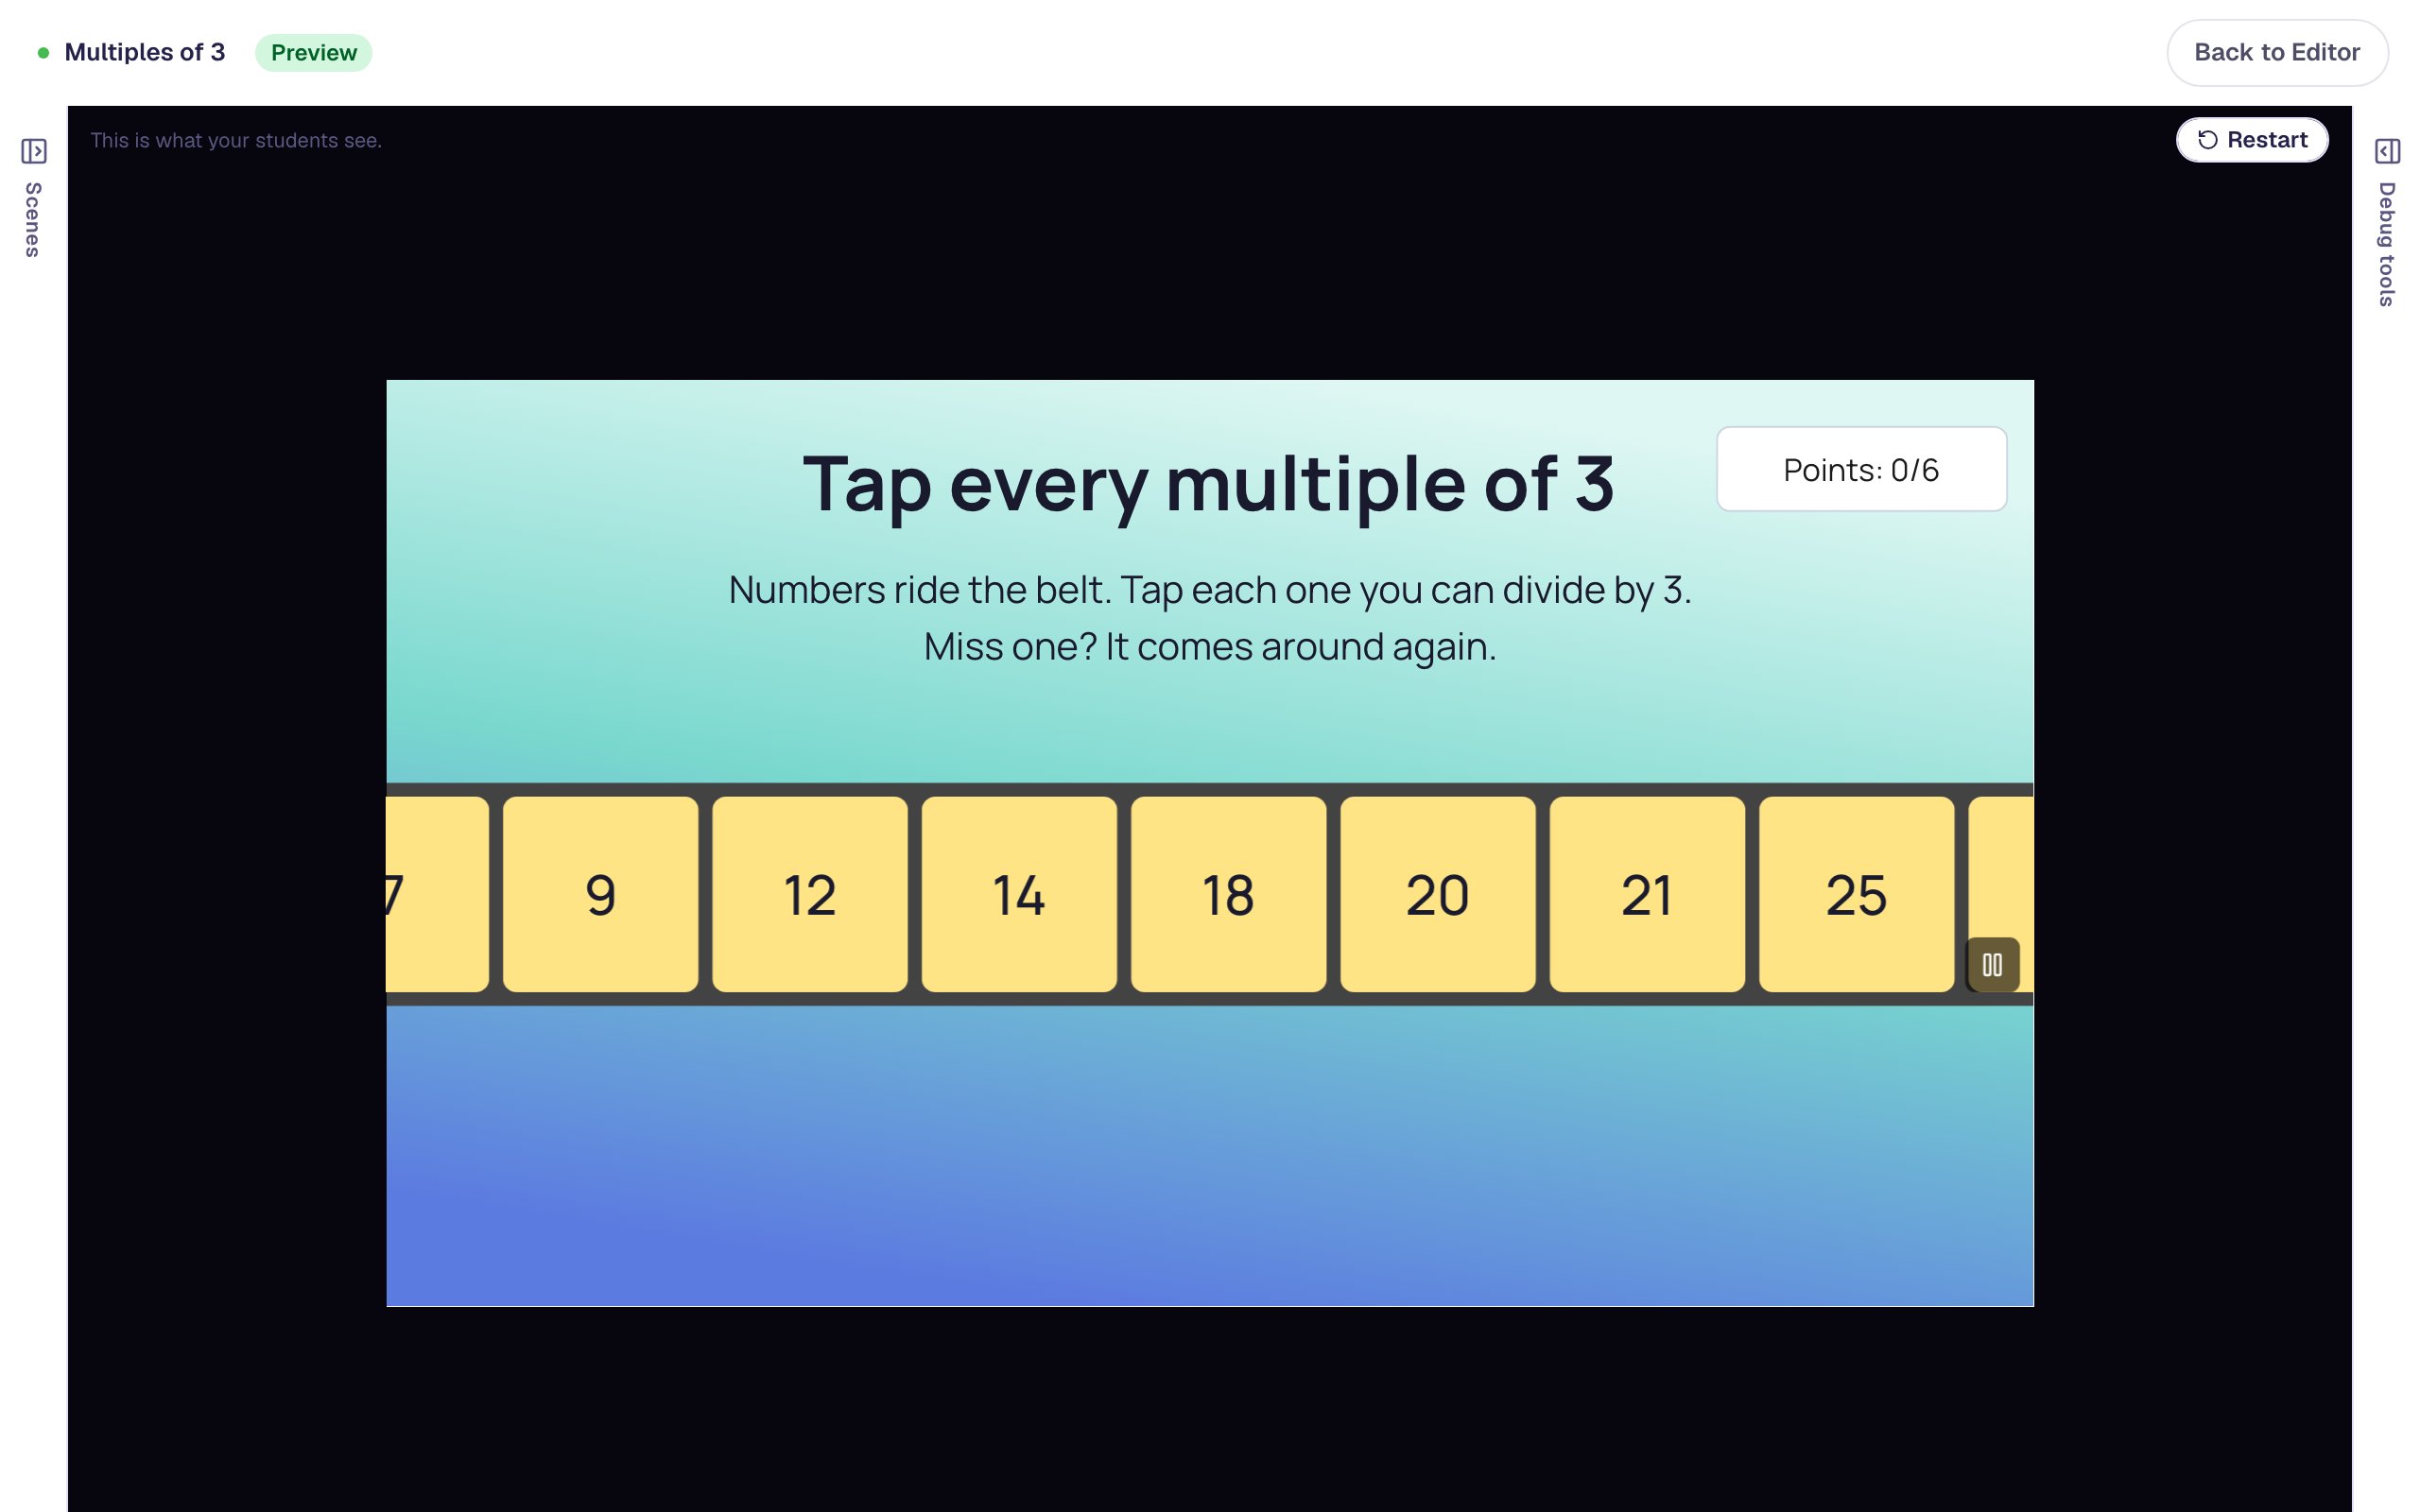
Click Preview. The numbers start rolling in from the right, and the score reads Points: 0/6.
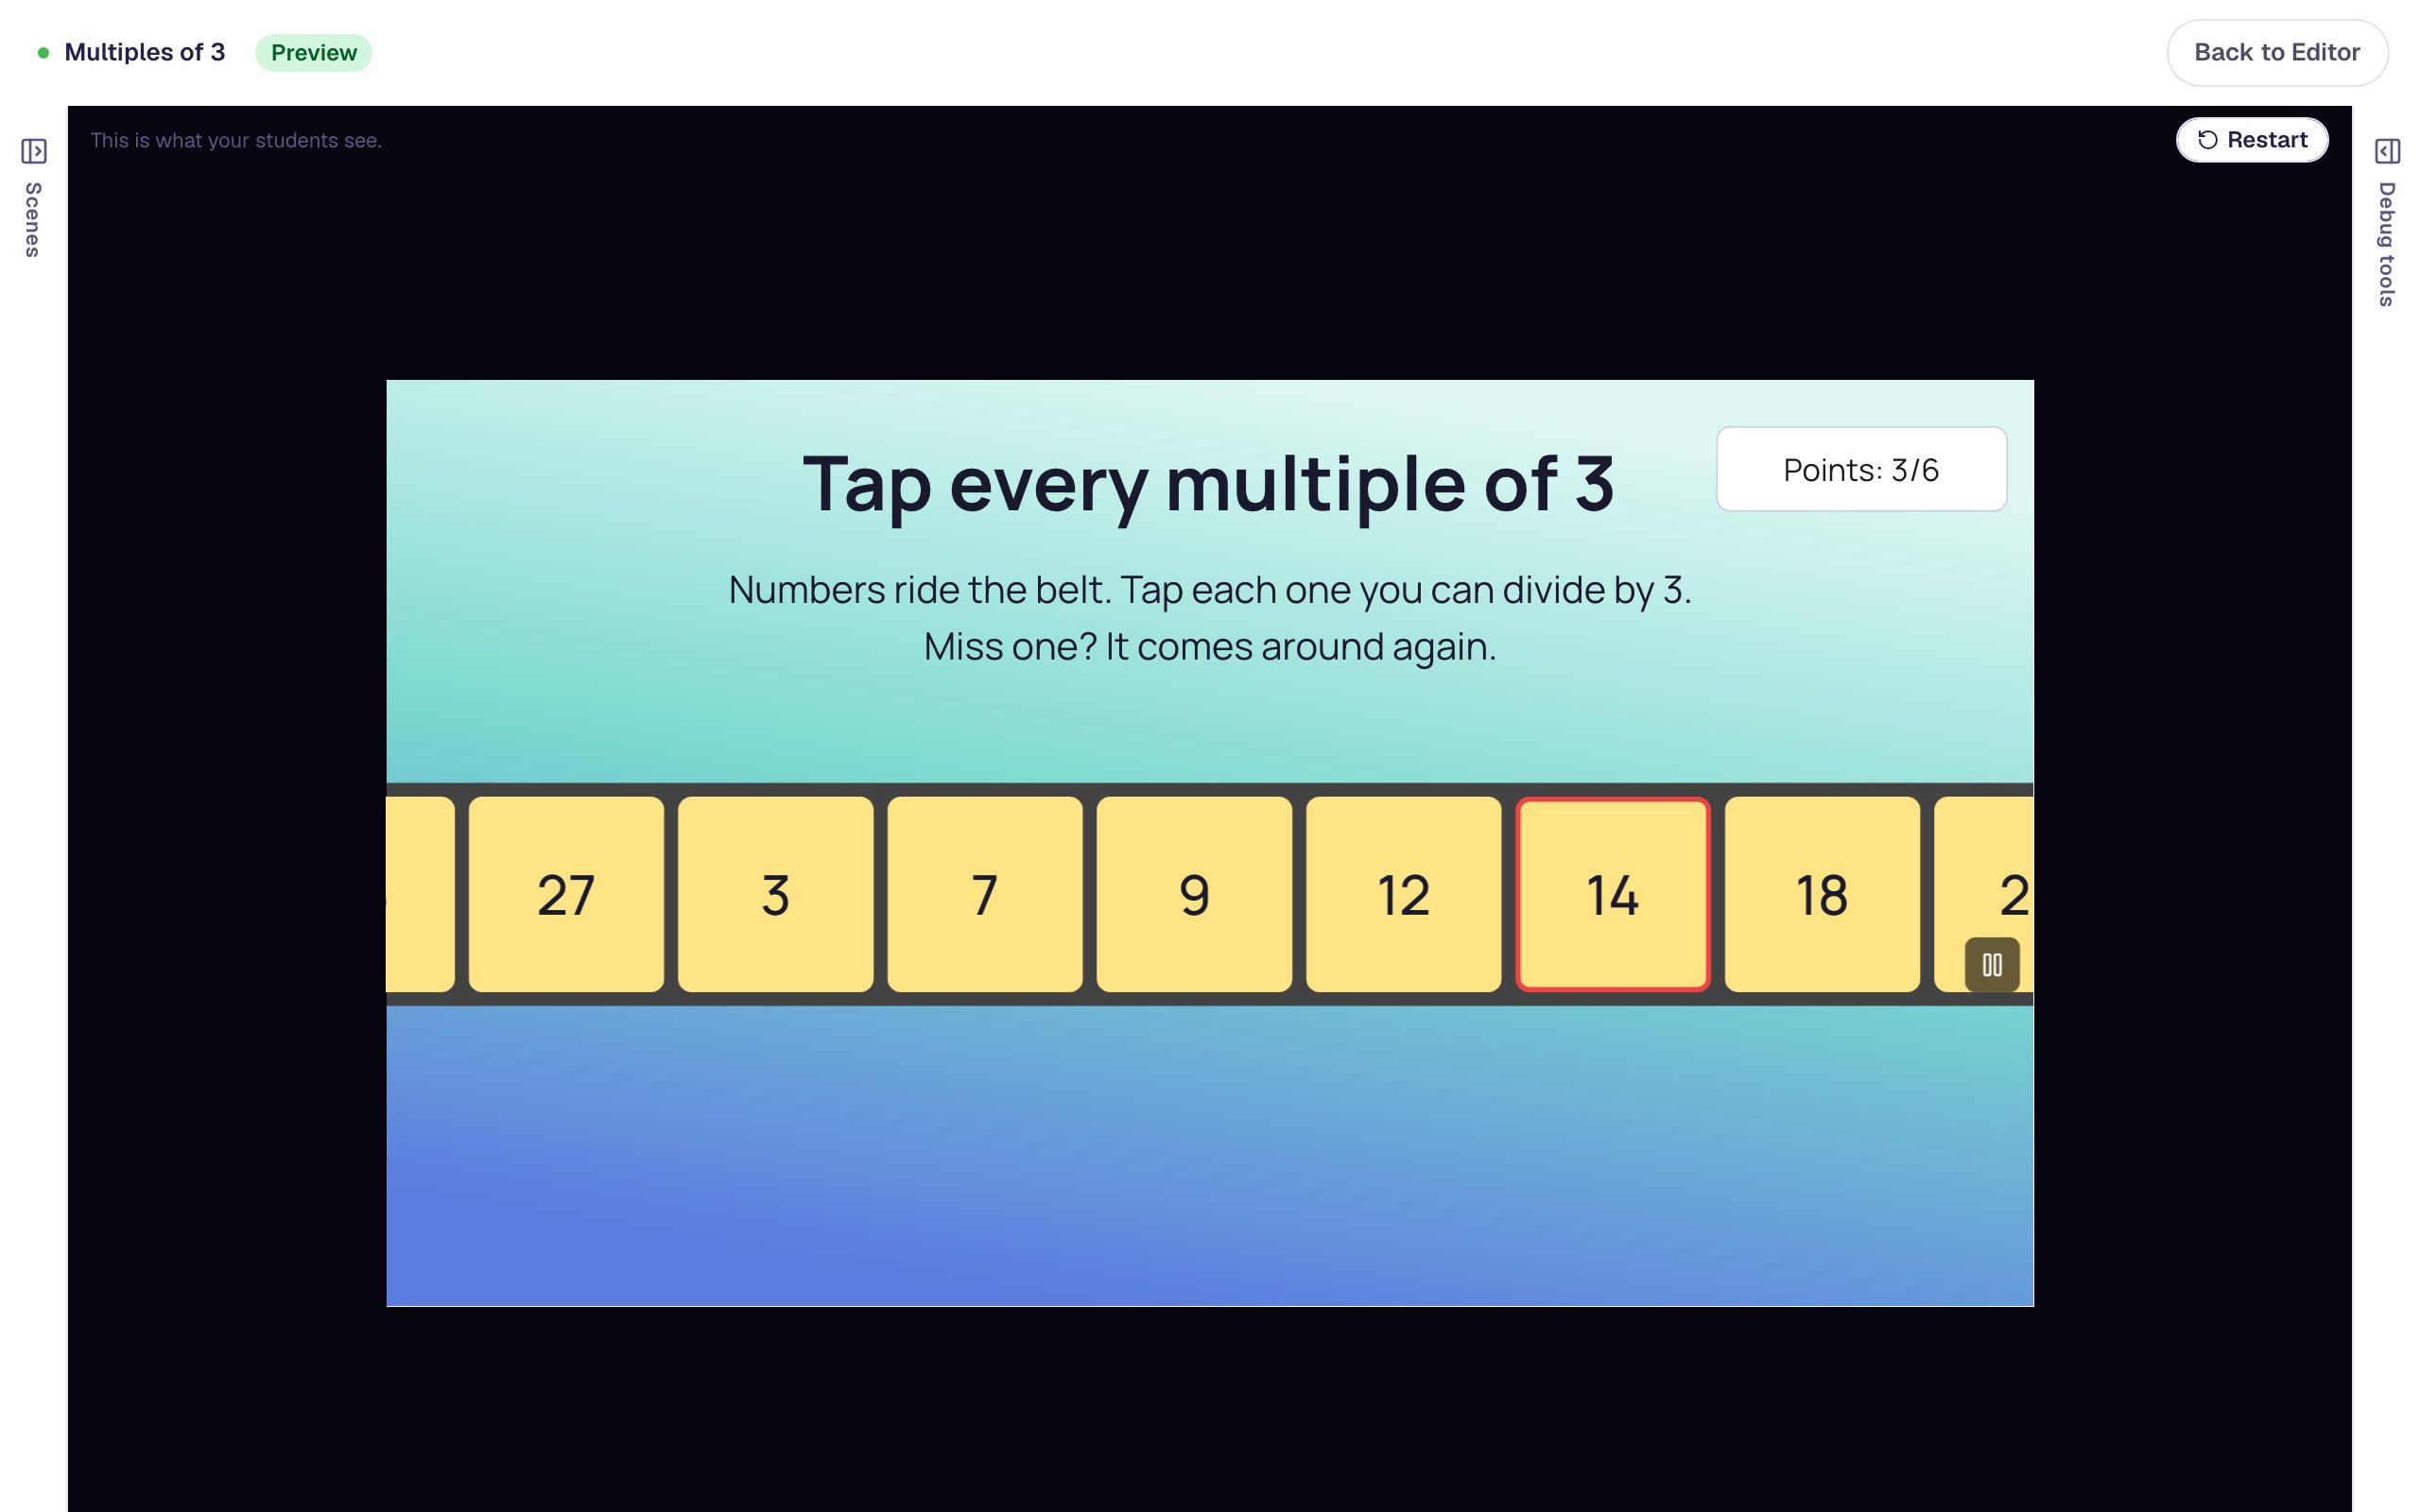
Tap 3, 9 and 12 as they come by. Each flashes green and the score goes up. Then tap 14 on purpose: it flashes red, and the score stays where it was.
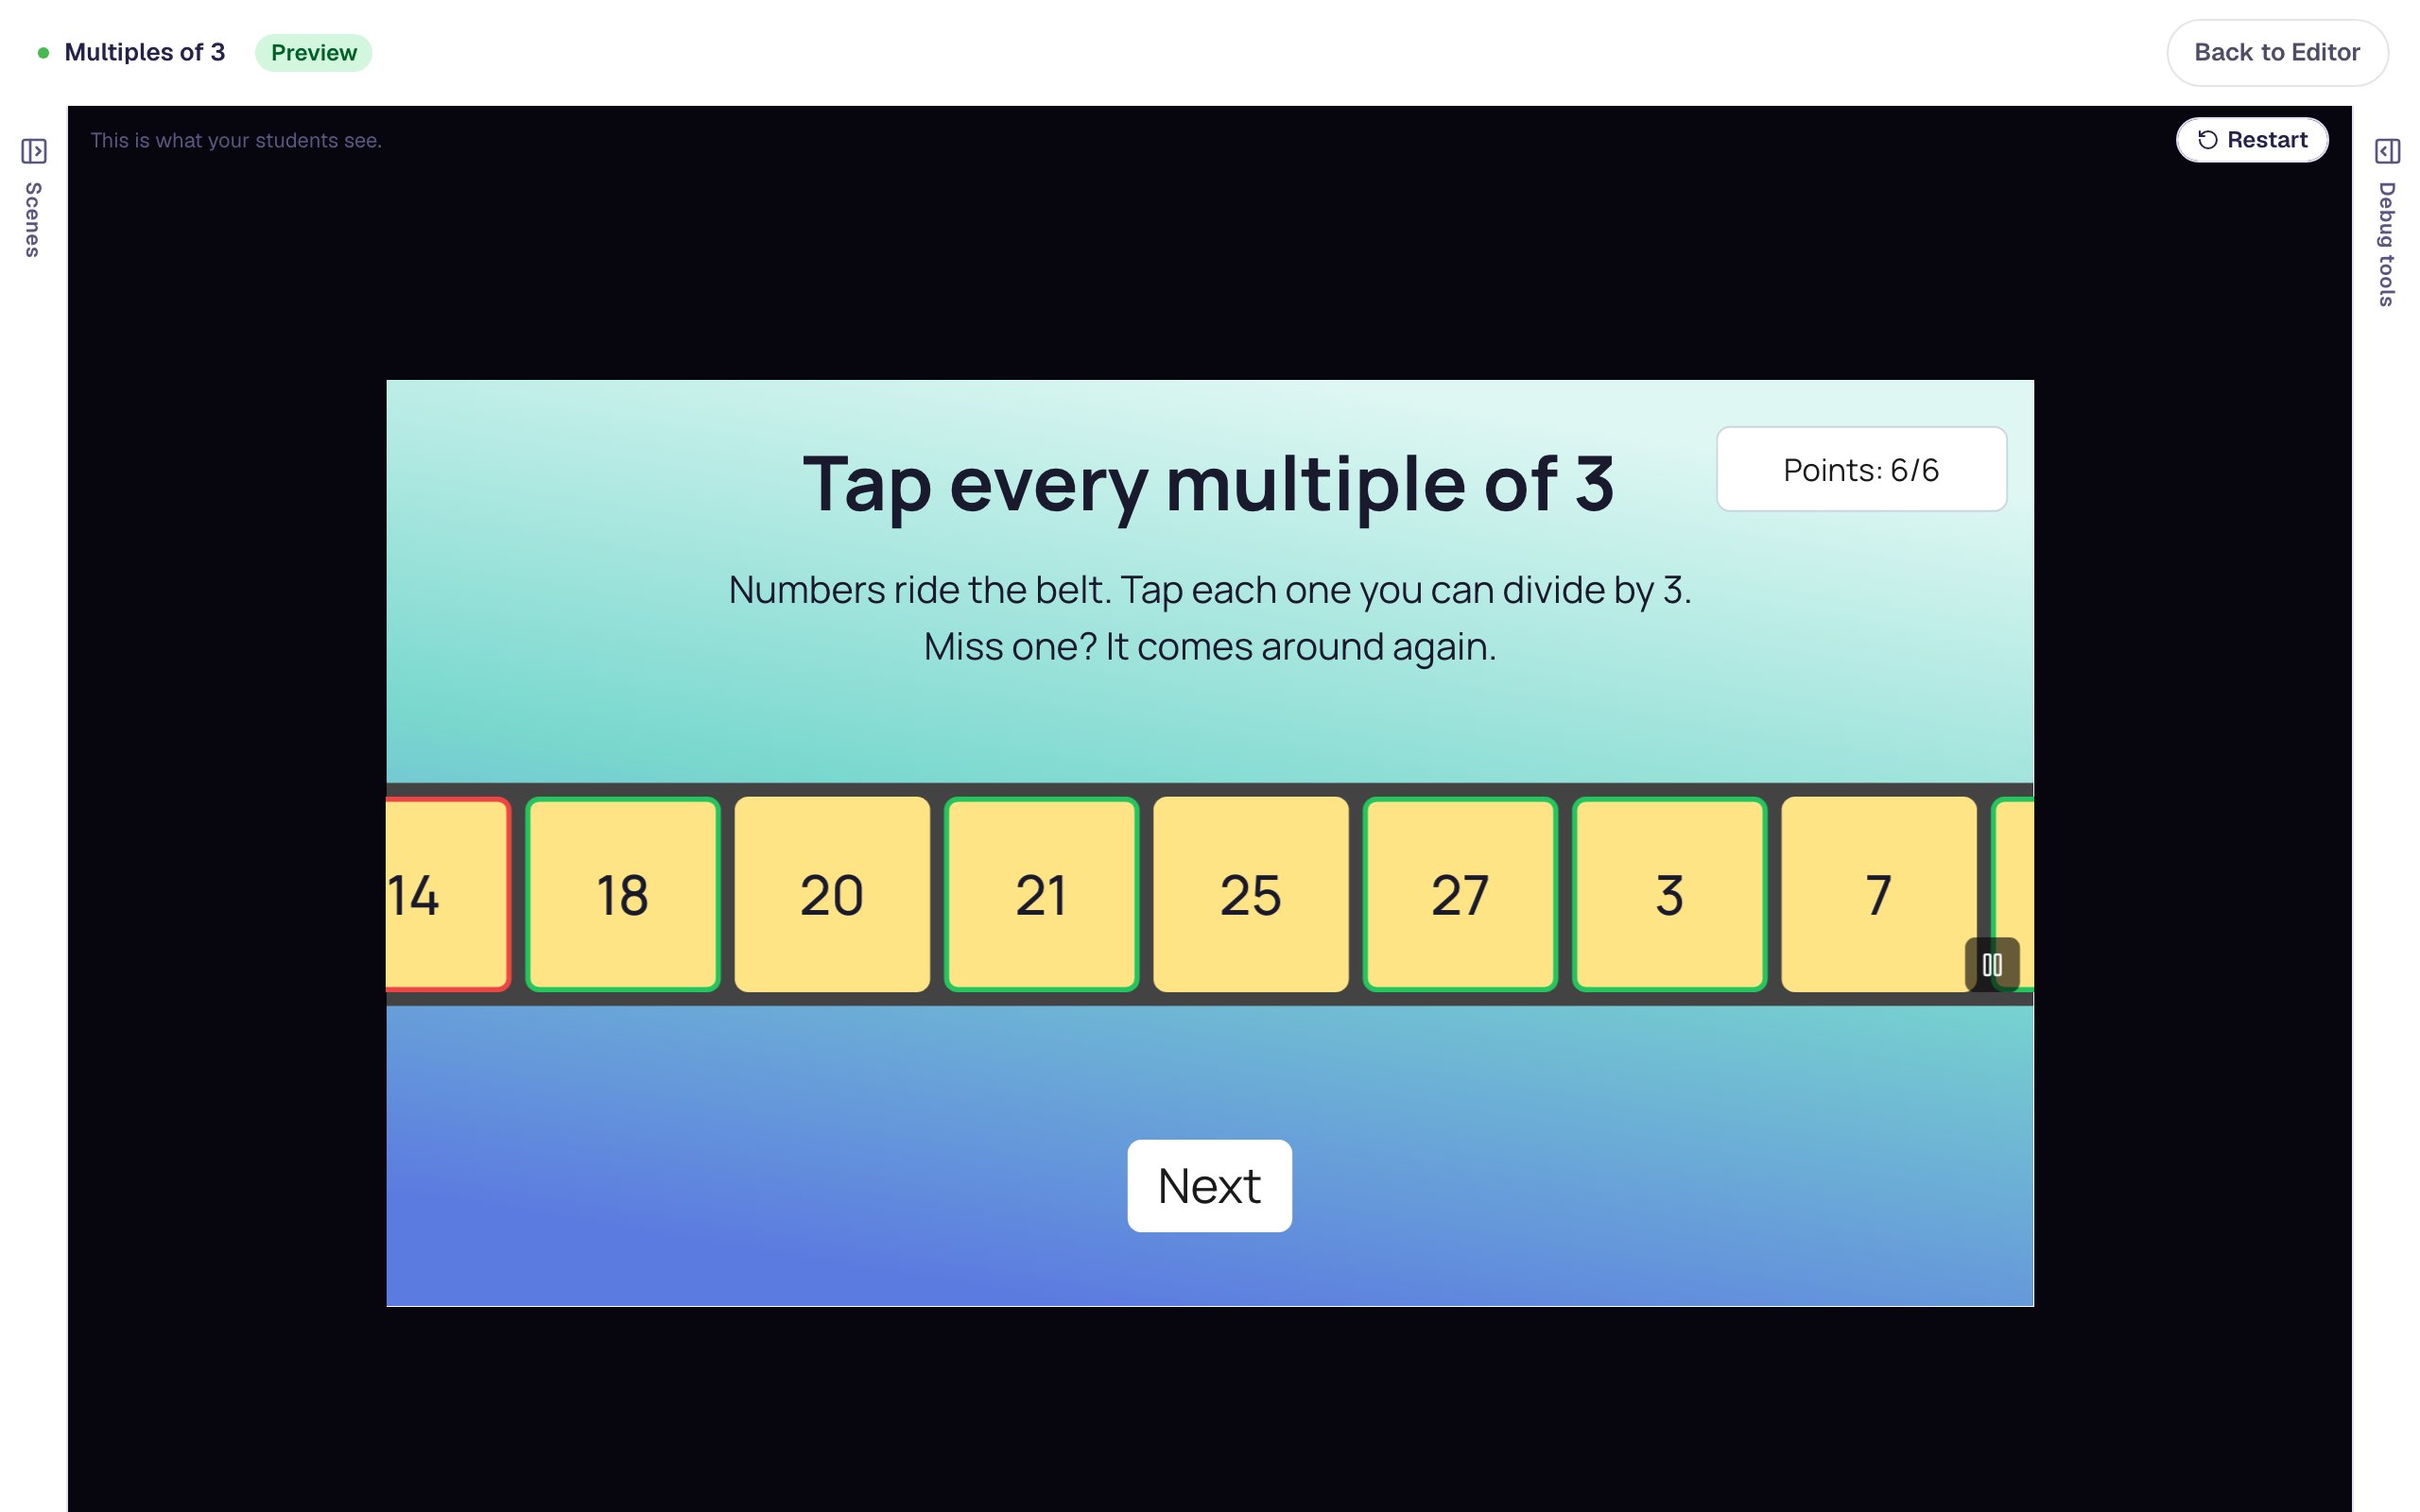
Find 18, 21 and 27 too. As soon as the last multiple is tapped, the belt is complete: every number that was tapped is outlined in green or red, the score reads 6/6, and Next appears.
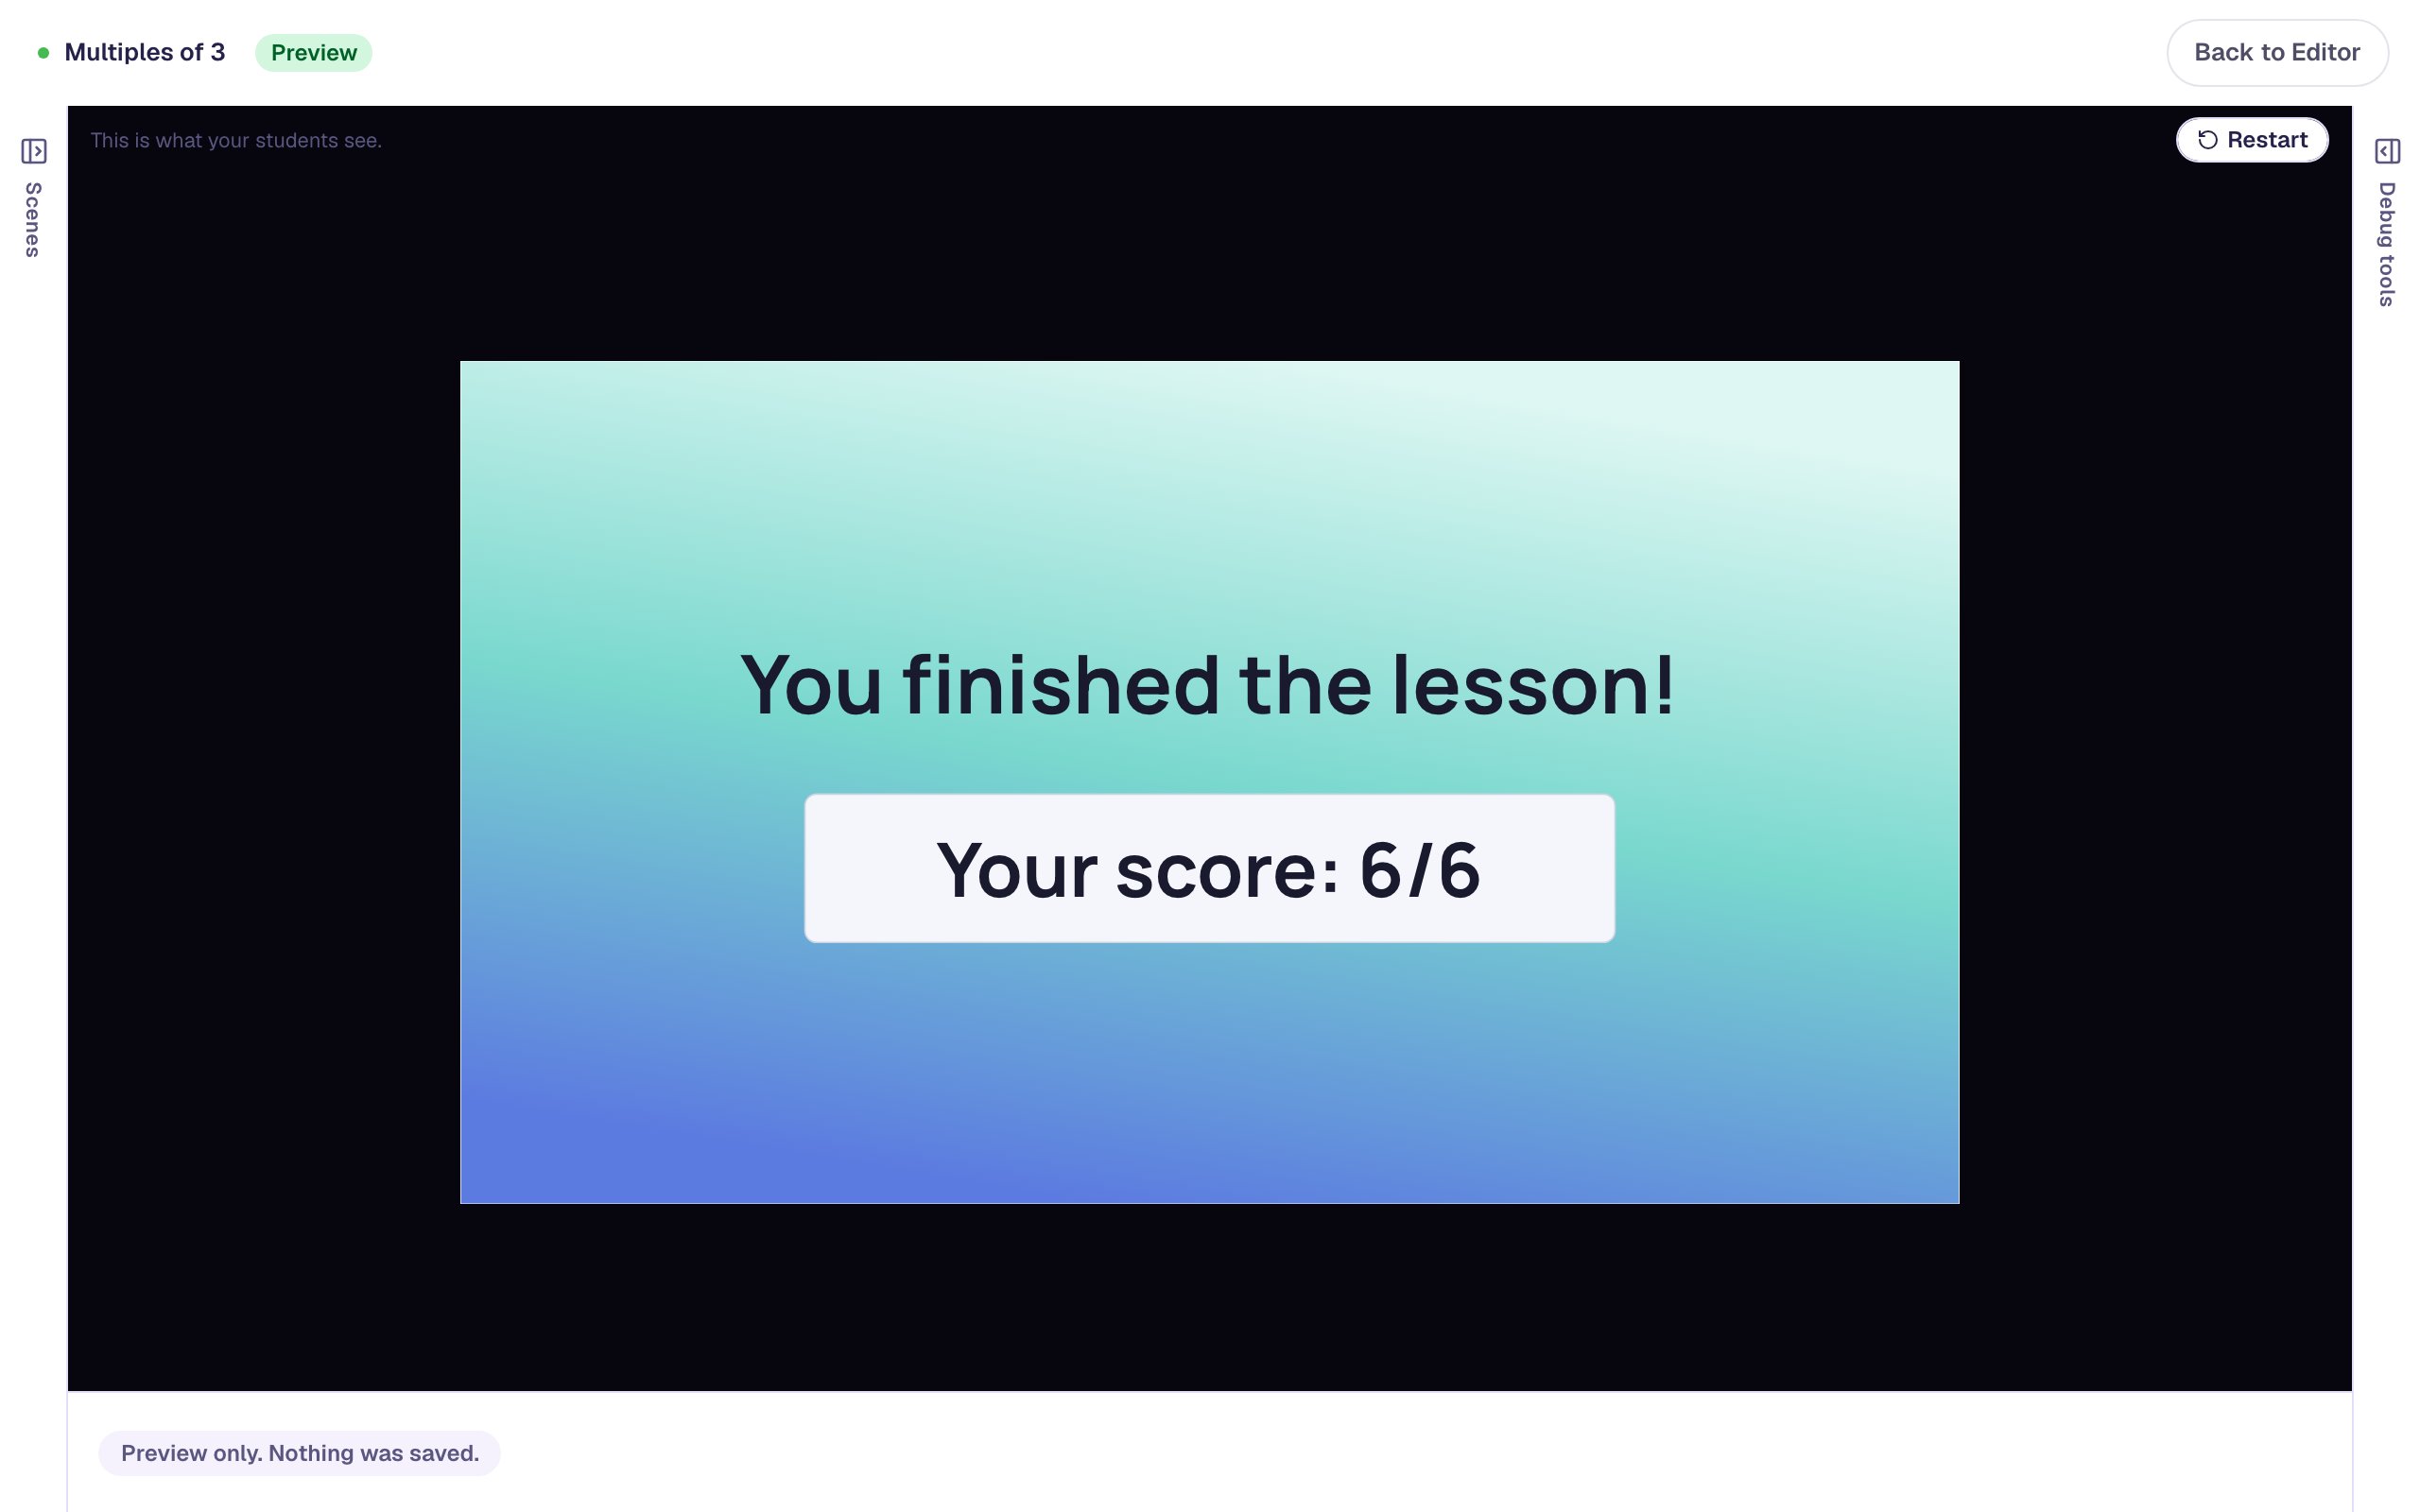
Press Next to reach the ending, which shows the lesson score.
The belt has a Pause button in its corner for students who need more time to read, and every tile can be reached with Tab and picked with Enter or Space. On a device set to reduce motion, the belt doesn't scroll at all: students see every number in a still grid and tap them the same way.
What you built
A fluency game with:
- a Conveyor Belt of ten numbers, six of them marked correct, scrolling at a readable 60 px/s,
- Per option scoring, so every multiple found is a point and a wrong tap only flashes red,
- a dark belt of yellow tiles, styled with two colours,
- a Score in the corner that counts up as students play, and
- a Next button on a Stay scene that appears once the belt Is complete.
To make a harder round, duplicate the scene, raise Speed to 100, and swap in bigger numbers, or change the rule to multiples of 4. To make it tighter, set Scoring Mode to Whole so a wrong tap costs the round. Before you publish, the lesson also needs an I'm done button (a Submit Button that submits the Lesson); that's the one validation issue showing at the top of the studio. Build your first quiz question shows where it goes.
For another game with a clock, Give students 15 seconds to answer a question adds a countdown to a question.
Make this lesson yours
Add the lesson you just watched being built to your account, then change it for your class: your questions, your pictures, your colors.
Free to sign up, and you'll come straight back here. I have an account