Spin a wheel to pick a story starter
Build a Spin Wheel that picks a random hero for a writing warm-up. Each segment saves its hero in a variable, and the scene shows it the moment the wheel stops.
- Level
- Intermediate
- Time
- About 15 min
- Steps
- 7
A warm-up scene where students spin for a story hero, see "Your hero" fill in, get one re-spin that never lands on the same hero, and then start writing.
Get the finished lesson
Skip straight to the result, or keep it open beside the steps. Add this tutorial's lesson to your account and explore how it works in the studio.
Free to sign up, and you'll come straight back here. I have an account
A blank page is the hardest part of writing. A wheel takes the choice away: students spin, the wheel lands on a hero, and they write about whoever they got. The suspense of the spin gets everyone started at once.
In this tutorial you'll build a one-scene warm-up with a Spin Wheel of four heroes. When the wheel stops, the scene says Your hero: a sleepy wizard (or whichever hero it landed on). Students get one re-spin, and the wheel never lands on the same hero twice. Three pieces do the work:
- a variable called
hero, which holds the hero the wheel picked, - a Set Variable action on each segment of the wheel, which saves that segment's hero when the wheel lands on it, and
- a placeholder,
{{ hero }}, in the scene's text, which shows whatever the variable holds.
If you haven't used variables before, Remember a student's choice and use it later builds the same idea with buttons. You don't need it first.
Step 1: Set the scene
Start a blank lesson (New lesson, then Start from scratch) and name it Story starter (click Untitled lesson at the top left).
Give it a background before anything else, so you're designing on the real colours. Click the gray margin around the scene so nothing is selected, open Background in the properties panel, and click Choose a style. Pick Lagoon gradient under Gradients and click Apply background. Do the same on the Closing Scene, so the ending matches.
Back on the Opening Scene:
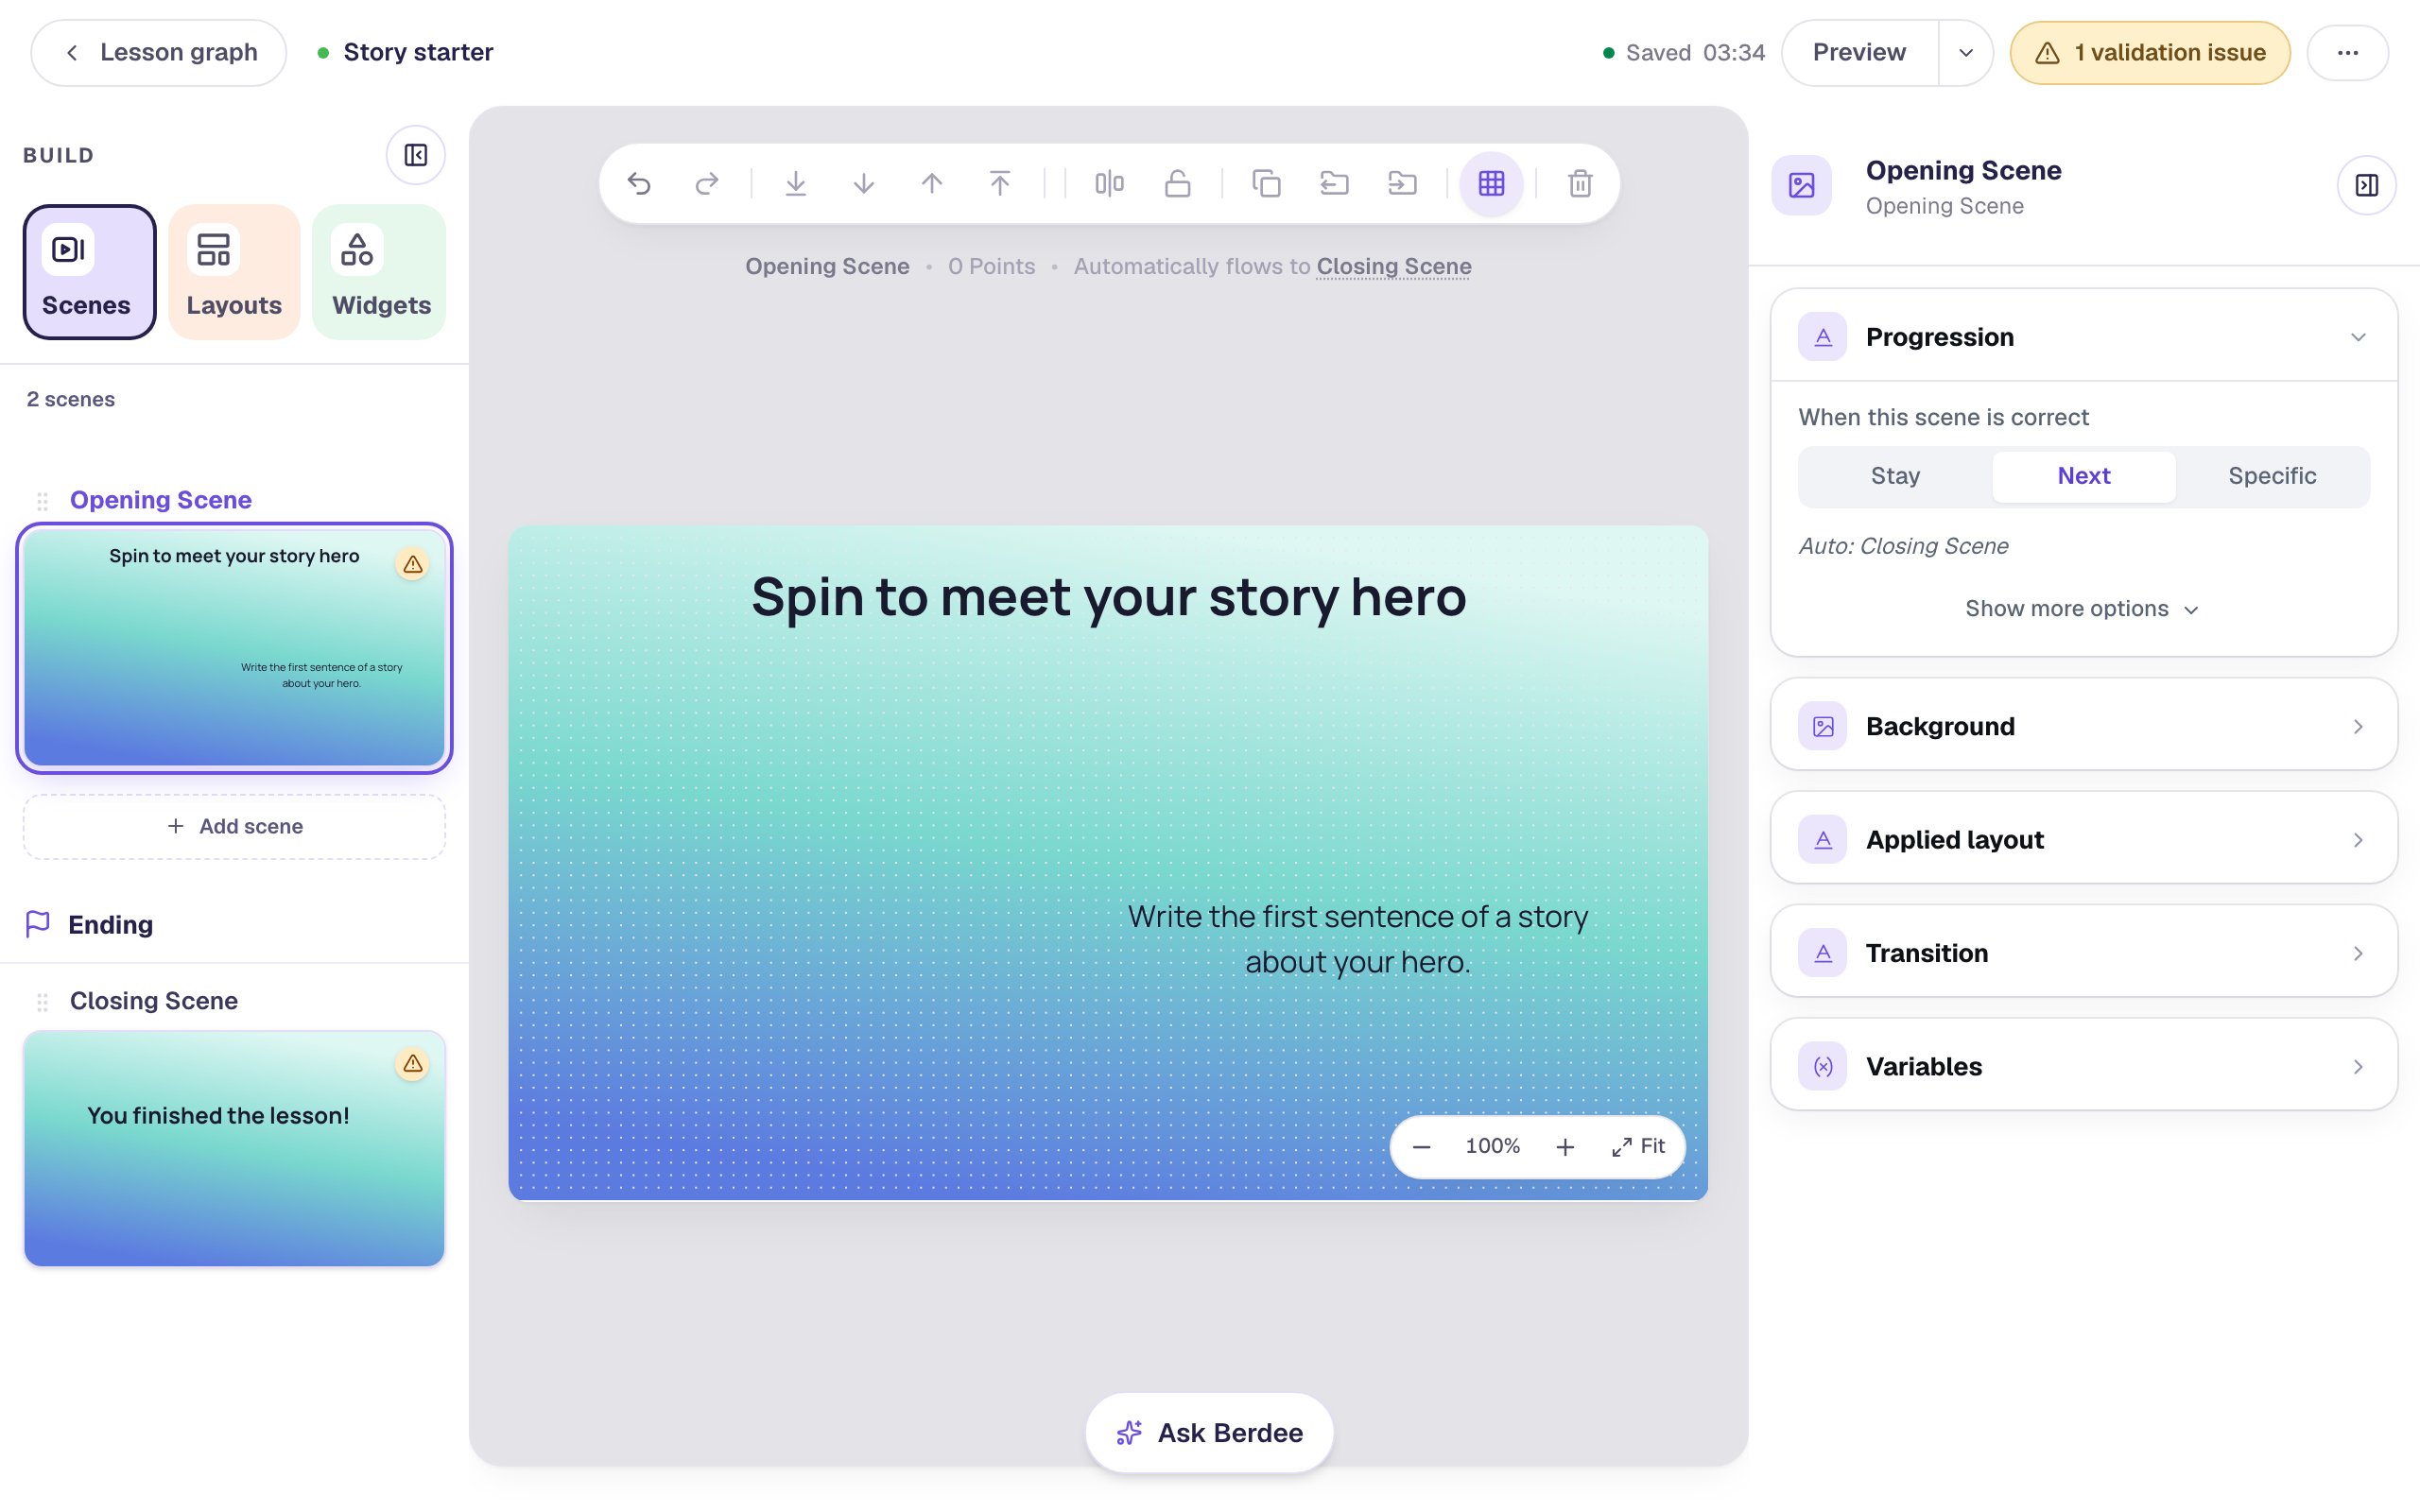
- Add a Heading that says
Spin to meet your story hero, set its Font Size to42, and drag it to the top. - Add a Body text that says
Write the first sentence of a story about your hero.Set its Font Size to24. Under Style & Layout, choose Fixed width and set Width to400so it wraps onto two lines, then drag it to the right half of the scene.
Step 2: Create the variable
The wheel needs somewhere to put the hero it picks. That's a variable: a named place where the lesson keeps a value while a student works.
- Click ⋯ (More lesson options) at the top right of the studio and choose Variables.
- Click New variable, then Some text, since the variable will hold a hero's name.
- Under What text should it start as?, type
???. Students see this before they spin, so Your hero: ??? reads like a mystery waiting to be solved. - Under What is this variable called?, type
hero.
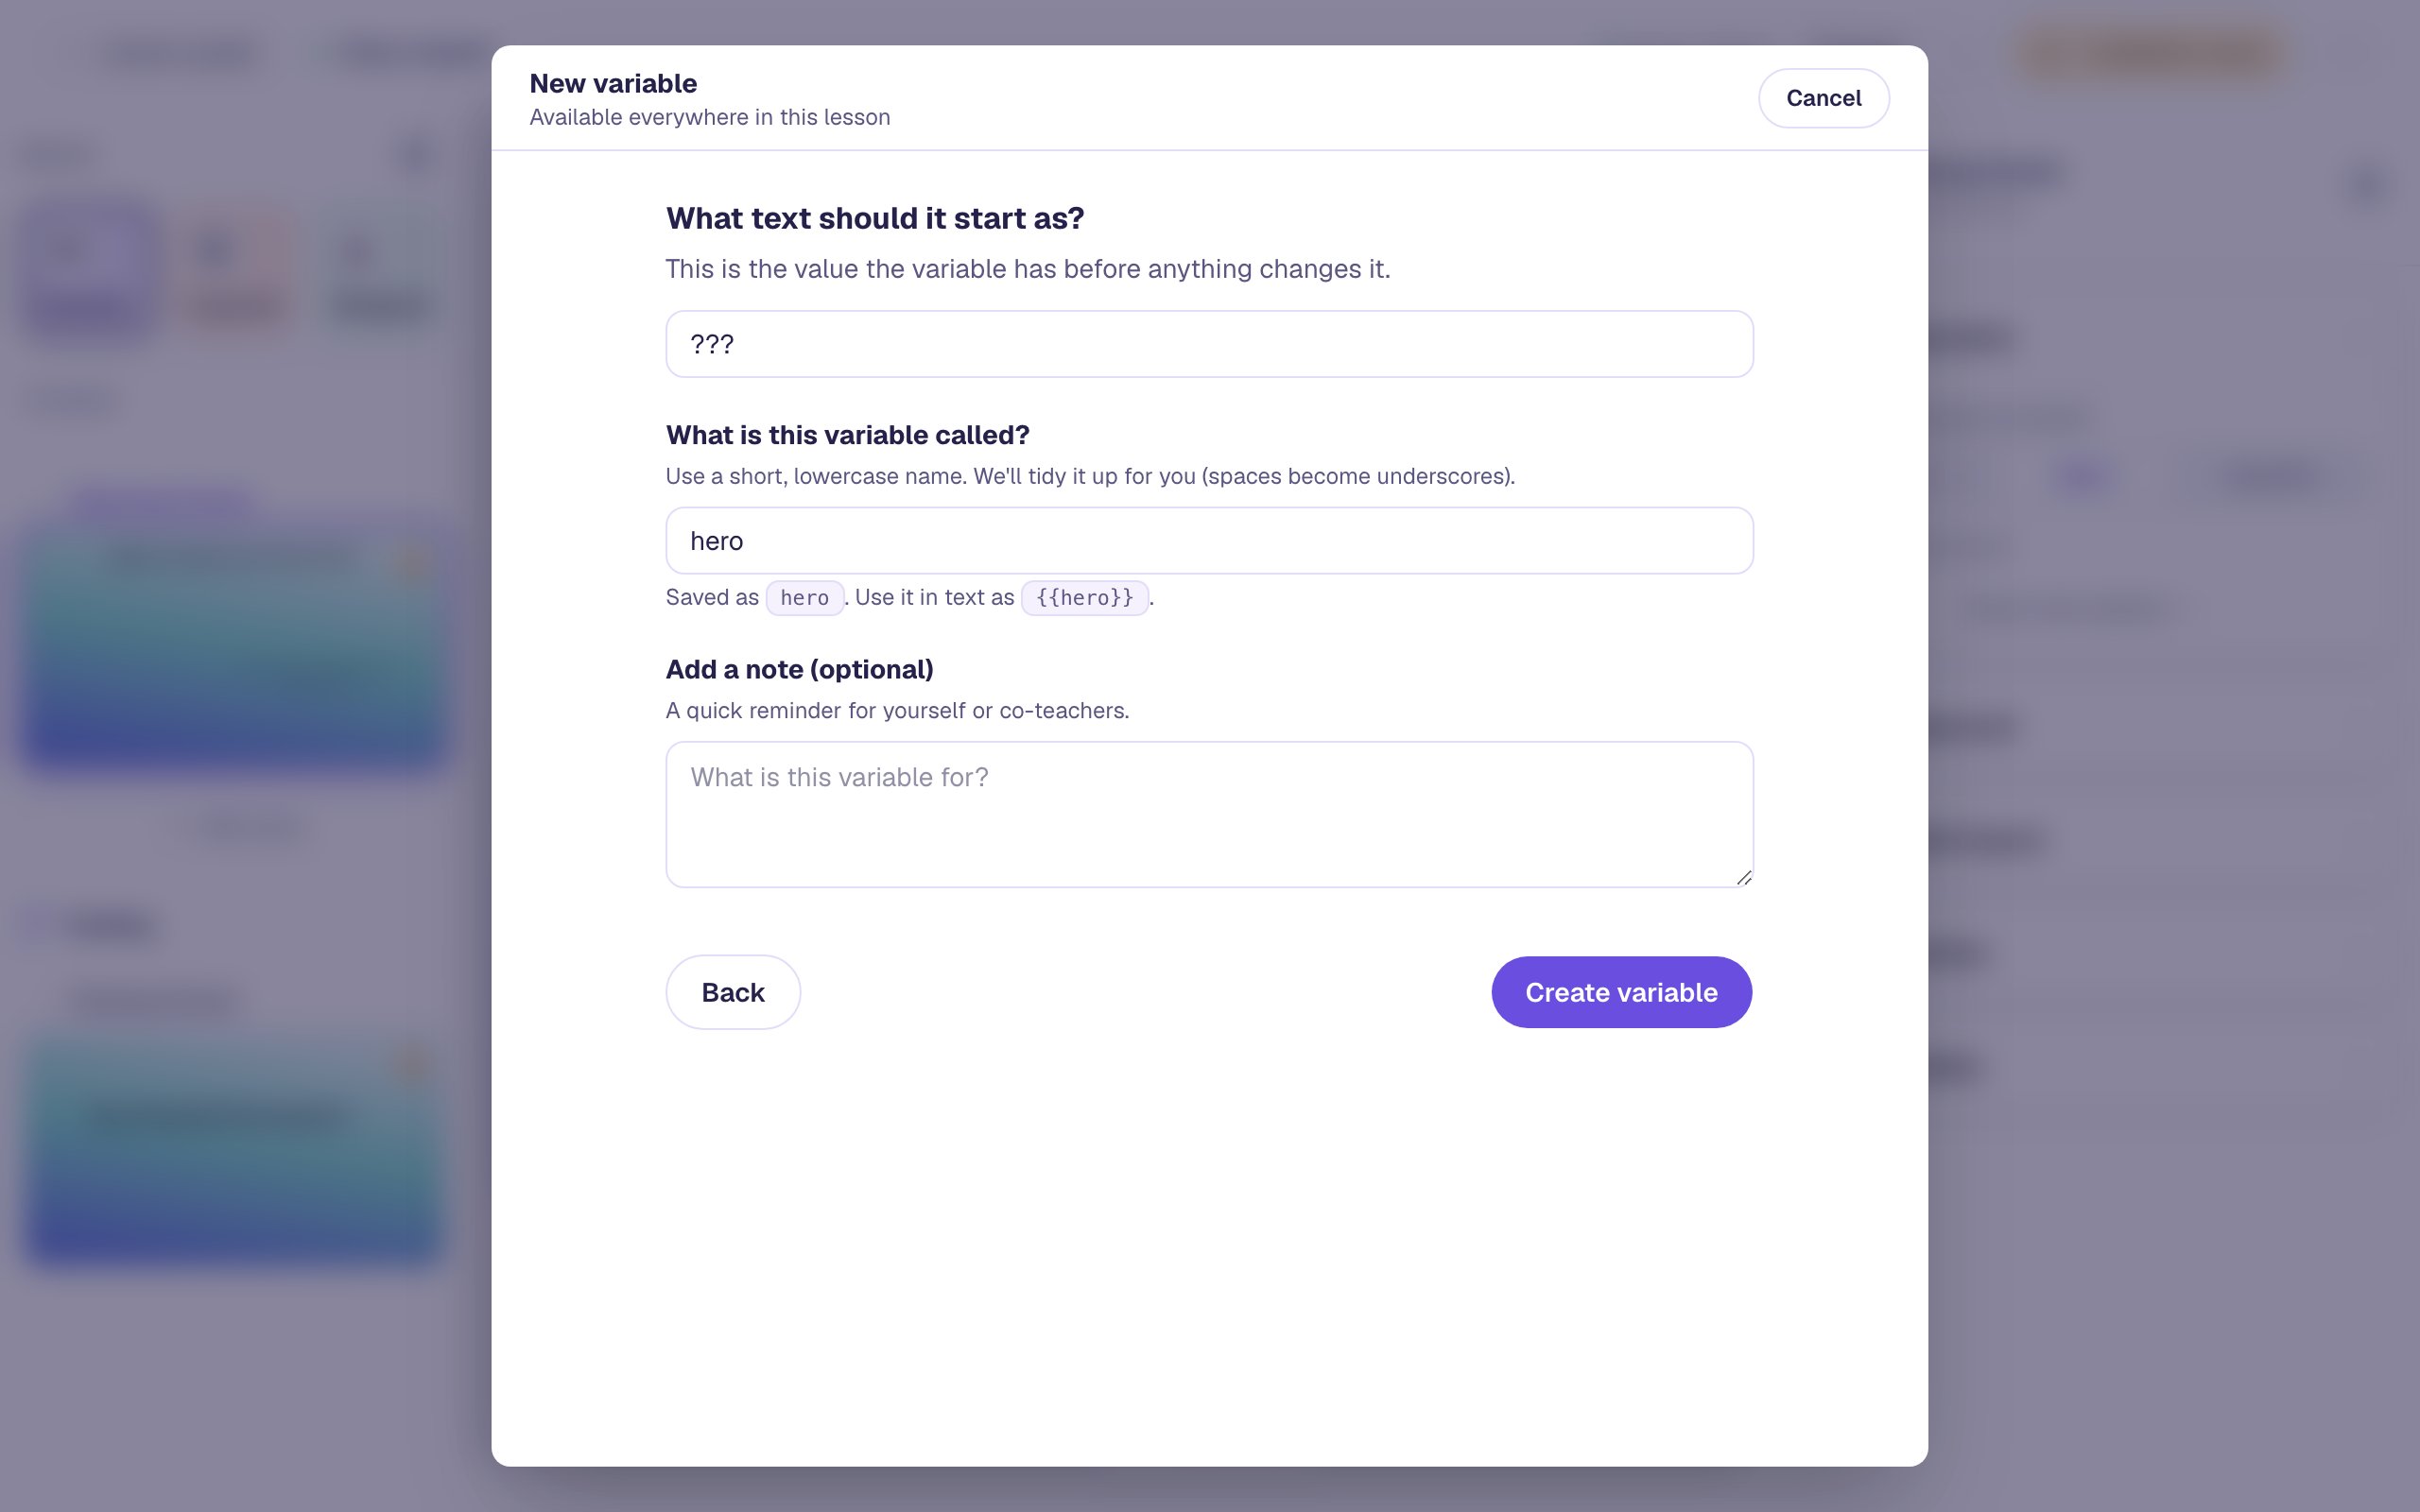
Click Create variable, then close the dialog with the ✕.
Step 3: Add the wheel and name its segments
Add a Spin Wheel from the Widgets tab. Under Style & Layout, open Show more options and set Width and Height to 380, so it stays a circle. Set its Font Size to 20 so the labels read from the back of the room, and drag it to the left half of the scene.
A new wheel has four segments called Option 1 to Option 4. Click ⚙ Configure above the wheel and rename them in the Segments list:
- Select Option 1 and type
Robot. - Then
Dragon,WizardandCatfor the other three.
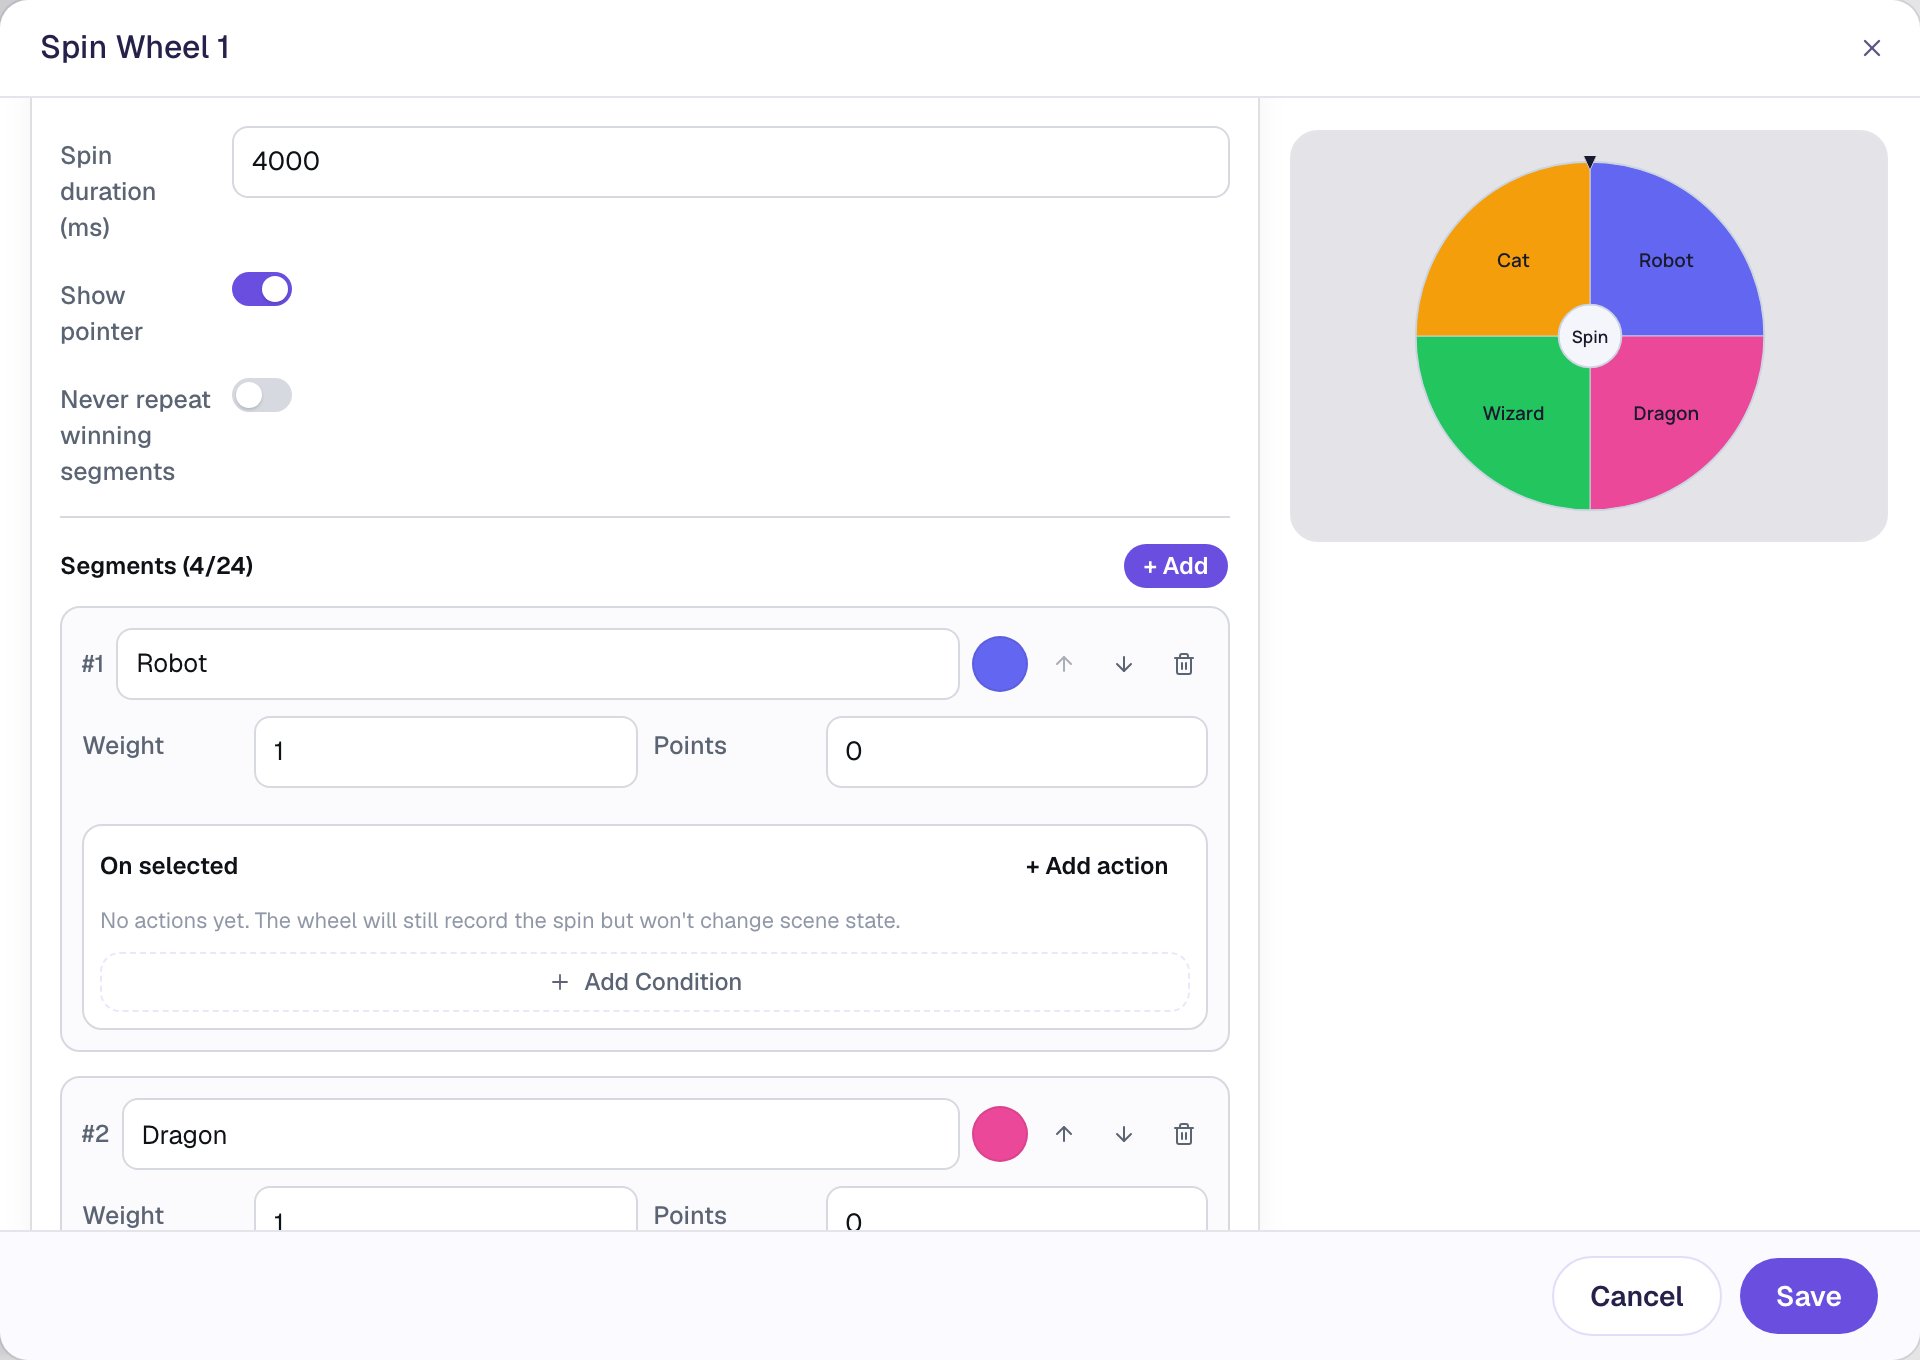
Keep the labels to a word or two: a wedge doesn't have much room. The full phrase students will read goes in the variable, in Step 5. Each segment already has its own bright colour; click the colour dot beside a label to change it.
Step 4: Decide how the wheel behaves
Still in ⚙ Configure, scroll to the top:
- Scoring: click Off. Picking a hero isn't a question with a right answer, and a wheel that doesn't count toward the score shows no points on the ending.
- Max spins: type
2. Every student gets one re-spin if they don't like their first hero. - Never repeat winning segments: turn it on. Now the re-spin always lands on a different hero, so it's a real second chance.
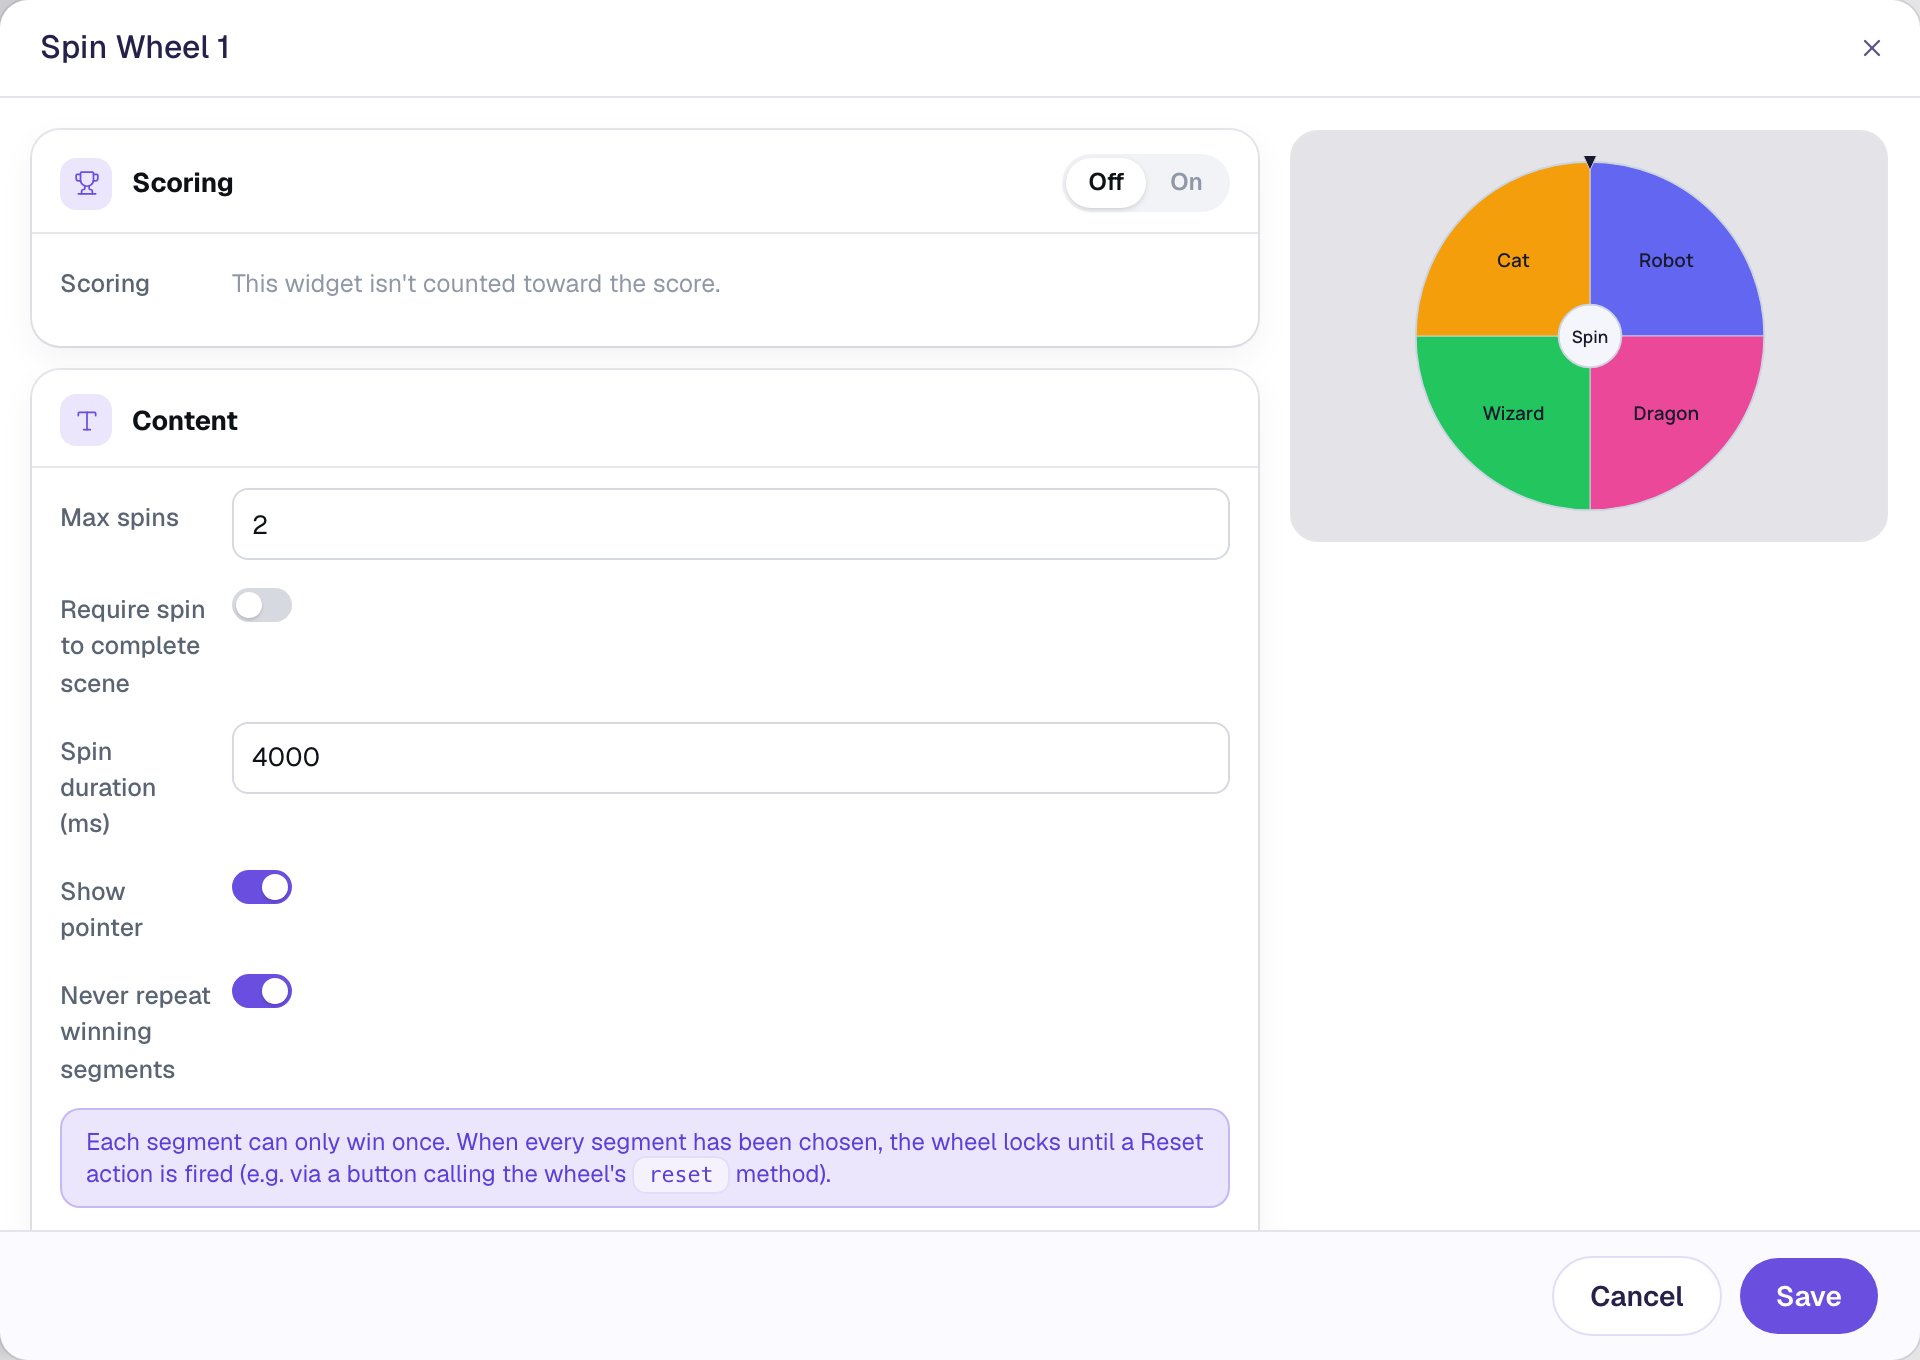
After the last spin the wheel locks, so a student can't keep spinning until they get the cat.
Spin duration is how long the wheel turns before it lands. The default of 4000 milliseconds (four seconds) is long enough for suspense. Students who have reduced motion turned on see a much shorter spin.
Step 5: Save each segment's hero
Each segment has an On selected list: actions that run when the wheel lands on it. Give each one a Set Variable action that saves its hero.
Under Robot:
- Click + Add action. A new action starts as Navigate to Scene.
- Change it to Set Variable.
- In the variable list, pick hero · Text.
- In the value box, select what's there and type
a lost robot.
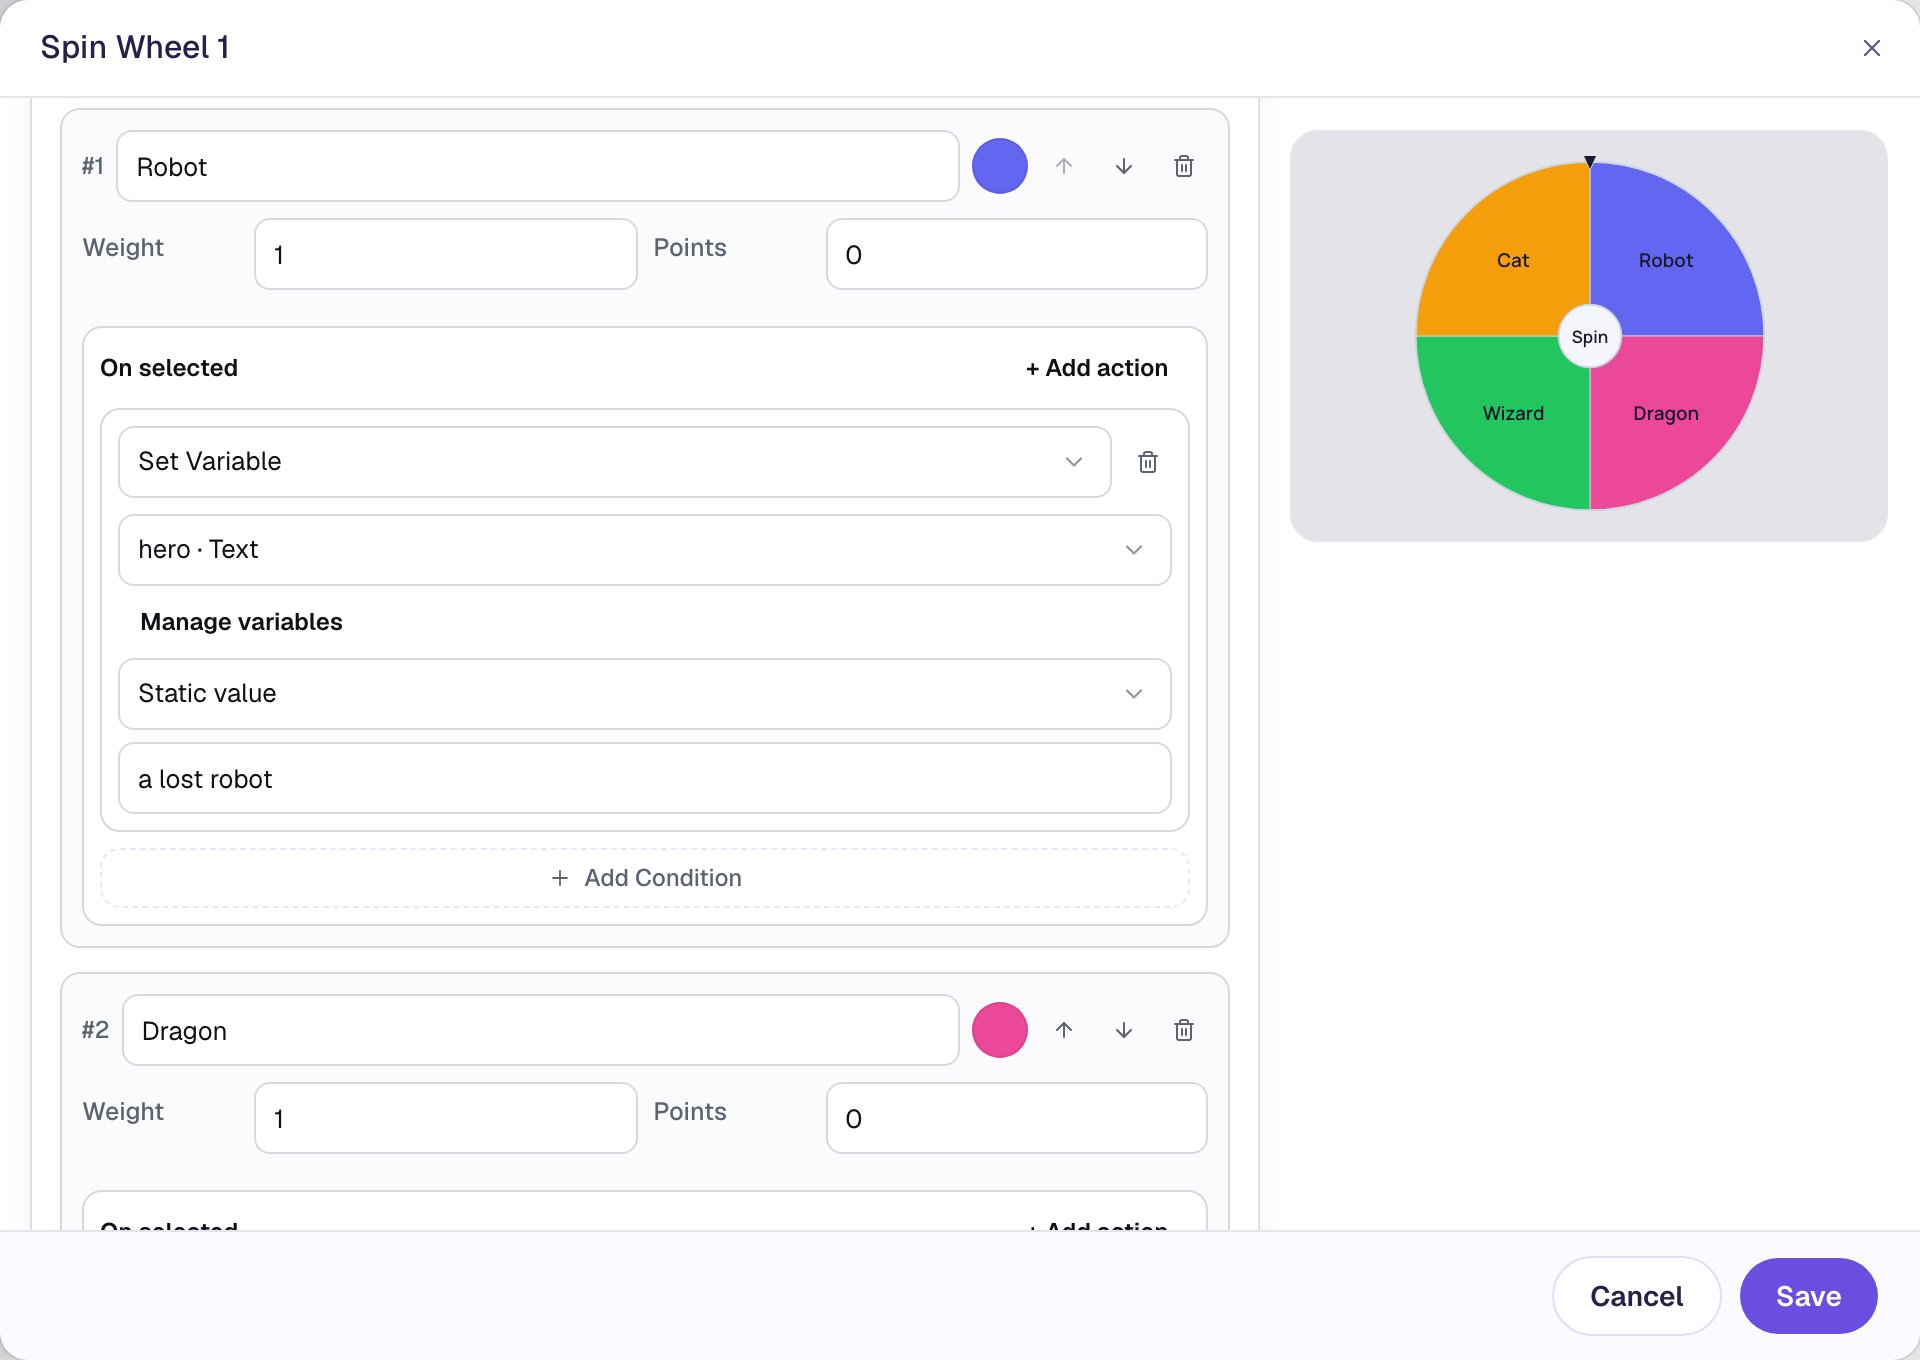
Do the same for the other three segments: Dragon sets a shy dragon, Wizard sets a sleepy wizard, and Cat sets a talking cat. Then click Save.
The value can say more than the label. The wedge says Wizard; the scene will say a sleepy wizard. A little detail in the phrase gives students more to write about.
Step 6: Show the hero, and a way to finish
Add a Subheading and type Your hero:, press Enter, then type {{ hero }}. Set its Font Size to 34. Under Style & Layout, choose Fixed width and set Width to 460, then drag it above the writing task.
Both settings are about the hero being longer than the placeholder. On its own line, a hero like a sleepy wizard isn't split mid-phrase. And an Auto width text is only as wide as {{ hero }} on your canvas, so in front of students a longer hero would wrap onto a third line. A fixed width leaves room for the longest one.
The canvas shows {{ hero }} in braces, because it doesn't know which hero a student will get. Students never see the braces: they see ??? until they spin, then their hero.
Then add the buttons that finish the lesson:
- Add a Button labeled
Start writing(⚙ Configure, Label, Save), set its Font Size to26, and drag it under the writing task. In Behaviors, click Add Behavior, choose On Press, change the action to Navigate to Scene, and pick Closing Scene. - Add a Submit Button. In Content, change its Label to
I'm doneand set Submits to Lesson. Bring its Font Size down to18and drag it to the bottom-left corner.
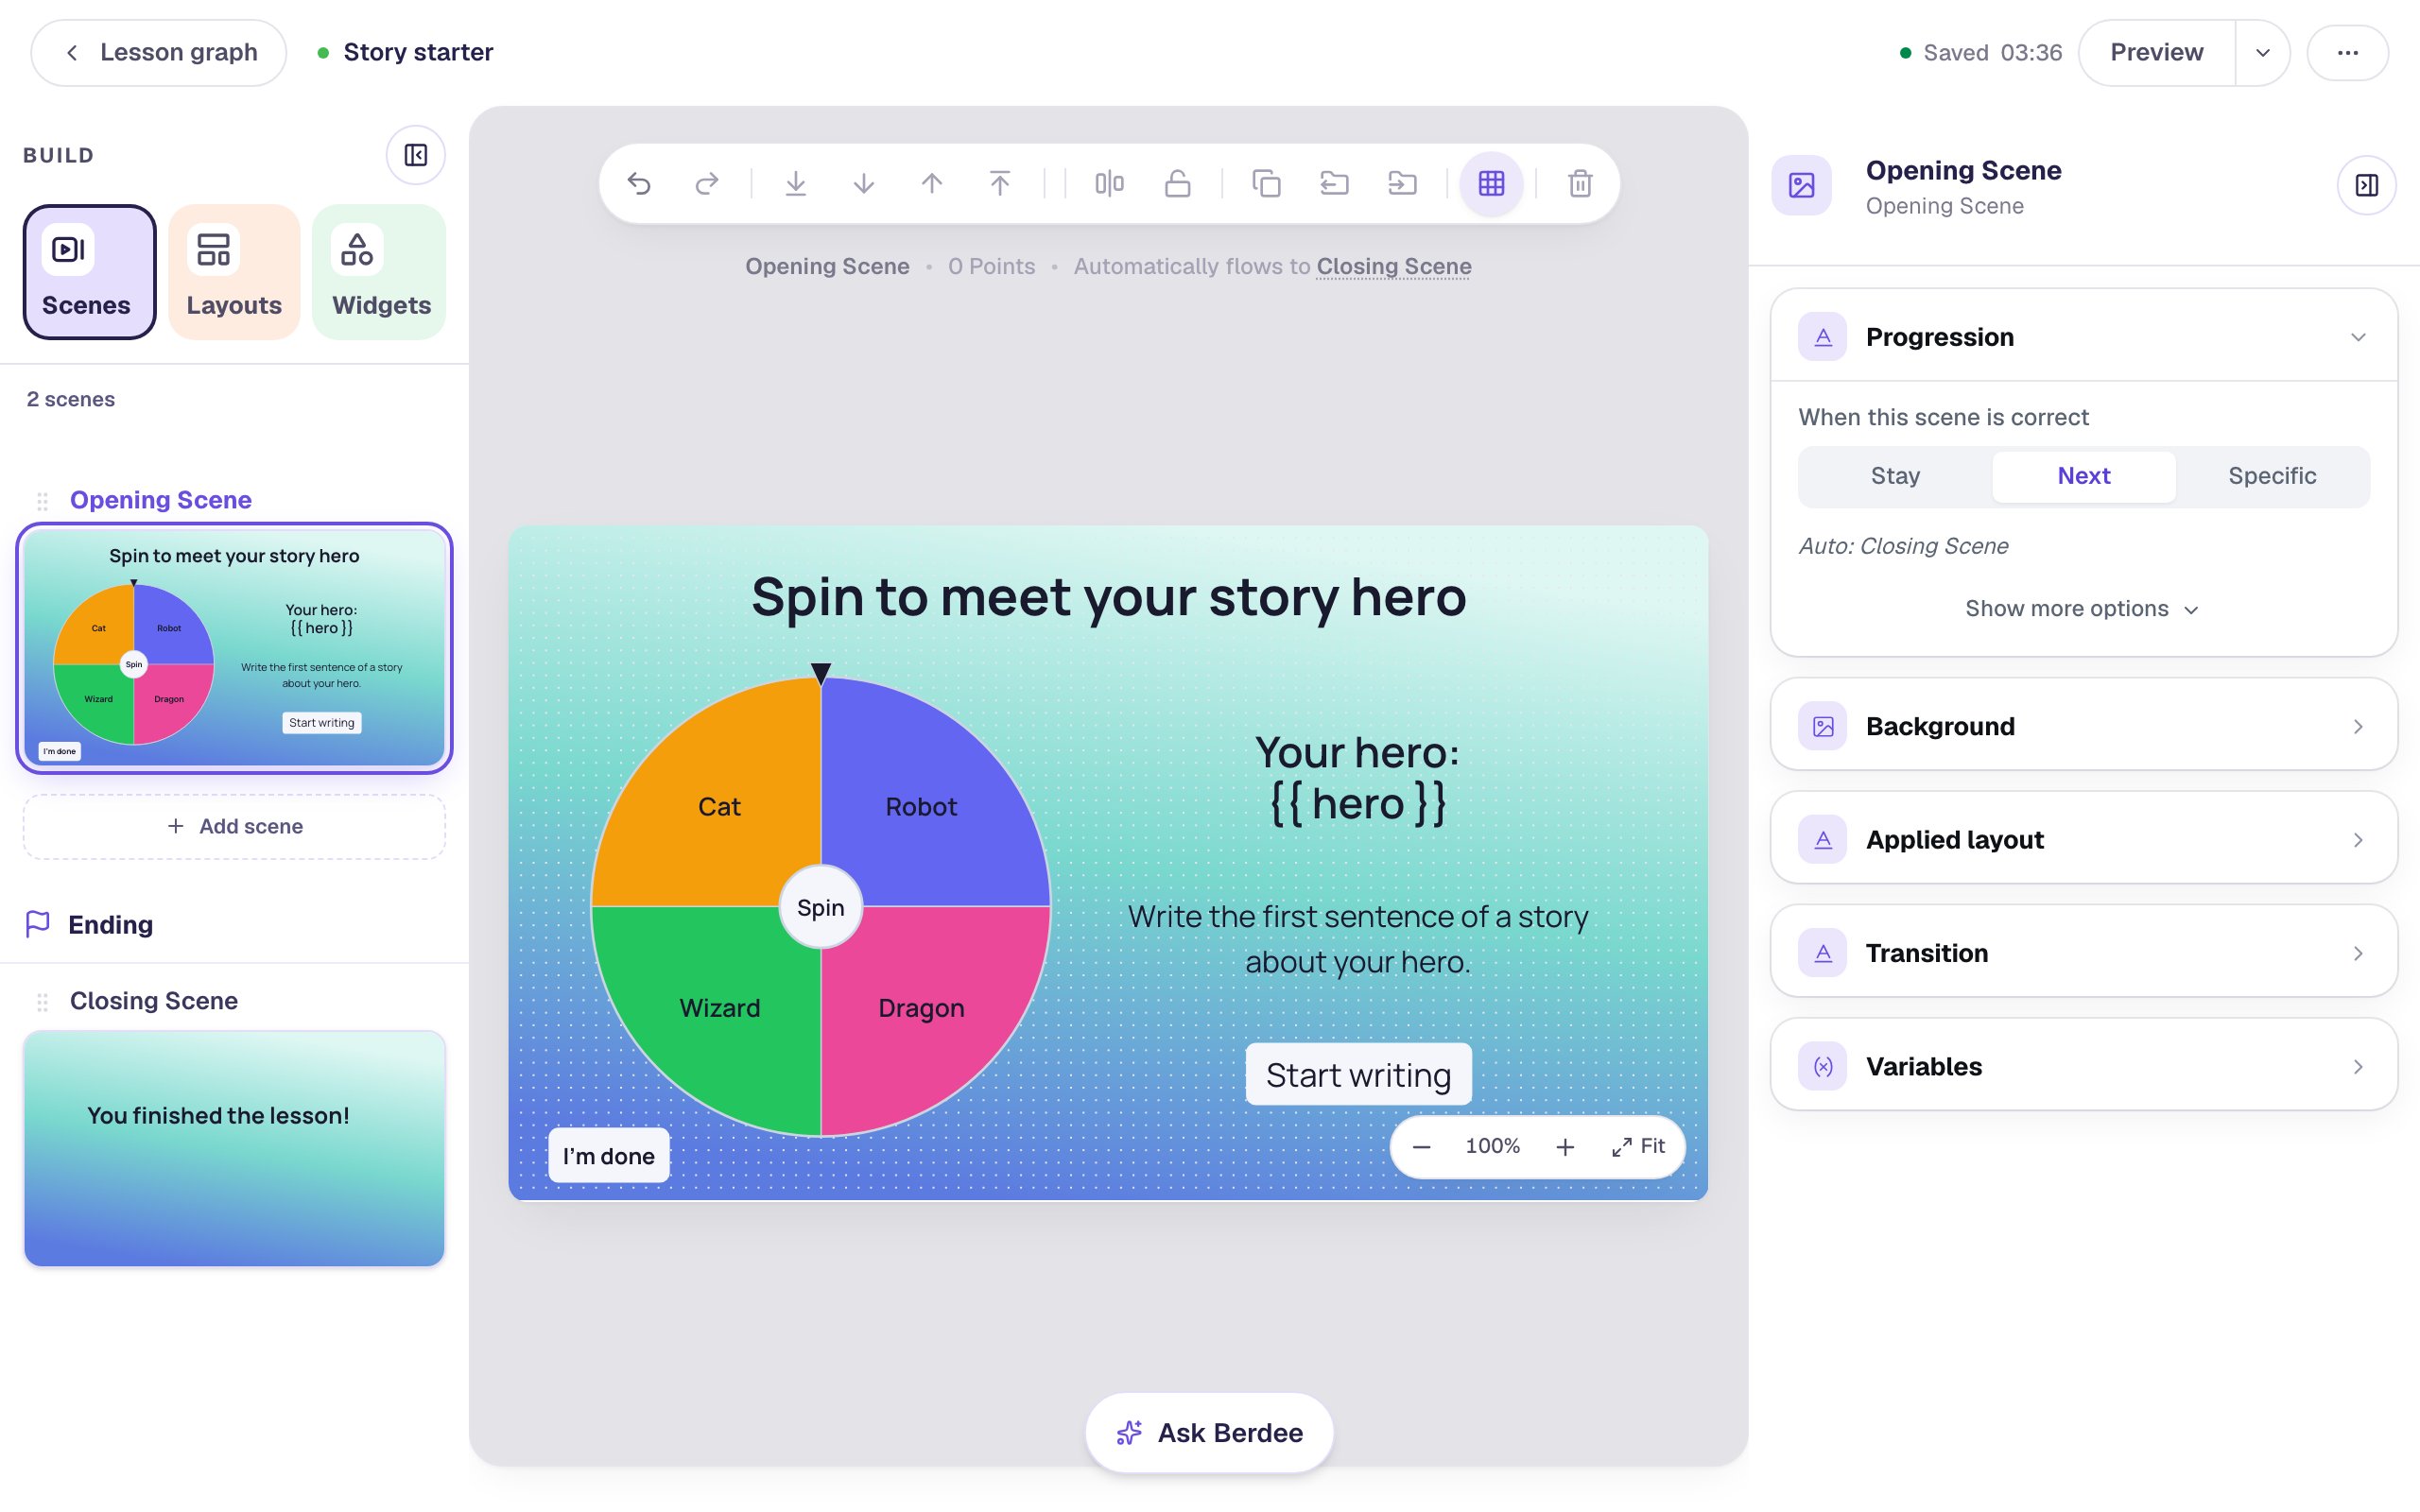
A wheel with Scoring off never finishes a scene on its own, so Start writing is how students move on. I'm done is the safety net every lesson needs before it can be published: without a button set to Lesson, the studio shows No Lesson-Submit Button in its validation list.
Step 7: Try it as a student
Click Preview and spin:
The wheel turns for four seconds, slows, and stops with one wedge under the pointer. The hero line fills in straight away:
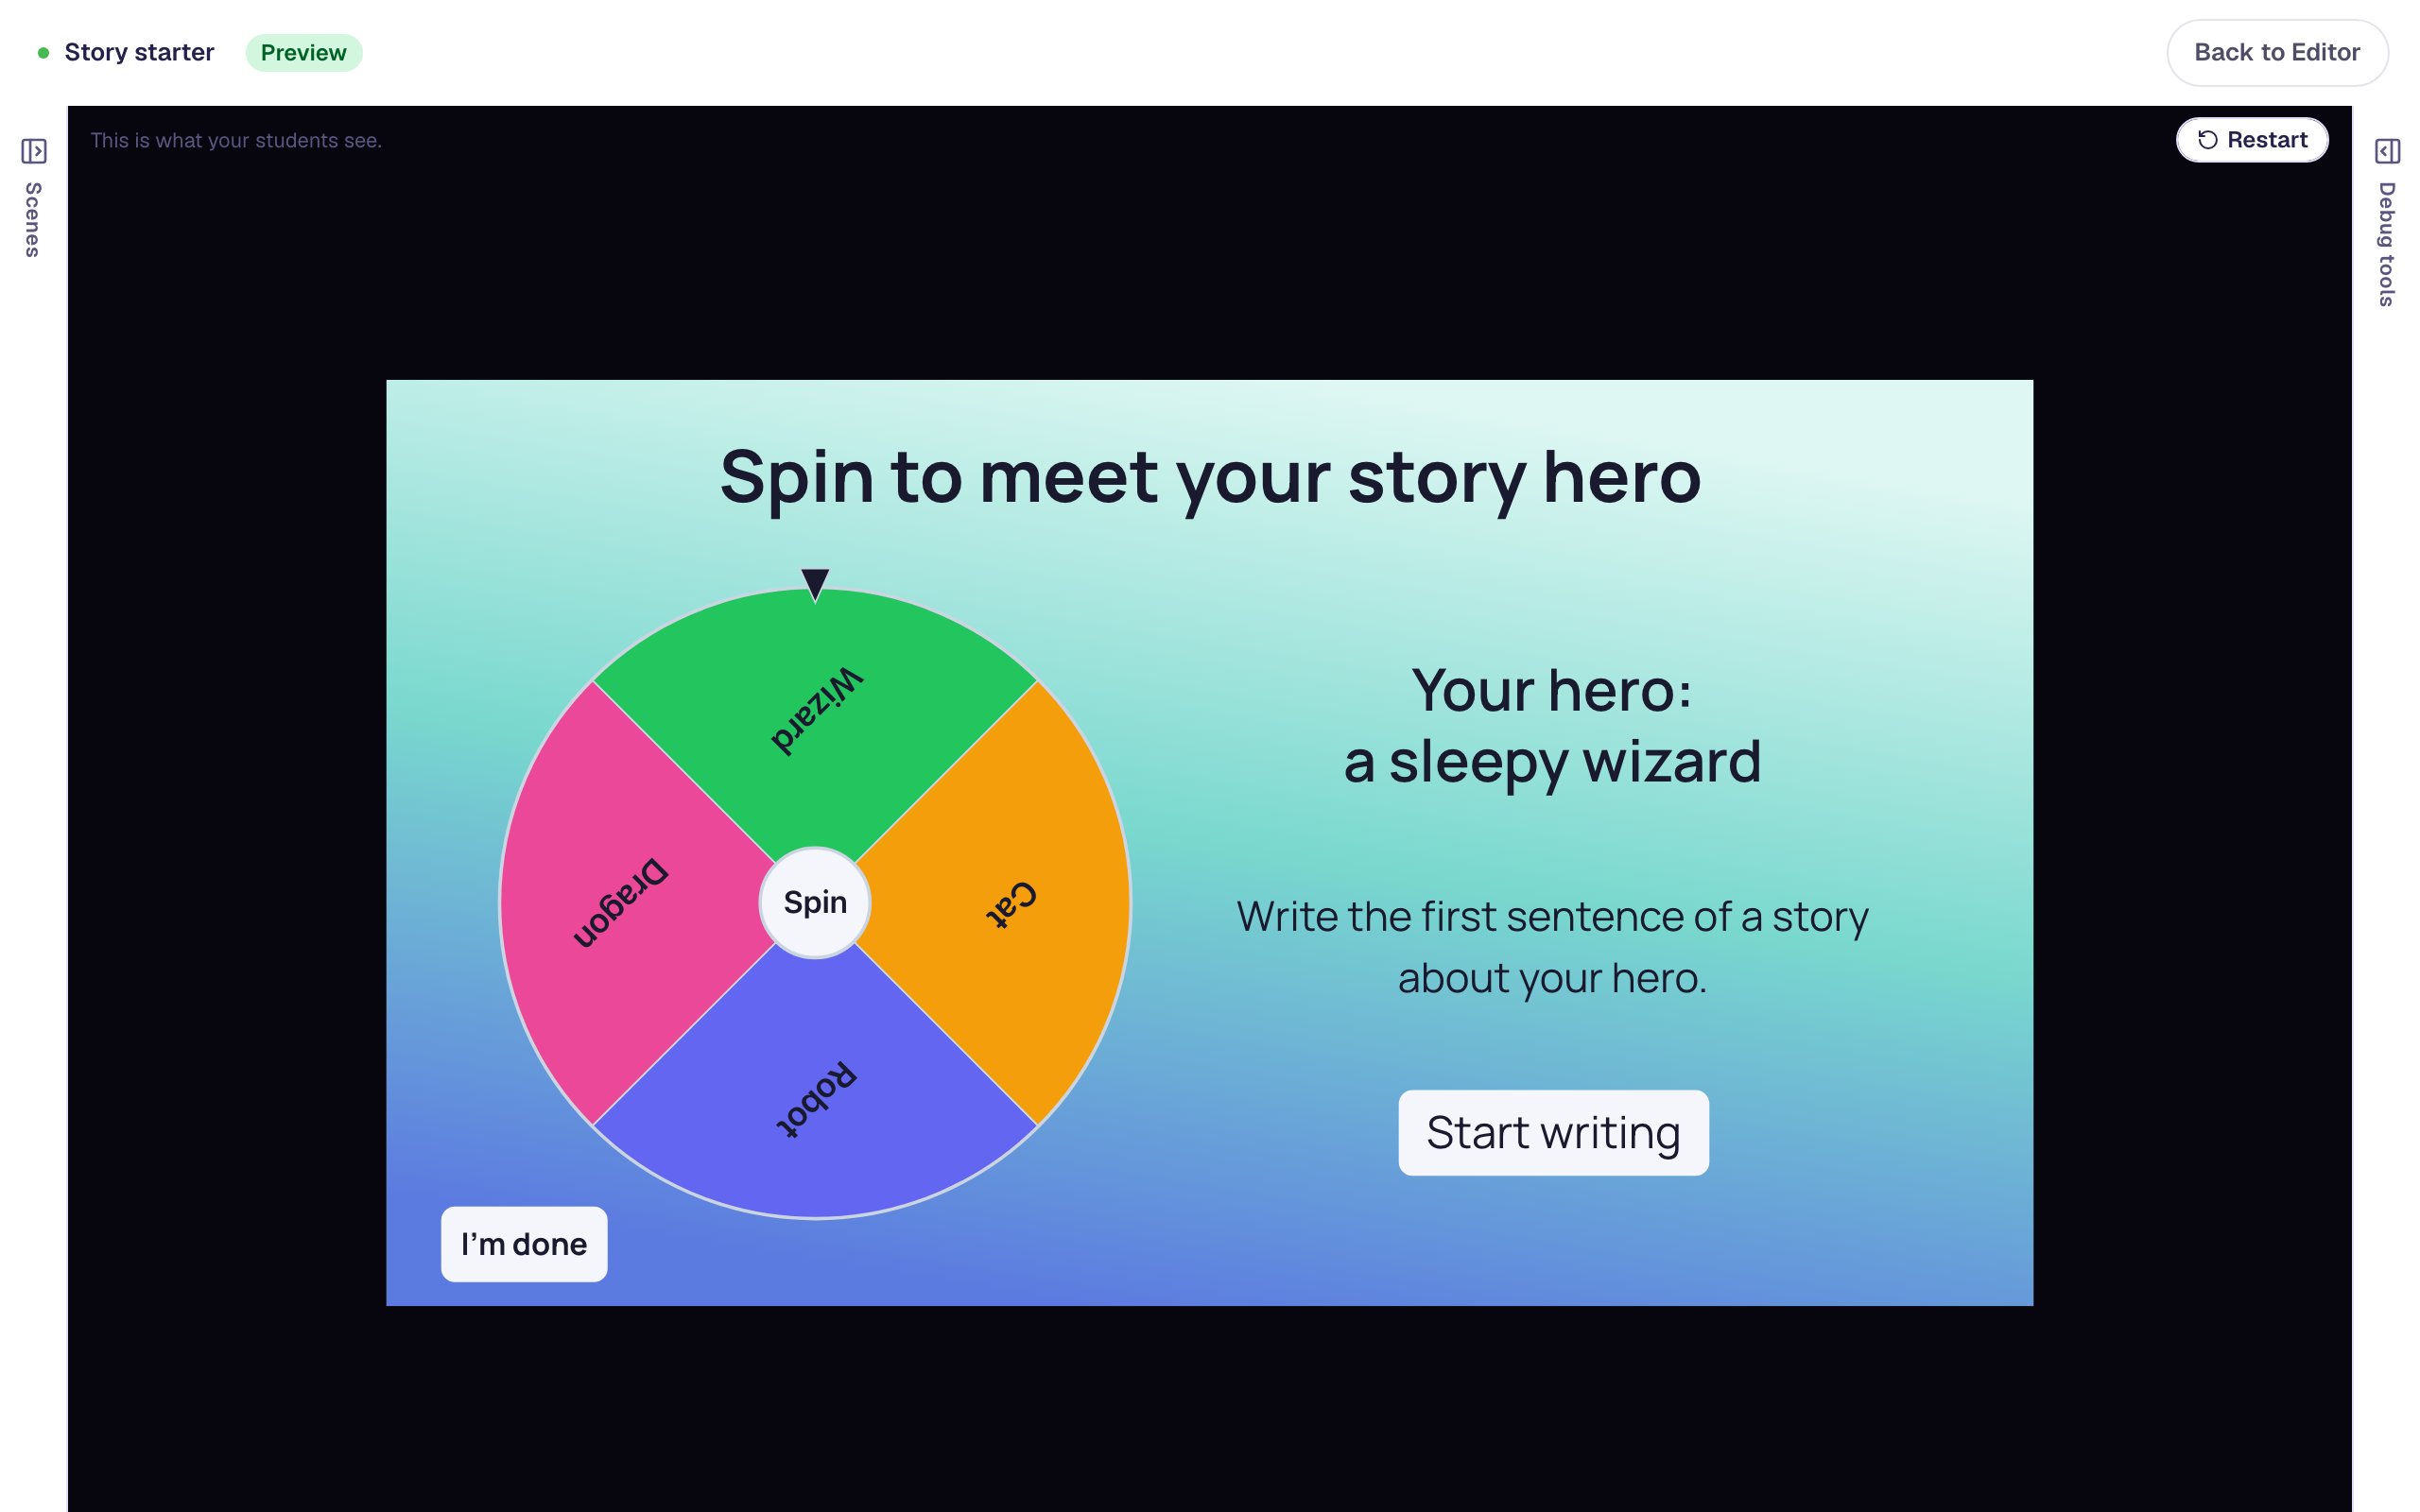
Your preview will land on a different hero than these pictures; that's the point of a wheel. Now use the re-spin:
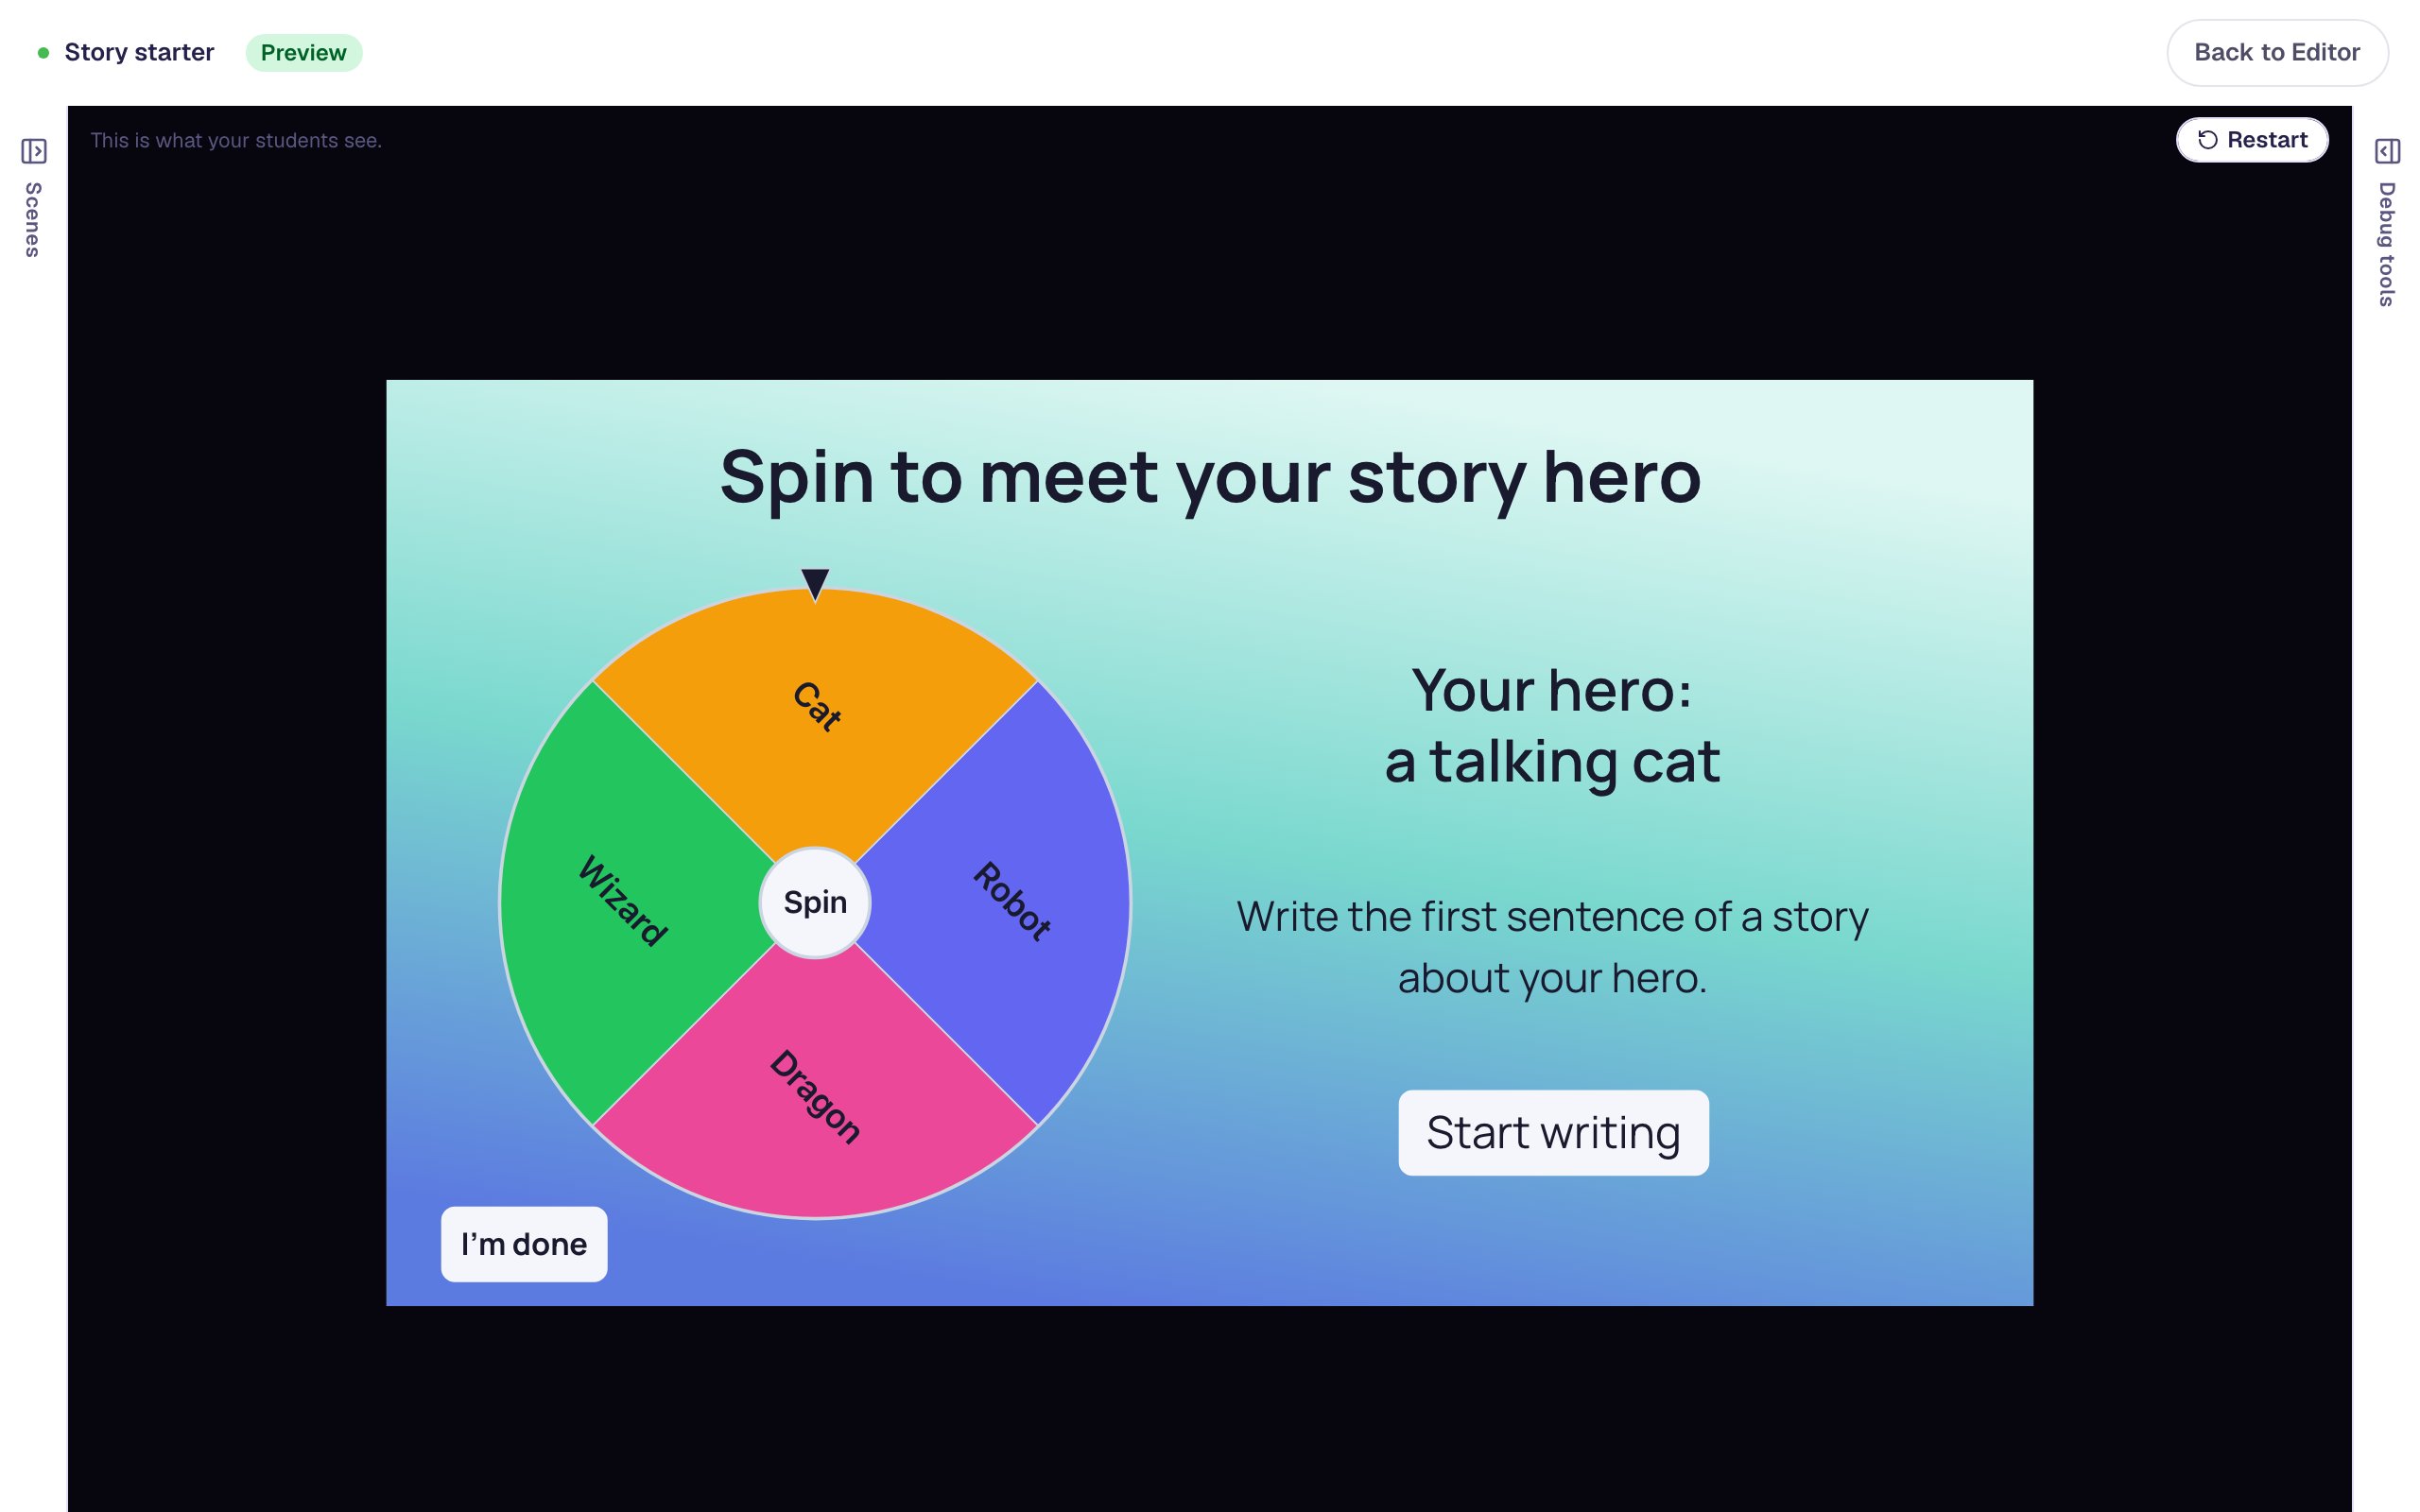
Each spin runs its segment's Set Variable again, so the line always shows the latest hero. After two spins the wheel is locked: clicking it again does nothing, and a screen reader announces no spins left.
Press Start writing to reach the ending:
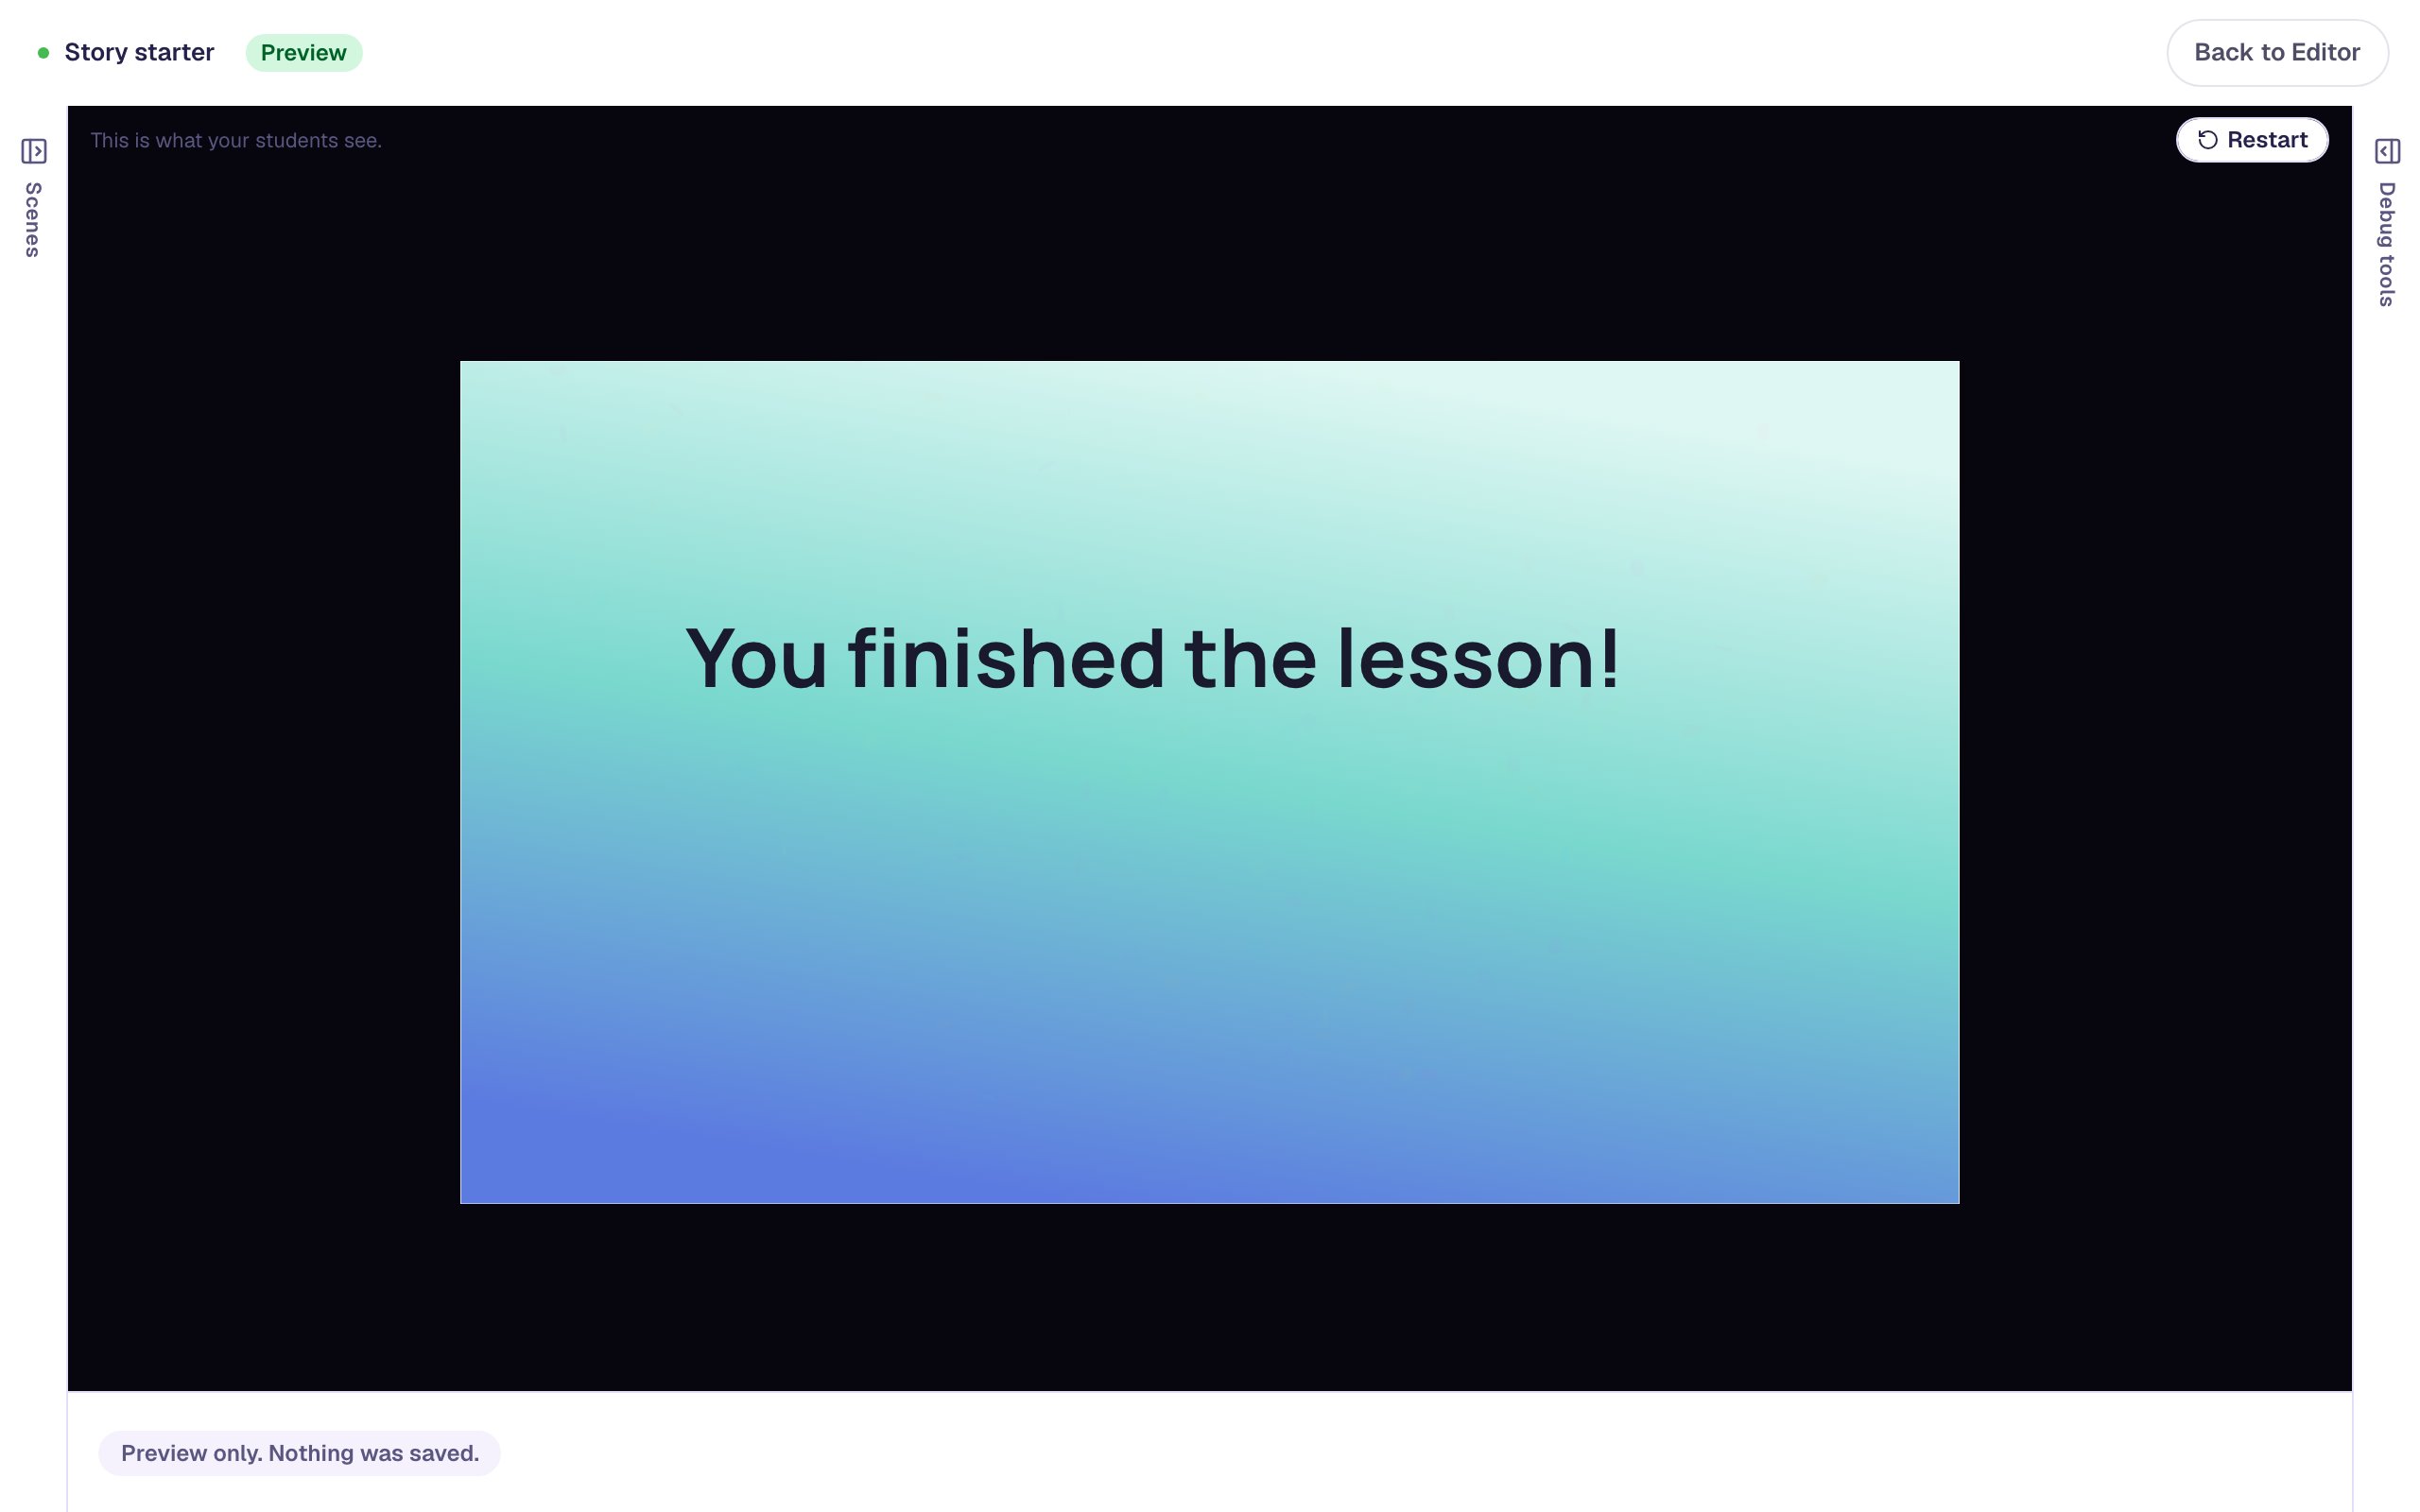
Click Restart to spin again from the start. Every restart resets the variable to ??? and gives the wheel back its two spins.
What you built
A writing warm-up that picks a hero for each student:
- a Spin Wheel with four short-labelled segments, Scoring off, two spins, and Never repeat winning segments on,
- a Set Variable action under each segment that saves the hero's full phrase in
hero, and - a Subheading that shows
{{ hero }}, plus a Start writing button and a small I'm done button.
The same wheel can pick anything a lesson needs: a setting for the story, a vocabulary word to use in a sentence, or a brain break. Add a second wheel and a second variable, place, and the task can read "Write about {{ hero }} in {{ place }}." A segment's On selected list can also Navigate to Scene, so a wheel can send each student to a different activity. Configuring a Spin Wheel covers weights for rare segments and points for prize wheels.
Make this lesson yours
Add the lesson you just watched being built to your account, then change it for your class: your questions, your pictures, your colors.
Free to sign up, and you'll come straight back here. I have an account