Remember a student's choice and use it later
Save what a student picks in a variable, then show it on a later scene with a placeholder like {{ planet }}, so the lesson talks back to them.
- Level
- Intermediate
- Time
- About 15 min
- Steps
- 5
A two-scene lesson where students pick Mars or Jupiter, and the next scene greets them with the planet they chose. One scene of text serves every choice.
Get the finished lesson
Skip straight to the result, or keep it open beside the steps. Add this tutorial's lesson to your account and explore how it works in the studio.
Free to sign up, and you'll come straight back here. I have an account
A lesson feels more personal when it remembers what a student did. If a student picks Jupiter, the next scene should say Jupiter, not "the planet you picked."
You could build a separate scene for every choice, but then you'd write the same scene twice and keep both copies in sync. In this tutorial you'll write it once. Three pieces do the work:
- a variable called
planet, which holds the student's choice, - a Set Variable action on each button, which saves the choice when it's pressed, and
- a placeholder,
{{ planet }}, in the next scene's text, which shows whatever the variable holds.
If you haven't used the studio before, start with Build your first quiz question. Behaviors in the properties panel come up in Add a hint students can open when they're stuck, but you don't need that one first.
Step 1: Create the variable
A variable is a named place where the lesson keeps a value while a student works. Every variable belongs to the whole lesson, so a value saved on one scene is still there on the next.
Start a blank lesson (New lesson, then Start from scratch). Then:
- Click ⋯ (More lesson options) at the top right of the studio and choose Variables.
- Click New variable, then Some text, since the variable will hold a planet's name.
- Under What text should it start as?, type
space. This is the value before a student picks anything. - Under What is this variable called?, type
planet.
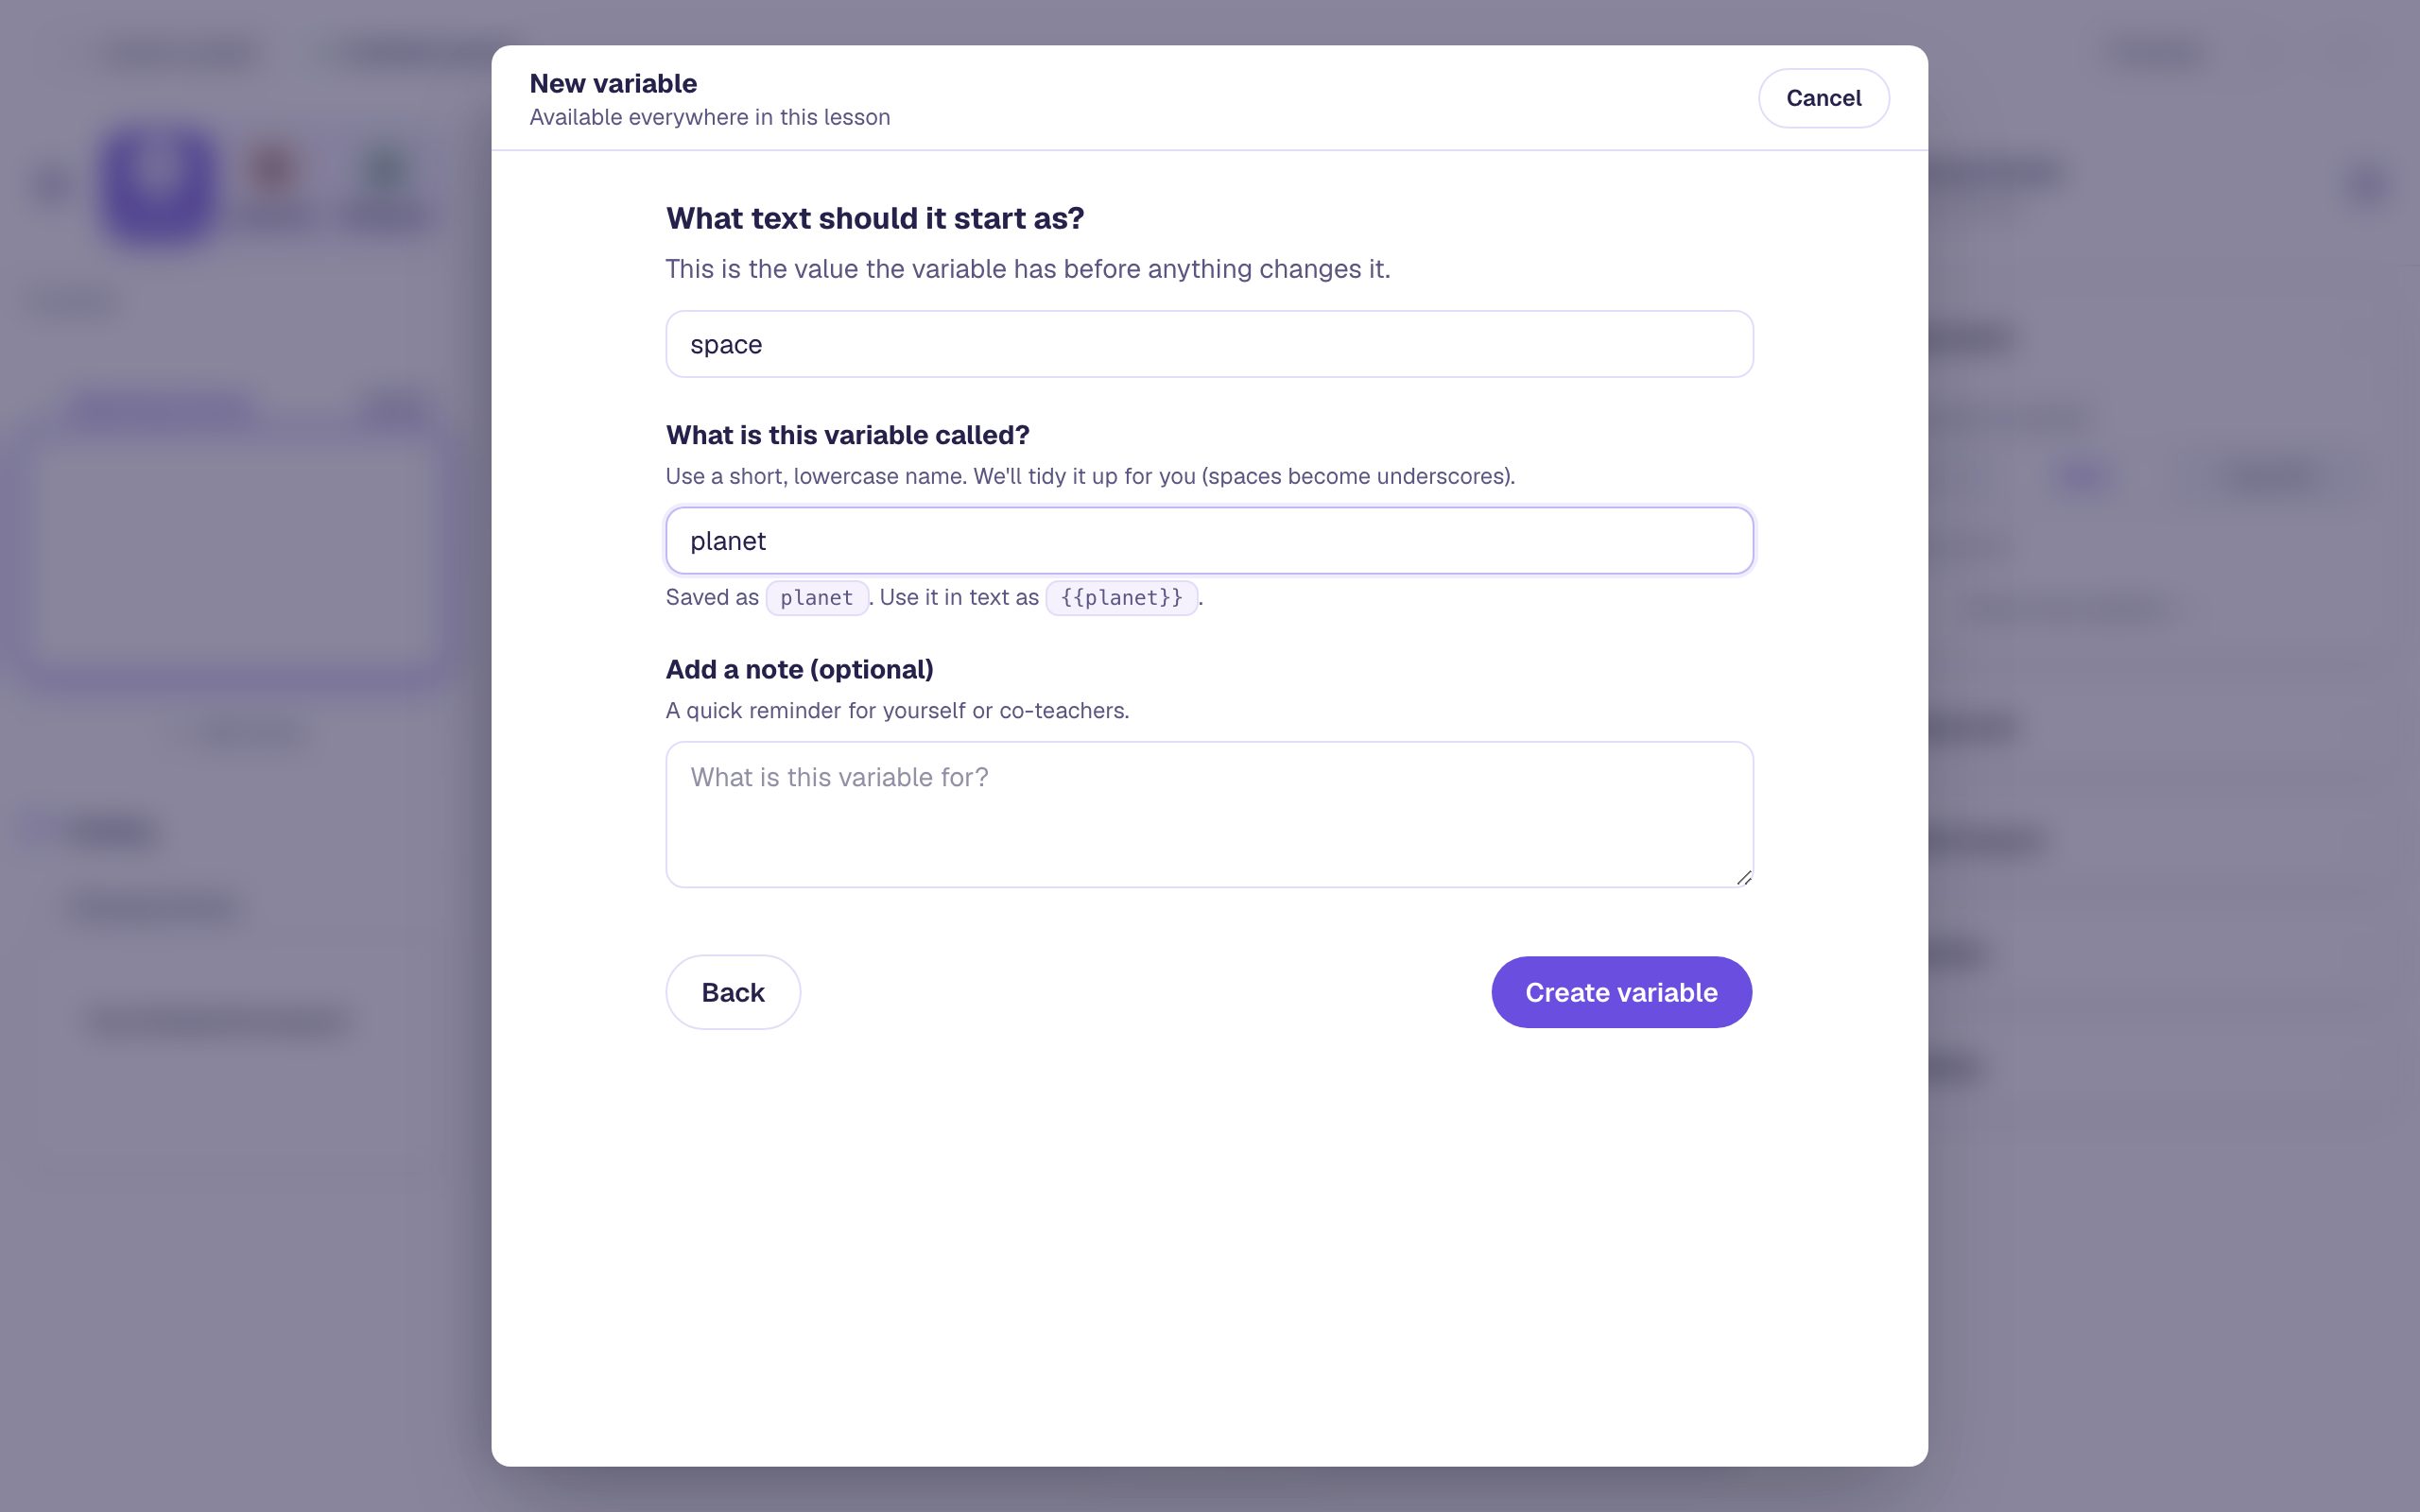
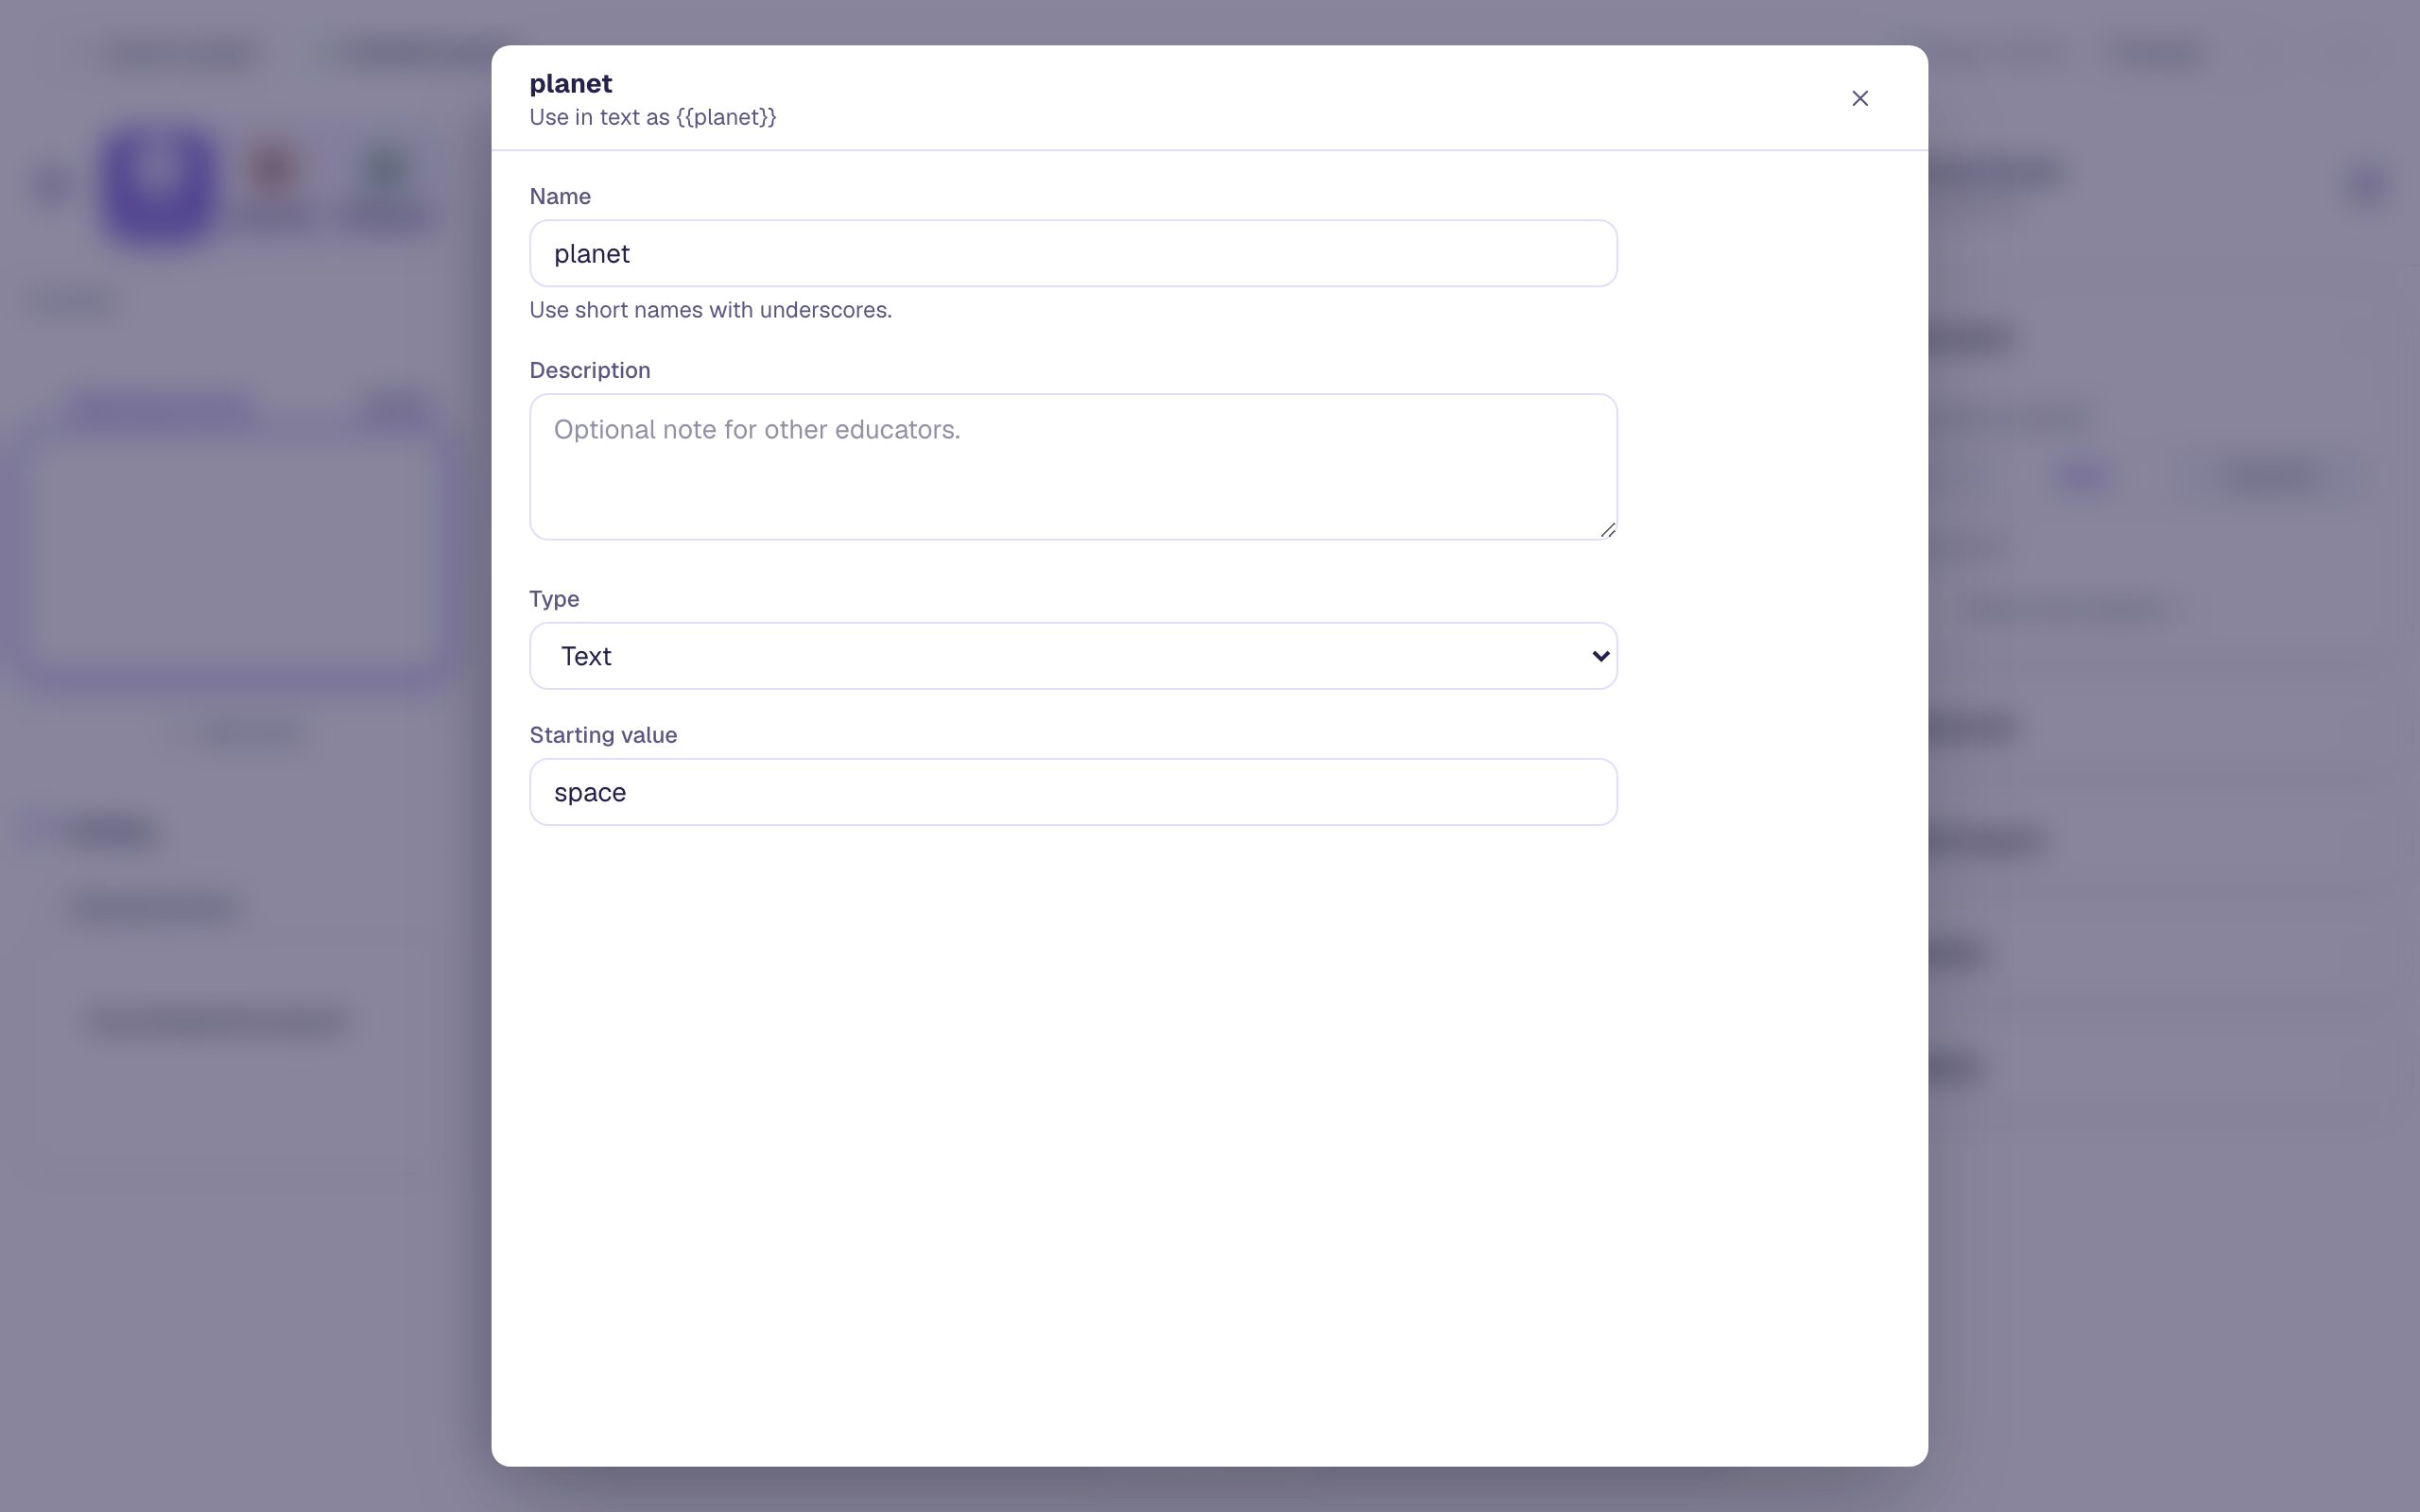
The note under the name tells you exactly what to type in text later: {{planet}}. Click Create variable. The dialog switches to the new variable's details, where you can change its name, add a description, or change its starting value later:
Close the dialog with the ✕ at the top right.
Why a starting value? If a student somehow reaches the next scene without picking, the text still reads sensibly: "Next stop: space!" Pick a starting value that makes sense in every sentence the variable appears in.
Step 2: Build the choice
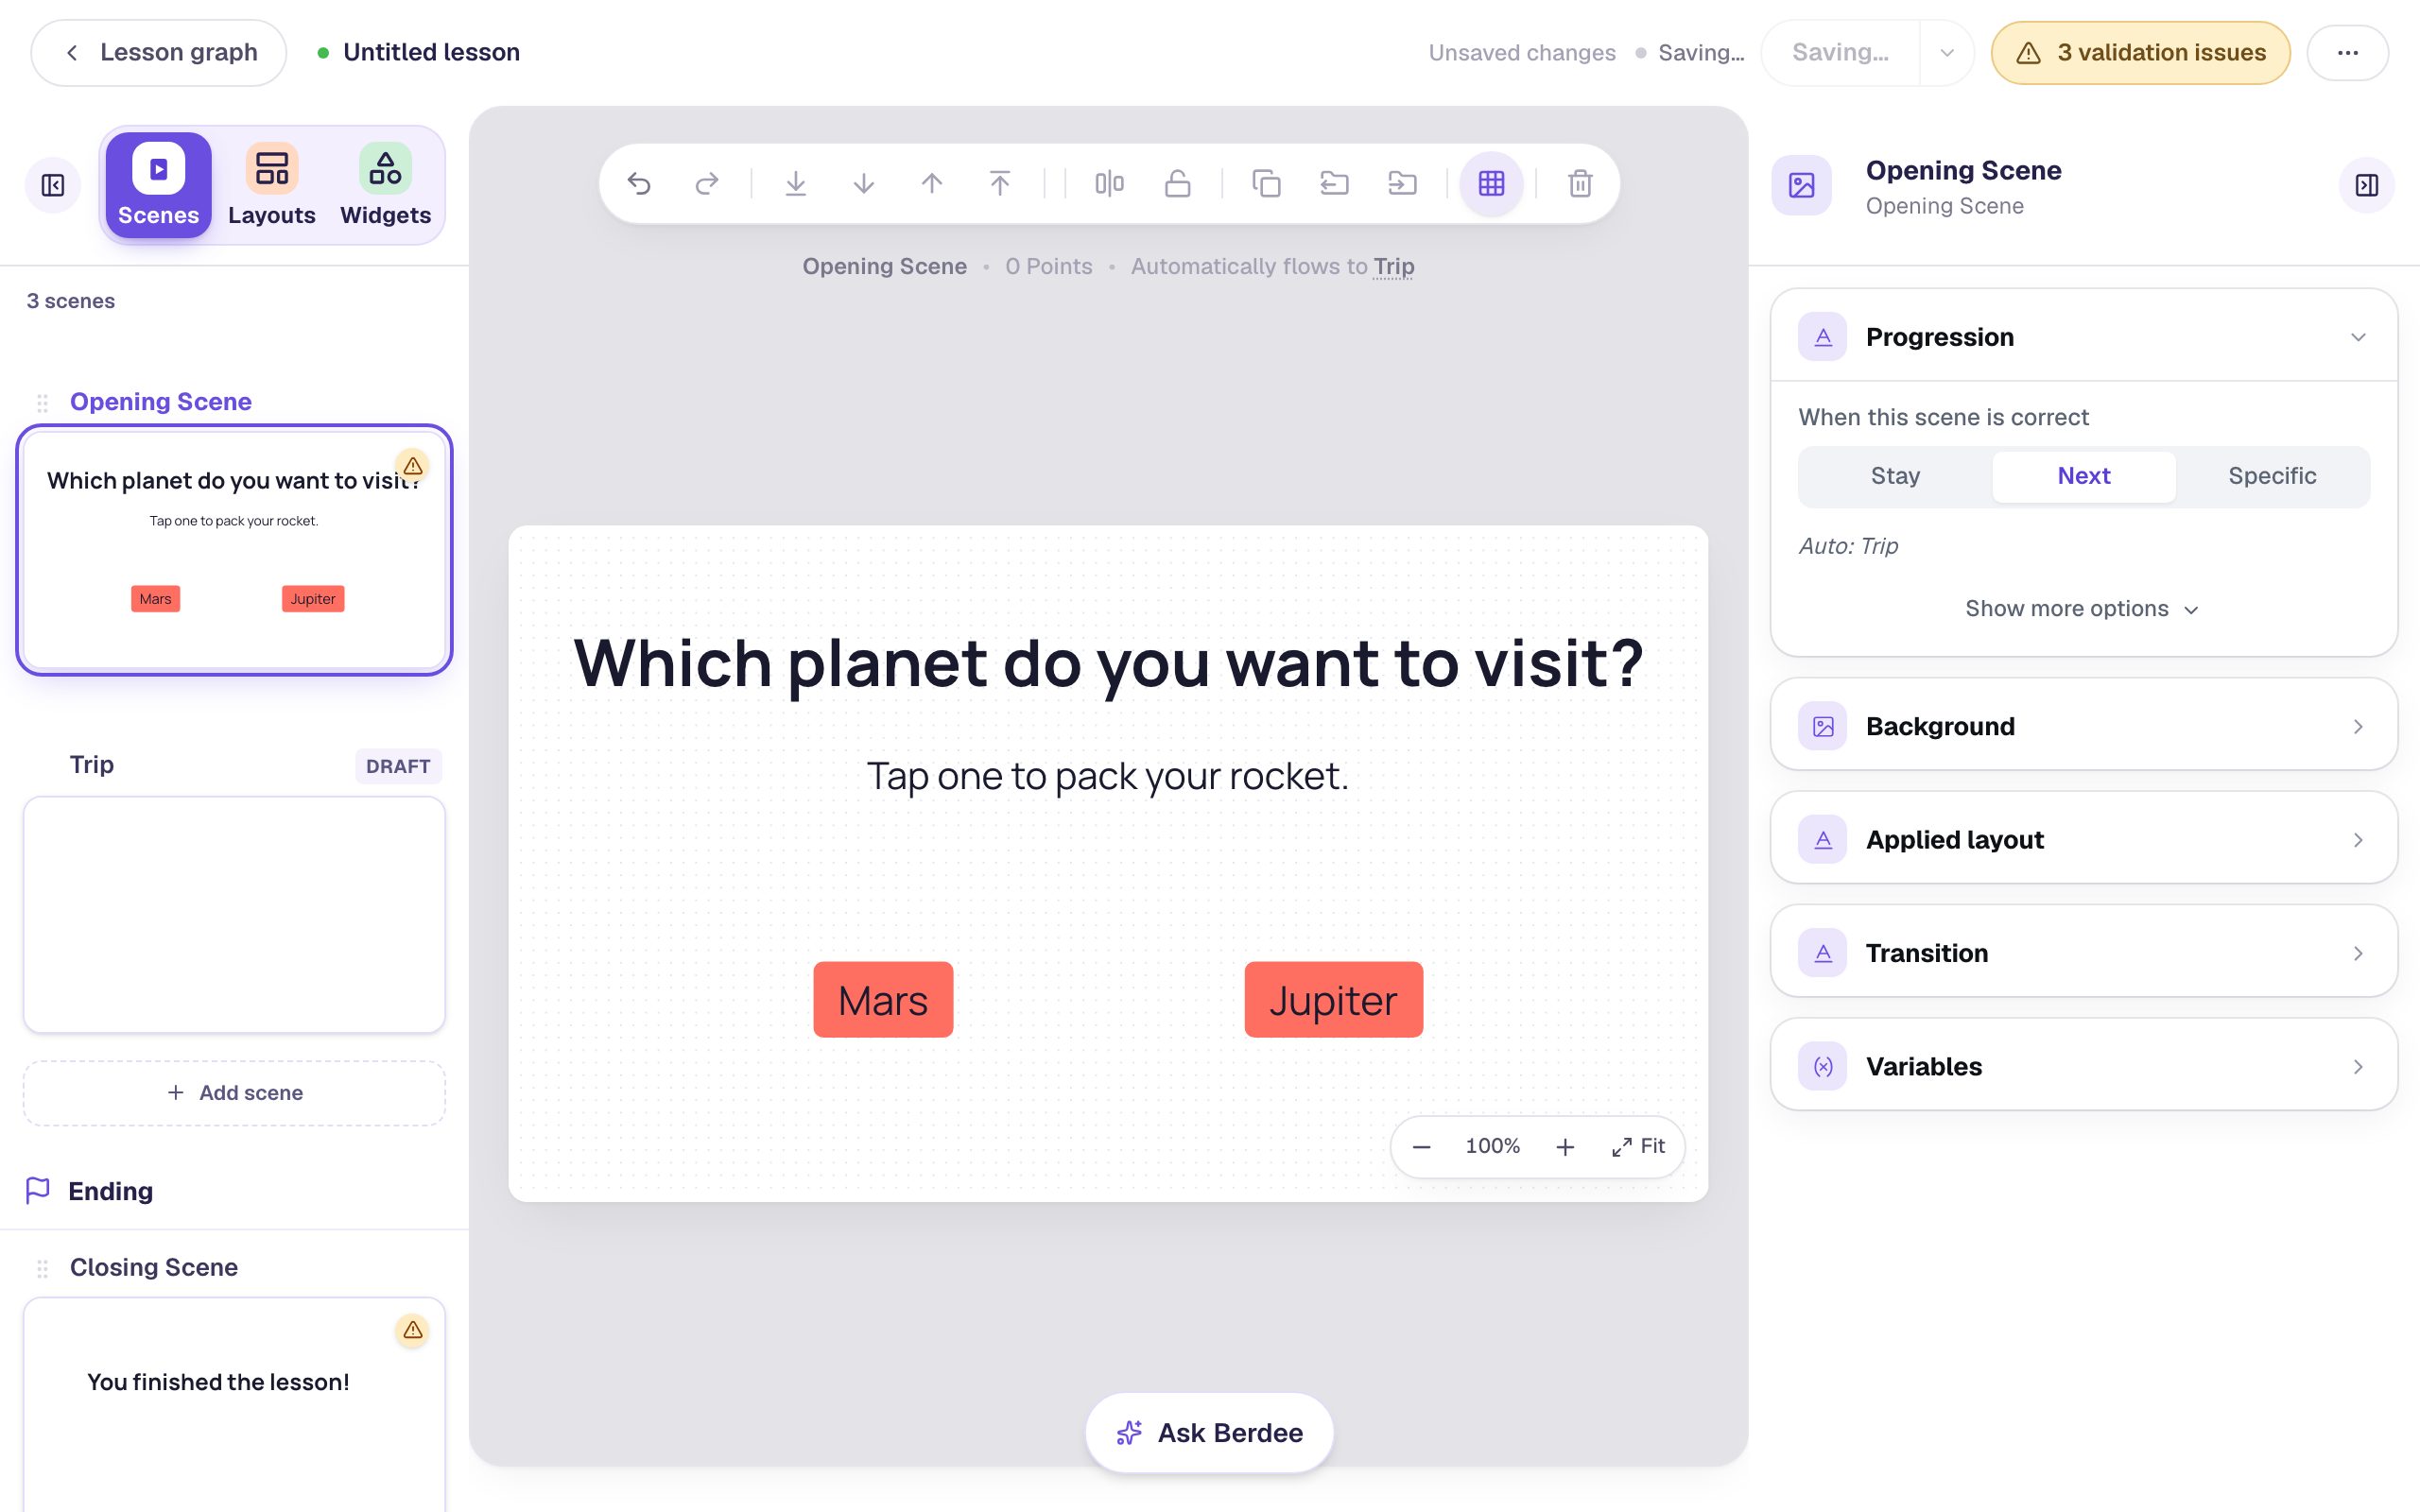
On the Opening Scene:
- Add a Heading that says
Which planet do you want to visit?and drag it near the top. - Add a Body text that says
Tap one to pack your rocket., set its Font Size to30, and drag it under the heading. - Add a Button, click ⚙ Configure, change its Label to
Mars, and click Save. Set its Font Size to32and drag it to the left. - Add a second Button labeled
Jupiter, also at32, and drag it to the right.
Now add the scene students go to next. Open the Scenes tab on the left, click Add scene, and rename the new scene Trip (click its name at the top of the properties panel, type, and press Enter). Then click Opening Scene to go back.
Step 3: Save the choice when a button is pressed
Each button needs one behavior with two actions: save its planet in the variable, then go to Trip. Order matters. Actions run from top to bottom, so the choice is saved before the student leaves the scene.
Click the Mars button to select it, and open Behaviors in the properties panel:
- Click Add Behavior and choose On Press. A new behavior starts with a Display Message action.
- Change Display Message to Set Variable.
- In the variable list, pick planet.
- The value box starts with placeholder text (
On Press triggered). Select it all and typeMars. - Click Add Action. Change the new action to Navigate to Scene, and pick Trip.
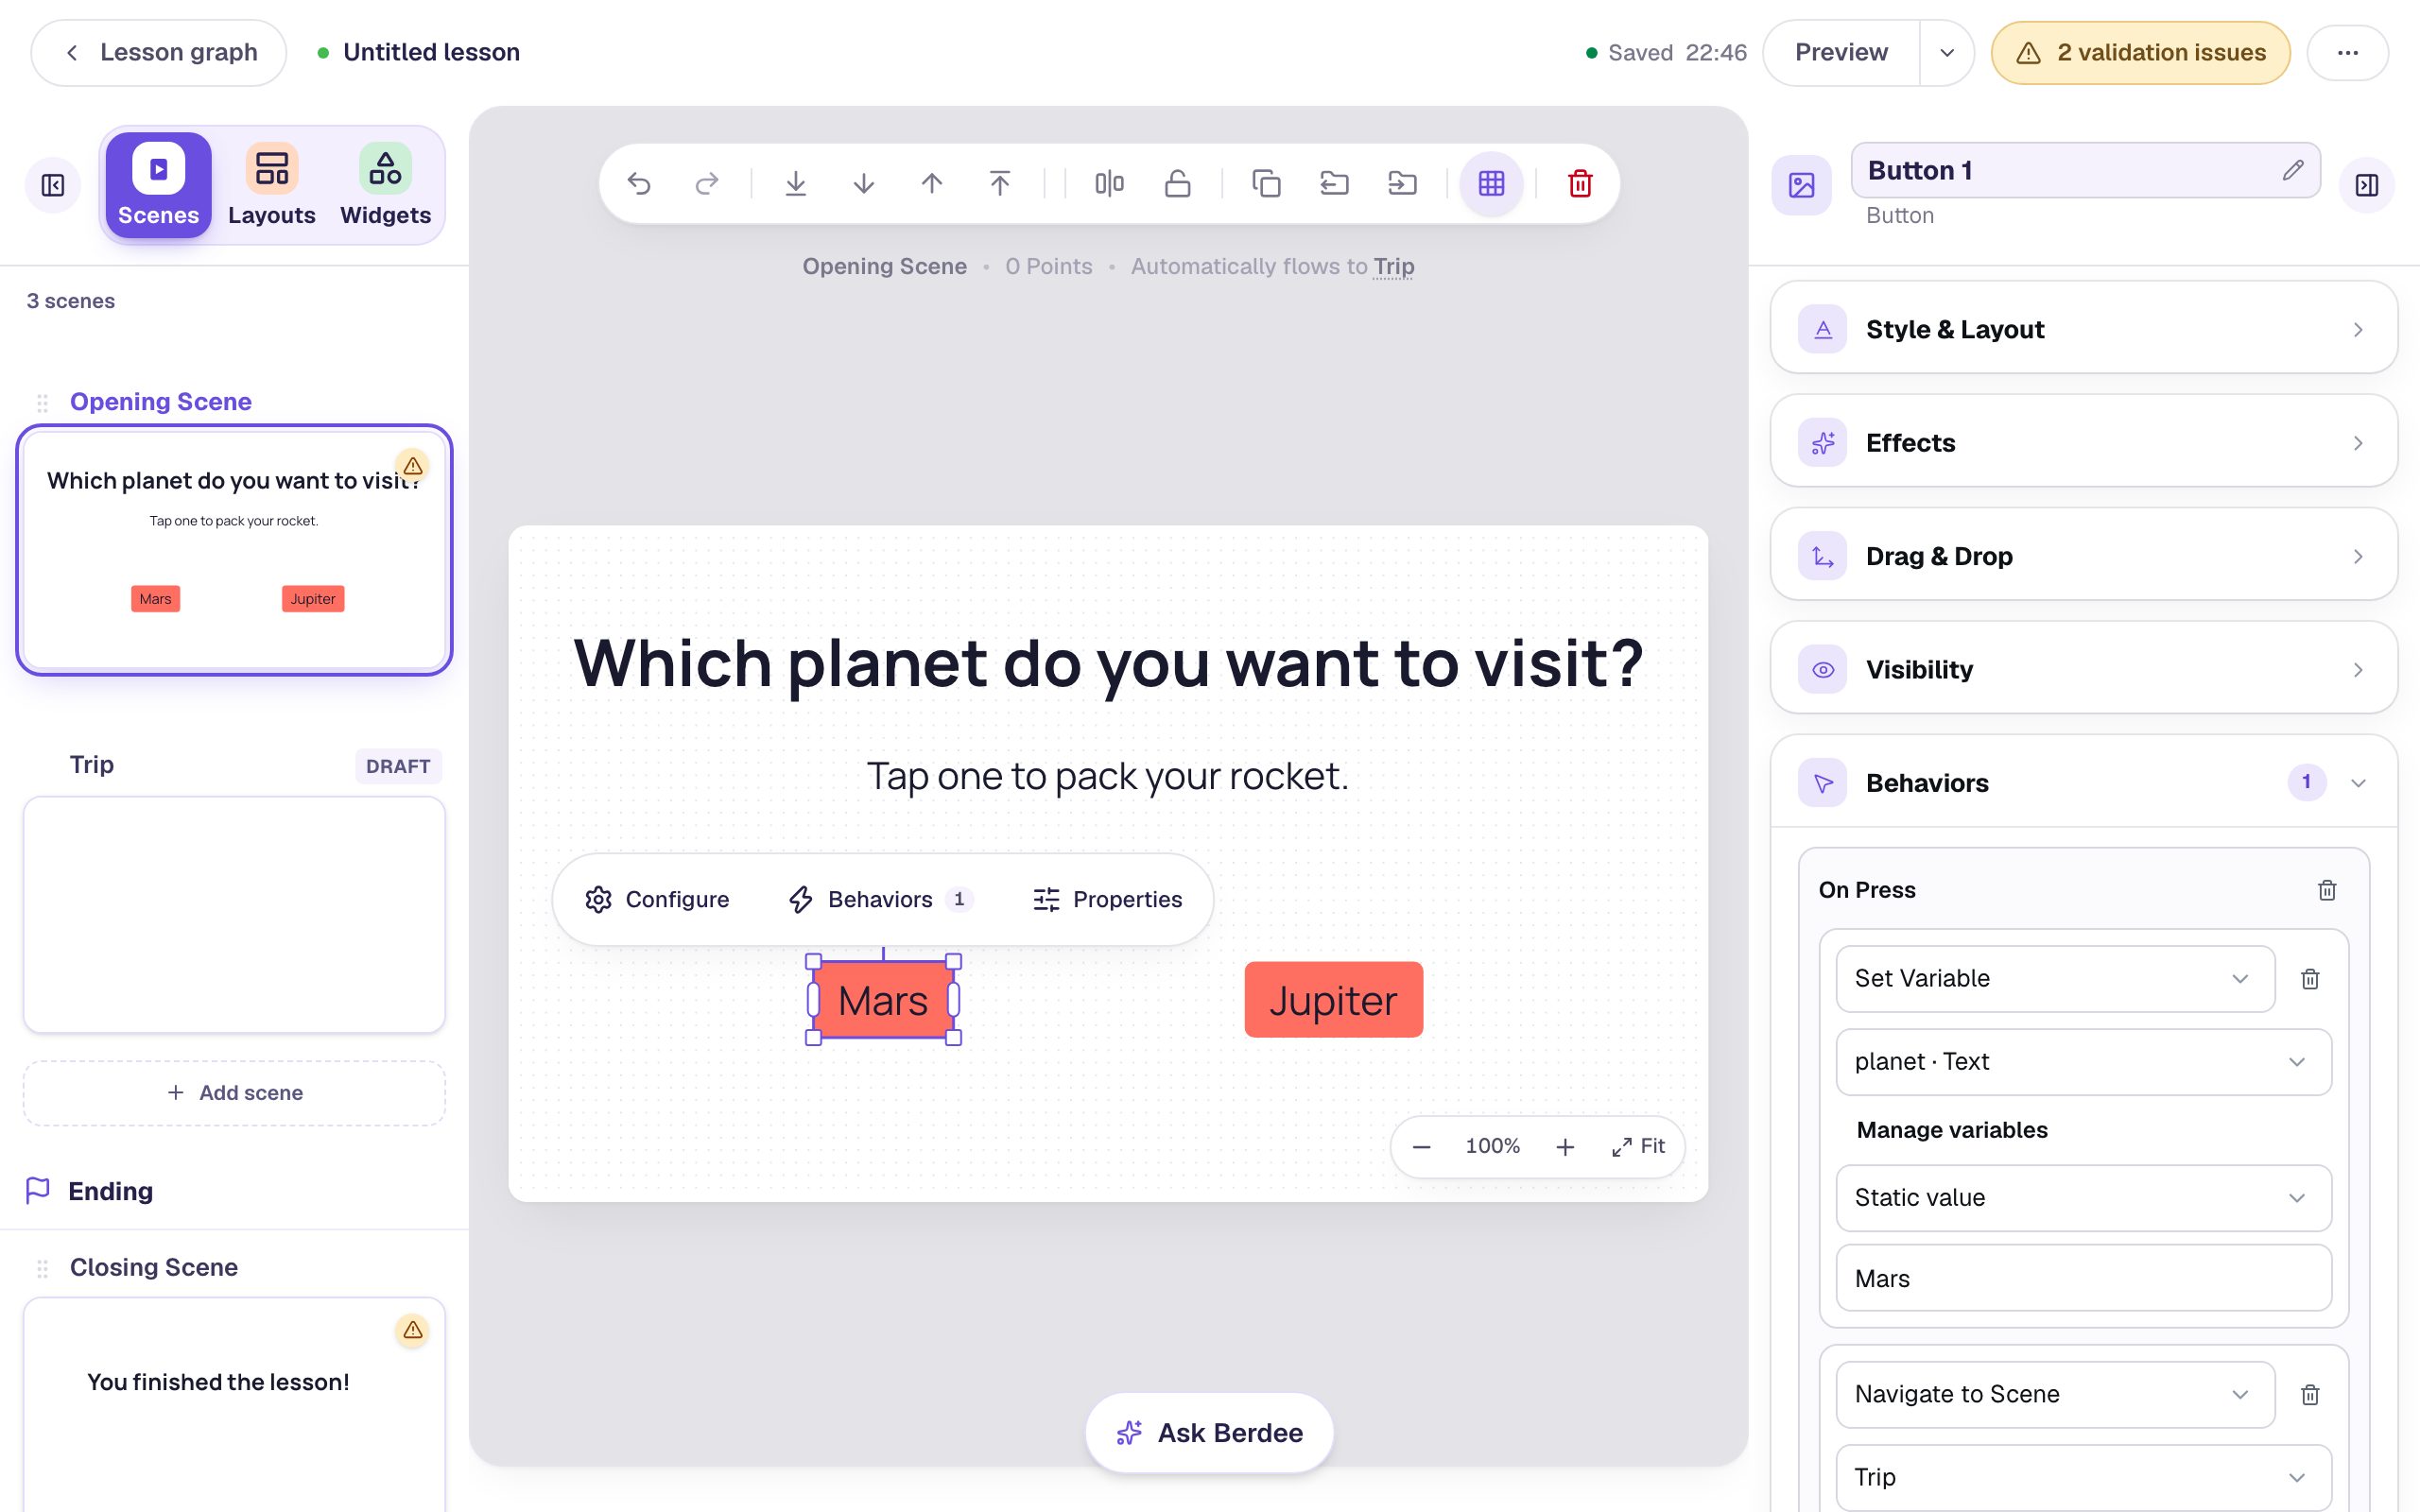
Type the value exactly as you want students to see it. The placeholder shows it word for word, capital letters included.
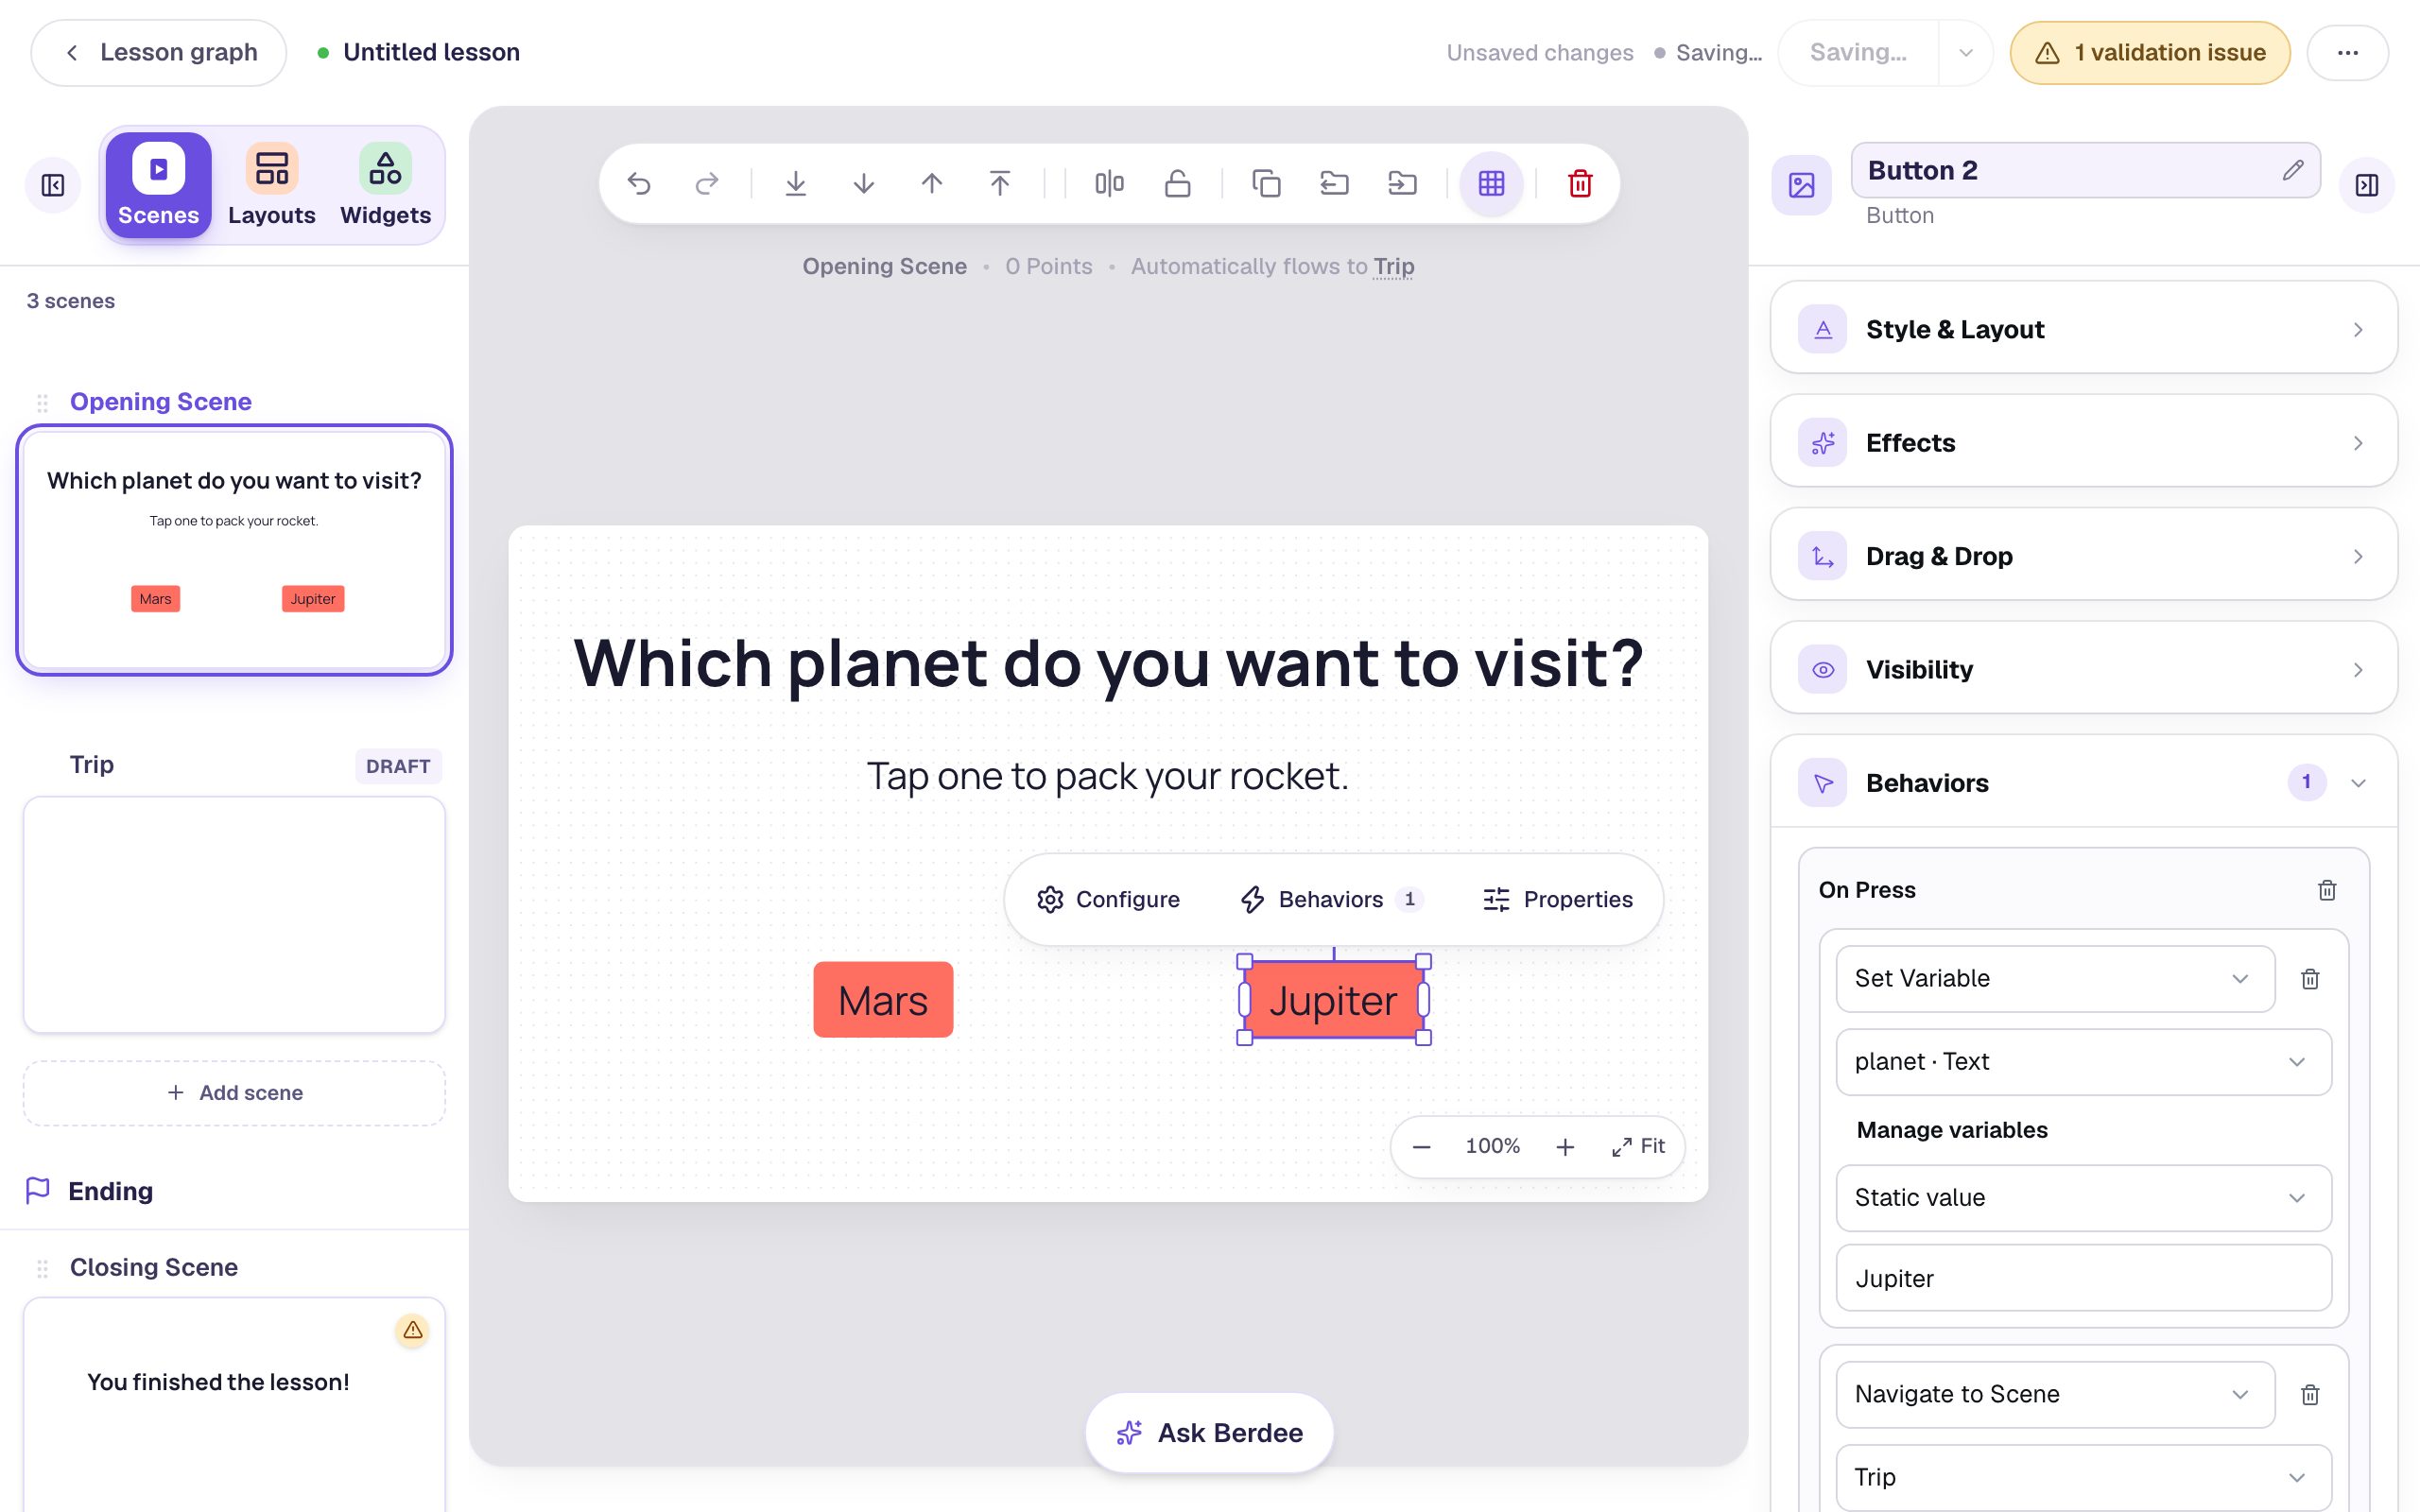
Now do the same for Jupiter: select it, add an On Press behavior, set planet to Jupiter, and add a Navigate to Scene action to Trip.
Step 4: Show the choice on the next scene
Click Trip in the Scenes tab. Wherever you want the student's choice to appear, type the variable's name between double curly braces:
- Add a Heading that says
Next stop: {{ planet }}! - Add a Body text that says
Buckle up, explorer. Your rocket is heading to {{ planet }}.and set its Font Size to30. - Add a Button labeled
Continue, at32. Give it an On Press behavior with one Navigate to Scene action set to Closing Scene, so students can finish the lesson.
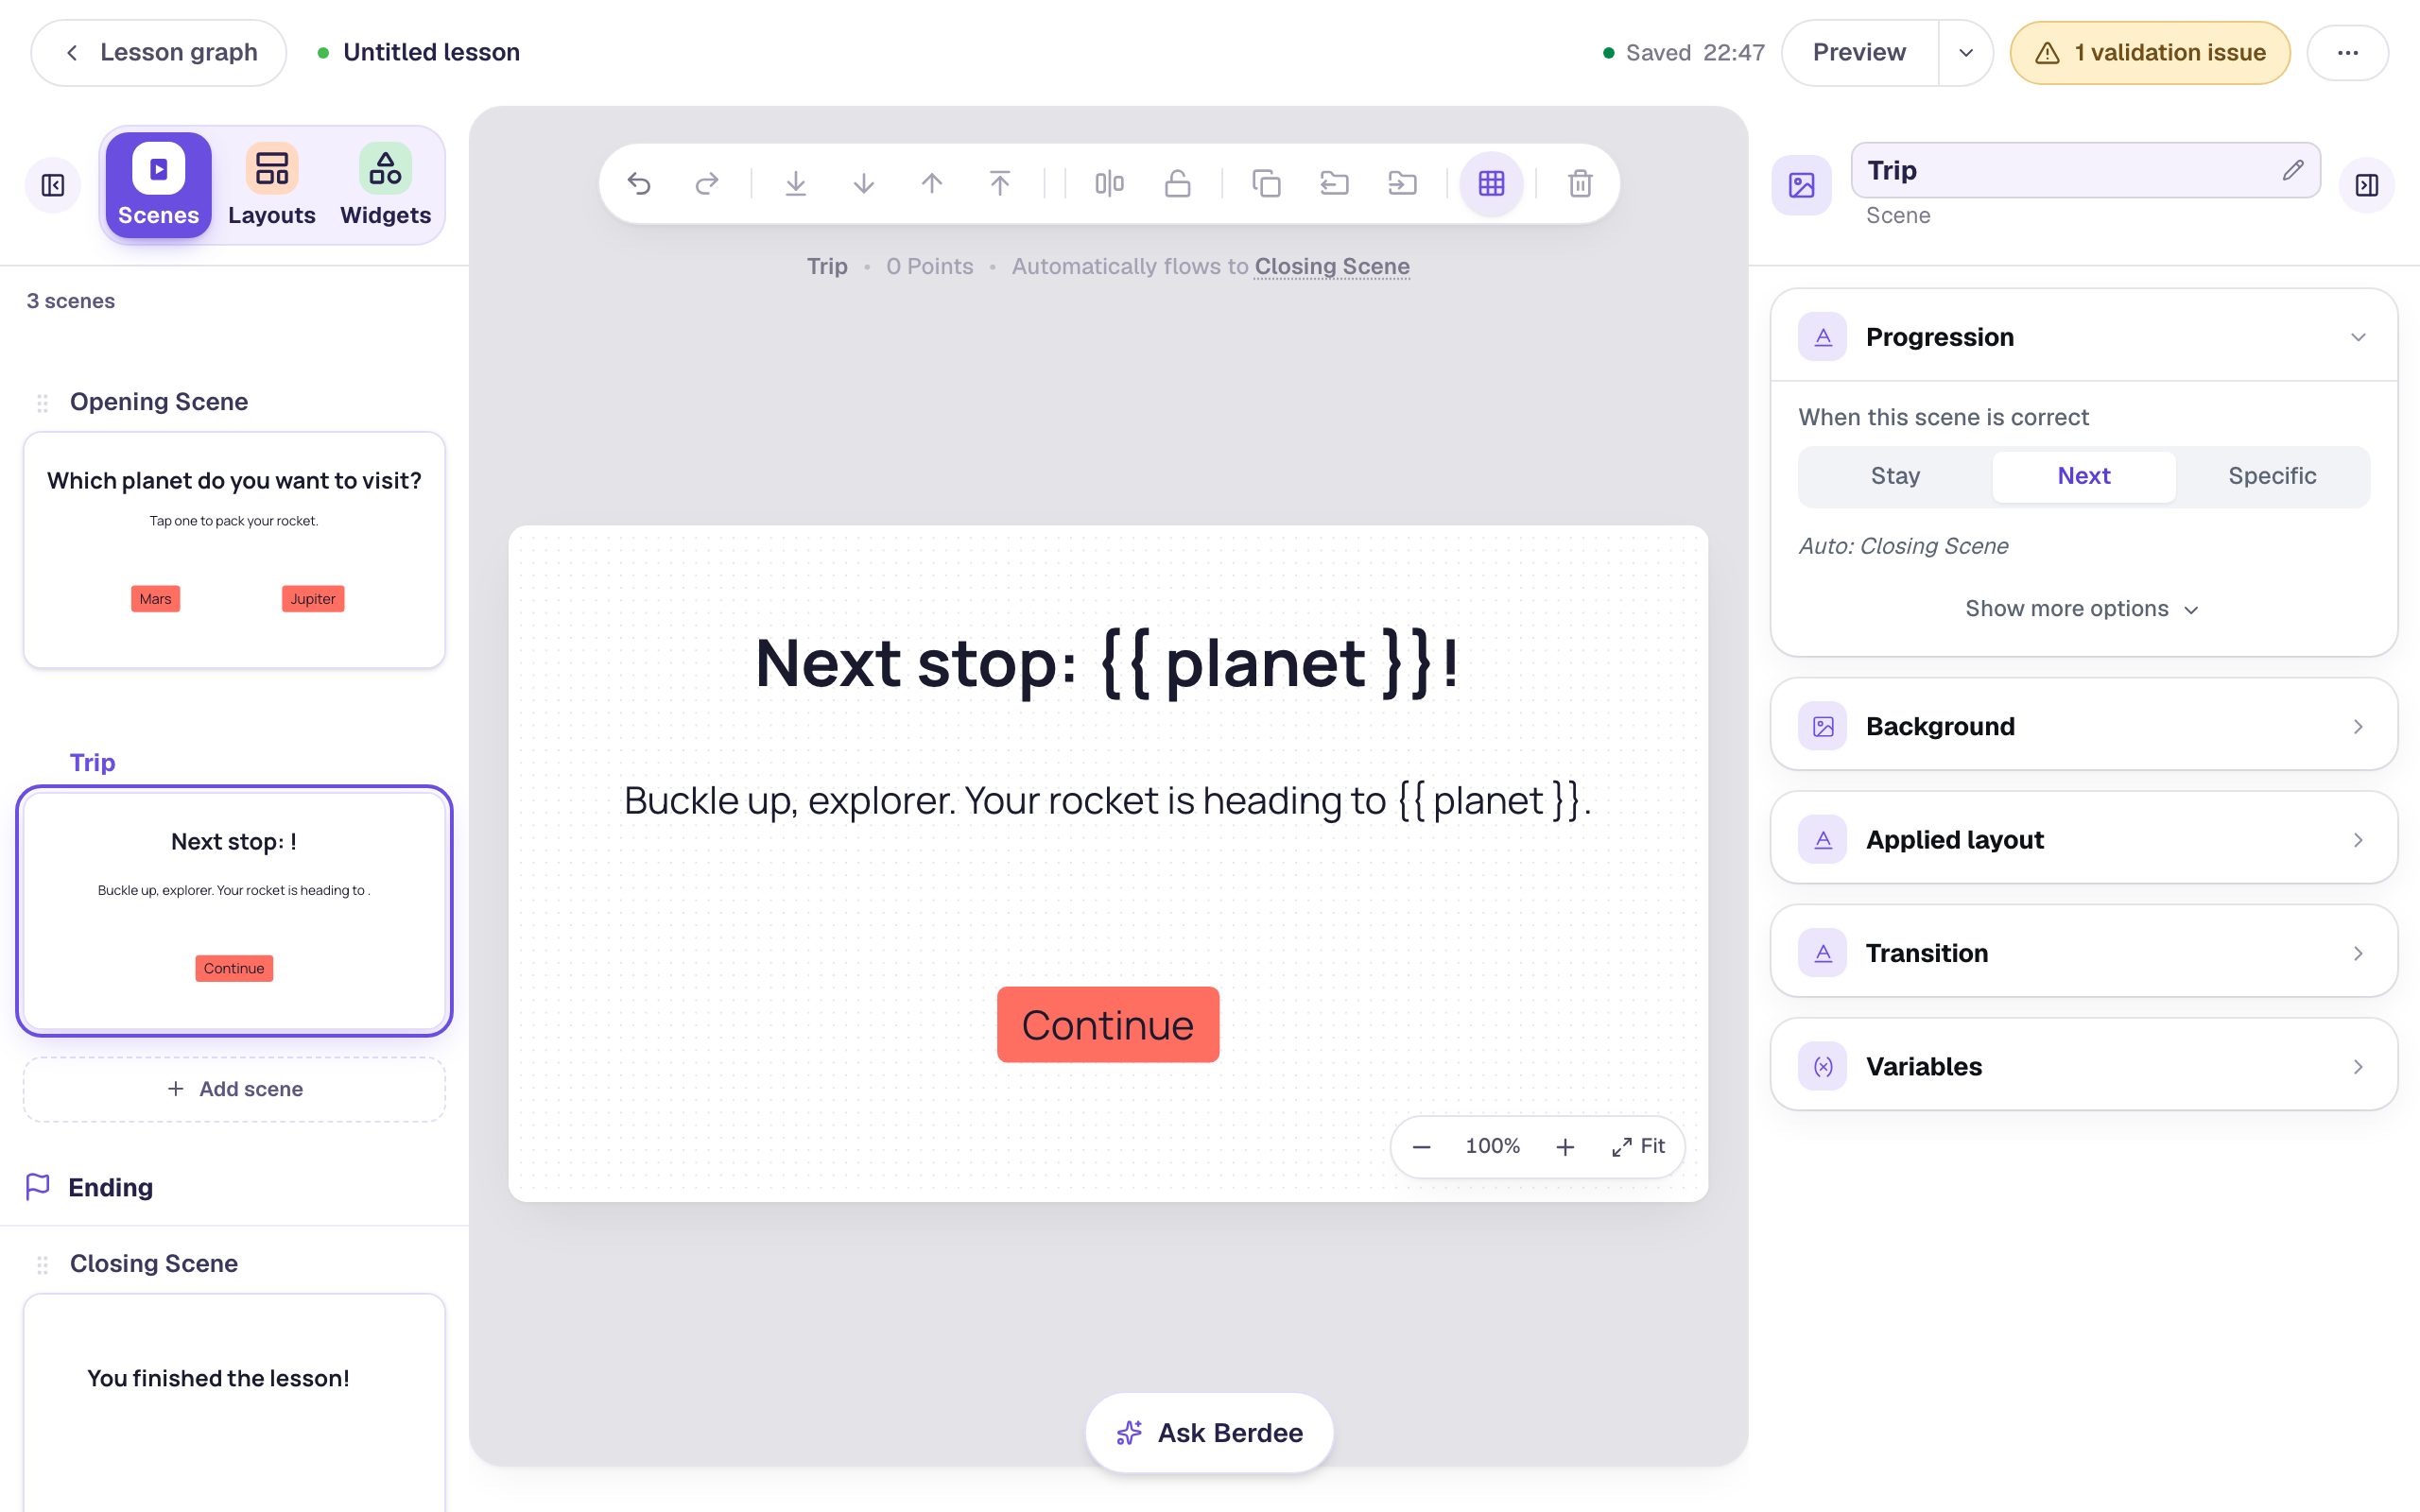
The canvas shows the braces exactly as you typed them, because it doesn't know which planet a student will pick. (The small scene thumbnail in the Scenes tab leaves the placeholder blank instead, so it reads "Next stop: !". That's only the thumbnail.) Students never see the braces: each one sees their own choice in that spot. The spaces inside the braces are optional. {{planet}} and {{ planet }} work the same.
Leave a little room around text with a placeholder. "Jupiter" is a different length from "{{ planet }}", so the line a student sees is a little longer or shorter than the one on your canvas.
One thing is left before the lesson can be published. The yellow pill at the top says 1 validation issue. Click it:
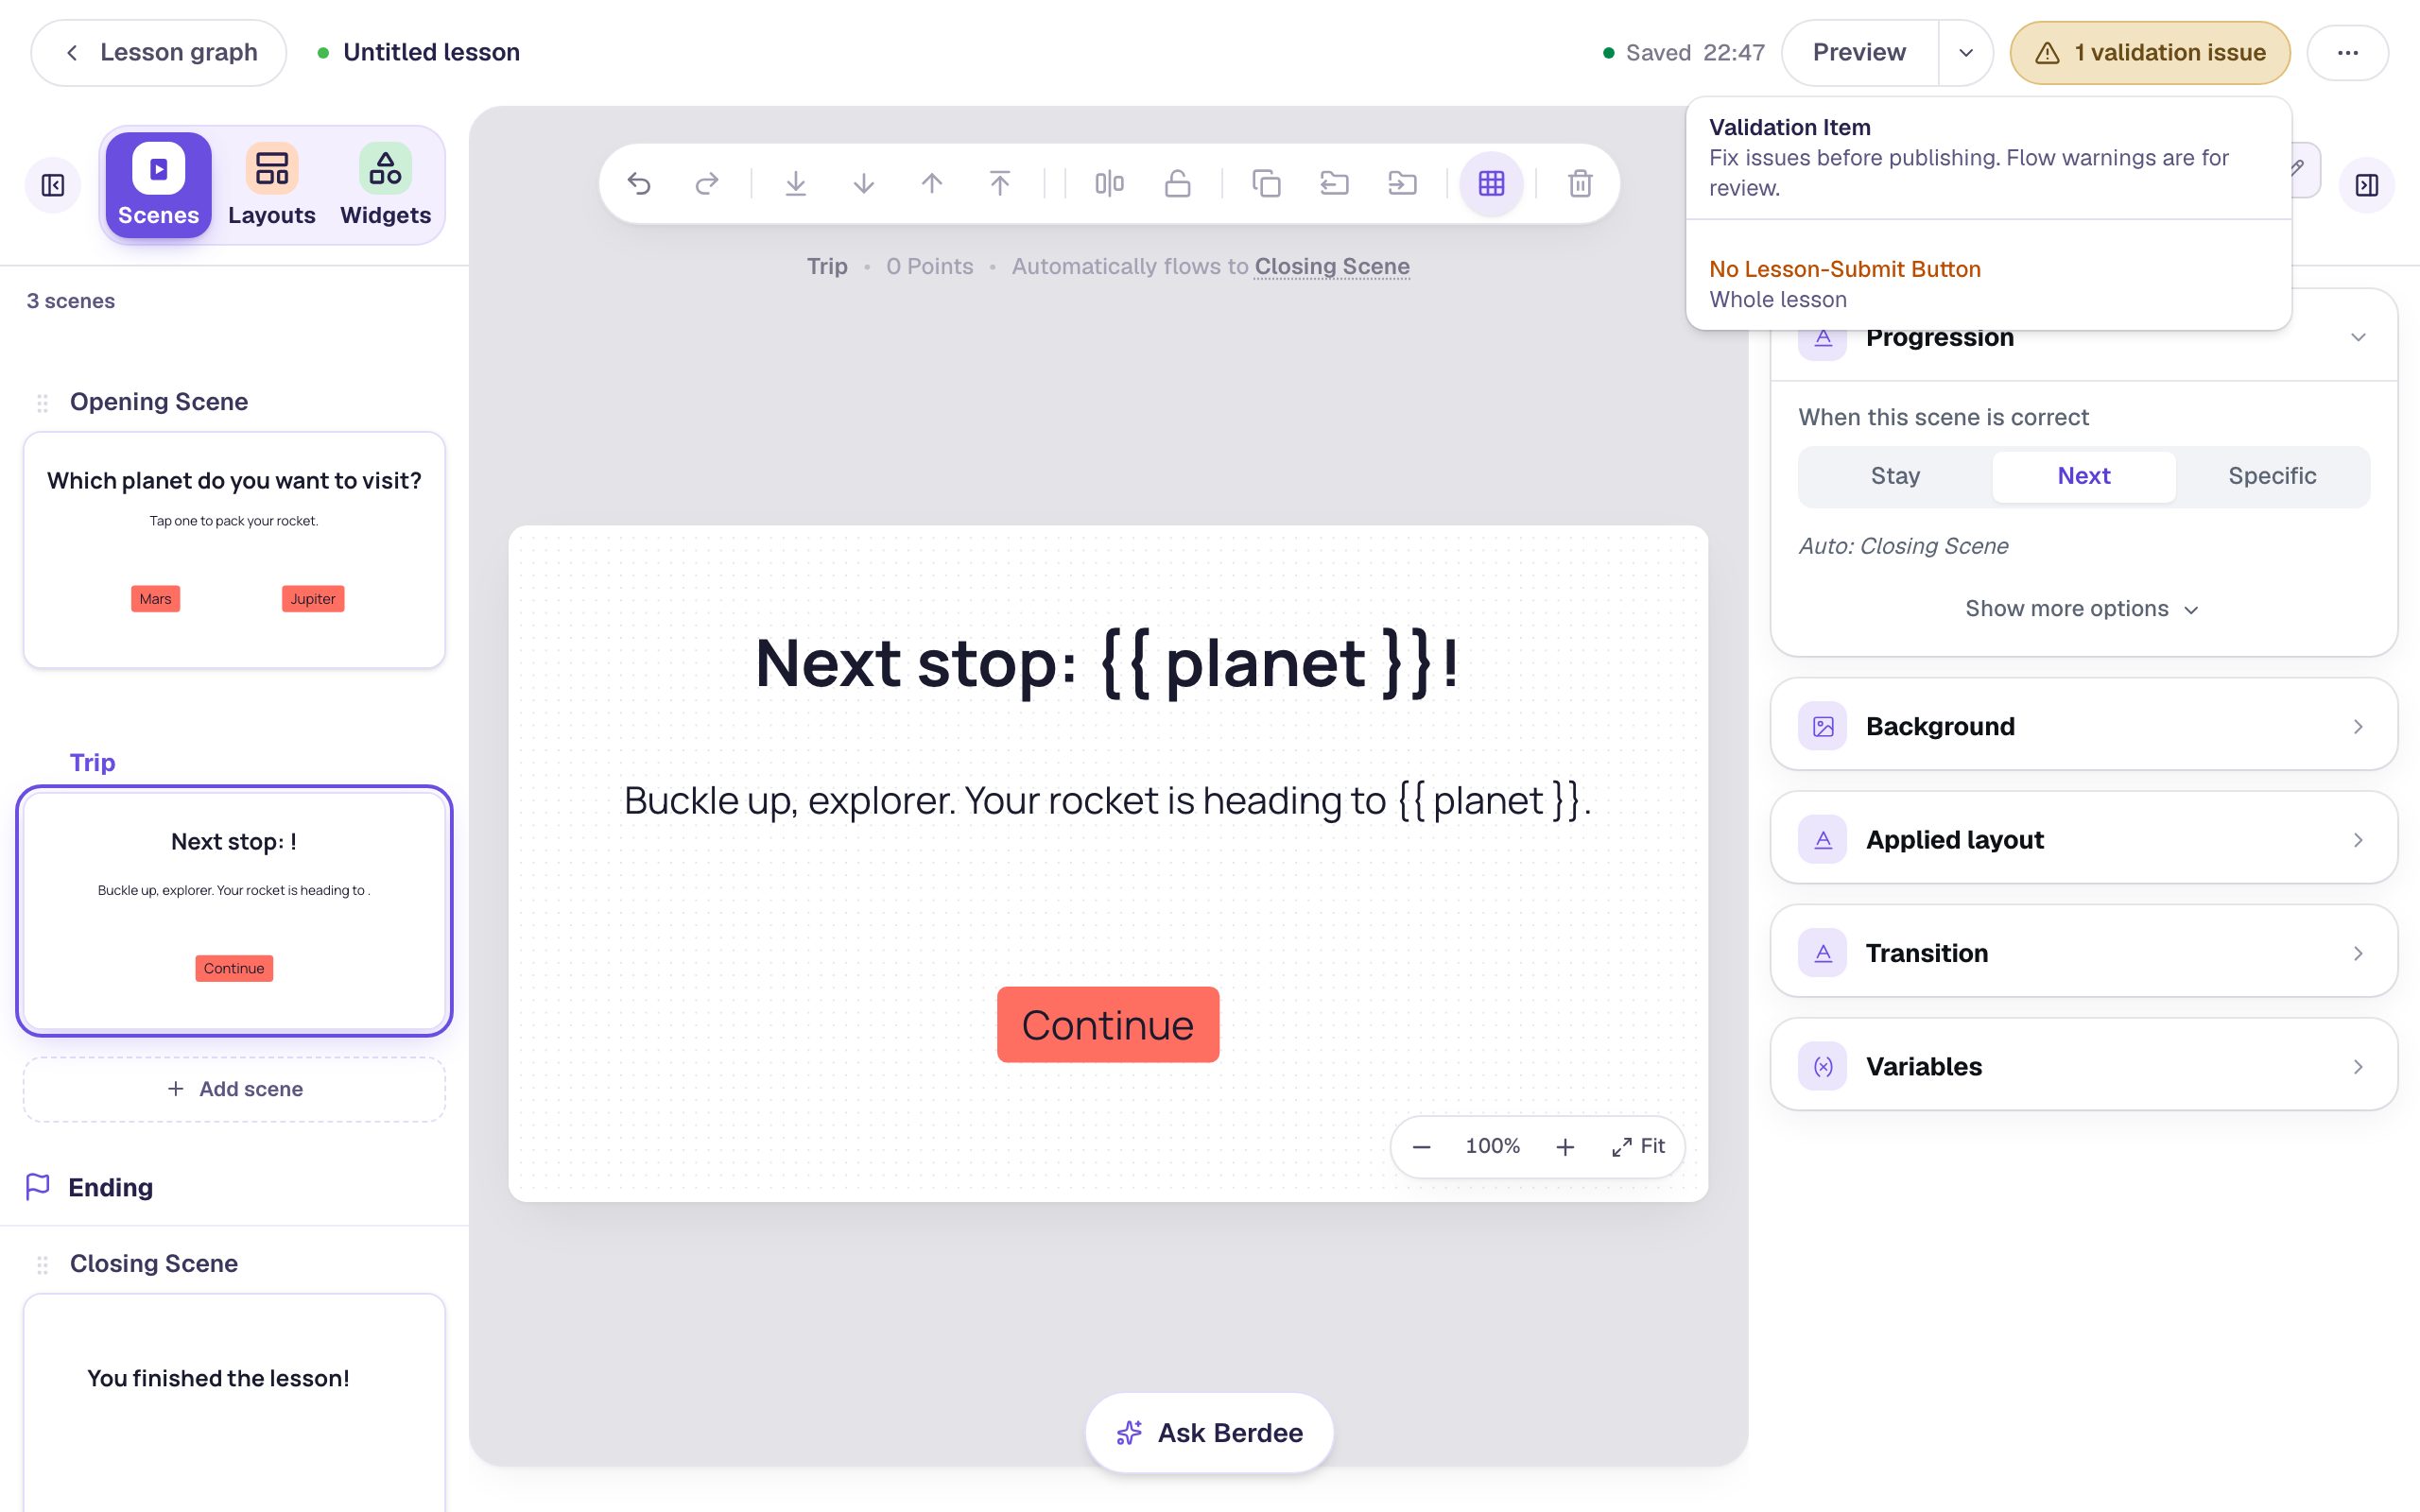
No Lesson-Submit Button means no button lets a student finish the lesson early. Continue doesn't count: it only moves to the Closing Scene. Add a small one on Trip:
- Add a Submit Button.
- In Content, change the Label to
I'm doneand set Submits to Lesson. - In Style & Layout, bring the Font Size down to
18, and drag it to the bottom-left corner so it stays out of the way.
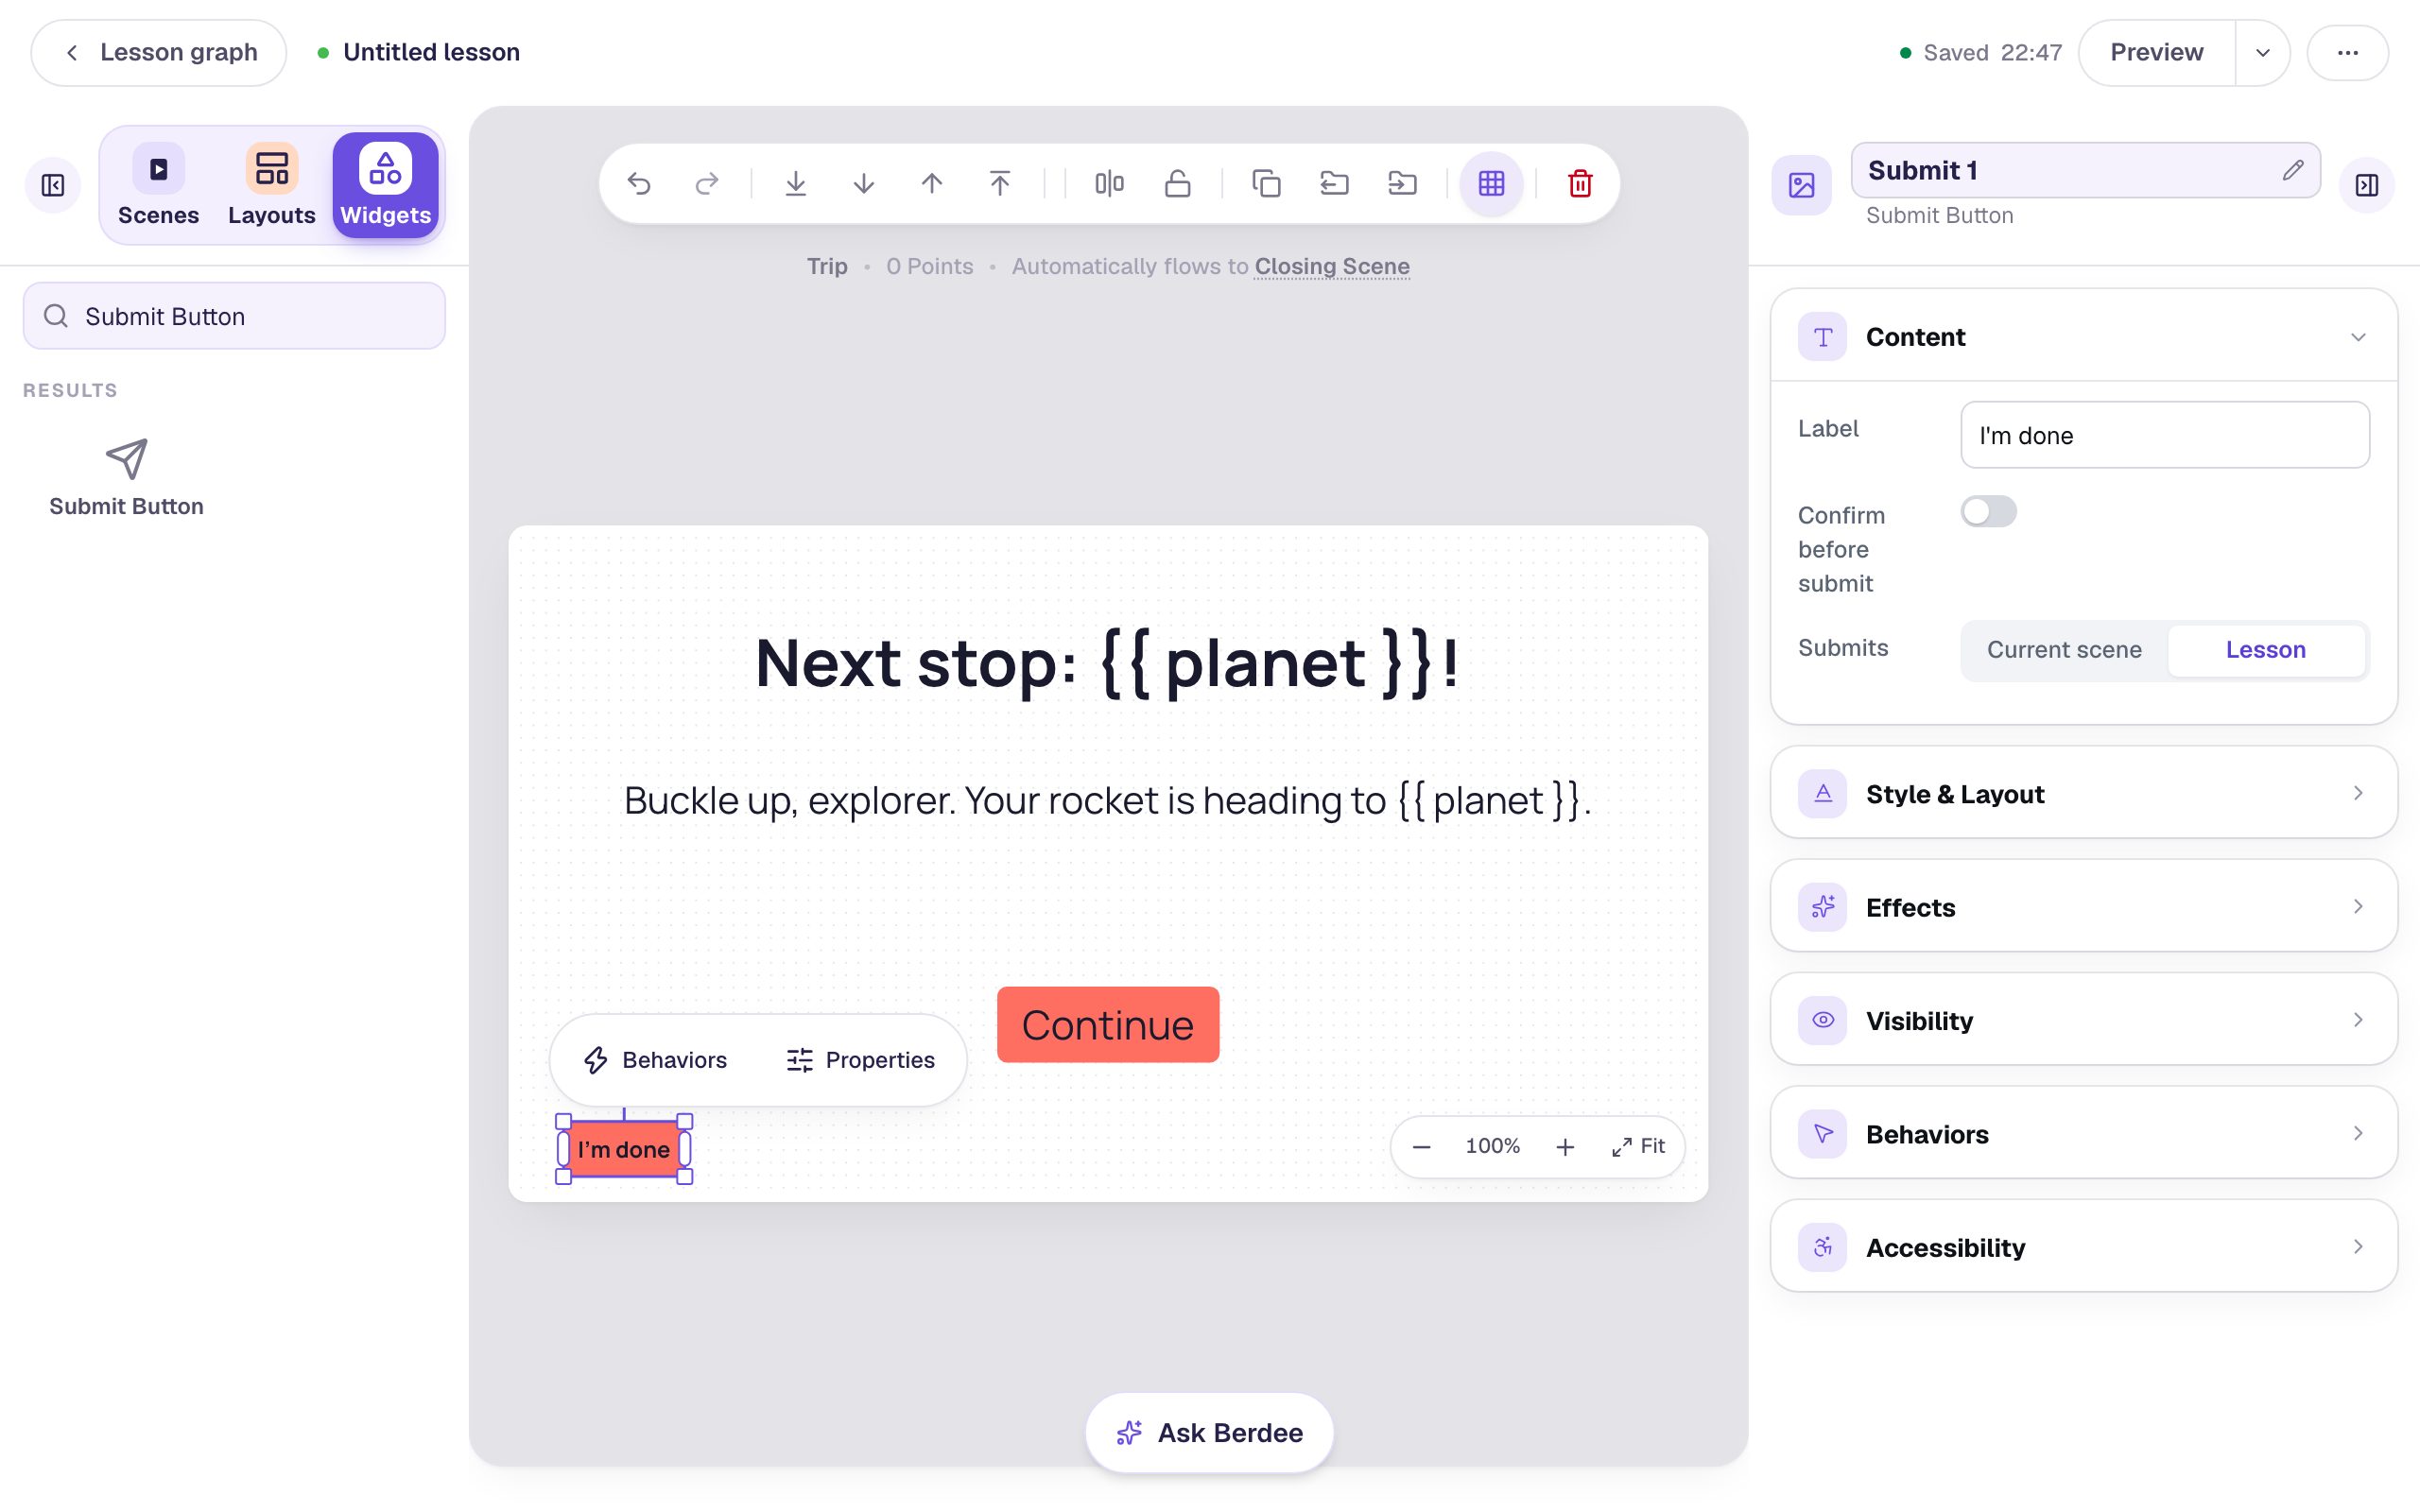
Most students will press Continue, which finishes the lesson by reaching the Closing Scene. I'm done finishes it right away.
Step 5: Try it as a student
Name the lesson (click Untitled lesson at the top left and type Space trip). Go back to the Opening Scene, since Preview starts on the scene you're editing, and click Preview. Try both choices:
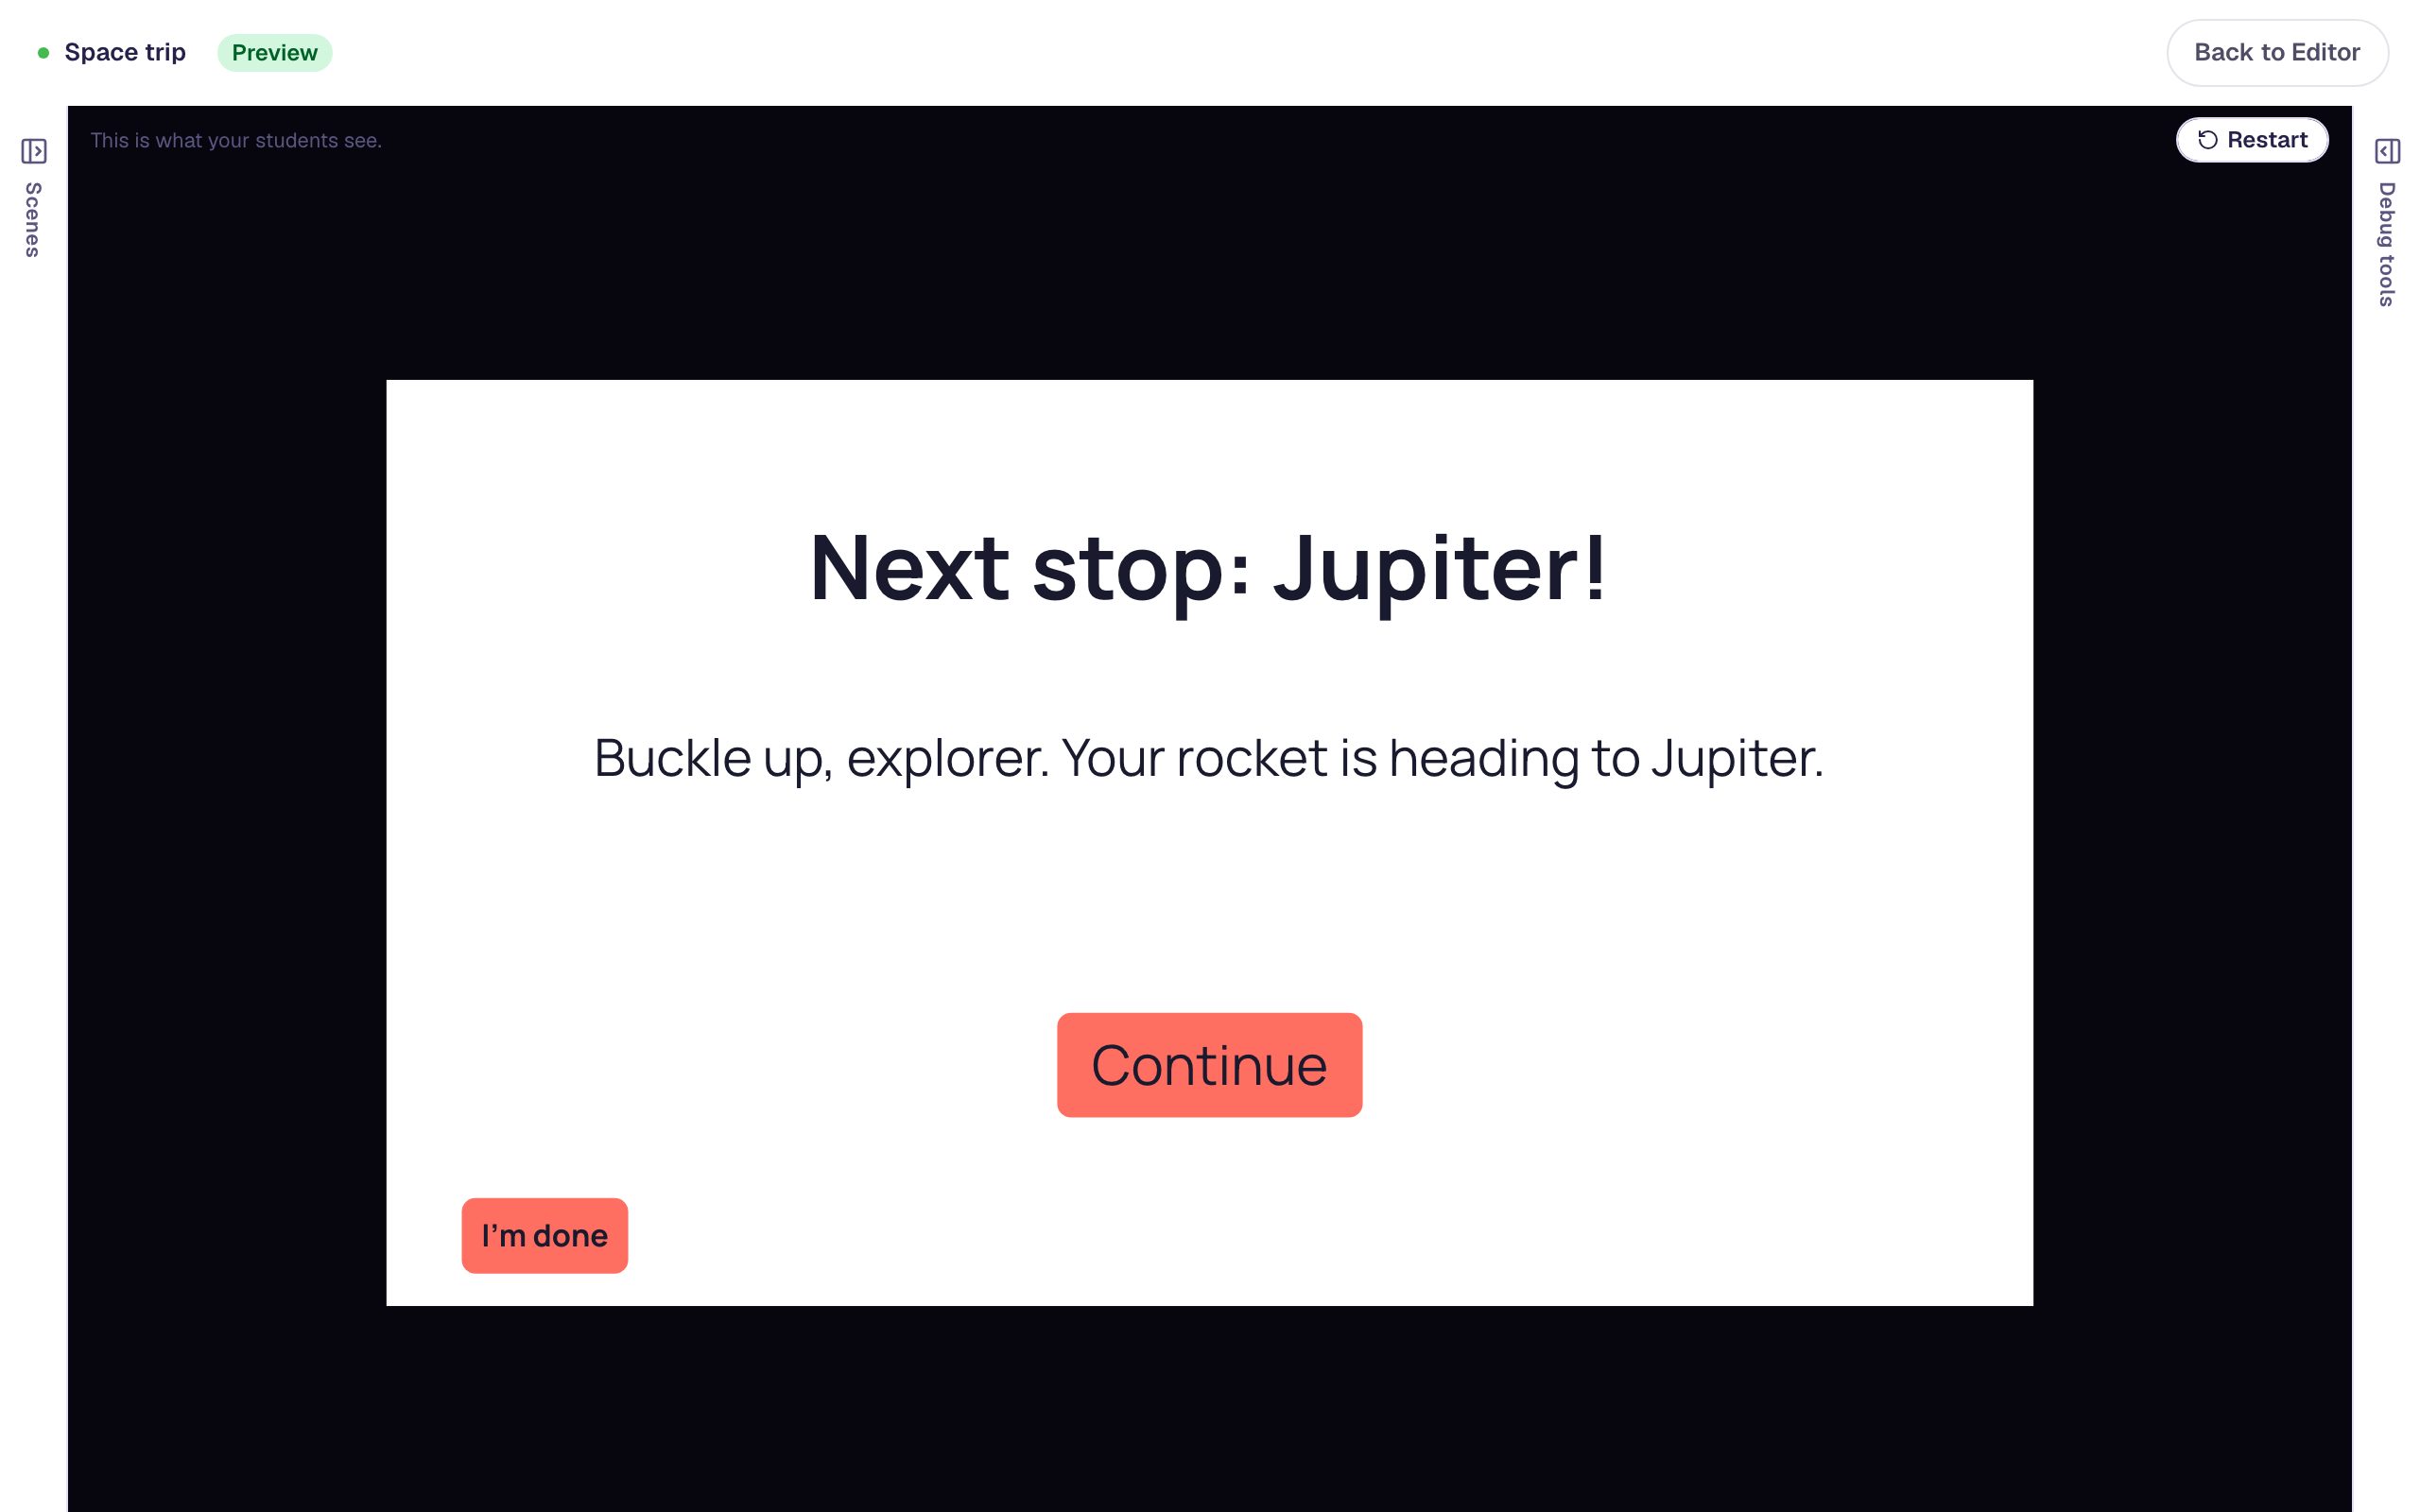
- Press Jupiter. The Trip scene says Next stop: Jupiter!
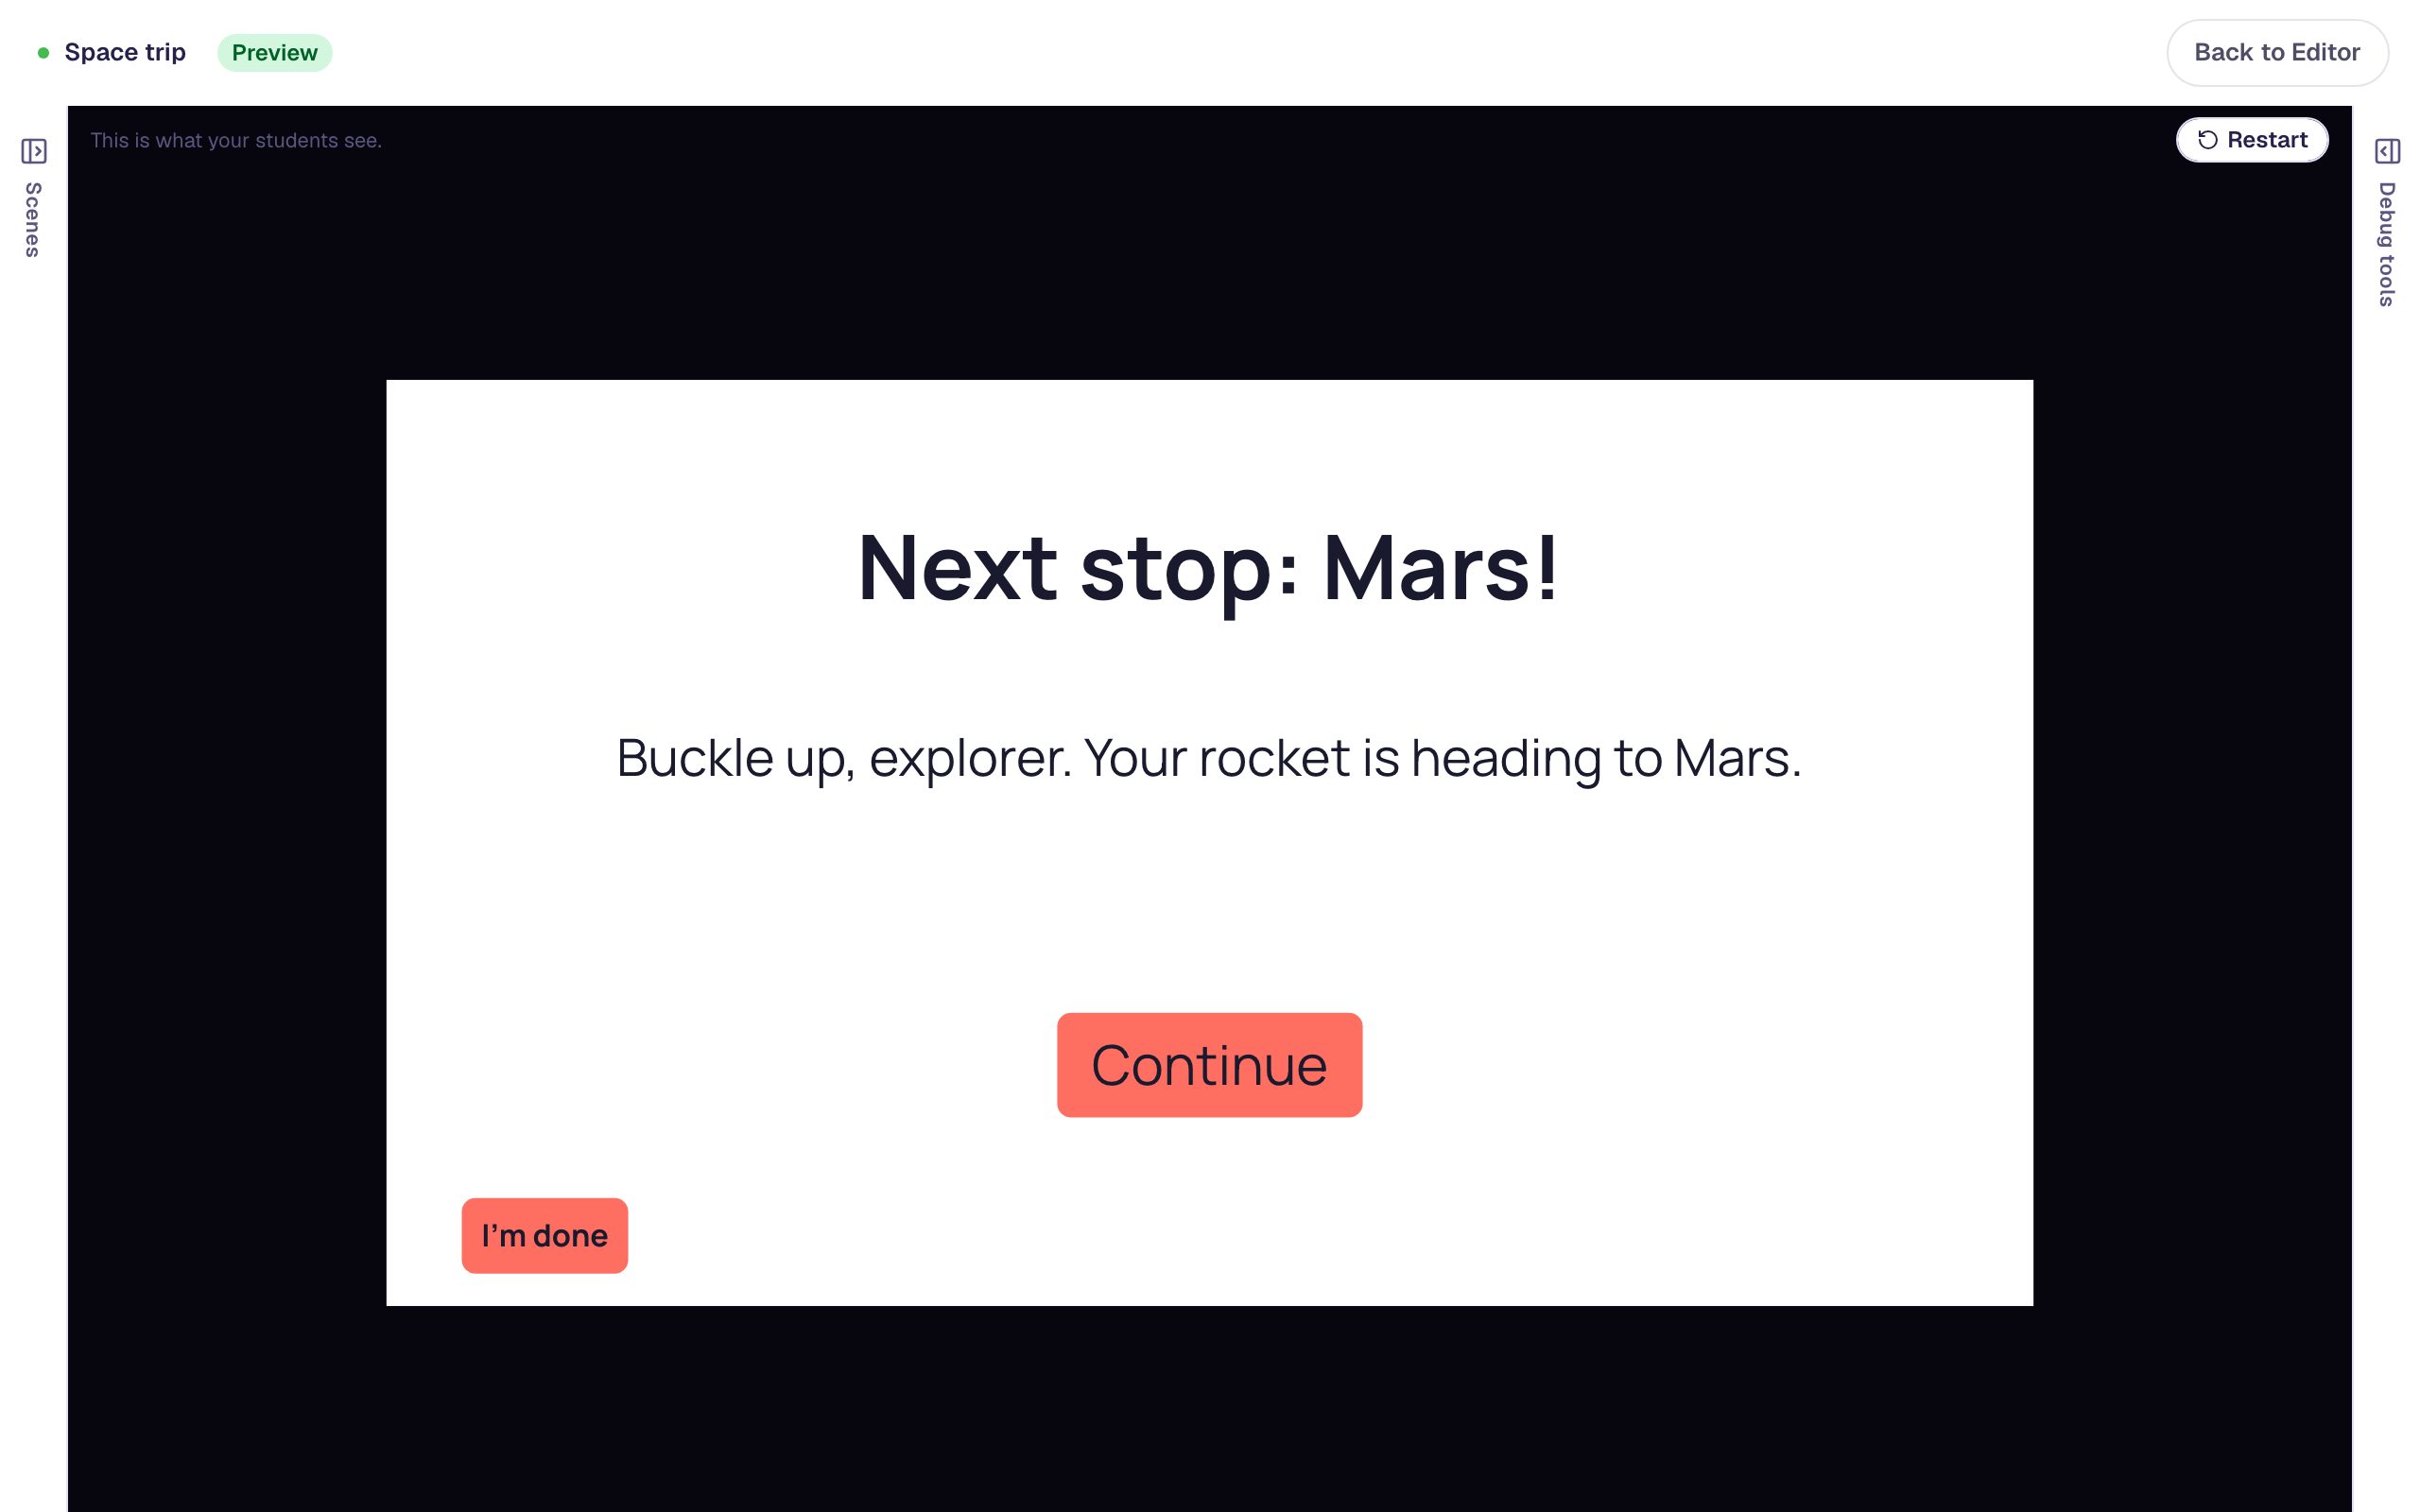
- Click Restart and press Mars. The same scene now says Next stop: Mars!
If a placeholder ever shows the starting value instead of the choice, check the button's actions: Set Variable has to come before Navigate to Scene, and the value can't be blank.
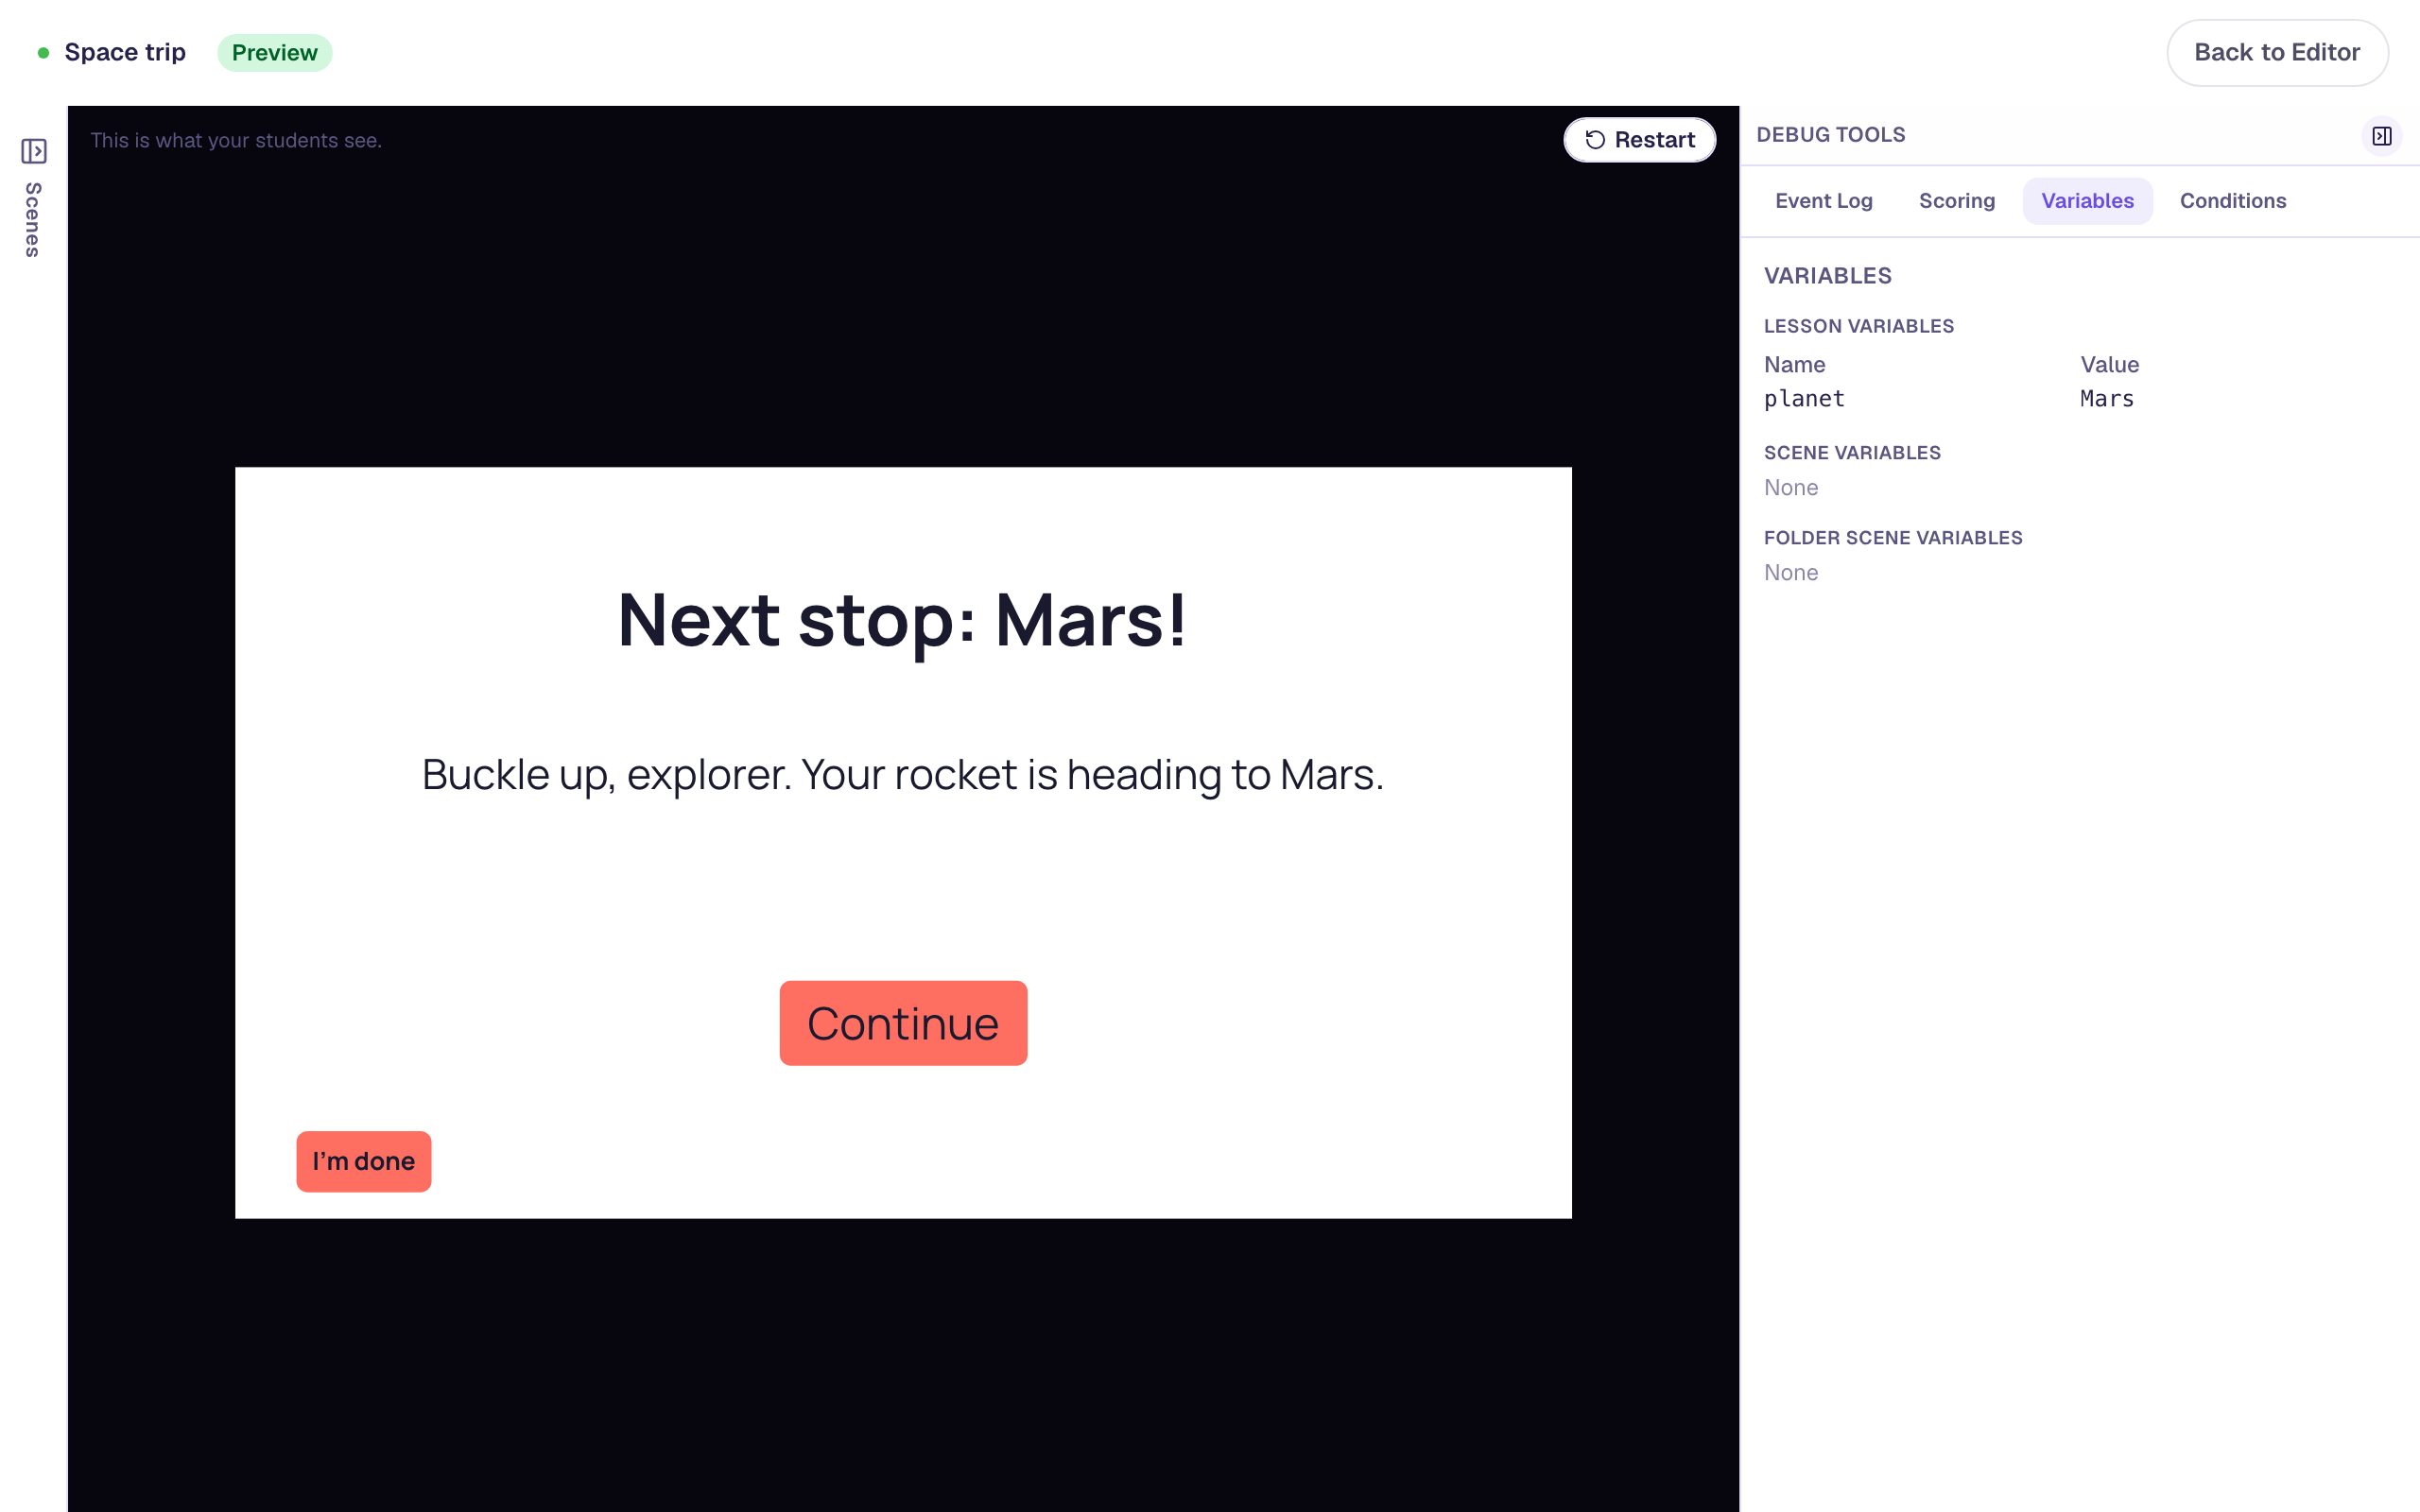
To see what a variable holds at any moment, click Show debug tools at the bottom of the preview and open the Variables tab:
What you built
A lesson that remembers a choice:
- a Text variable named
planetthat starts asspace, - two buttons whose On Press behaviors Set Variable and then Navigate to Scene, and
- one Trip scene whose text uses
{{ planet }}to show each student their own choice, plus a small I'm done button that lets the lesson publish.
The same idea scales up. A variable can hold a number too: an Increment Variable action adds to it each time something happens, so You found {{ stars }} stars! can count as students go. You can also use a variable to decide what's shown, not just what's said, with a Conditional visibility rule. Variables and Liquid Templates and Variables cover both, and Show a hint after two wrong tries puts them together: a counter that reveals a hint. And in Spin a wheel to pick a story starter, a Spin Wheel sets the variable instead of a button.
Make this lesson yours
Add the lesson you just watched being built to your account, then change it for your class: your questions, your pictures, your colors.
Free to sign up, and you'll come straight back here. I have an account