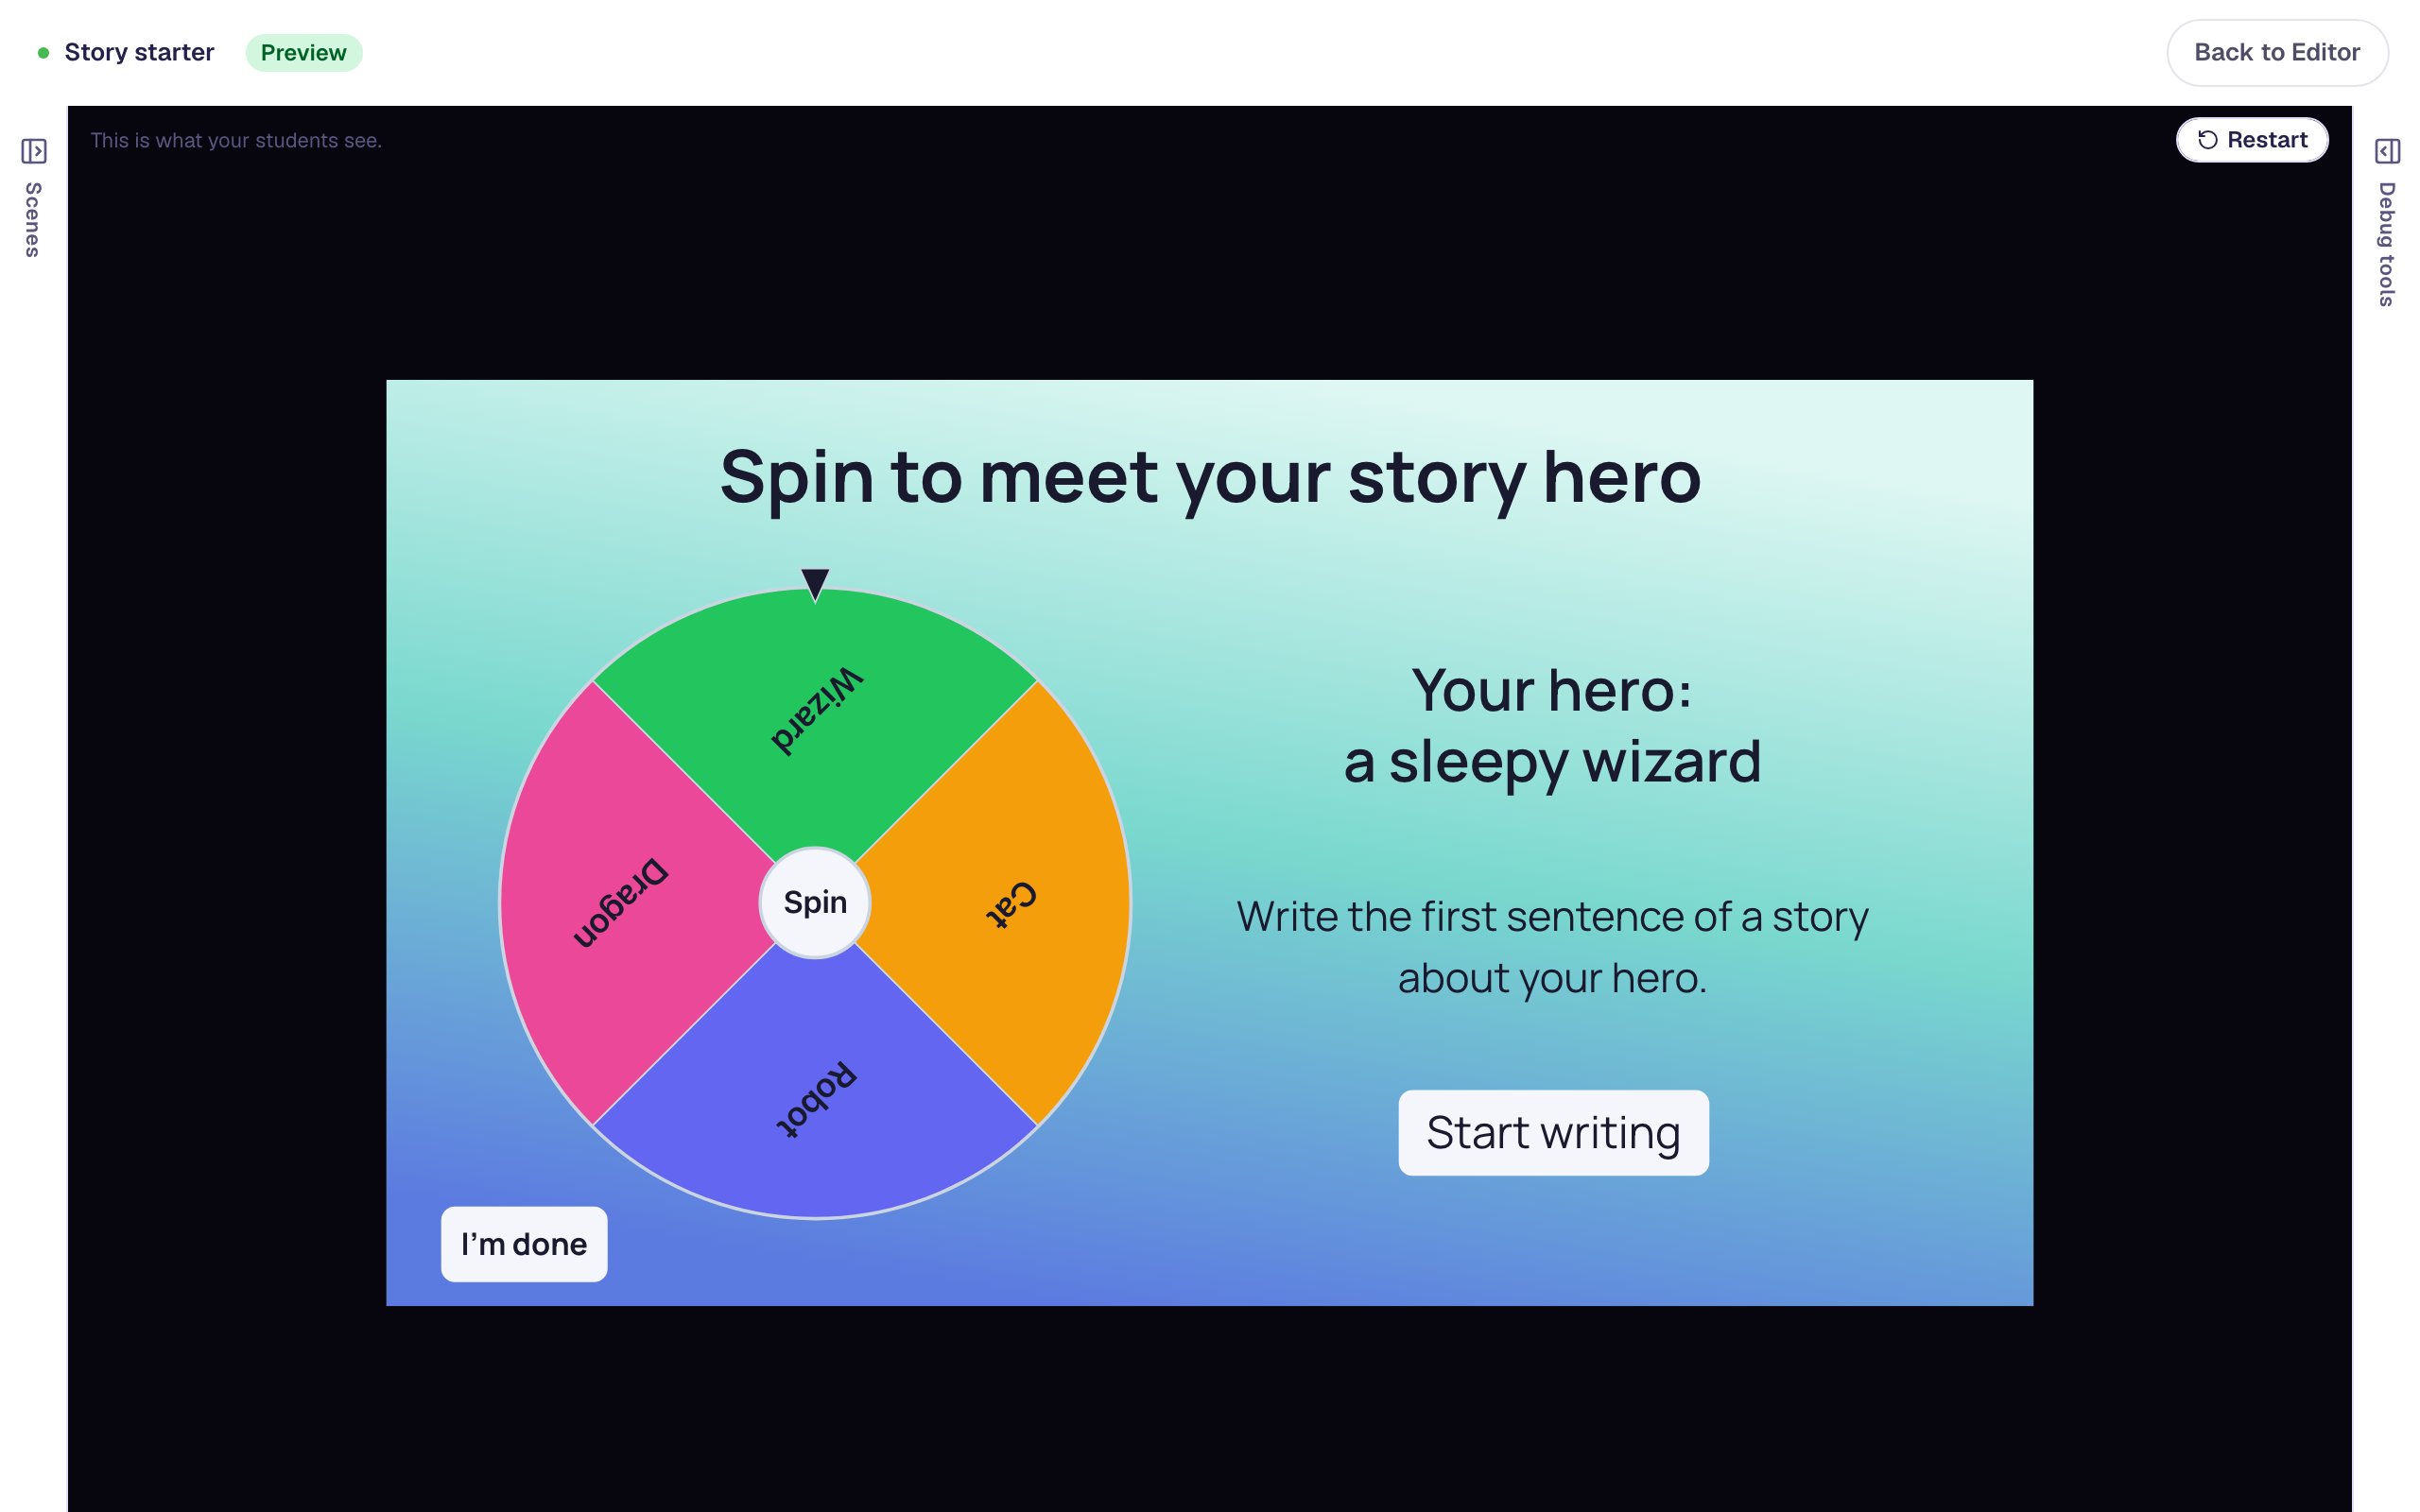
Label a diagram with dropdowns
Put four dropdowns on a picture of a volcano so students label each part by choosing its name from a list. Each dropdown is marked like a quiz question, and a wrong pick gets a try-again message straight away.
- Level
- Beginner
- Time
- About 15 min
- Steps
- 7
A "Parts of a volcano" scene where students label the crater, lava flow, vent and magma chamber by choosing from a dropdown at the end of each line, get a gentle message after a wrong pick, and move on to the ending once all four are right.
Get the finished lesson
Skip straight to the result, or keep it open beside the steps. Add this tutorial's lesson to your account and explore how it works in the studio.
Free to sign up, and you'll come straight back here. I have an account
"Label the diagram" is a classic worksheet for a reason: students have to look at a picture, find each part and remember its name. On paper you mark it later. In Berdee you can put a Dropdown at the end of every line, so students choose each name from a short list, and the lesson checks every label the moment they pick it.
In this tutorial you'll label a volcano with four parts: the crater, the lava flow, the vent and the magma chamber. You'll build one dropdown completely, with its list of names, its right answer and a try-again message, then copy it for the other three parts and change only the right answer.
If you haven't used the studio before, start with Build your first quiz question: this tutorial moves quickly through the parts it already covers.
Step 1: Set the scene
Start a blank lesson (New lesson, then Start from scratch) and name it Parts of a volcano by clicking Untitled lesson at the top.
With nothing selected, open Background, click Choose a style, pick Gradients, then Lagoon gradient, and click Apply background. Select the Closing Scene in the Scenes panel and give it the same background, so the ending matches.
Back on the Opening Scene, add a Heading that says Label the parts of a volcano and set its Font Size to 40. Under it, add a Body text: Choose the right name at the end of each line.
Then add an Image, click Choose image and upload your diagram. Use a picture with a line drawn from each part to an empty spot at the edge: that empty spot is where each dropdown will go. Make the picture big, here 880 wide and 390 tall under Style & Layout, so the parts are easy to see. Under Accessibility, describe the picture in Alt Text without naming the parts, for example A cross-section of a volcano: ash rising from the top, lava running down one side, a tube up the middle, and a pool of melted rock deep underground. Four lines point to the parts.
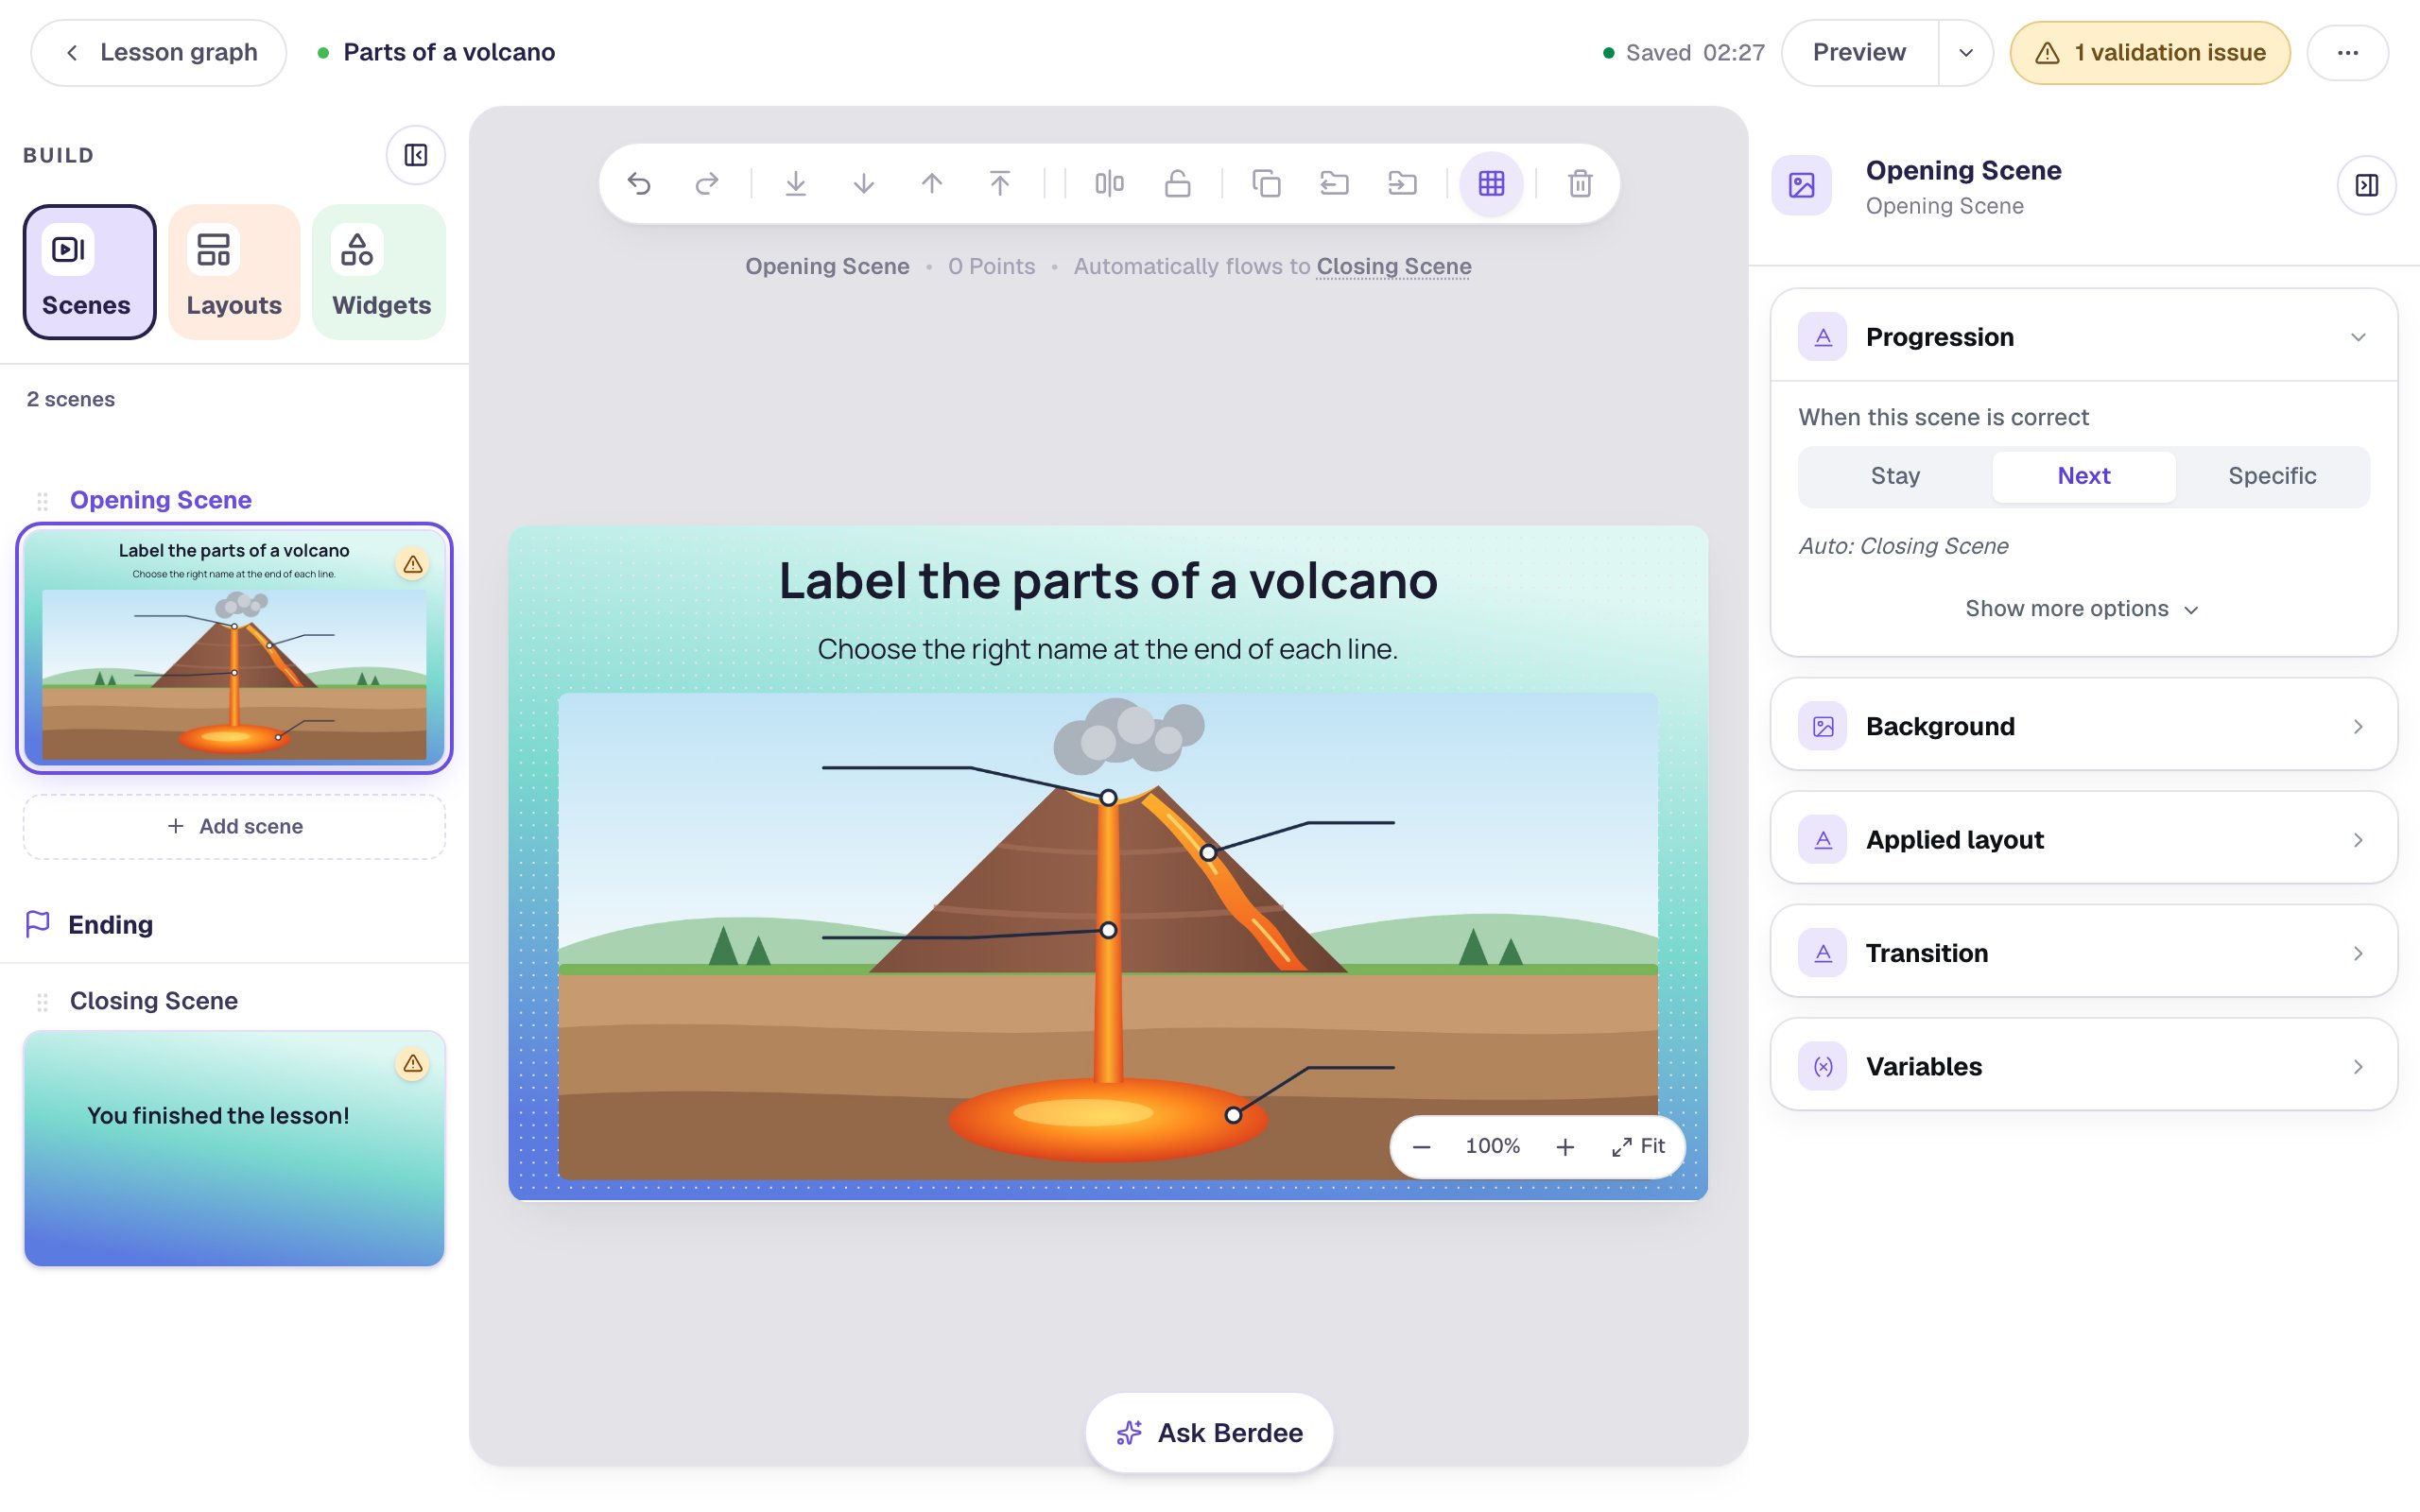
Step 2: Add a dropdown and write its list
In Widgets, search for Dropdown and click it. Select the new dropdown and click ⚙ Configure above it.
- In Placeholder, type
Choose a part. Students see it, faded, until they pick something. - A new dropdown has three options. Click Add Option to make a fourth.
- Type the four names, one per option:
Crater,Lava flow,Magma chamberandVent. - This dropdown goes at the end of the crater's line, so Crater is the right answer. Check that its round button is green (a new dropdown's first option starts marked correct) and the other three are empty.
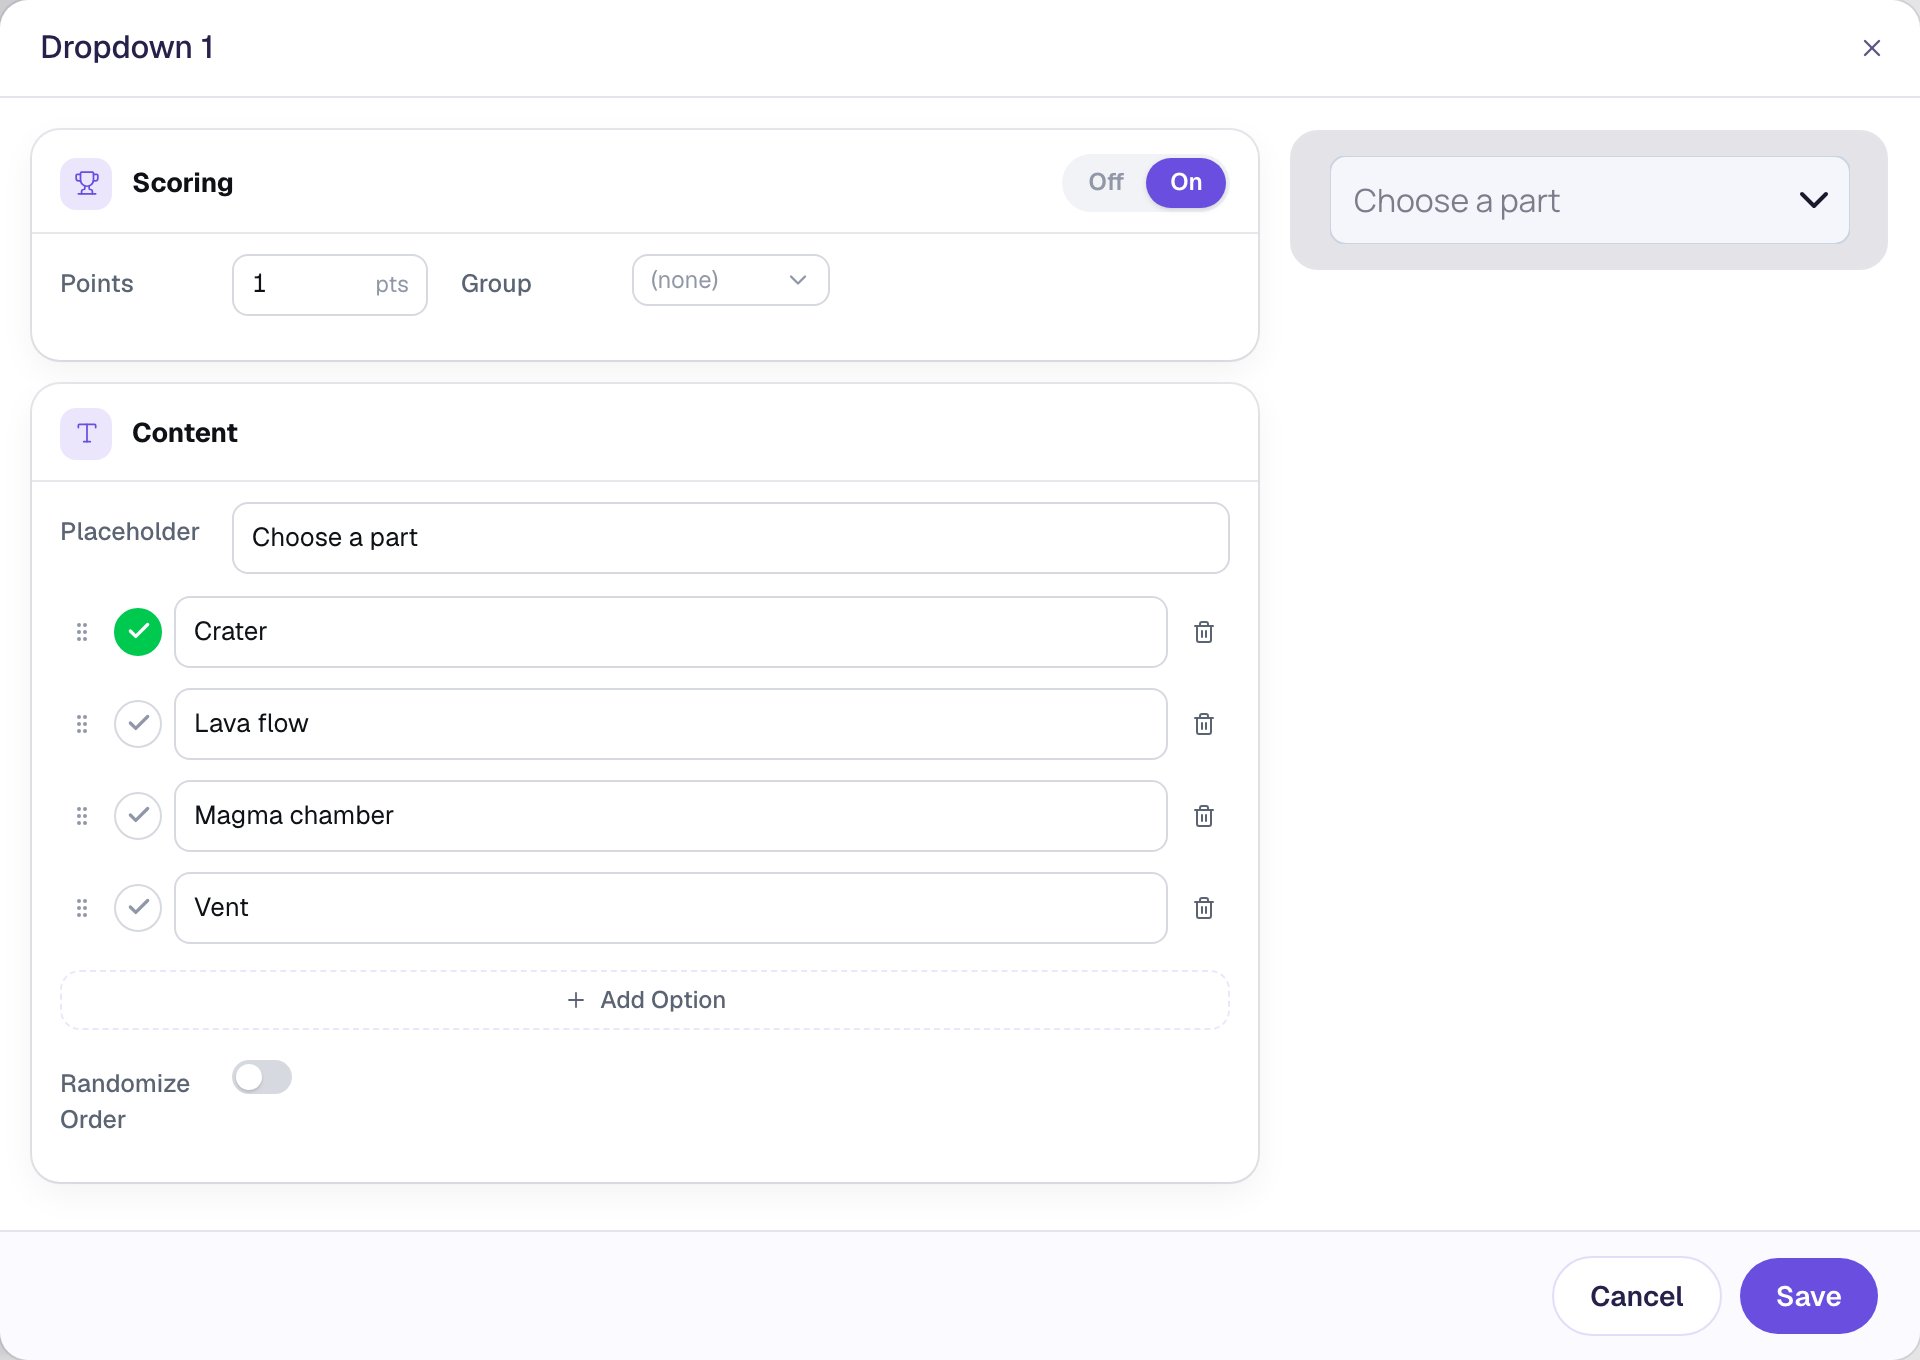
Keep the names in alphabetical order and leave Randomize Order off. Every dropdown on the picture will have the same list in the same order, so where a name sits in the list gives nothing away, and students can find a name quickly. Click Save.
Step 3: Put it at the end of the line
With the dropdown selected, open Style & Layout and set Font Size to 18, so the names are easy to read on a busy picture. Drag the side handle (or set Width) to about 196: wide enough for Magma chamber, the longest name. A dropdown's height follows its font size, so you only choose the width.
Drag the dropdown onto the picture so its right edge meets the end of the line from the crater.
Two more settings make the activity easier to check later and to use with a screen reader:
- Name it. At the top of the properties panel, click the name (Dropdown 1), type
Crater label, and press Enter. The name is what you'll see in results. - Describe it. Every dropdown on the scene says
Choose a part, so a student using a screen reader can't tell them apart. Under Accessibility, typeName the part at the very top of the volcanoin Alt Text. It's read aloud instead of the placeholder, and it describes the place without giving away the answer.
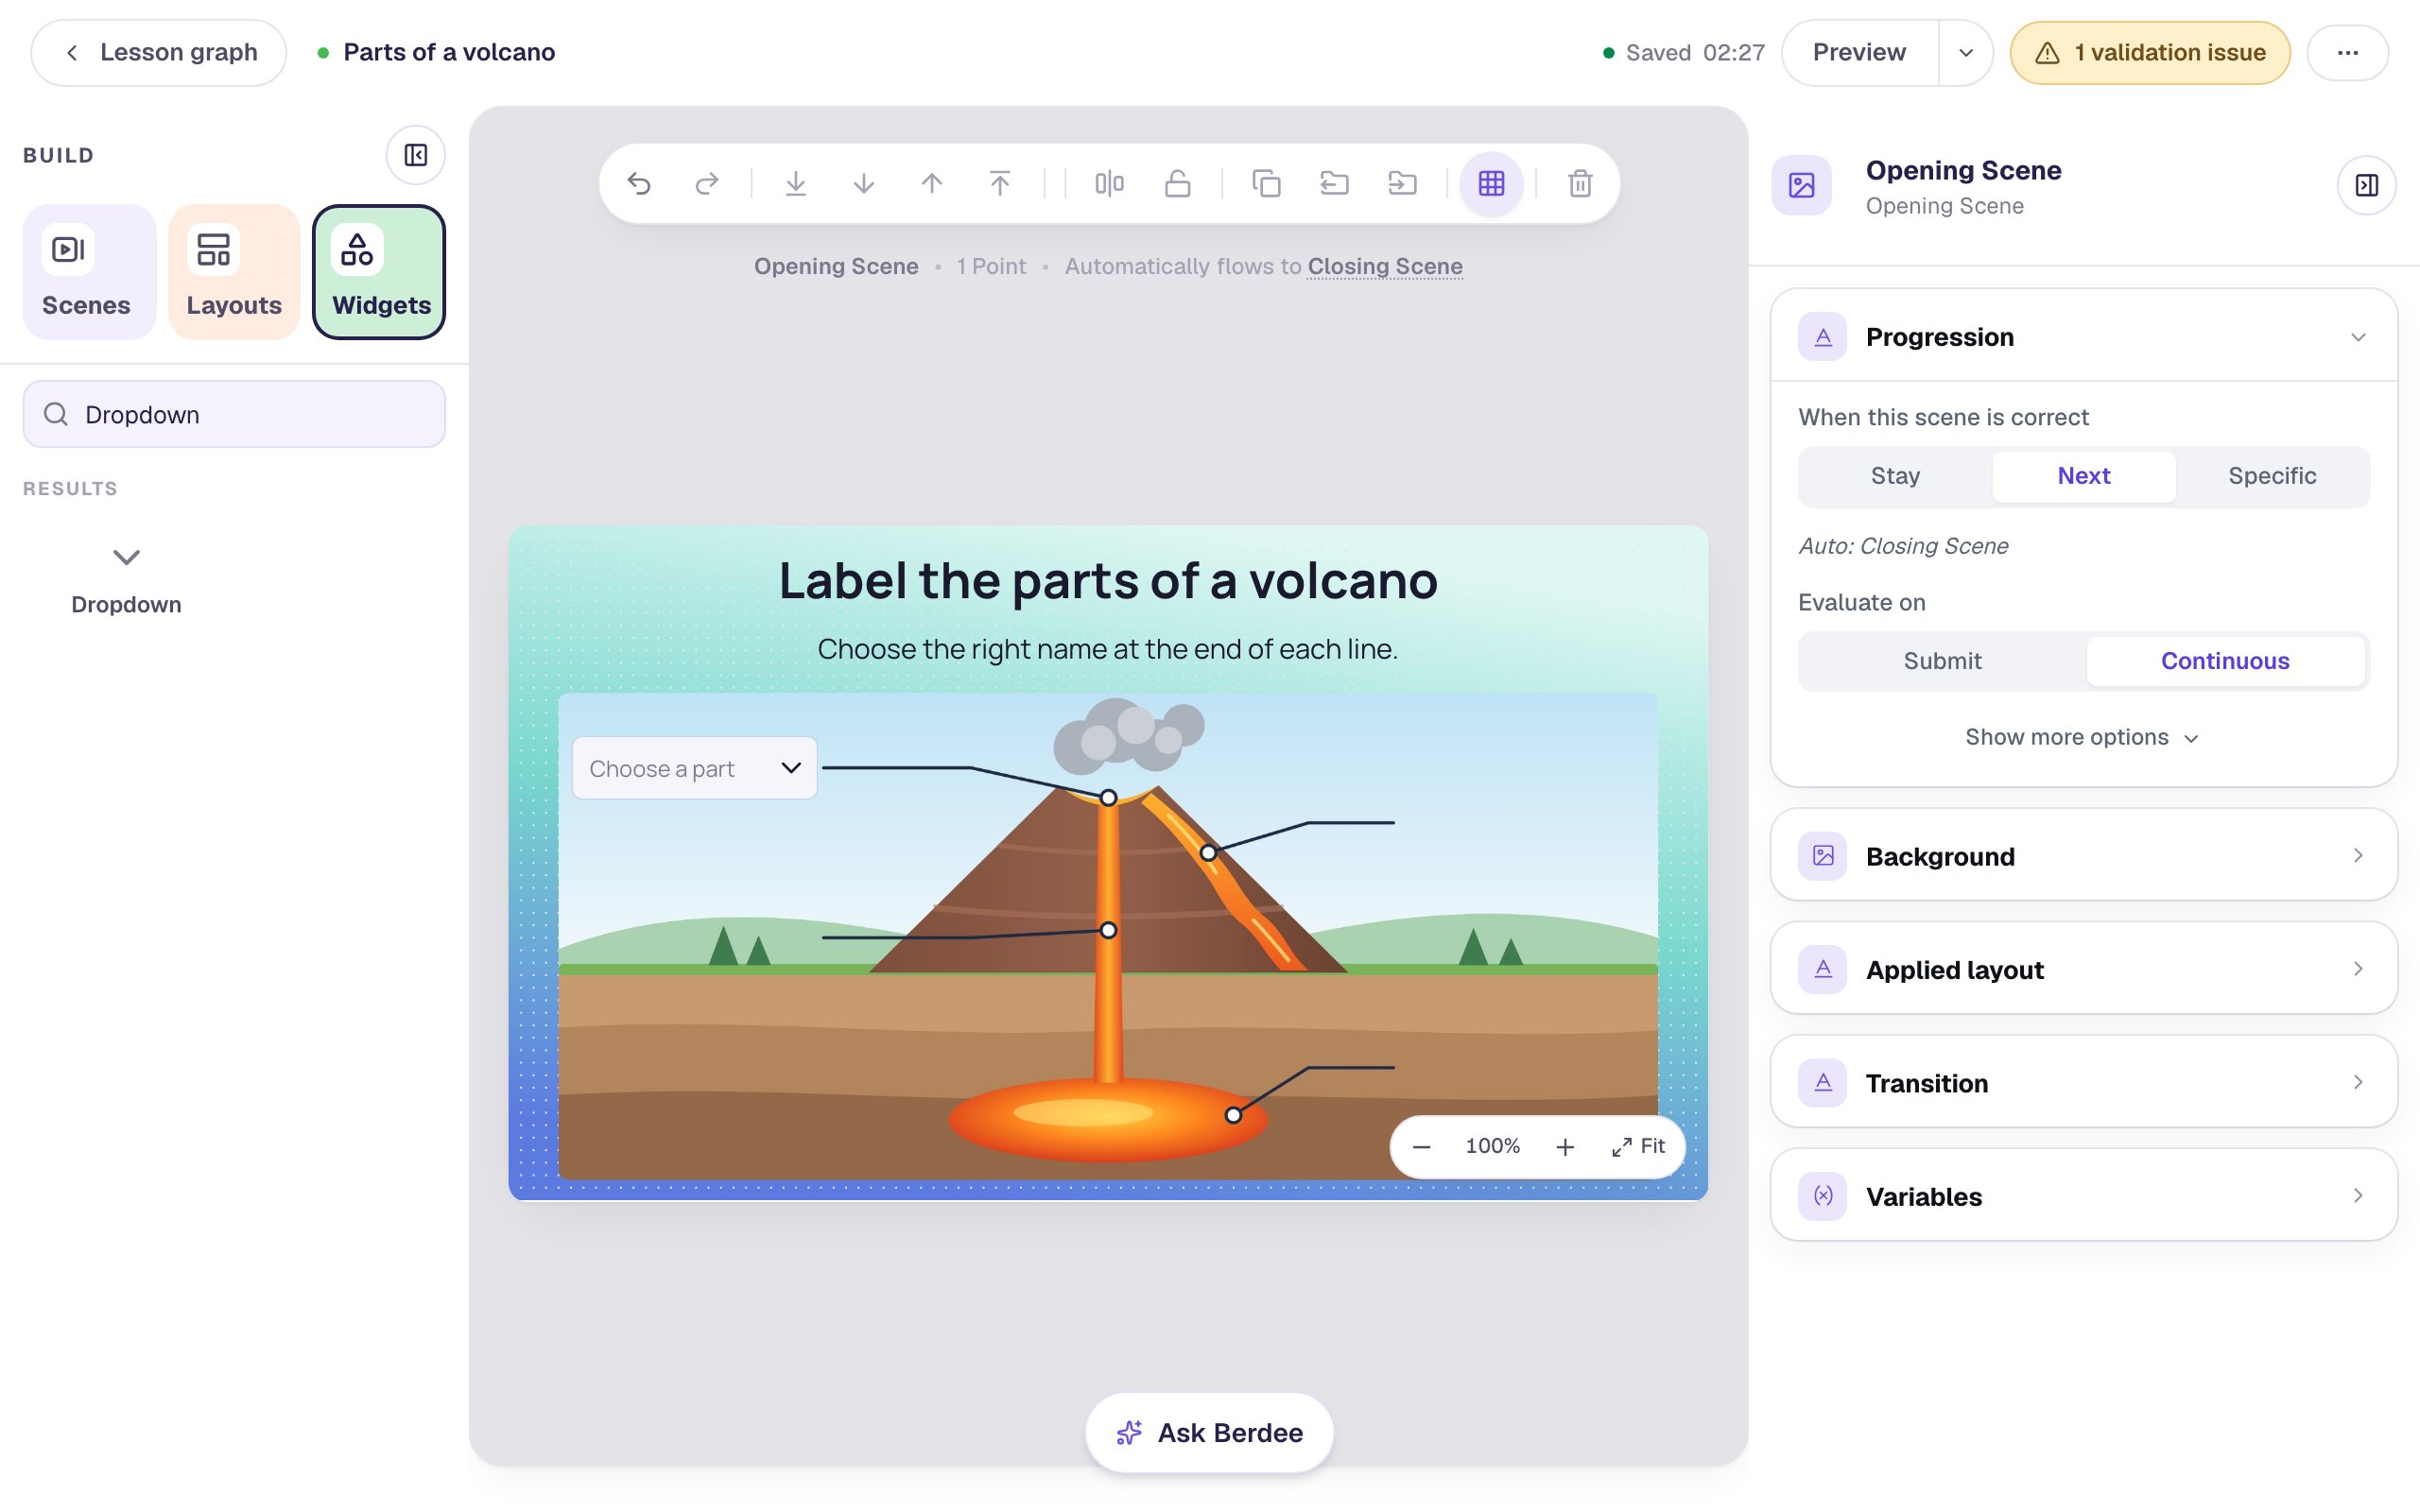
Step 4: Answer a wrong pick straight away
Select the dropdown and click Behaviors above it. Berdee suggests ideas that fit a dropdown. Click Give instant feedback on a wrong pick and change the message to Not quite. Follow the line to its part, then try again.
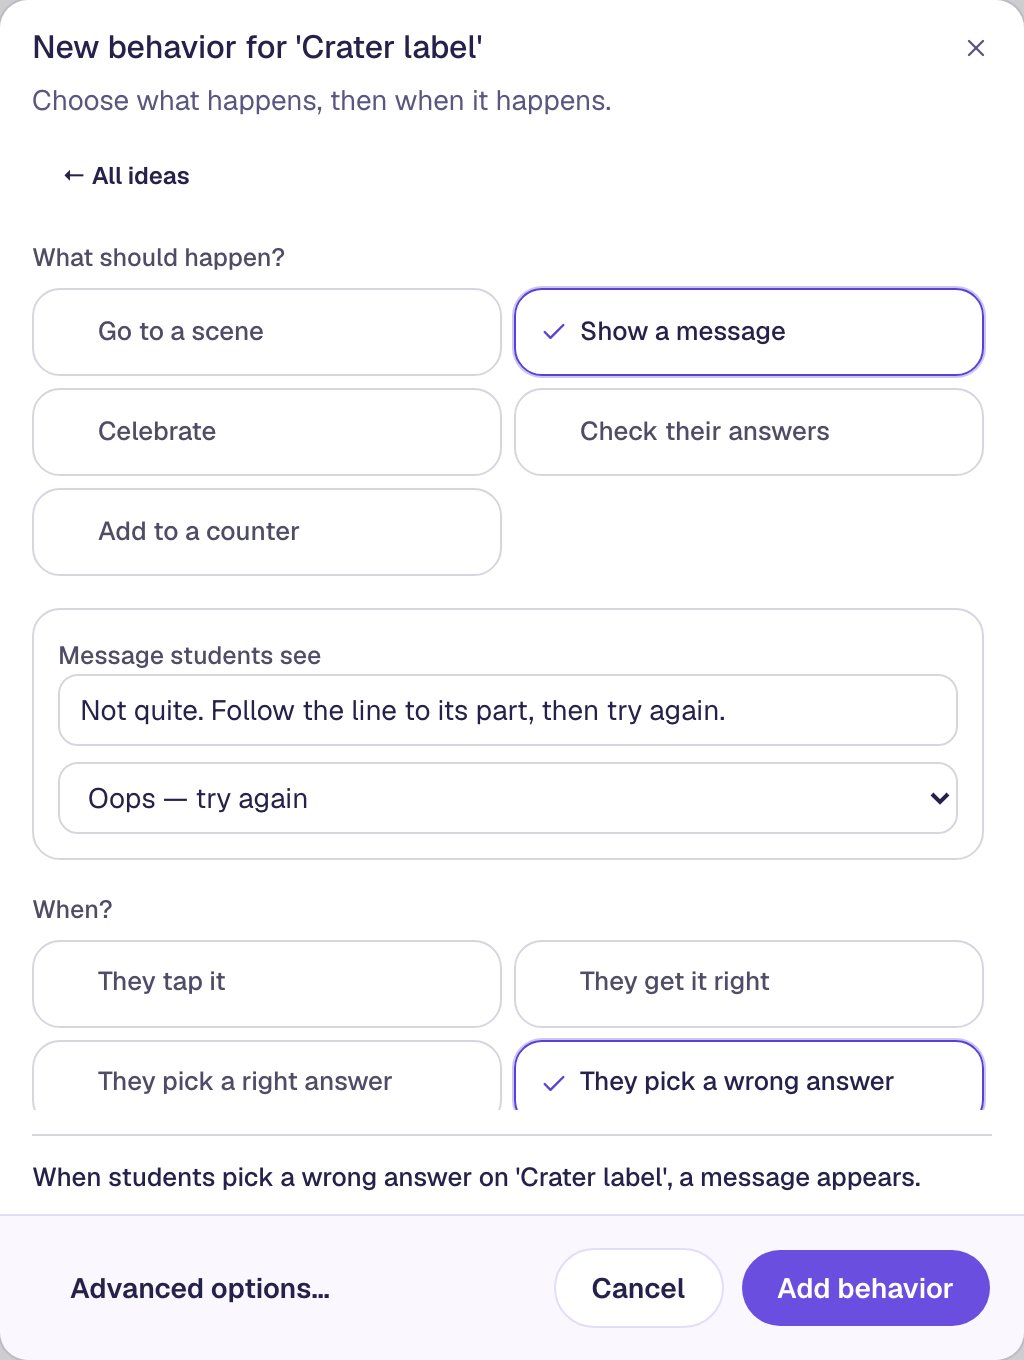
They pick a wrong answer runs every time a student picks a name you didn't mark correct, so each wrong guess gets the message. Click Add behavior.
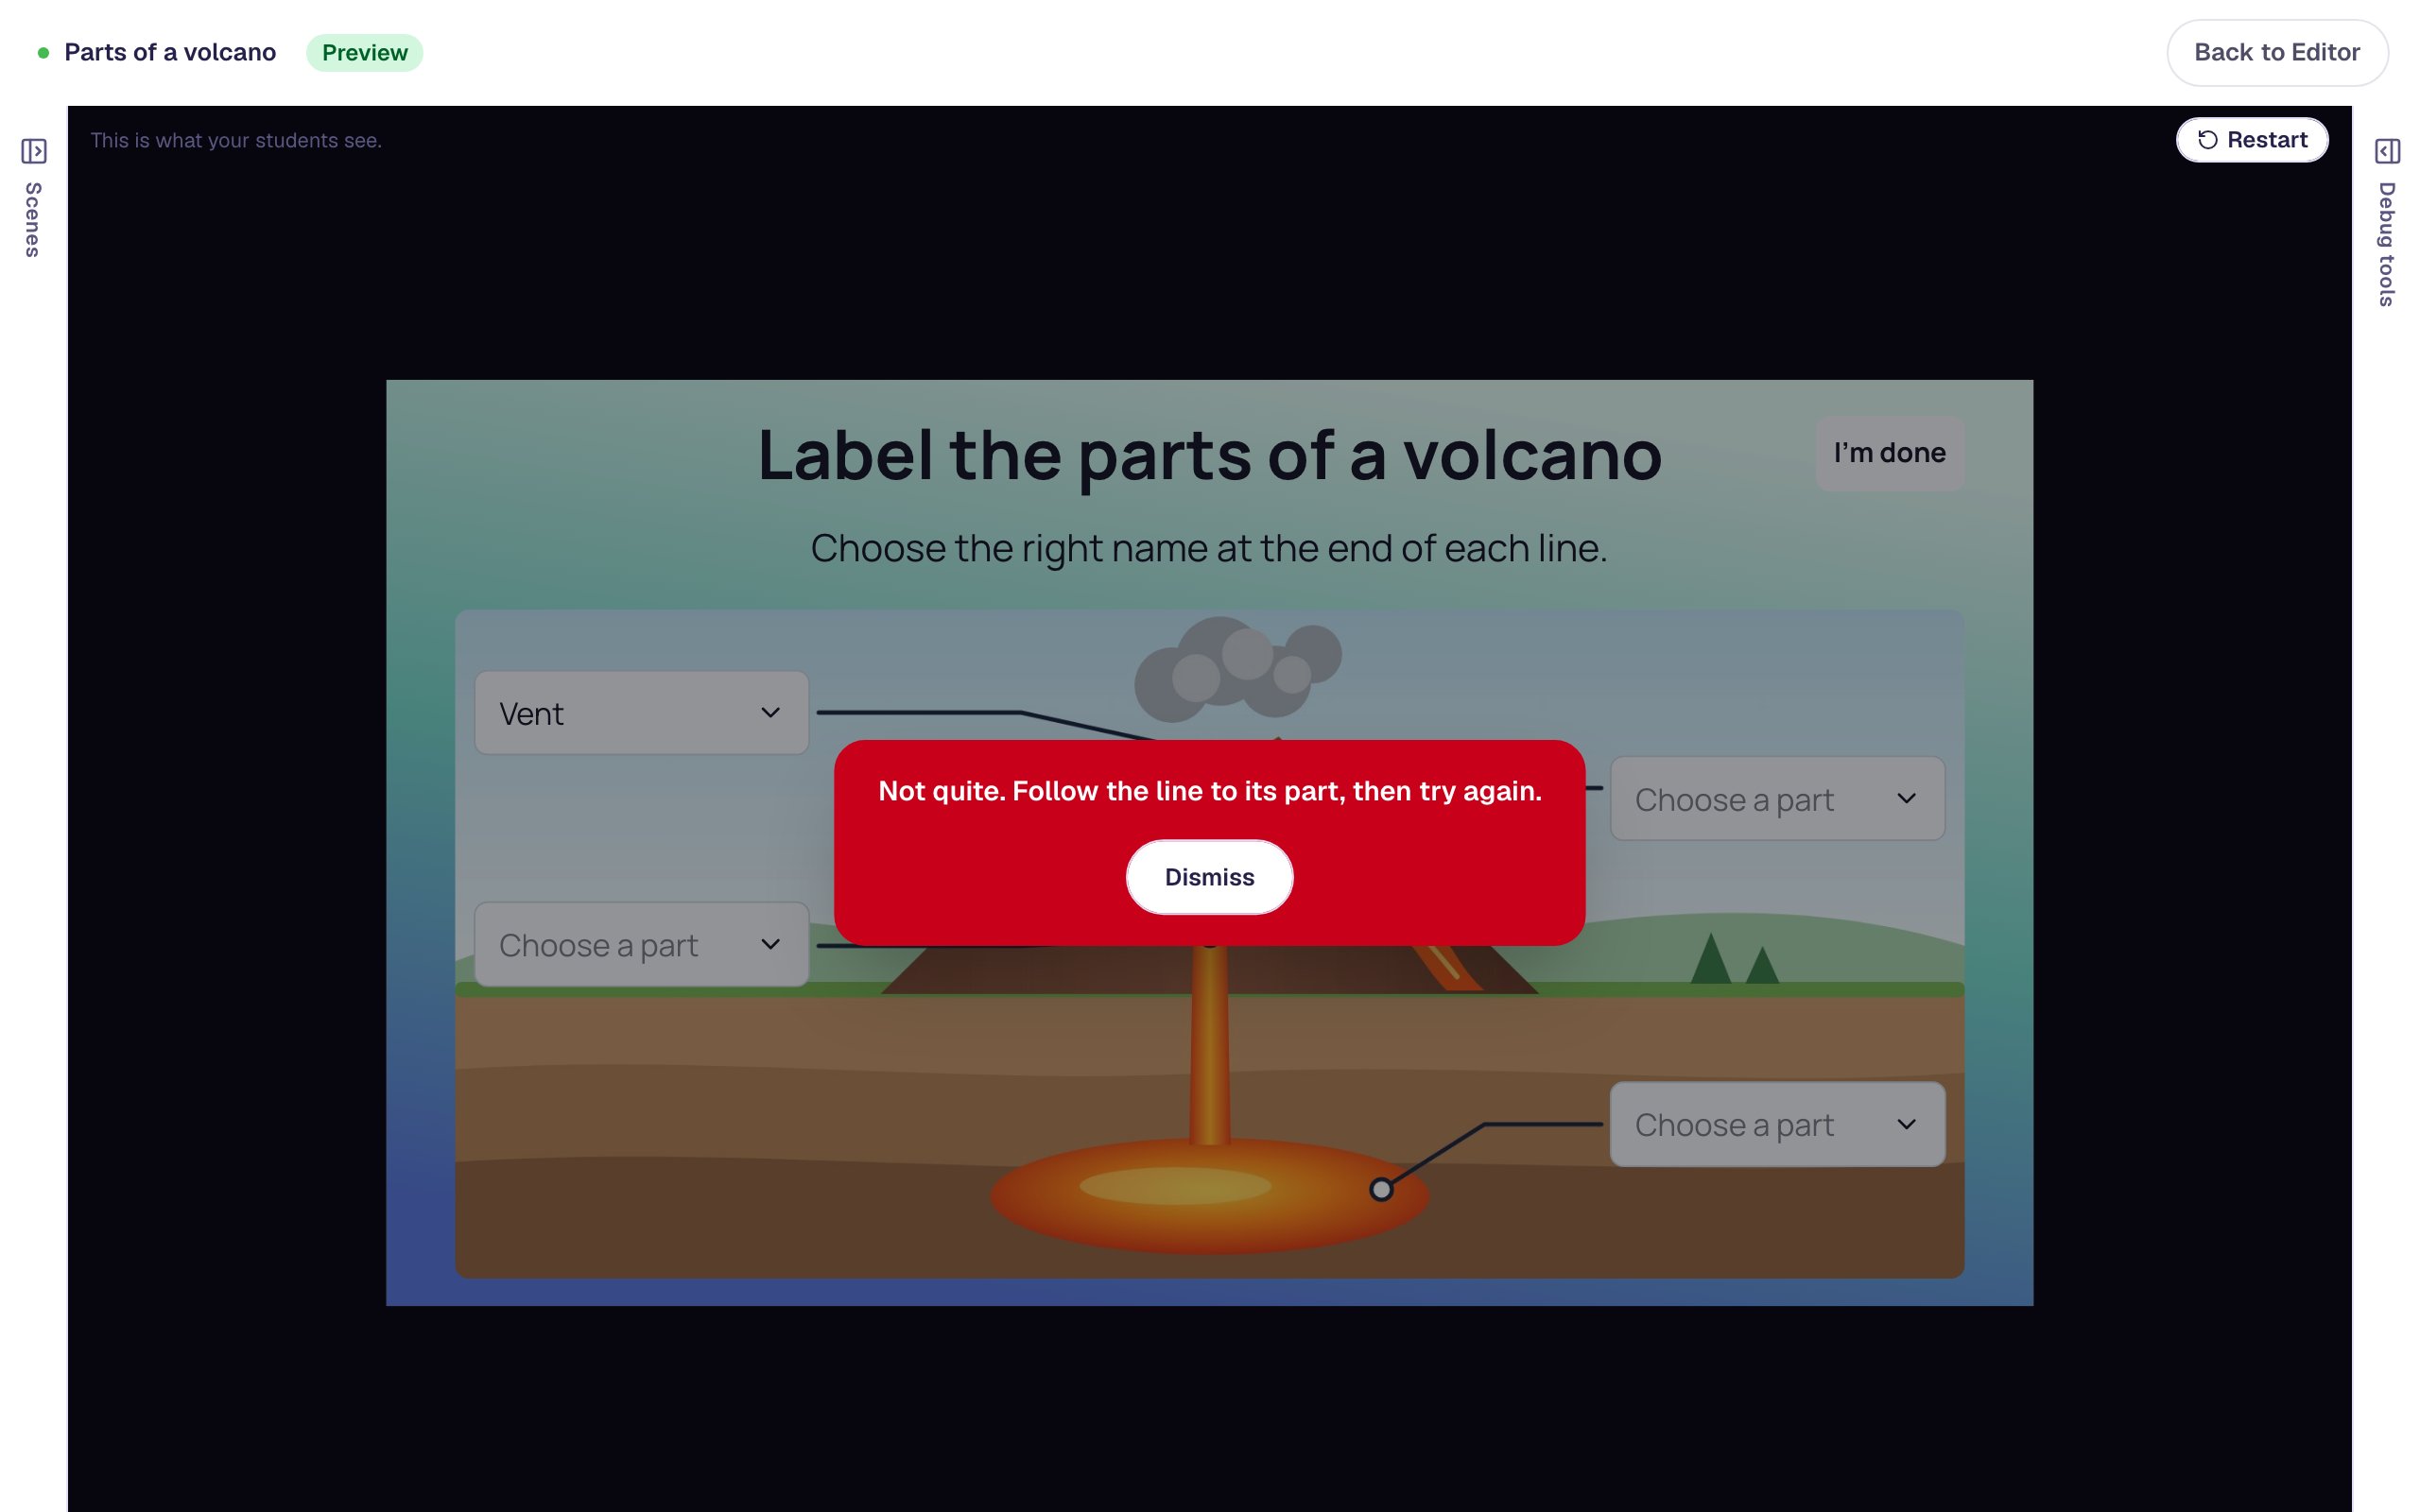
The message points students back to the picture instead of telling them the answer. They dismiss it and pick again; nothing is locked.
Step 5: Copy it for the other three parts
Everything you've set so far (the list, the size, the try-again message) is the same for every label. Only the right answer and the names change, so copy the finished dropdown instead of building three more.
With Crater label selected, press ⌘ D (Ctrl + D on Windows). Drag the copy to the end of the line from the lava running down the side. Then:
- Click ⚙ Configure. Click Crater's green button to clear it, click Lava flow's button to mark it correct, and click Save.
- Rename the copy
Lava flow label. - Change its Alt Text to
Name the part running down the side of the volcano.
Do the same twice more:
| Line from | Right answer | Name | Alt Text |
|---|---|---|---|
| the tube up the middle | Vent | Vent label | Name the tube running up the middle of the volcano |
| the pool underground | Magma chamber | Magma chamber label | Name the pool deep underground |
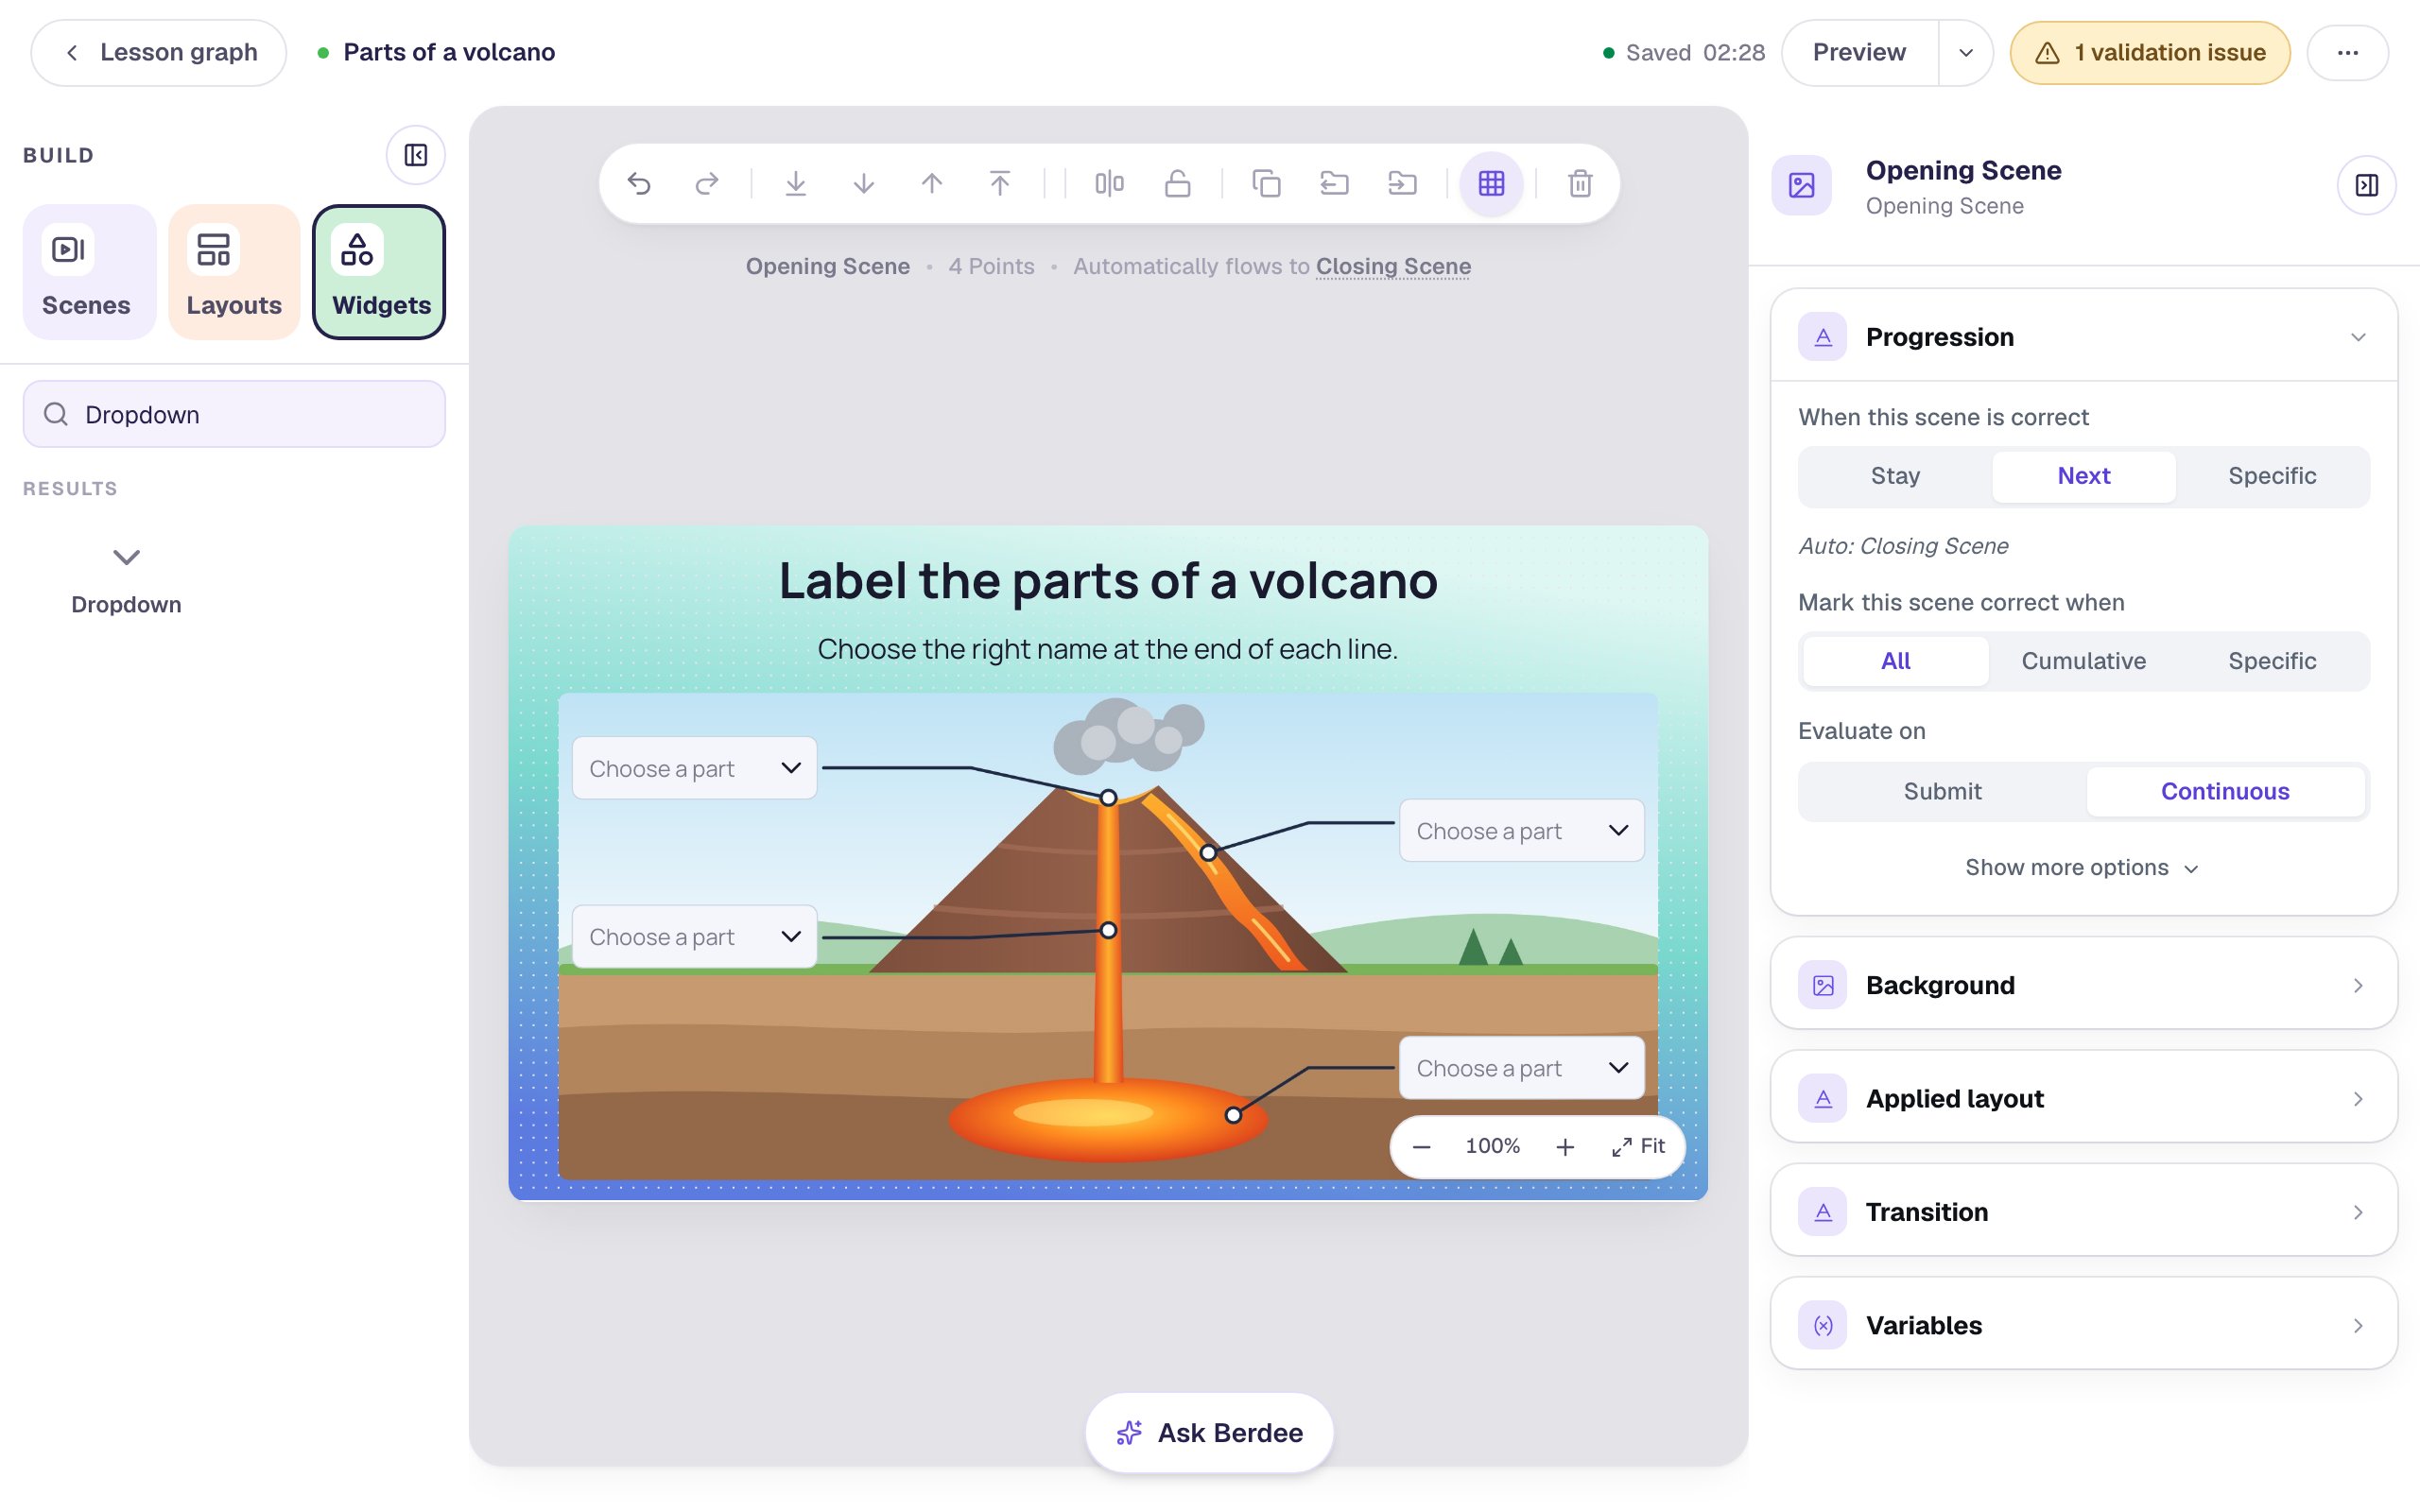
Check each copy's right answer before moving on. A copy starts with Crater marked, and a dropdown with two names marked accepts either of them.
Click an empty spot on the scene and look at the bar above it: the scene is now worth 4 Points, one for each label.
Step 6: Let the scene finish by itself
With nothing selected, look at Progression in the properties panel. When this scene is correct is Next and Evaluate on is Continuous: as soon as all four labels are right, the lesson moves on to the Closing Scene by itself. That's what you want here, so leave it alone.
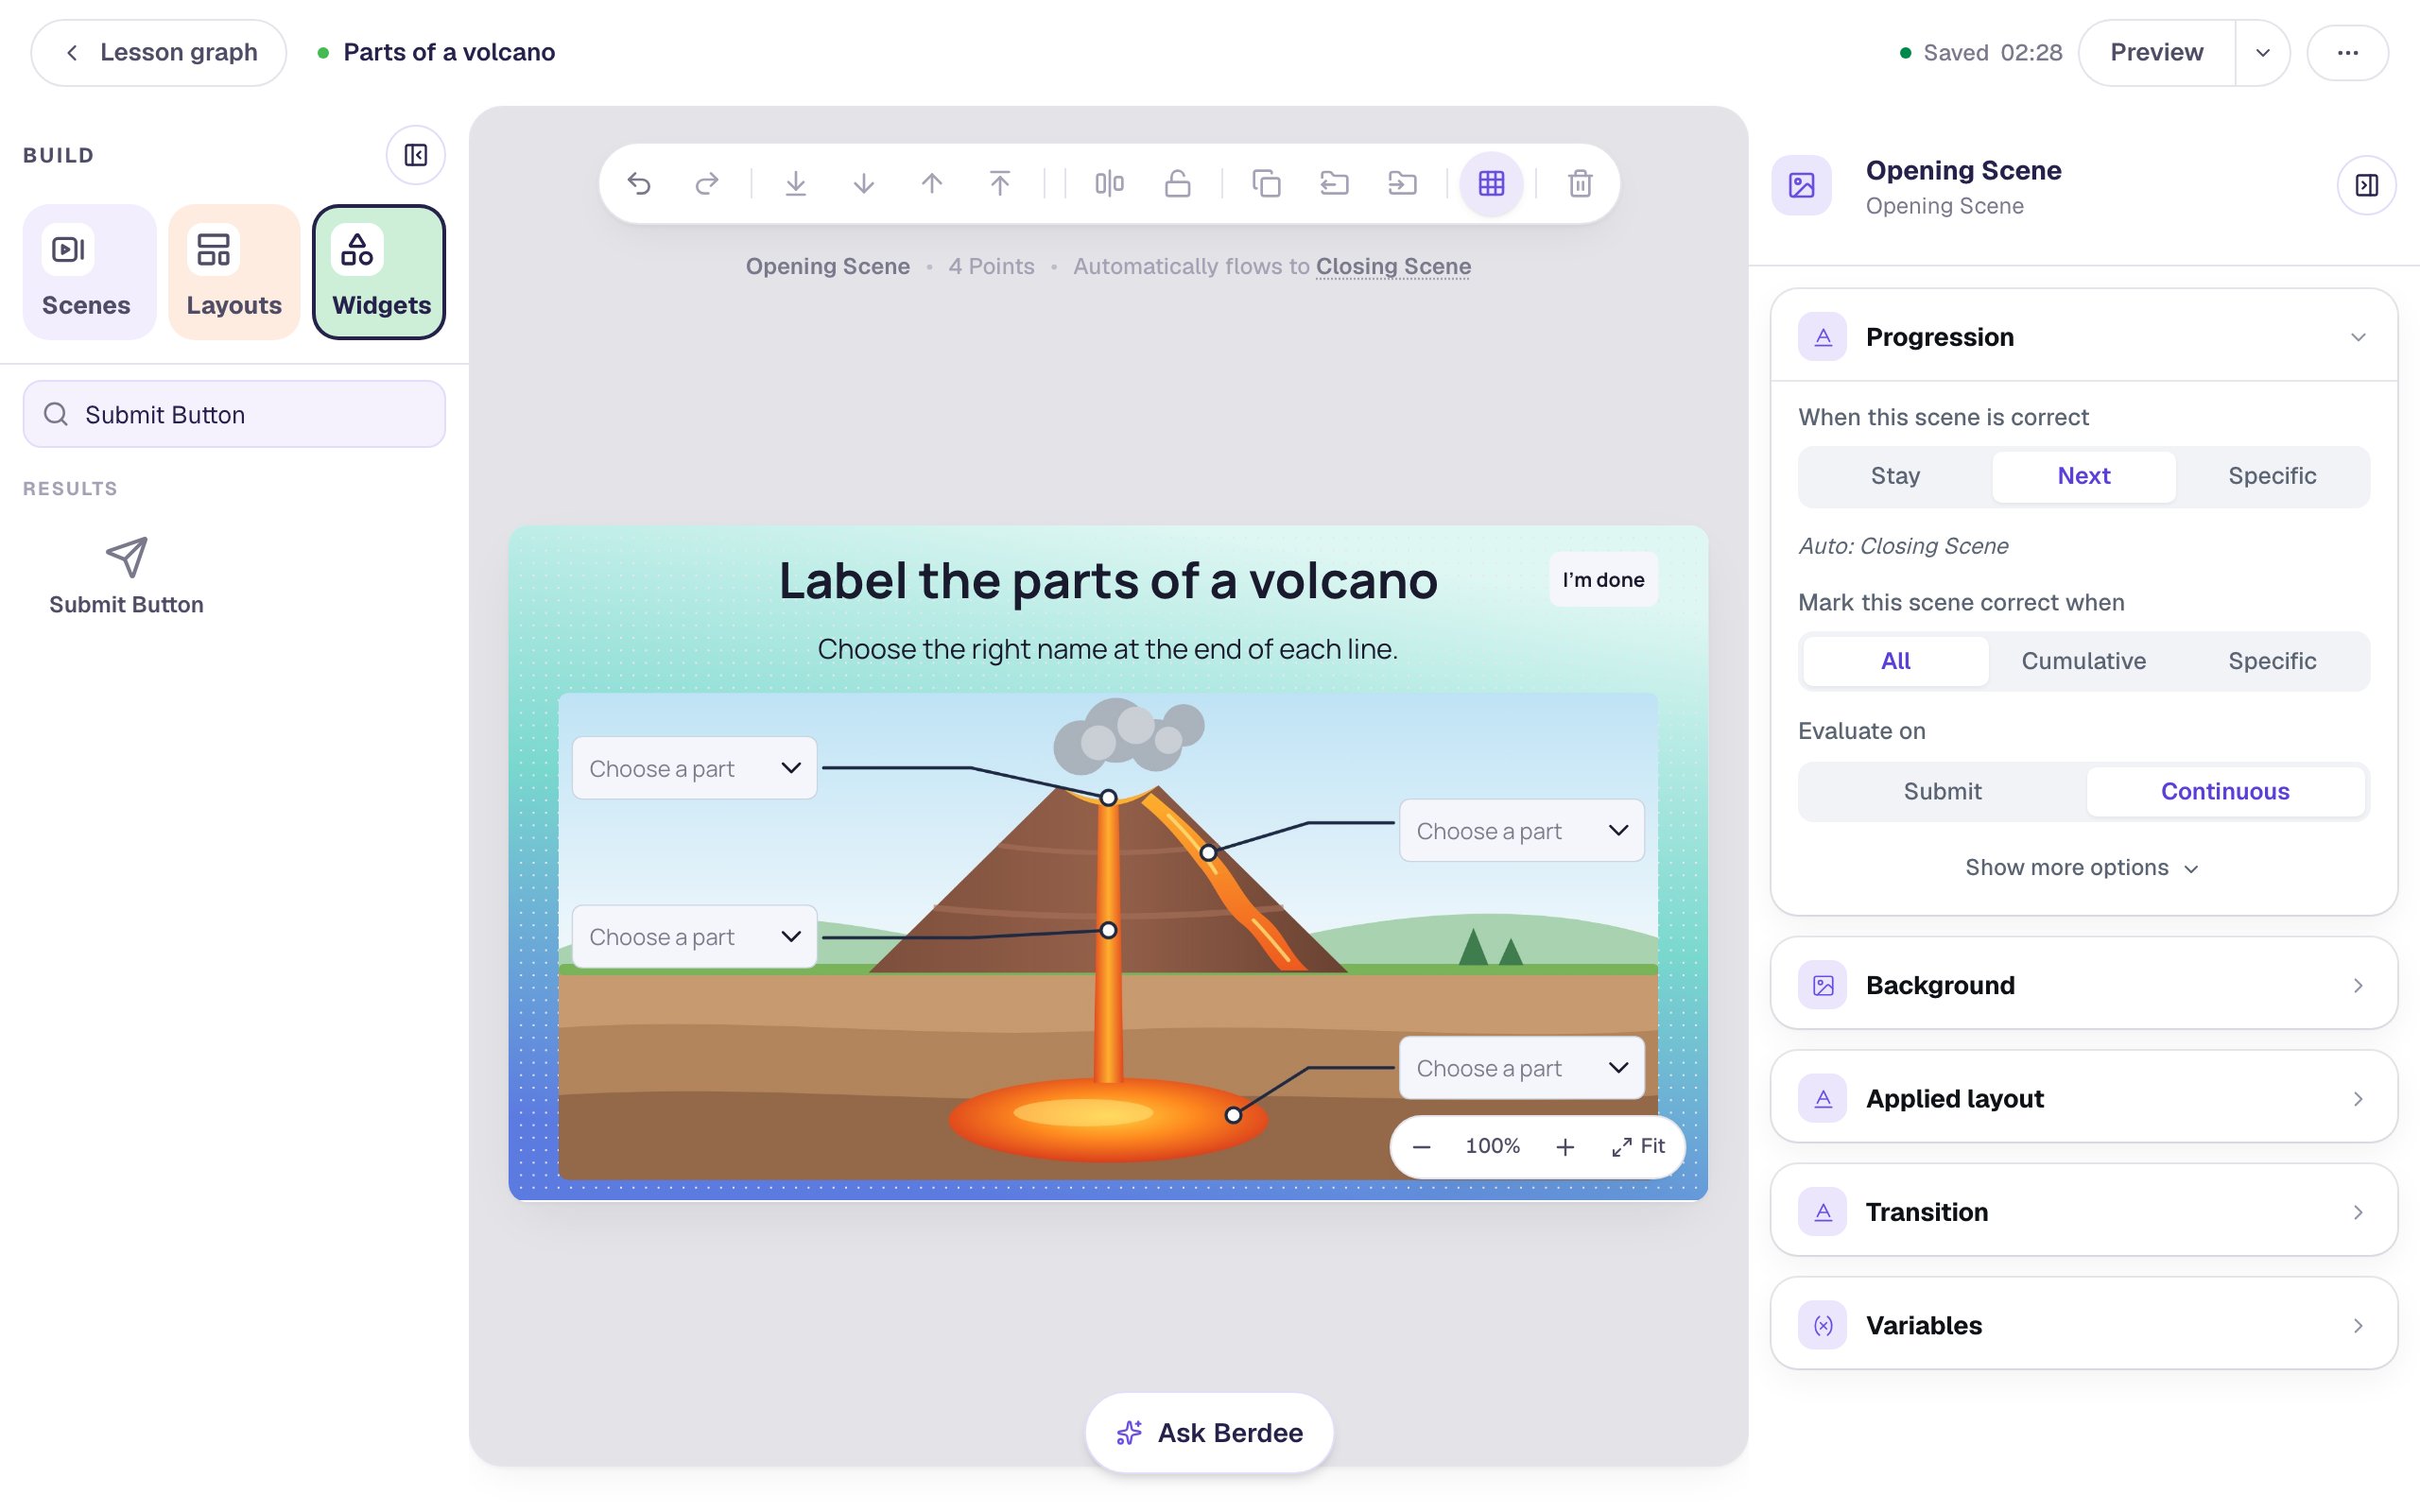
The yellow 1 validation issue pill at the top right is about publishing. Every lesson needs a button that finishes it, which is also a way out for a student who's stuck. In Widgets, add a Submit Button. In Content, change its Label to I'm done and set Submits to Lesson. Set its Font Size to 16 and drag it to the top-right corner, out of the picture's way. The pill disappears.
Step 7: Try it as a student
Click Preview and label the volcano, getting one wrong on purpose first:
Choose Vent at the end of the crater's line. The message appears:
Click Dismiss, choose Crater instead, then label the other three parts. The moment the last label is right, the lesson moves on:
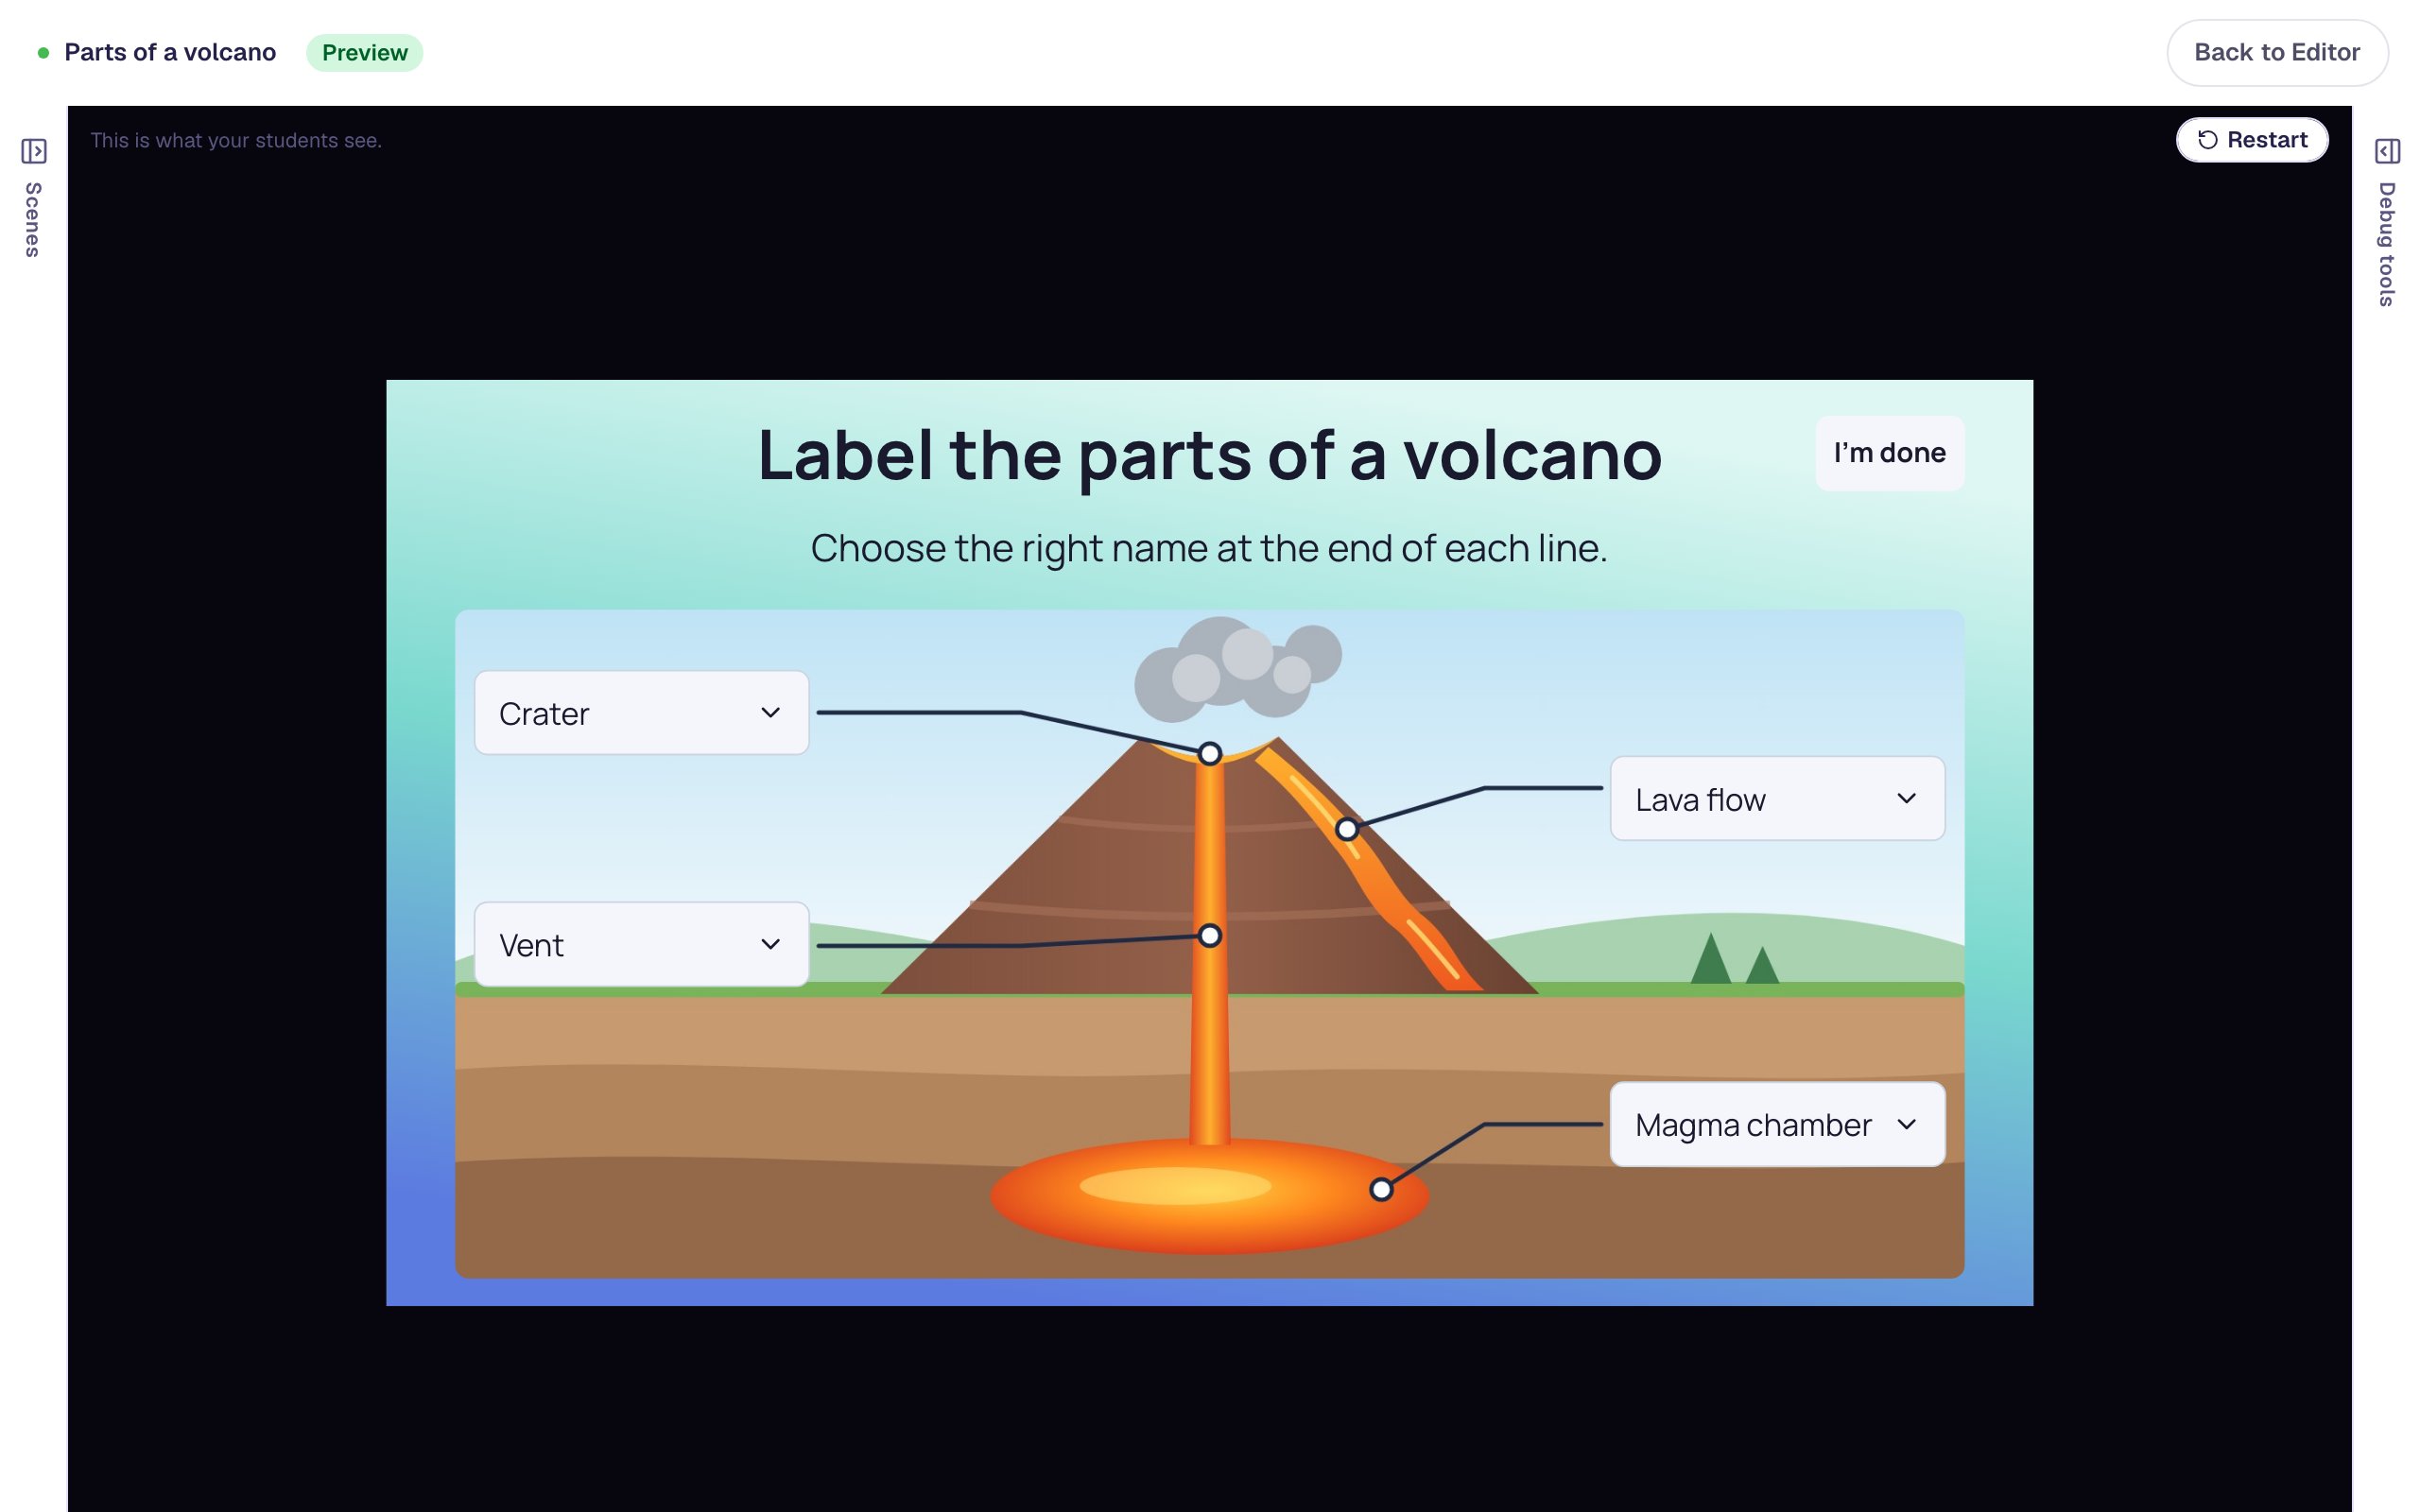
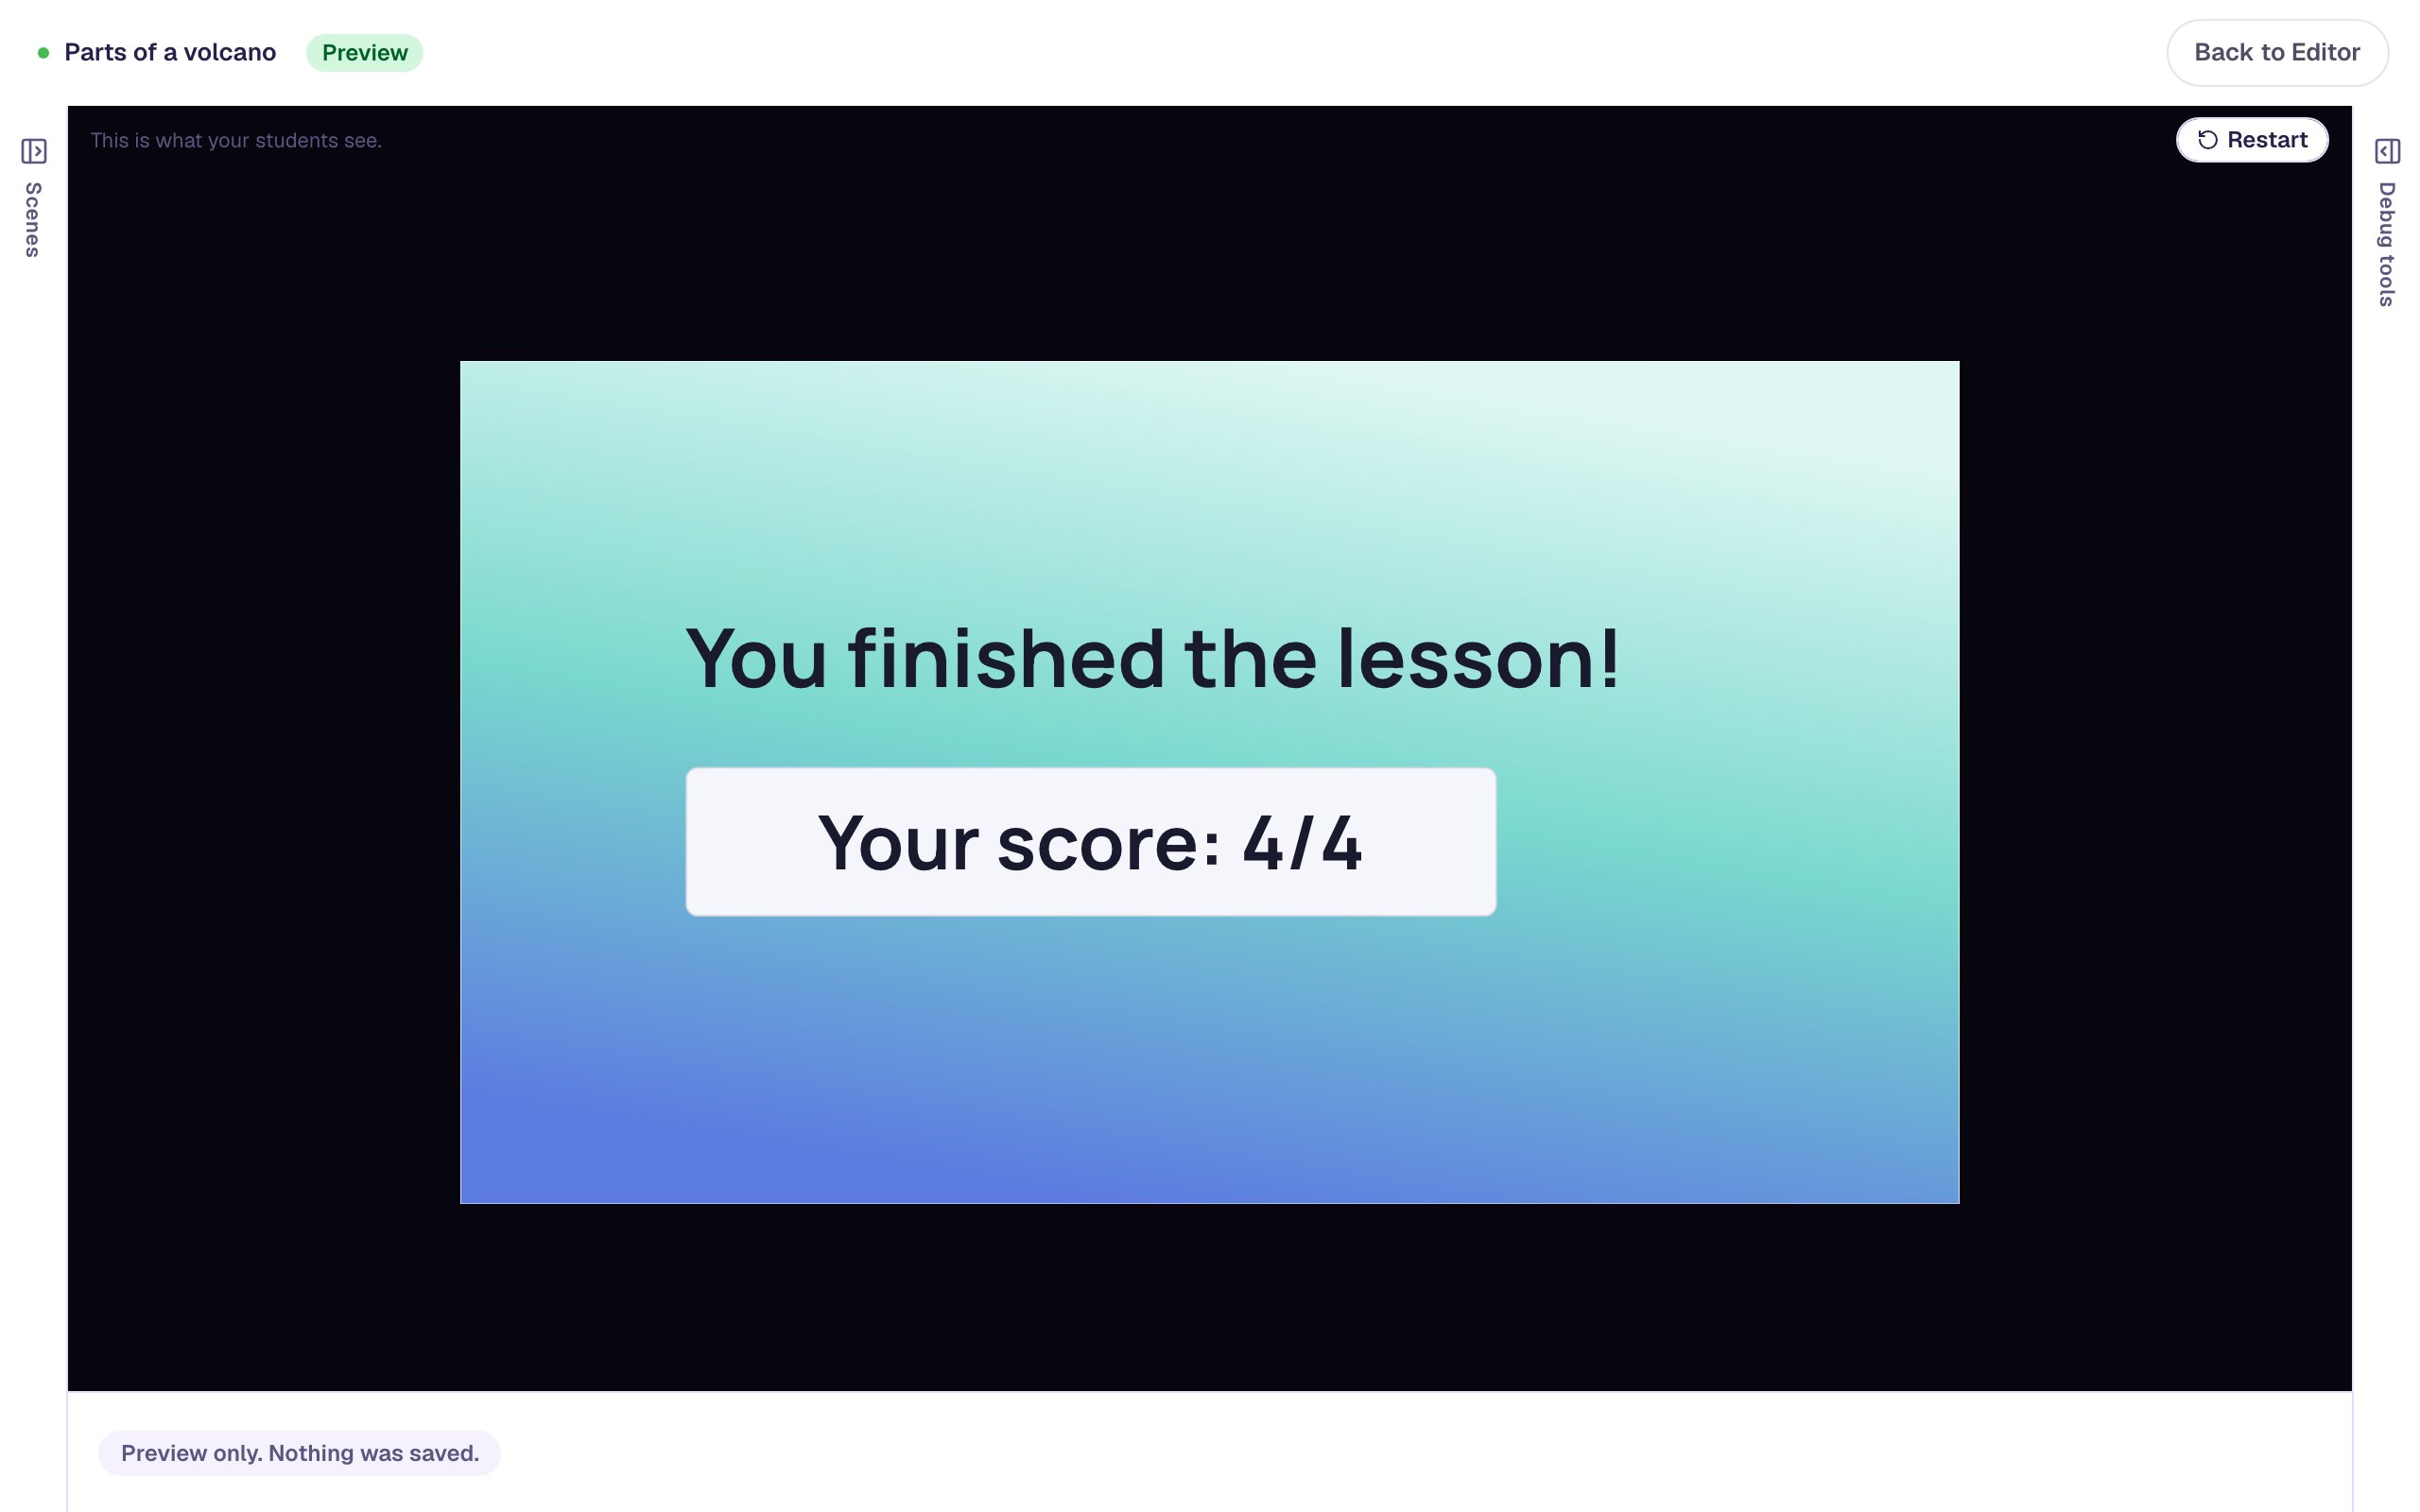
The score is 4 / 4 even though the first pick was wrong. This scene checks each label as it's picked and lets students fix a wrong one, which suits practice. If you'd rather the first try count, have the scene check answers only when a Submit button is pressed: see When the check happens.
Students who use a keyboard reach each dropdown with Tab and choose with the arrow keys. A screen reader reads each one's Alt Text, so they hear "Name the part at the very top of the volcano" rather than four identical "Choose a part"s.
What you built
A labelled-diagram activity that marks itself:
- an Image of a volcano with lines that end in empty spaces, and alt text that doesn't give the answers away,
- four Dropdowns with the same alphabetical list of names, each with its own right answer, name and Alt Text,
- a They pick a wrong answer message that sends students back to the picture, copied to every label along with the dropdown, and
- the scene's default progression, which moves on to the ending once every label is right, plus an I'm done button that finishes the lesson.
The same build works for any diagram: the parts of a cell, the bones of the arm, the countries on a map, or the stages of the water cycle. Draw or find a picture with a line to each part, build one dropdown, and copy it.
For a gentler first look at a diagram before you test it, let students uncover the parts one at a time with Make a picture students can tap to explore, then follow it with this scene.
Make this lesson yours
Add the lesson you just watched being built to your account, then change it for your class: your questions, your pictures, your colors.
Free to sign up, and you'll come straight back here. I have an account